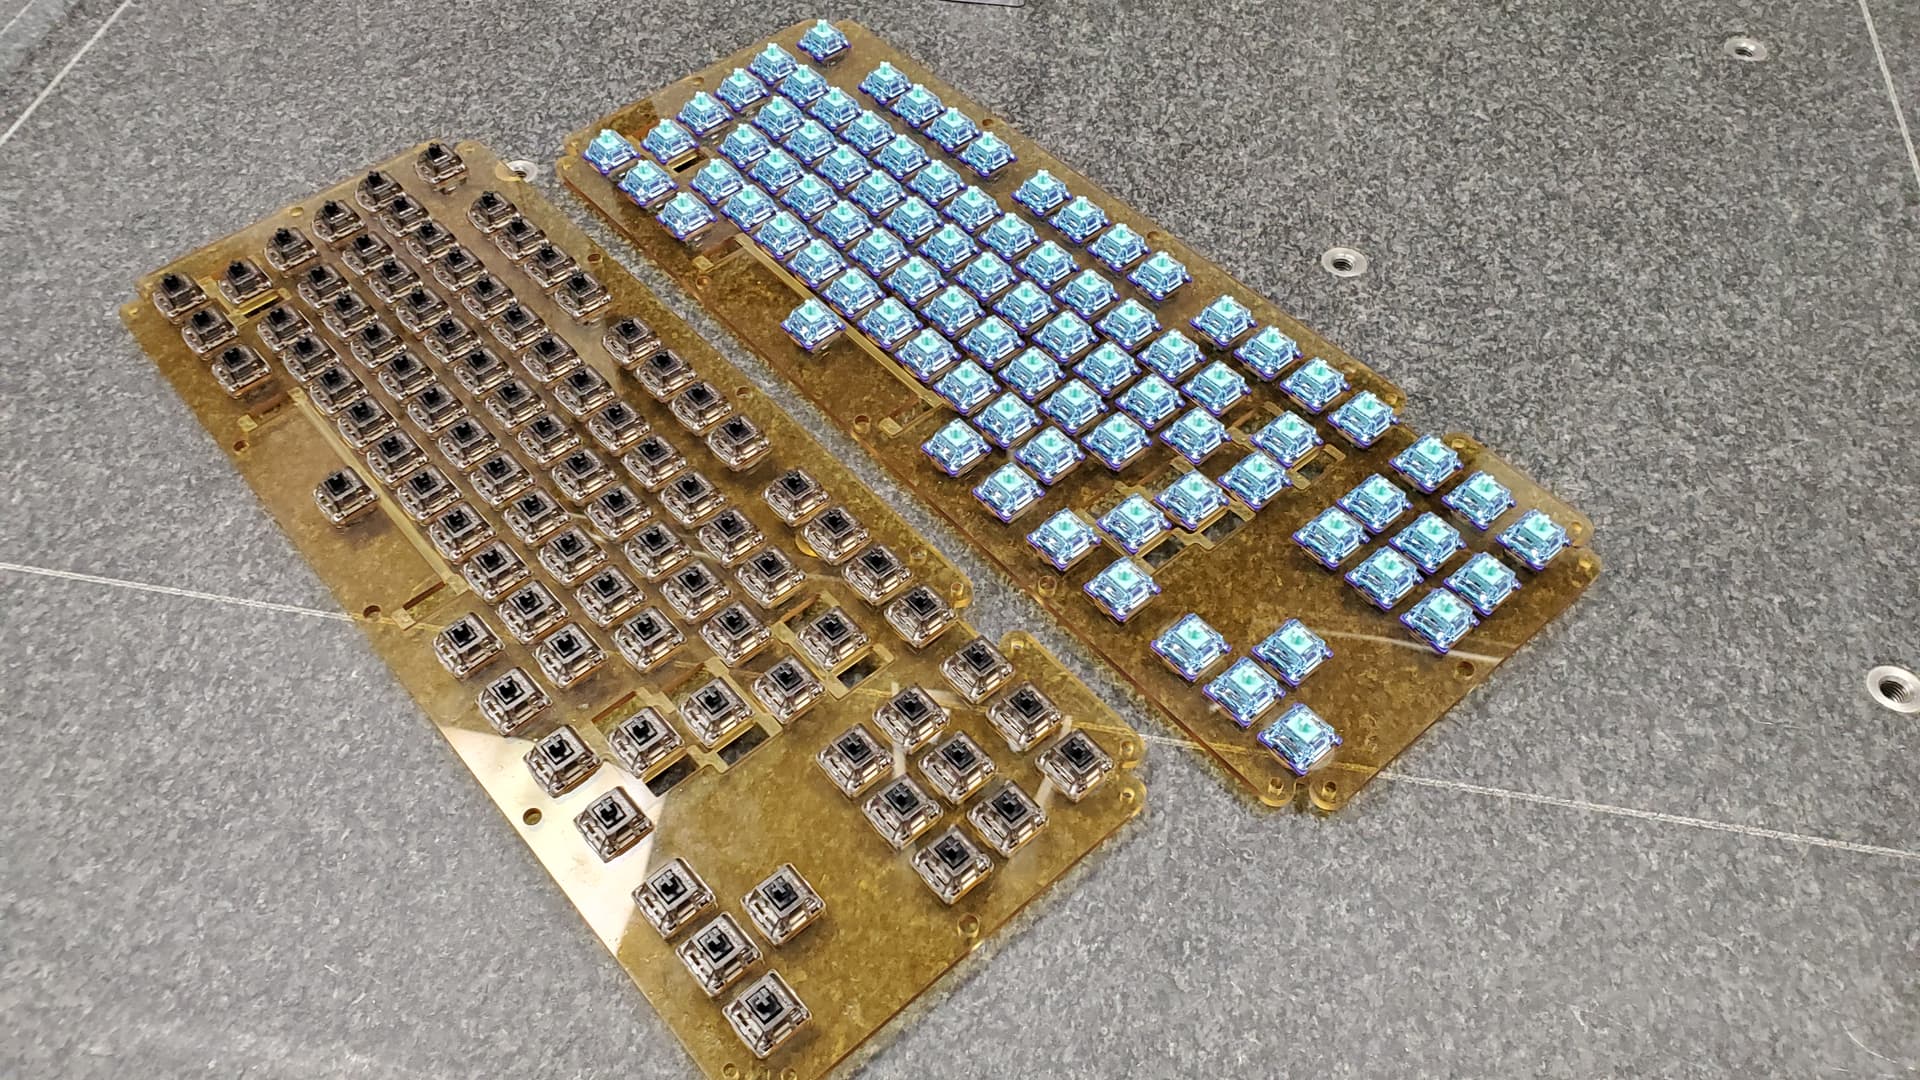
Short up date. Have finally finished with the lube and film for the Black Ink V2s. I have noticed that I might have the through pockets for the switch plate a bit tight for the switches. So, those will have to be opened up a little.
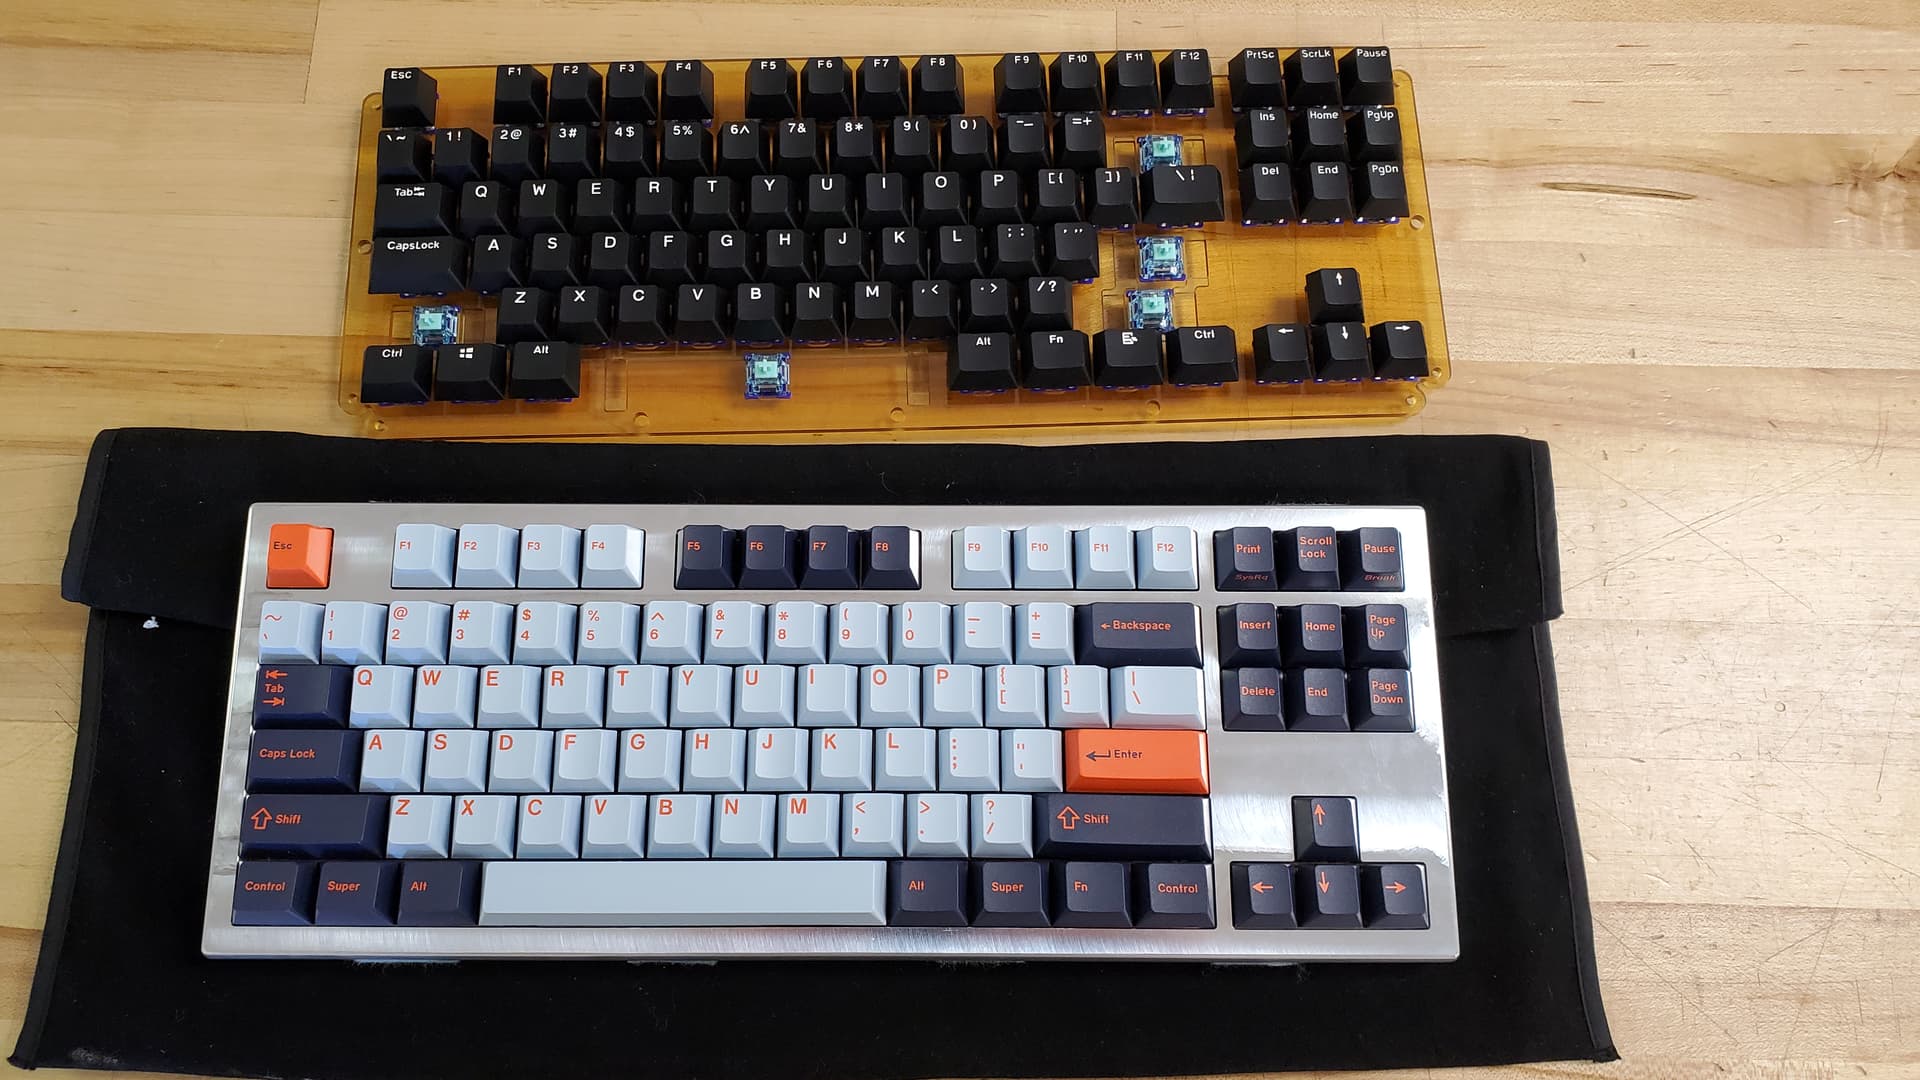
Further messing with and looking at the keyboard mostly assembled. I might also have the clearance around all the keys for top plate a little too close. Was getting some ticking from the space bar just catching the edge of the top plate.
I can say I am liking the feel and sound so far. Both the tactile and linears are pleasant. Next week I might have some time to remake the base plate and modify the top plate for what should be final changes for fitment.
5 Likes
This looks great! I should just get you to build me my vague custom case design ![]()
Ps: my Yuri set arrived today!
1 Like
Thanks! Today I have done a little bit of messing around with frosting the switch plate. Using scotch-brite pads seem to do just fine. Much quicker, and more consistant than blasting. Abrasive tumbling leaves an interesing finish, but the media we are currently using is hard on the clean edges.
5 Likes
Okay, so this is just useless input from the peanut gallery, but it would be cool if you could open the top of the case in some section (perhaps over the arrow cluster) to show the plate off even more. I feel like this is such a strong feature of your board that it would be a shame not to show it off at every angle.
Also, and I’m just floating this out there, but a single LED could light the edges of this pretty well.
2 Likes
That’s not a bad idea. The Hiney 87C north is a bottom lit PCB. So, would need to see if that would be a thing that could be added.
Have even thought of doing a full case out of it also.
1 Like
Small update. Been busy with working on a project that actually pays at the moment ![]() .
.
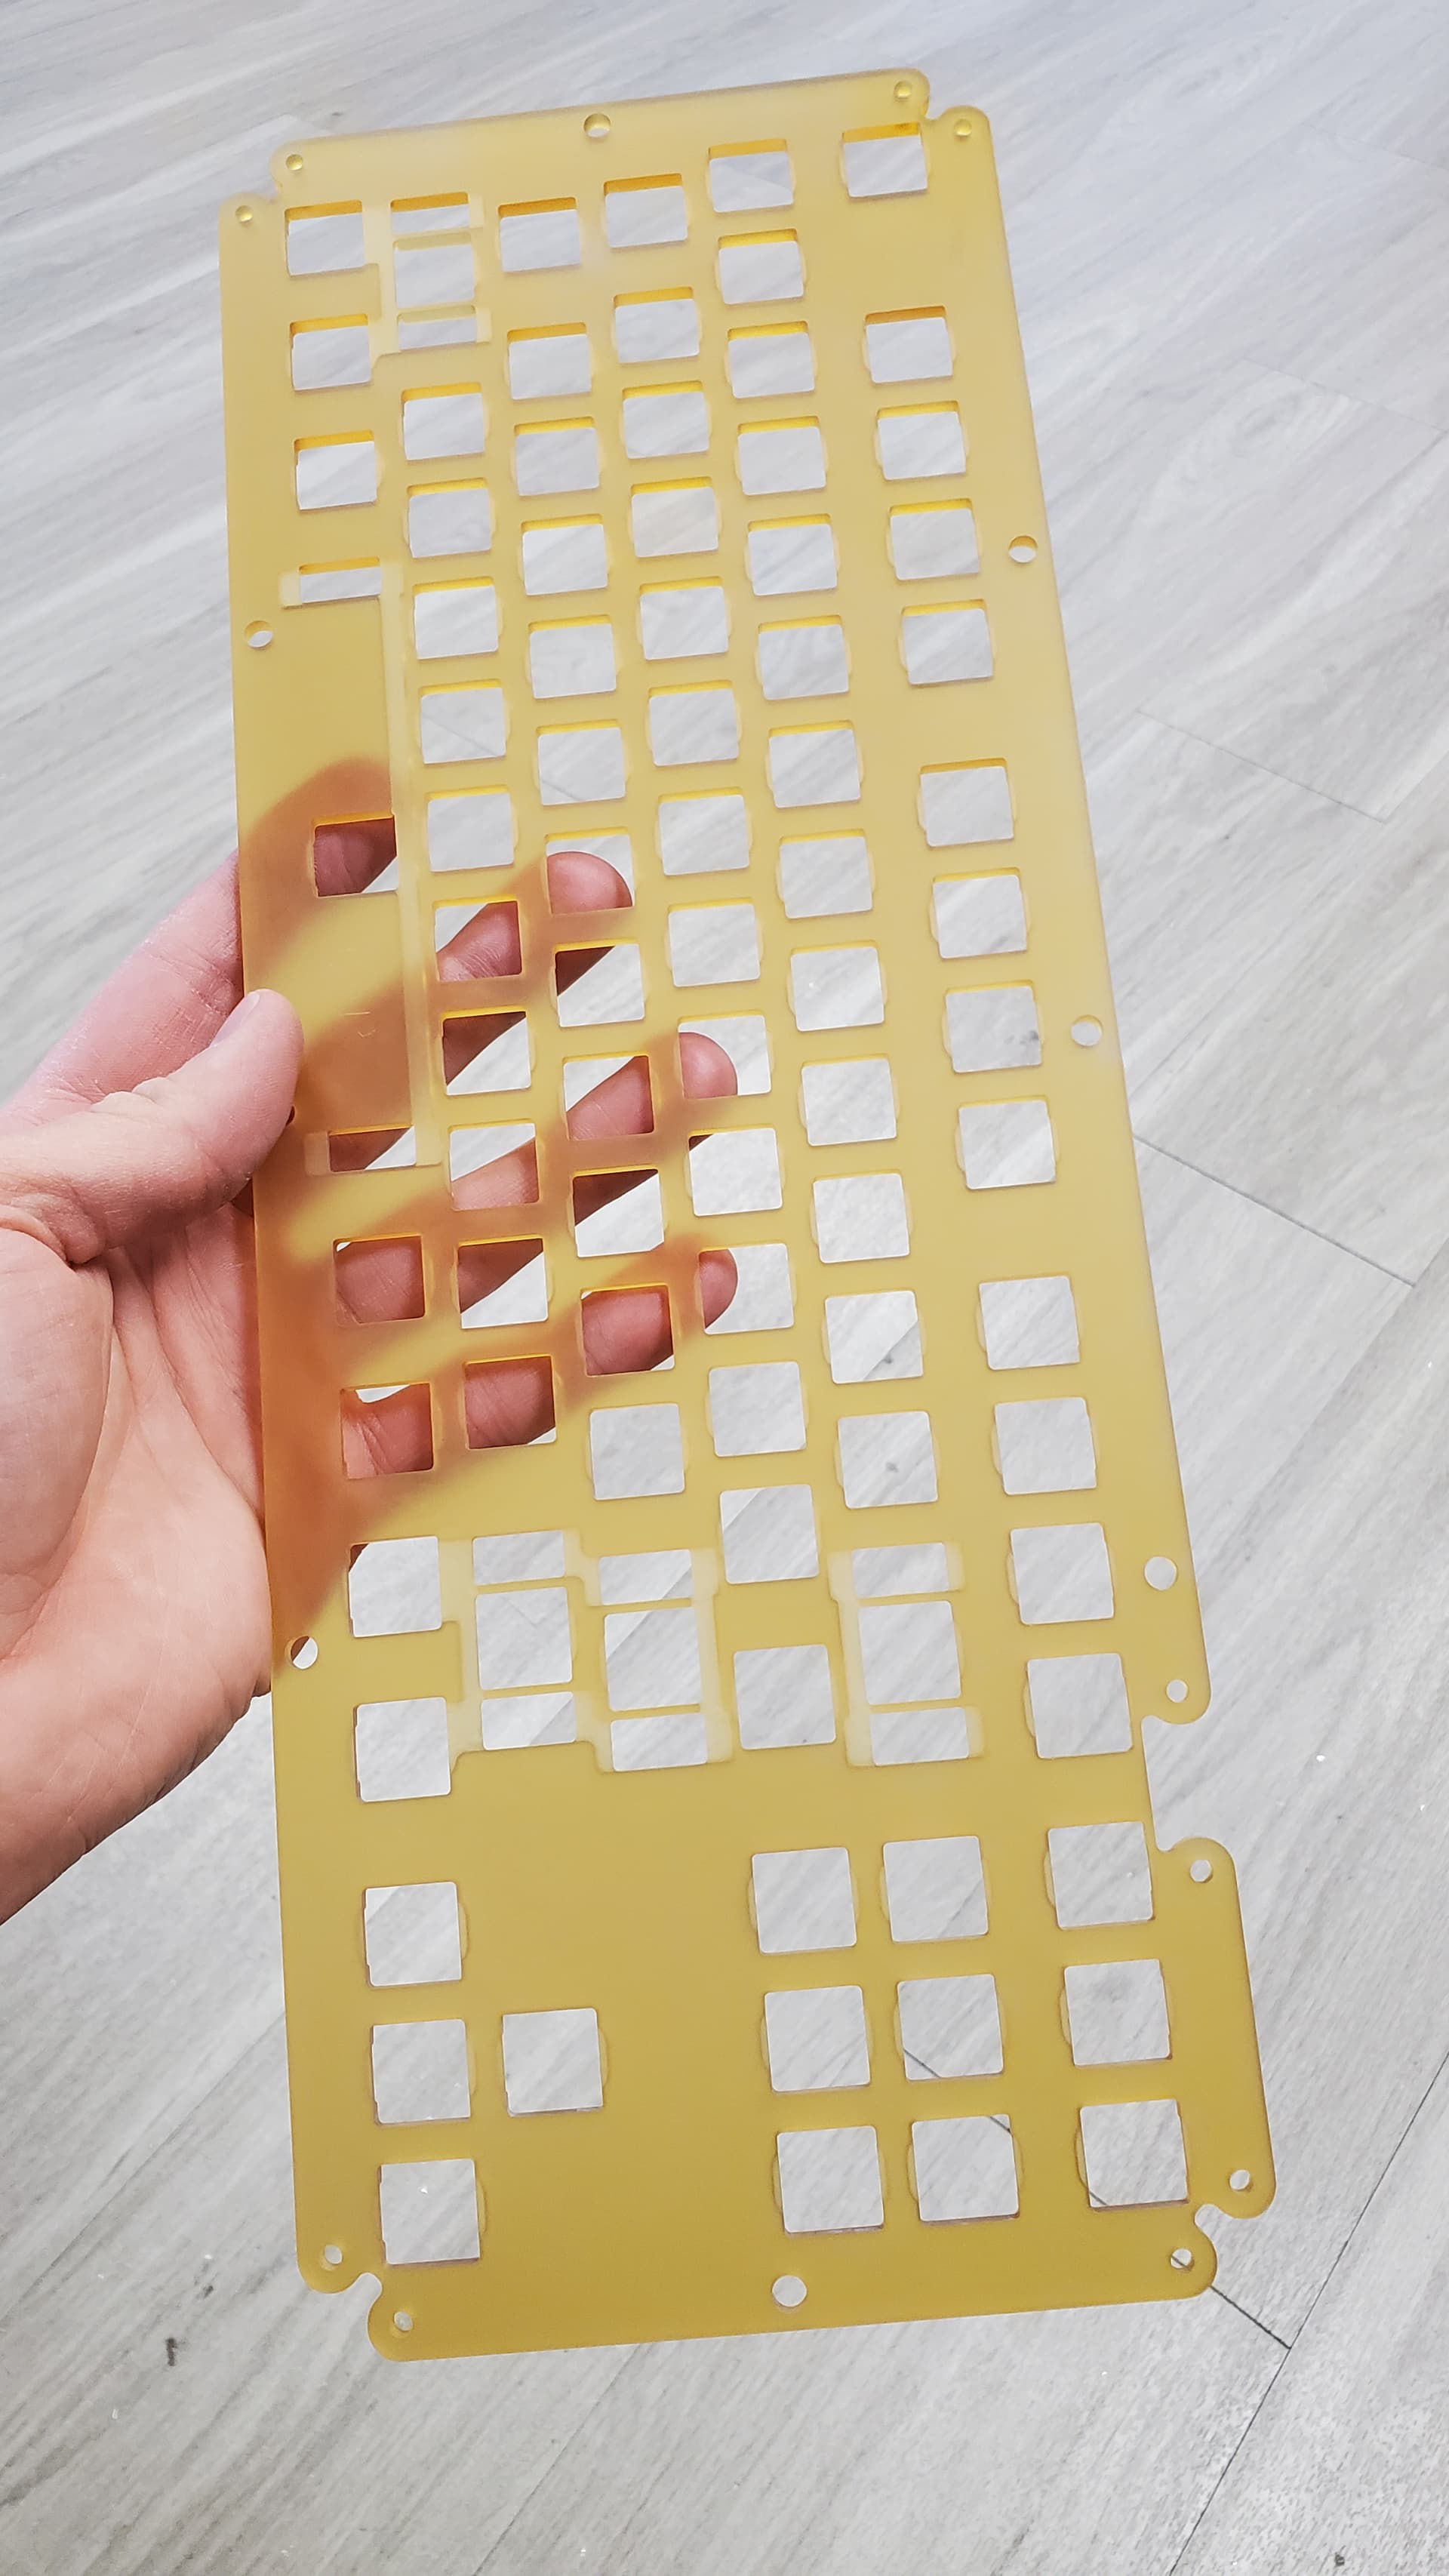
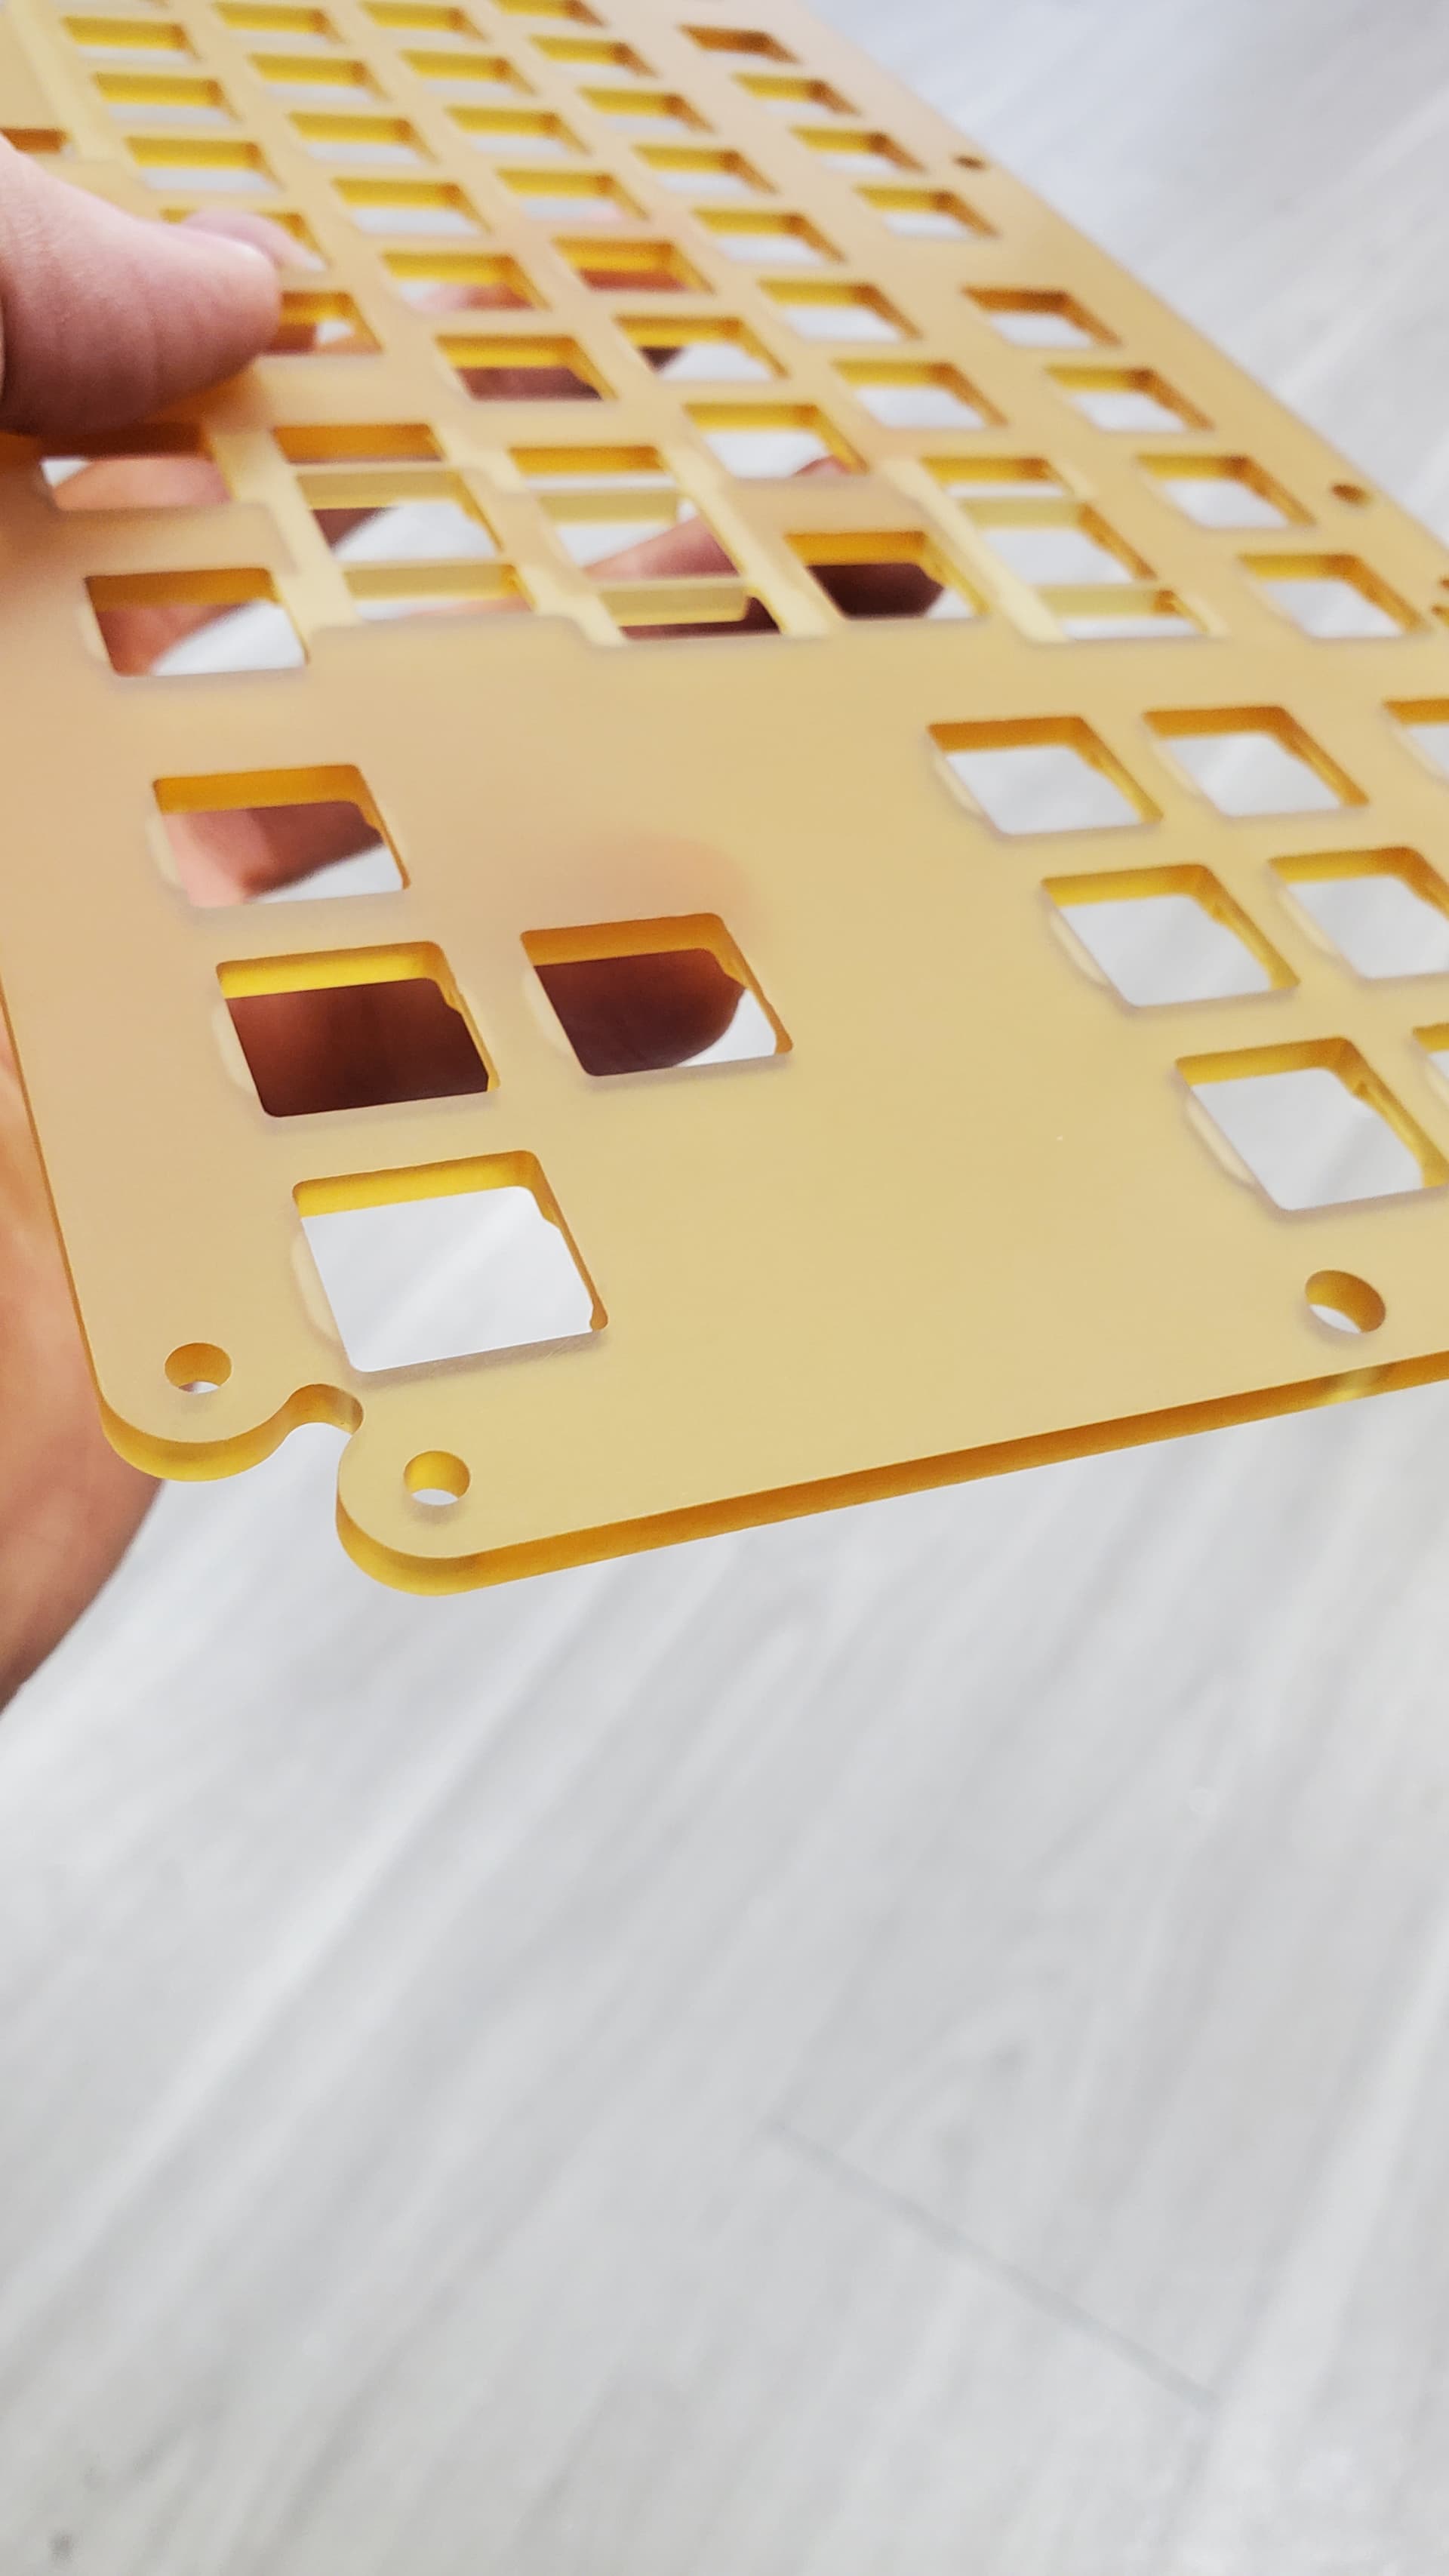
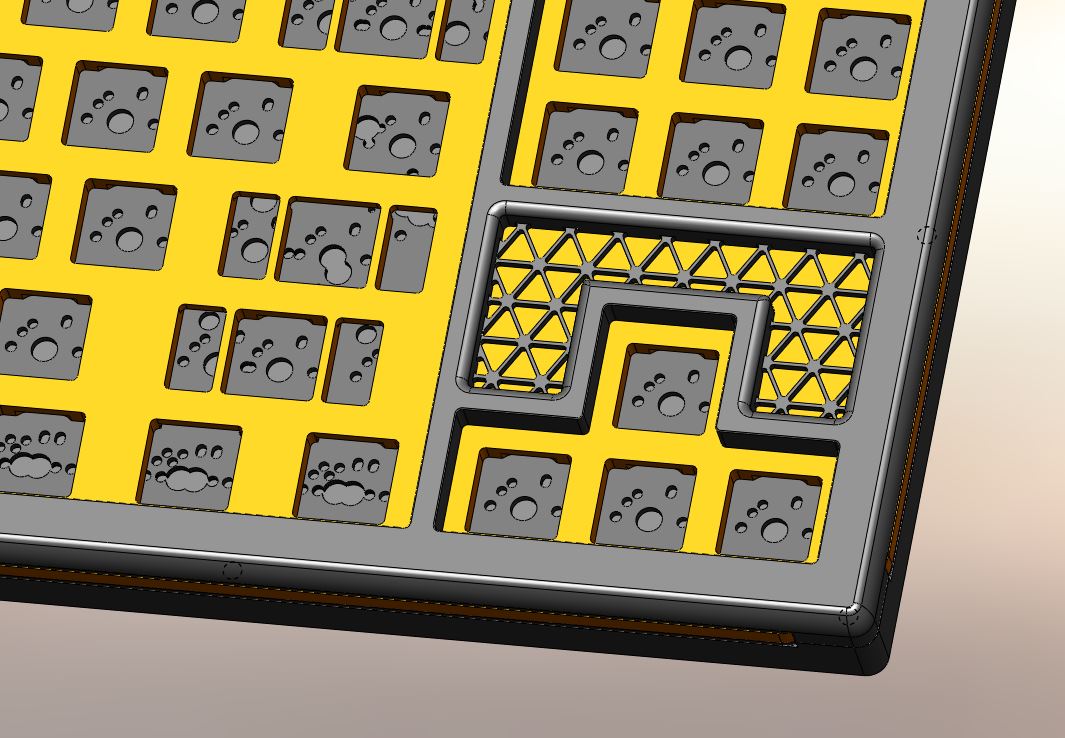
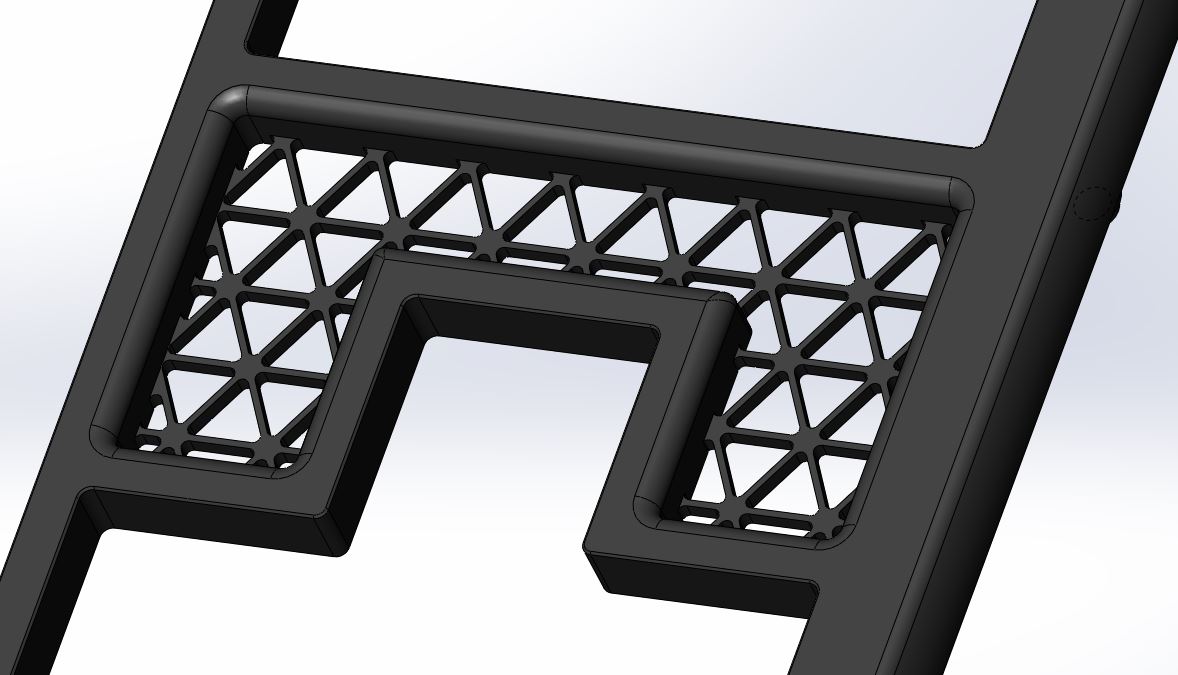
I will be finishing up the switch plates shortly and finally fully build out the switch plate and solder everything up. Started experimenting with the pocket idea(@Extra_Fox ). I wanted a reason to do an iso-grid. Feedback is welcome on that design. Other option would be to just make it a through pocket and match the outside edge project.
3 Likes
That’s really cool, but seems like it’d be a real pain to machine?
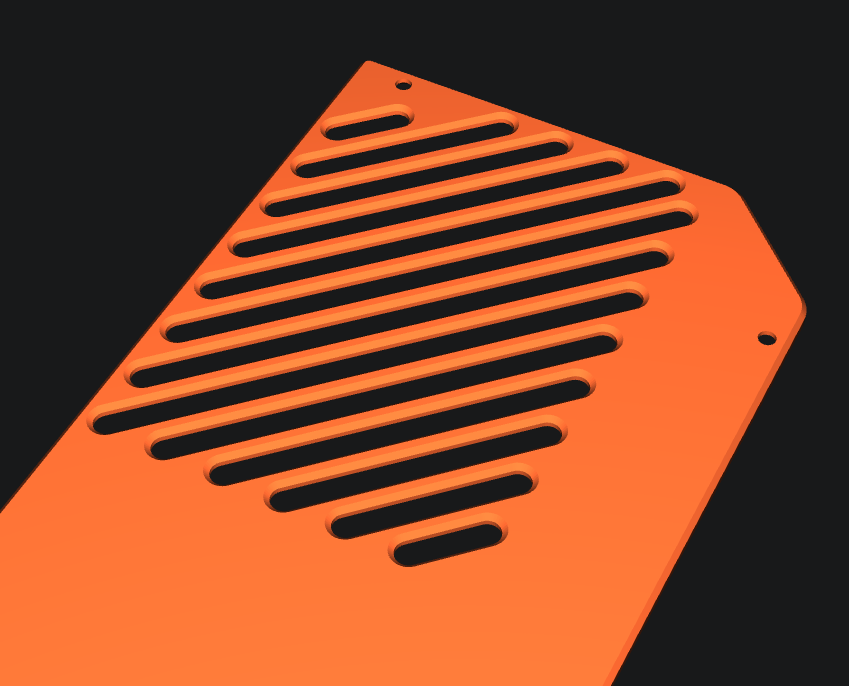
As a suggestion, what about 45 degree slots that are 4-5mm wide and 4-5mm apart. Same height as the case so you can maintain the same look of the edges.
Kind of like this.
1 Like
That could be an option. Honestly the shape really doesnt matter. Once its programmed its easy. The total material removed and total amount of surface to finish cut are the main thing. I can compare the two and see the difference in my CAM software.
I love low-angle keyboards. Great job!
1 Like
Soldering complete on both test setups.

Second one was easier with a conical wedge tip for the iron.
2 Likes
Hey!
I love the Designs man. Keep up the awesome work! I’m actually working on custom keyboards project; would be open to discuss custom plate purchases single and in bulks? if so may I contact you via, Discord, Instagram, or other application you use?
1 Like
Small update. My friends with a laser cutter were able to get me a set of gaskets out of the felt. I still haven’t had time to get the leather split down to the correct thickness.
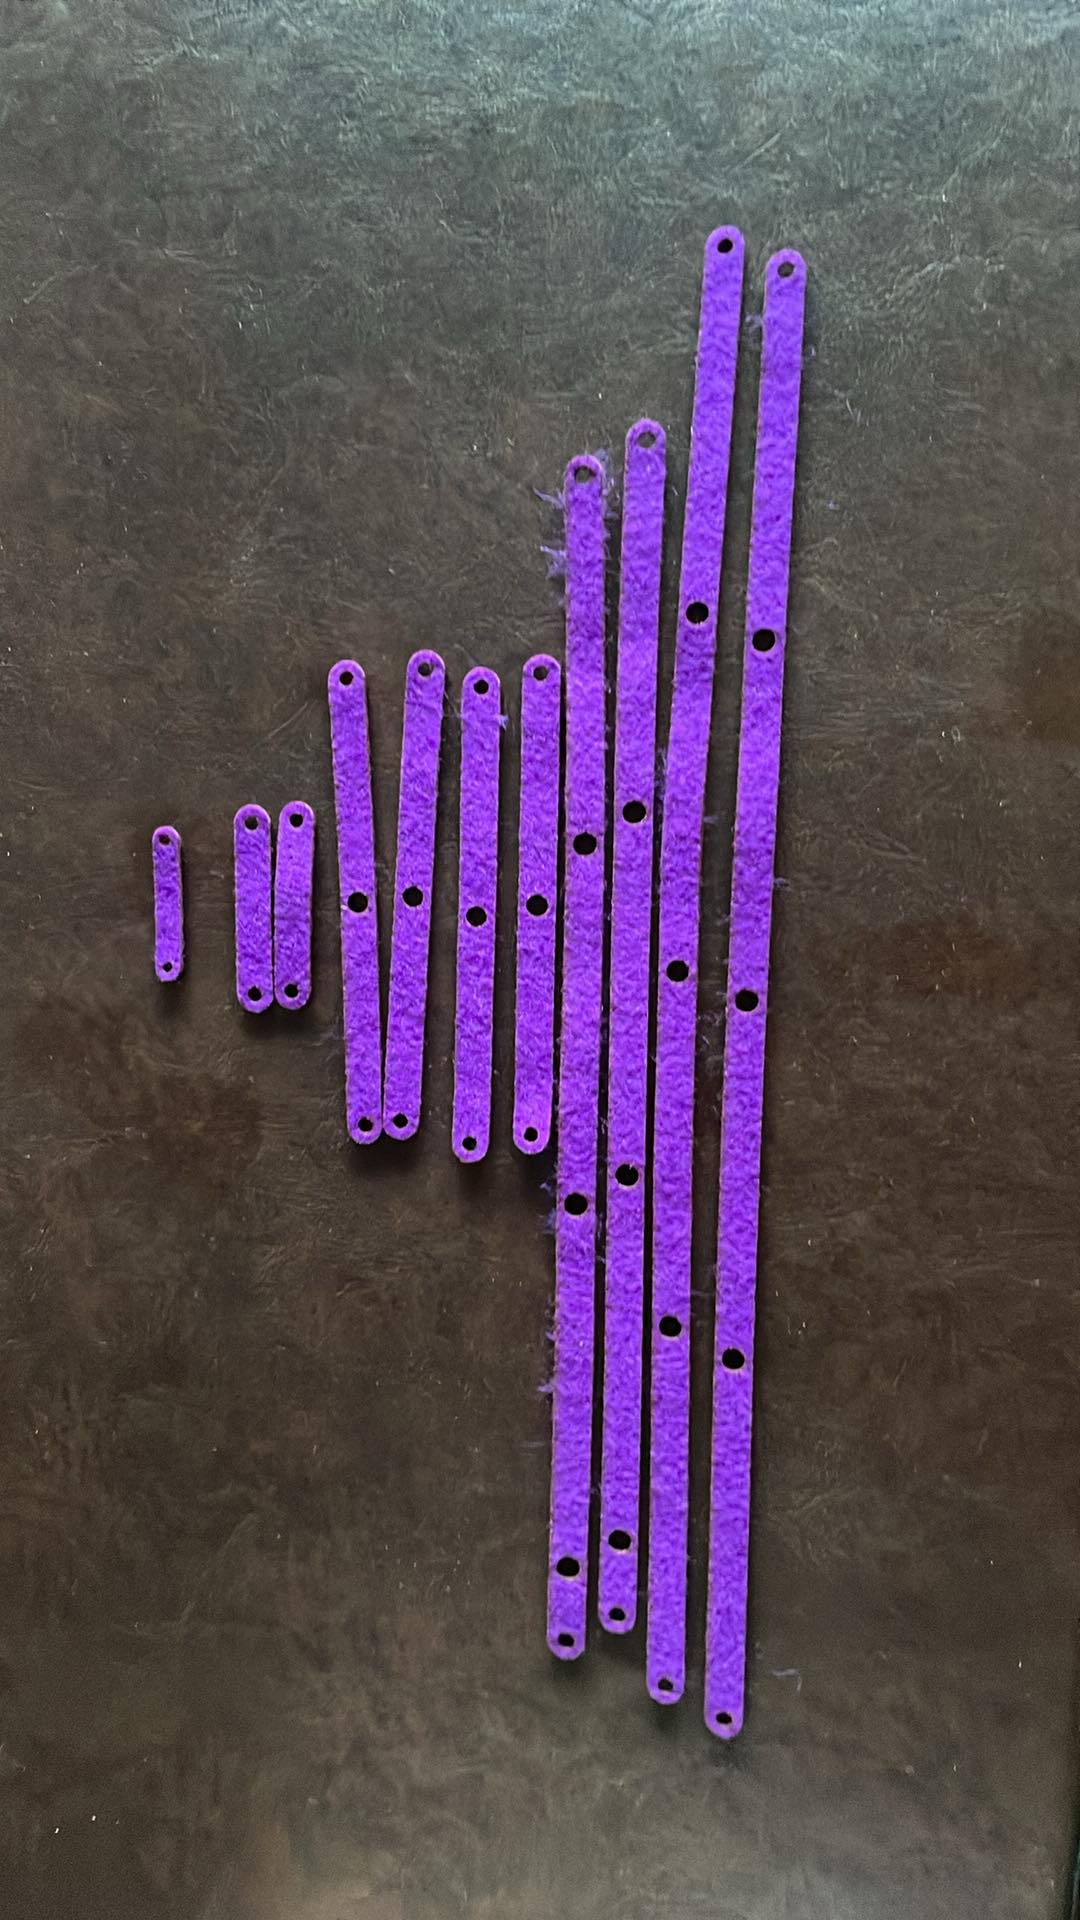
They make a huge difference in sound as I expected they would. Will have to get a quick recording made. I did notice with my current design it is a massive PITA to assemble. So will have to make some changes to address that issue.
4 Likes