Recently on eBay I obtained a Genest Technologies Numerikeys which is an interesting 33 key numberpad with a navigation cluster and side modifier keys.
Let’s check it out!
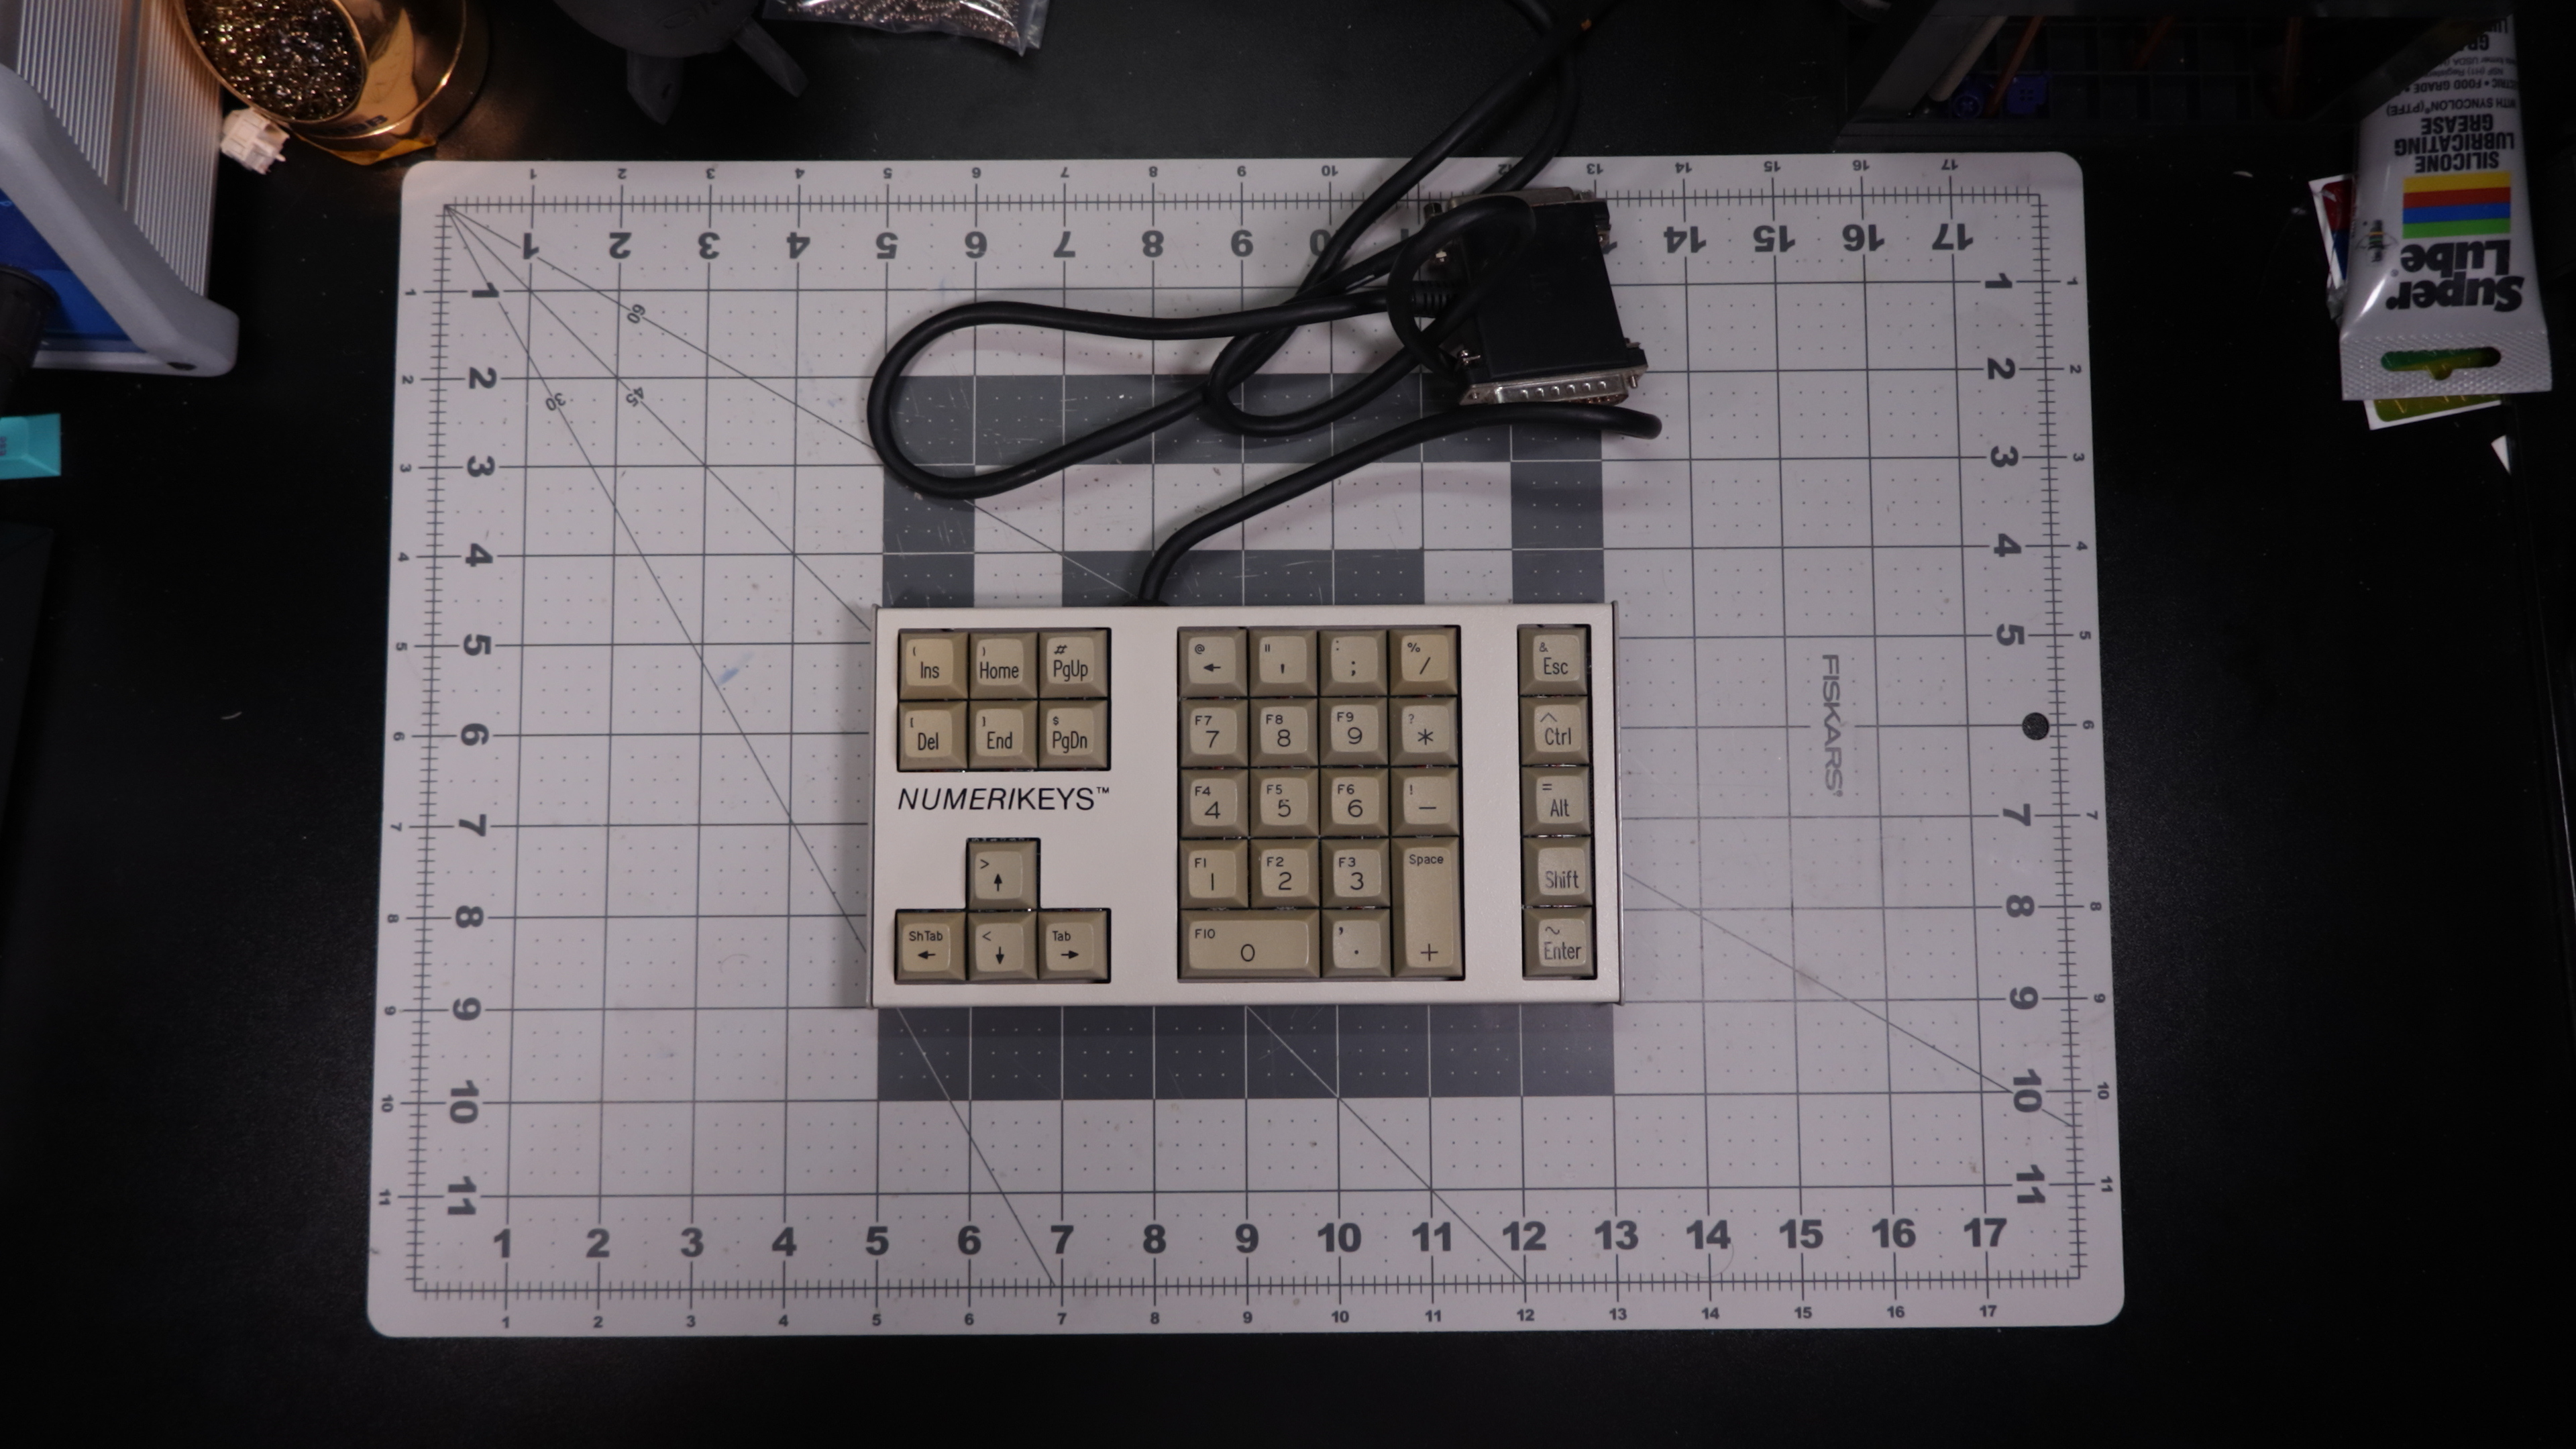
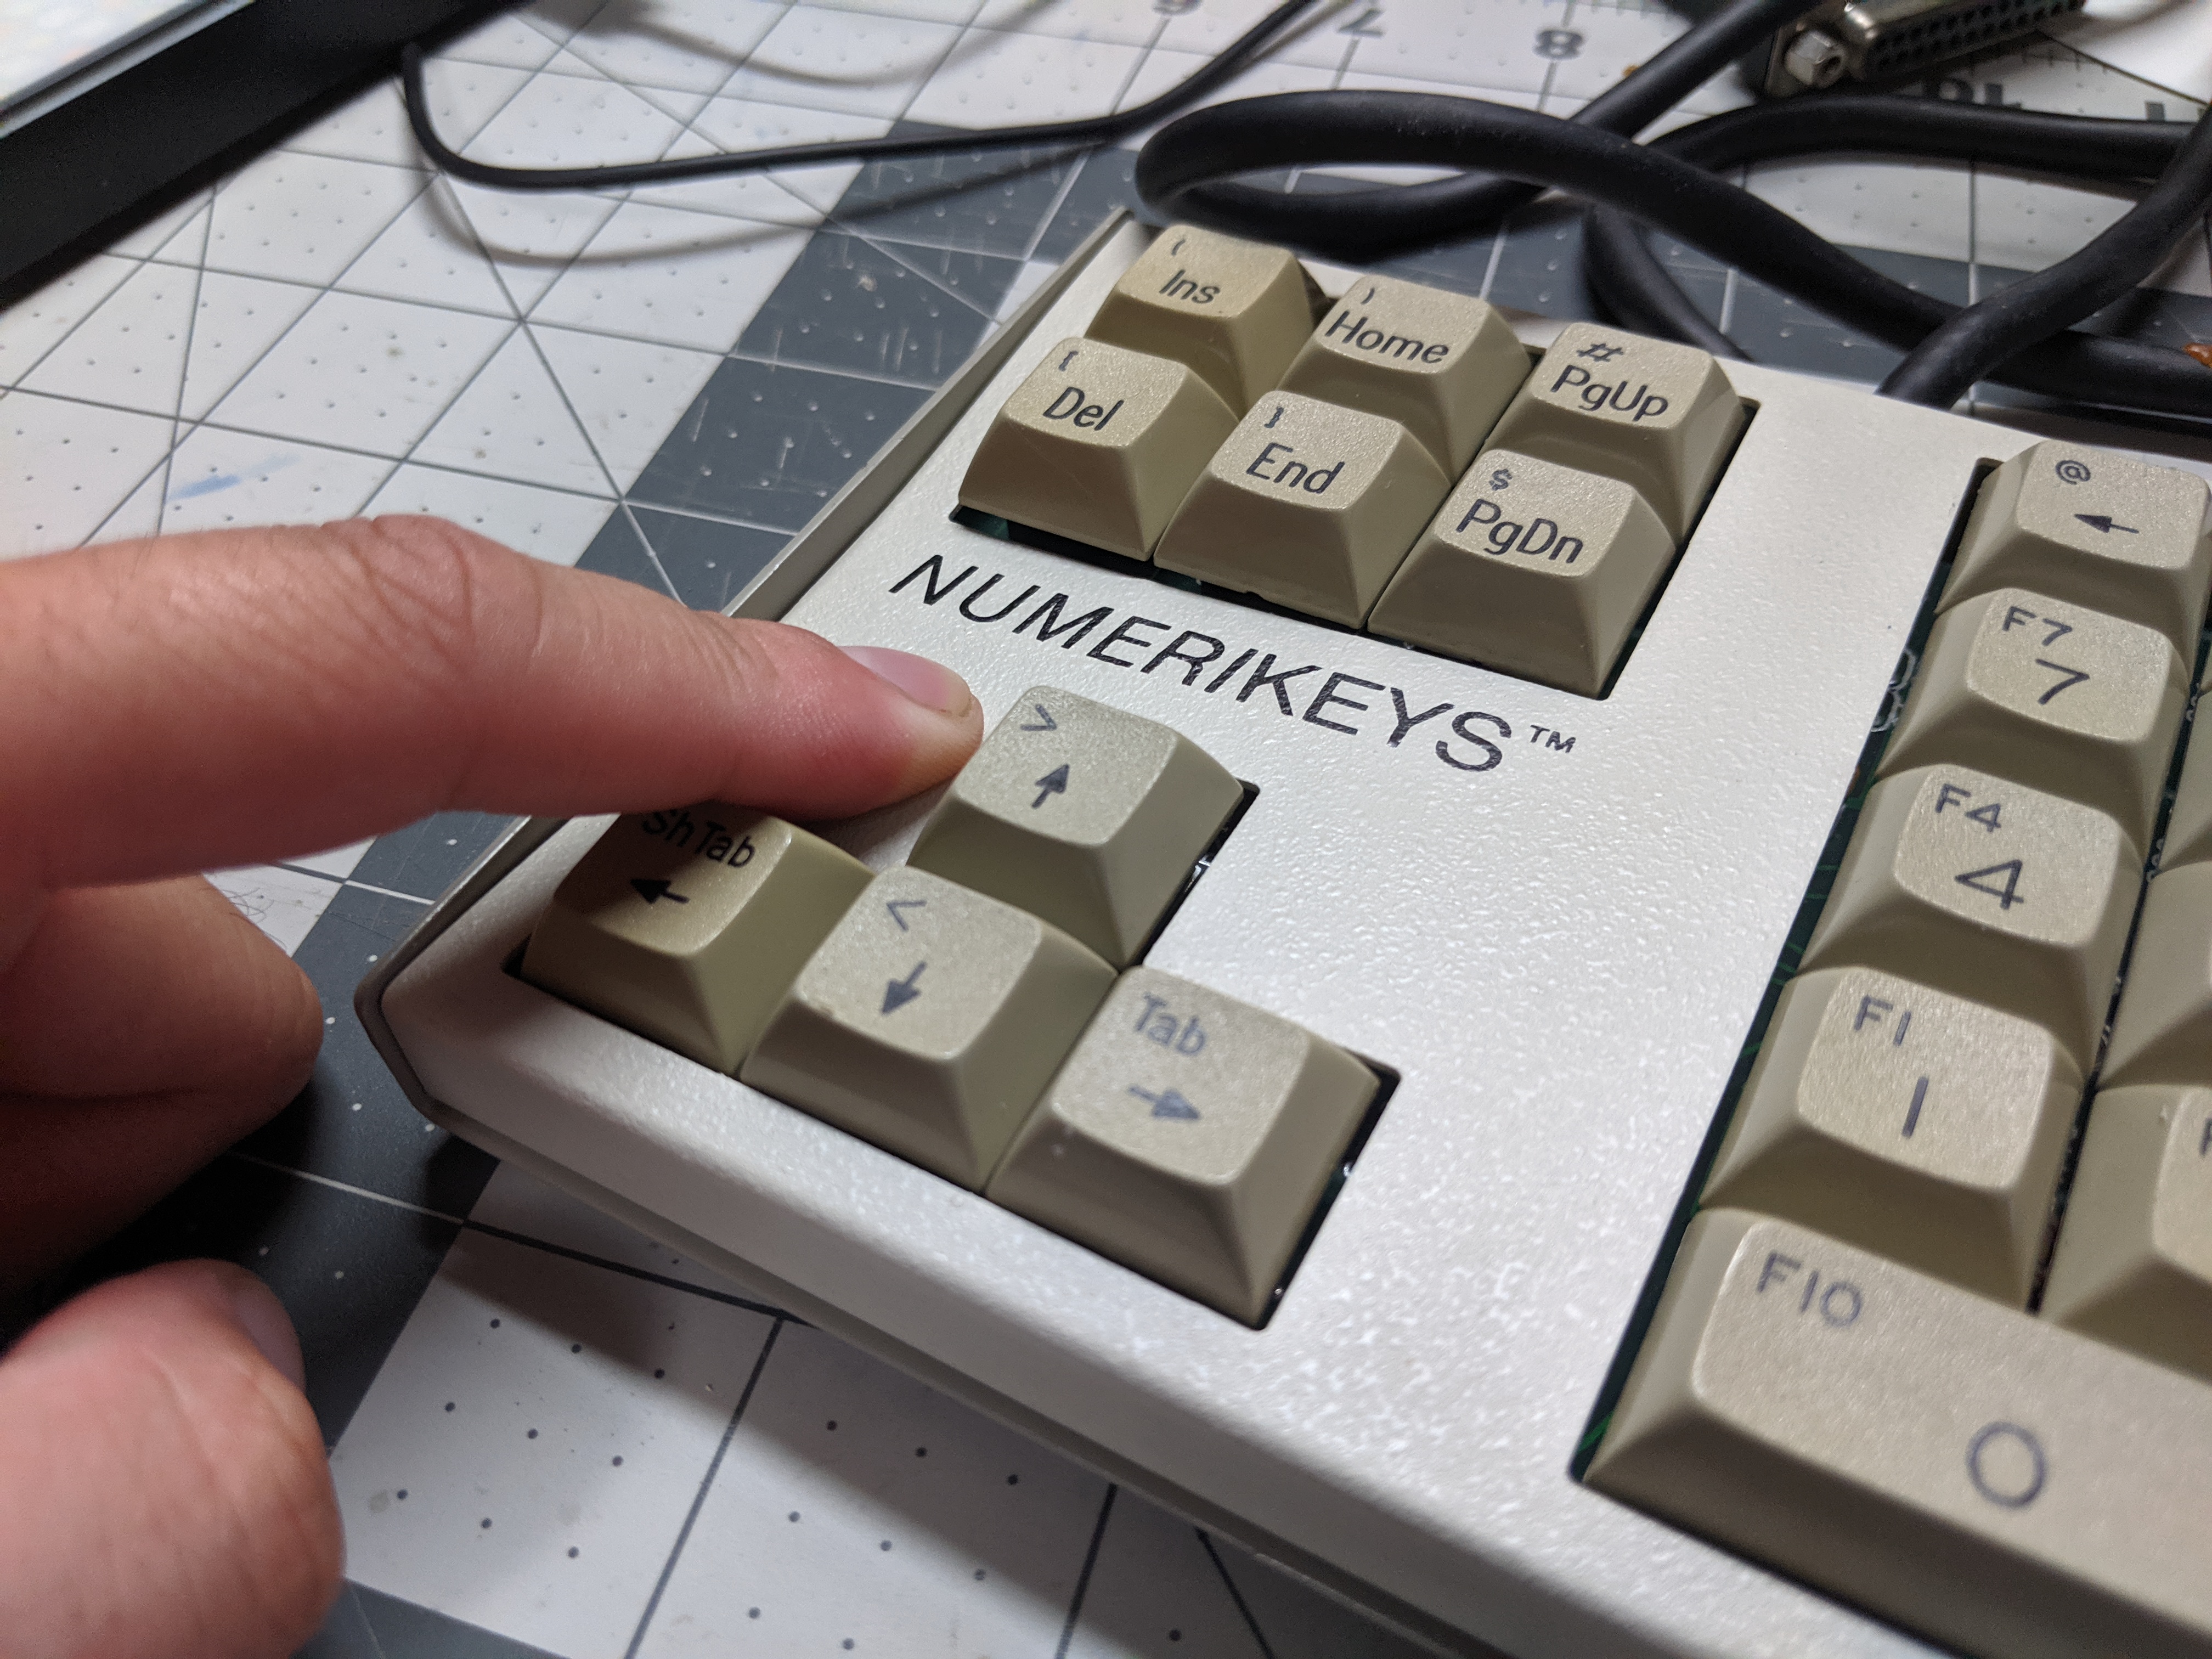
What a layout. I think in the modern context of how popular 60% keyboards are, something like this could be pretty awesome to have on your desk.
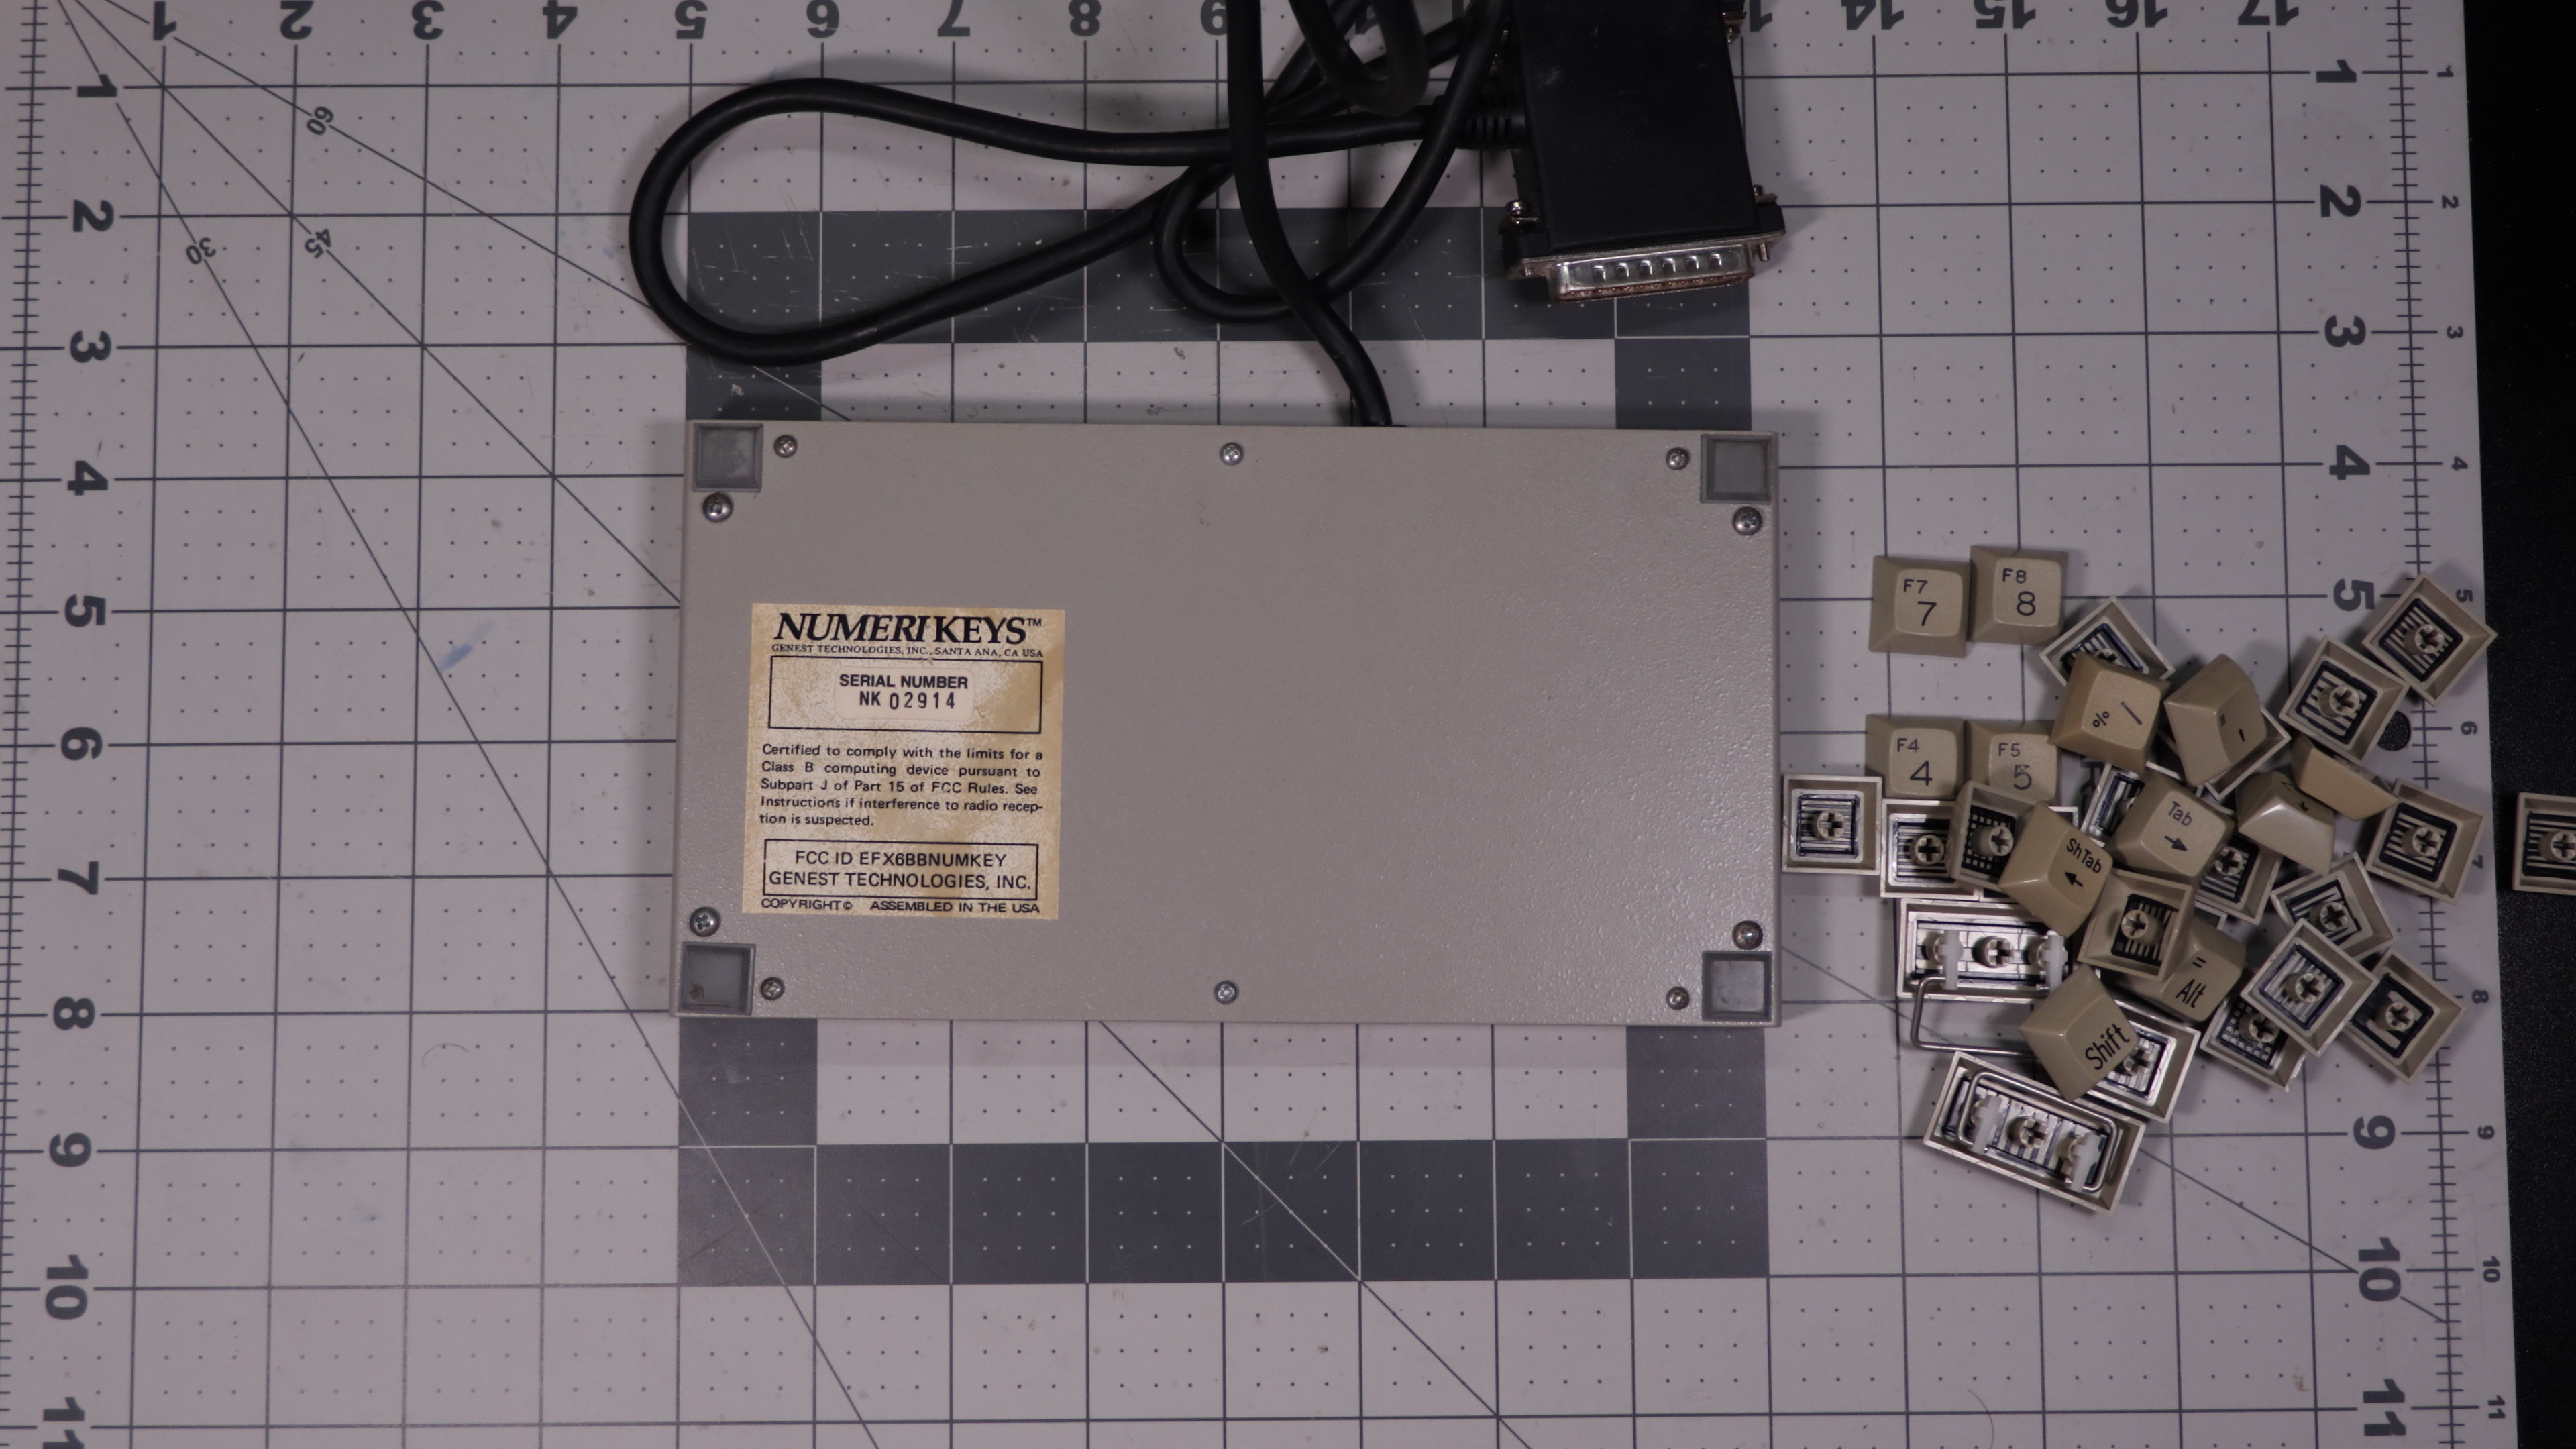
Real quick, the connector.
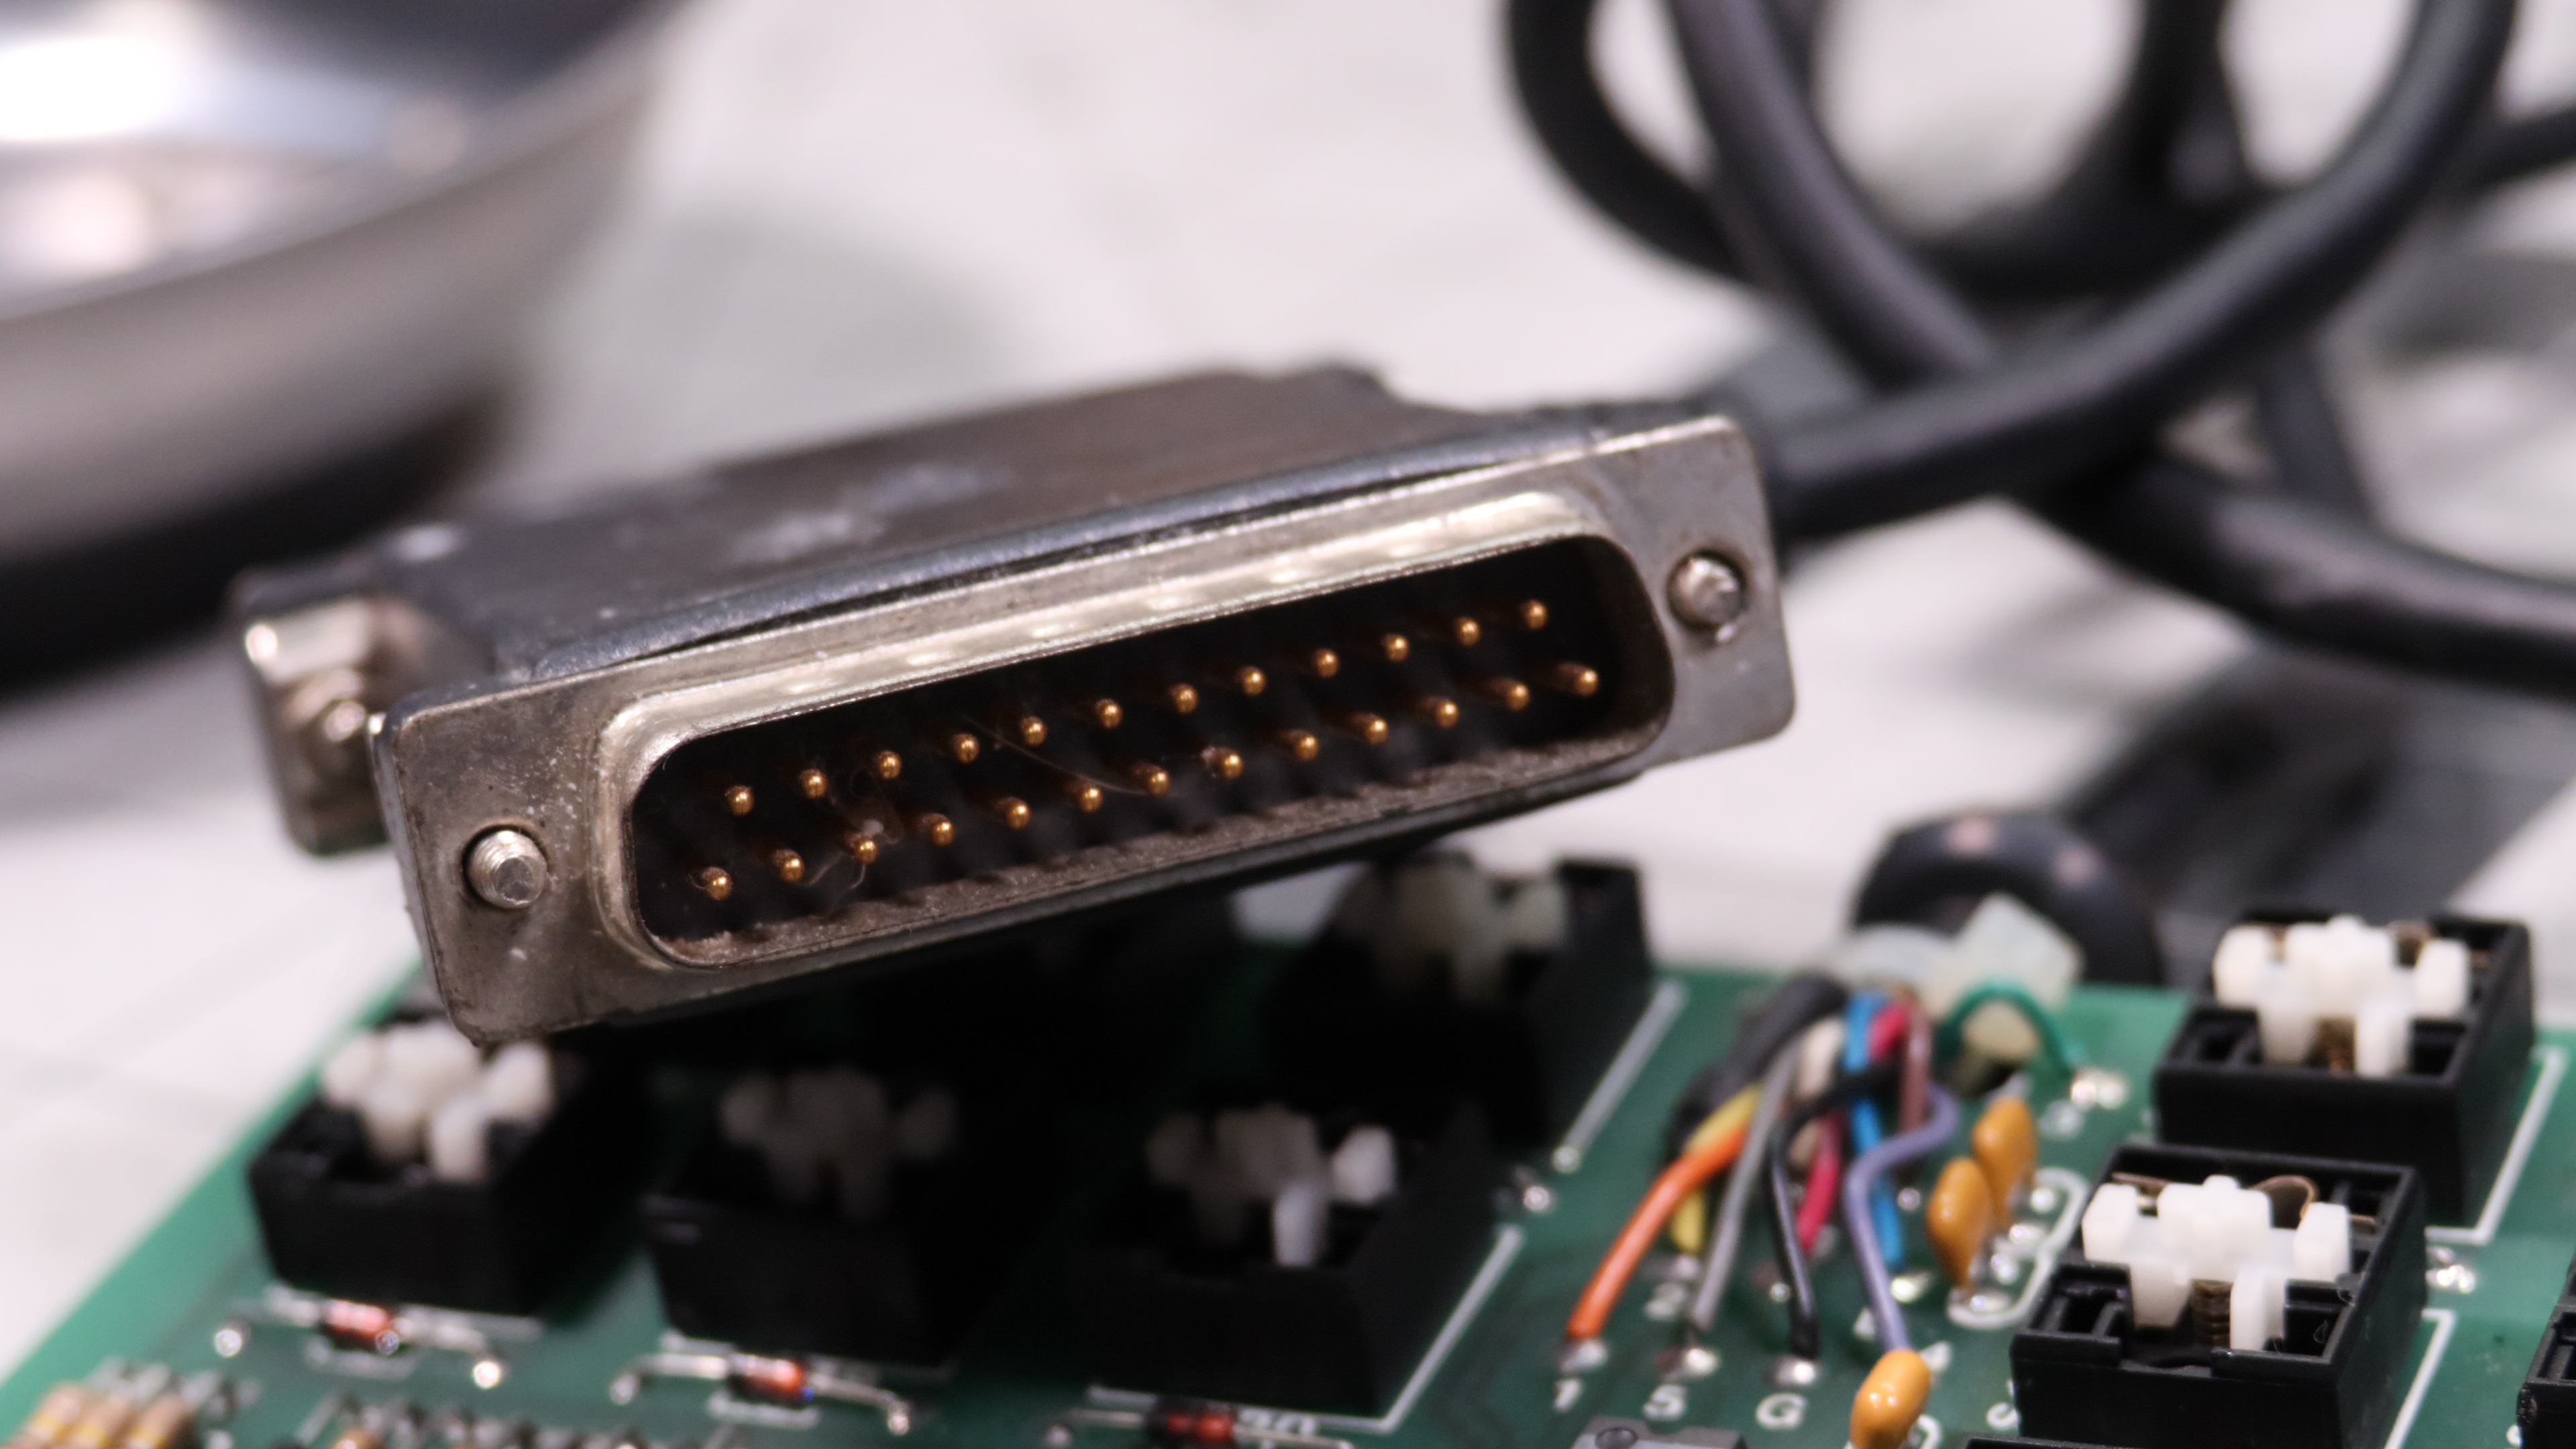
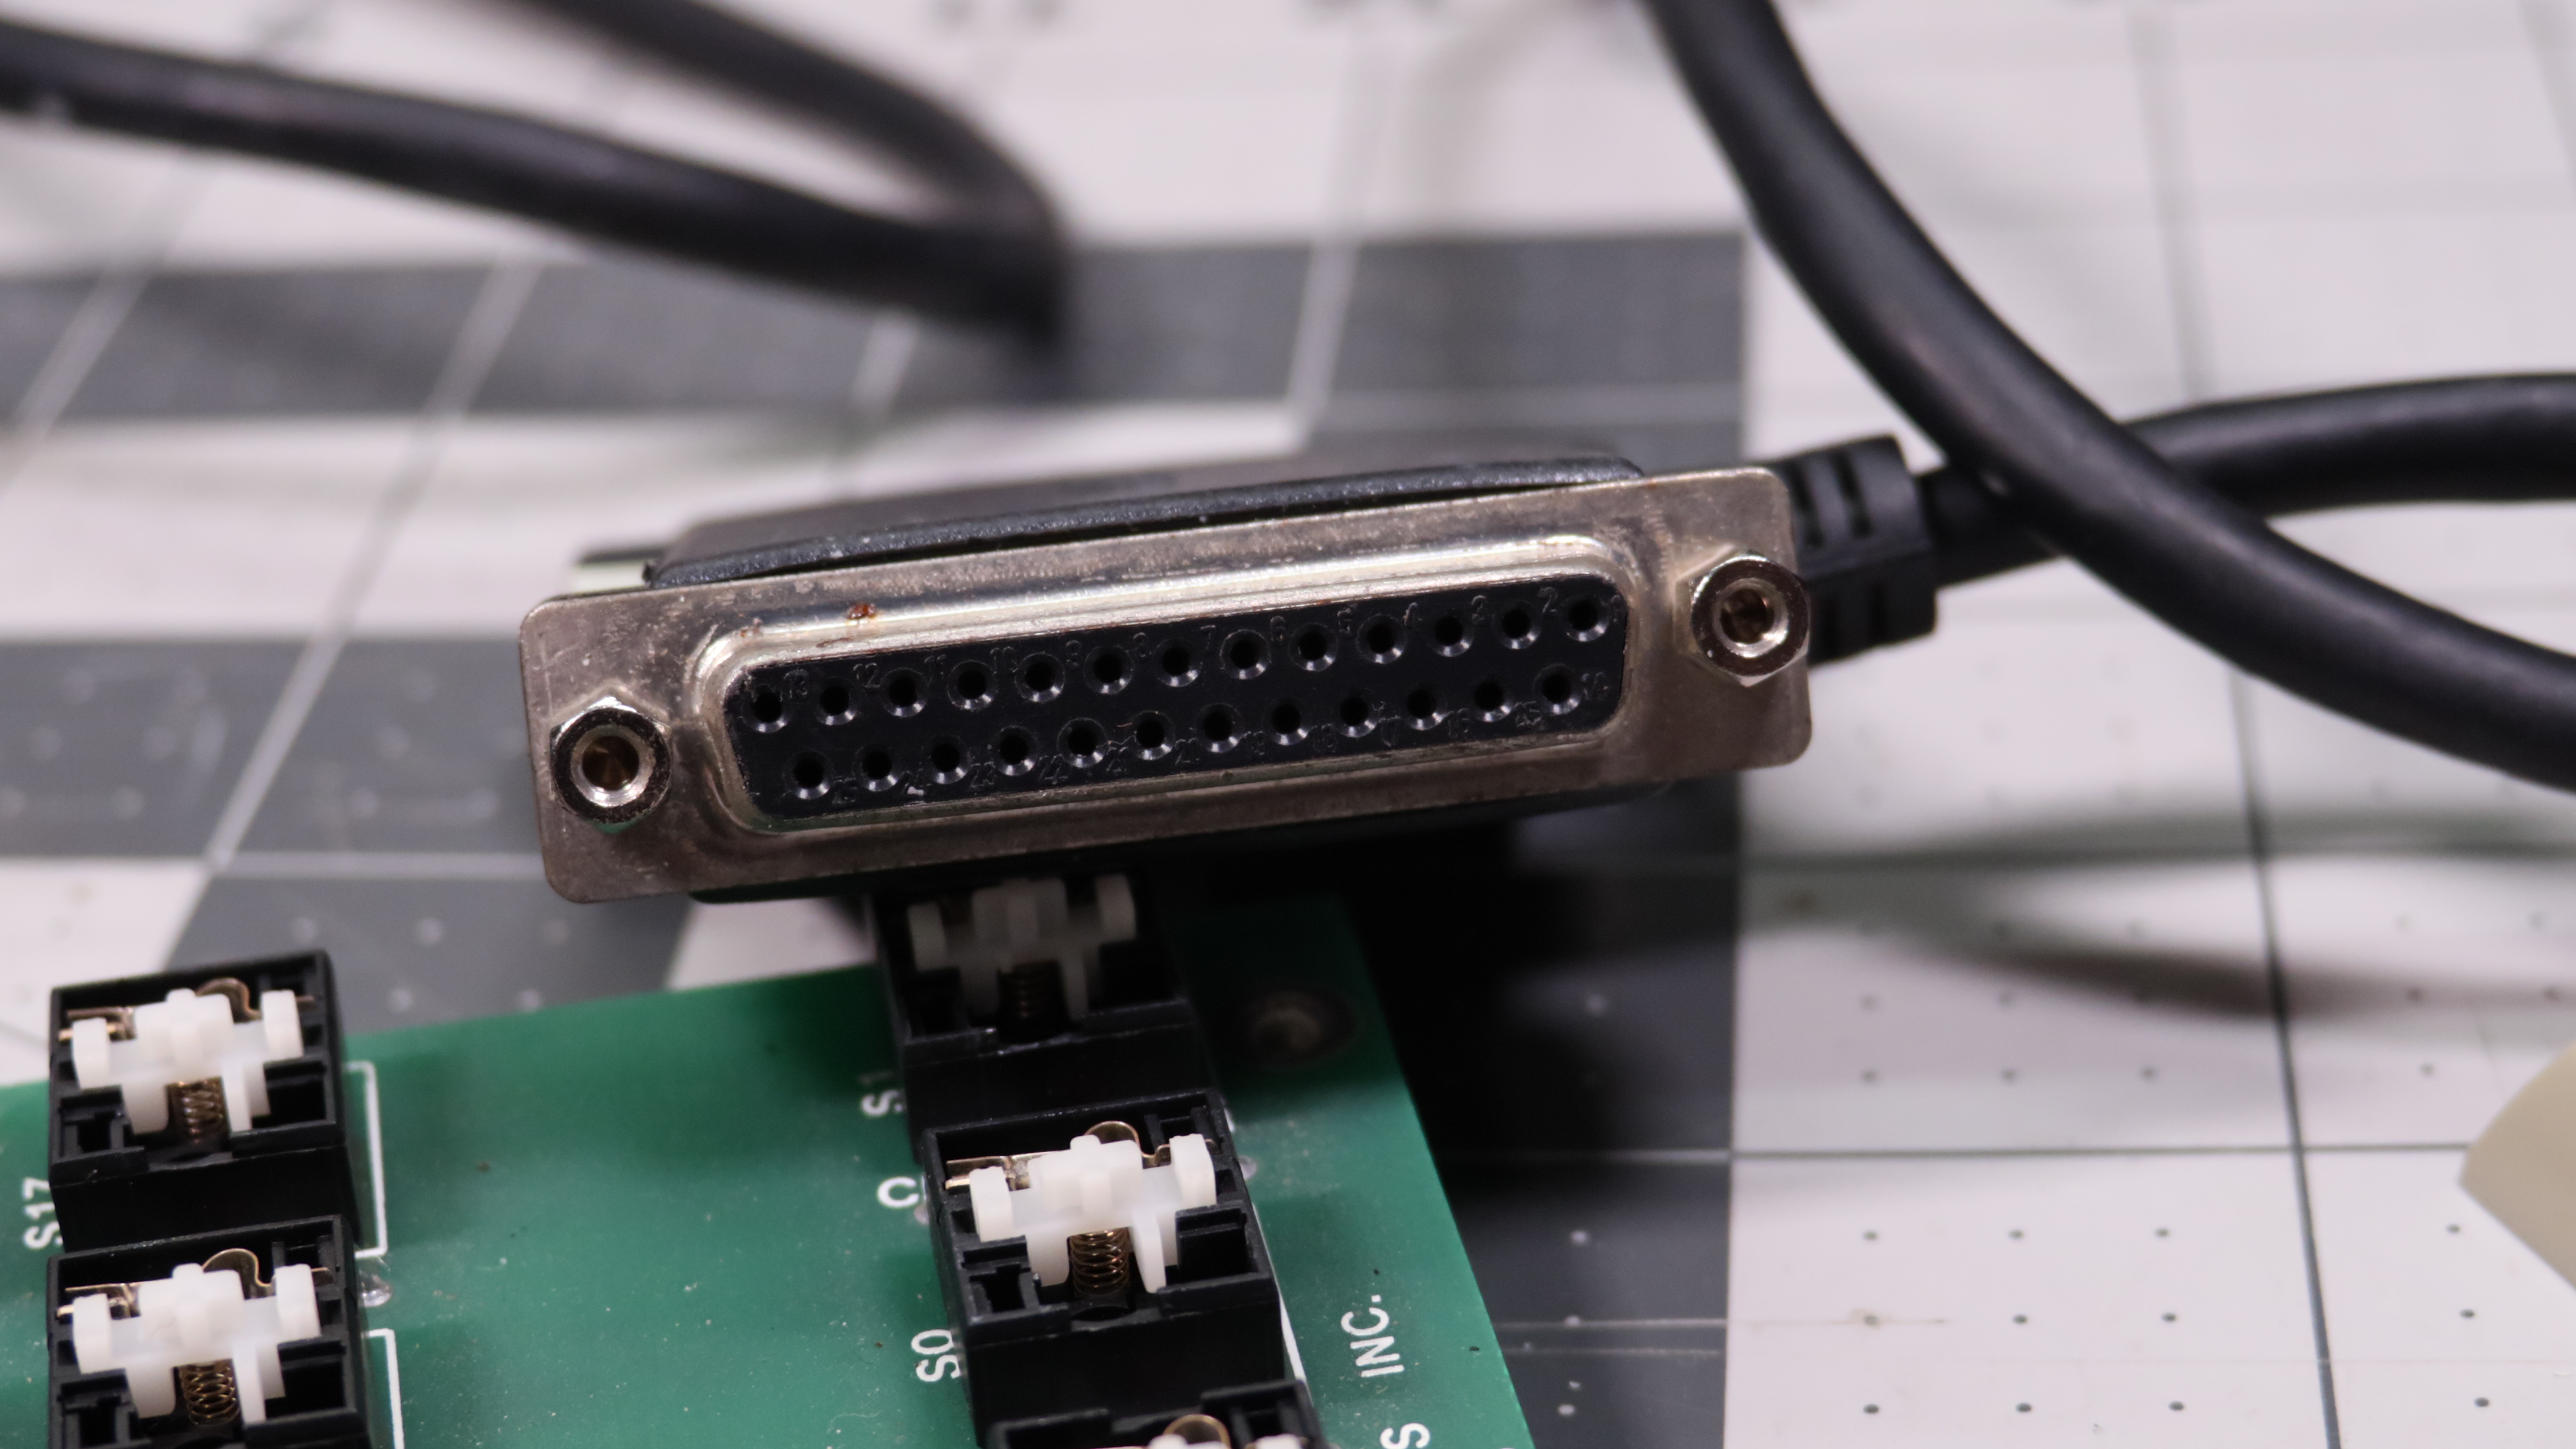
So why does this have a male and female end? Back in the day, you’d connect this to your PC’s parallel printer port. Since you’d lose printer functionality if it was just a male plug, they added a female for your printer to passthrough.
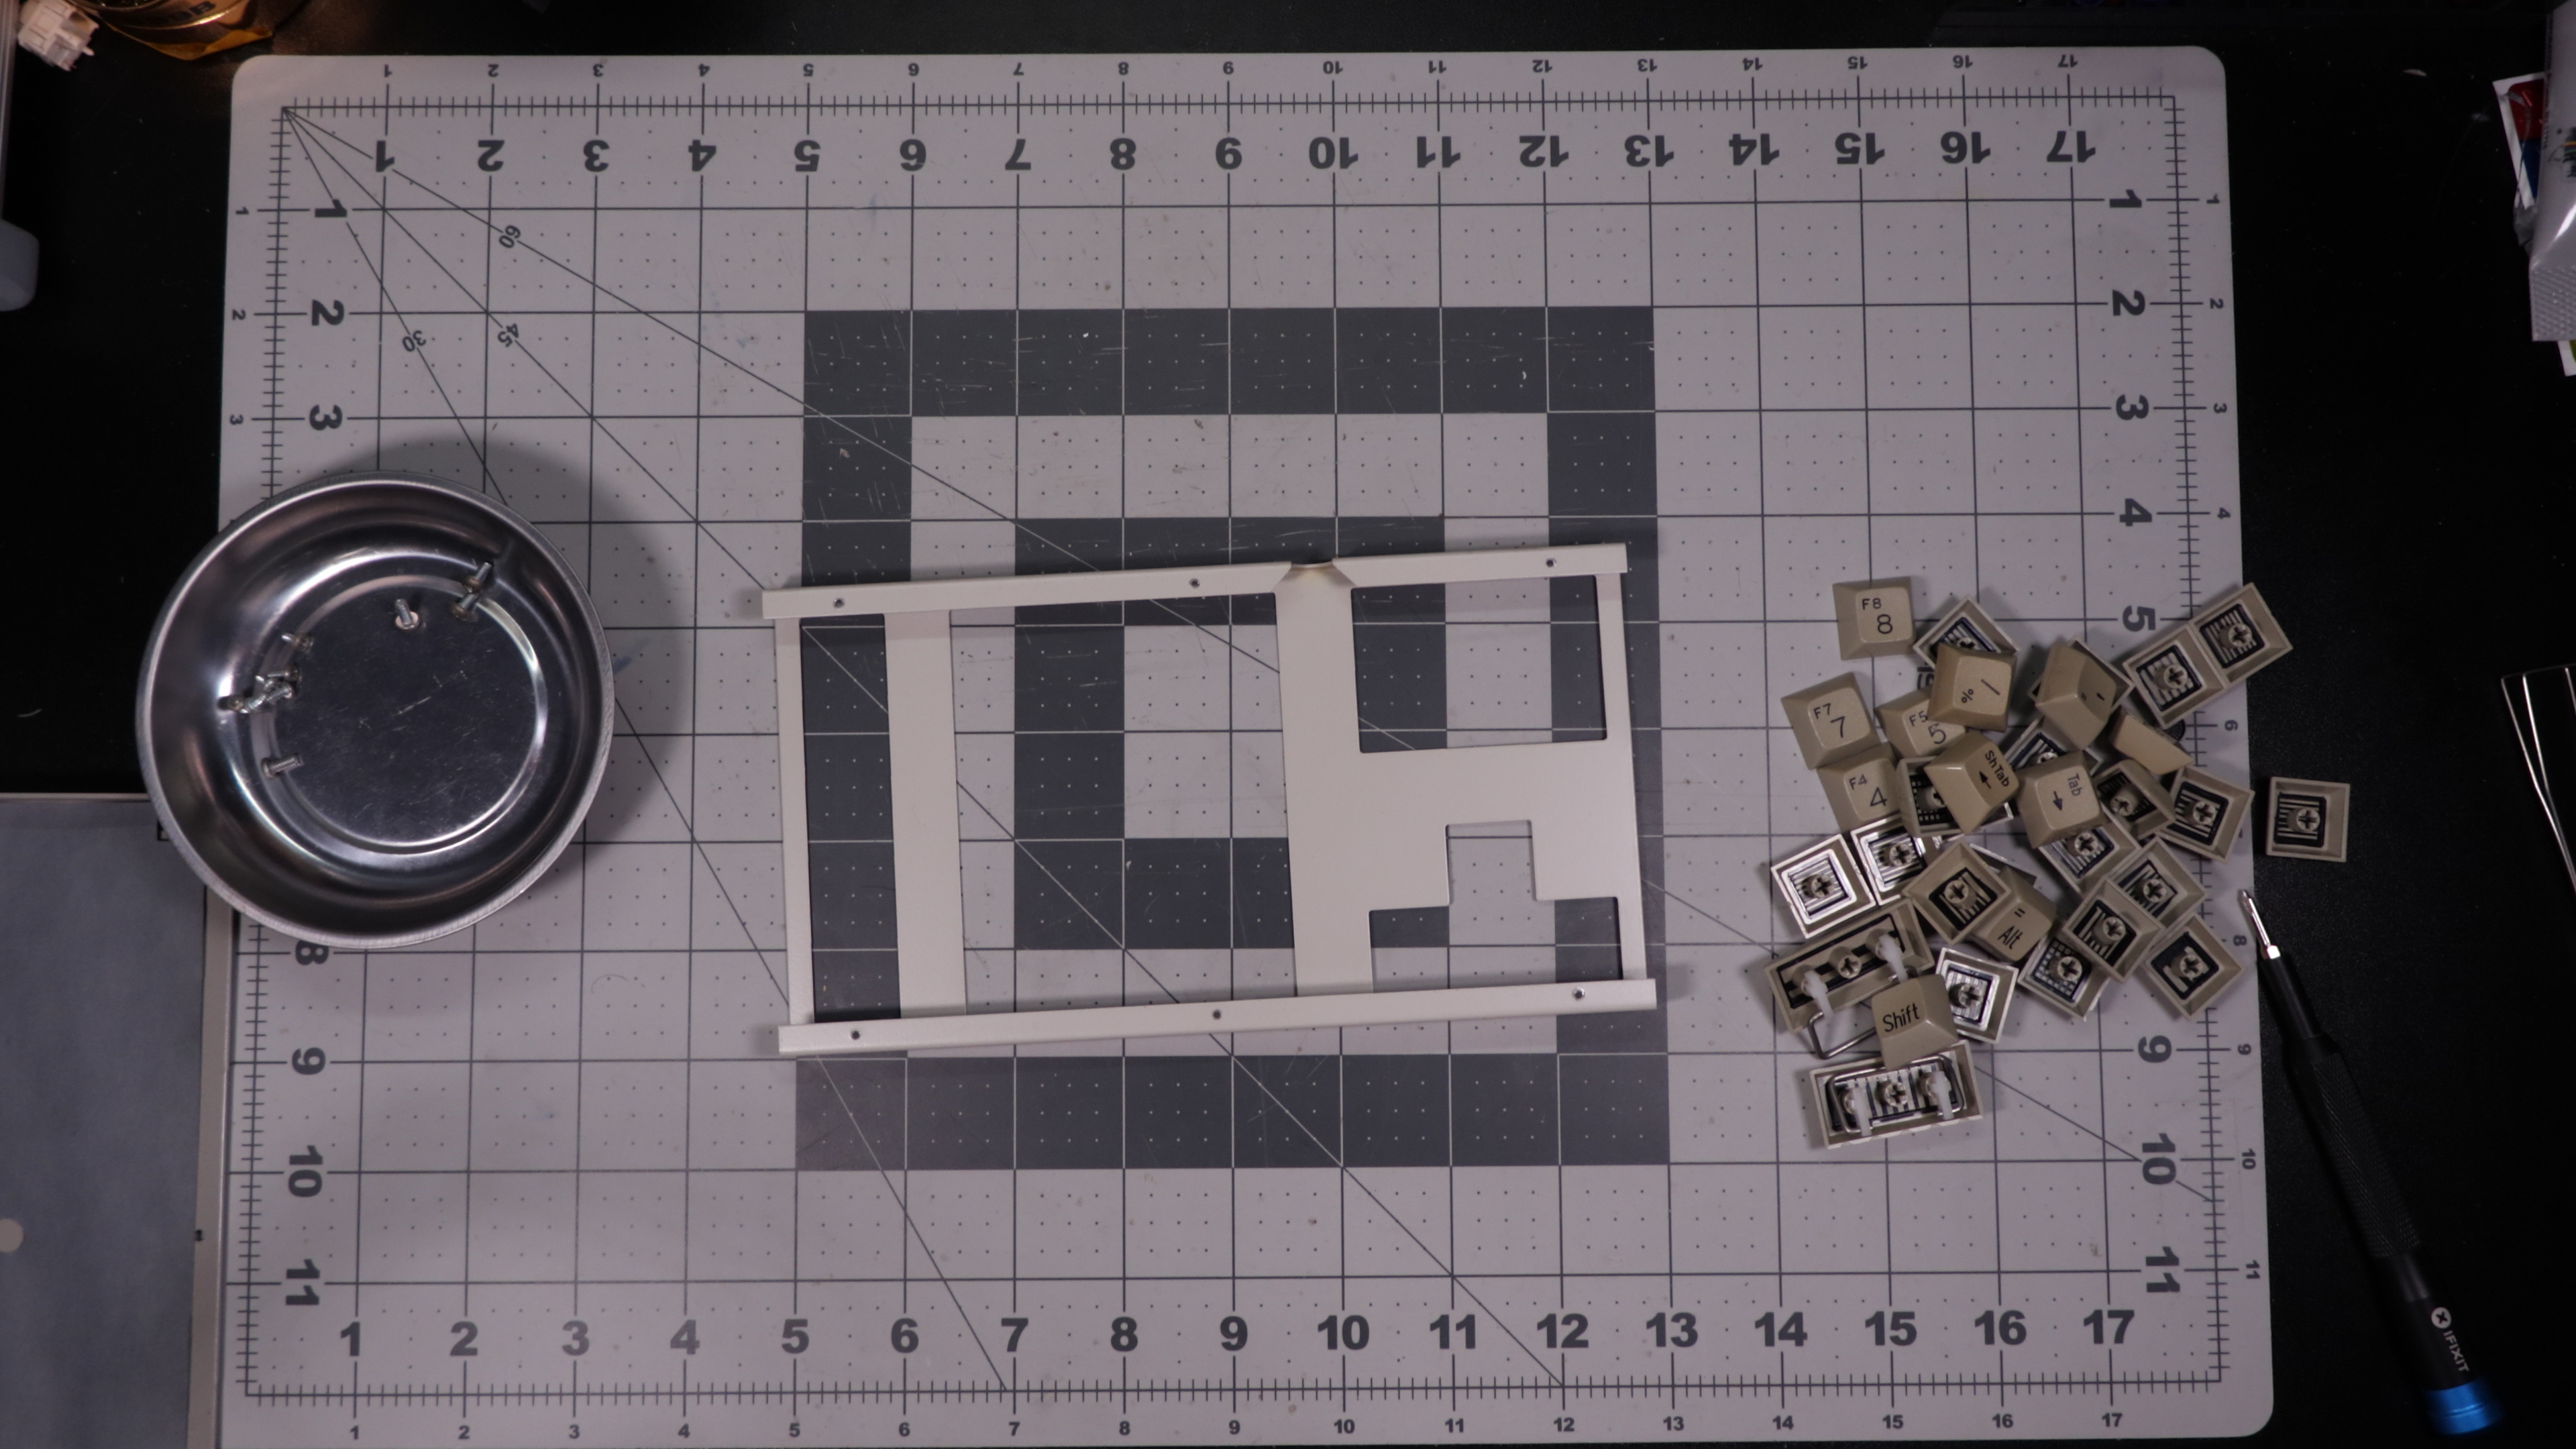
Now let’s take the keycaps off and see what we have.
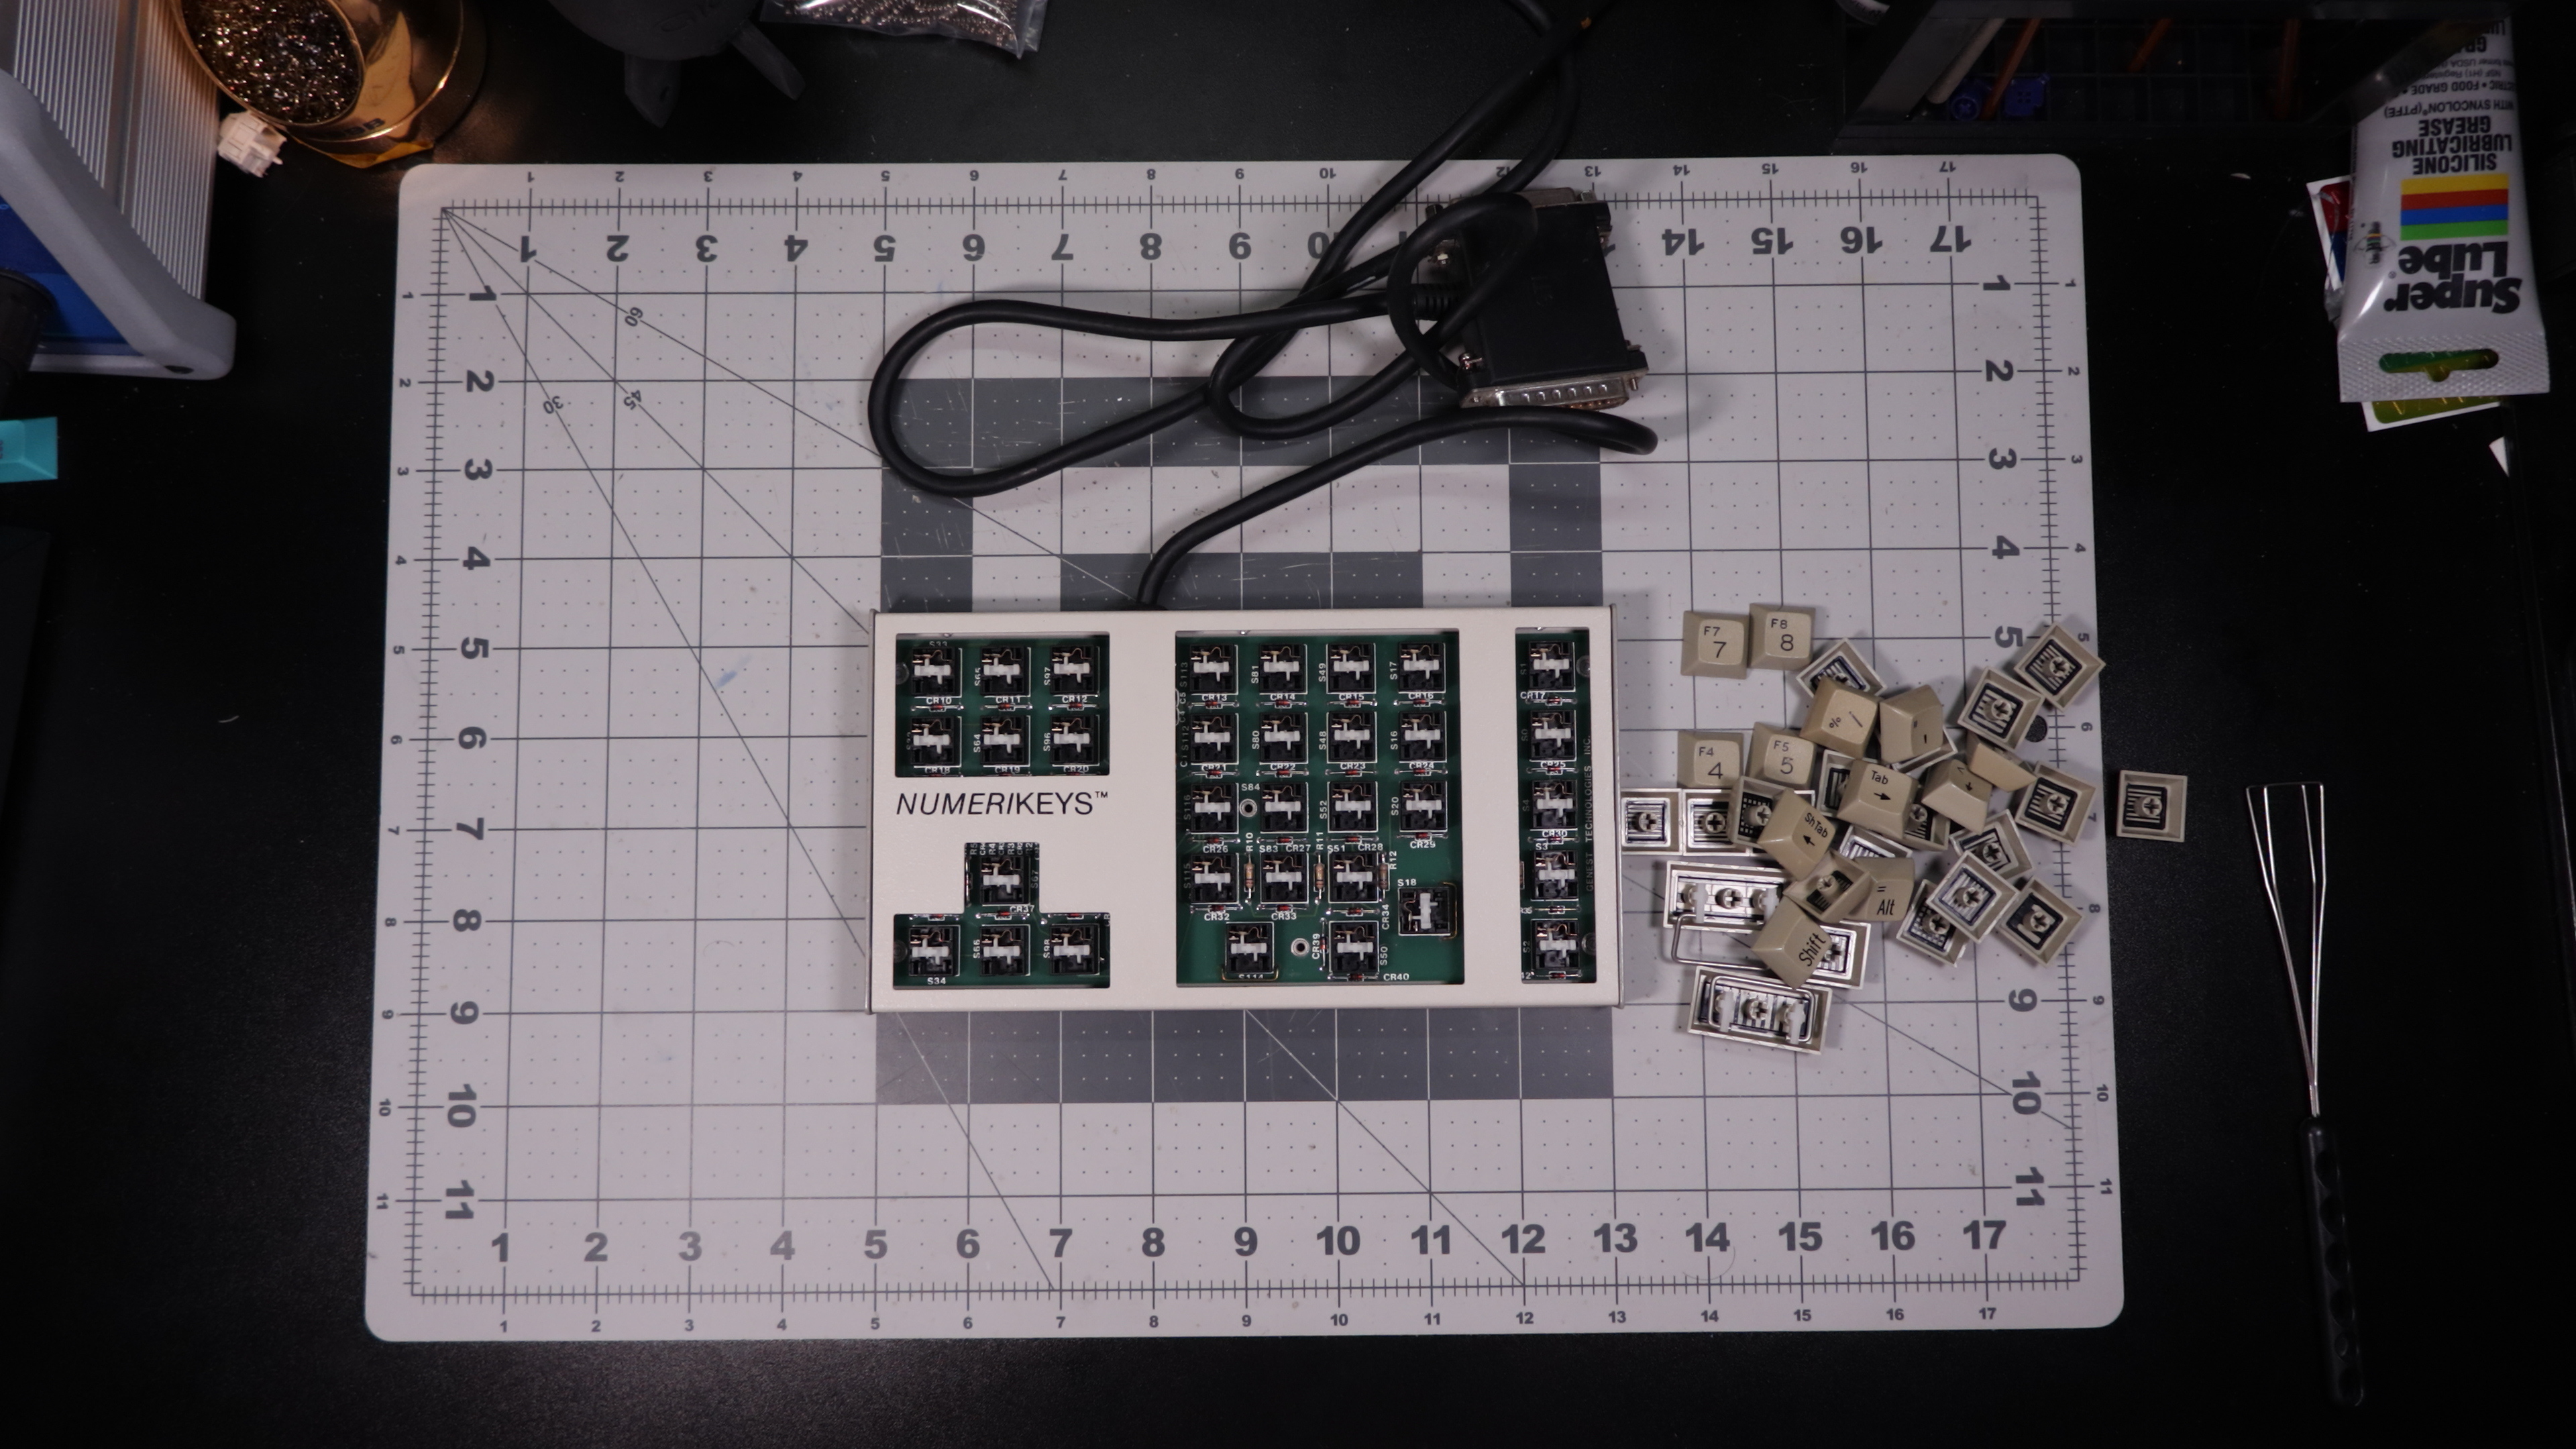
Ooh what are these? These are Cherry M8 switches. Wowee. These are extremely exposed with no top housing. and you thought ALPS switches were dust magnets…
Before we zoom in, let’s take this apart.
The back features 10 screws, 4 larger ones in the corner and a set of 3 smaller screws on the top and bottom.
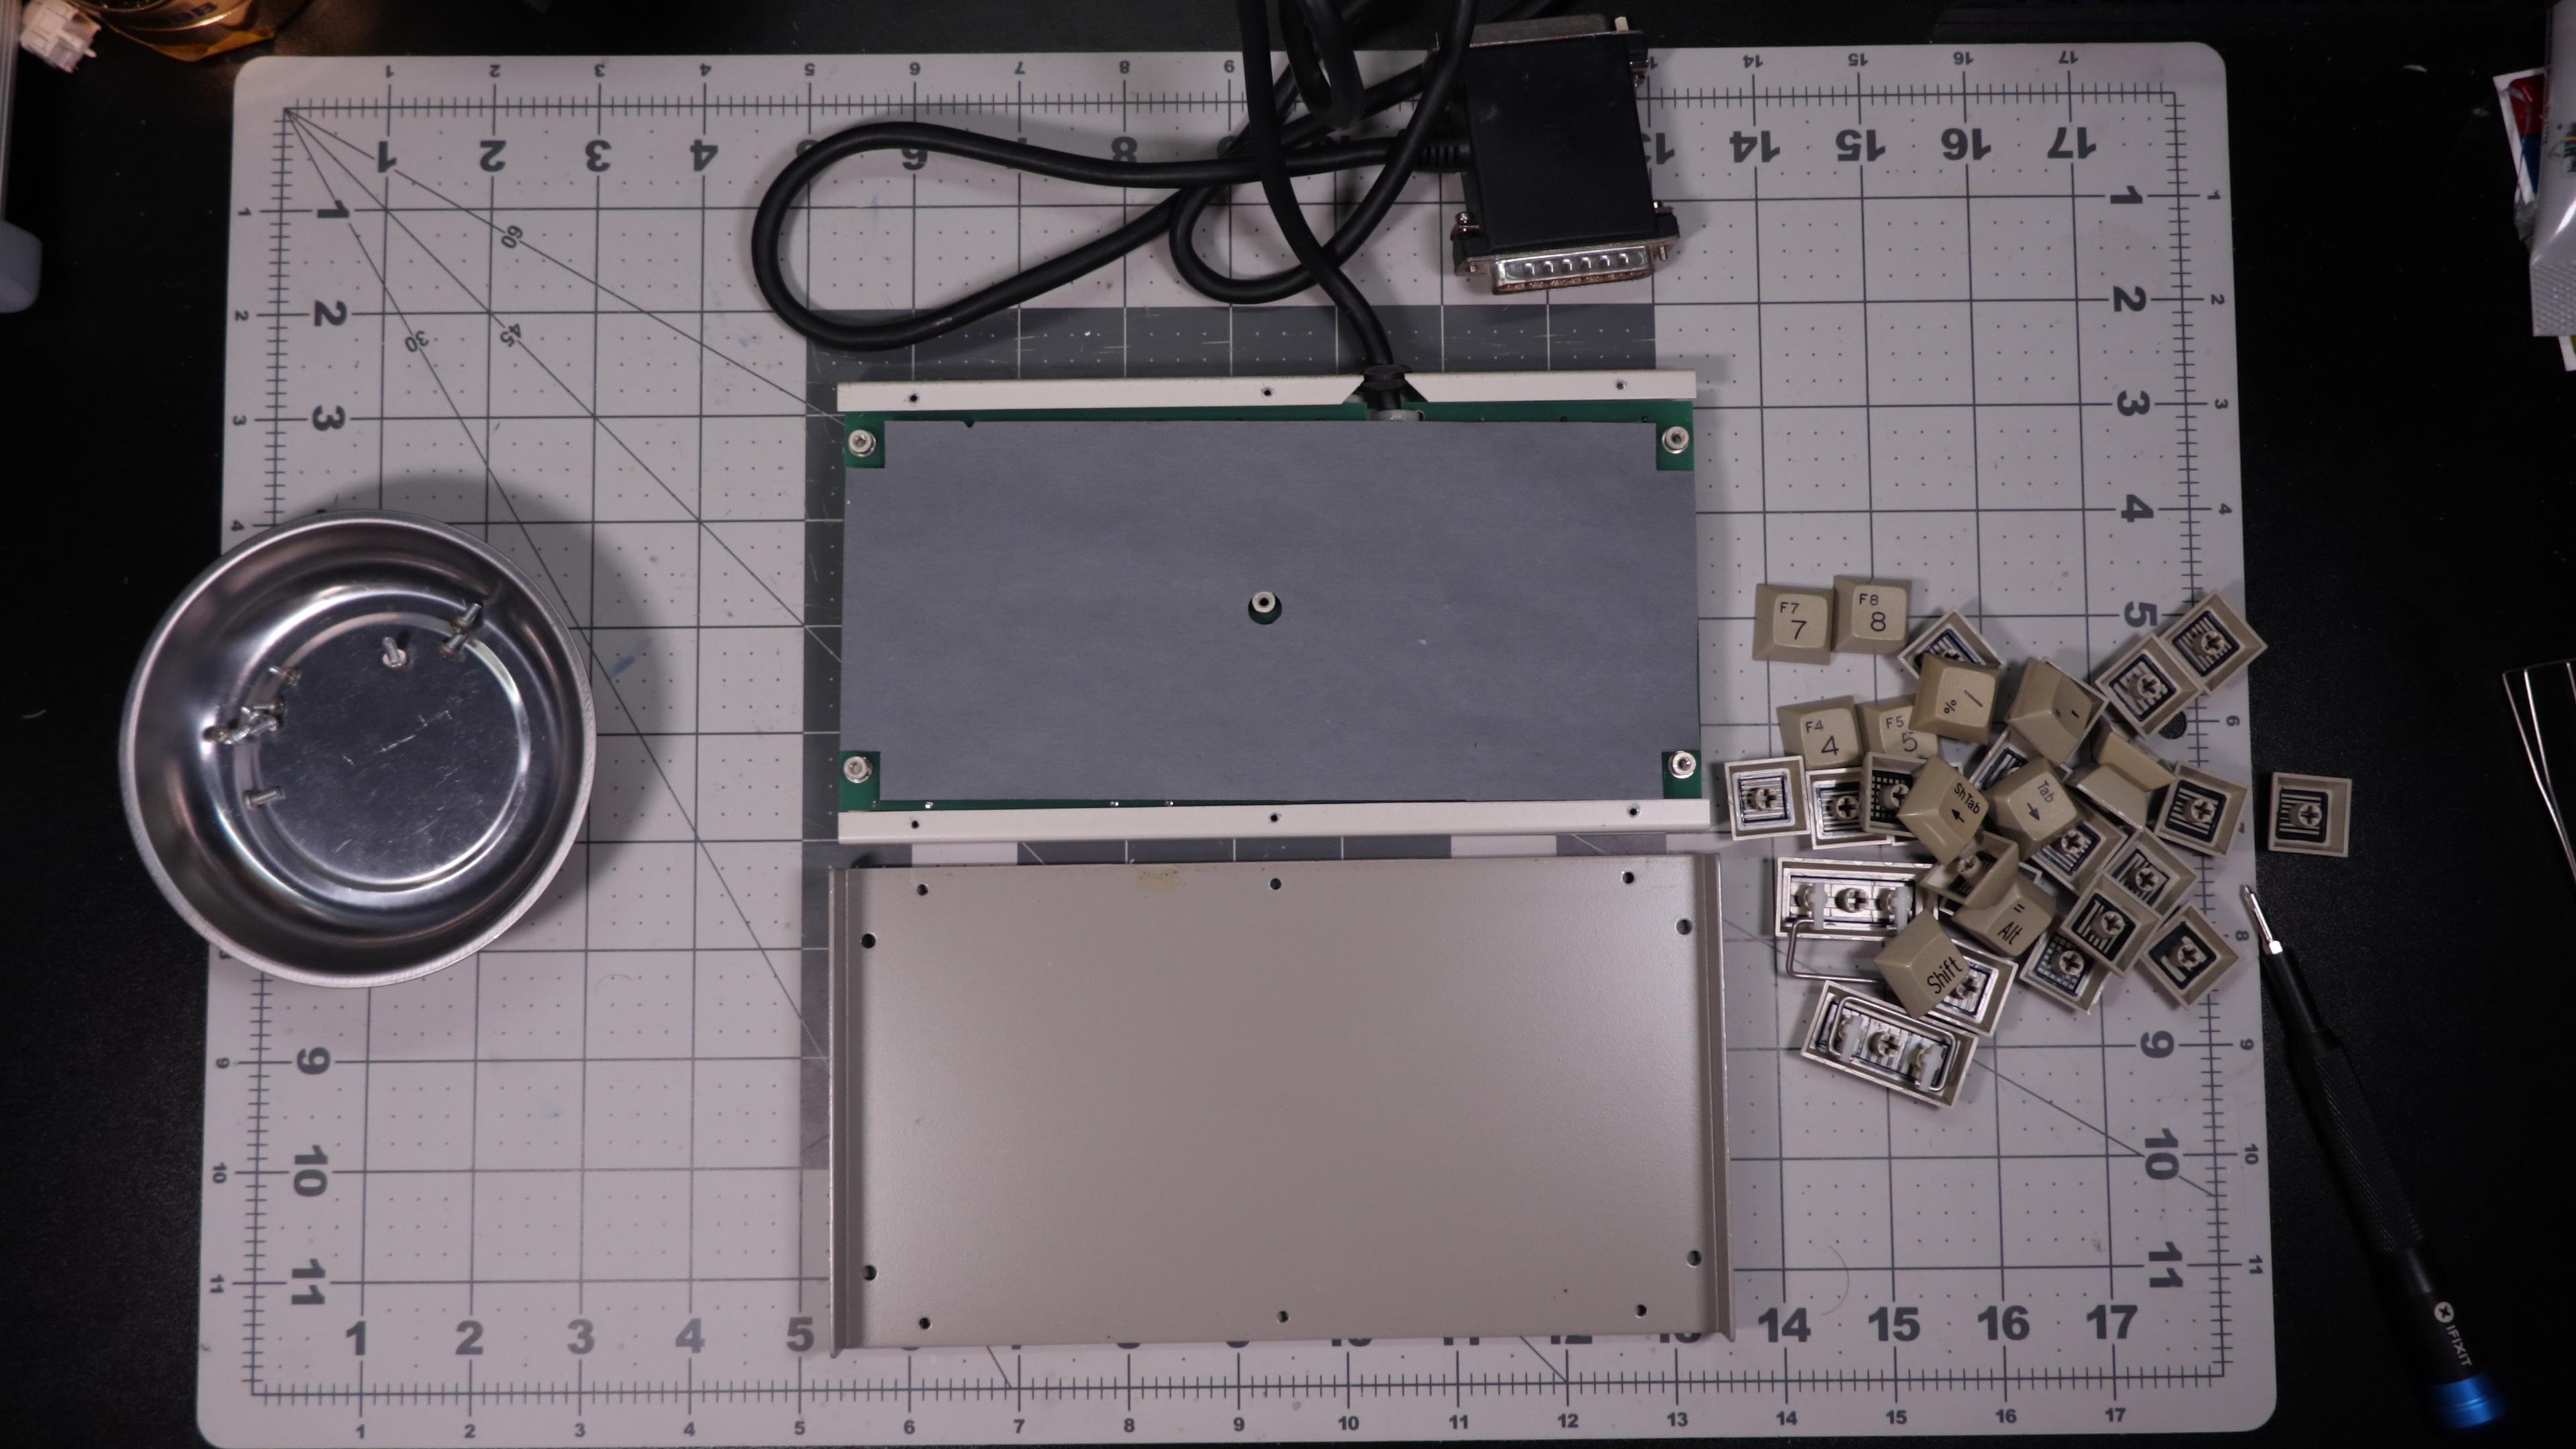
Taking those screws off you can see the interesting construction of this case. It’s two pieces of bent metal that are simply closed together. The PCB is held to the back of the case through the four larger screws, and we can see that the smaller 6 screws connect the top and bottom together. Under the PCB is actually a sheet that prevents the solder joints from shorting on the bottom of the case.
Taking that cover off, we have an out of focus PCB.
After taking the rubber grommet holding the cable to the top case, here is what the top part of the case looks like:
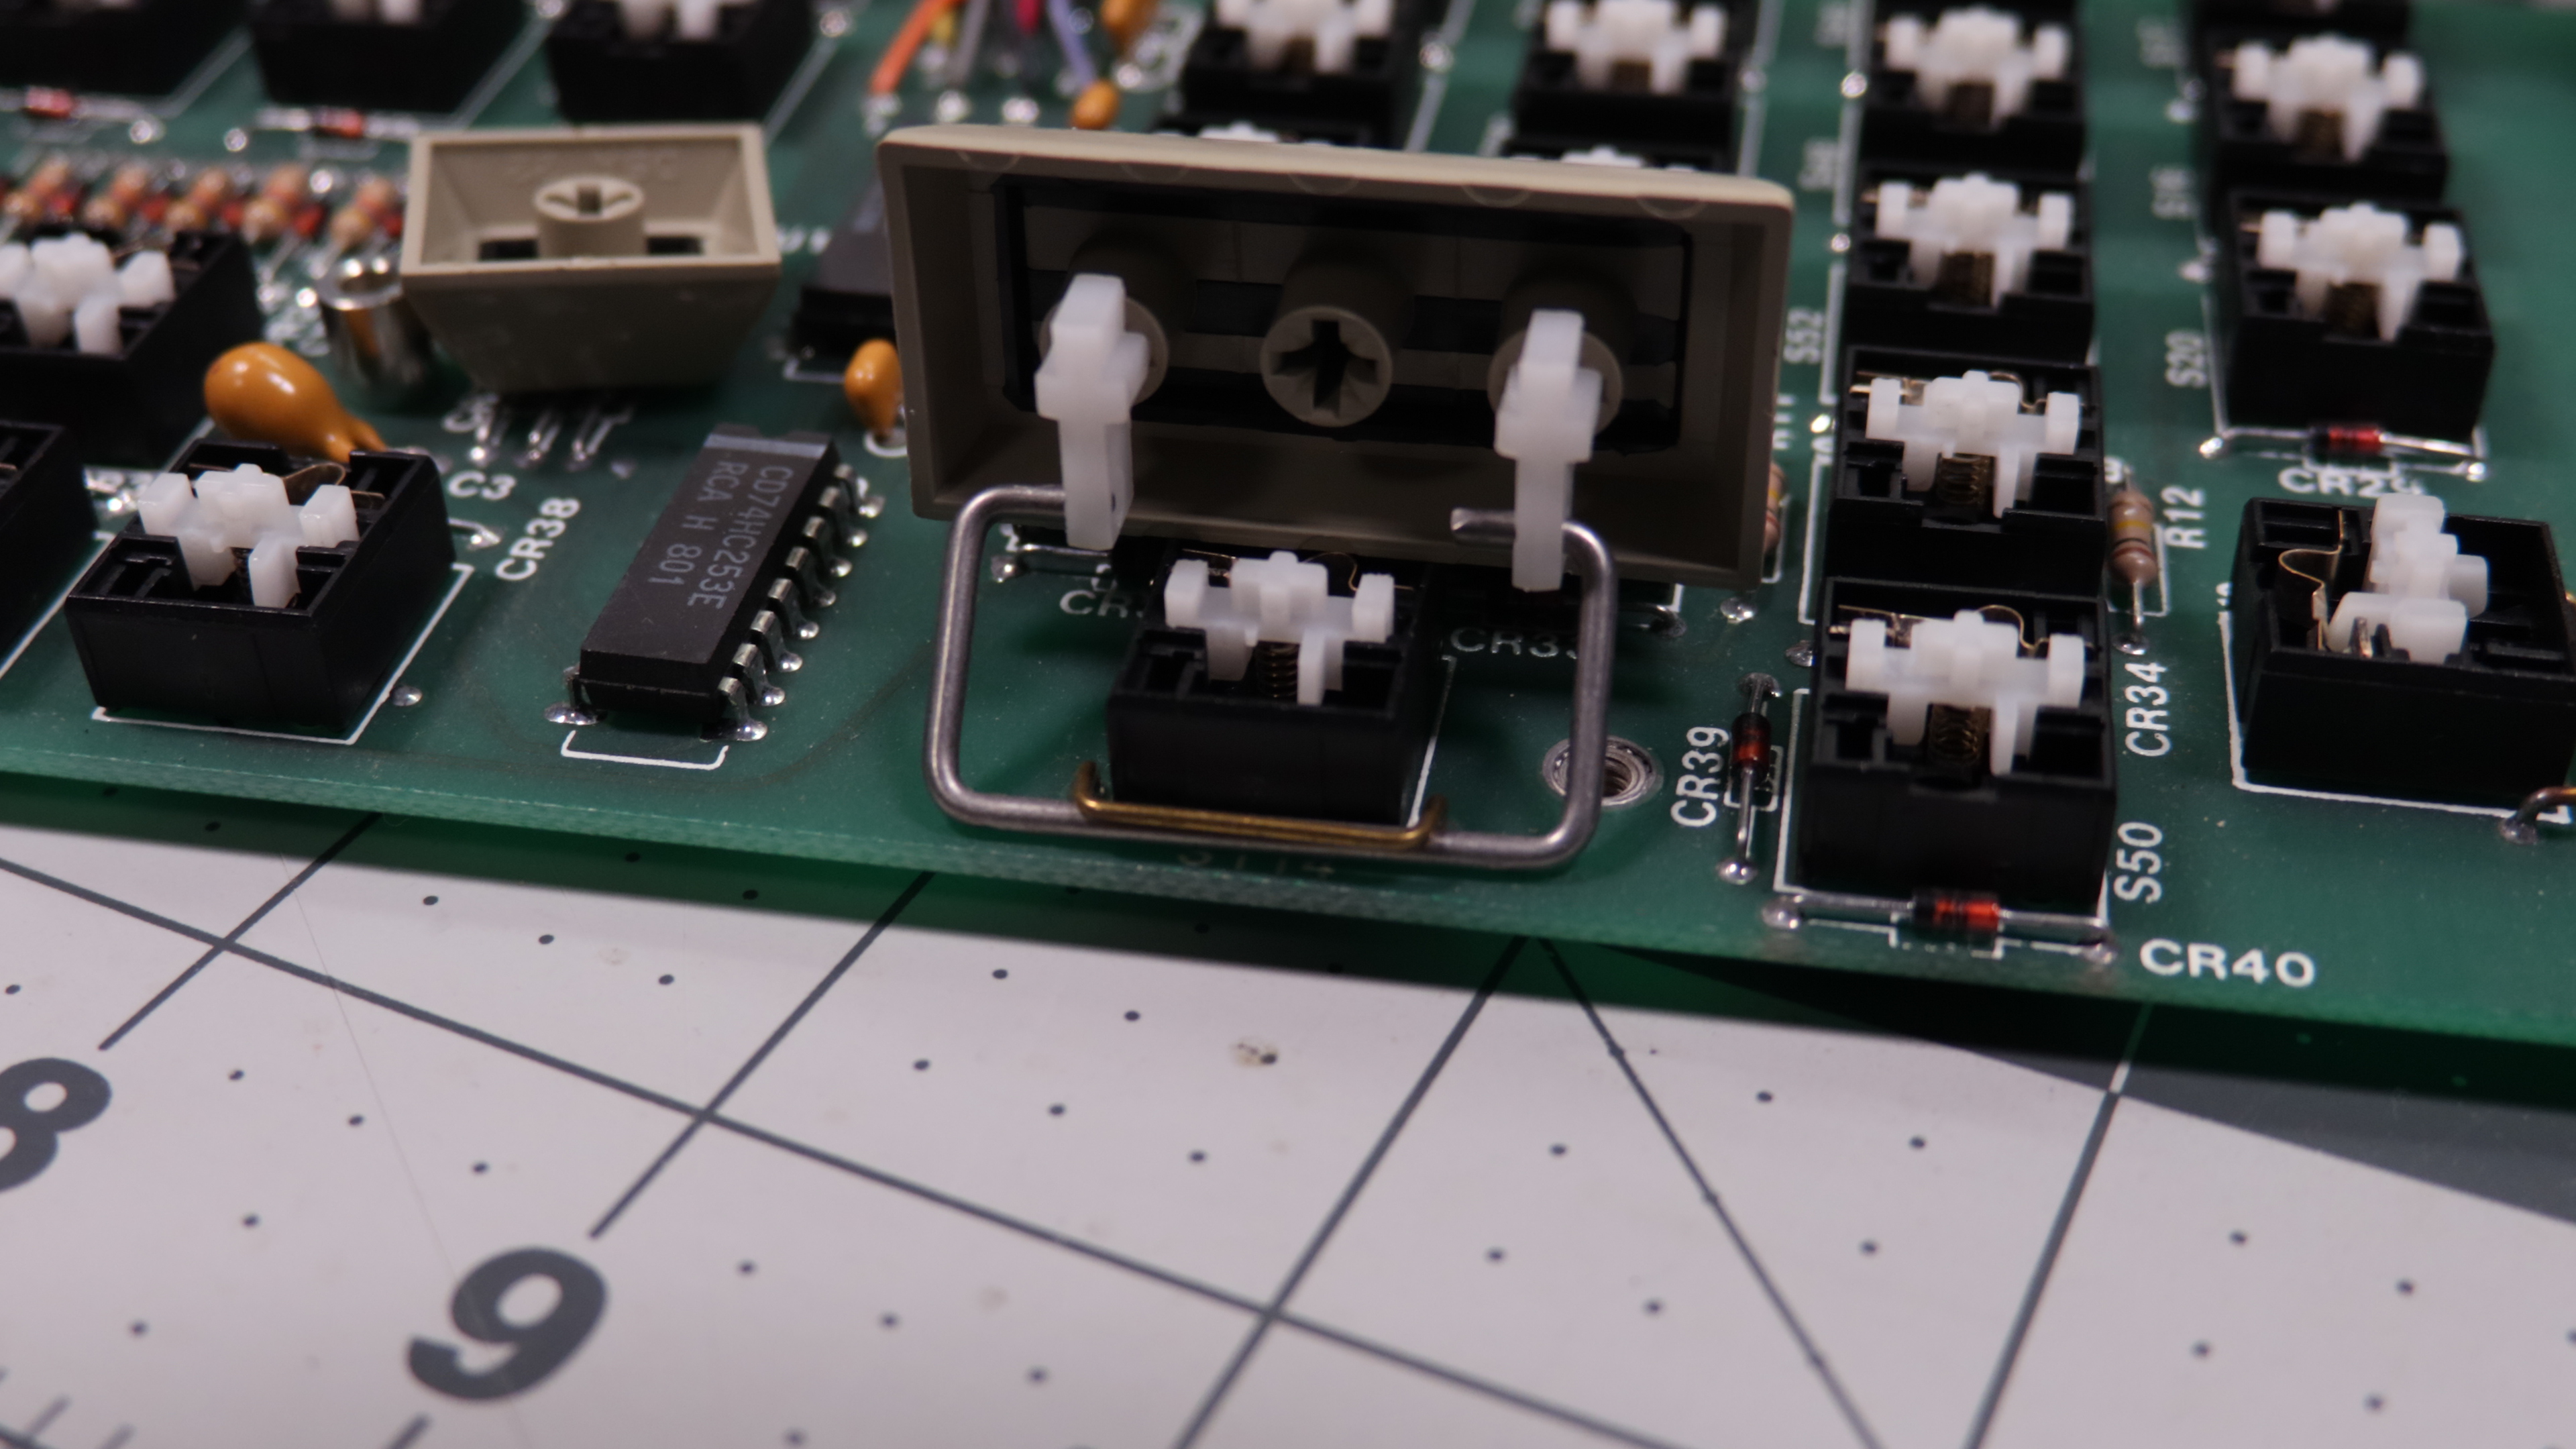
So let’s take a look.
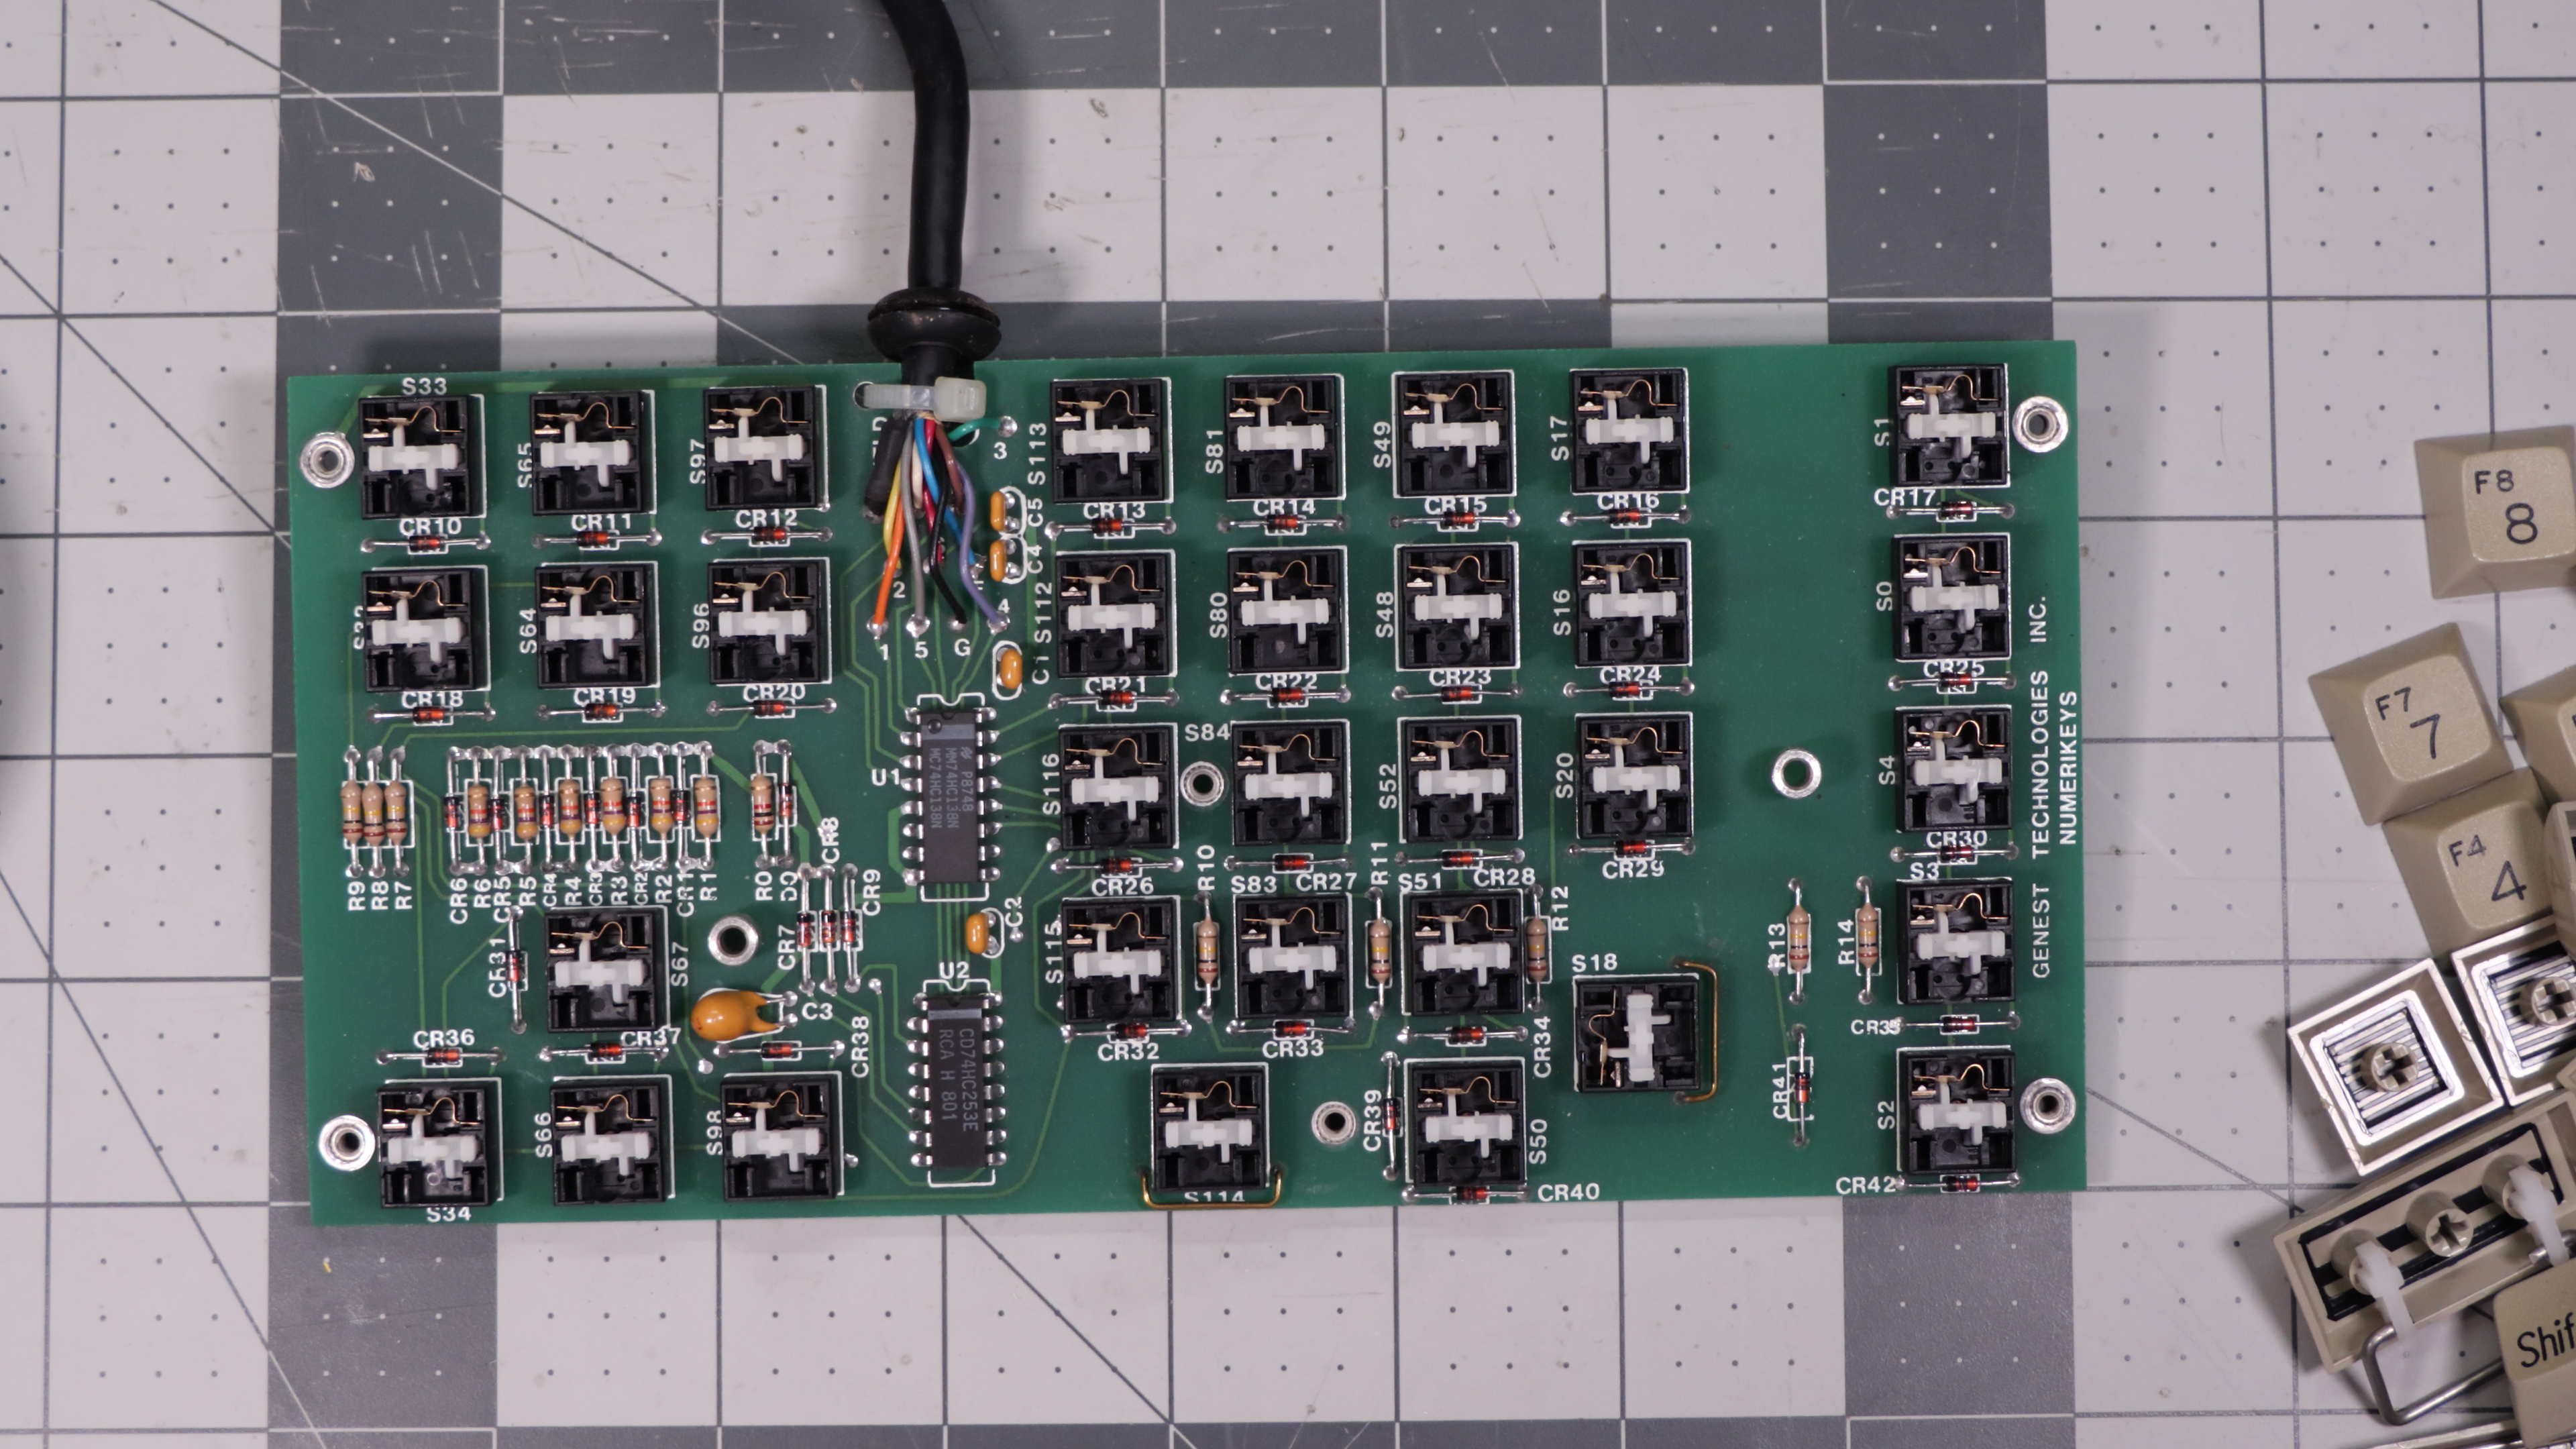
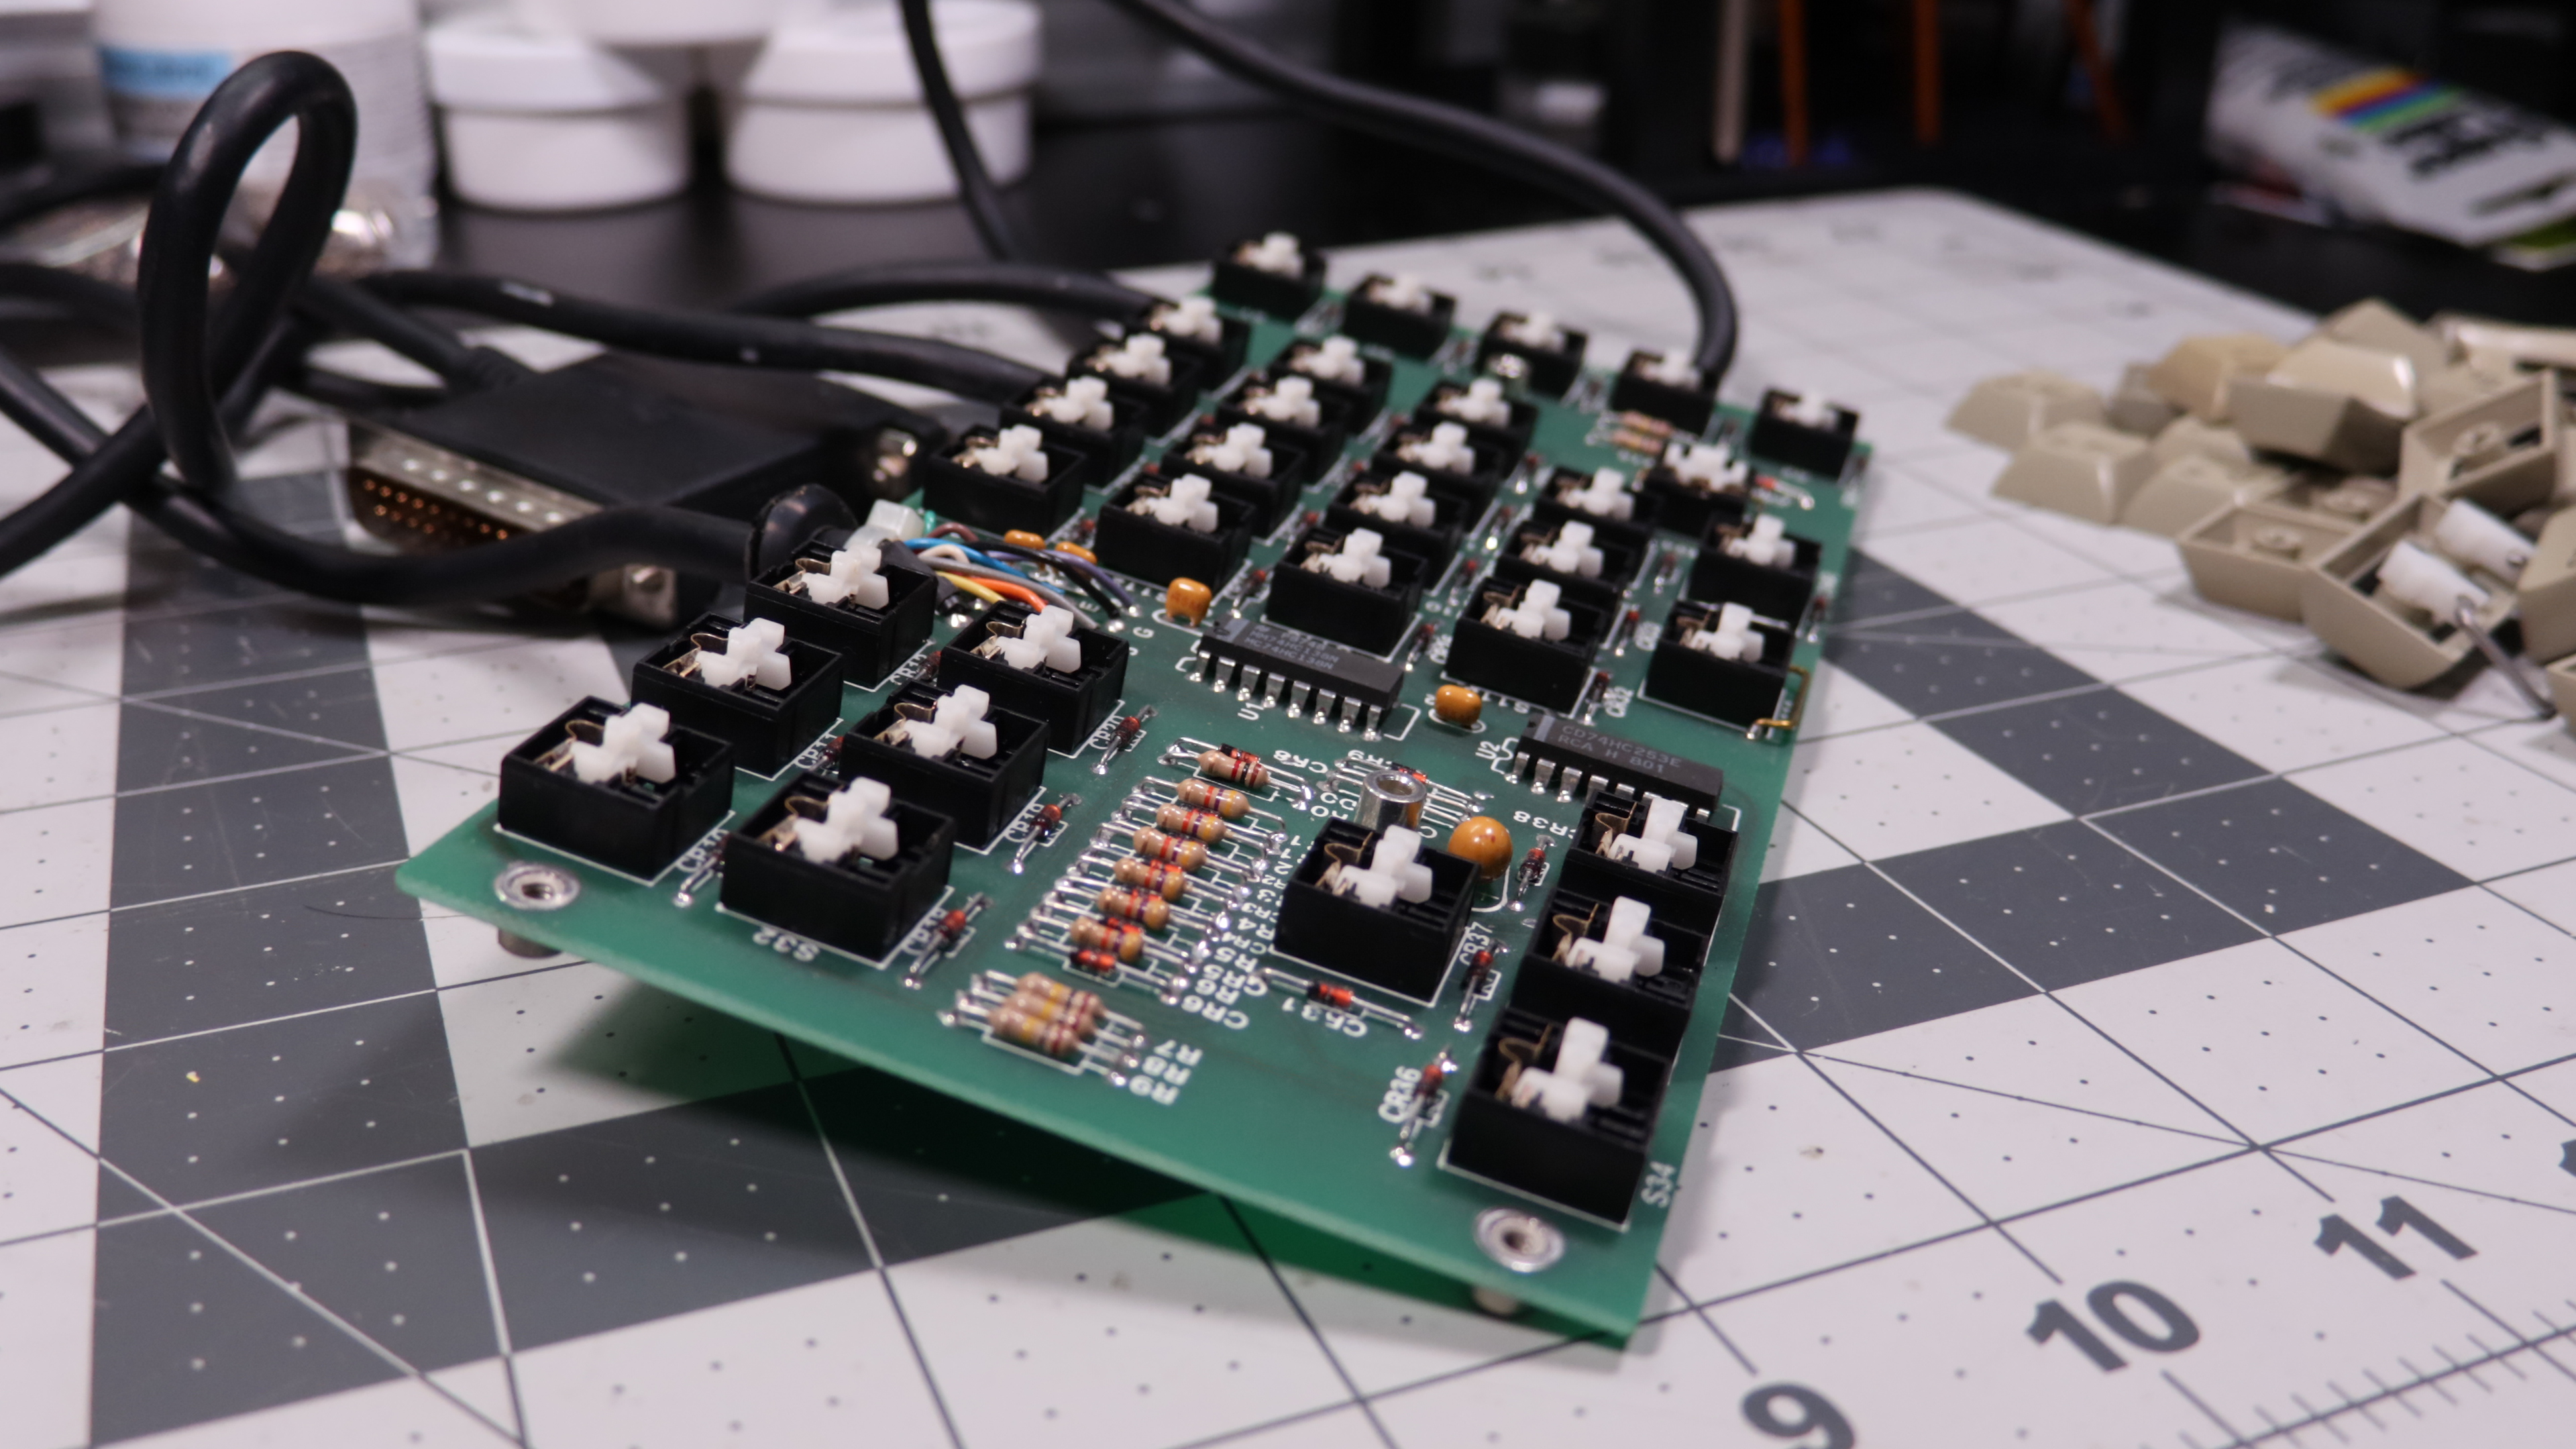
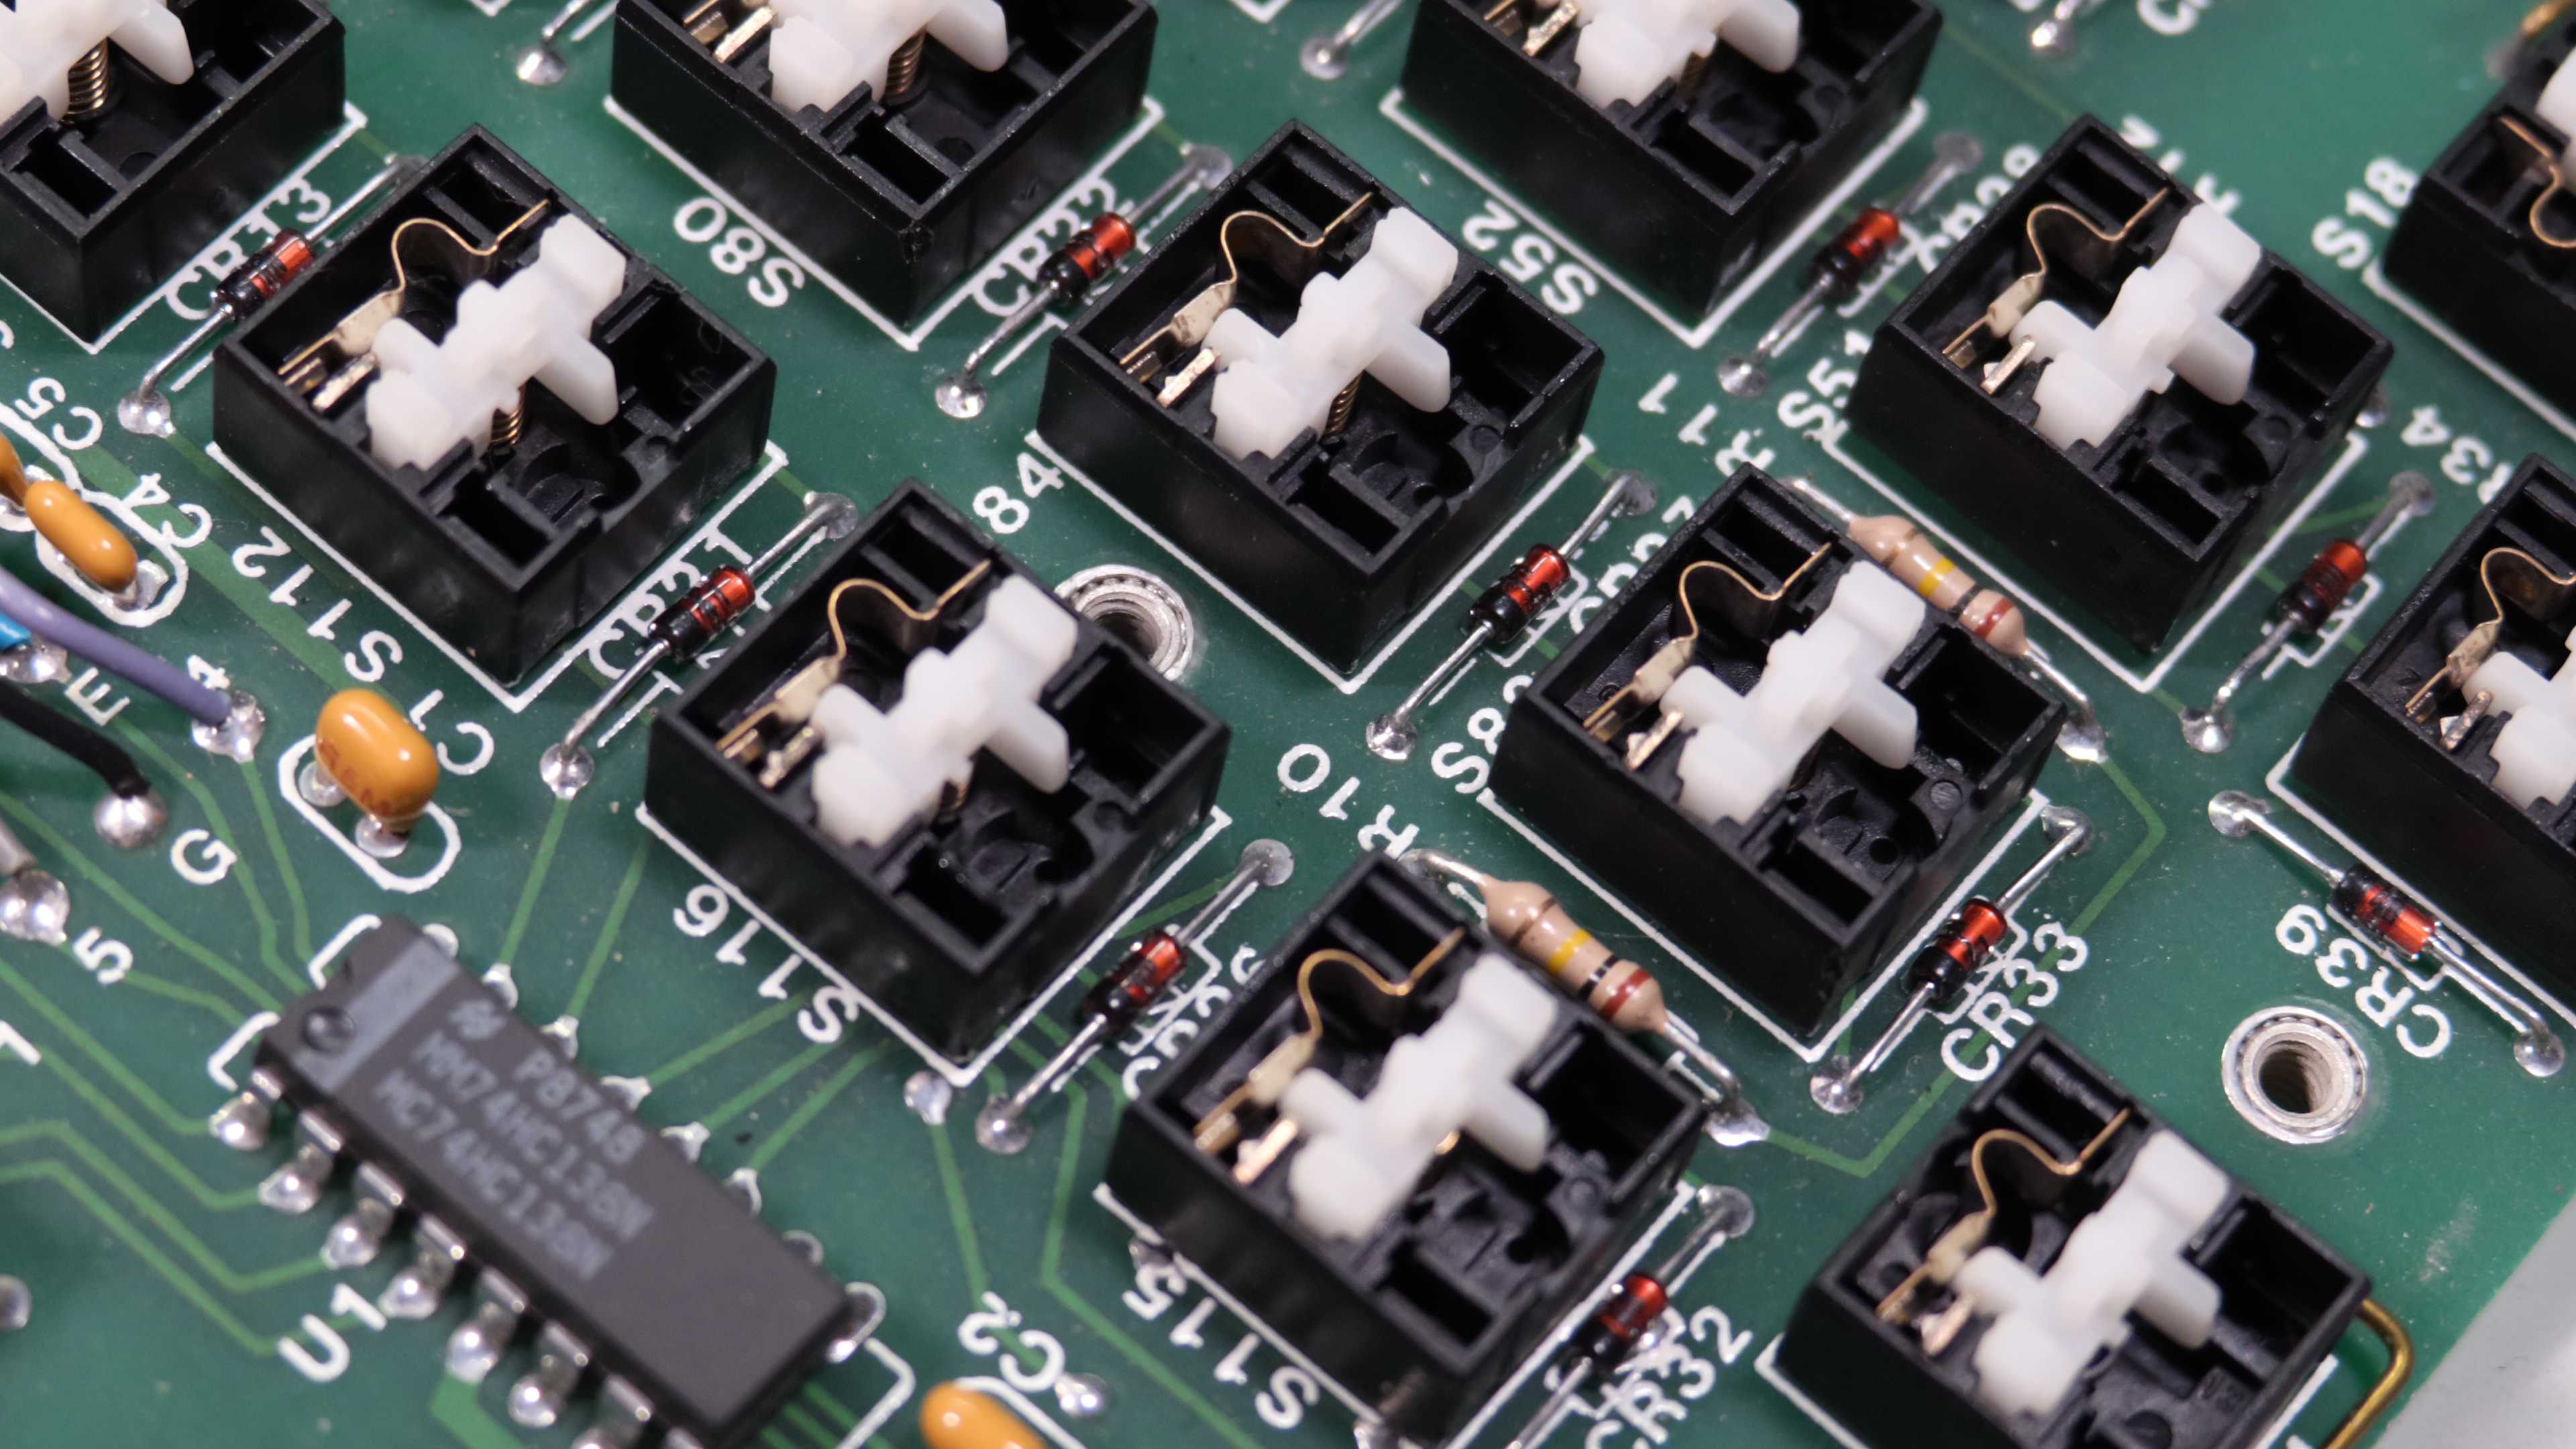
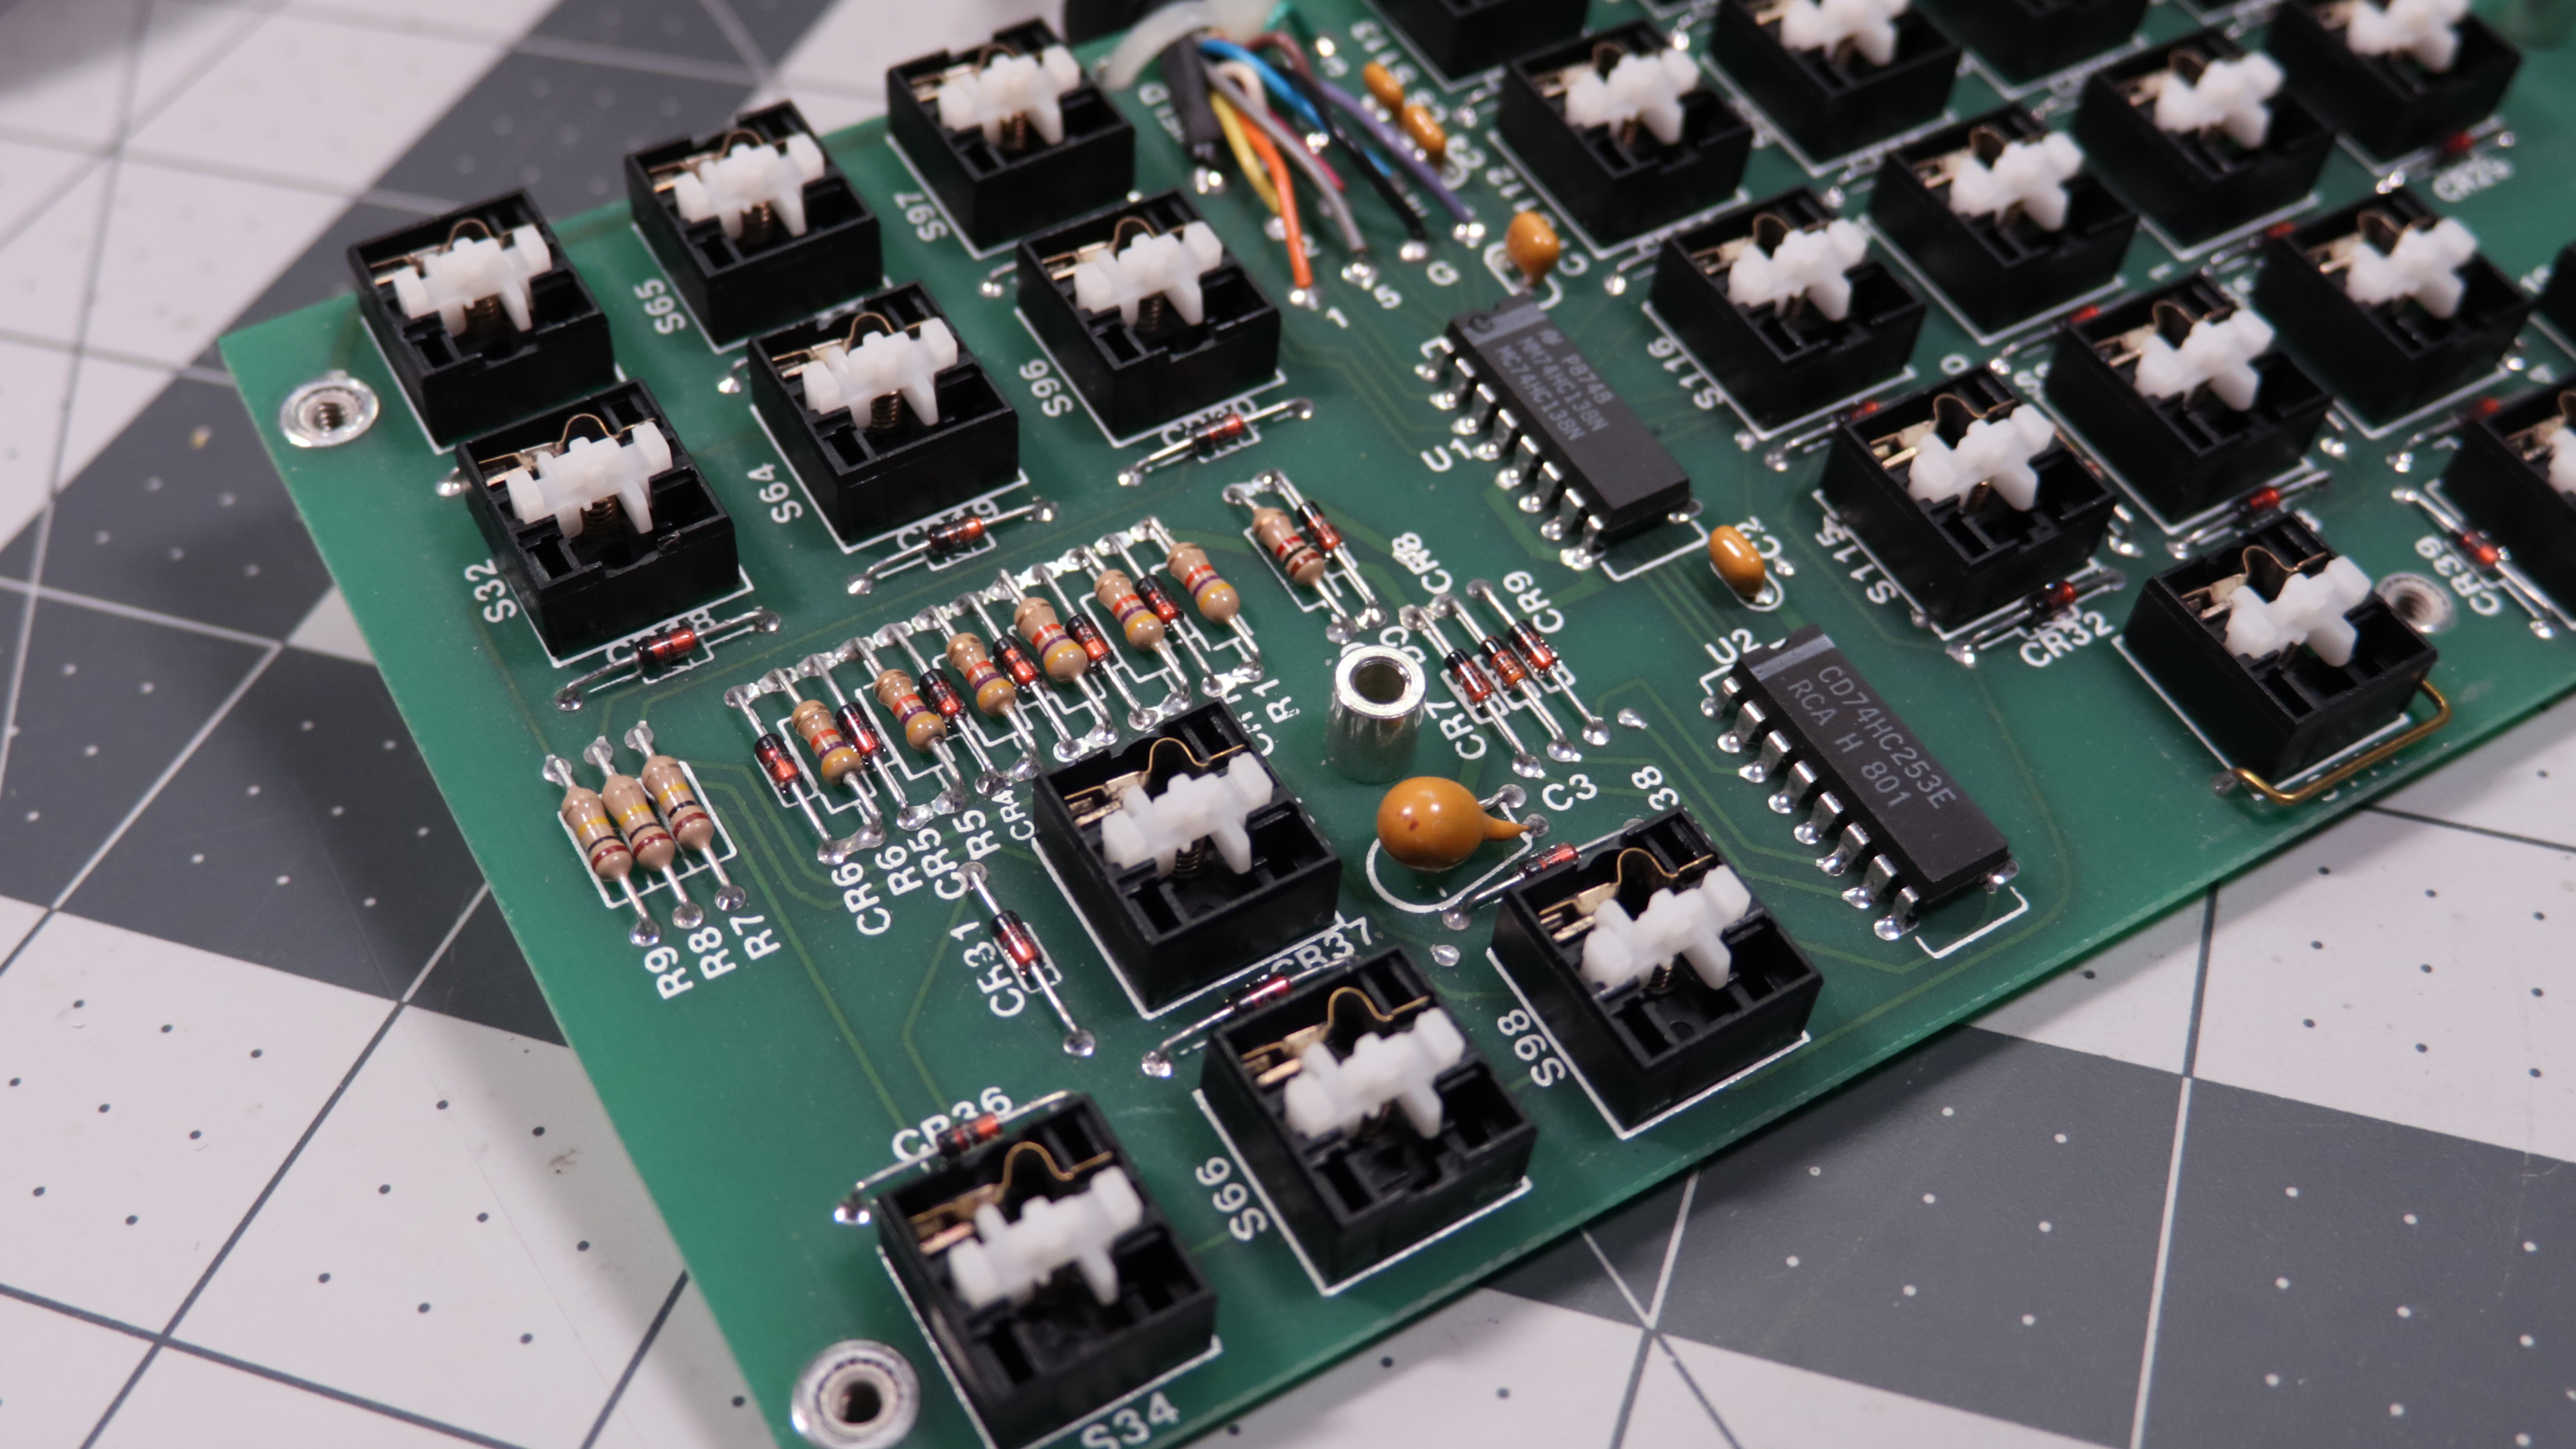
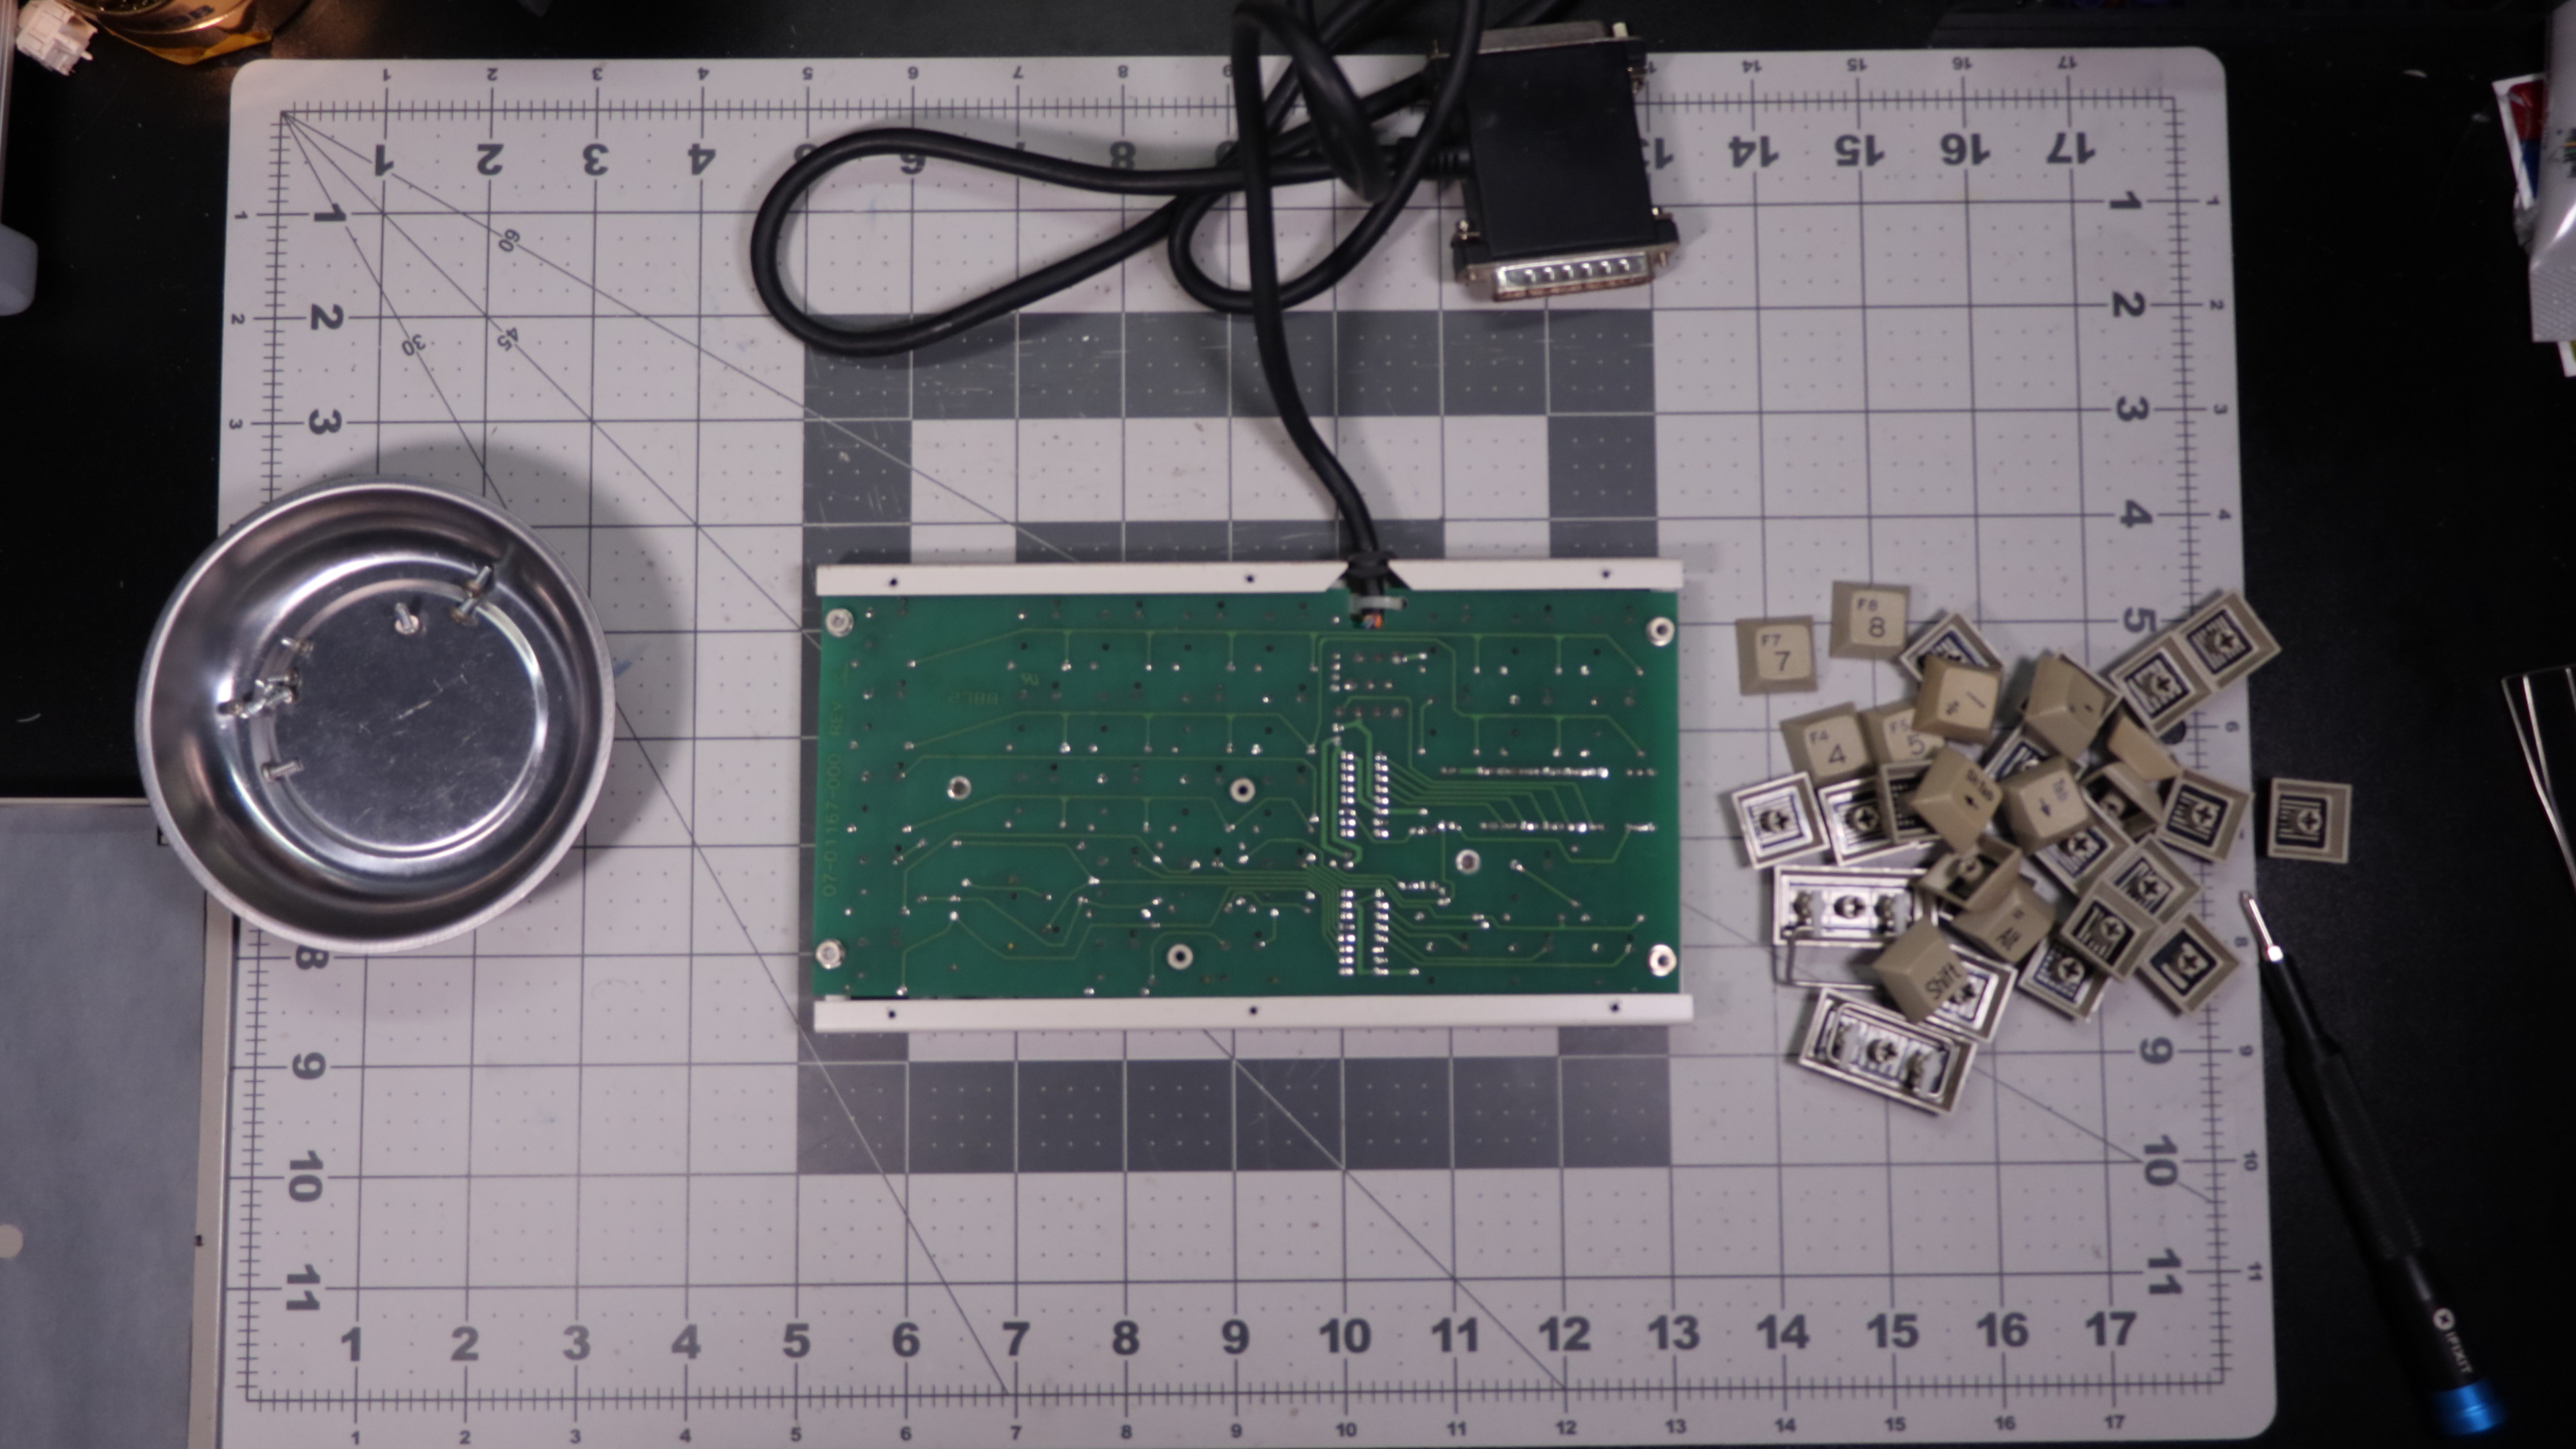
All of the diodes and components are on the top side of the PCB to allow the Numerikeys to be as thin as possible. Honestly I think this looks pretty cool. Despite the parallel port cable having 25 pins, it seems like only 11 cables leave the PCB into the cable housing. Interestingly, on the top we also see standoffs. This is to prevent the PCB from shorting if the top of the housing is pressed since it is pretty thin metal and has quite a bit of give.
Here is a representation of the switch on the Deskthority wiki done by Daniel Beardsmore:
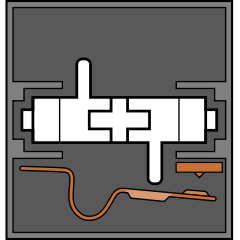
When the switch is pressed down the bottom portion moves closer and allows the two pieces of metal to contact.
The mechanism as explained on the Deskthority Wiki reads:
Cherry M8 switches use a gold-silver contact mechanism. When at rest, the slider separates the two contacts, with one bent outward against the slider, under tension. As the slider enters the housing, the contact under tension approaches the second contact, following the grooves on the upper portion of the slider. When pressure has been removed from the switch, the spring pushes upwards, overcoming the force provided by the contact and returning the slider to its start position.
The contact mechanism is the same as that of the Cherry M9 switch.
Source: Cherry M8 - Deskthority wiki
So how does it feel? It feels pretty scratchy and a bit on the mushy side to be honest. I think it’s mostly because of the accumulated dust and whatever other particulates that have spread on the slider rails and leaf throughout its life. While this would be very easy to disassemble and clean, I feel like it might be a fruitless effort due to the ease of the switch getting dusty/dirty again.
The Keycaps:
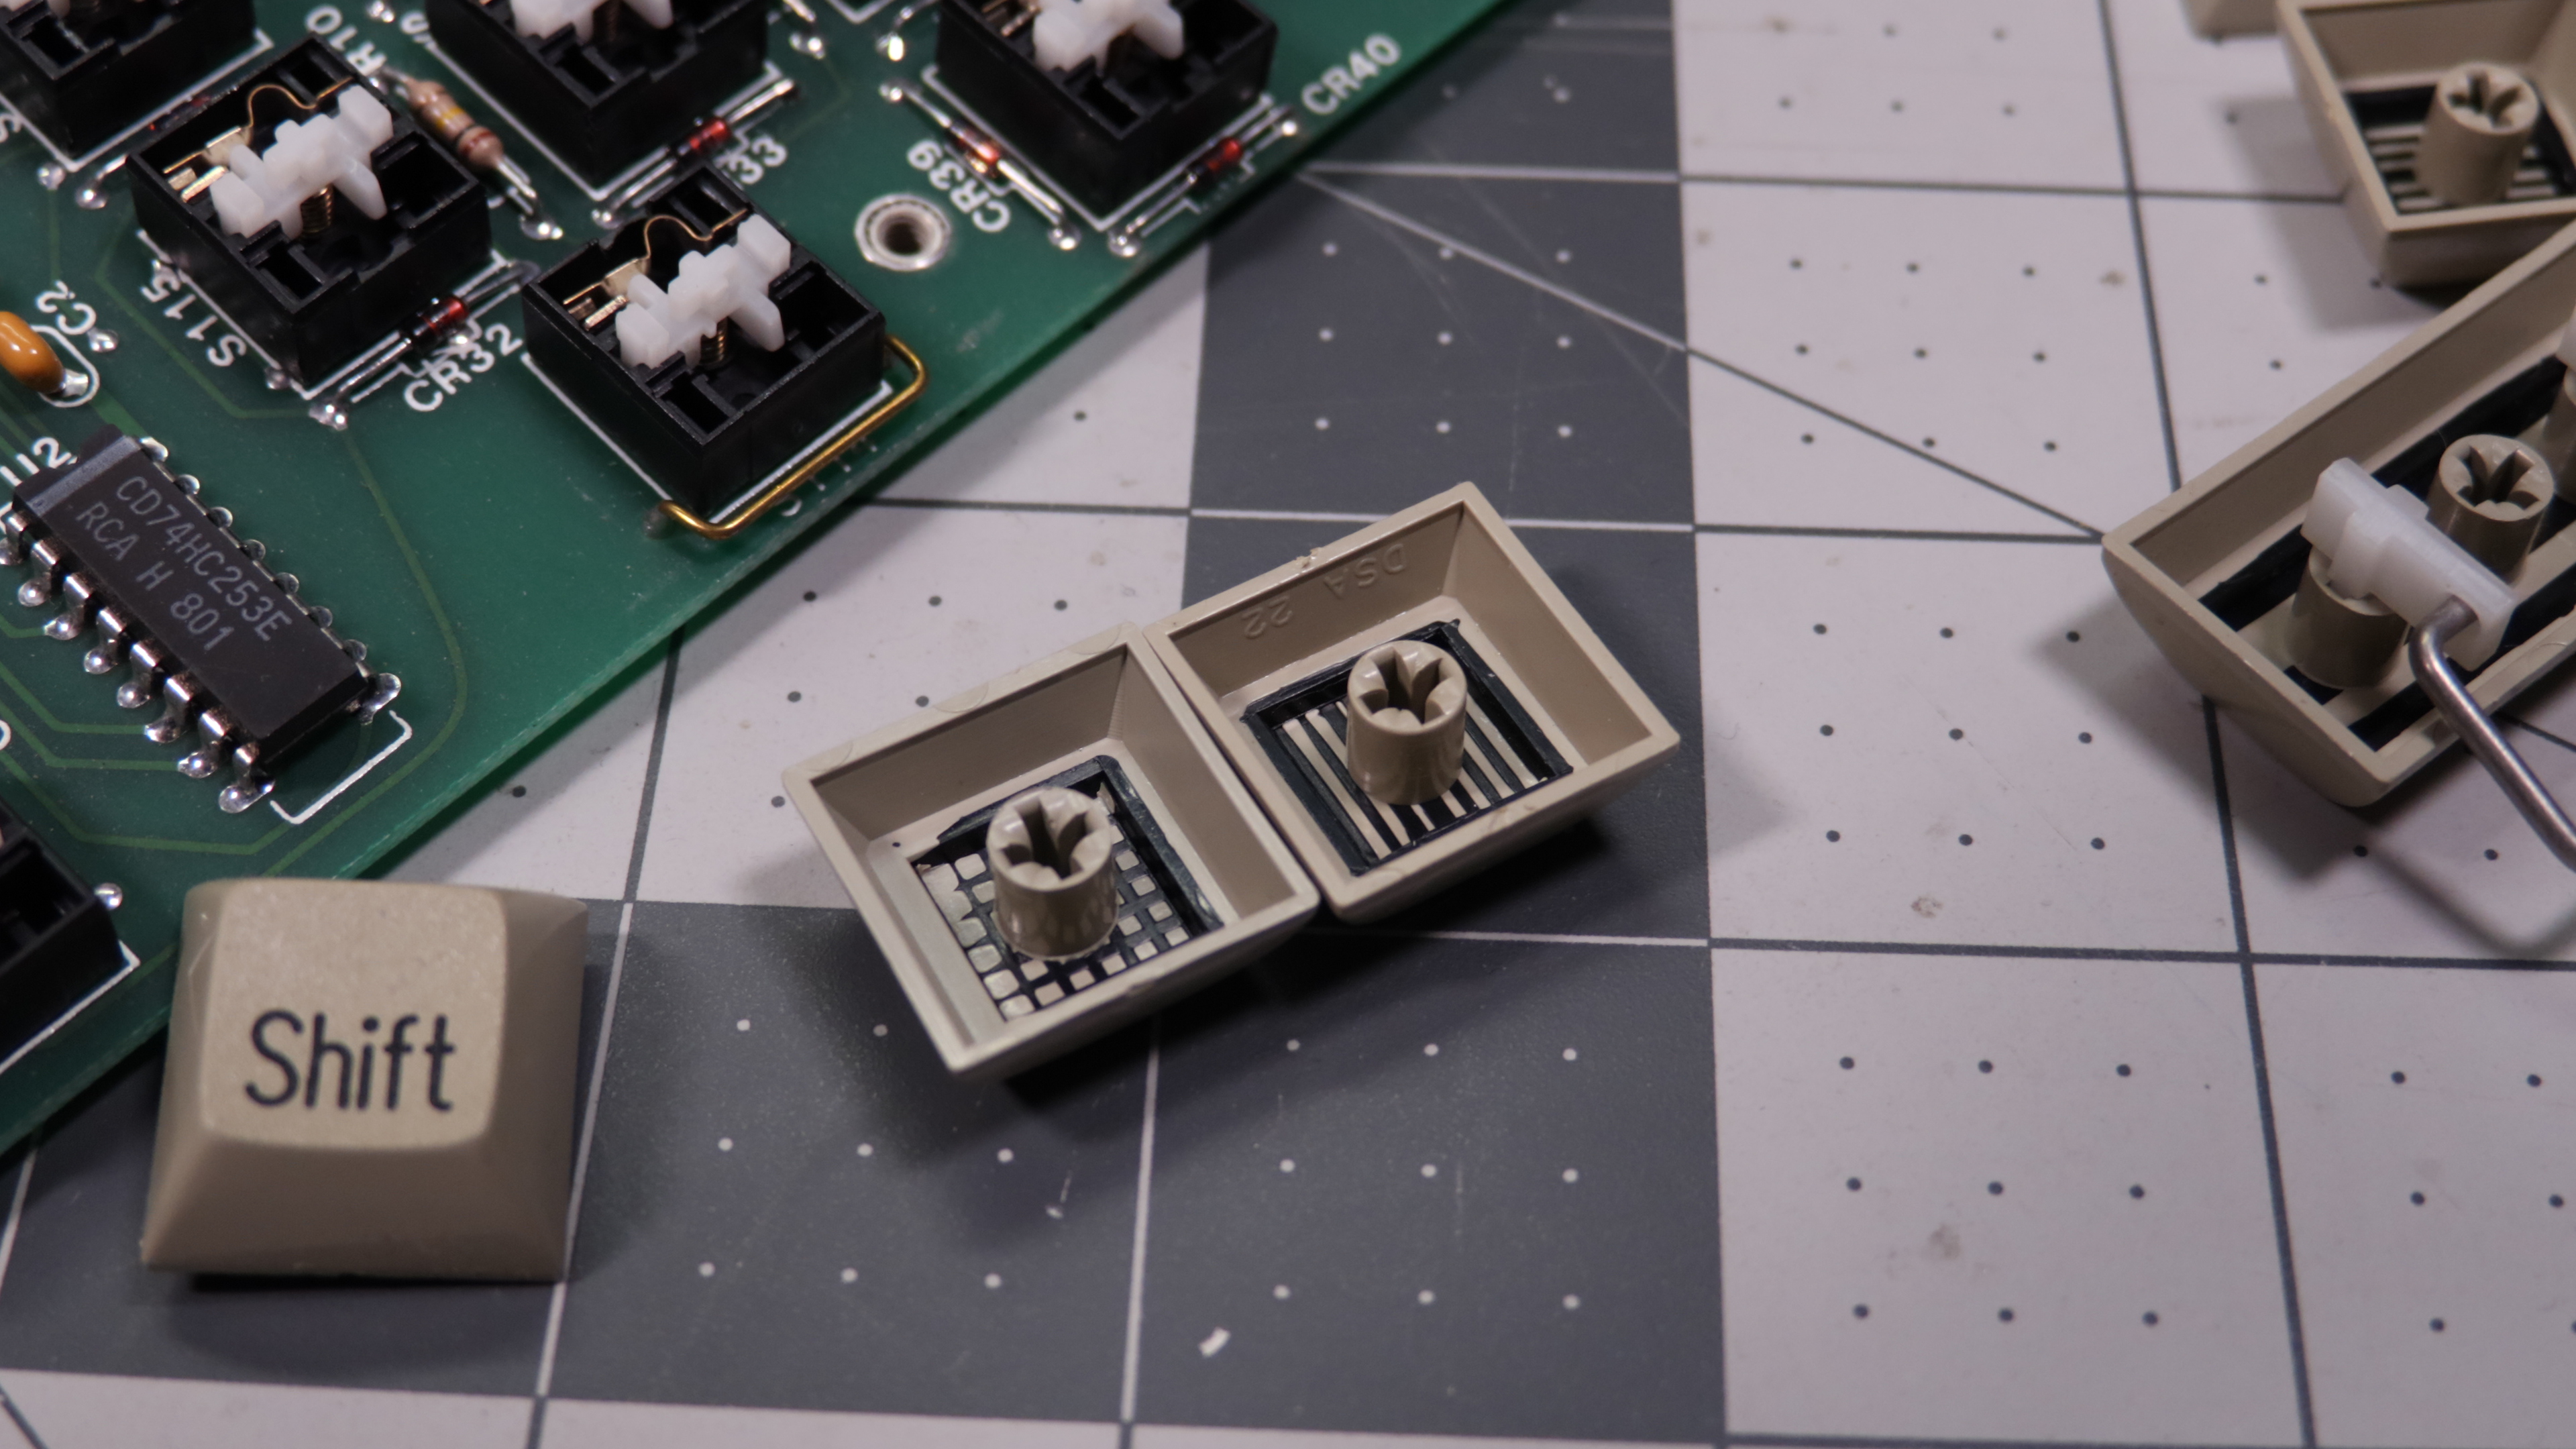

These are some pretty nice doubleshots with quite the interesting font legend. I have mixed feelings about the legends. The individual letters look nice, but some of the keys have a silly kerning between characters that make them look awkward the longer you look at them.
They are DSA keycaps based on the internal lettering.
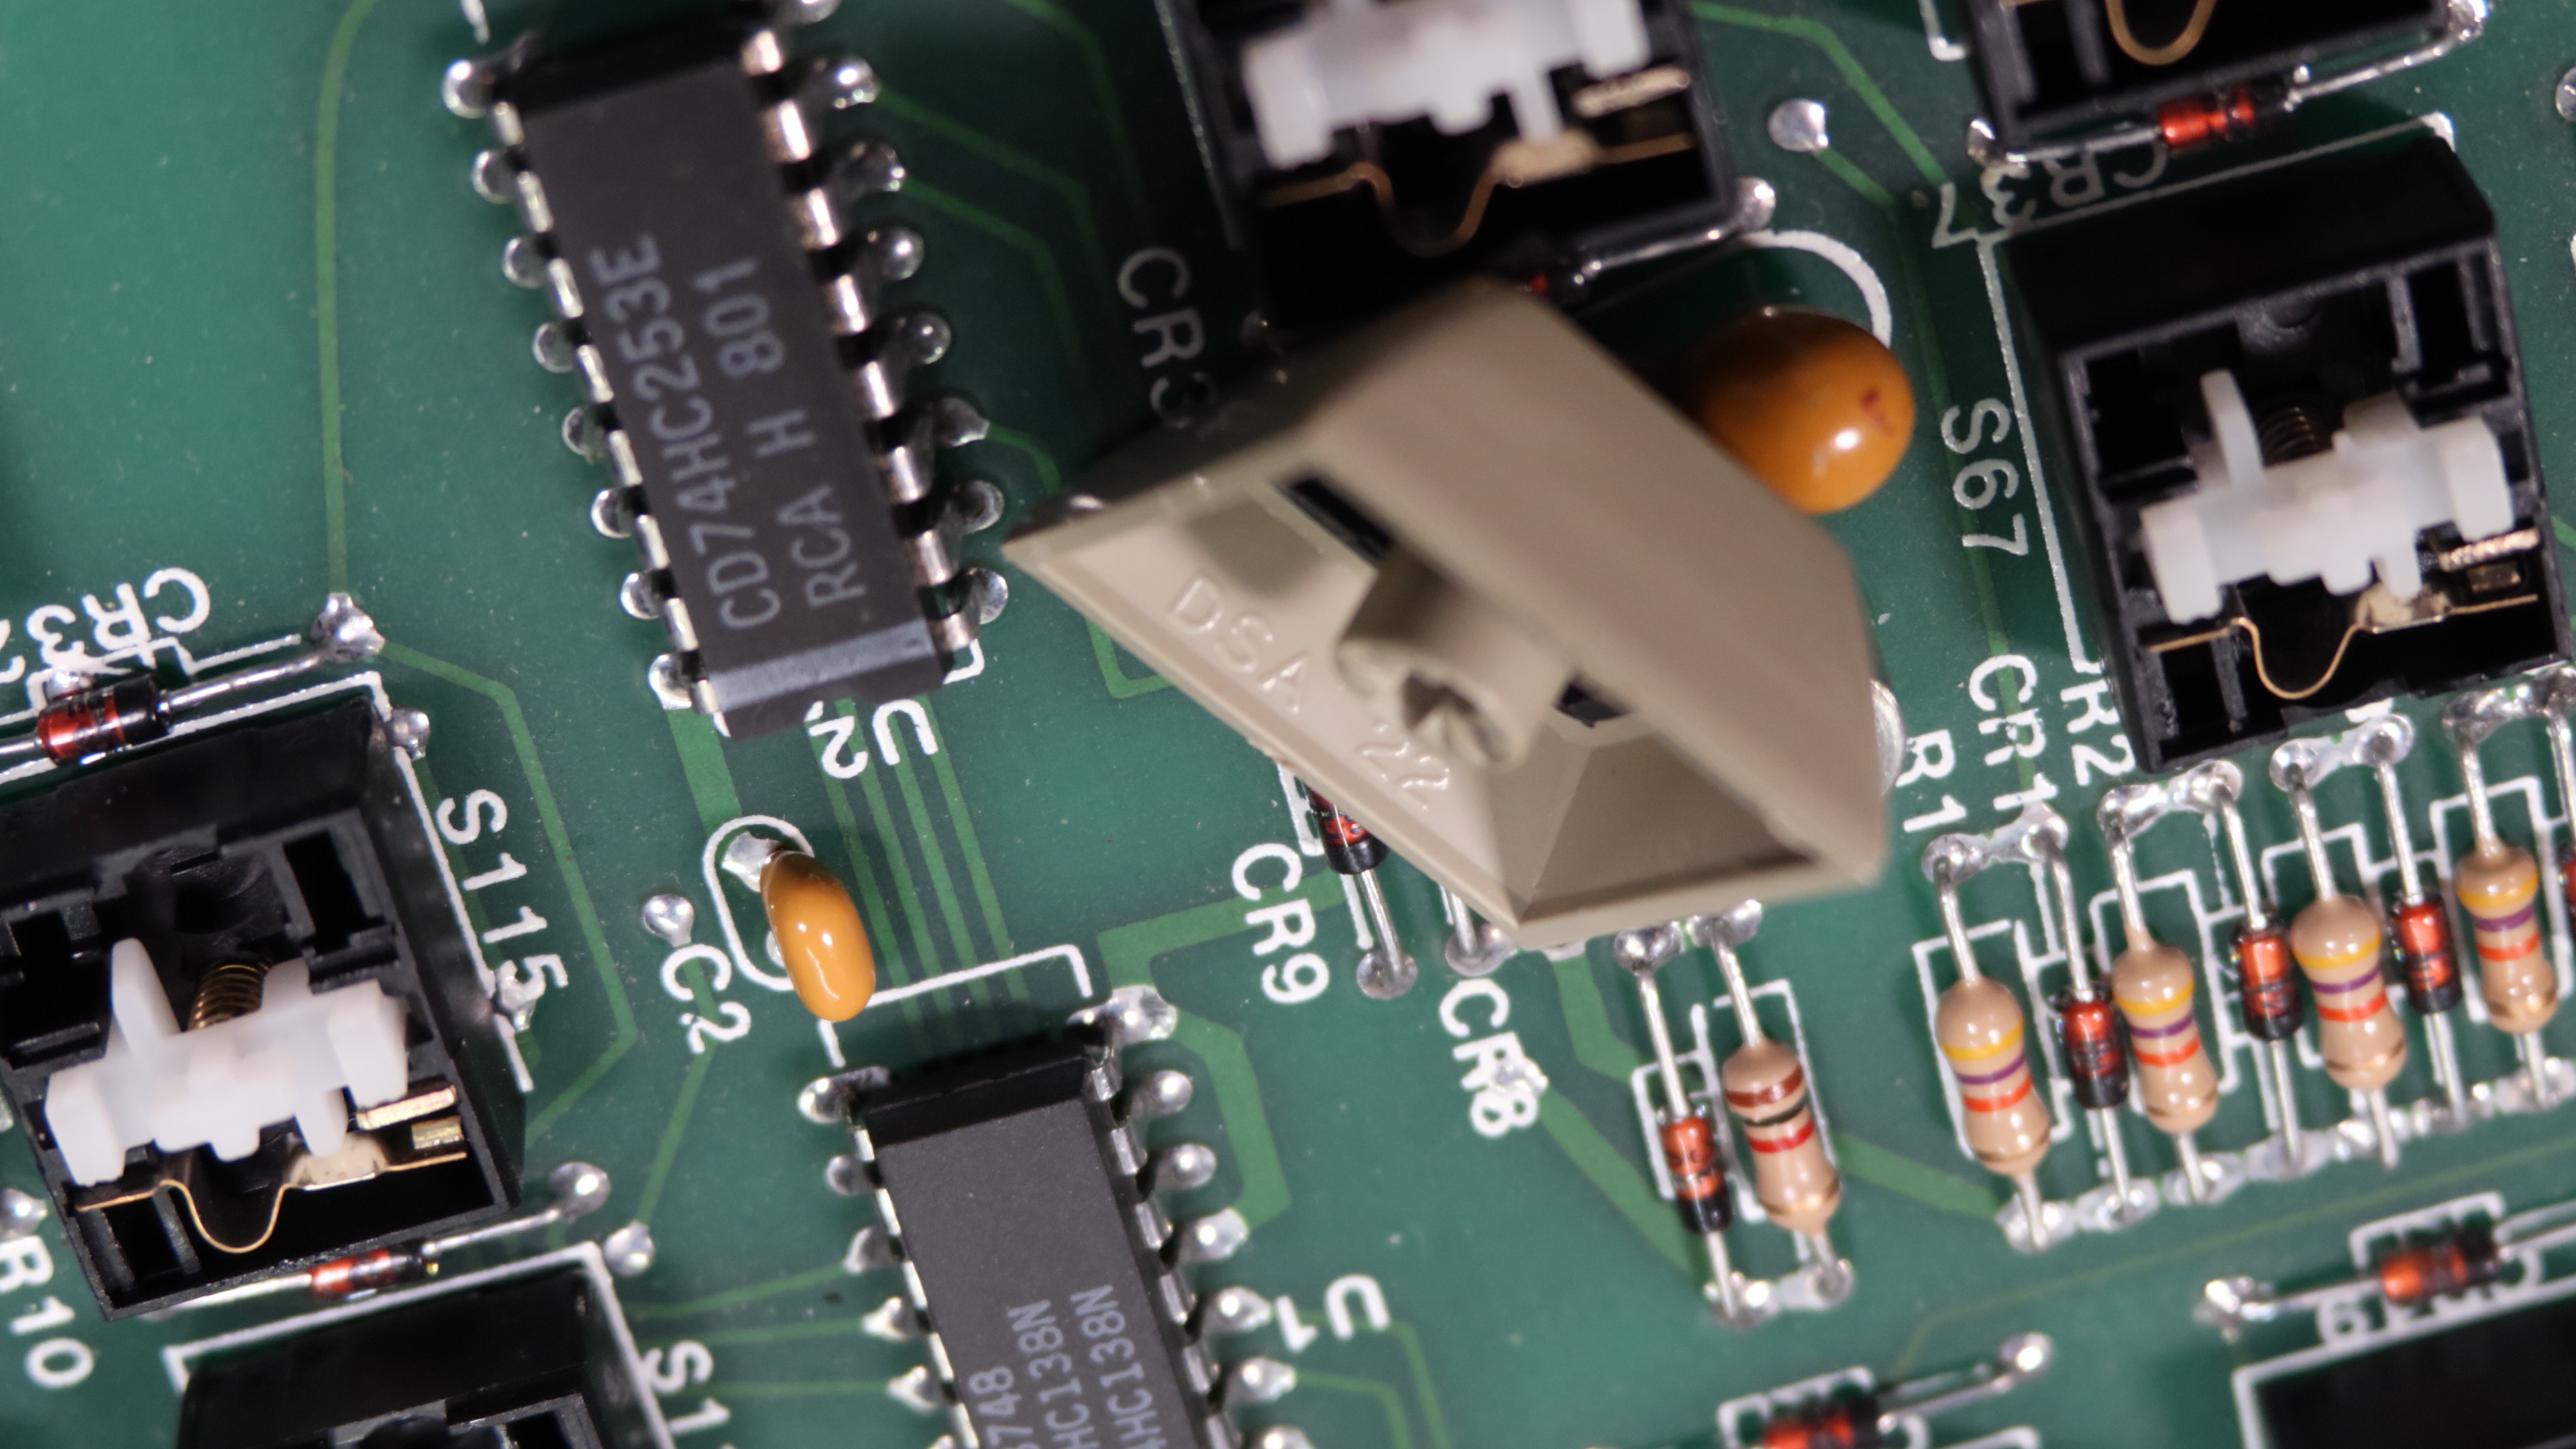
The stabilizers are also quite a bit interesting if you noticed them earlier. They are used for the 2u keys on this keyboard.

These hooks hold the stabilizer in place allowing you to press any side of a stabilized key and have the whole key uniformly press down. The stabilizer wire is pretty girthy!
So the earliest piece of media I’ve found so far about this board is an article that PC Magazine did back on March 29th 1988:
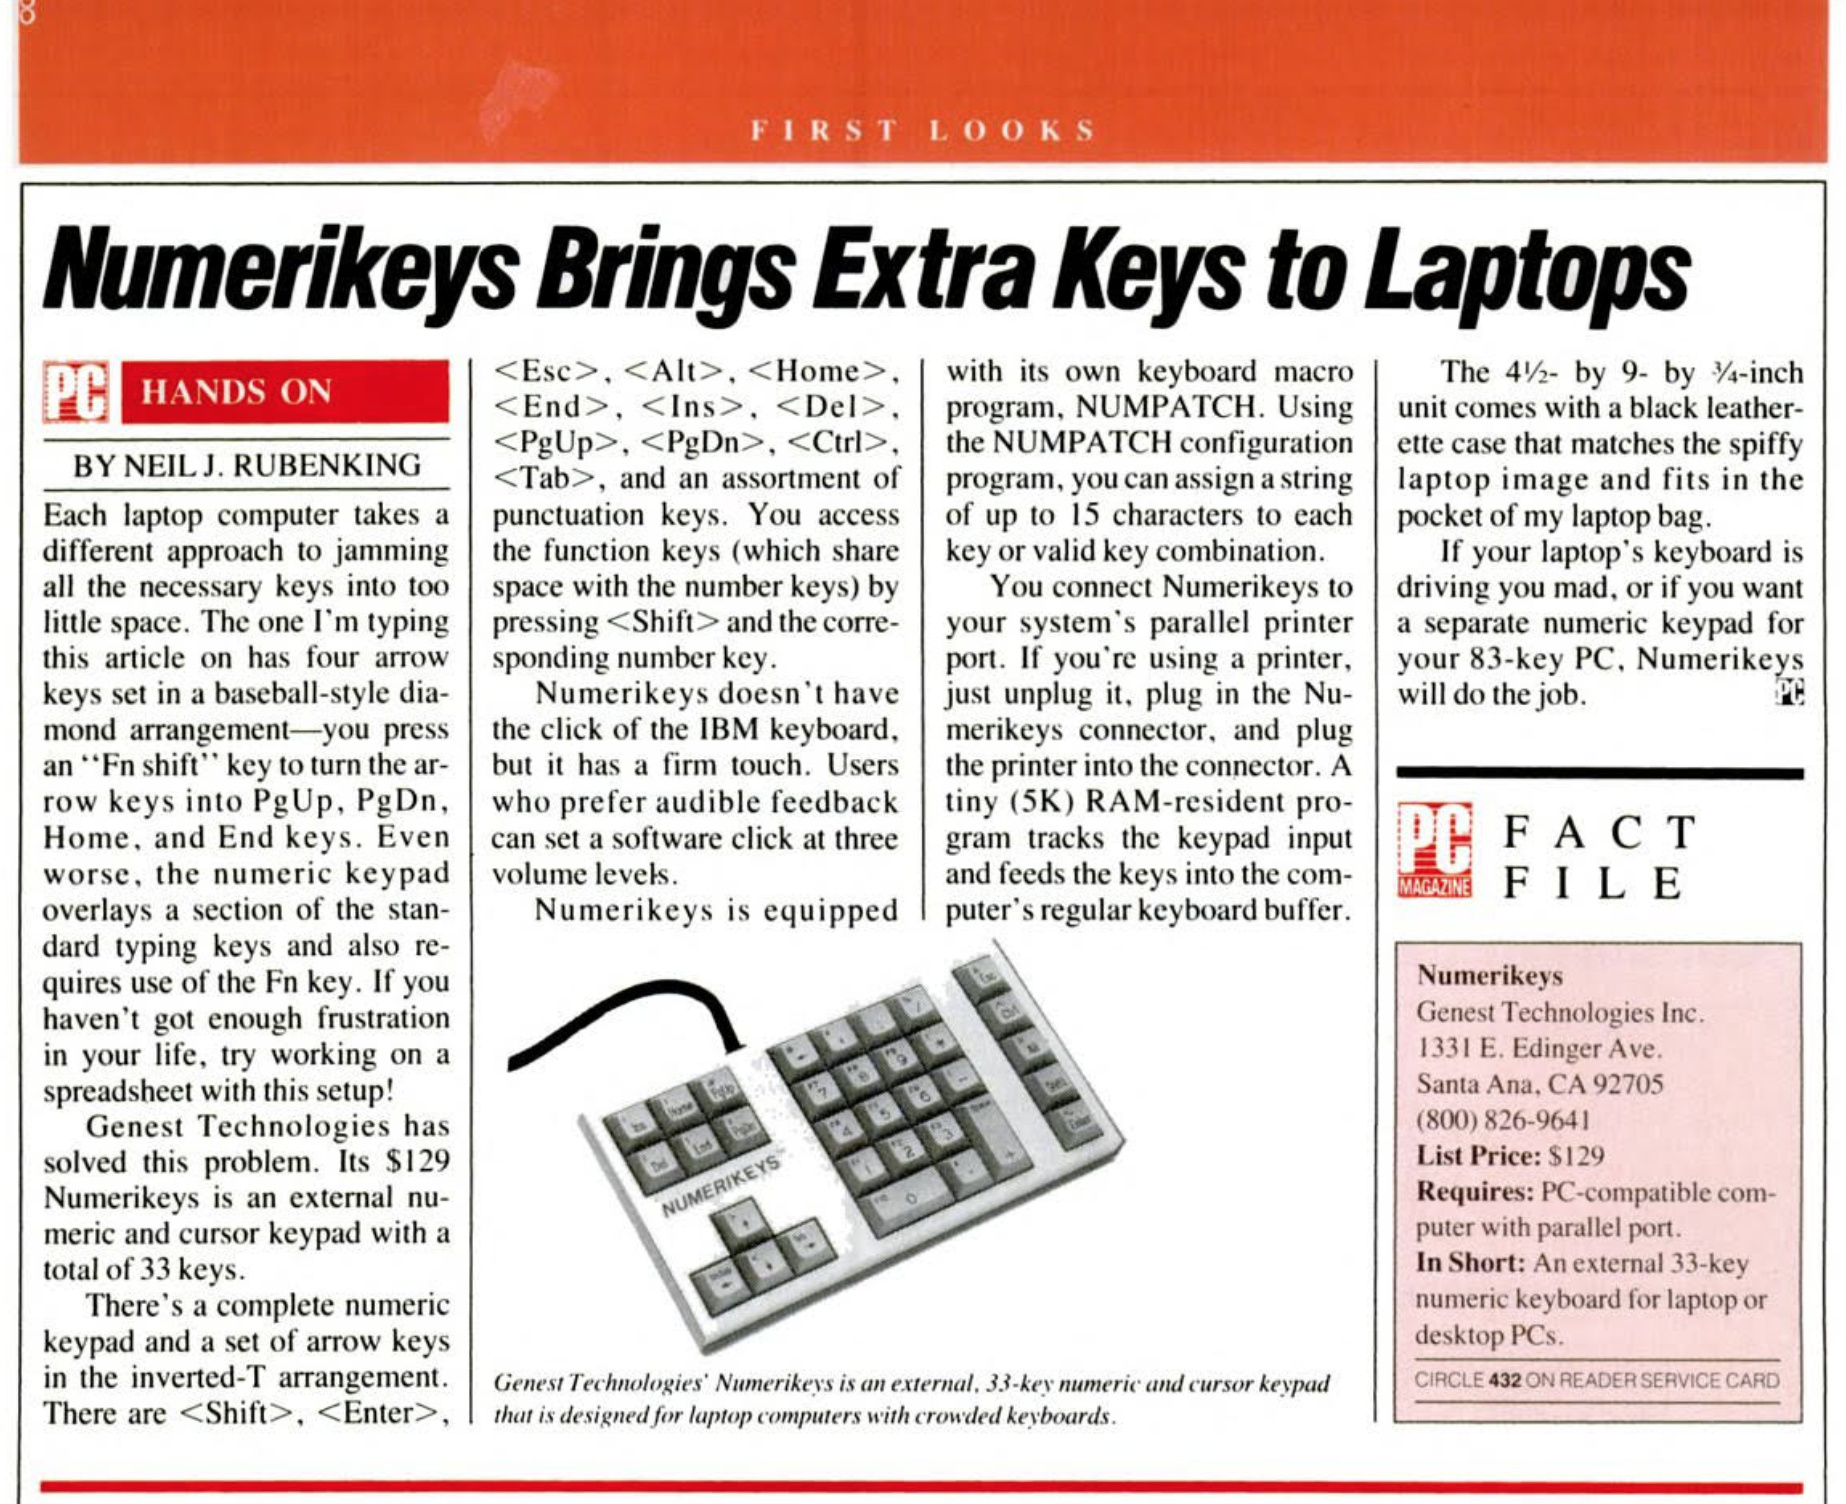
Hey they were based in California! The Numerikeys was one of 4 trademarks Genest Technologies filed since their inception on February 24th 1981. They’re no longer in business and I can’t find any information if they were acquired or simply went the way of the dinosaur.
Using this US Inflation Calculator with the price ($129) & date (1988) of PC Magazine would bring the Numerikeys to cost $279 with today’s money. Wowee that’s quite a bit for this kit.
So this was a pretty cool find that I like quite a lot. I’m thinking of using this as inspiration to possibly make a modern acrylic version of something like this to permanently stay on my desk as a useful little macropad/numpad/navpad wombo combo.