Thanks man, I appreciate it. If not for others documenting their builds and methods, I wouldn’t have been able to do any of this in the first place, so it seems only fair to return the favor. I also enjoy spinning a good yarn…
1 Like
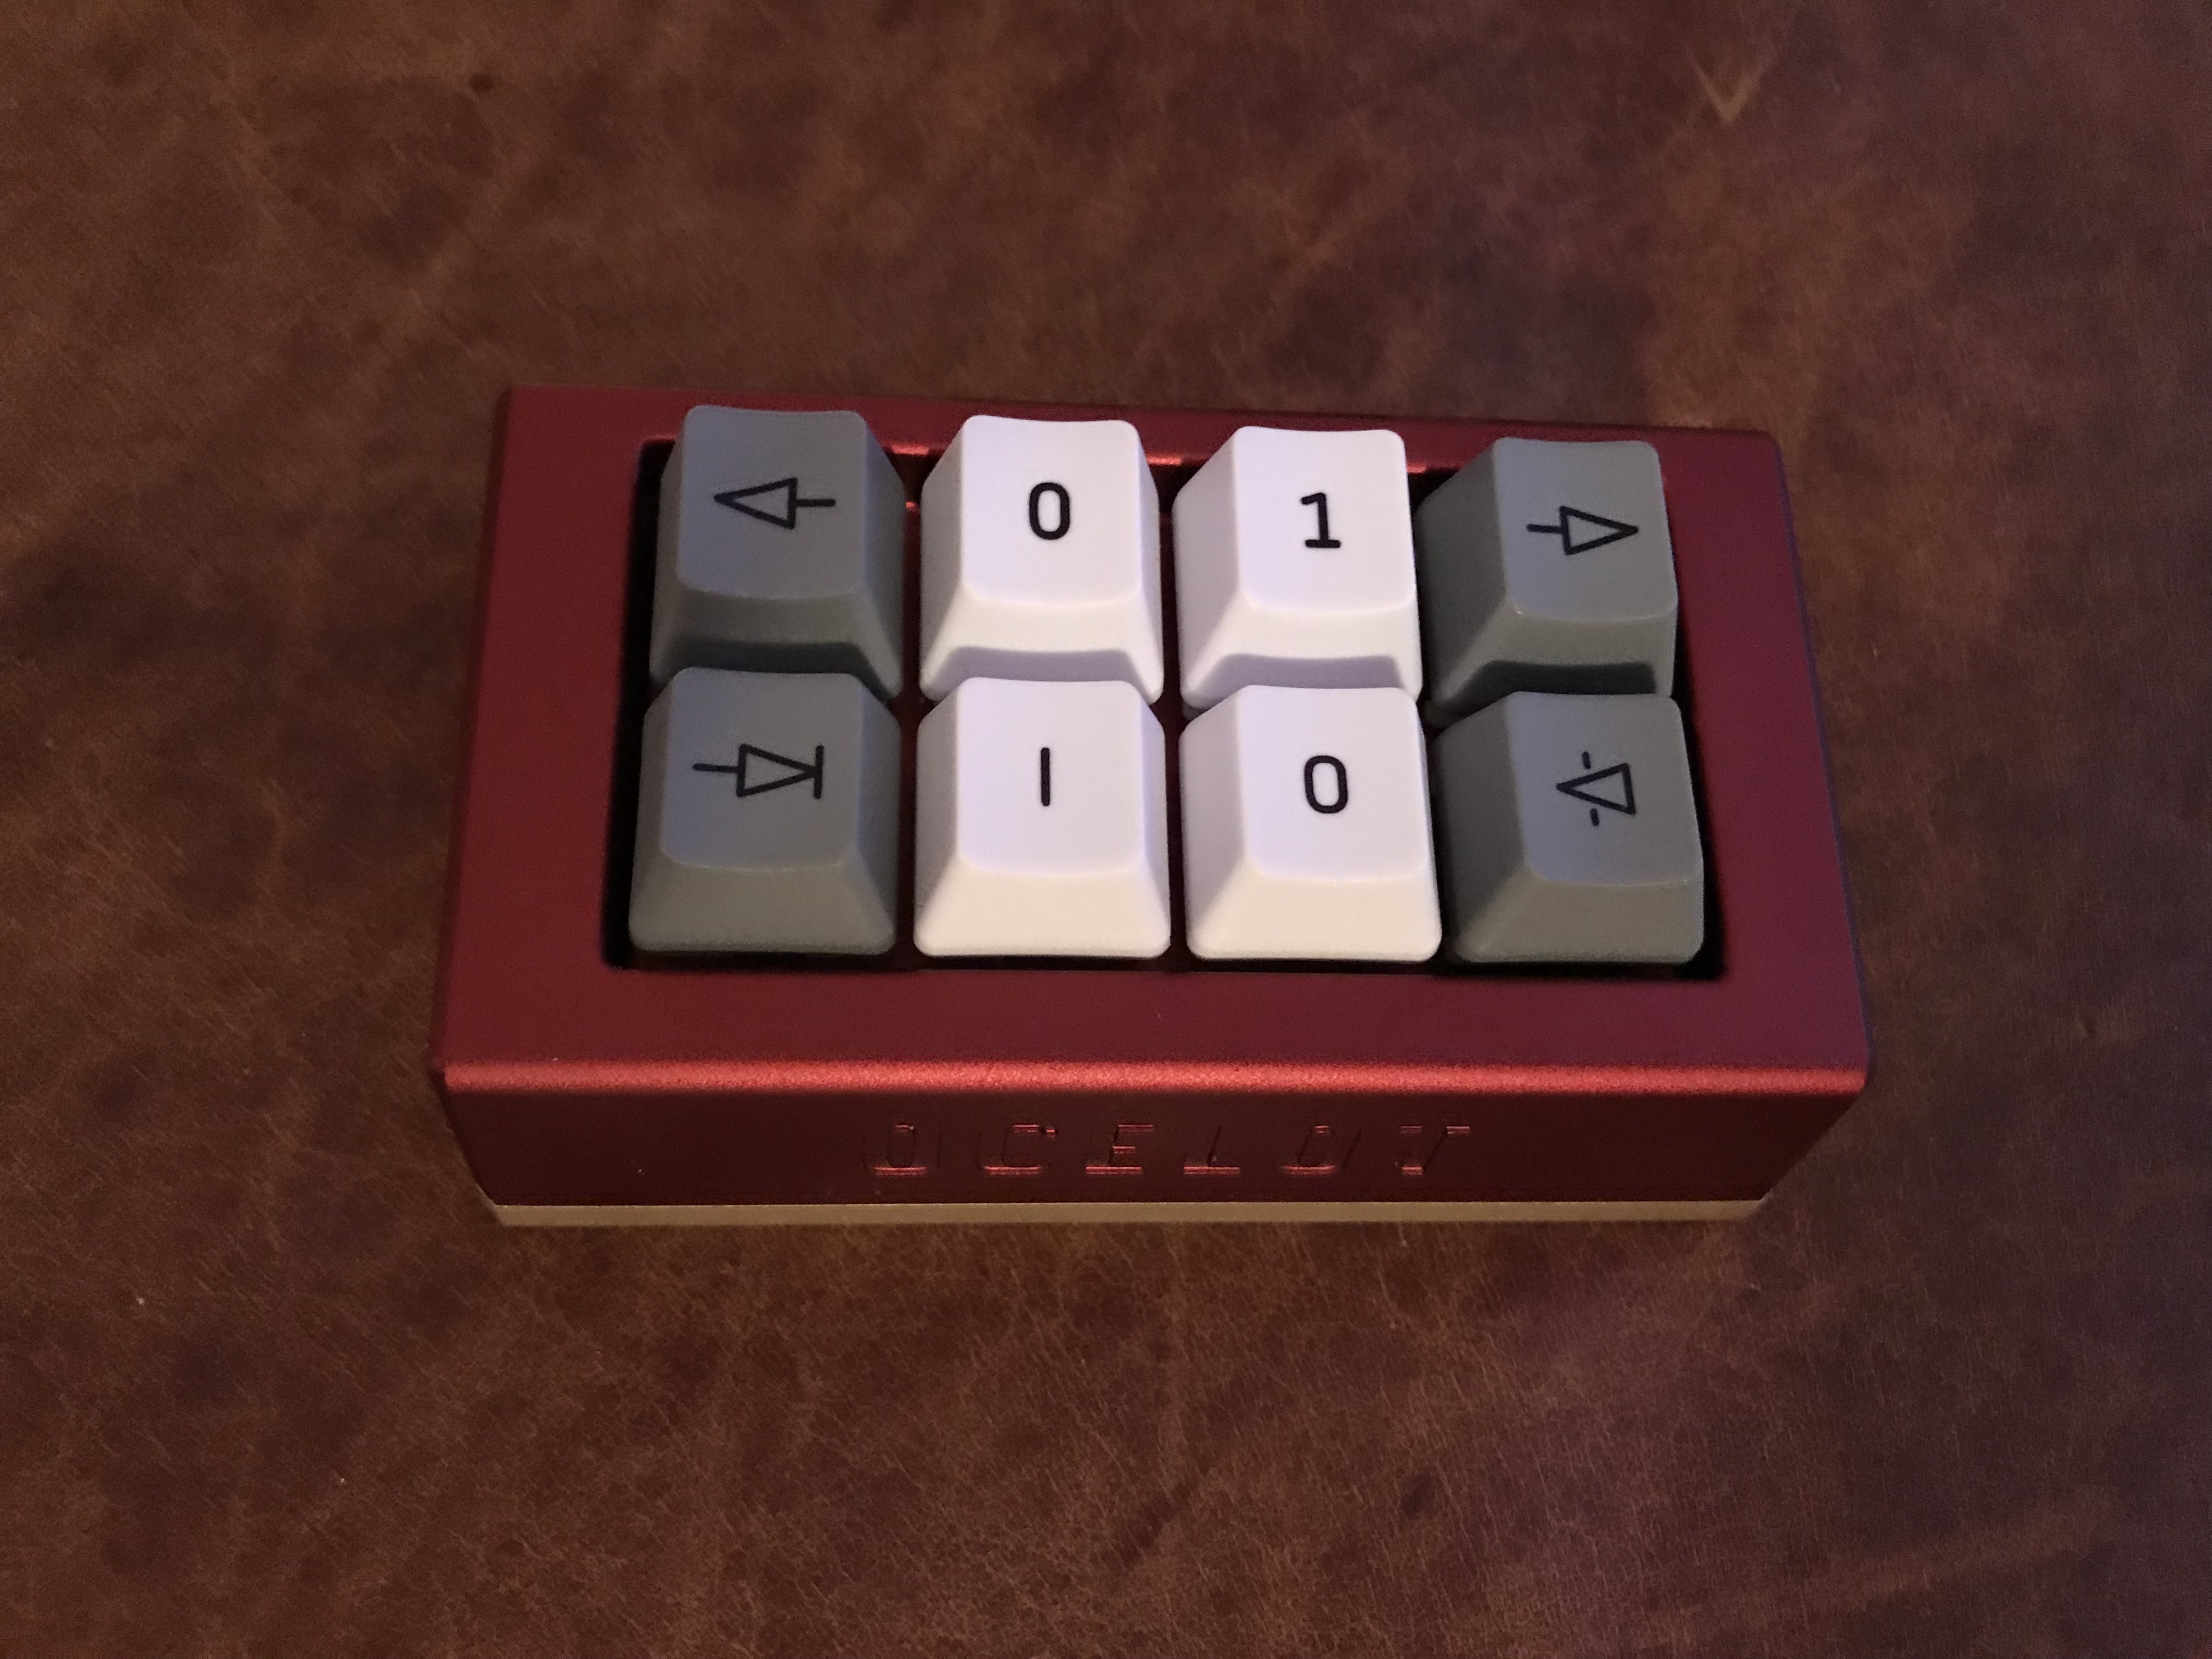
Build #13: Ocelot
By now, I thought we’d be talking about one of several 60s I’ve got in the pipeline. Between whatever Holy switch variant has hit the market this week, experiments with Rama-style stabilizer mods, first experiences with hotswap boards, and more QMK hacking, there is a bunch going on here in jshuf-keebland. But as is often the case with this hobby, there’s always something holding up progress. Usually, the holdup is waiting on supplies to arrive, and, to be sure, there’s some of that. But in addition, this polar vortex business has flushed me out of the unheated garage where I set up shop. Great in the summer and fall, less great when it’s 1F outside.
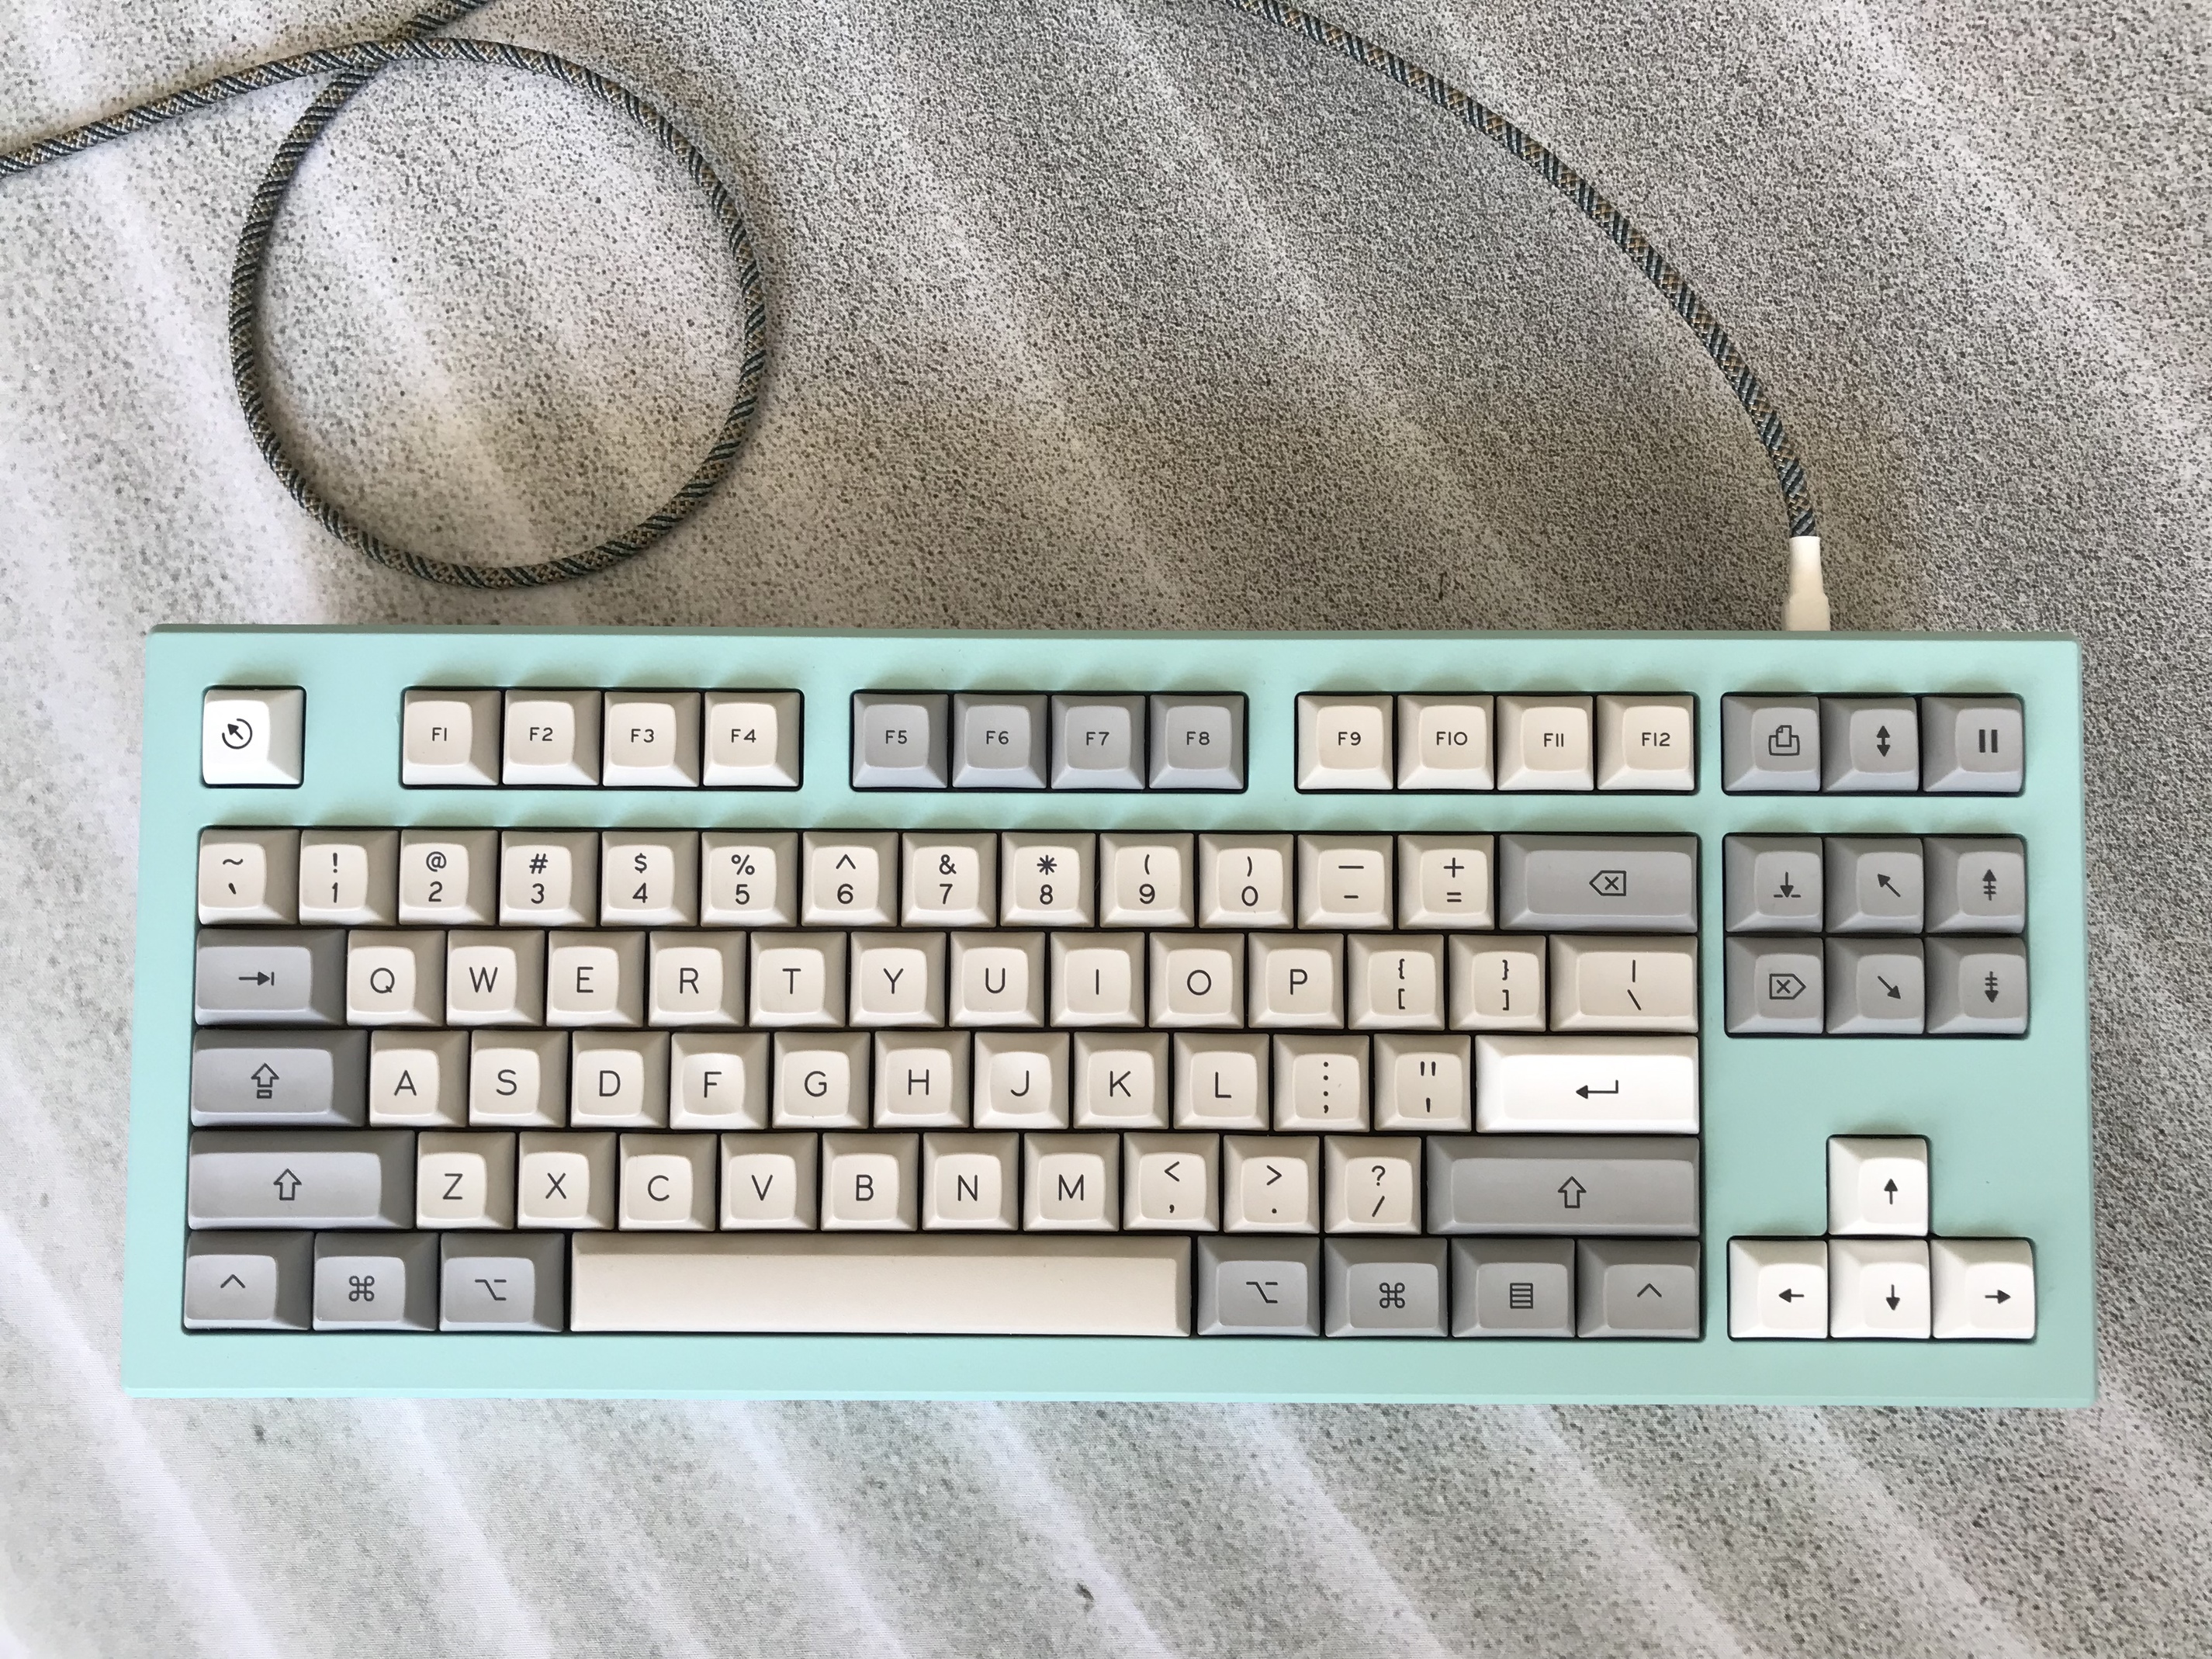
All of which is to say: it’s nice to have a quick project that can be knocked off in the oh-so-warm dining room in an hour. I hadn’t built any kind of macropad before, and the Singa Ocelot just looked, well, cute. Let’s do it.
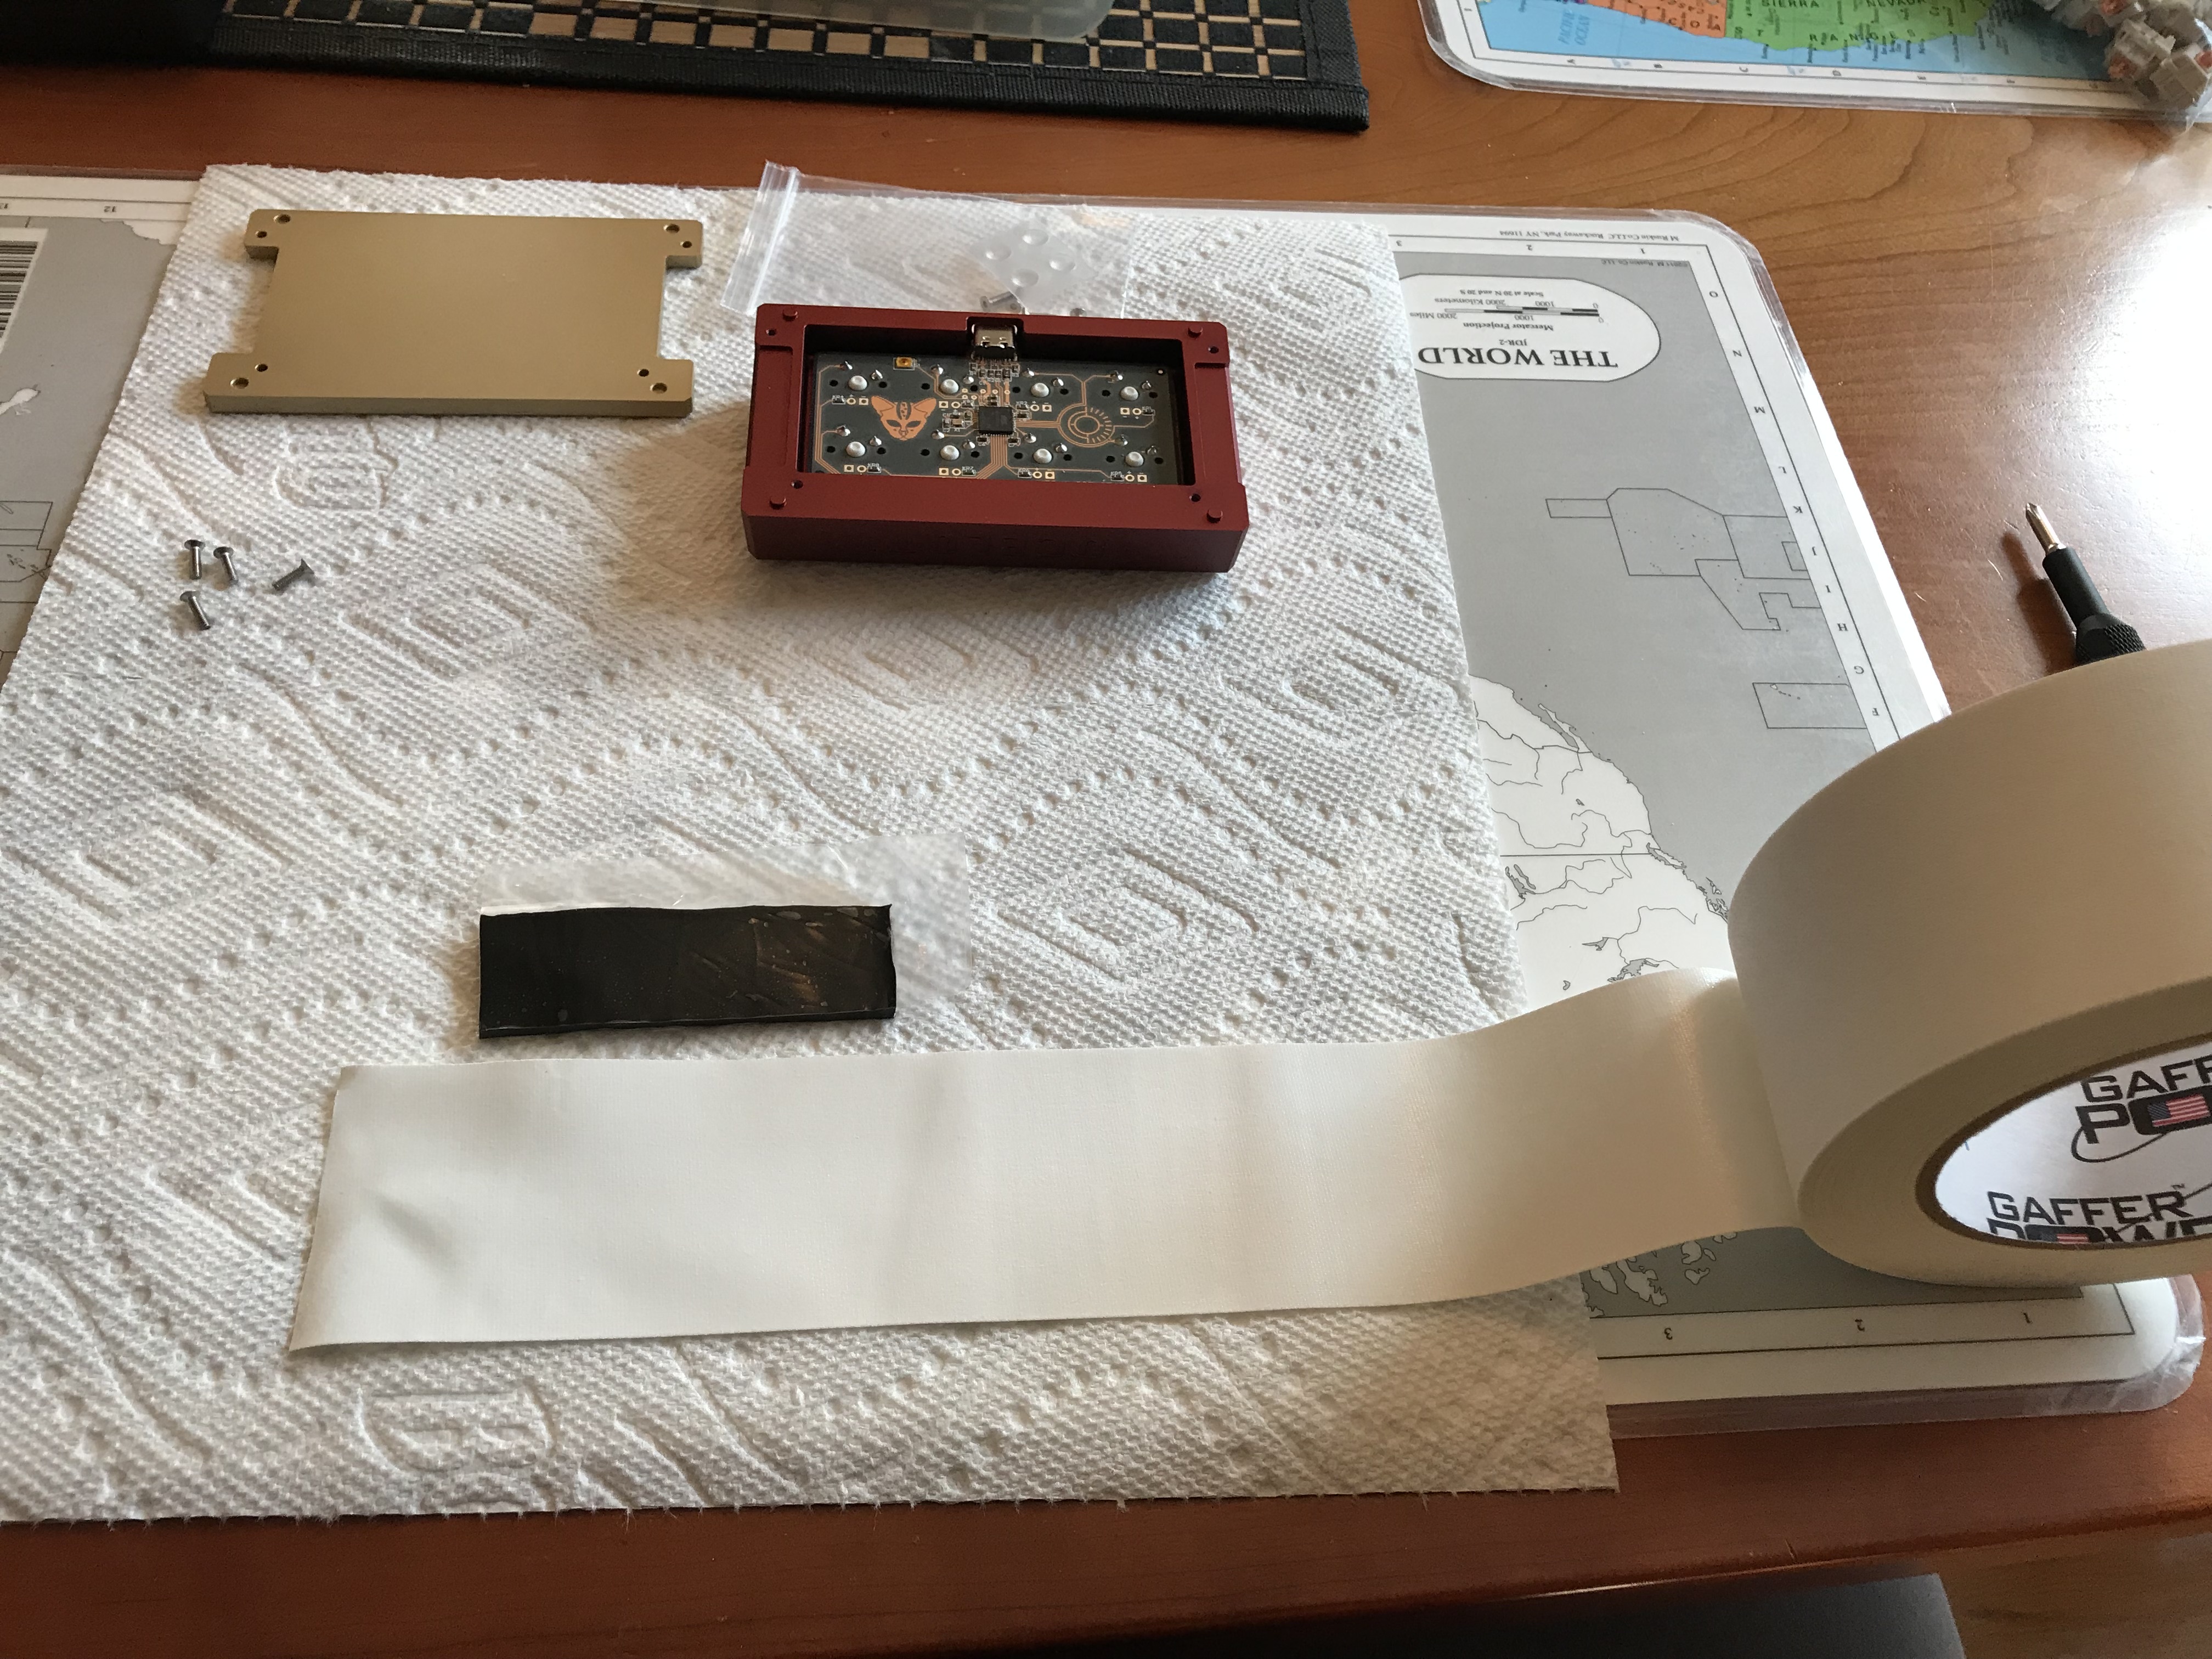
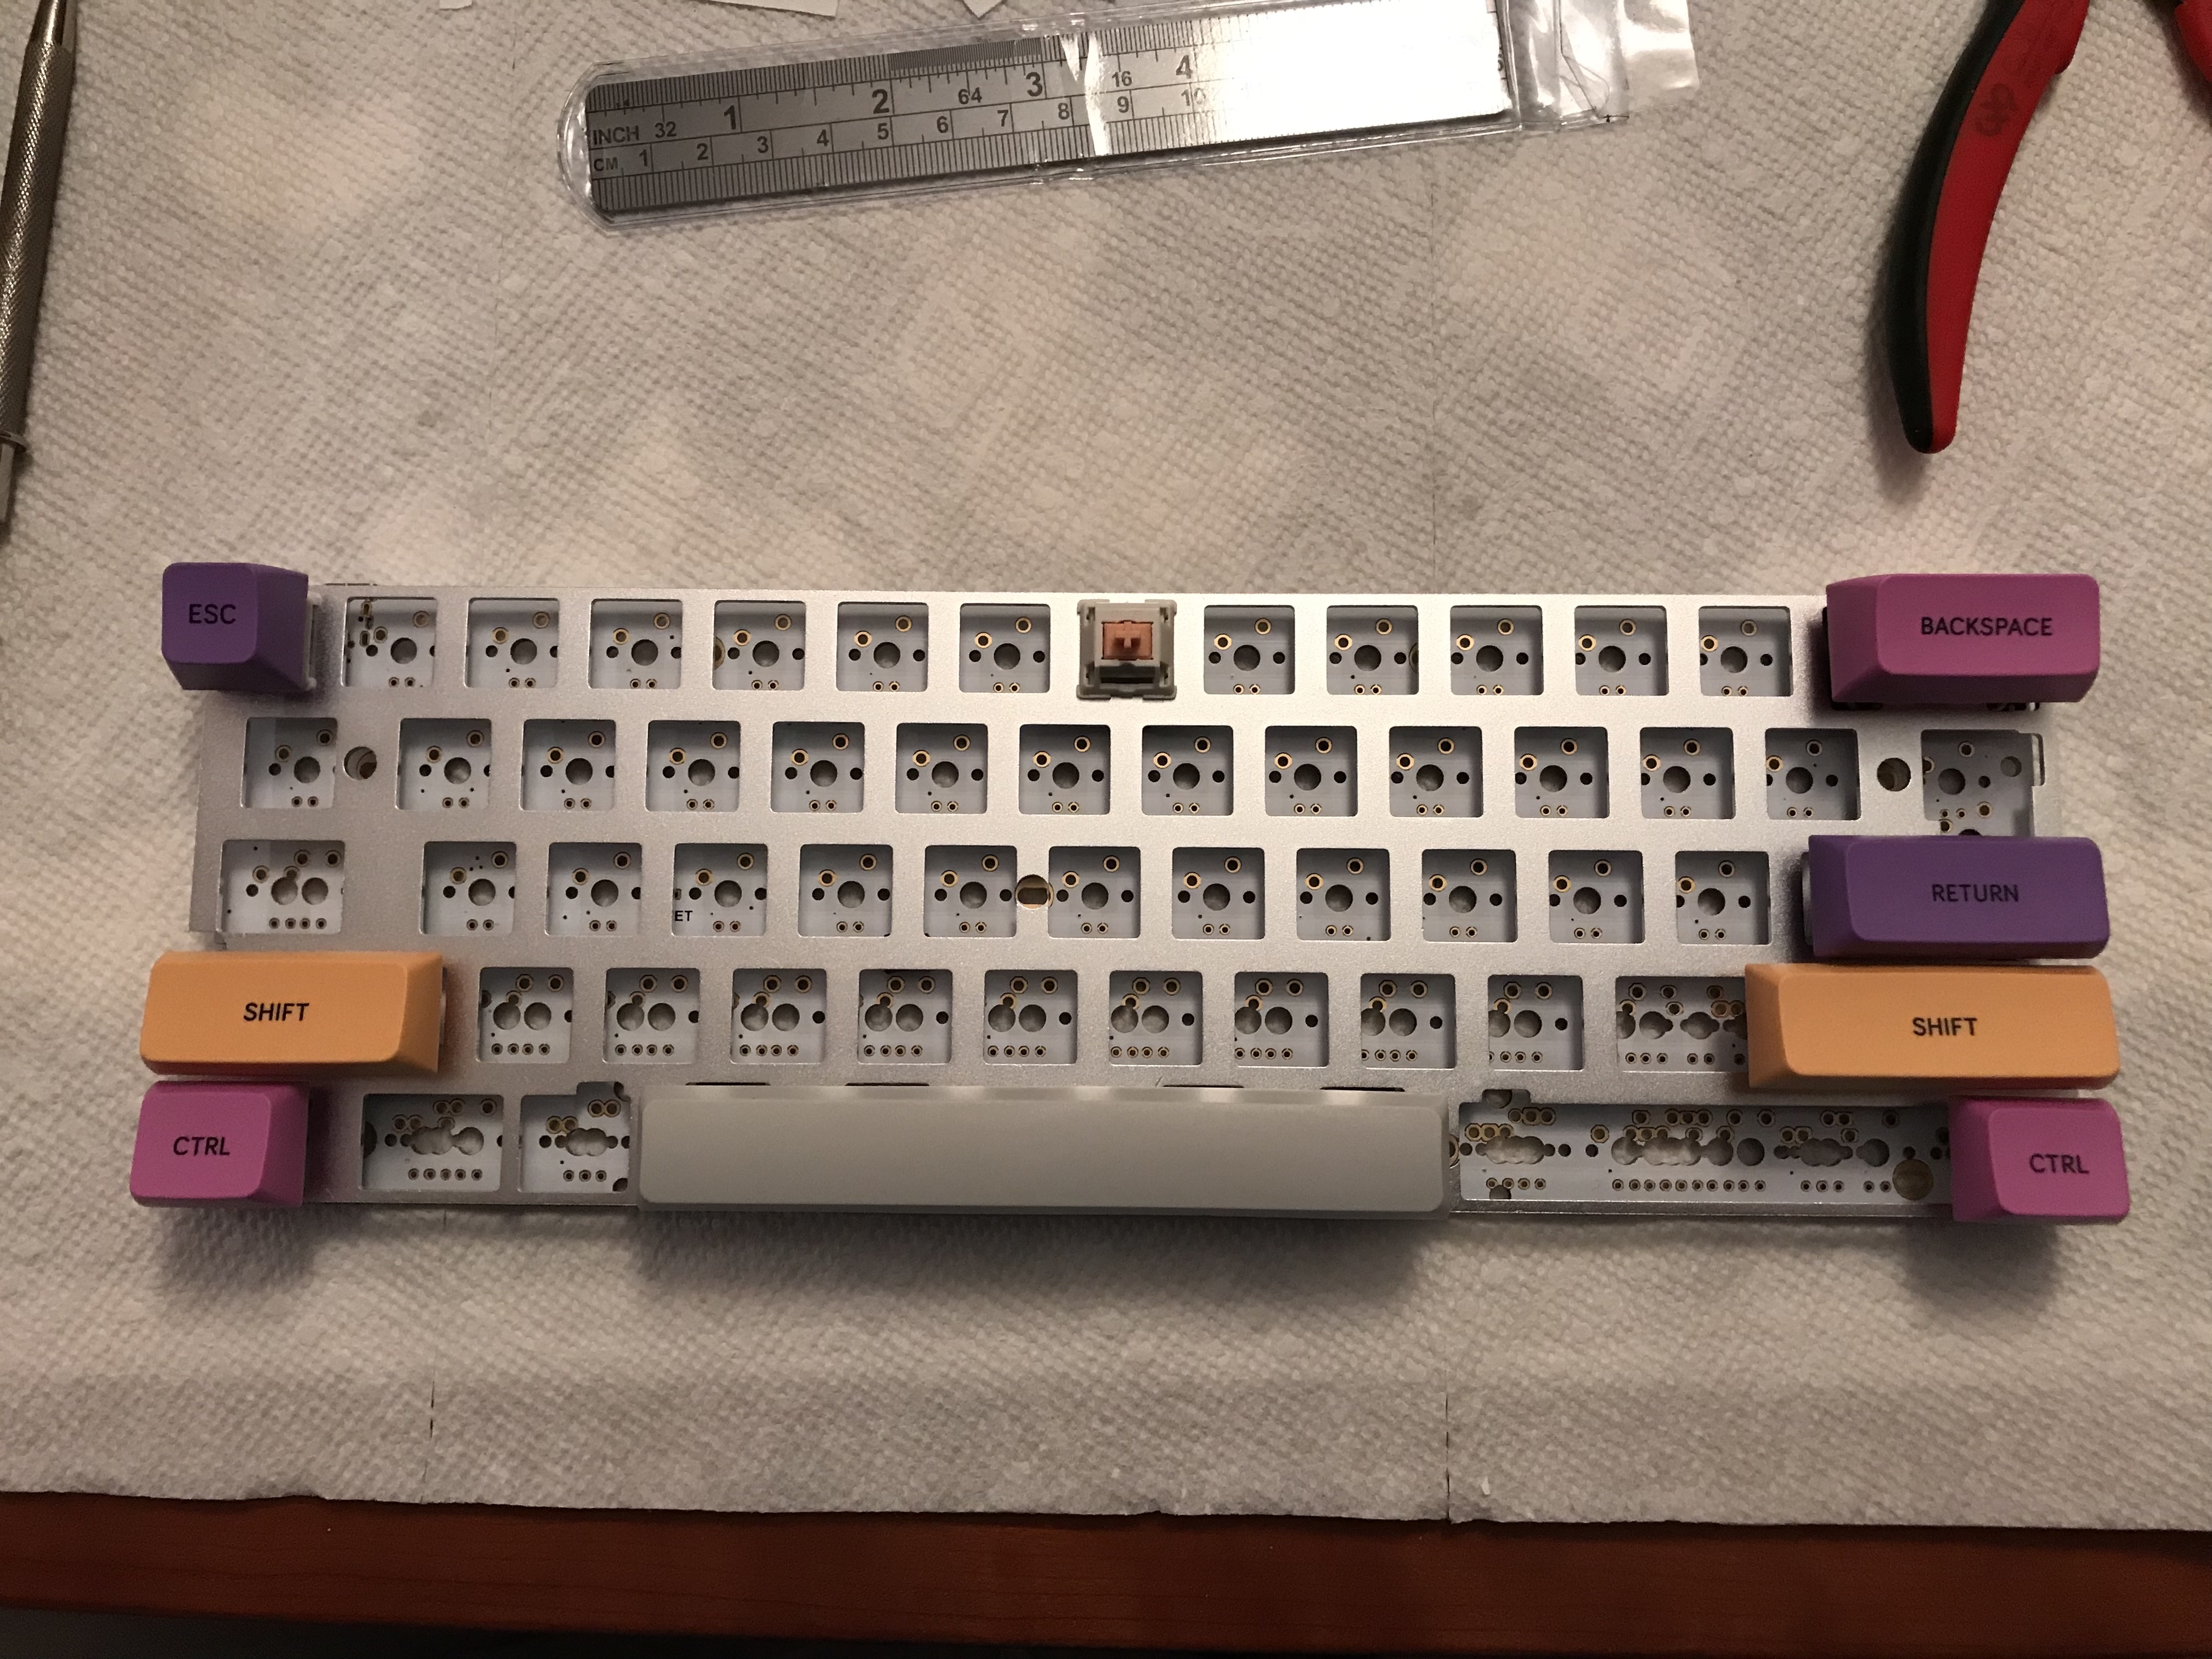
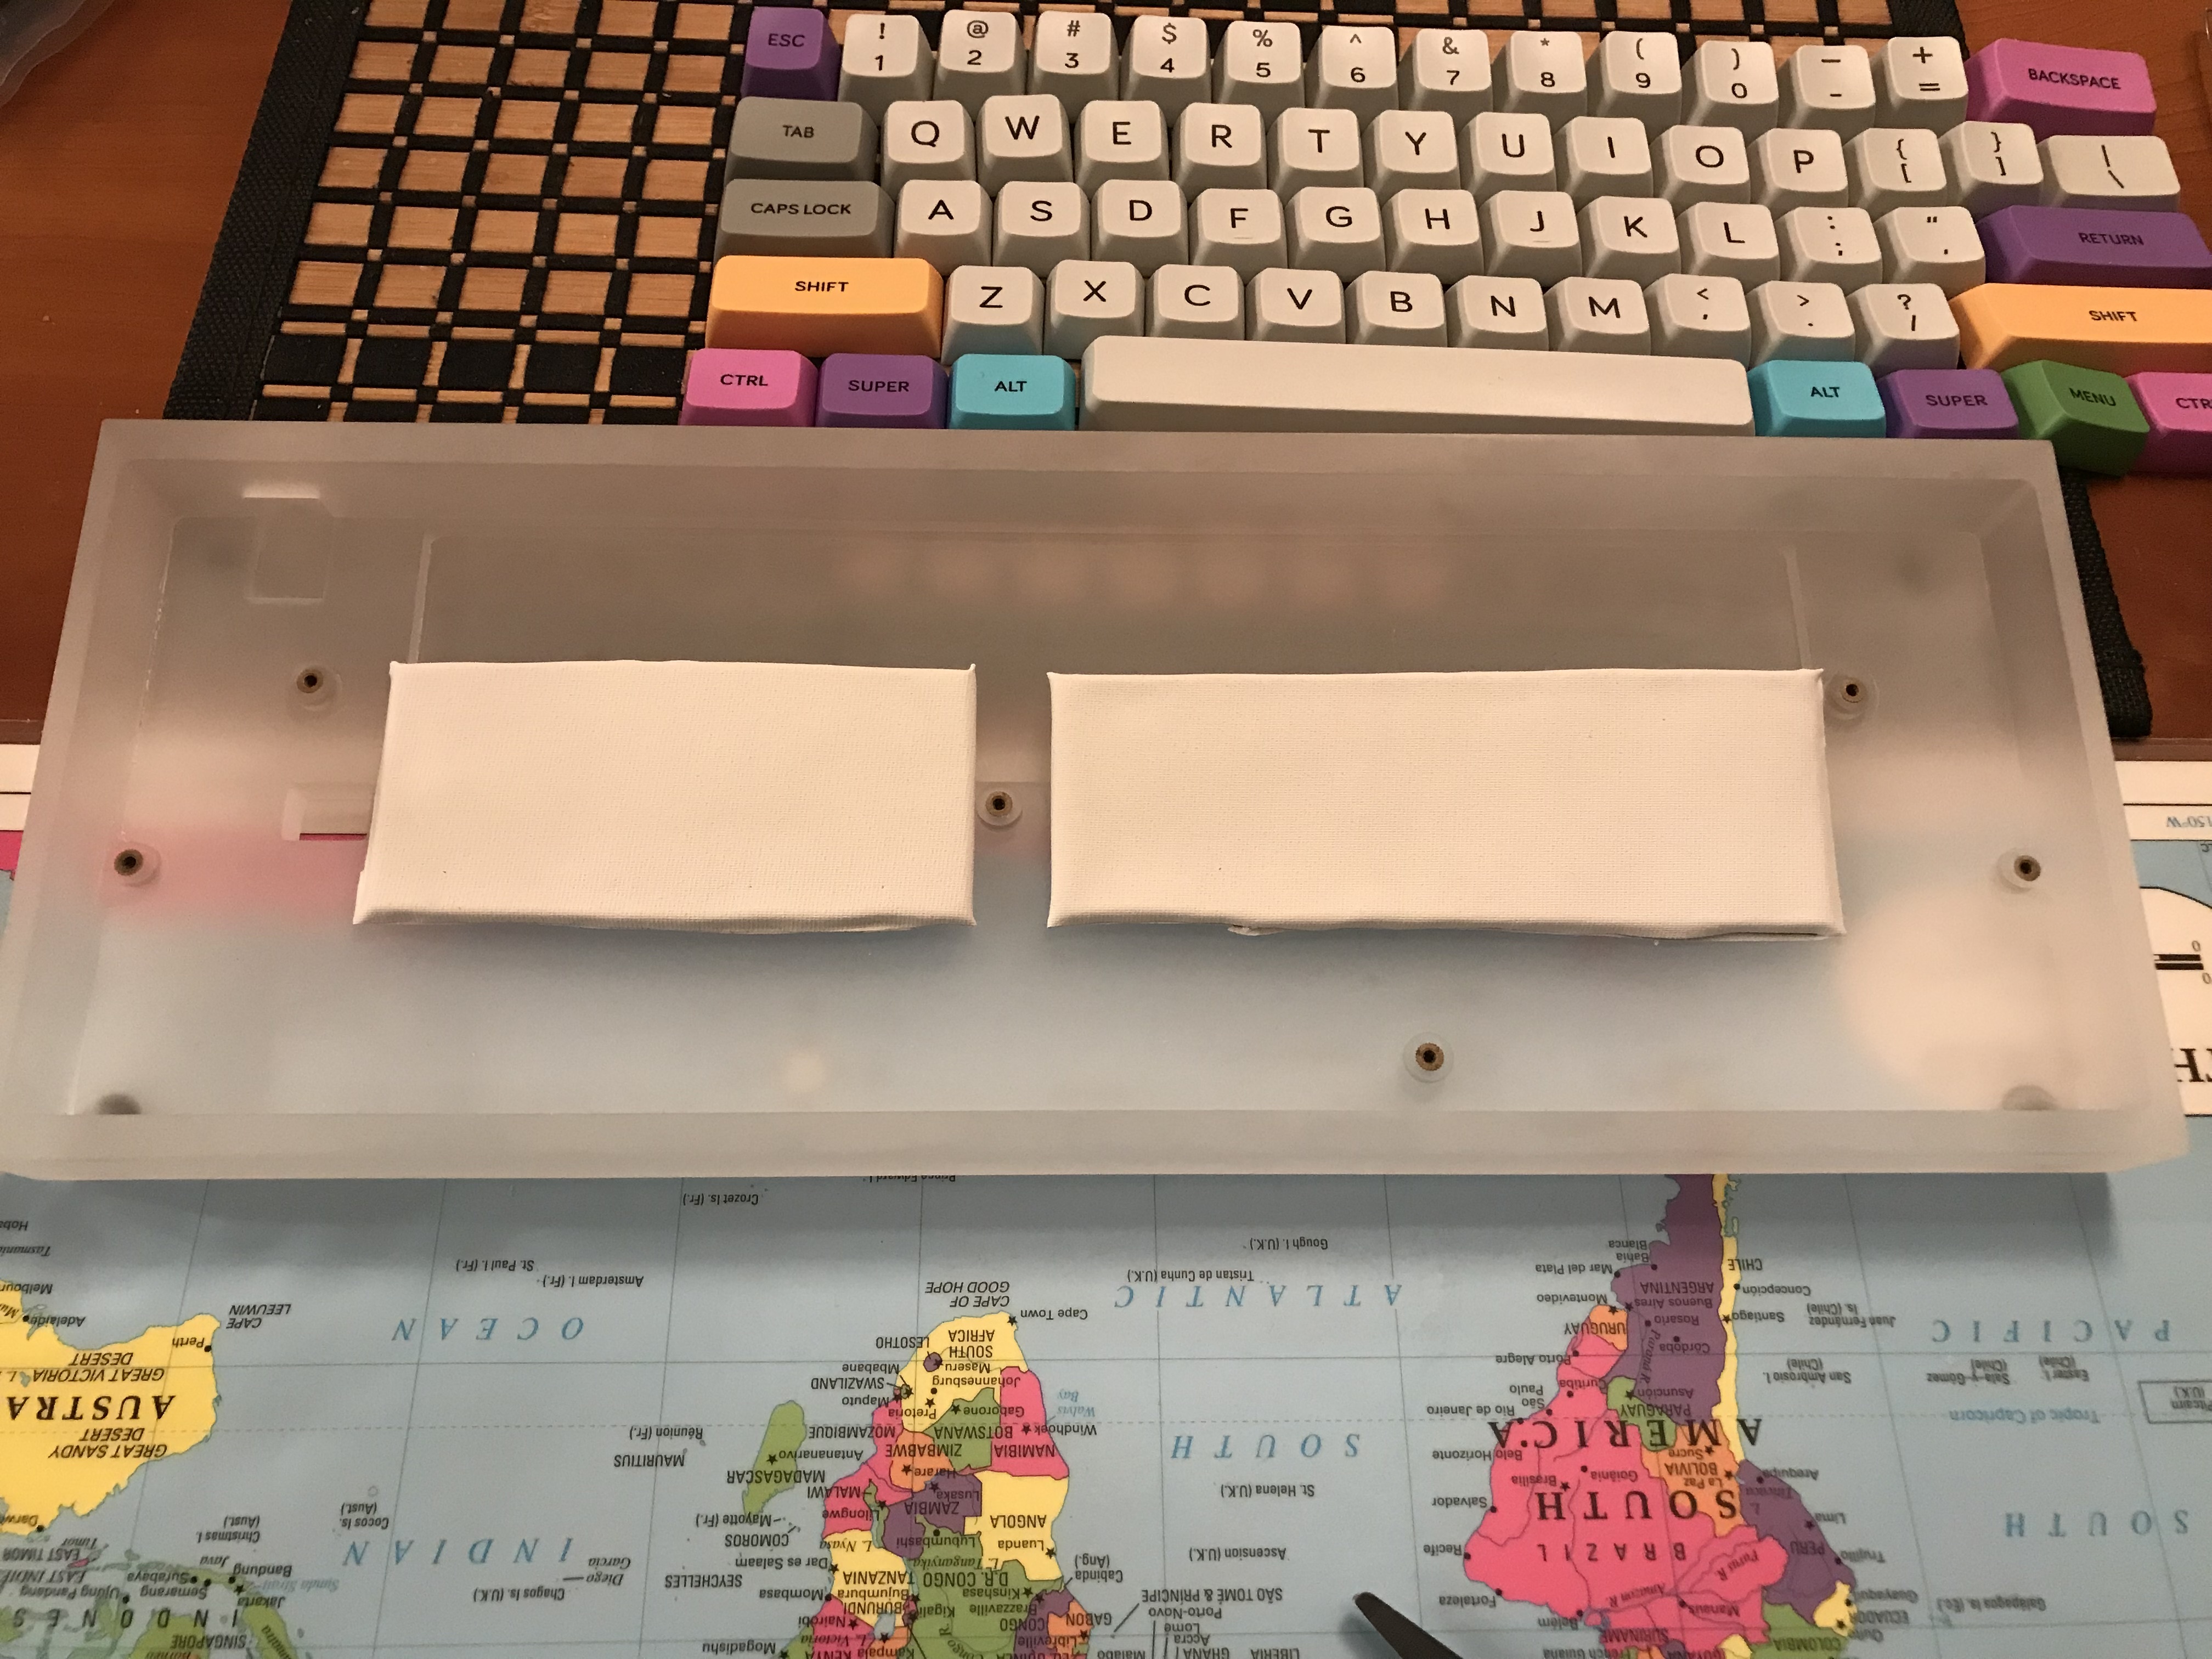
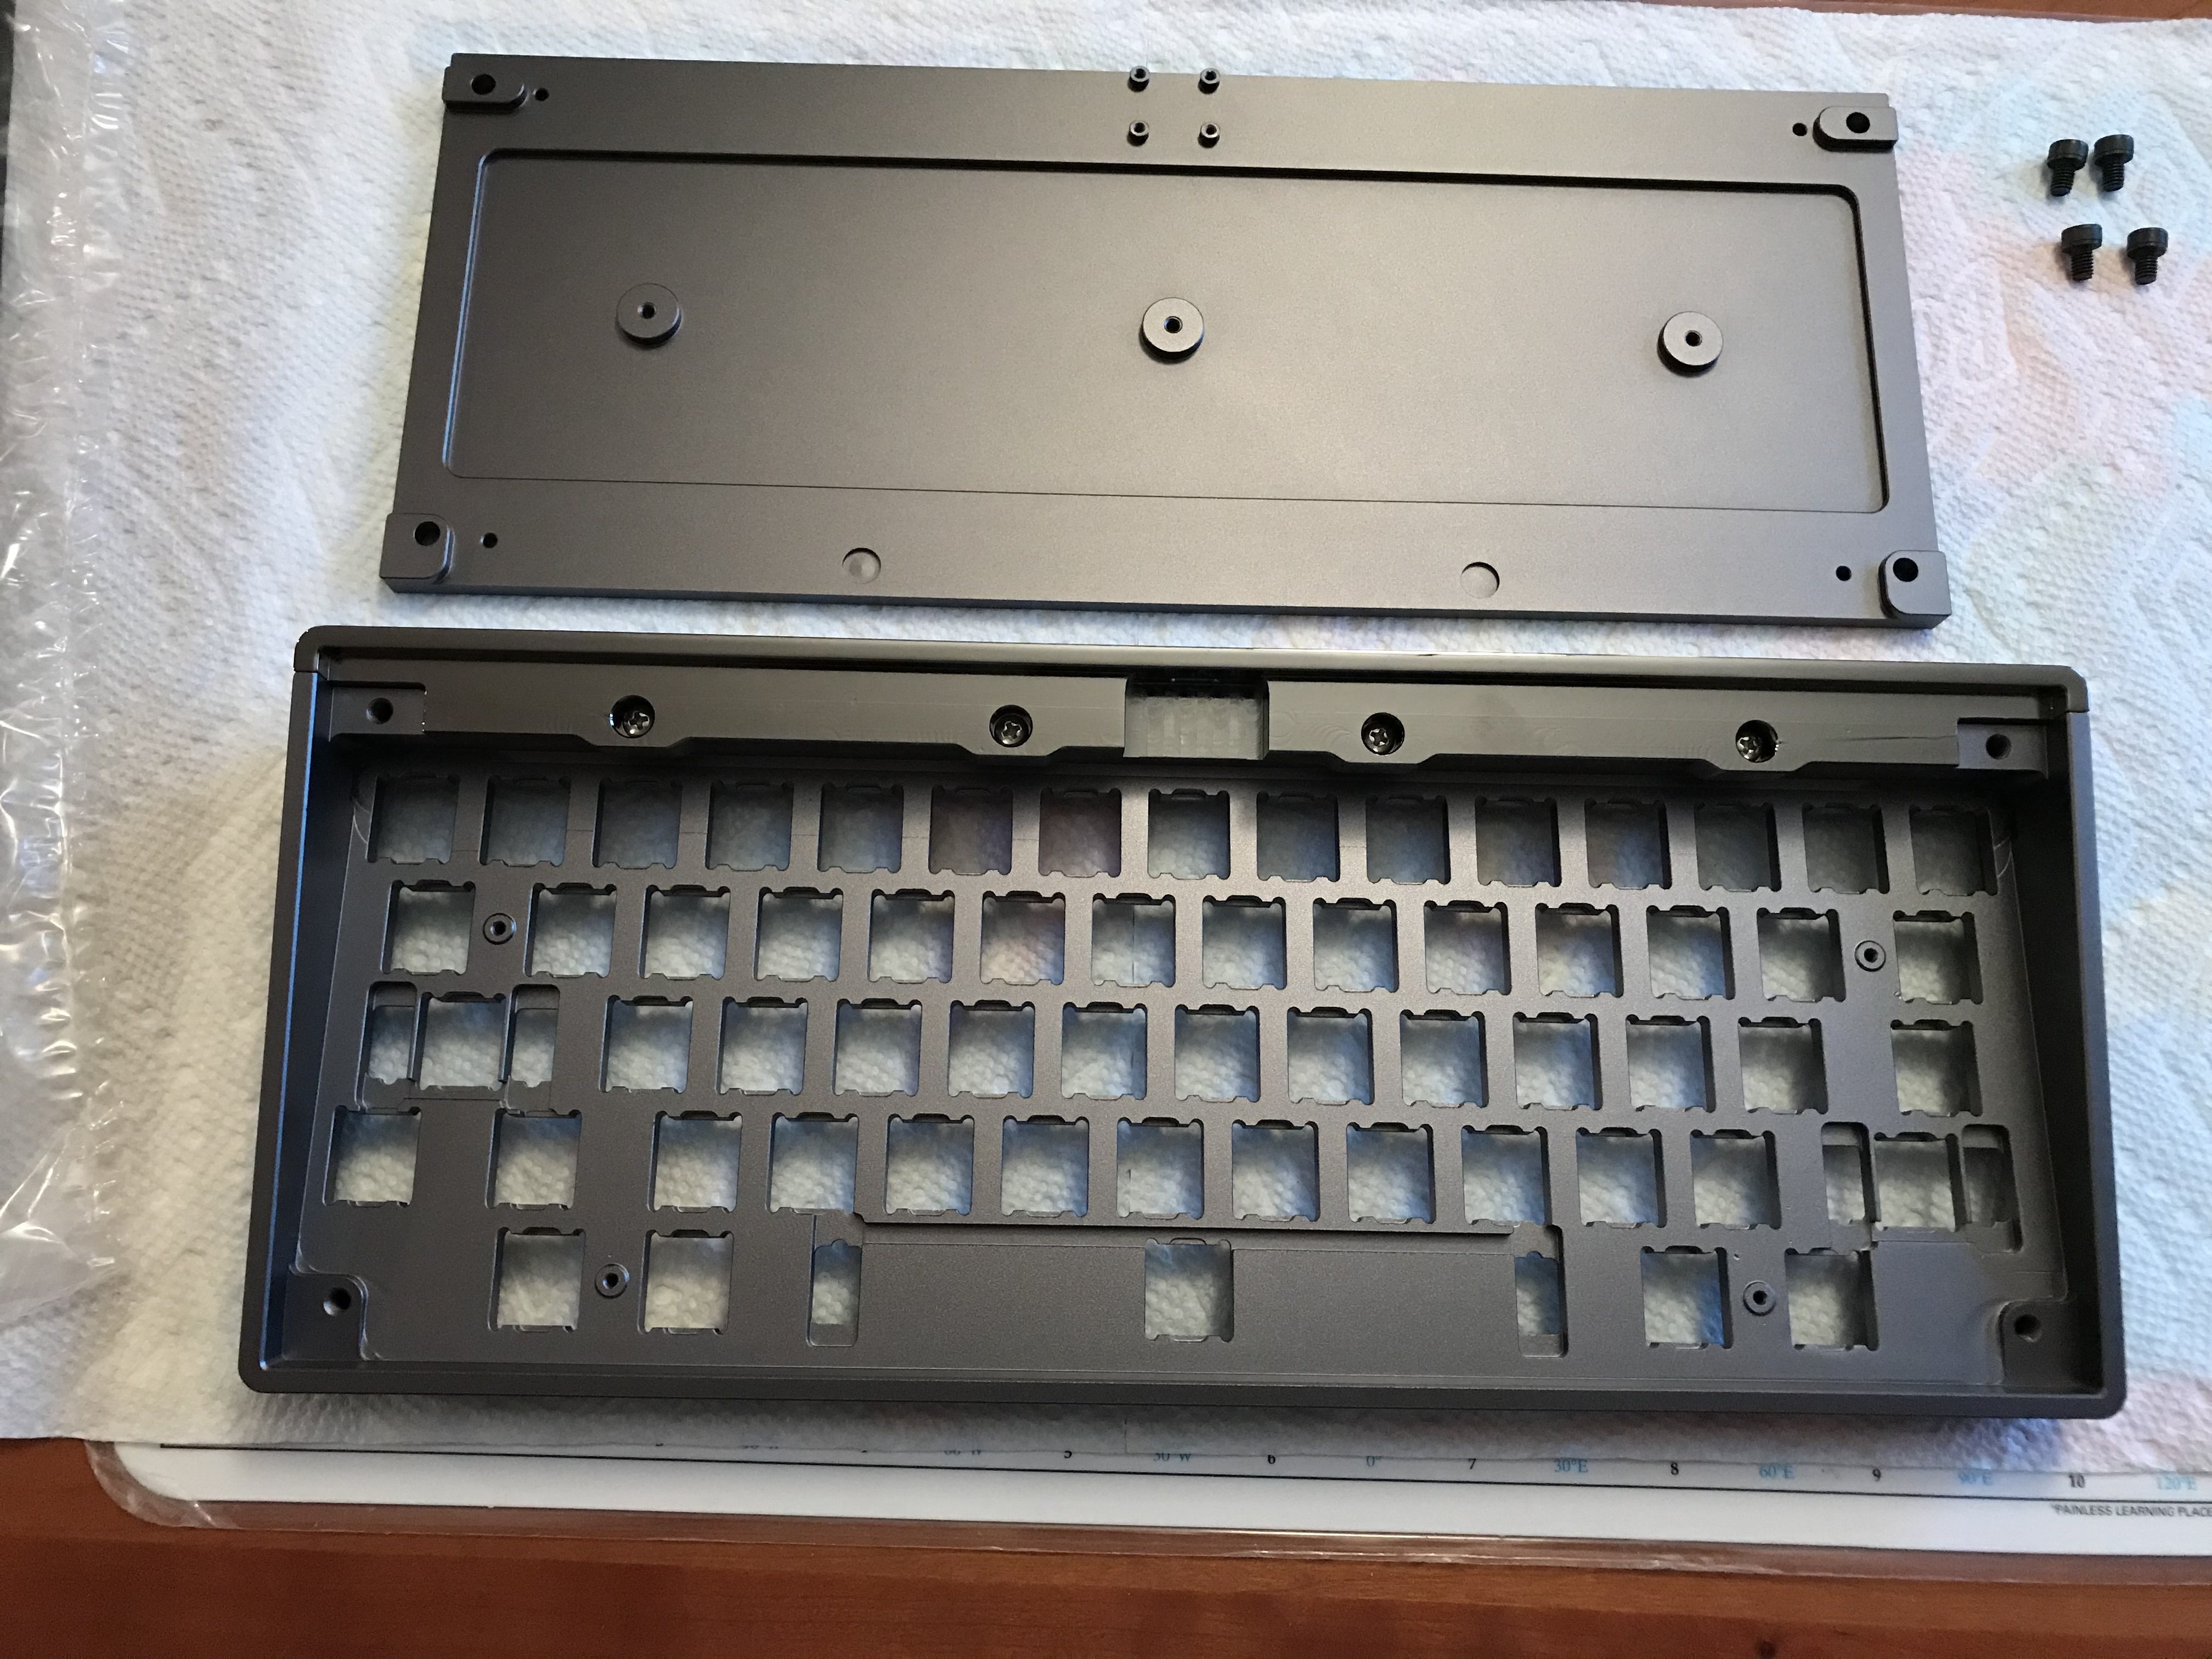
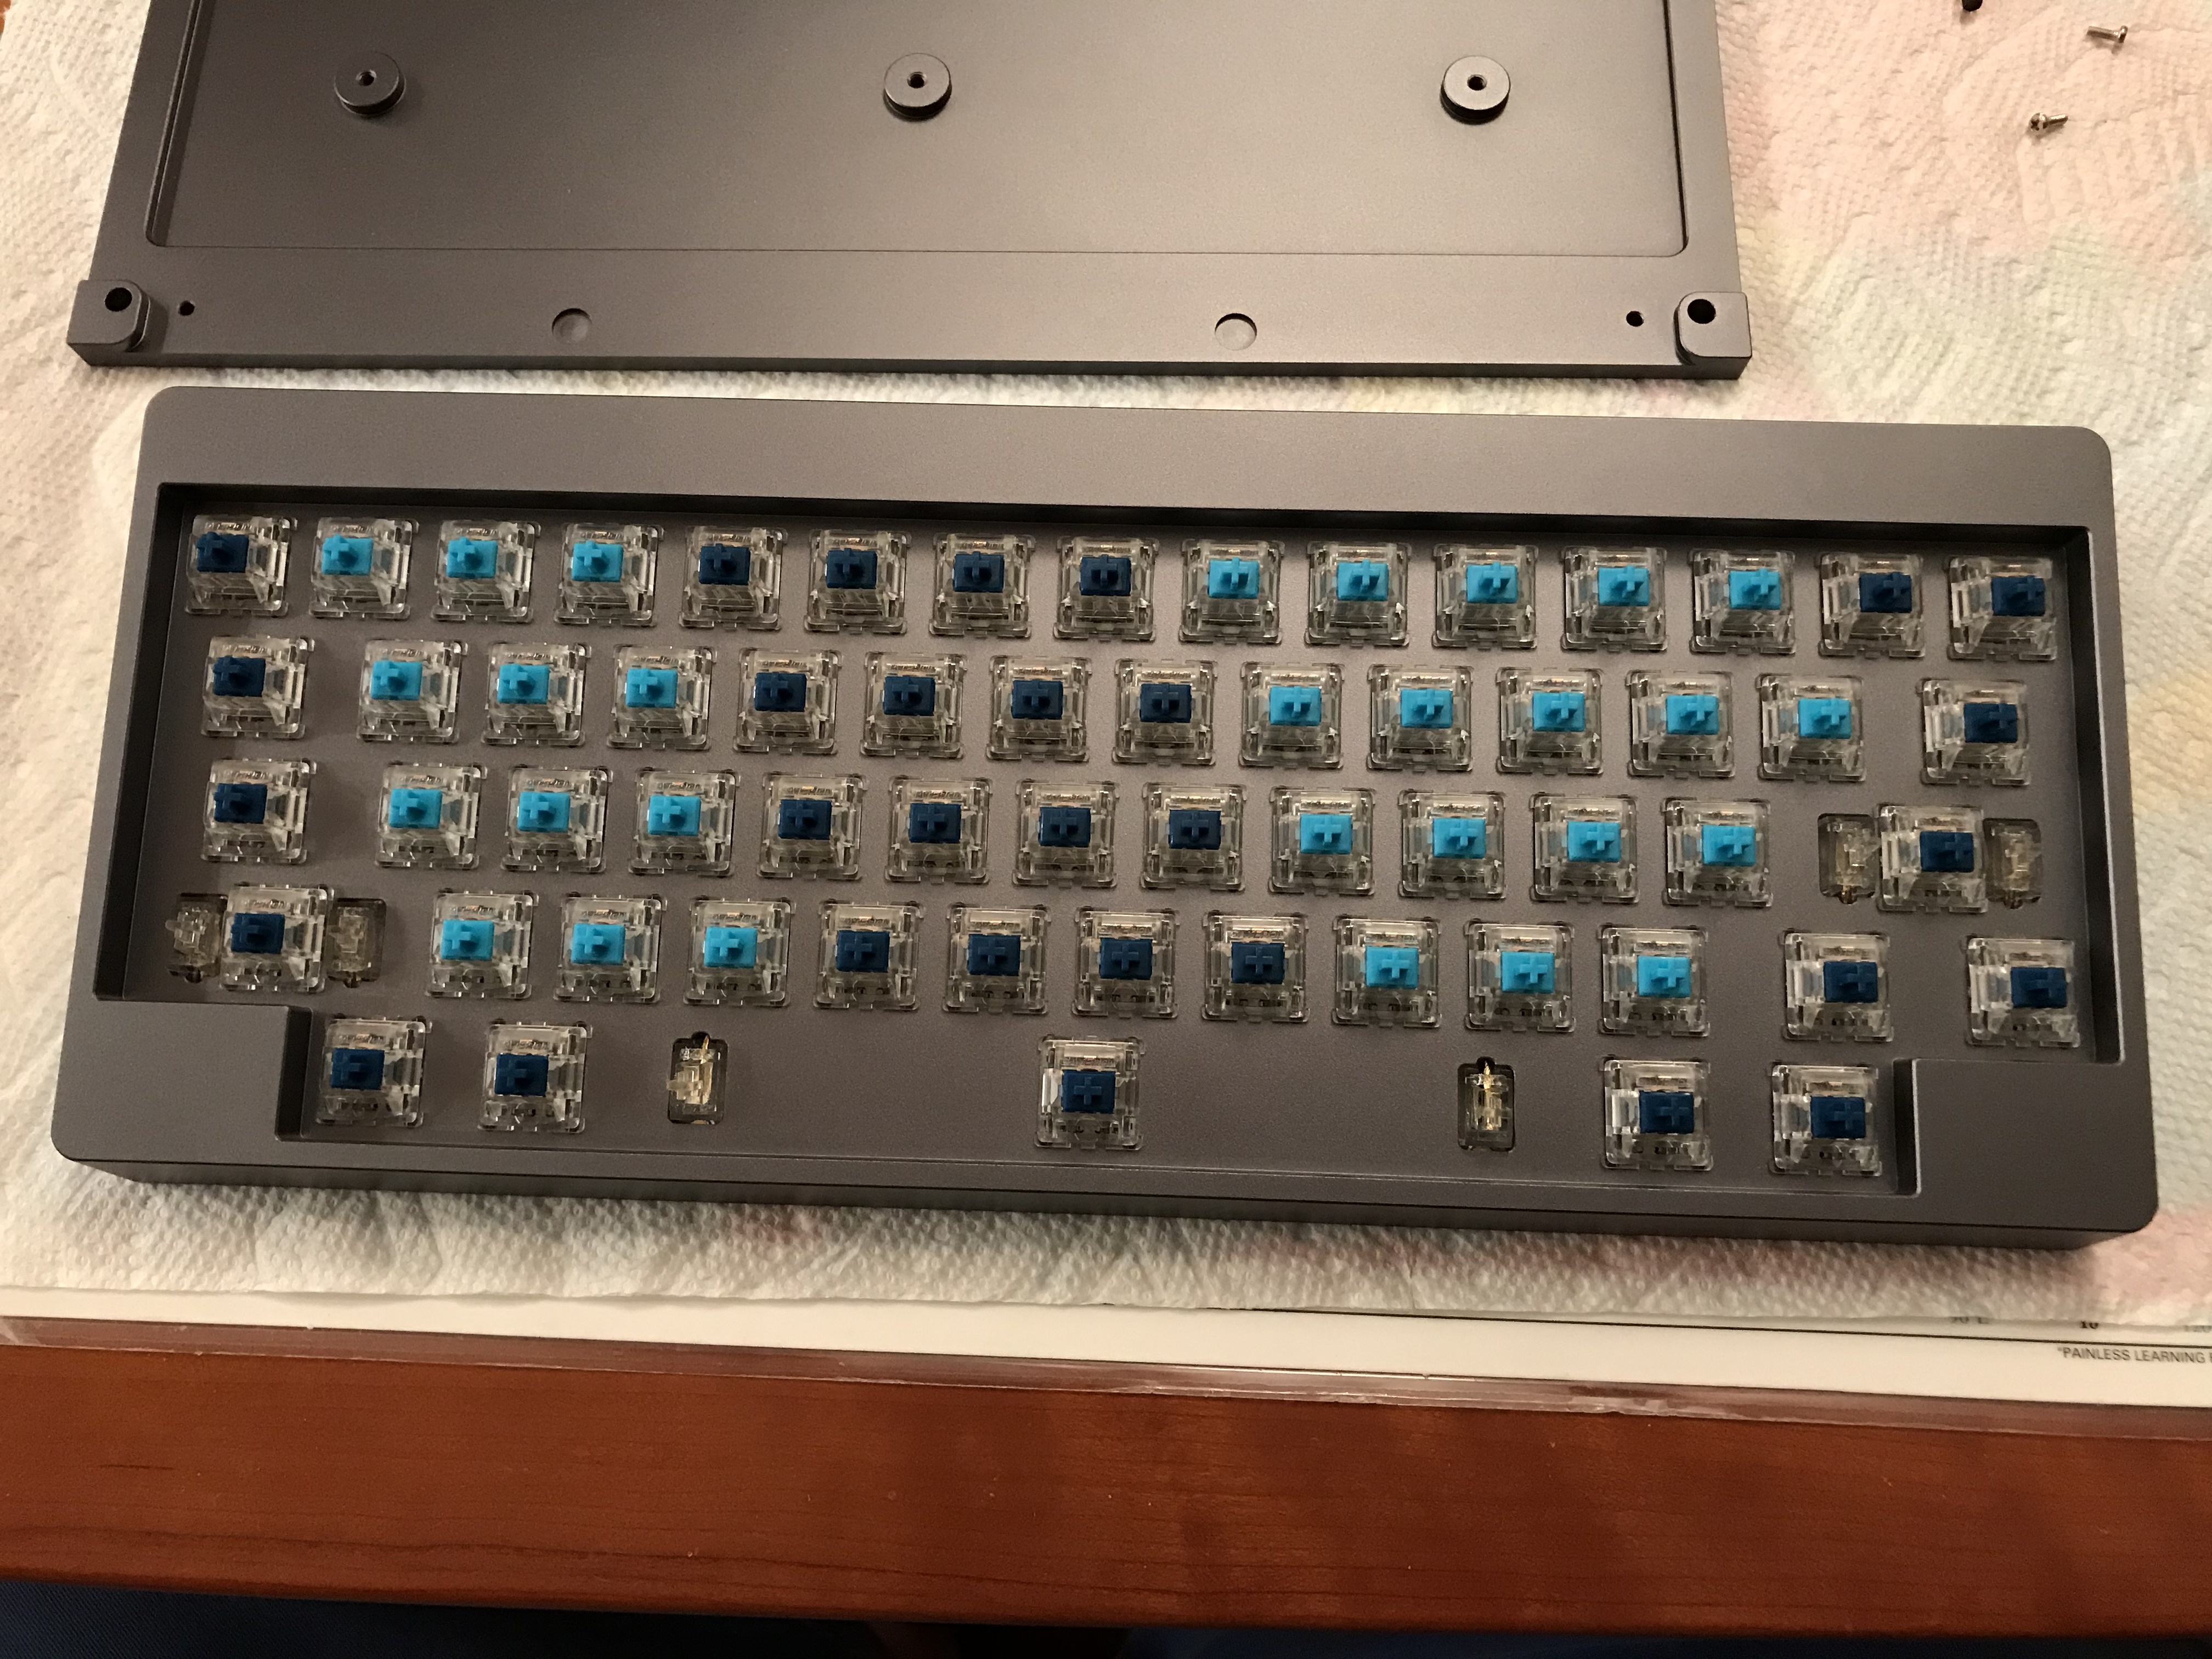
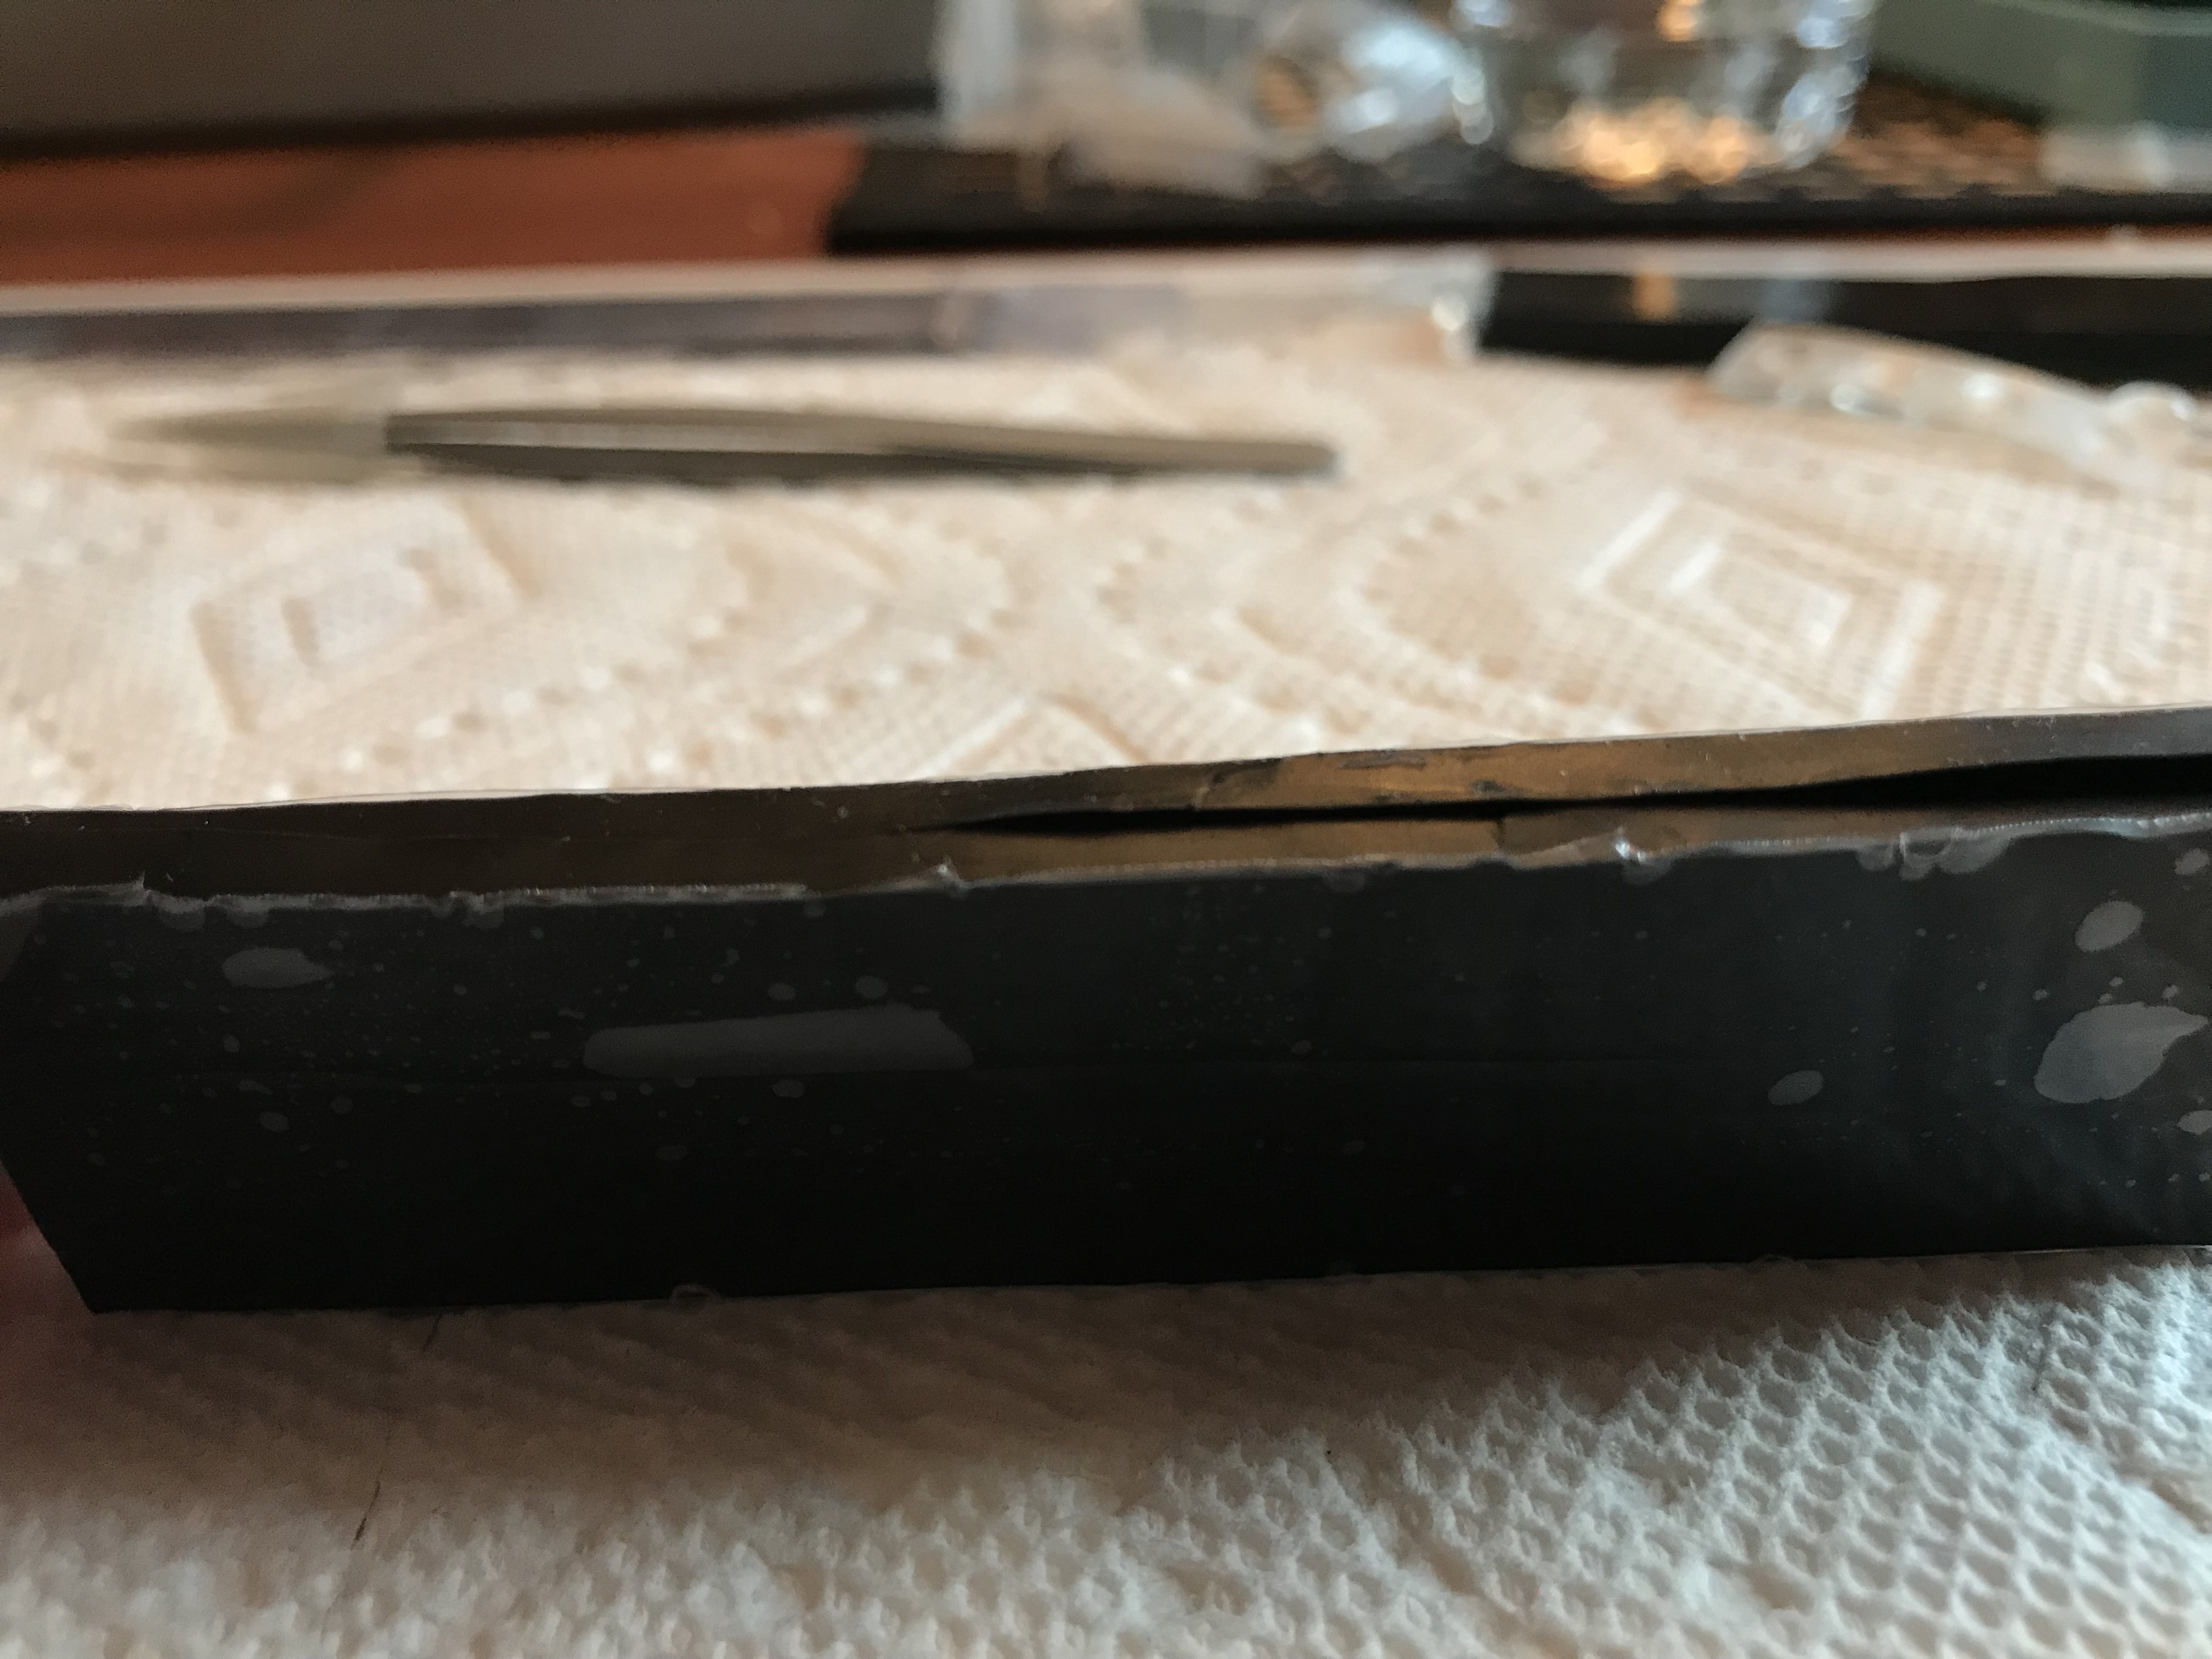
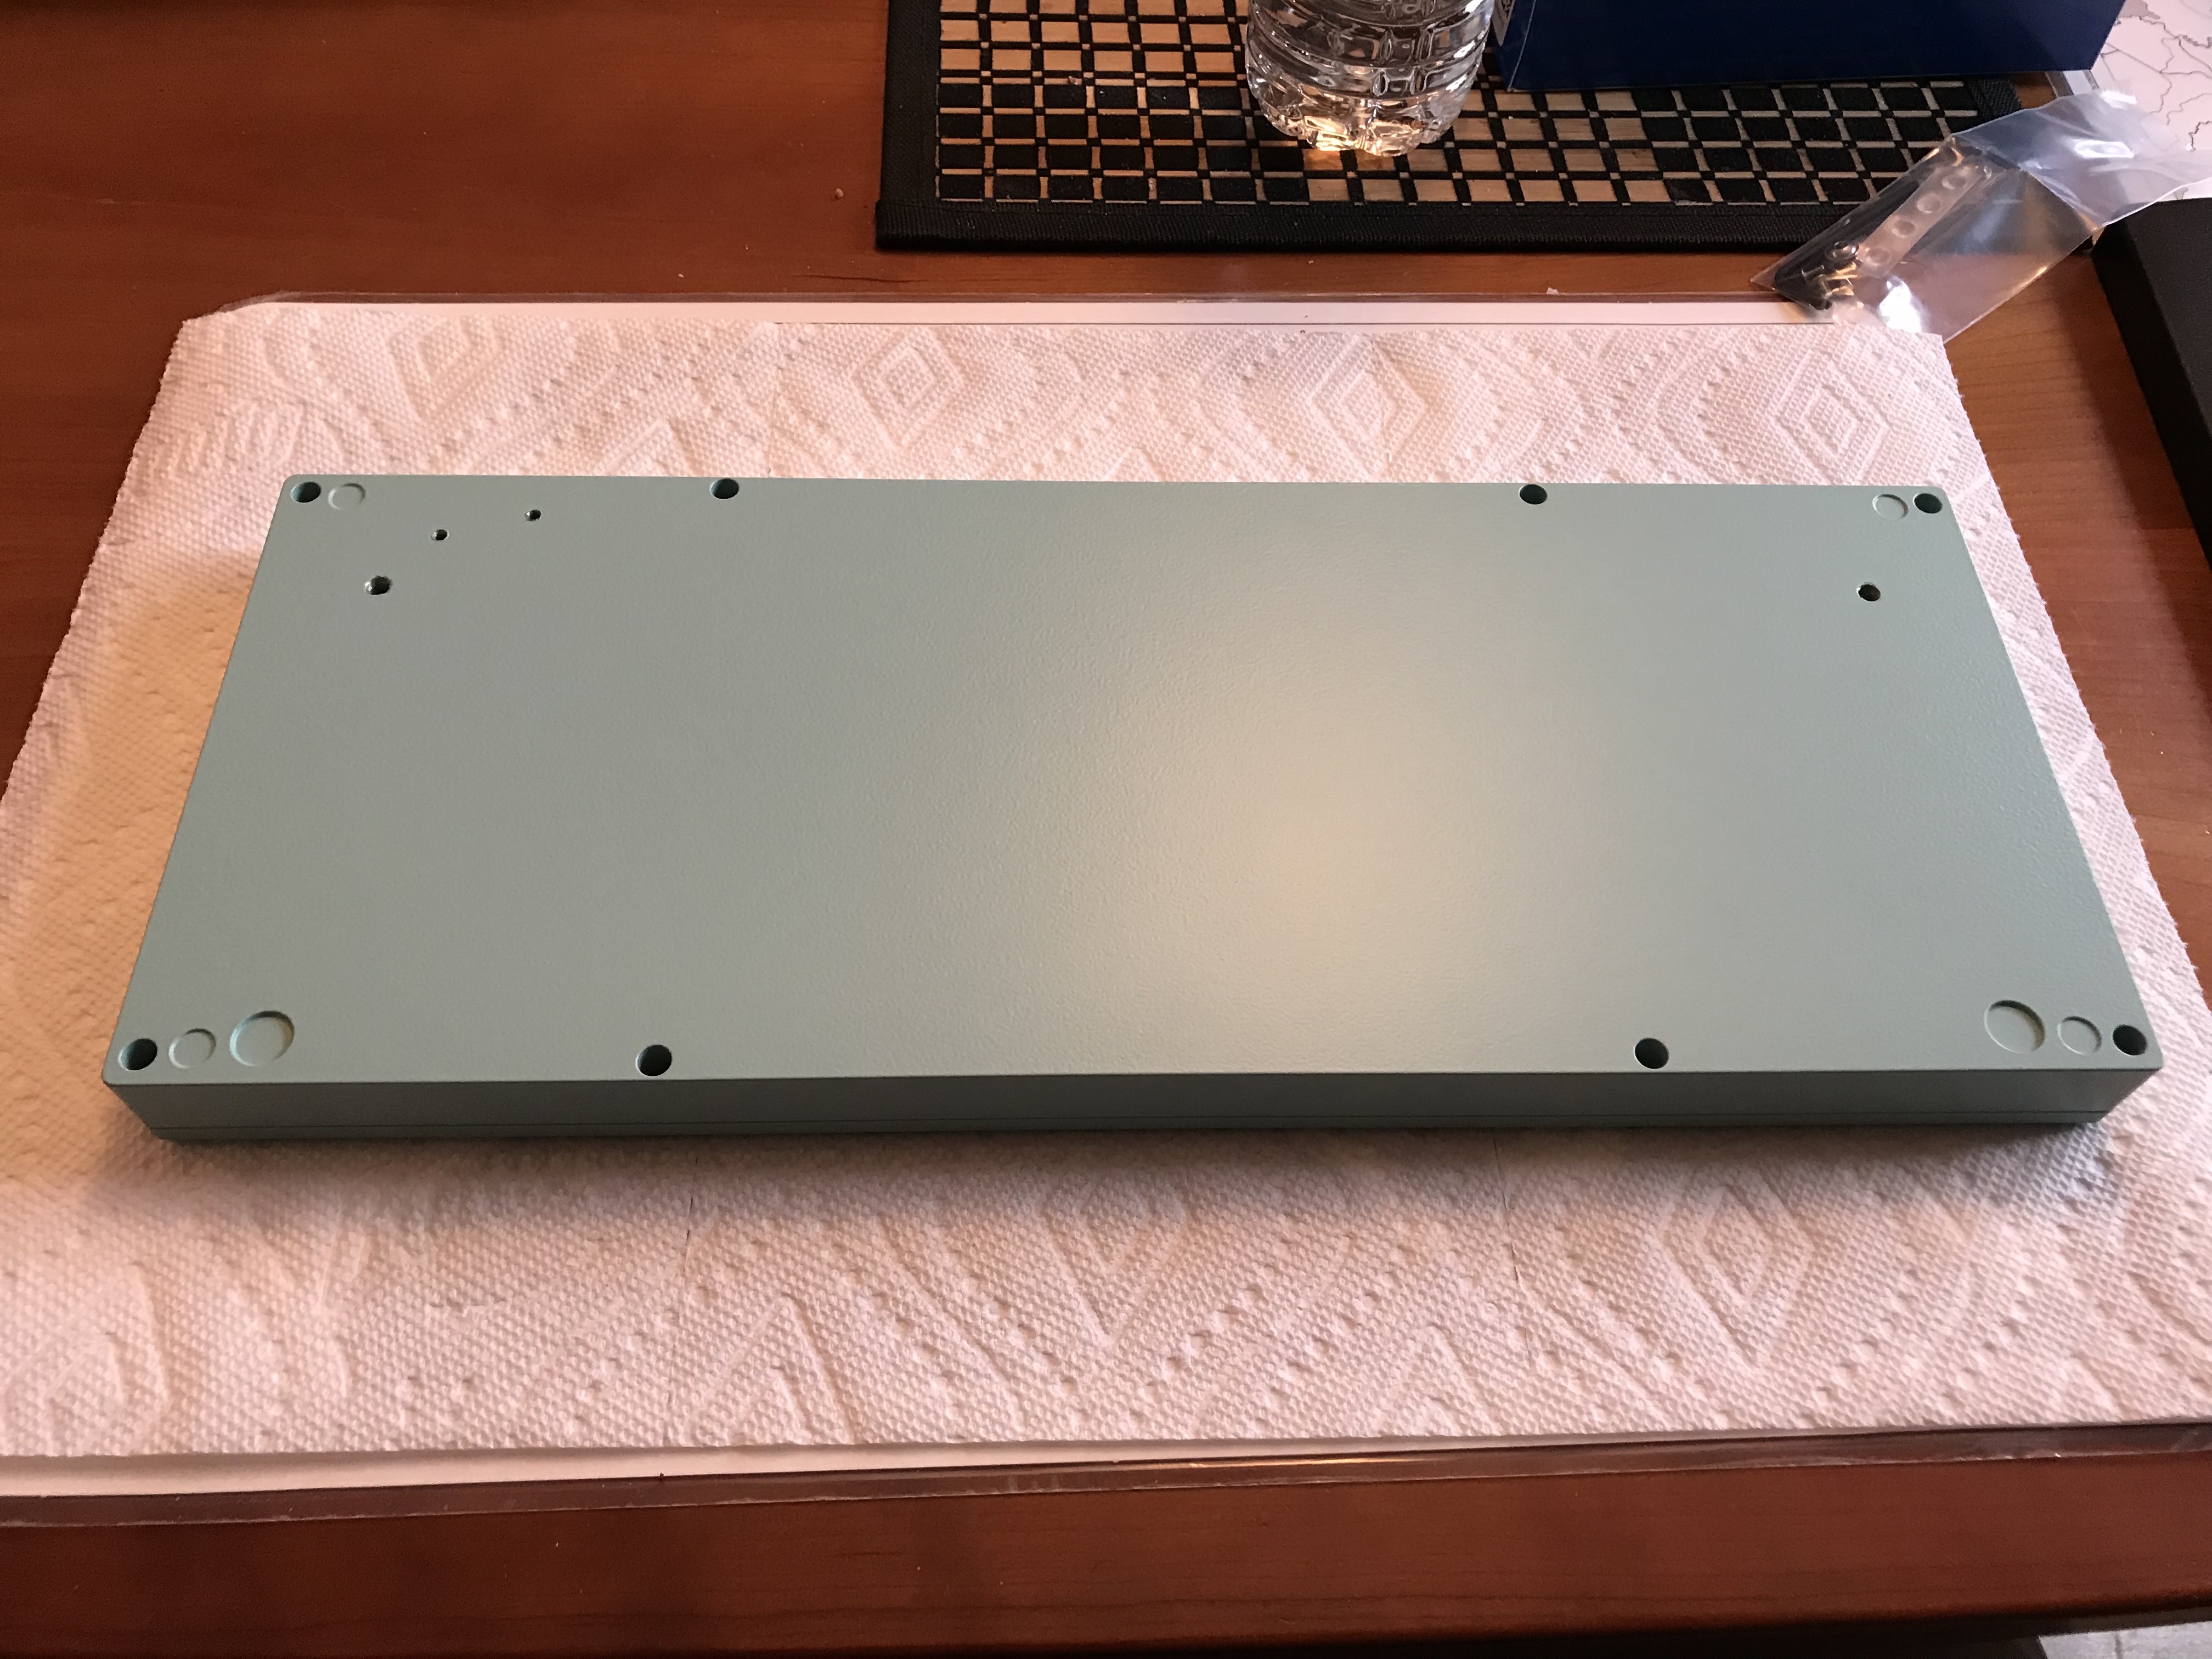
The Ocelot case consists of two parts: a matte-finished baseplate and a top case with an integrated plate.

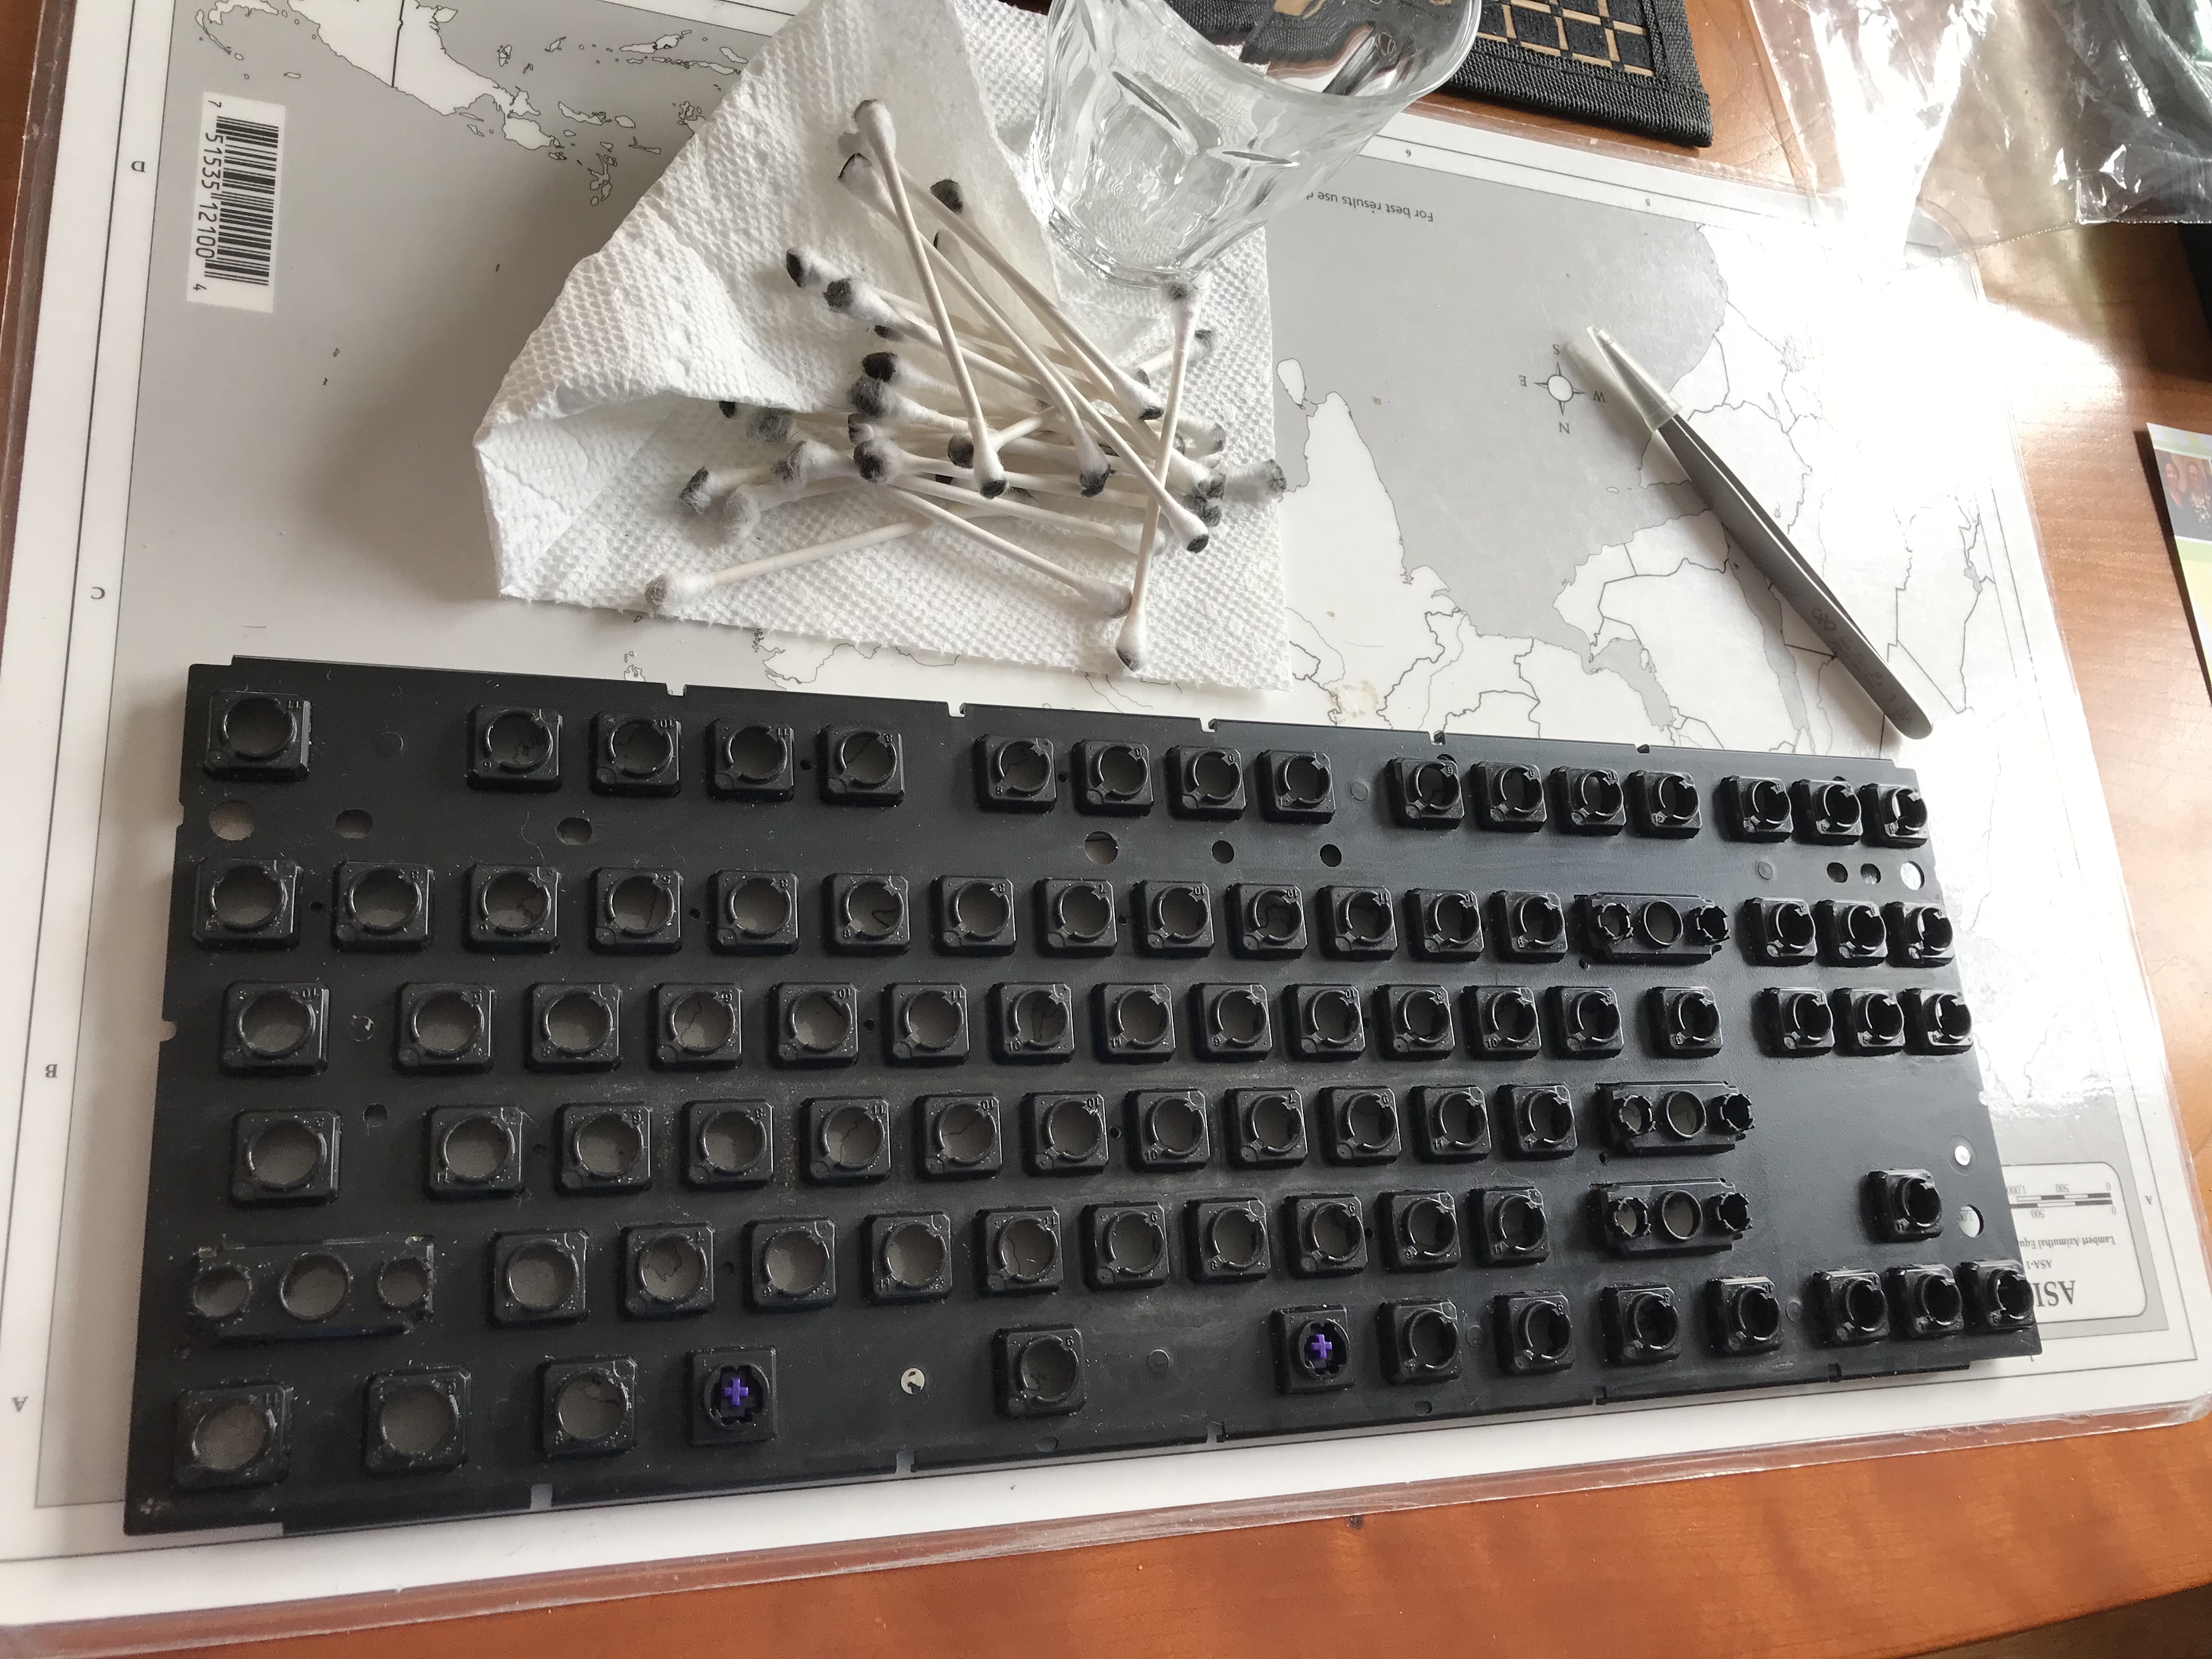
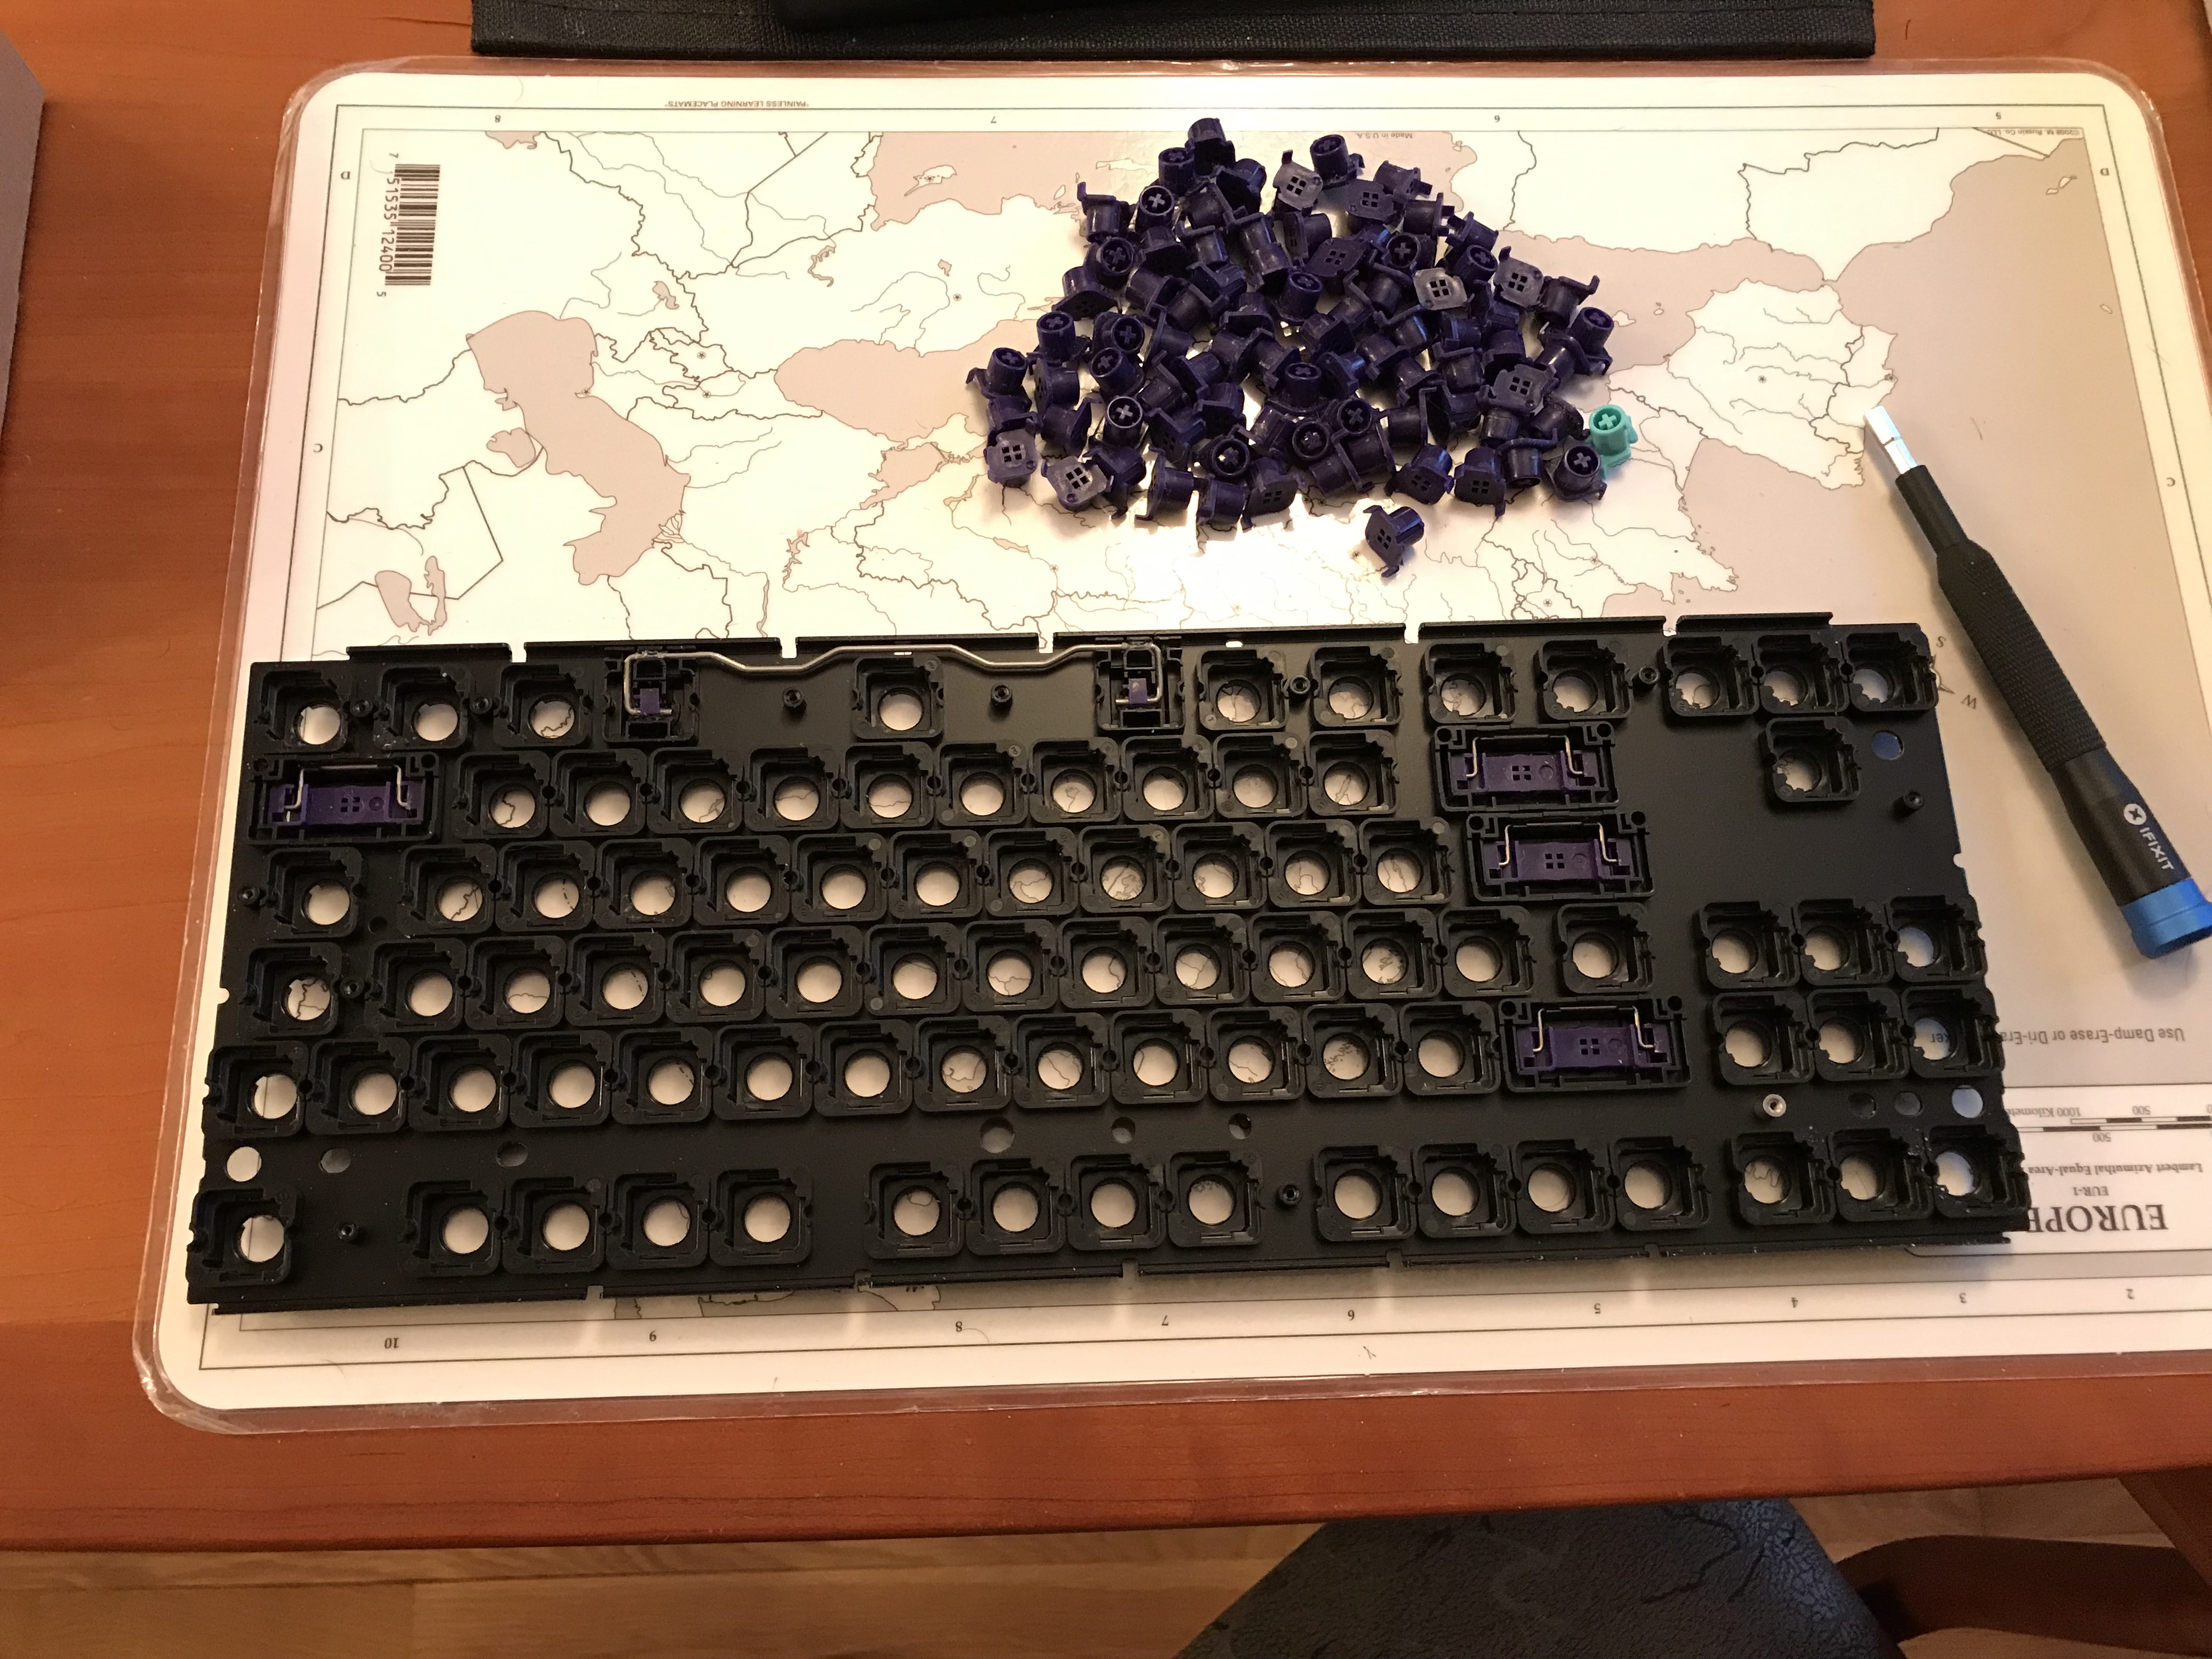
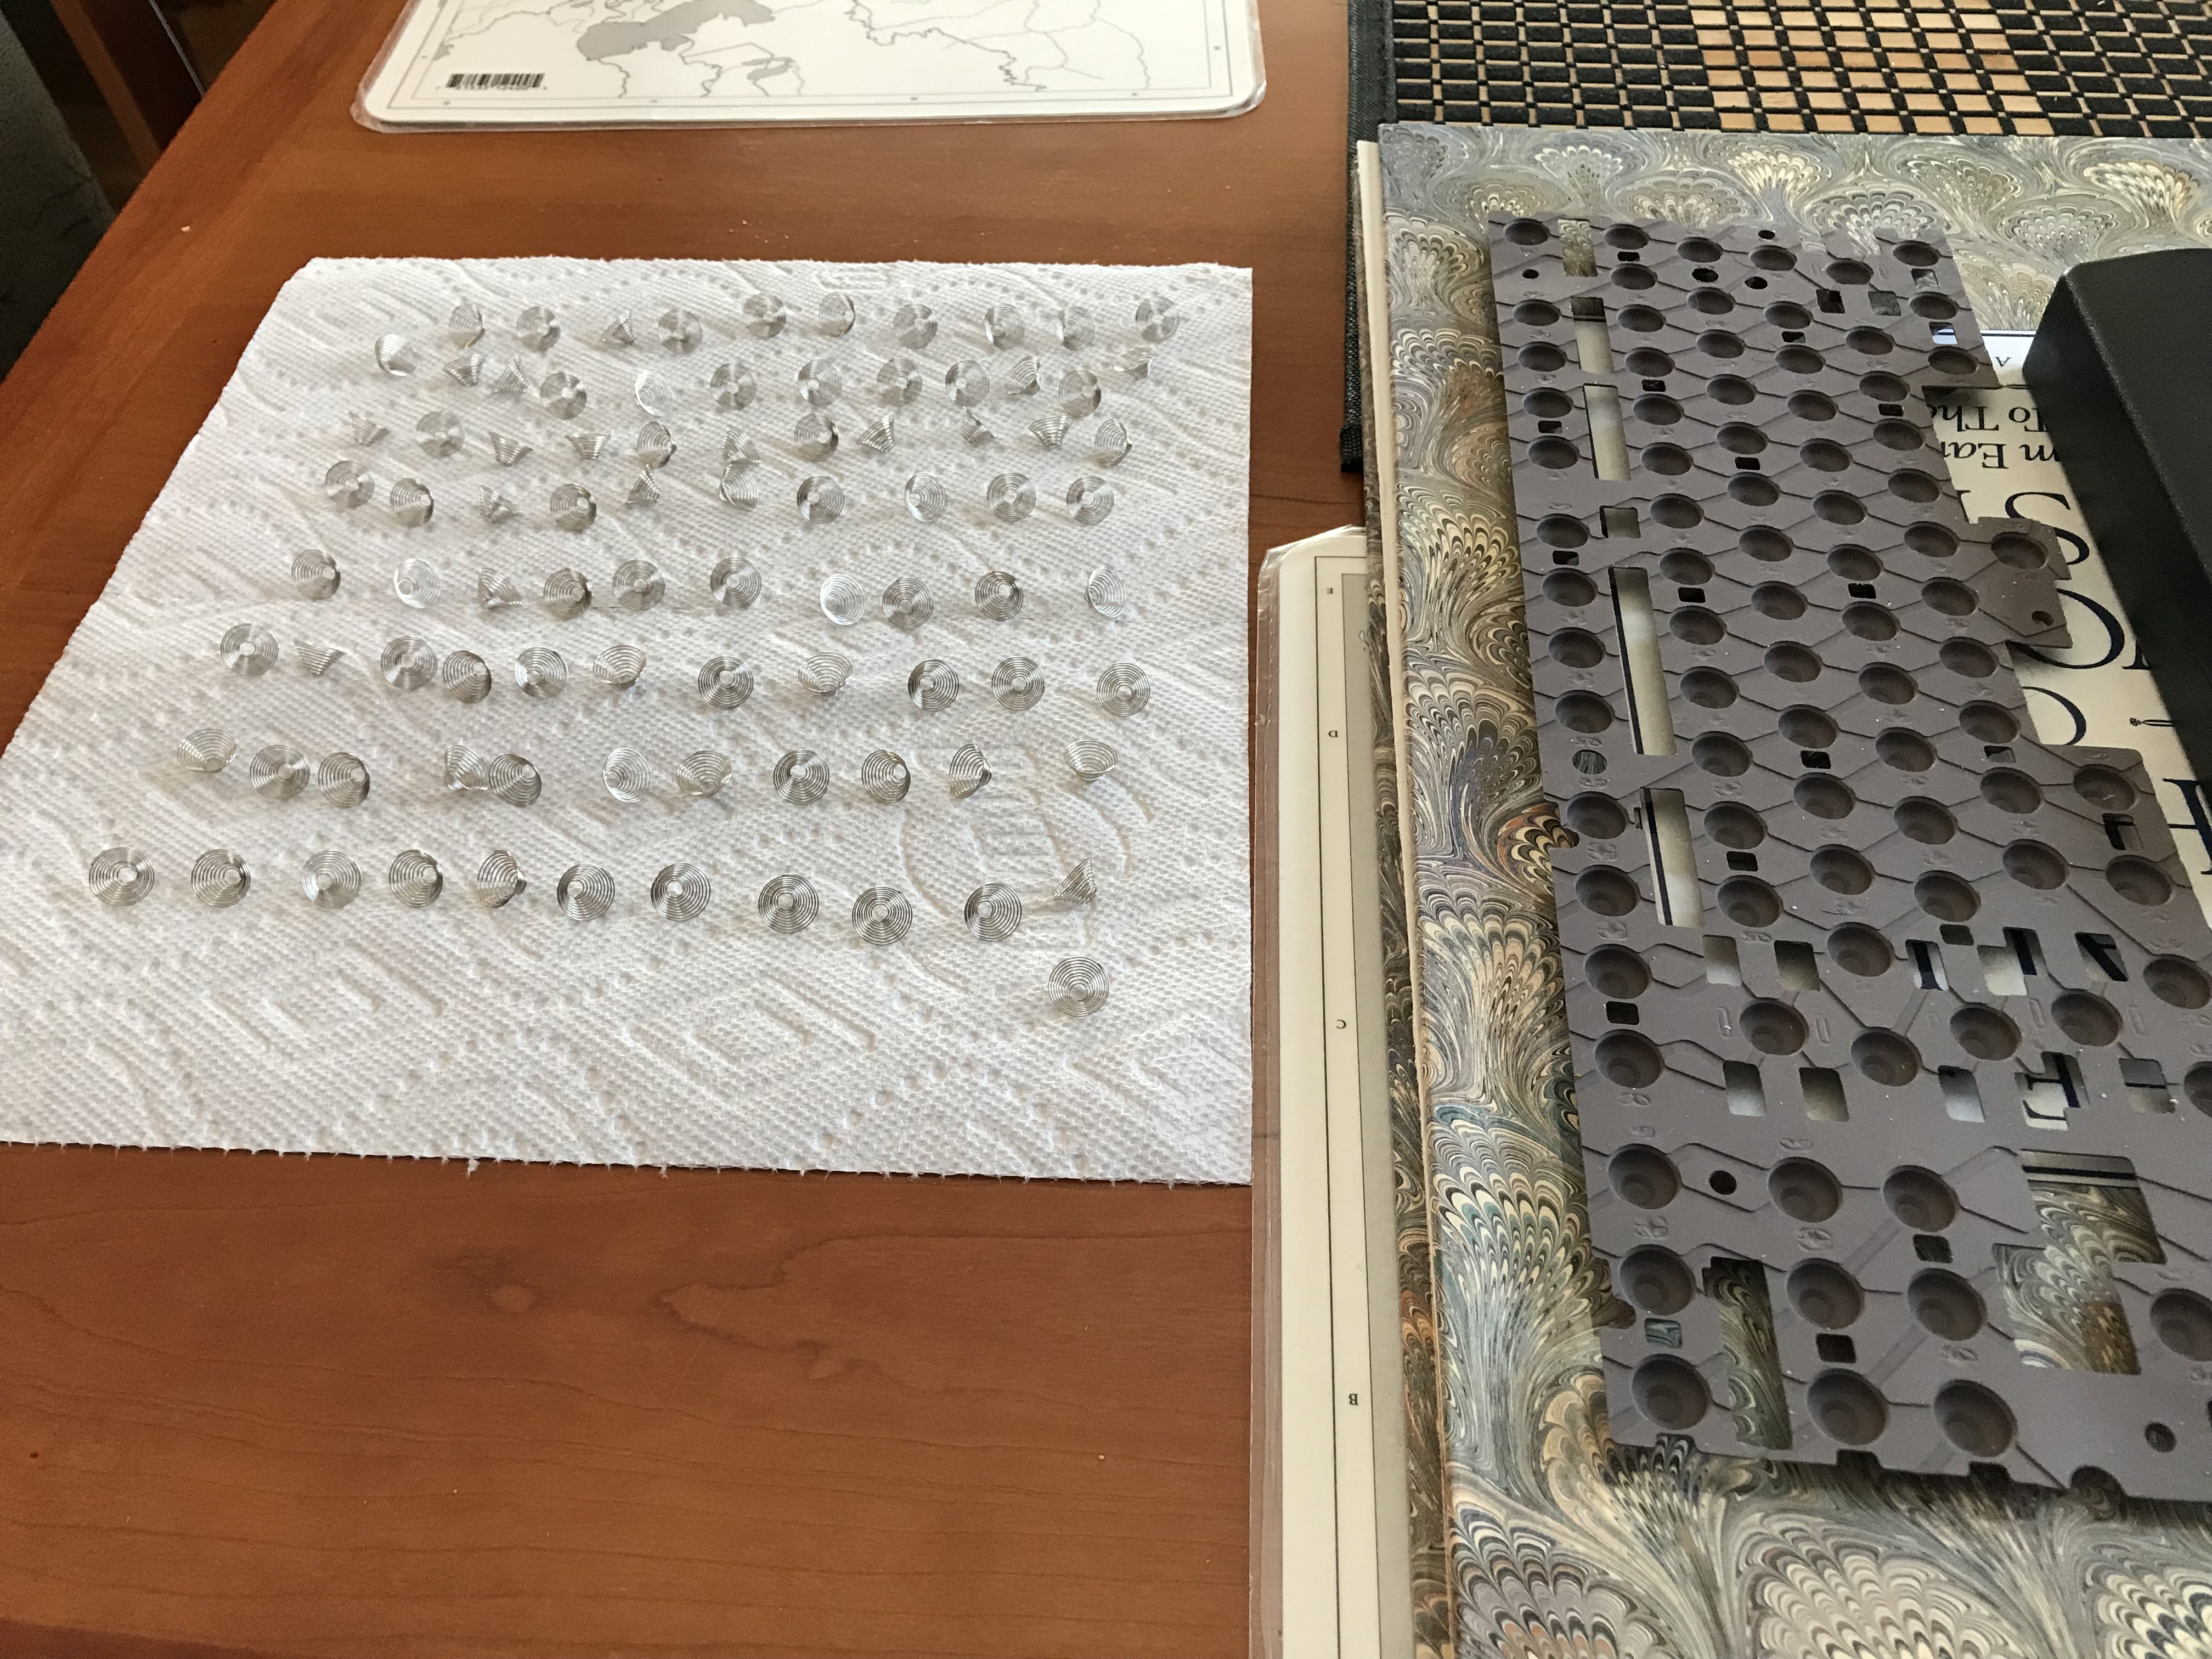
There’s no mounting screws for the PCB, so we begin by inserting switches into the integrated plate.
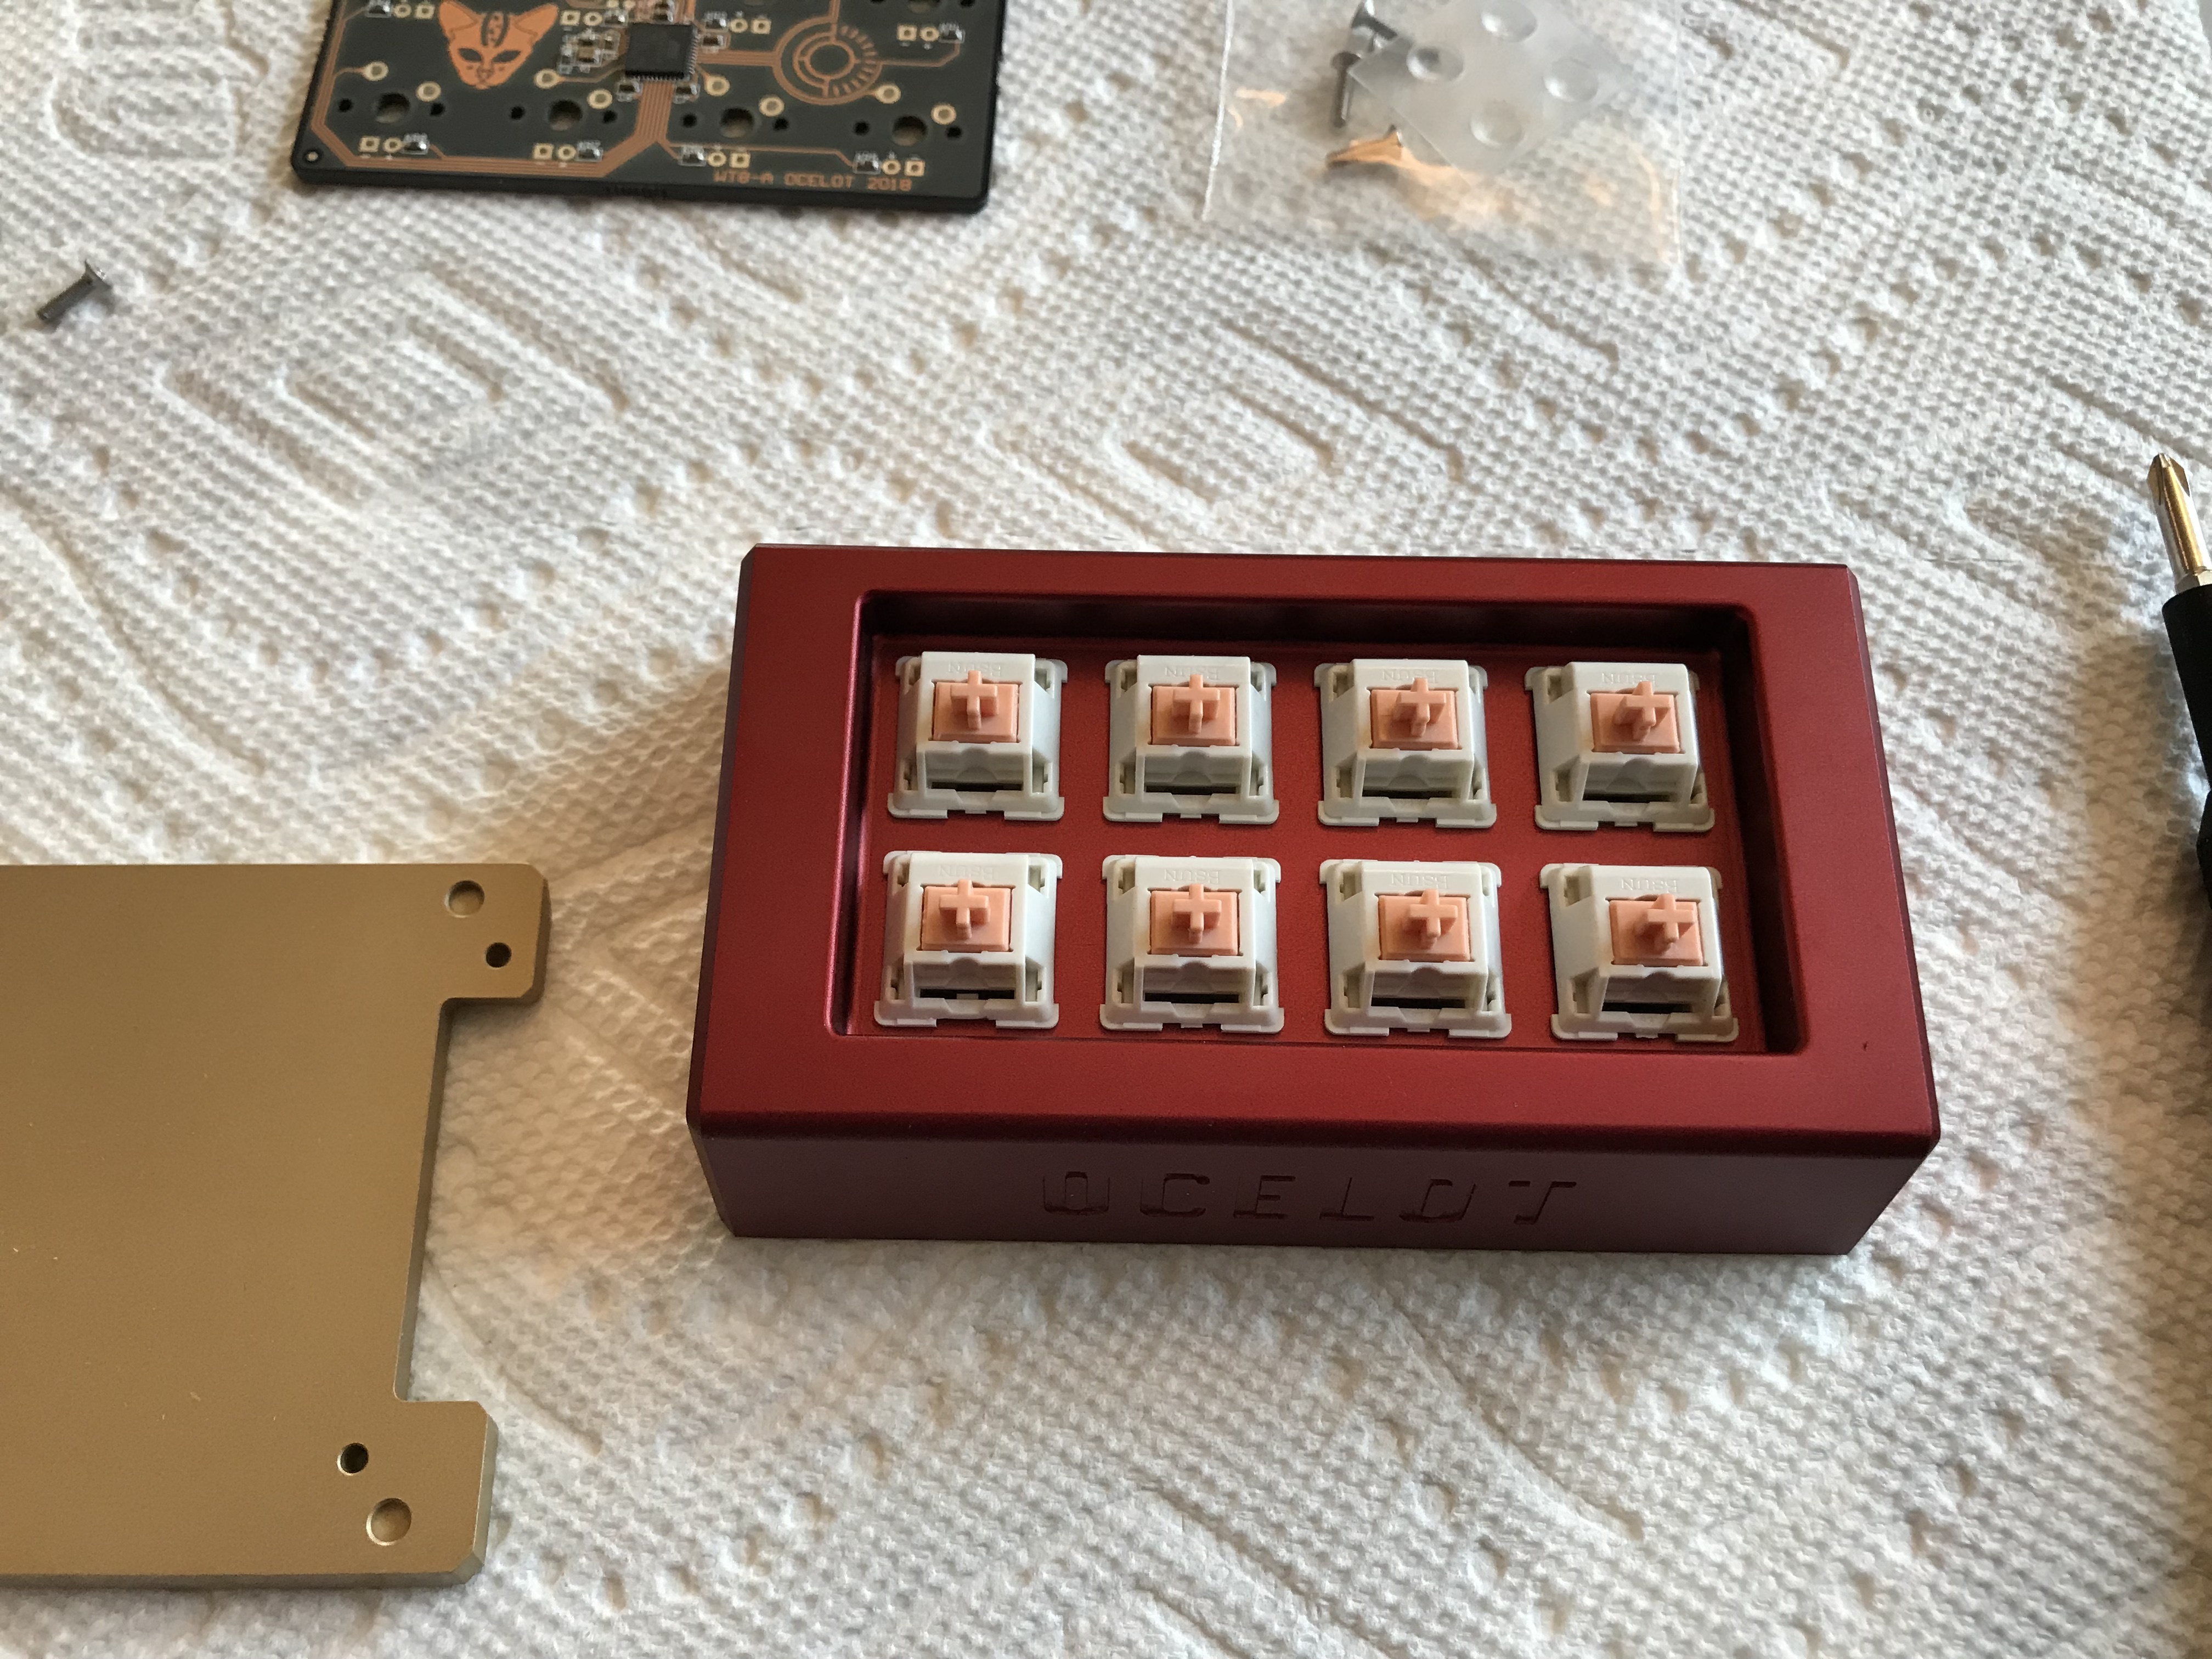
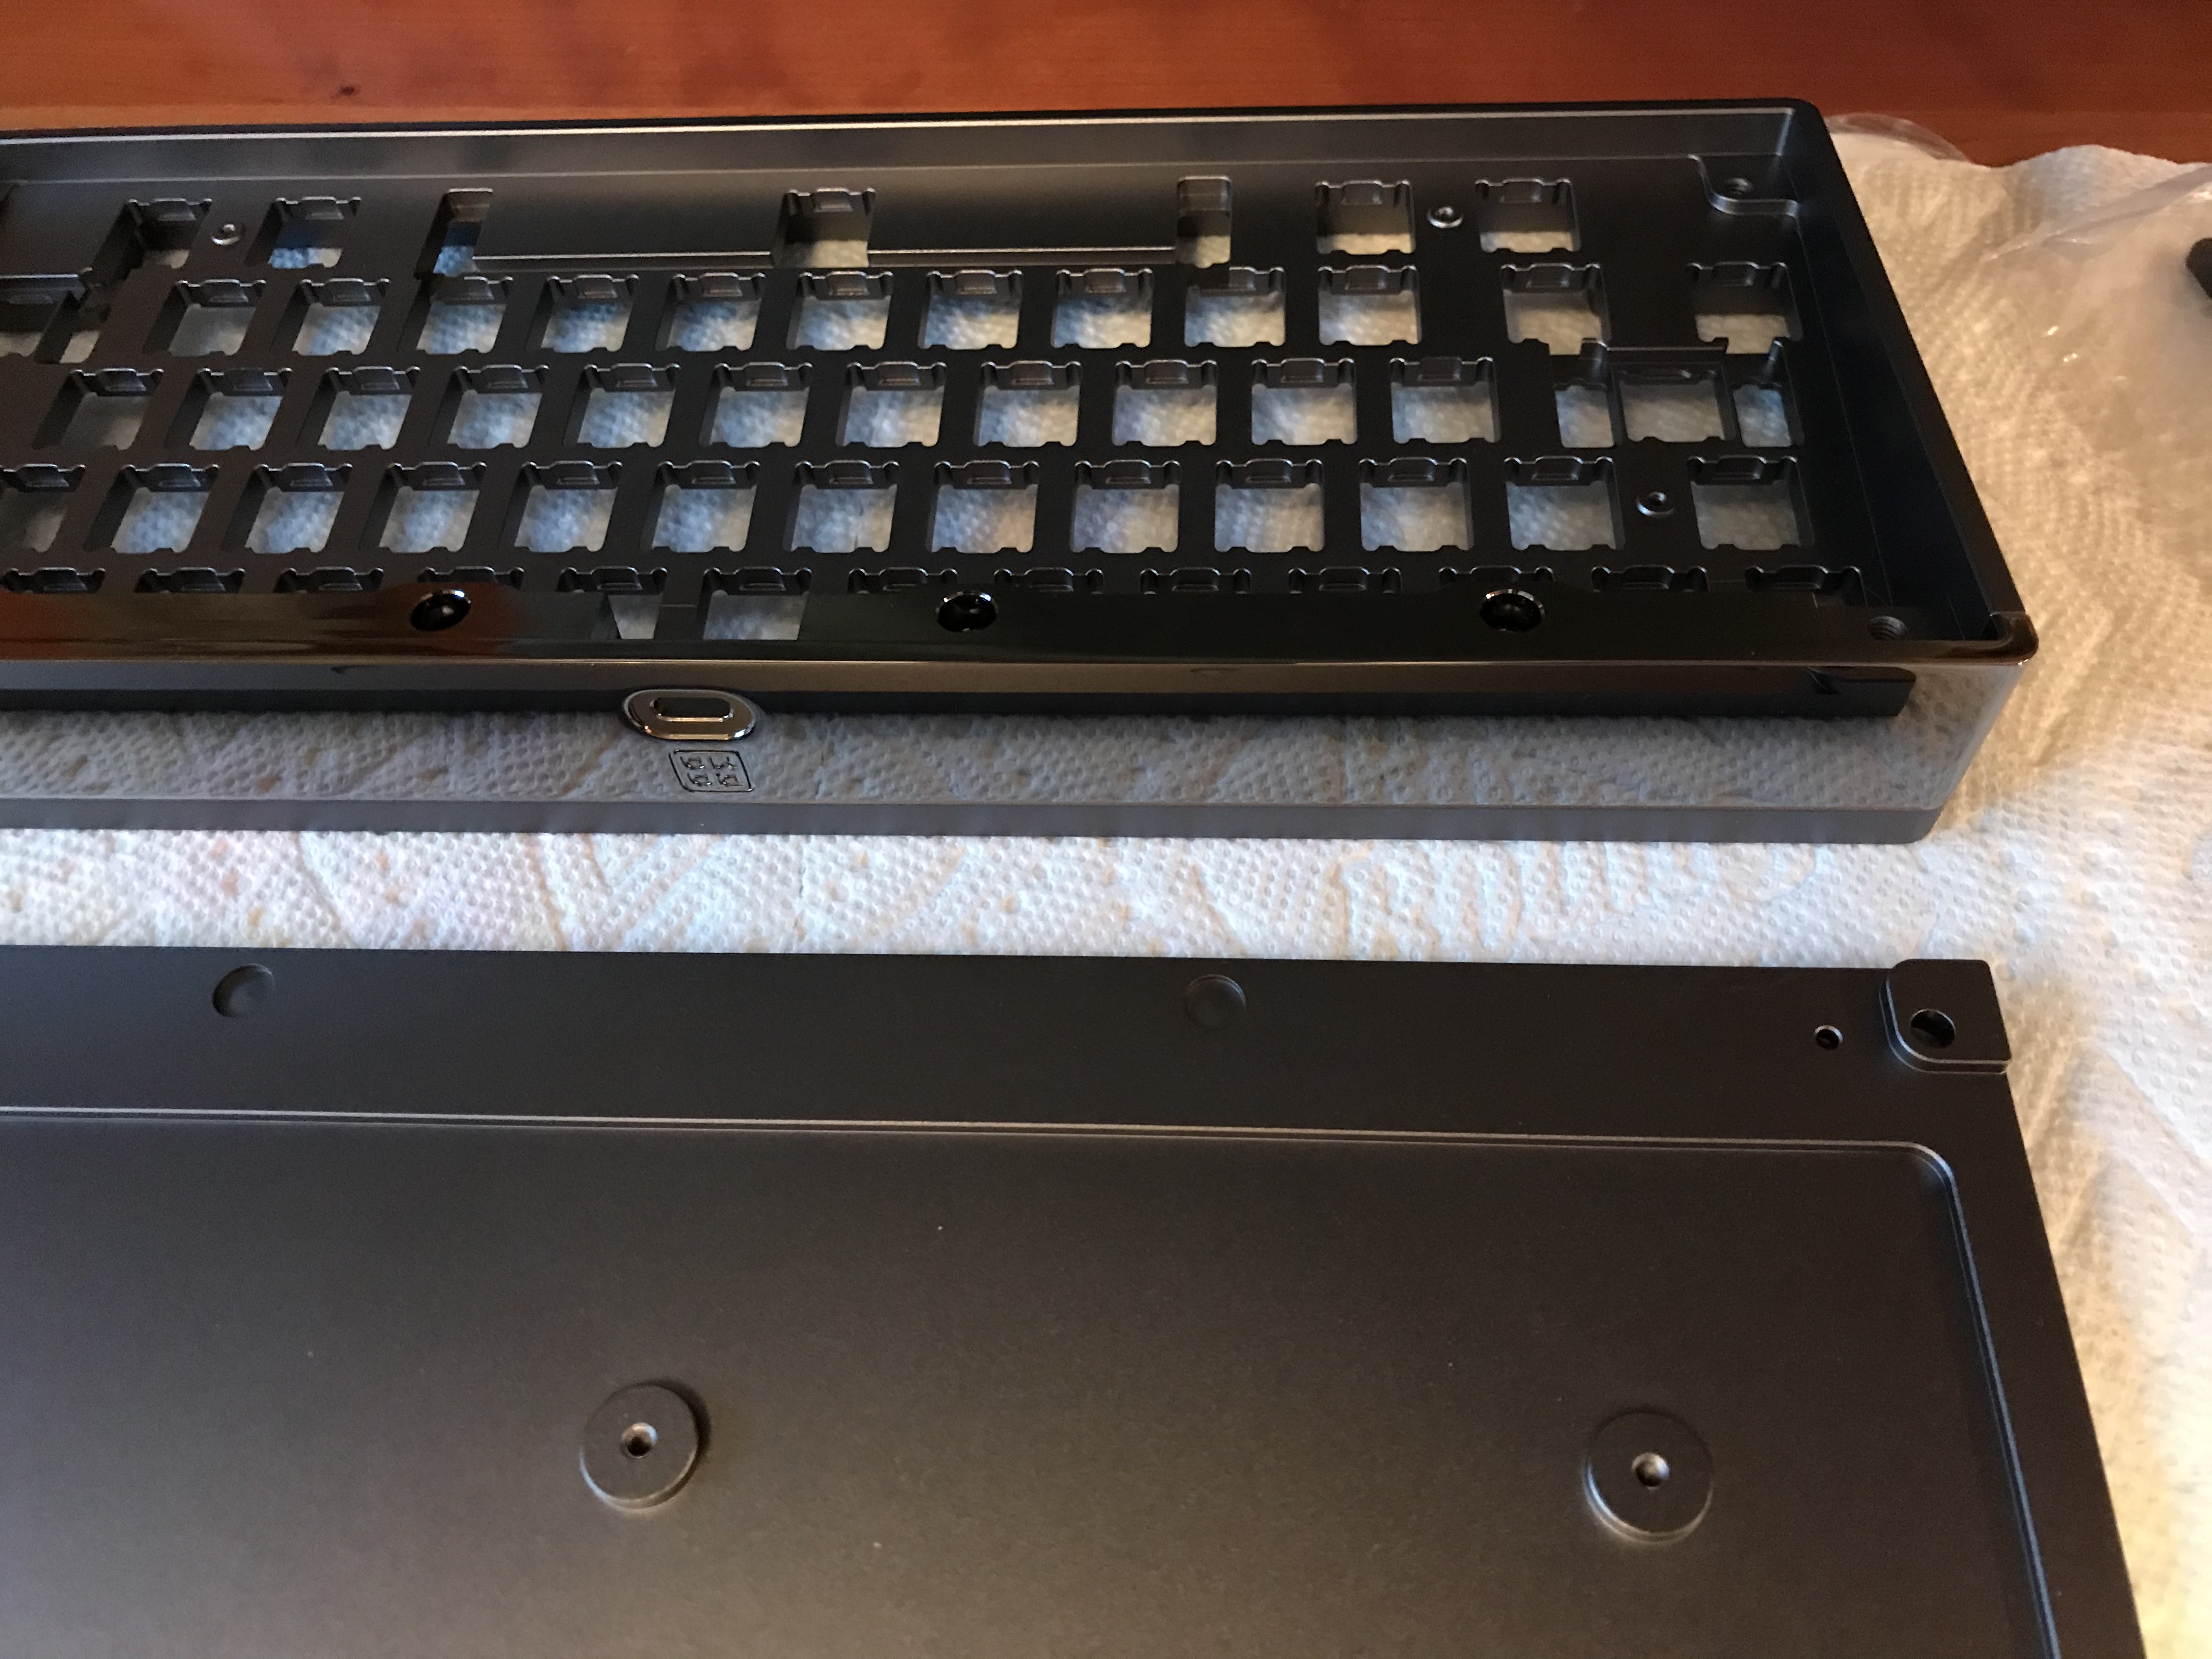
Once the switches are snapped into place, we flip the case over to make sure everything is lined up nice and neat.
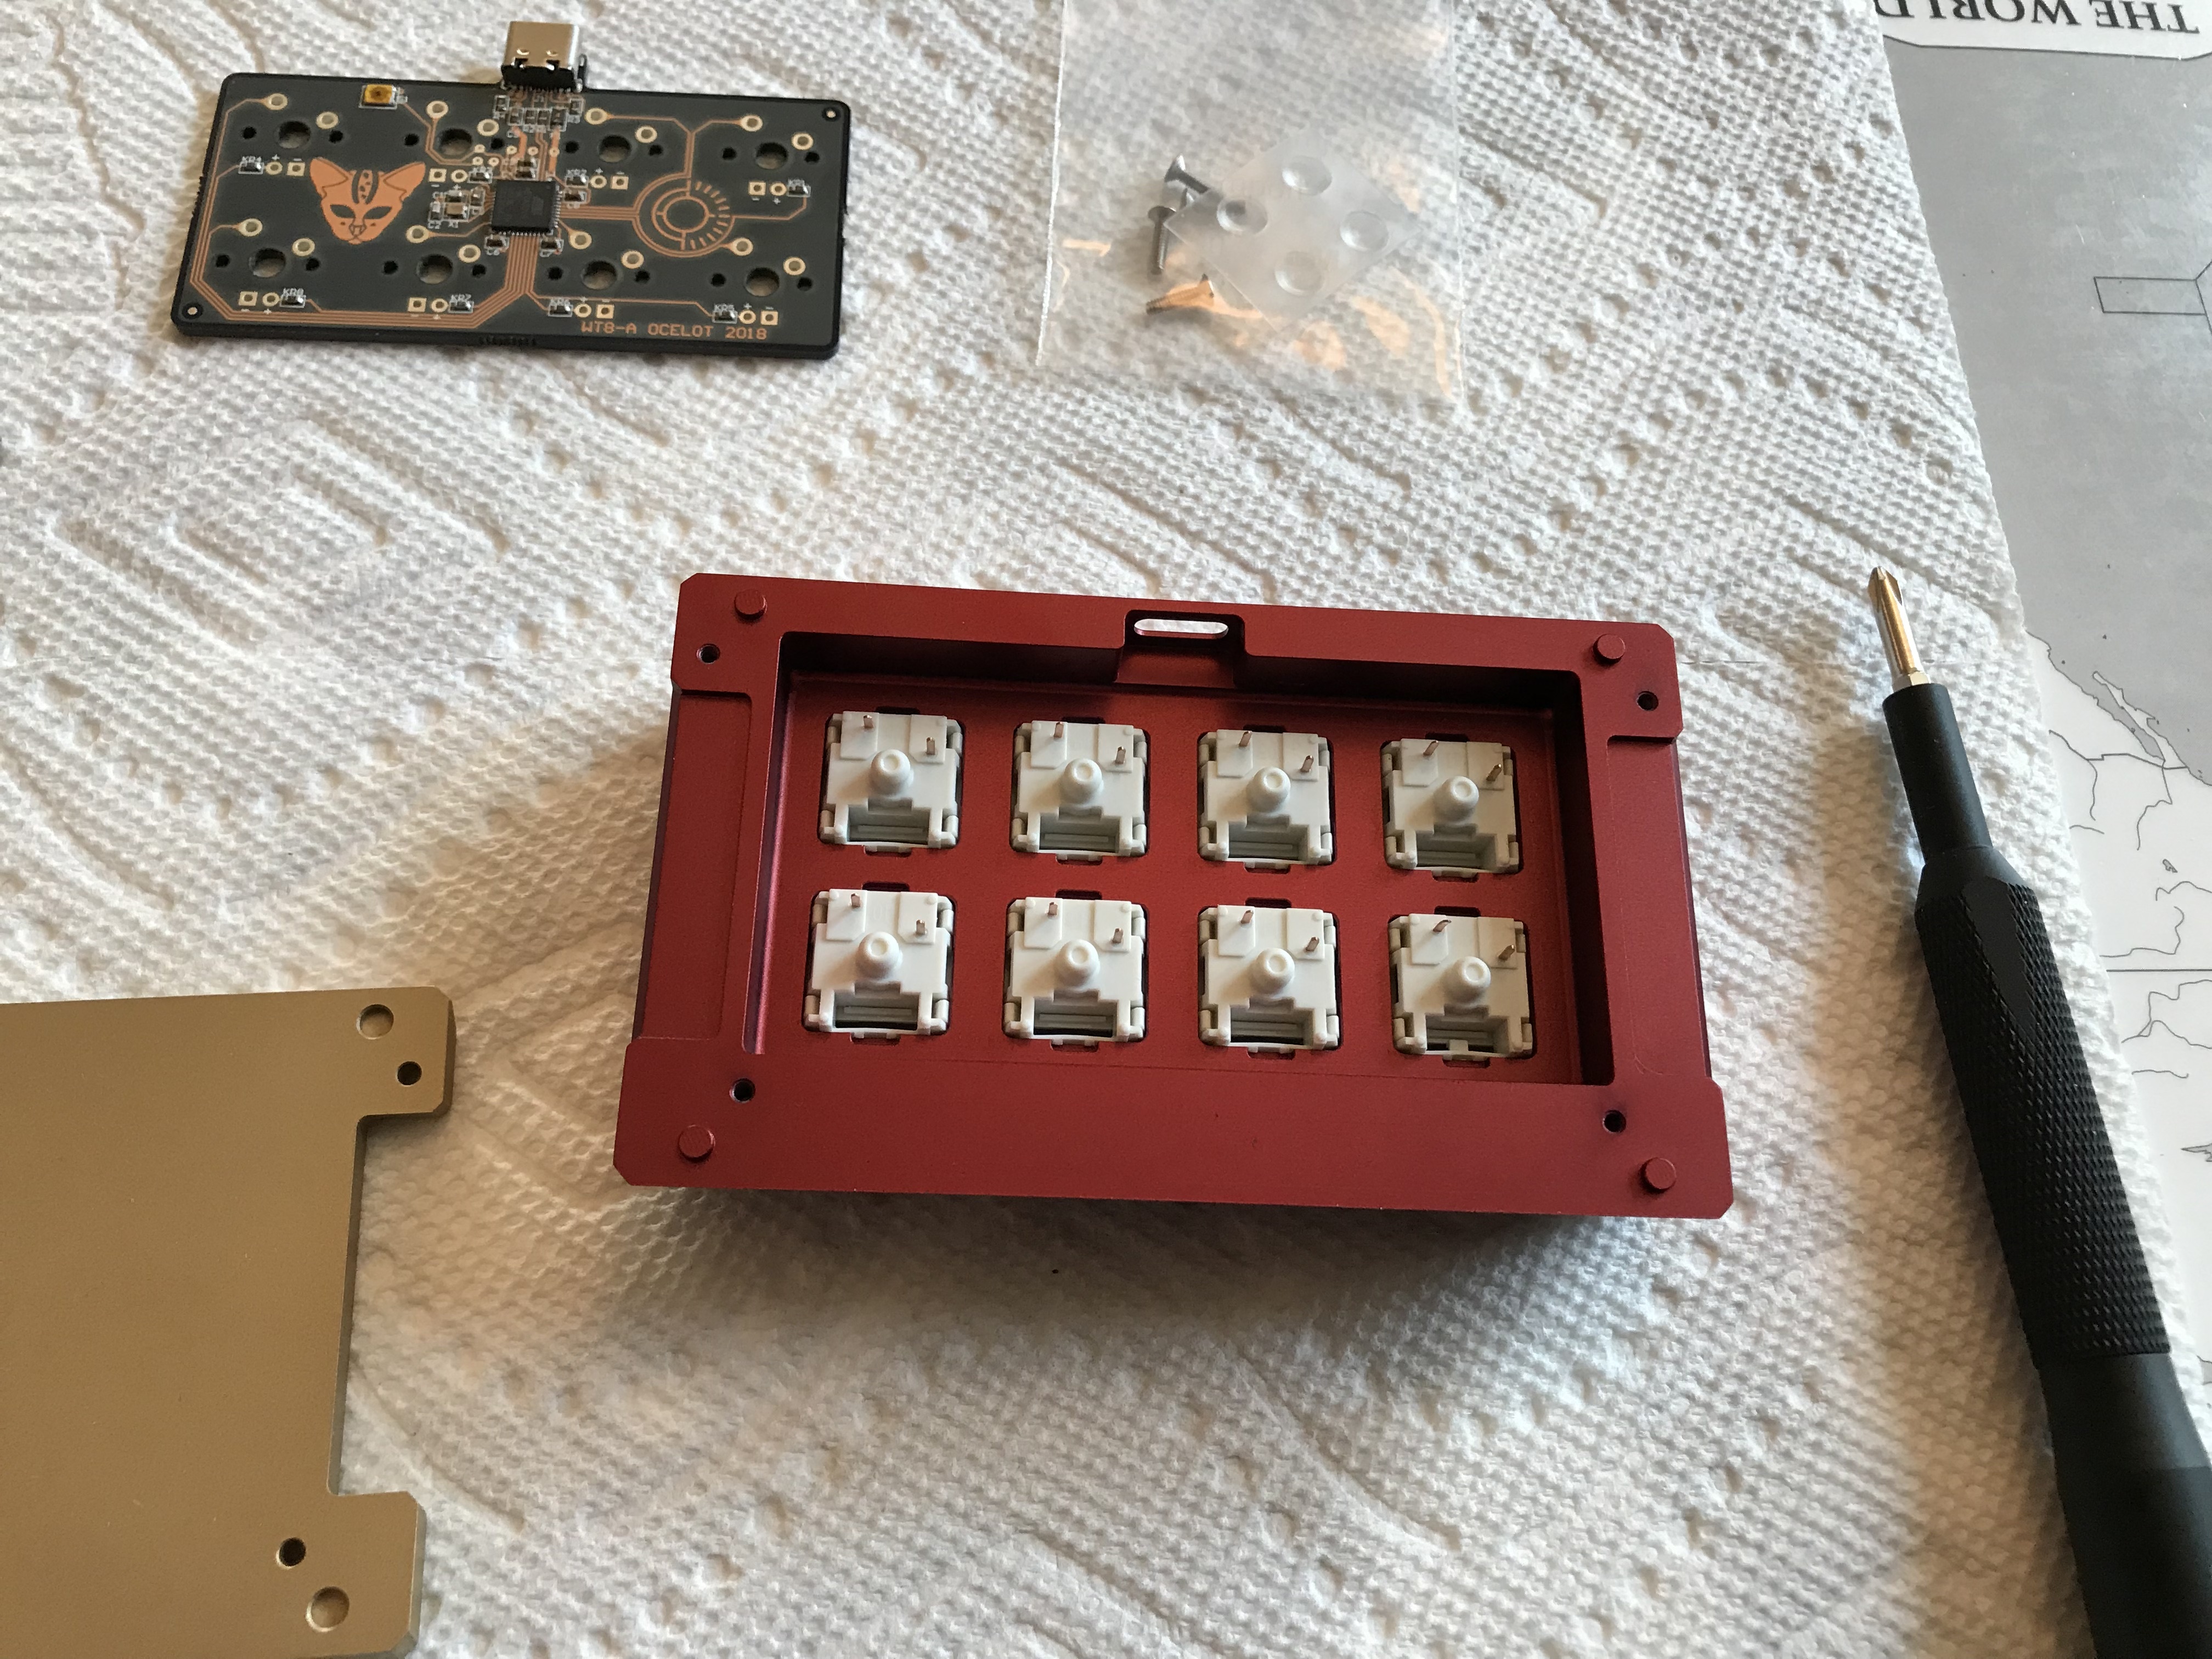
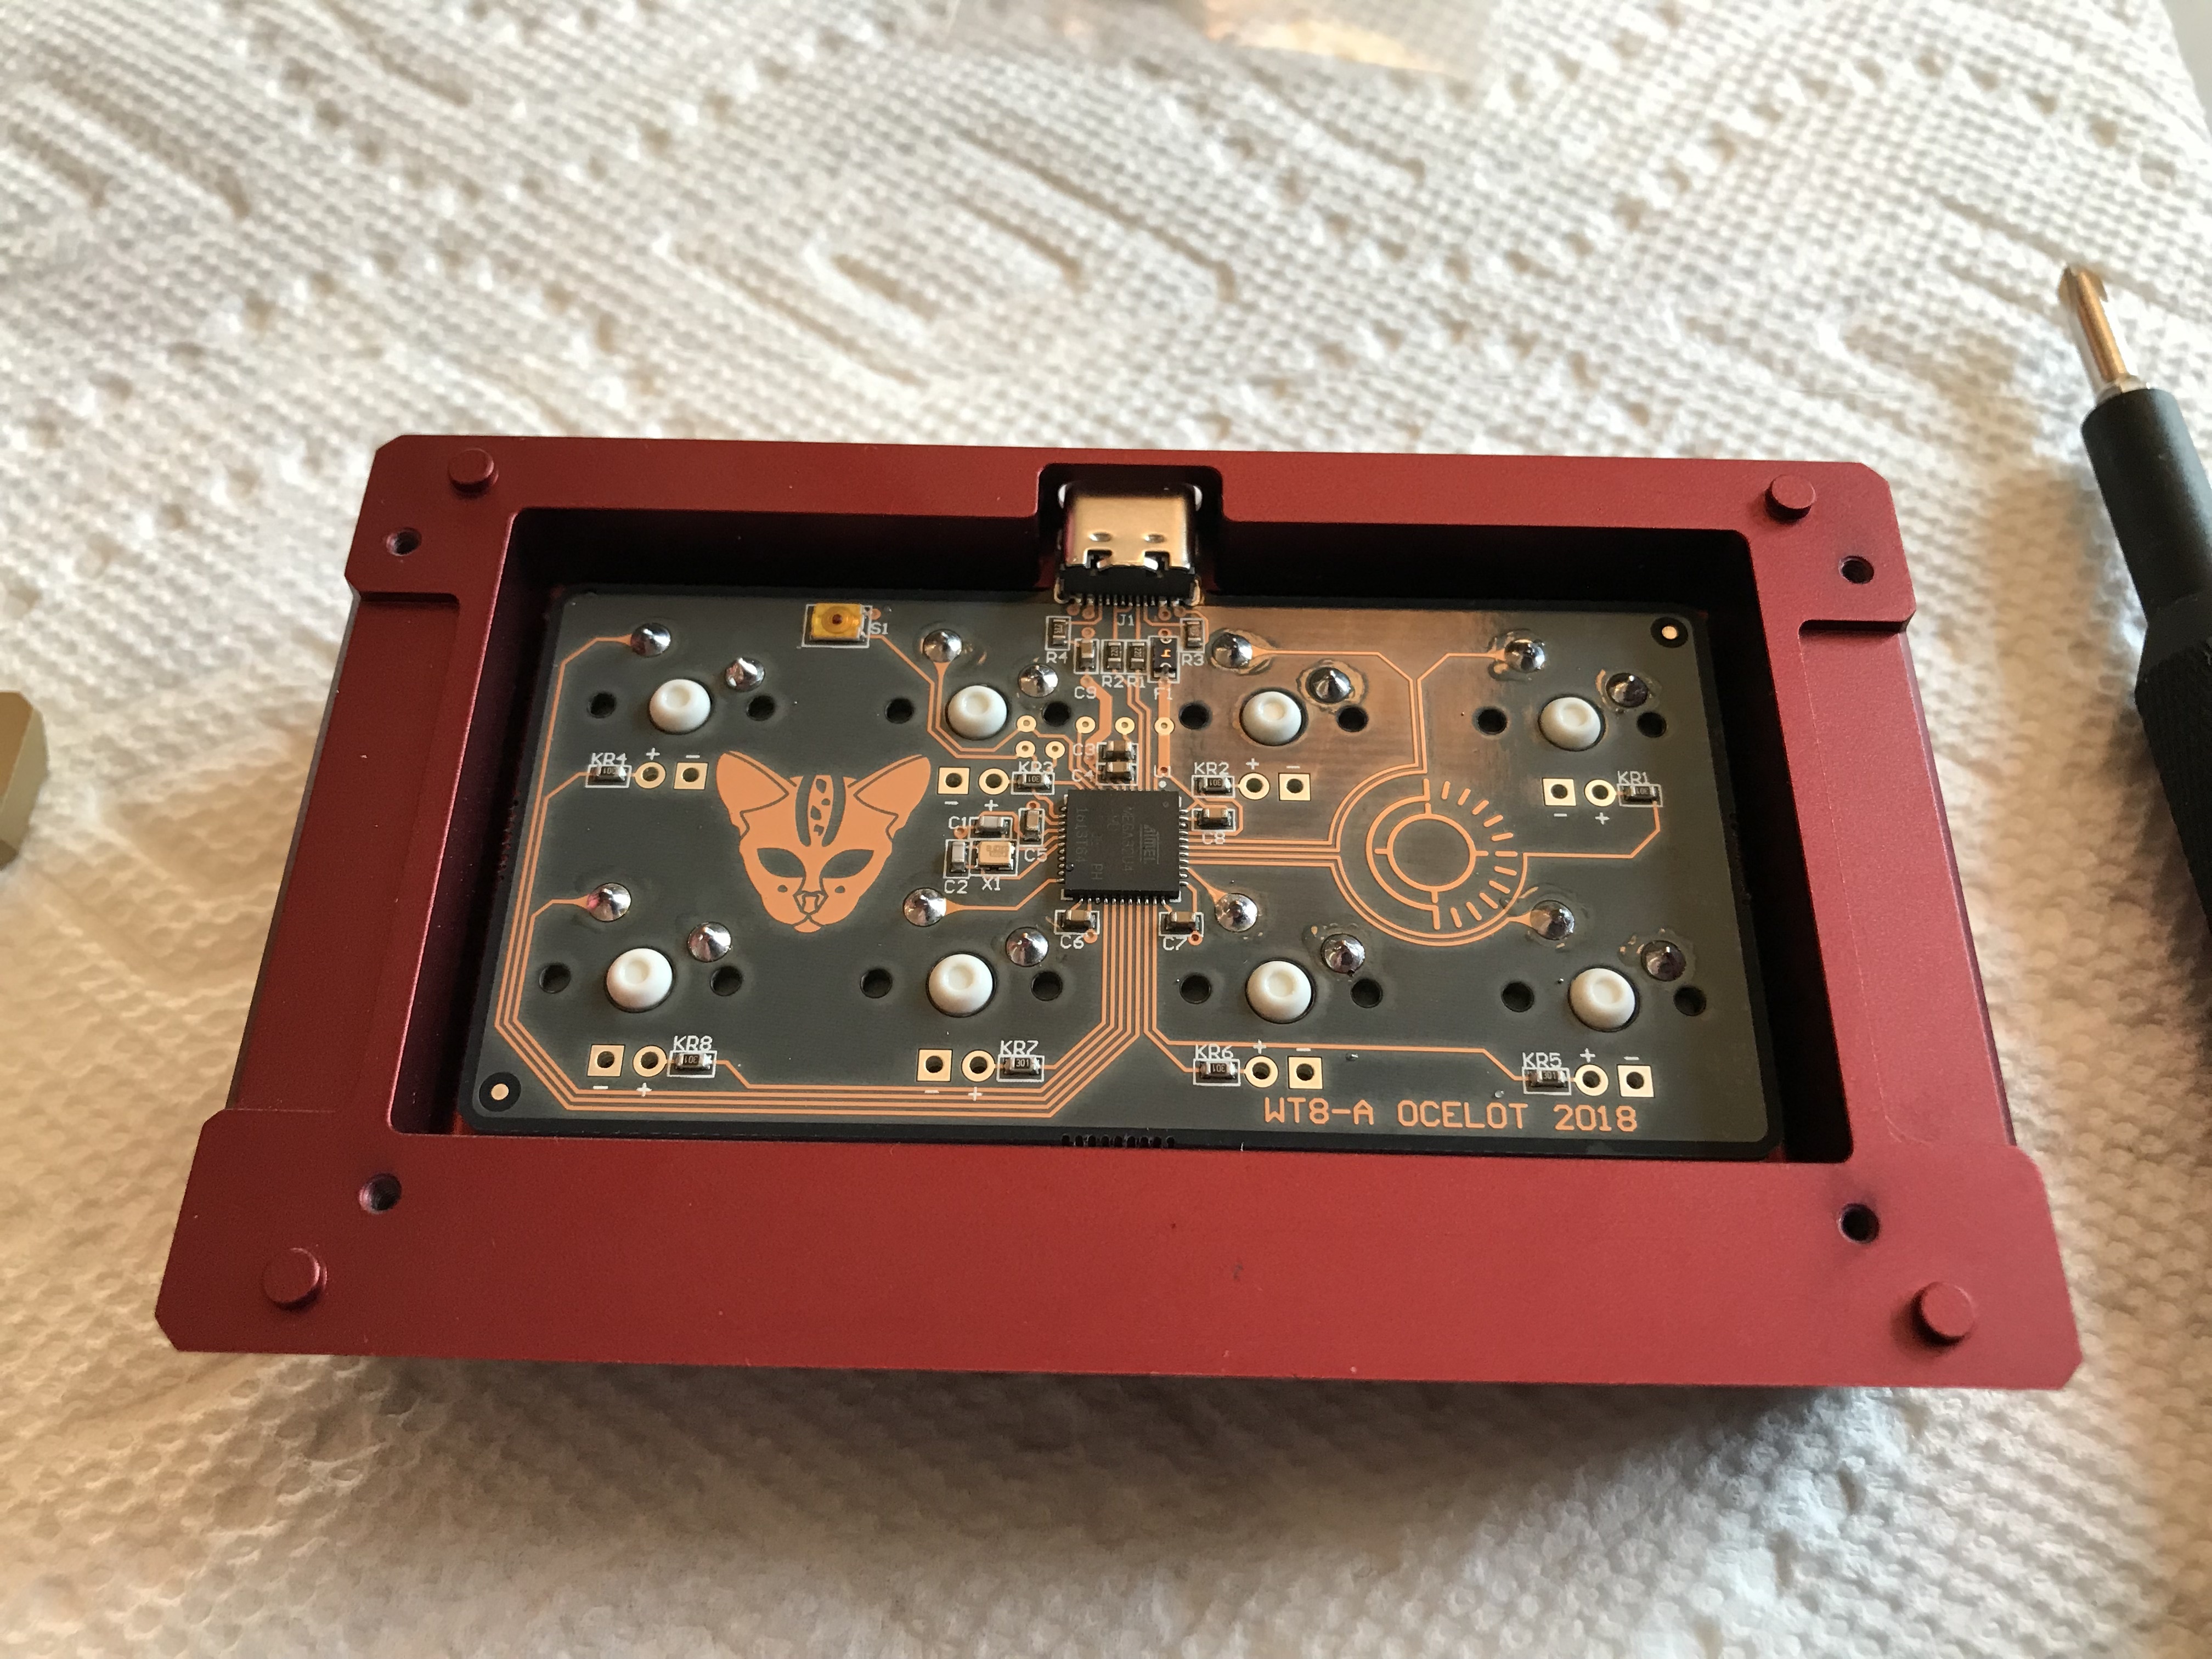
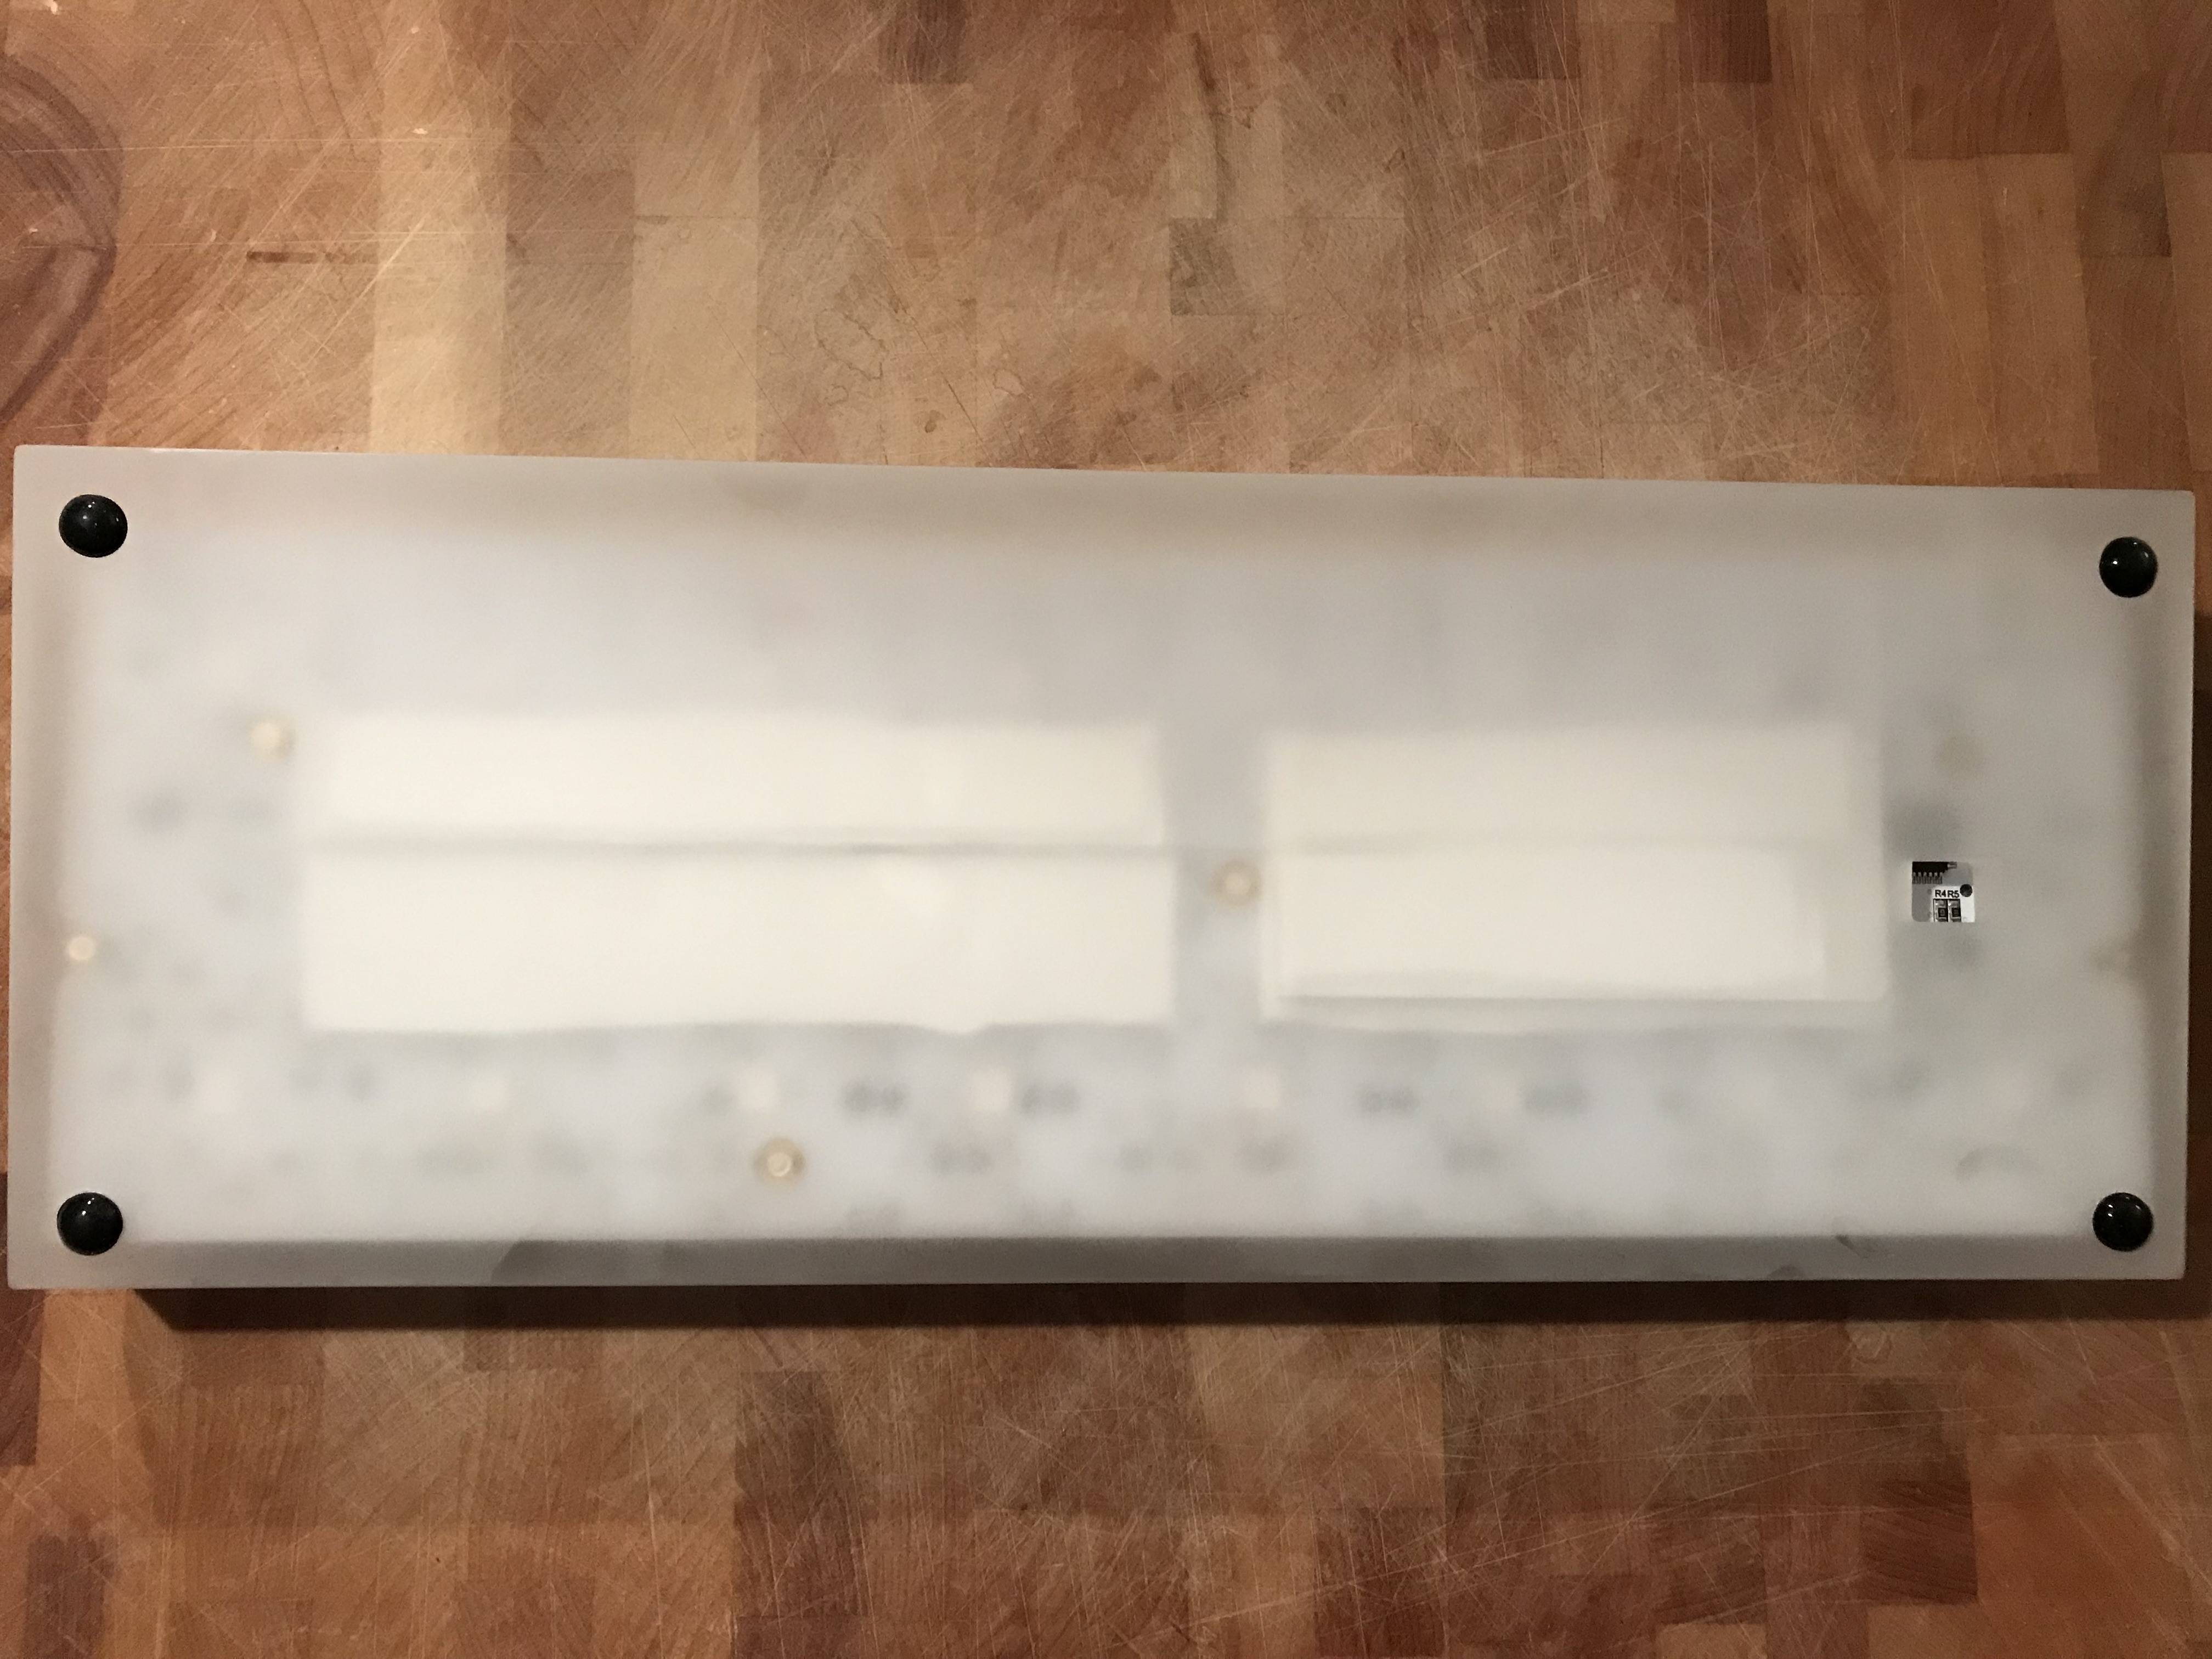
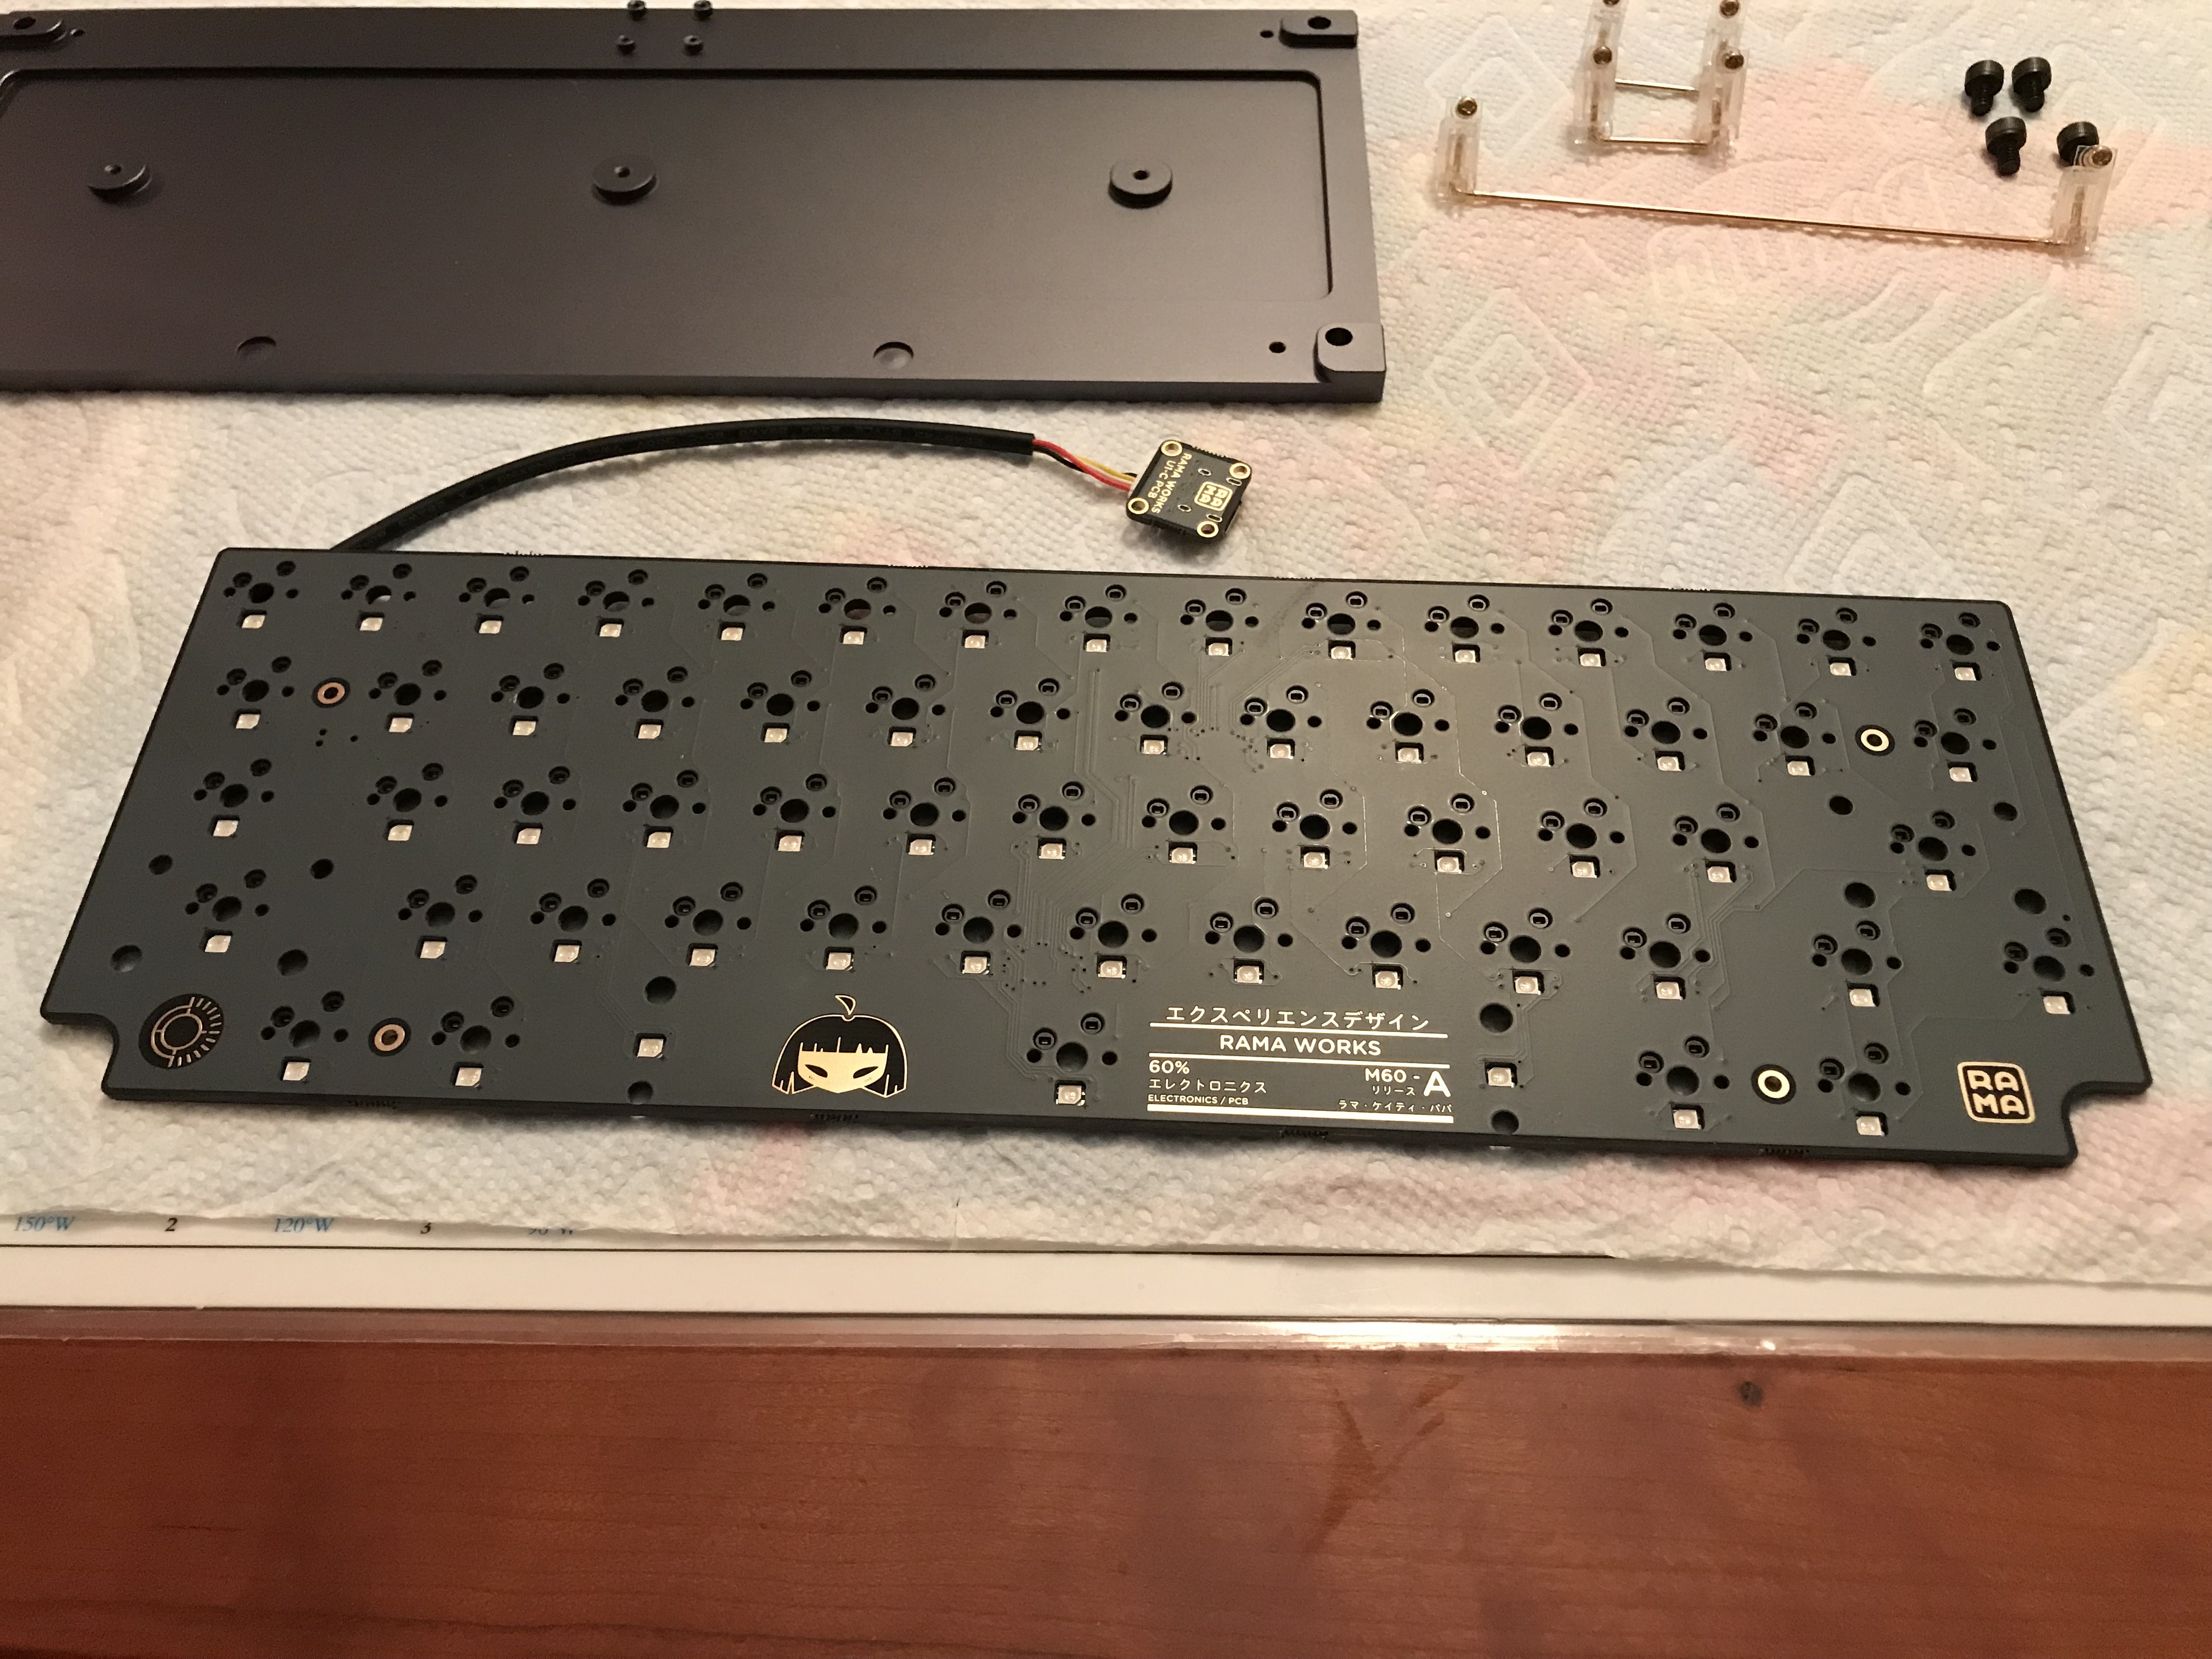
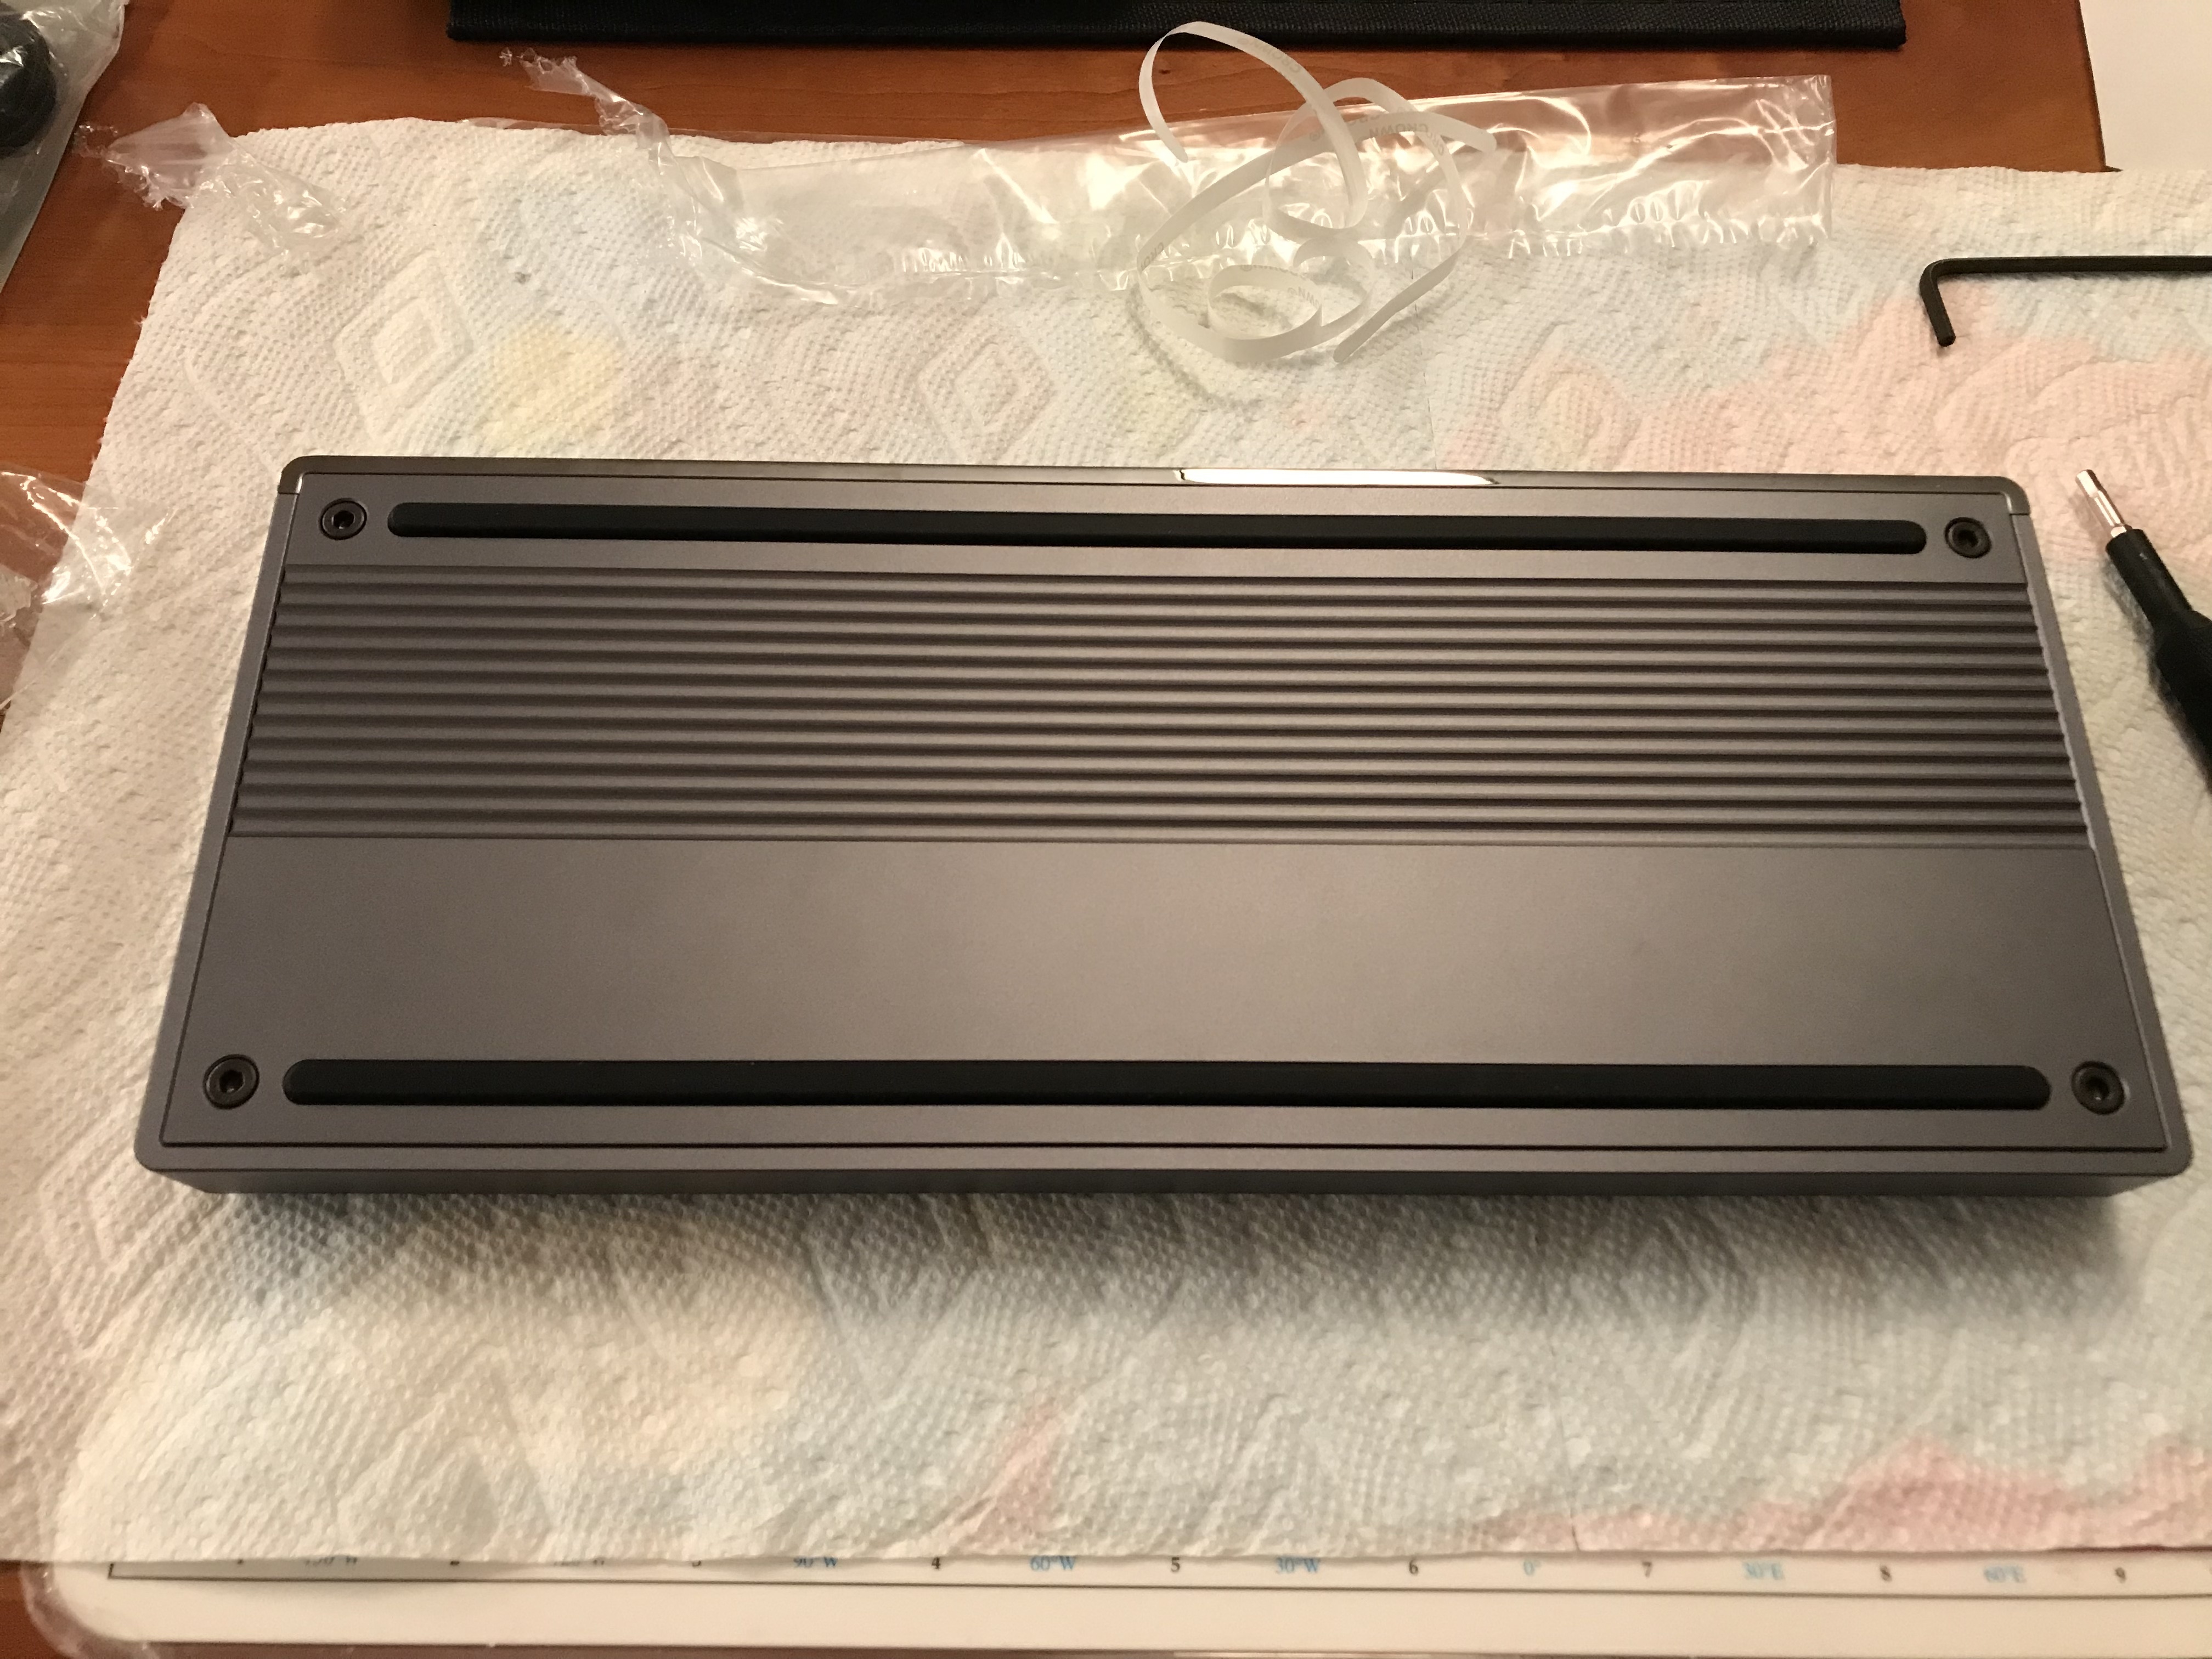
The PCB dropped right into place, with USB-C connector out the back and switch pins lined up. A quick trip to that frozen garage for a quick bit of soldering, and there we are.
At this point in the build, it was pretty clear that some kind of case dampening was going to be necessary. A quick tap test on the switches yielded a pretty significant metallic ping from the case. Time to break out the Sorbothane.
Sorbomummies
I find Sorbothane to be quite effective at eliminating case ping, but as more people look into using it, there are a couple of questions that keep coming up.
- Sorbothane is sticky, and if it is in direct contact with the PCB, will it be possible to remove it without breaking the PCB?
- Will the plasticizer in Sorbothane do bad cosmetic things to the case, or bad things in general to the PCB or its components?
While I’ve been able to separate Sorbothane from PCBs before, by applying steady firm pressure until the Sorbothane gradually peels away, and I’ve never felt like the PCB was going to crack or break before the Sorbo let go, I’ll grant that it can be a bit nerve-racking. As far as plasticizer concerns go, I haven’t seen issues so far, but I’ve only been building for a few months, so I can’t offer any insight into long-term effects. So, after thinking over the problem for a while, I’ve come up with a possible solution. Enter Sorbomummies - pieces of sorbothane wrapped in gaffer tape.
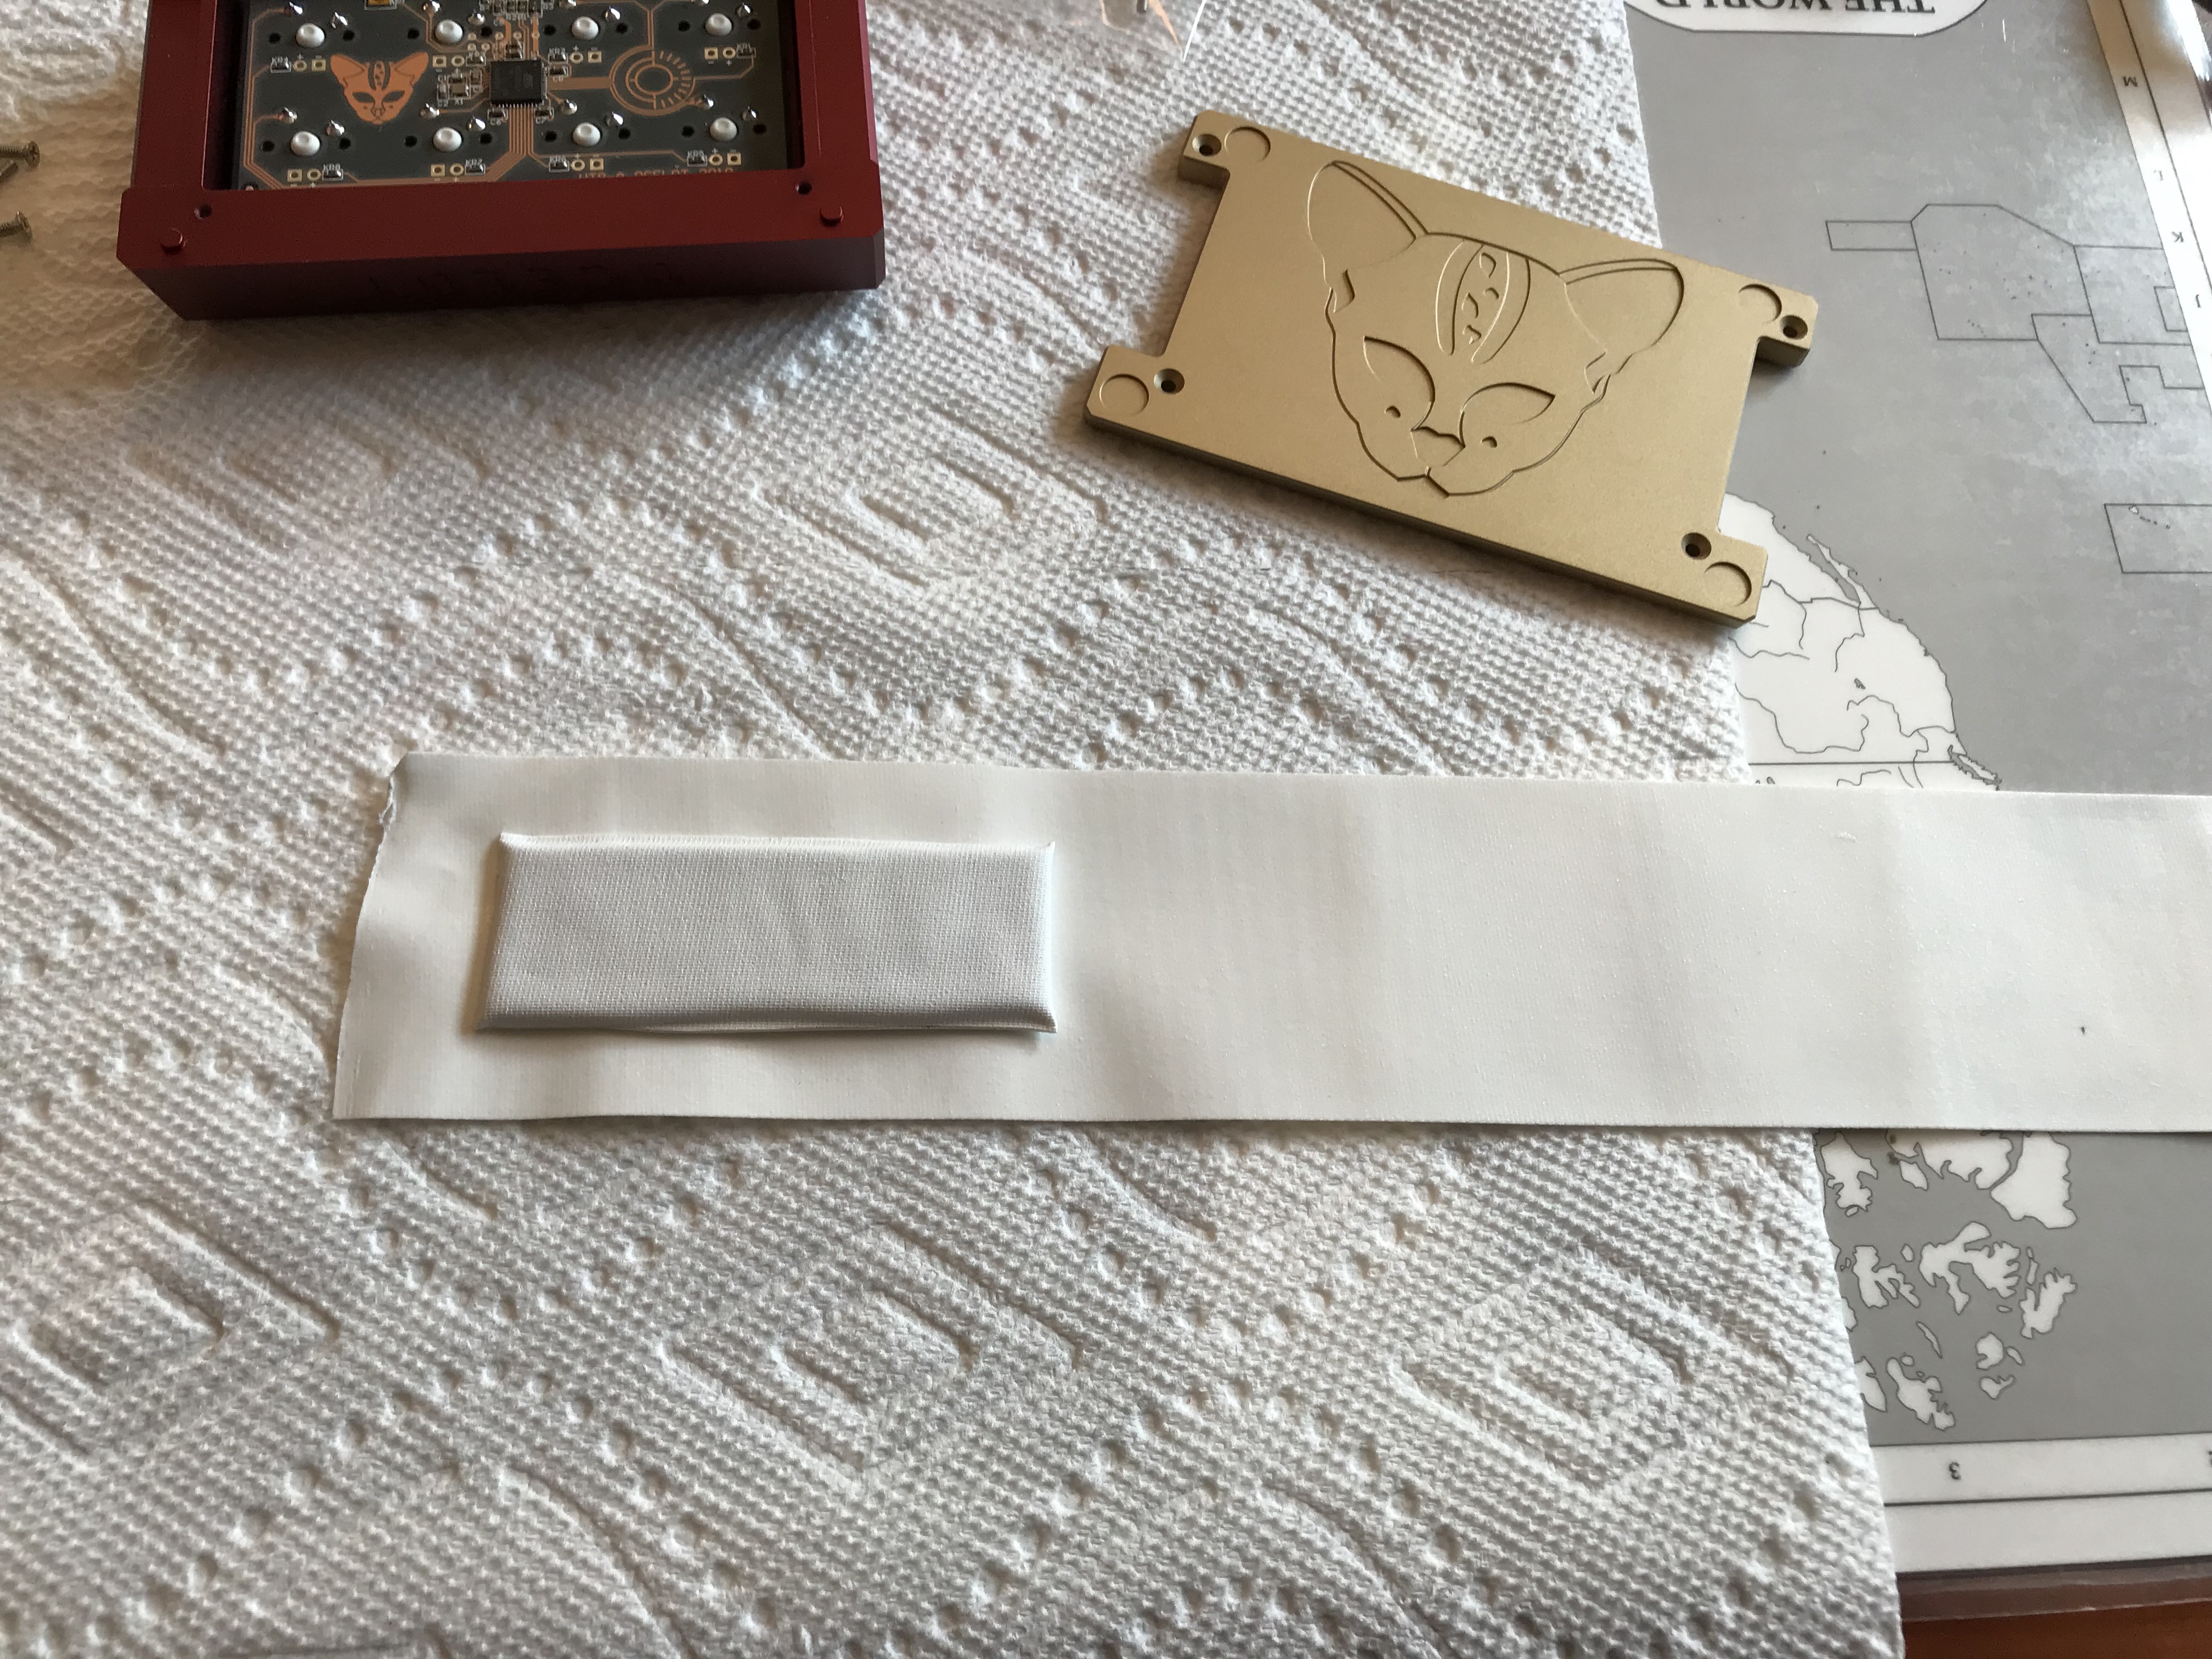
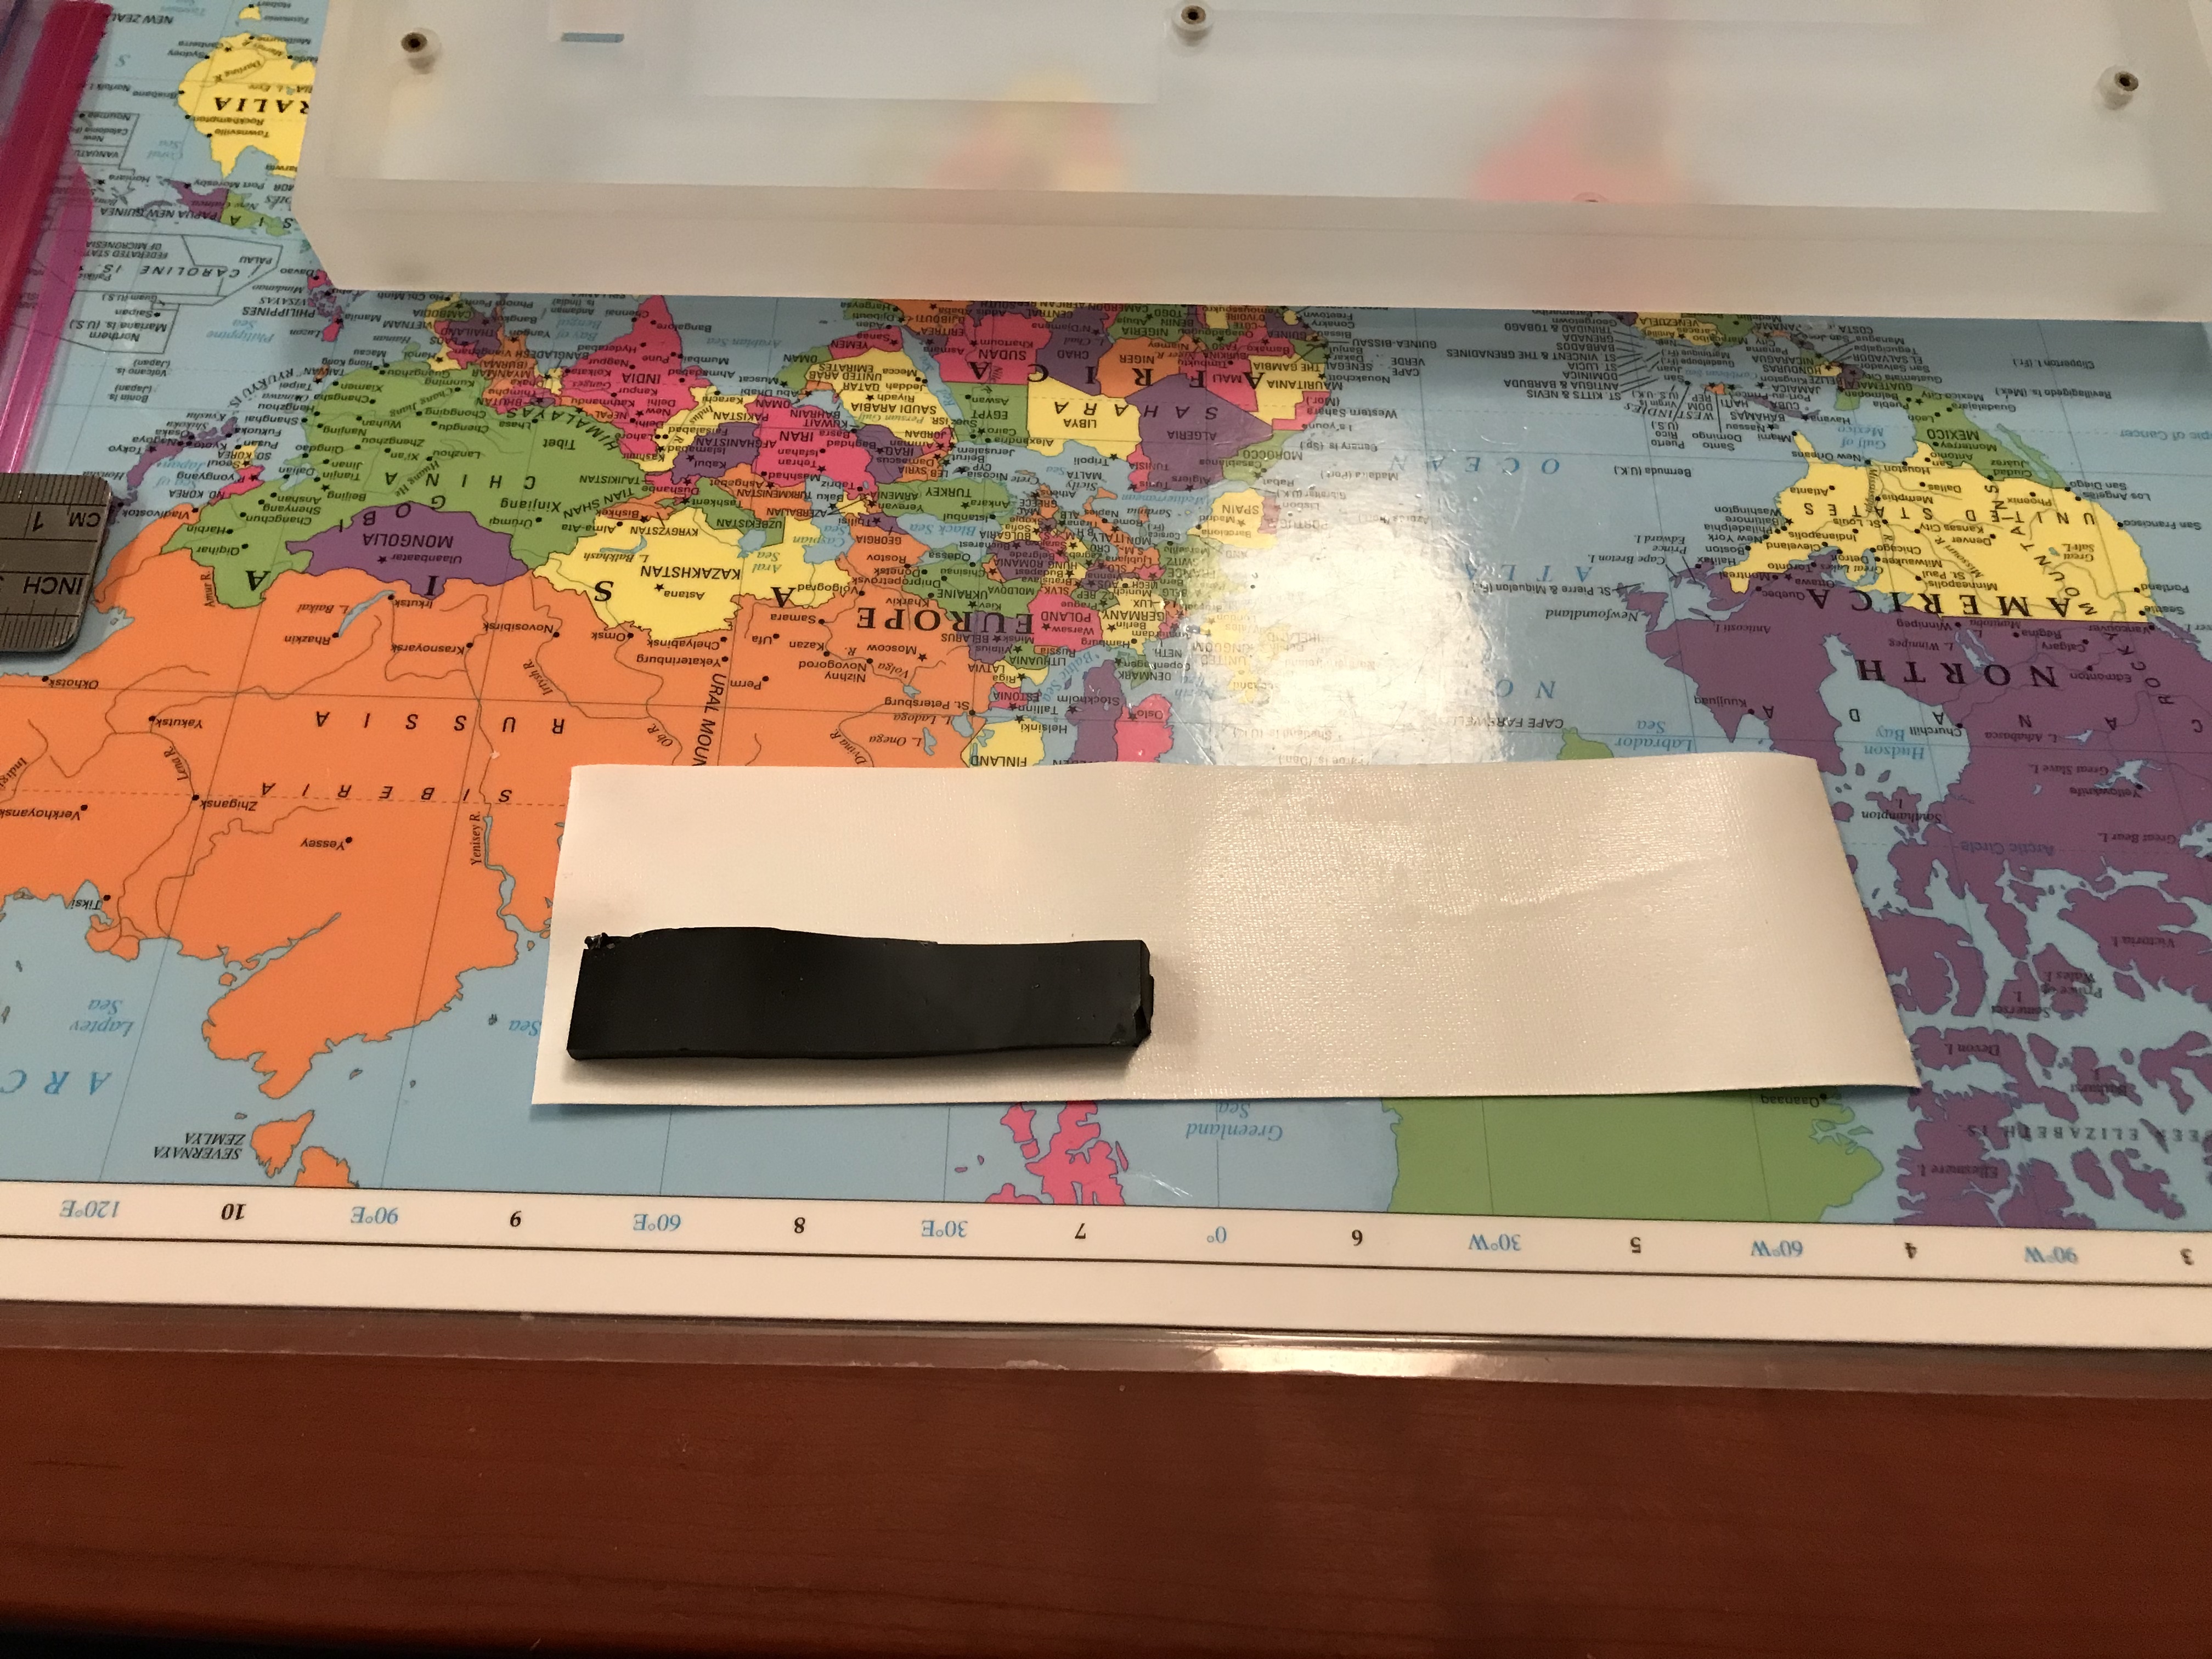
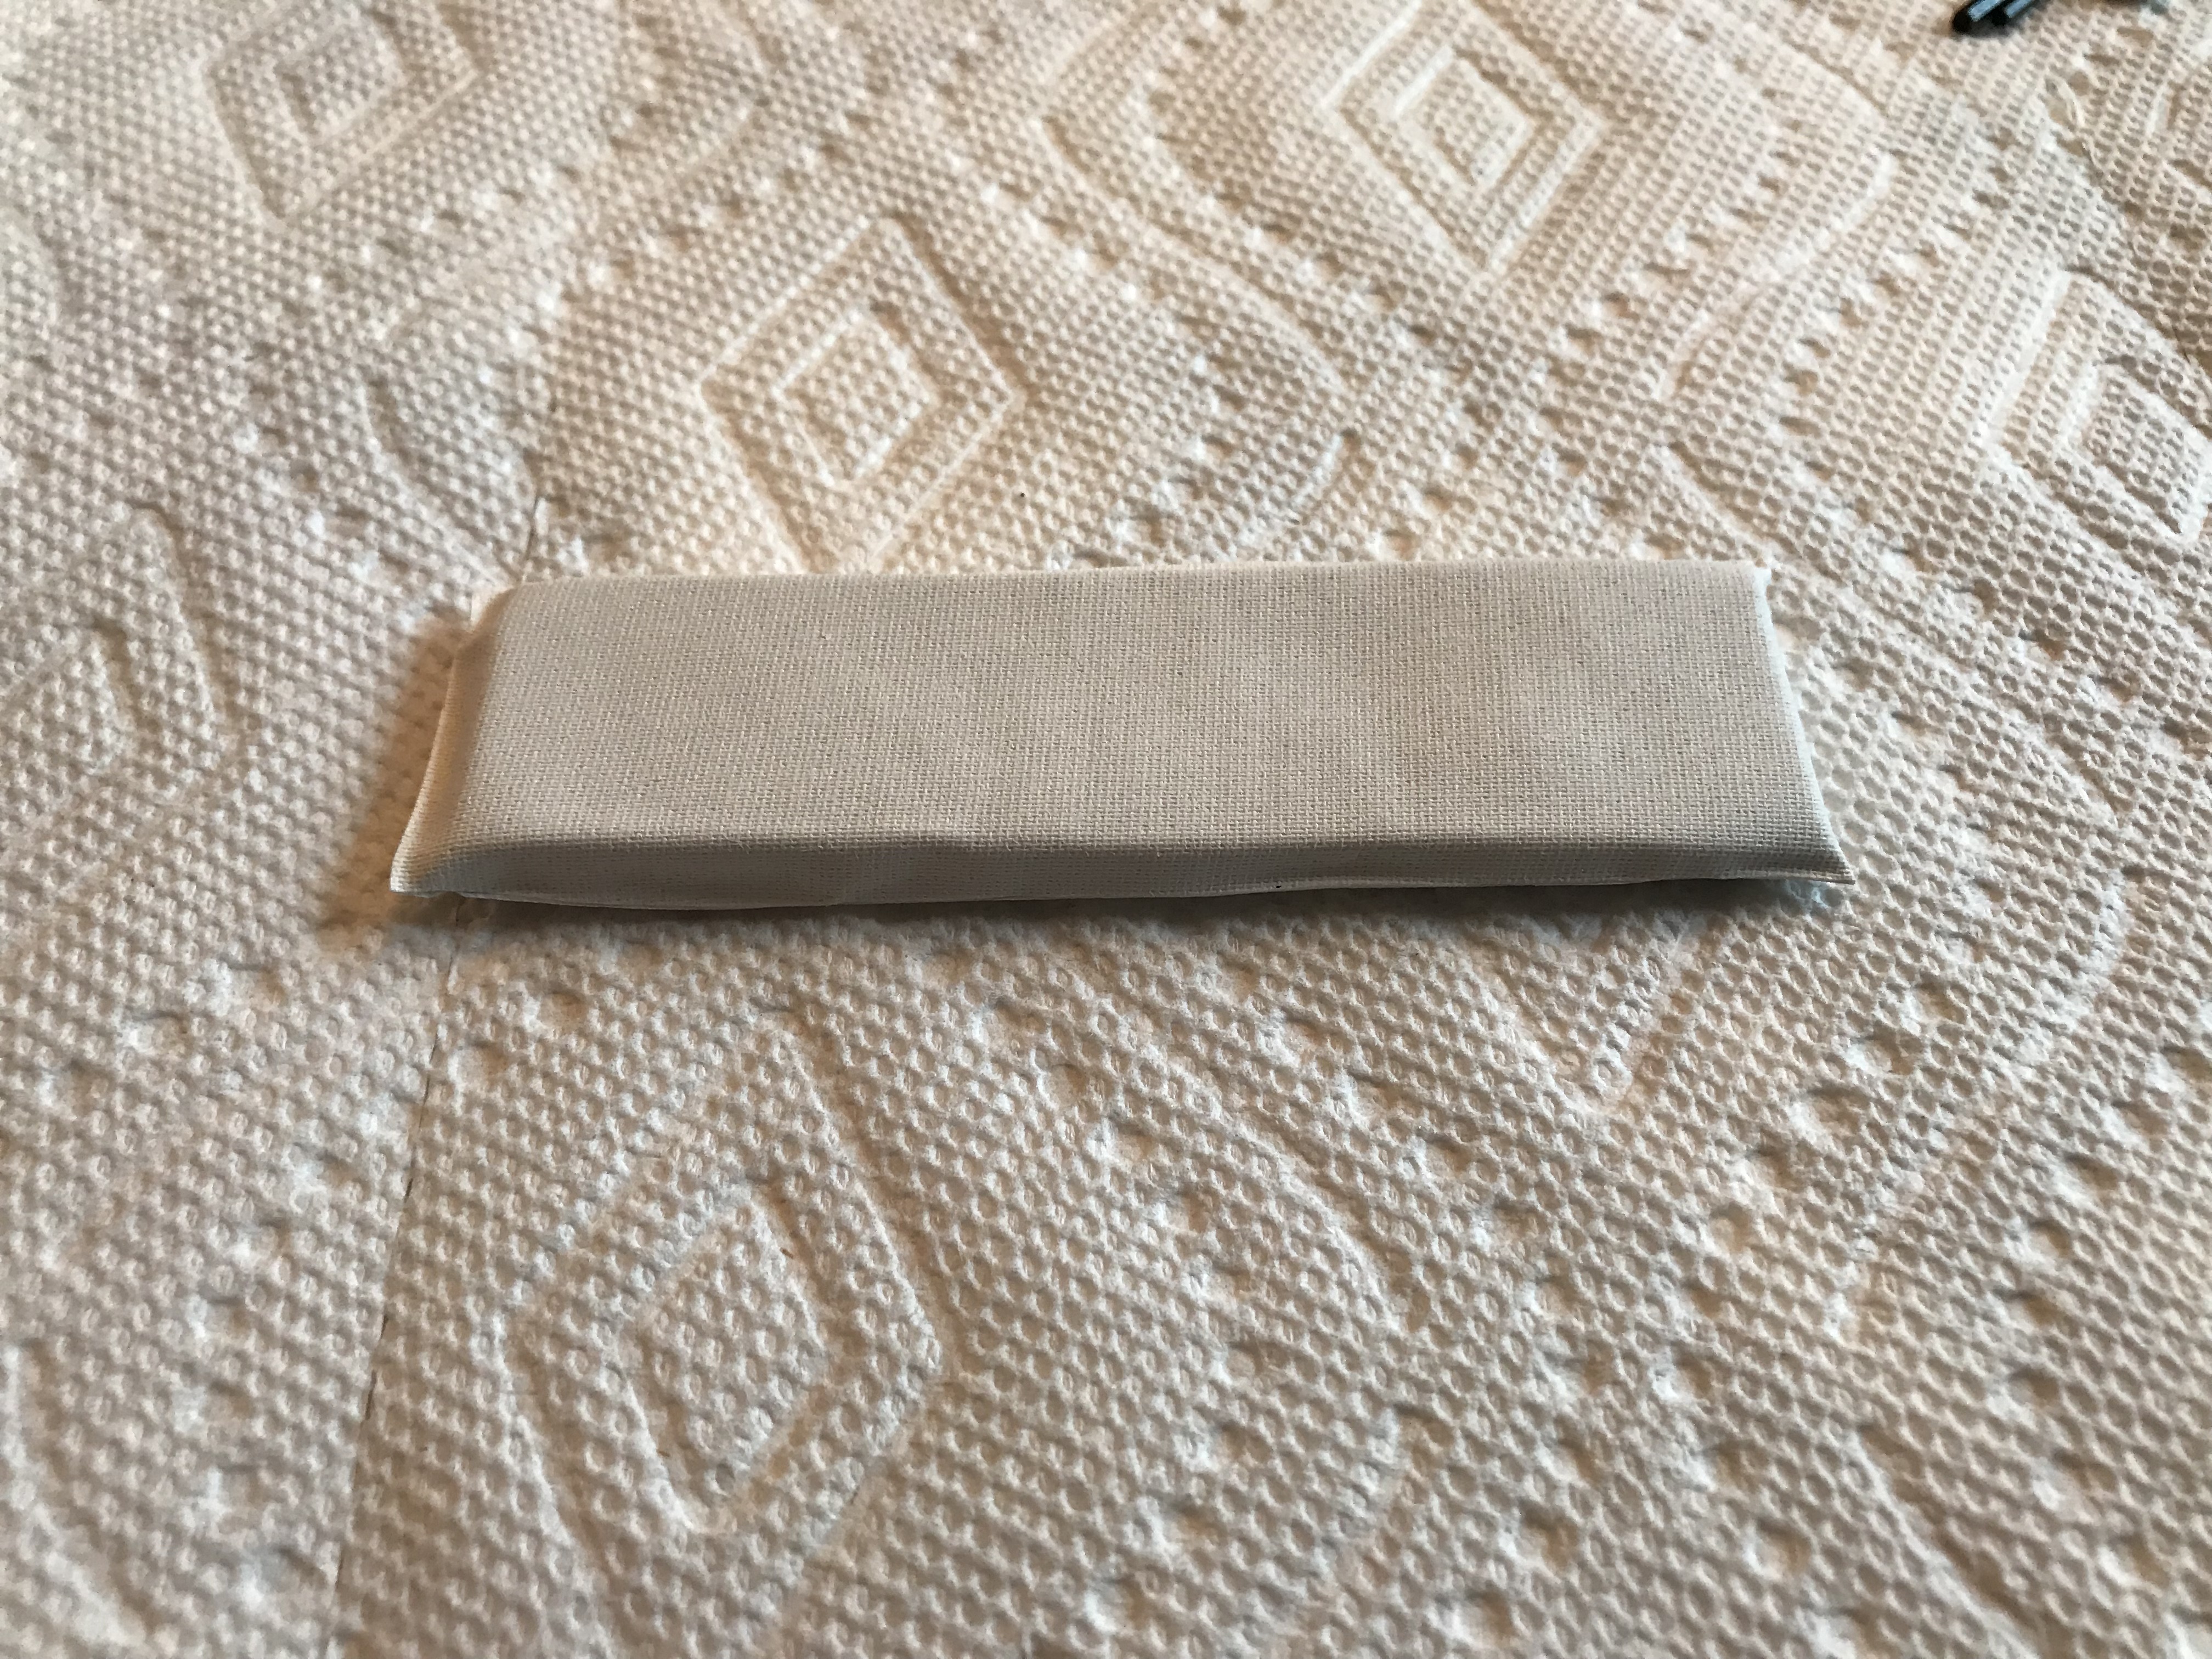
Start with a strip of gaffer tape, adhesive side up, a little over twice as long as the Sorbothane square you want to use for dampening. In this case, I want the square to span all eight switches, with a bit of spare room on all four sides.
Cut the tape, and place the sorbothane centered in the tape, with a little room to the left.
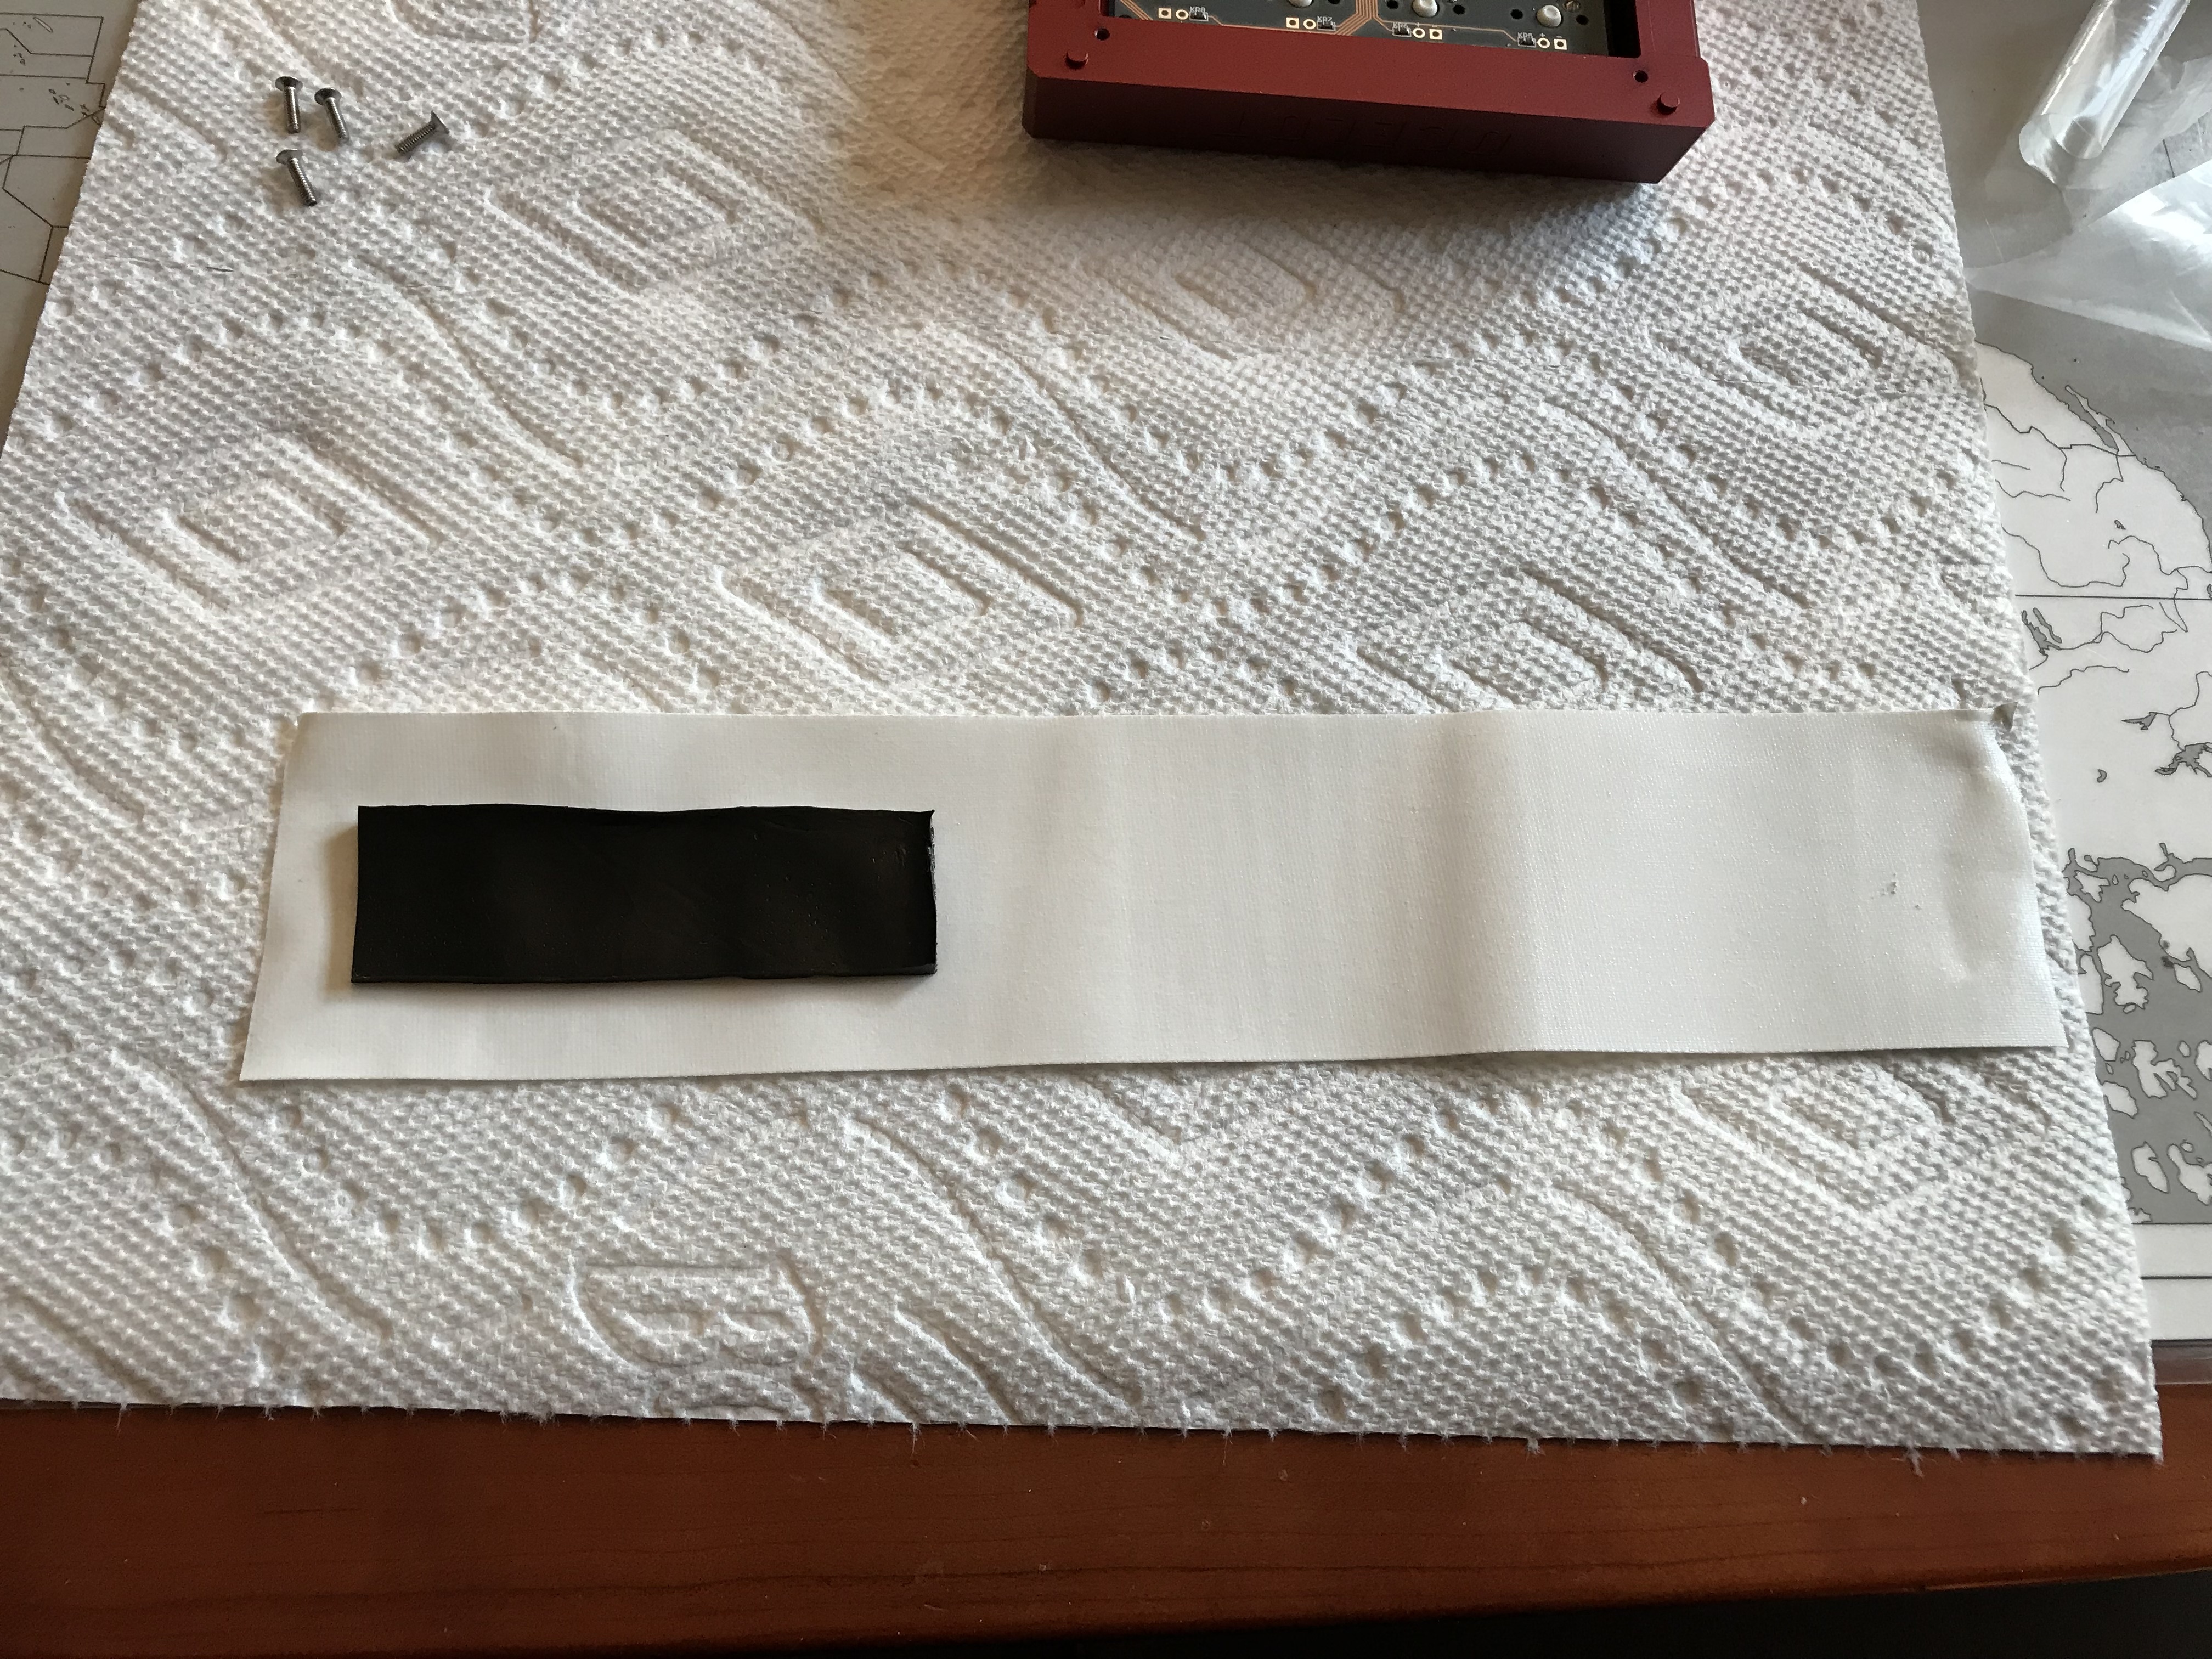
Now, fold the extra tape back over the sorbothane, and use the edge of your finger to tighten up the edges of the Sorbothane.
Use scissors to trim the excess gaffer tape from the sides of the Sorbothane packet. Here’s the initial Sorbomummy, laid in place on the PCB.
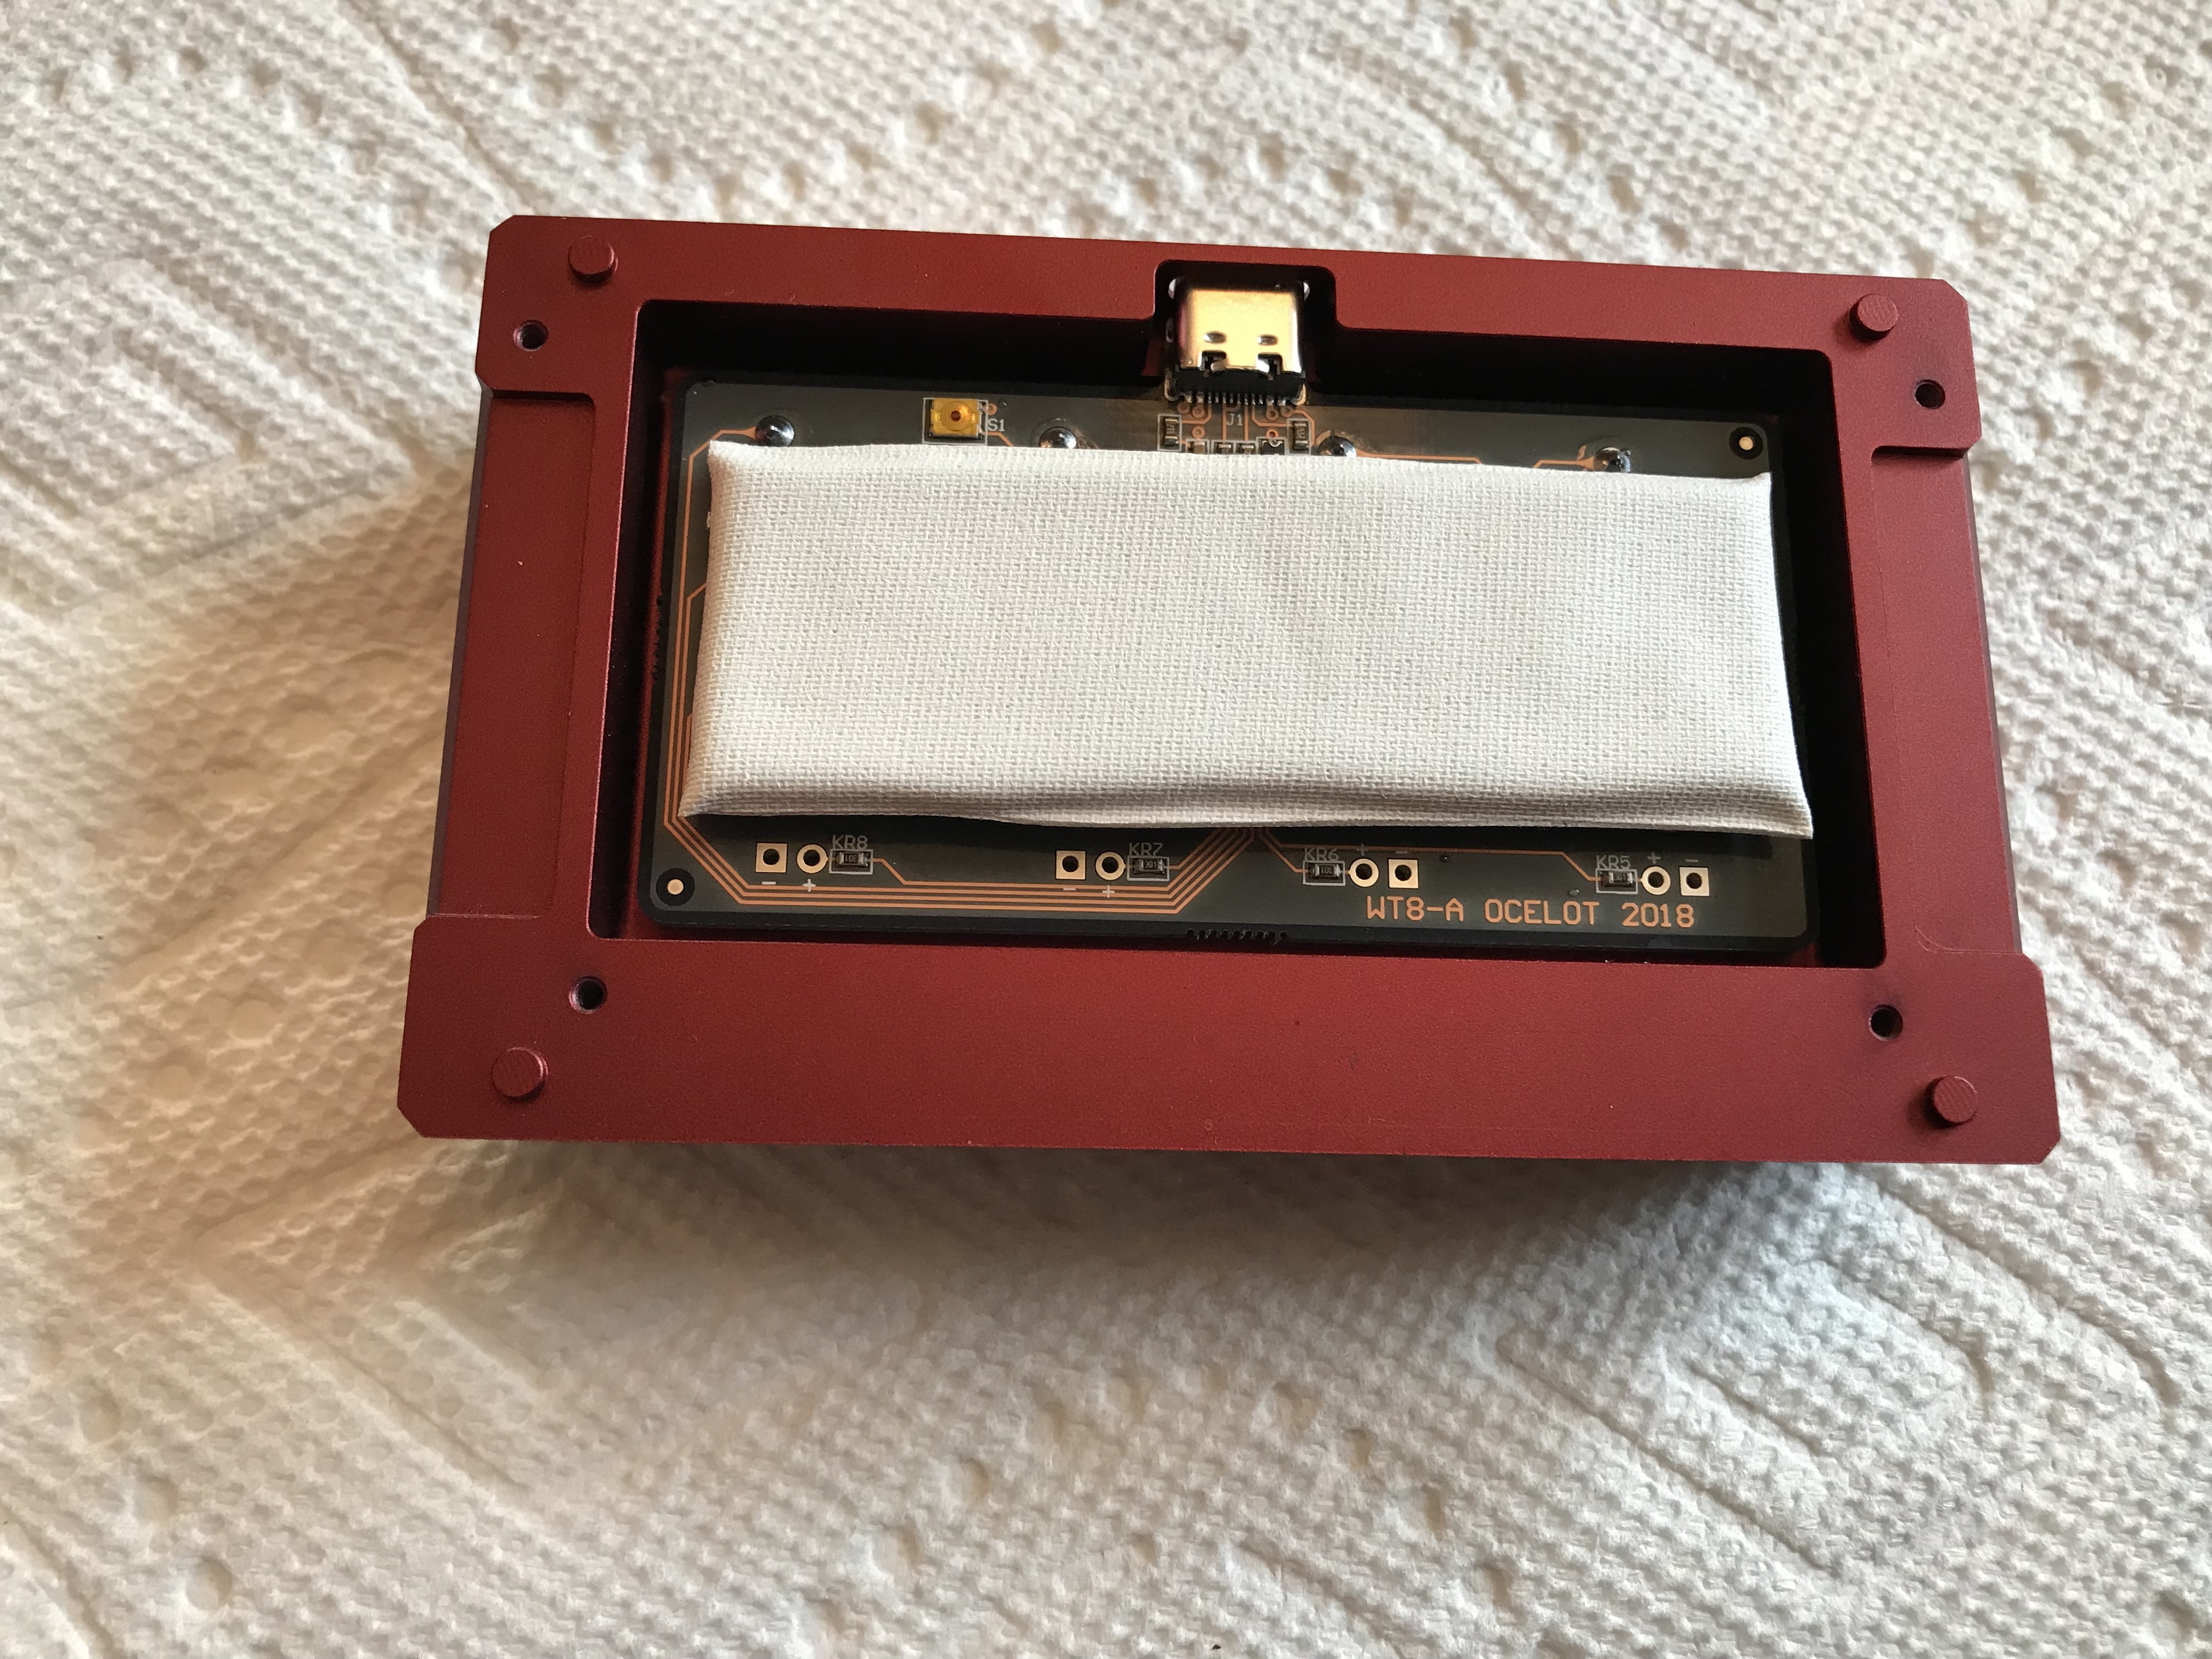
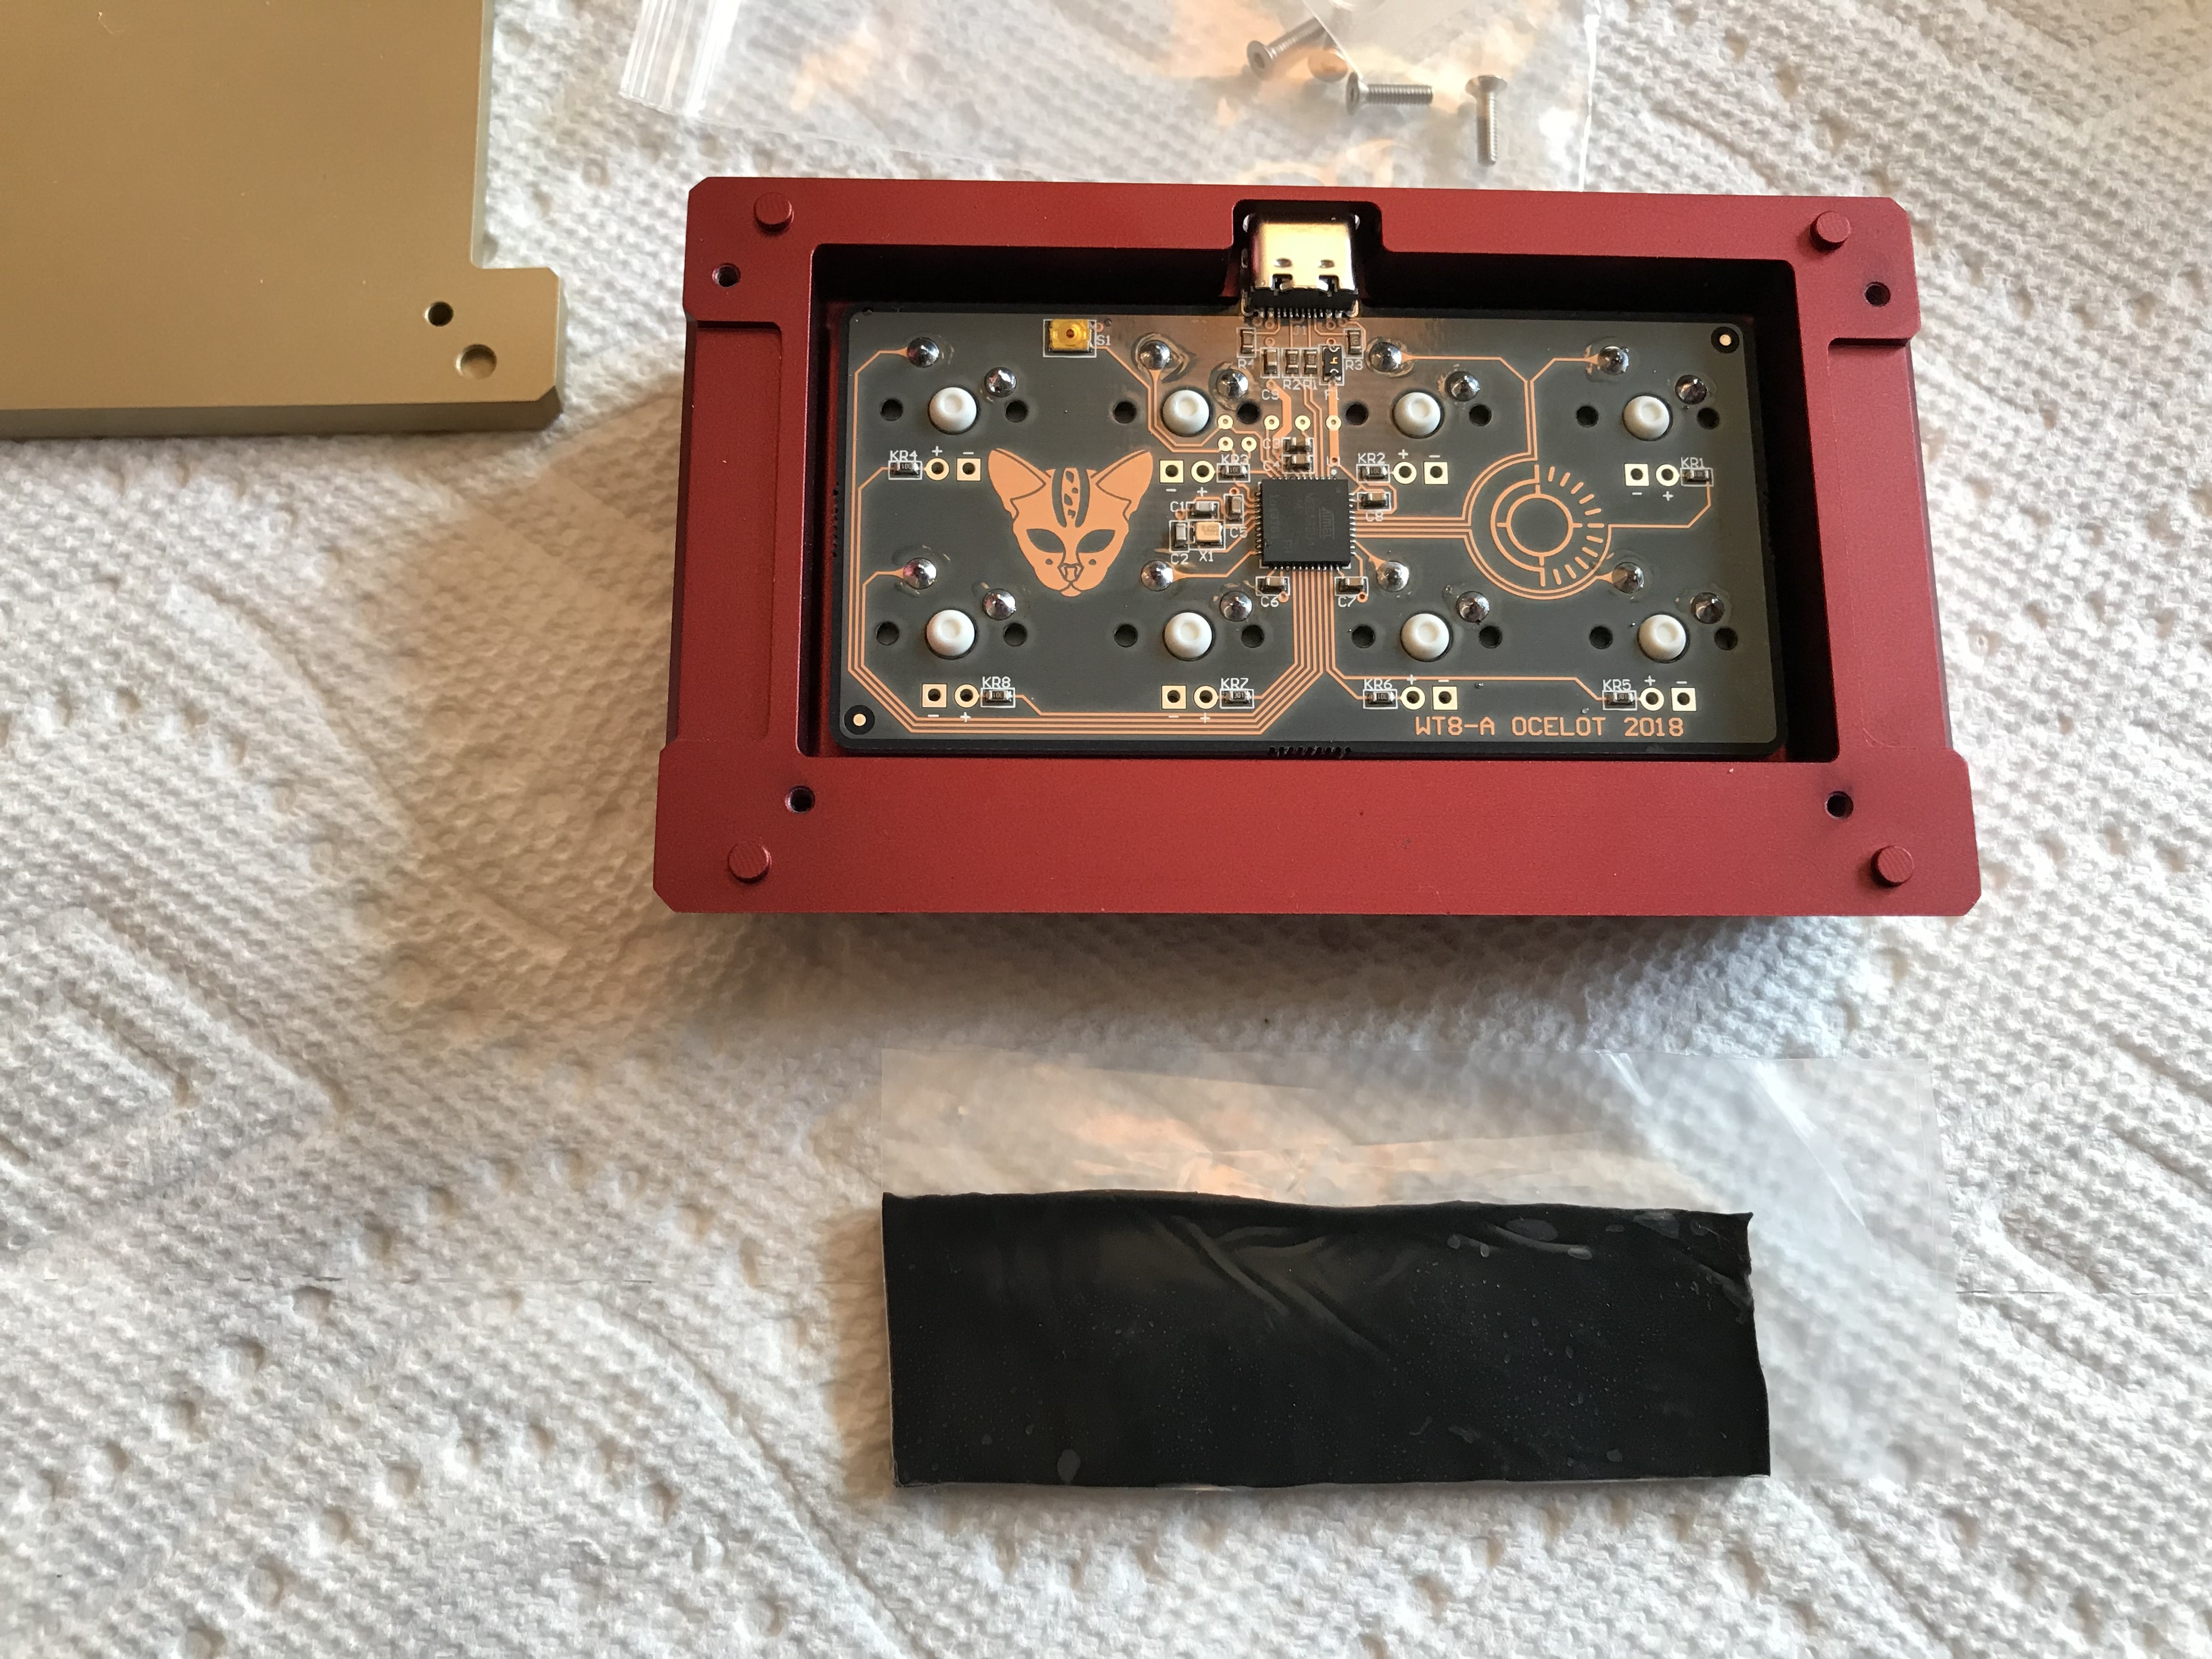
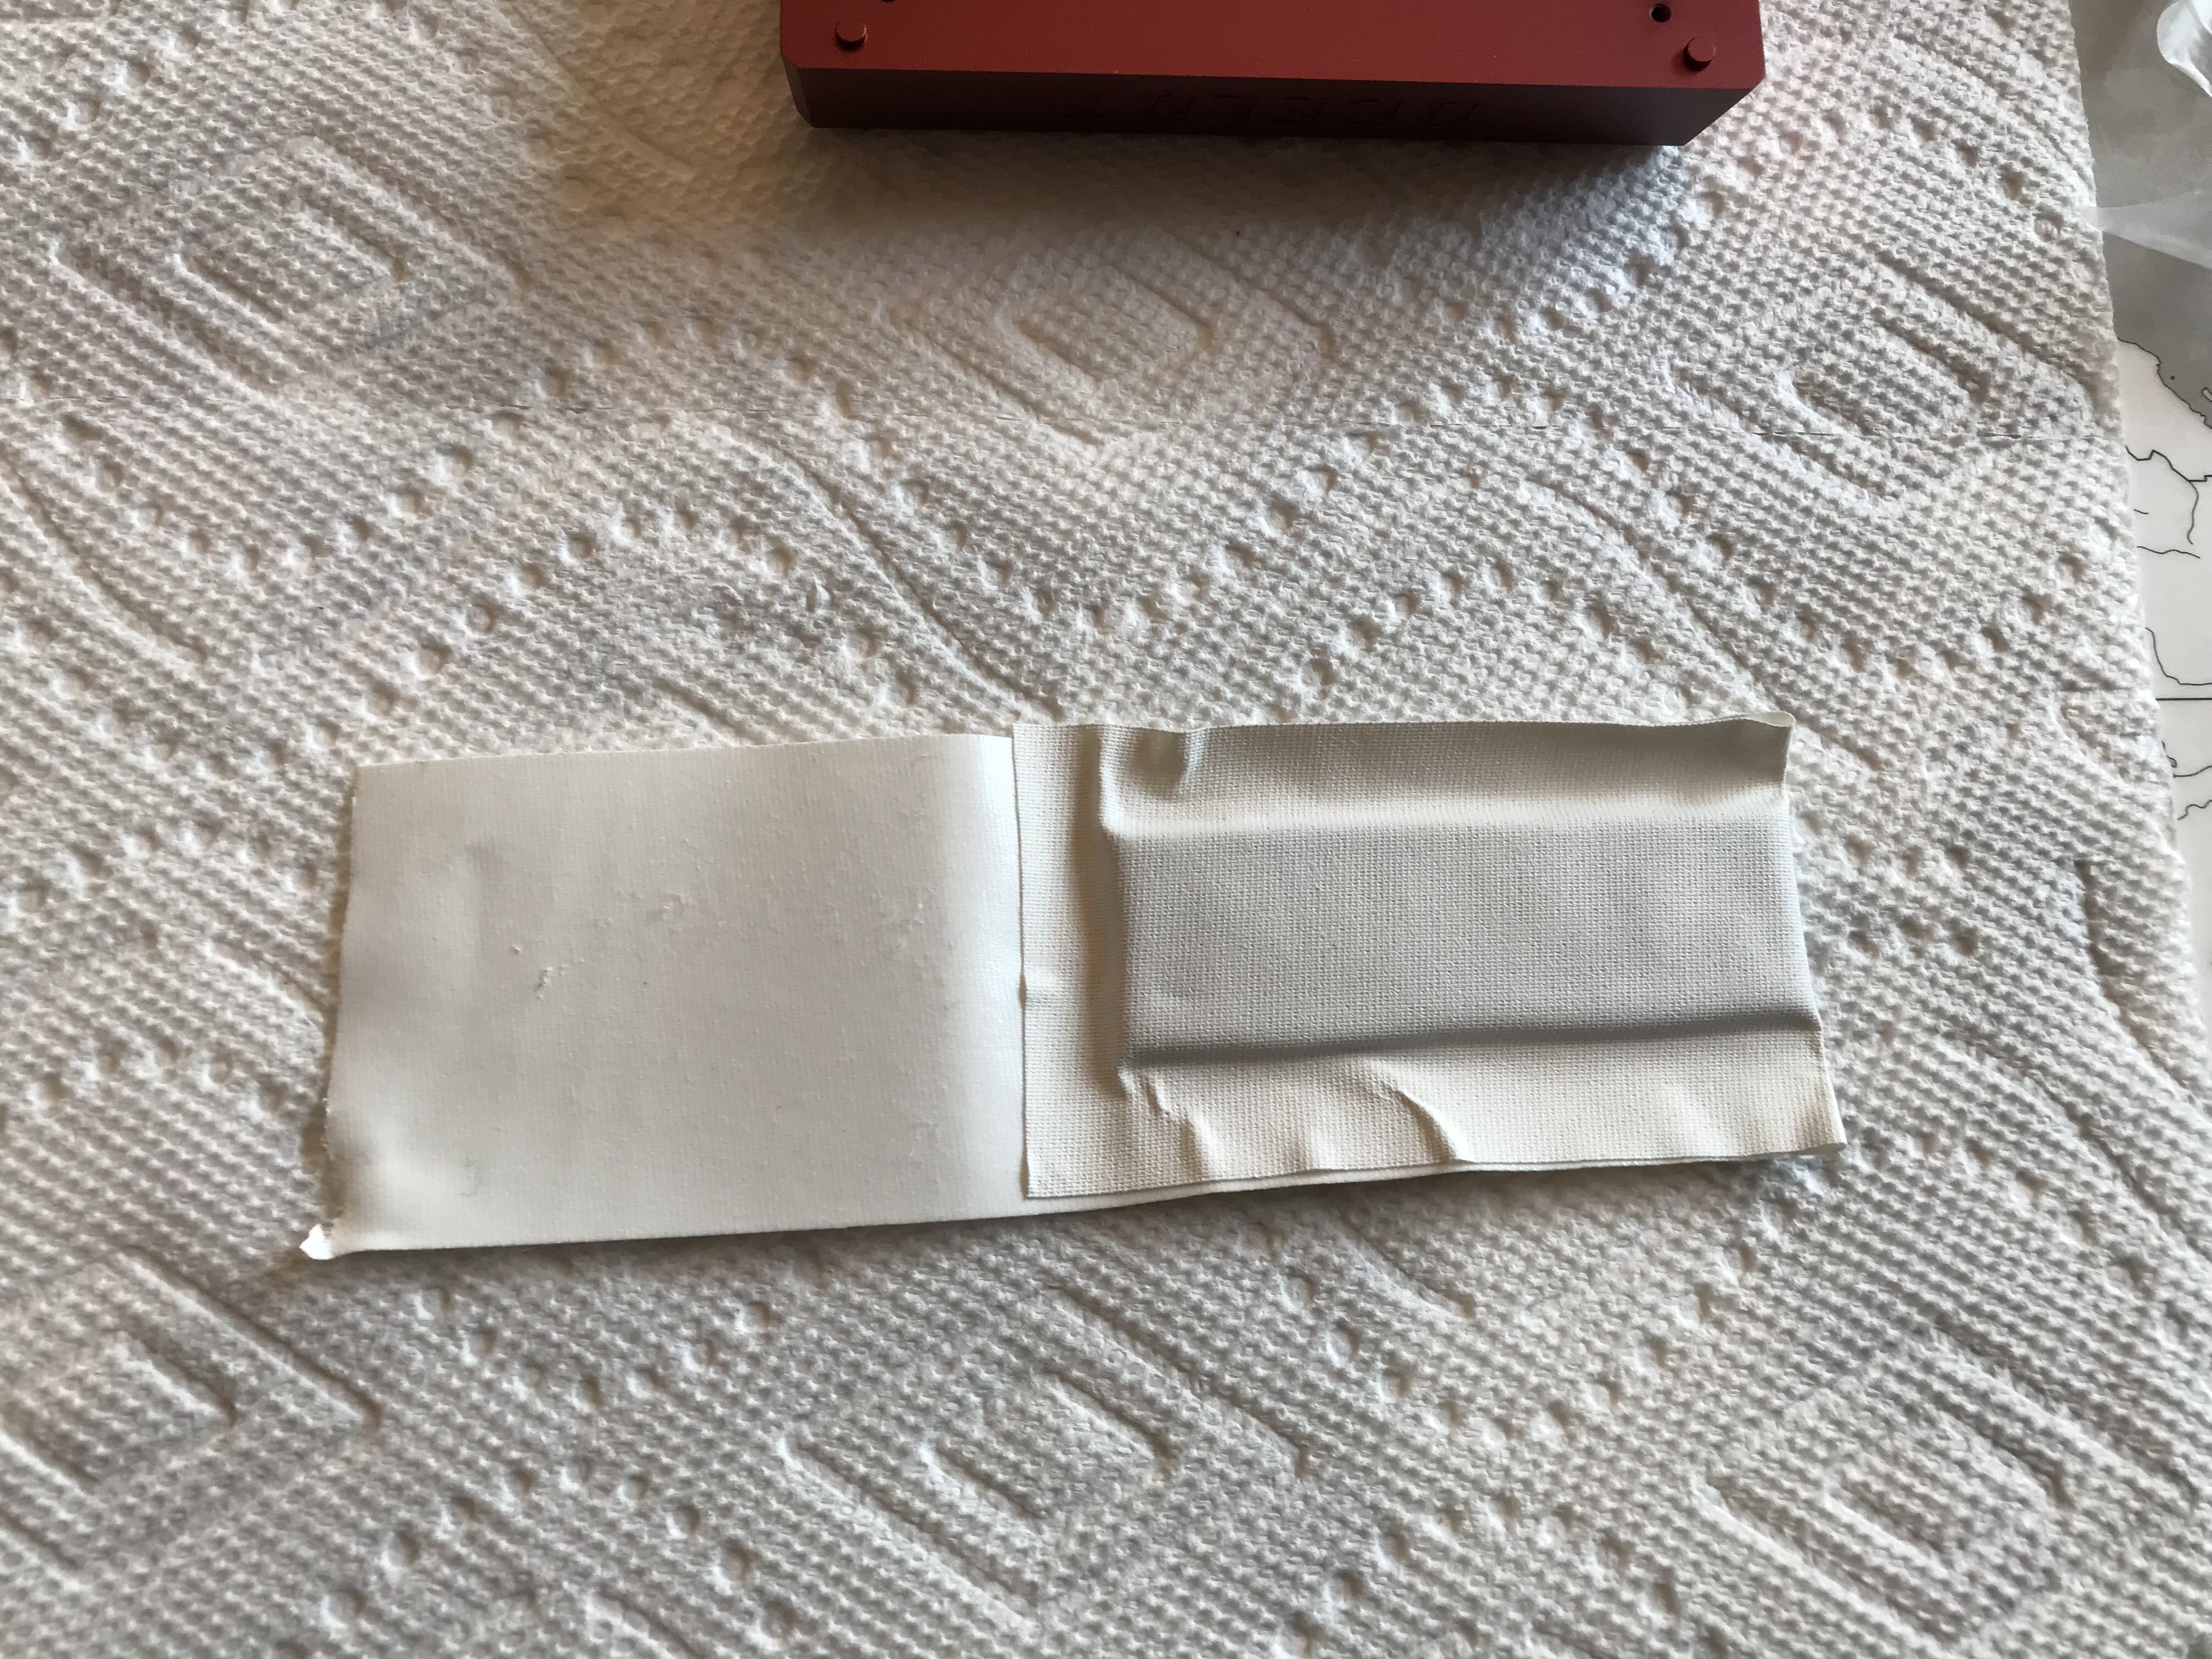
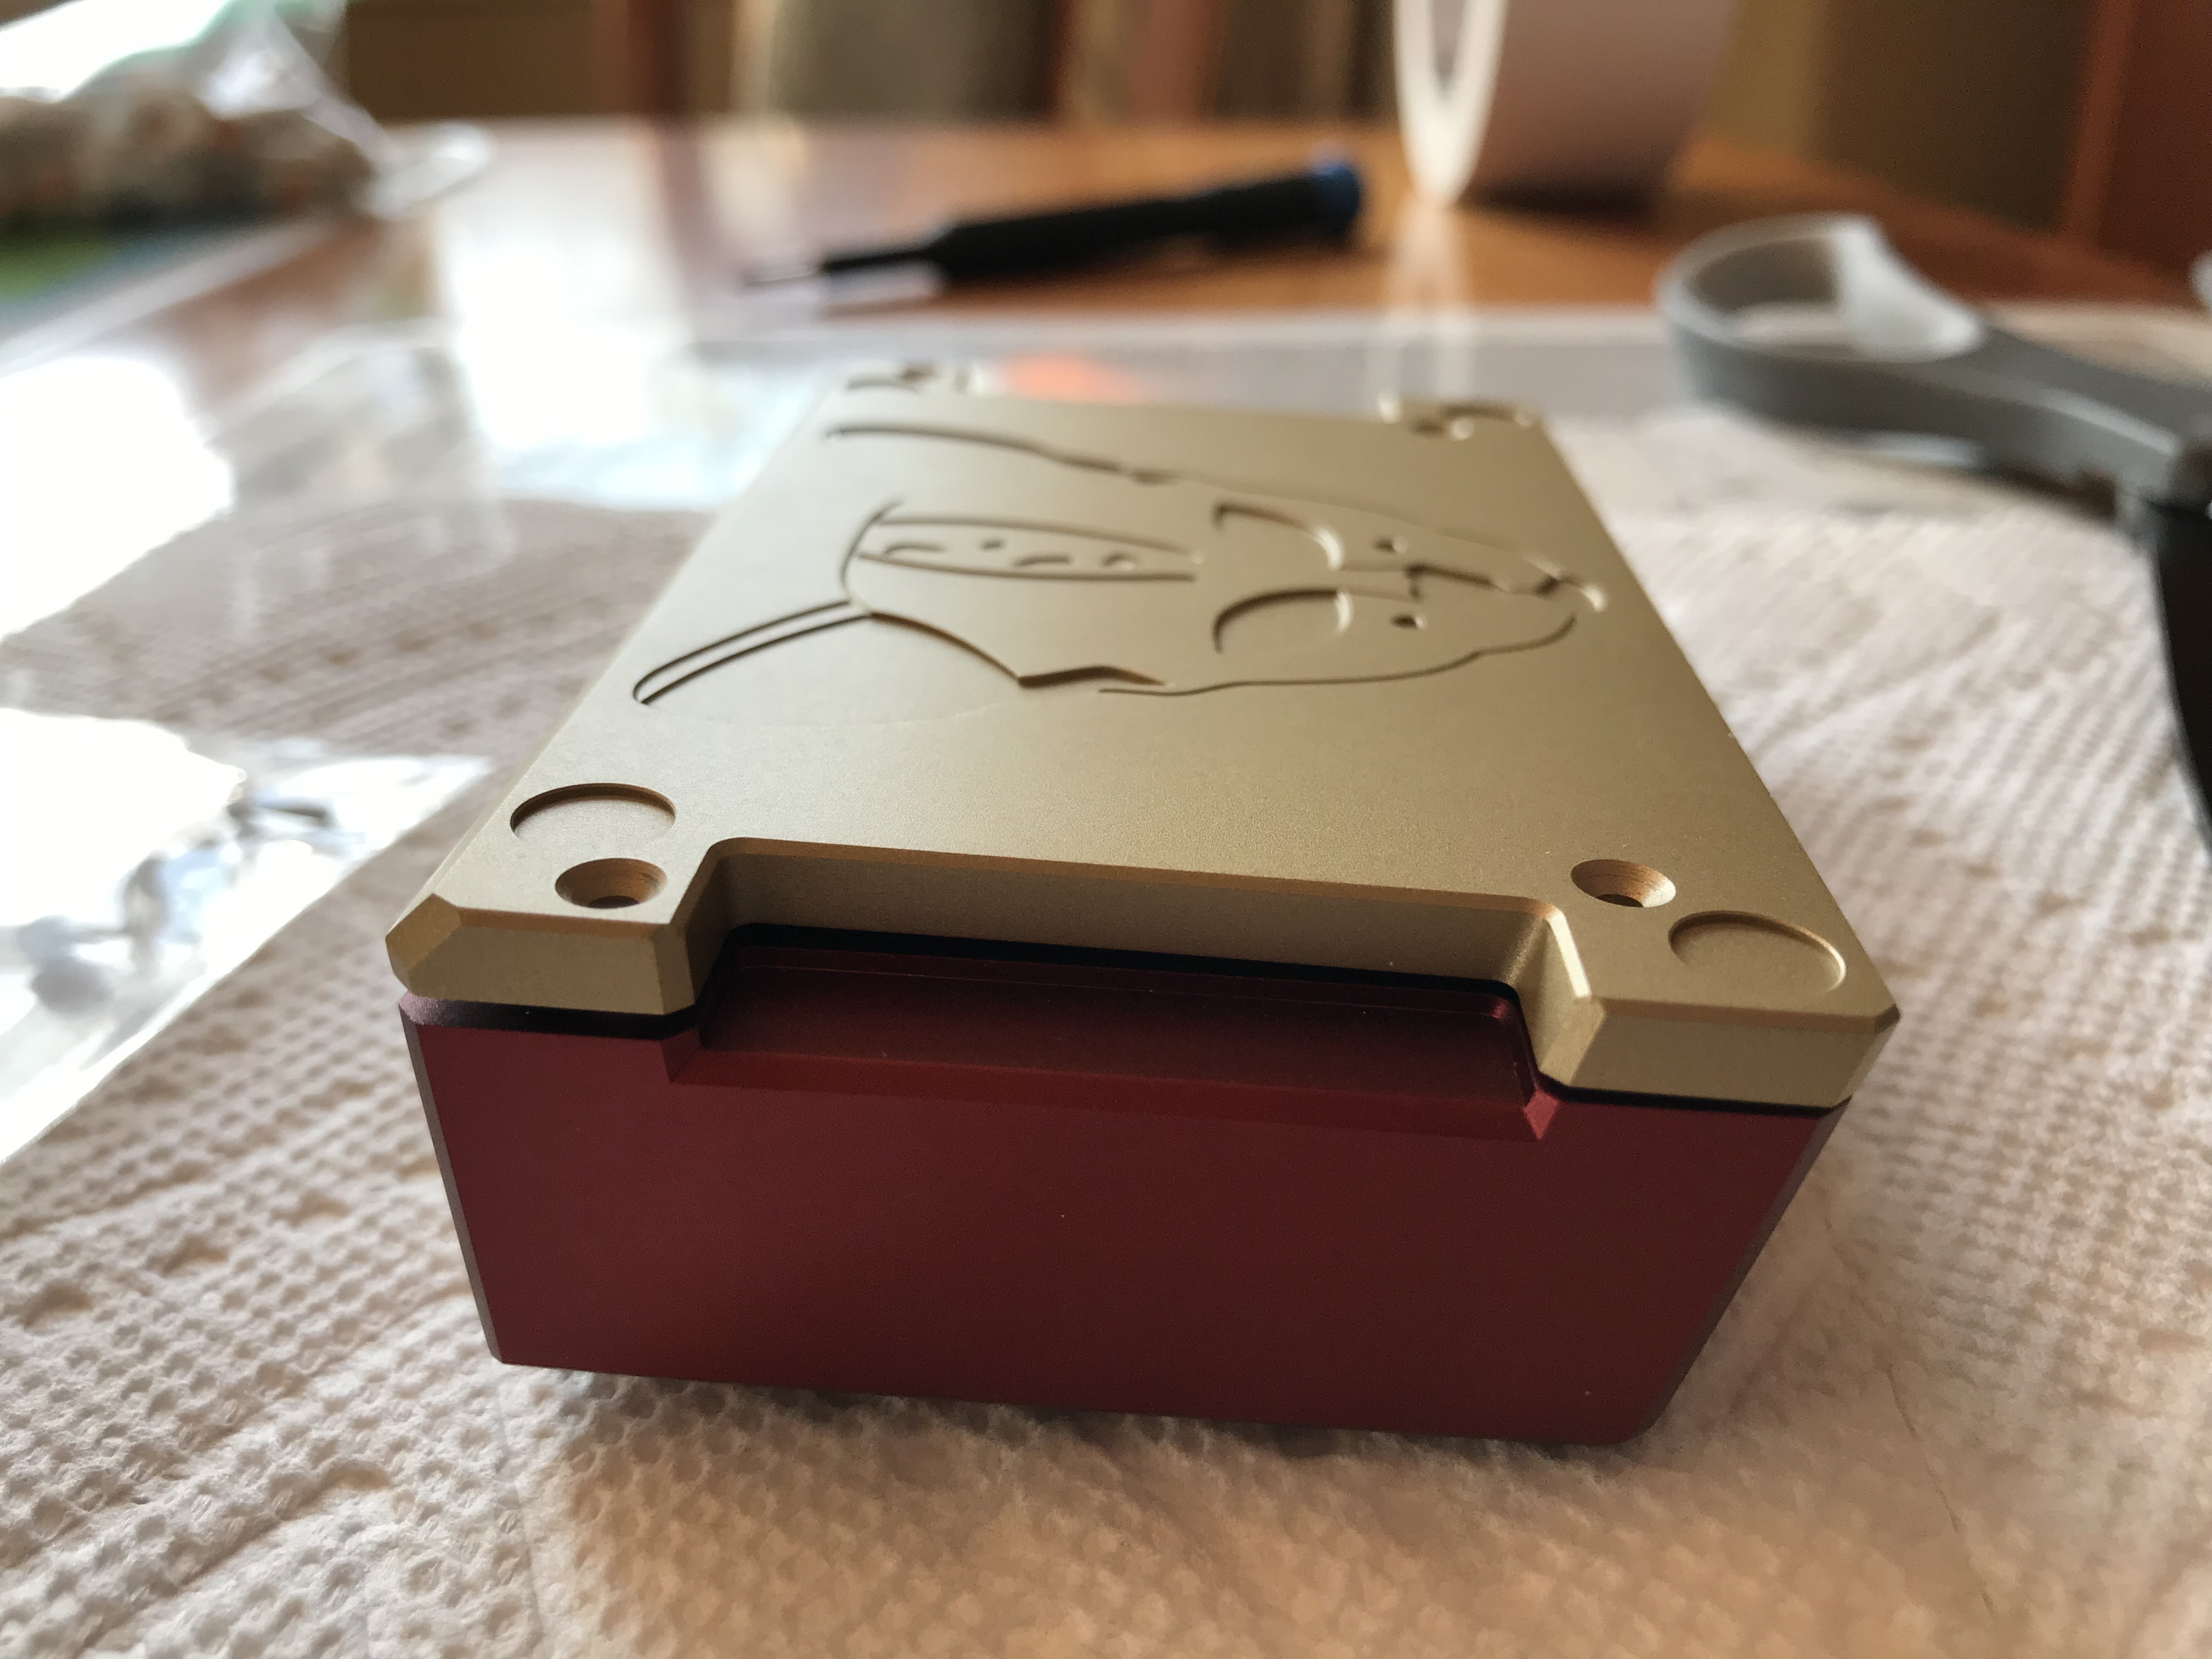
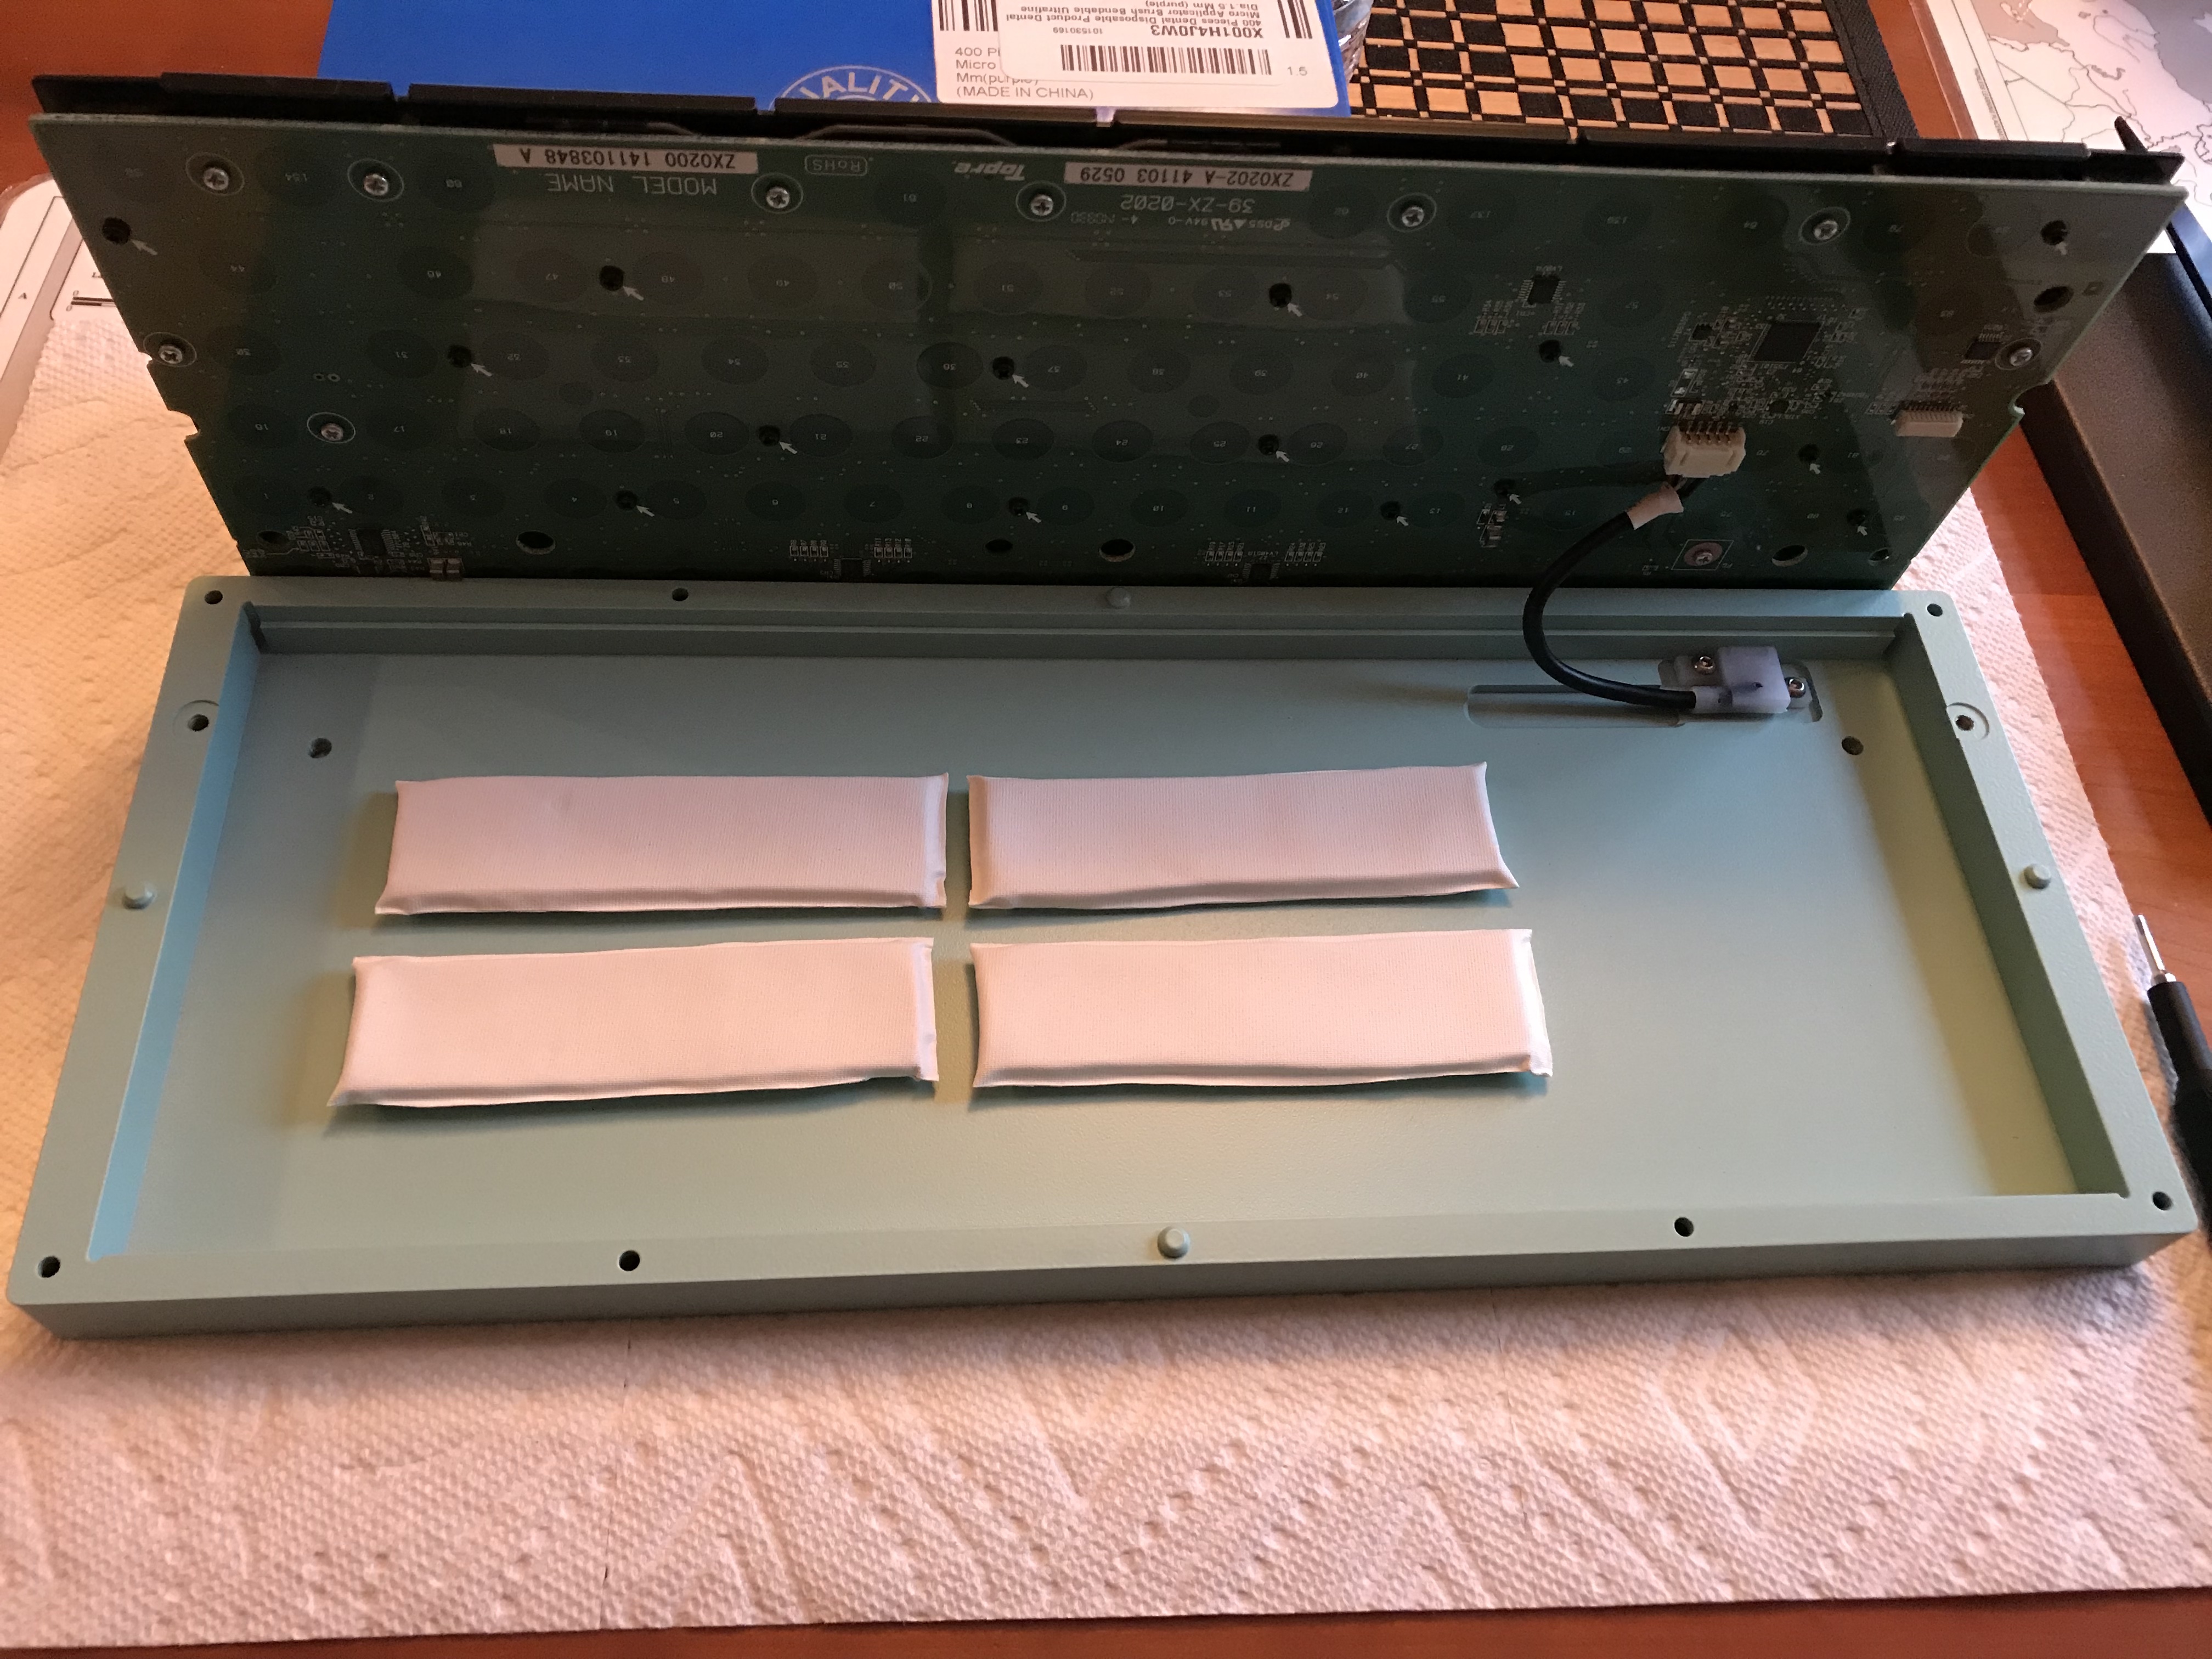
The idea is that the pressure from the soldered switch pins and the case base will hold the packet in place and allow it to dampen key impacts. It’s a good idea to place the packet first and make sure that enough pressure is present - in this case, one wrap of gaffer tape on a 0.1" thick piece of Sorbothane wasn’t quite enough. I ended up having to wrap the packet three times to get sufficient thickness. The process is pretty much what you’d expect, just keep wrapping your mummy. While we’re here, check out that Ocelot base!
If you’re using Sorbothane as originally intended by the manufacturer, you should be targeting a 10-20% compression of the material. After three wraps of the Sorbothane in gaffer tape, here’s the Ocelot base, resting on the Sorbomummy, just a little bit displaced from the Ocelot top. 10-20% compression once the top’s screwed in? I’ll go with yes.
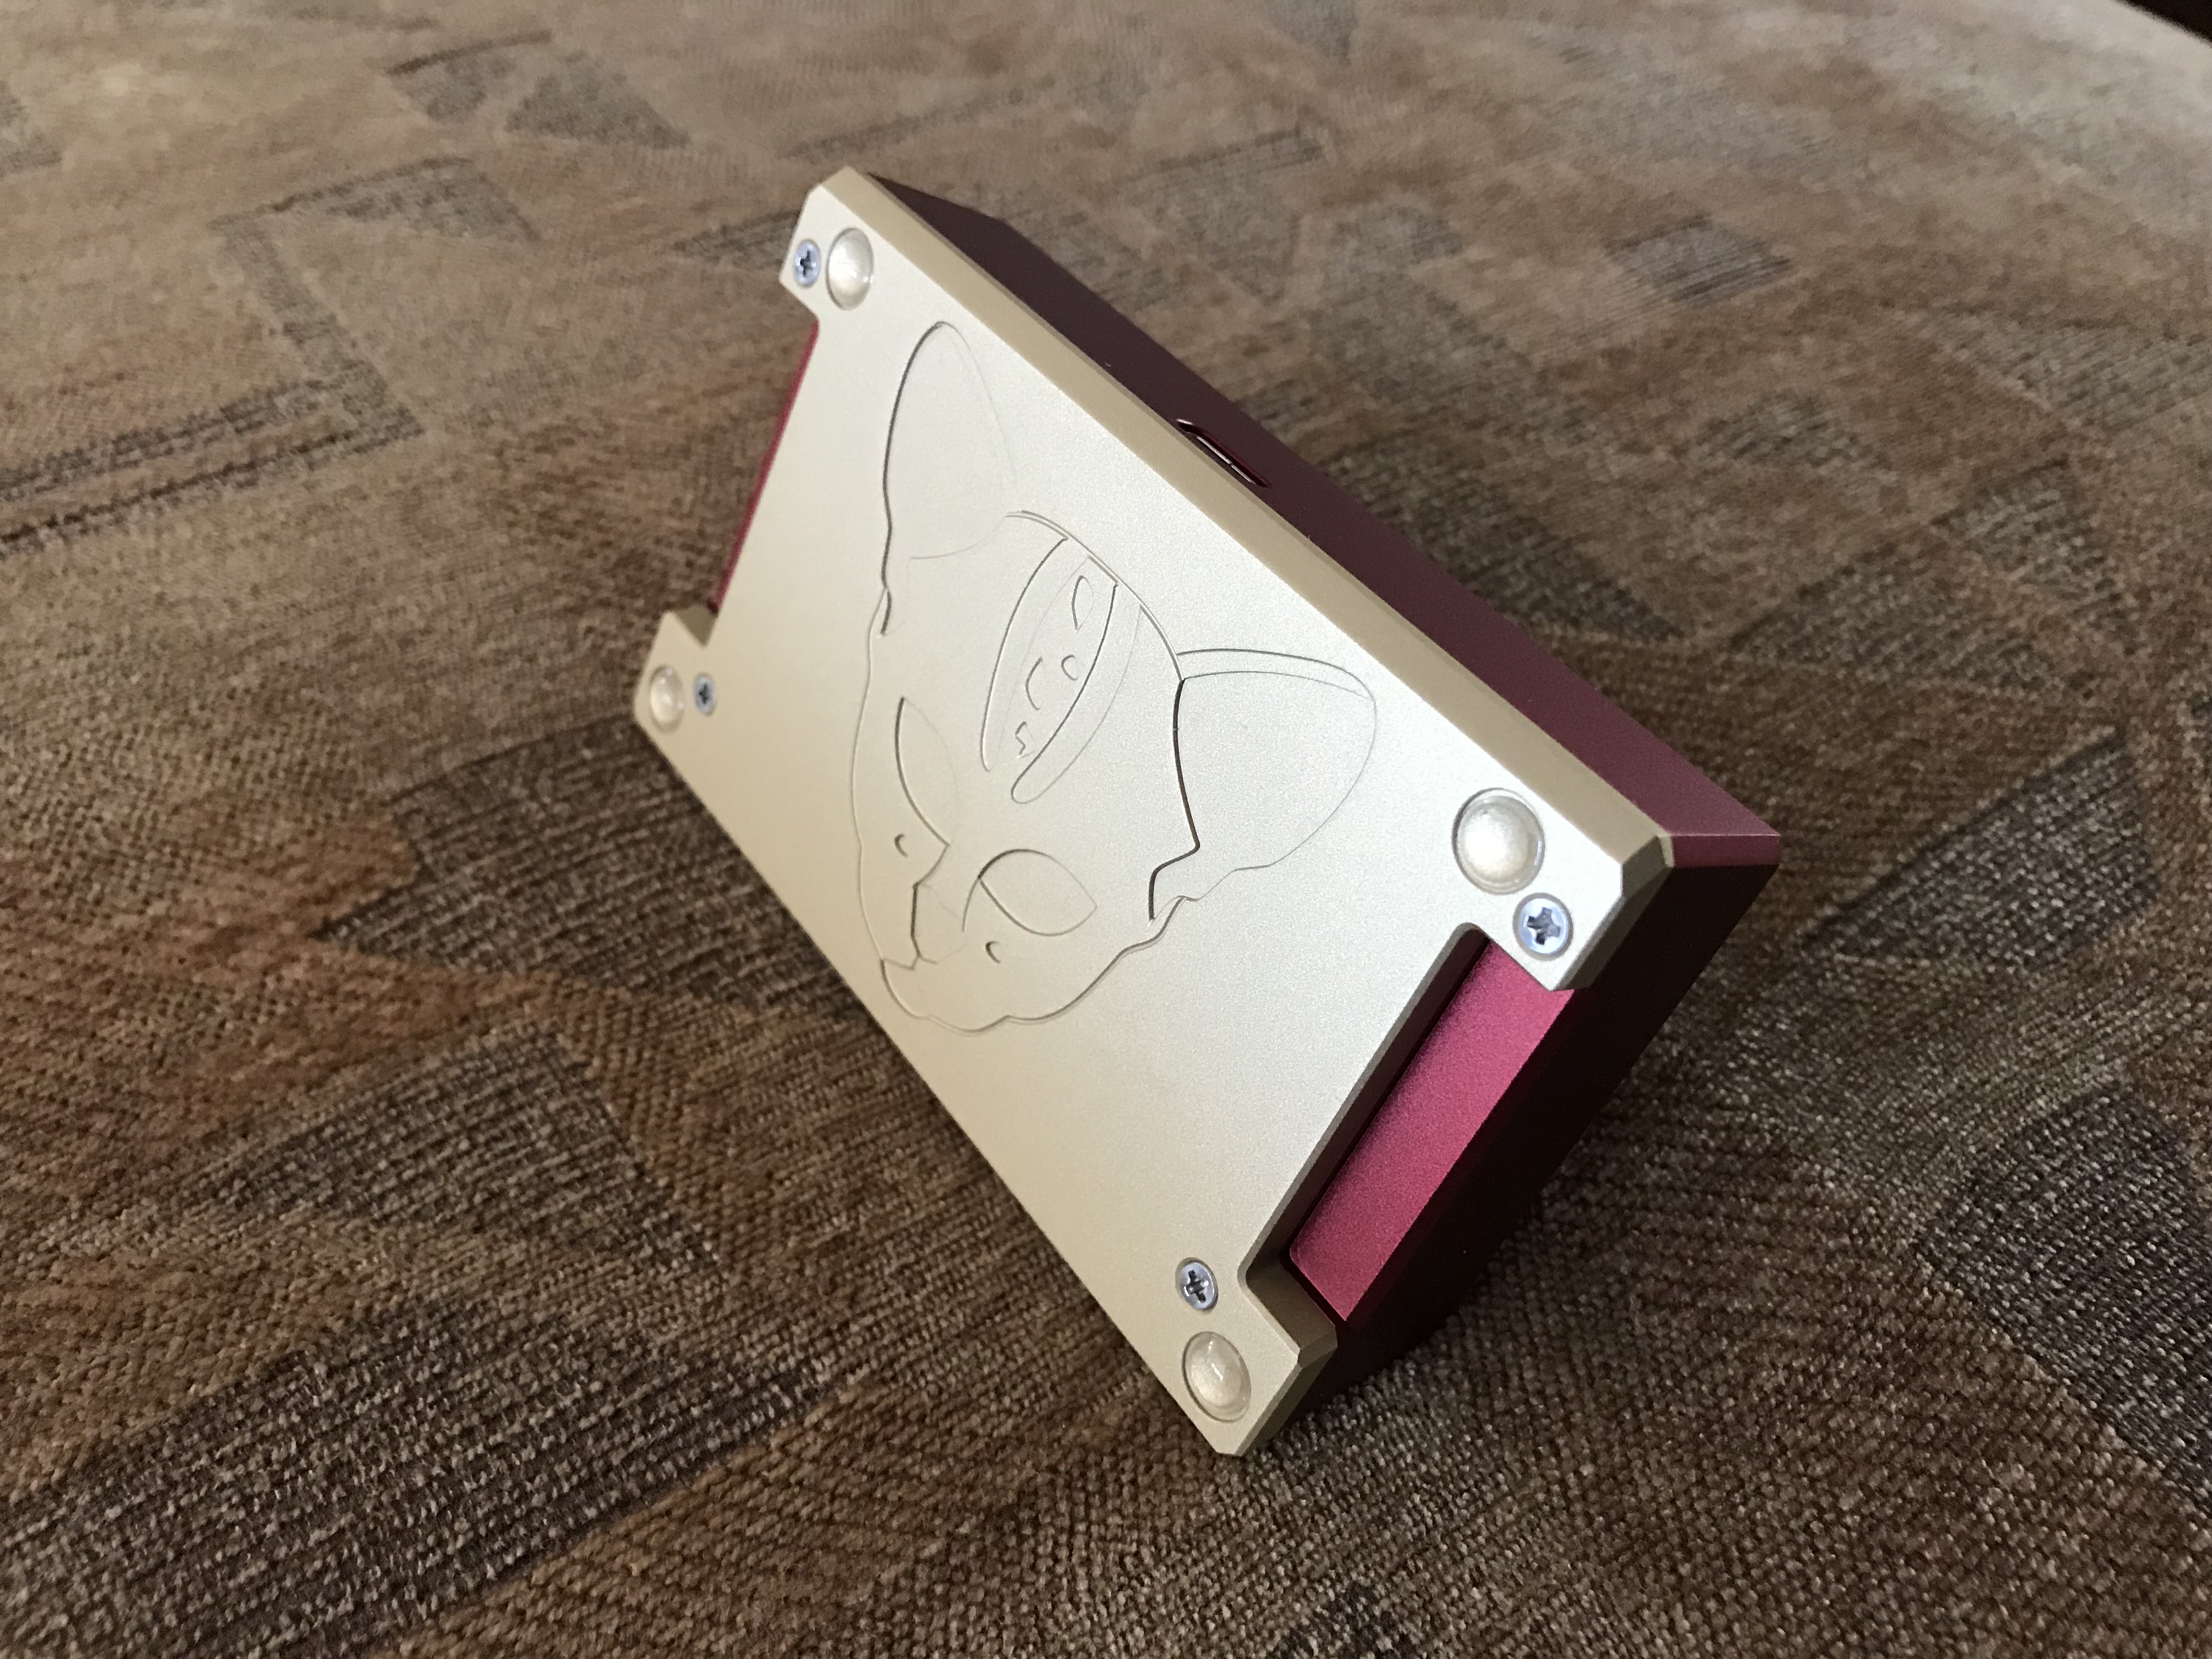
Put the screws back in, and we’re done - and no more metallic case ping. Just the loud clack of those Holy GSUS noise bombs.
Lessons learned
- Gaffer tape seems to be a good solution for introducing Sorbothane into builds in a non-reactive and easy-to-remove way. I’ll be trying this approach again on upcoming builds.
- In the event anyone was curious, the VIA configurator (0.29) handles switching between multiple VIA-compatible devices on the same host system, in pretty much exactly the way you’d expect. Olivia and Wilba FTW.
- Since VIA doesn’t (yet) handle macros, I’ll still be setting those up in QMK userspace for the time being. No big deal, but if you’re looking for the Singa Ocelot in the repo, note that
wilba_tech/wt8_ais the droid you’re looking for.
I’m still not sure exactly what I’m going to do with this thing, but what the hell. It’s nice!
Specifications
case: Singa Ocelot (velvet)
case dampening: 0.1" 40 Duro Sorbothane, triple-wrapped in gaffer tape
PCB: Wilba WT8-A
plate: 3mm integrated
LEDs: none
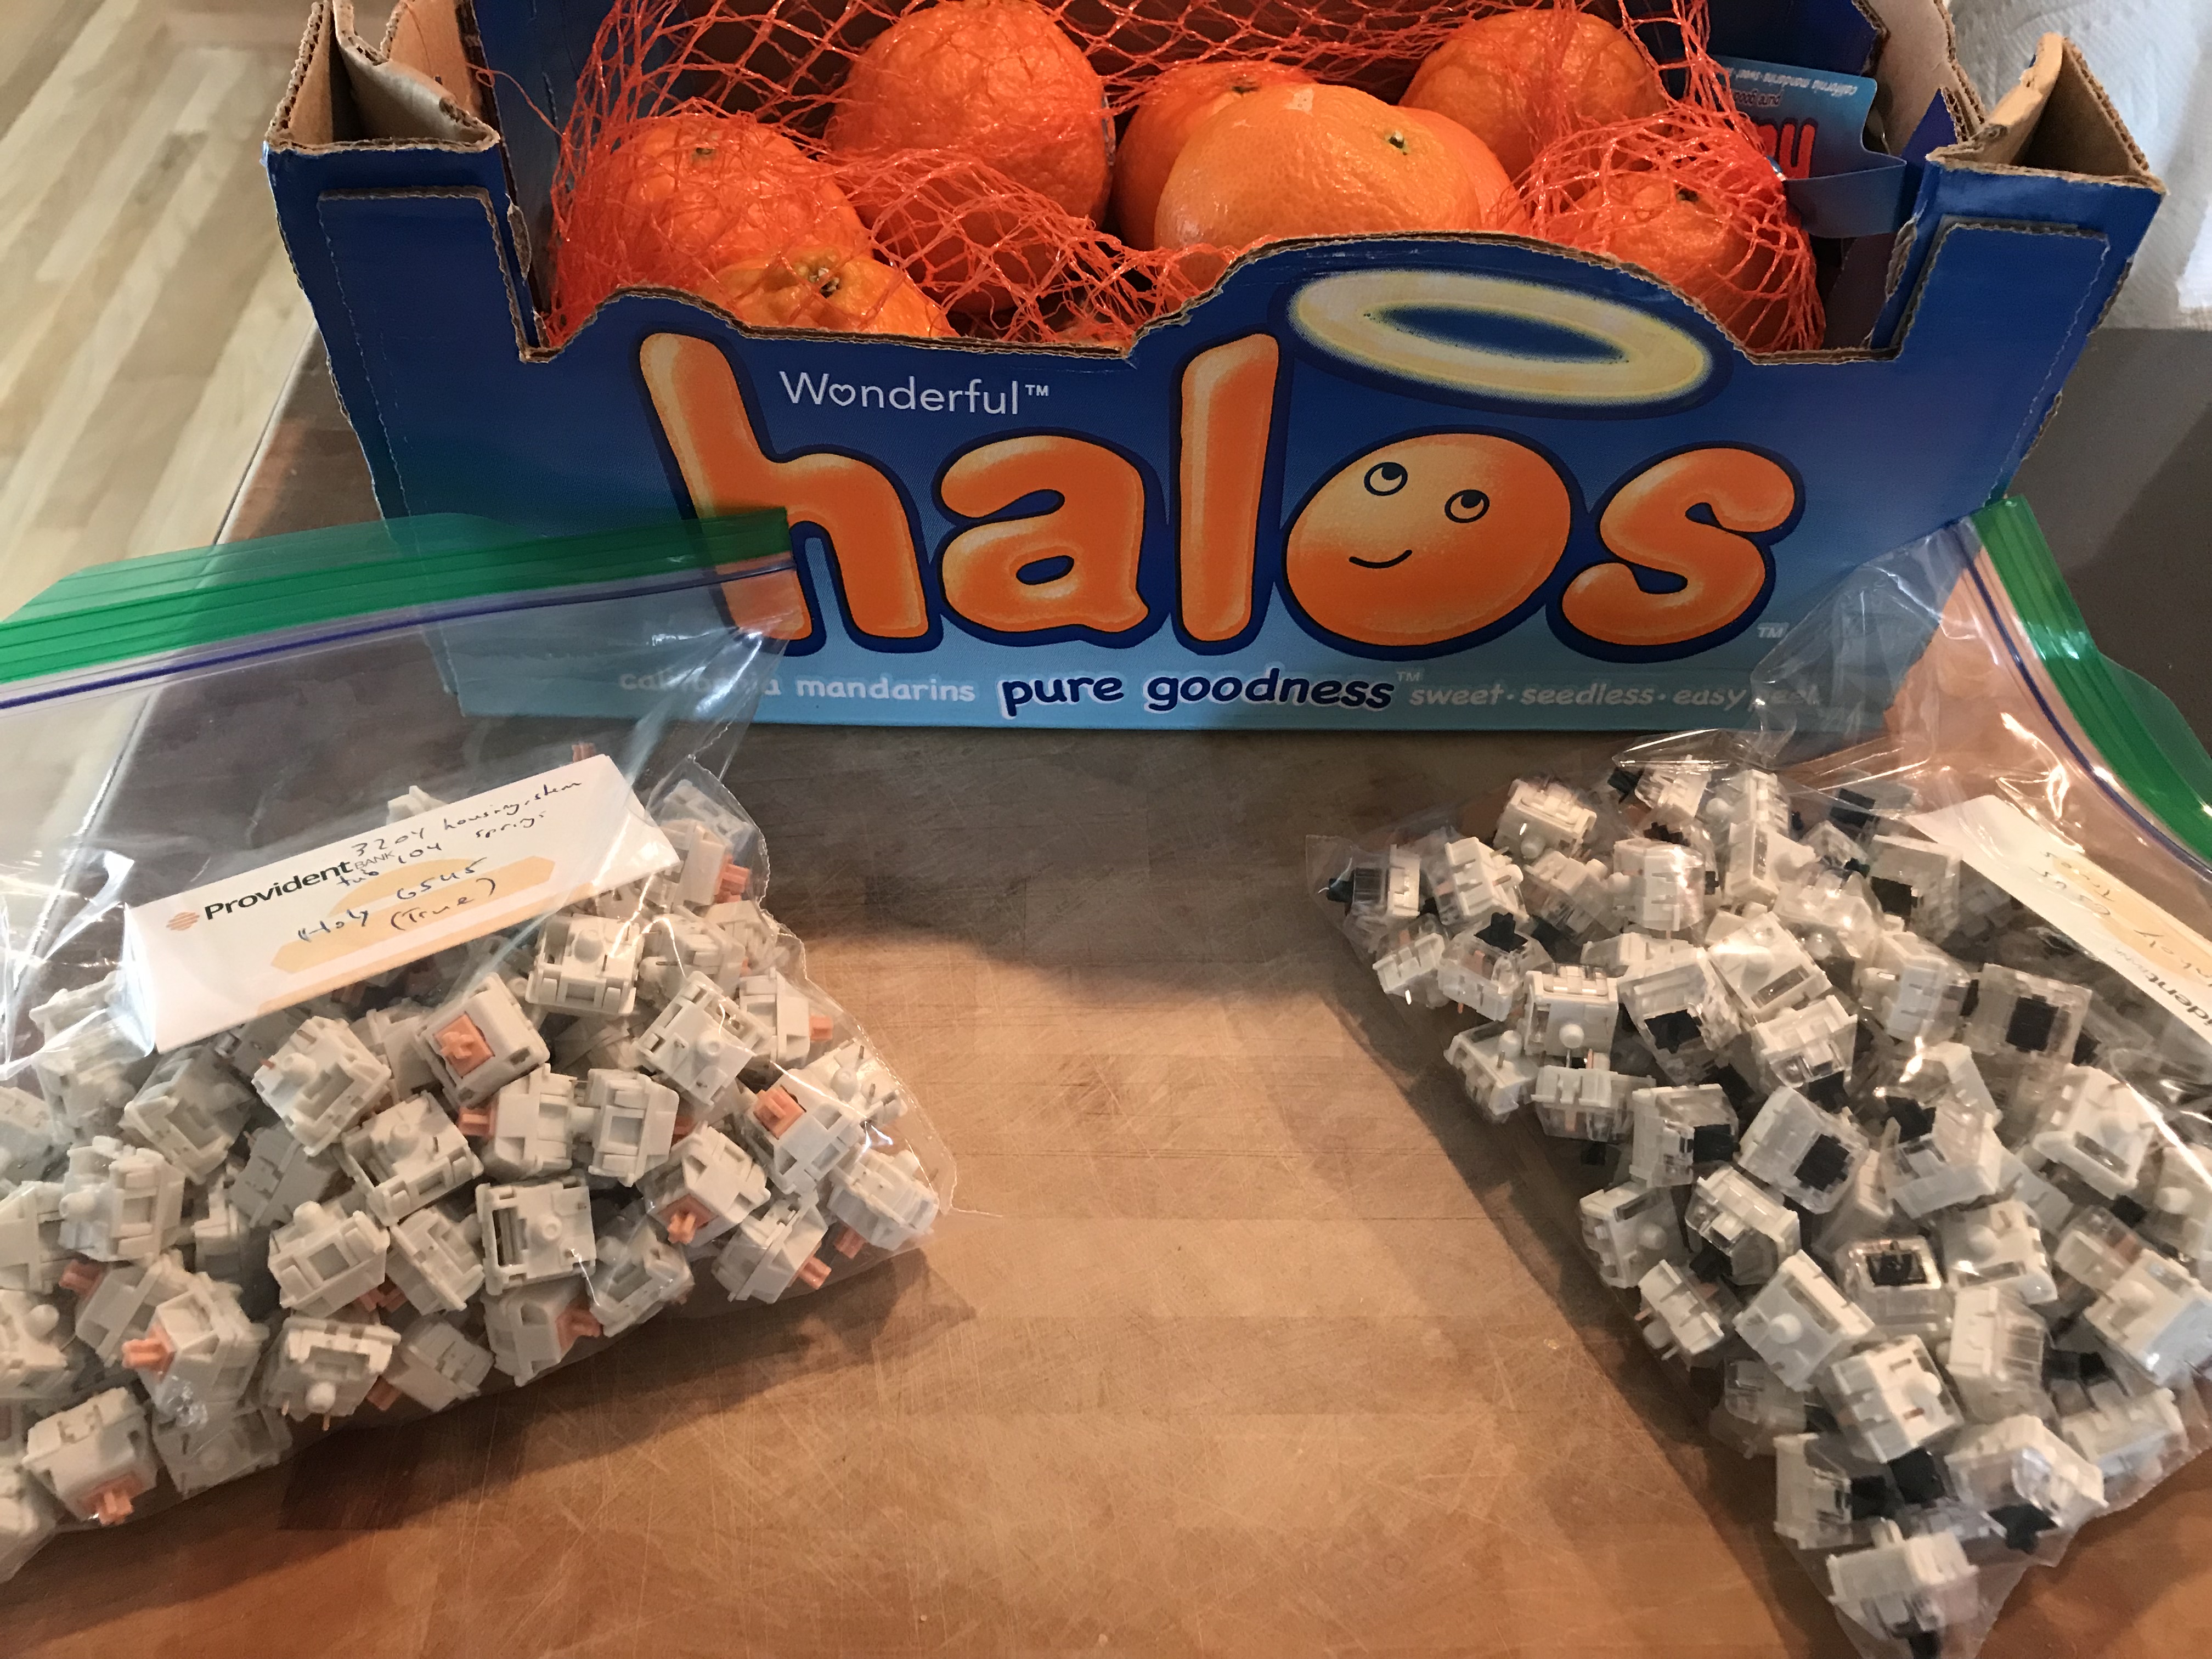
switches: Holy GSUS (Halo True stems)
switch lubing:
Tribosys 3204 hand-lubed stems & housing
Krytox GPL 104 tub-lubed springs
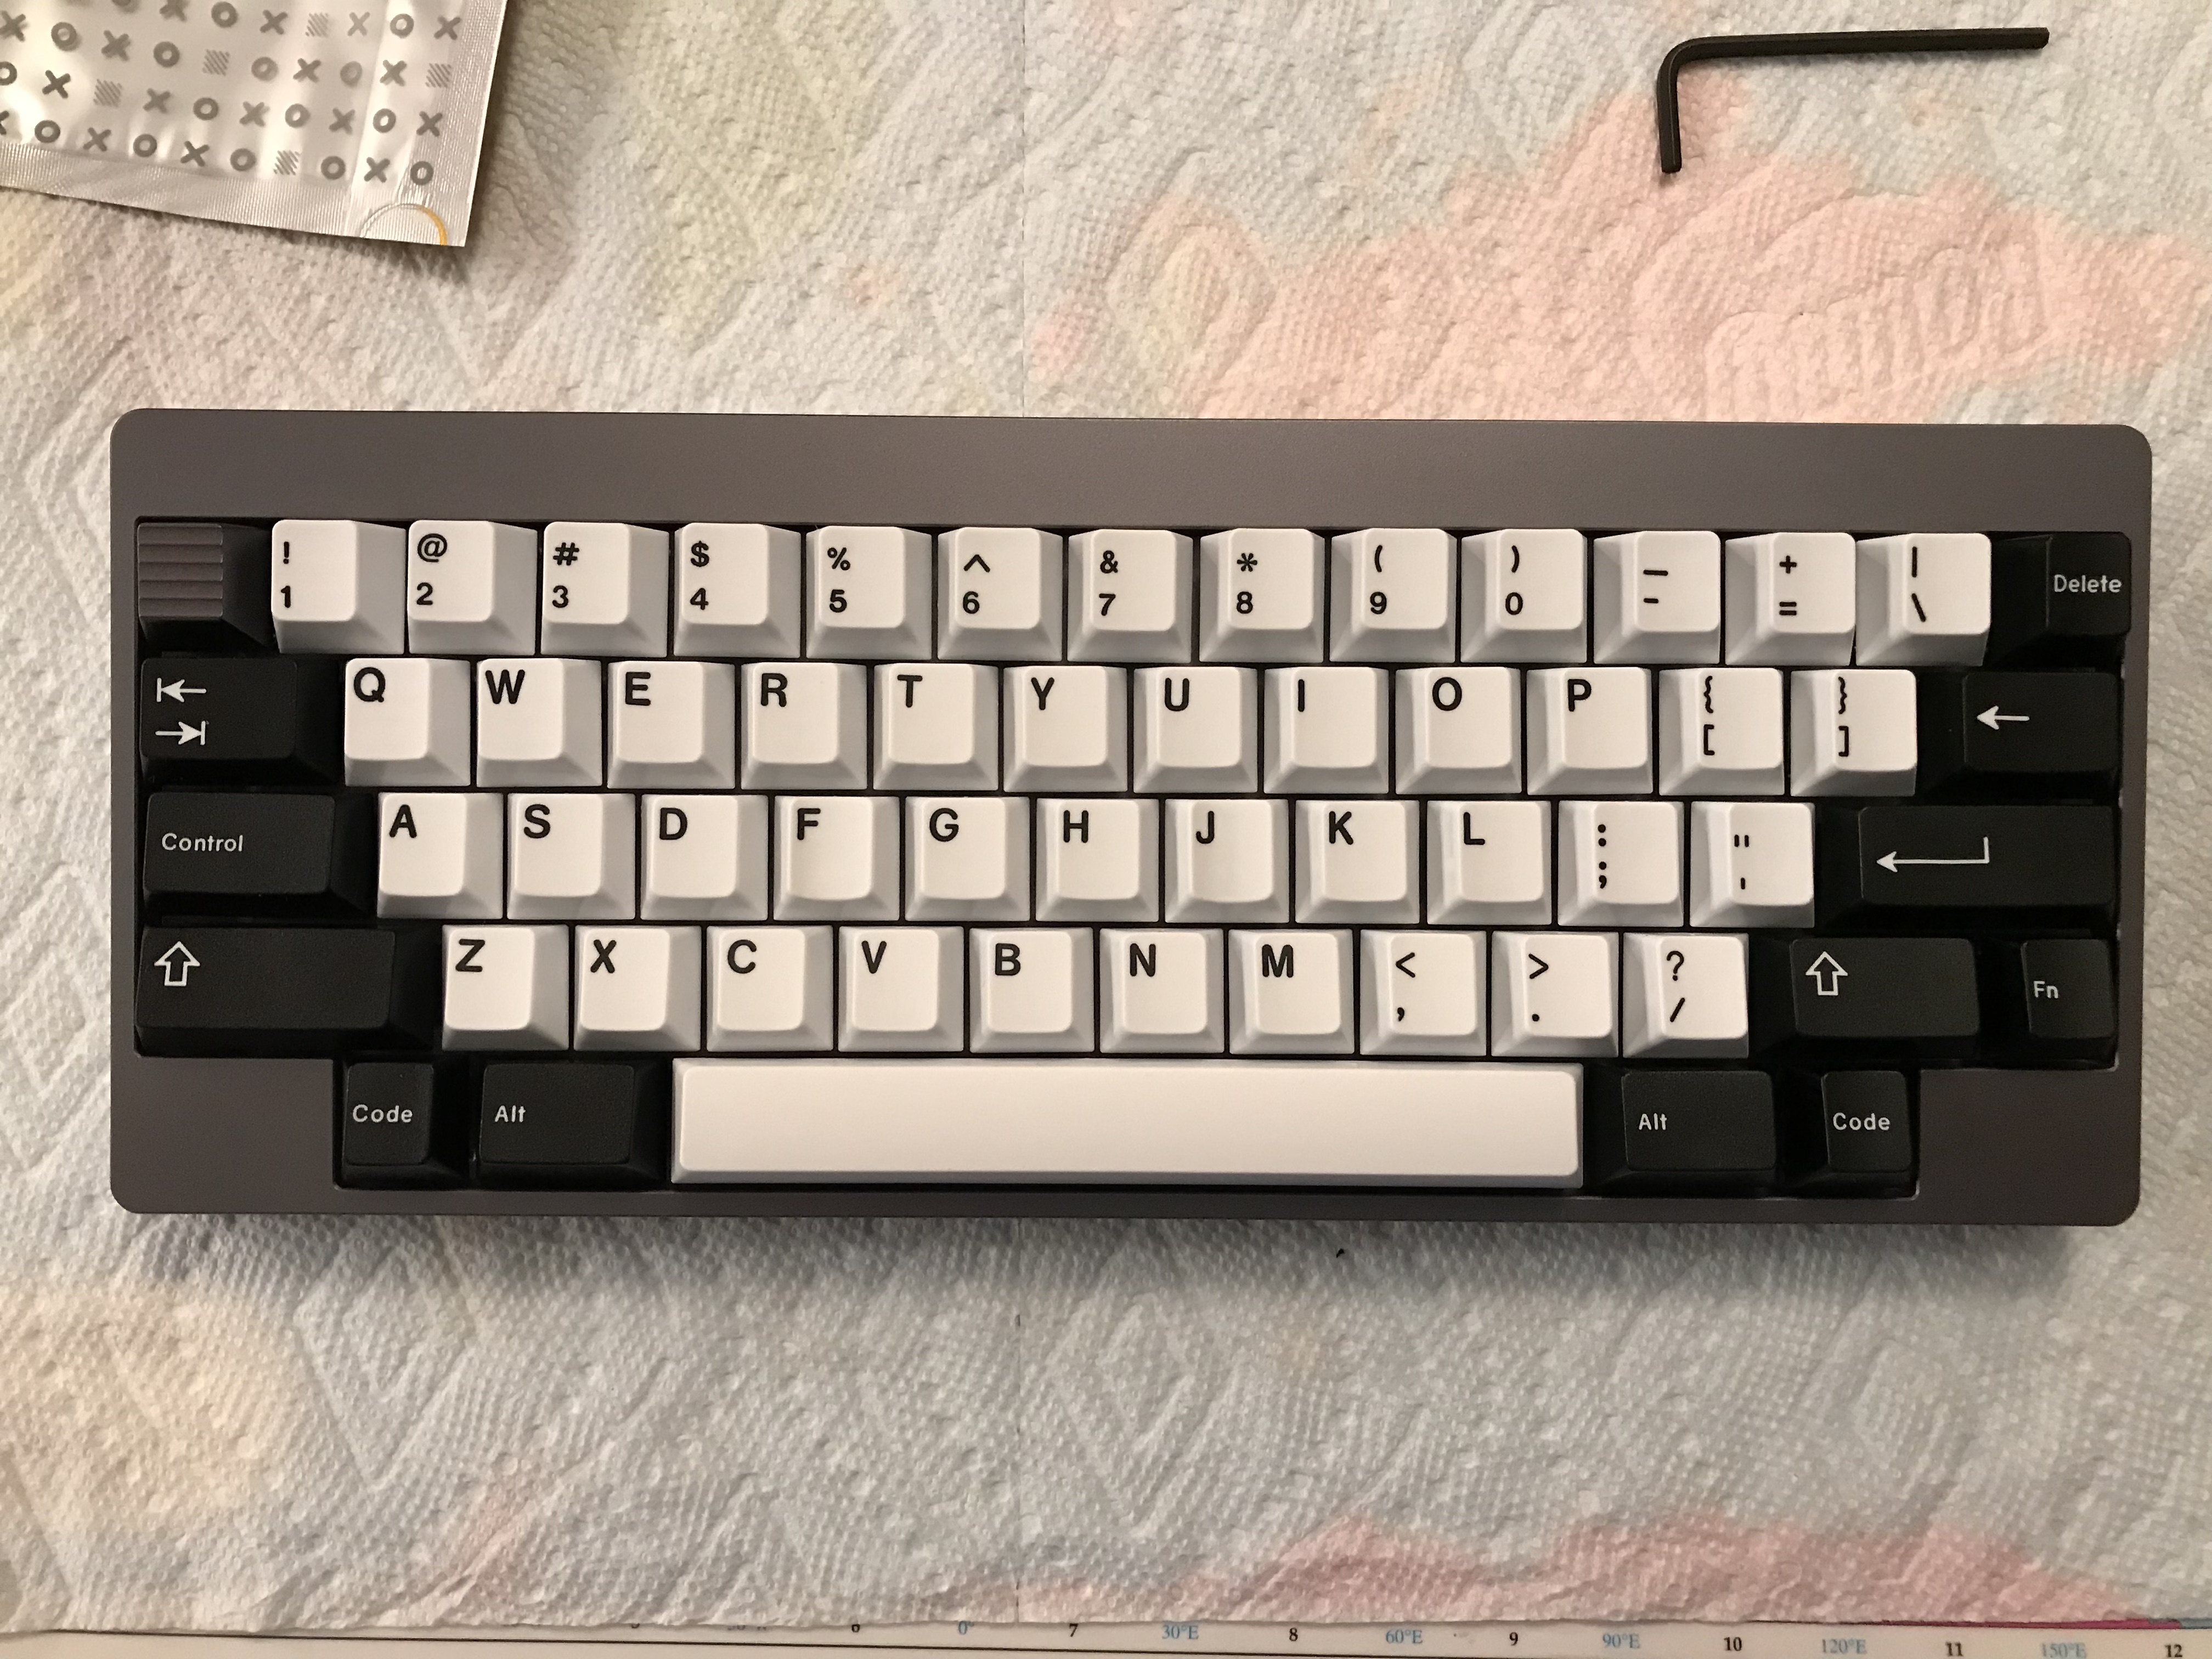
keycaps: OLKB Acute Ortholinear
plate/PCB dampening: none
HxWxD (without caps or feet): 0.88"x4.0"x2.38"
HxWxD (without caps): 0.94"x4.0"x2.38"
HxWxD: 1.31"x4.0"x2.38"
assembled weight: 0.79 lb
5 Likes
Build #14: Tofu tasting (1st course: acrylic)
In an earlier build log, I mentioned that my “workshop” is in the corner of an unheated garage. This makes it difficult to do much soldering in the winter months. During the worst of the cold spells, I hunkered down and did a bunch of switch modding. For this build, the first in a series of builds with various Tofu cases and PCBs, I wanted to actually use some of the fruits of my labors. Introducing: the Holy GSUS!
For those who haven’t been following the Holy Panda saga, I’m not going to replay all of the drama here - you can use this post to review. For our immediate purposes, the following suffices:
- A Holy Panda is a switch assembled from the stems of Halo switches (tactiles), and everything else from an Invyr Panda (linear). It is very tactile and loud. Up until recently, the market price for these has been quite high, due to the scarcity of the Panda switches.
- A Holy GSUS is also assembled from the stems of Halo switches, but everything else comes from a Bsun GSUS, a clone of the Invyr Panda. While this was a one-off run, it is now possible to find other Panda clones on the market.
For lubing, I went with manual application Tribosys 3204 on the housing rails, slider stem, and slider sides; I didn’t apply any lube to the tactile legs. I used roughly 1mL per 65 switches. For the springs, I tub lubed with Krytox GPL 104, about 1 drop of lube for every 7 springs. The results are below - a lubed batch of Holy GSUS on the left, and on the right, an unlubed batch of the Unholy GSUS - GSUS stems with Halo housings and springs, the unused byproduct of the Holy GSUS assembly process.
I had been using electrical tape for the stabilizer bandaid mod, and then silicone pads, but I found the silicone pads to be a bit finicky in recent builds. Specifically, if they aren’t centered under the stabilizer housing, the housing can tilt slightly to one side when it’s screwed into place atop the silicone pad, leading to problems with stabilizer function. So, on to alternative #3: gaffer tape, a good cloth tape. Here’s the bandaid mod on the DZ60 we’re using for this build:

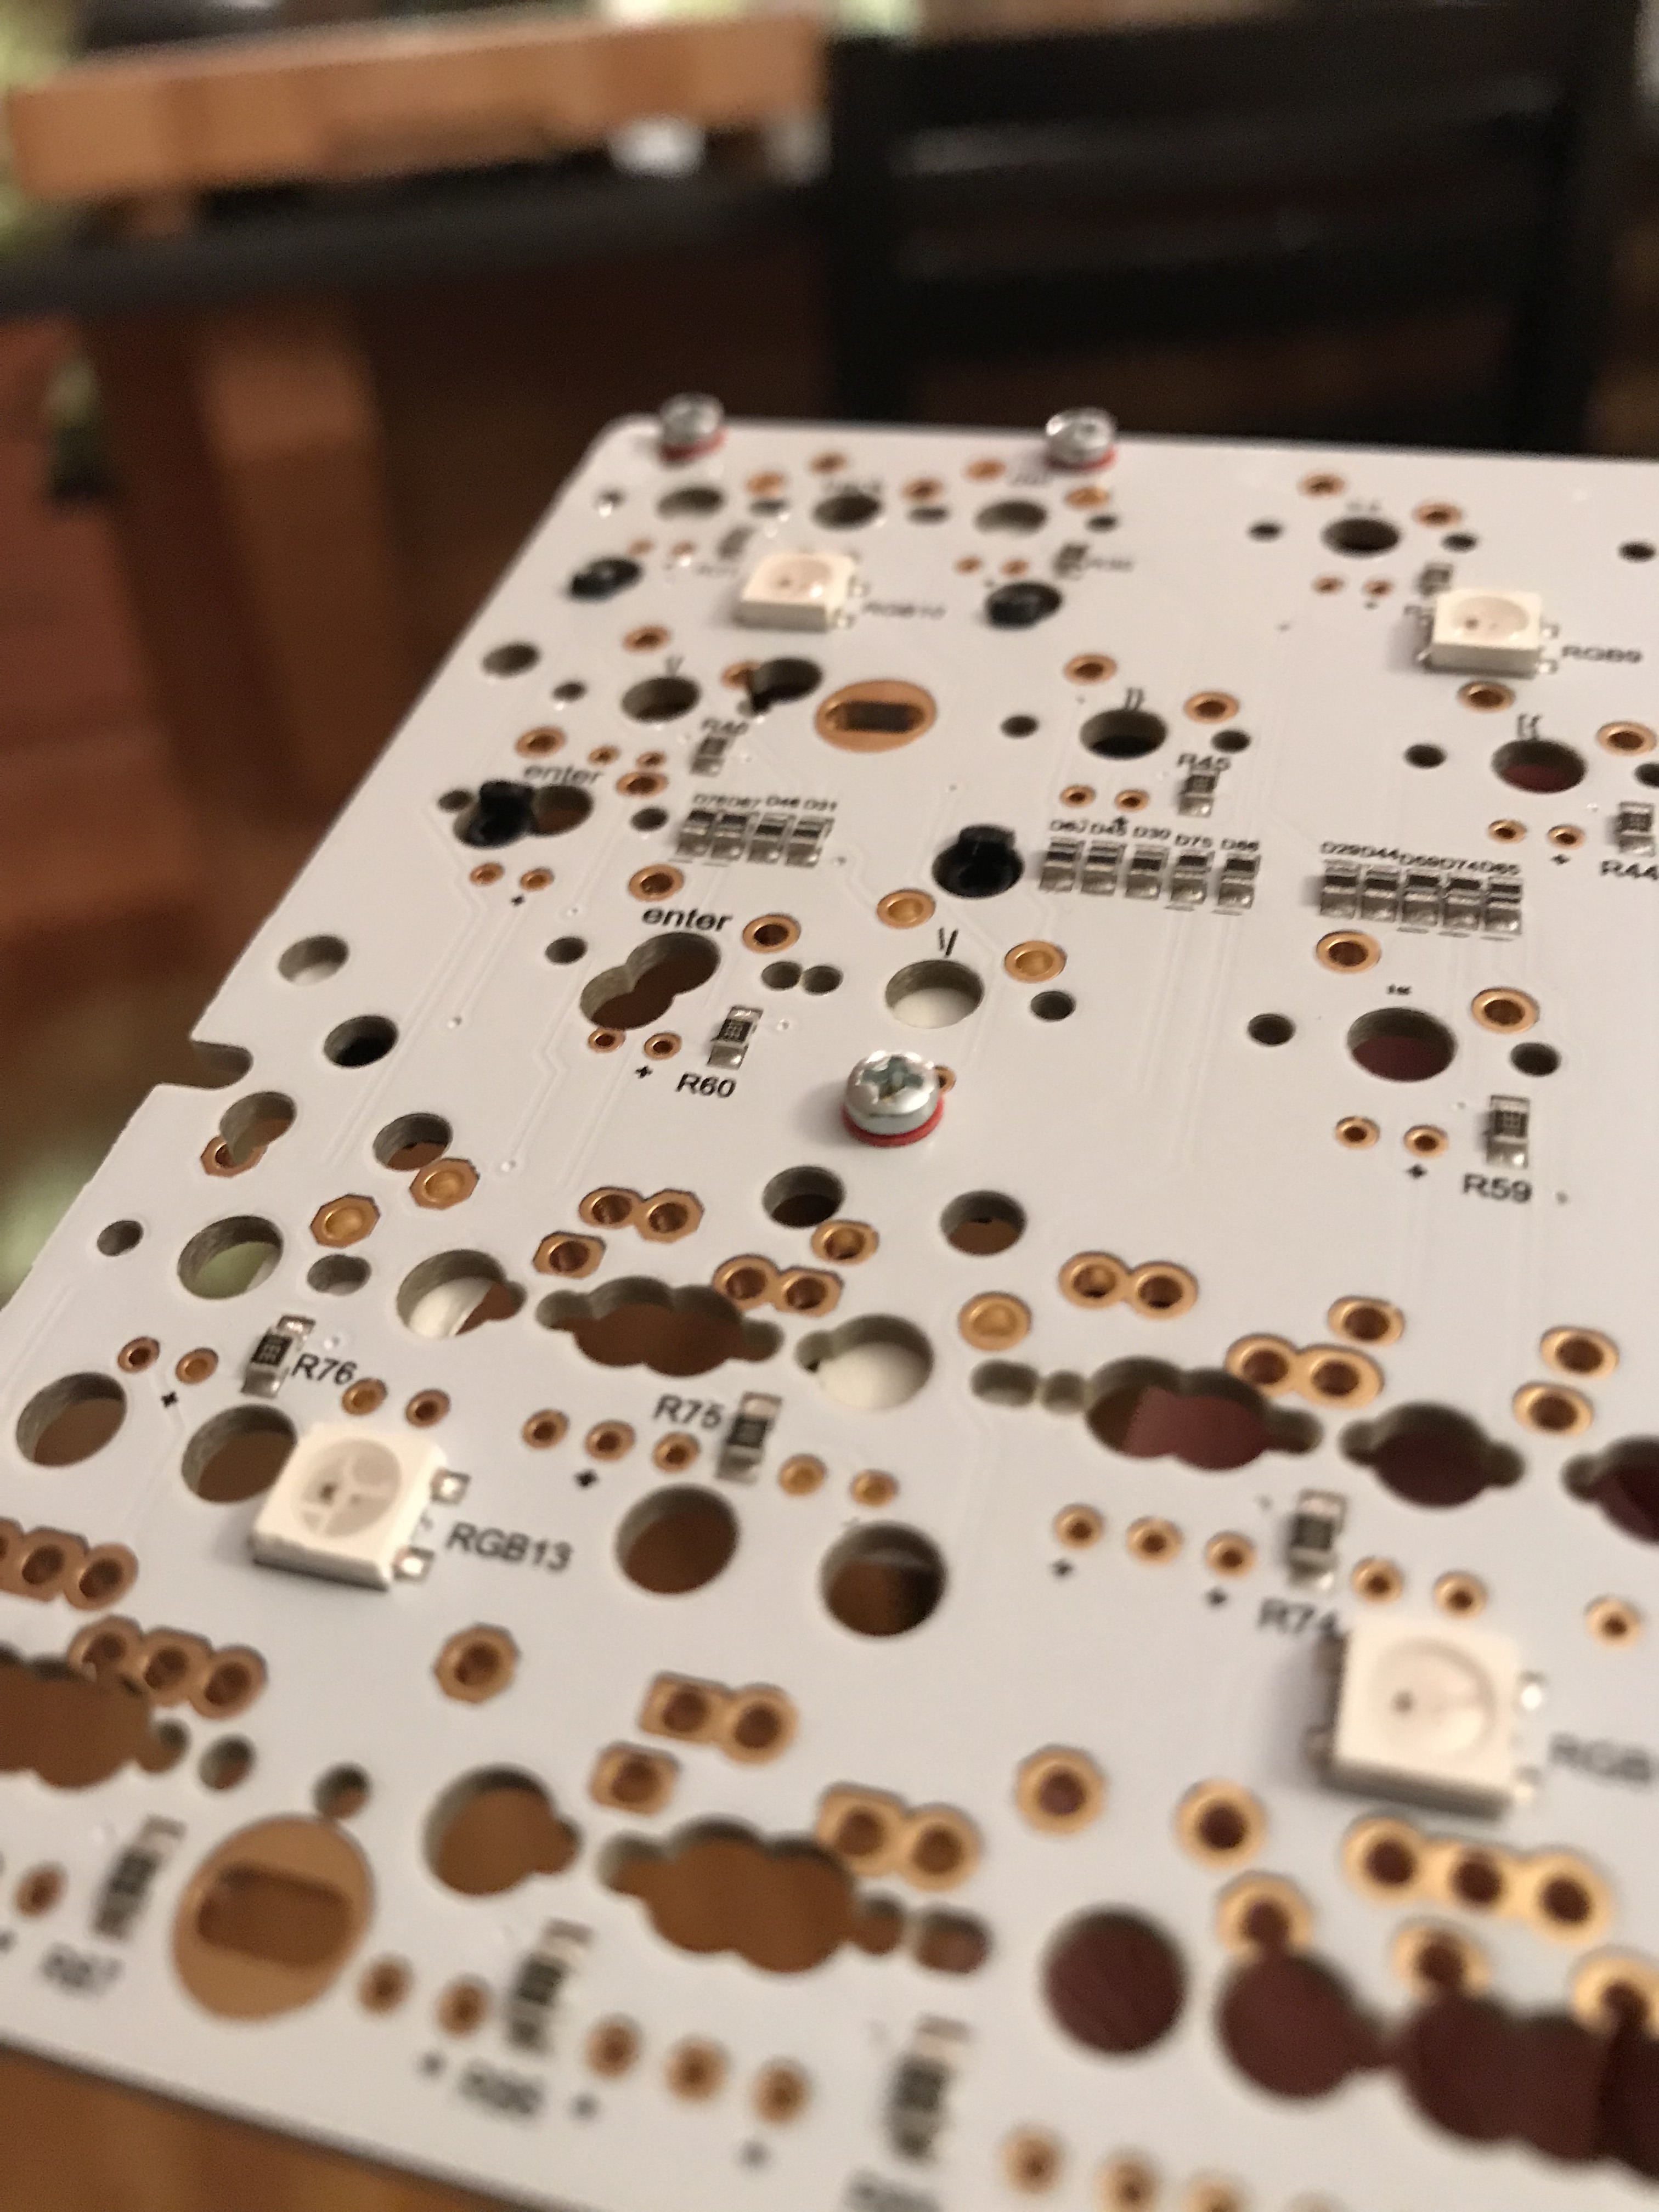
Whenever I build with a DZ60, I use nonconductive washers for all of the screws - it’s not strictly necessary for all of them, but for at least one of the screw holes, the screw can short out a couple of pads on the board, and once I’ve used a washer for one screw hole, my OCD kicks in and I’ve got to use washers for all of them. Here they are on GMK stabilizer screws:
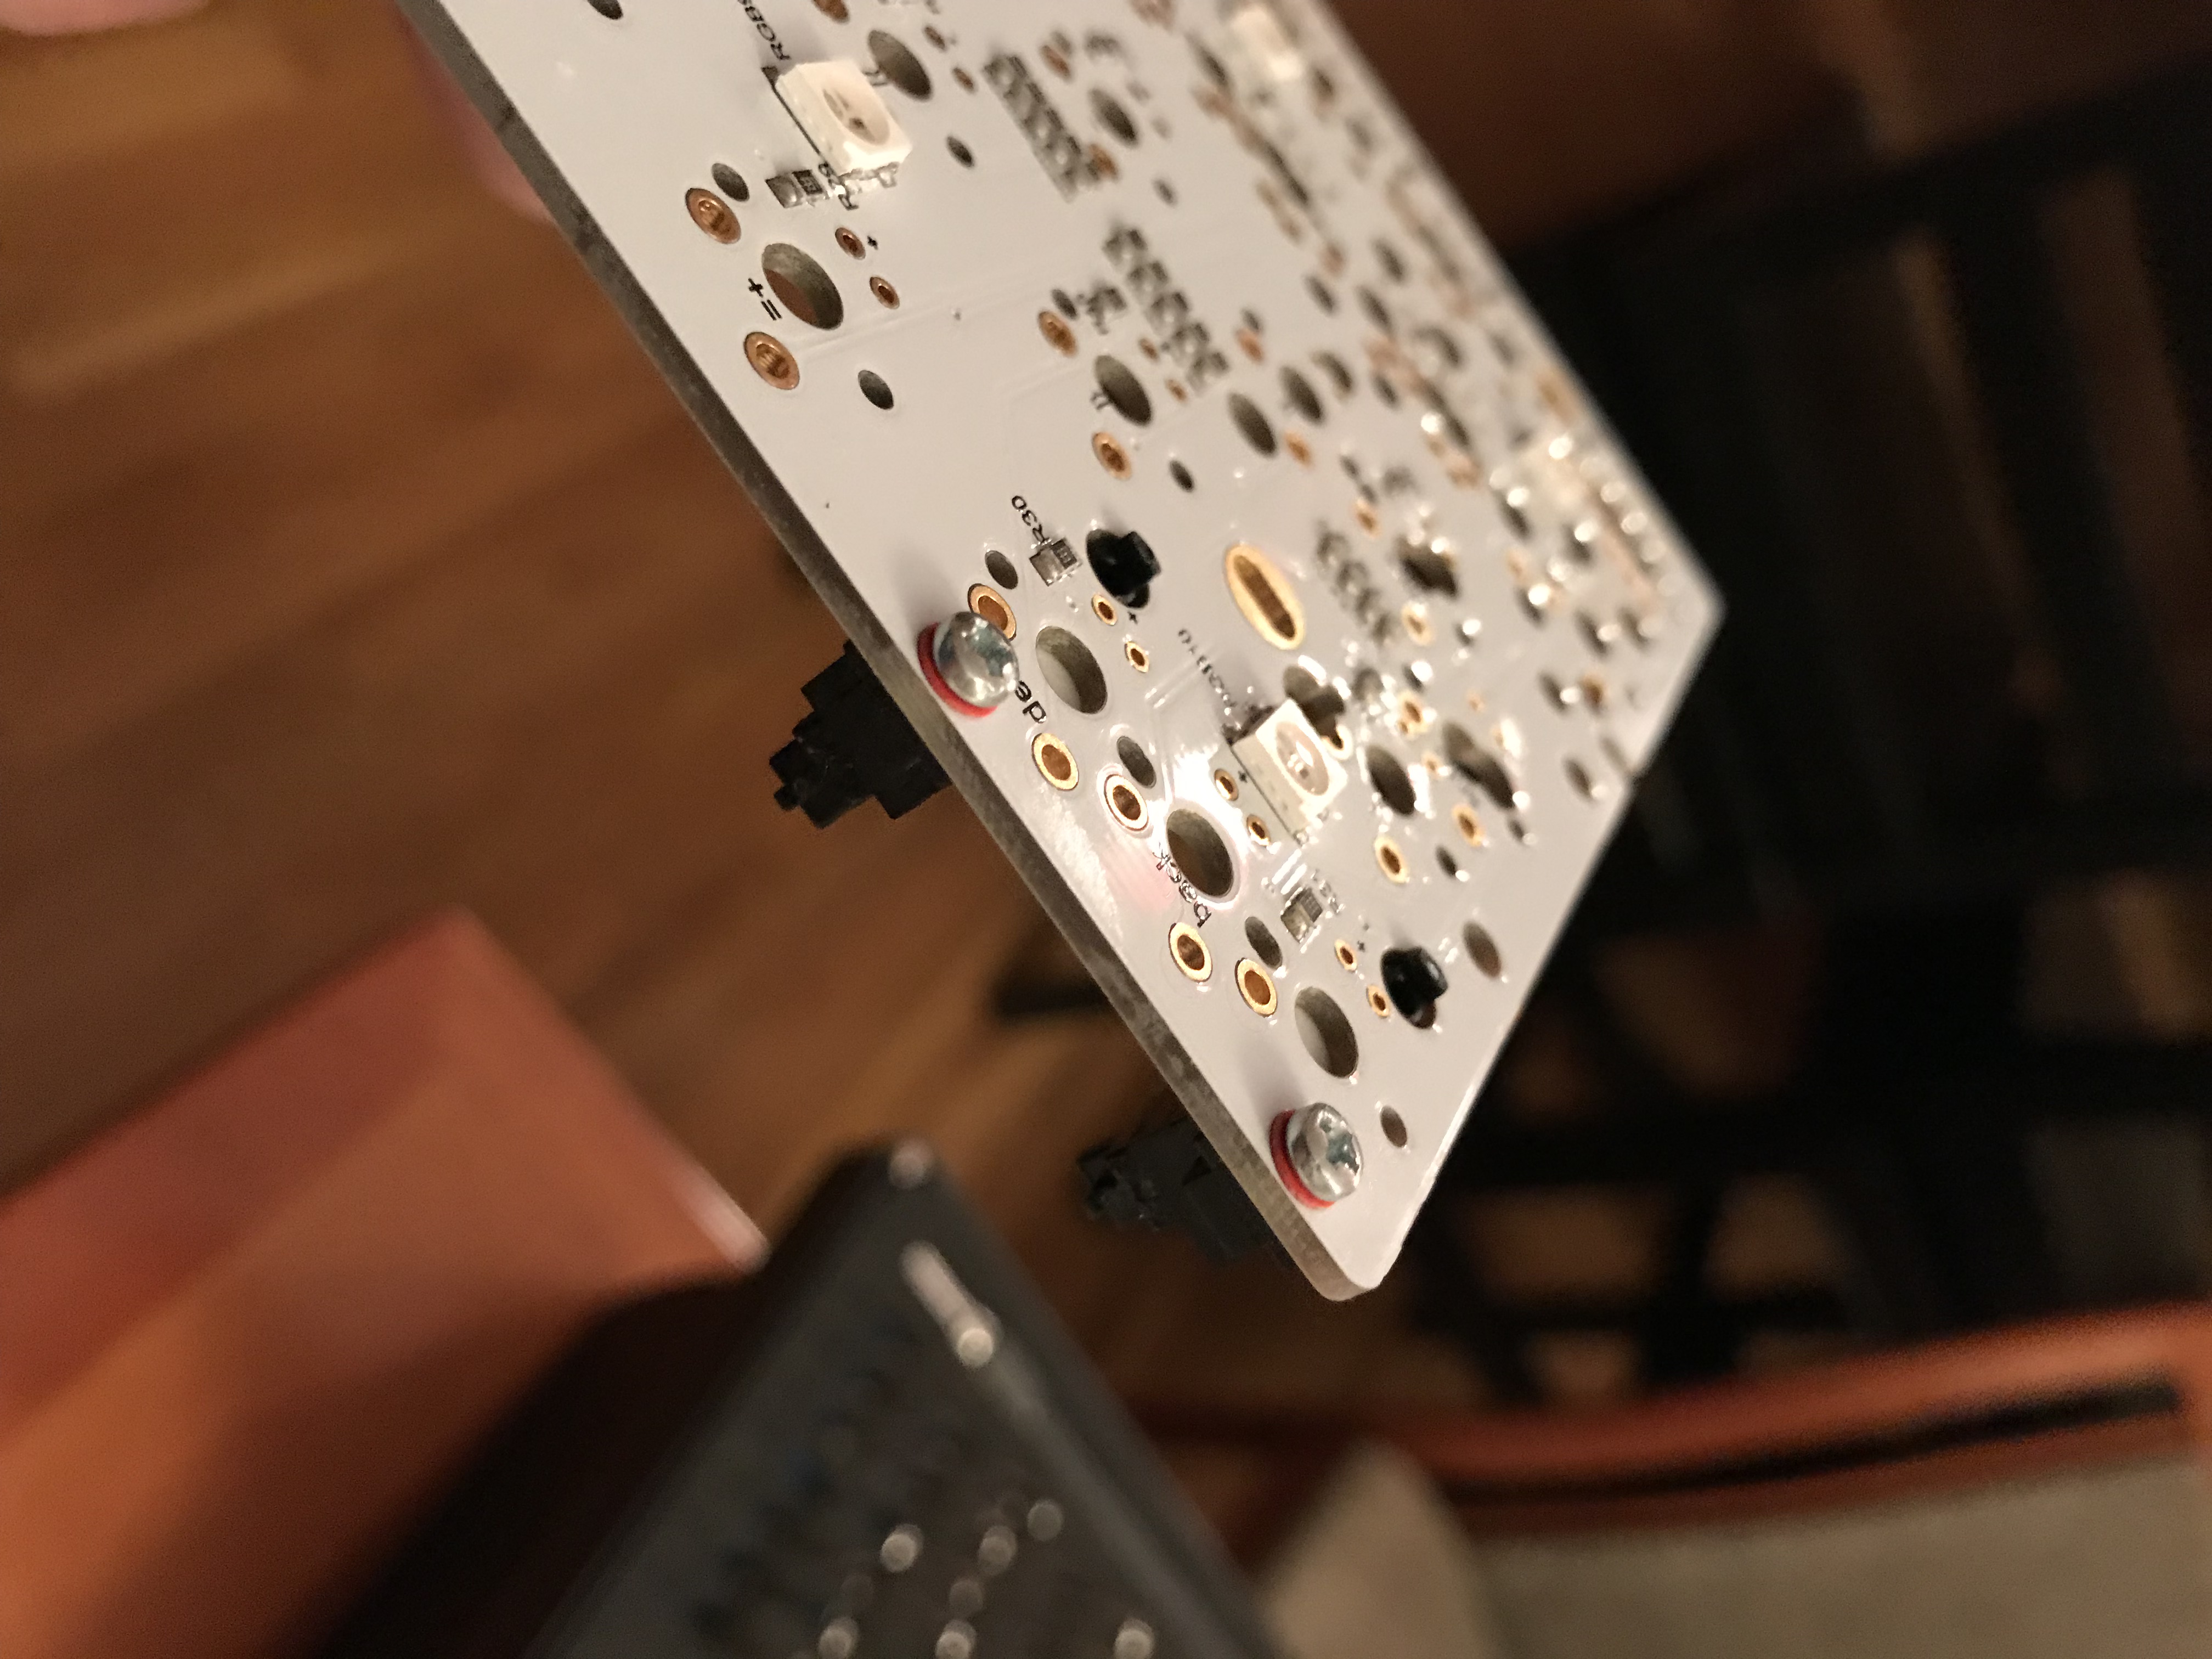
And here’s the one that has caused me short problems in the past, the stab screw for the enter key, just to the right of R60 (you can see a pad poking out from underneath the red washer):
With bandaid modded, clipped, and lubed stabs in place, it’s time to address PCB/plate dampening. For a typical 1.5mm plate, I’ve been finding that 4mm of Sorbothane between the plate and PCB is just about right for removing plate pings. Because 4mm thick Sorbothane doesn’t seem to be readily available, I’ve been hand-cutting 4mm-wide strips from a 0.25" thick sheet of Sorbothane.
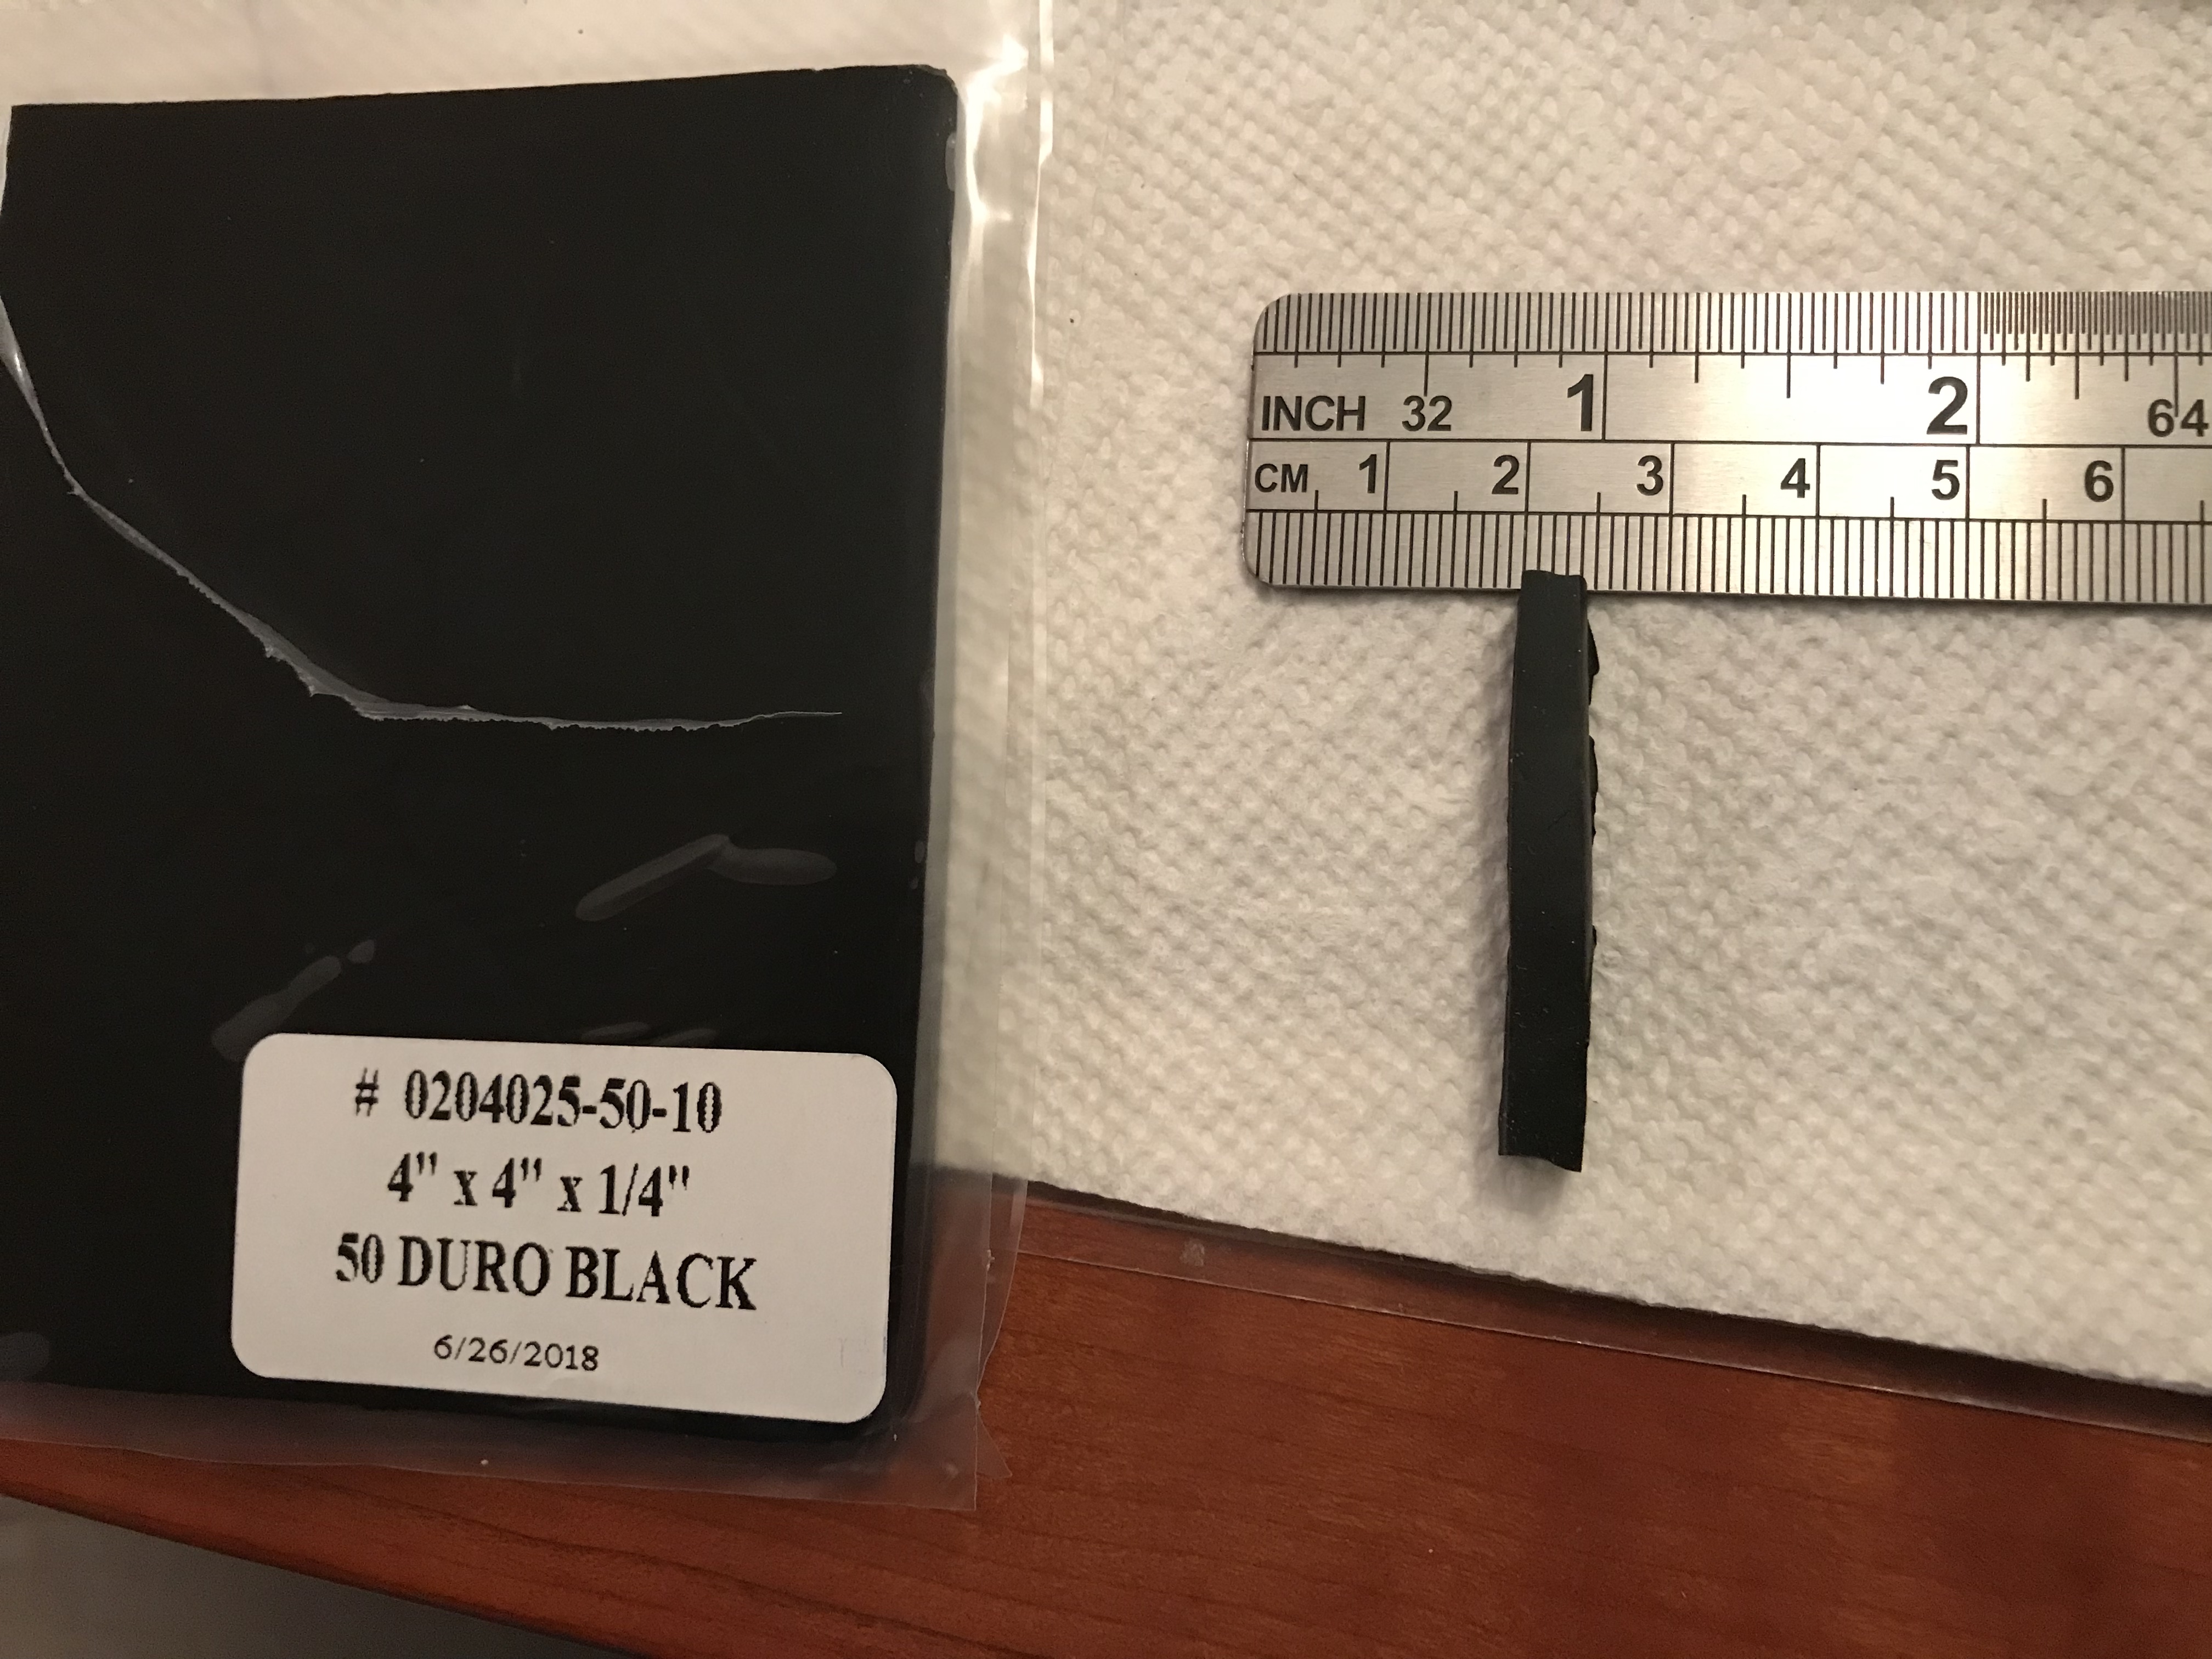
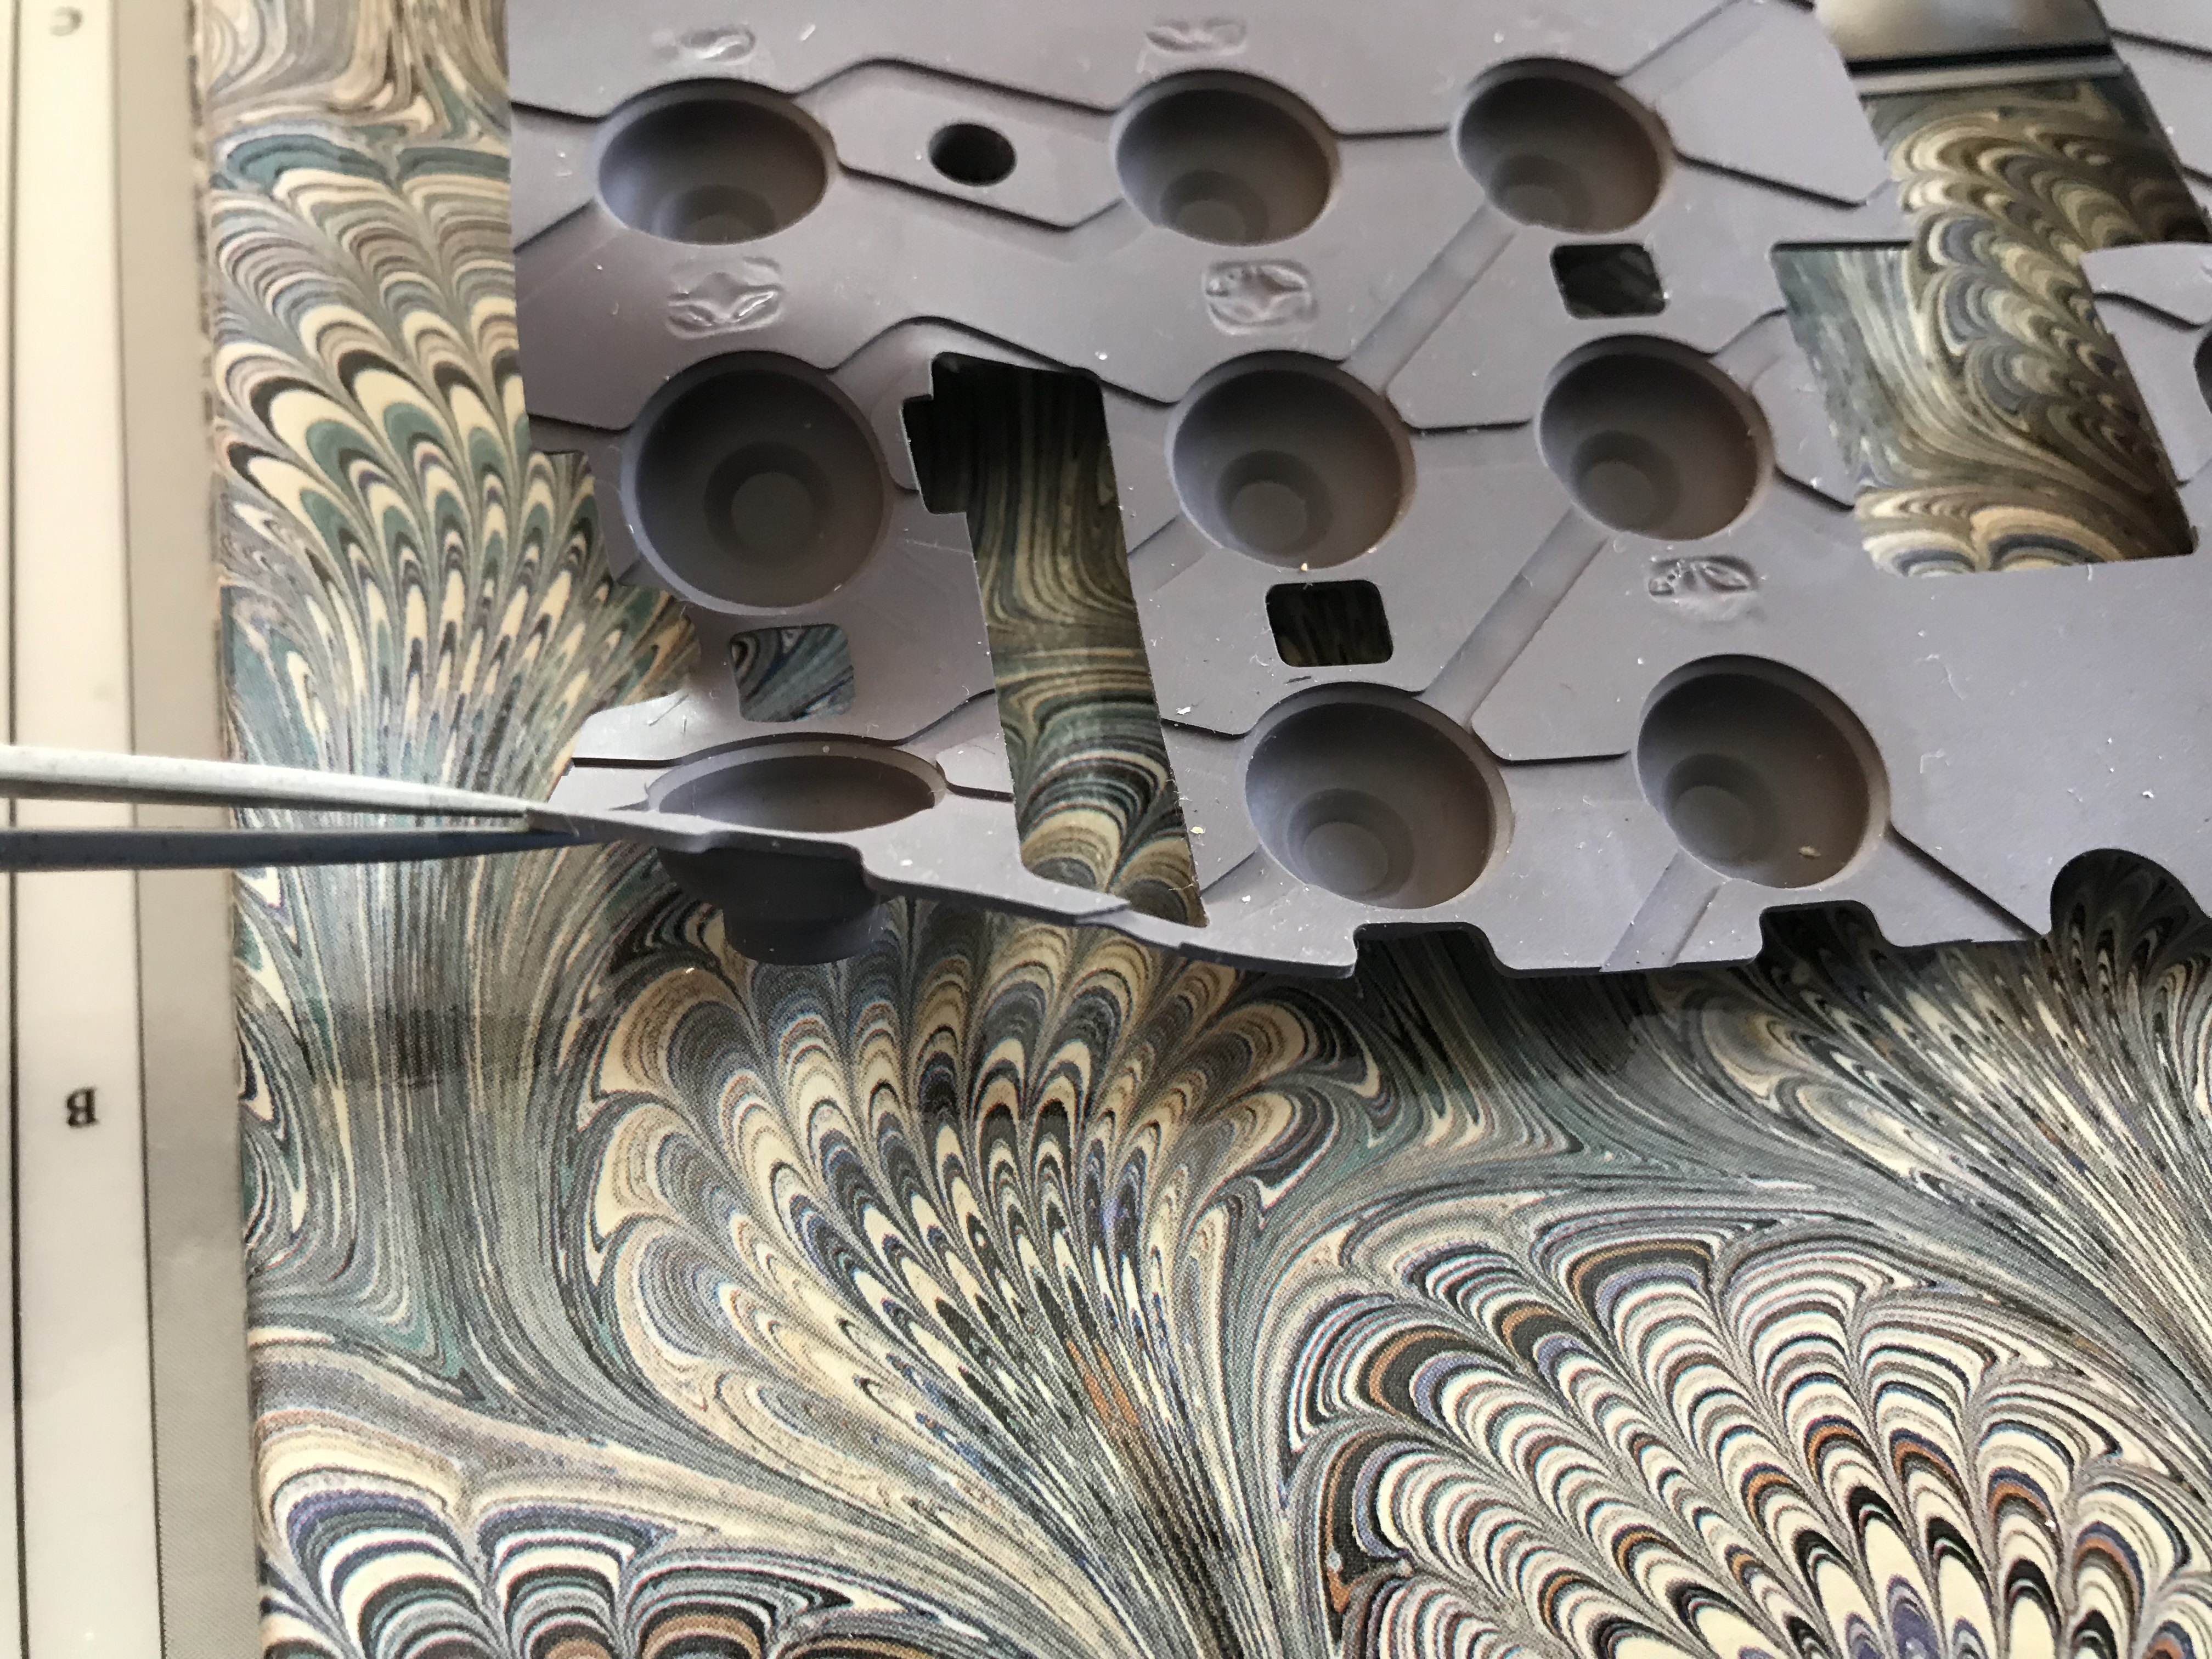
Once I have the 4mm strips, I’ll cut off small pieces and rotate the pieces sideways before sandwiching them between the plate and PCB, to achieve the desired 4mm compression. I put the pieces wherever I can fit them without getting in the way of screw holes or switch cutouts - on this plate, that means the area right above LShift, the little area between Return and the screw hole above it, the same area on the left side of the board between CapsLock and the screw hole, and on either side of the space bar. Not much Sorbothane, but you don’t need much to obtain good results.
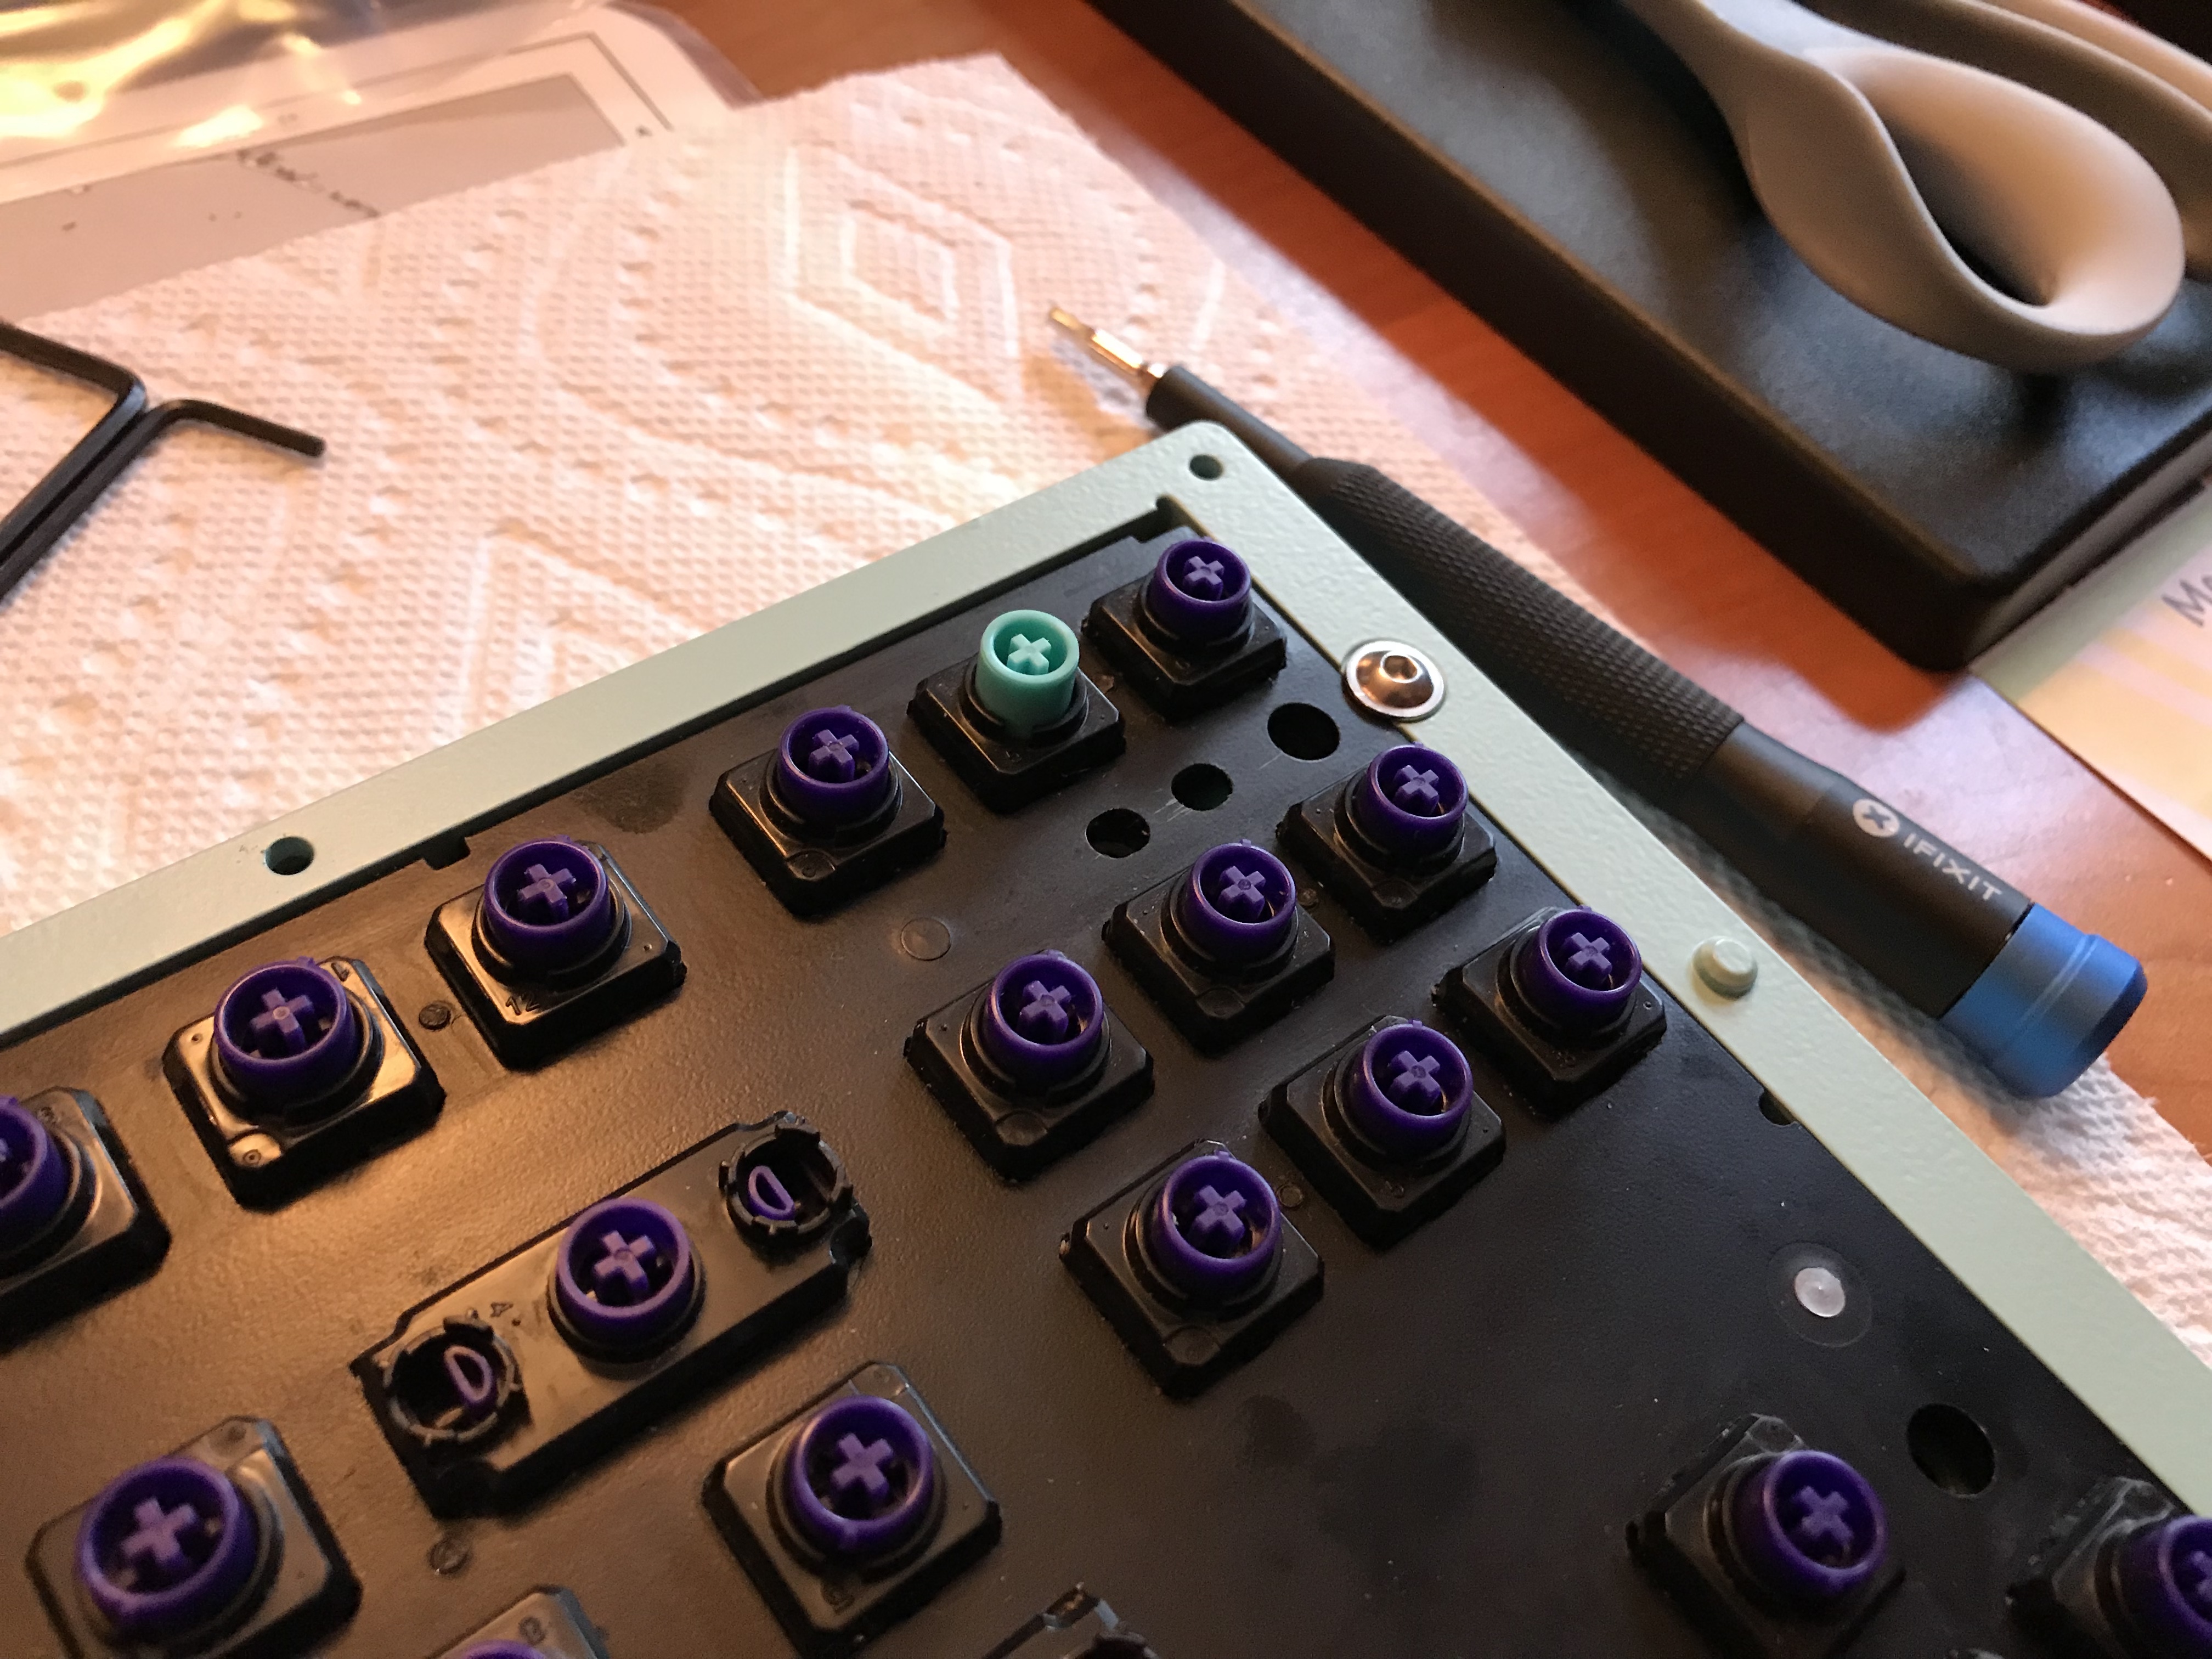
Before going any further, this is a good time to get corner switches in, and check stabilized keys for any issues.
Now, at this point we could just mount switches, solder, screw the PCB/plate sandwich into the case. In fact, I did this during a brief warm spell (50F in the garage, fire up the iron!), because I wanted to find out: how loud would a hyper-tactile switch be, in a hard sound-reflecting plastic case?
It turns out, it’s loud. Very loud. If you’re a hard typist, the combination of acrylic and Holy Pandas will be like having a batch of popcorn popping under your fingers. Even if you love the click and clack of a noisy switch, you might find this to be just a little too much of a good thing.
So, I opened it back up, and set about dampening the case. If you’ve been following my logs at all, you know my standard approach involves Sorbothane. However, for this build, we have to be careful. The case we’re using is a frosted acrylic Tofu, and a big reason for using this case is to show off and diffuse all of the RGB underglow from the DZ60. So, if we use Sorbothane, we need to make sure we’re not blocking the LEDs. Easy. However, Sorbothane is black, and aside from light absorption, black is going to look somewhat ugly through a frosted translucent case.
To solve both problems, I did the same trick that I used on the Ocelot build - I wrap the Sorbothane in white gaffer tape. After cutting a section of Sorbothane to size, I place it on the adhesive side of a strip of gaffer tape:
Then, I fold the tape over, crimp the remaining three sides of exposed tape together, and trim the excess tape from the resulting bundle of Sorbothane to obtain a nice tidy packet which I can place in the case wherever it’s needed.
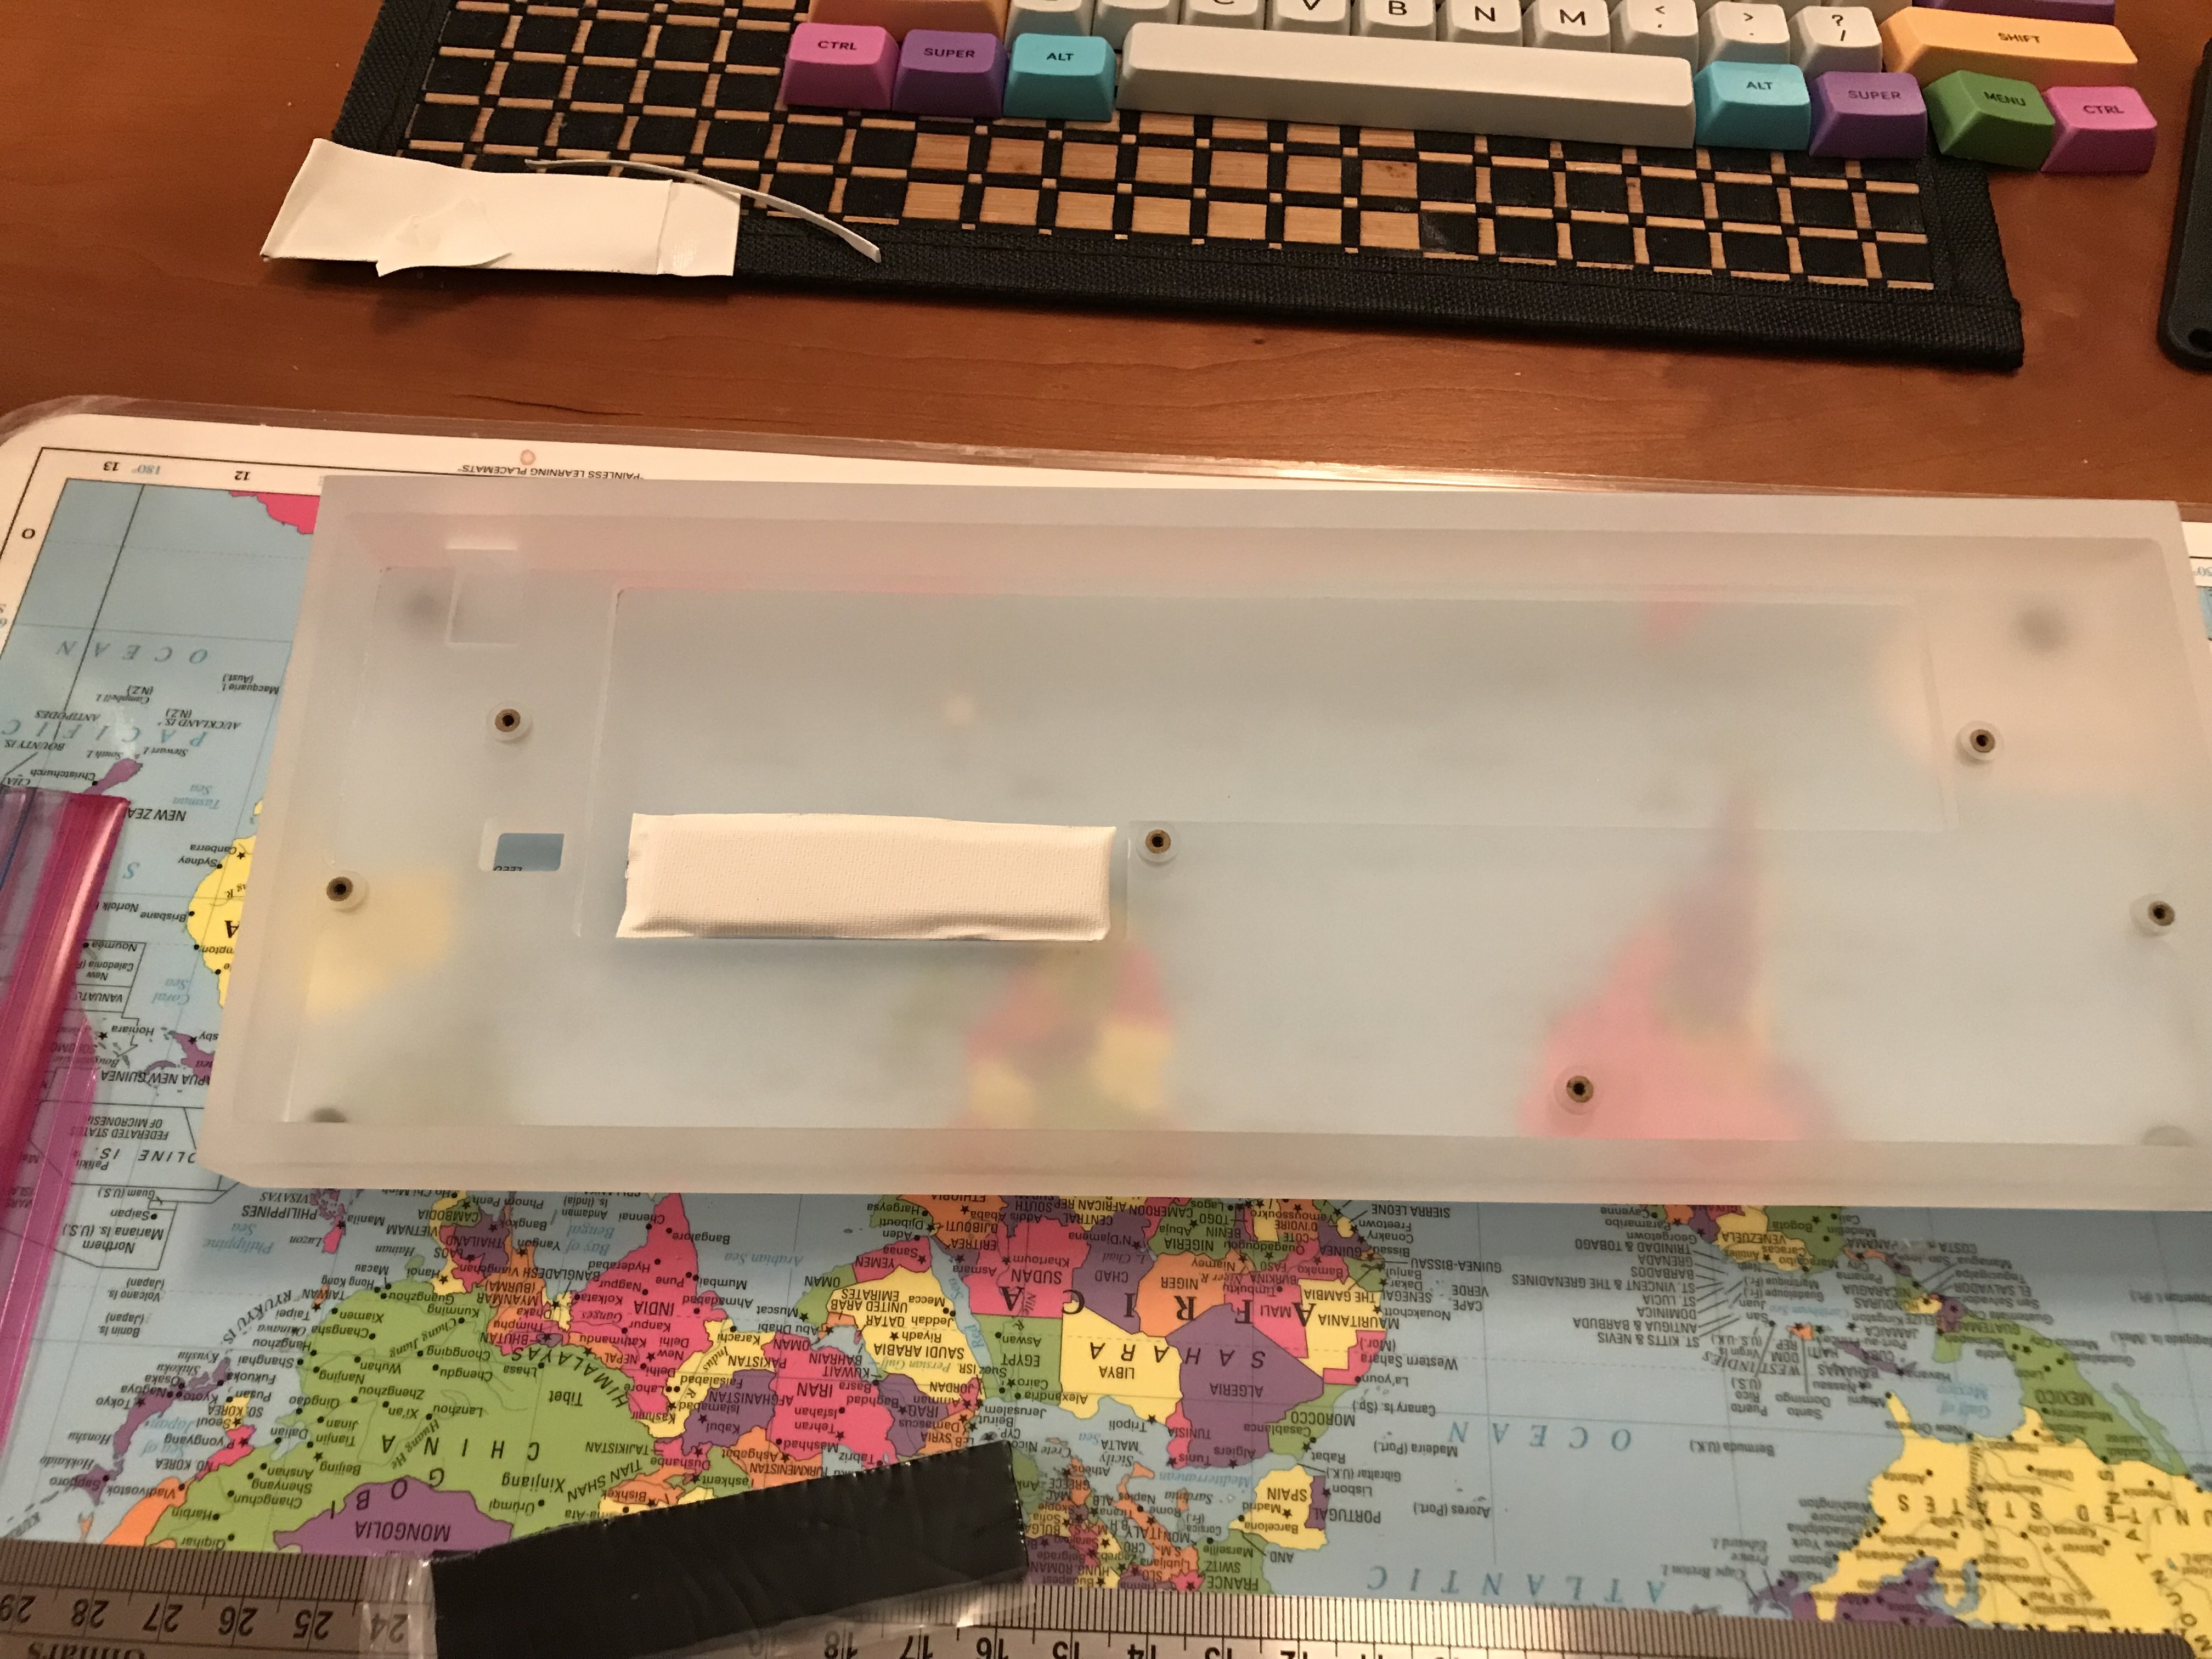
With the acrylic Tofu case, that means I need a couple of layers of Sorbothane packets. The Tofu has a recessed L-shaped cutout area, and hence the case surface is further away from the PCB there. So I started by placing three Sorbothane packets in the center of the L-shaped area:
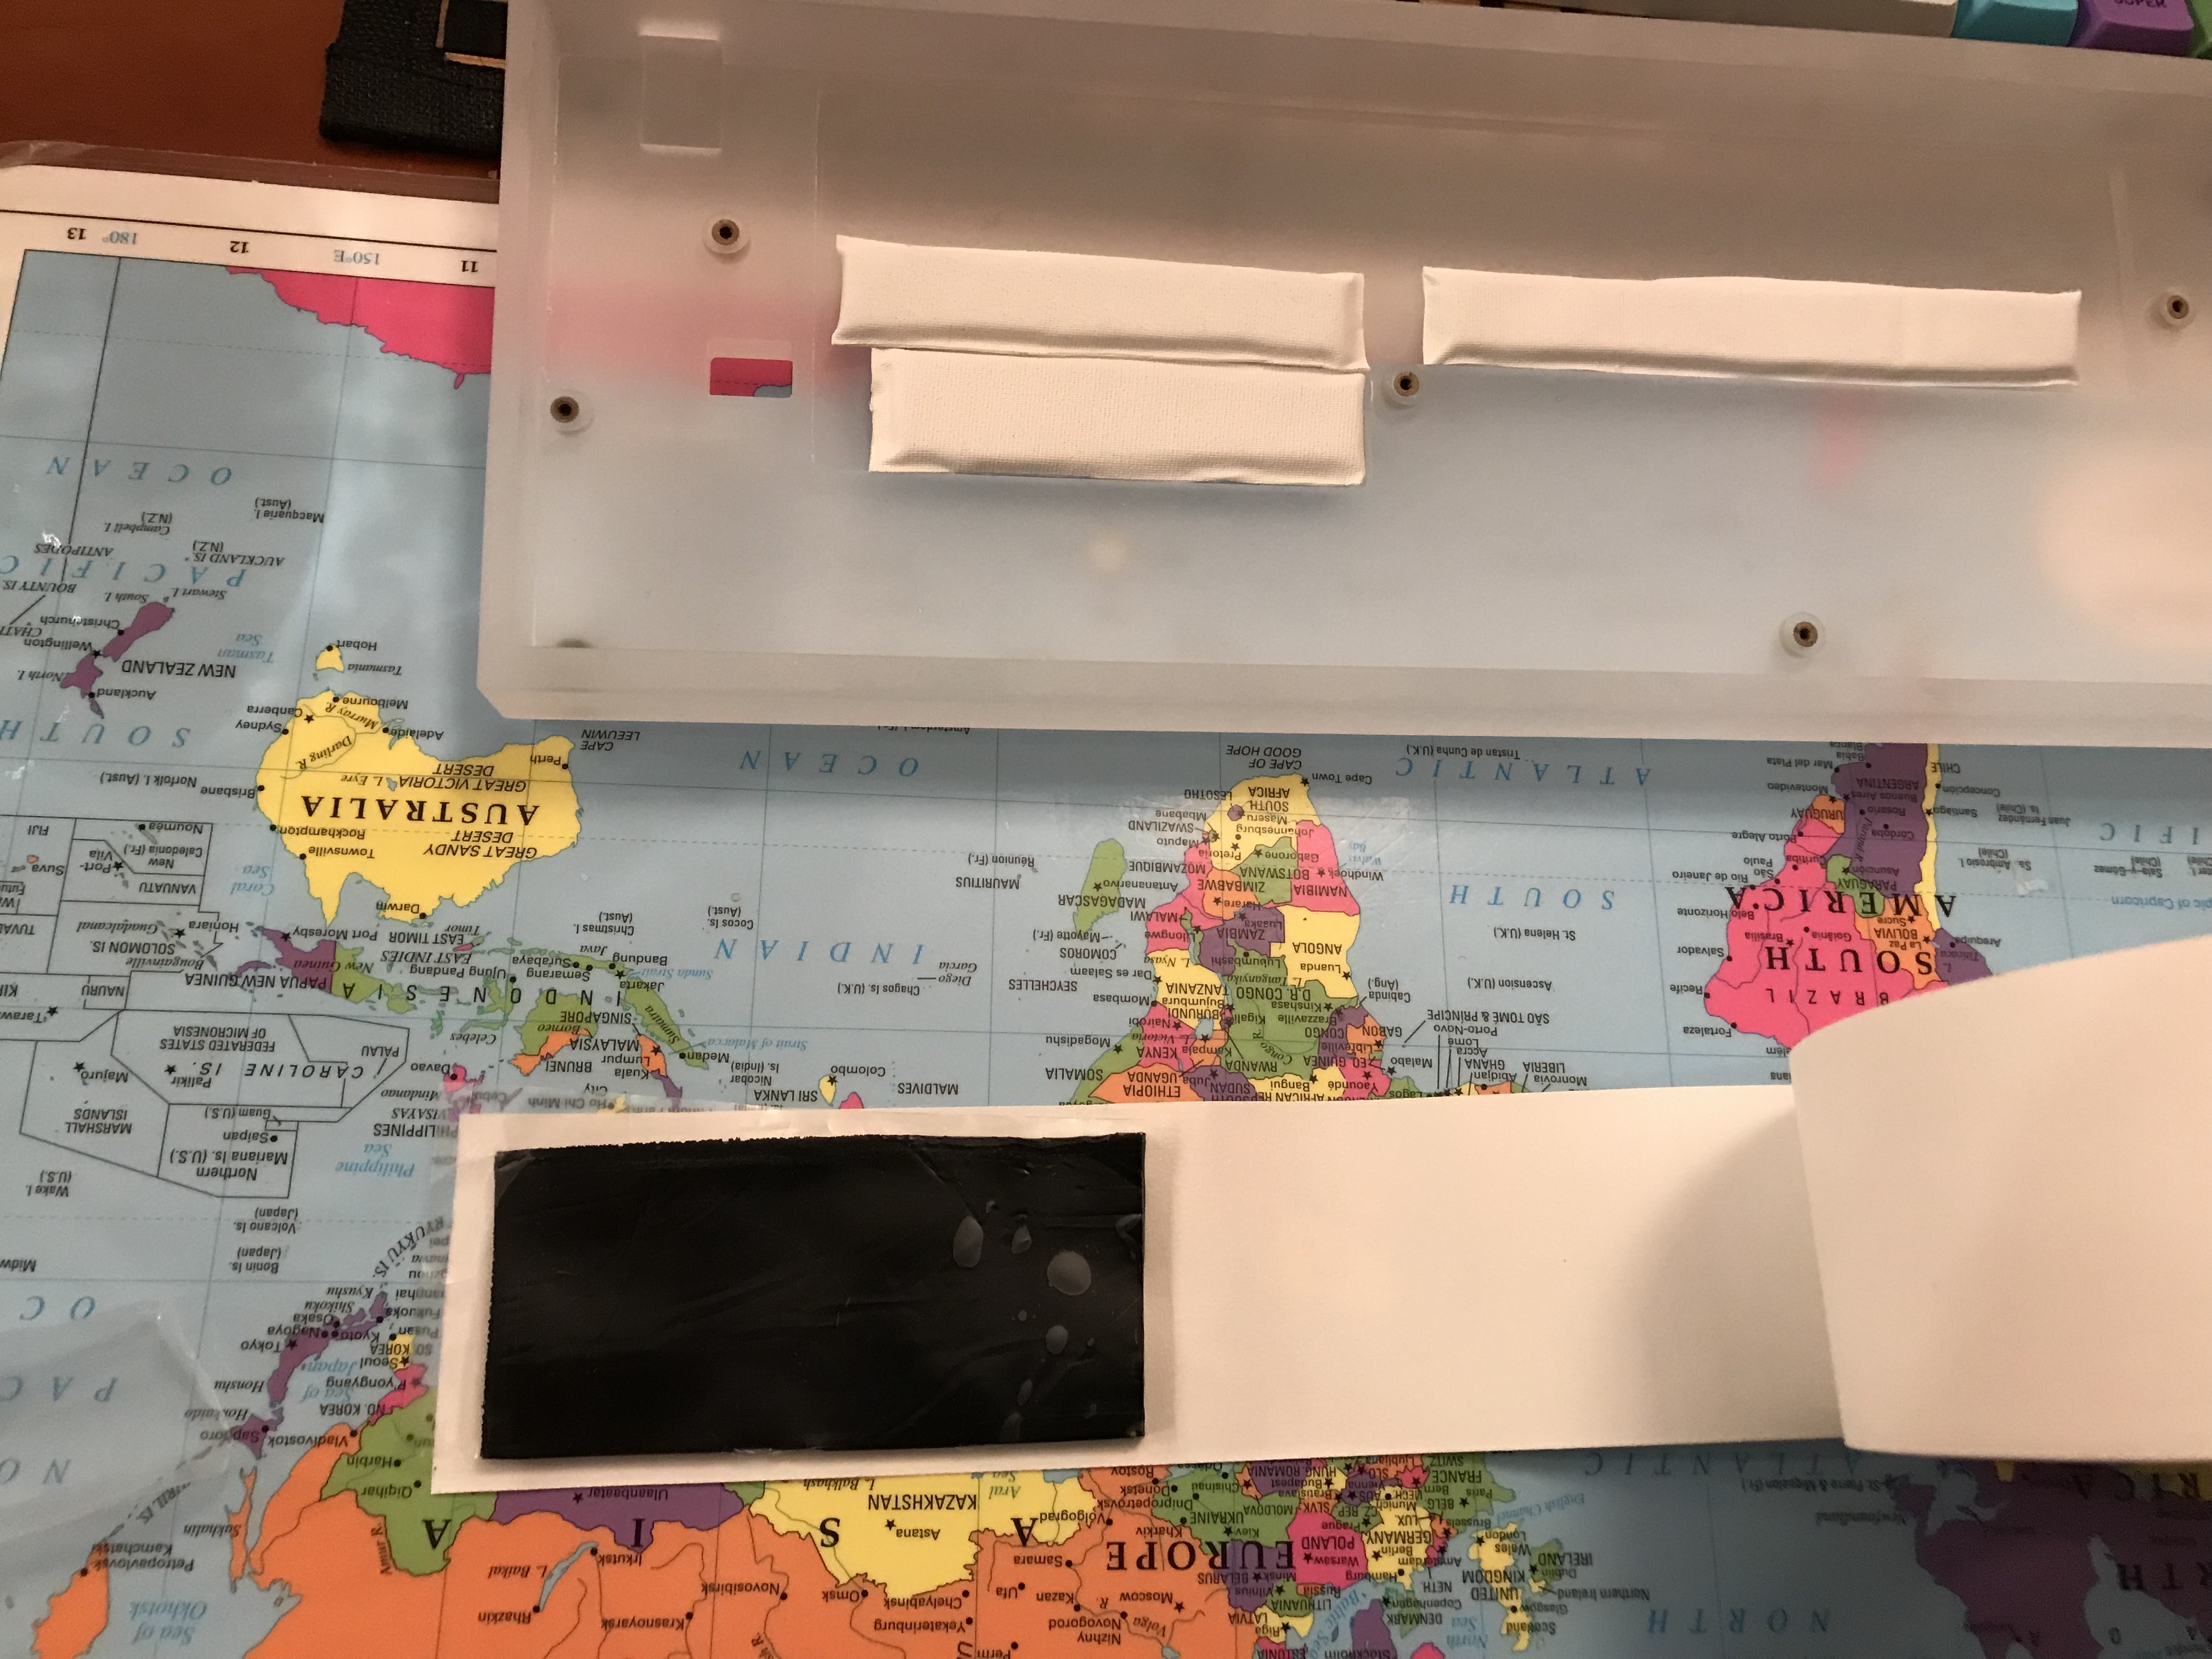
Then, I placed two larger packets on top of those, to cover the remaining distance to the PCB. Note that there will be nothing other than pressure between the case, the PCB, and each other to hold these packets in place.
Also note that because the exposed surface of these packets is the non-adhesive cloth side of the gaffer tape, there’s no discoloration of the case, and removal of the packets is trivial. Here’s what it looks like from the underside. Just around the edges of the Sorbo packets, you can see a few of the LEDs (the small white squares).
Light from the LEDs makes it to the edge of the case unimpeded, so we’re good to go.
From the top, the case does a pretty good job of light diffusion, better than I was expecting.
And, while this is never going to be a quiet keyboard, the Sorbomummies do a decent job of taking away some of the high-pitched clack. If I focus on riding the tactility and not bottoming out, it’s actually not a bad experience, for such a lightweight board.
Lessons learned
- First keyboard with Holy Panda clones (no, the Ocelot doesn’t quite count), and I like them, but I’m not sure if it will be too much tactility for long typing sessions. The jury is out. Sound is great, though, especially with dampening in place. I need to try a Holy Panda variant in a heavy case.
- Other than having to carefully separate the occasional entangled springs, tub lubing springs works for me. Much faster. Could possibly increase the ratio of lube per spring?
- I finally remembered to get corner switches in and test stabs before soldering! Old dog, meet new trick.
- Gaffer tape + Sorbothane seems to preserve the sound-dampening benefits of Sorbothane, while also making it easier to place in the build, and less potentially destructive (concerns about plasticizers in Sorbothane).
- Gaffer tape also works at least well as silicone pads and/or electrical tape, and I’ll be using it going forward, but in a common refrain for my build logs, I still haven’t found what I’m looking for.
- First experience with MDA caps - the gentle sculpting makes them much more usable than XDA, and the material feels quite nice. With that said, I’d still prefer GMK any day of the week - MDA feels bulky and clumsy to me by comparison. YMMV.
Finally, every teenager that has passed through the house has strongly approved of this board. Draw your own conclusions.
Specifications
case: acrylic Tofu
case dampening:
- 0.188" 30 Duro Sorbothane for bottom layer
- 0.1" 40 Duro Sorbothane for top layer
PCB: DZ60 R2
LEDs: PCB underglow only
plate: DZ60 plate-B aluminum
plate/PCB dampening:
- 0.25" 50 Duro cut to 4mm thick squares
stabilizers: GMK screw-in
stabilizer mods: clipped, lubed, bandaid with gaffer tape
switches: Holy GSUS (Halo True stems)
switch lubing:
- Tribosys 3204 hand-lubed stems & housing (1mL/65 switches)
- Krytox GPL 104 tub-lubed springs (1 drop/7 switches)
keycaps: MDA Big Bone
HxWxD (without caps or feet): 1.25"x11.63"x4.31"
HxWxD (without caps): 1.31"x11.63"x4.31"
HxWxD: 1.75"x11.63"x4.31"
assembled weight: 1.65 lb
6 Likes
I love how thorough you are with your builds and how well documented they are! Very nice.
1 Like
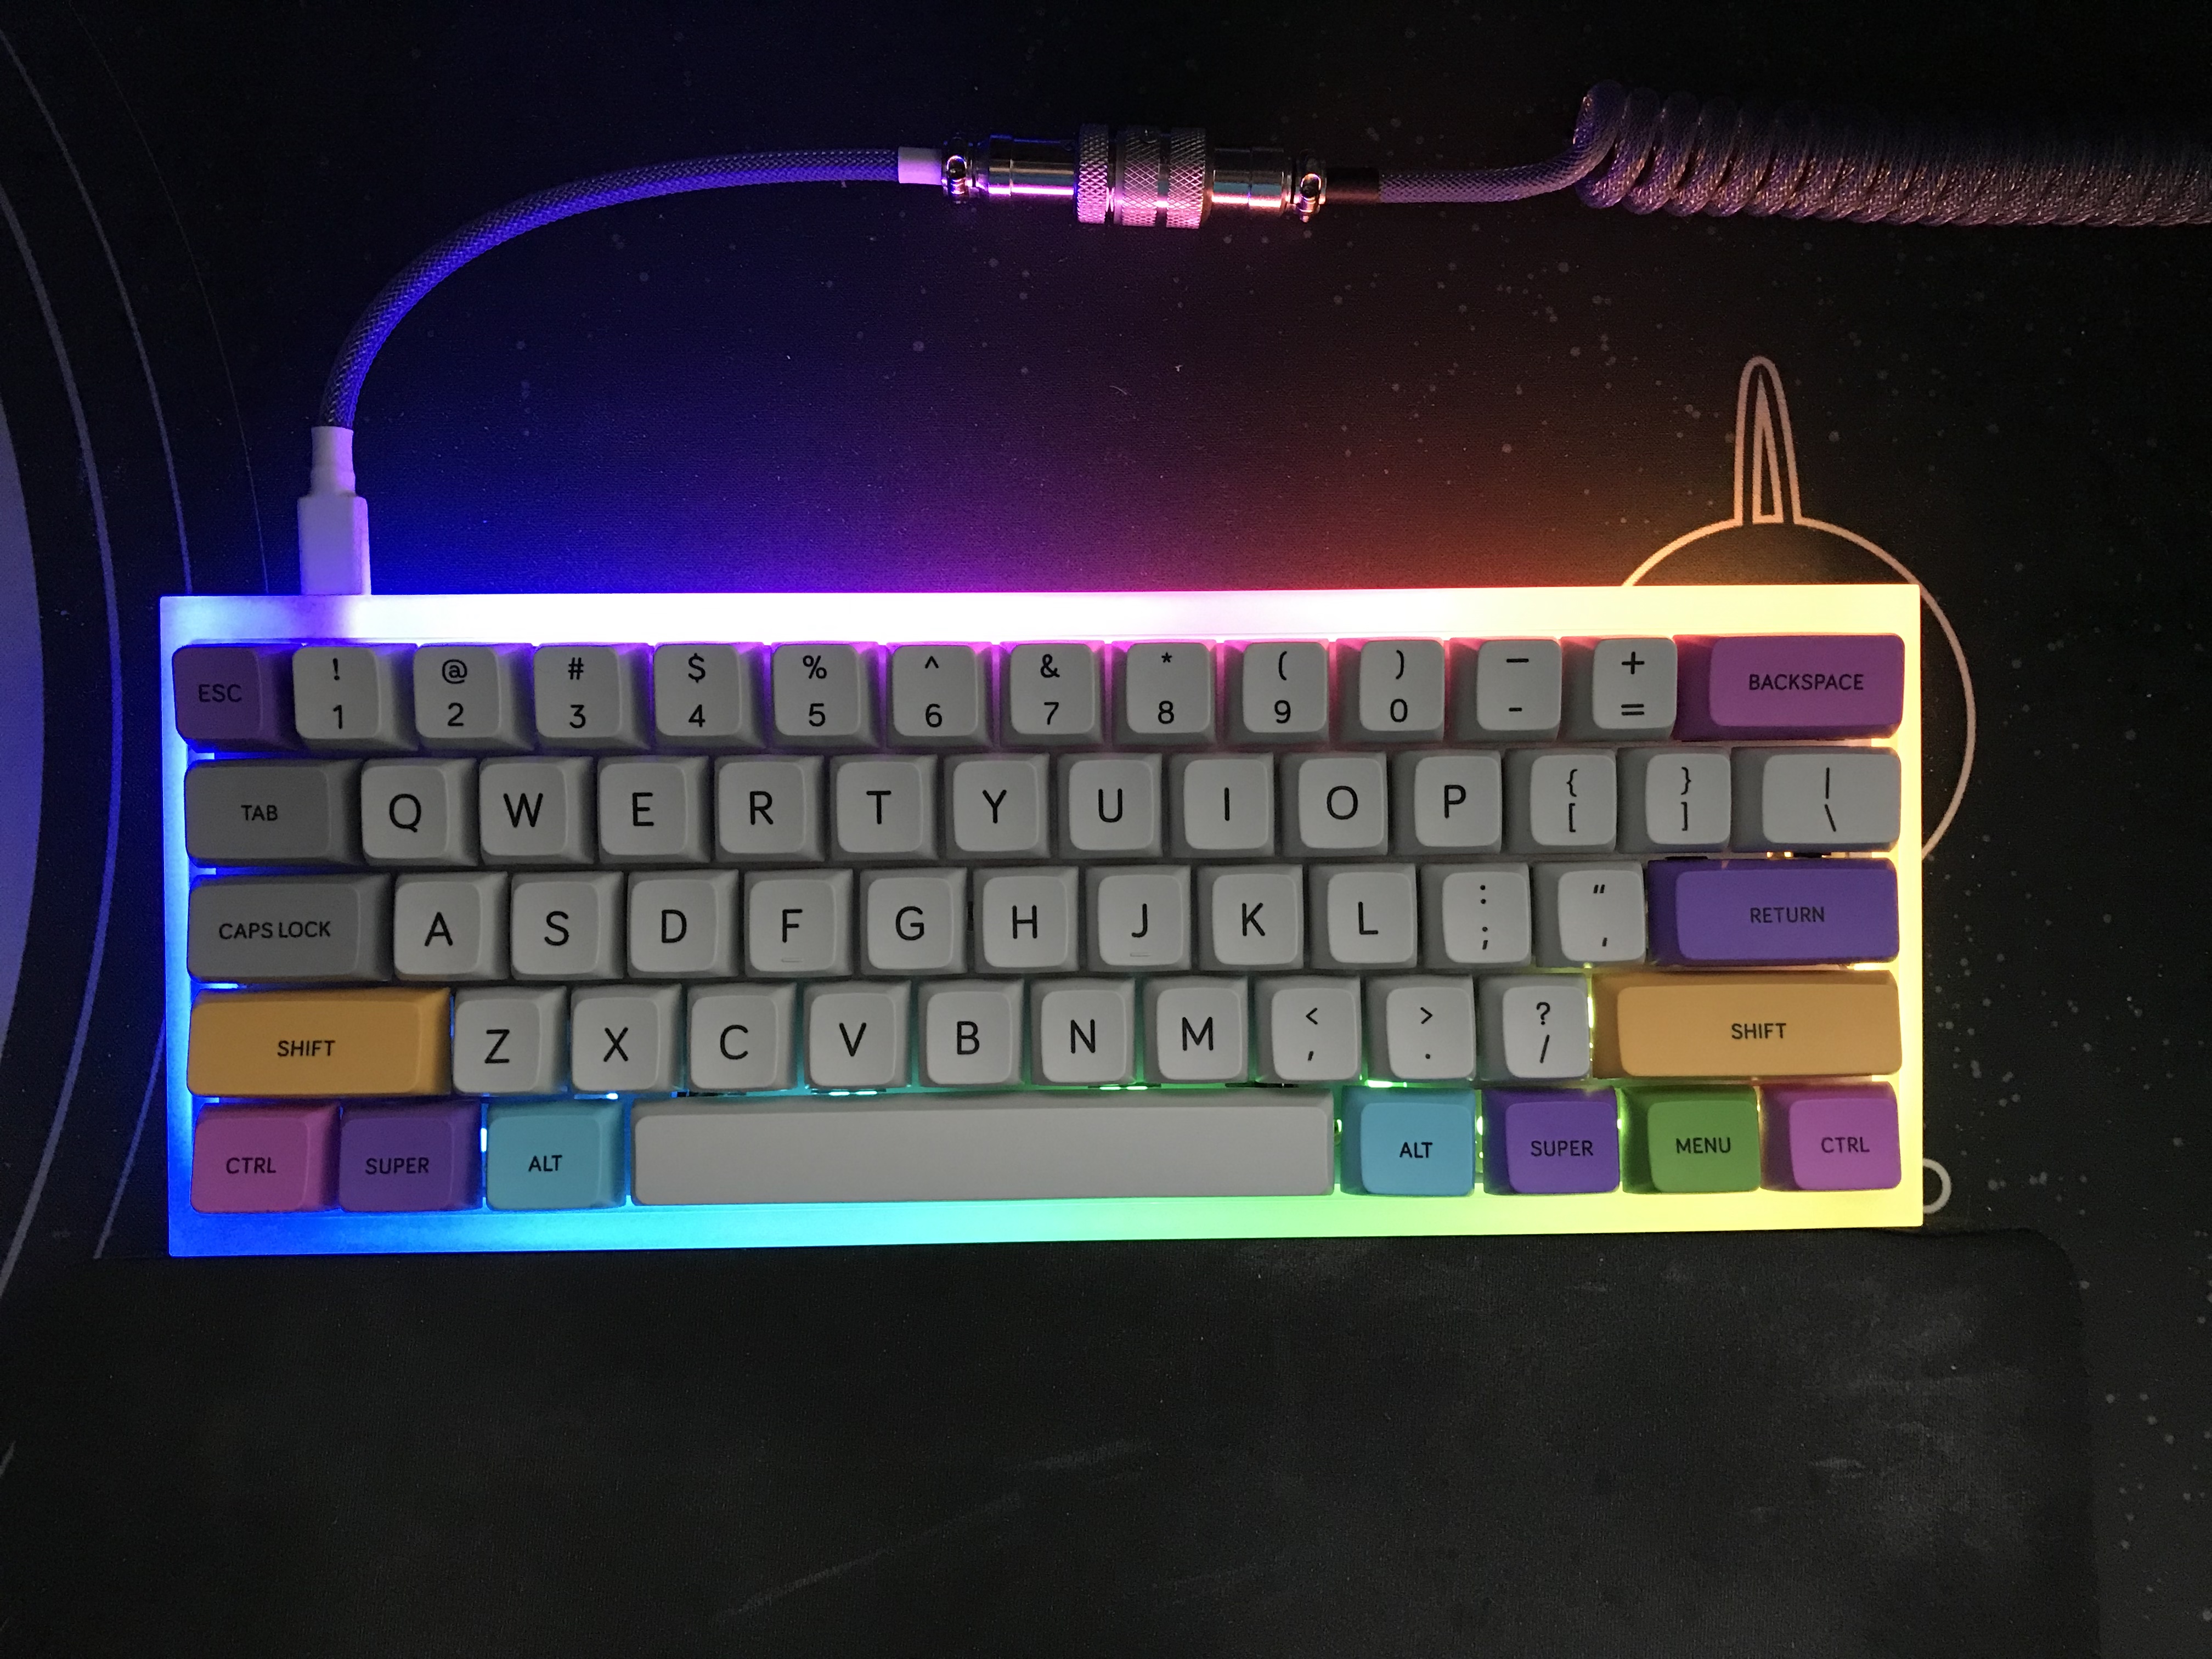
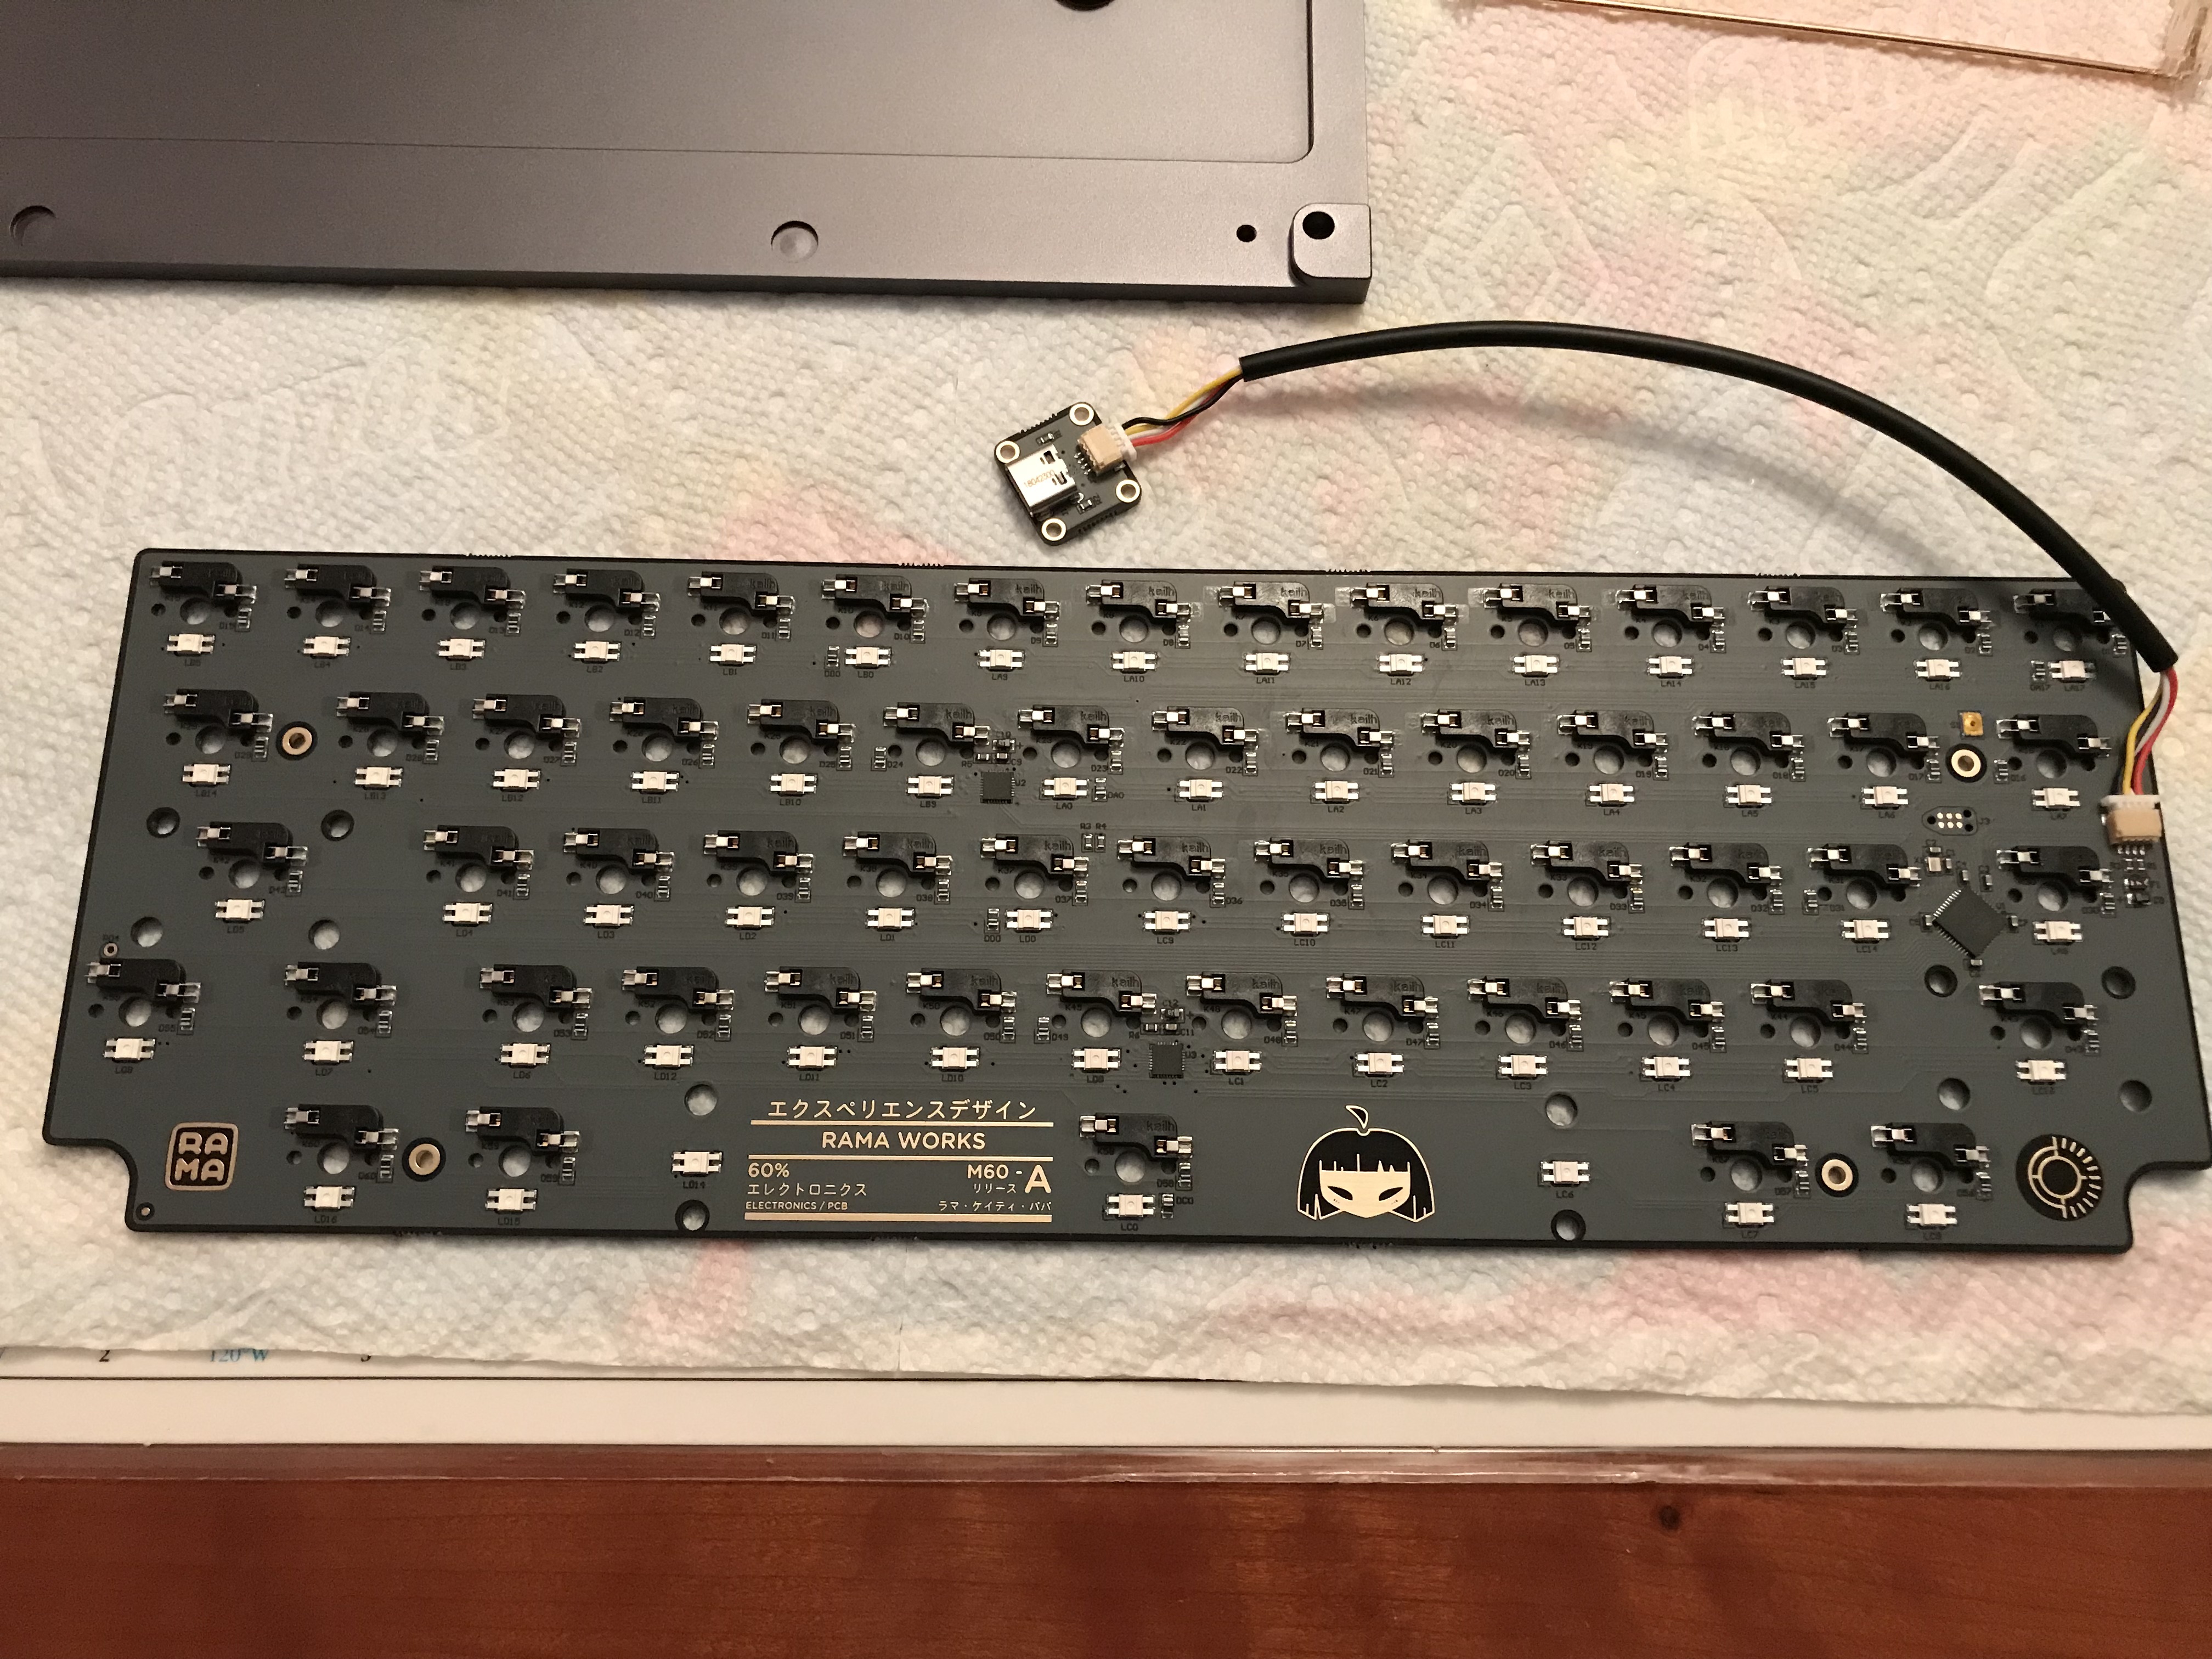
Build #15: Rama M60-A
Here’s the thing about an M60-A build log: there isn’t really much building to log. Once you have stabs and switches lubed, you’re basically almost done. More than other logs, this one will be about admiring the board. Let’s start by admiring the anodization (‘Moon’ grey finish) on the M60-A’s integrated plate and bottom, which is exceptional: uniform, smooth, even. Any specks you may see in this photo or any of the others are due to the use of a phone camera, or dust that I failed to wipe away - the finish really is flawless.
And of course the PVD backplate. You’re looking from above, at the reflection of the paper towel underneath the board, to illustrate that ‘PVD mirror-finish’ is not hyperbole.
The beauty isn’t just skin-deep with the M60-A. The Wilba-designed M60-A hotswap PCB is lovely, both top and bottom:
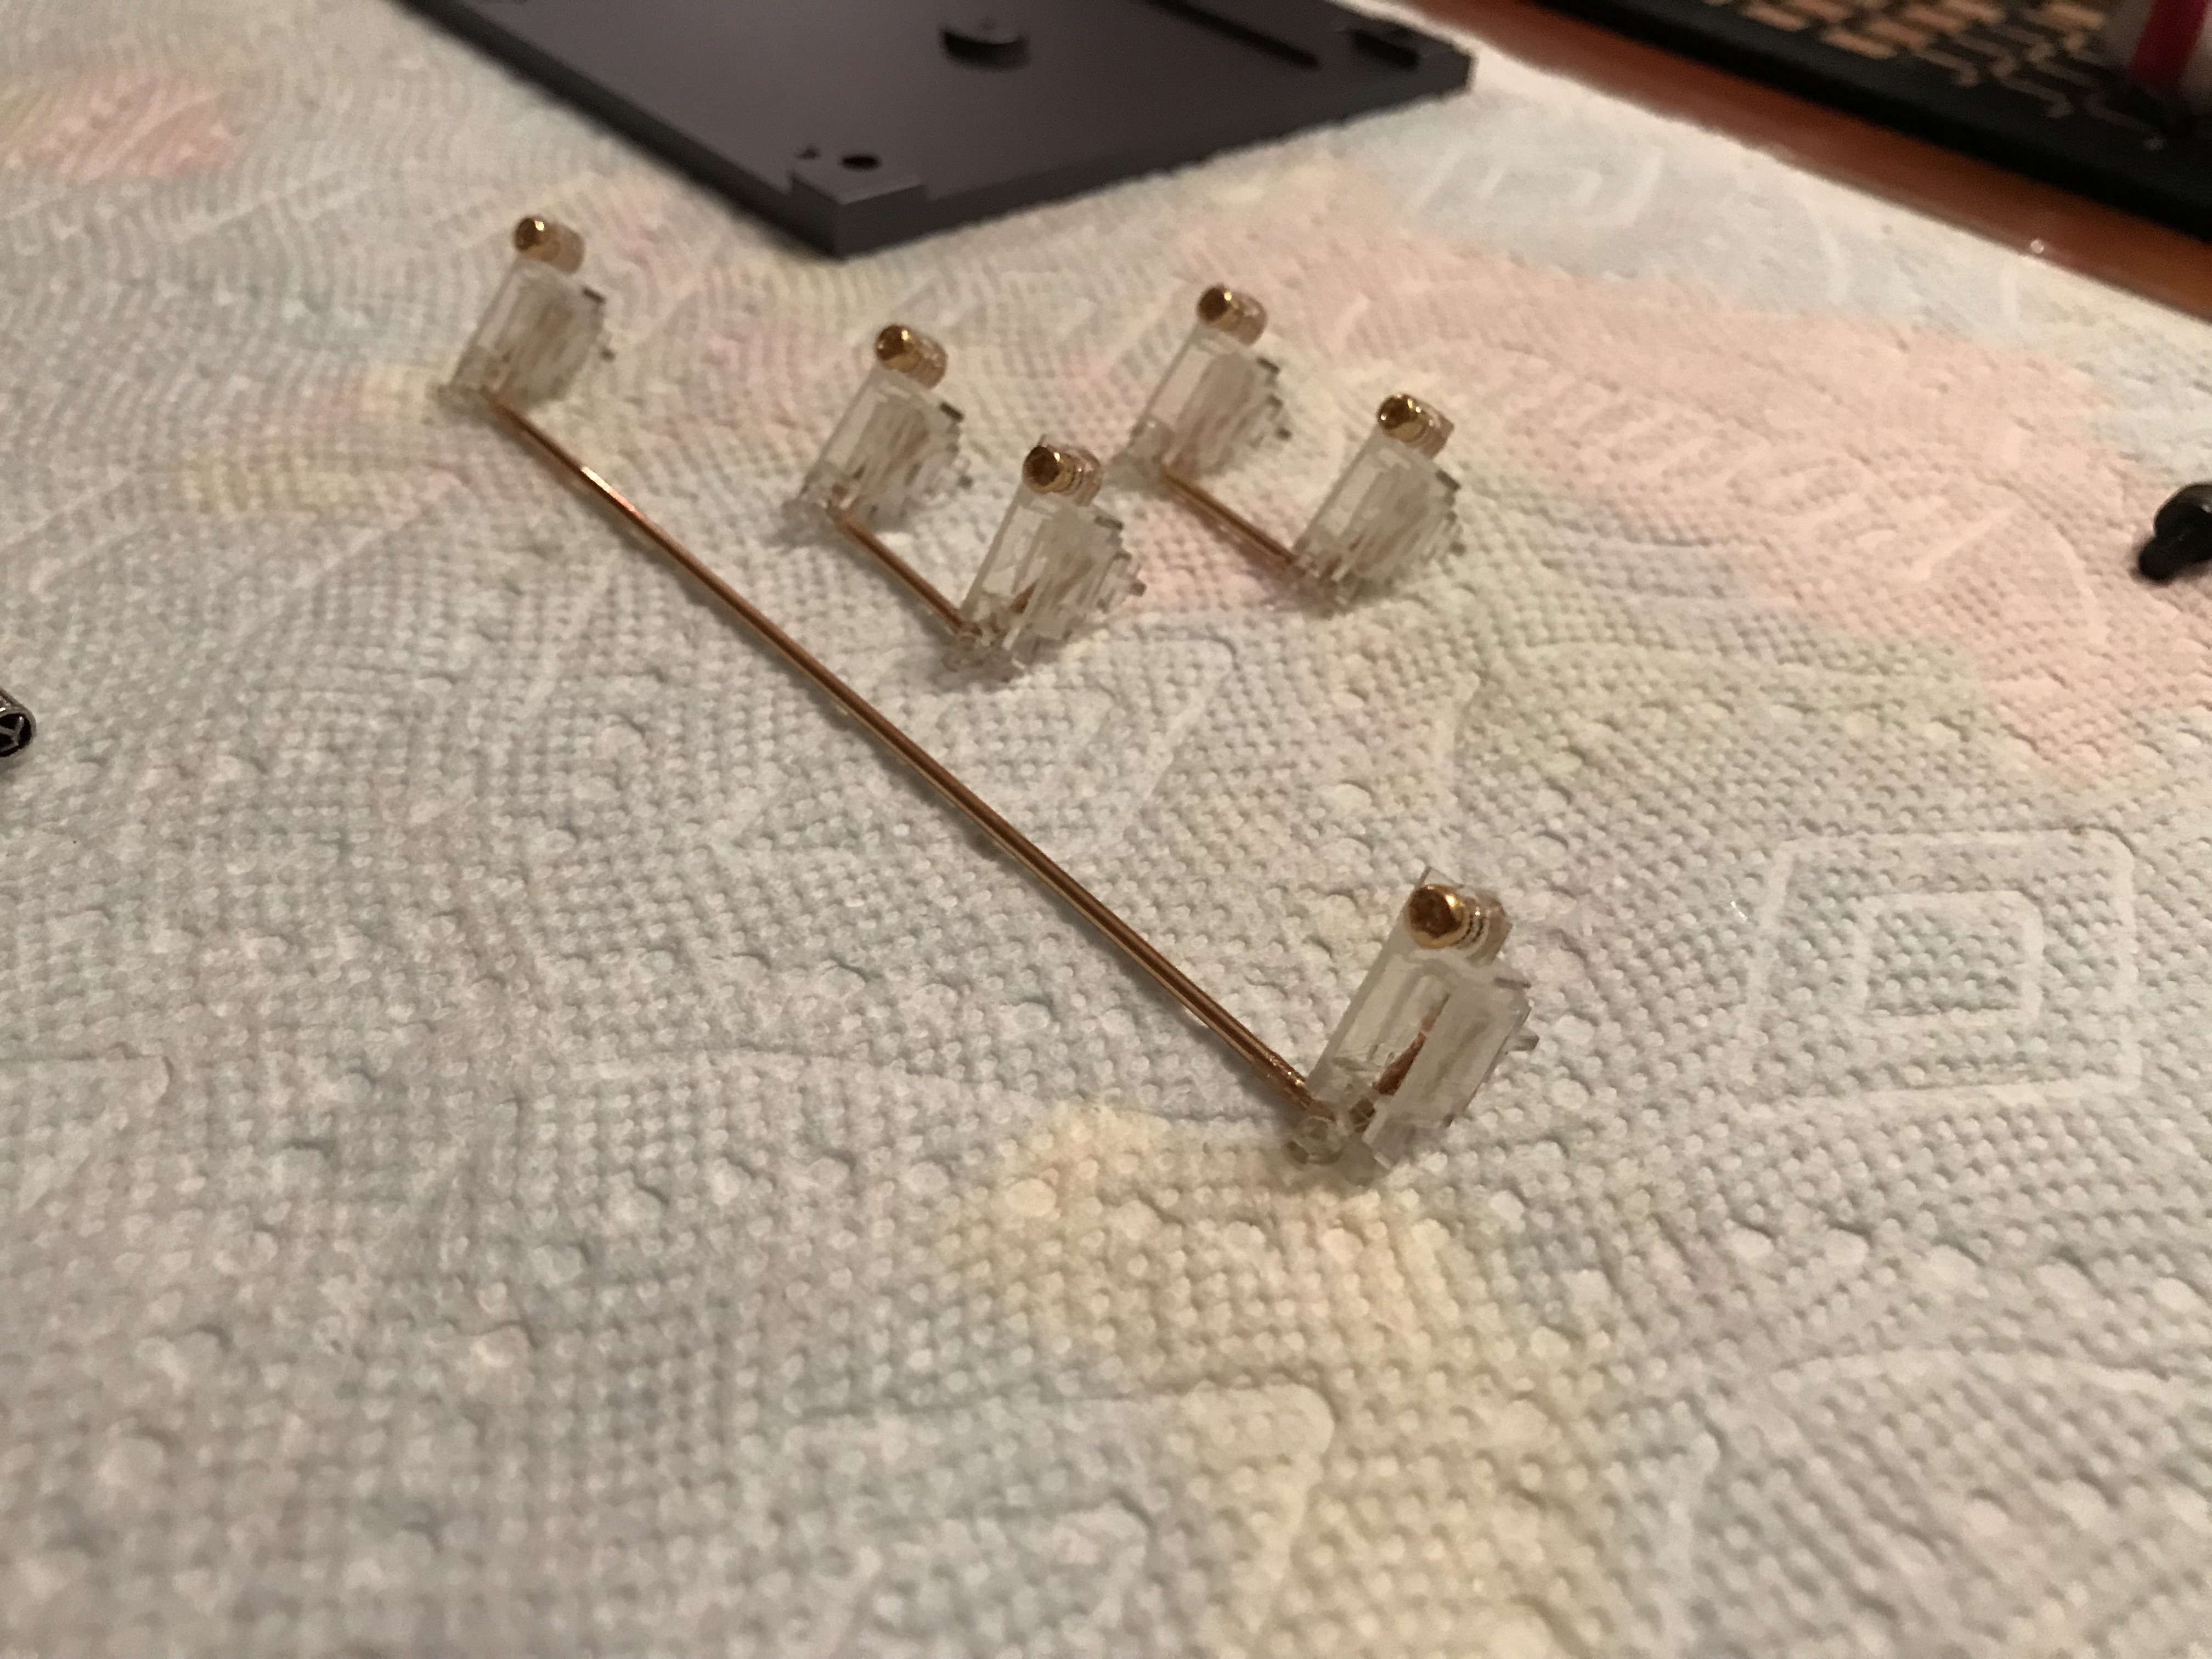
In this build, even the mods and lube jobs were easier than usual. The Wilba-designed PCB includes per-switch RGB LEDs and spacebar stabilizer RGB LEDs, so to be sure to enjoy all of those Rs, Gs, and Bs, I went with transparent Zeal stabilizers. Because of the placement of the LEDs, a bandaid mod would have been counterproductive; and, because the Zeal stab sliders have no legs, no clipping needed to be done; and, because of the M60-A’s HHKB layout, only one 7u and two 2u stabs were needed. Lube three stabs and screw in? Fast and straightforward.
At this point, you might be famished from all of the hard work. Be sure to obtain proper nourishment.
Homemade chicken soup with a big pile of cilantro will help.
The switch lube job was easy as well, although that had nothing to do with the M60-A. Remember the Zilent build logs I did a while back? I had some spare 65g and 67g V1 Zilents already lubed and ready to go from those builds, although not enough of either to populate the entire board. Hey, let’s pretend we’re in Topre-land - how about some variable force action?
Maybe you can tell the difference between lubed 65g and 67g Zilents in this layout by feel - I can’t.
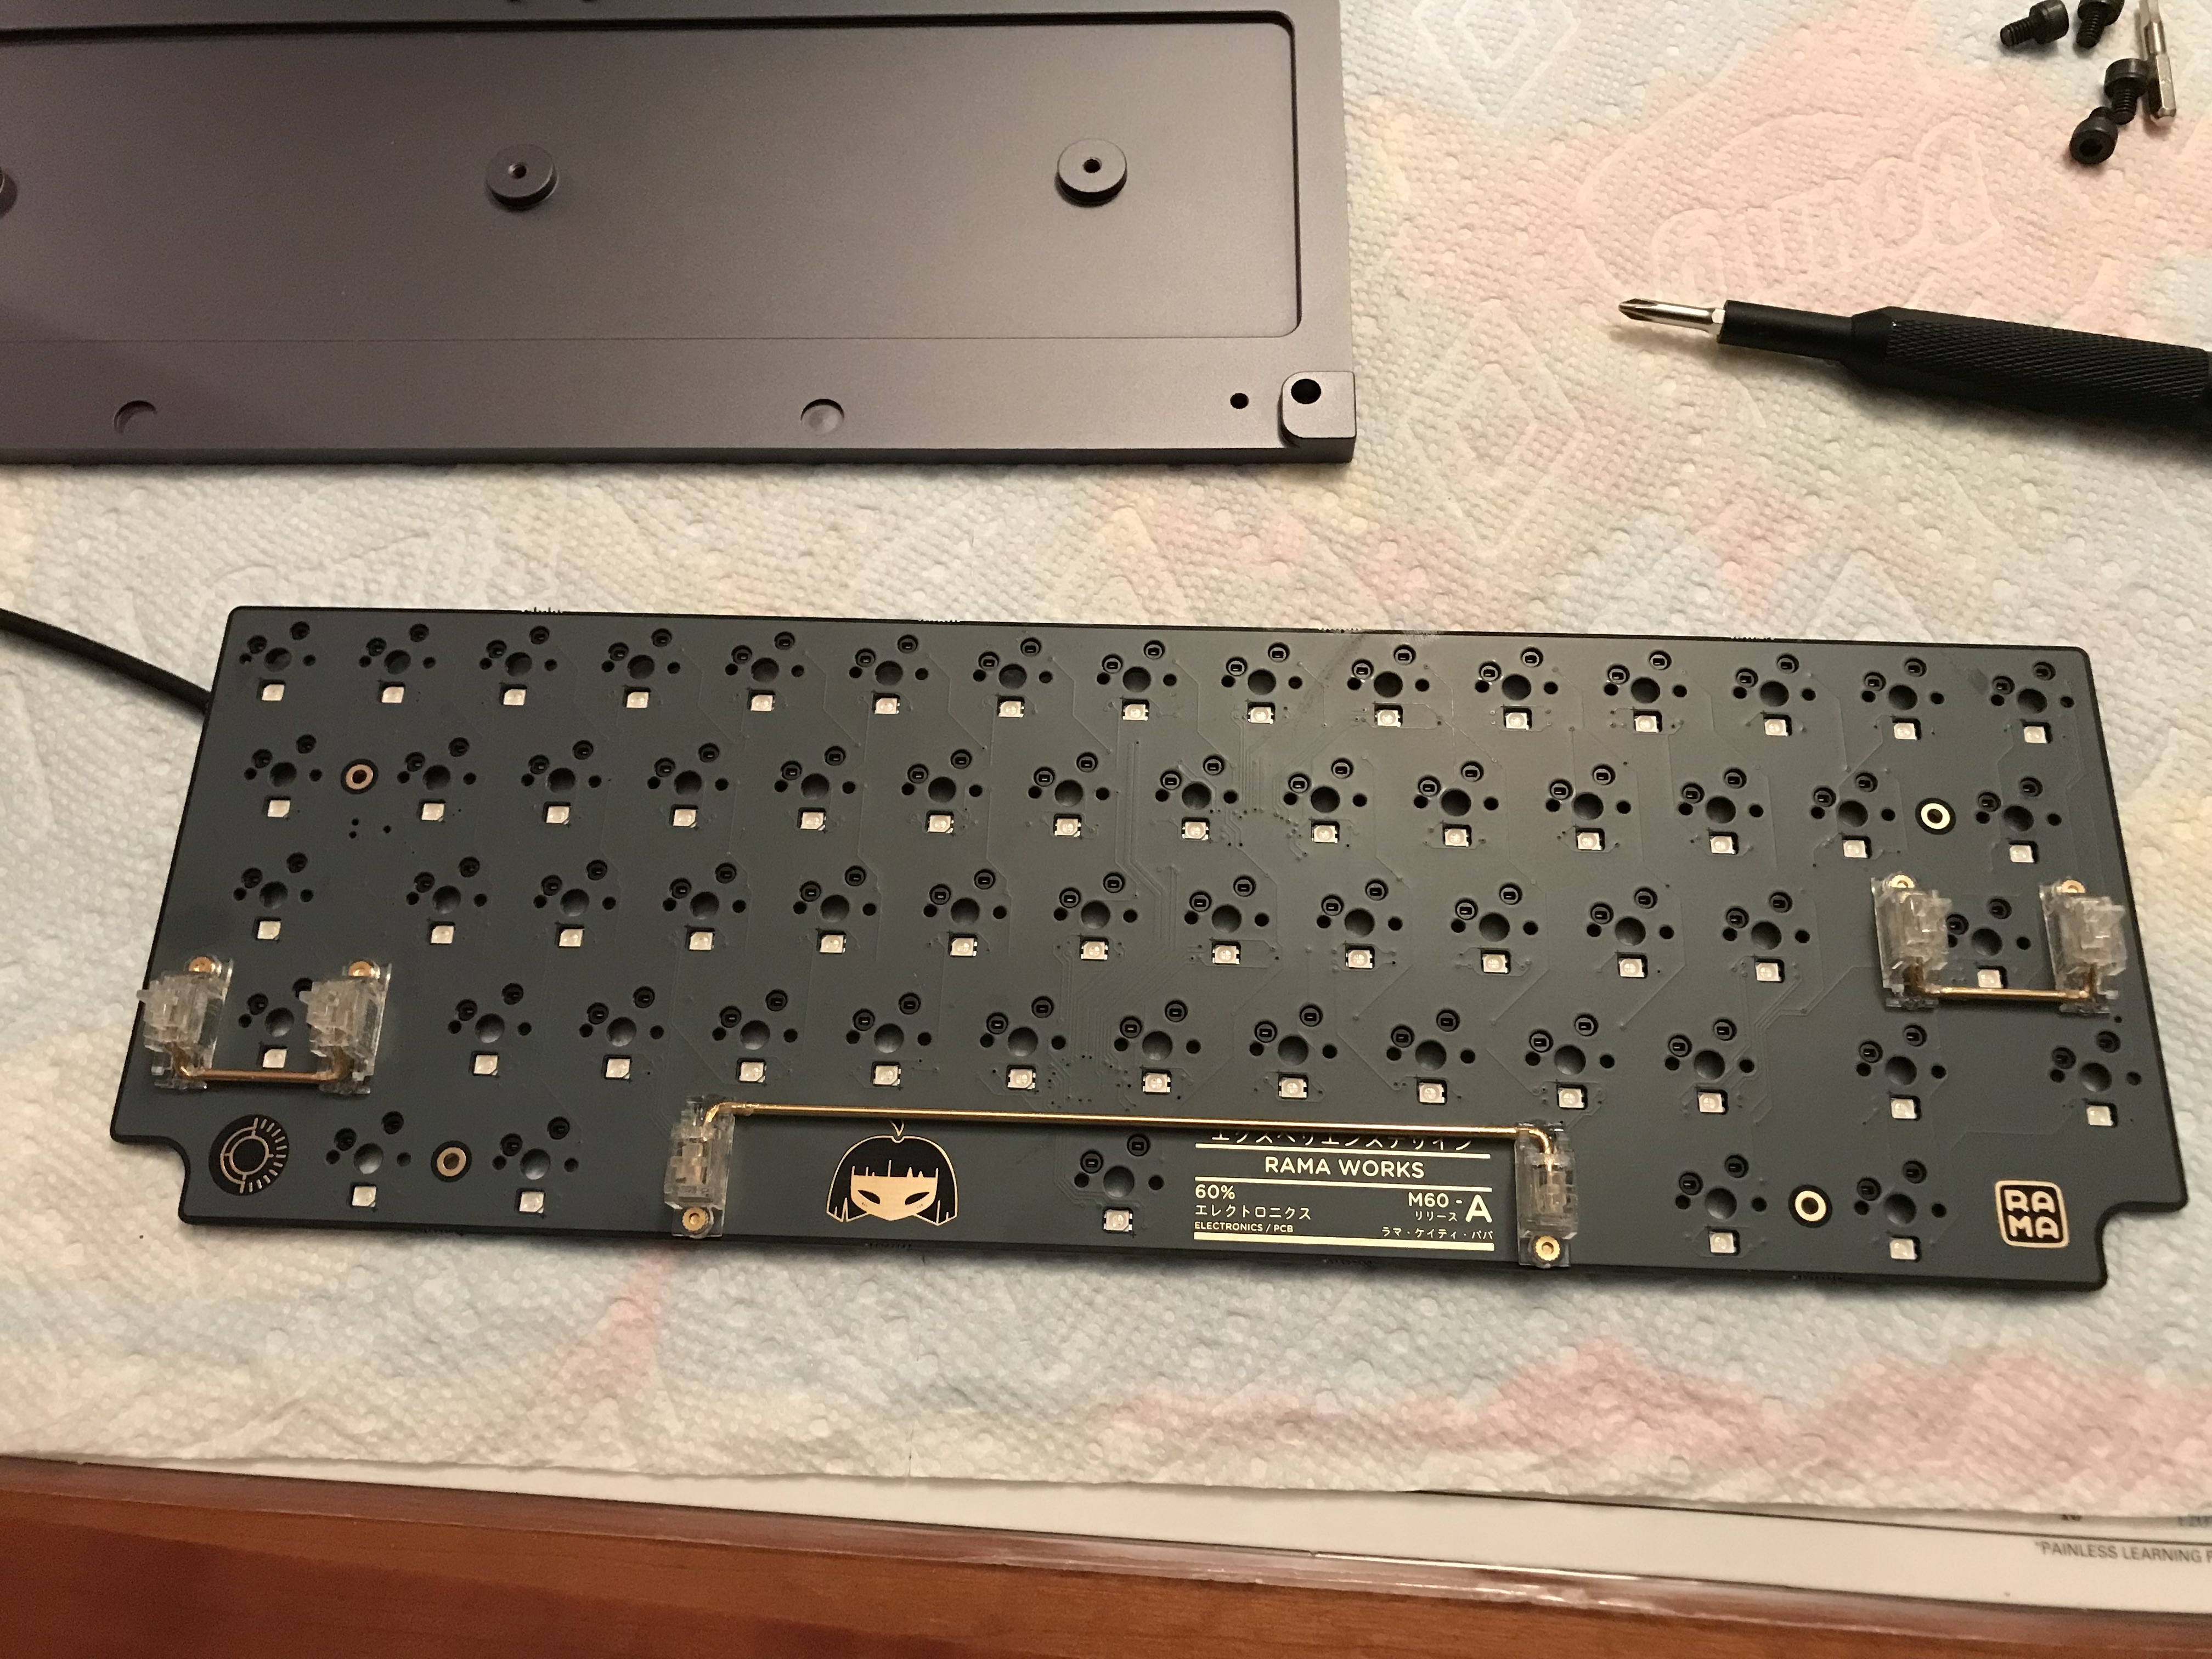
After carefully pushing the switches into the plate and hotswap sockets (I like to backstop the hotswap socket with a finger to prevent excess force from dislocating the socket), it was time to assemble the case. Now seems like a good time to mention that Rama’s online support for M60-A builds is quite thorough and graphically satisfying. I don’t know of any other vendor or GB runner in the community that provides this level of online support. Feel free to interpret that as both a shout-out for team Rama, and a call to action for the rest of the community to step up their game.
Time for more ano porn. Here’s the underside of the M60-A, with silicone feet installed. Note the glare of the ceiling lamp on the strip of PVD backplate.
We can’t really talk about M60-A support without mentioning firmware configuration, another area in which the board excels. While the M60-A supports QMK in the usual way, it is also one of the few boards that can be configured with the VIA configurator. For people who aren’t looking to download and compile firmware with QMK, have a fear of flashing firmware, and just want to do simple keymap assignments and lighting adjustments, there will never be a need to go beyond what VIA offers, right now. It delivers an extremely intuitive interface, and it’s hard to imagine that anyone reading this wouldn’t enjoy the experience of making a keymap or lighting change in VIA and seeing it reflected instantaneously on the keyboard. Very cool.
So with that said, why wouldn’t you use VIA?
- If you’re comfortable coding with QMK, and you’ve set up a QMK userspace that generalizes to all of your boards, then VIA is superfluous. In my case, I’ve spent a fair amount of time generalizing my keymaps to apply to a wide range of board layouts, so new layouts can be supported and flashed quickly.
- VIA support for more advanced features (macros, for example) remains to be implemented.
I ended up compiling my own firmware with macros and flashing it to the M60-A, and while I can’t configure macros with VIA, it doesn’t interfere with them either, so I’ve continued to use VIA for playing with lighting.
Not so fast! At press time, I discovered that I lost my macros with the latest flash of the firmware, but I was able to get them back by disabling DYNAMIC_KEYMAP_ENABLE. So at present, it looks like either I can use VIA, or I can use my custom firmware with macros, but not both at the same time. So it goes…
As I’ve already noted, the M60-A anodizing is very high quality, and the mirror PVD back is stunning (take care to enjoy it without fingerprints all over it - that won’t last). With GMK Monochrome caps, the board almost looks too pretty to use. Almost. And although I’m not a fan of artisan caps, I couldn’t resist the Wave cap Rama offers in the same colorway, and I have to say that it really works here - the consistency of the industrial look really works for me.
With V1 Zilents, the board is reasonably quiet without the optional weight or a Sorbothane treatment. Even the spacebar is not too bad. With that said, this is a somewhat hollow-sounding board, and although I haven’t tried non-silent switches on it yet, I can’t say that I’m surprised that others have noted that the sound needs work. I’m expecting to get the internal weight for this board later this year, and I’ll probably play with my usual sound dampening treatments then.
Before we get into lessons learned, let’s check out that backside again.
Lessons learned
- The M60-A unboxing experience merits mention. From the hard protective foam, to the layered presentation of the items in the M50-A kit, to the consistency of theme in all of the materials, Rama has this down. The only possible nit I could pick would be “start here” documentation - it might have been a nice touch to include a card with a pointer to the M60-A guides on the website.
- The Rama hype for fit and finish is real. In terms of construction quality, this is the nicest board I currently own. The anodization and PVD treatments are top-notch.
- Integrated plates look lovely and remove one variable from the build equation, but I remain unconvinced in terms of sound. It just feels like any vibration from key impact is being transmitted unimpeded across the entire board, which for me is not a good thing. It will be interesting to see how much of this problem will be addressed by the silicone internal dampener Rama recently introduced.
- The PVD backplate is incredibly nice, for the five or so seconds it will remain spotless before you touch it, at which point you’ll be keeping a microfiber cloth handy to wipe it down every time you accidentally touch it. Love the way it looks, hate the degree of maintenance it’s going to take to keep it that way.
- As convenient as hotswap is, I’m looking forward to the solderable M60-AX PCB. There is something intrinsically flimsy about hotswap that seems out of place on a board like this.
Whatever. Look at it.

Specifications
case: Rama M60-A (Moon)
case dampening: none
PCB: Wilba M60-A
plate: integrated, 4.5mm
LEDs: RGB per-switch, integrated in PCB
switches: 29 V1 R11 65g Zilents
	  31 V1 R11 67g Zilents
switch lubing: Tribosys 3204
keycaps: GMK Monochrome
	 Rama WAVE SEQ 2 AL (Moon)
stabilizer: Zeal transparent V2
stabilizer mods: lubed housing, sliders, and wire ends with SuperLube
plate/PCB dampening: none
HxWxD (without feet or caps): 1.31"x11.63"x4.56"
HxWxD (without caps): 1.38"x11.63"x4.56"
HxWxD: 1.56"x11.63"x4.56"
assembled weight: 3.60 lb
5 Likes
Build #16: Beach Norbatouch
This is a long one. Go grab a nice beverage before you settle in.
From the moment I saw the Norbatouch case with the Retro Refrigerator finish, I had a vision for it. While the name for the finish suggests an appeal to fifties-era Better Homes and Gardens nostalgia, the actual color suggested something else to me - the color of a beach bungalow, the kind you might see along certain Florida coastlines or a Caribbean island. That particular coastal colorway implies white and beige tones, and maybe the color of a bungalow’s weathered sun deck, all colors which I thought would combine to yield a really nice looking board.
While I had the vision, what I didn’t have was, well, any of the parts. Ha!
Sourcing the materials
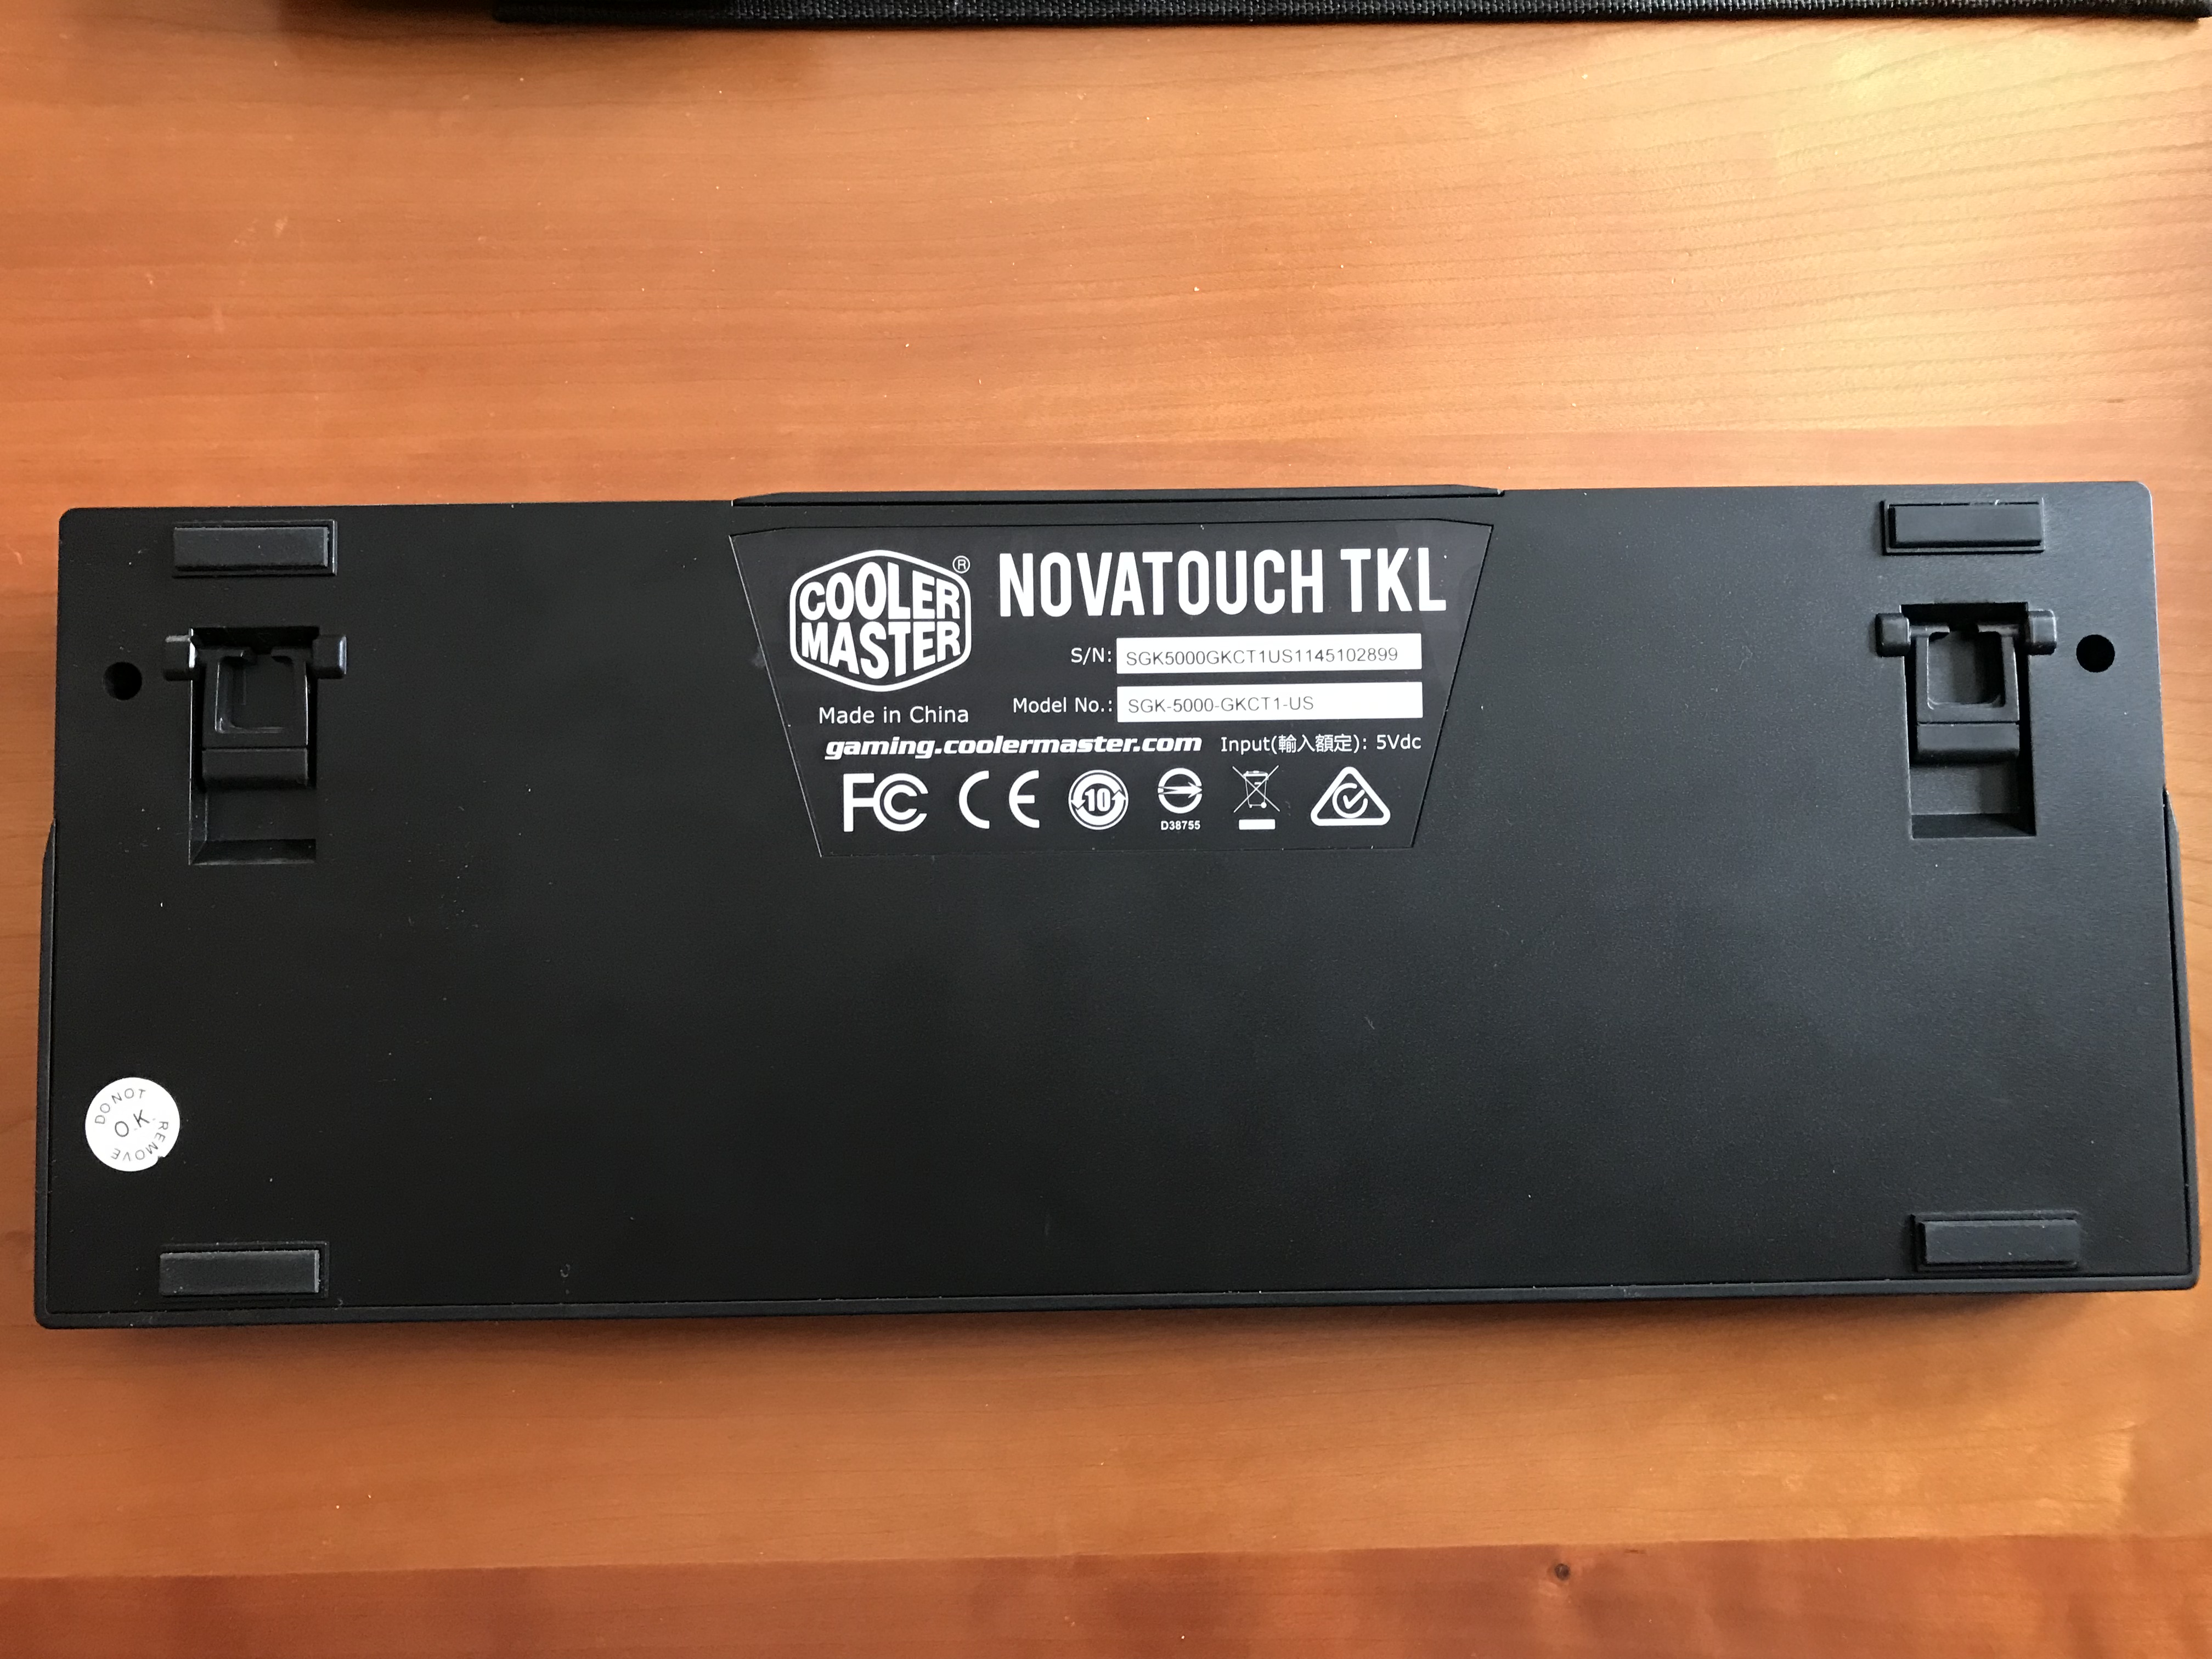
Let’s start with the proper donor board. Sure, we can still use the relatively-easy-to-find CoolerMaster MasterKeys Pro S with the Norbatouch, but I wanted this first Norbatouch to serve as my introduction to Topre, which meant getting my hands on a Novatouch TKL. The Novatouch, a CoolerMaster board with MX-compatible Topre sliders, was discontinued in 2016, and they have since become steadily harder to find and more expensive, as the infamous purple sliders are generally regarded as the cream of the available crop for putting MX-compatible keycaps on a Topre board. Here, let @Manofinterests school you.
Still, with sufficient devotion, the ebay gods will eventually smile upon you, and I recently found myself in possession of a heavily used but functional Novatouch. As advertised by the seller, there was one problem; the MX cruciform for the slider on the ESC key was broken. I figured I could deal with that by using a KBDfans MX slider to replace the broken one, and moving it to Scroll Lock, an essentially unused key.
Next: keycaps. Readers of my build logs may recall the problems I had with finding color-matched keycaps in the wooden case Zilent series of builds. I wanted to avoid that problem this time around, so one of the first things I did, months before I had either the case or the donor board, was to obtain color chips for the DSA dye-sub sets offered by PMK, for all of the colors in the dye-sub offerings that could conceivably work for the colorway I was after.
While I didn’t find exactly what I had in mind, I did find three colors among this set that appeared close enough to work, and picked up the necessary sets for TKL coverage. DSA isn’t my first choice for profile, but I really wanted to get the colors in the ballpark, and felt I could do that with these caps.
Finally, the case itself. I’ve had a Norbatouch Pi in Retro Refrigerator on order for a while, but I couldn’t resist the opportunity to pick up a recent R2.5 extra in this finish to finally get this build underway (teaser: I now have alternate plans for the Pi - drop by in a few months…)
Pre-build evaluation
We’re starting with a used Novatouch as the core of this build. It’s worth evaluating the exterior and interior of the keyboard to see what else we might need to do before treating it to the full Norb. Exterior first.
- As disclosed by the seller, the cruciform of the ESC slider is broken, and there isn’t any way I can see to make it usable again. But that was expected, and as mentioned earlier, we should be able to replace it with a workable alternative.
- This keyboard rattles like hell. Although the stabilized keys are worse, most of the 1u keys rattle too. Either this board has really seen little love by its prior owner, or the owner was willing to put up with a lot to get Topre action with MX sliders, or perhaps both. It’s kind of like typing on nice rubber domes through a plastic bag full of cheap silverware. Unusable.
Before we take a look at the interior, put on your hazmat suit.
I mean, OK, it’s used. We expect some crud. But this seems excessive?
Also some gunk on the sliders, and on the domes, so, before this even gets near a pristine Norbatouch case, we have a refurbishing project on our hands.
- Completely dismantle the Novatouch to get at all parts for cleaning.
- Remove all solid matter from the plate with isopropyl alcohol.
- Clean the domes lightly with soapy water, and let air-dry thoroughly.
- Clean the sliders with soapy water, and let air-dry thoroughly.
Then, and only then, can this board go to rehab:
- Install silencing rings on sliders.
- Lube rails of slider housings.
- Lube stabilizer sliders, clips, and wires.
- Reassemble plate/domes/PCB sandwich and evaluate.
On the other hand…nothing to desolder! Always look on the bright side of life.
Refurbishing a Novatouch
First, we have to get into the case. There are four screws to remove. Two are in the obvious locations:
The other two are hidden underneath stickers on the case. One is under the “DO NOT REMOVE” sticker, and the other is hidden under the serial and model number sticker.
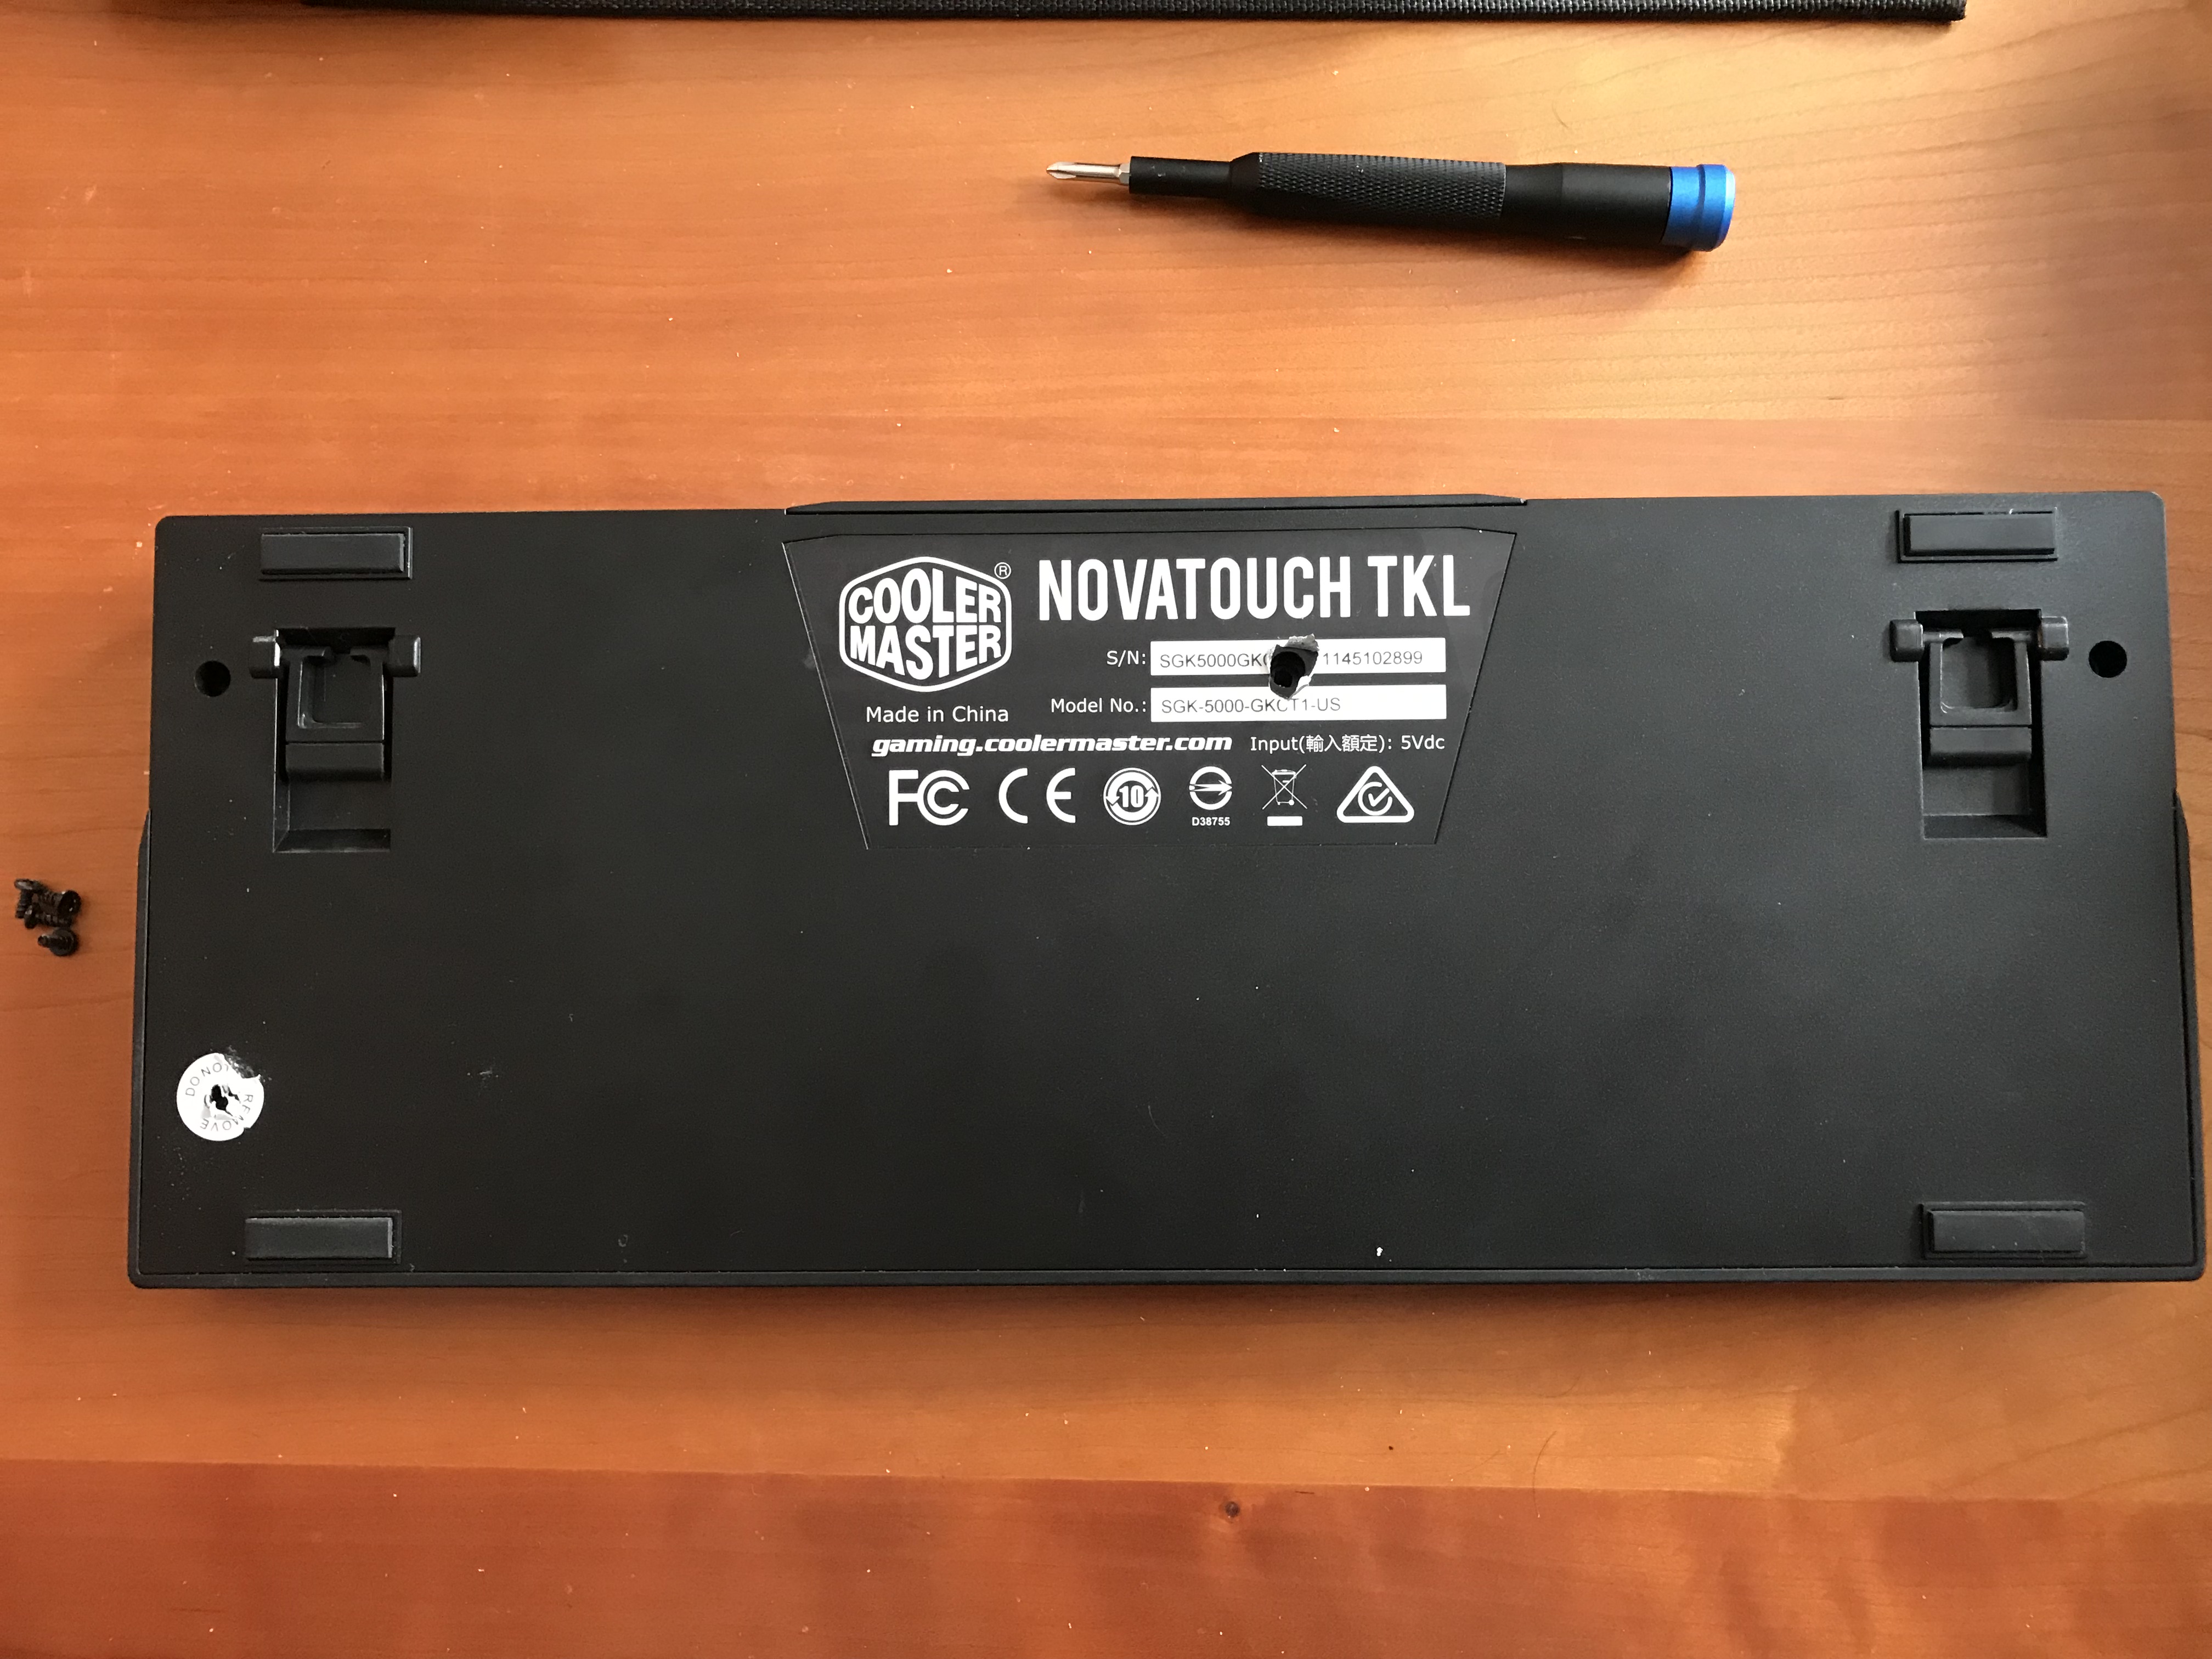
Once those screws are removed, the top piece of the plastic case can be separated from the bottom by working a credit card around the edge and gently prying to release the tabs holding the case together.
Be careful when removing the PCB/plate assembly - it’s connected by a cable to a USB housing attached to the bottom half of the case.
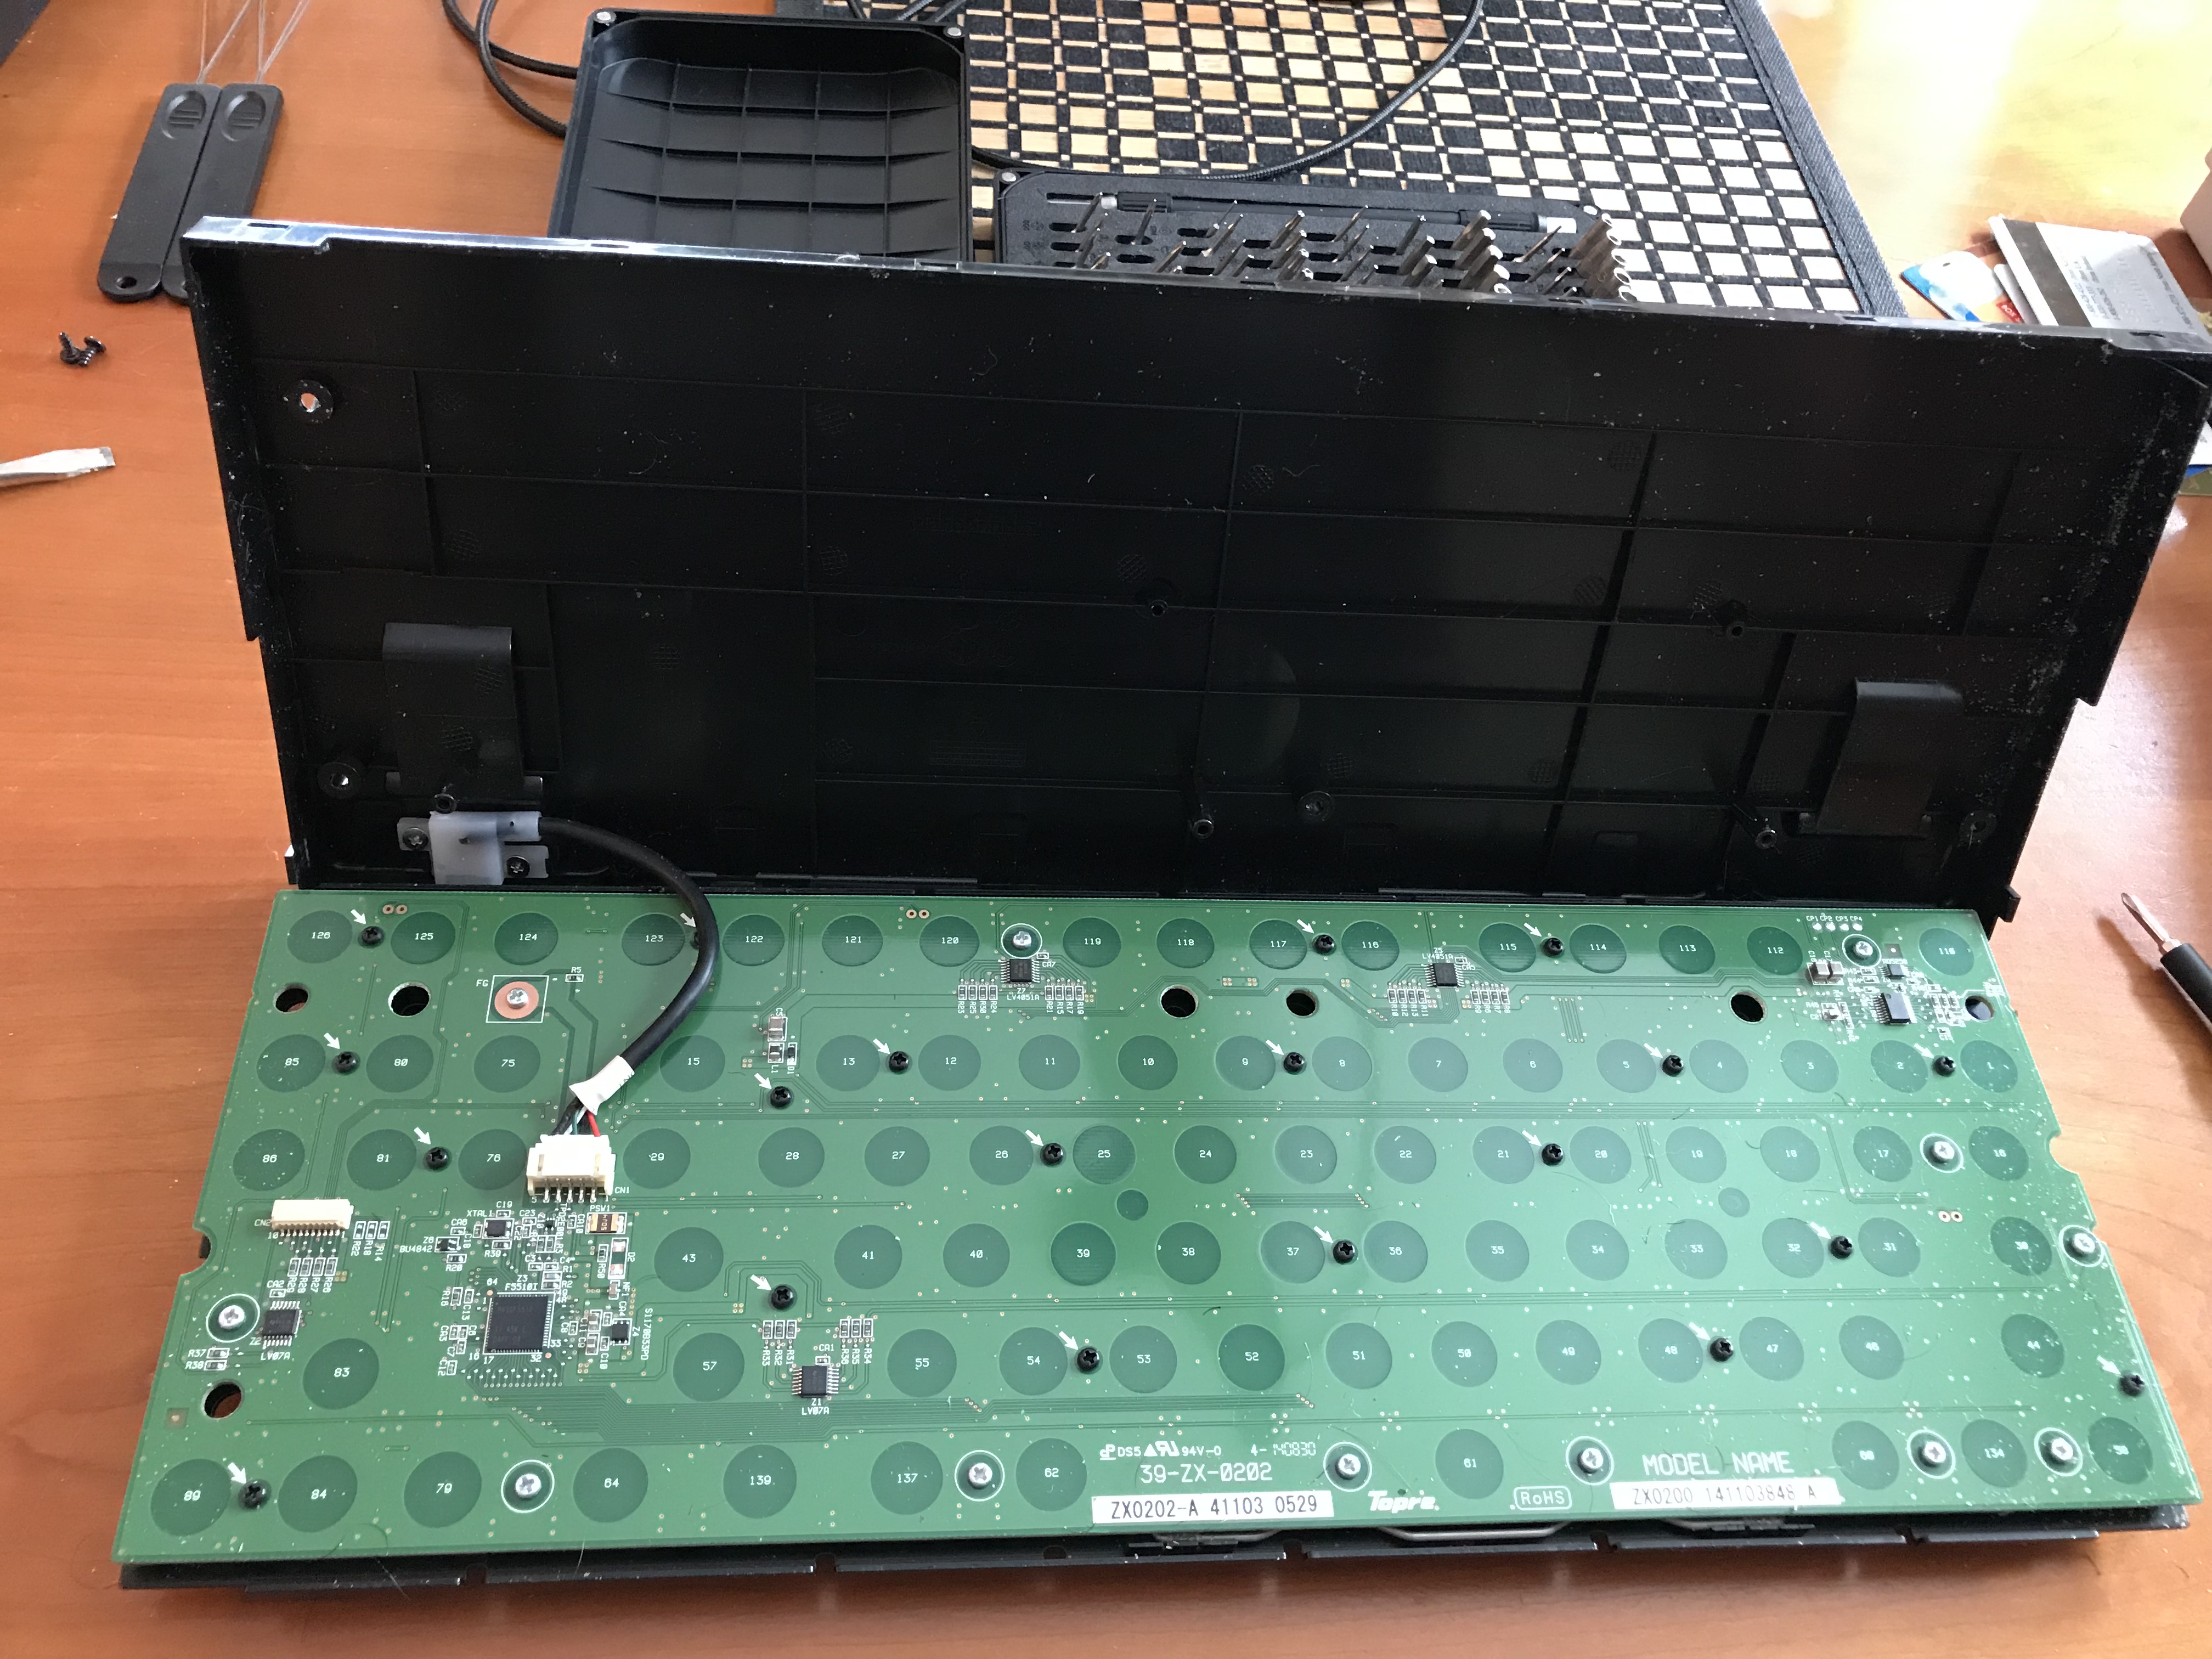
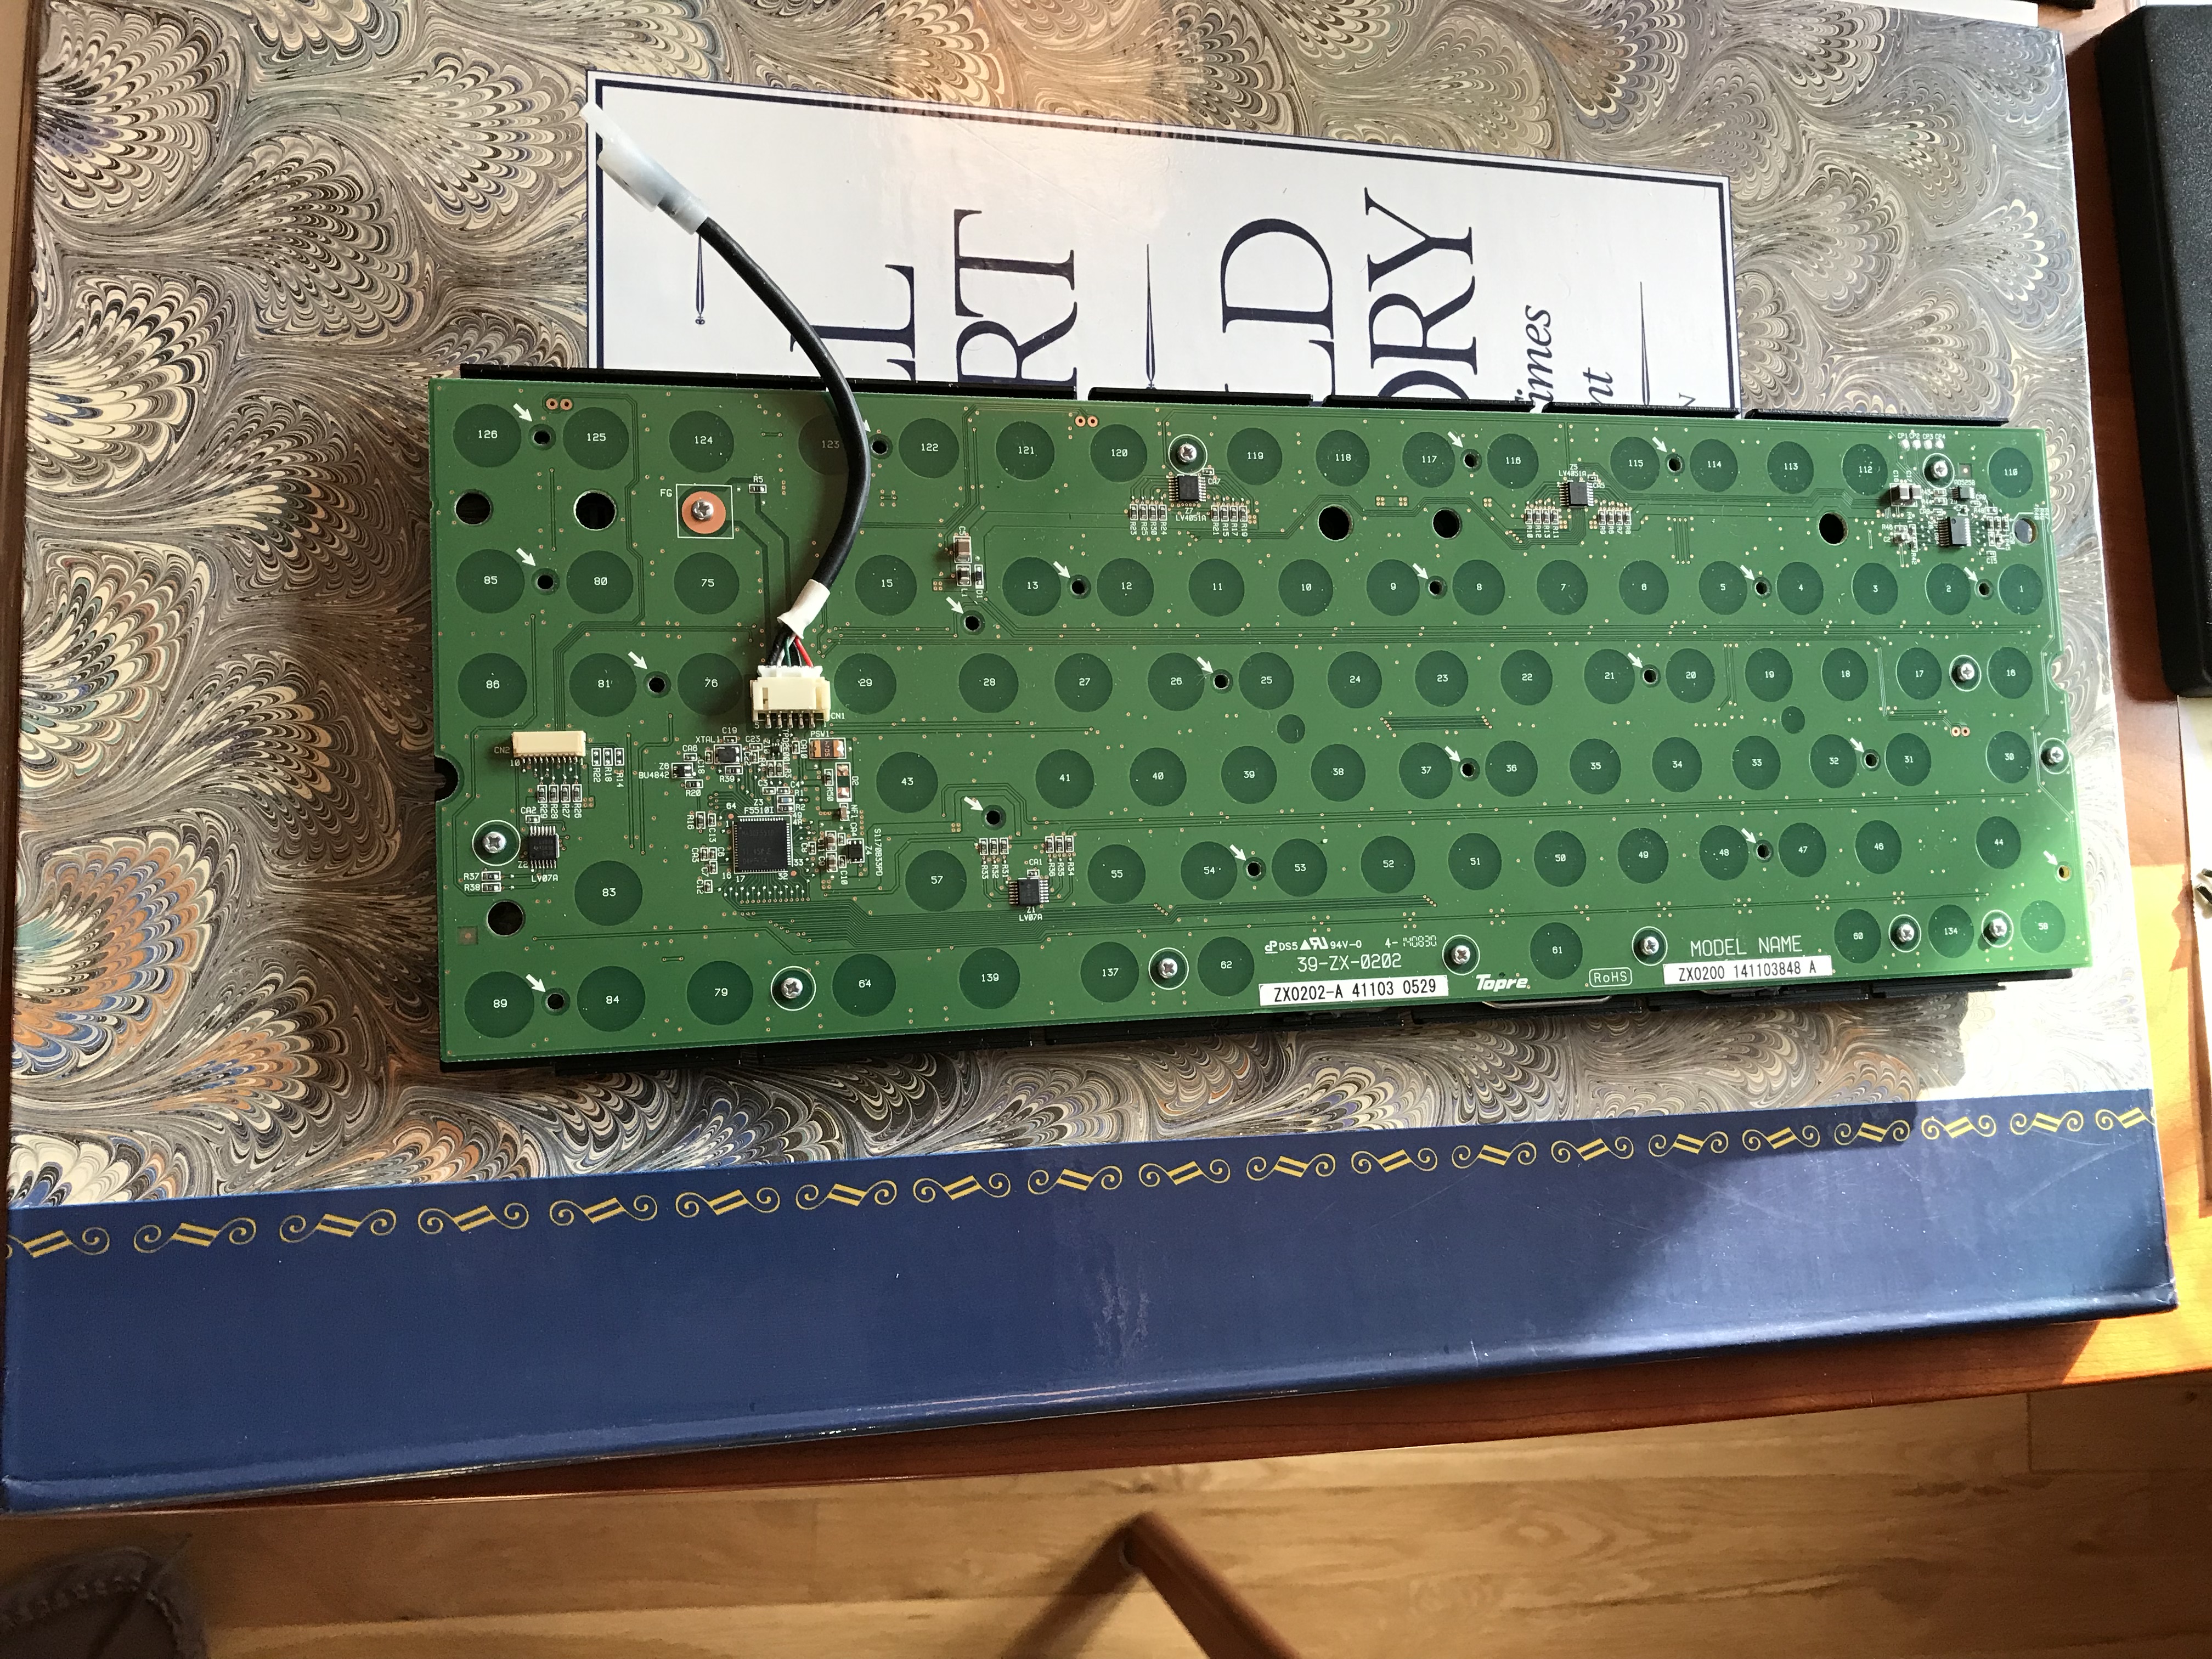
That housing is held to the bottom half of the case by two screws, and can easily be removed.
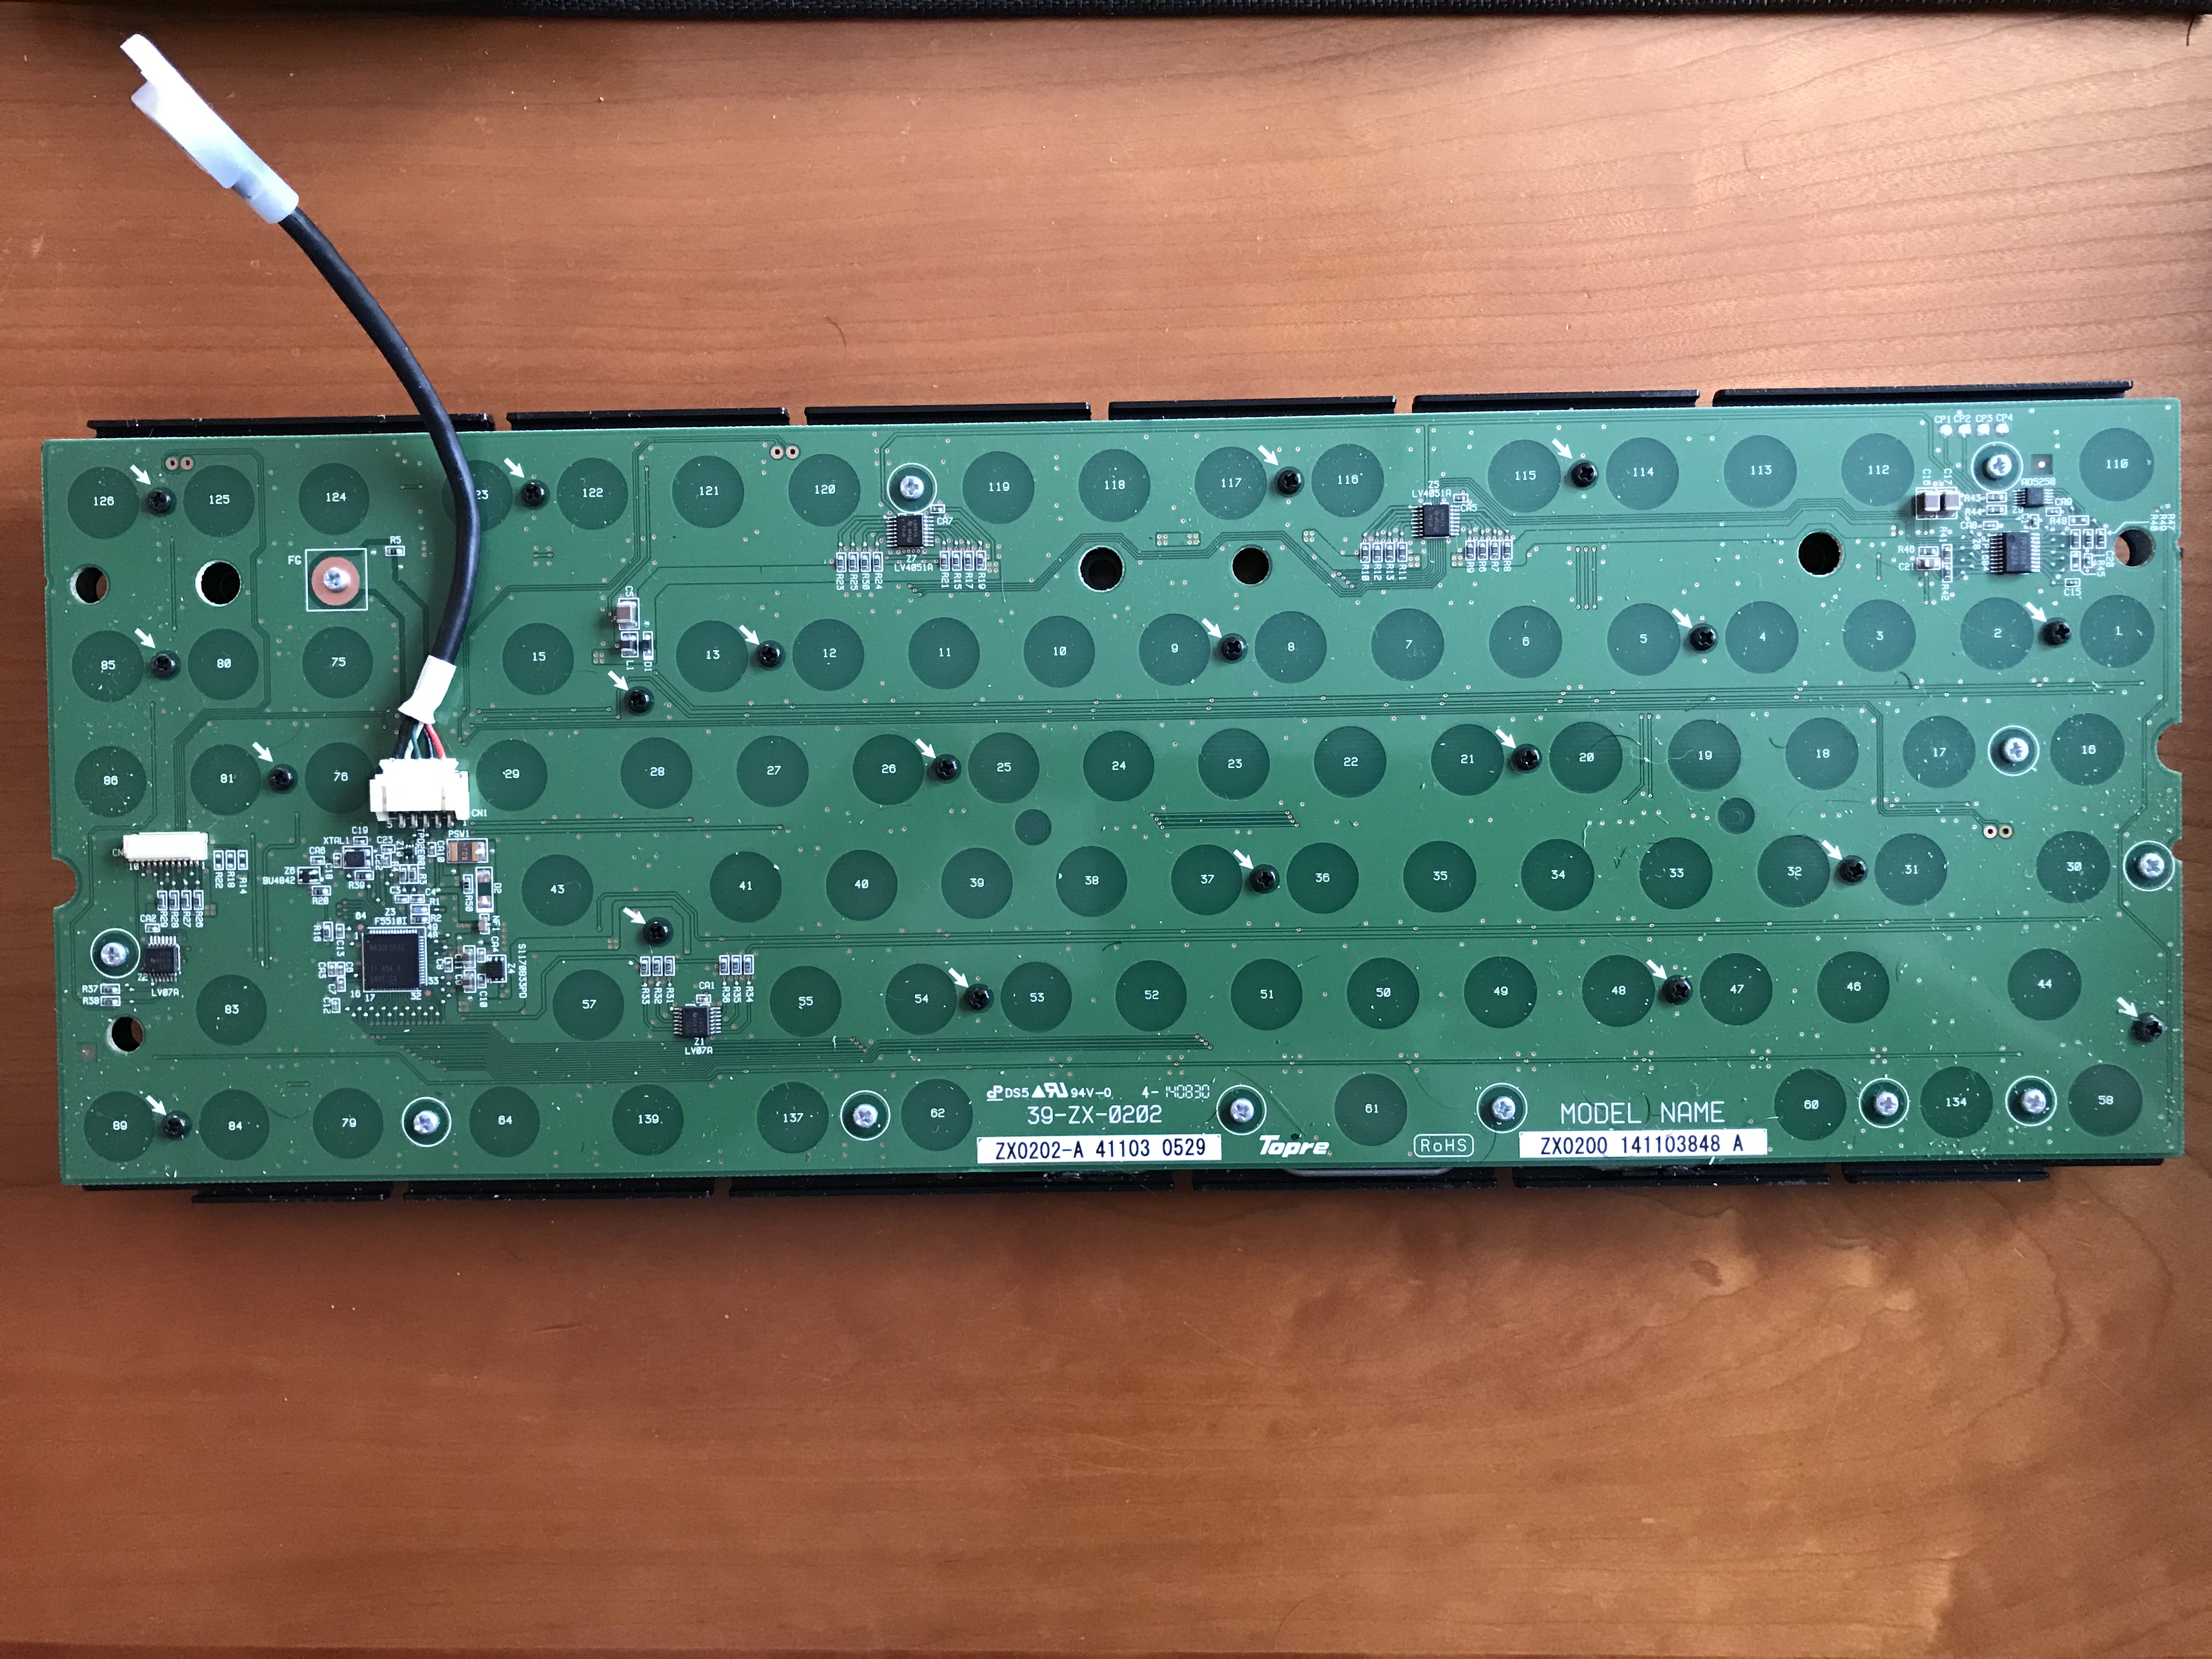
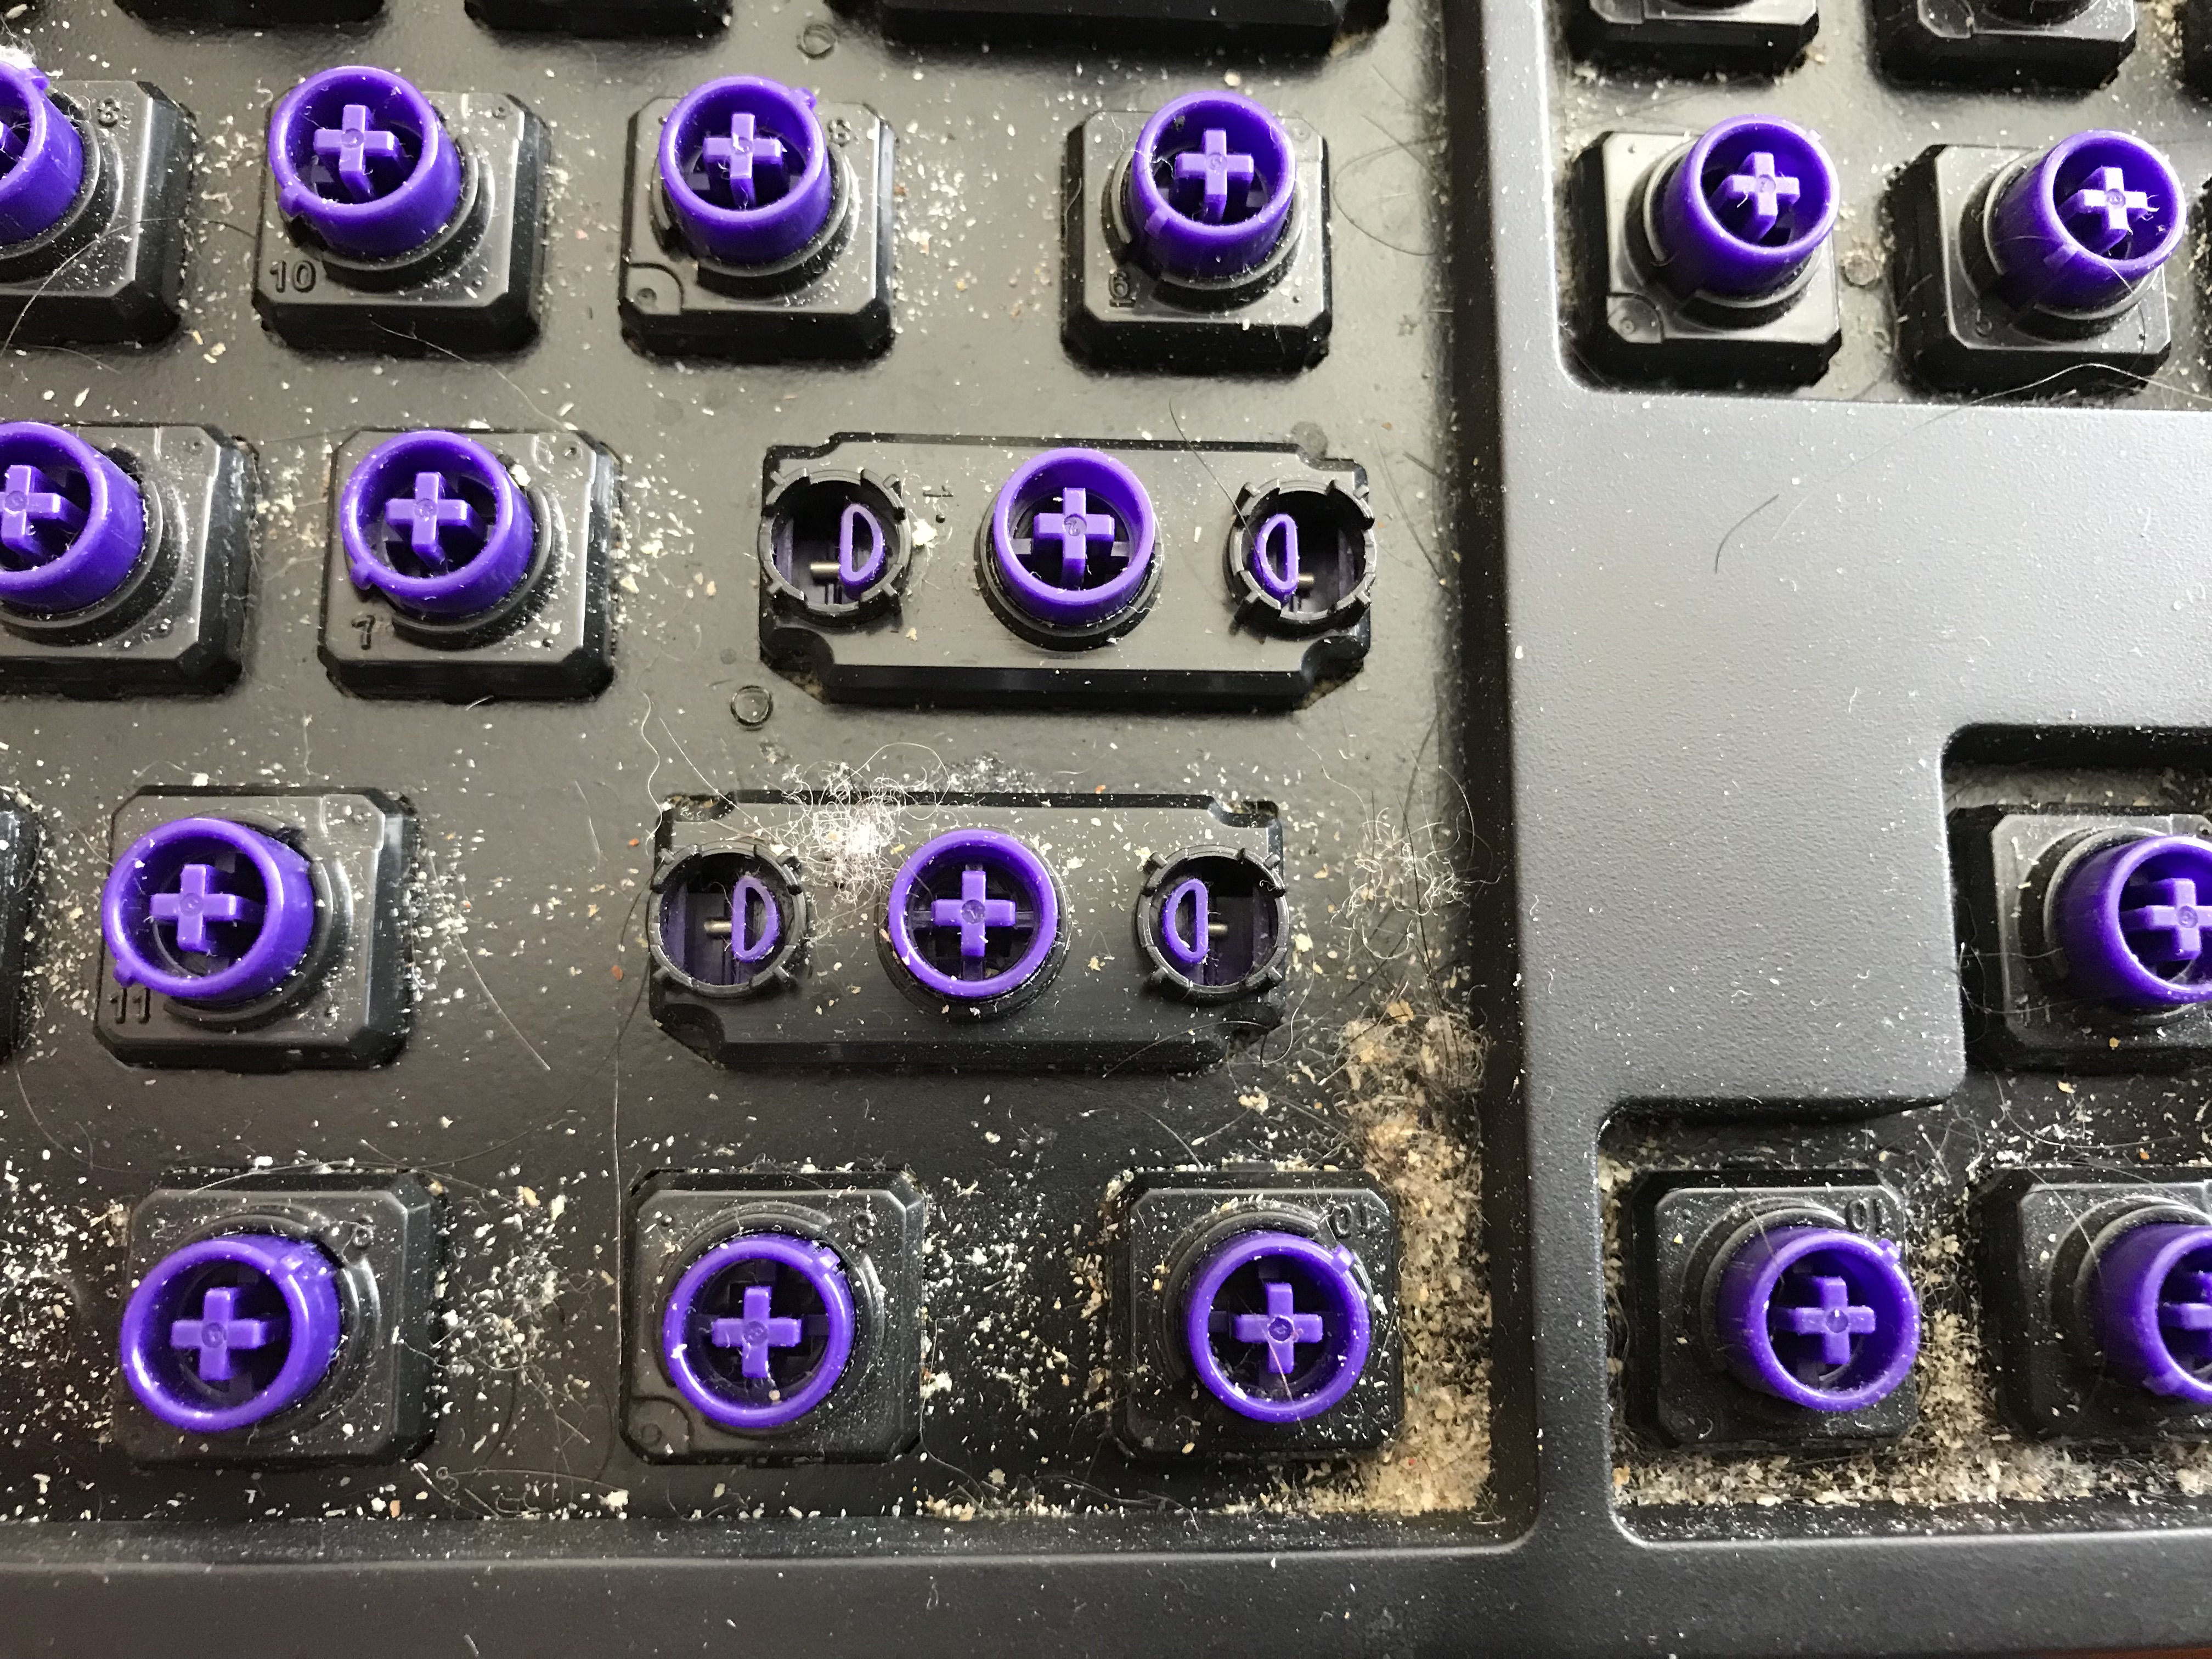
Now, look at that last photo, at all of the little white arrows on the PCB, pointing to black screws. There are 20 of those. You have to remove all of them. Yes, all of them.
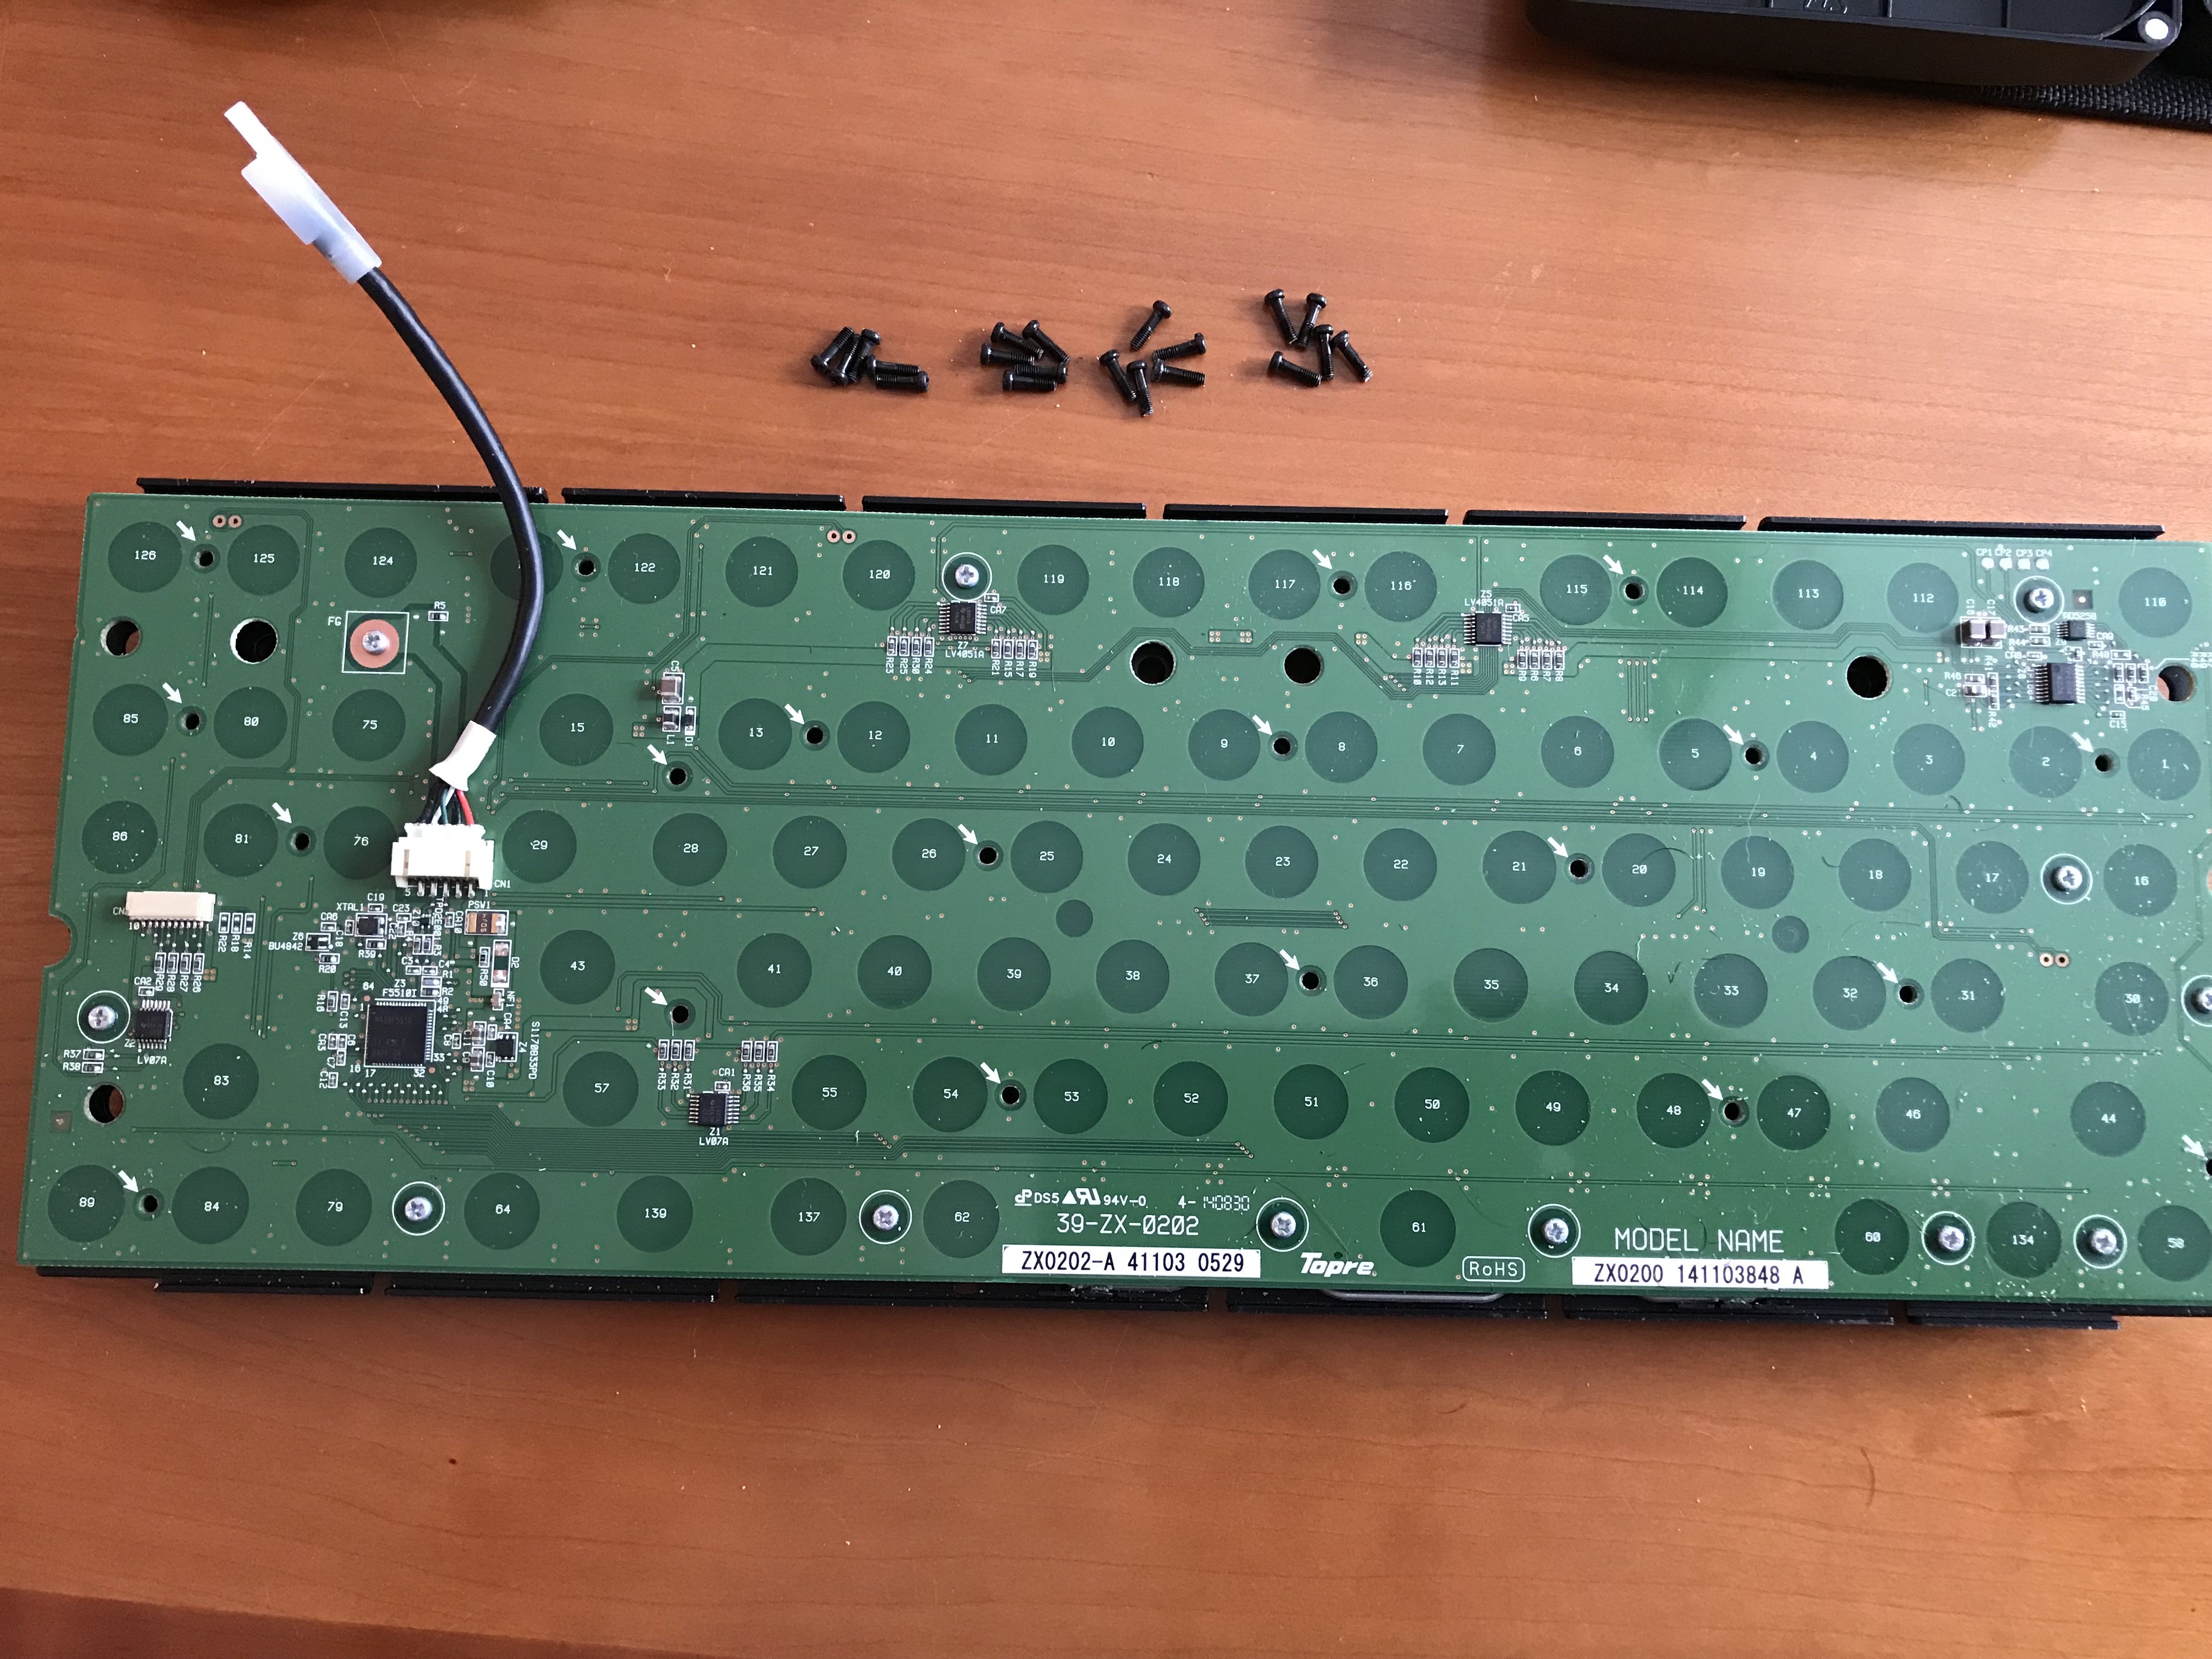
Did you think you were done? Not just yet. See the silver-headed screws, marked on the PCB by white circles, and the one with a red ring and white square, 12 in total? That’s right, all of those have to be removed too.
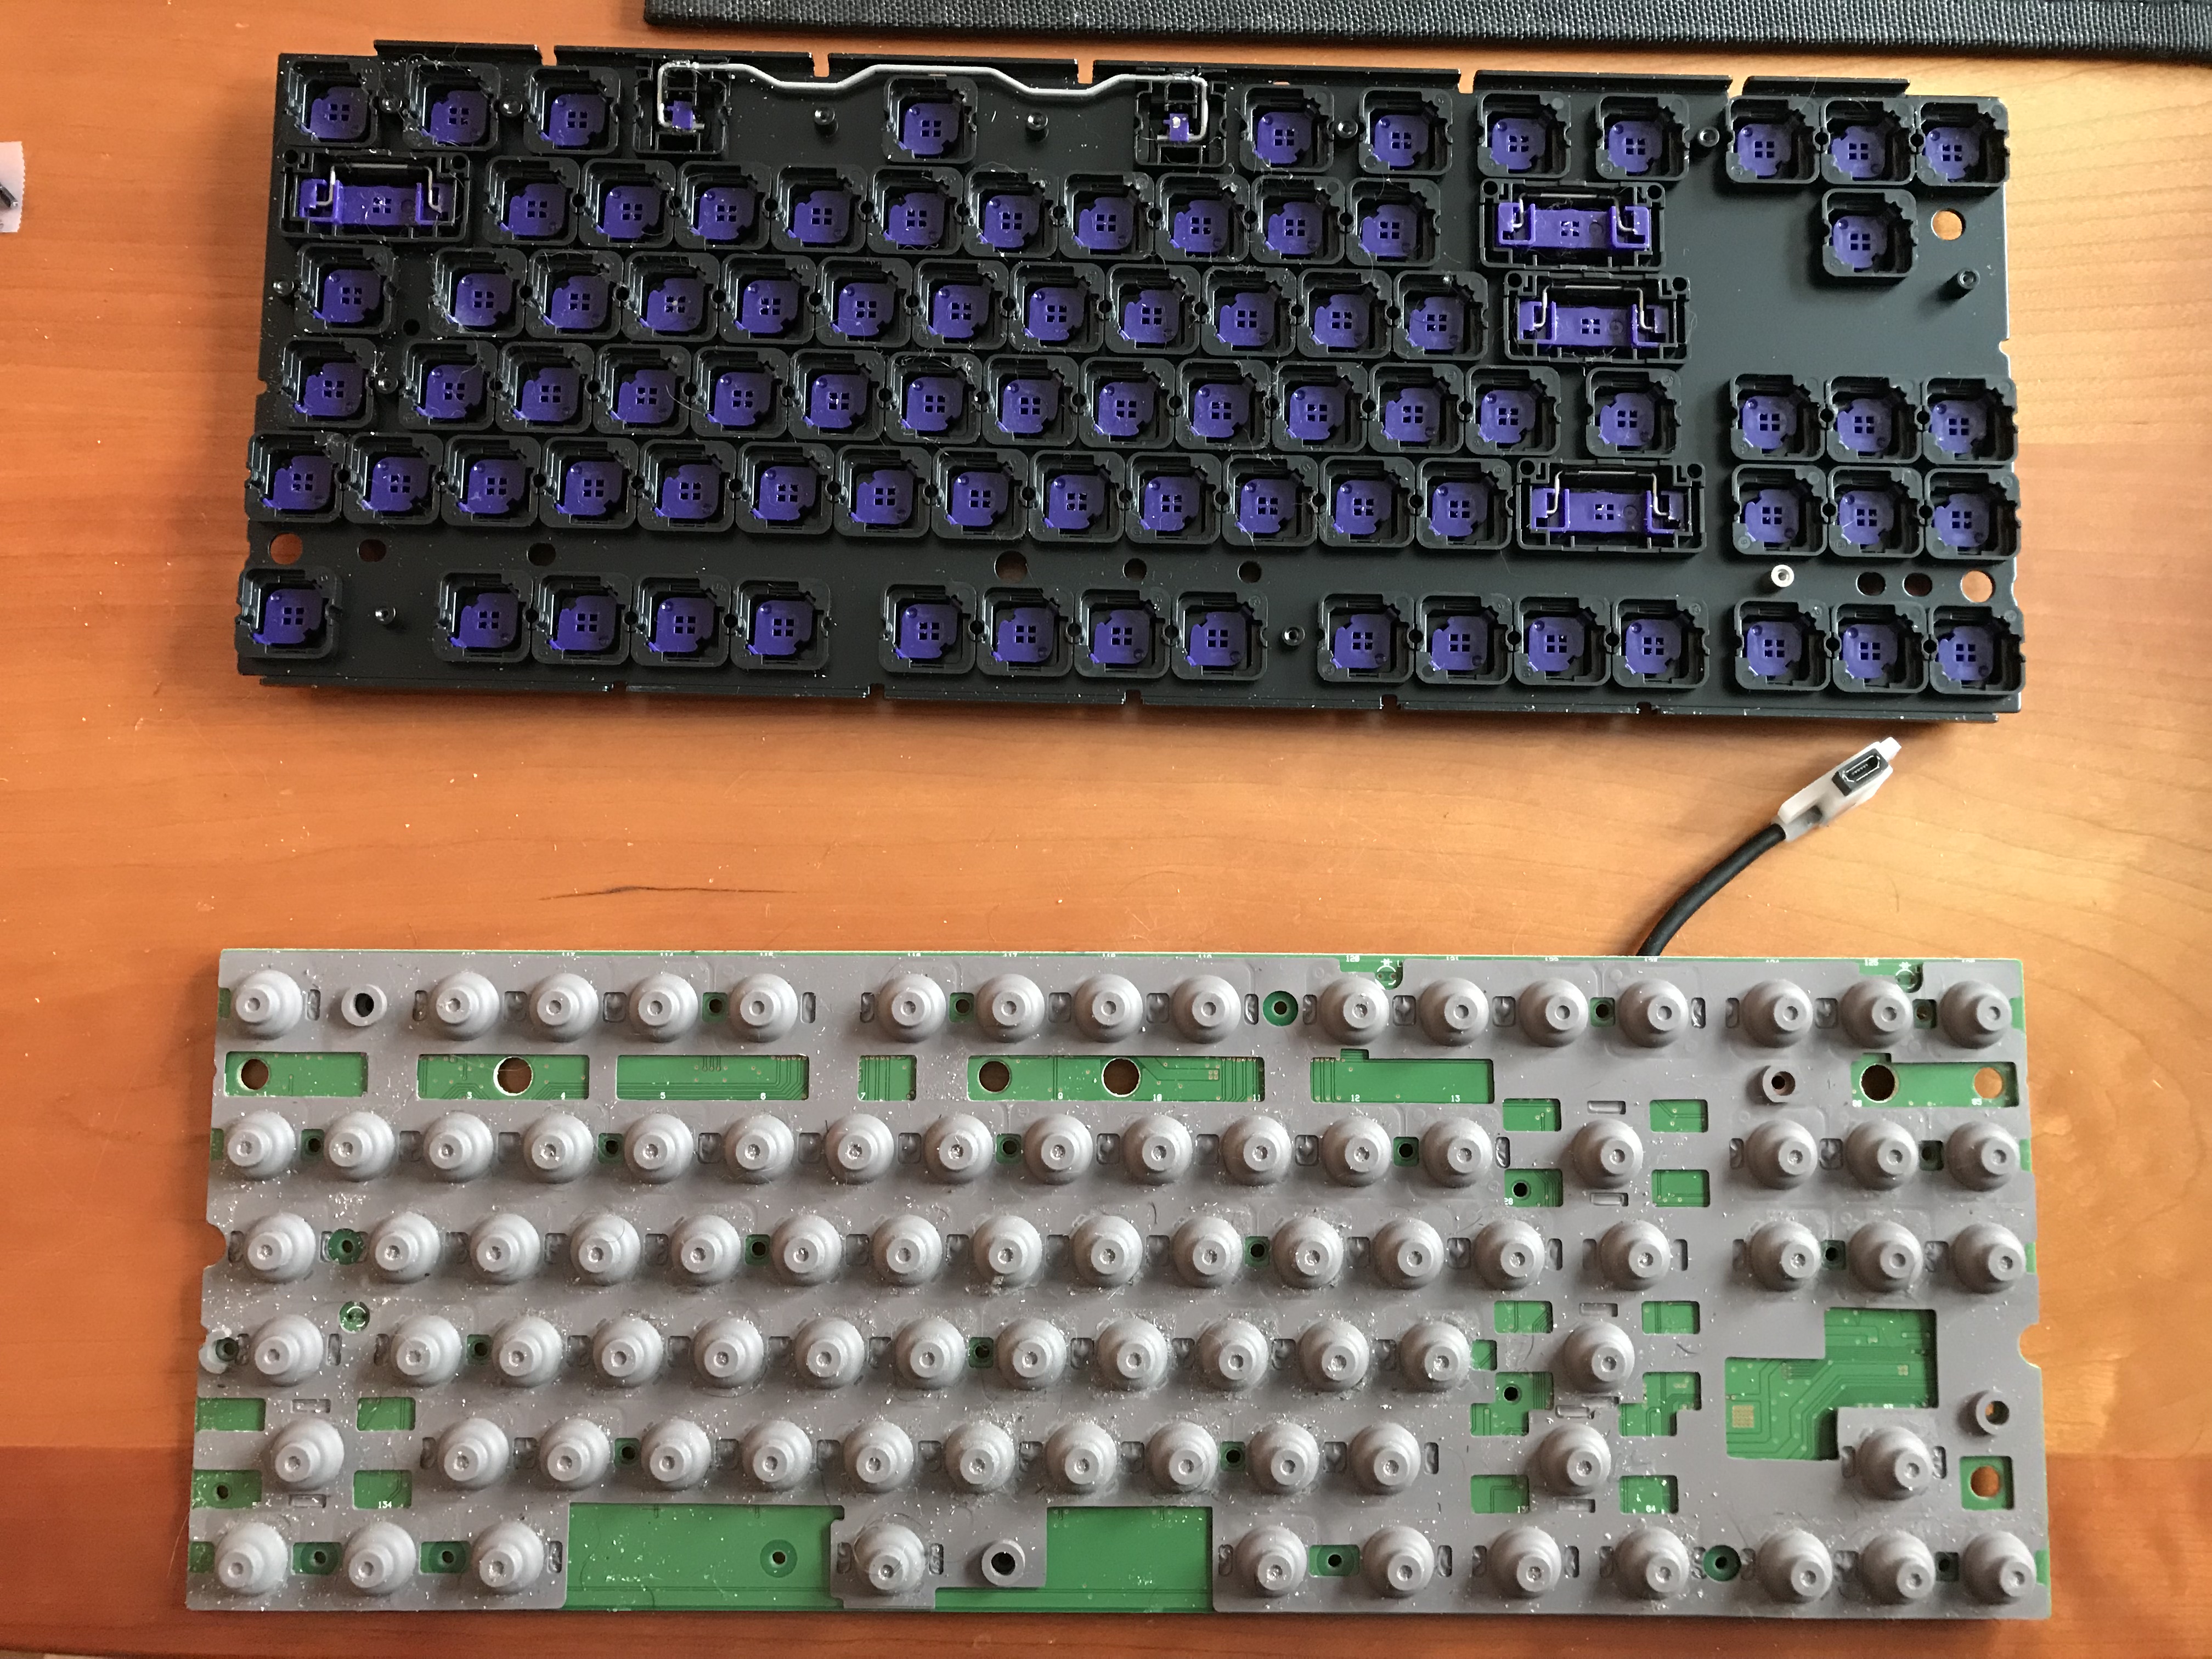
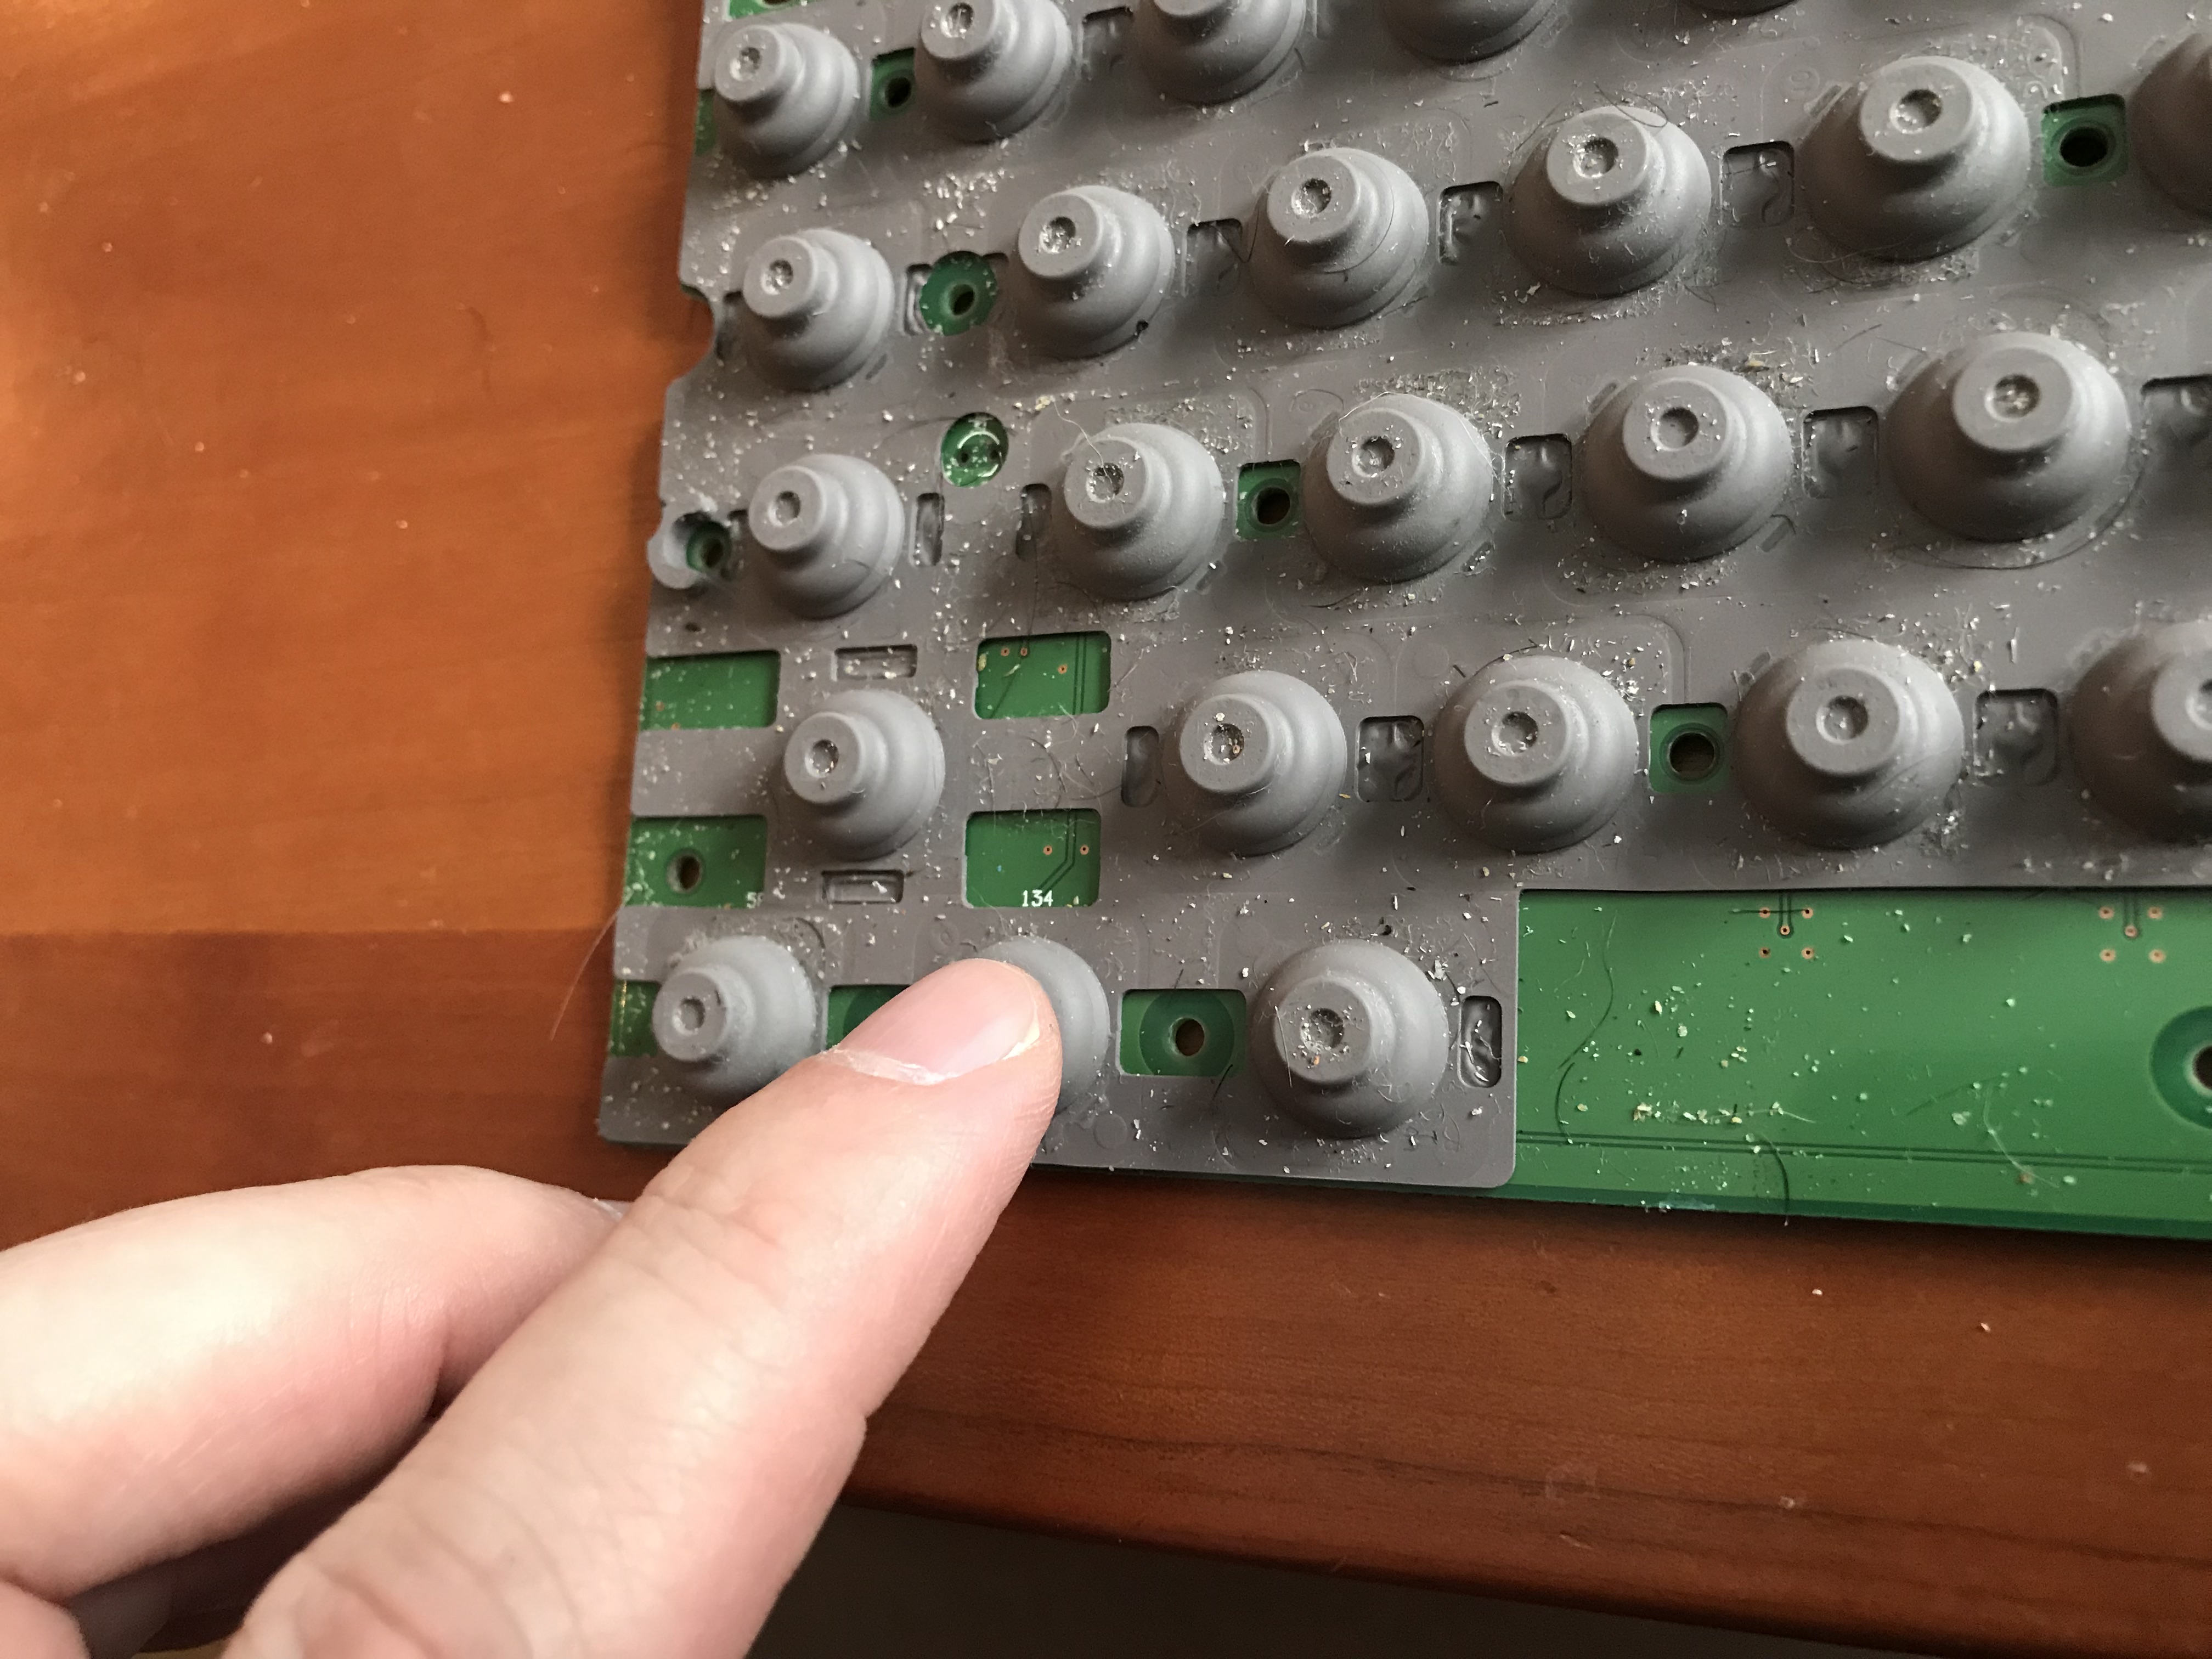
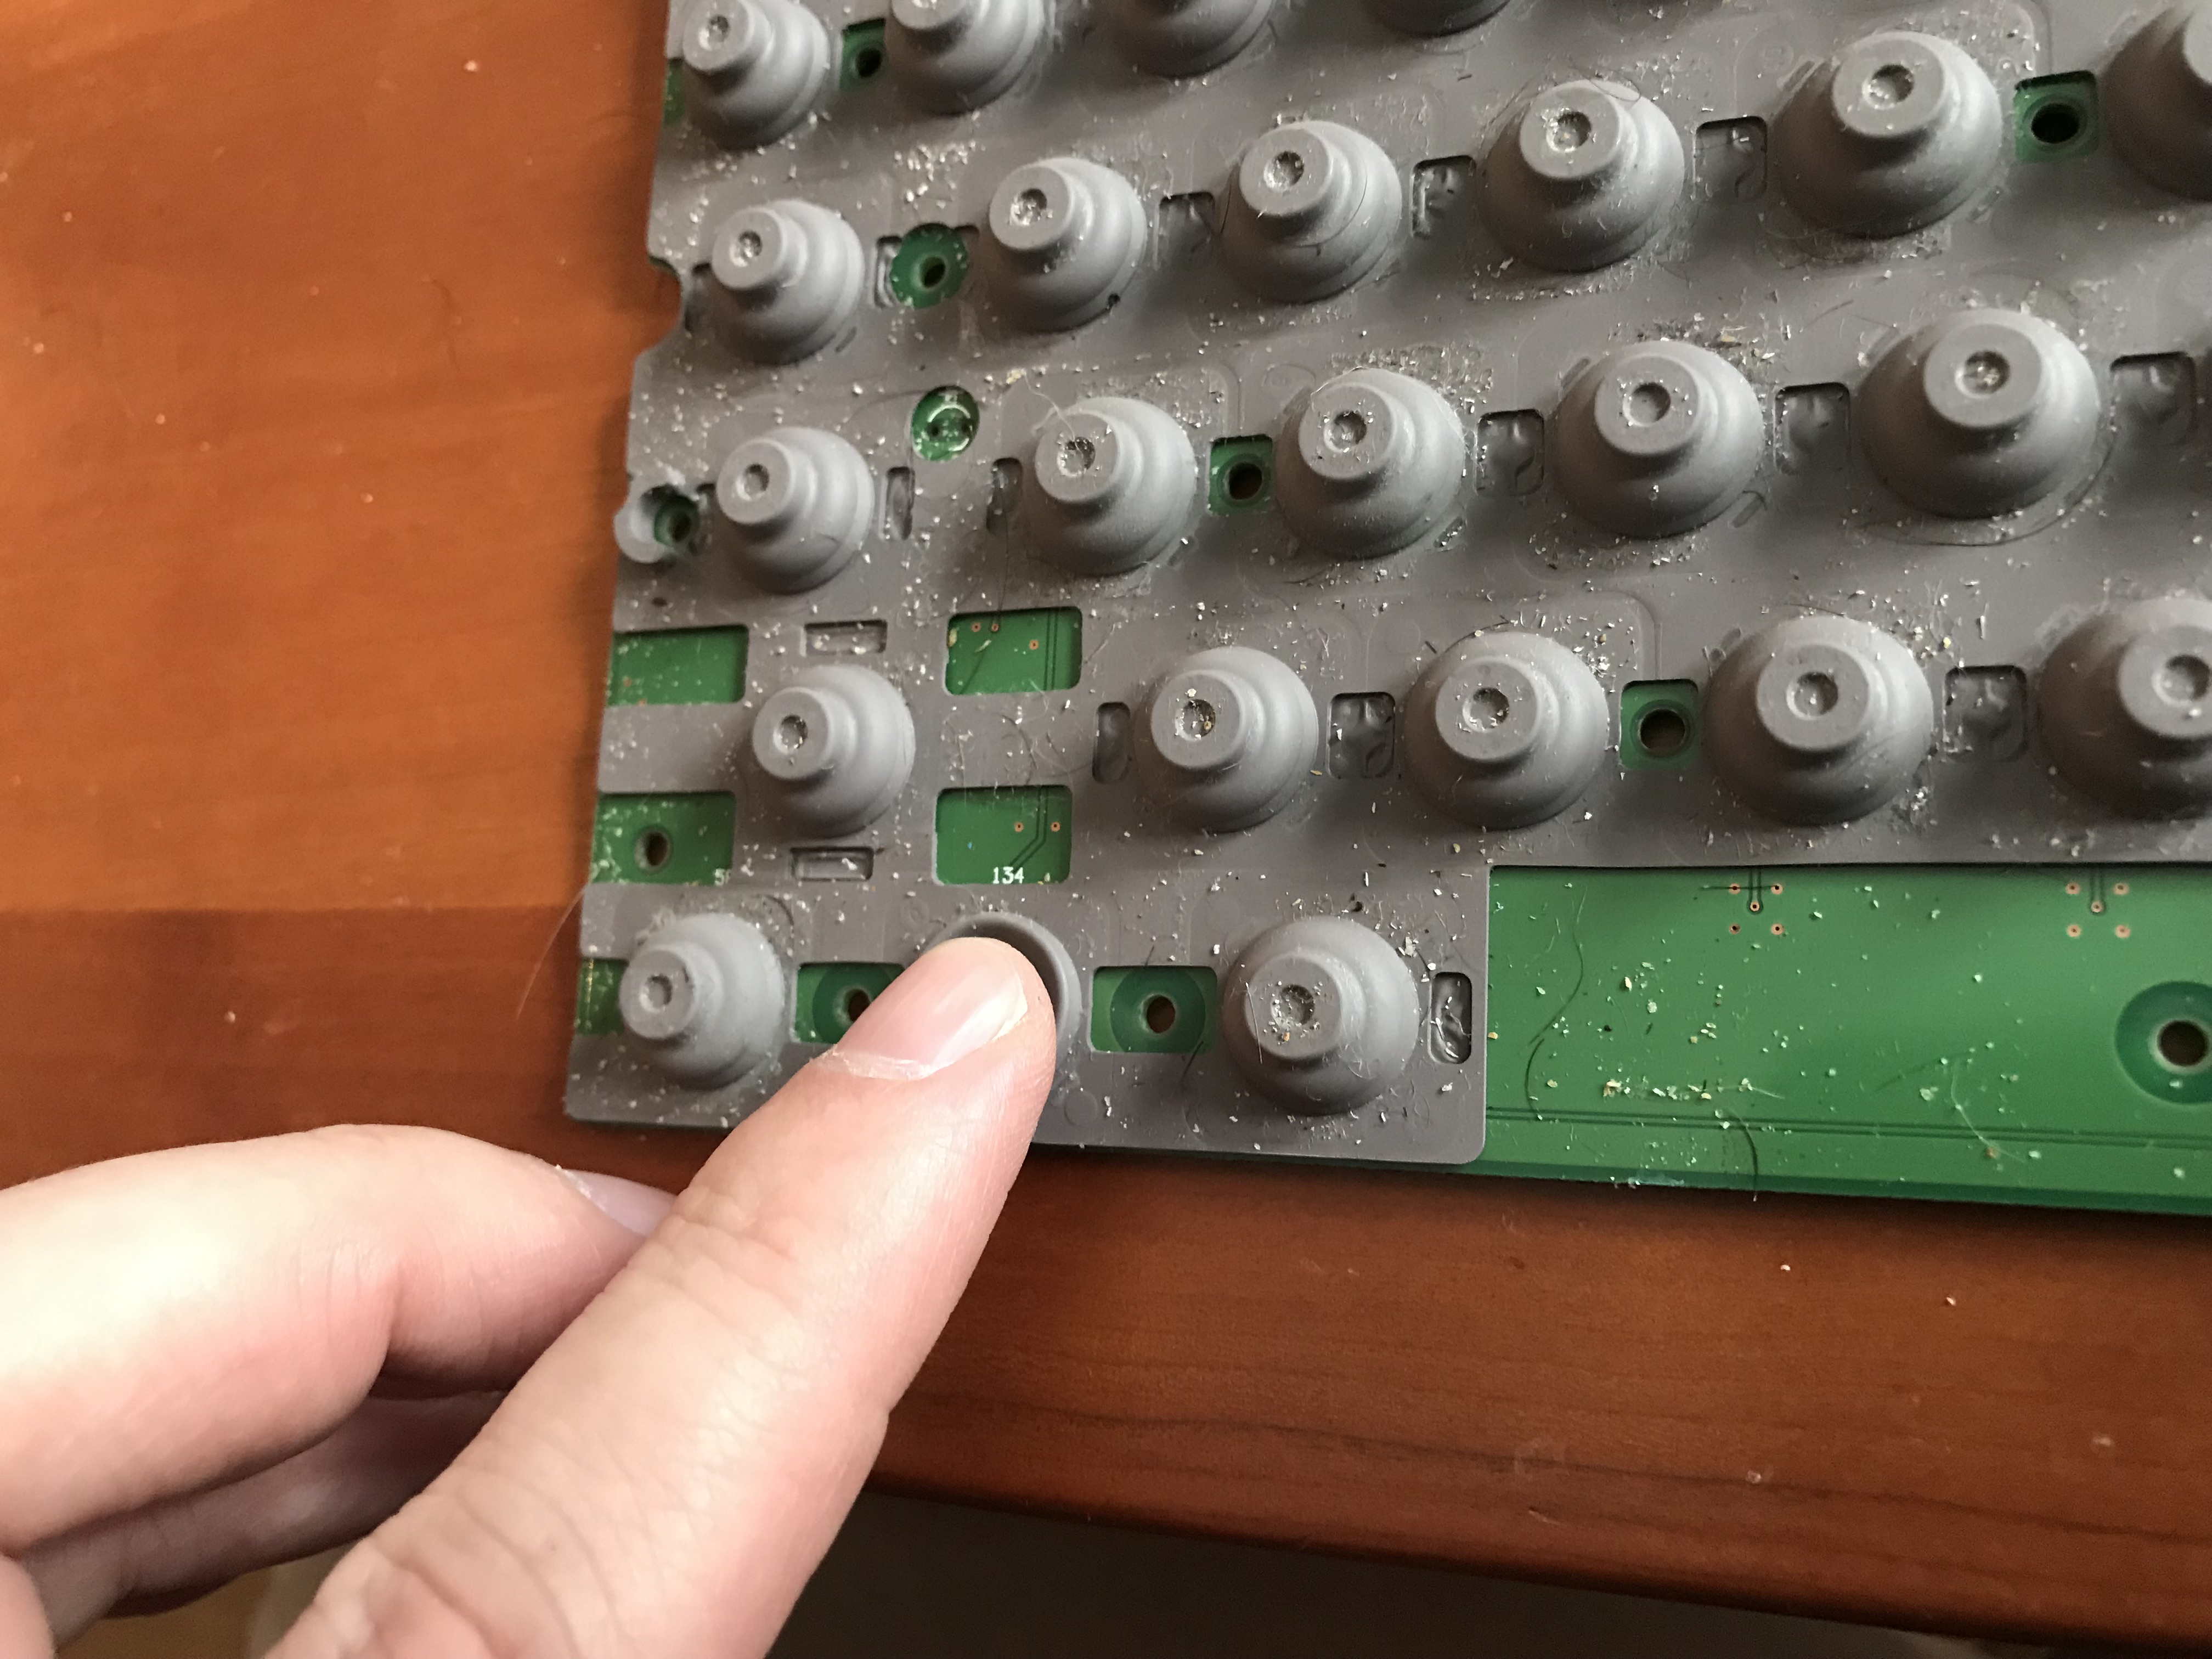
Once you’ve removed all of those, there is no longer anything holding the rubber domes and springs in place other than pressure, so you now need to exercise care in separating components, so that you don’t launch those delicate conical springs everywhere. Starting from the photo above, and holding both sides of the PCB/plate sandwich tightly together, I inverted the sandwich and set it down on the table, and then gently separated the plate/slider assembly from the rubber dome and PCB layers of the sandwich. In the top half of the following photo, we see the tops of the rubber domes, which are part of a rubber sheet sitting atop the springs (which you can’t yet see), which in turn sit atop the PCB. In the lower half of the photo, we see the inverted plate/slider assembly, which also gives us our first look at the stabilizer assemblies on the Novatouch.
At this point, we can take a peek at the springs. Note that the rubber dome sheet is quite thin, and I felt it would be easy to tear some of the sheet’s thinner struts, so I was quite gentle when handling it.
We can also see what happens when a rubber dome is pressed directly.
After getting those photos for your benefit, I washed my hands thoroughly. Did you notice all of the residue on the membrane and PCB? Ugh.
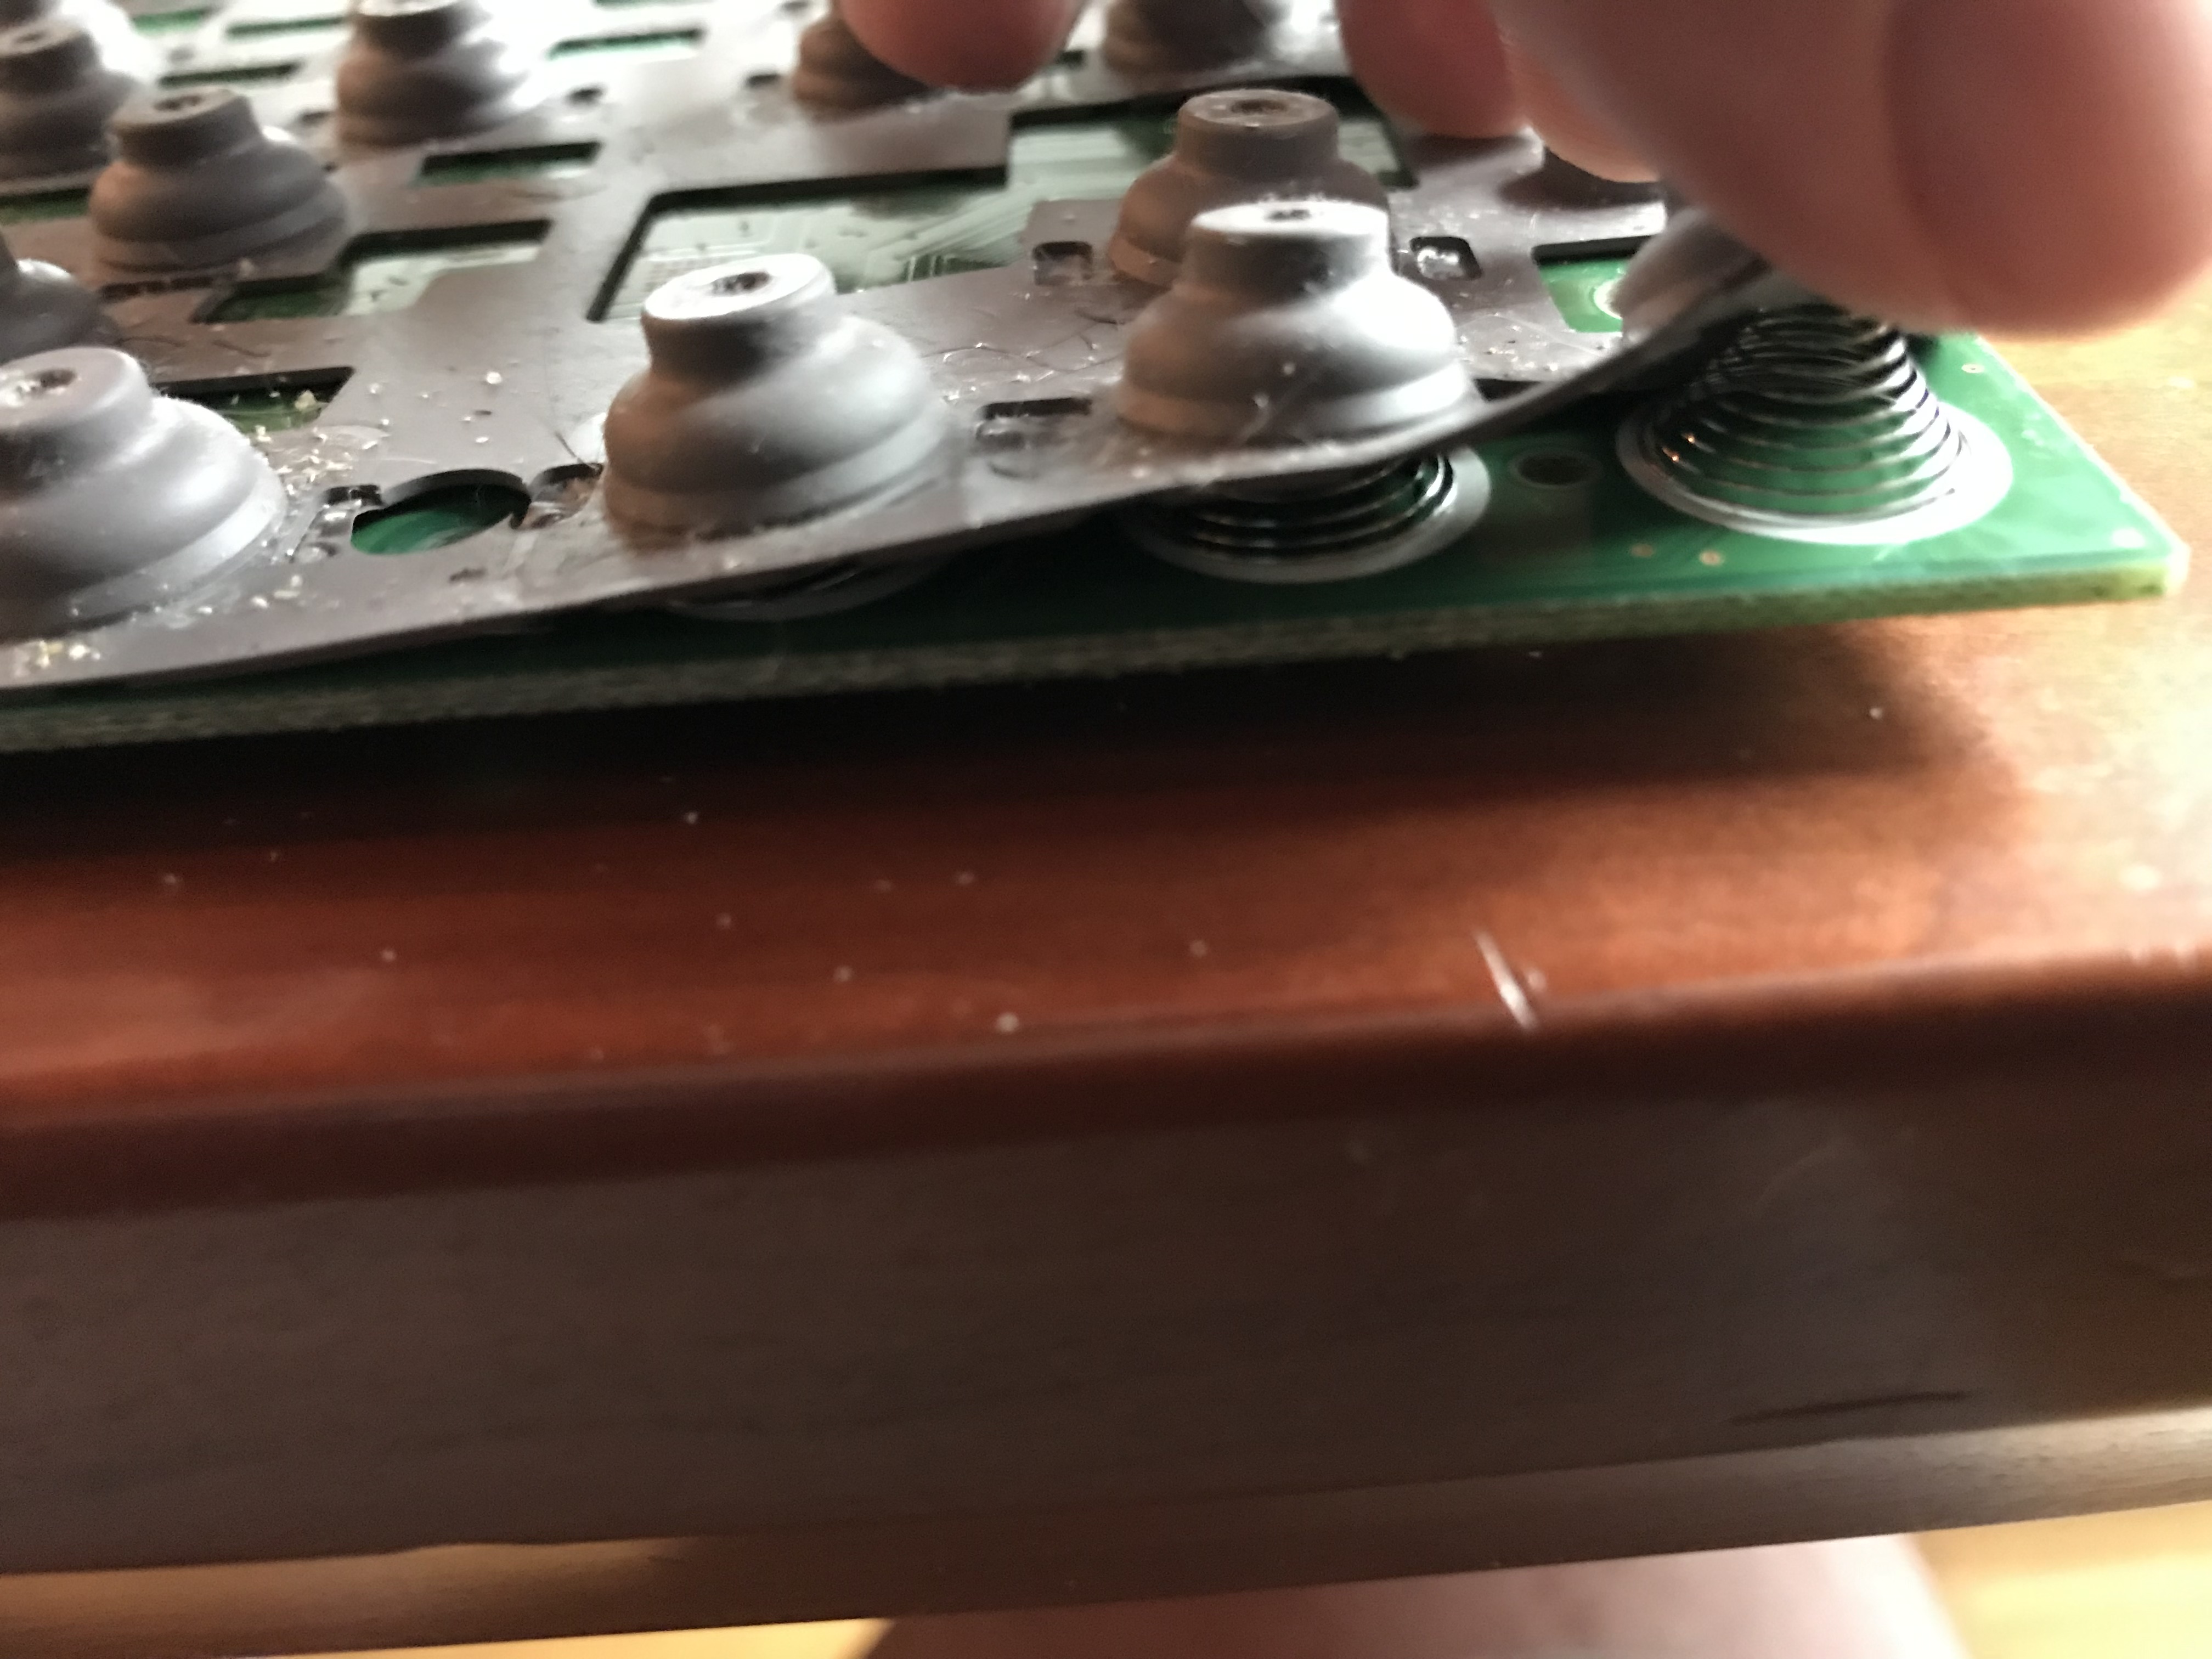
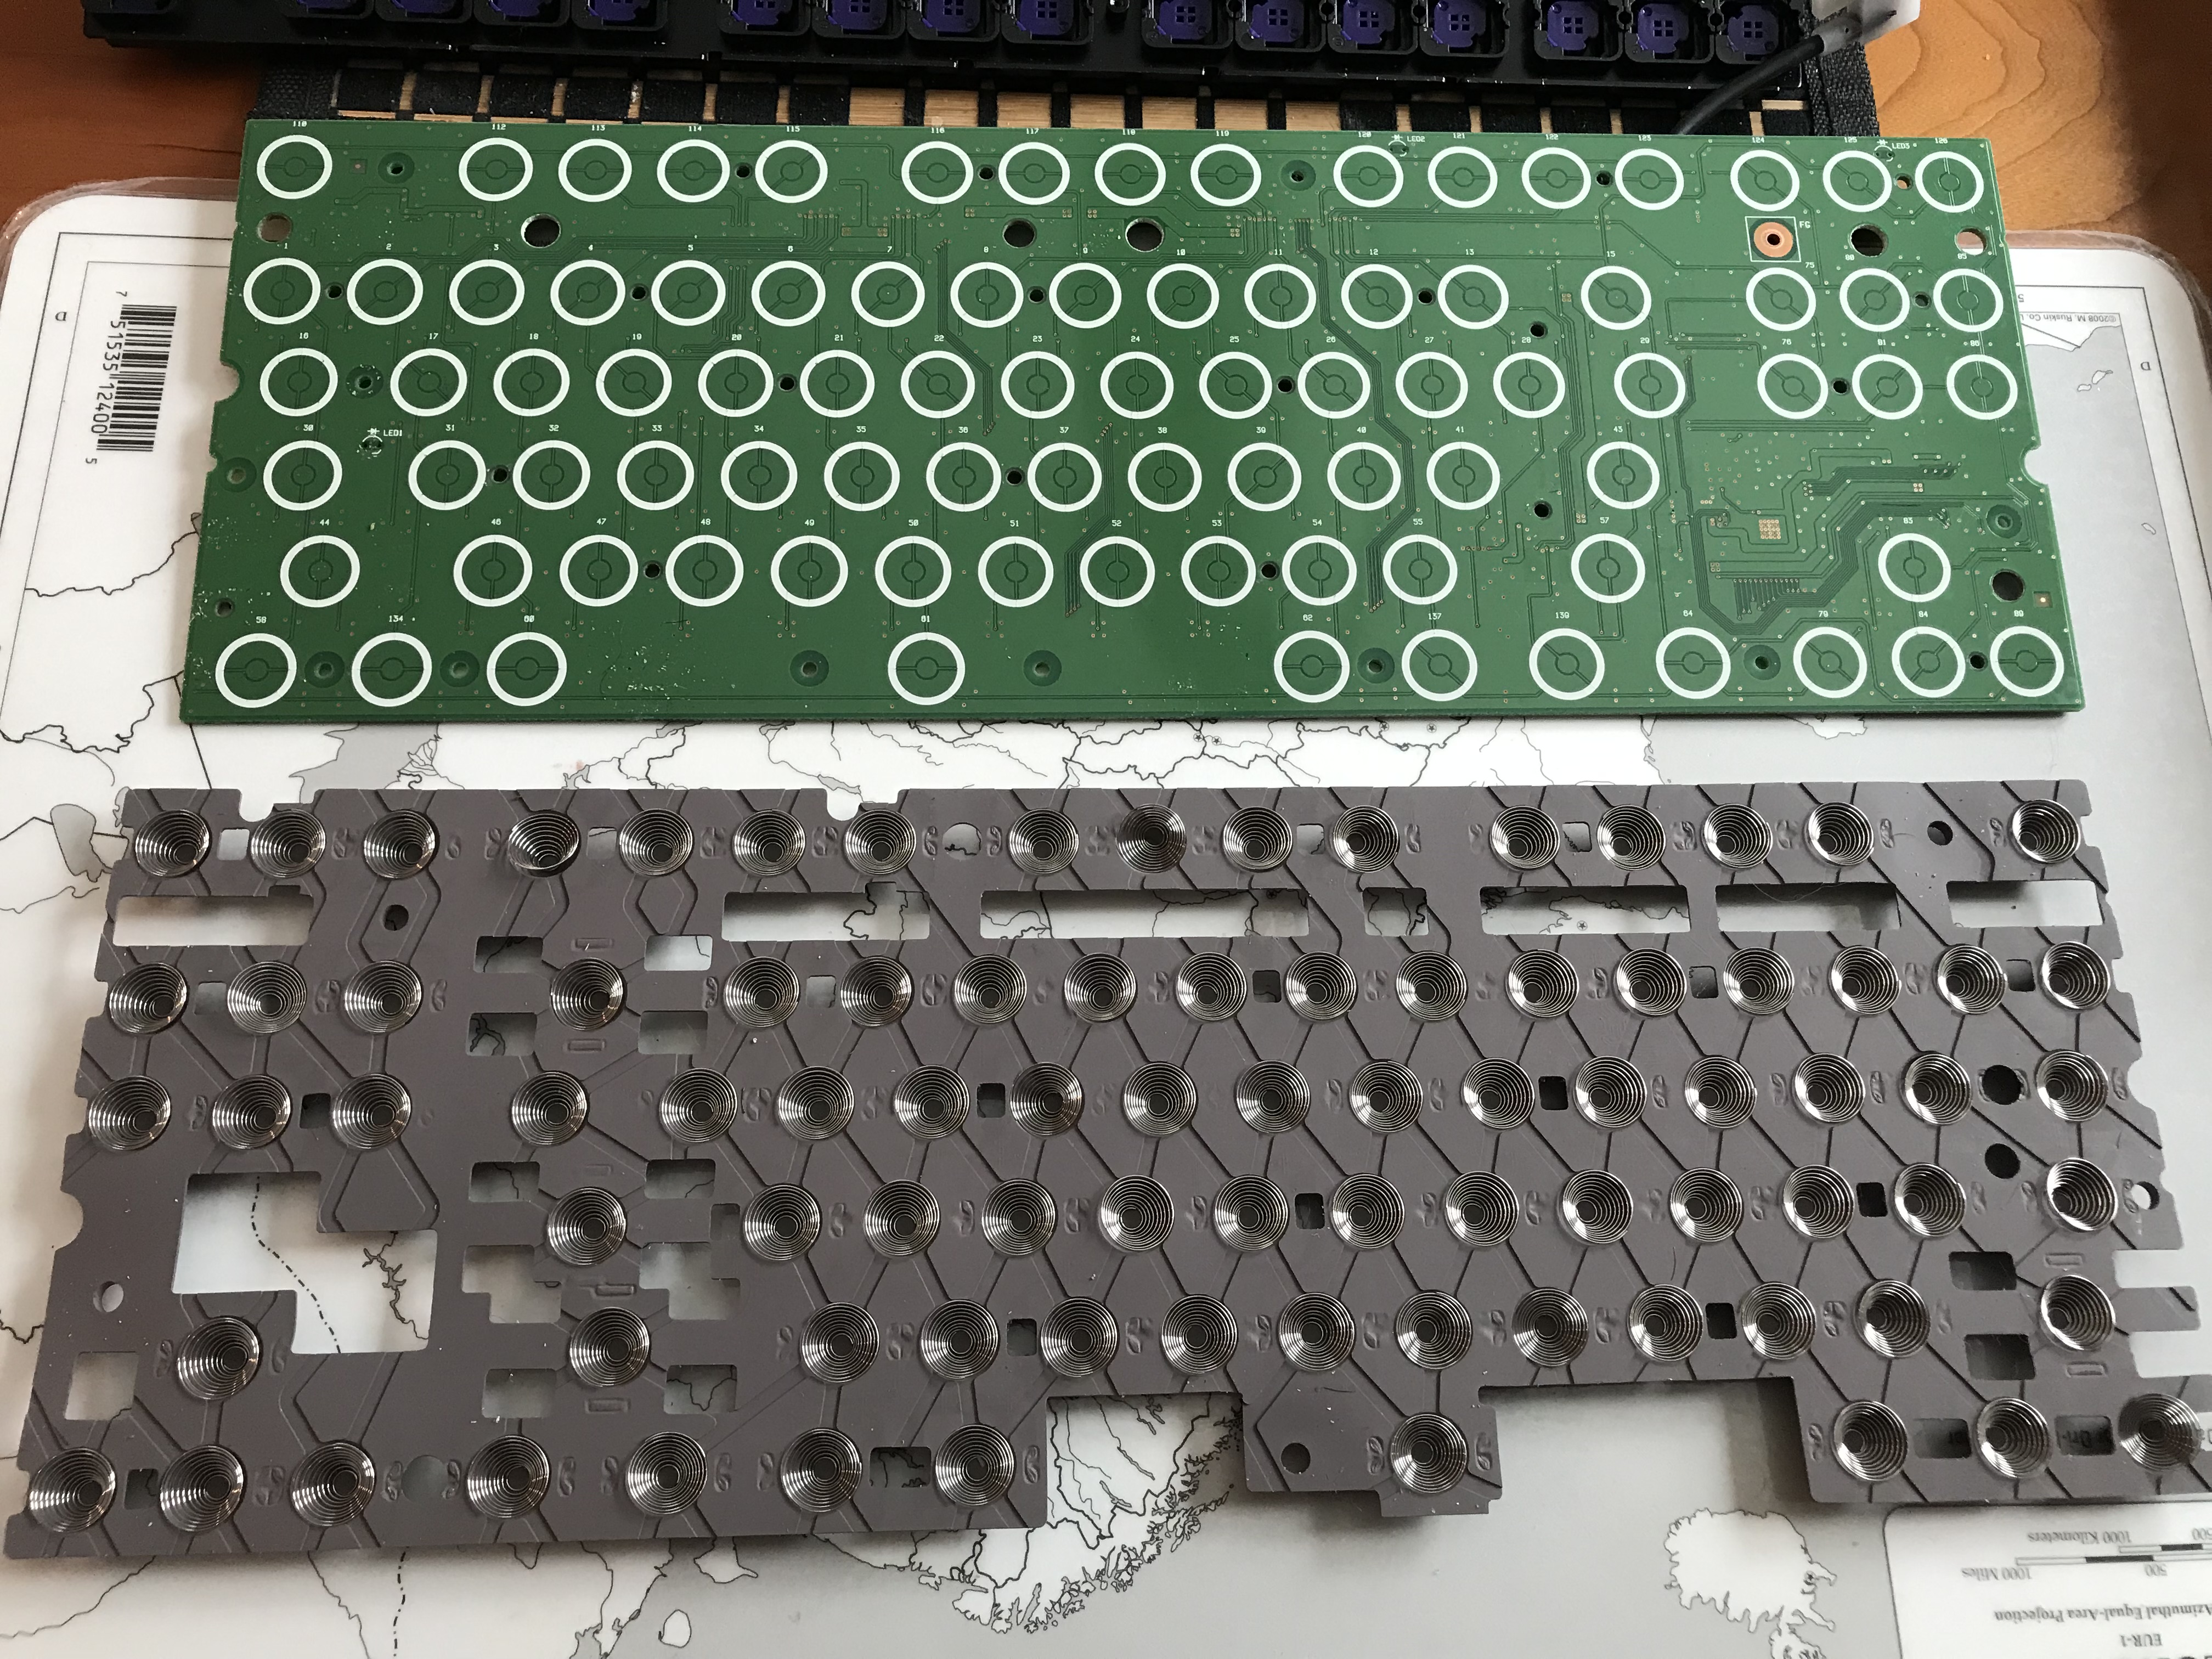
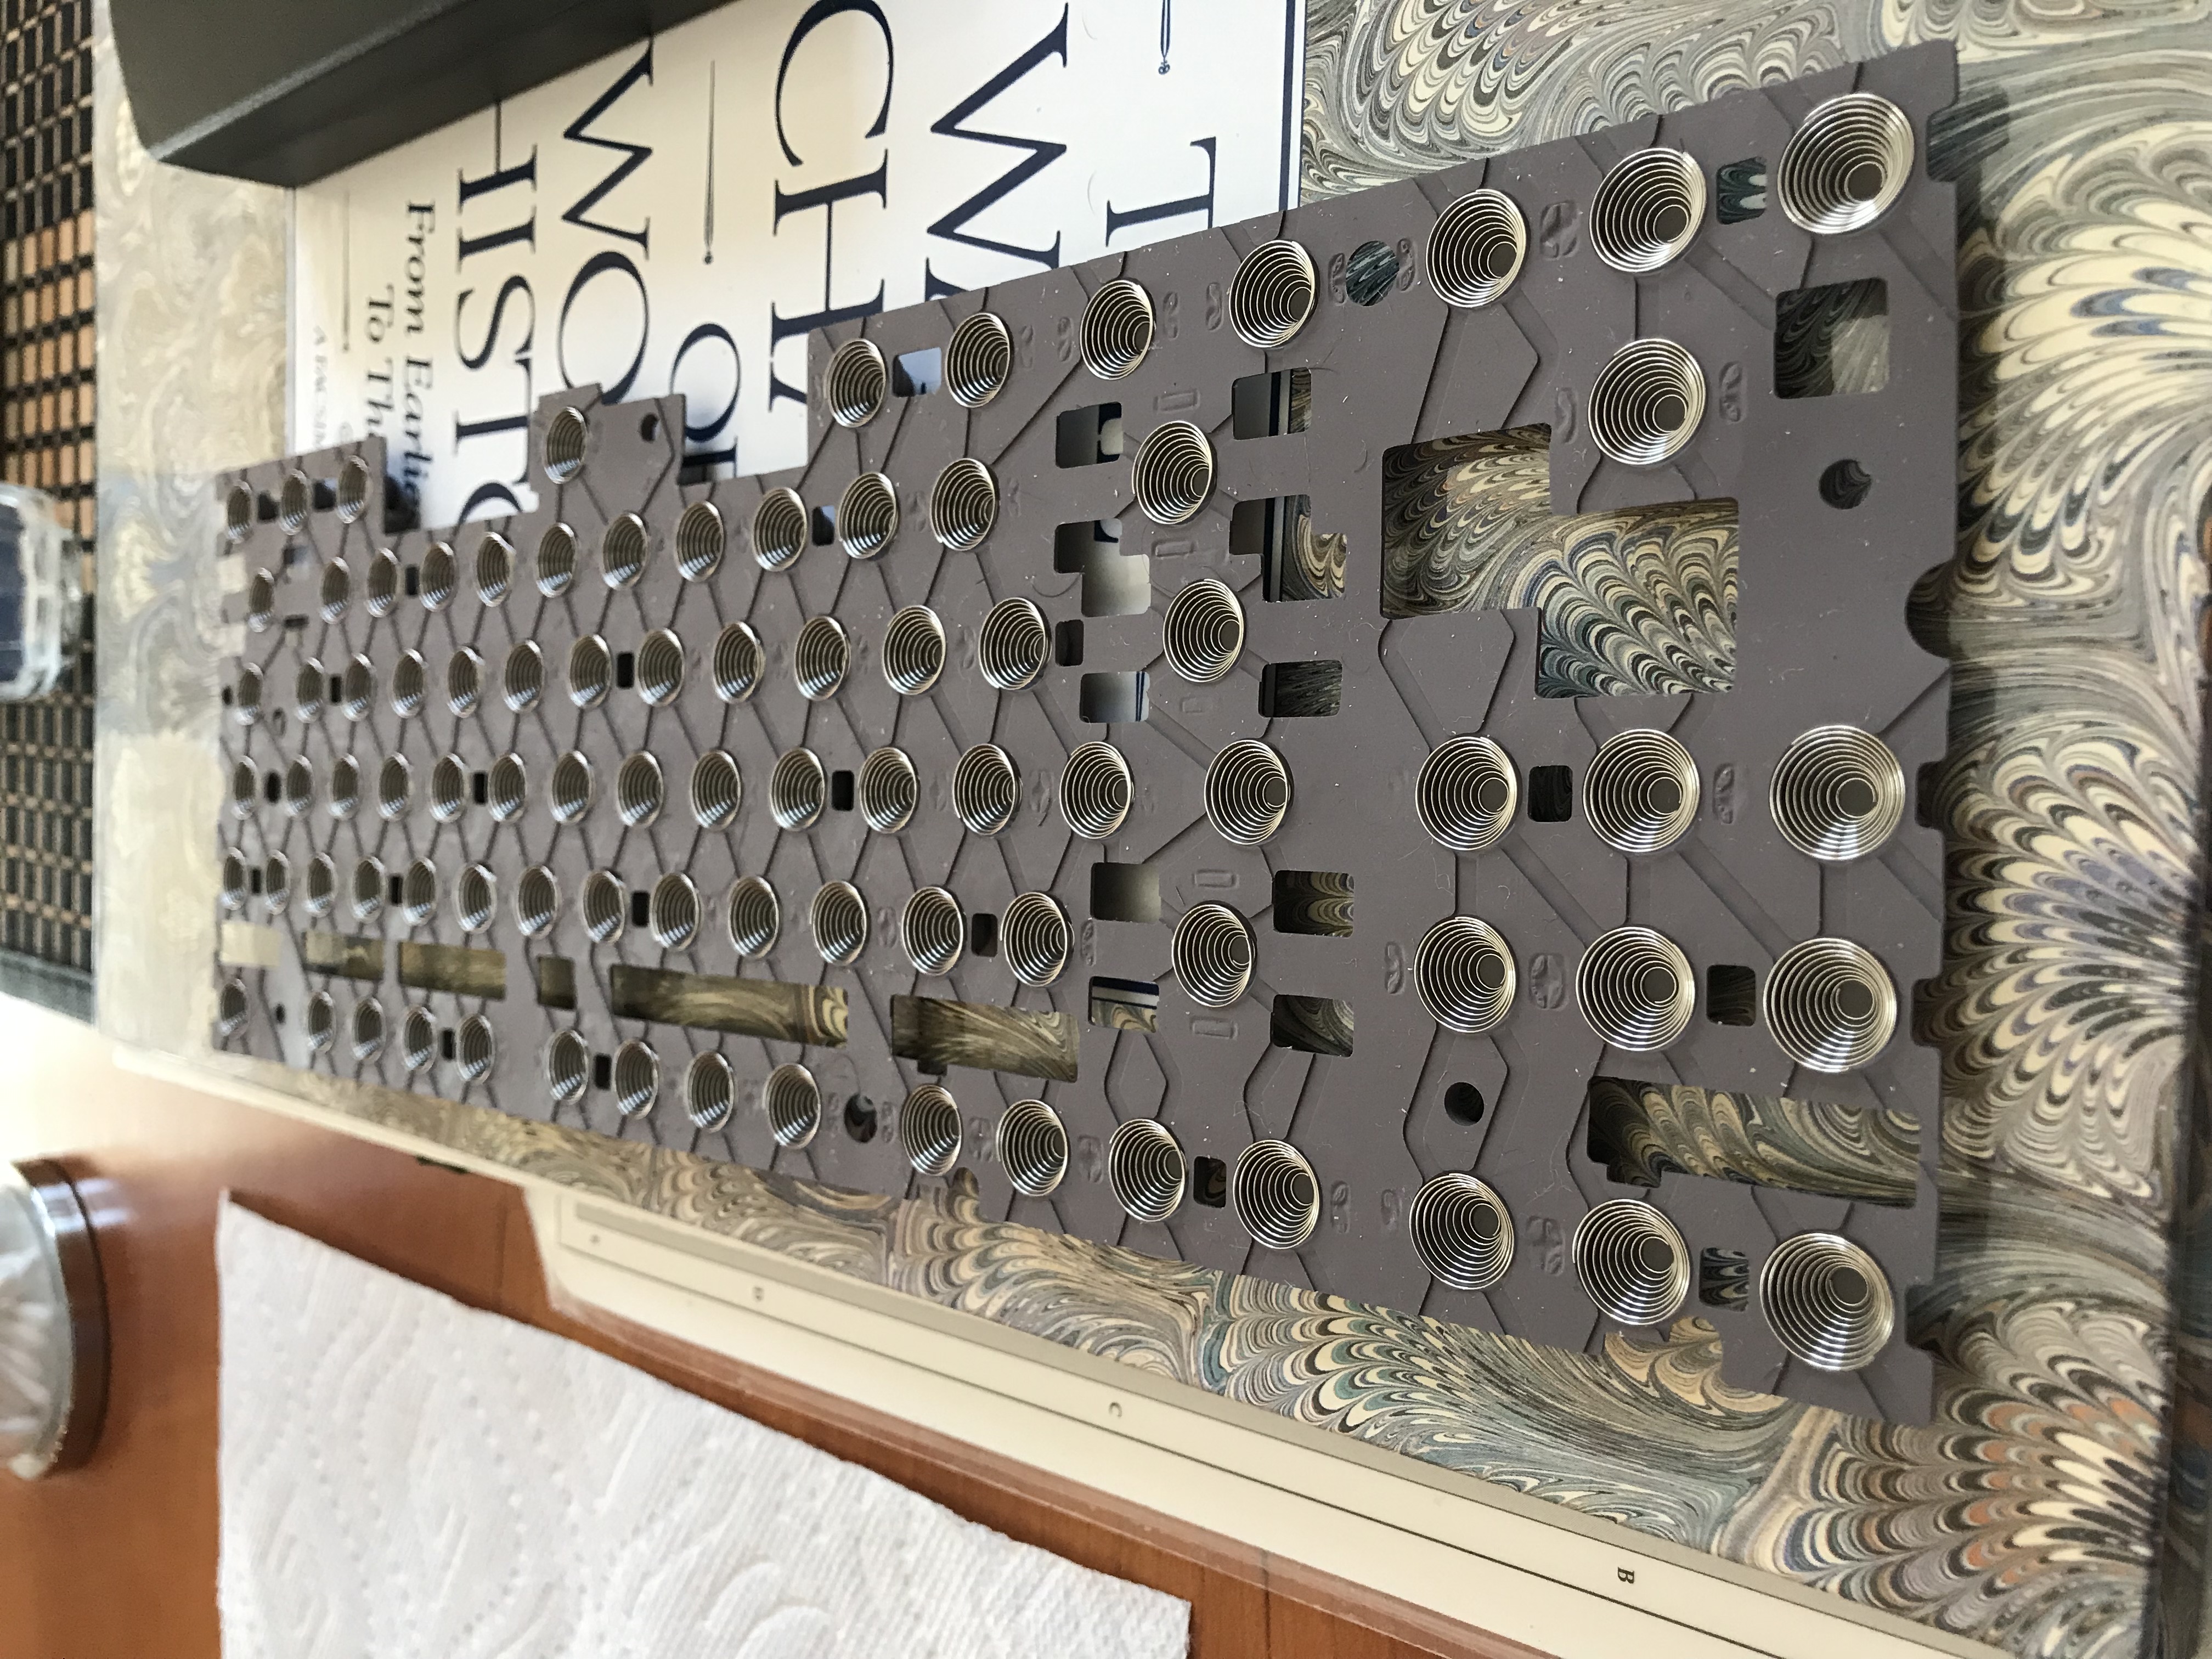
I sandwiched the PCB/dome assembly between a couple of placemats and flipped it over, and then gently lifted the PCB away from the rubber membrane, giving us our first look at all of the springs, and the other side of the PCB. Note that the springs simply sit atop the PCB, on the white rings, and the rubber dome sheet lies across the top of all that; it’s held together by pressure and those 32 screws we removed earlier.
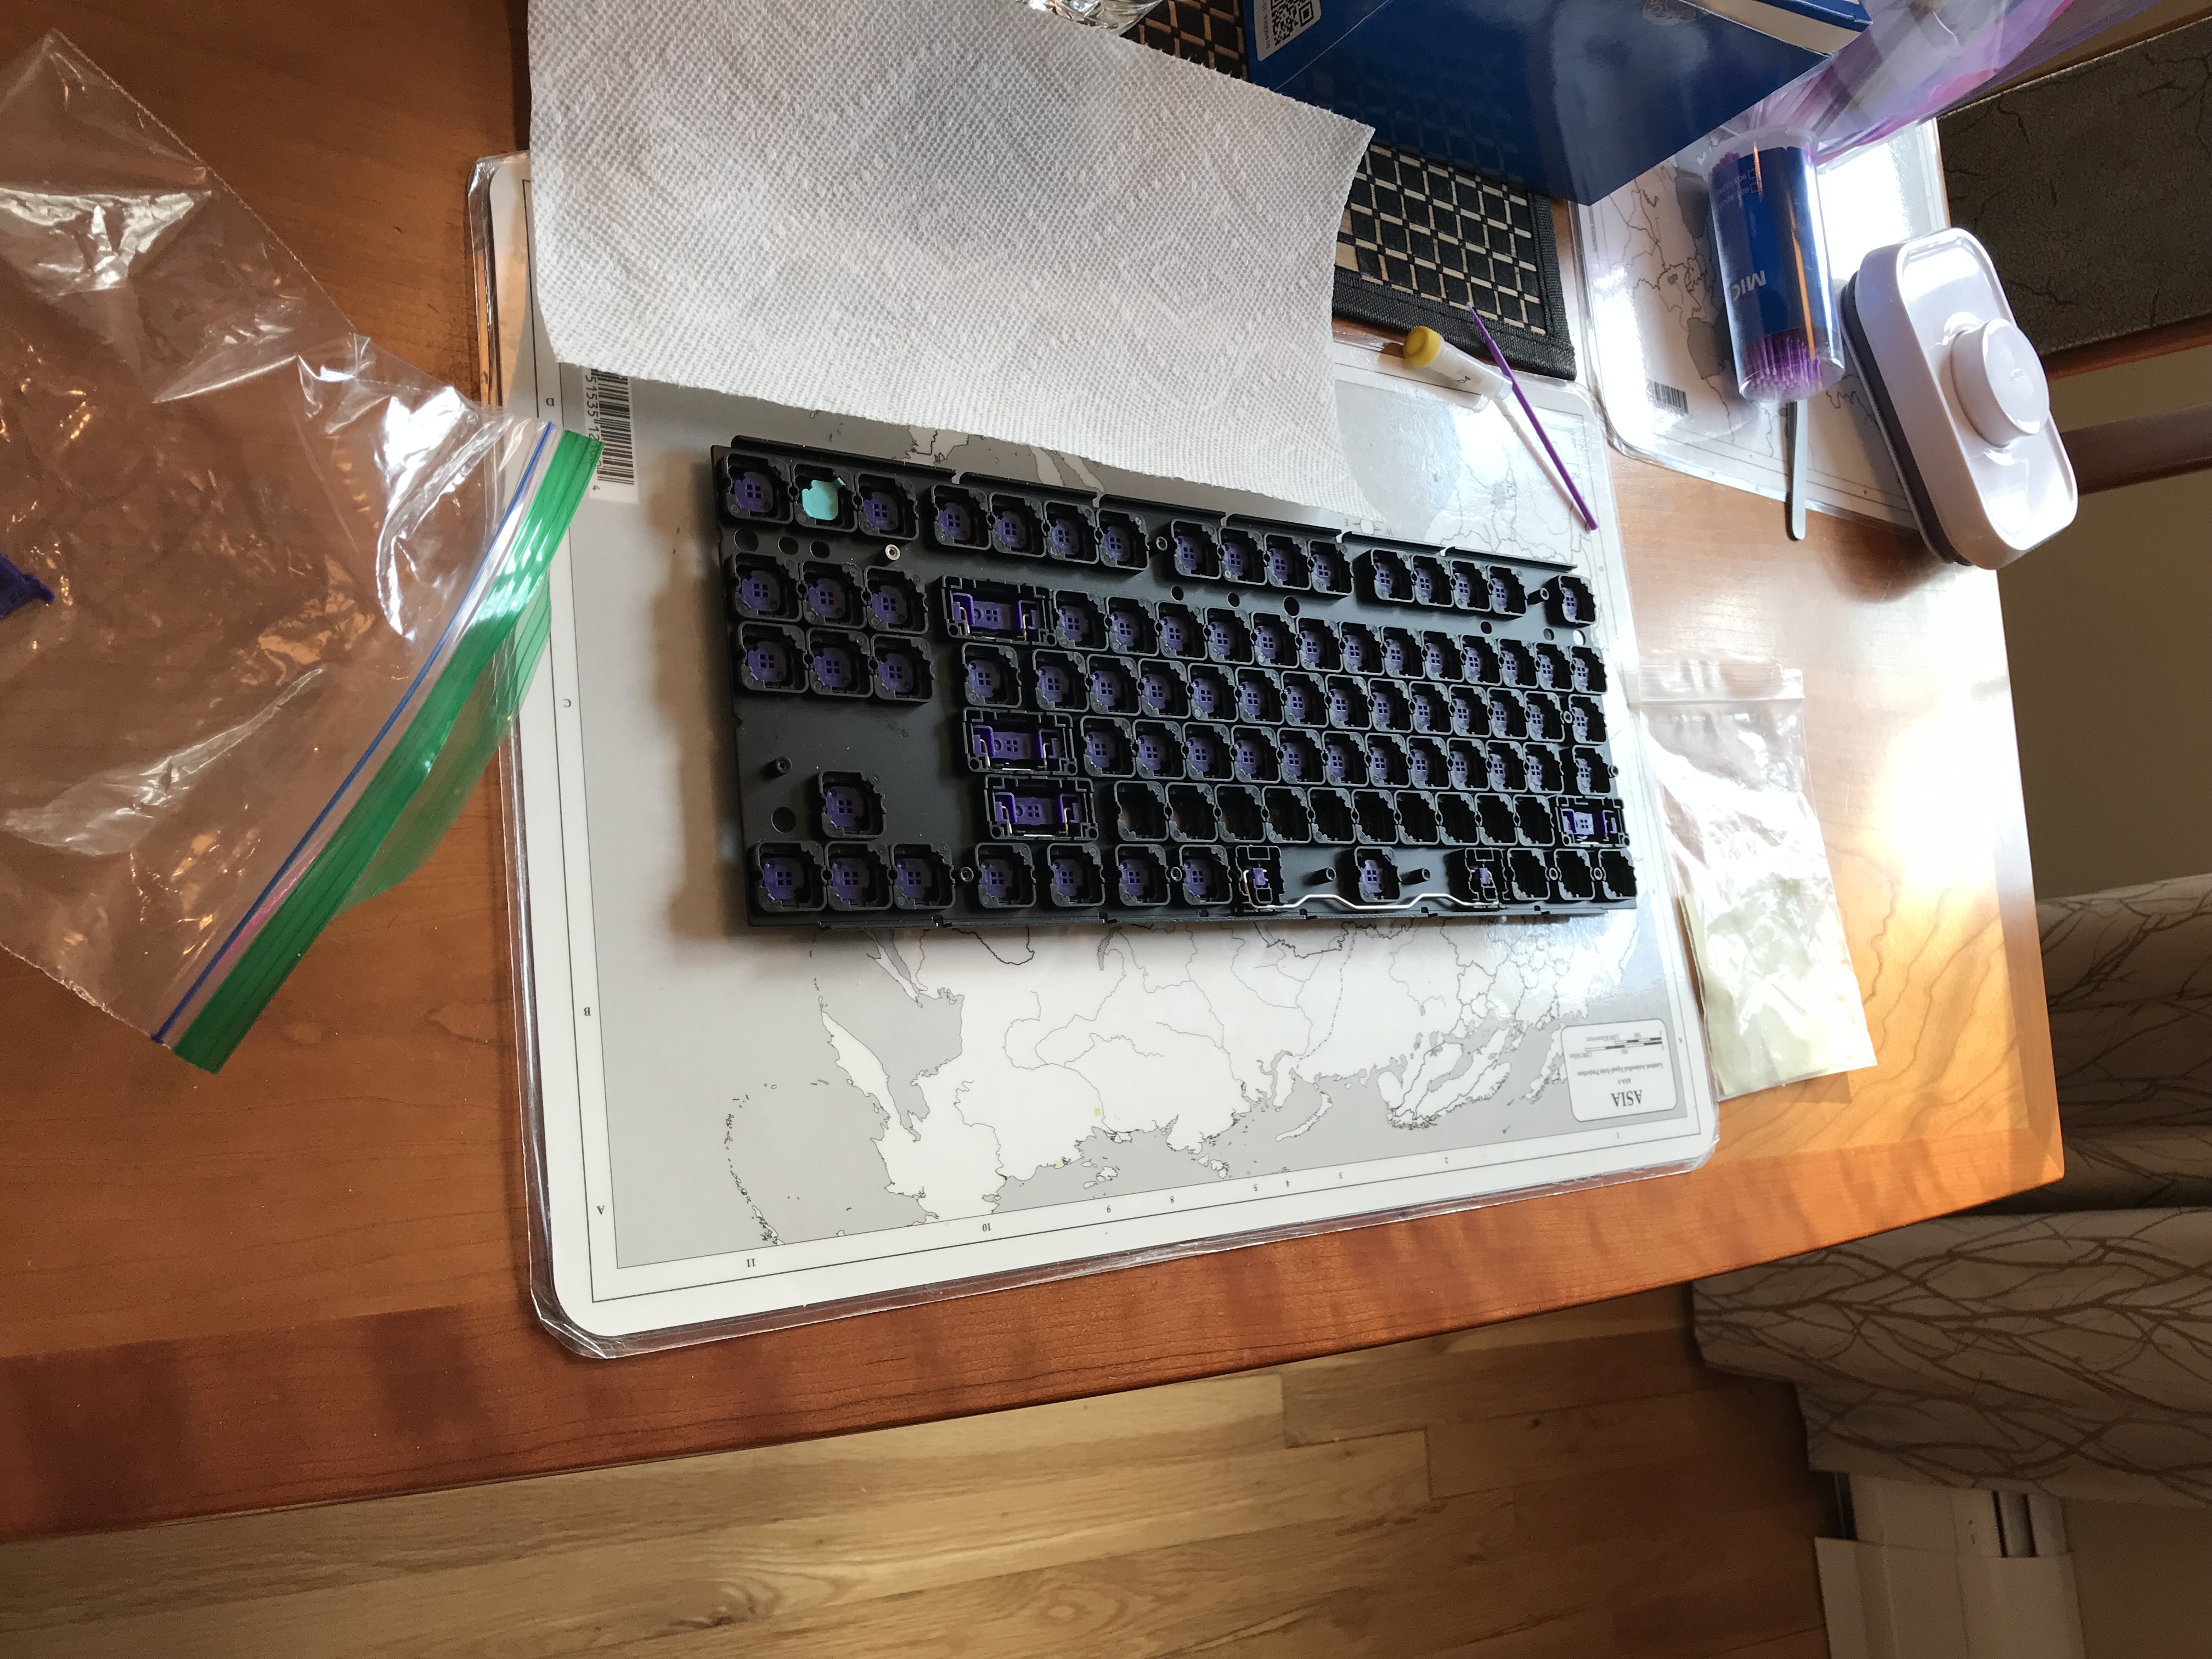
At this point, it’s time to start cleaning. After reviewing a bunch of online resources on Novatouch disassembly and cleaning, I elected to use cotton swabs and isopropyl alcohol to clean the plate.
Here’s the result after the first pass:
After the second pass:
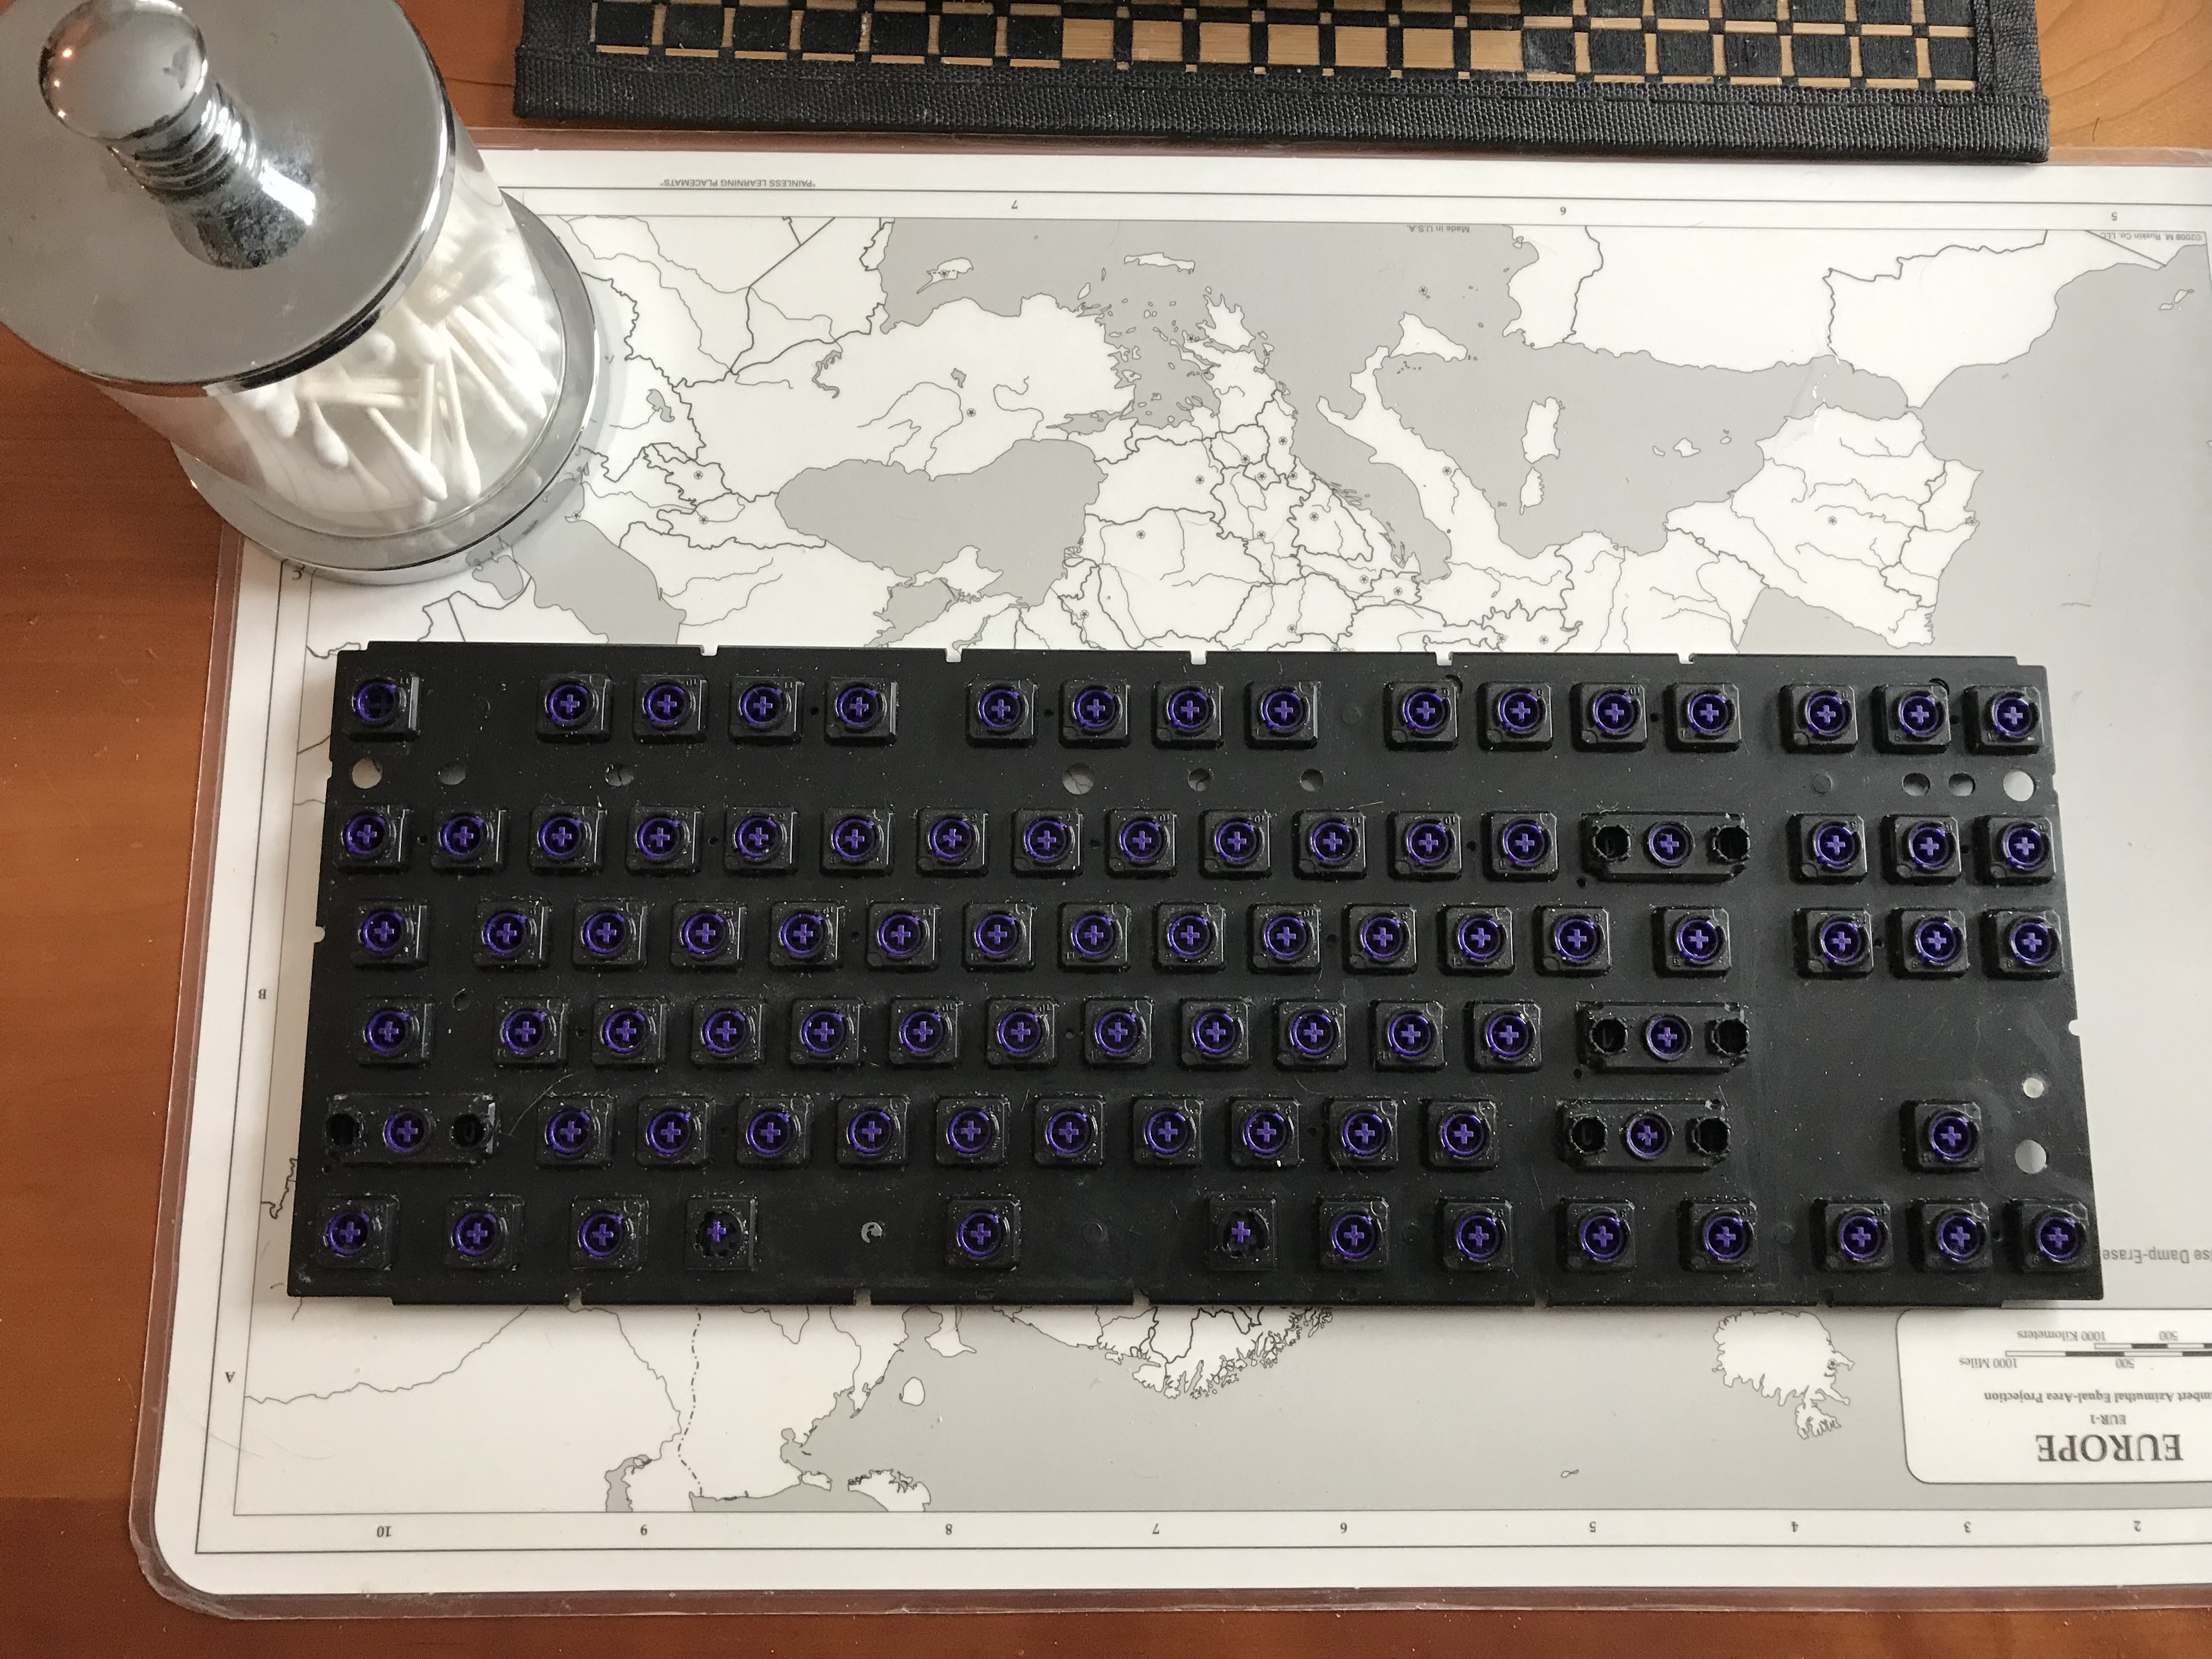
I also wanted to clean the sliders, which had cruft inside the cruciform stems, and underneath, inside the slider housings. Removing these is pretty easy - I just used a fat hex head on a screwdriver to apply gentle pressure to the cruciform stems from the top of the plate, to pop the sliders out the back of the plate.
To get the sliders for the stabilized keys out, it’s first necessary to pop the wire out of the clips that hold it in place. Here’s a closer look at the stabilizer for RShift.
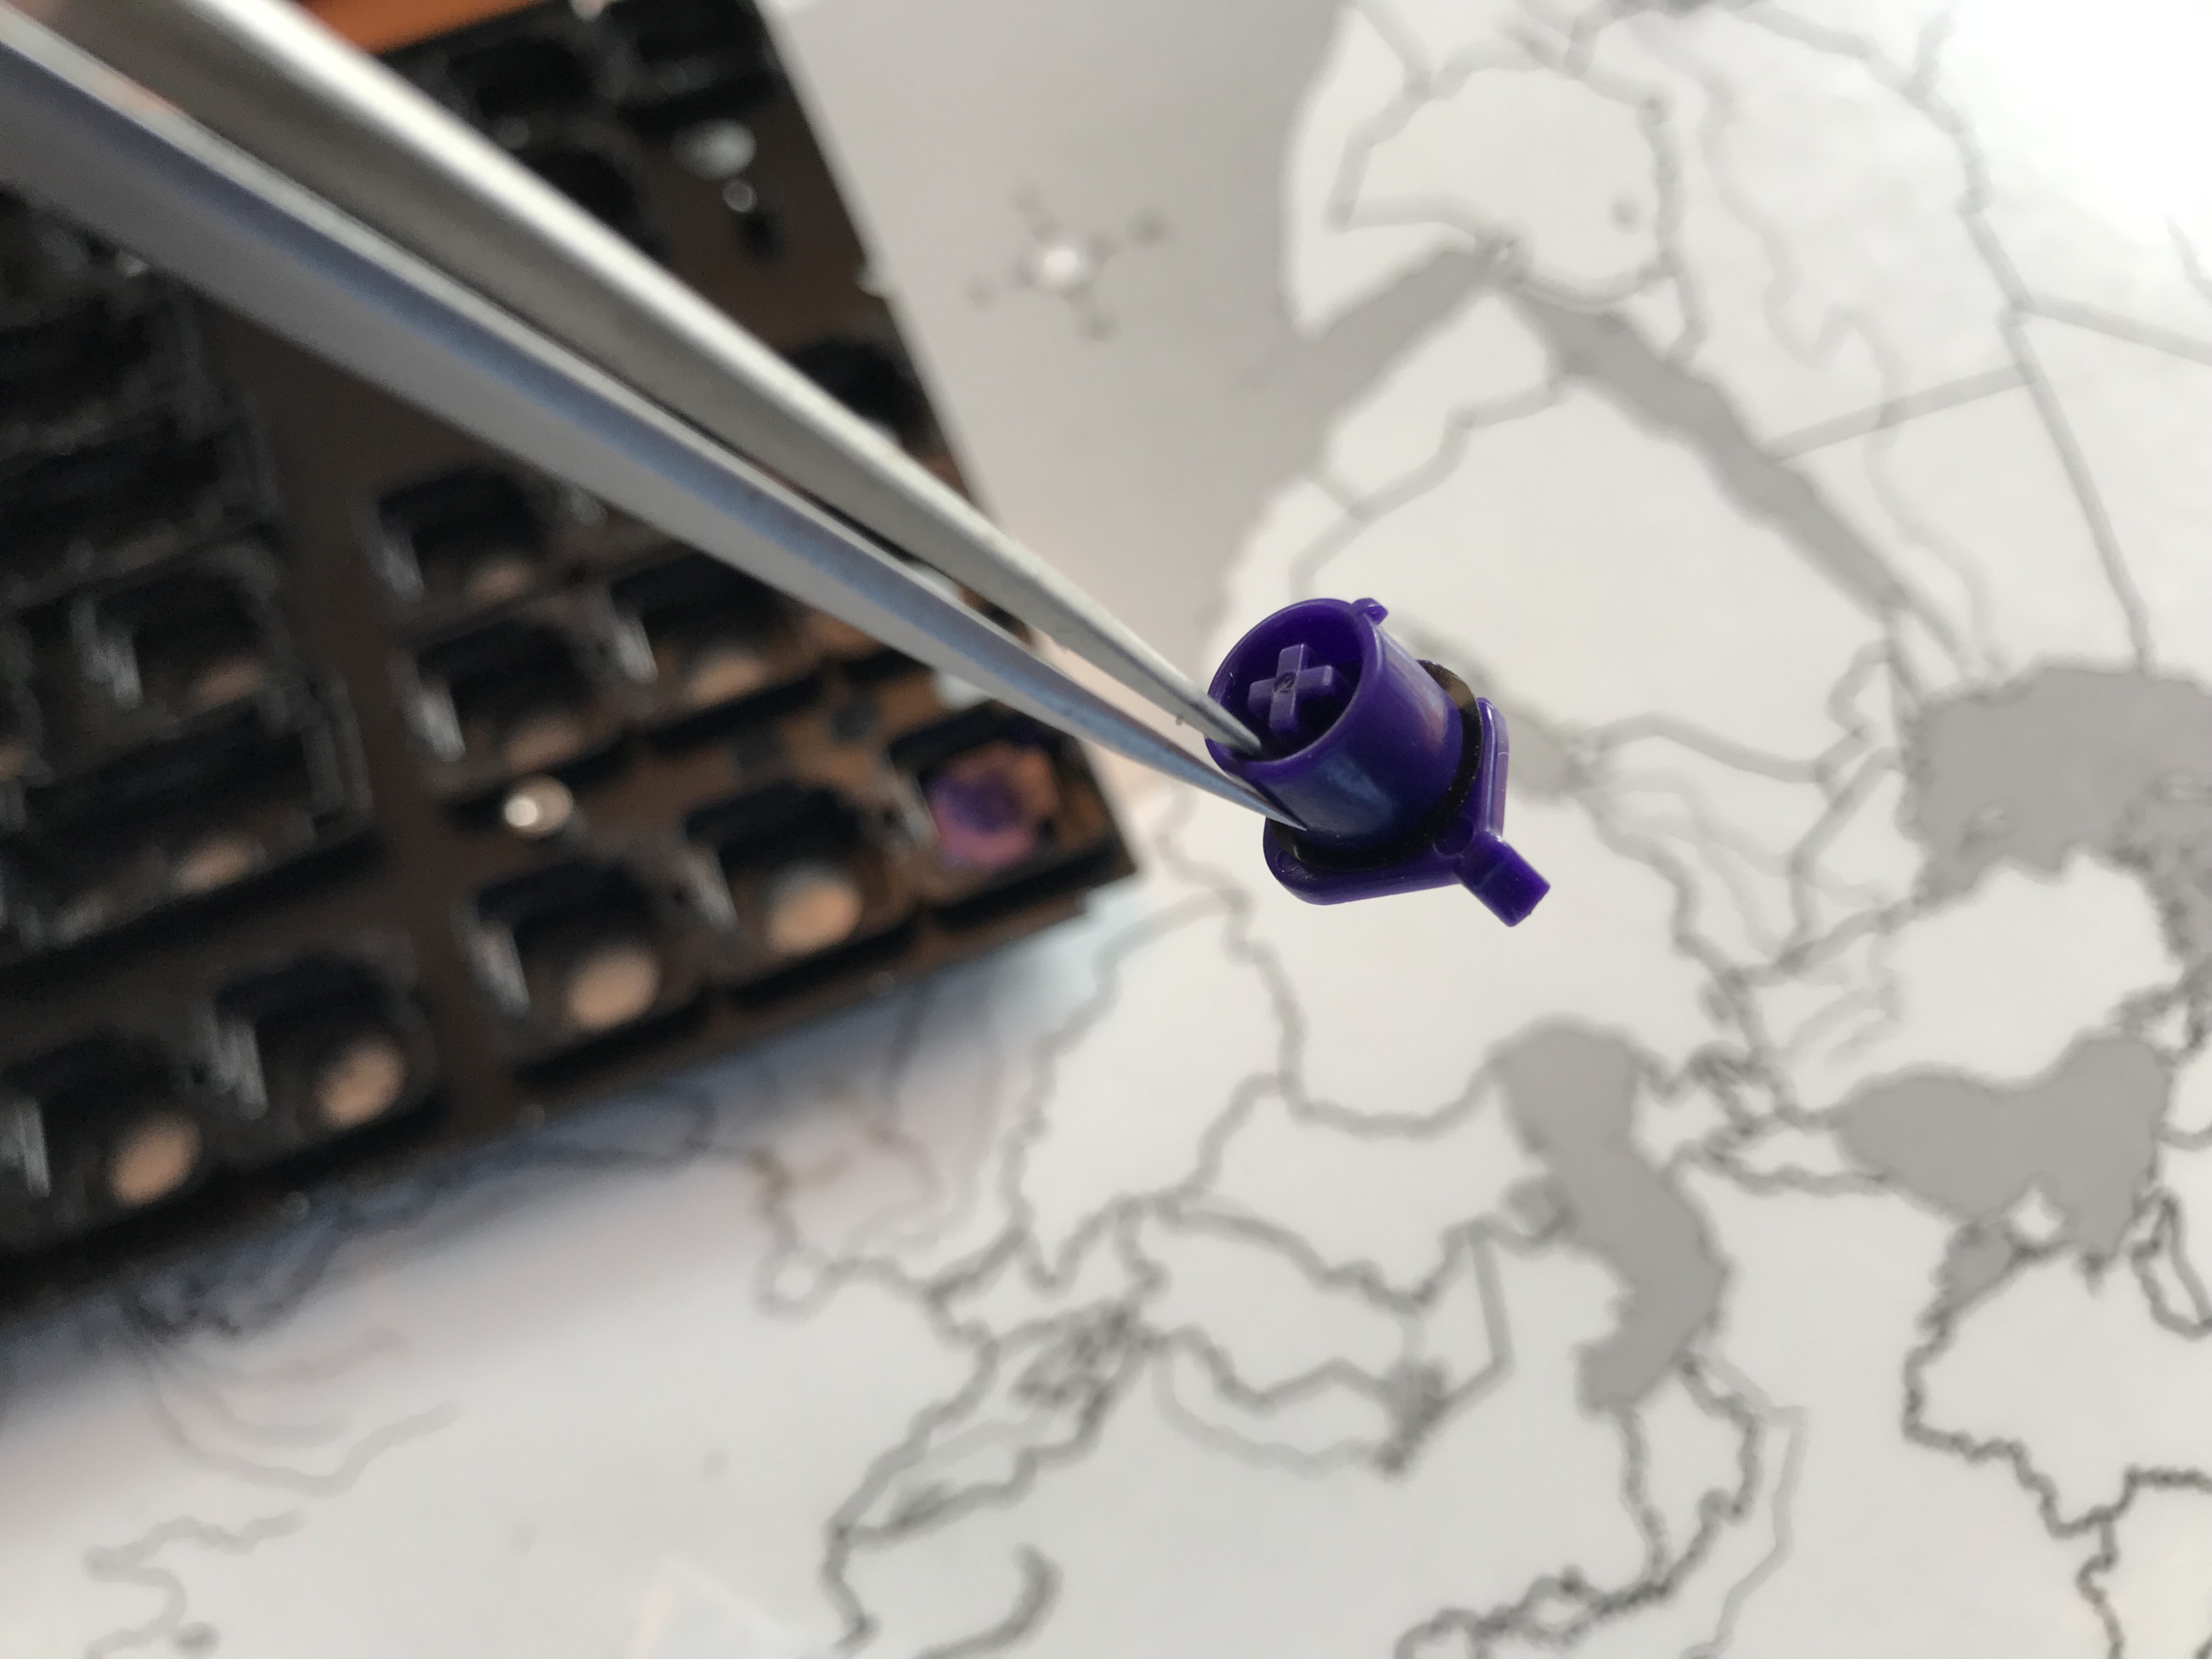
To clean the sliders, I used warm soapy water and more cotton swabs. Note that I’ve taken the opportunity at this stage to discard the one broken slider and replace it with a KBDfans slider. Which of these things is not like the others?
We’re still not done cleaning. As you may have noticed, the top side of the membrane had cruft on it as well, and I felt it was best to remove the springs at this point so that I could gently clean and air-dry the membrane. More warm soapy water and cotton swabs.
Mods and reassembly
With the cleaning task complete for the plate, the sliders, and the rubber dome membrane, it’s time to start improving the performance. First up, we need to lube the sliders. Or, more accurately, we need to lube the housings. Many of the guides online discuss lubing the sliders, but if you play with a slider in its housing for a bit, you’ll see that most of the slider does not actually make contact with anything. Movement occurs along the ribbed rails at opposite corners of the housing. I applied 3204 to both rails of each housing, and a little dab at the base of each rail where the sliders would impact on top out.
In addition to lubing, I applied silencing rings to each slider. The KBDfans silencing rings are very thin rings that sit at the base of each slider and absorb the impact when the slider returns from a keypress and hits the housing. These rings are made of a thin, rubbery, almost gelatinous film, which makes them a hassle to apply. Again, tweezers are your friends - I used them to work each ring down the stem of the slider, and then to flatten them out at the base of the slider. Here’s a close up of an installed silencing ring (the black ring at the base of the slider stem).
I did have an issue with one key on the first time around - the ring didn’t seat correctly, leading to an annoying click on the keypress. Unfortunately, this meant taking the PCB/plate sandwich back apart to pop out the slider and apply a new ring. So it goes.
Next up, reinstalling the sliders and stabilizers. This is straightforward and quick. For the stabilizers, I liberally applied SuperLube to the wires and the clips where the wires mount, as well as inside the stabilizer sliders where the wires make contact. This took a couple more passes before I felt comfortable that the result wasn’t going to rattle. FWIW, I used quite a bit more SuperLube on these stabs than I would typically use on an MX build - they needed it.
Next, we have to get all of the springs back in place in the rubber sheet, which is a chore. The springs have to be placed cleanly in each rubber dome, level with the membrane and PCB, and aligned correctly in each dome. If a spring is even a little bit off with respect to its ring on the PCB, it will not register a keypress. Adding to the fun, the springs themselves are also quite light and delicate. I found tweezers to be invaluable for this task - both for carefully picking up and placing springs in domes, and for leveling the springs, by laying the tweezers sideways across the widest ring of the spring and applying gentle pressure to seat the spring in the dome.
We’re now ready to put the PCB back together with the springs and rubber domes. I did this by carefully aligning the PCB screw holes with the holes in the rubber membrane, and very gently lowering the PCB into position. Again, I have to stress that level springs and PCB alignment are critical here - the second time I did this and put everything back together, the Tab key was unresponsive, and after disassembling, I found that the spring for the Tab key was a fraction of a millimeter out of place.
If the alignment is good, you’ve now got 32 screws to put back in place. It’s worth noting that all of those screws serve a purpose - they help to ensure that the sandwich is evenly compressed enough that the springs are held exactly in the correct position to generate capacitance on the PCB rings on keypresses. Don’t lose them!
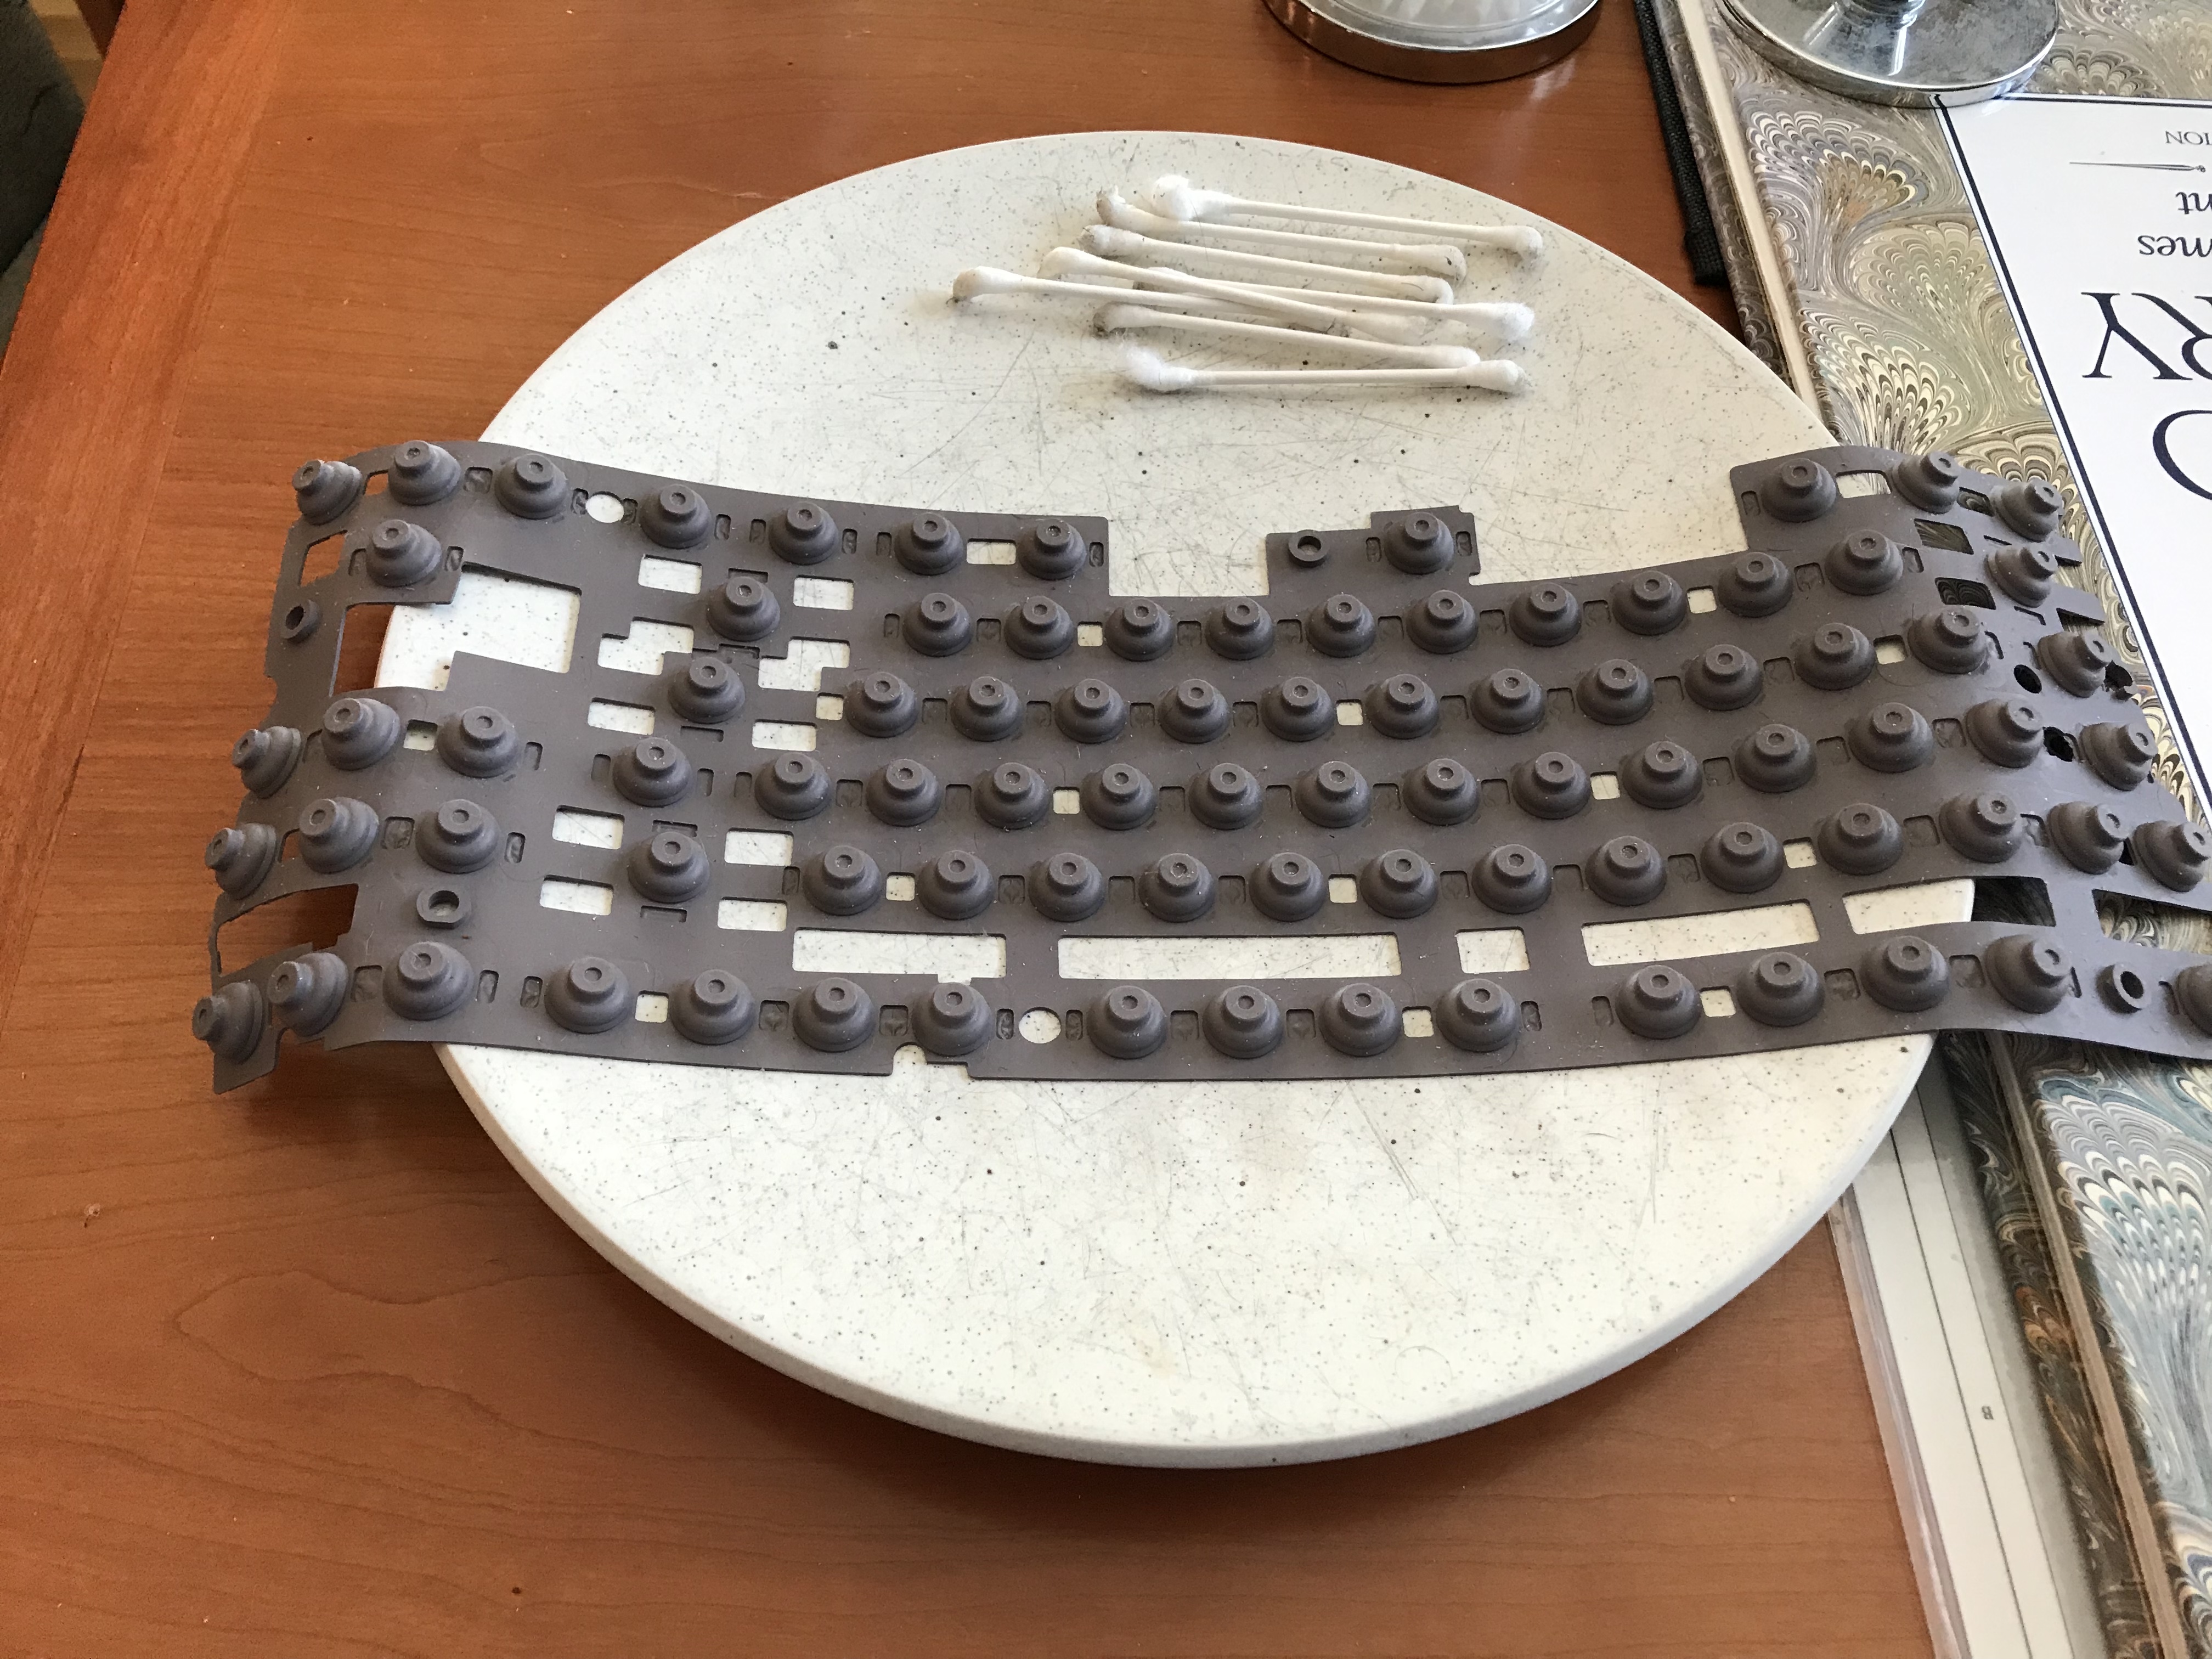
Next up, case dampening. You know how I roll - it’s Sorbothane time. I started with a 0.1" thick sheet of Sorbothane, and cut eight strips of equal size.

Why this many strips? Because 0.1" was not thick enough to span the distance between the case base and the underside of the PCB. By stacking pairs of strips, I obtained enough thickness to make contact with both surfaces.
Next, I reused a technique I’ve been using recently to make it easier to work with Sorbothane without the stickiness, and to avoid any potential case-staining issues with Sorbothane plasticizers. I placed the stacked Sorbo strips on a piece of gaffer tape:

Folding the tape back over the stack, pinching the tape together to form a packet, and trimming the excess tape away, I obtain a Sorbothane packet, ready for placement in the case.
The original eight strips yielded four 0.2" thick packets, which I felt would be more than enough to get good sound results without having to fuss over placement. Here, I placed them to avoid the USB connector and wire, which has already been attached to its new home in the Norbatouch case.
Getting closer to completion! The PCB/plate assembly is mounted in place by two screws on the perimeter of the Norbatouch base; here’s one of them, the silver hex screw. As @norbauer himself mentions later below in the comments, these screws are not necessarily intended to bring the plate flush with the housing, but in this particular build, with the Sorbothane packets underneath the PCB, the screws are useful for dialing in a good level of PCB/Sorbothane contact and compression. YMMV.
The two halves of the Norbatouch are then screwed together via eight screw holes in the underside of the case. The two tiny holes in the upper left are the screw holes for the USB connector, and the two larger holes in the upper left and right are for the optional feet.
Before we install the keycaps and head to the beach, a bit of review…
Resources for Topre, Novatouch, and Norbatouch
This was my first non-MX build, and a large part of this project involved scouring the web for build guides and resources. Here’s the complete list of reference materials that I used for this project, in the hopes that having it all in one place might save someone else some time.
- Topre overview
- Ripster CM Novatouch Review
- Ripster chemical tests
- Wodan Norbatouch install
- TopClack Norbaforce build
- Cleaning a Realforce 105UB
- SuperLube can damage Topre domes
- BKE Redux replacement tutorial
- Where to lube Topre housings
- ManOfInterests slider showdown
- HHKB cleaning
- Cleaning keycaps with denture tabs
- Installing KeyClack silencing rings
- Stock vs BKE vs Redux domes
- Realforce disassembly video
- Jetski’s Novatouch Silencing Guide
Lessons learned
- It’s very much worth reviewing all of those guides above before setting out on the Norbatouch journey. By the time I had absorbed all of that material, I felt that I pretty much knew what the project was going to involve, and that more or less turned out to be the case.
- Lubing is absolutely essential, and the difference in sound is extreme. Before lubing, the keys rattled, and the stabilized keys were unusable. After, the keys just glide without a hint of rattle. Coupled with the case dampening, the keyboard produces a lovely satisfying thock. It’s glorious. Certainly the most dramatic before-and-after, soundwise, that I’ve experienced with any build to date.
- There is no need to apply lube to the sliders themselves - it’s enough to apply it to the housing rails, as this is where all of the slider contact happens. This makes for a relatively quick and easy lube job.
- The one KBDfans slider in this build is a bit looser than the native purple sliders. If I was building a board full of the KBDfans sliders, I might consider lubing the slider cylinder as well.
- Case dampening will also make a big difference - the Norbatouch is a big metal slab with significant space between the PCB and the case, so echo and reverb will be apparent without some kind of dampening treatment.
- Tweezers are always handy for any build, but they were especially helpful here for working with the springs and installing silencing rings on sliders.
- Rubber dome/spring/PCB alignment is temperamental. I would suggest allowing yourself time for at least 2-3 assembly/disassembly cycles. I actually got the placement right the first time, but I had to reopen the case to correct a faulty silencing ring, and during that process, I shifted a spring just enough that a key didn’t work after reassembly, necessitating another disassembly/reassembly cycle. All those screws! Welcome to Topre.
- Before cleaning any board, it’s always a good idea to check the solvents you plan to use and be sure they won’t react with any materials. Again, there is good information in the resources above.
- Cleaning used boards is a hassle, but there’s no avoiding it - not only for basic hygiene, but in particular to provide clean surfaces for lubing, and for slider silencing rings.
- Given the number of screws that have to be removed, I’d strongly recommend testing the board after you put in the initial 12 screws, but before you put in the remaining 20, and I’d strongly recommend testing again before you install the board in the case. If a lot of keys aren’t responding after the first 12 screws, it’s likely there is a big alignment problem that isn’t going to go away after the remaining 20 are installed. Domes and springs are finicky.
- On a related note, check every single spring and make sure it is seated properly in each dome before putting the PCB back in place. Every. Single. Spring.
- I didn’t mention it during the build log, but the Hasu USB controller works well for turning this into a QMK-compatible board. It helps to think of it as translating the native keycodes from the board to whatever keycodes you desire from QMK.
- It would be interesting to build a Norbatouch with a MasterKeys Pro S donor board, with heavier V1 Zilents or lighter V2 Zilents, to do a side-by-side comparison. To a certain extent, the sound and feel here remind me of the Zilent builds in my earlier build logs.
- This is my first Norbauer build, and the hype is real. The powder coat finish is gorgeous and smooth, and the rounded bevels on the corners are perfect. If I can find any faults here, it might be in the screw holes - all of them seemed a bit tight, even after reseating the screws and trying again. The riser feet don’t seem to want to screw in all the way, and I’m reluctant to apply heavy force for fear of scratching that beautiful finish, either on the case or the feet.
- I wish GMK offered an analogue to PMK’s DSA dye-sublimated options, for mixing and matching standard colorways with stock legends. I like the colors here, but really not all that happy with DSA after a few months of GMK under my fingers. YMMV.
Let’s wrap this up! Before…
…and after. Thanks, @norbauer!
Specifications
donor board: refurbished CoolerMaster Novatouch TKL
case: Norbatouch R2.5 (Retro Refrigerator finish)
case dampening: 0.1" 40 Duro Sorbothane, stacked to 0.2", wrapped with gaffer tape
PCB: donor
plate: donor
LEDs: none
switches: stock Topre
switch lubing: Tribosys 3204 on slider housing rails
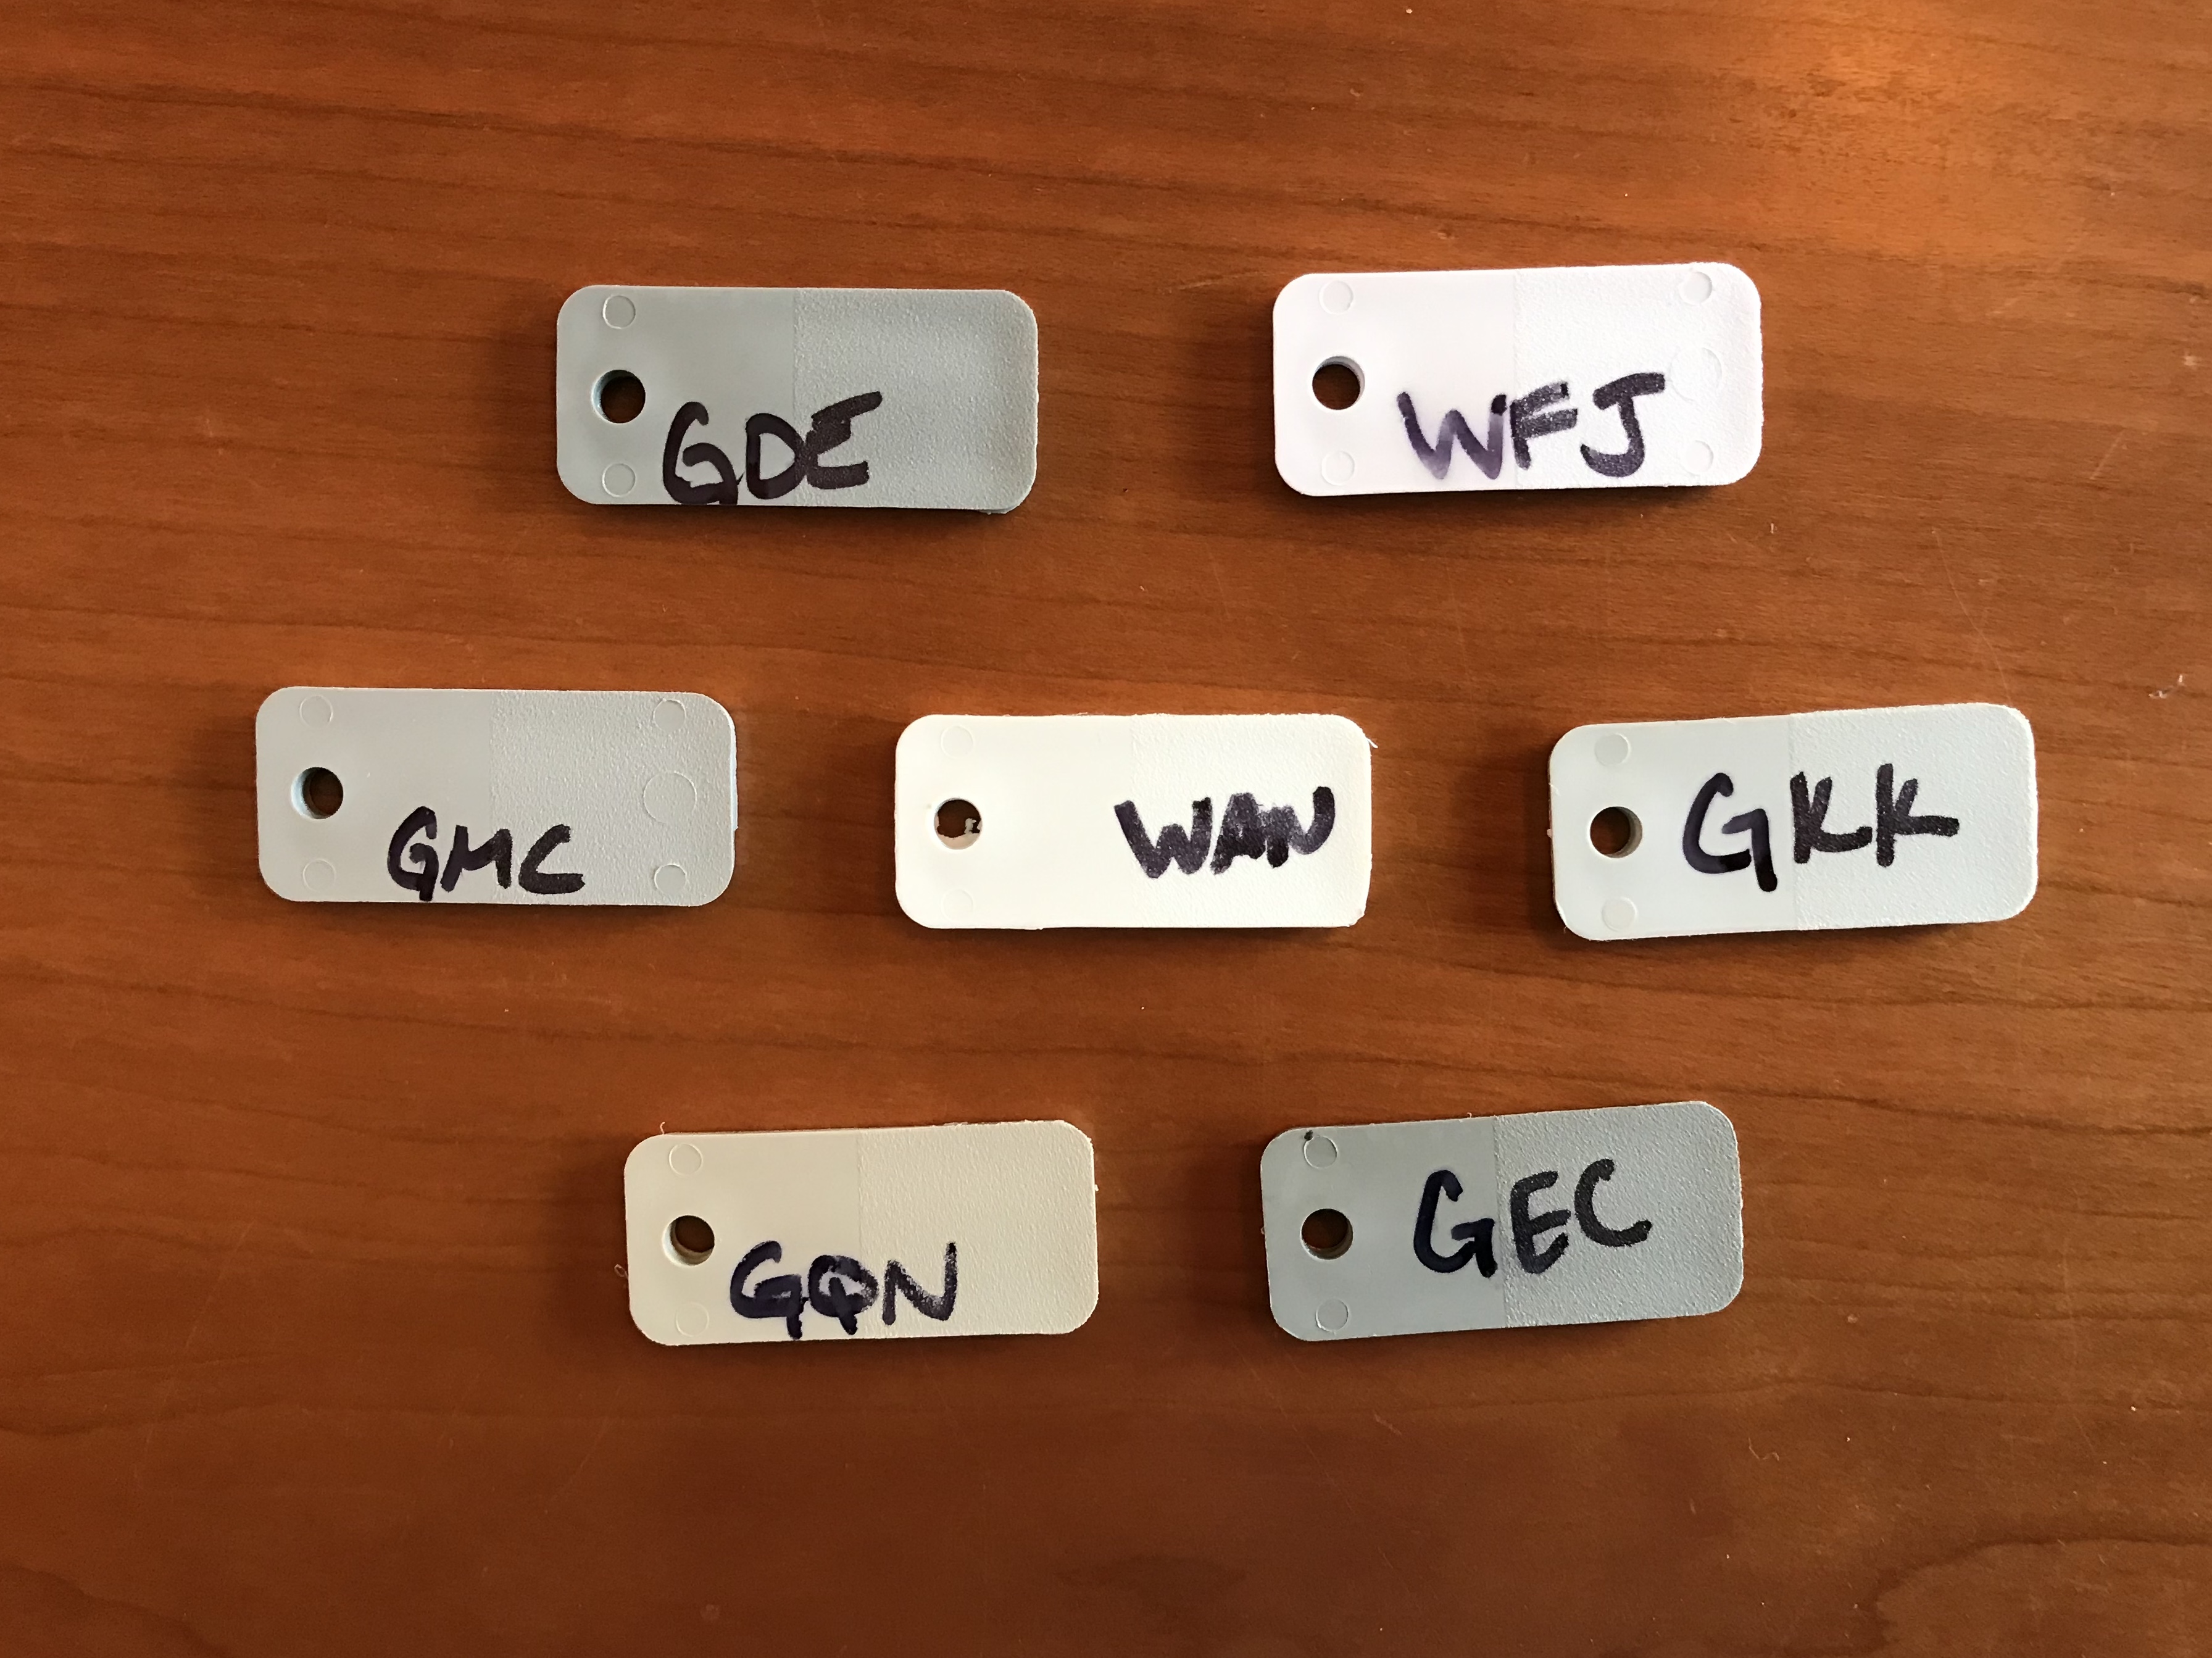
keycaps: PMK DSA dye-sublimated
TKL Base (color: GQN)
TKL Icon Mods (colors: GEC, WAN)
stabilizers: donor
stabilizer mods: SuperLube applied to wires, sliders, and wire clip mounts
plate/PCB dampening: none
HxWxD (without feet or caps): 1.0"x14.63"x5.75"
HxWxD (without caps): 1.75"x14.63"x5.75"
HxWxD: 2.0"x14.63"x5.75"
assembled weight: 4.76 lb
10 Likes
Very nice write up . Thanks for sharing .
1 Like
Wow. That is one serious-business build log. I’ll be pointing people here for Norbatouch guidance from now on. ![]()
Thanks so much for saying that, and for being such a kind supporter of my work in general! ![]() I really appreciate it.
I really appreciate it.
FWIW, on the Round 3.14 Norbatouches, I made the threads more coarse, which helps a bit with the issue you mentioned. And of course on subsequent designs I’ve gotten entirely away from risers that thread into the housing at all. I personally am not a huge fan of risers in general and continue to explore alternatives.
Also, note that on pre-round-3.14 housings, the flange screws that hold the plate in place only make assembly easier when you flip the bottom half of the housing over with the plate in place; they don’t screw all the way against the plate to hold it firmly in place. I changed this in Round 3.14 for those people who don’t want to use shelf liner; they now screw all the way in and tension the plate to keep it from moving around. This might have been part of your experience with some of the screws feeling tight or now screwing in all the way; those two don’t actually do so on that particular revision of the housing. FWIW.
5 Likes
Thanks for taking the time to look this over, especially during what appears to be an epic product shipment and release period!
Figures. I tend to like some angle to the case, especially with DSA, but I will be experimenting with other profiles on the 3.14s to see how I get on without risers.
Good to know. I probably should have been clearer in the build log, and I’ll go edit it - in this case, screwing them in helped to achieve contact with the Sorbothane packets underneath, and “dial in” the level of compression. If not the original purpose of these two screws, it at least ended up being a nice feature!
Yes, my proposal isn’t entirely to do away with case angles (even though I personally use my boards dead-flat). I’ve merely been thinking that something like a desk mat that lives under the keyboard might be a better approach than a small object attached to the rear over the case to impart an angle (leaving a big gap space at the rear). I tried to solve that a bit with the Norbaforce (concealing the gap). While an improvement, the result isn’t entirely satisfactory to me, purely as a matter of looks.
I’ve been exploring such mats with CNC-machined hardwood inserts that then get covered in leather. I think it would look much nicer, for one thing, and also provide a more cozy home at one’s work area. Still very much a WIP though.
1 Like
Anytime I see an update from you on your intro post I know I’m in for a real treat. This last build was amazing and so detailed! Thank you for all the effort.
1 Like
Oh yes 
This is awesome 
I have 2 : questions
-
How much wobble does the KBDfans slider has over the Novatouch sliders ? Could you add a little video wiggling 2 keys with different slider to see the comparision side by side ?
-
After lubing, does the KBDfans slider vs stock novatouch still feel different ?
Thanks !
1 Like
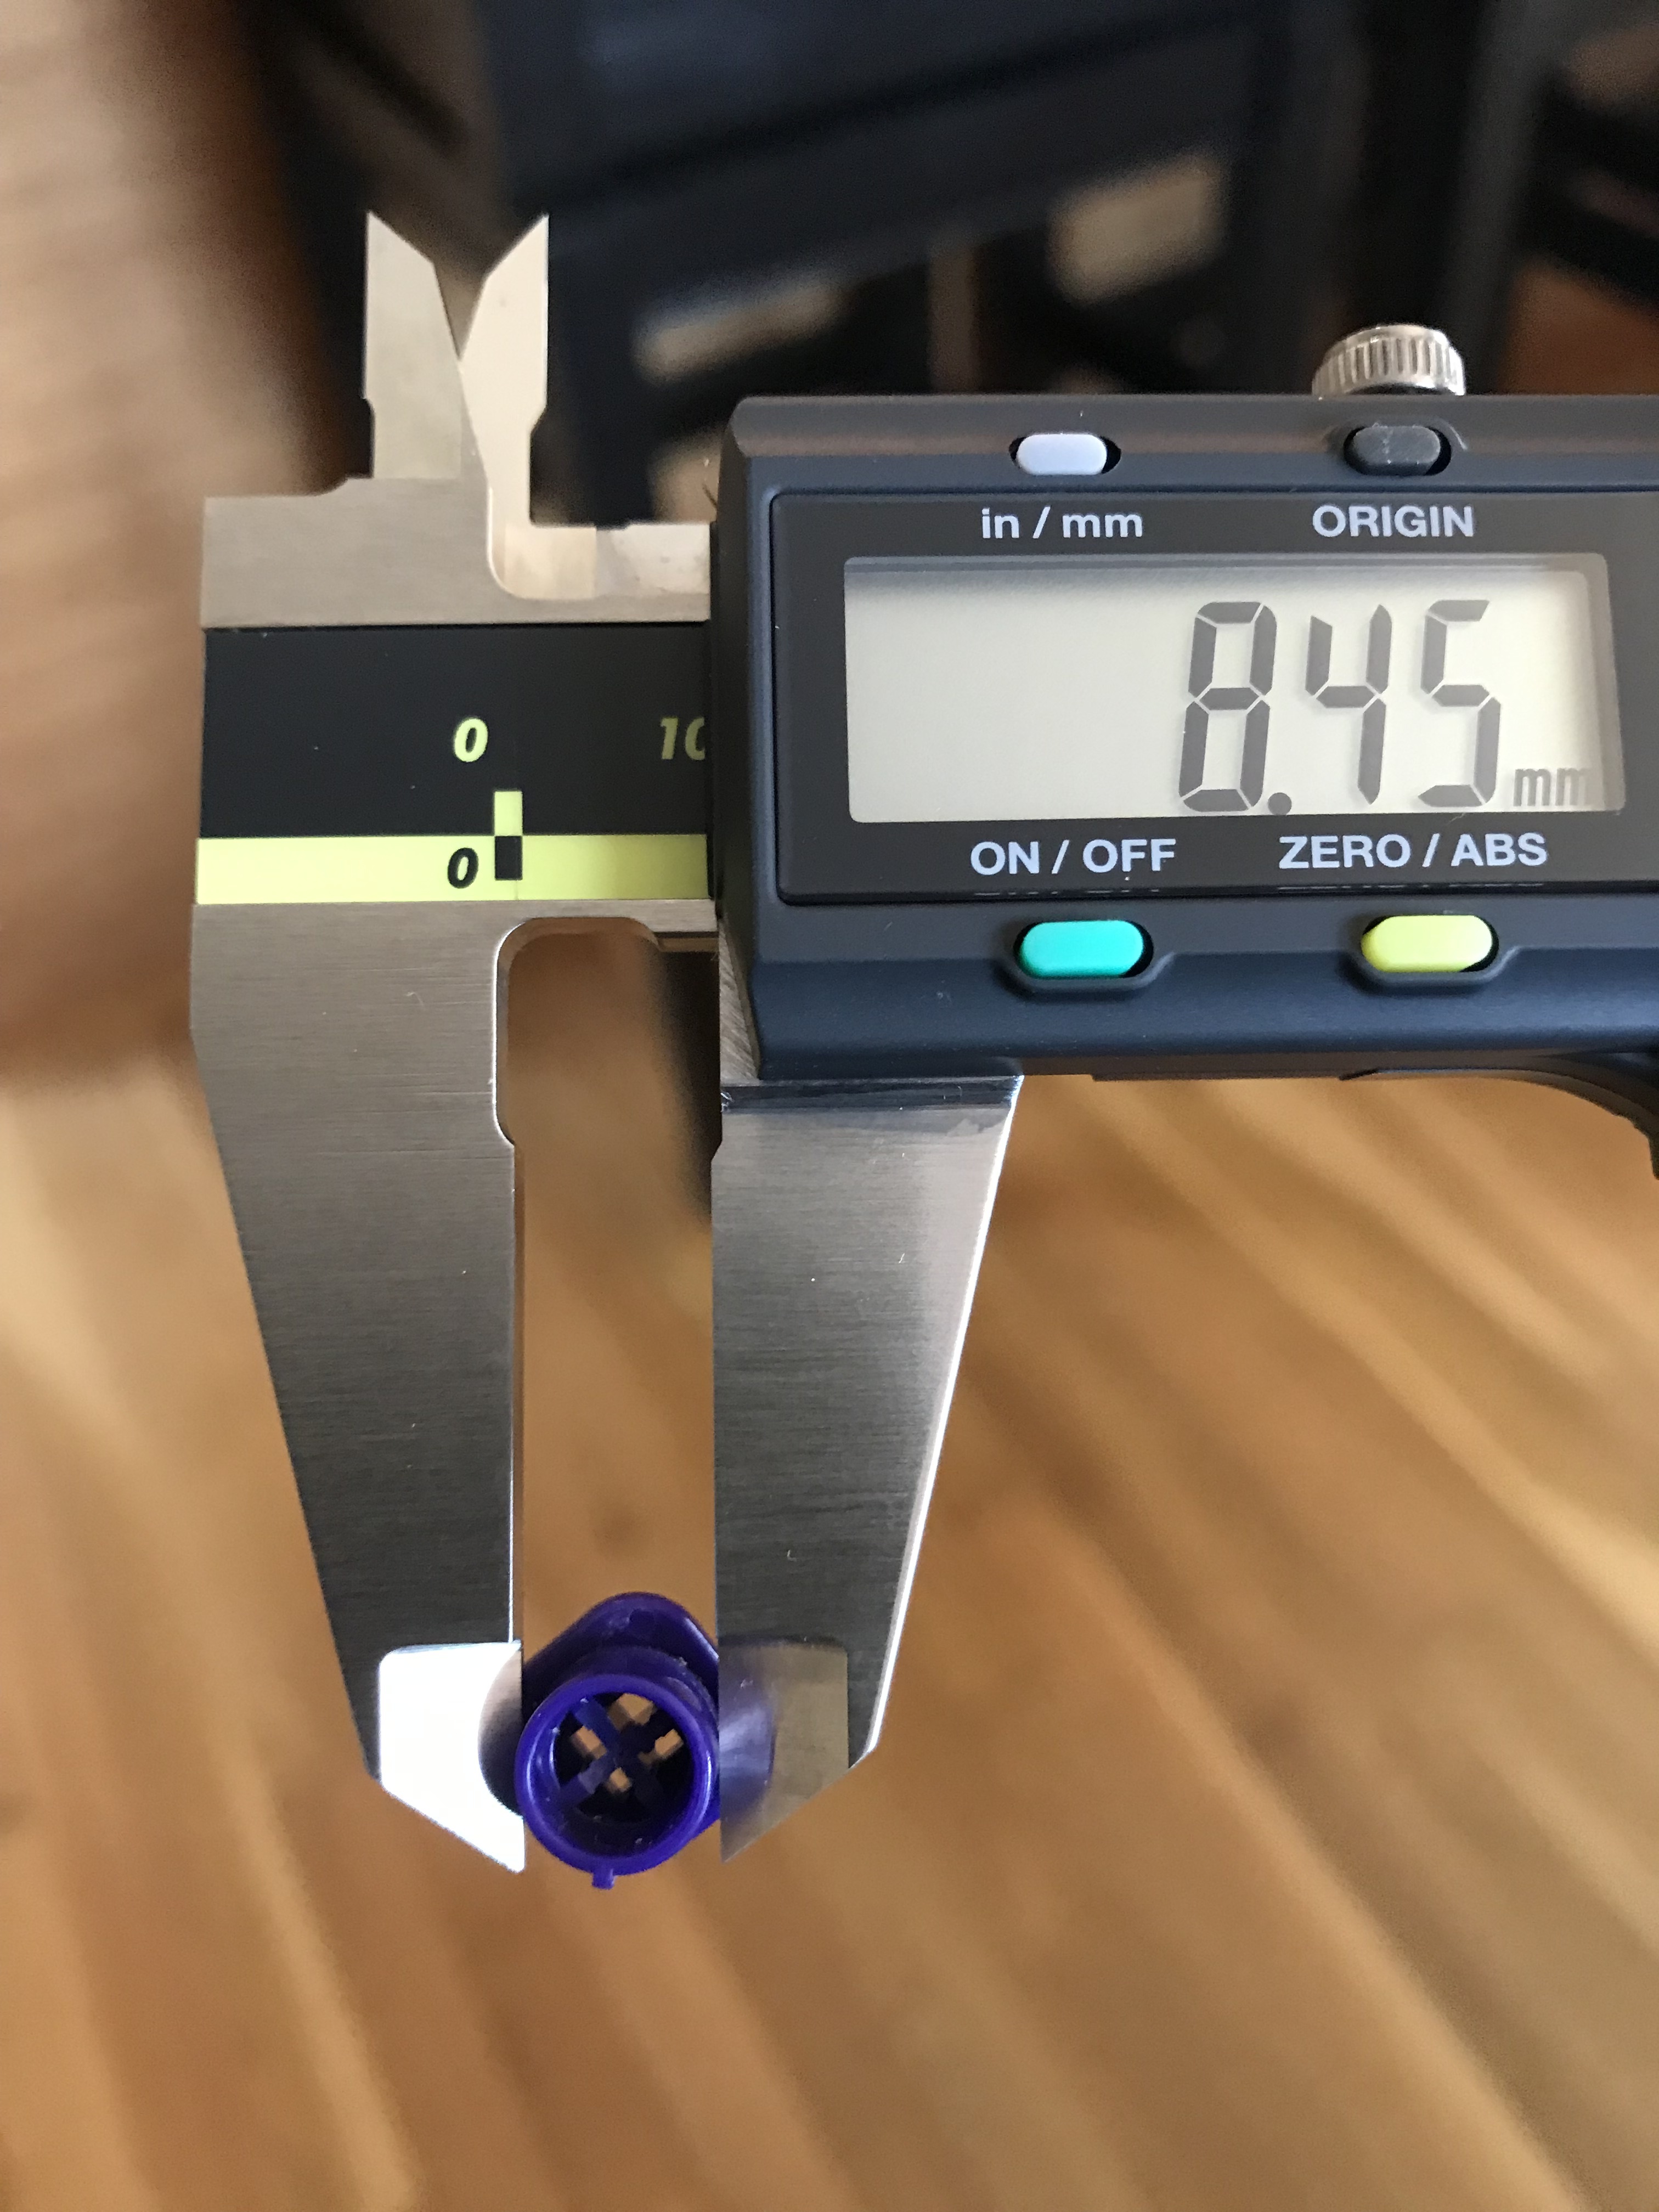
A little hard to show the effect in video, but perhaps these stills give an idea. Looks like approximately 0.3mm more play on the KBDfans slider than the Novatouch sliders flanking it:
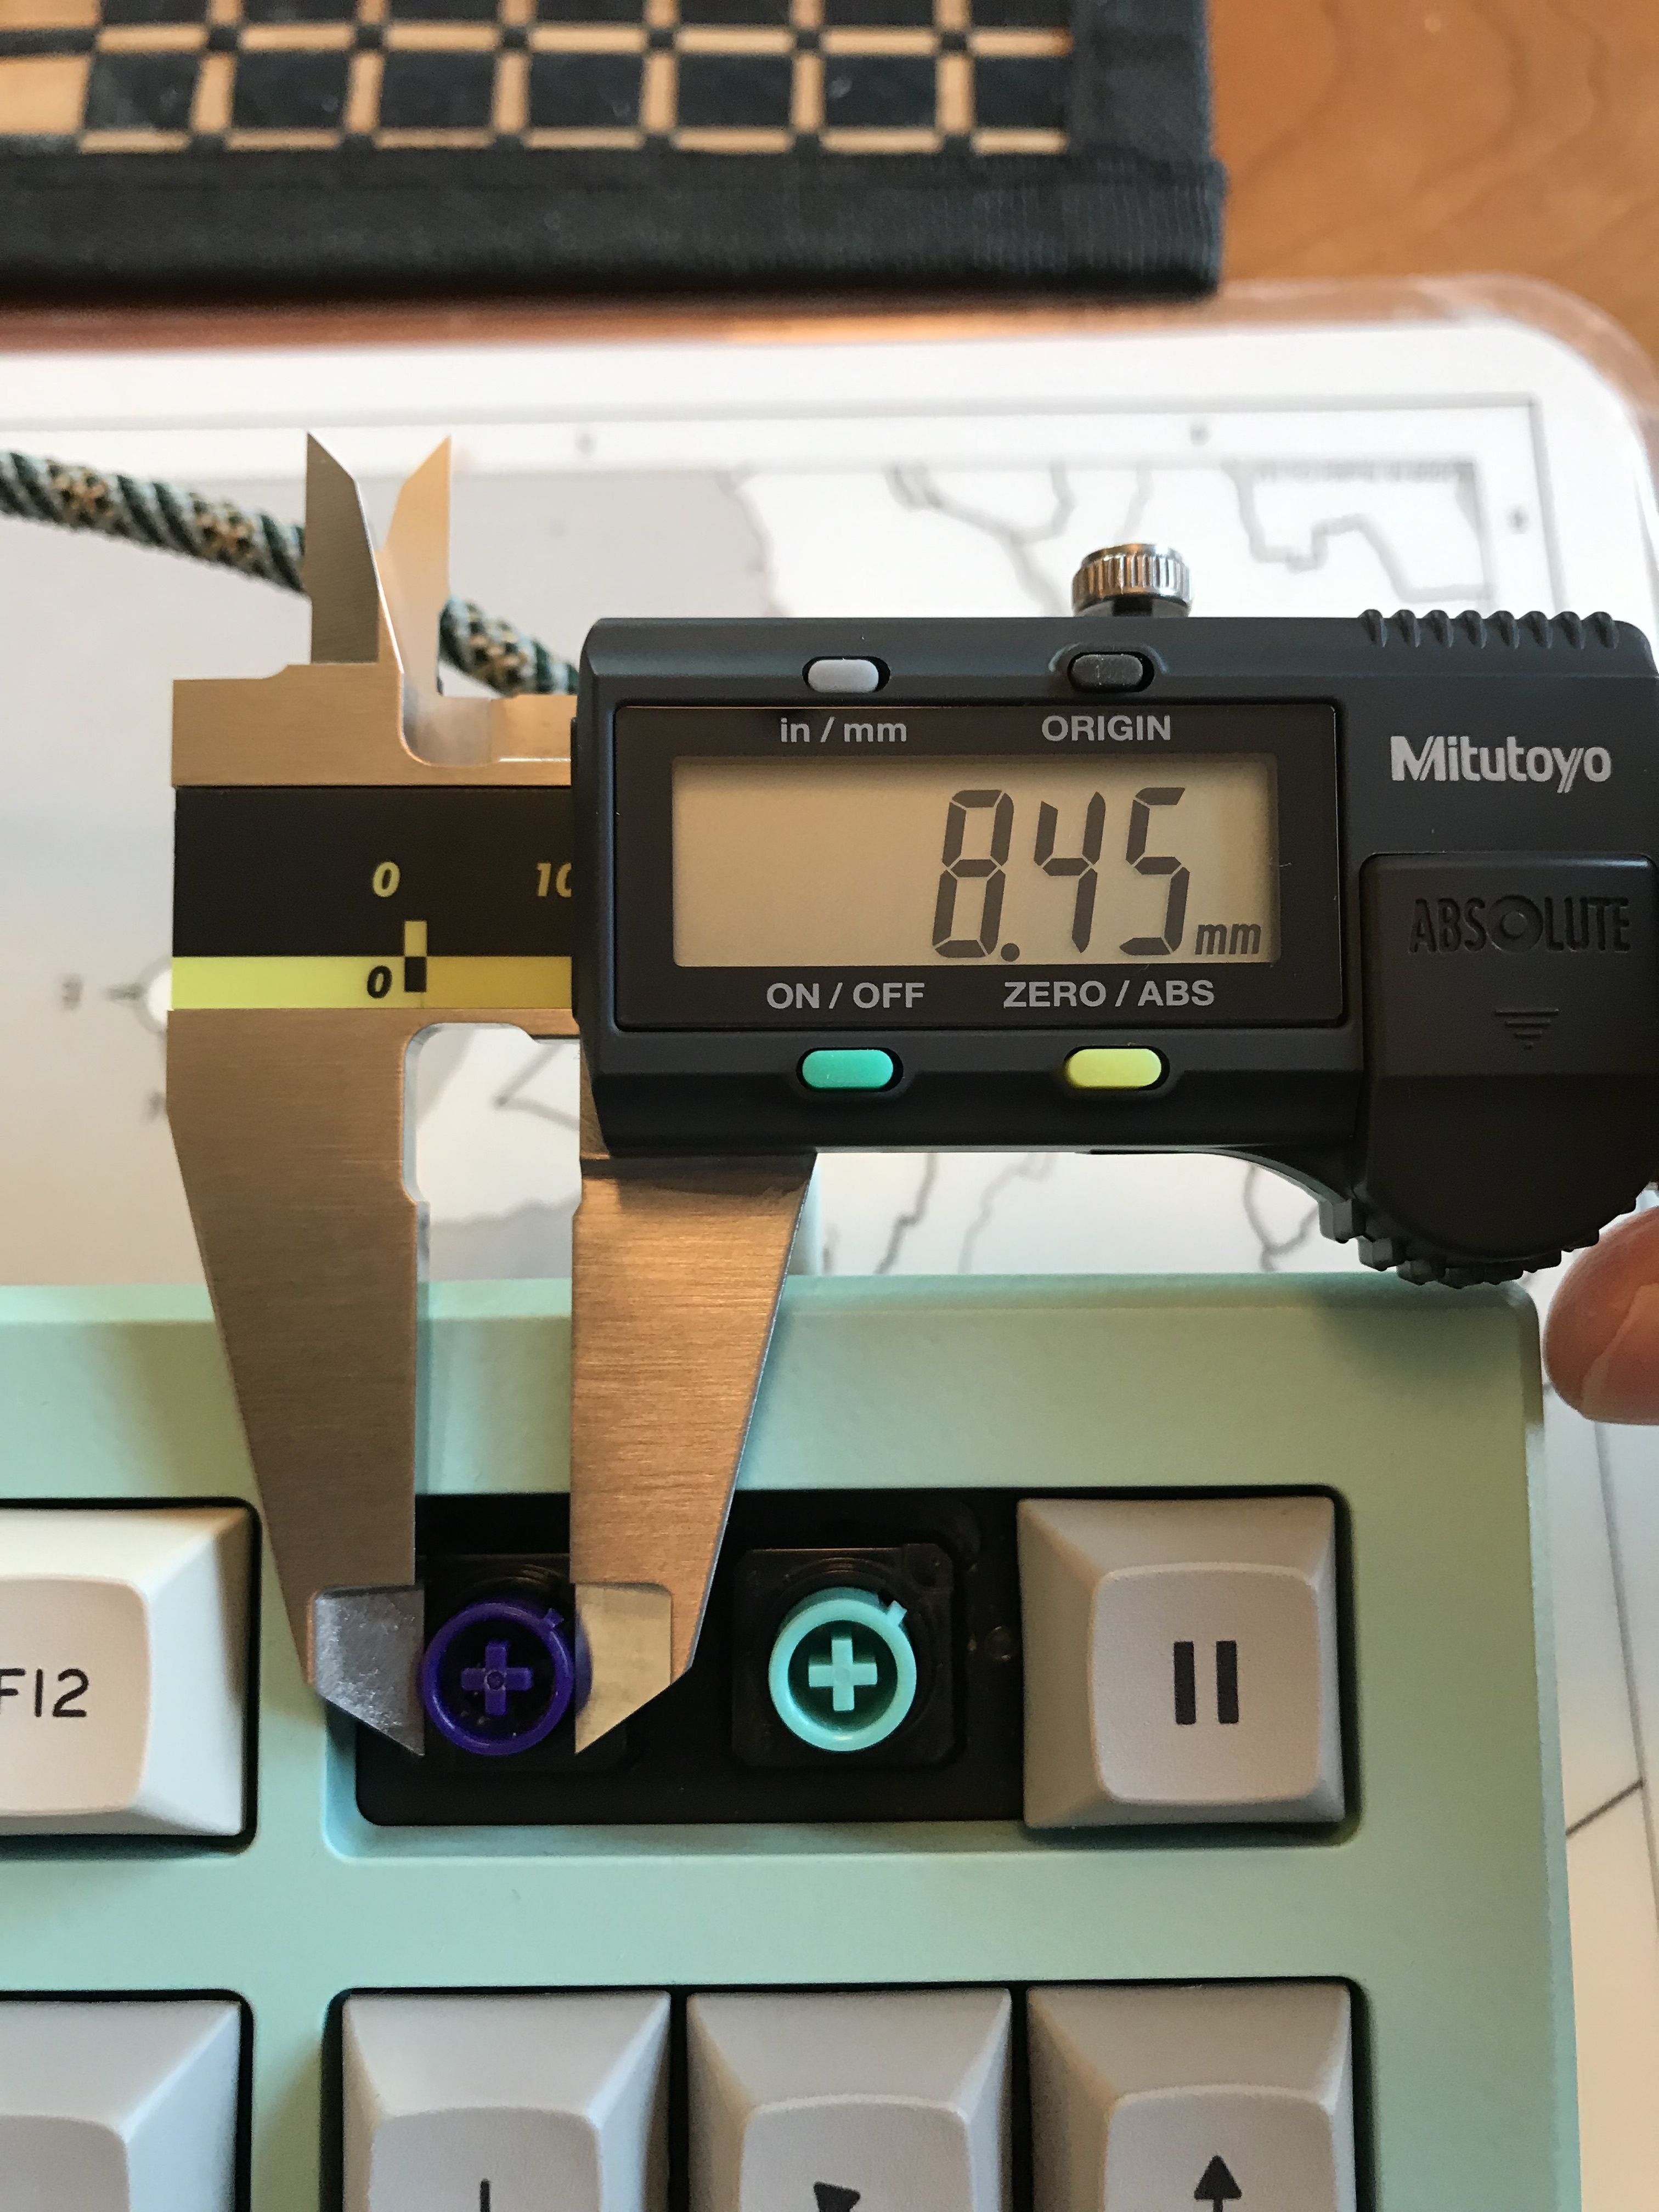
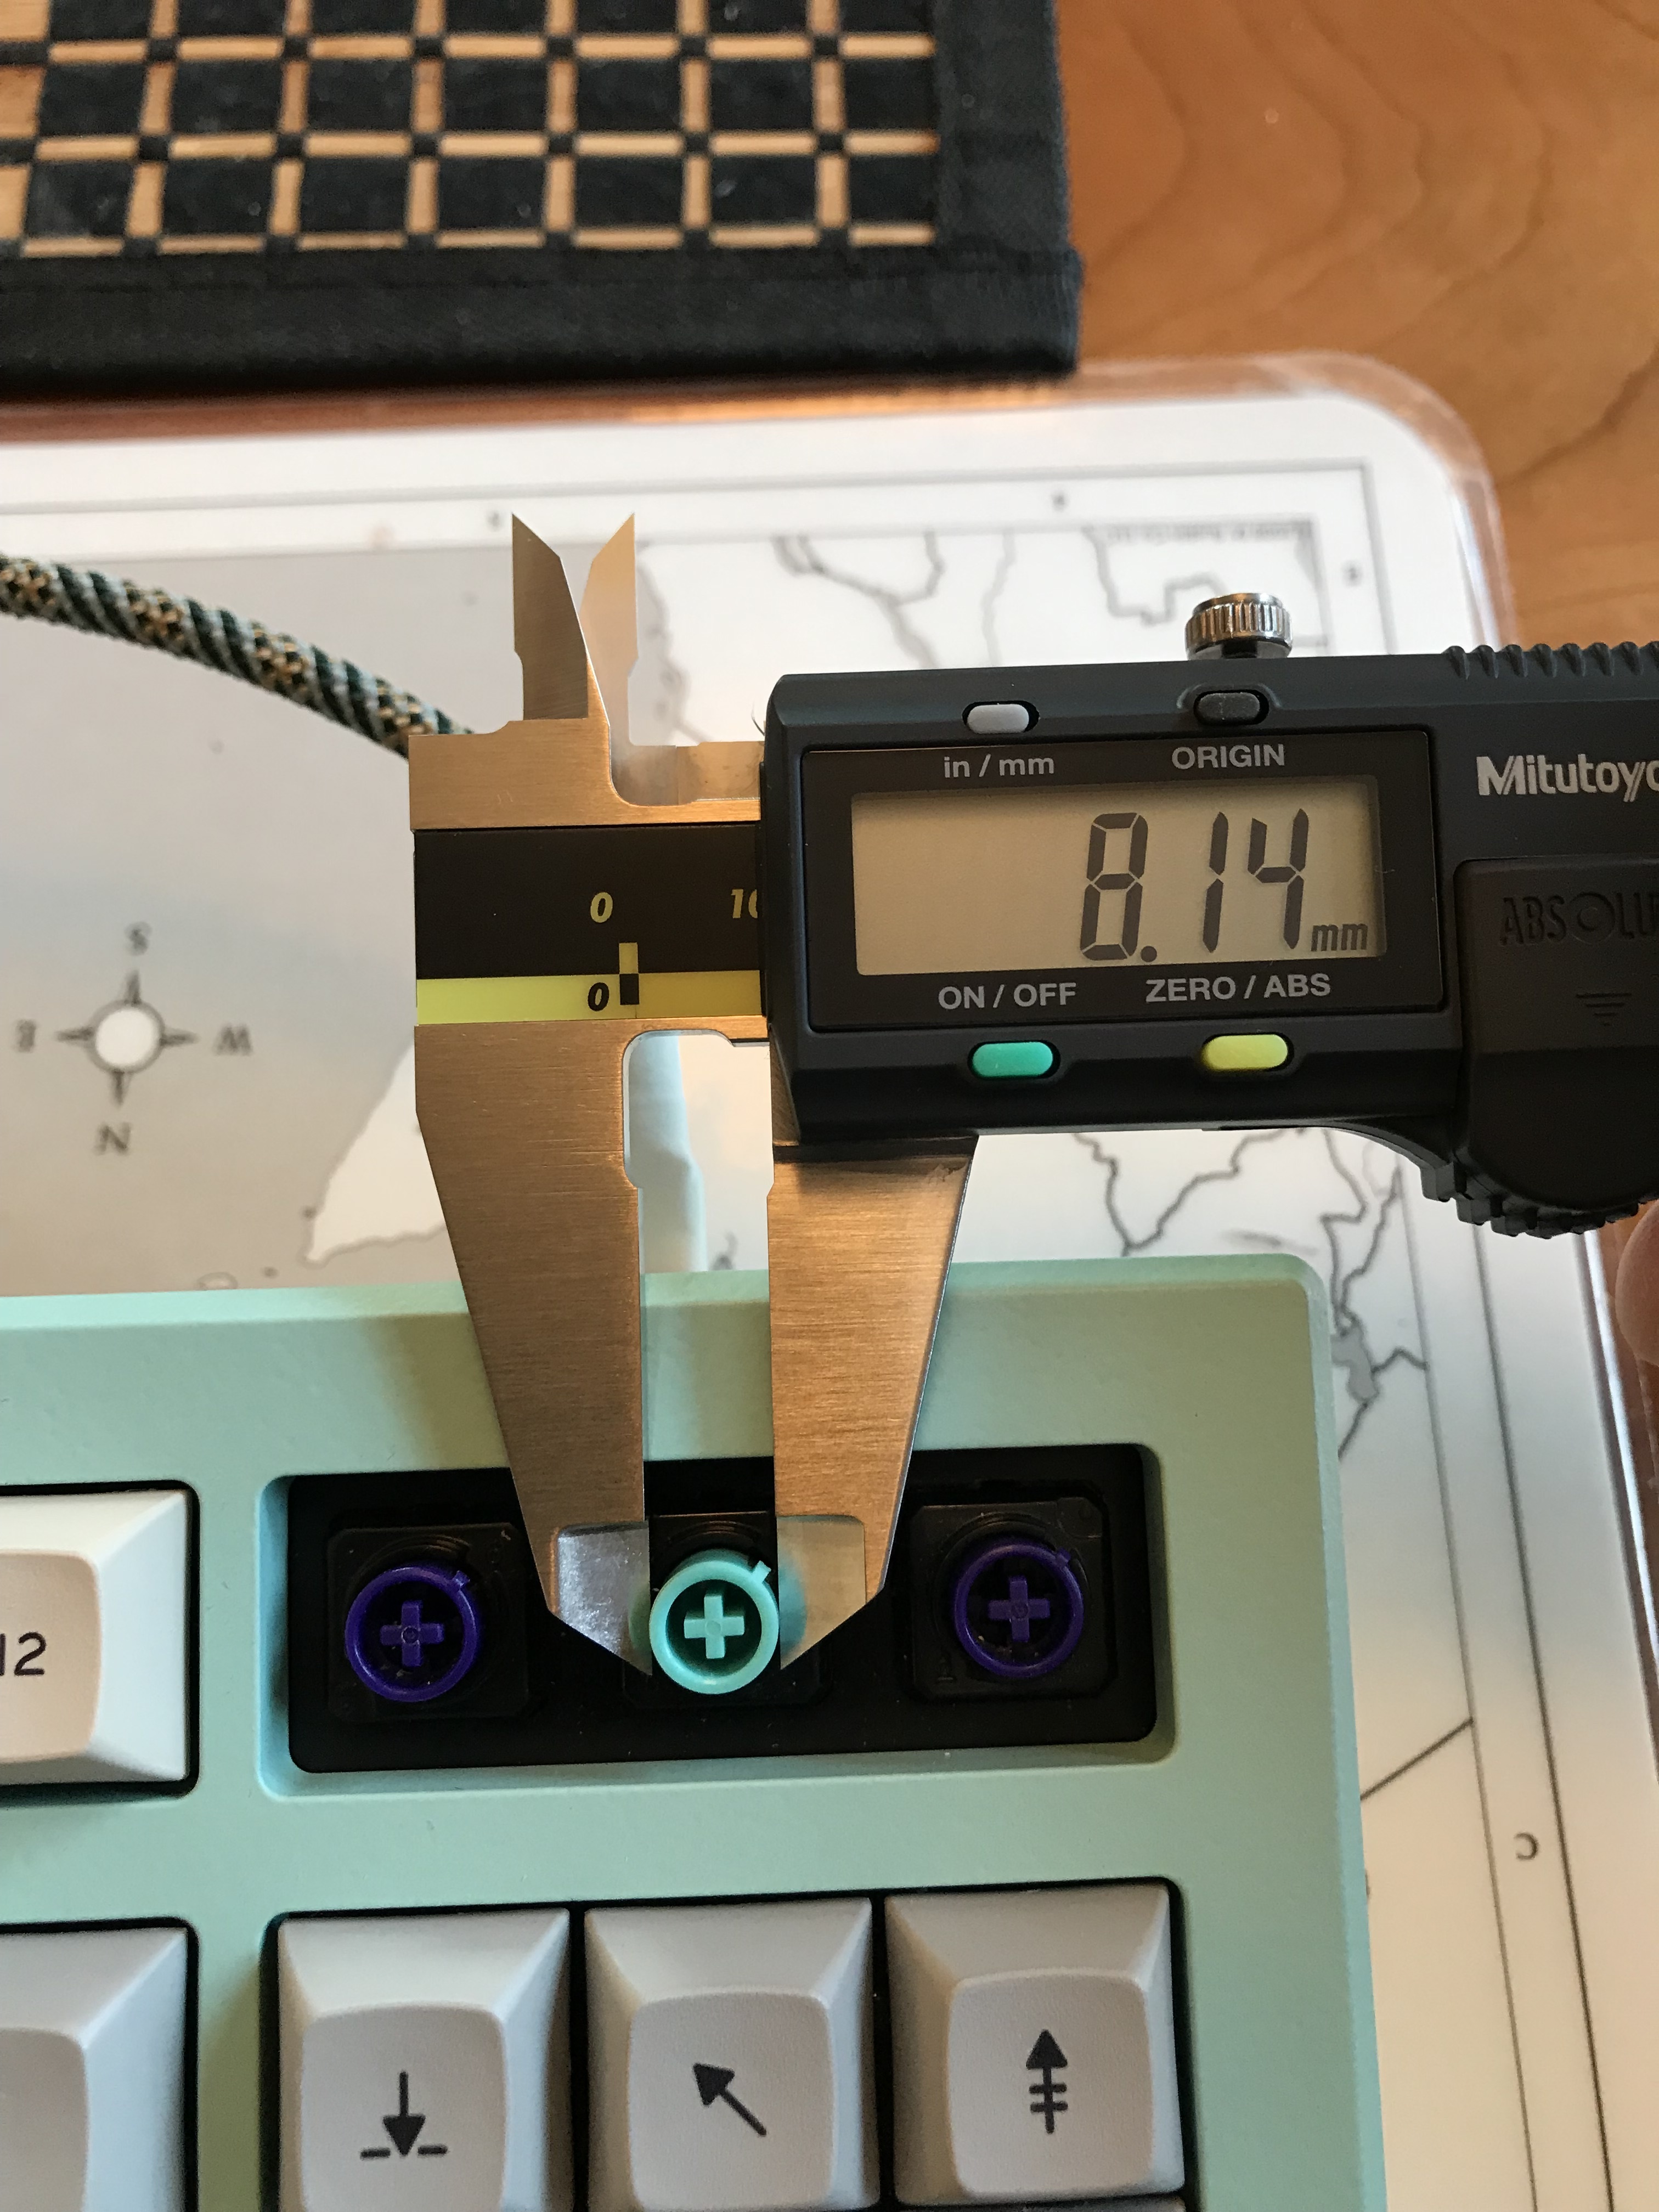
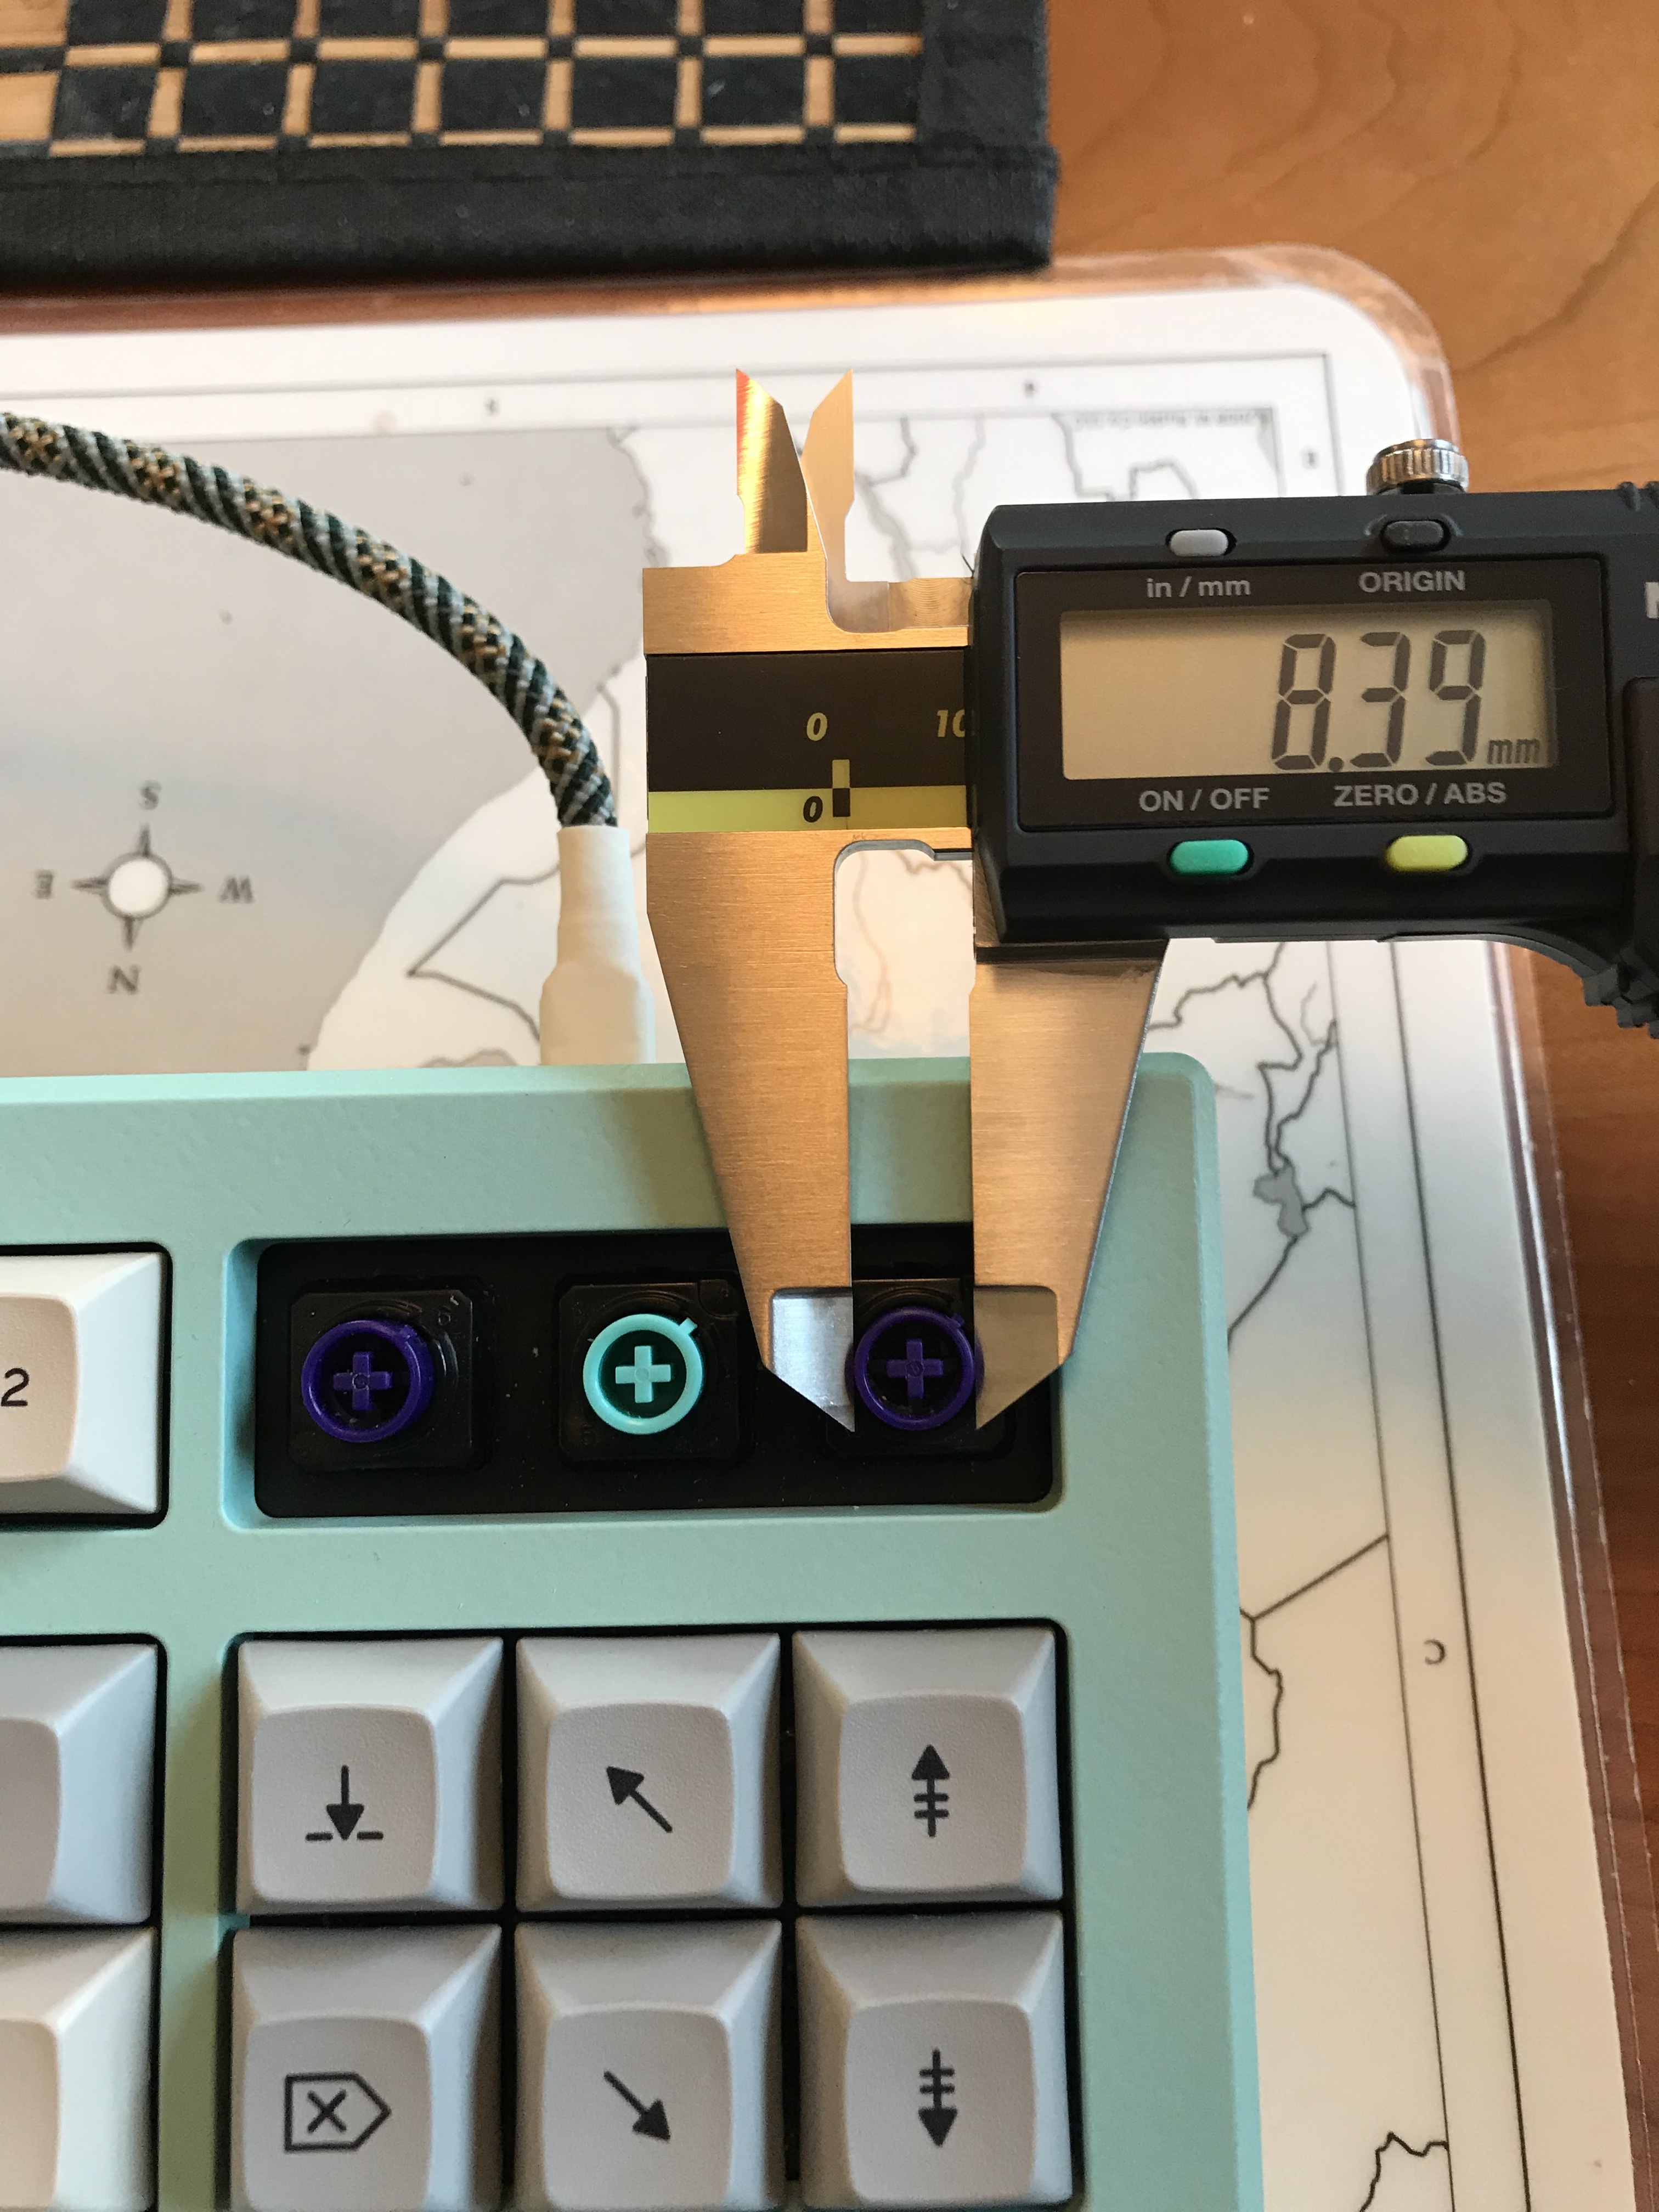
After lubing, still different, but I’d say almost all of the difference is wobble; both from the slider stem, and the difference in keycap fit on the stem. In terms of smoothness of slider travel and sound, not a large difference.
2 Likes
I’ve never seen the issue with KBDFans sliders more clearly illustrated. That’s quite a difference. This widely reported issue is why I’ve never given them a try myself.
Also, good taste in calipers: I use the same model.
3 Likes
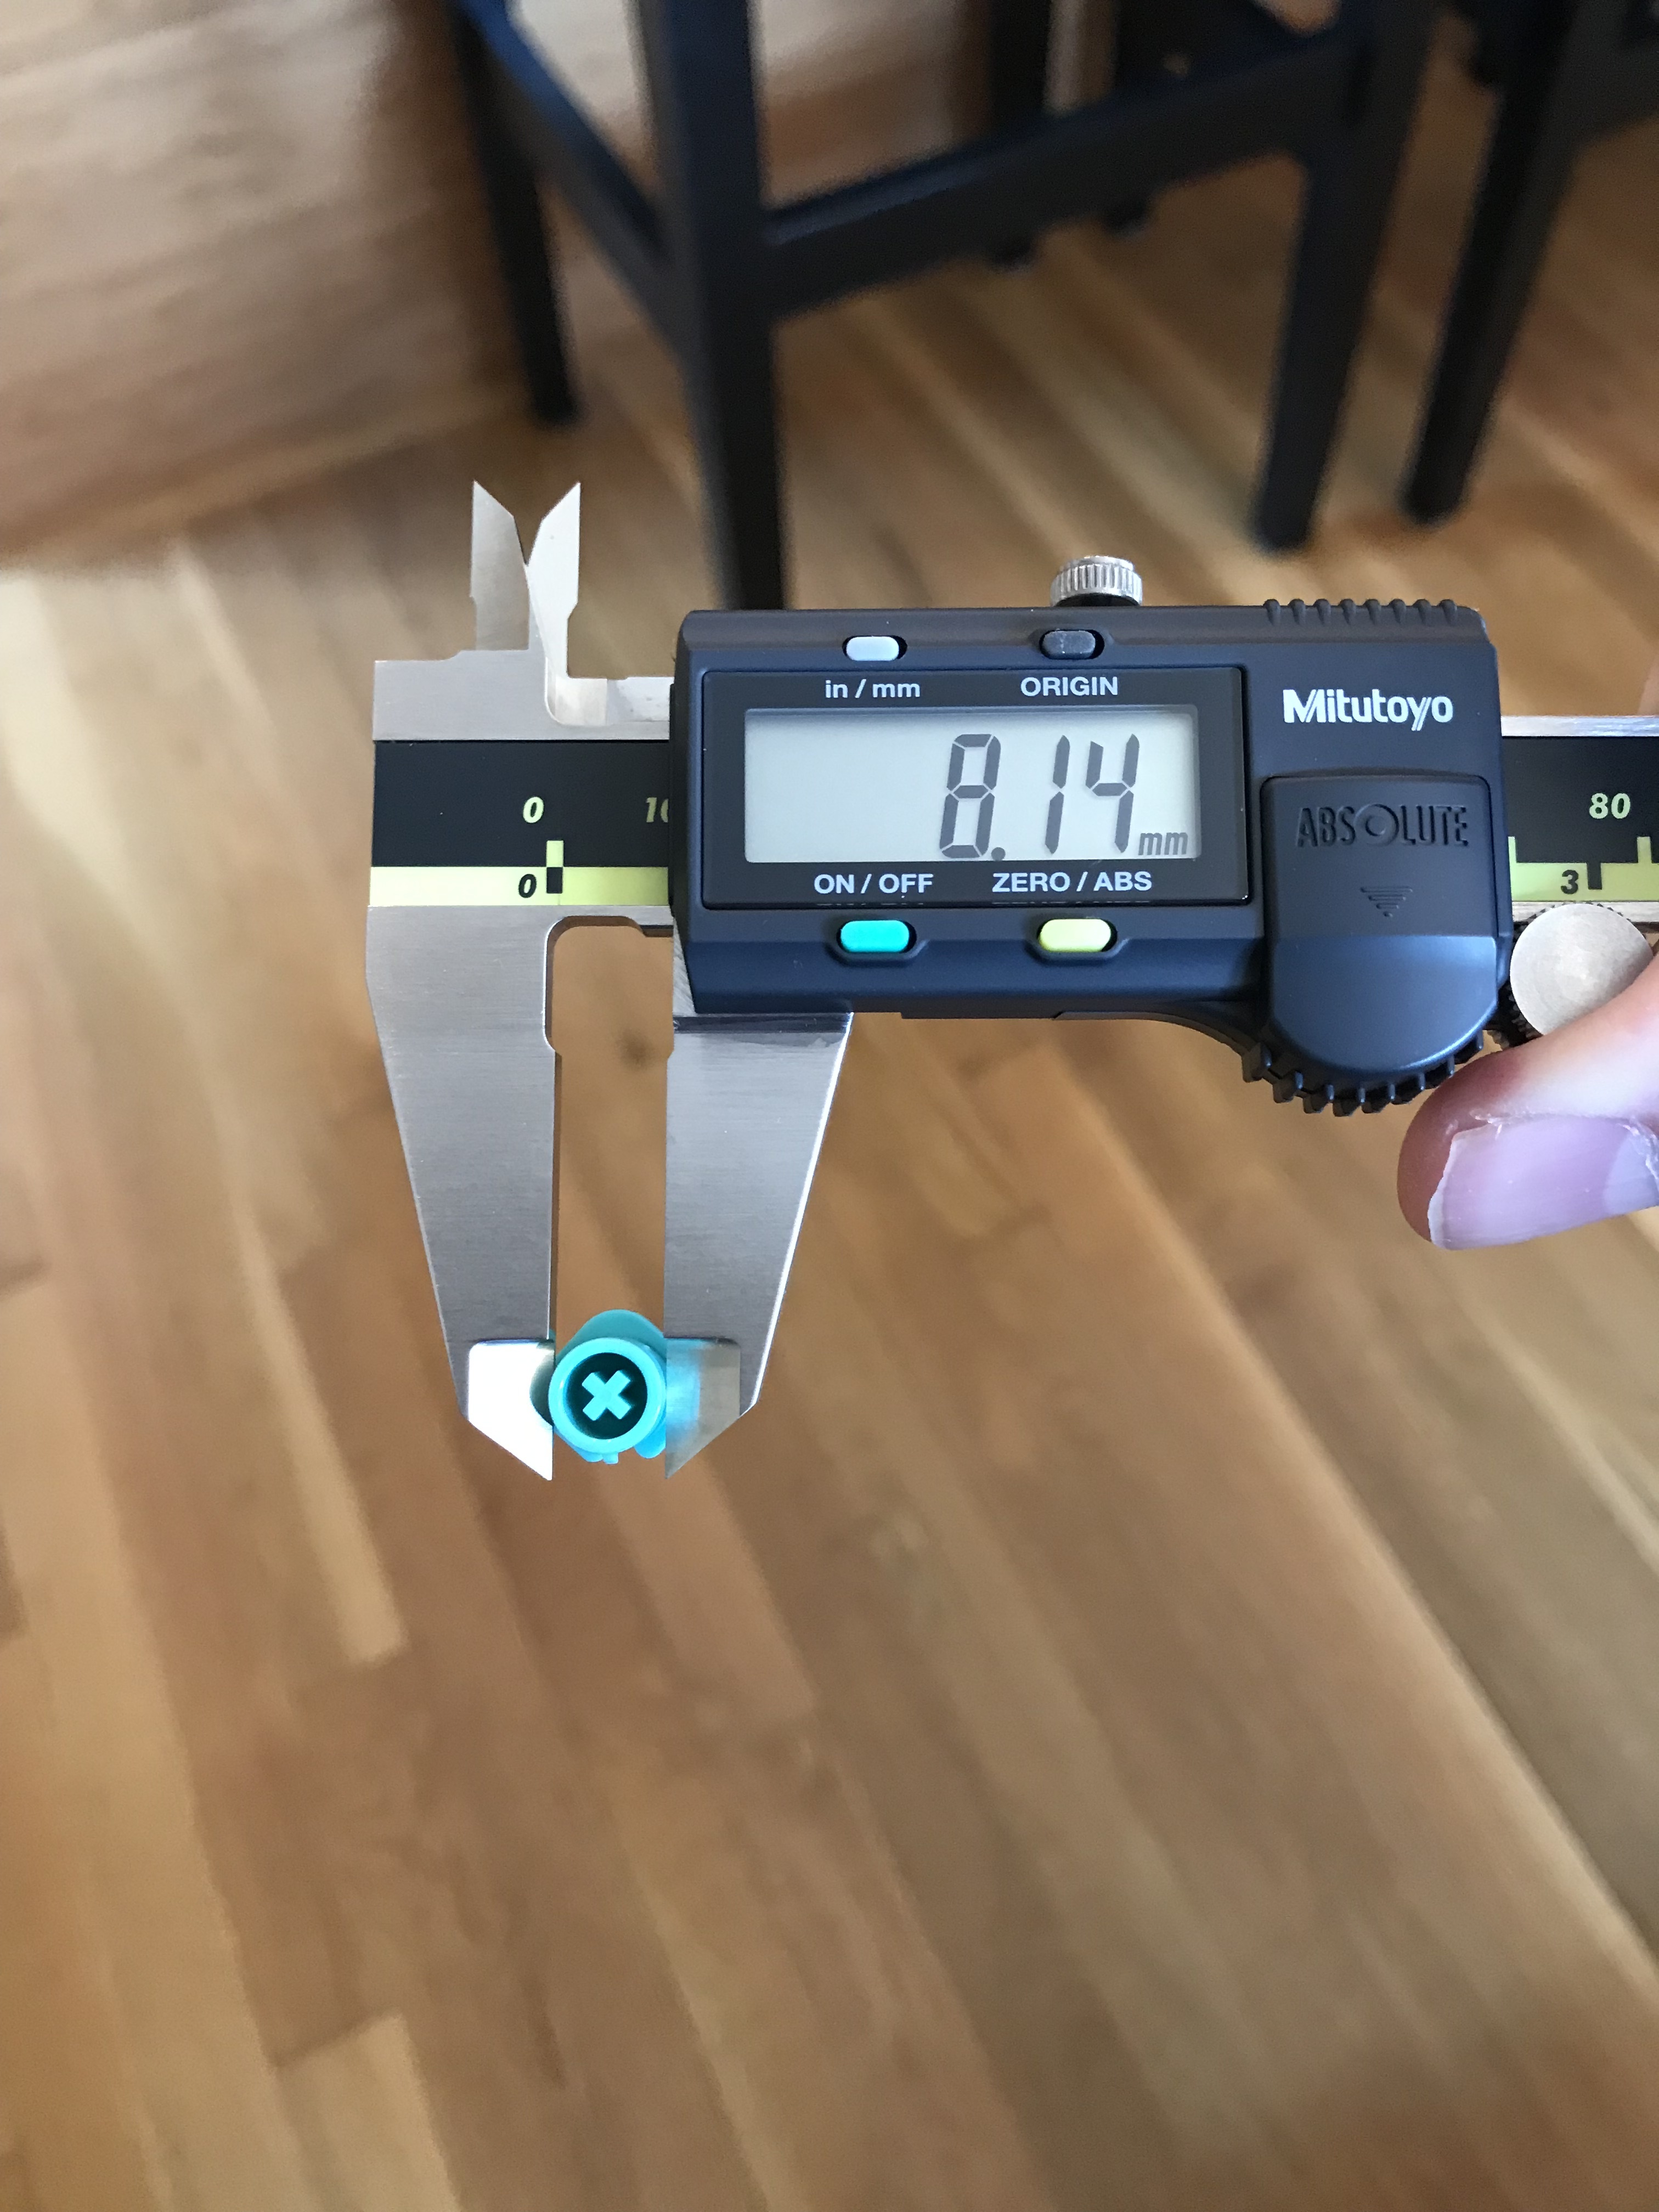
Just to be sure I wasn’t measuring parts that were unrepresentative, I measured once more with a spare KBDfans slider and the broken Novatouch slider I mentioned in the build log (my reluctance to throw away perfectly good plastic pays off once in a while). Consistent results:
4 Likes
That’s awesome, thanks for the measurements !
1 Like
Oh and an extra question popped in my head !
Could you please measure the original topre slider dimension as well ?
I know for sure that original topre slider has more wobble than the Novatouch ones, I had a stock board and a novatouched one side by side.
I’m curious how they are comparing with KBDFans mx sliders …
Geez, i wish i was a new member like you
3 Likes
I don’t have any original Topre sliders handy at the moment, but hope to rectify that soon. I’ll take measurements once I have them.
Seems that stock ones are 8.3mm in outer diameter, and the Niz ones 8.21