I love the color!
That is an impressive feat!
Very nice work. Lovely keyboard. ![]()
I love the color!
That is an impressive feat!
Very nice work. Lovely keyboard. ![]()
How cool. I love watching the progress of this project.
Ill see if I can make an example(less the ano) over the weekend.
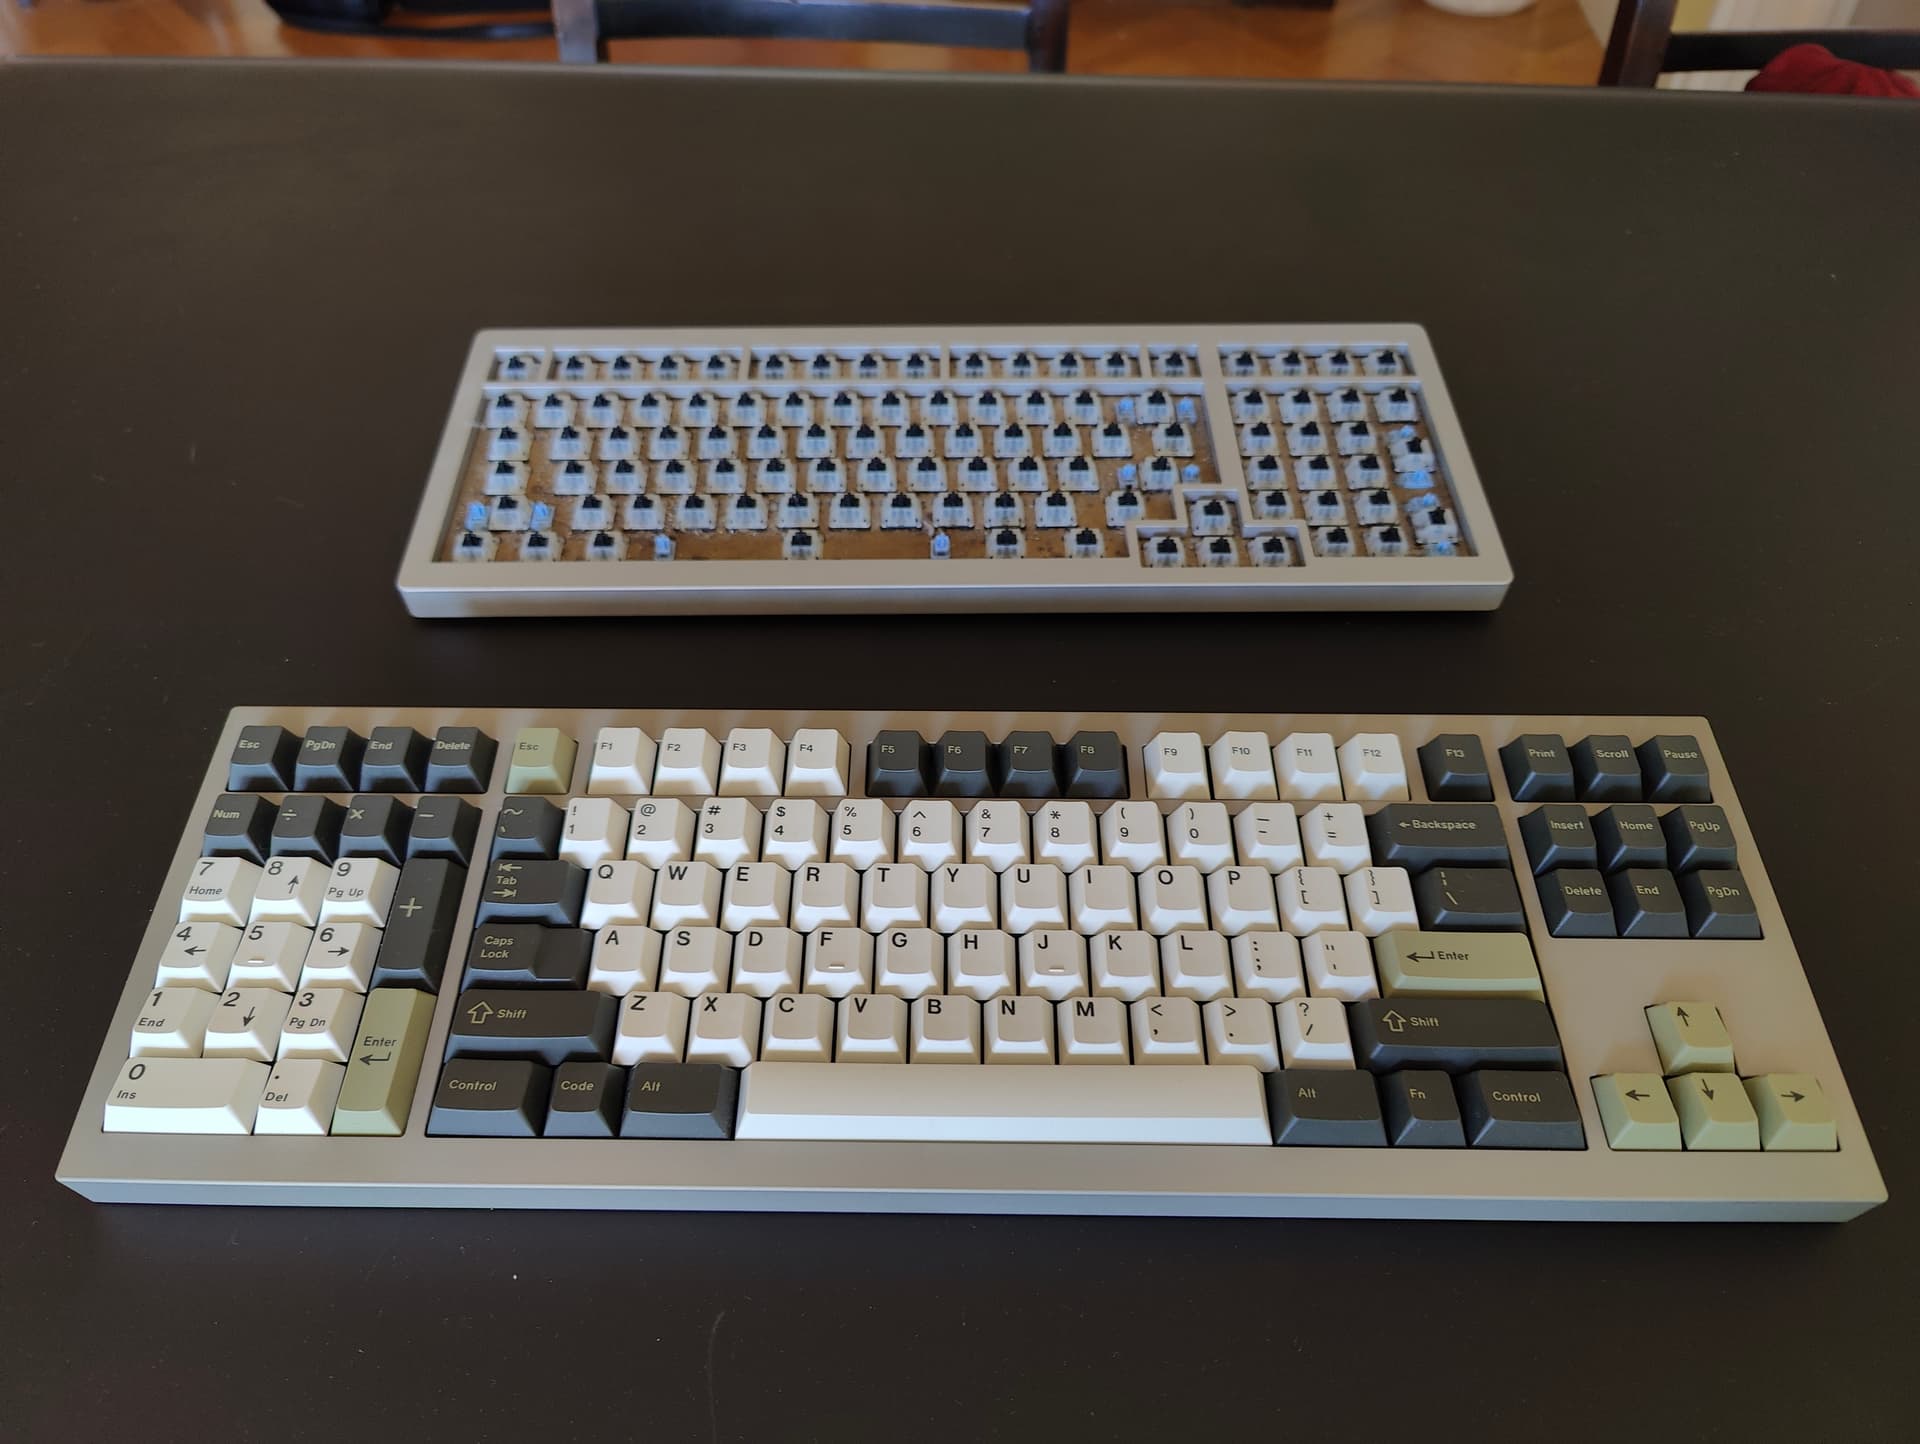
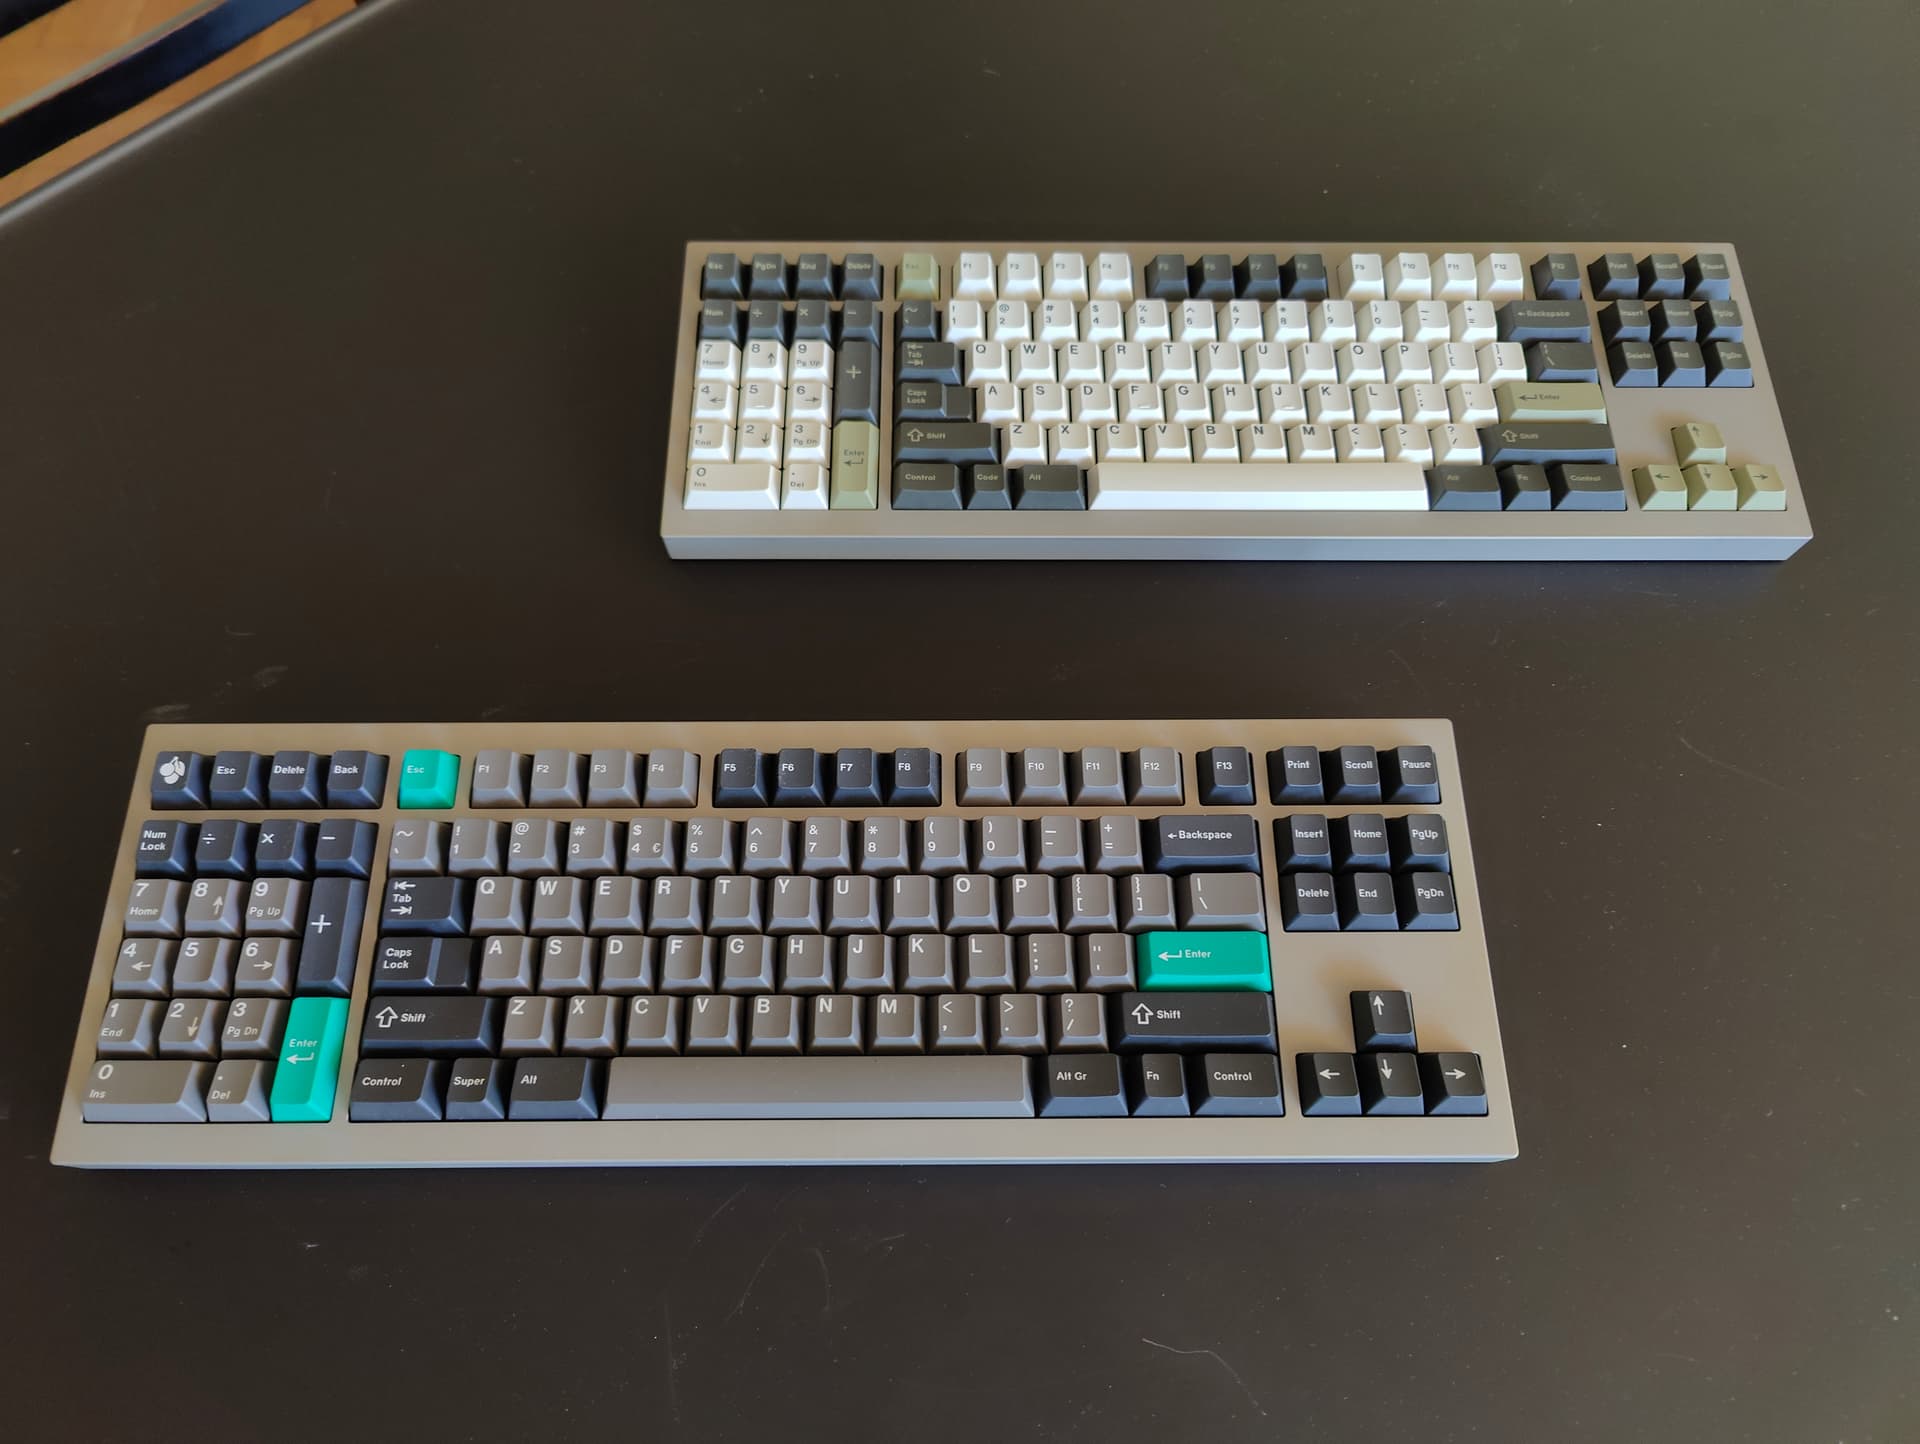
I finished the second Aquanaut today.
I had to take the Olive keycaps from my Winghead to put them on the Aquanaut.
The Winghead has been my beater board for 6 years now (time flies), it is time for him to take a good rest ![]()
You served well my loved Winghead but is time for you to retire!
I couldn’t help but take a few shots with both the Aquanauts while they are still together.
The Olive caps version will go on my work desk tomorrow.
These are some really beautiful boards.
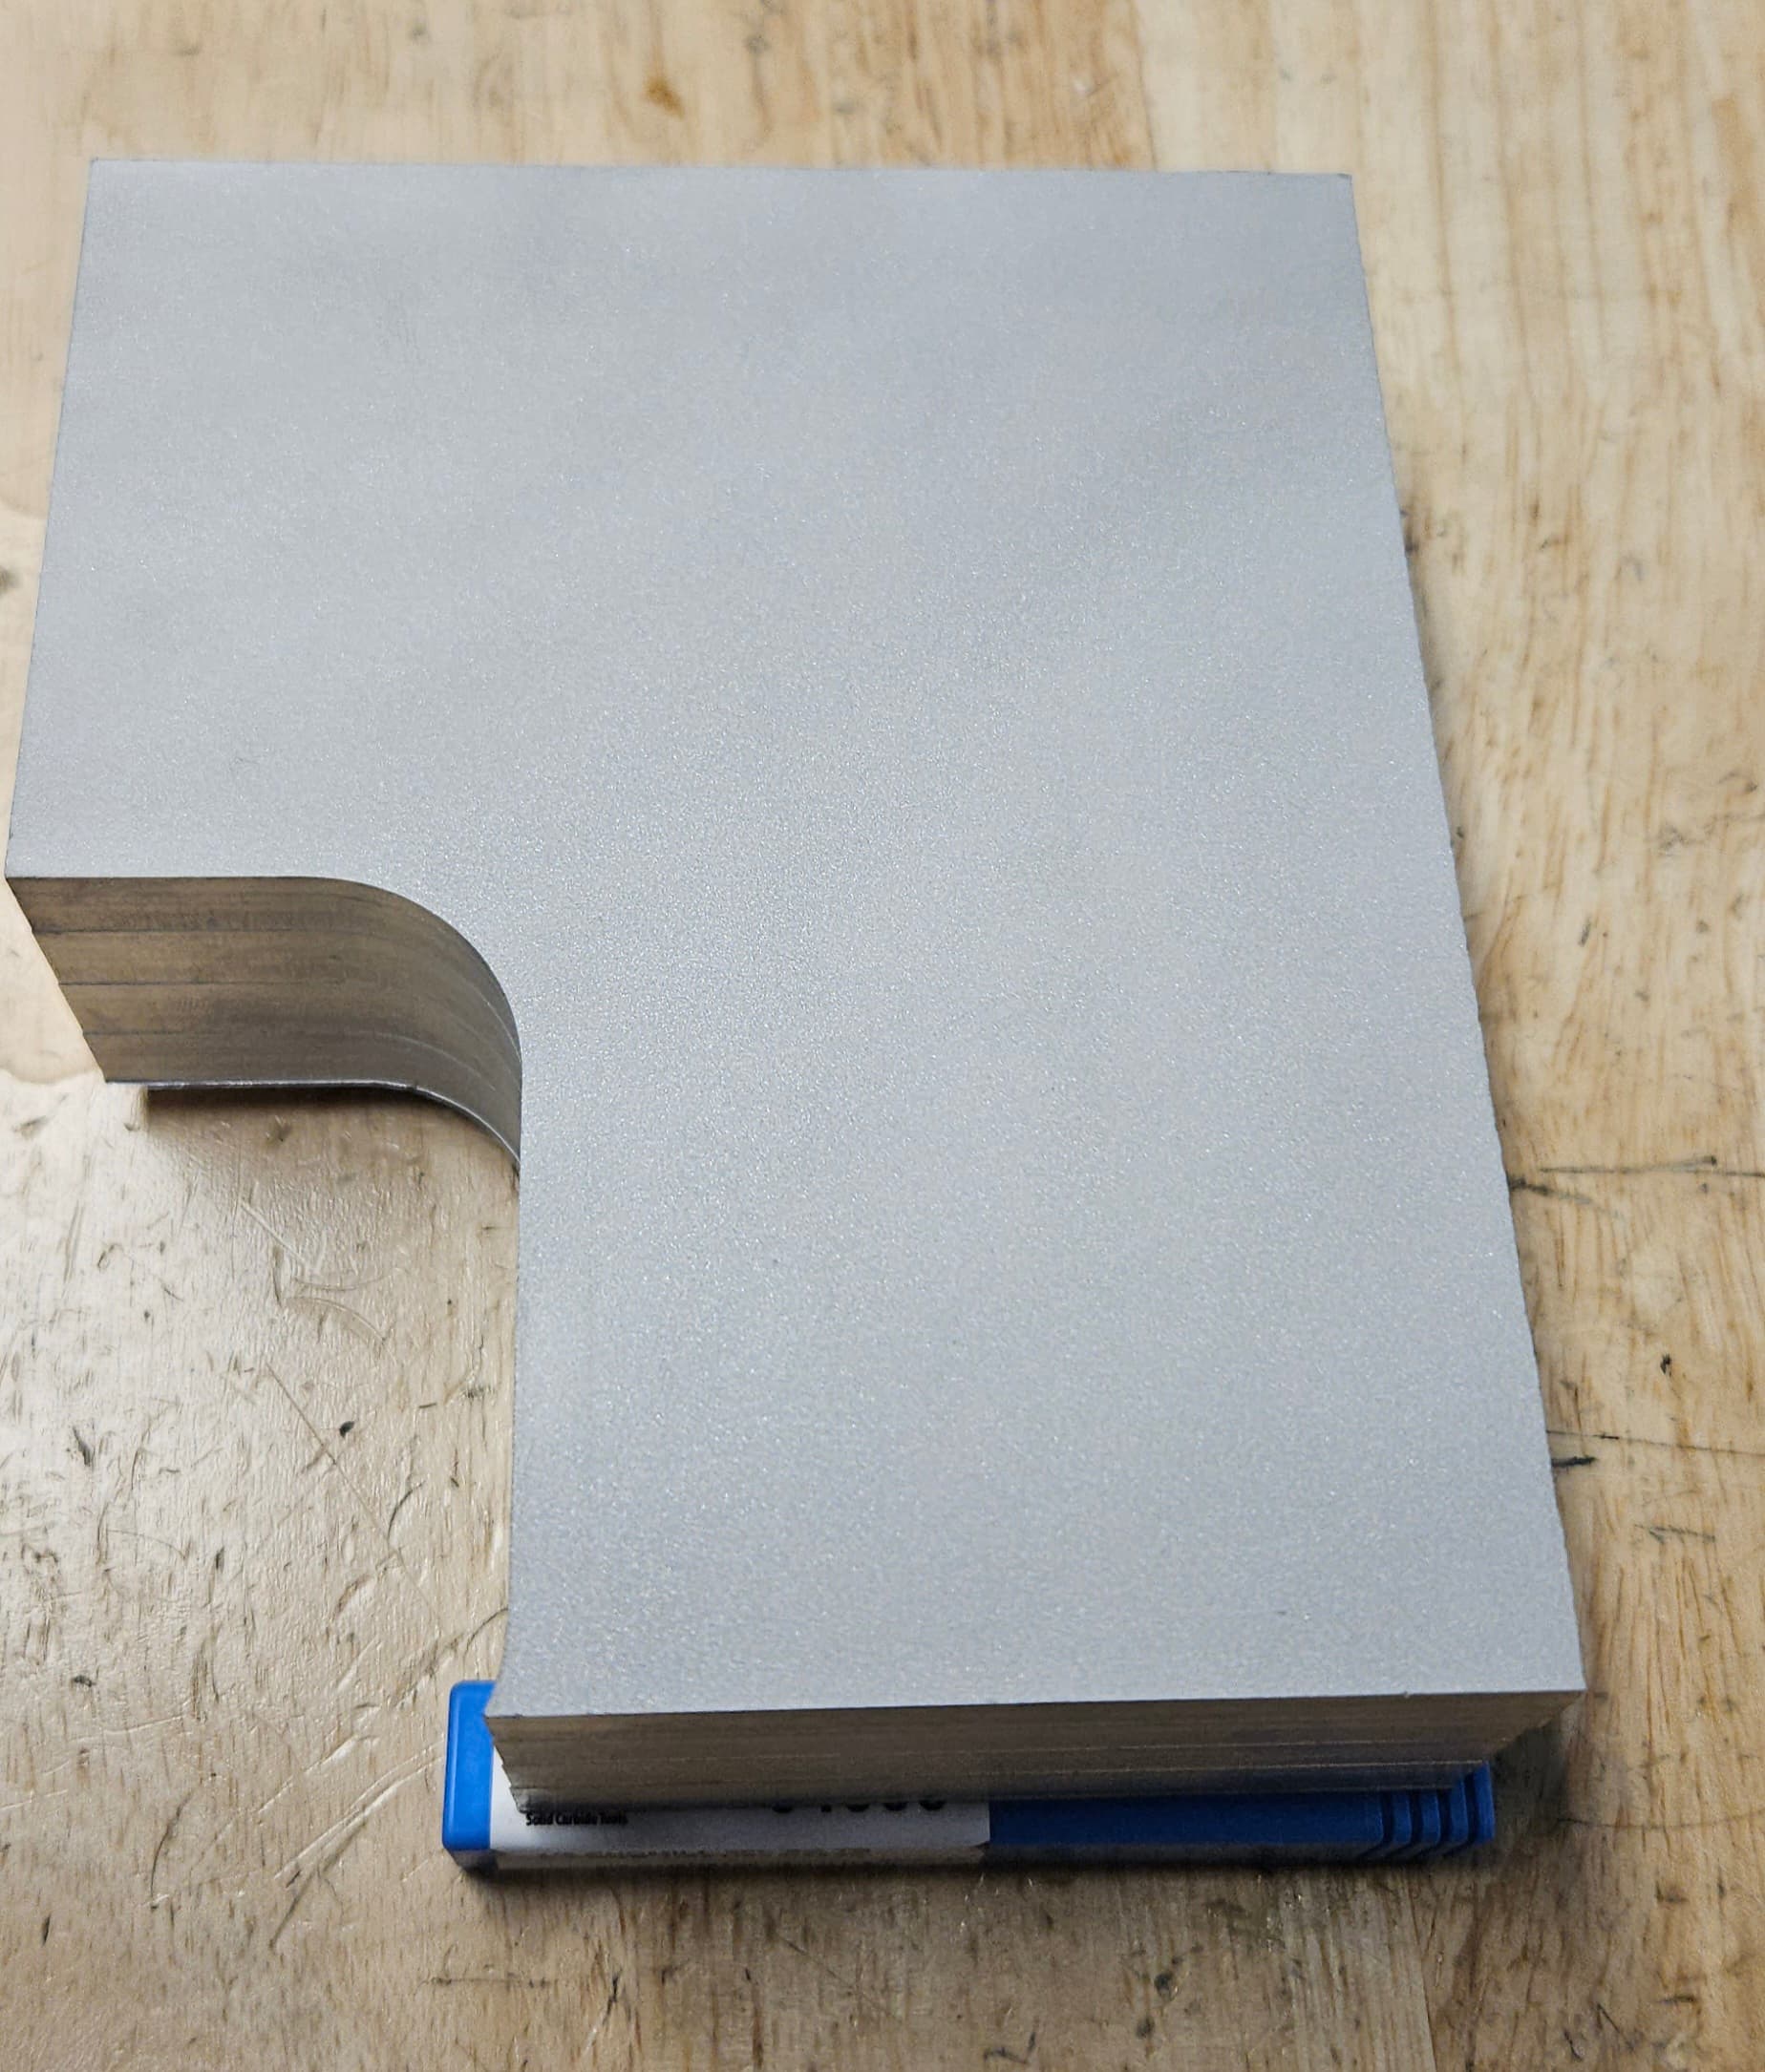
Got a picture of an unevenly blasted surface. Even with slight variations such as this which is hard to pick up with a potatoe, there are coloration differences that can be seen.
Note: starting on the back right corner I did diagonal passes towards the back left.
I can see the diagonal gradients, this is so interesting !!!
Thank you for the information @beanns2 ![]()
I have a few questions for personal knowledge ![]()
Would the gradient more visible when doing anodization ?
What are the correct way of blasting the part to prevent those issues ?
Out of curiosity, did you blast this piece yourself for demonstration ?
This would mainly be an issue for the color (or no color). Since black anodizing would even the look out a bit. However it shouldn’t make it worse but it wouldn’t remove it either.
Keeping the passes as even as possible, higher grit/more aggressive blasting can also help to even things out, and this usually helps with type 3 hard anodizing.
Yes, since I know here at my shop when we blast parts we need to try and keep everything as consistent as possible, and when they are not you can definitely see on the part.
Thanks for having taken time to instruct me such a thing, I had really no idea !
Wow — this project turned out amazing! Congrats @Rico
I haven’t been around lately, but it’s delighting to see your work being inspirational and at the usual detail to every aspect. Lovely ![]()
Wekcome back !
Thank you for the nice feedback ![]()
I am now waiting for your URSA keycaps to adapt one of the boards with the EC PCB and plate that I made ![]()
There is no worry though: both the boards are in good conditions, one at home and one at work.
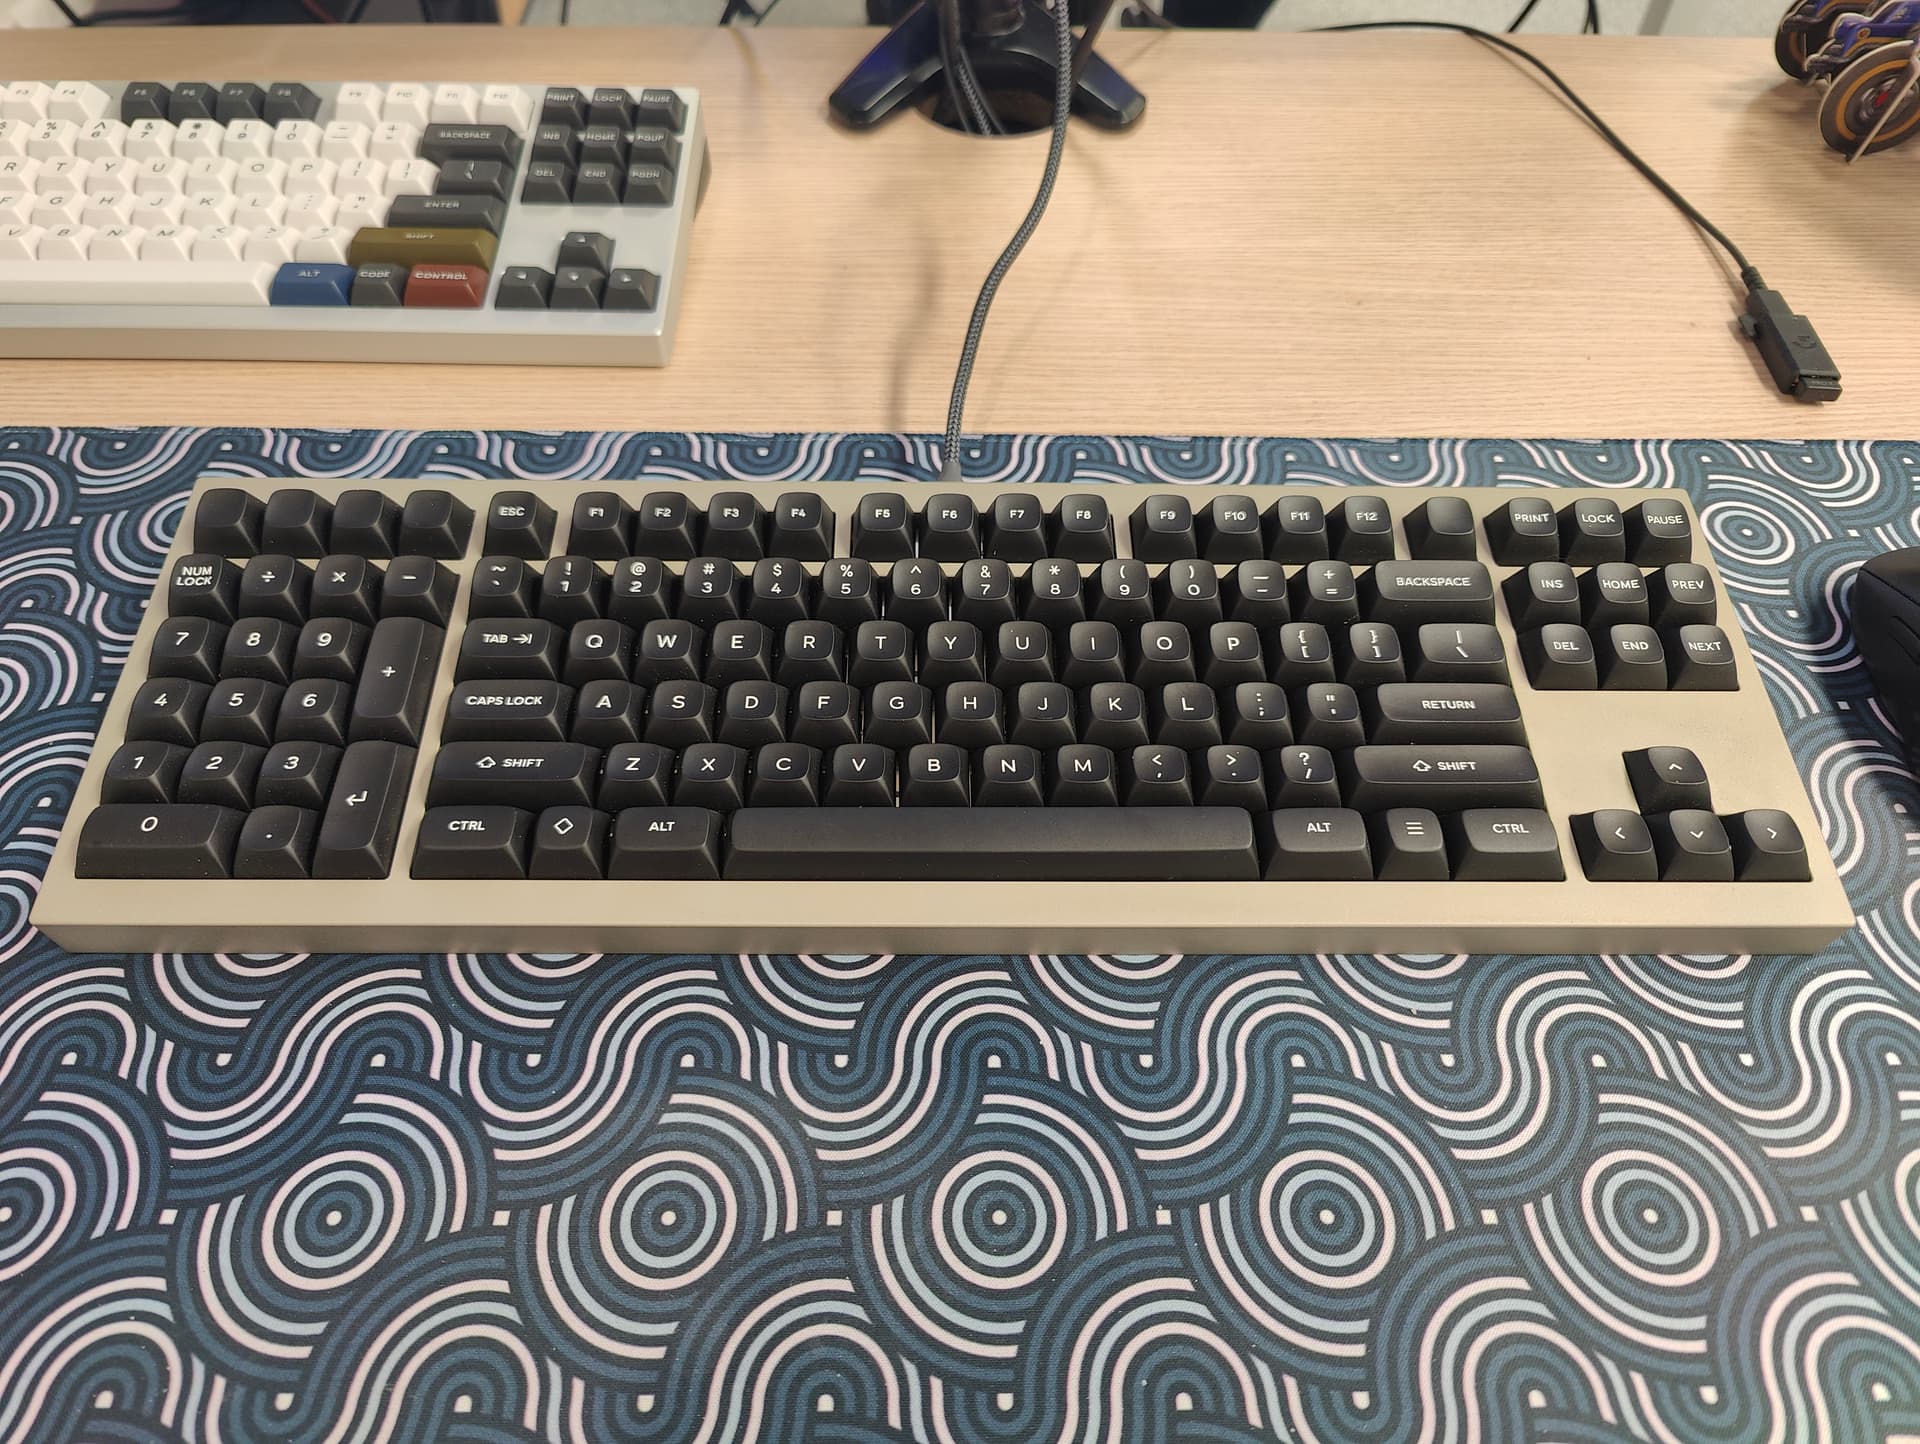
My URSA keycaps arrived last week so I could finally convert one of my boards to EC!
Here is the result:
I am in love with this setup and this is to a good part due to the awsome URSA keycaps that @Andreas designed!
This project is finished now … but I bought a lot of URSA keycaps: Classic, Minicom and accents.
I need to work on a new keyboard project to put those awsome keycaps to good use ![]()
stunning ![]()
Love seeing your work, and even going through the old projects. Very inspirational, if occasionally a bit daunting due to the truly excellent results! ![]()