Nice to hear. I likely won’t enjoy vints then since I’m addicted to the feel of 205g0.
Can you plz show the overpolished switches?
What is the effect on the switch feel?
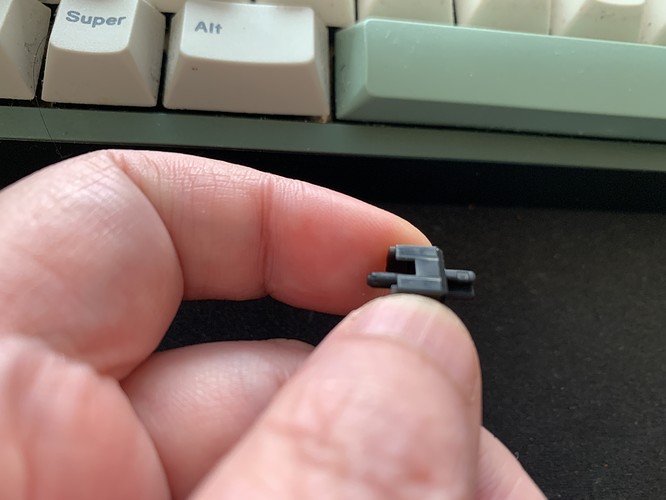
Over-polished switches had rougher lines along where top housing rails touch. Lines not only felt rough but looked rough as well with naked eyes.
I was able to fix the damage by repolishing twice to smooth out the lines, once with just diamond paste then again with baking soda+PG, so they now look like other polished switches.
This is what the lines on a fixed switch looks like now. If you look carefully, you can see that lines are pretty deep but, after smoothing with finest (diamond paste) and softest (baking soda) abrasives, lines are now only faintly visible unless at certain angles against the light like in this photo.
How do they feel now? Like…
Thanks, so would you just recommend a single-pass diamond paste or two-pass?
Also, what do you use to dilute the diamond paste – water or PG?
I recommend going with single-pass of diamond paste, no dilution. It’s the simplest, least surprise. Other methods call for dilution which gets complicated.
I have two issues with the diamond paste:
- Undiluted it is very thick, I can’t find a way to apply it evenly
- When I dilute it with water, I have to do the application and the polishing itself in a short period of time, or else it dries out and then it seems to be less functional
Are you using the same brand of diamond paste as I’m using? I’ve no problem using diamond paste as is. Yeah, diamond paste don’t mix well with water because it’s water-soluble, meaning it’ll break the paste apart. PG doesn’t evaporate which is why I use it.
Yes, I think so. I am using this one: https://www.amazon.com/gp/product/B004HR5PJ8/ref=ox_sc_saved_image_3?smid=A1CU4YHM5NICIL&psc=1
The issue is it sticks to the brush more than it sticks to the plastic, and it falls off the brush in relatively big lumps
Maybe it’s from old stock. Since you don’t have PG, I think mixing in some toothpaste may be the way to go. Not too much though. Just enough to keep the paste on the surface longer.
To add to this crazy discussion, I’m going to try combining this method along with a massage gun to see if I can smooth out these scratchy vints I recently harvested.
Using the massage gun alone has yielded some great results, though I wonder how smooth you can get combining that with 0.5 micron polish.
Will report back after I have tried a few switches.
Be careful. With diamond paste, I think it’ll take only seconds to damage the switch if massage gun is used.
For sure! It’s going to be a bit of a stupid idea, but at worst I break 1-2 switches. Could potentially expedite the process and simulate a week+ of use. I want to see if JWK level smoothness is even possible with cherry switches (outside of a batch of godly vints which unfortunately are very elusive).
Going to probably run one for 5 seconds and one for 10 seconds. If it still works at 10 I might slowly try to work my way up to see if there are any differences in the results. On the lowest setting,my gun goes about 2000 RPM. So holding it under the gun for 5 seconds would be around 165 presses and 330 for 10 seconds.
Alright, so I tried a couple of things:
After applying the paste to the stem only, I went for 5-10 seconds, and there was little difference IMO between stock. (Switches were all cleaned using an ultrasonic cleaner and some detergent in filtered water.)
I tried a new switch then just upped it to around 30 seconds, same deal.
I then just said “screw it” and went for a full 90 seconds on the next switch, noticeably smoother.
I then put the next one under the gun for 3 minutes, really smooth! I then tried applying the paste to the housing rails, the contact point on the leaf, and the stem. This was potentially a bit smoother, but the results were fairly close to just applying it to the stem alone. Using an OP black as a comparison, the OP black was definitely a bit smoother than the polished black. Using a stock H1, however, I noticed that the MX black was pretty much on par with the H1.
The switches retained functionality throughout all of these trials. No issues with them registering after spamming them for a few minutes. Whether this will continue long term, who knows!
I’m just going to go for it and try to fill out a whole 60% board with this method. I have a crap ton of these switches lying around.
Interesting result. As to why polishing wasn’t as effective as expected, some theories:
- Switch stem wasn’t massaged at all the different angles to force it to come into contact with housing. This is the most important one.
- Massager wasn’t the right type. Is yours kind that moves at least 4mm or kind just vibrates?
- Paste wasn’t applied properly. Did you put paste on stem legs? What about stem pole?
TBH, it doesn’t take me that long to manually polish by stepping on a board filled with diamond-pasted switches, two intense hours while coding, doped w/caffeine and high-RPM tune, or 8 casual hours while designing. I place a foam pad below the board placed upside down to prevent damage and I also use angled foam to make sure to at least four angles are covered.
Same method can be used to also cover the corner angles but I usually skip that because stepping the boards in those angles are not easy. Instead, I just roll a silicone ball over the board when I get tired of stepping.
Wdym angled foam? Like an incline that you rotate?
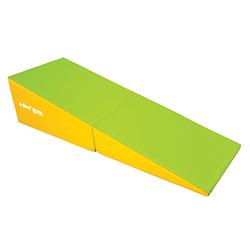
Sorry, I meant sloped or wedge shaped foam like this:
If you don’t have one, just stack foam layers into a slope. You’ll need one to four:
- wide slope for top and bottom sides
- long but narrow slope (like the picture above) for left and right sides.
- (optional) long and narrow slope like (2) but with only one corner low.
- (optional) same as (3) but other corner lowered.
You can get by with just (1) since titter-tottering left to right works decently. Top and bottom is just too narrow to do the same. To cover the corners this way, just step on one corner at a time. Seems overly complicated but the point is to polish all sides and corners however you can with what you have and not waste time building tools.
IMPORTANT: Make sure to have a sheet of foam under the upside-down board. The foam will protect the switch from too much pressure as well as catching top of the stem so pressure can be applied directionally without slipping.
This is good time to share my insight into what makes a polished switch feel scratchy:
- Stem legs - I think 60% of smoothness comes from legs. Doing a decent job with legs will be most rewarding. Do a bad job and it’ll feel like hearing grainy noise through your fingers.
- Bottom housing hole - if any polishing agent residue remains in this, switch will feel like shit or like stem is sporadically catching on something. I’ll give it 30%.
- Top housing rails - After polishing, you’ll see two lines on front and back of the stem. They’re from sort of rails on front and back of top housing rubbing against the stem. 10%.
The reason I don’t mention side rails is because I never had issues with them. Keyboards are never side sloped so it’s just front and back depending on whether the board is north or south-facing or not.
-
I usually make sure to run the massage gun in a circular motion to make sure that I account for the off-center presses, I’ll try running it in a half-sphere motion with these next couple to see if it makes a difference.
-
It is the gun that moves 4mm, the usual one people use to break in switches.
-
I pretty much just treated it like I was lubing the switch. applied the paste to all 4 sides of the stem, the stem legs, though I did not try doing any on the stem pole.
I think the quality of the paste I have could also be a factor? Amazon sent me two tubes by mistake and told me to keep one of them, so I’m going to try the other (more expensive) brand and see if that makes any difference as well.
Yeah, so after 3 minutes at different angles and with polish on the stem pole, I think I’ve gotten slightly better results. Still not OP black smooth, but in the ballpark of general JWK smoothness. I think this will be sufficient after lubing and filming. I’m going to try this method and fill out a whole board.
Could very well be. My first tube of 0.5um diamond paste was wetter than the second although polishing result was about same.

