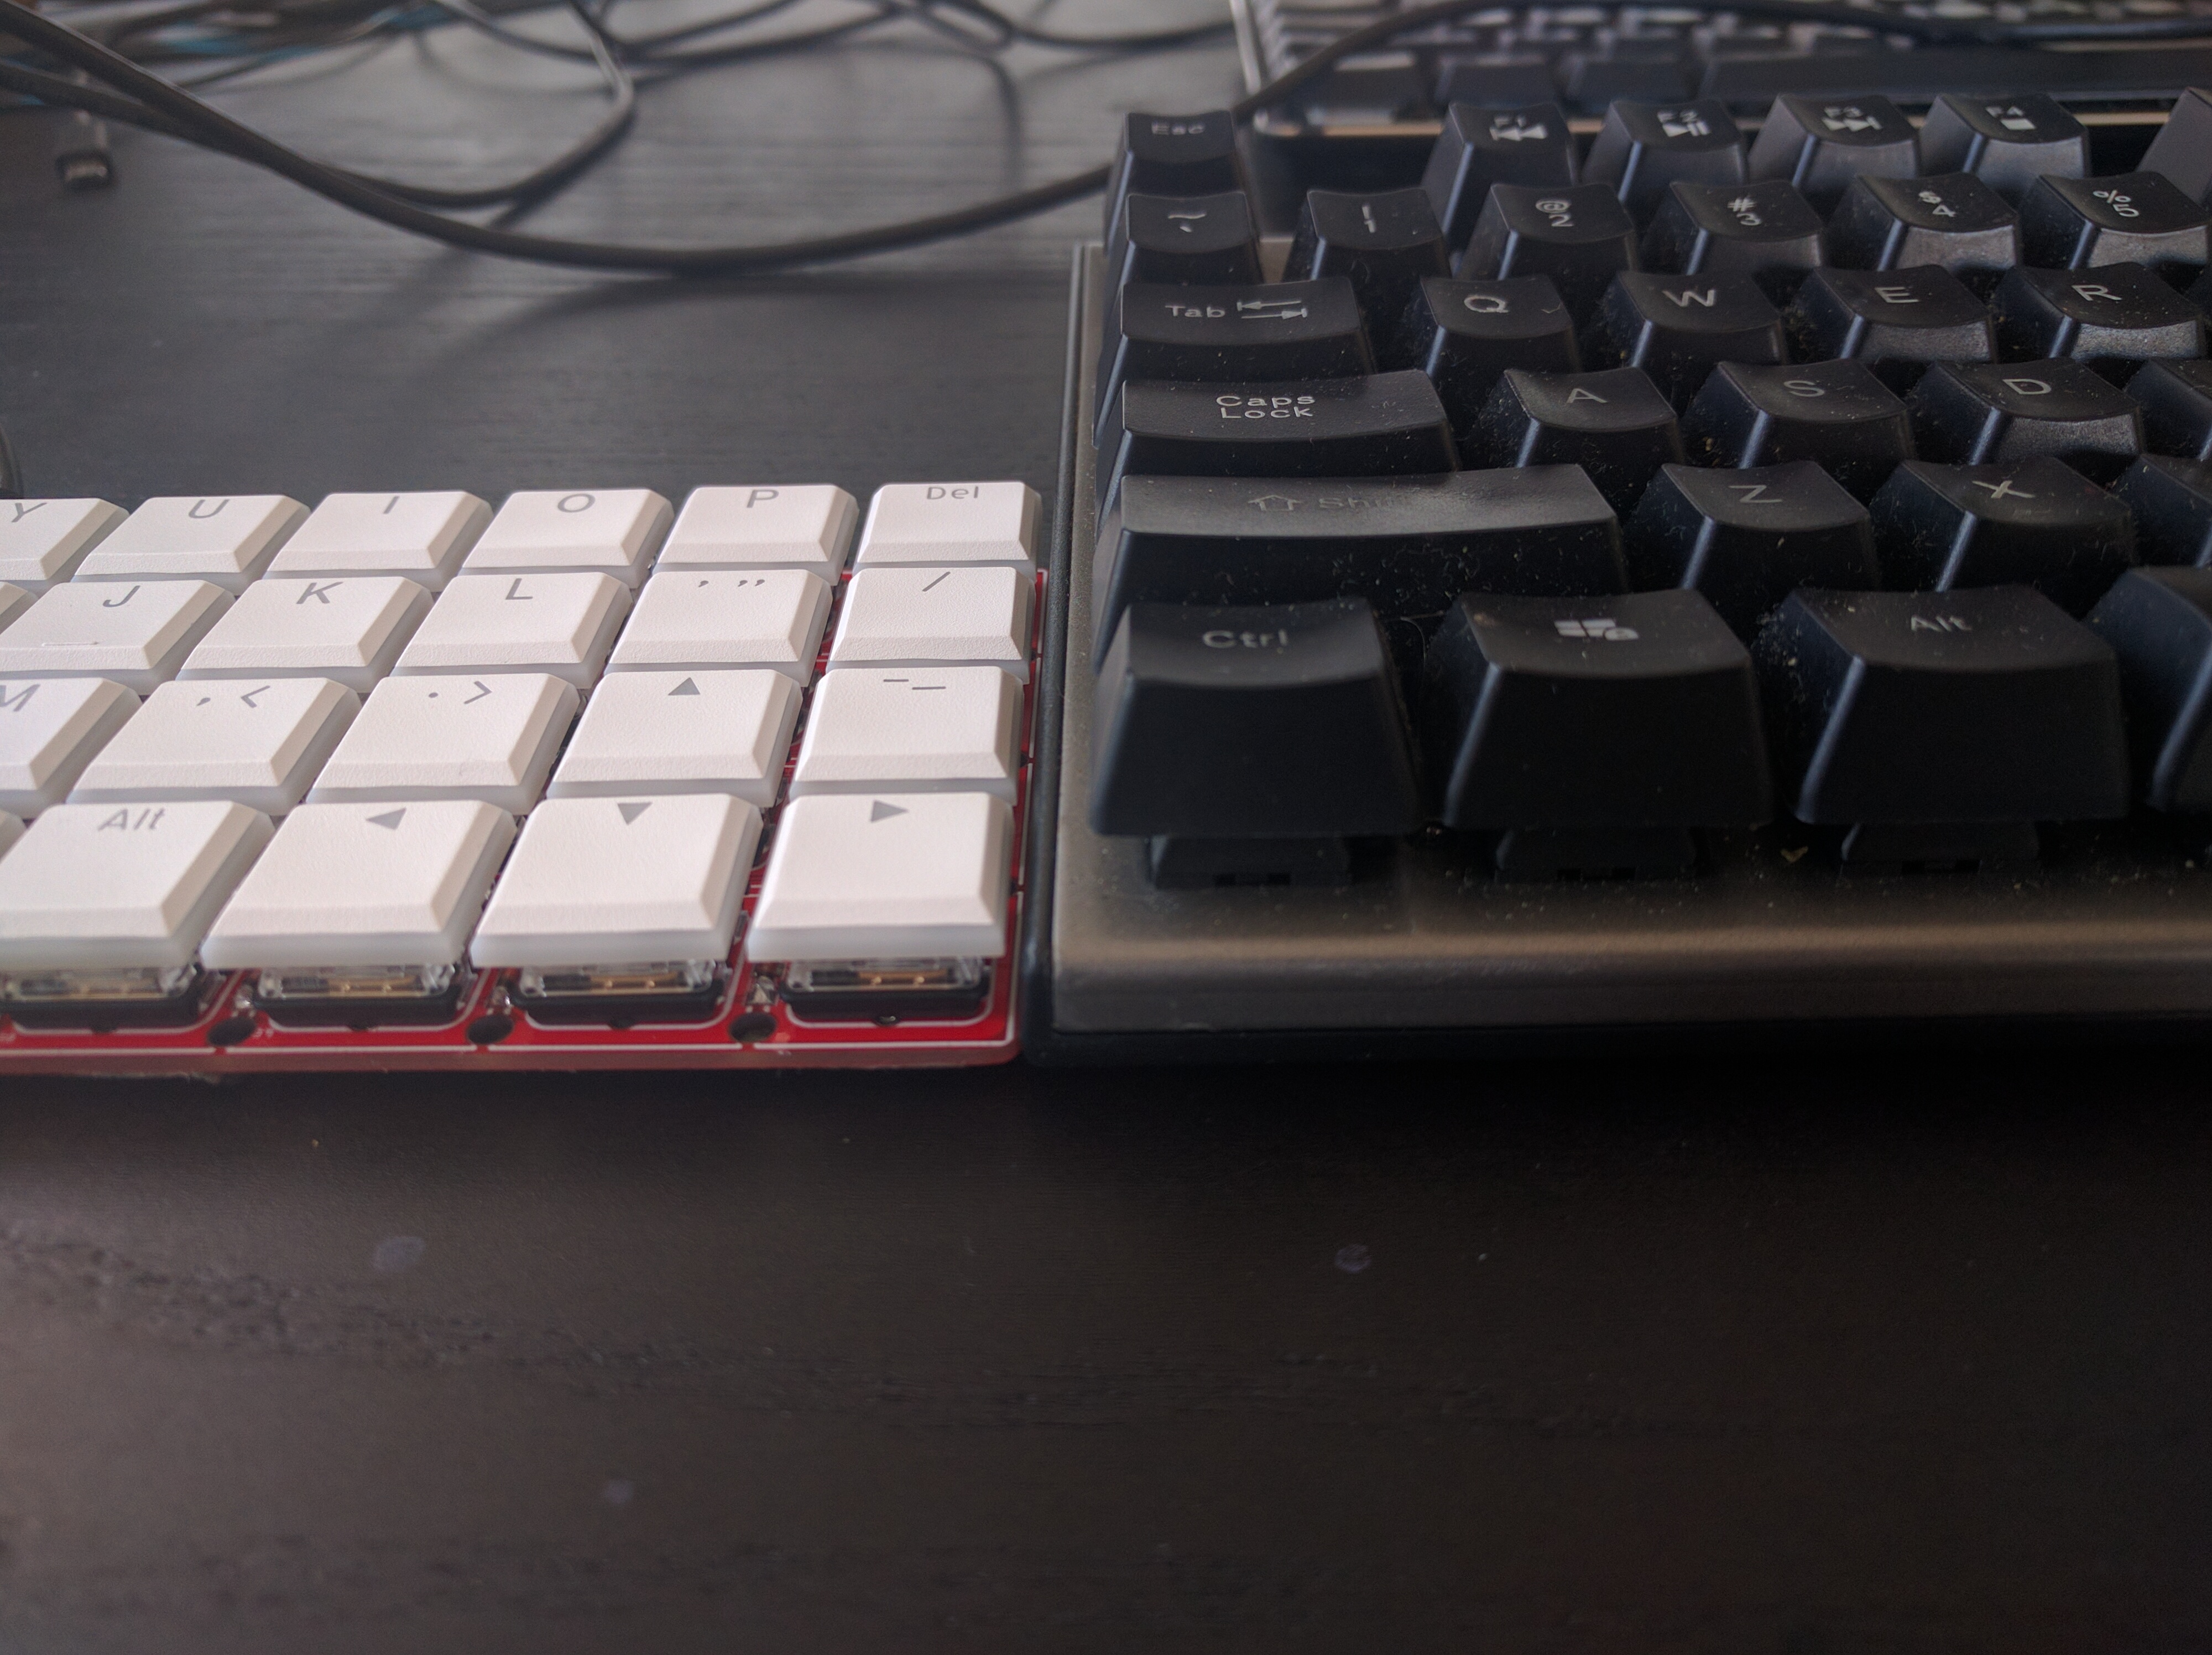
Every year comes this time when I get a sudden urge to acquire a new keyboard. I used to raid electronics shops to try and find something not too horrible, then I switched to online shops. Fortunately by the time mechanical keyboards became really popular (and expensive) I learned that I can make my own keyboards, so now it’s a new build. This year I decided to do a minimal one, so as to not spend too much on the switches. In fact, I decided to try and see how small I can make it without going for multiple layers or crazy chord schemes.
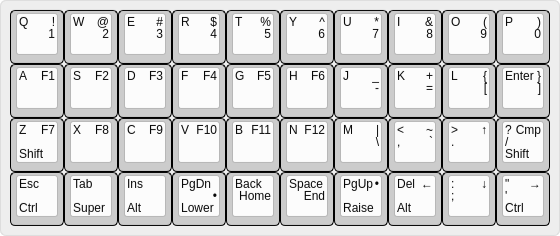
Of course I started with the layout editor. Based on my previous experiments with the 5plit keyboard, I came up with something like this:
The keys on the bottom row have two functions, depending whether you press and release them (tap) or use them as modifiers for other keys (hold). It’s a bit similar to the Space Cadet parentheses on shifts, except it’s not based on timing, but only on what other keys you press.
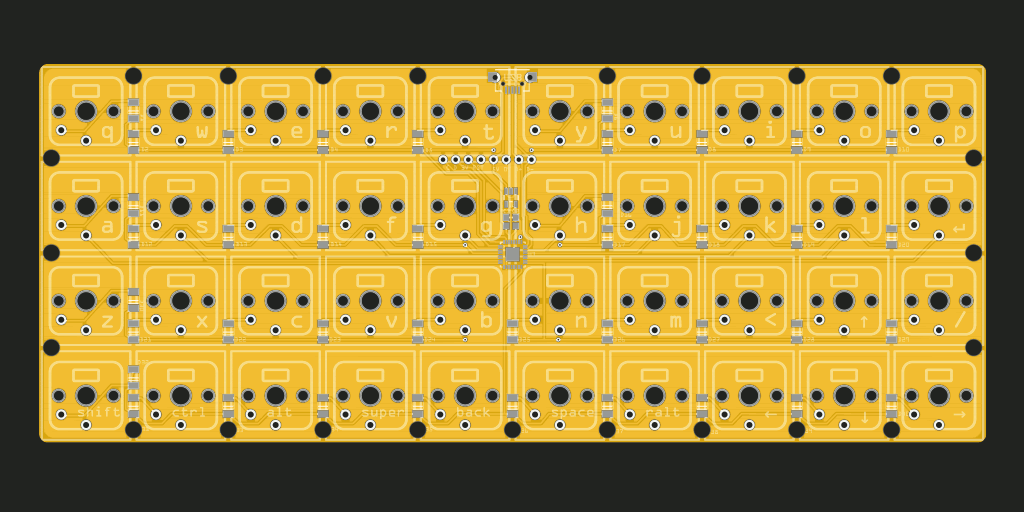
Apart from being minimal, I also wanted it to appeal to my preferences, which include it being as flat as possible and without any bezel. I fired up Fritzing and quickly whipped up a PCB for it:
I decided to use a SAMD21 ARM Cortex M0 chip, because it requires a minimal number of extra components — literally just two capacitors and a voltage regulator. It also runs CircuitPython, which makes it much easier for me to add the extra logic I will need for the hold/tap mechanism. I’m familiar with it from previous projects too, which makes things much easier.
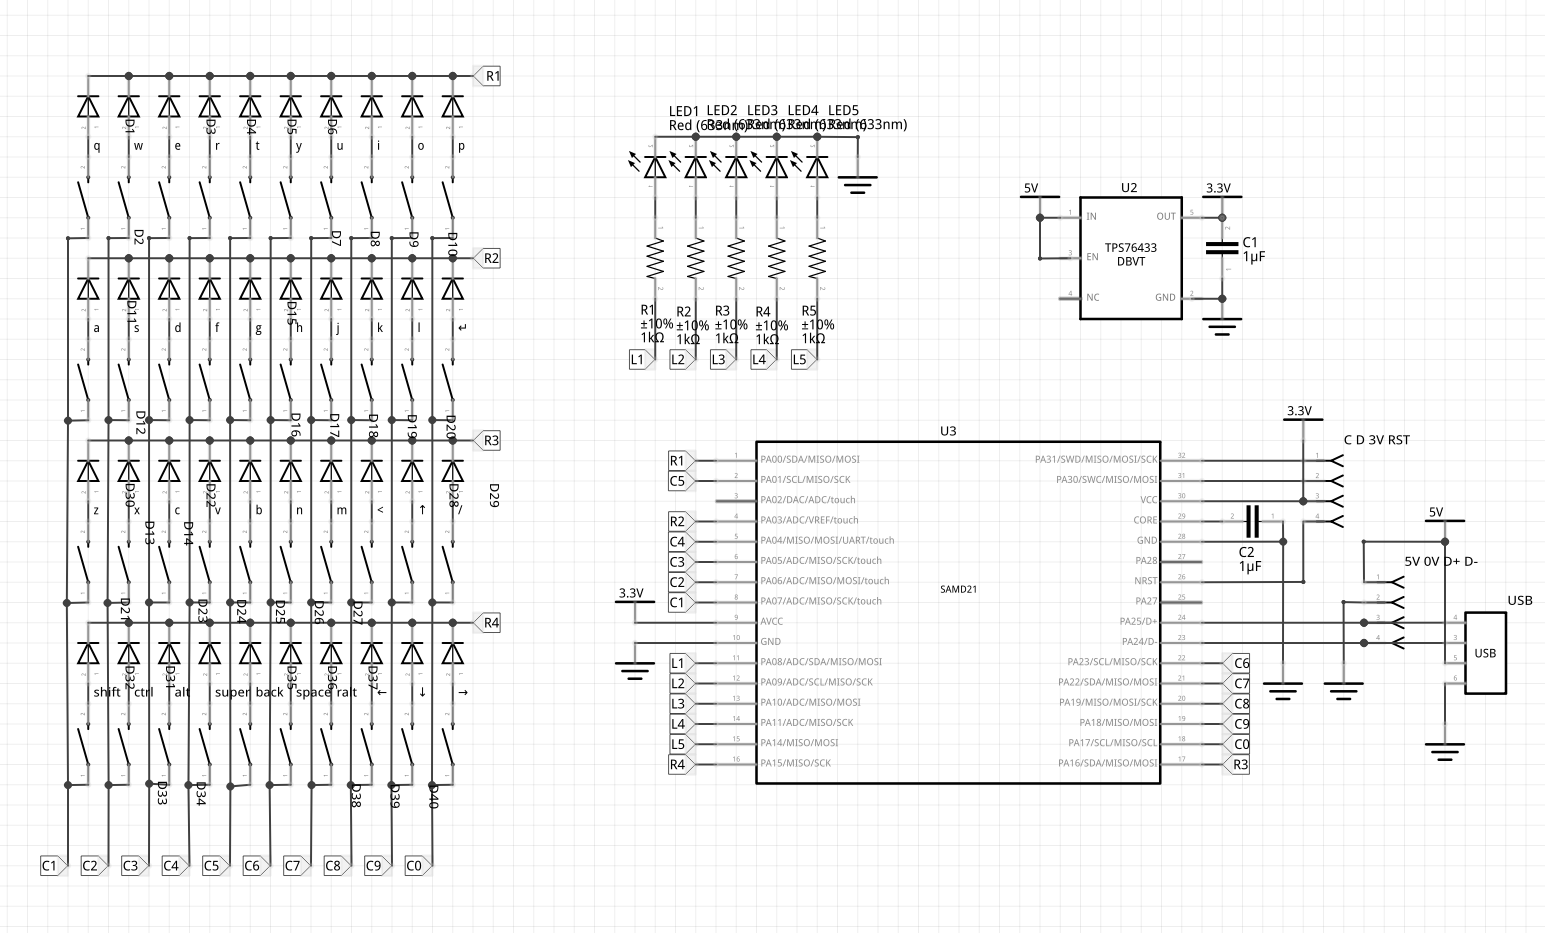
The schematic for all the connections is pretty simple:
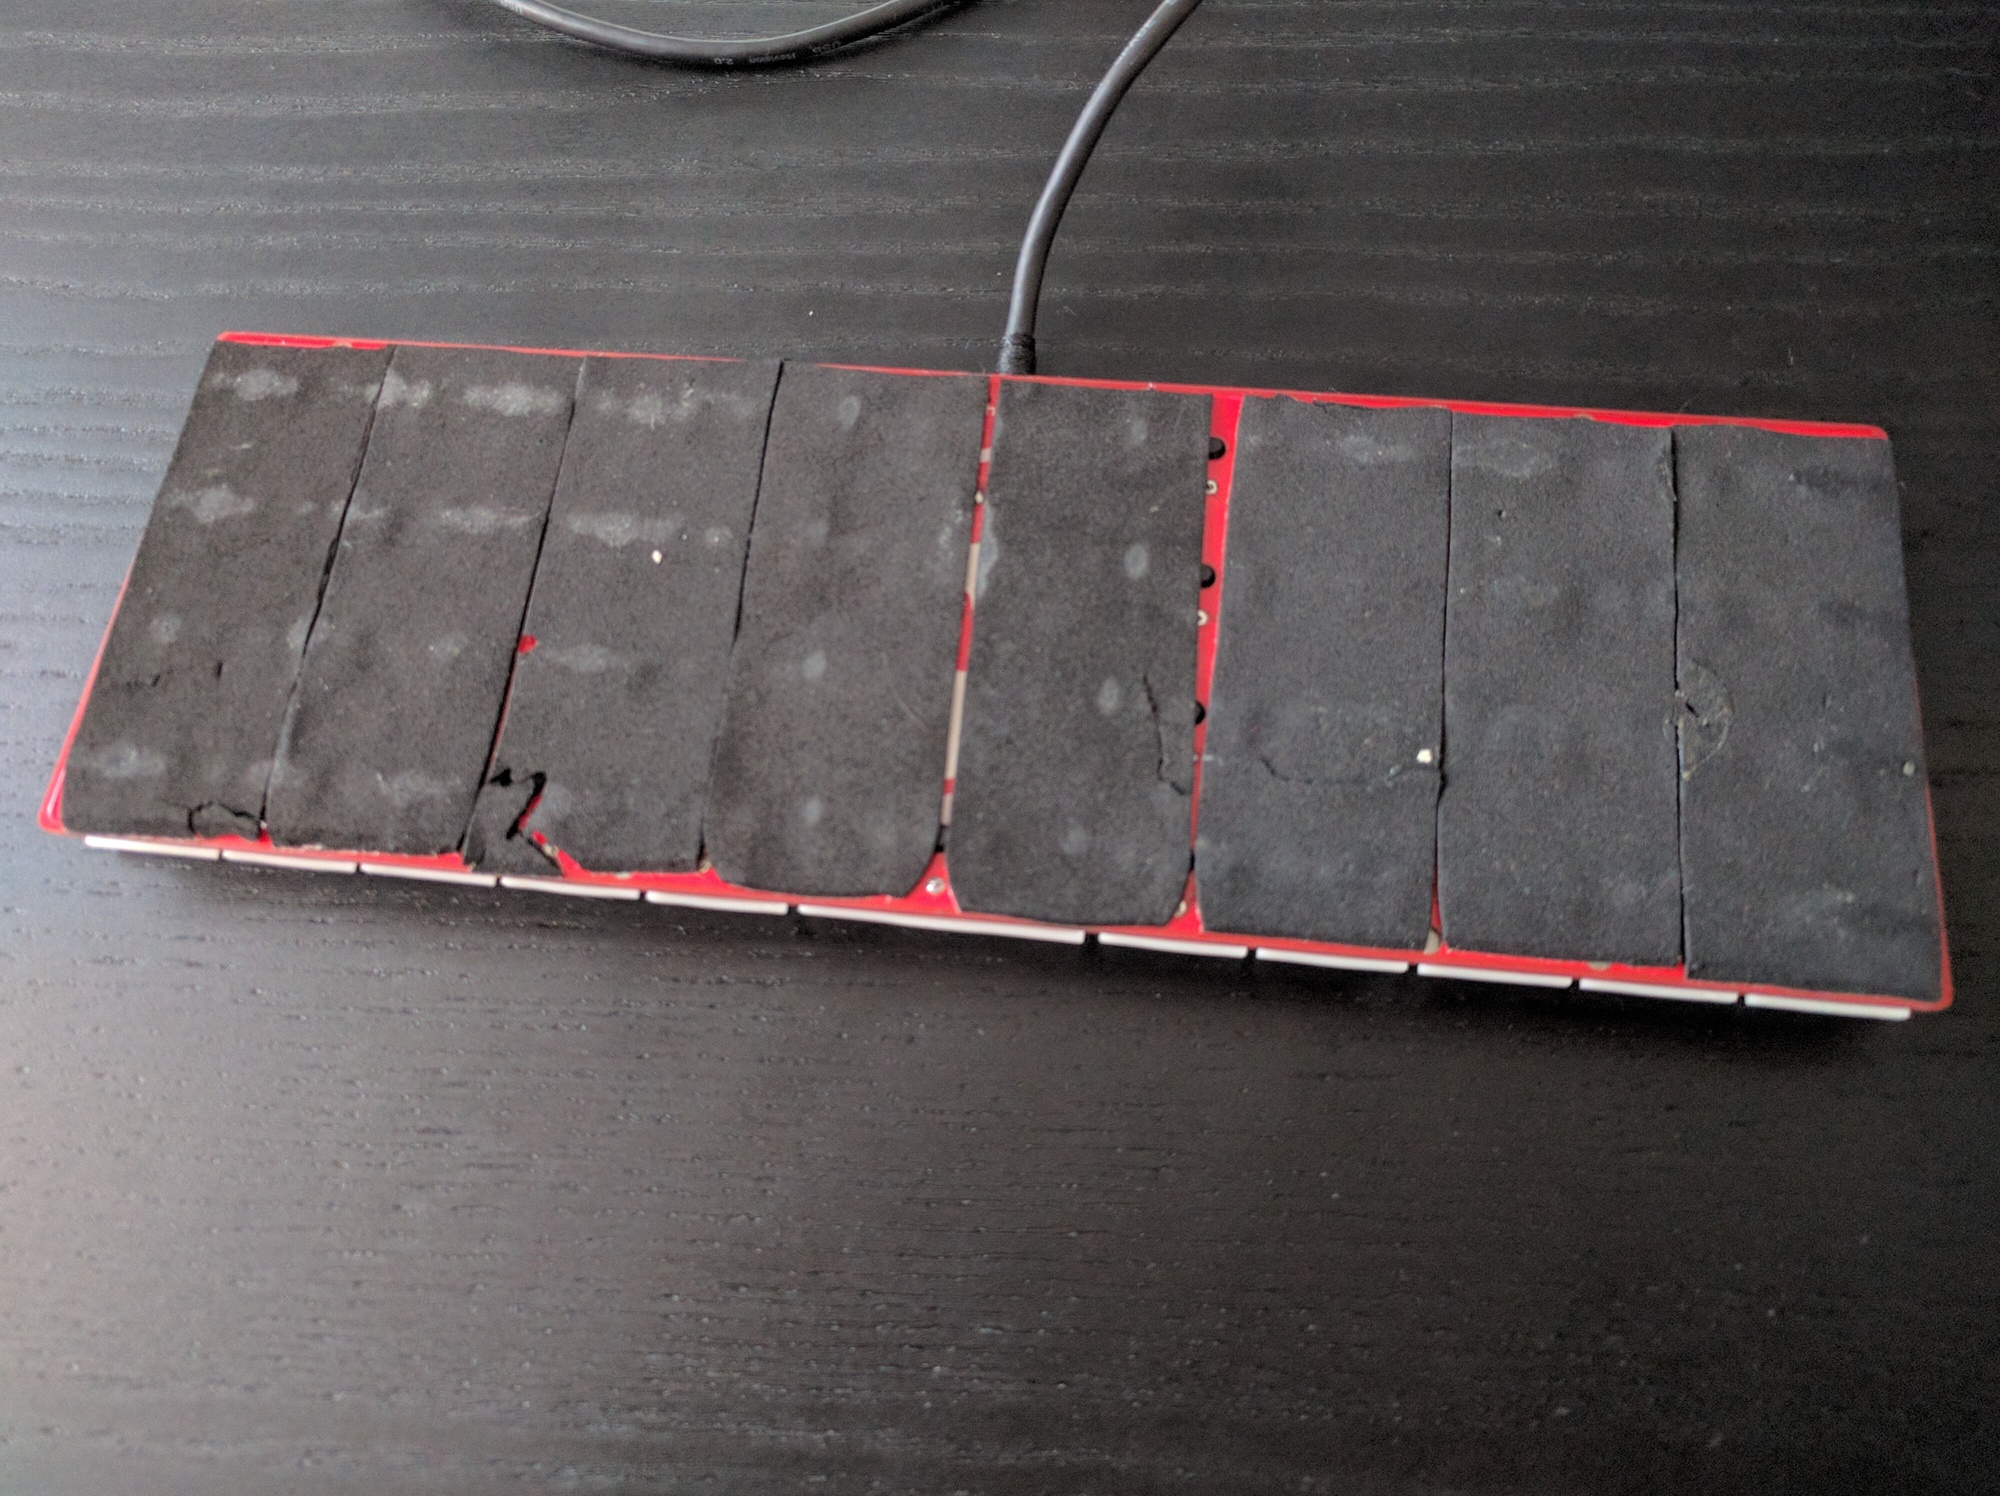
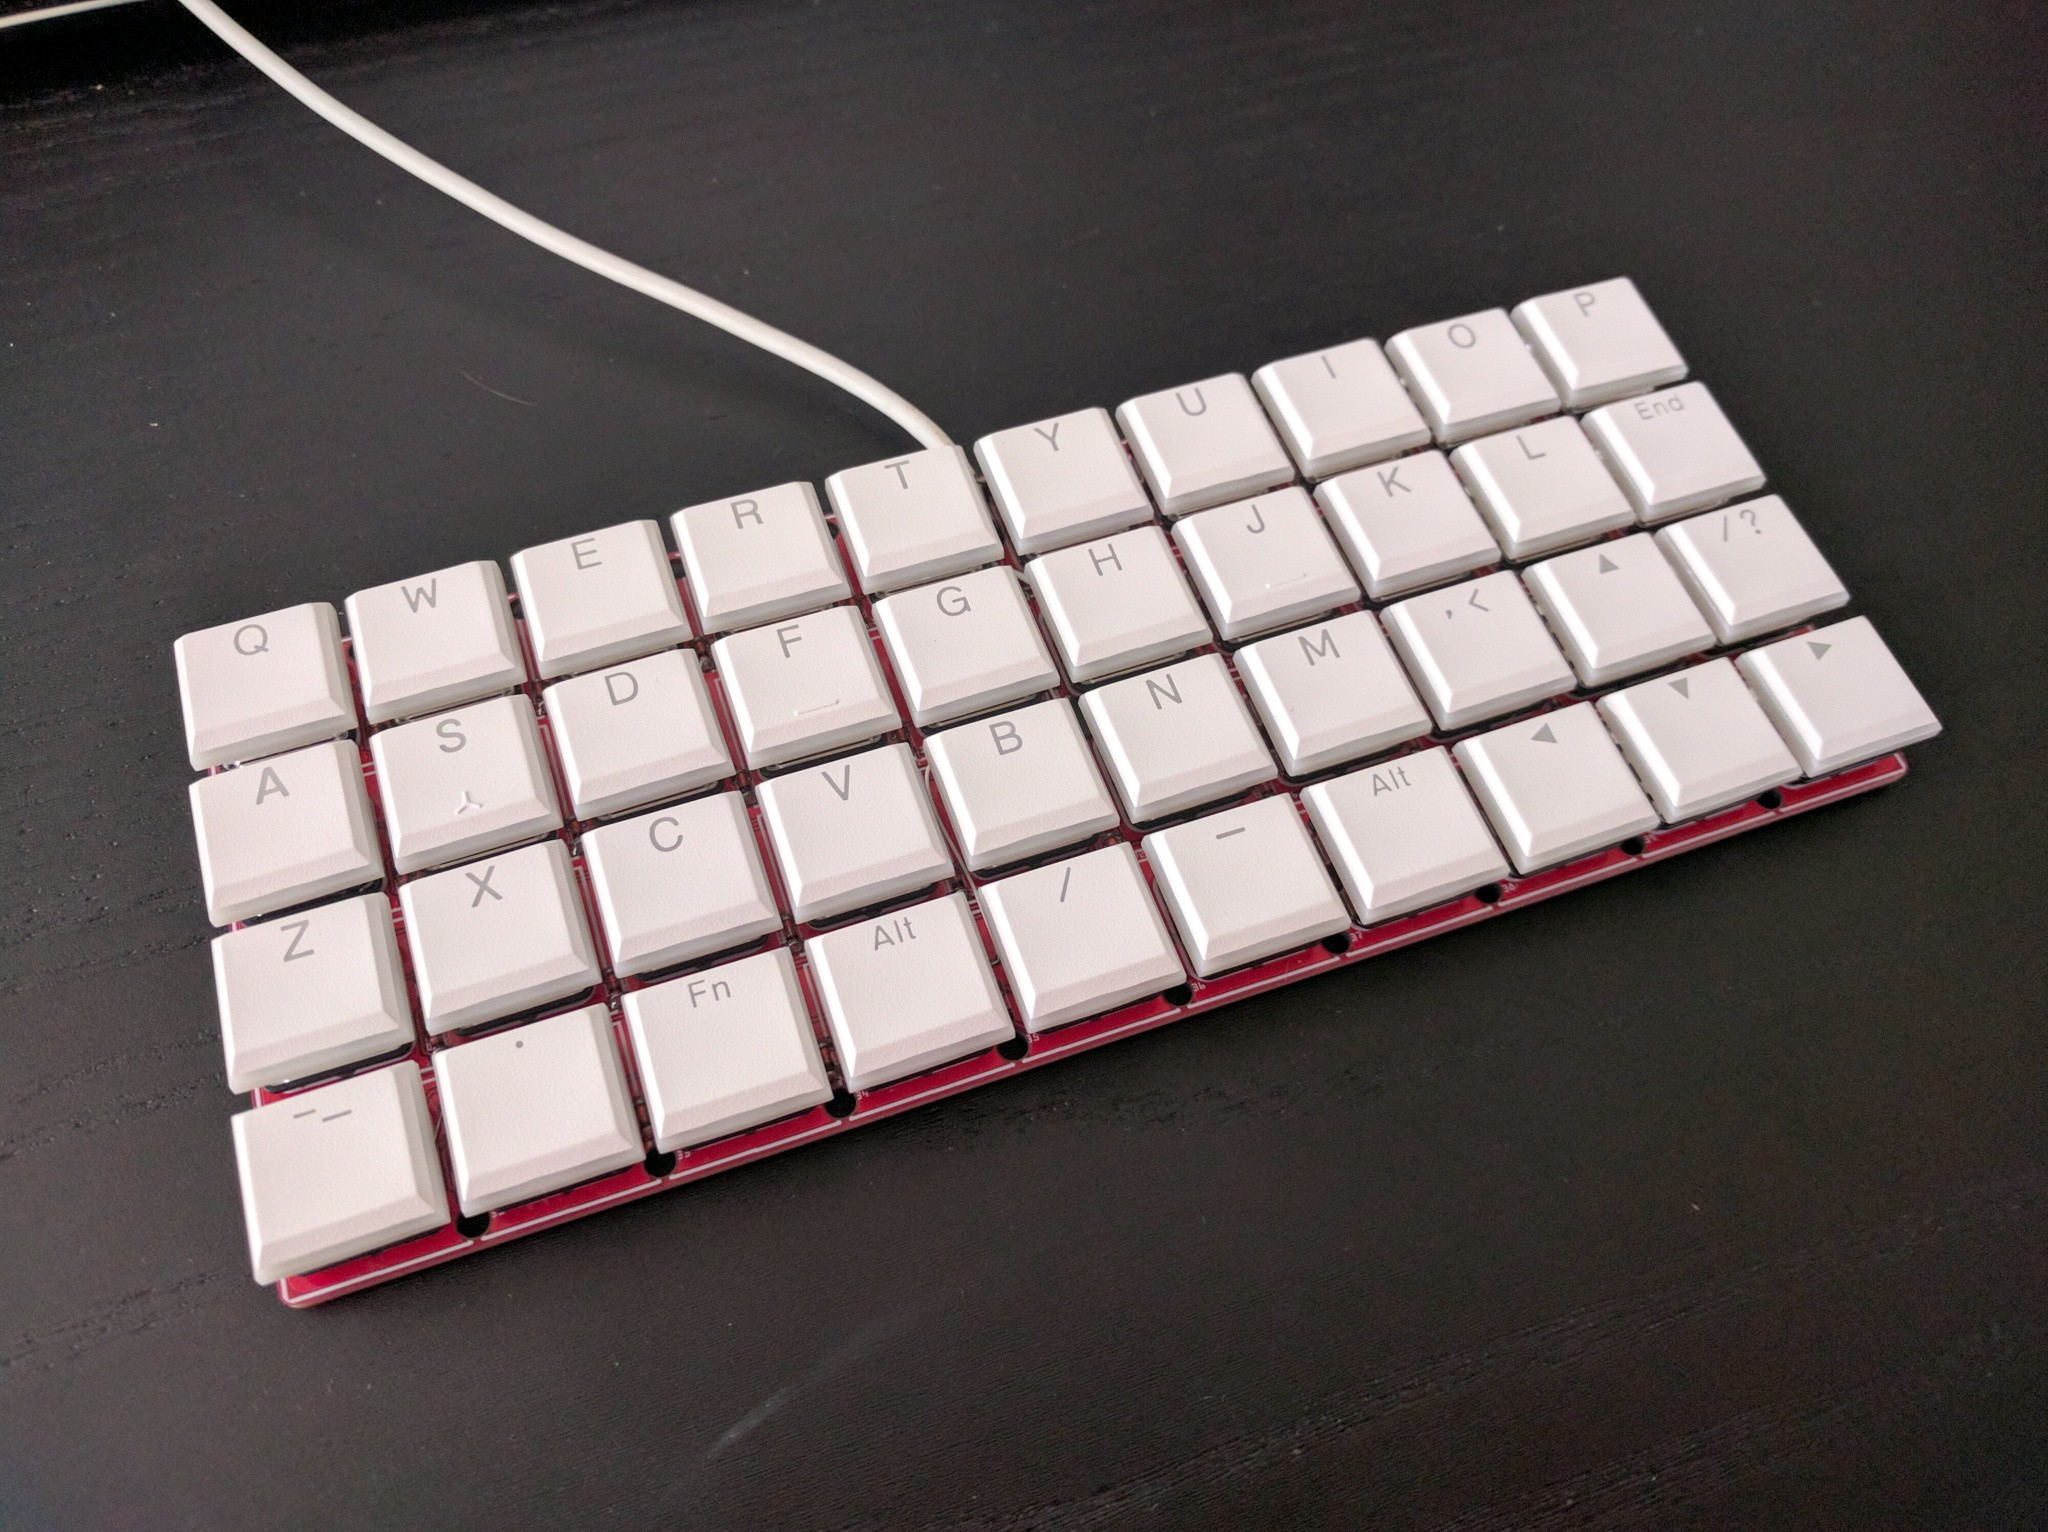
Then I ordered the PCBs at the usual Chinese fab, and went to Kailh’s Aliexpress shop to order 40 white choc switches, and a set of white double-shot key caps for them. Fast-forward two weeks until everything arrived:
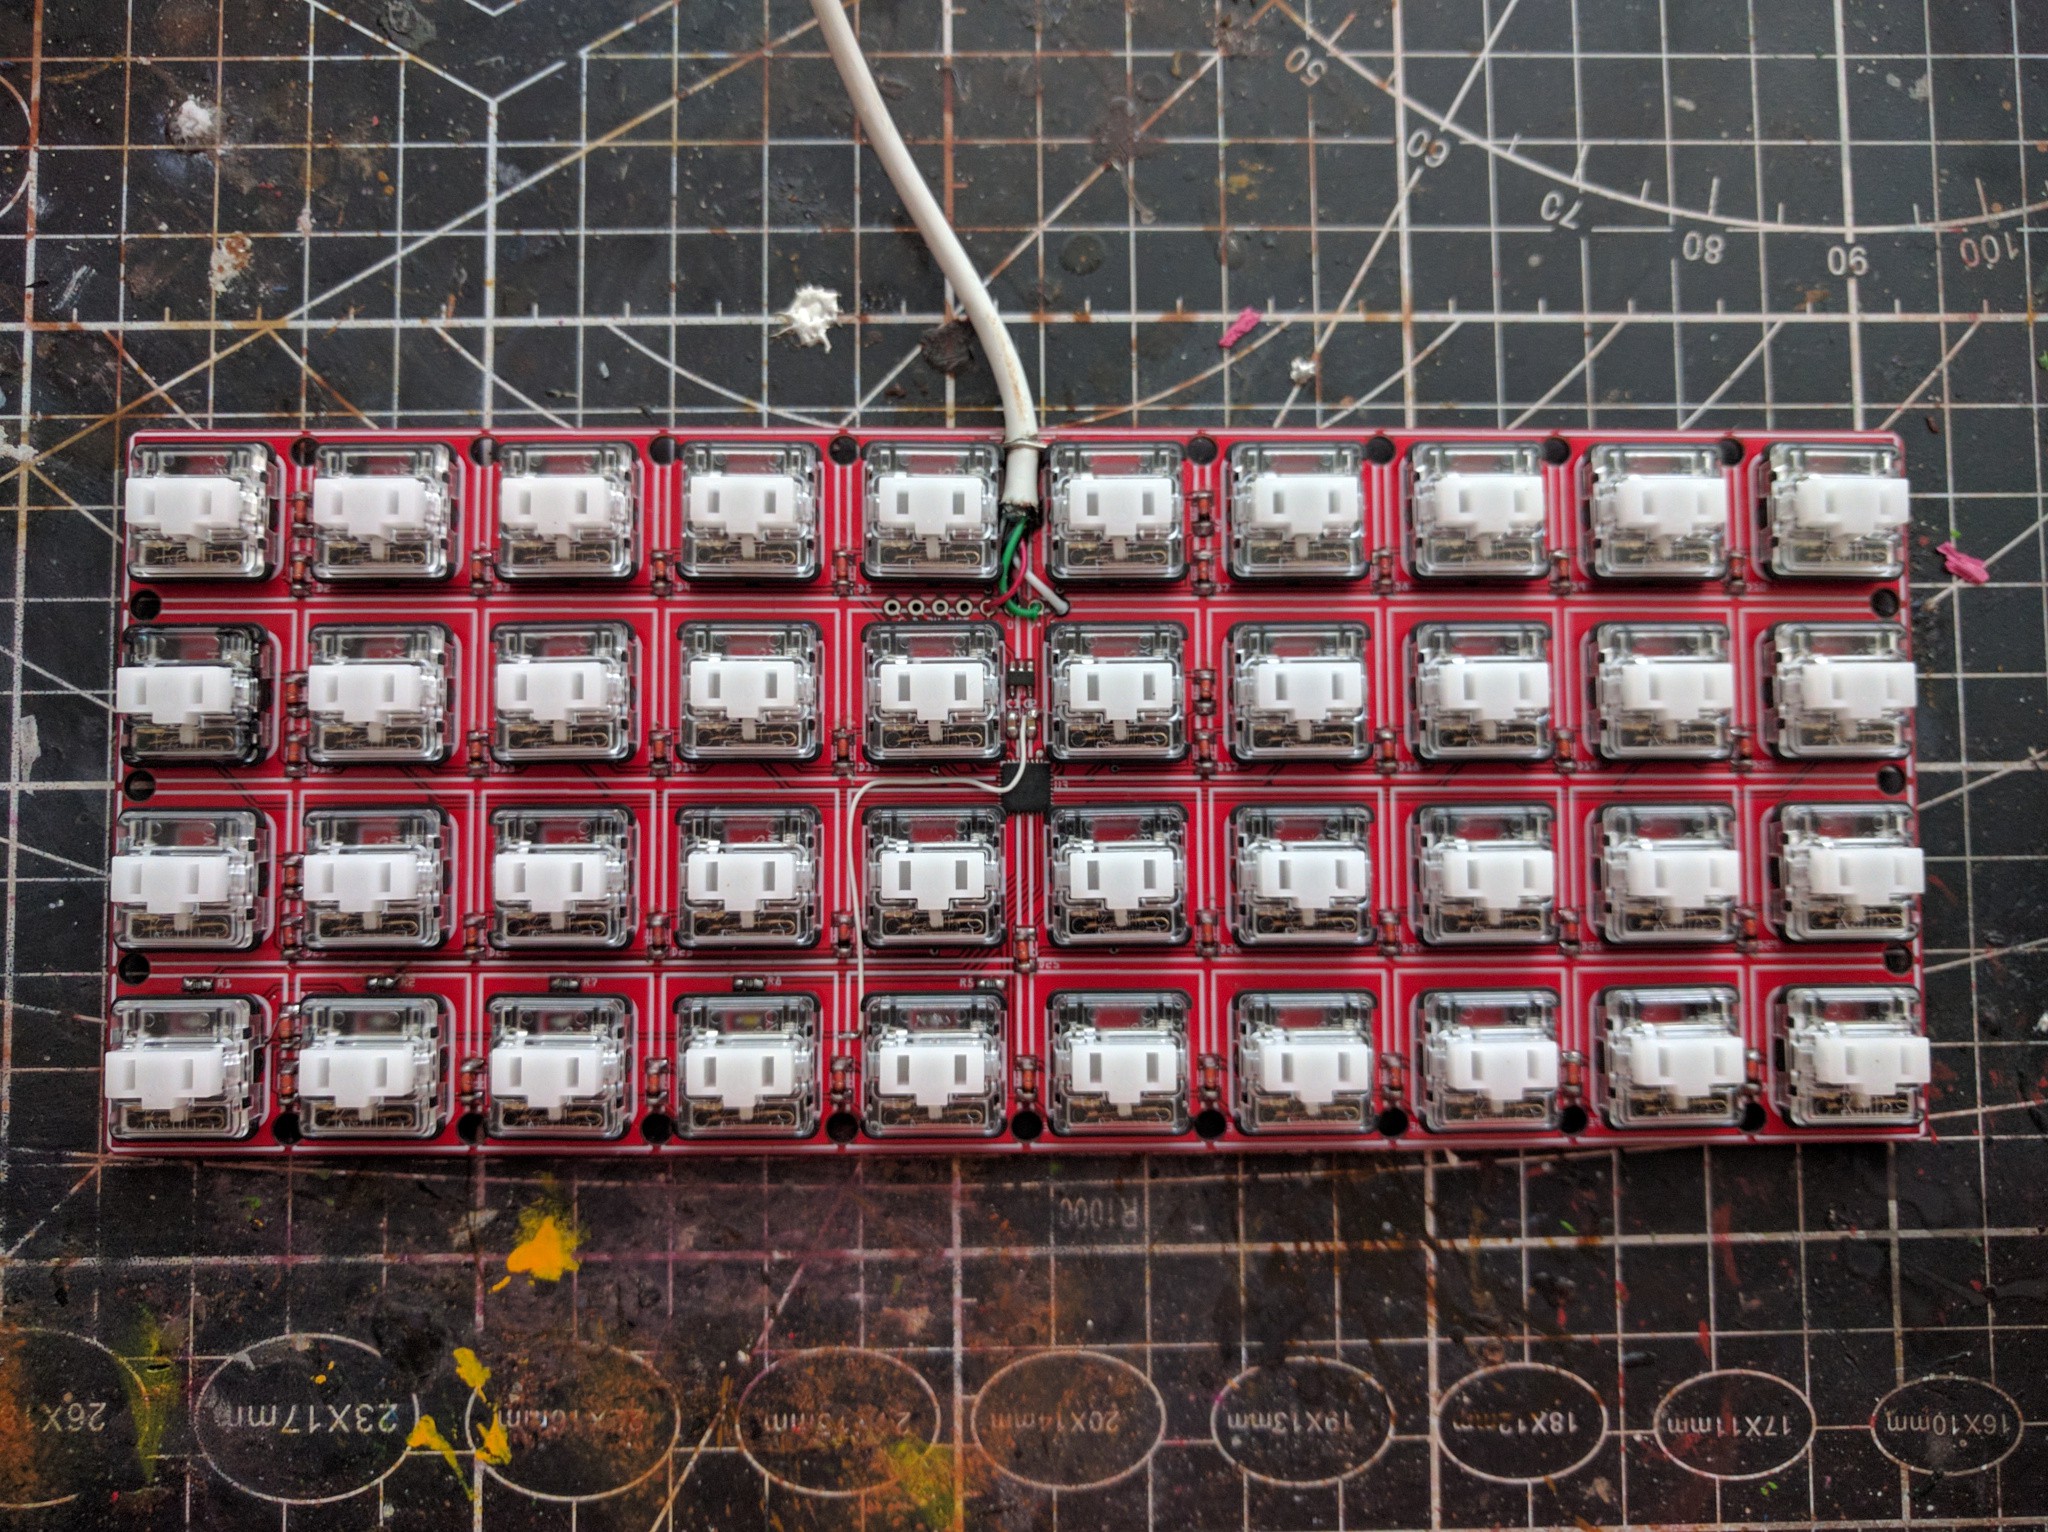
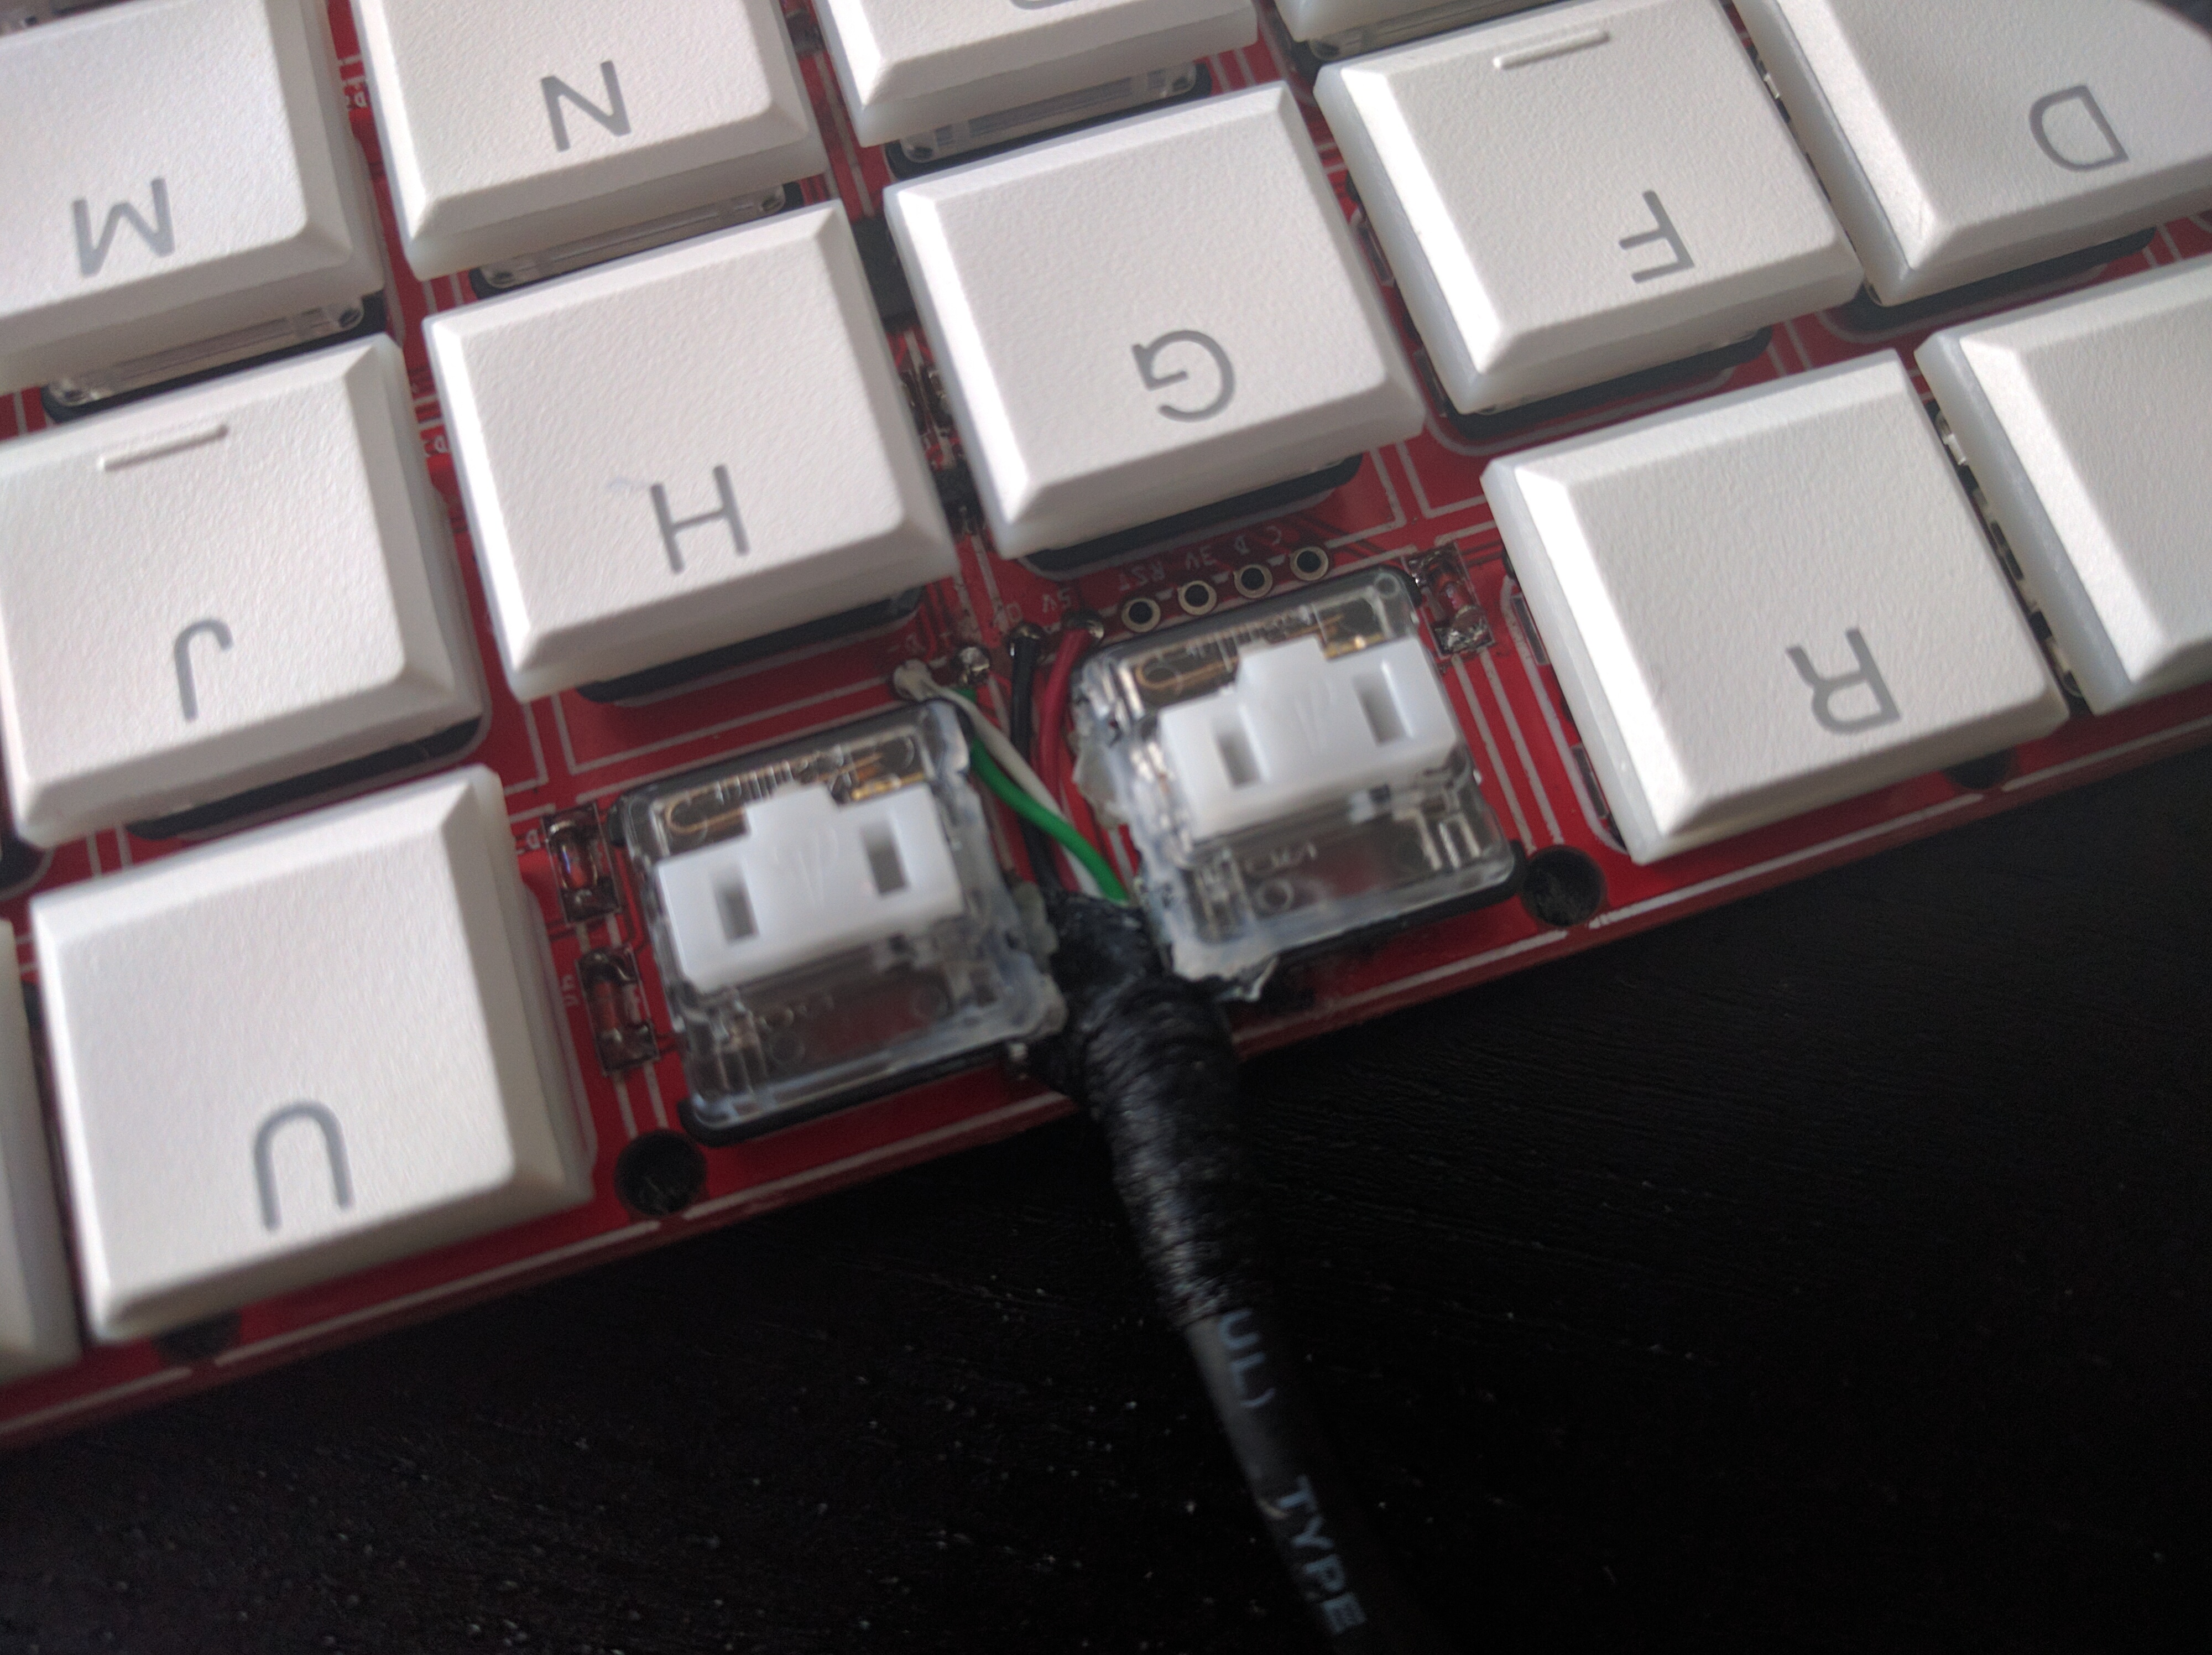
After soldering it all up and testing I discovered that I made a few mistakes in the PCB design. The diode for the bottom left key was shorted by a rogue trace, the D+ and D- USB pins were mis-labelled (but connected correctly to the USB socket, which I ended up not using), and I forgot to connect the LED’s ground to the rest of the ground. All that was fixed easily enough with a little bit of solder mask scraping and bodge wires. Then came the programming.
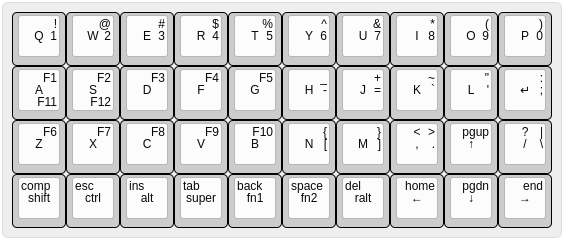
I flashed it with UF2 bootloader and a CircuitPython image, and wrote a simple 100-line Python program to scan the keys and send USB HID reports. All seemed to work fine, so I sat down and added a little bit more of state management for debouncing and for handling the hold/tap logic. In the process I discovered that I need to send the modifier keys as soon as the key is pressed, even if later on I end up deciding it was a tap and not a hold, so that I can shift-click things. That’s fine, because pressing and releasing modifier keys usually doesn’t do anything. After using the keyboard for two days and trying to learn to properly touch-type on it, I discovered that the Shift key is really badly places, so I came up with a modified layout, realizing that I can use the hold/tap mechanism on all keys, not just bottom row:
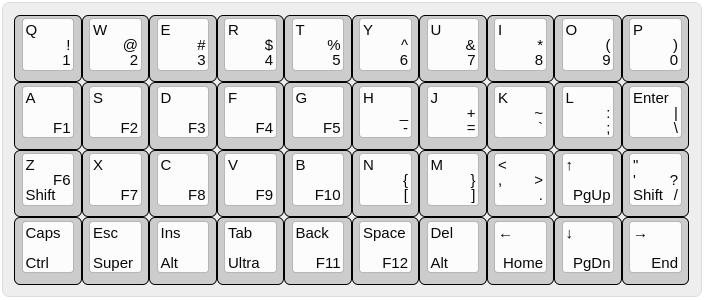
(Ultra is the layer switching key here.)
I’m using that keyboard for a few weeks now, and I’m pretty happy with it. It’s minimalism is especially good for forcing me to touch-type, since there is simply no room to move my hands, so they have to stay at the home row. I ended up not making use of the status LEDs at all (my CapsLock is remapped as Compose).
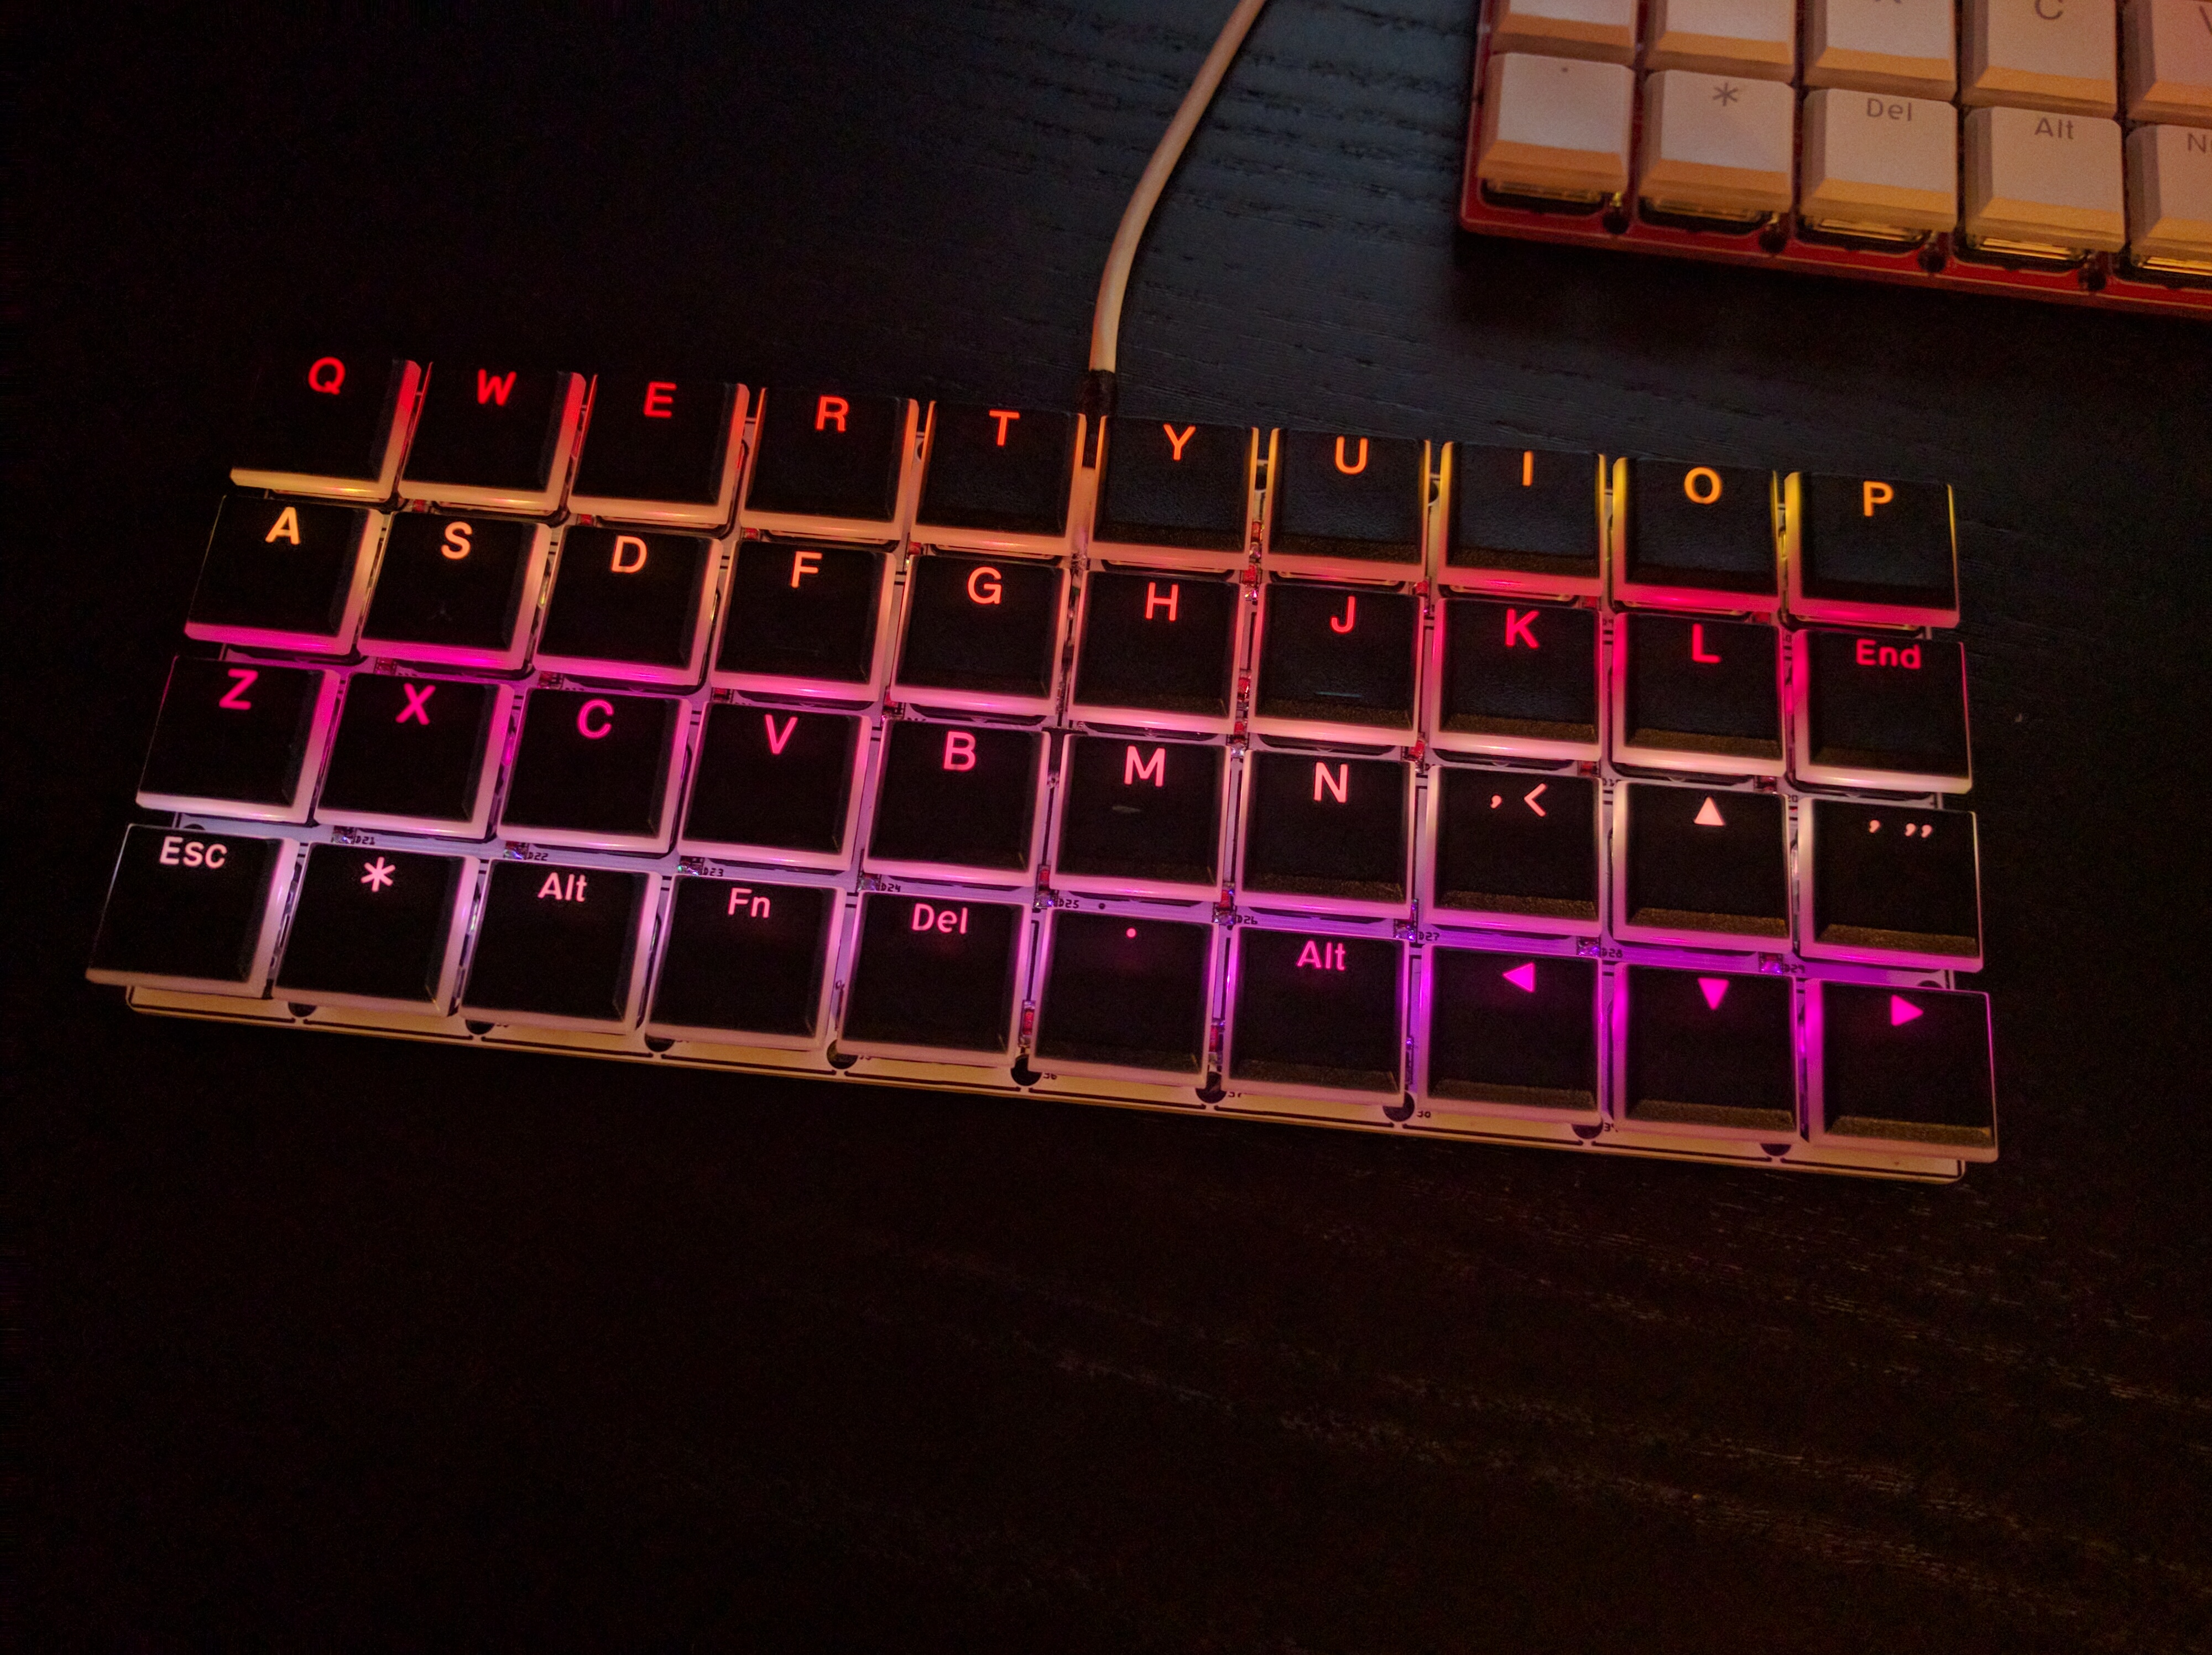
But of course there can be always improvement. Someone remarked on Twitter, that it would be great to be able to program colorful light effects in CircuitPython. So yeah, why not add some LEDs in there? I fired up Fritzing again, added a string of 40 APA102 smart LEDs in there, zig-zagging through all the keys, and ordered the PCB again. Two weeks later, it came, and I started assembling it, starting with the LEDs:
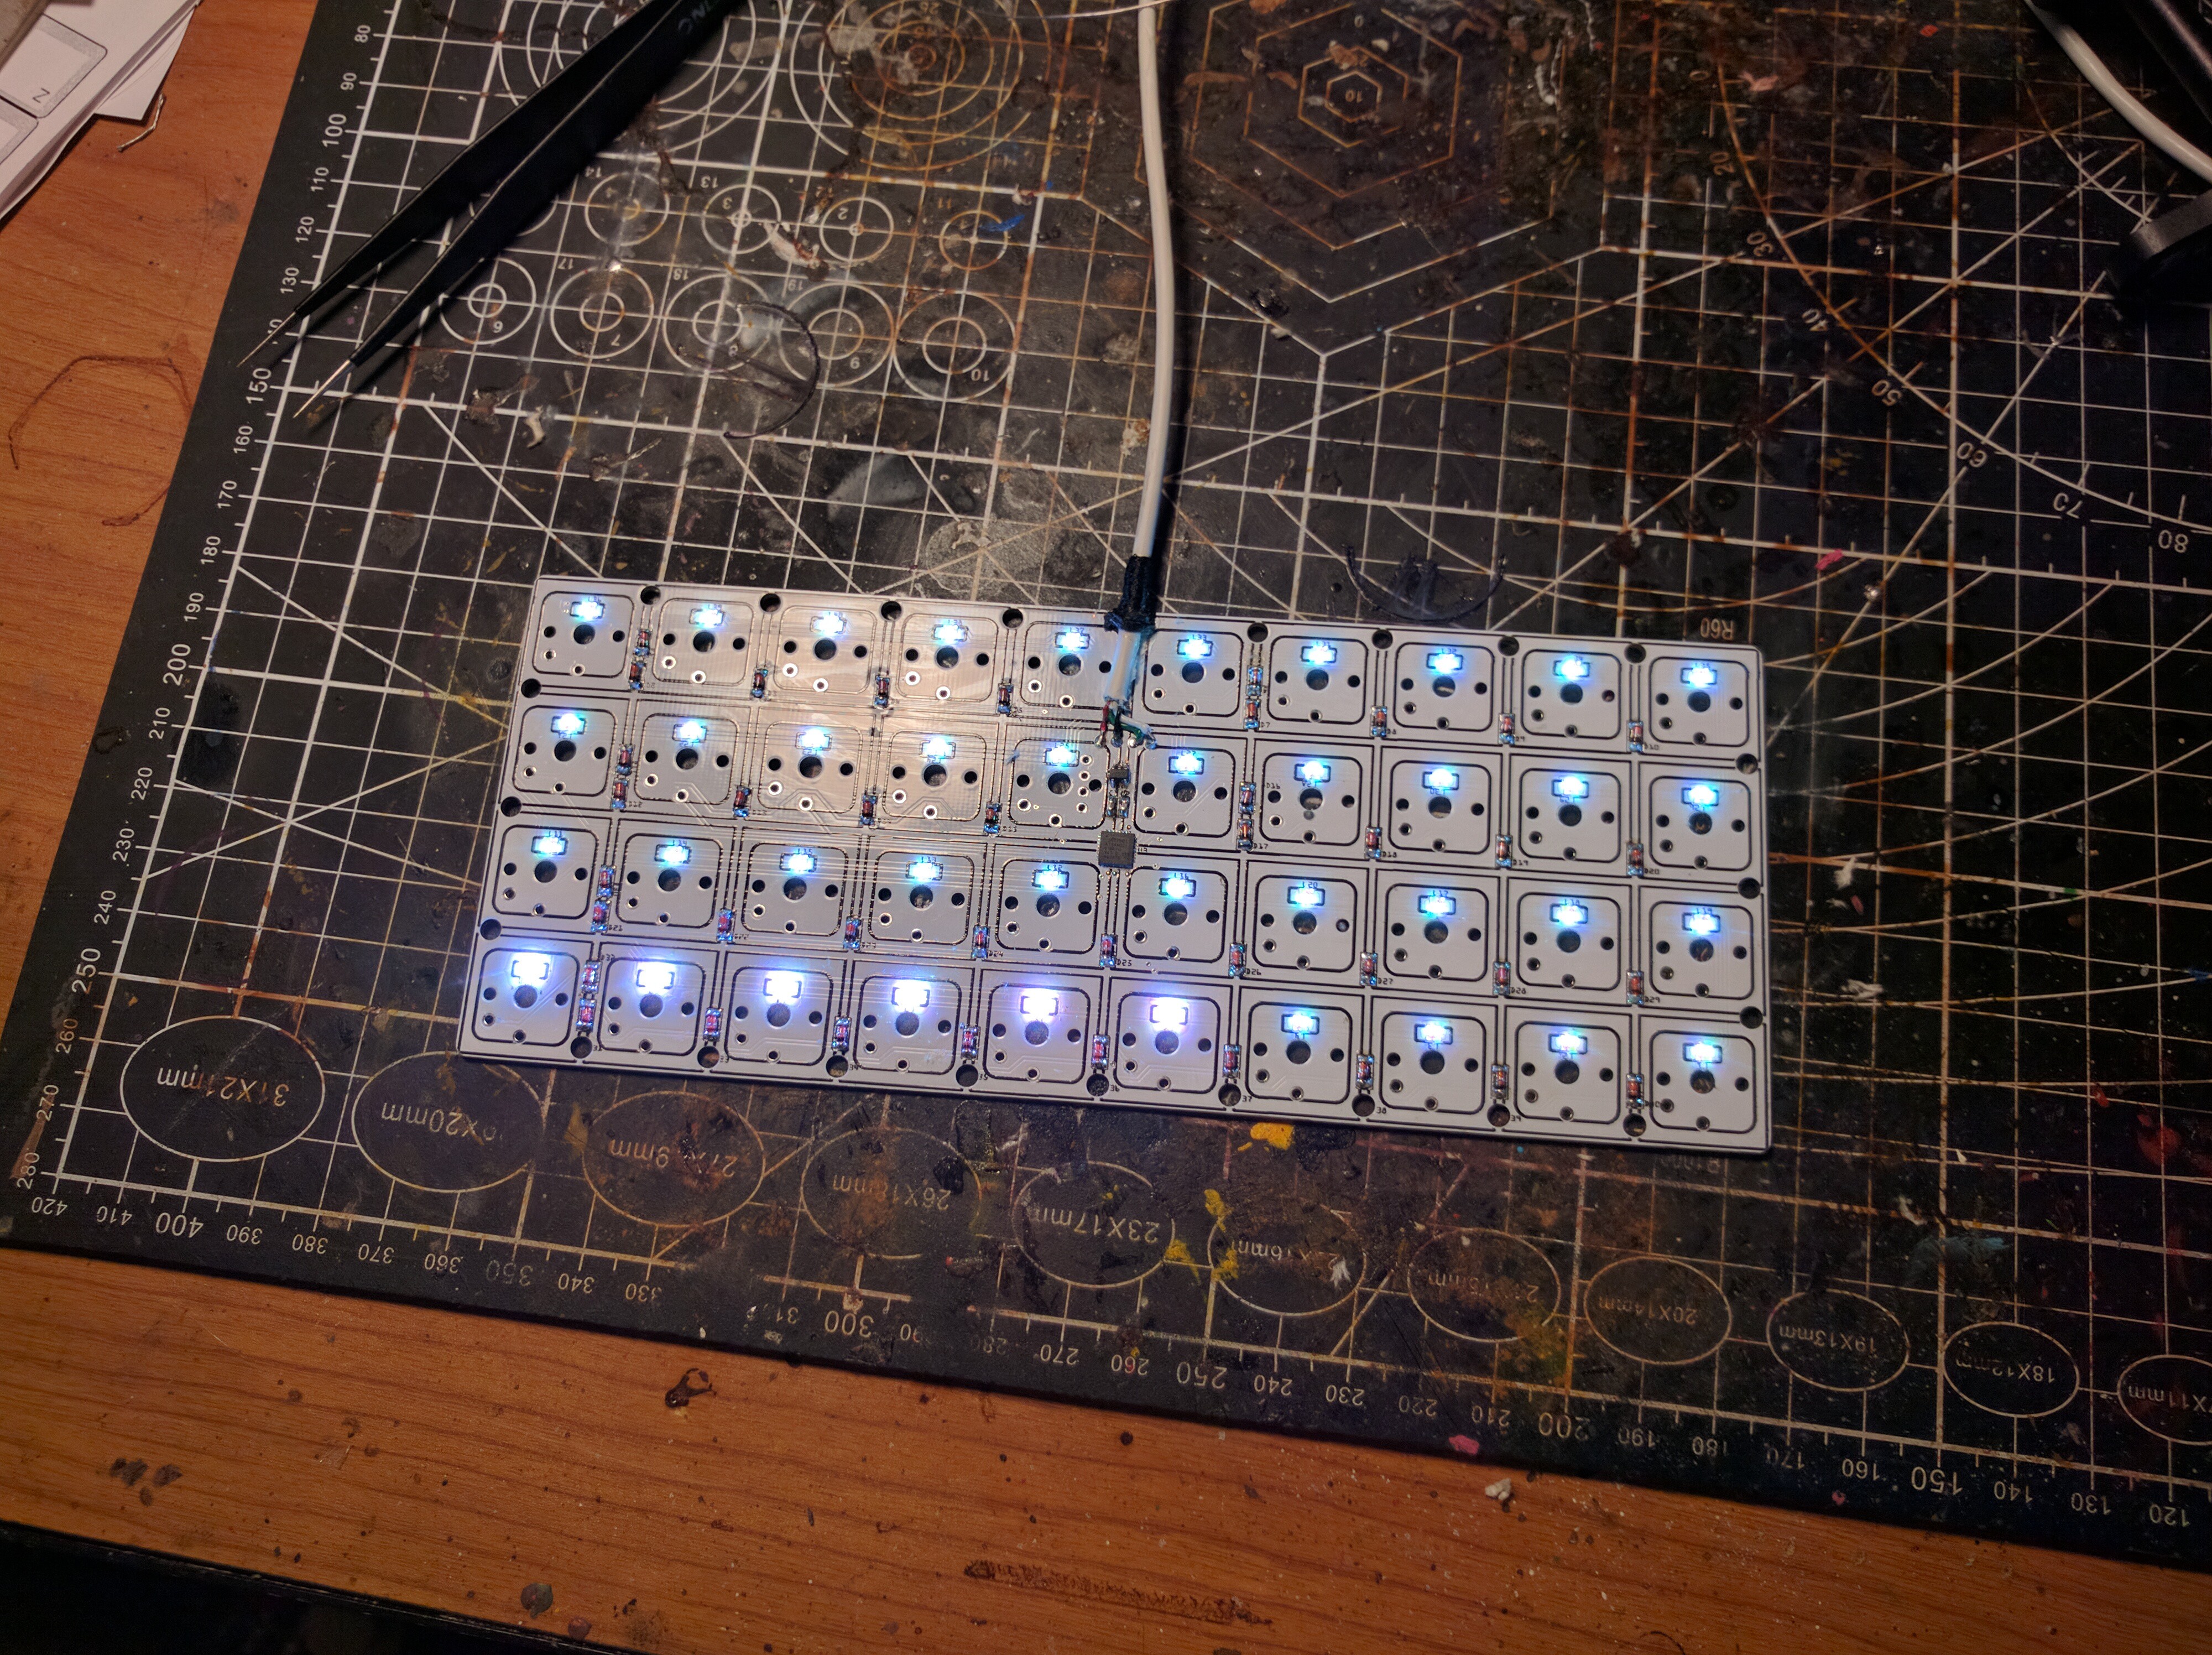
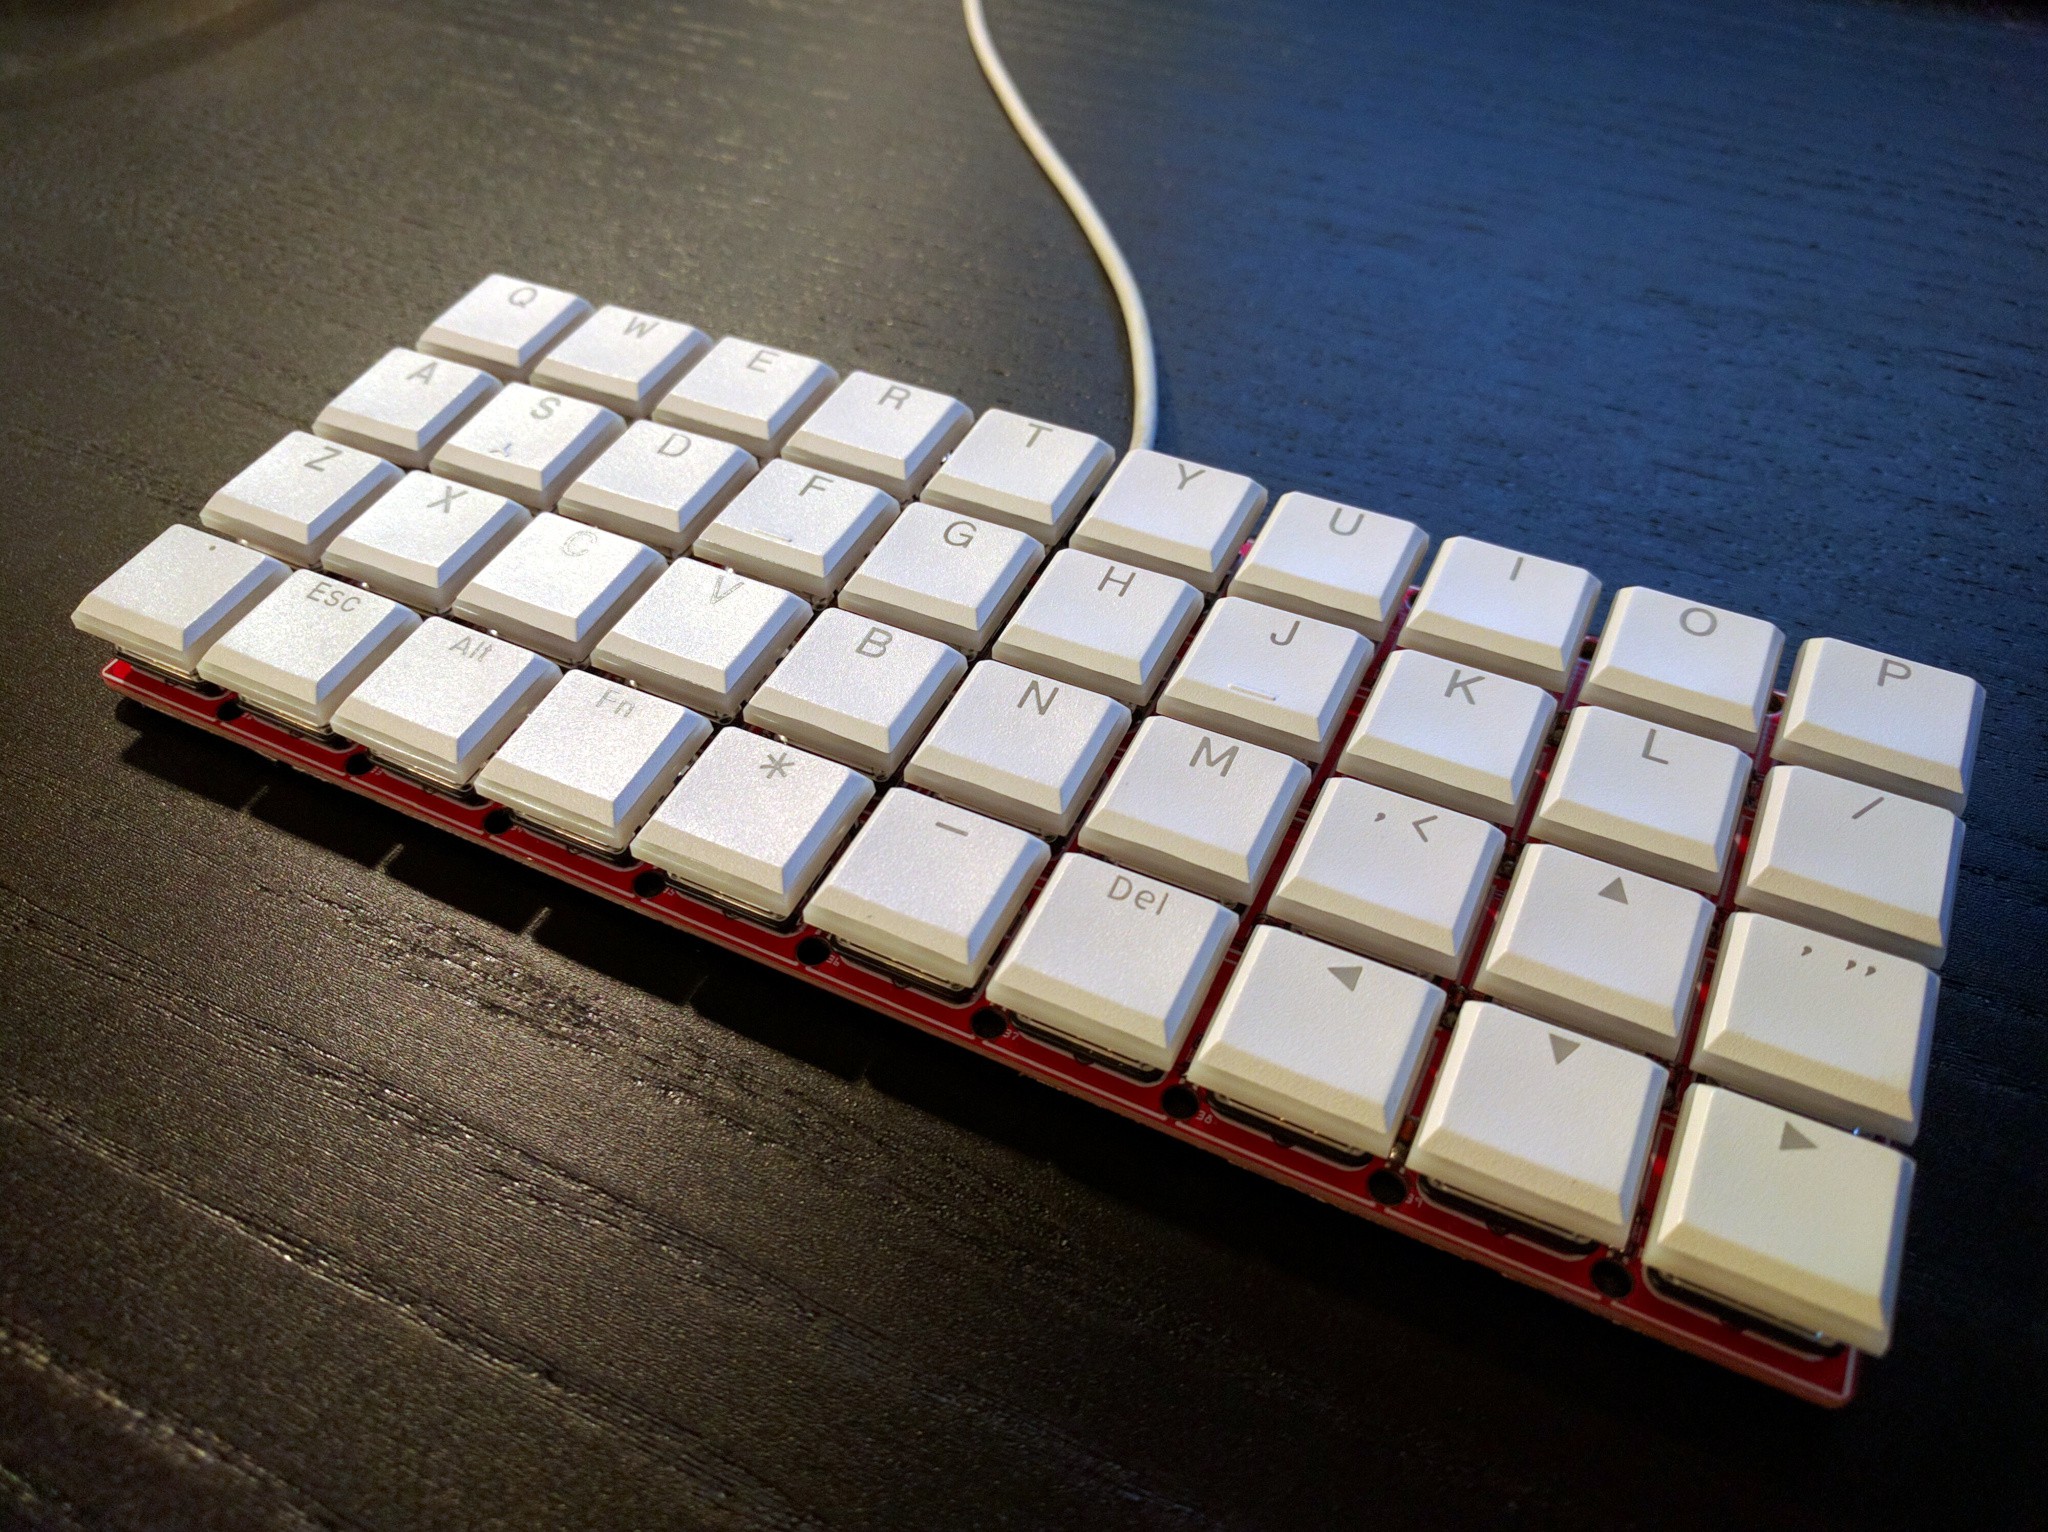
That turned out to be a very good decision, because it took me 4 hours to get all the LEDs to light up properly — turns out soldering tiny SMD footprints by hand is a bit tricky. But that worked, and this time I used transparent key caps to make it look a bit more cool:
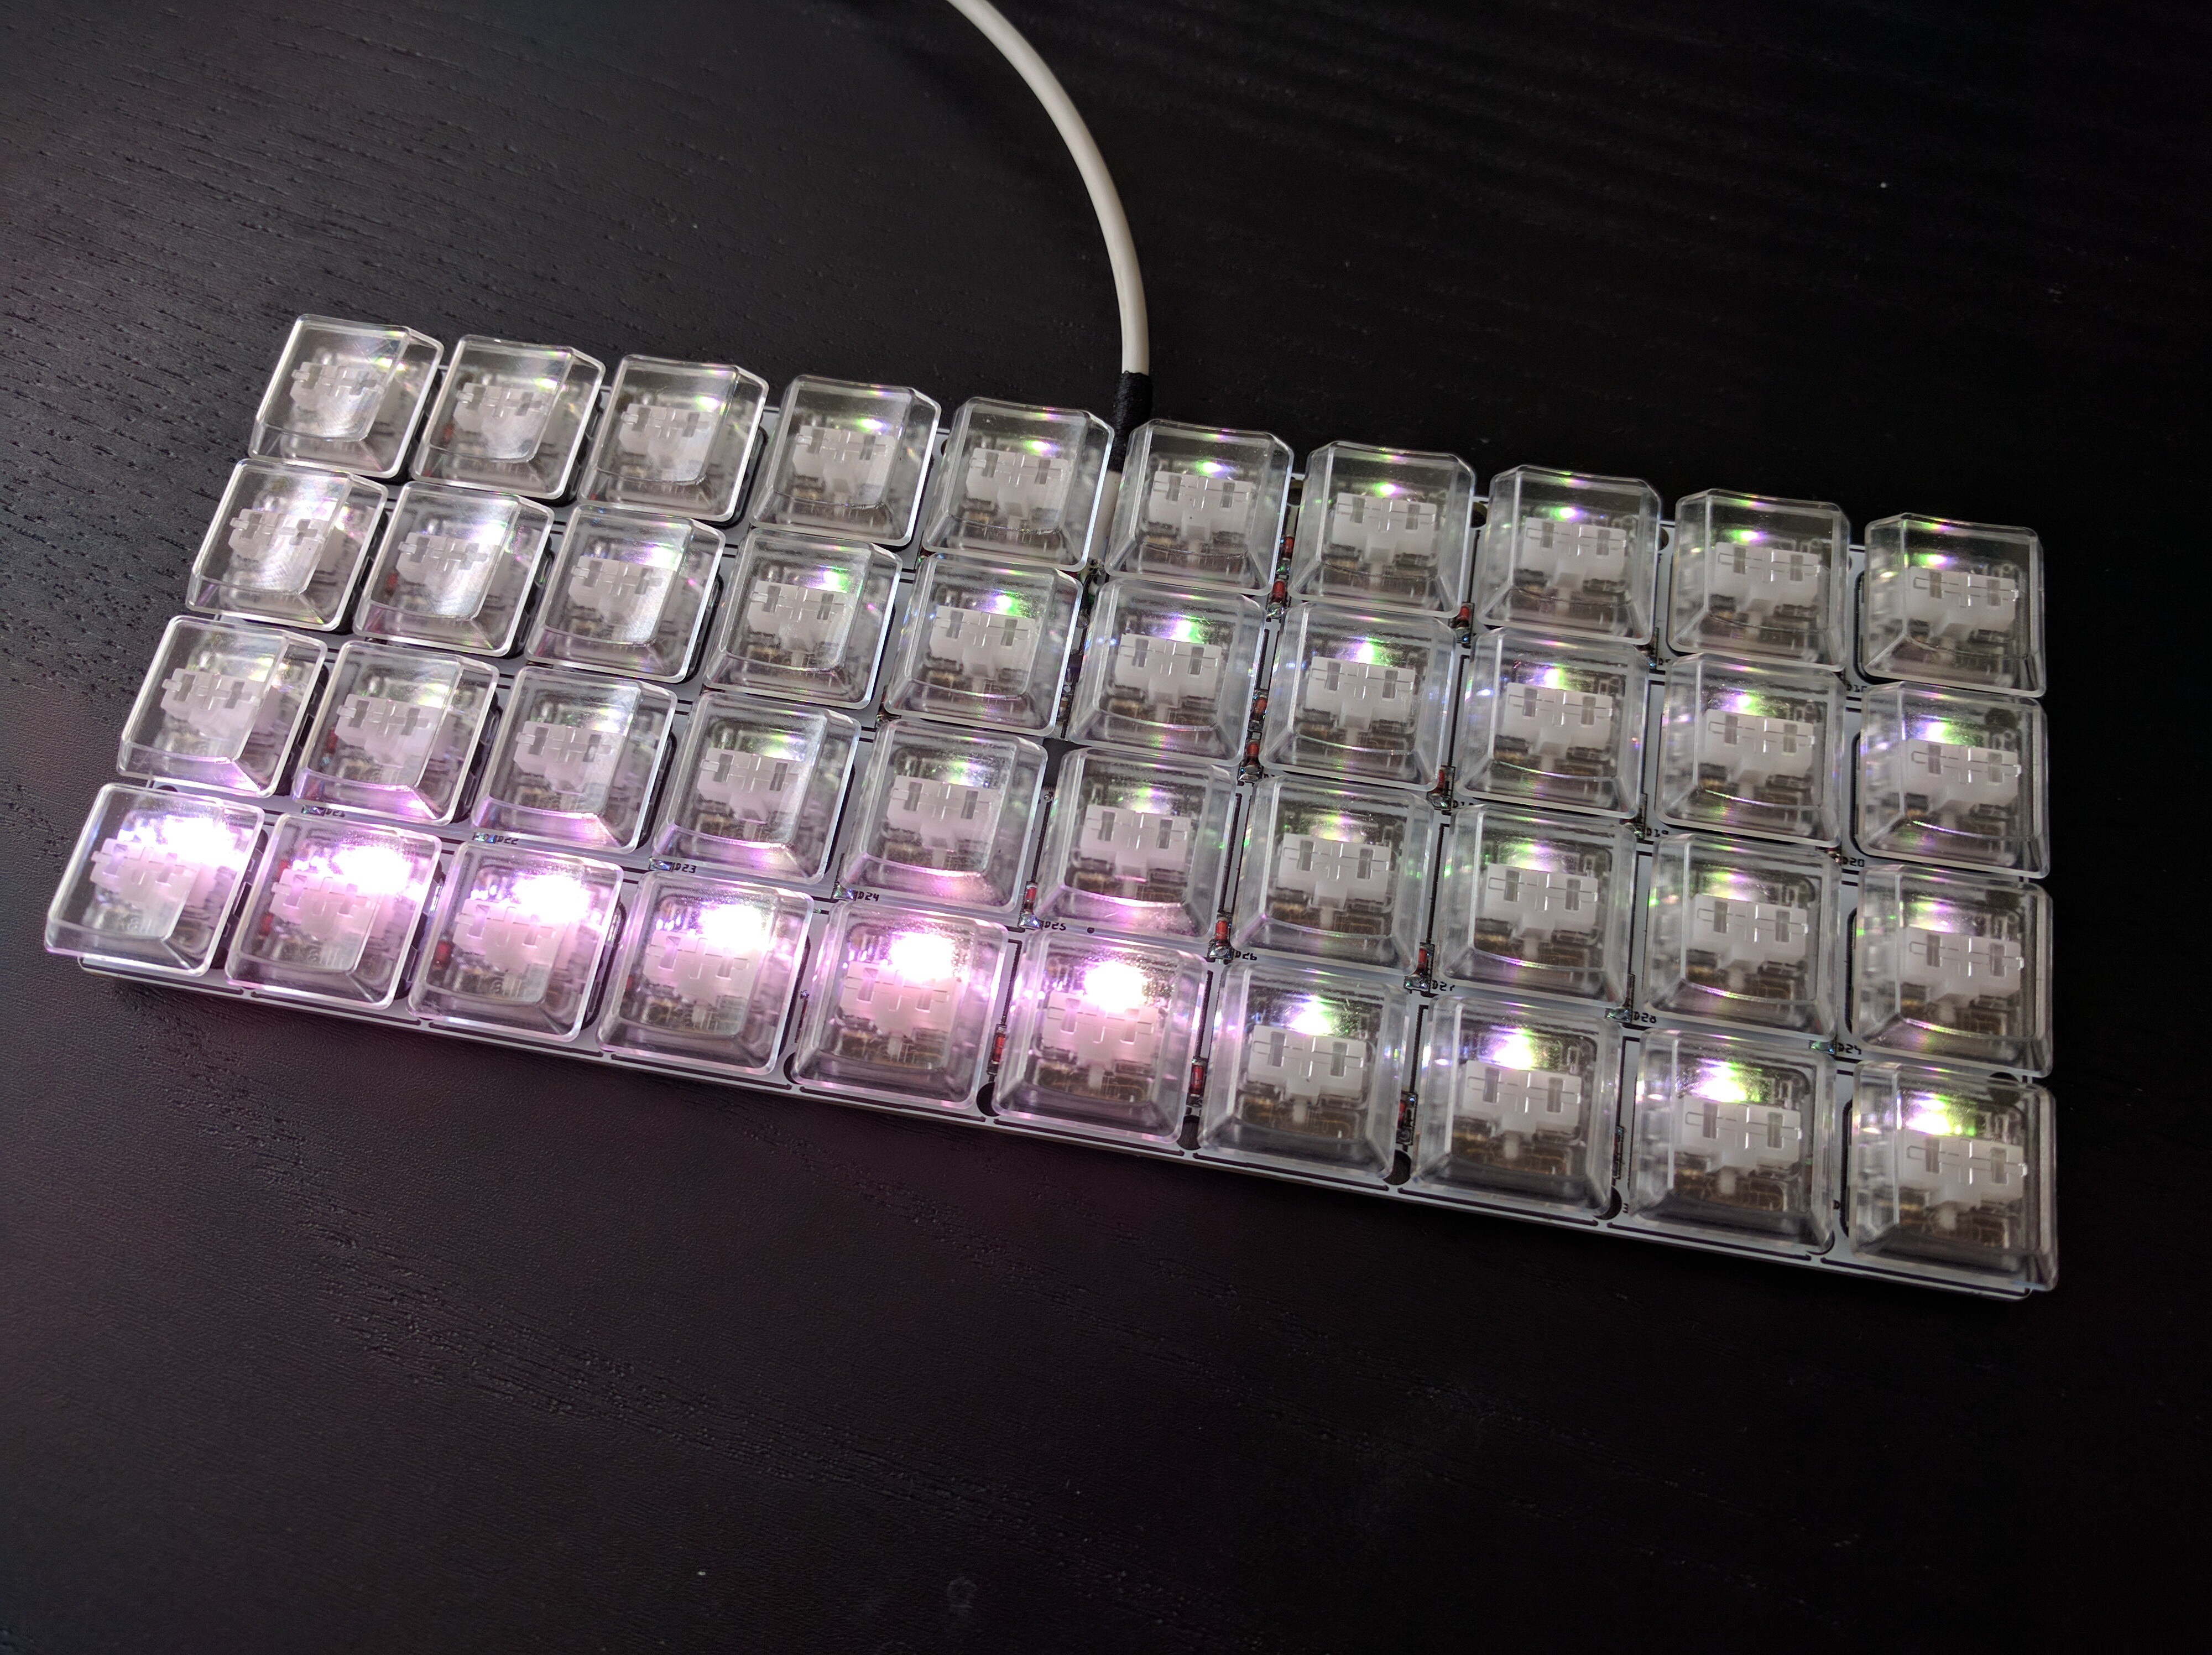
(No, I don’t know why the last 6 LEDs are different color, I suspect quality problems.)
I still didn’t program any cool effects for it, but it works as a keyboard, and I can imagine it could also work as a nice macro pad with light indicators, or even a MIDI device (CircuitPython supports USB MIDI). I will probably be experimenting with it a little bit in the future, for now I don’t have the energy left for much programming.
The project is described at Dorsch 40k Keyboard | Hackaday.io if you want some more technical details (and a 47-key Planck version that I also made).