Flatreus

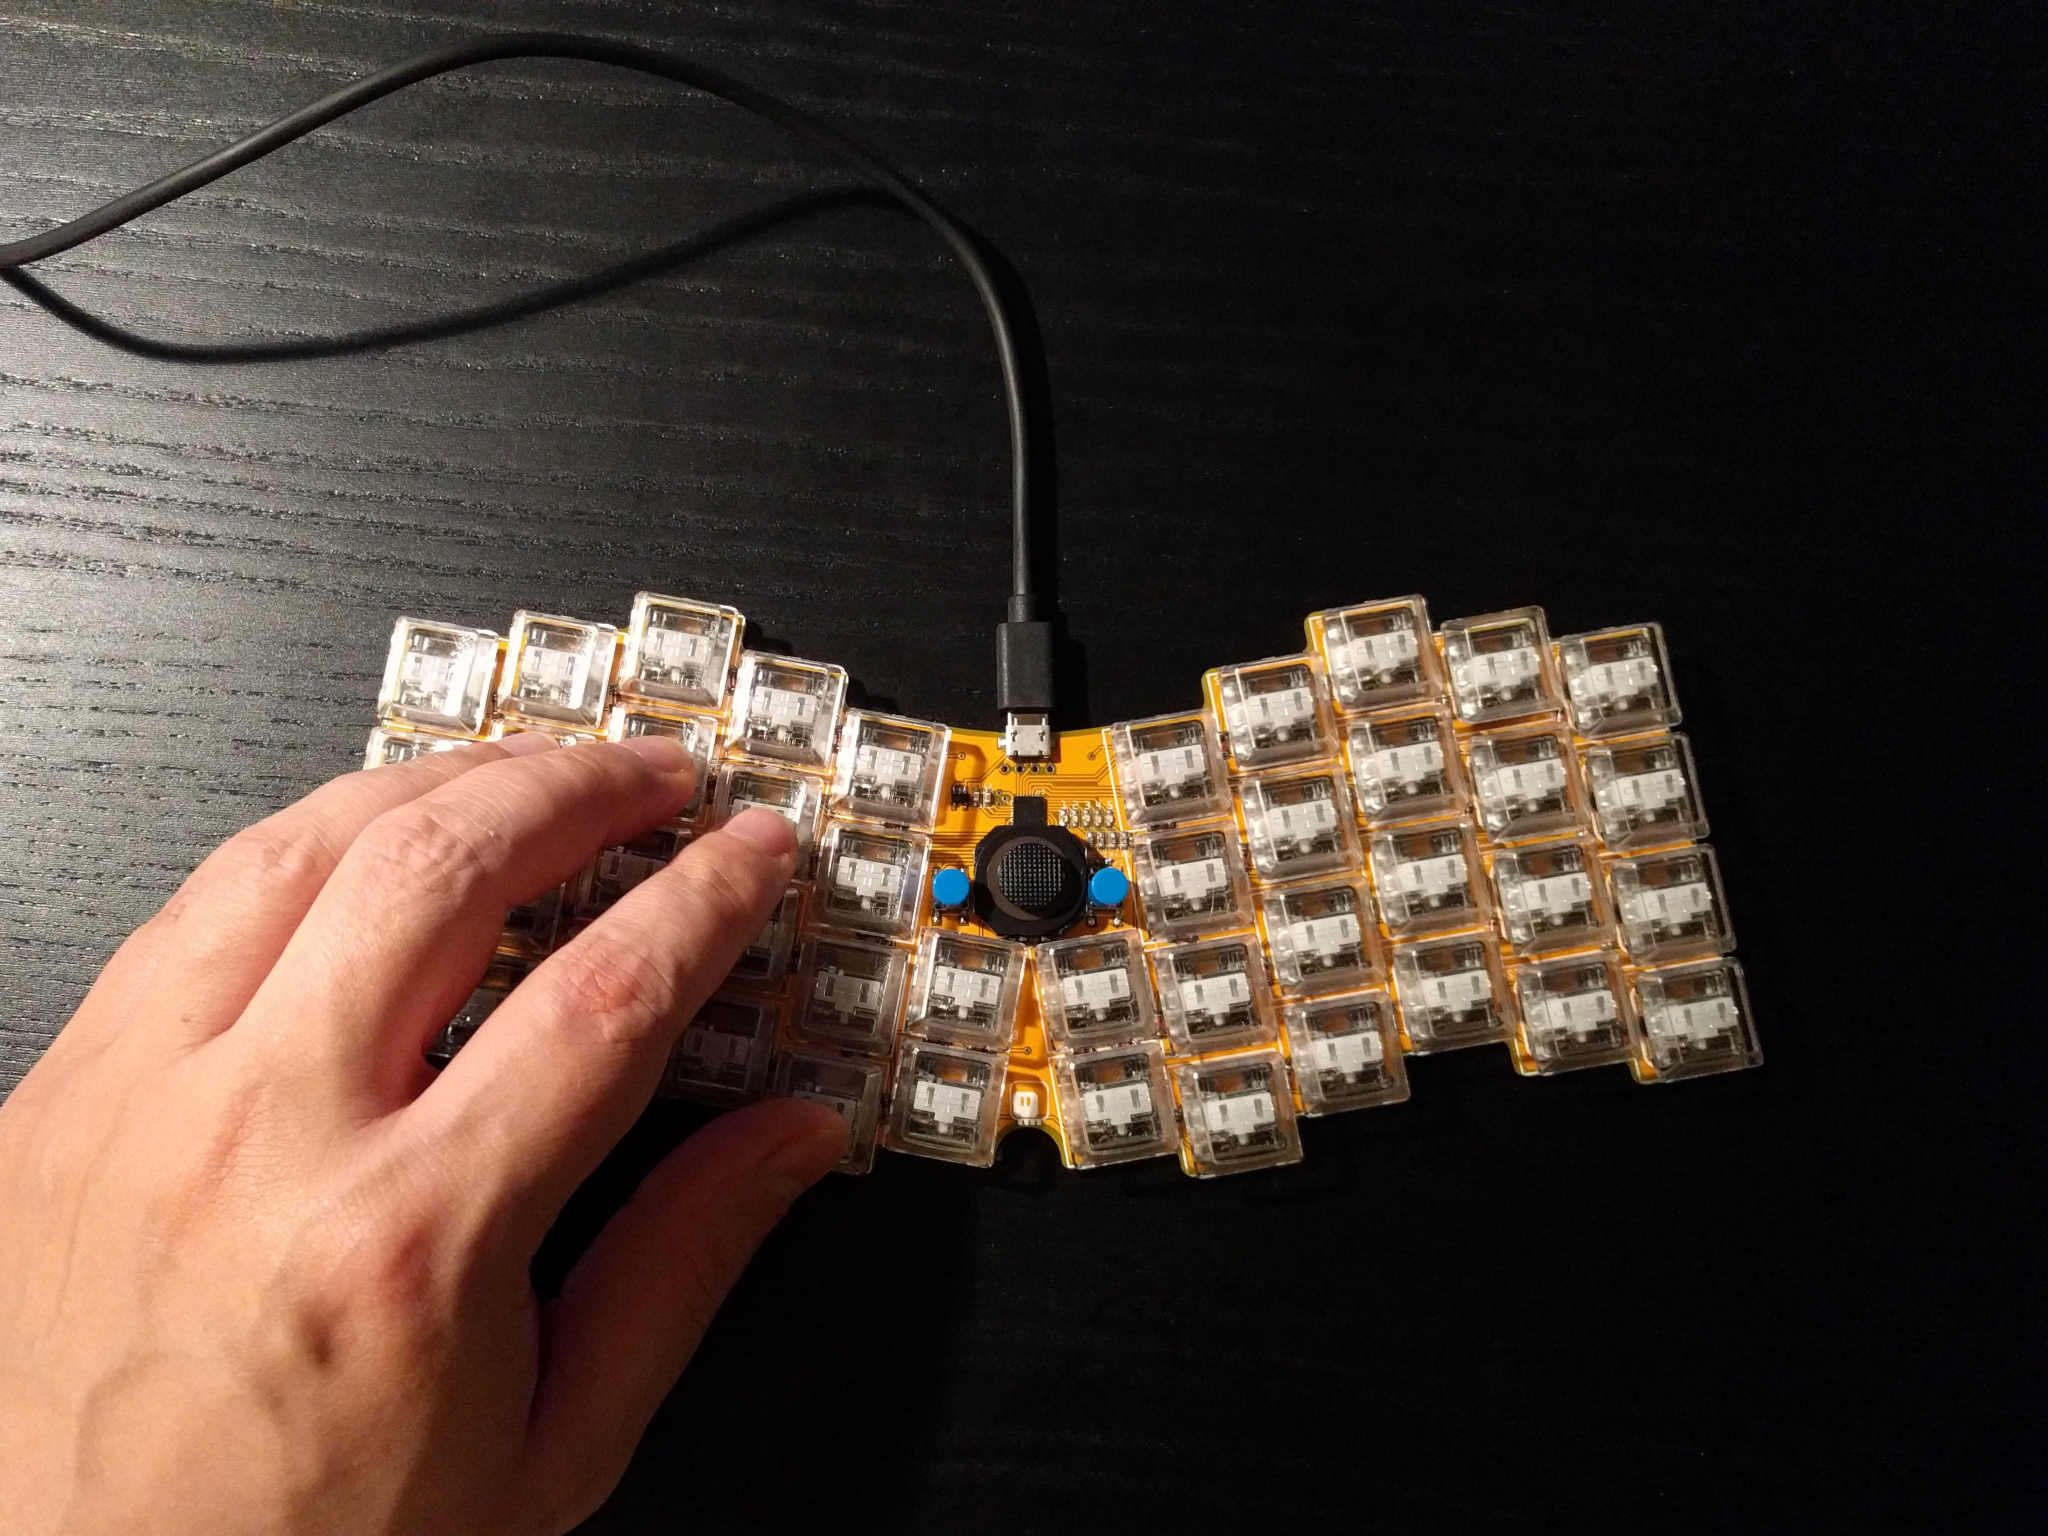
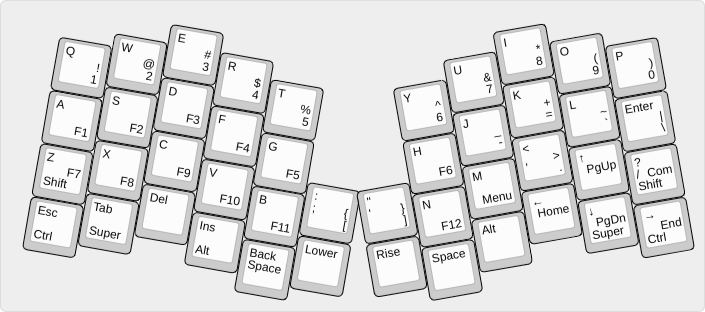
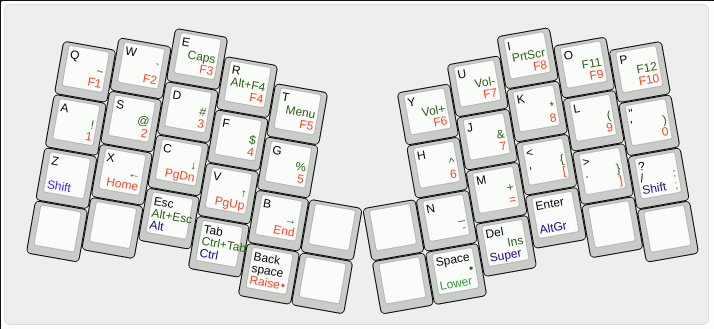
This had to happen sooner or later, so I may as well just do it and get it out of my head. The idea is simple: Atreus, but flat. Using the choc switches.

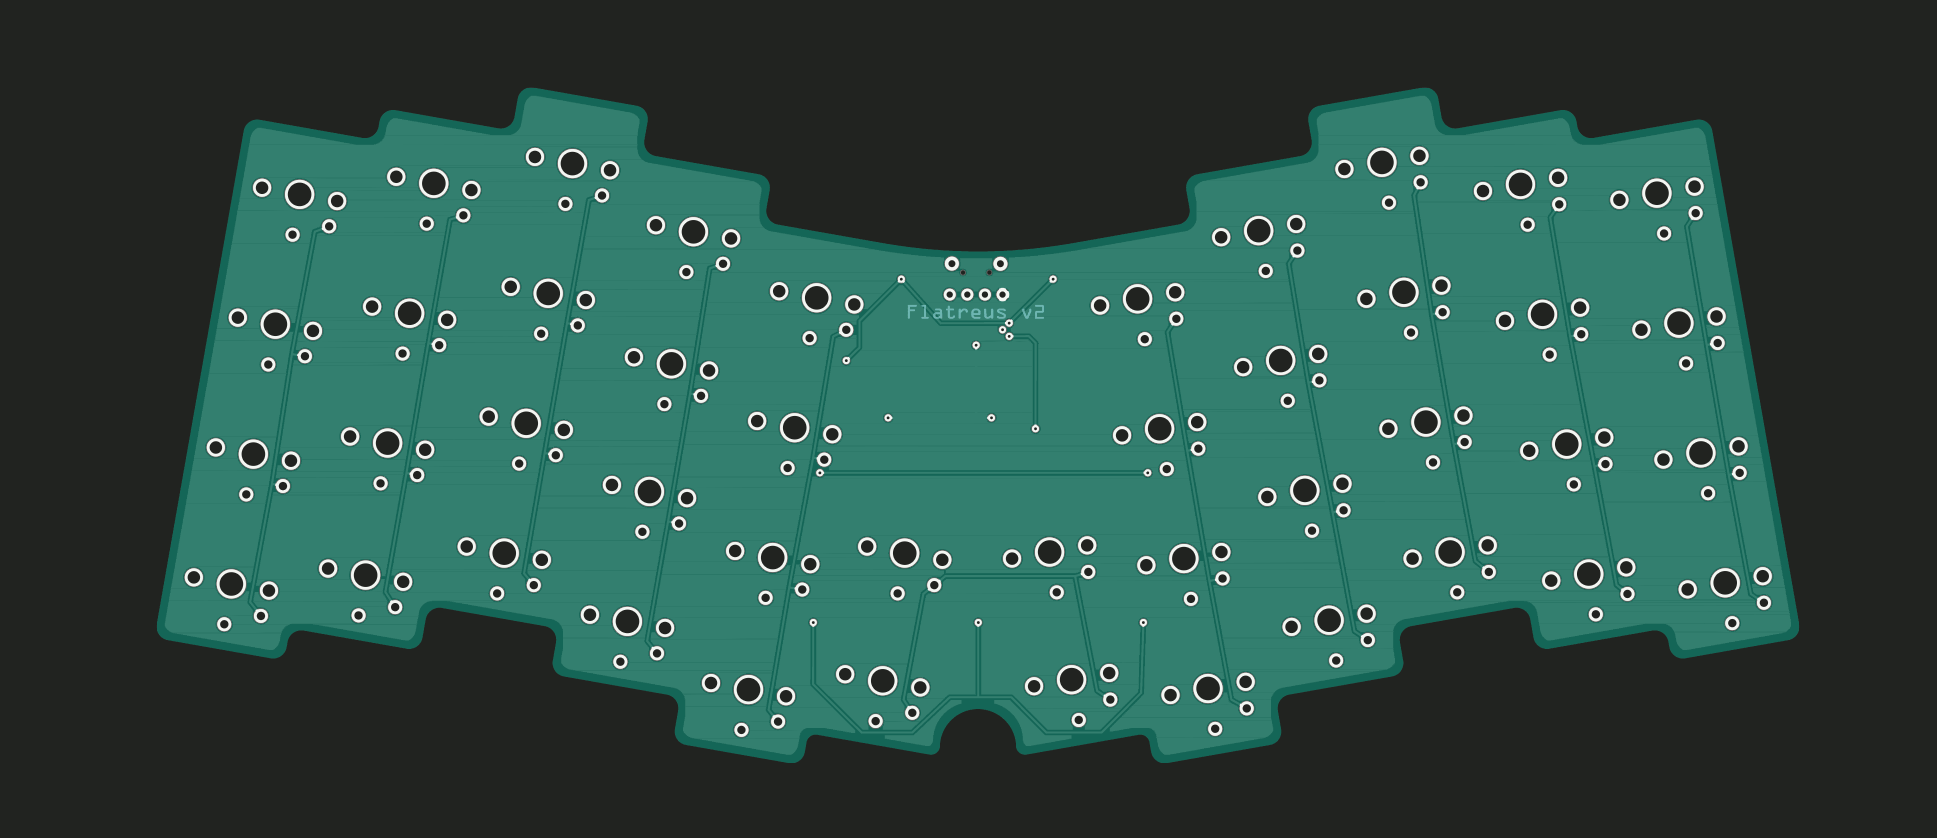
I prepared the basic PCB design a while ago:

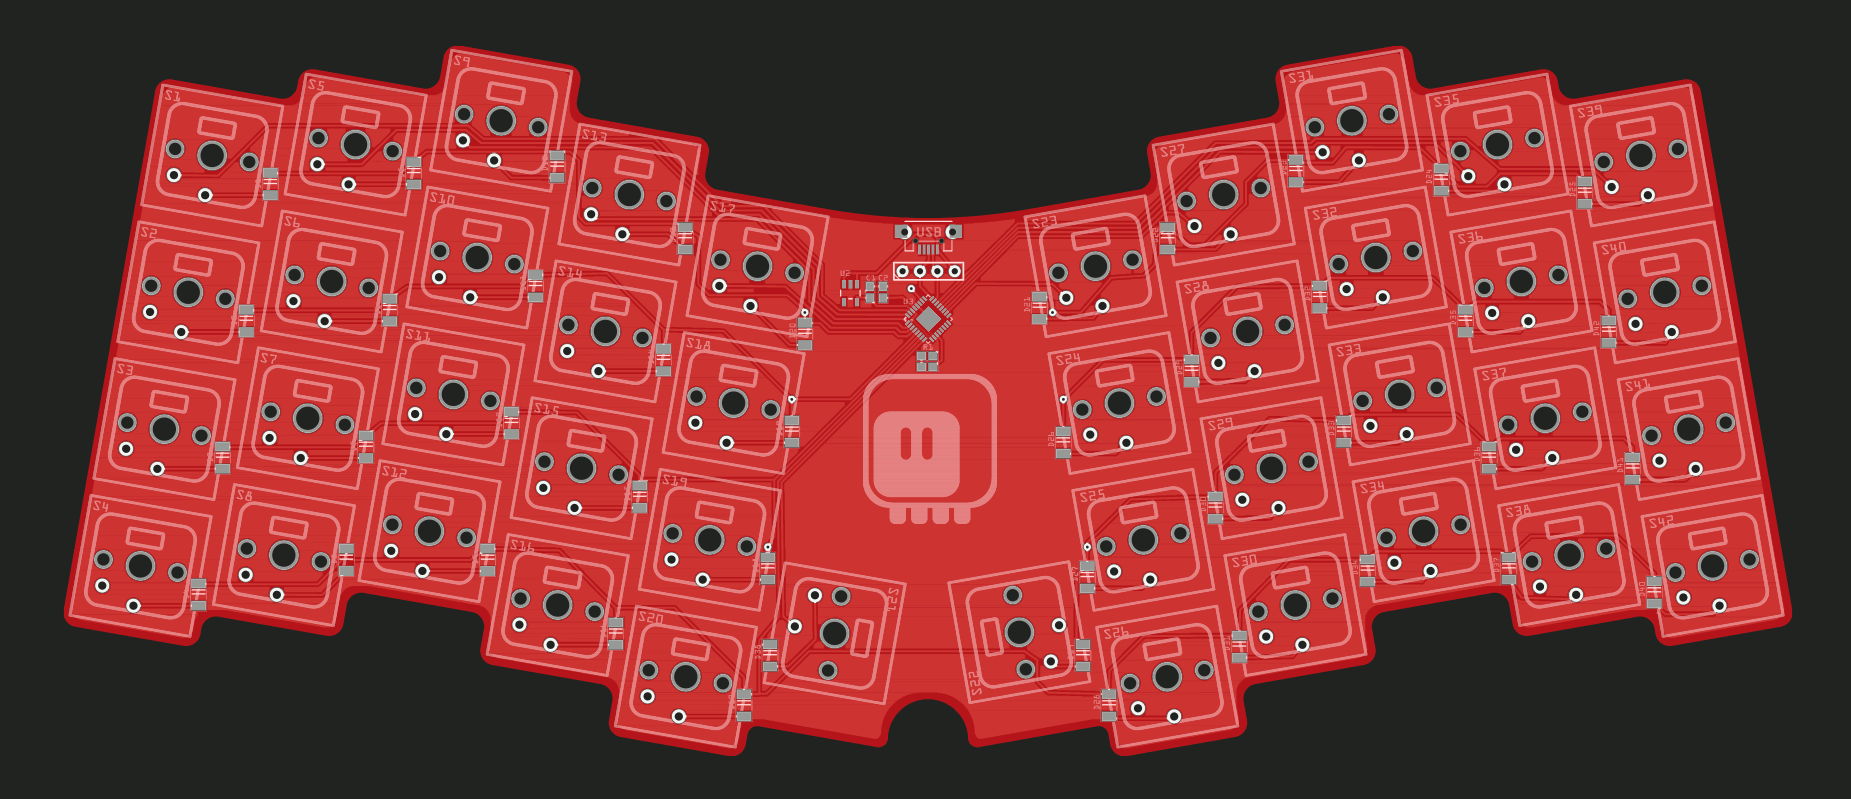
But I didn’t hurry. I got some valuable feedback, and added two more thumb keys, and rotated the ones that were there already to normal:

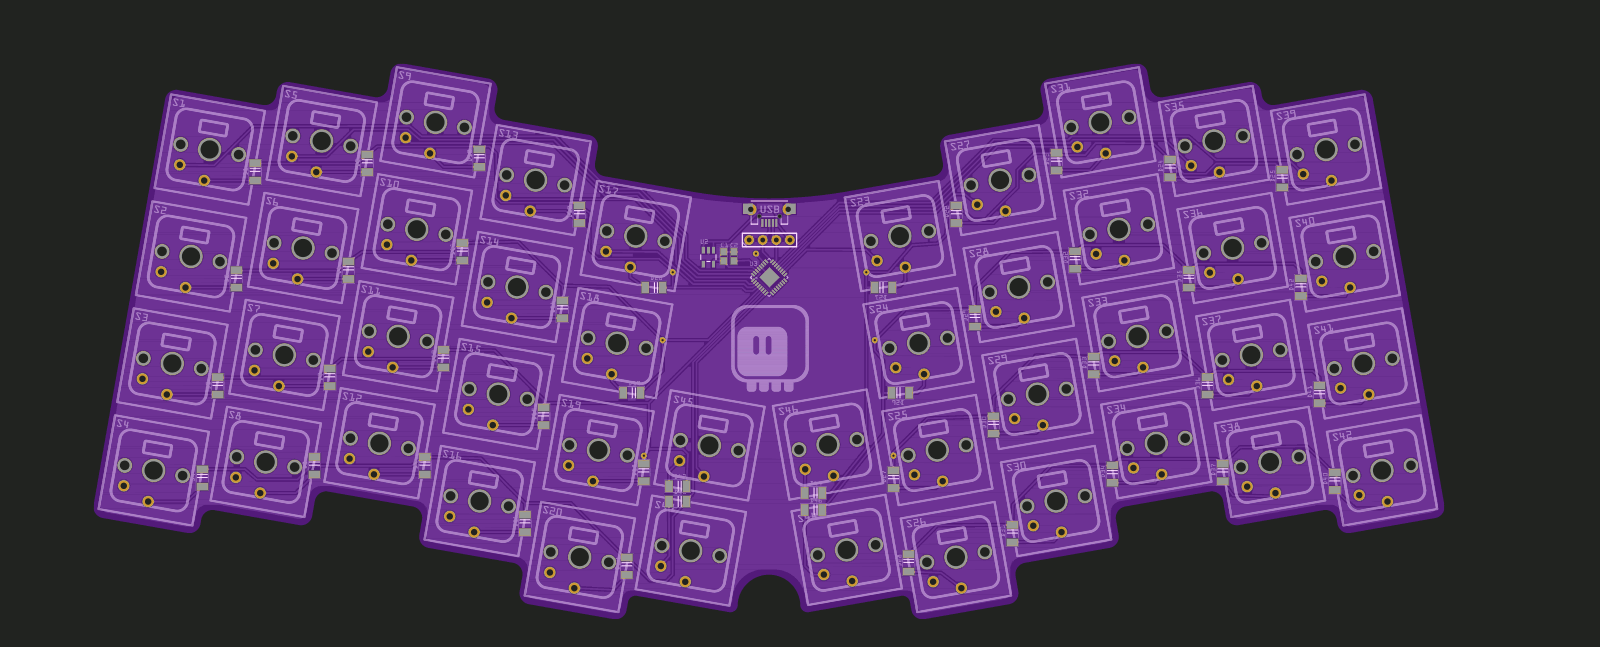
But there is still this empty space smack in the middle of the PCB, so I thought why not put a PSP joystick in there, with two mouse buttons, and emulate a mouse as well?

That is my most recent design, and I think I will go with that, except I will also add a few LEDs on the free microcontroller pins, so that I can use them for debugging and as status indicators.

I’m still waiting a little bit with ordering, to see if I will come up with further improvements.

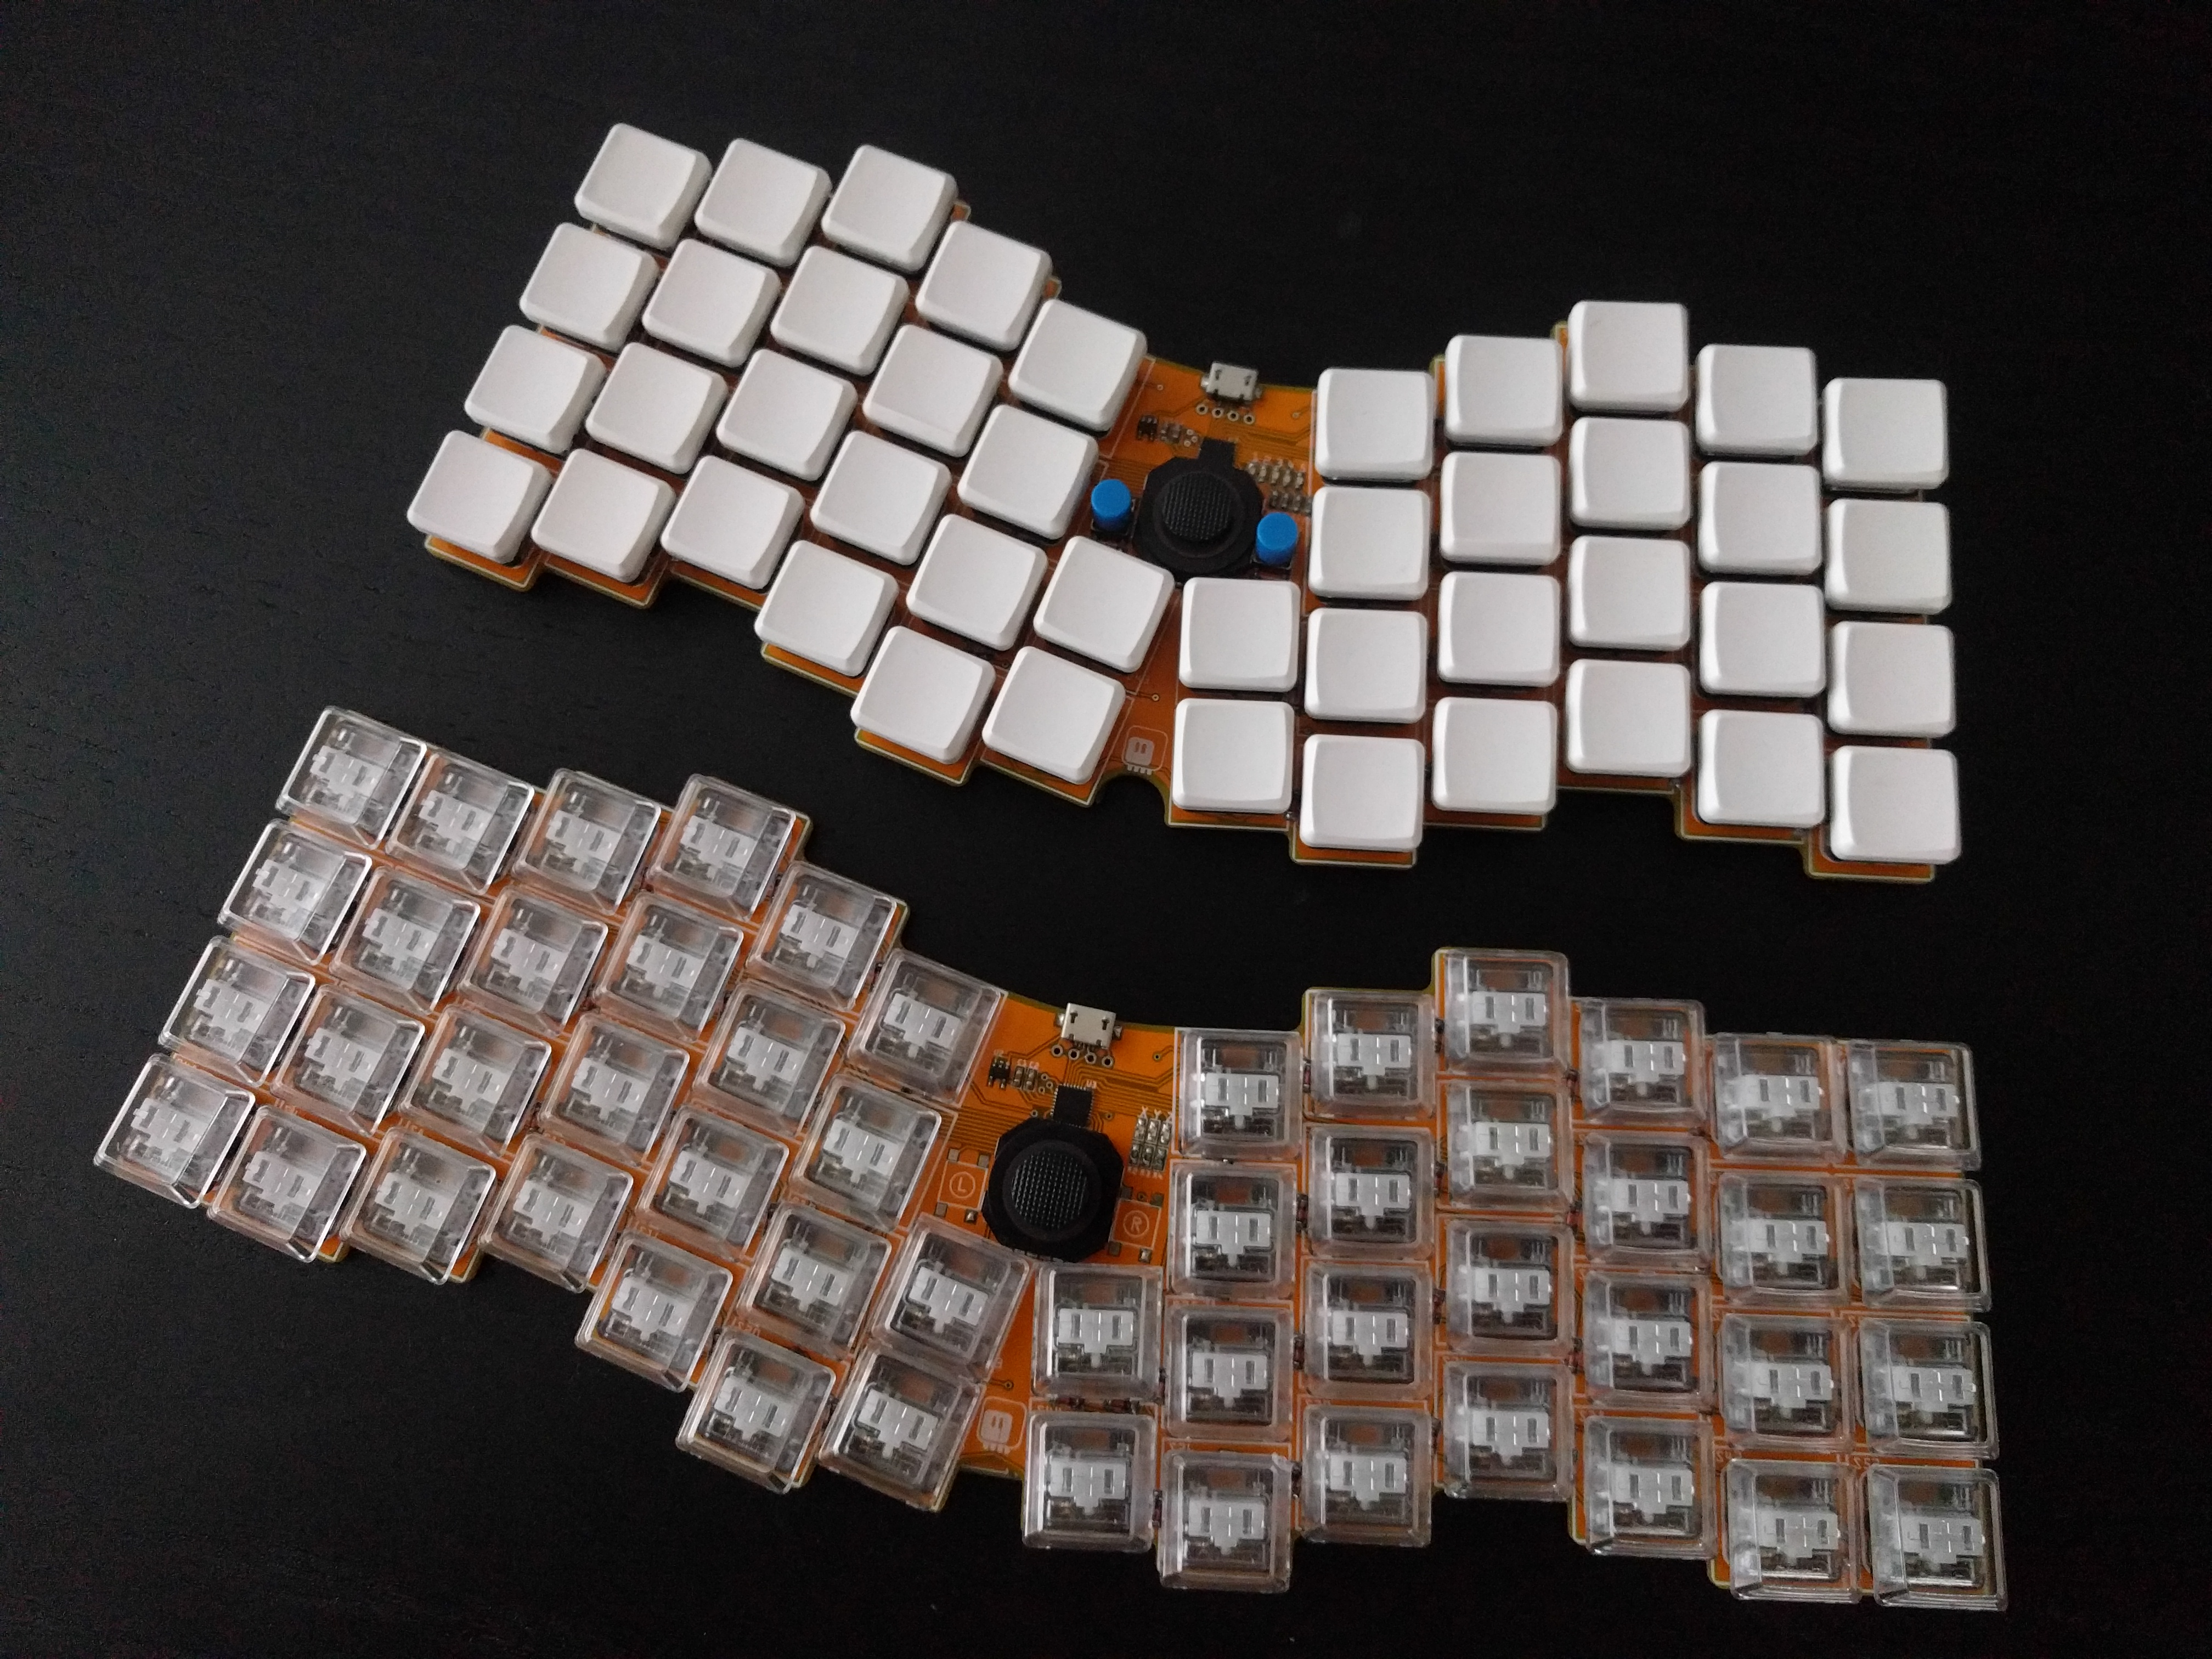
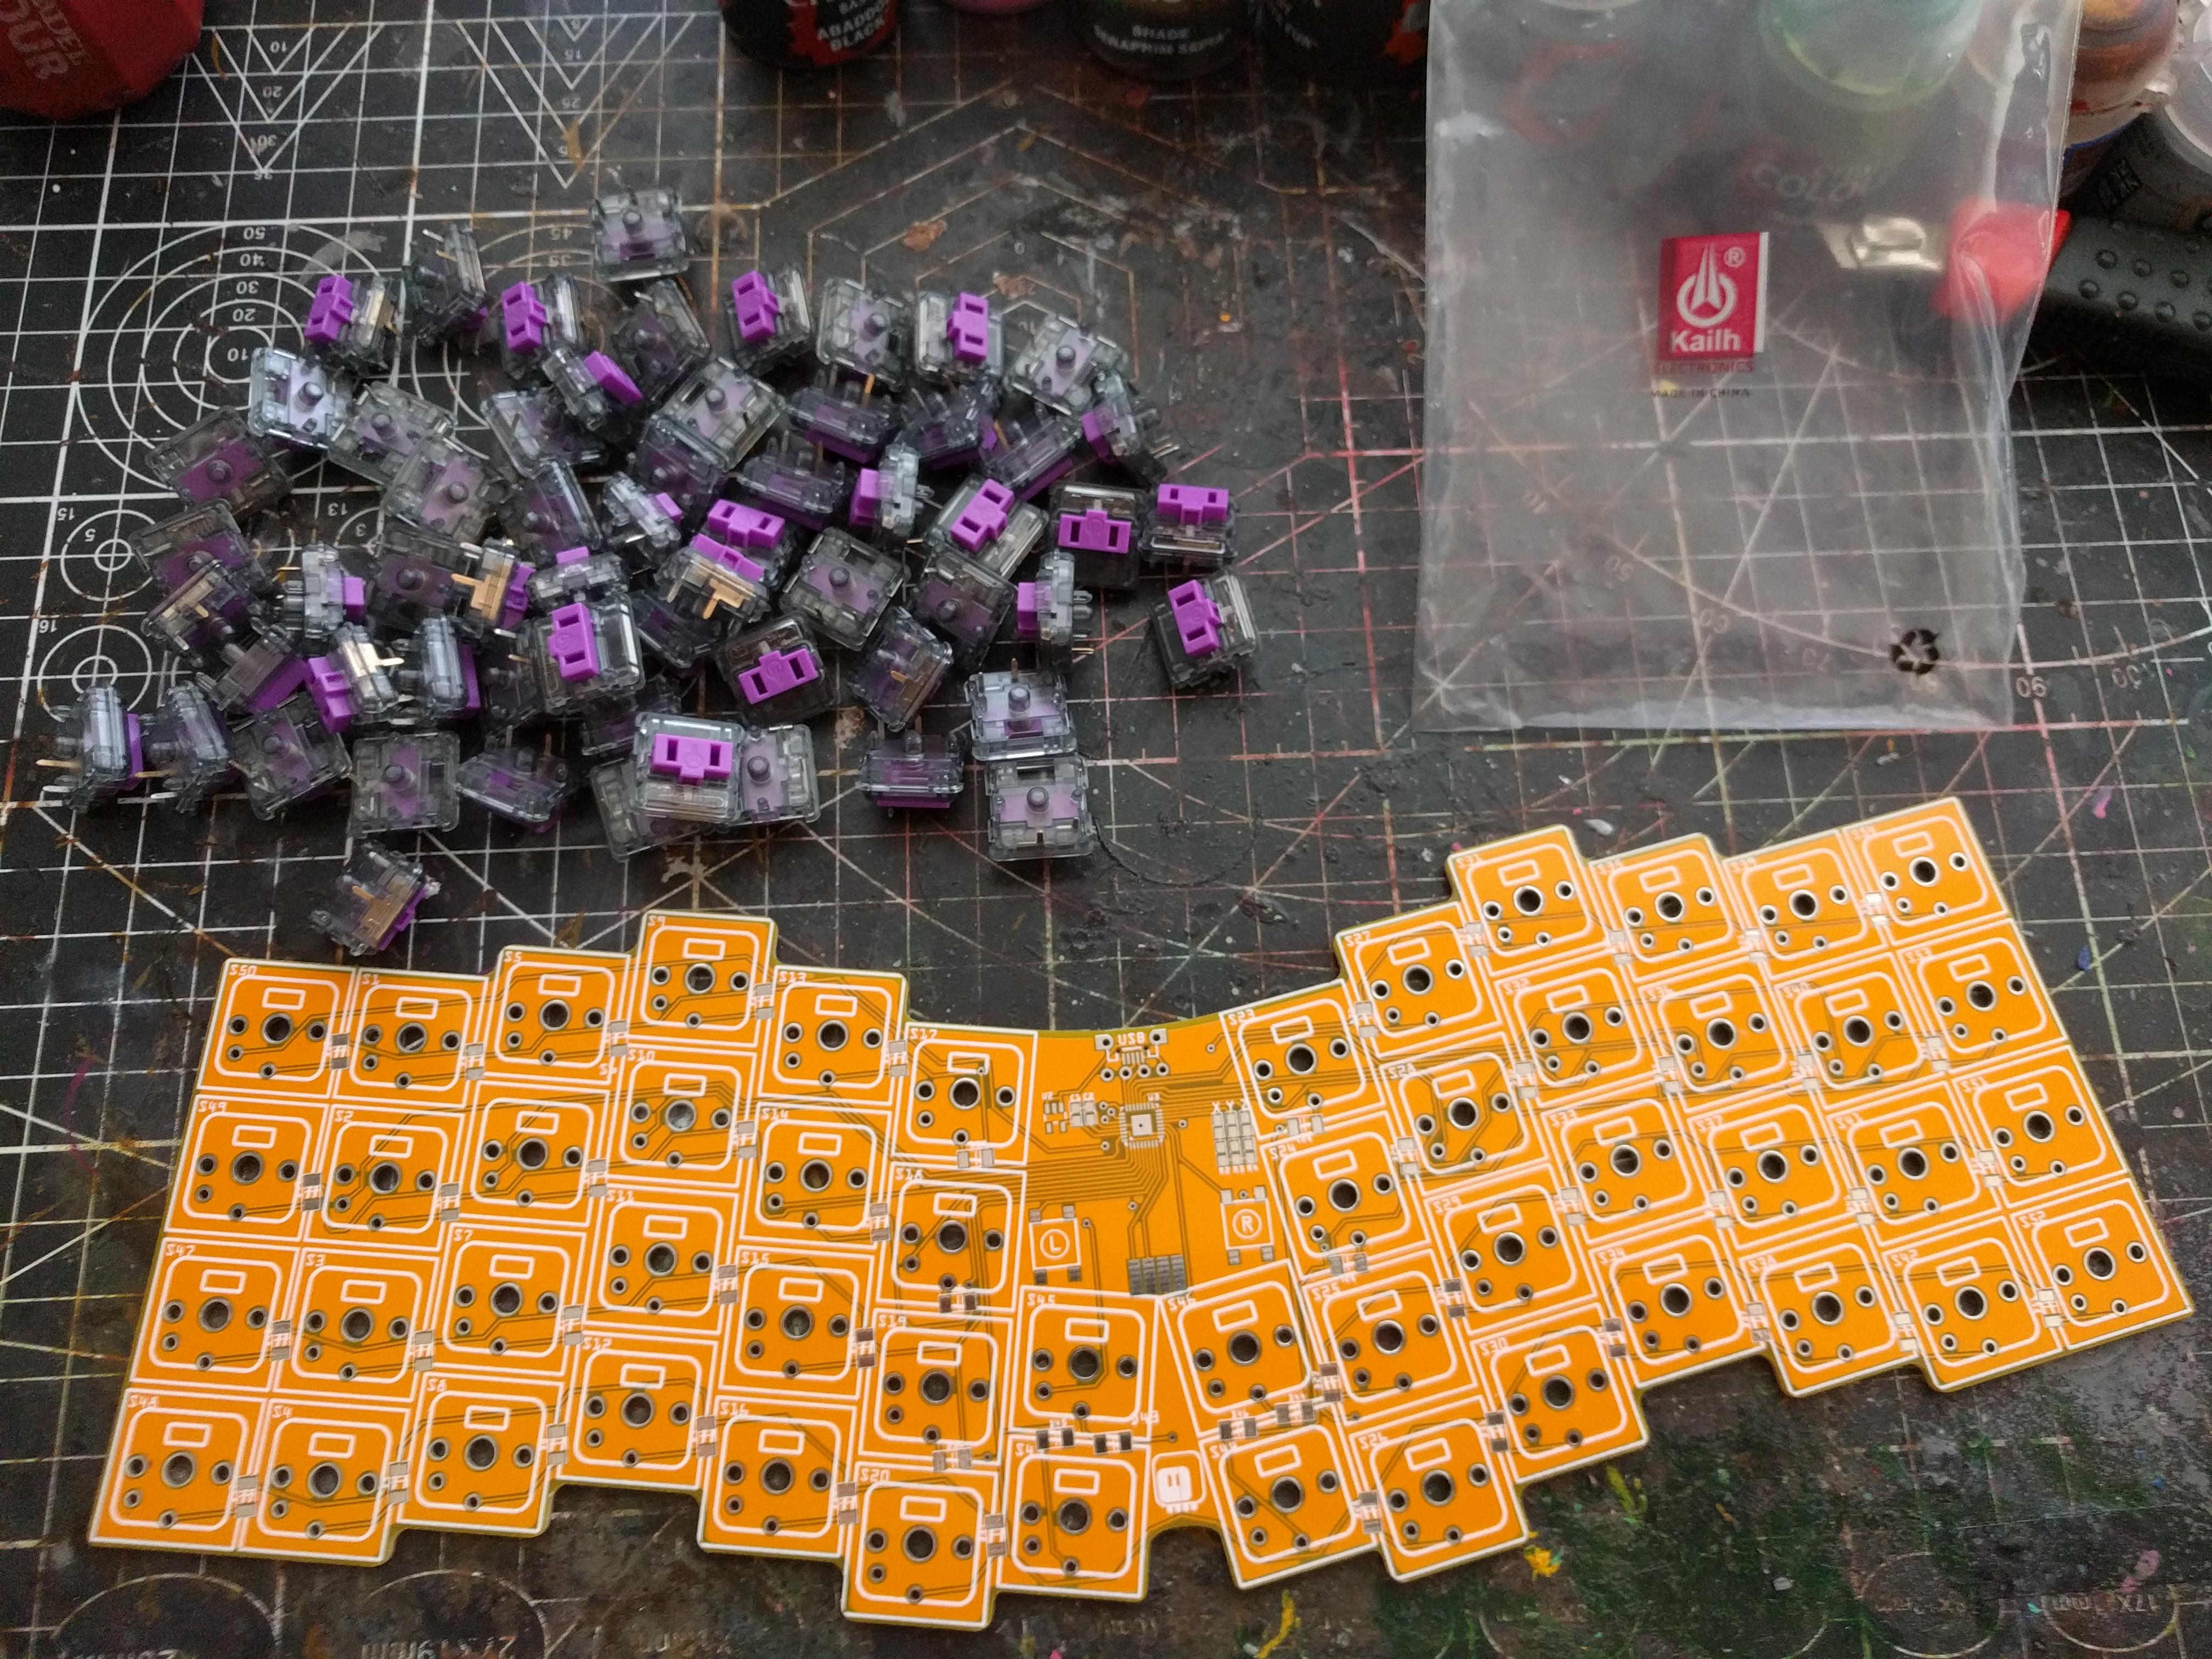
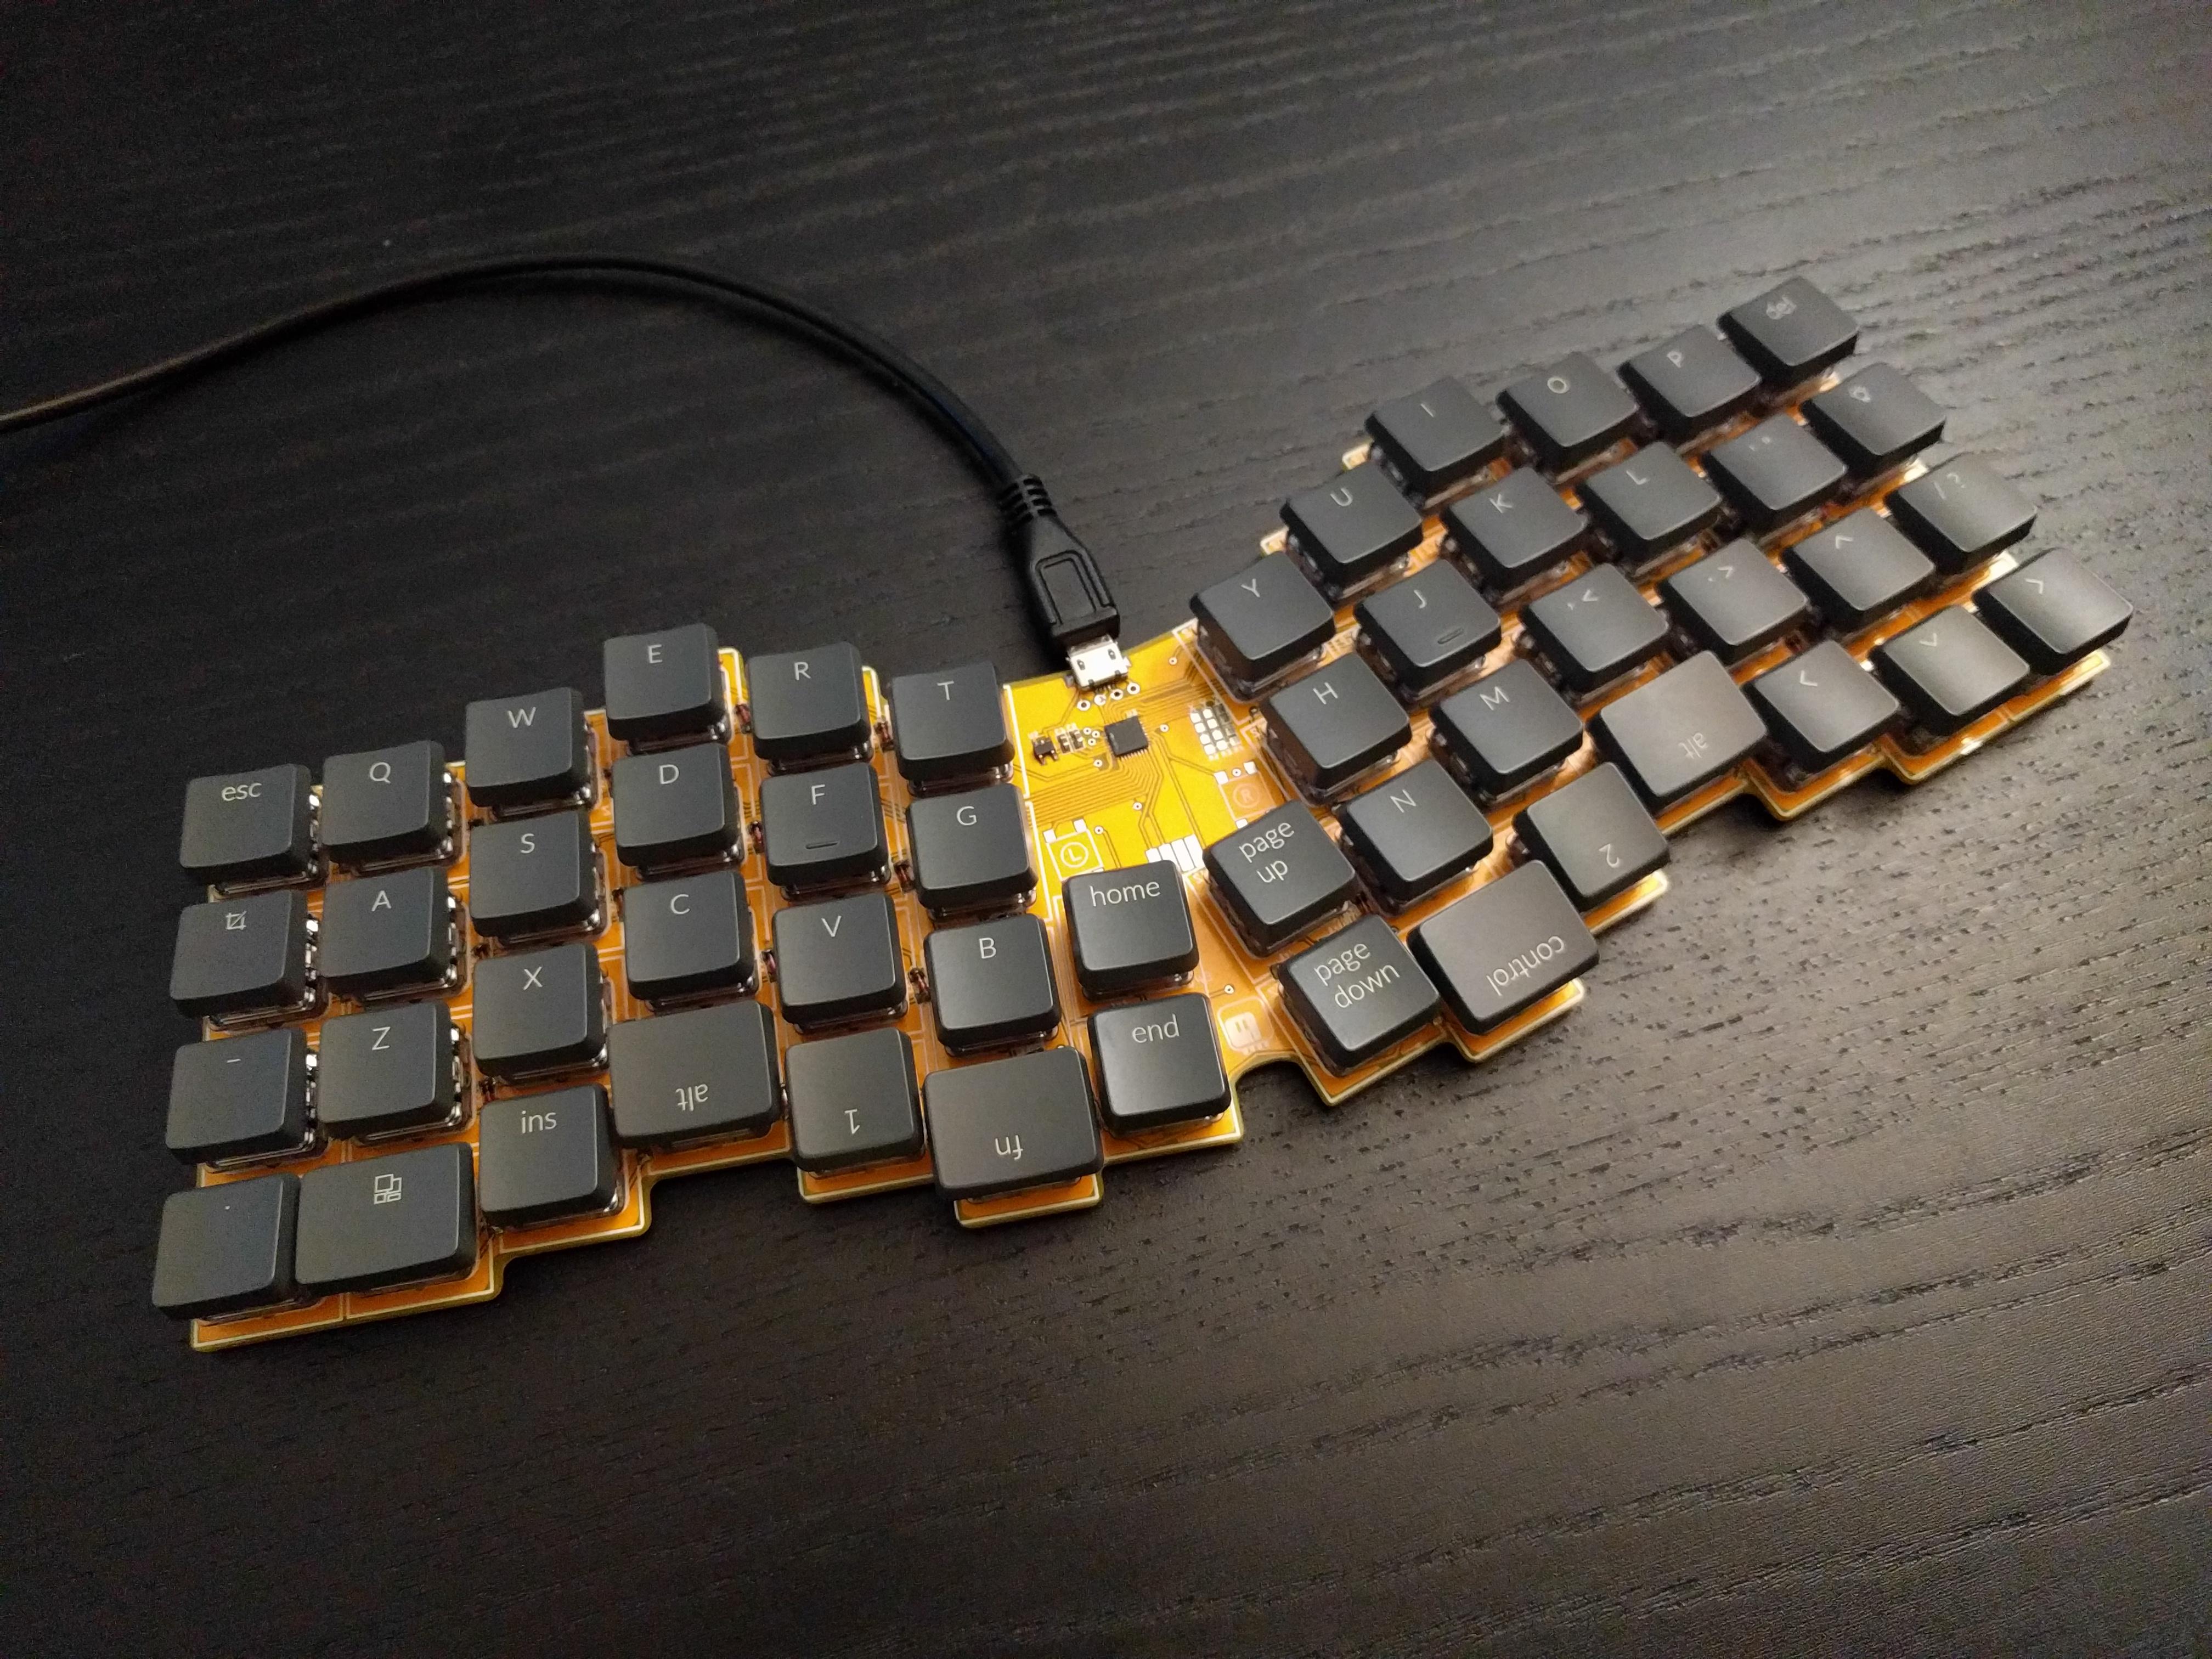
Mechanically the plan is very simple: just the PCB with the choc switches directly on it, and later maybe I will laser-cut something between a top plate and a case, that goes between the PCB and the switches.

11 Likes

So after a week of working on it, and one complete redesign (I realized that Inkscape defaults to different DPI after upgrade, and that all my PCB outlines were about 10% too large as an effect), I finally ordered the PCB. Of course I had to do it during one of only two times in the year when China has holidays, so it will take another week for it to be fabricated, but that’s just my luck. The design looks thus:


And the back side:

There isn’t much unusual going on there. 44 switches with their corresponding LEDs, arranged in a 11x4 matrix, with 5 LEDs for various status indicators, a PSP 1 joystick and two tact switches for mouse emulation, and a SAMD21 microcontroller with its required two decoupling caps and voltage regulator. And a USB micro socket (with a header for an optional cable as well).

The soldermask will be yellow.

3 Likes

It’s finished, and it works as expected.

The microswitches I used for mouse buttons have a bit larger actuation force than I would like, I might replace them with lighter switches at some point.

I tried it with the original Atreaus layout, but somehow I can’t get used to it — it seems to be designed by someone who uses the numpad a lot, and that’s not me. So I went with something more planckish:

I’m also using the hold/tap mechanism here for all the modifiers.

More information, all design files, code, etc. available at Flatreus Keyboard | Hackaday.io

4 Likes

This is an awesome project! I was just thinking of an Atreus-like low-profile keyboard to use on top of the shitty MacBook’s one. So I’m super interested in this! Thanks for sharing the design sources :heart:

1 Like

So Flatreus is nice, but I’m not a fan of the layout, and since I’m trying to use it more like a Planck, I was missing two extra columns. So here’s Electra, a variation on Flatrues with two more columns.

I haven’t actually soldered the switches to it yet, and I’m wondering if I should, because I’m getting new PCBs tomorrow with yet another variation on the theme — I feel like I’m getting closer to my perfect layout. I will probably wait and use the switches in the new one.

5 Likes

Updated my flatreus a little bit. First of all, I replaced the, frankly quite horrible, tact switches with actual mouse buttons — the kind that is used in mice. They are much lighter and more clicky, I really like their feel, even if they are not sticking out as high as the tact switches did.

You can also see I settled on leftover caps, as the “nice” ones went to other projects. The white wave is a bit of an accident, as I wanted to have the “5” keys, with the nubs on them, in positions of the F and J keys.

Finally, I completely changed the layout, to this:

This is based on the layout I made for even smaller keyboard, so 8 keys are not being used, and I’m actually pretty fine with that, as they were hard to reach anyways. I like this layout because it is easy to remember for me.

3 Likes

'tBack when I have just built Atreus, it felt a bit small for me — I wasn’t used to layers yet, and I felt that two extra columns would really help. So I designed Electra (a granddaughter of Atreus), and even ordered the PCB, but never assembled it, because instead I started working on Kamina, which became my default keyboard.

But recently I bought on impulse some Kailh Purpz switches, and when they arrived, I decided to use them for this board.

As keycaps, I went with the keychron ones, because I really don’t have a good use for them — they are too small and too high for me.

The layout is pretty standard for me, with digits in the middle row. I didn’t really have use for the center buttons, so I put the navigation keys there. All in all I’m quite happy with it.

6 Likes

Great job on the flatreus! I’d like to build one myself (I even have a psp joystick laying around from a previous project), is there a build guide? I’ve seen the hackaday page but I don’t know if have enough experience to reproduce the build without a little guidance.

You are right. I don’t have a detailed build guide, unfortunately, but I can give some advice, and you can find me on the Adafruit’s CircuitPython Discord if you want a more interactive discussion (also on the Absolem and Low Profile Keyboards Discords).

Especially burning the bootloader on the SAMD21 is a bit of a stumbling block. I used the programming pins for the switches, so you have to program the bbootloader before you solder the switches, by connecting the wires where the switches would be, and you need a CMSIS/DAP-capable programmer to do it (JLink one that I use is way overpriced, but I have it for unrelated reasons).

Soldering the QFN32 chip also requires a little bit of skill, and the PSP joystick is best soldered by disassembling it first, soldering the PCB part with the metal brace on it first, and then re-assembling the metal parts back — this way they will not melt. (You can add some extra lube inside in the process.)

Otherwise, it’s all pretty straightforward.

Thank you, I’ll catch you on discord then! (I sent you a friend request, my profile picture is a bunch of basil leaves)

I’m a patient person :slightly_smiling_face:

Does this make changing the keymap harder? On a new keyboard it always takes me some time finding the right layout.

Not at all, the keymap is just a piece of Python code that you edit on the USB drive that comes up when you connect the keyboard while holding the top left key down.

1 Like