GTI Keyboard project
I started planning this project in June 2017, and weirdly enough I finished it within the estimated time frame.
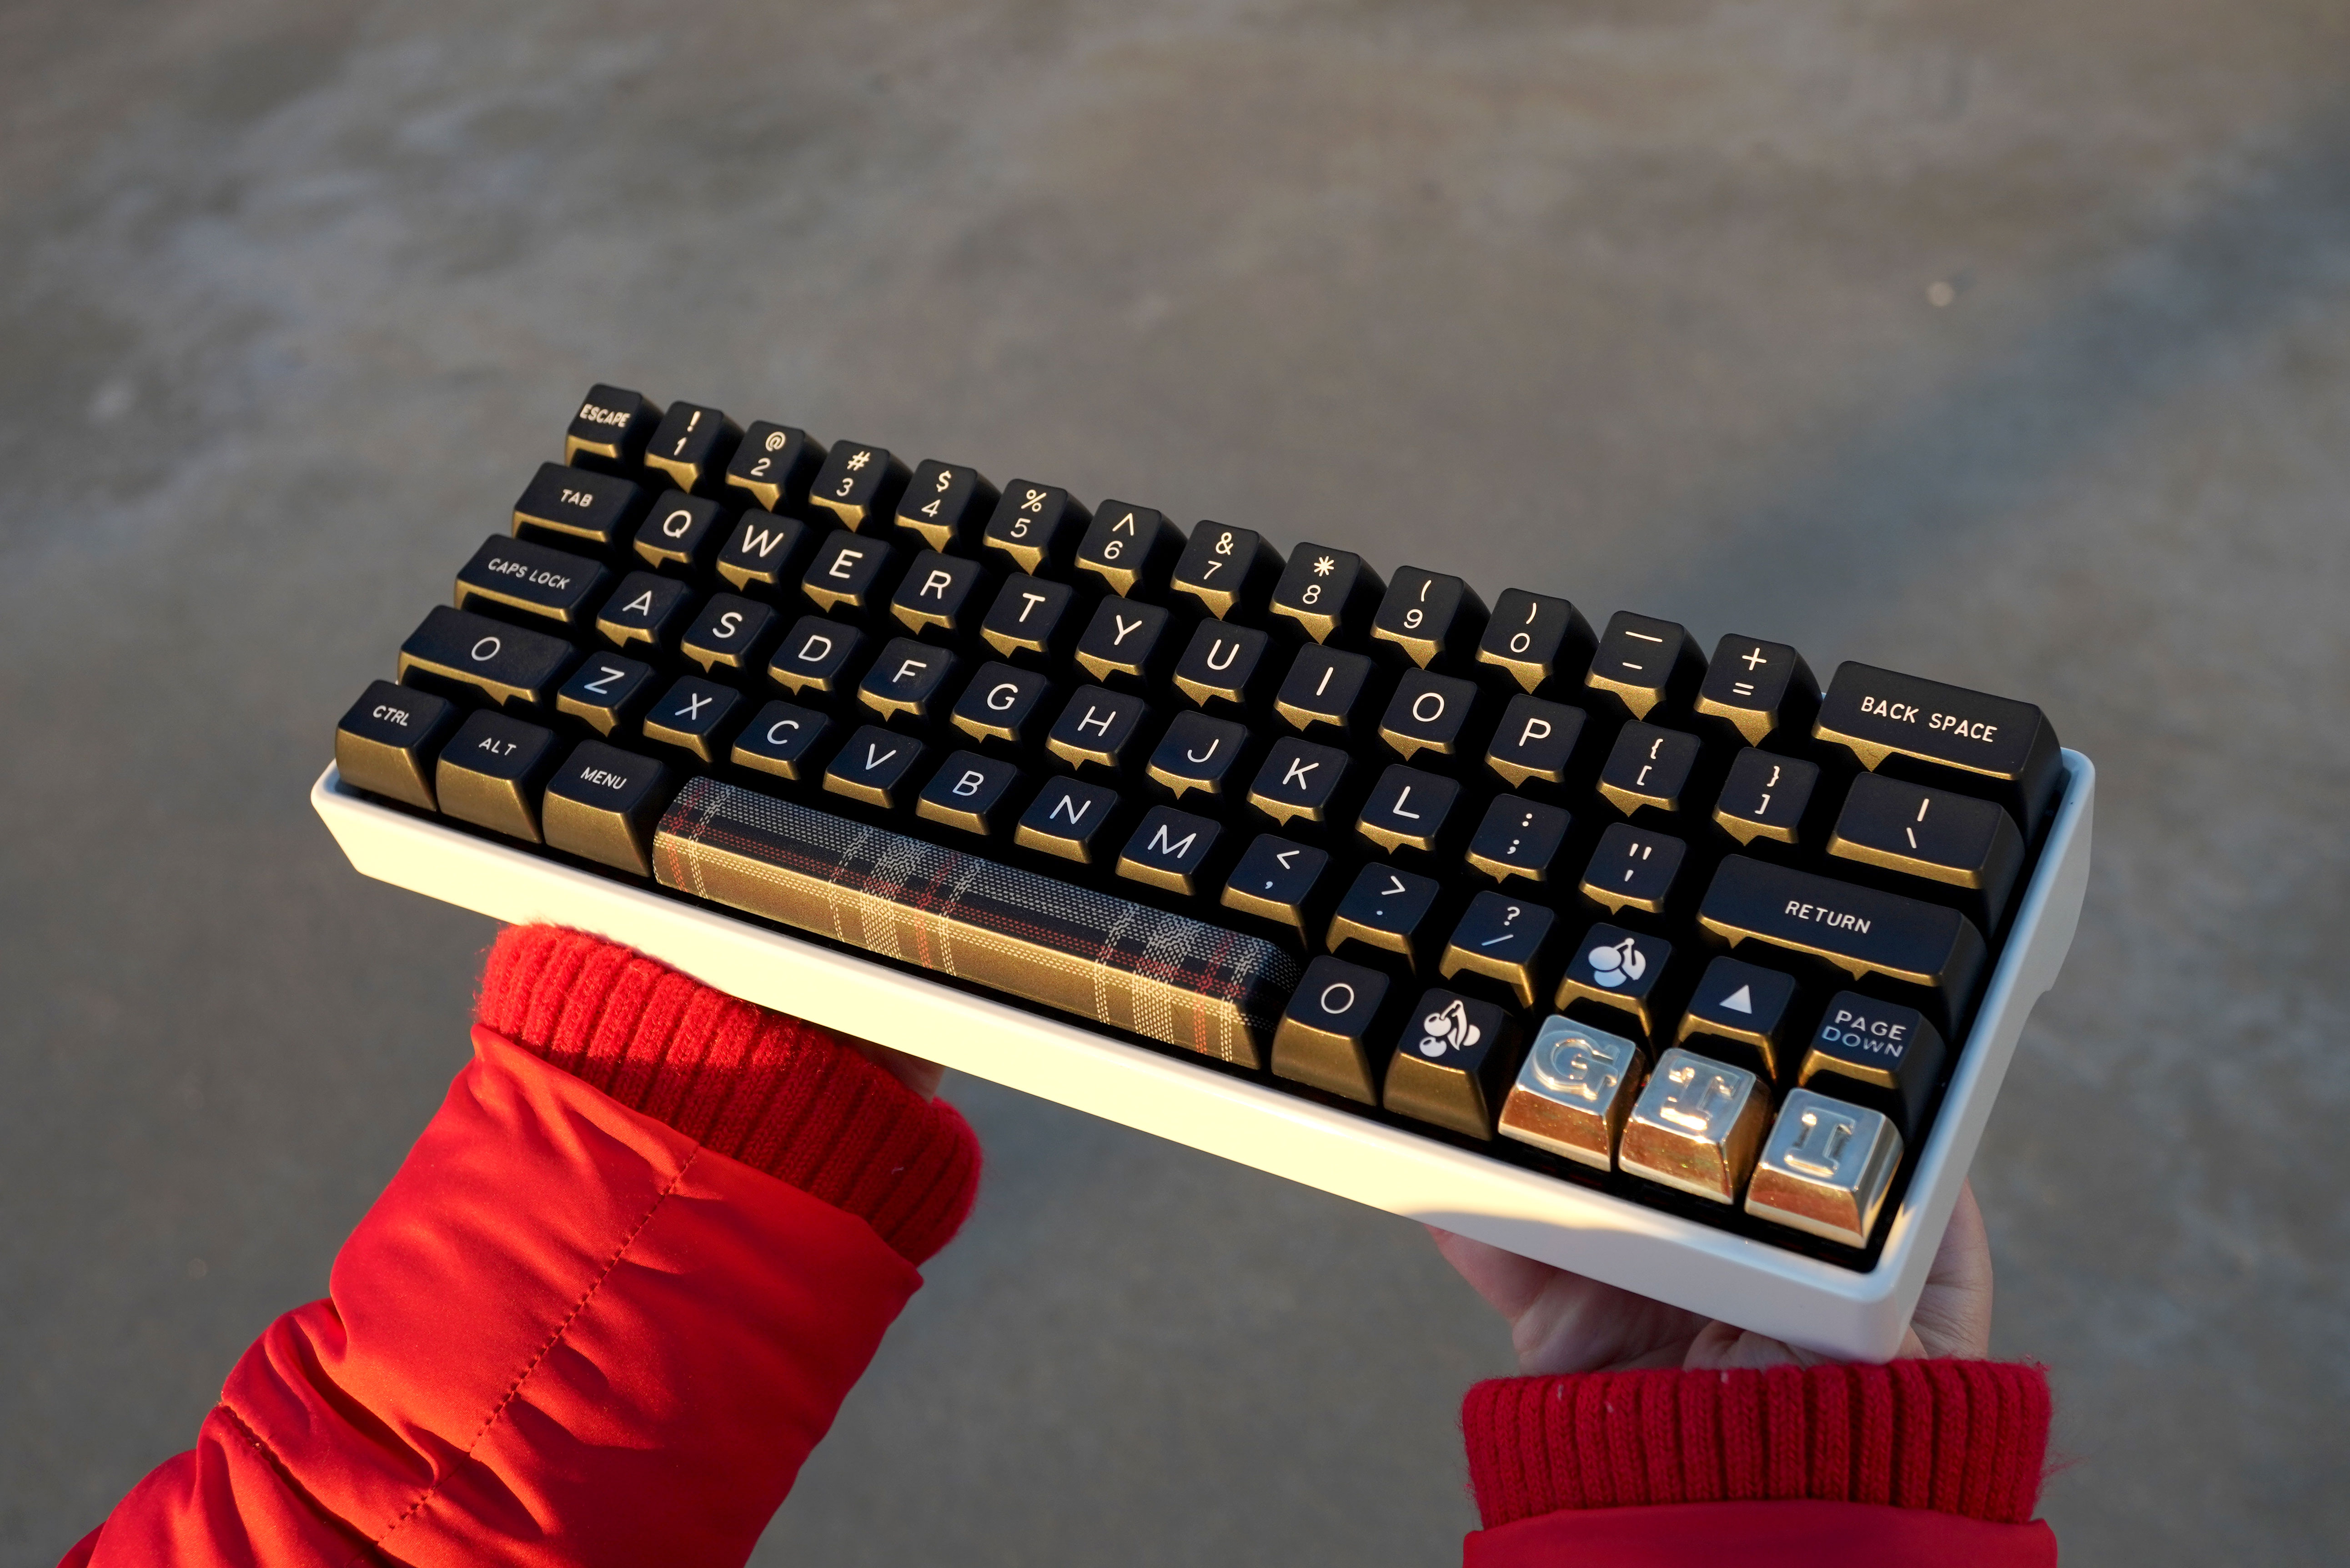
The project started with the pièce de résistance, the GTI keycaps in solid sterling silver.
GTI keycaps:
At first I entertained the idea of sculpting them, but I quickly realized that I suck at it; plus, I was going to waste way too much resin and make a mess at home.
I decided to 3D model the keycaps and then print them. I had to go through a few iterations where I made sure the size was right, the proportions matched the OEM letters, and that the letters had the convex curvature of the MK7 emblem.
Once I managed to get all those characteristics, and I was happy with the designs for all three letters, I proceeded to get the first test 3D printed from shapeways. The first test was made in stainless steel.
The first keycaps were a success! The dimensions were perfectly 3D printed in steel. The only problem was that the tolerances of the cross inside the stem were too tight. I tried filing it down with needle files, but stainless steel is too hard to be filed down by hand. I figured it would not be that bad in silver given that silver is much softer than stainless steel.
Once I received the silver keycaps I started filing down to spec the inside of the stems and it took me a few hours per keycap. If I do this again I would tweak the tolerance on the stem cross.
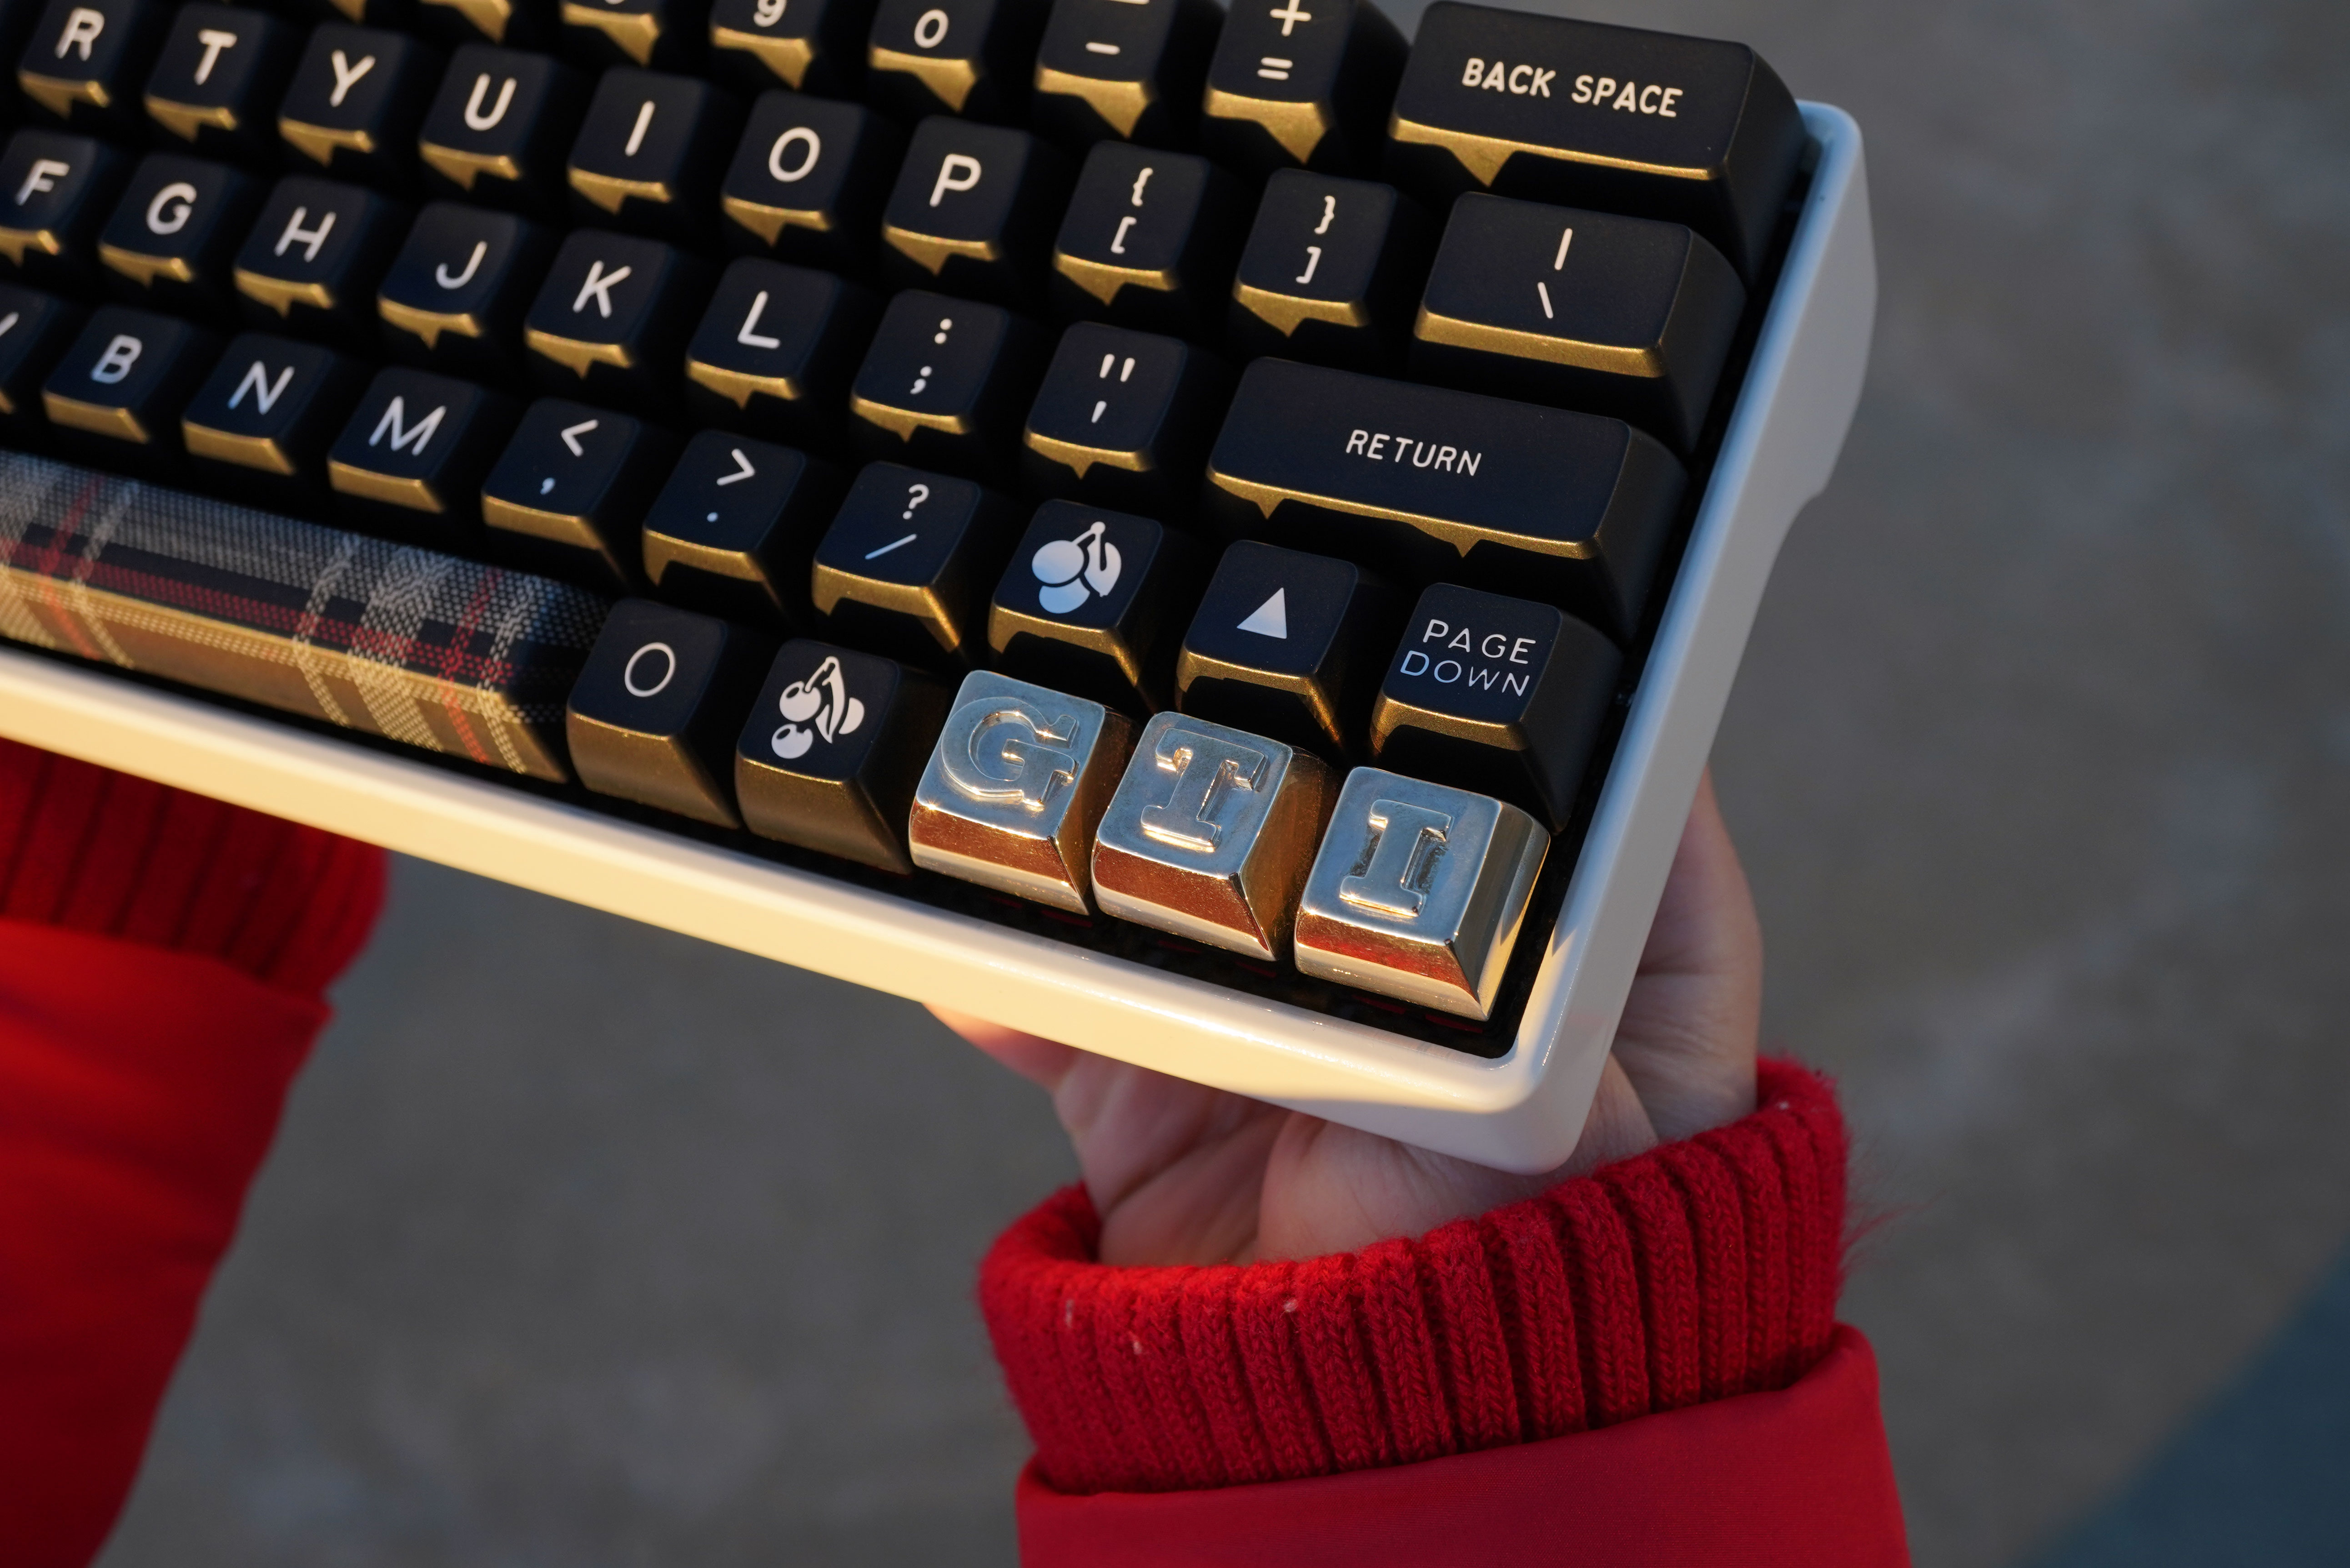
For those of you who are asking why I didn’t go for the sport package emblem with red letters, well, I didn’t because my GTI doesn’t have the package; this keyboard is intended as an homage to my very own GTI, car that I really REALLY like and enjoy.
Case:
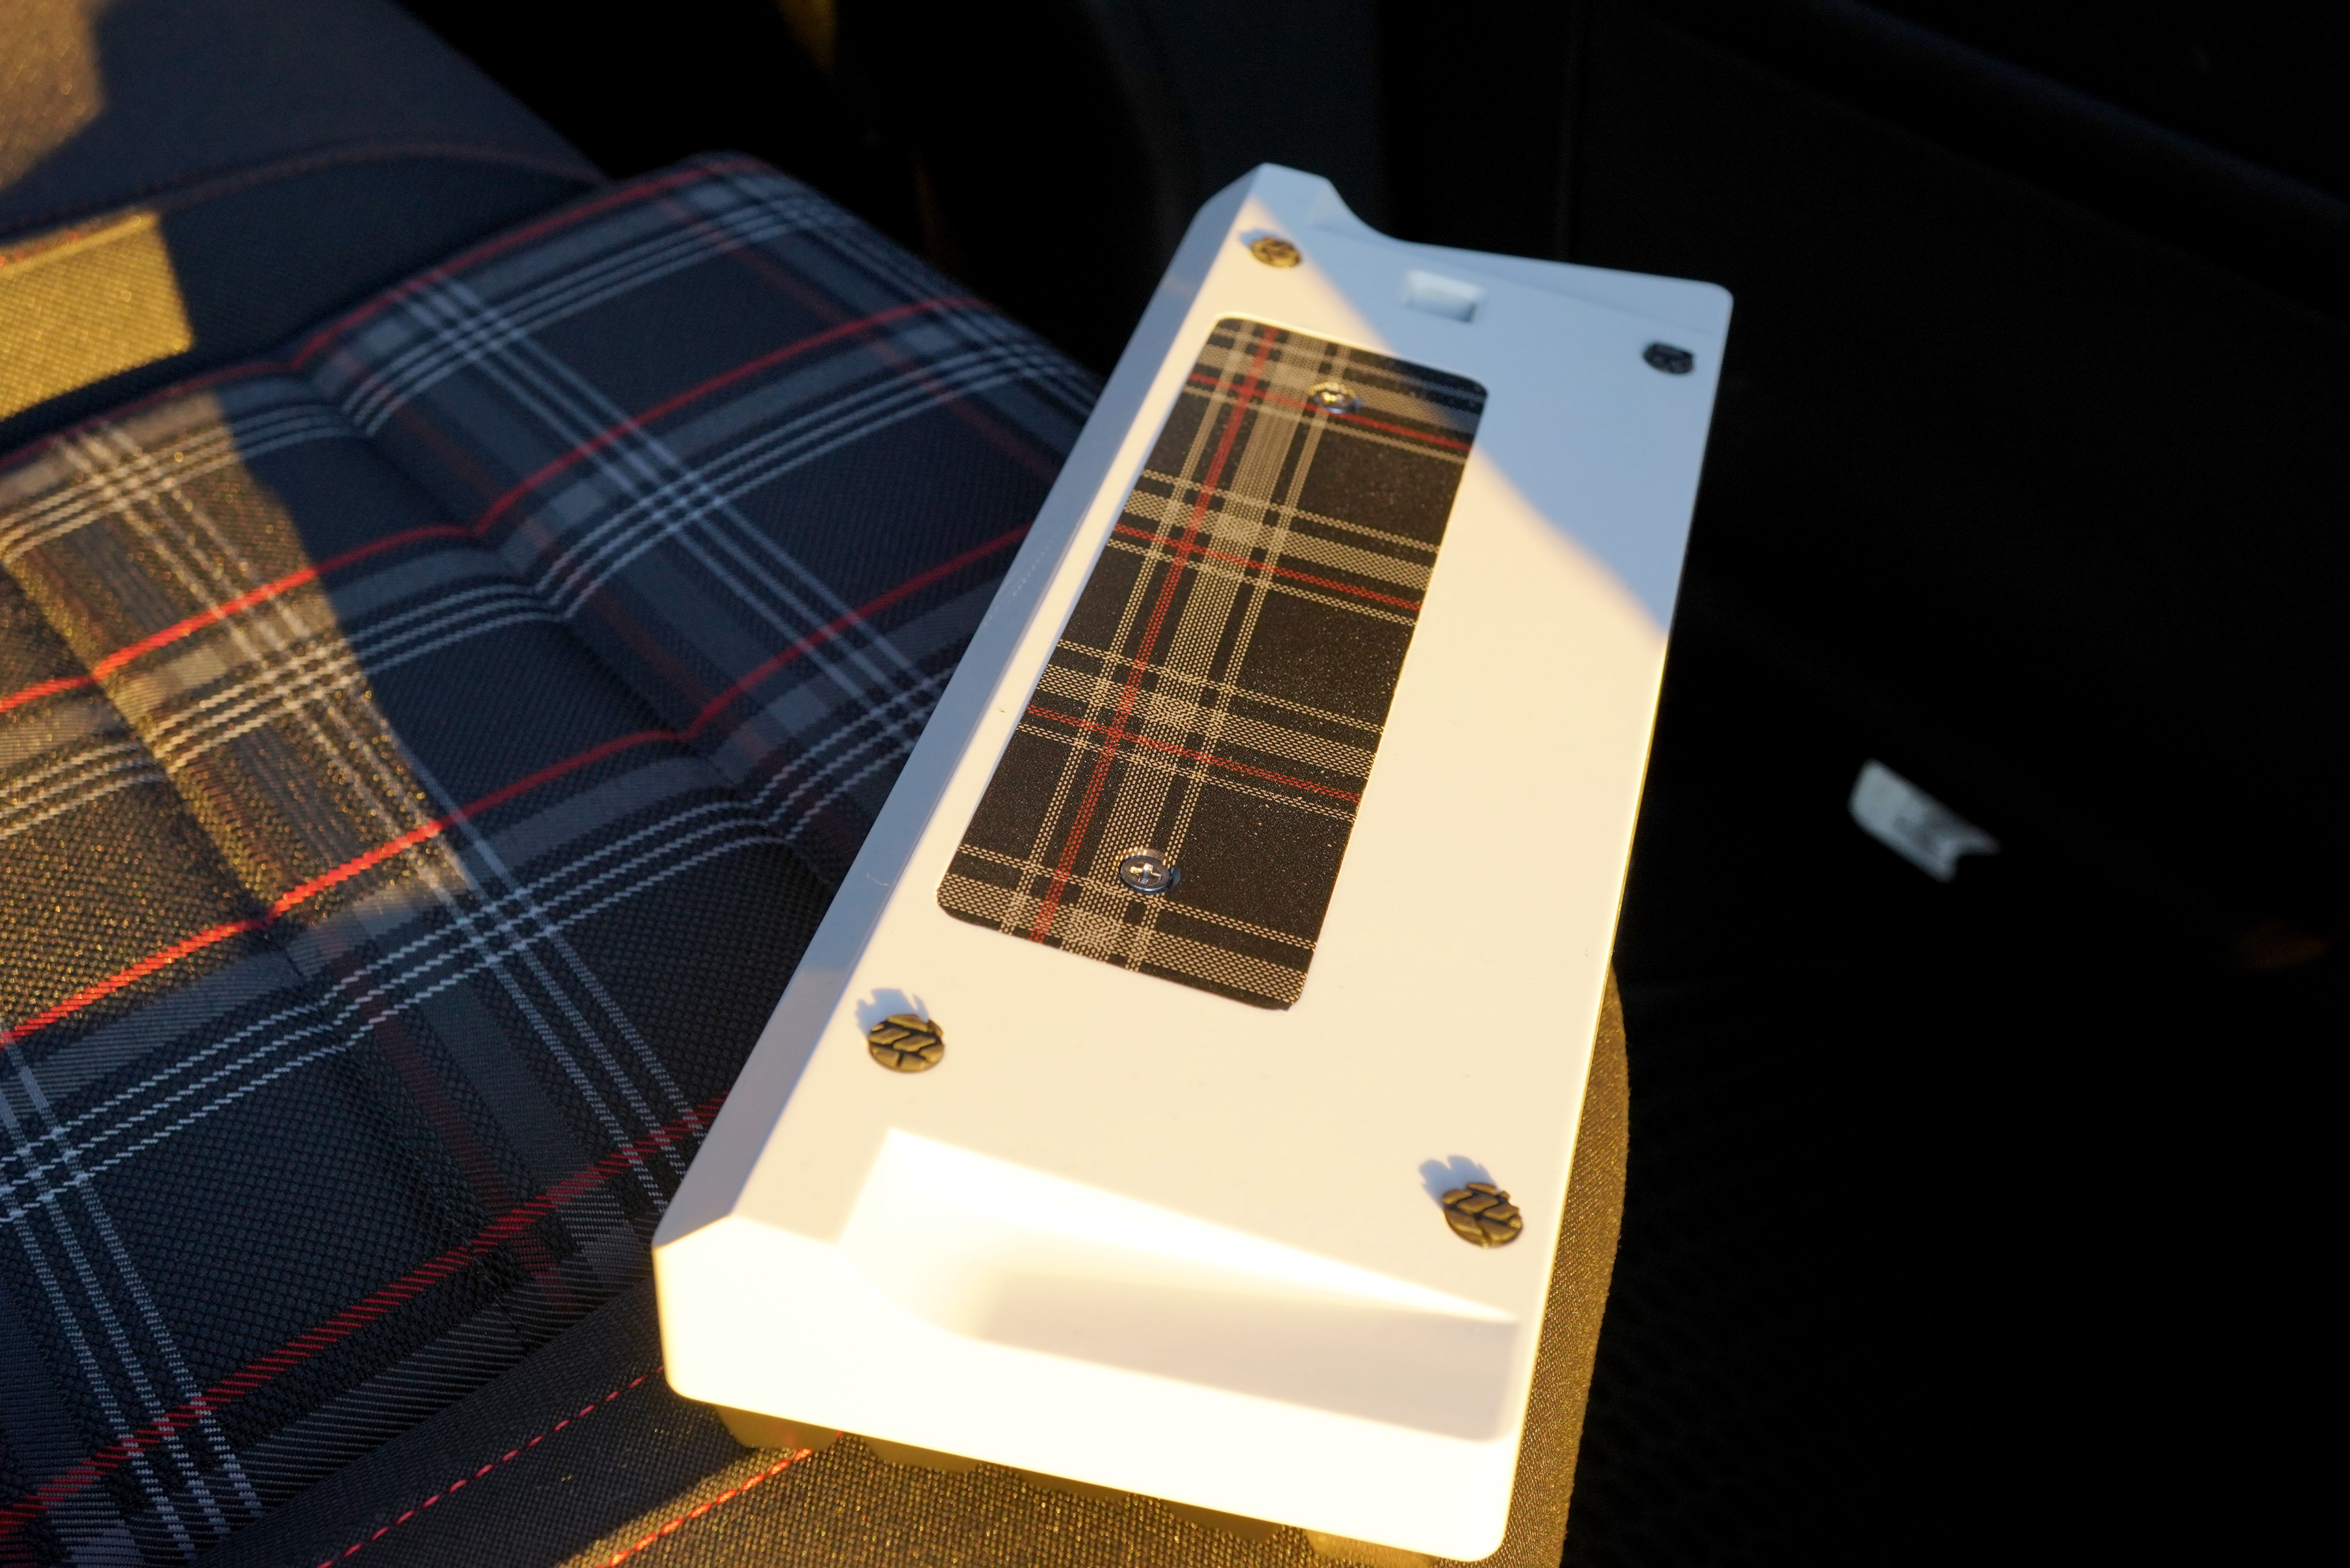
Aluminum 60 percent case with weight. This is pretty common and easy to find.I wanted something heavy and with large surfaces so I could paint it.
Once I got the case I started painting it. I used OEM Volkswagen paint. I had so much paint that I was able to cover the case with two coats of primer, 8 coats of Candy White, and about 4 coats of car grade gloss.
Between each layer of paint I wet sanded with 2000 grit sandpaper to make sure the next coat would stick properly with no bubbles and with a smooth finish.
After letting the paint and the gloss dry and settle for a couple weeks I started the multi step wet sanding and polishing. I went from 800 grit sand paper all the way to 3200 grit. After that I polished using three stages of car paint polishing compound by hand.
Once the case shined just like my GTI, I had to use carnauba wax. It feels smoooth!
Keycap set:
SA is my favorite profile. I had to get something that would go well with the keyboard without calling too much attention. SA Maxkey White on Black Keycap Set was the way to go.
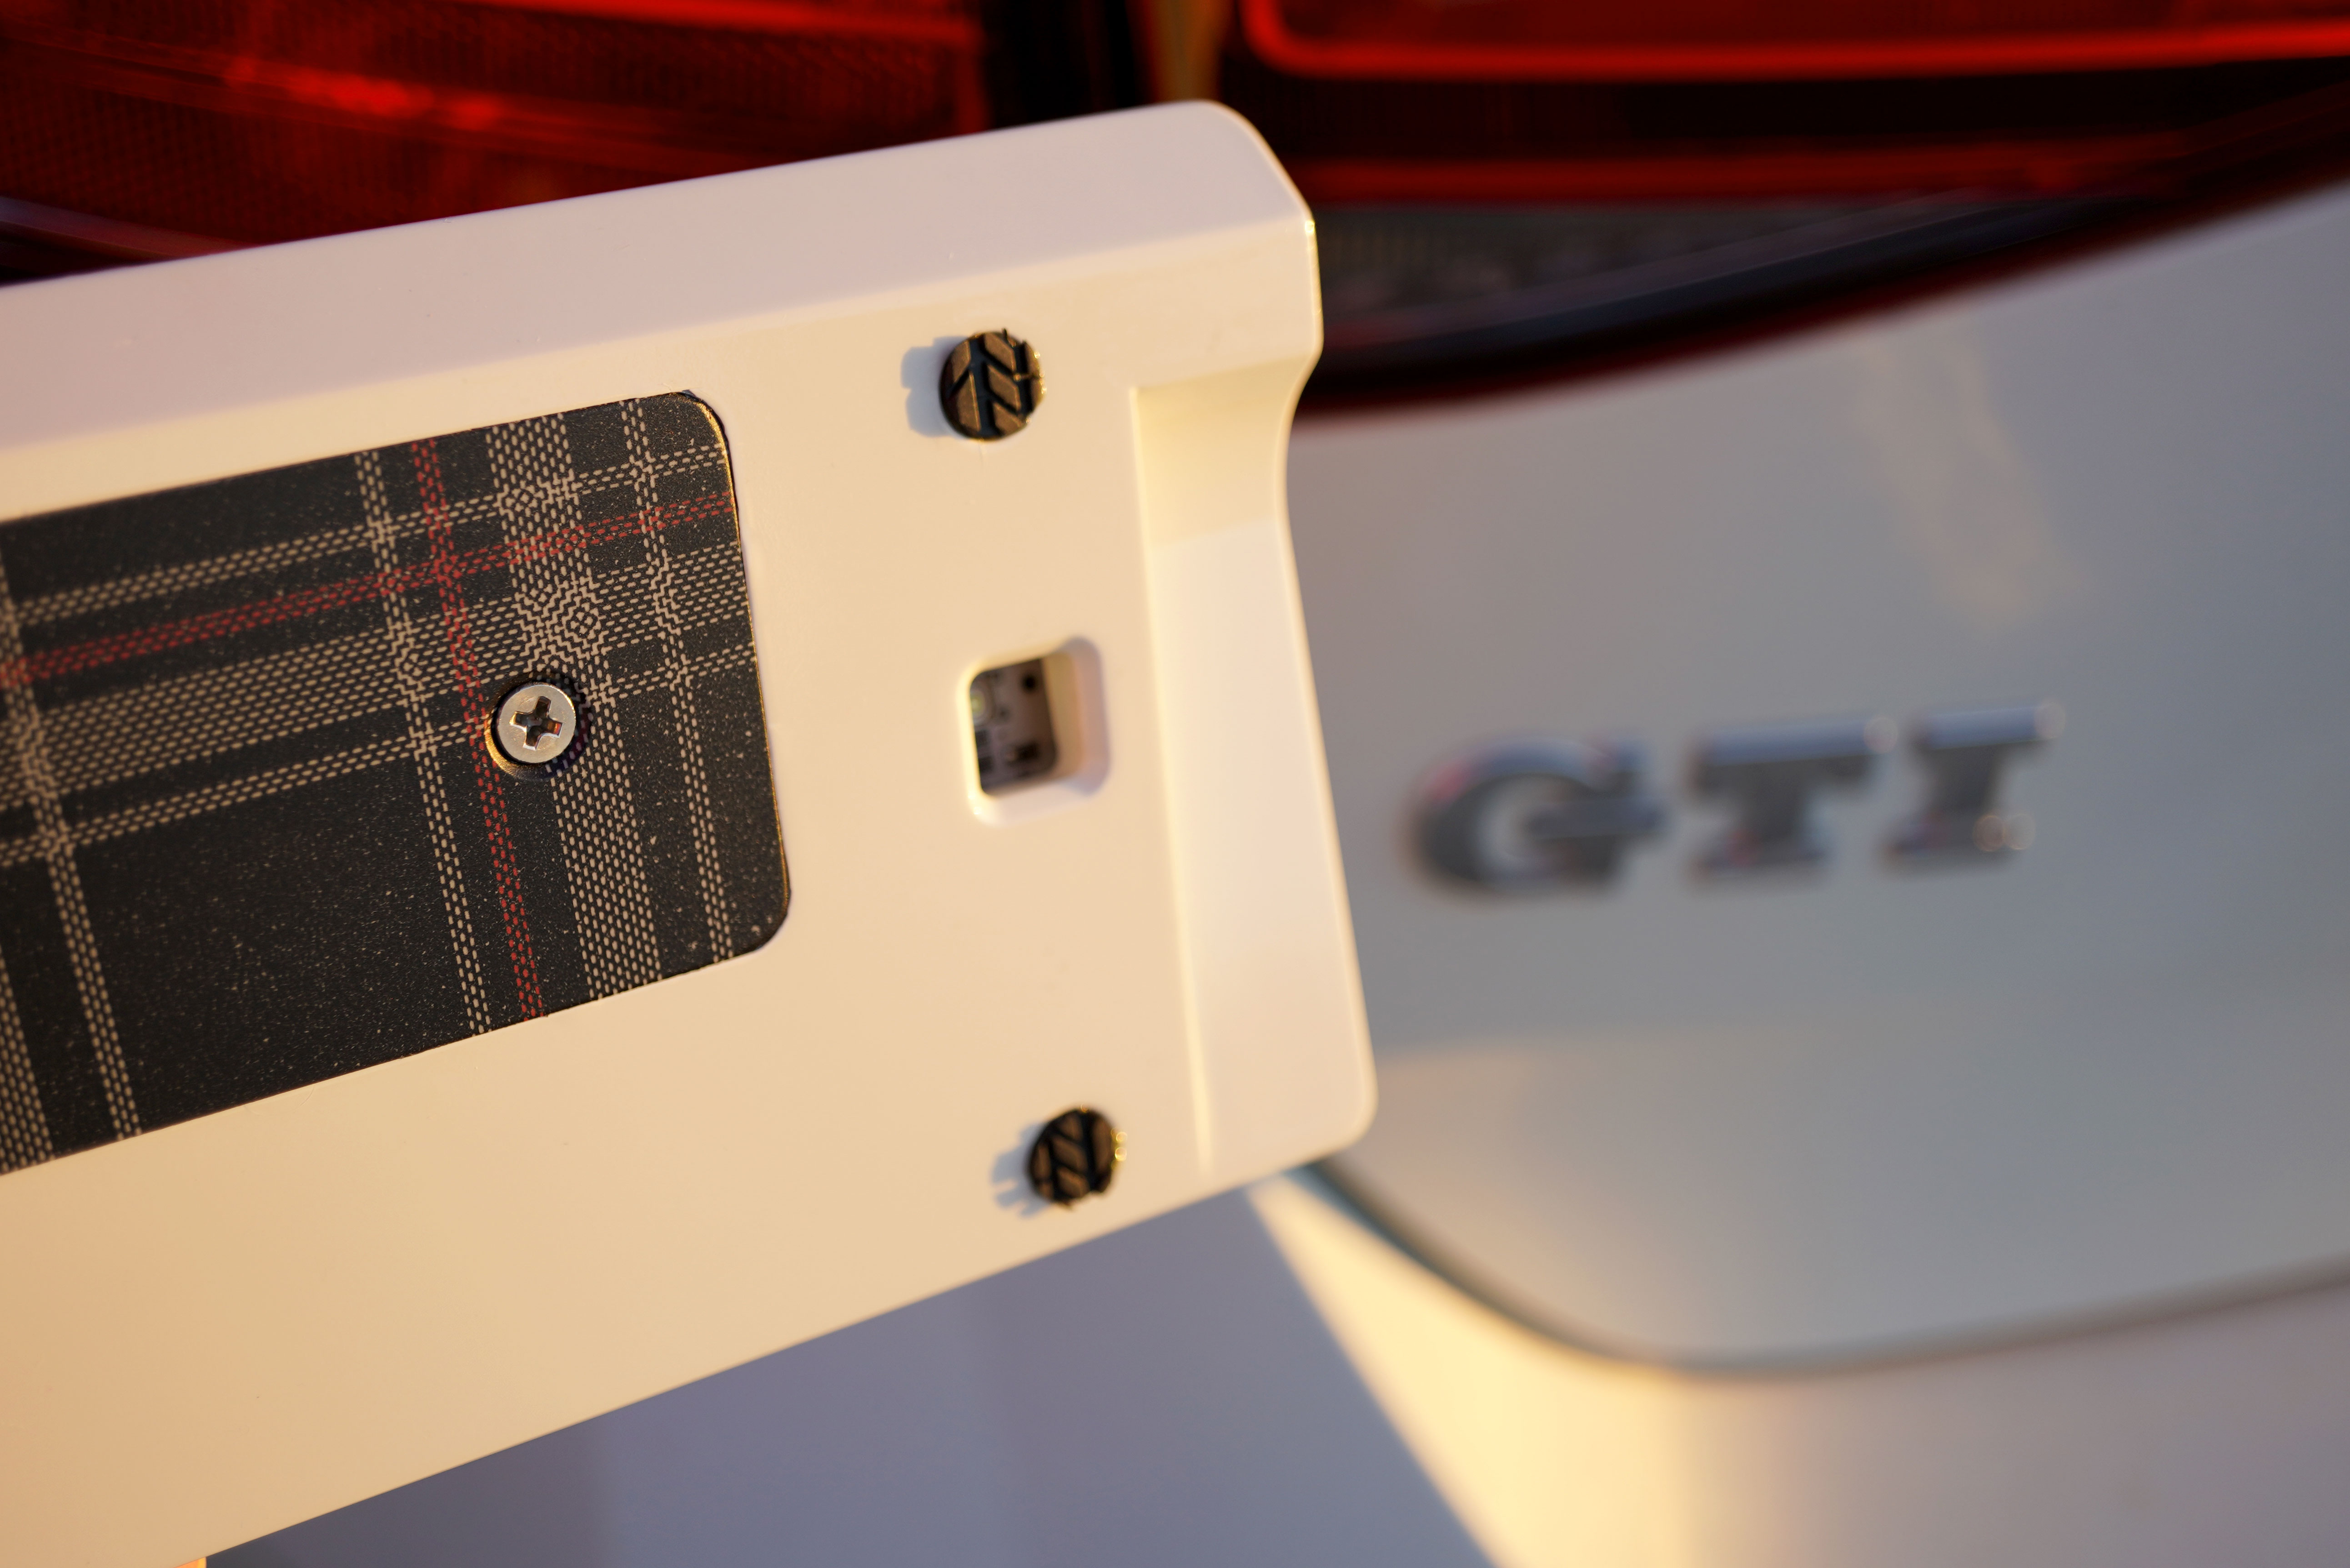
Clark Plaid:
White case and GTI keycaps wasn’t enough, I needed something else. I decided to incorporate the famous clark plaid from every generation of the GTI on the spacebar and the stainless steel weight in the back. I thought it was going to be a bigger challenge than it was. I managed to get both pieces hydro dipped at home and on the first try. I also applied a couple coats of clear matte finish. The pattern matches almost perfectly to the MK7 GTI seats.
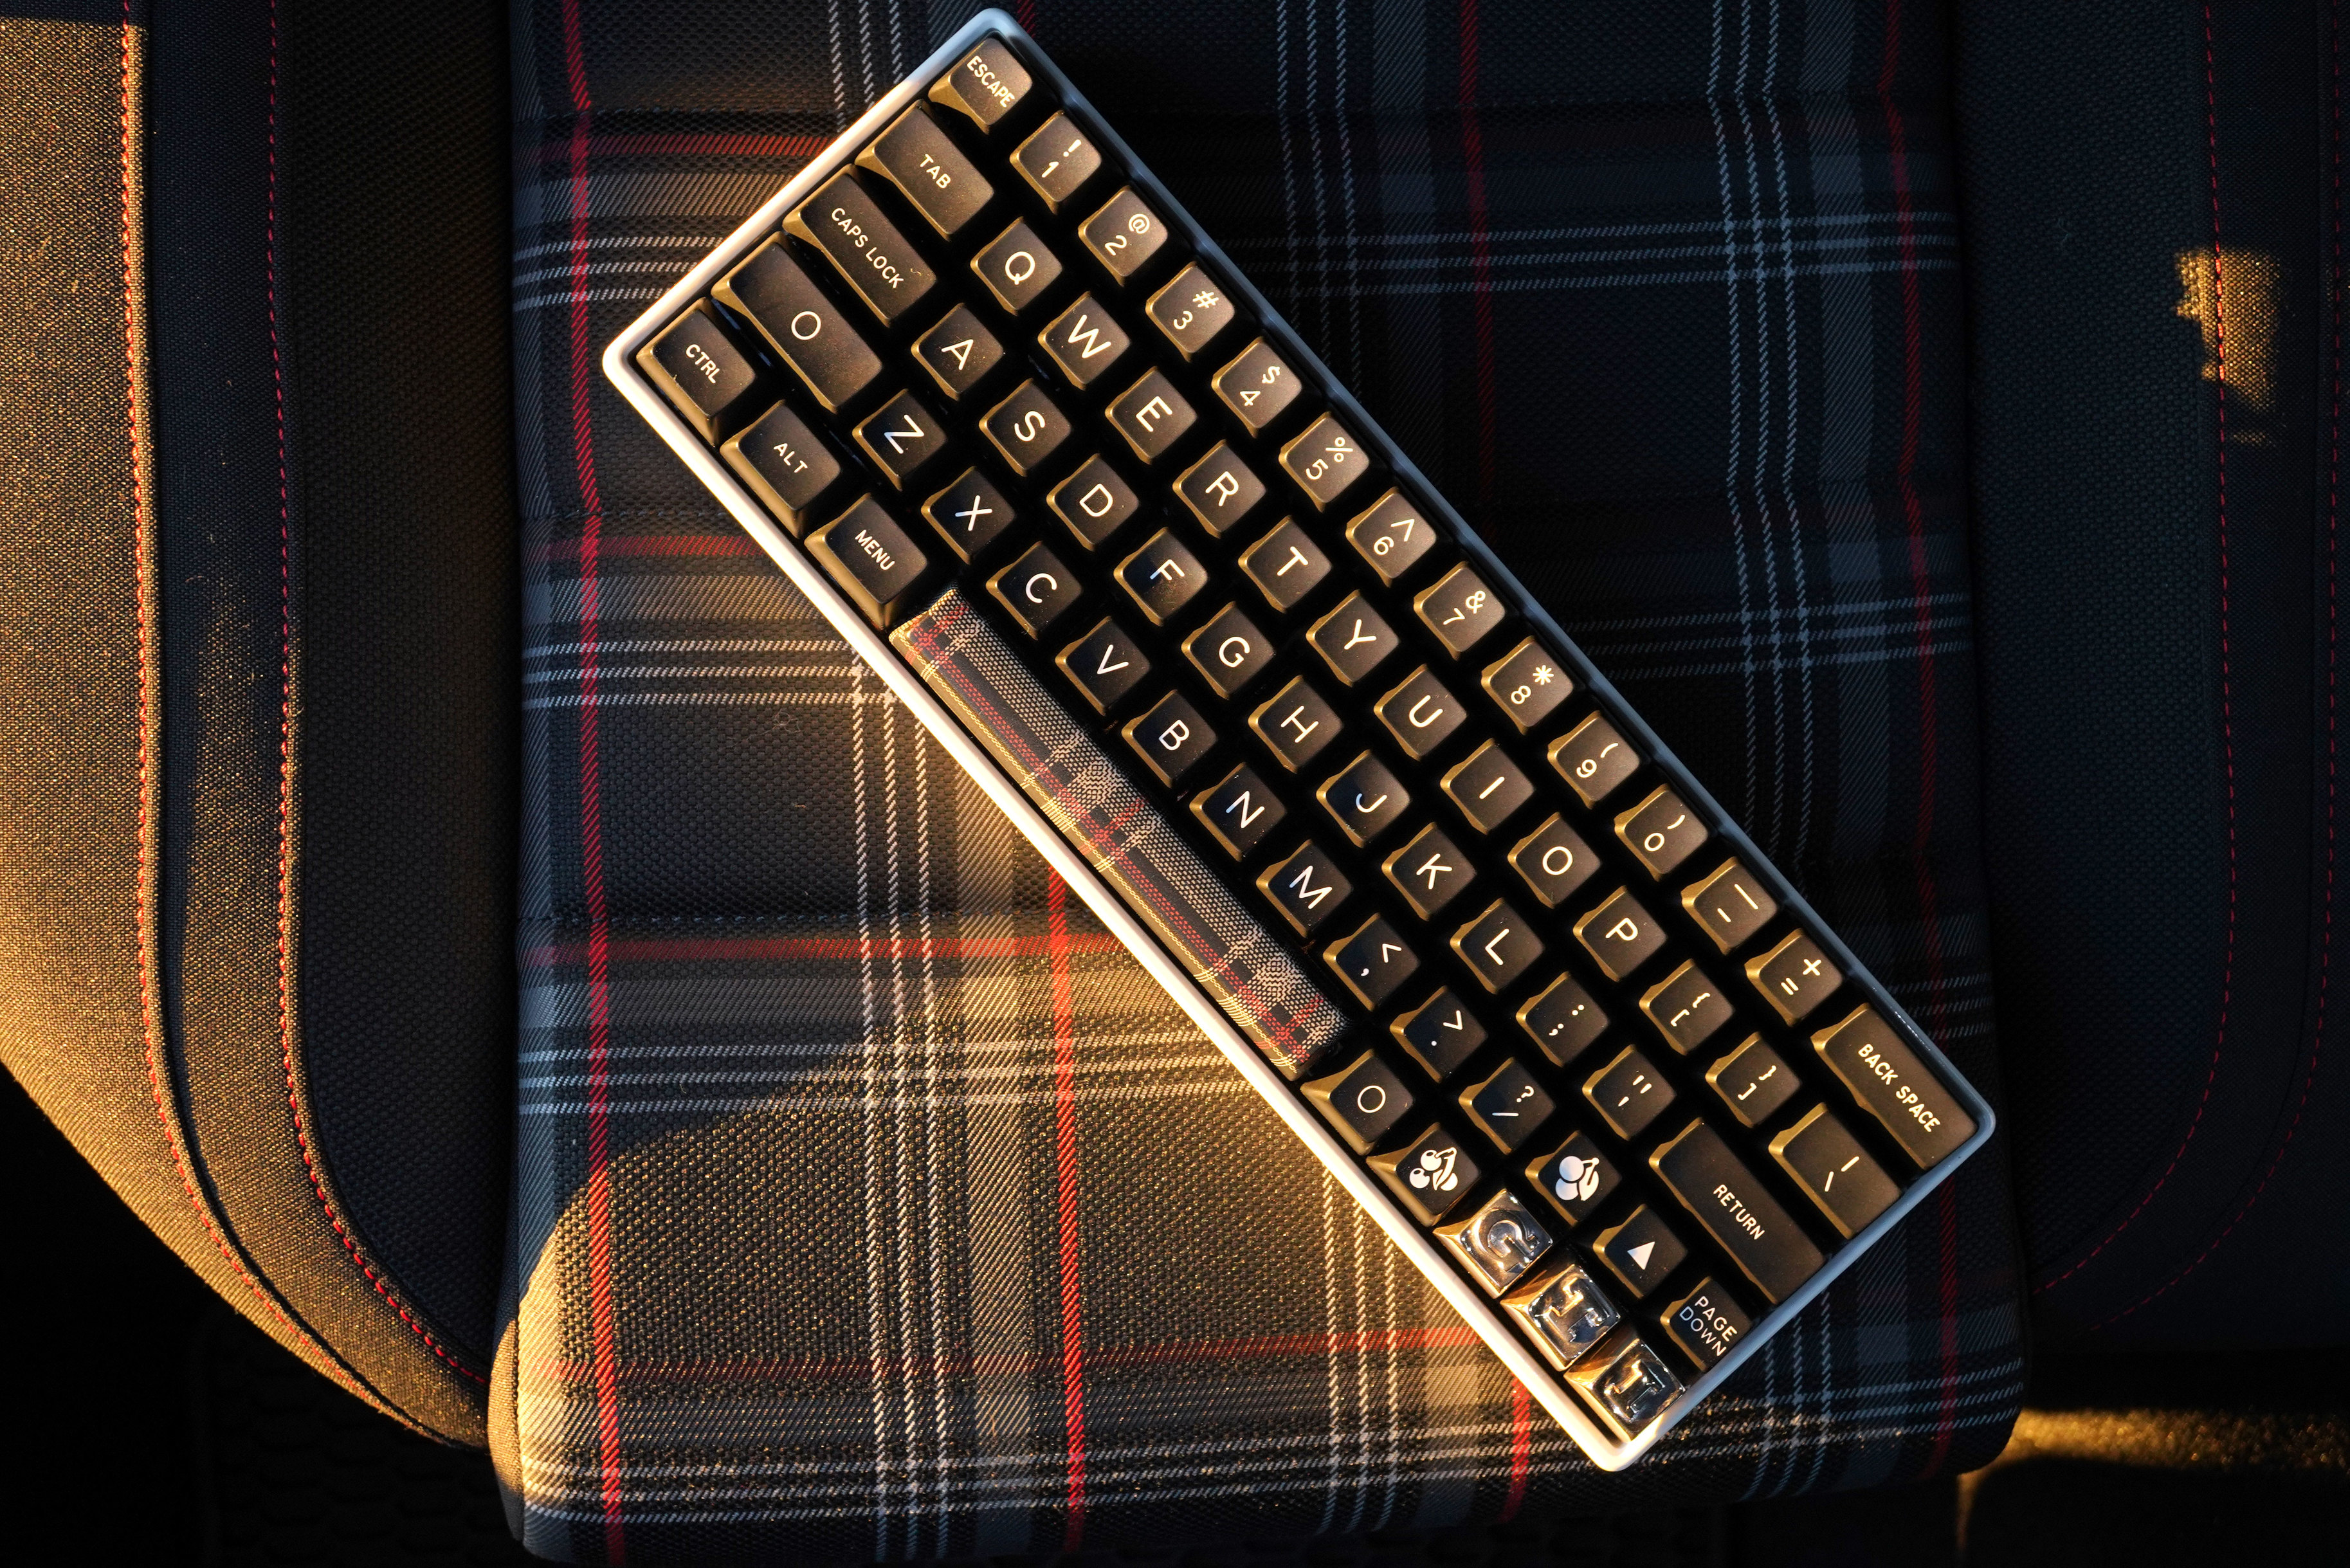
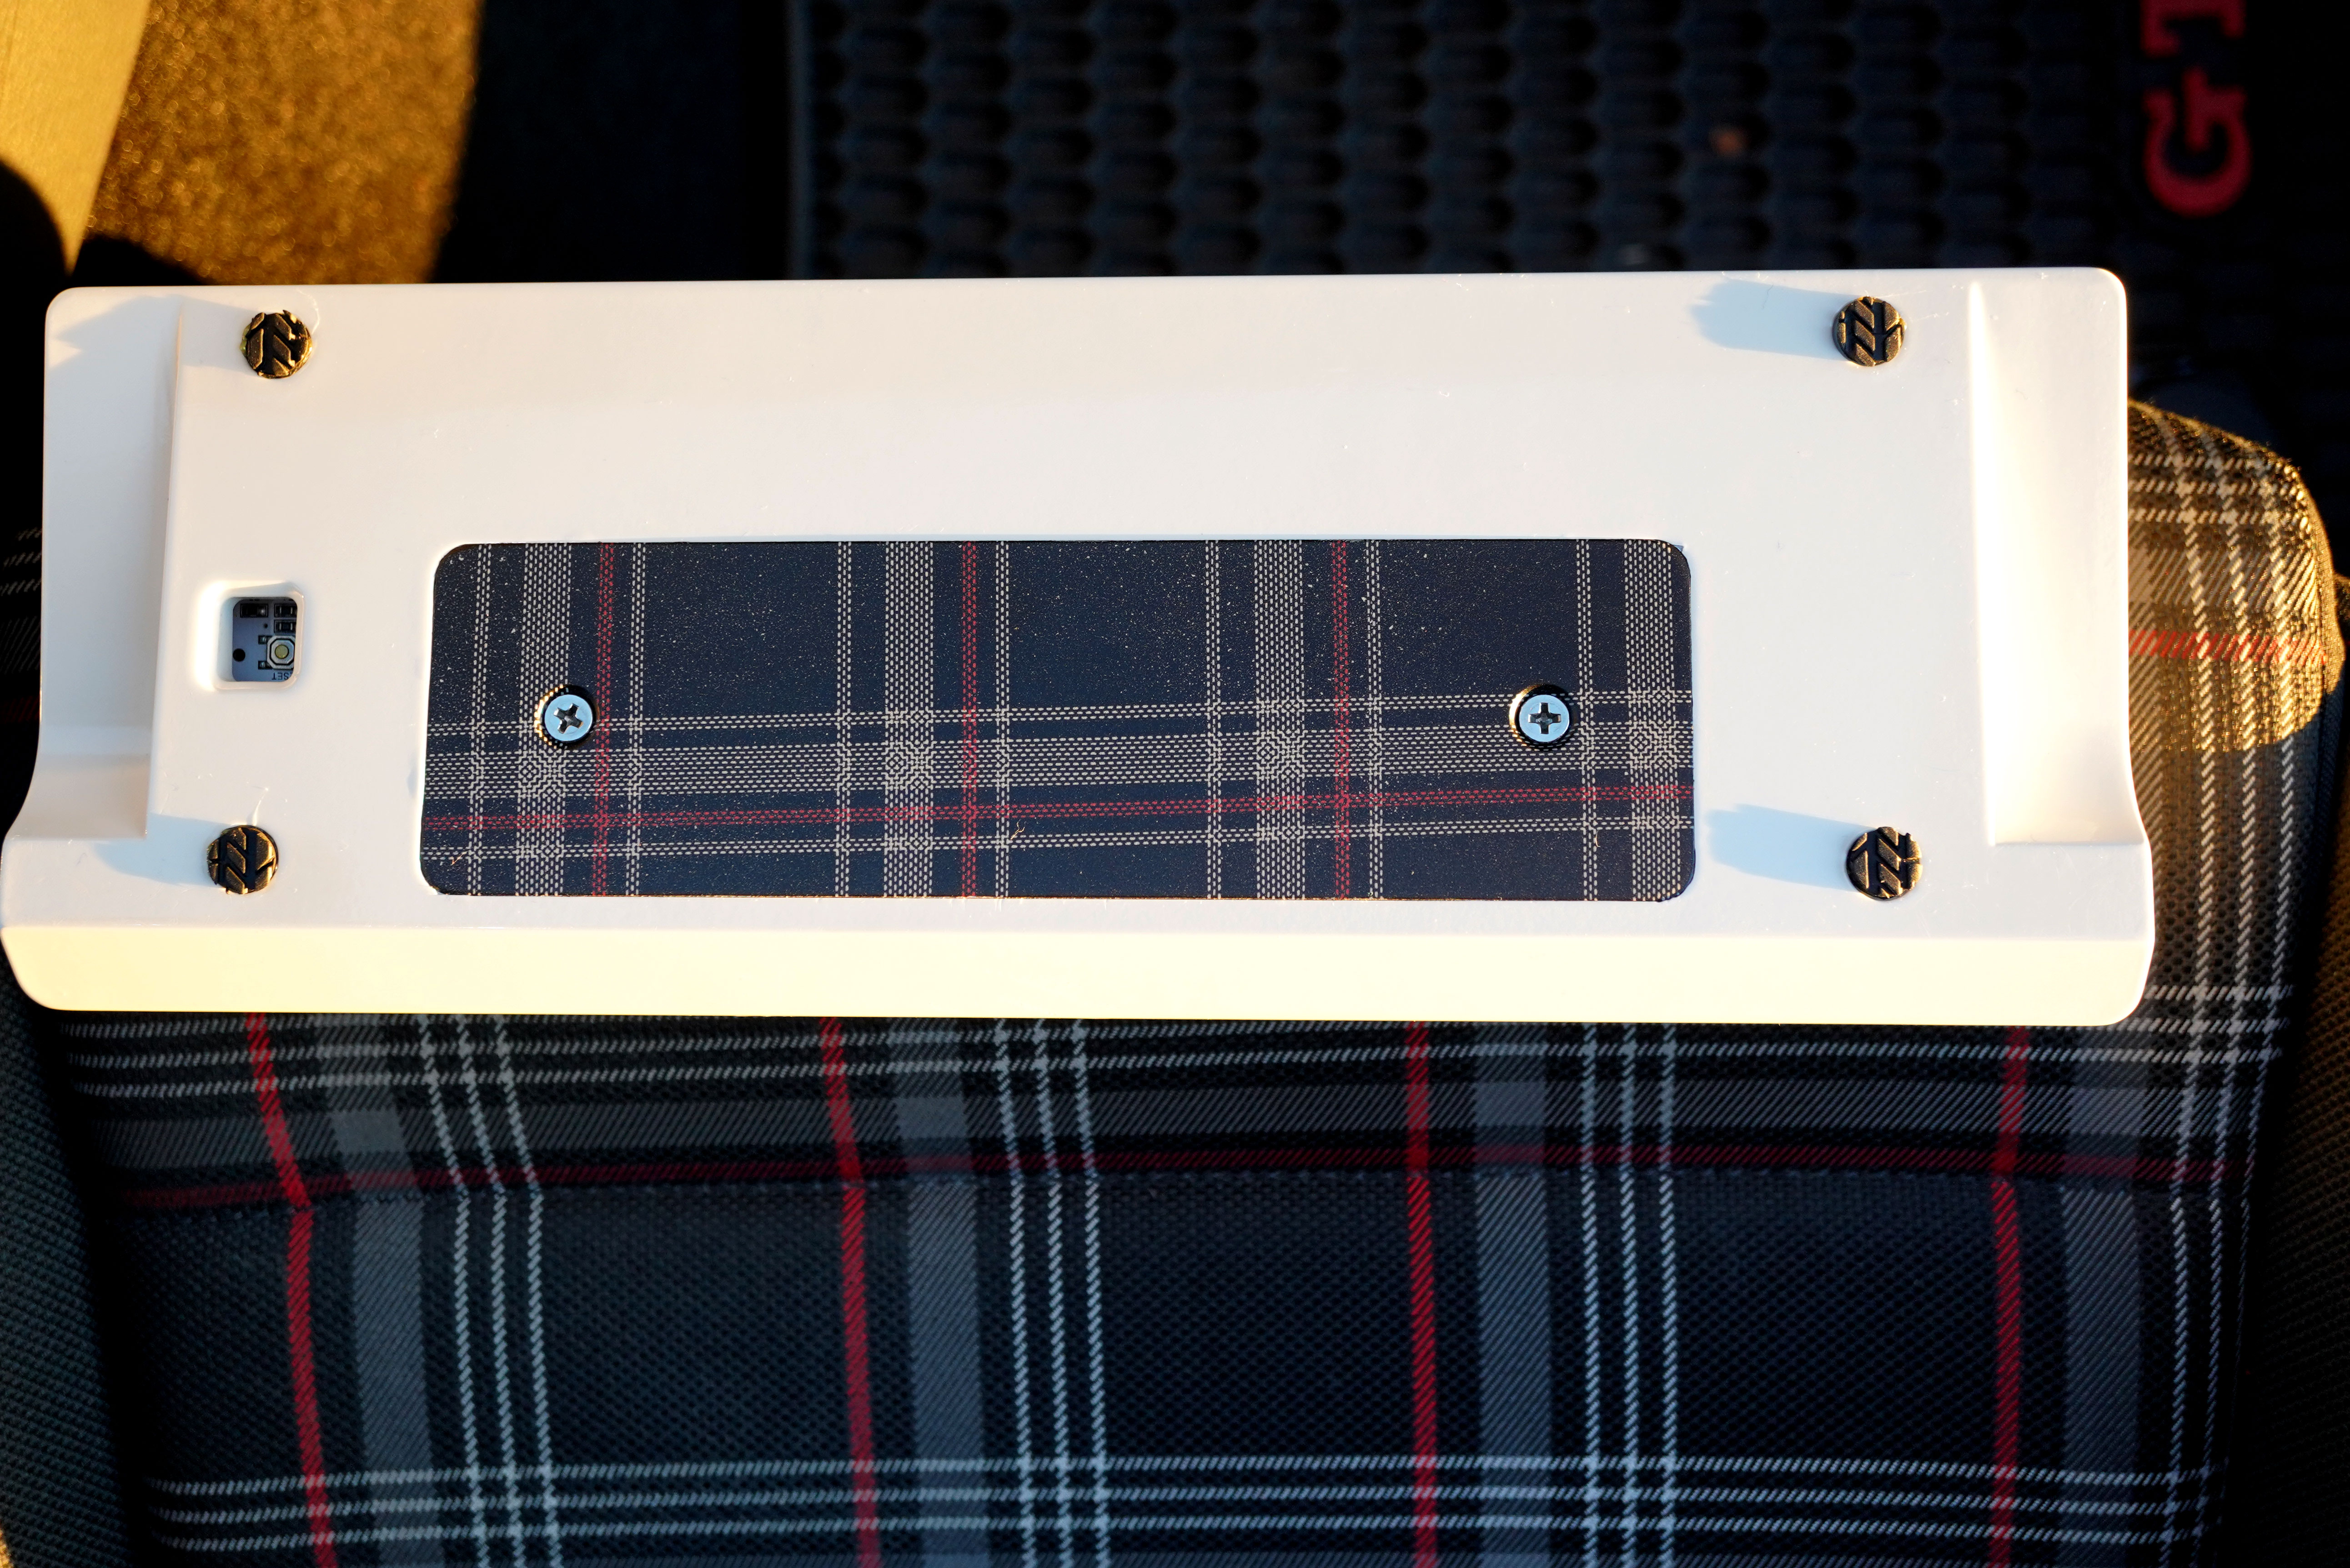
Plate:
I went with a custom made 1.5mm carbon fiber plate. Why custom? Because I wanted the 1u cluster on the bottom right corner.
The plate was cut by Big Blue Saw; they have the best customer service.
PCB:
DZ60 REV 2.0 60% because it supports the 1u cluster on the bottom right corner.
Switches:
Lubed Cherry MX Gray with 55g gold springs and red stickers. No LEDs.
Cable:
Not pictured, but I also assembled and soldered a custom cable with red and black sleeve and an aviation-style 4-pin male-to-female connector in the middle just because. I might take a picture later and post it.
Feet:
I didn’t want the boring transparent 3M dots. After a few weeks I came up with the idea of using a punch hole on some cheap RC car tires and then gluing them using soft silicone. It ended up looking pretty good and sticking very well. All corners touch the desk and they have excellent grip!
You can find a few more pics on this album in Imgur.
I hope you all GTI drivers appreciate this one.
What’s next?