The amount of build logs you did in this year has been impressive!
Thanks for the last 3 builds in a row , I could read something interesting on my phone during my holidays 
1 Like
Build #24: Brutal60
It’s been a while since I did a build where I tried a bunch of new things all at once. CannonKeys’ Brutal60 is a pretty affordable build by custom standards, and it ended up being a great build for trying out several things that were new to me:
- FR4 plate material
- Linjär switches
- GPL205 grade 0
- Tsangan layout
- Instant60 PCB
- Burger mount
- Polyfill
- EPBT keycaps
We don’t have Smell-O-Vision yet, but if we did, I’d invite you to experience the lovely aromatics of the Brutal60 unboxing - a “subtle citrus scent” added to the packaging, according to Upas of CannonKeys. Between the harsh plastic smell of a desk mat, and the fragrant rotting fish of Cream switches, it’s nice to unpack keeb goods that leave you with the vibe of the therapeutic, rather than the carcinogenic.
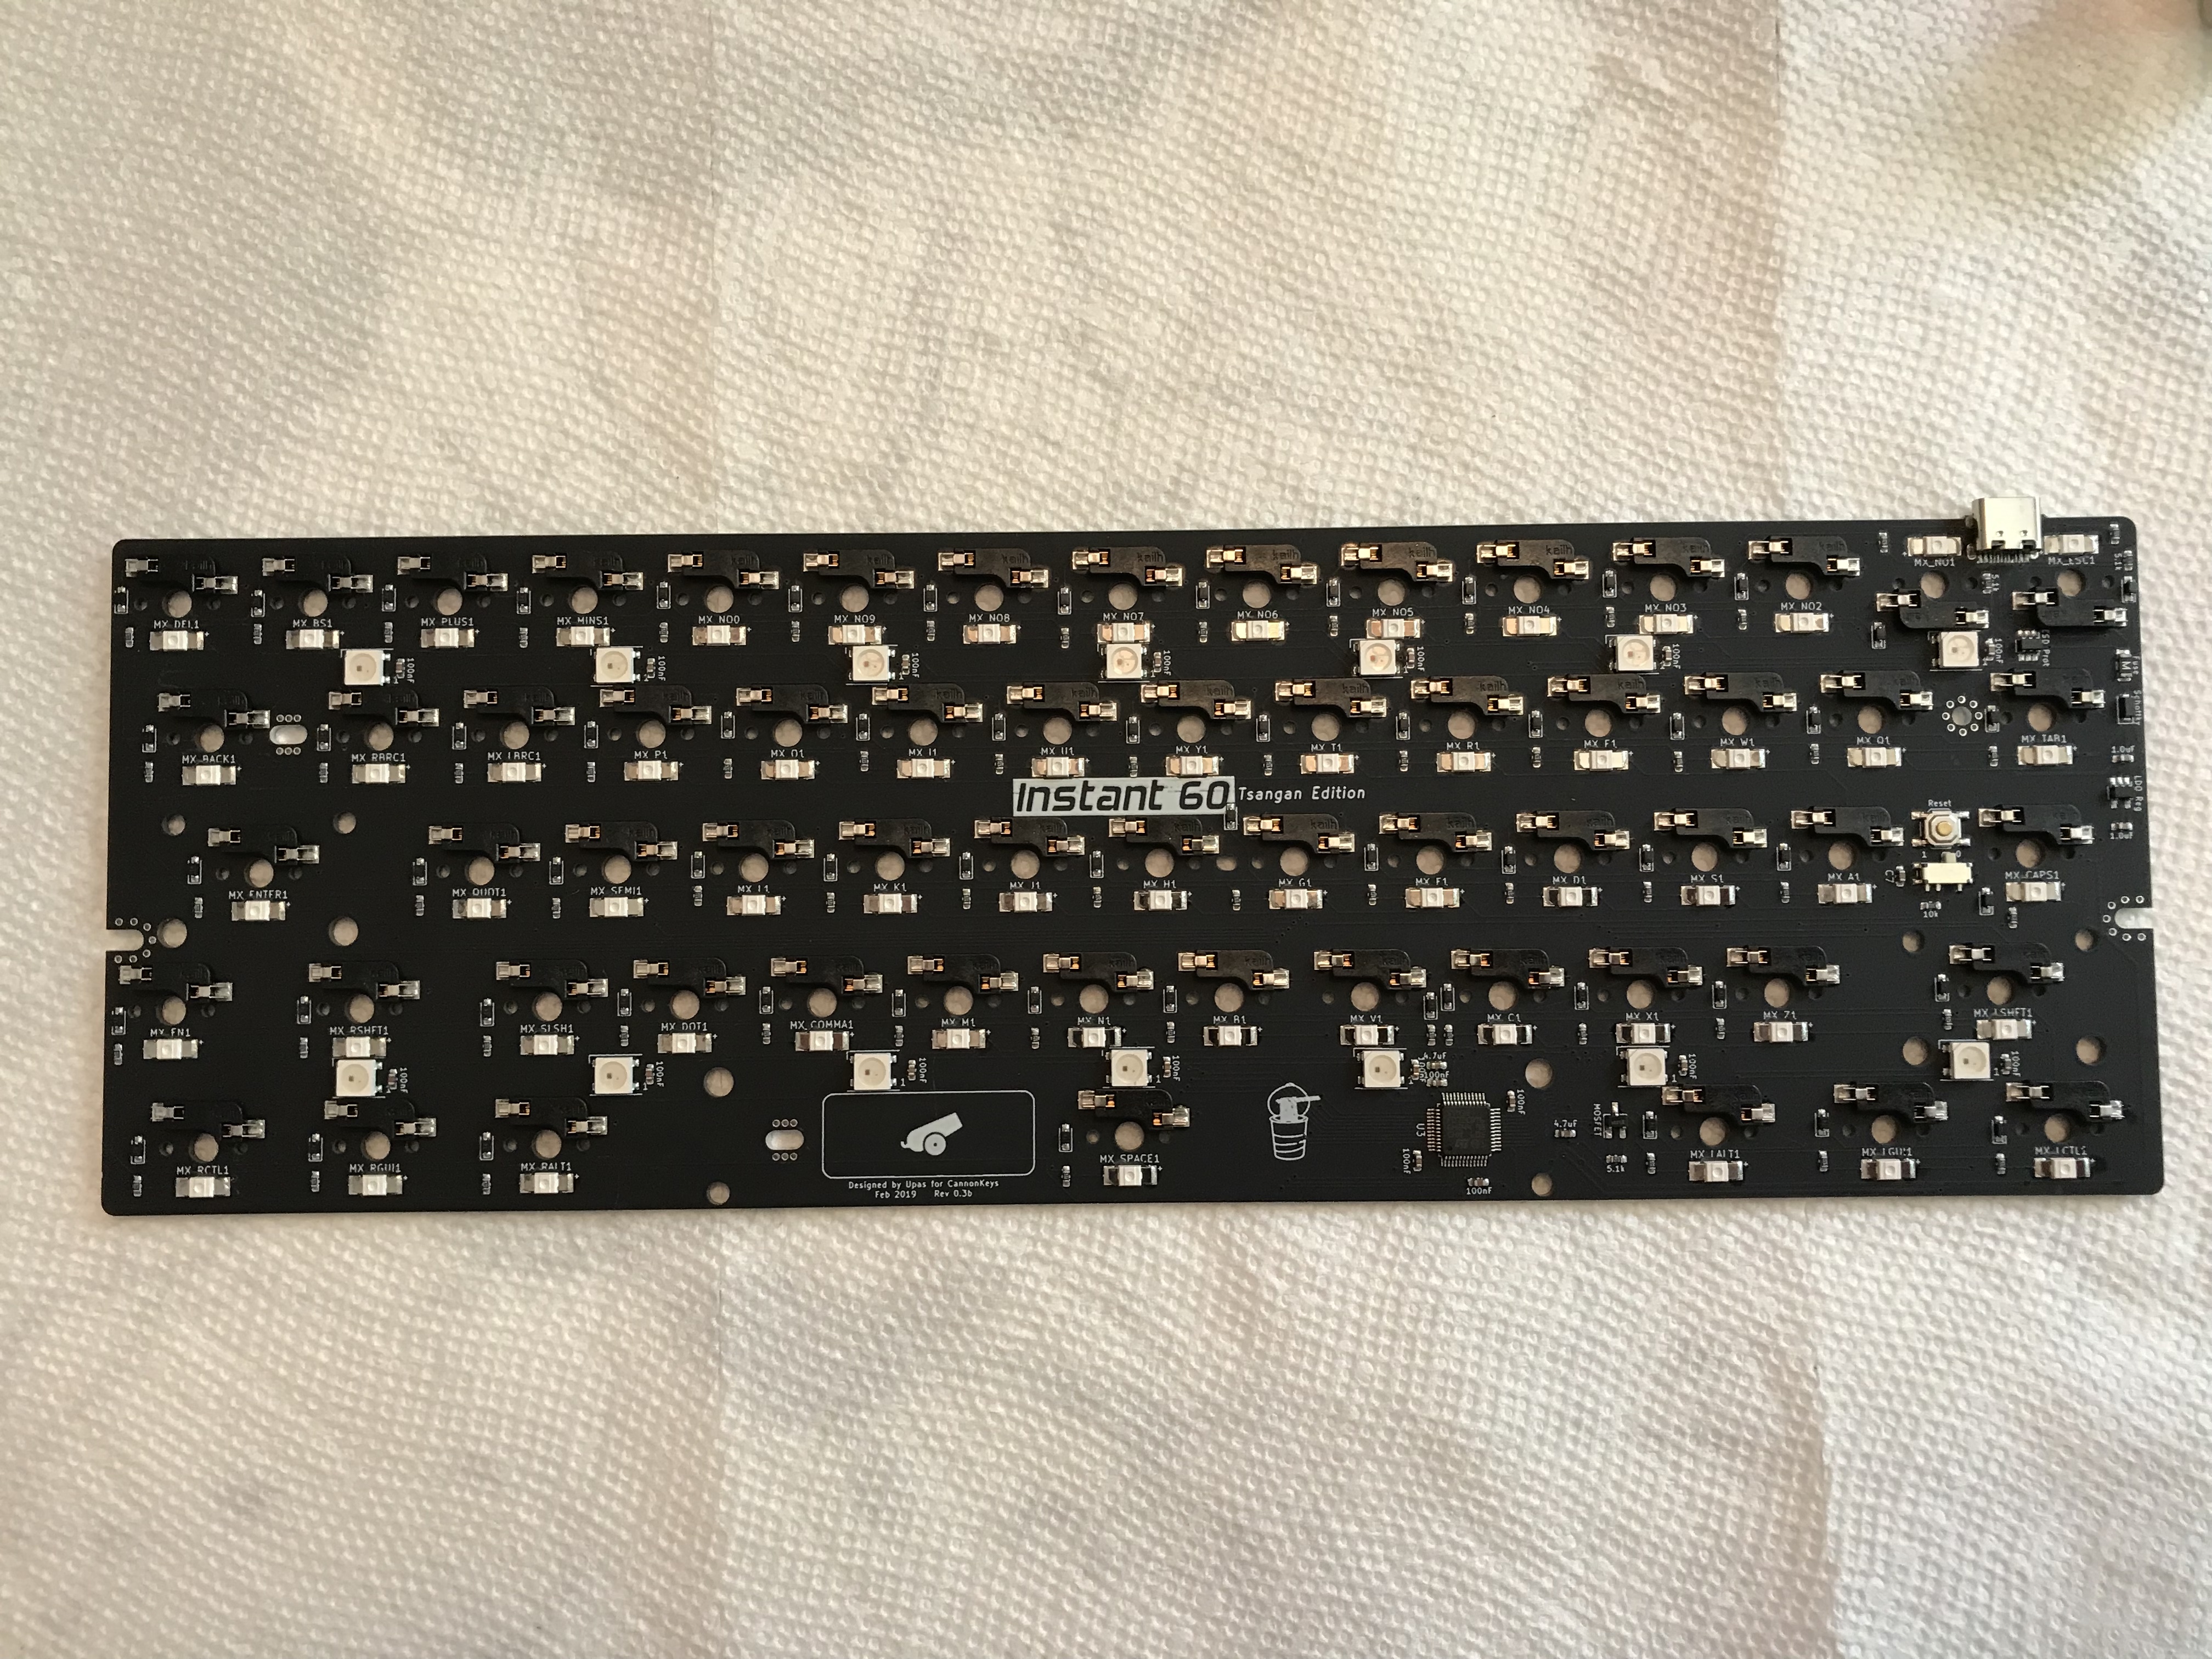
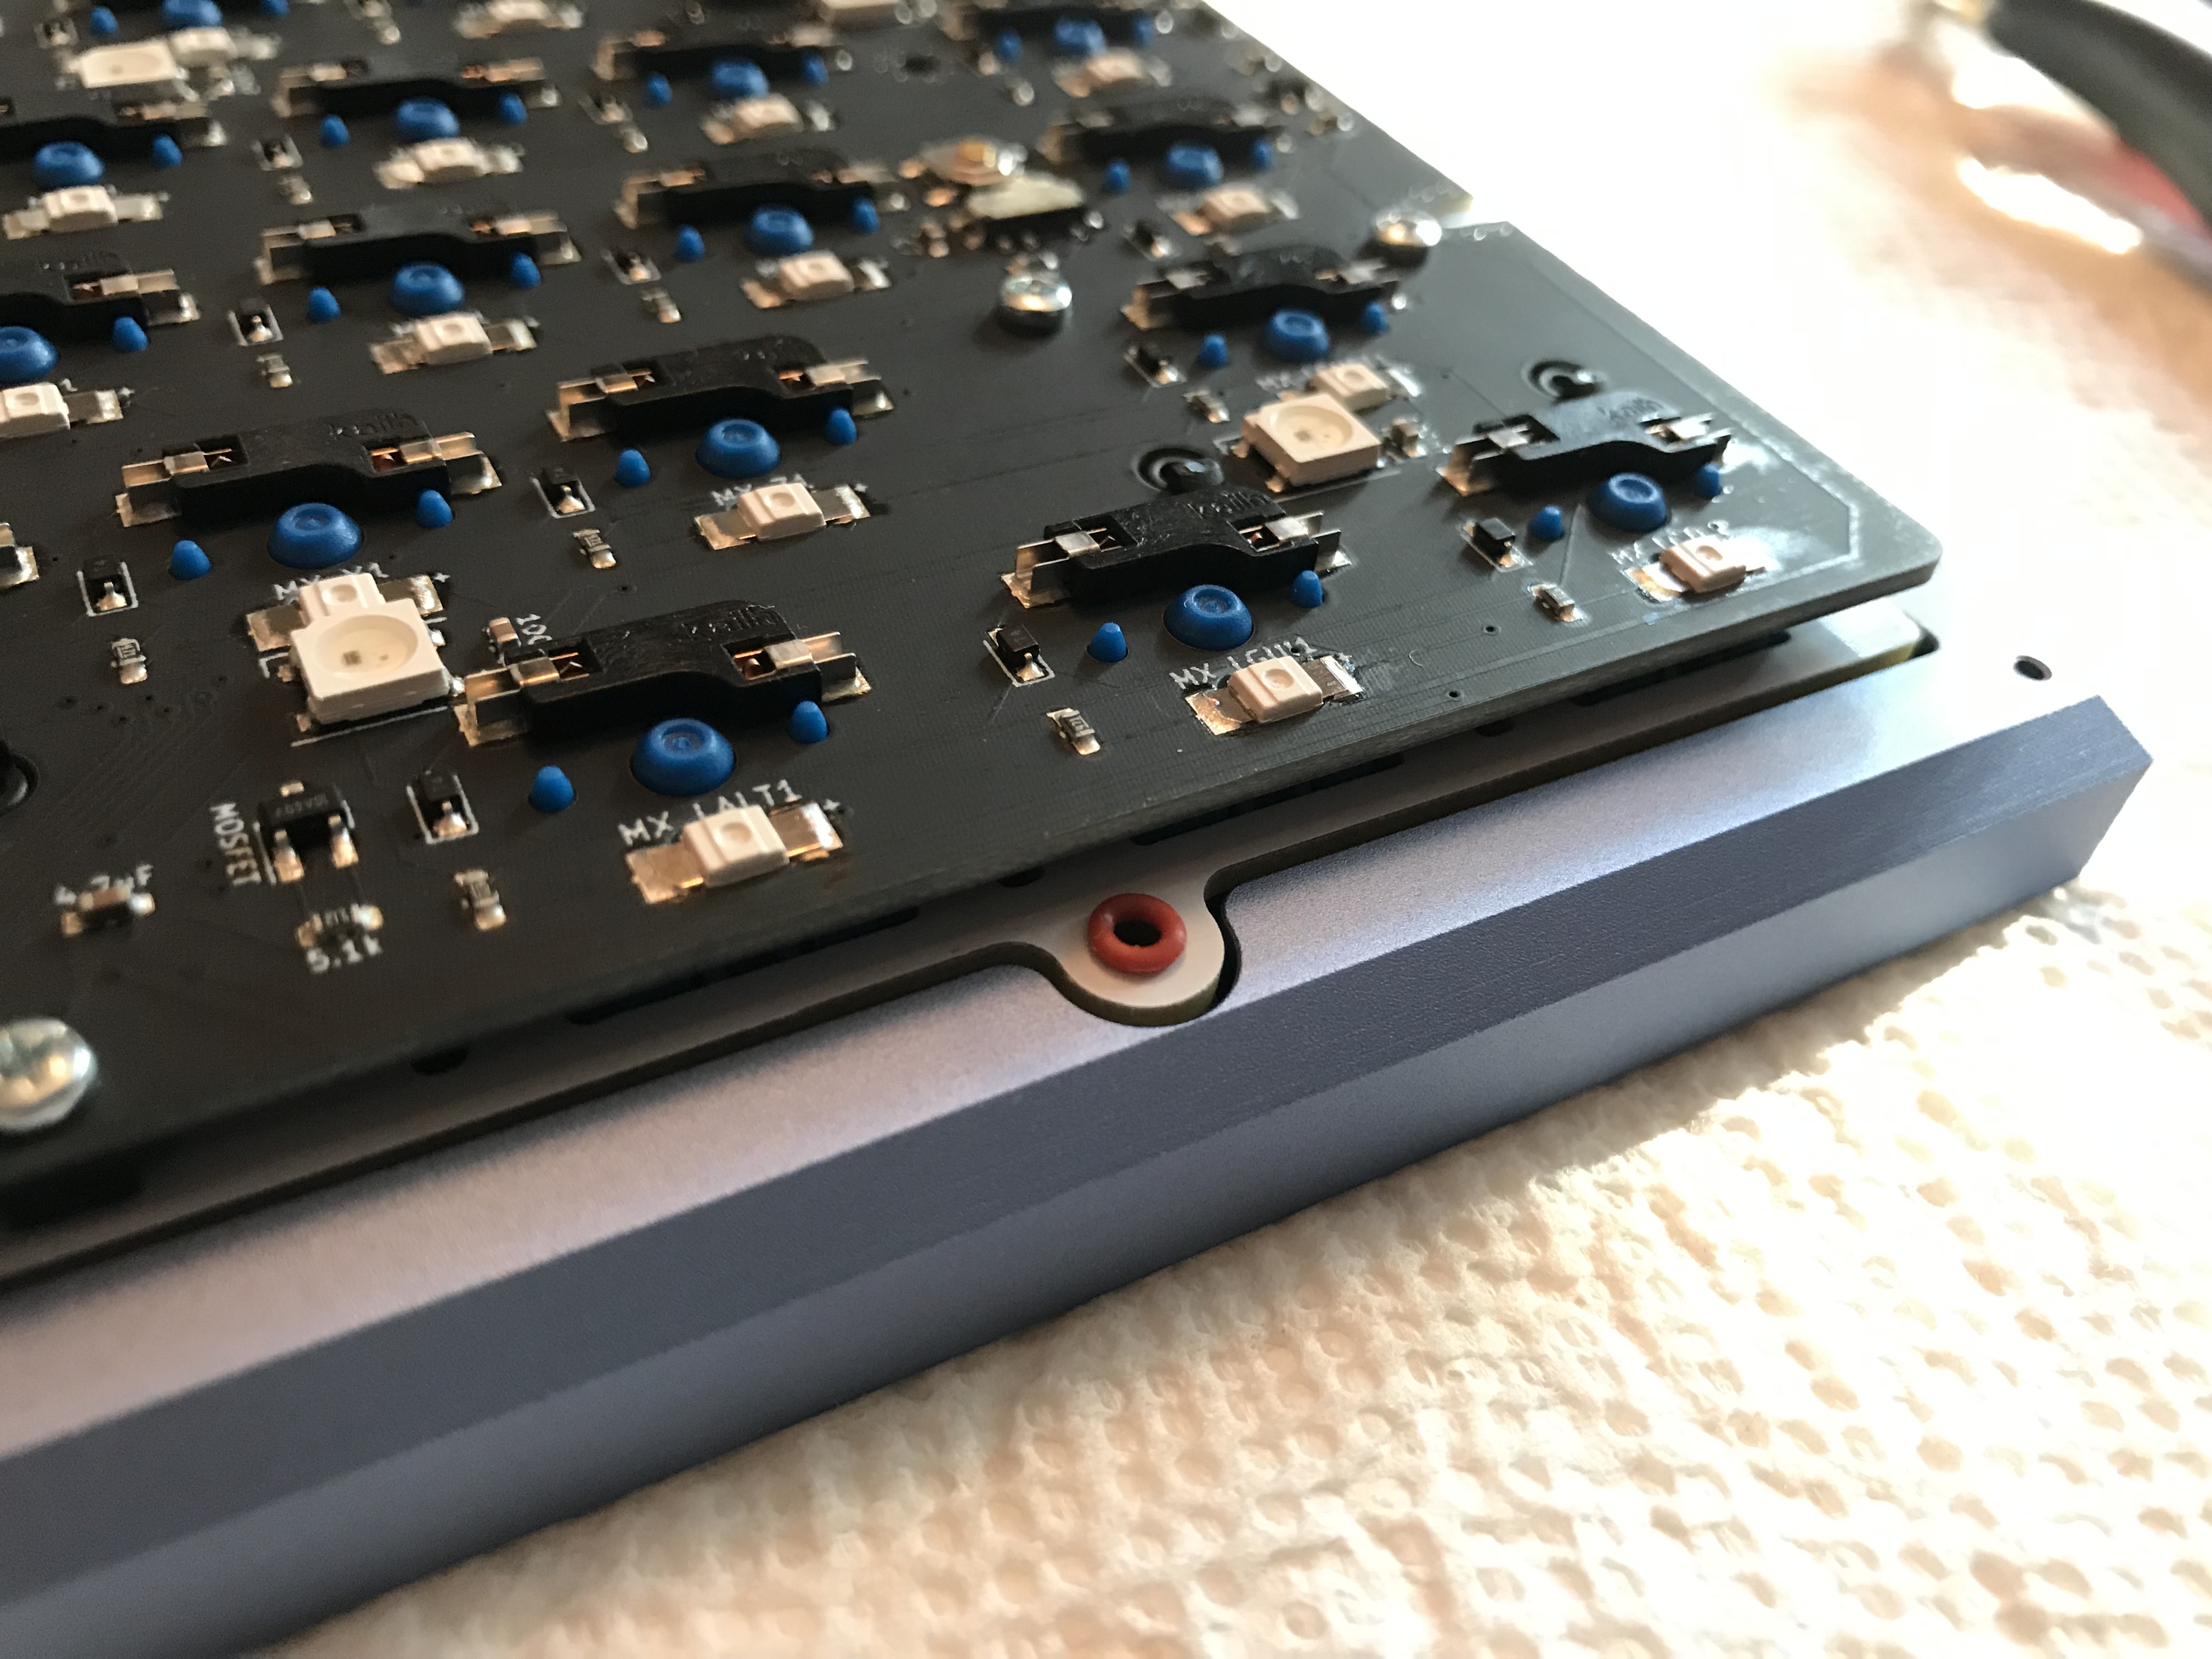
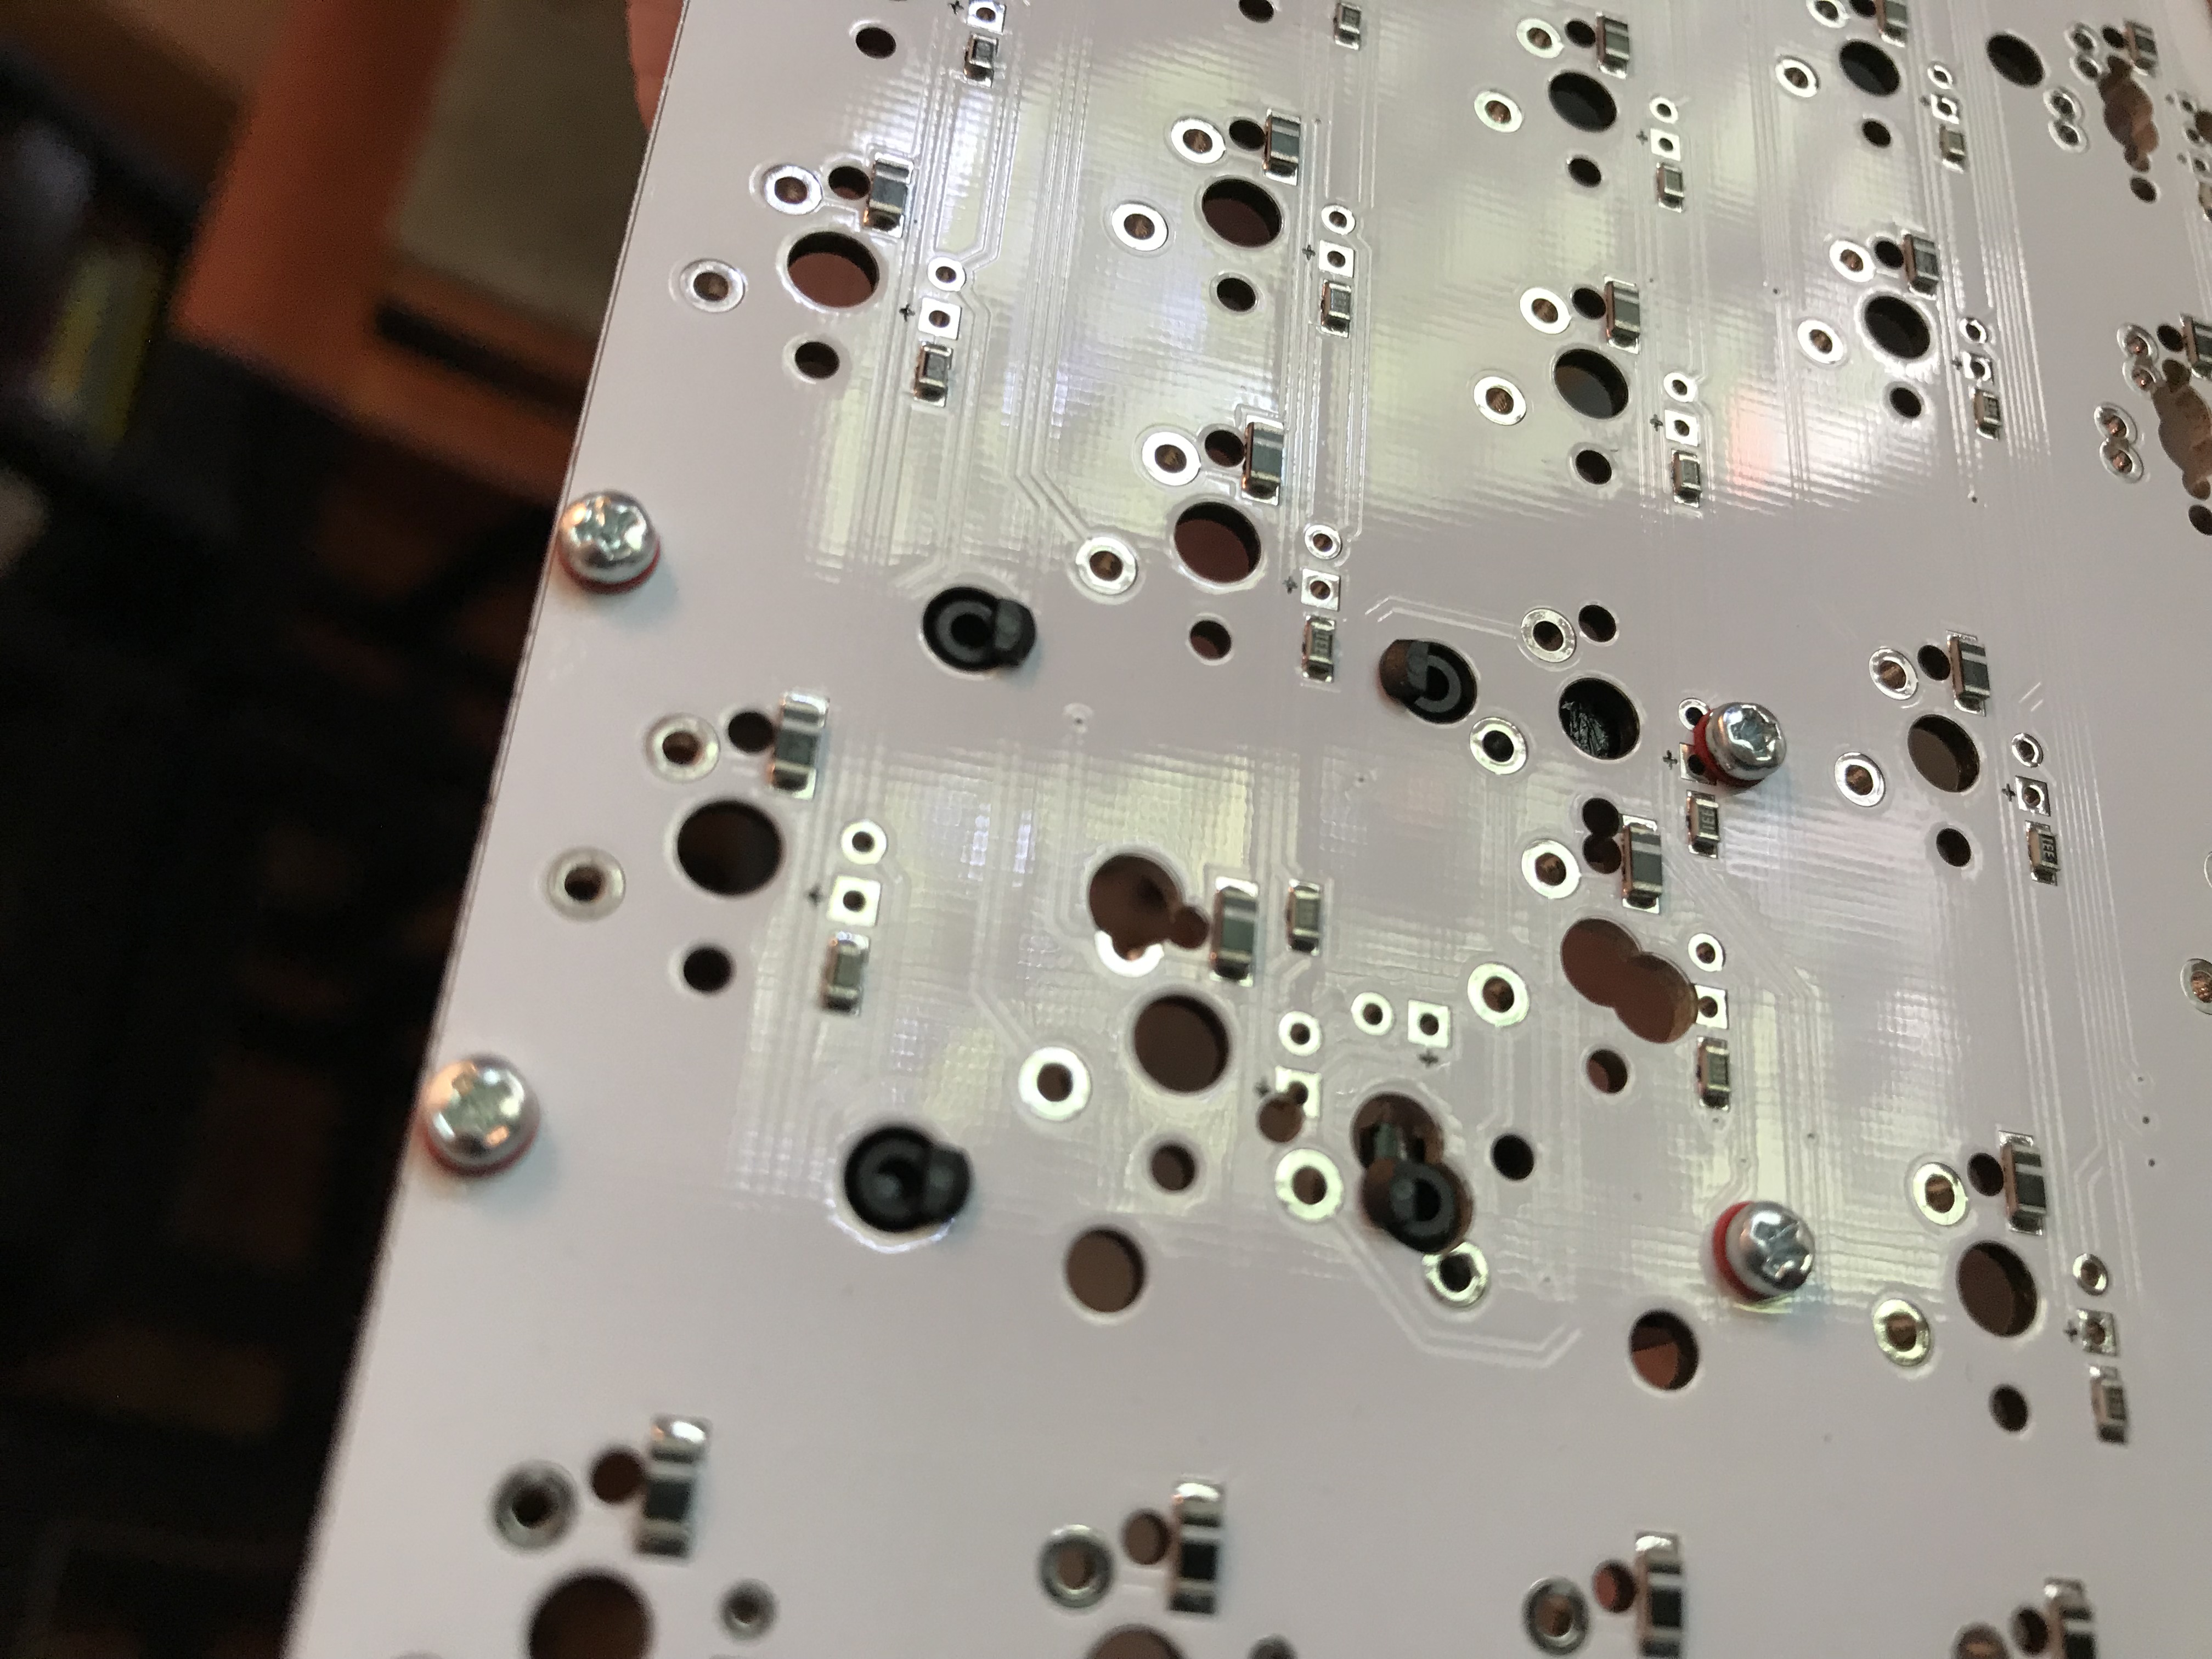
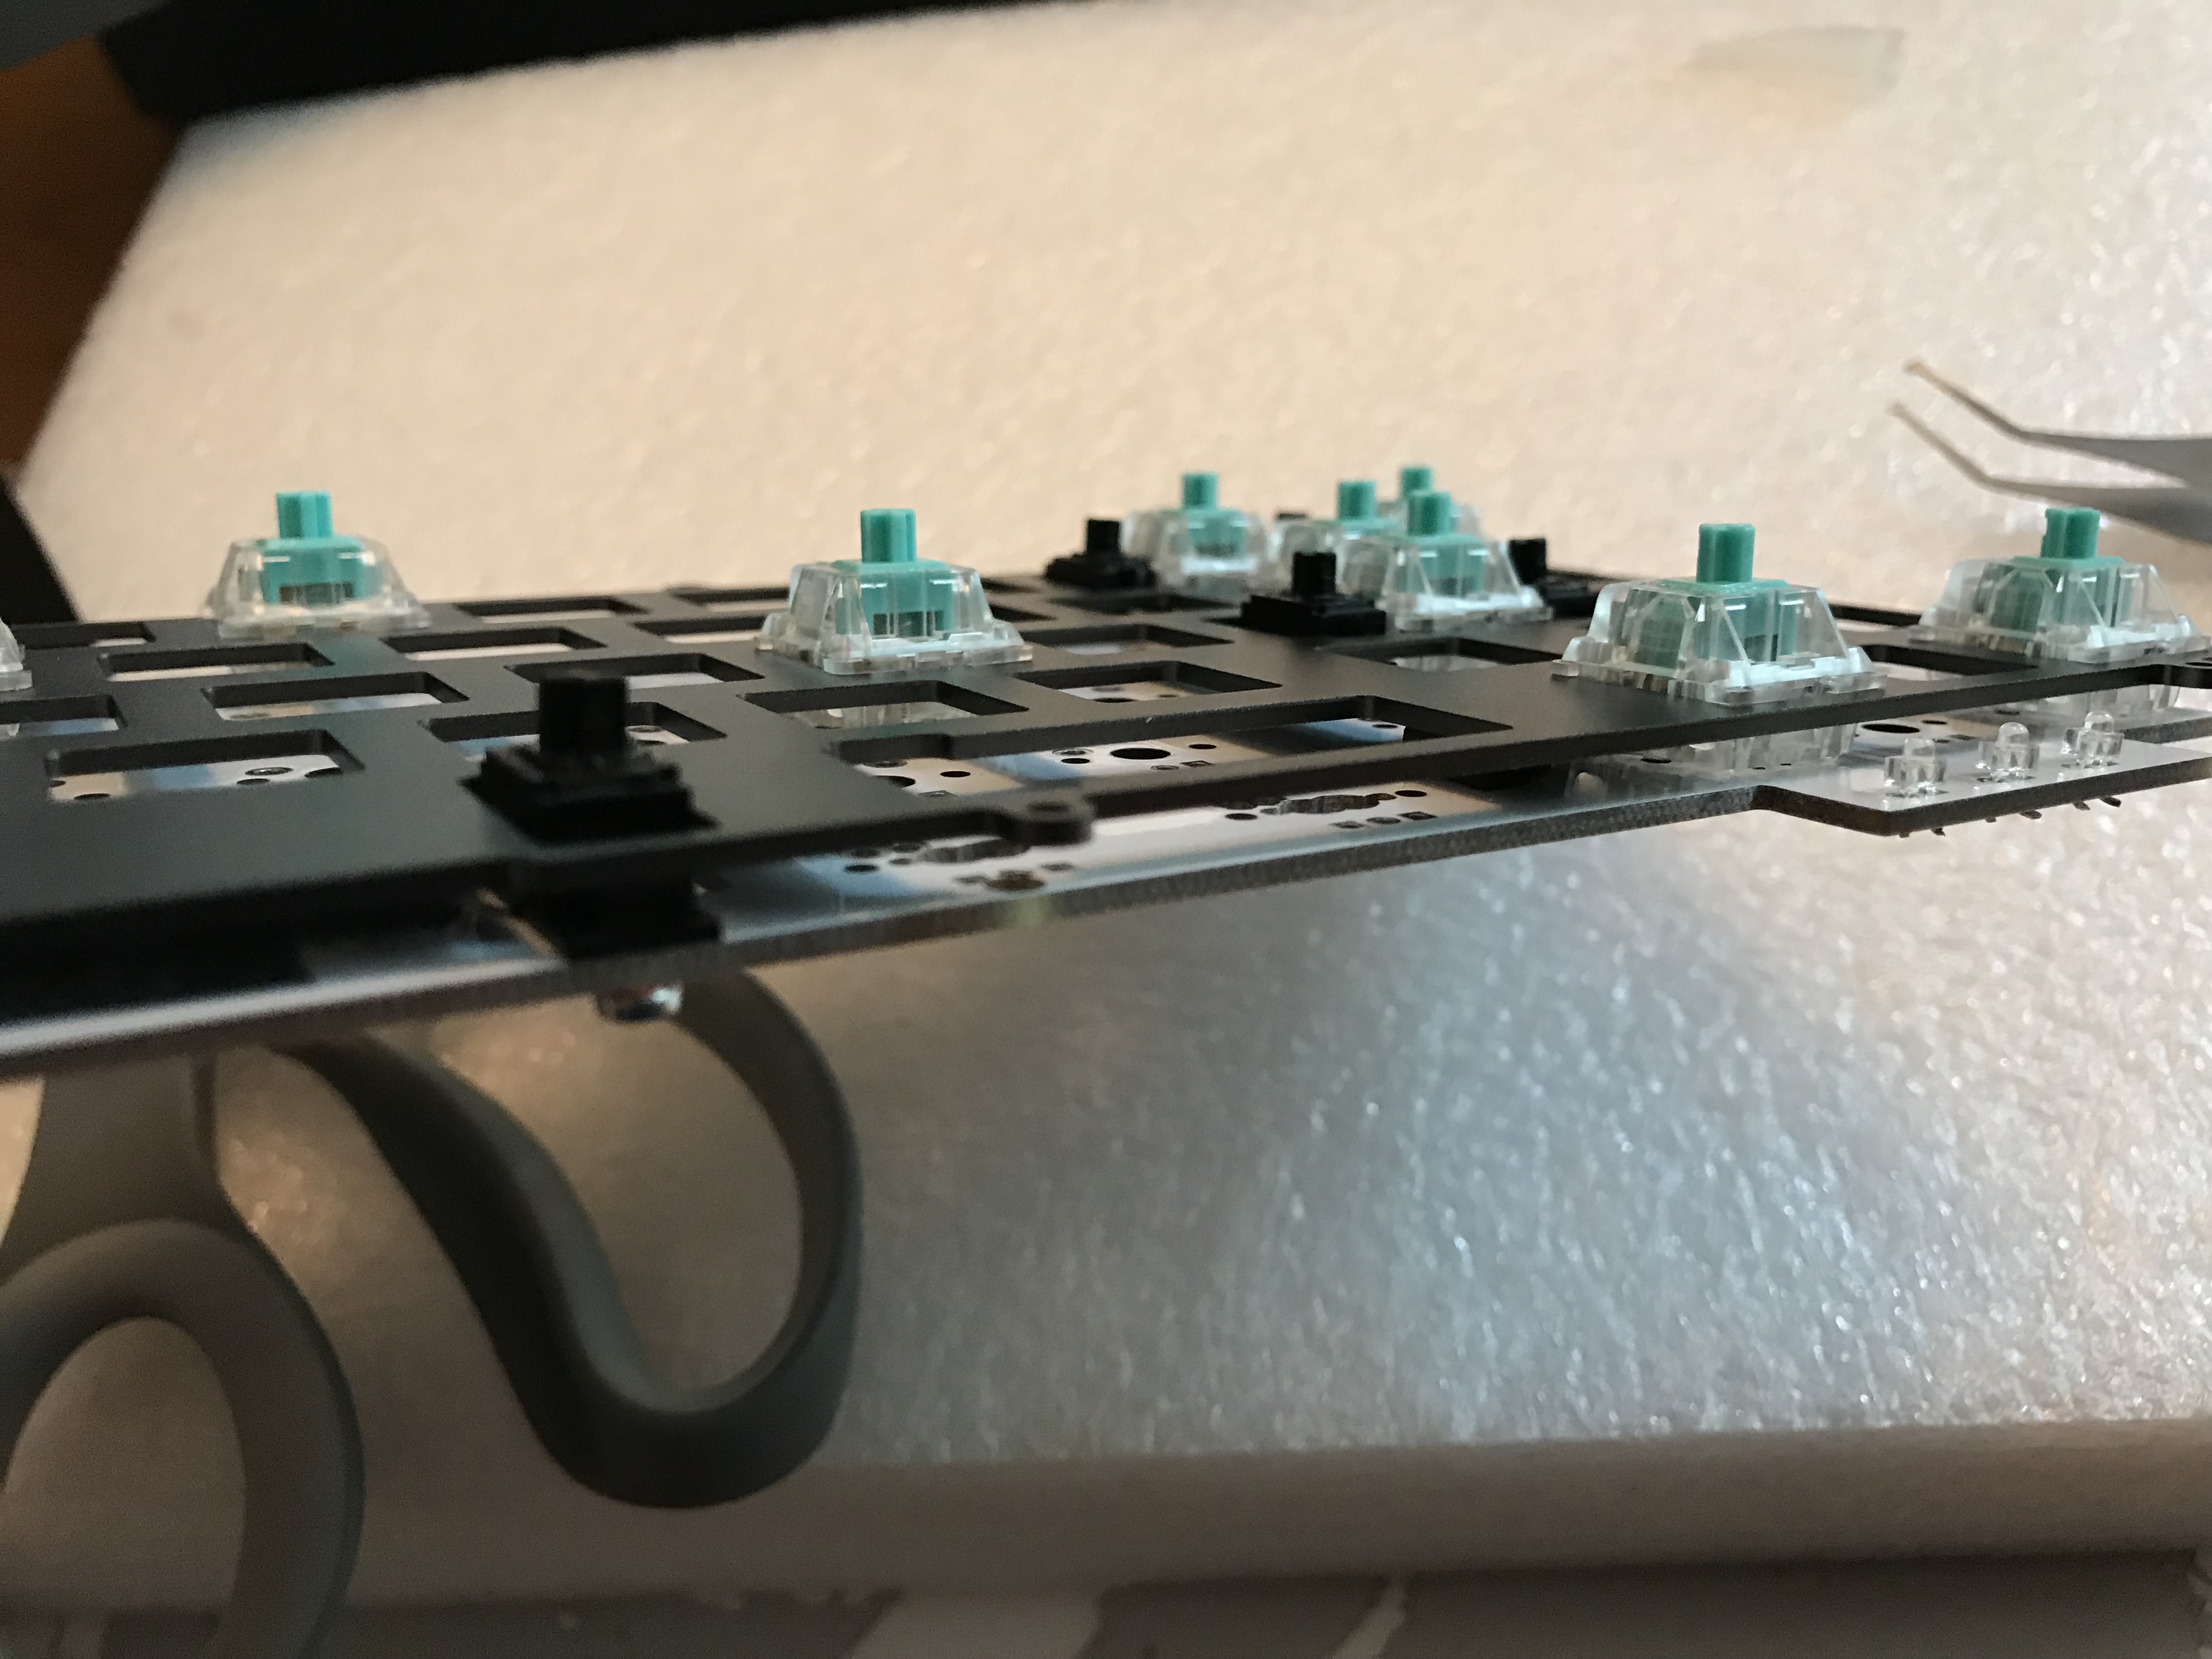
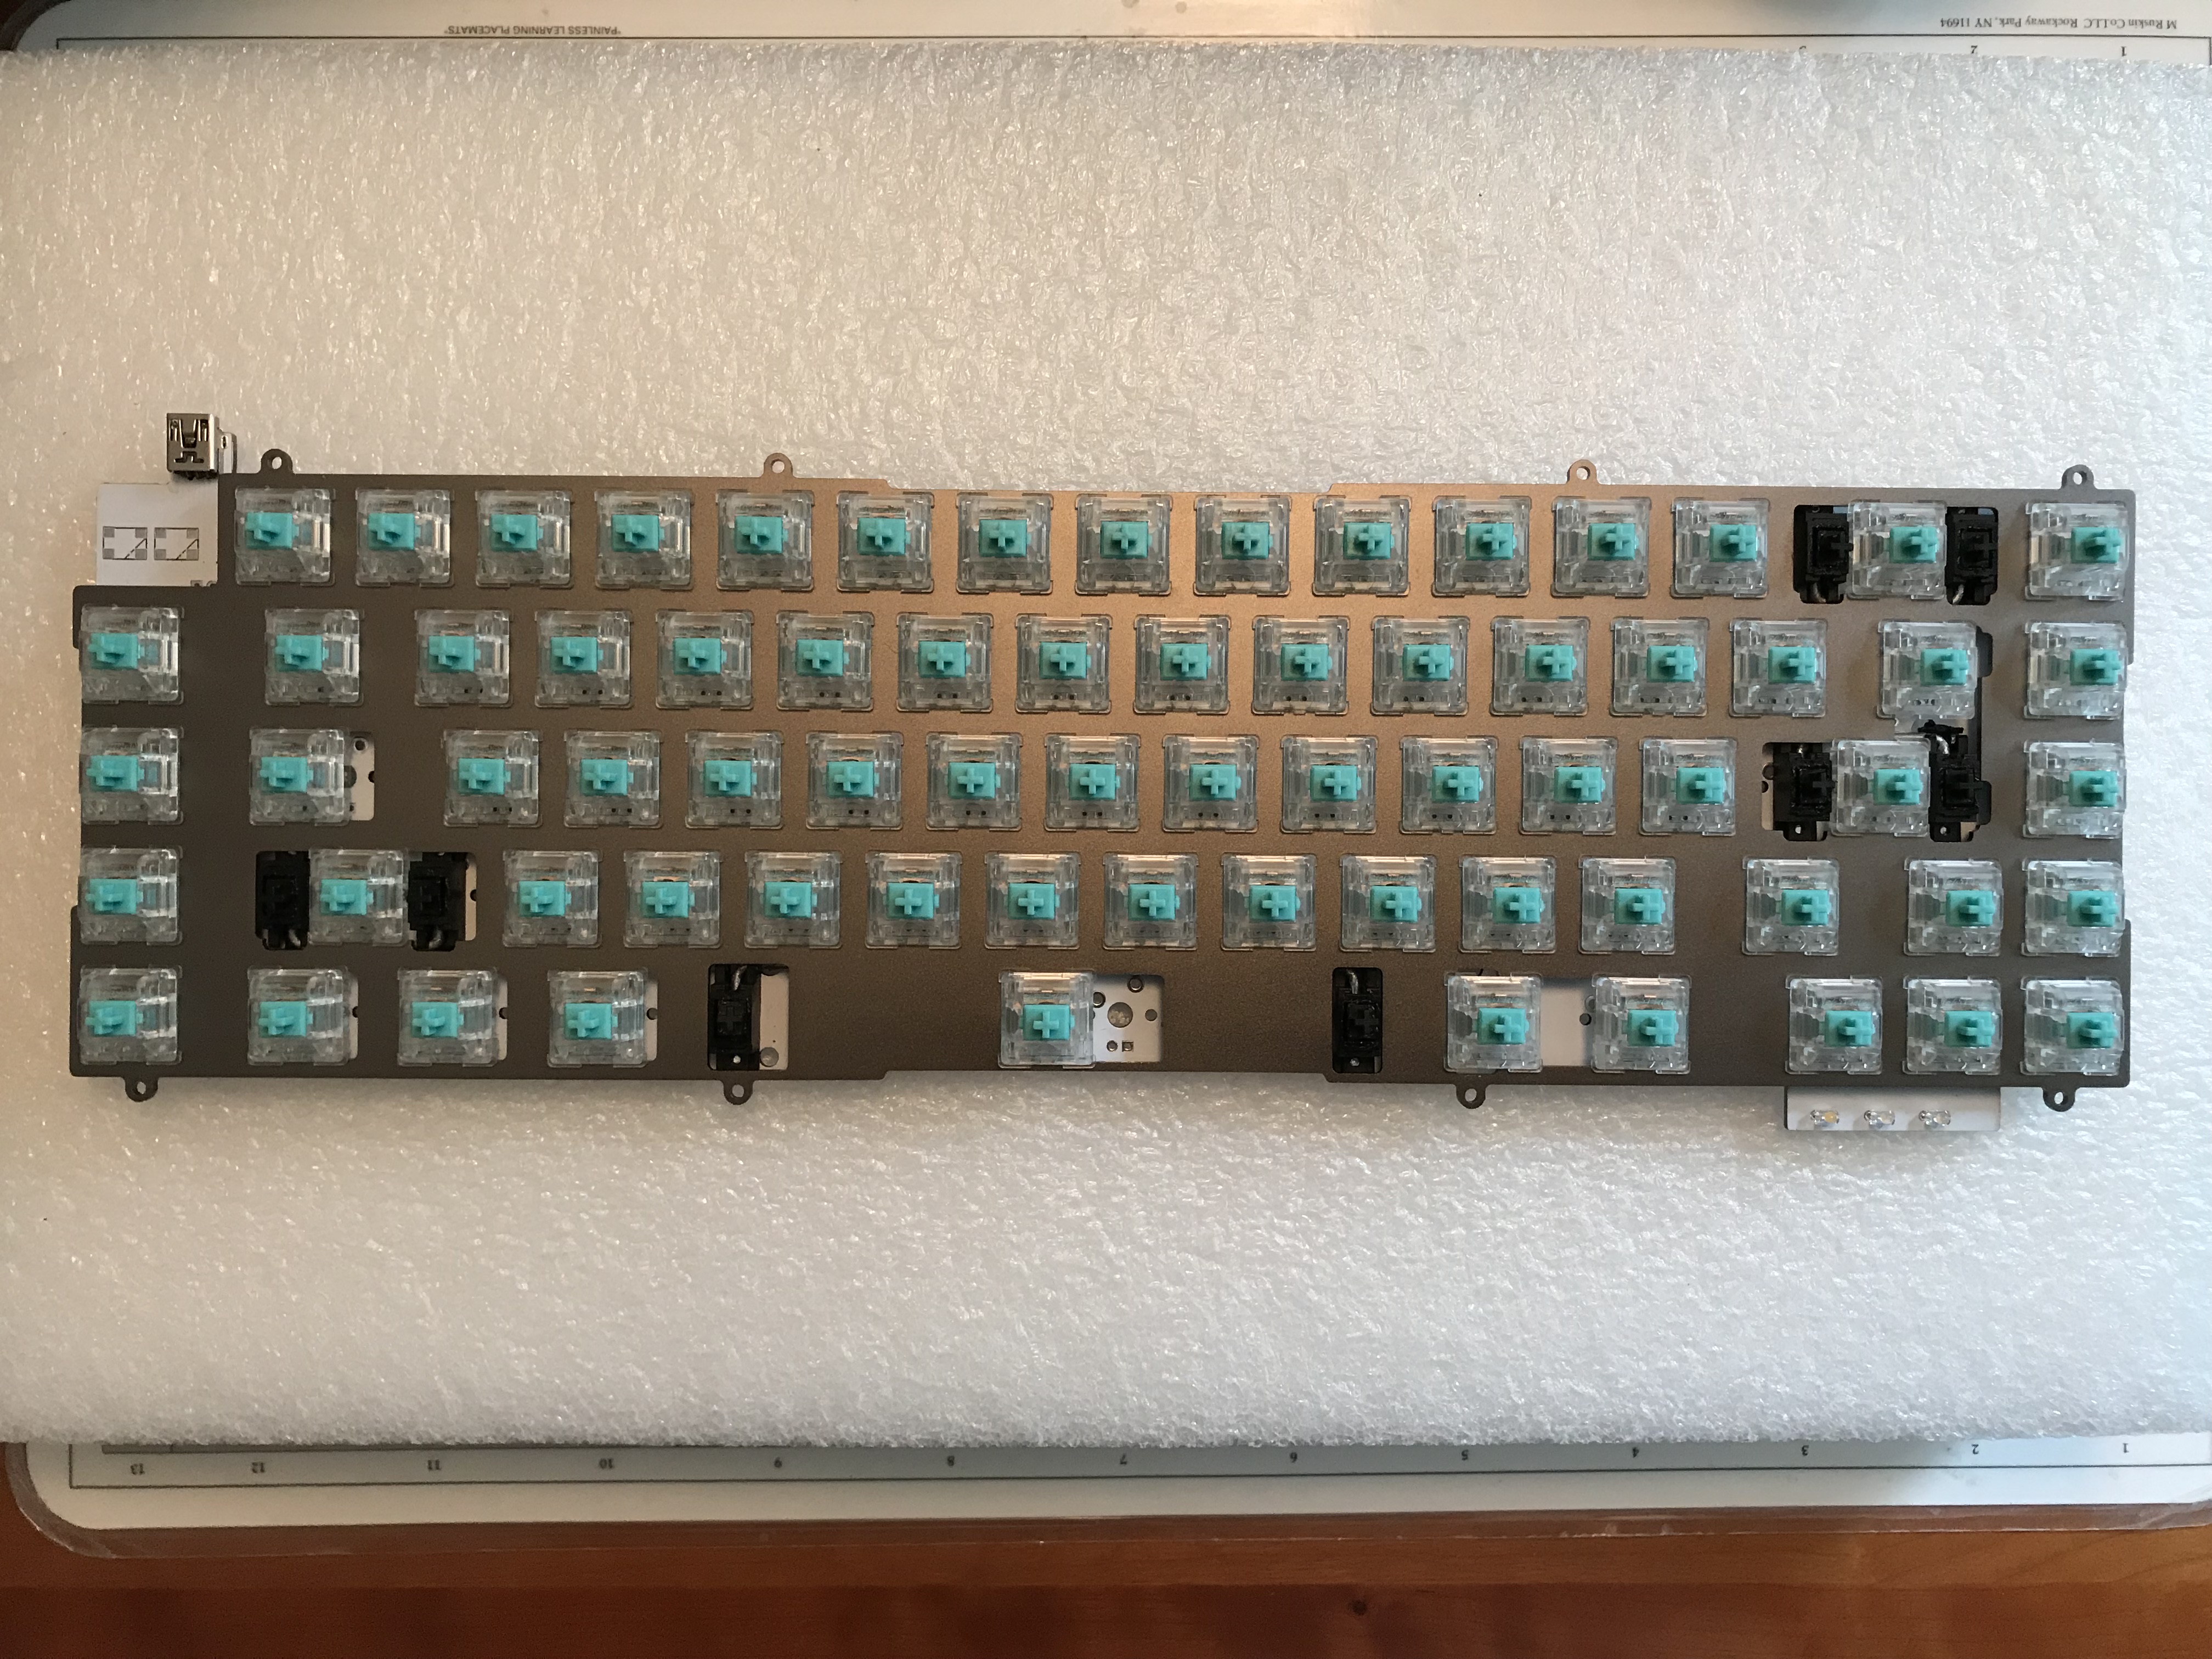
Rather than use a swiss cheese approach to support ANSI and Tsangan layouts, the Instant60 comes in two variants. Here’s the Tsangan PCB, with built-in per-key white LEDs.
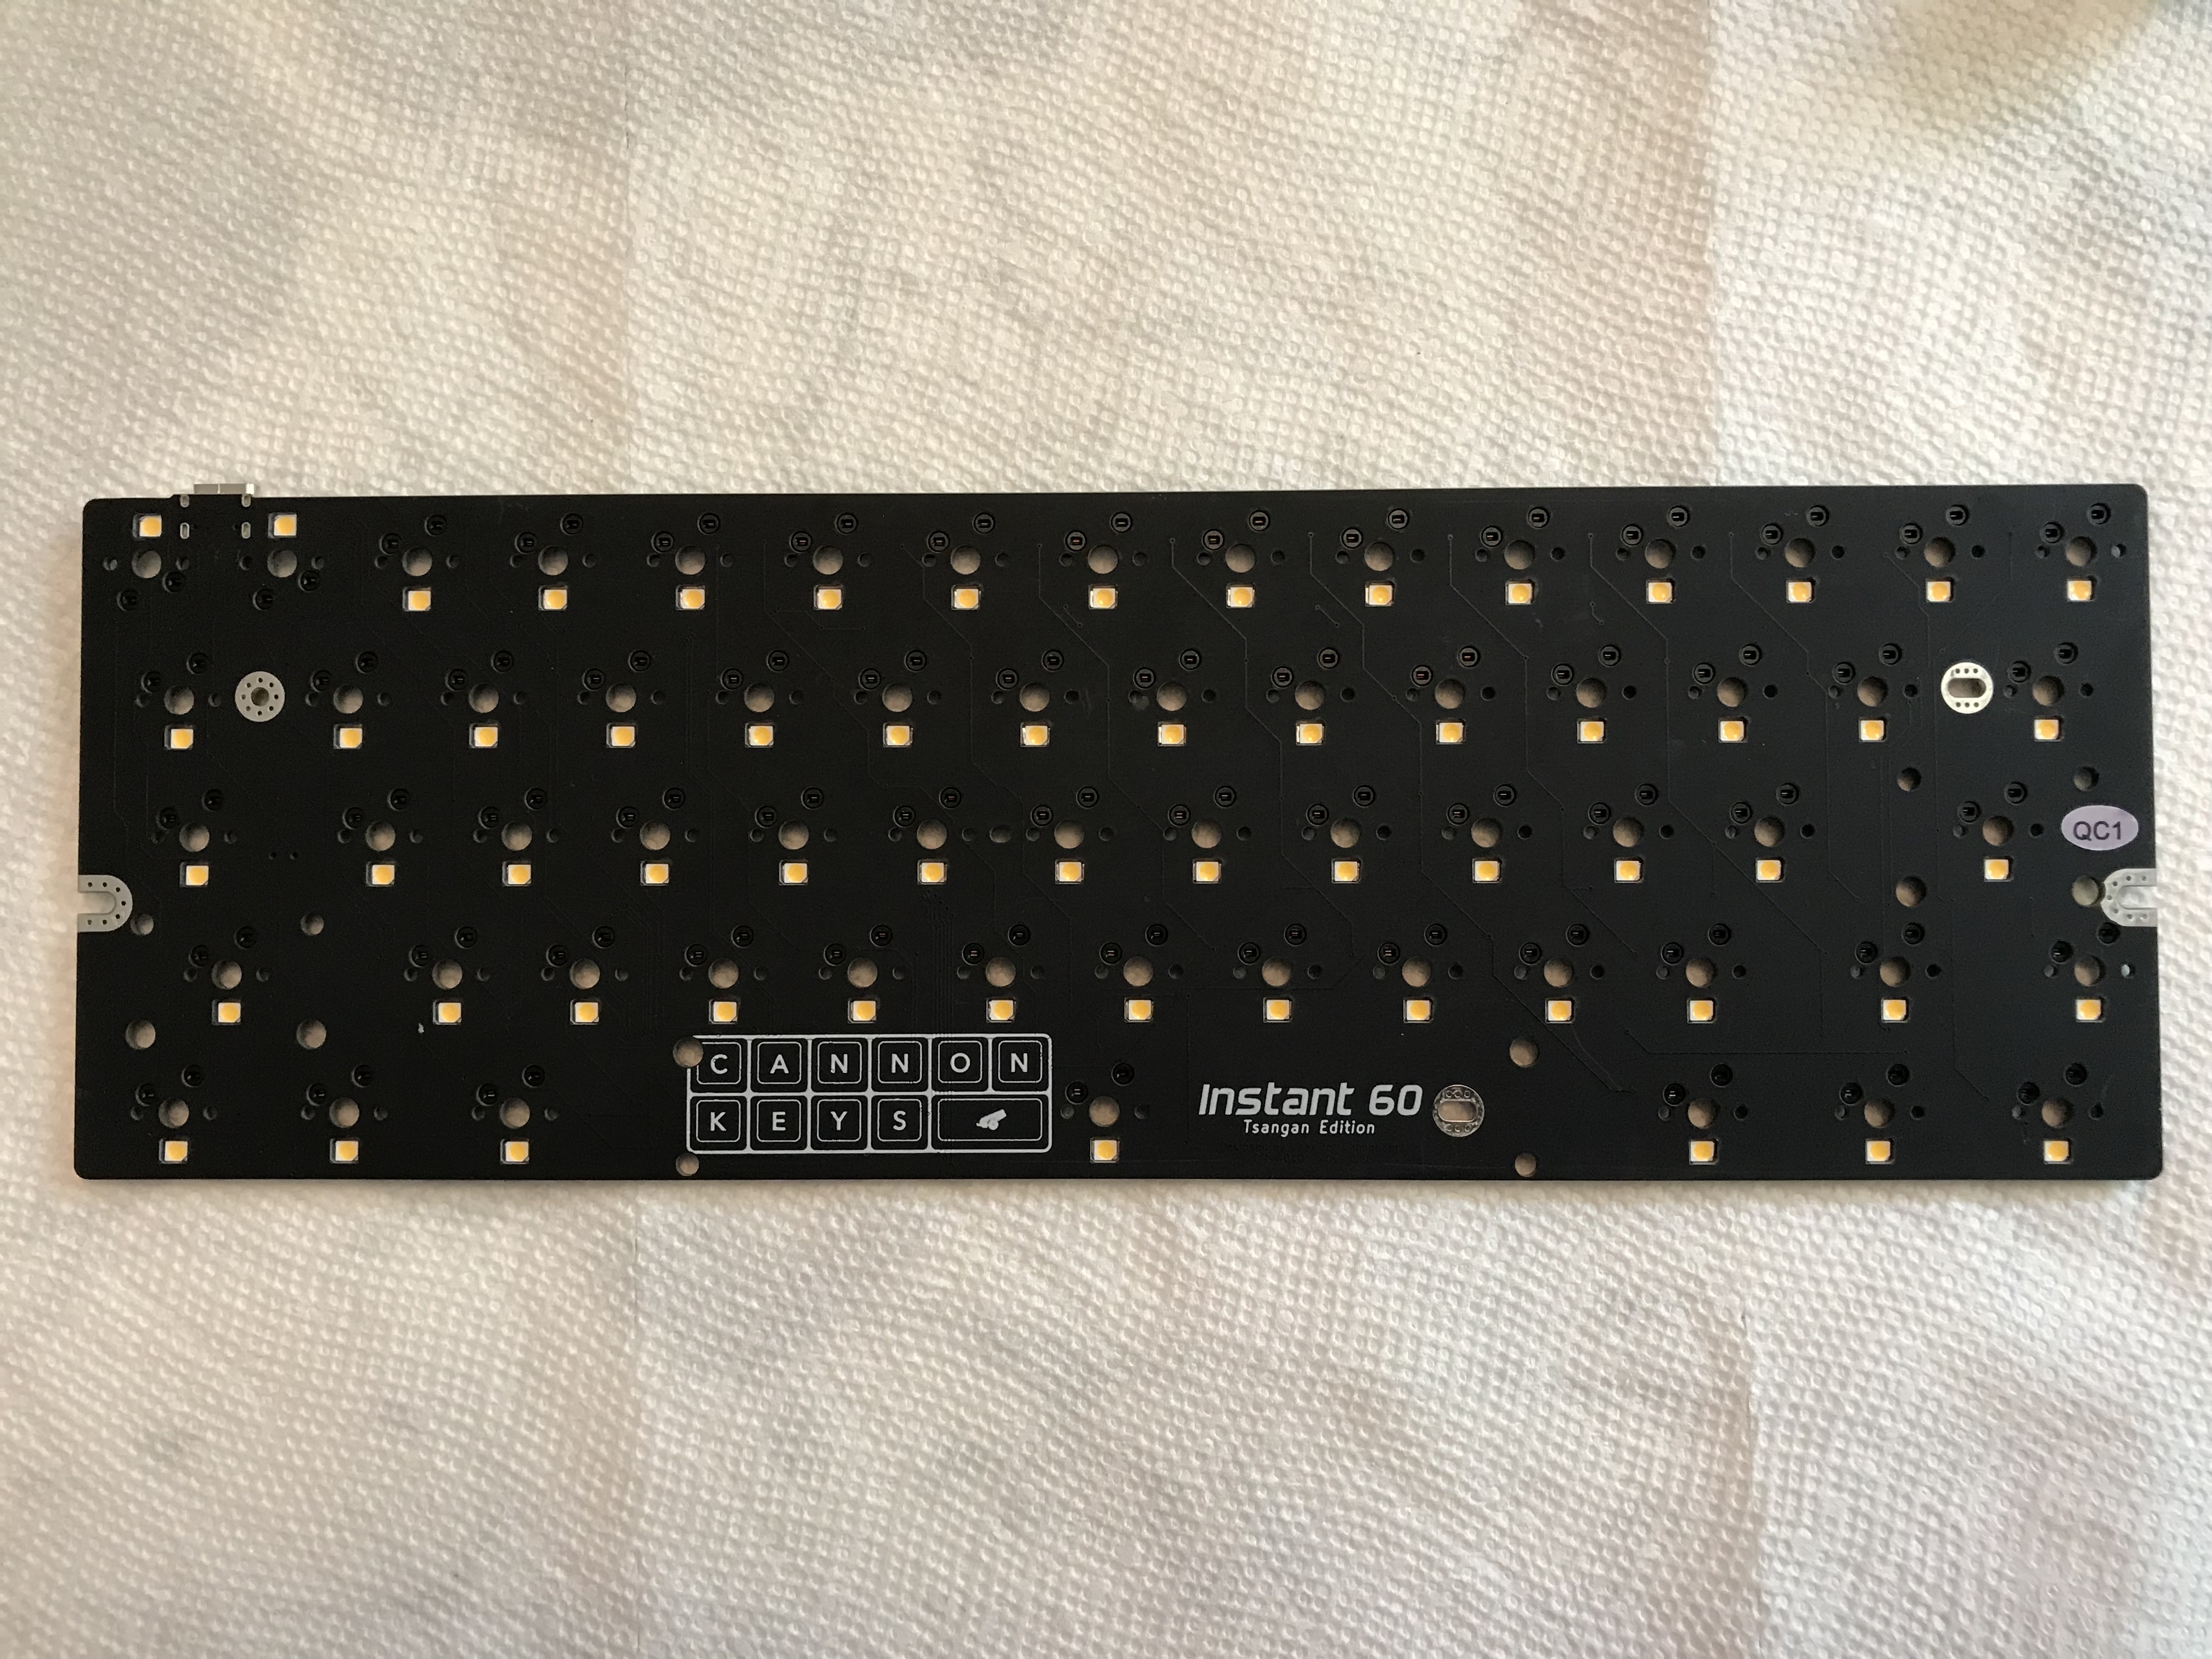
It’s a hotswap board, with RGB underglow.
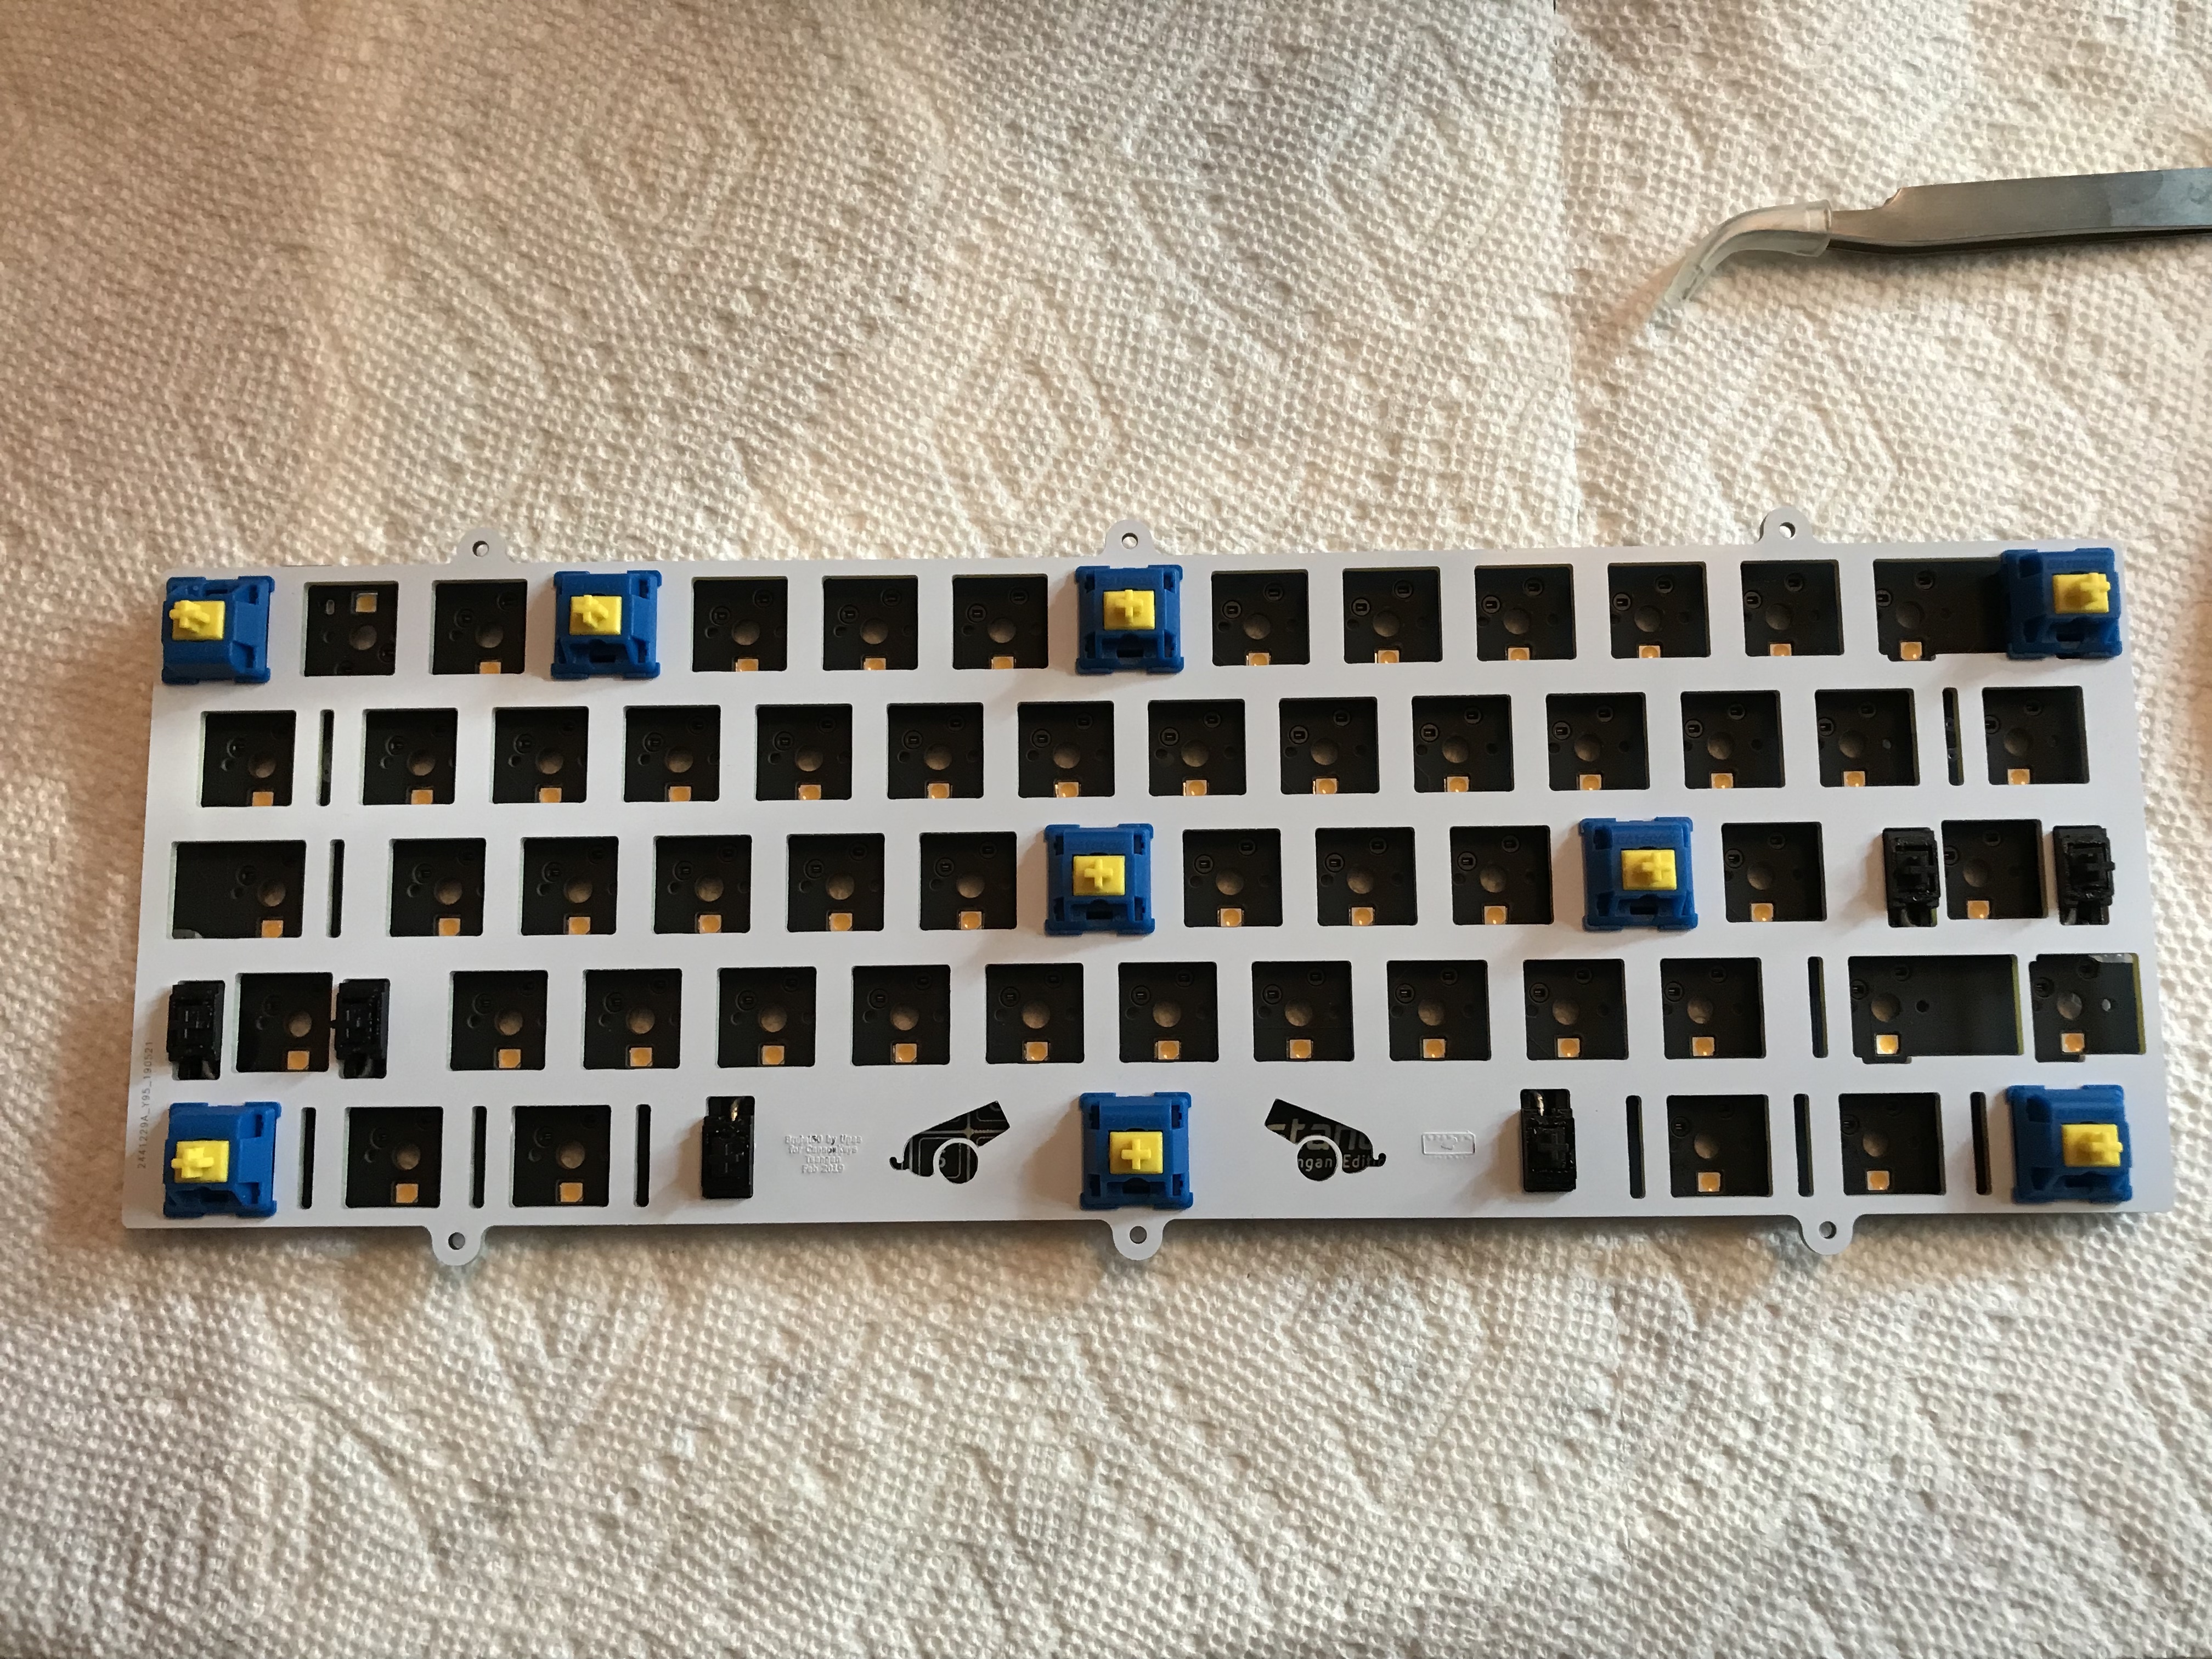
I’m not really a linear guy; I like my tactile bumps. But since we’re using a hotswap board, we’re not particularly committed to the switch choice, so I thought I’d give linears another go, and since we’re using an FR4 plate, I felt I’d get a cleaner read on the sound of the plate by using linears. Plus, it was just time to meme it up. Check out those Linjärs. Just a small dose to let you gently adjust to that Swede life…
I tub lubed the switch springs with 104, but this time, I lubed the stems with 205g0. As this was my first time working with 205g0, I was careful to apply a very thin coat to the sides of the stem, and the “ridge” around the perimeter of the switch top; also, I didn’t lube the housing at all. I tried this approach because I wanted to avoid overlubing with this thick grease, and I thought that by putting the lube on all of the possible contact points on the stem, I’d further thin out the lube as the stem moved inside the housing. I also wanted to see whether it was strictly necessary to lube the housing, because if it wasn’t, that would be a big time savings, and at this point in my switch lubing life, I’m looking for every time optimization I can find.

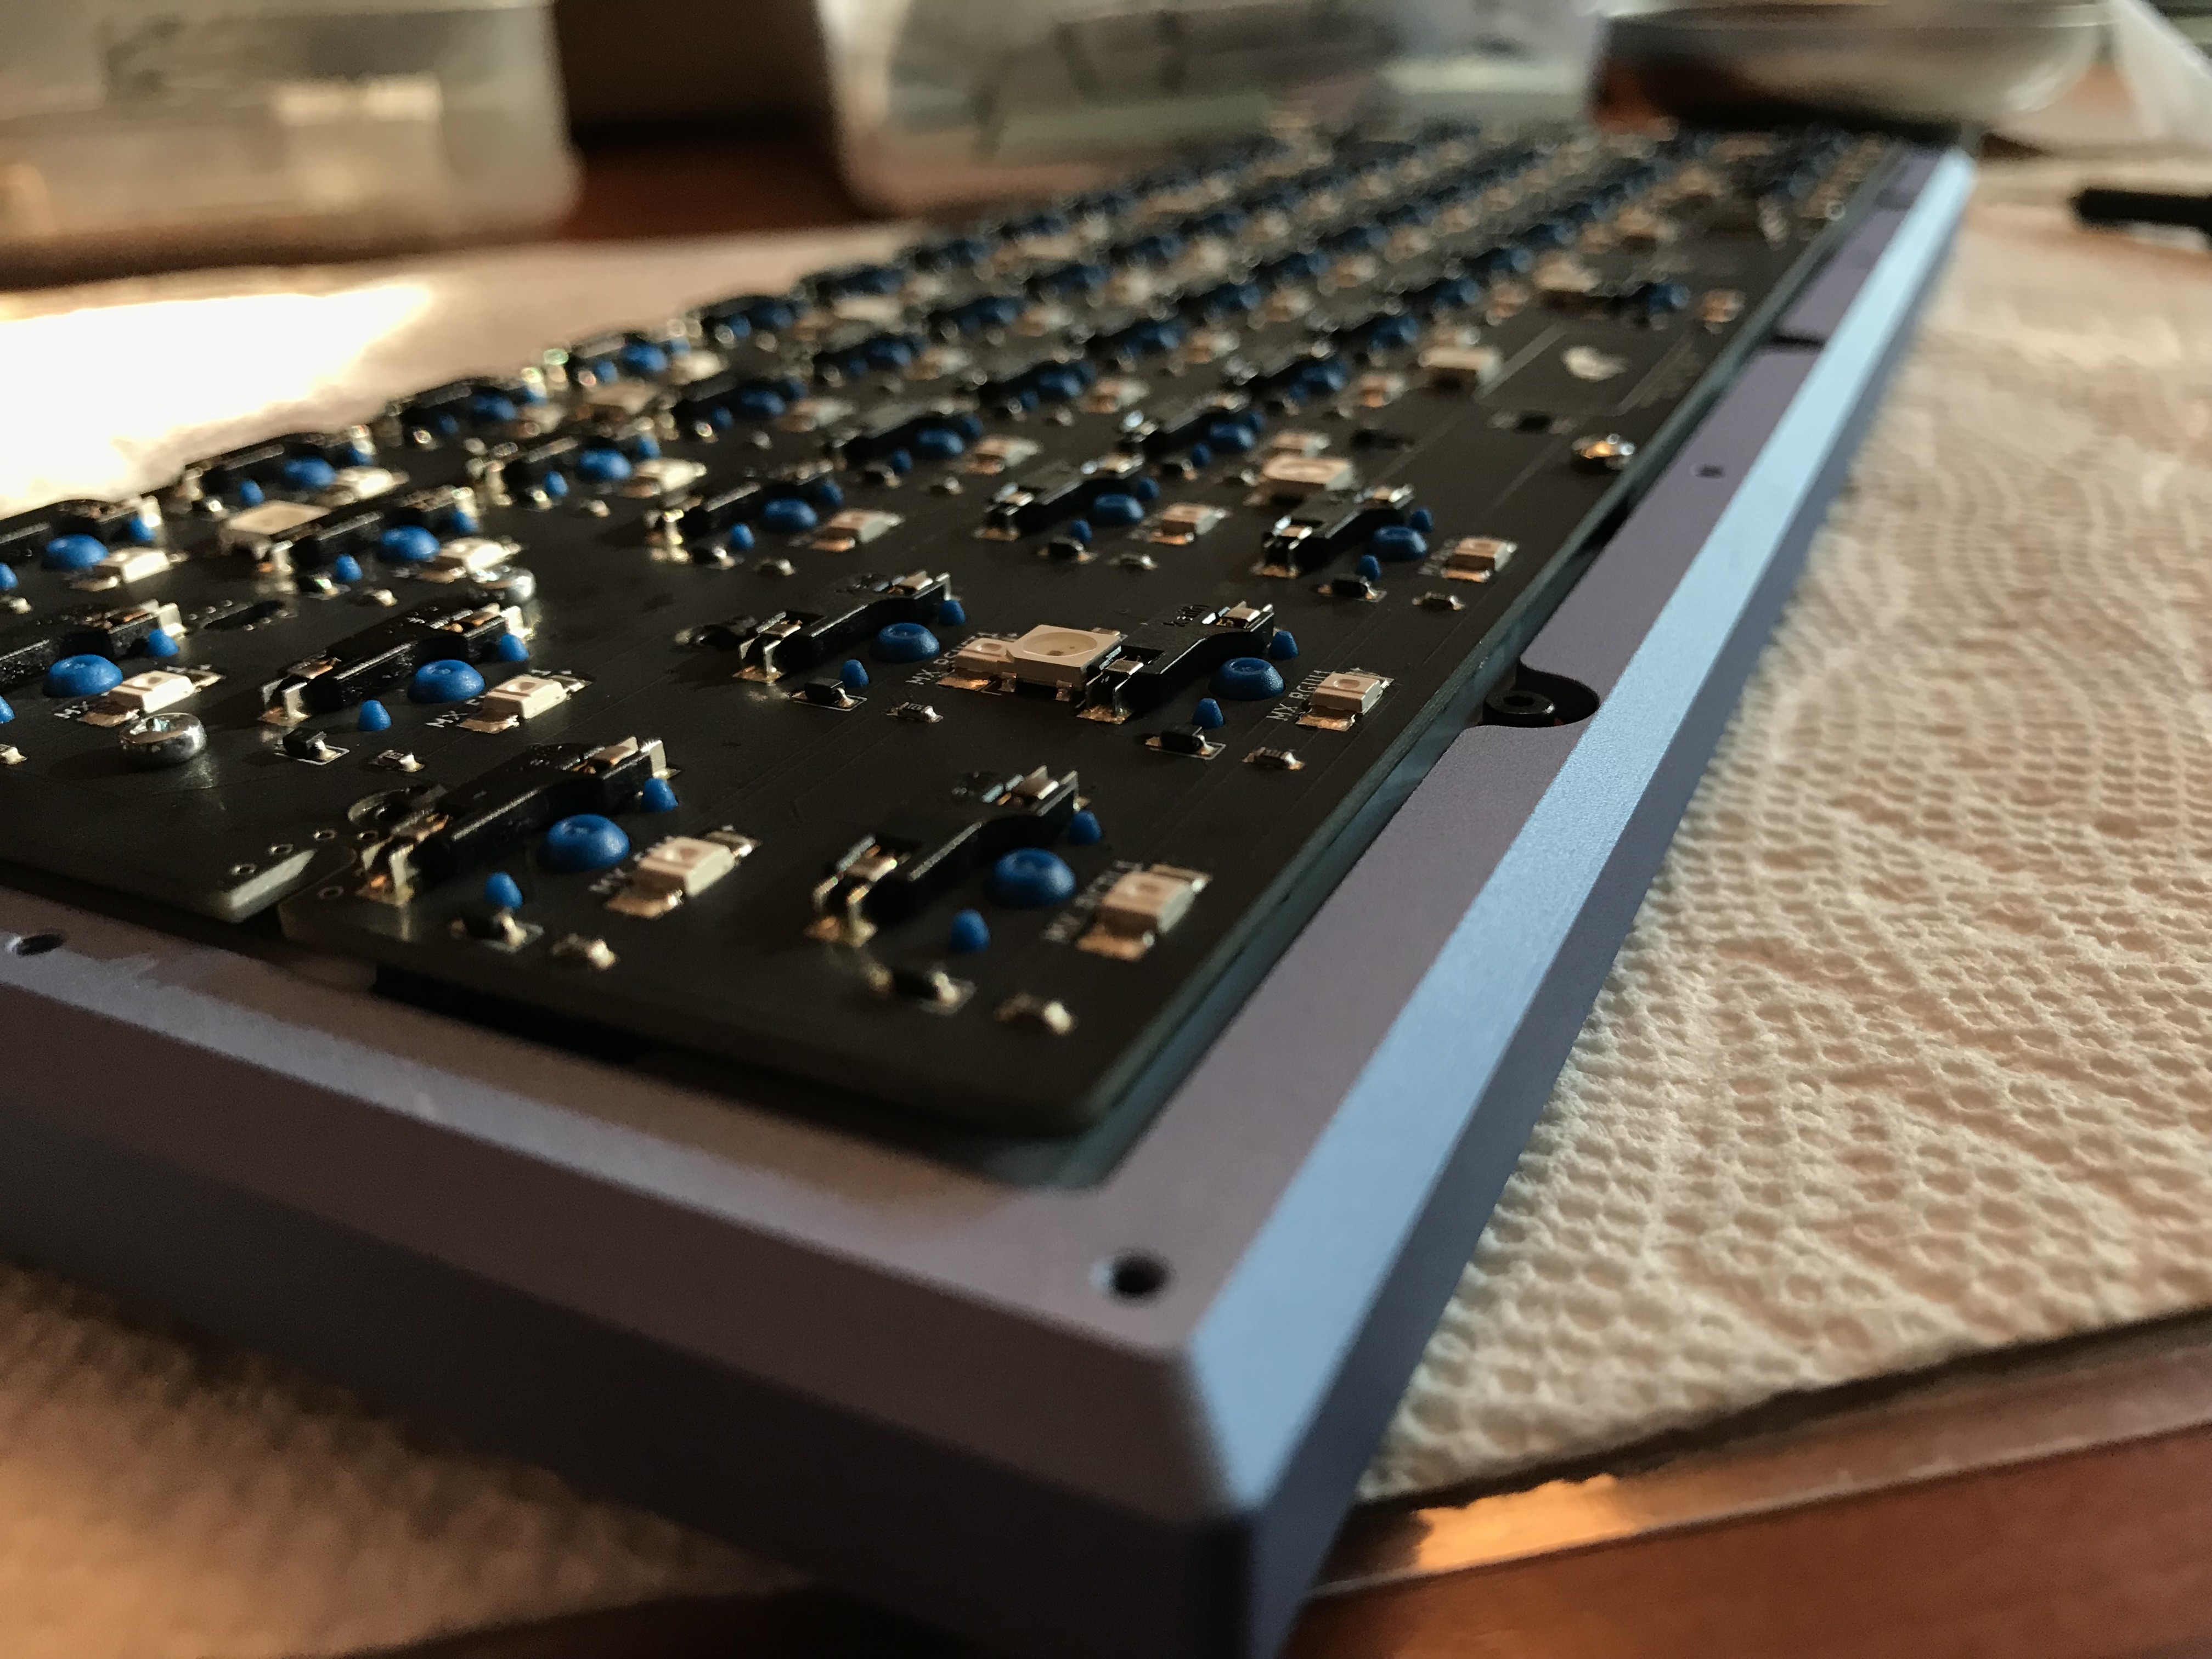
On to assembly. The “burger mount” involves attaching the plate to the case top with screws, but rubber washers are used to isolate the plate from the case. Think of the washers as the “buns”, and the plate as the “patty”. Here’s the placement of one washer (the “bottom bun”) before placing the plate on top:
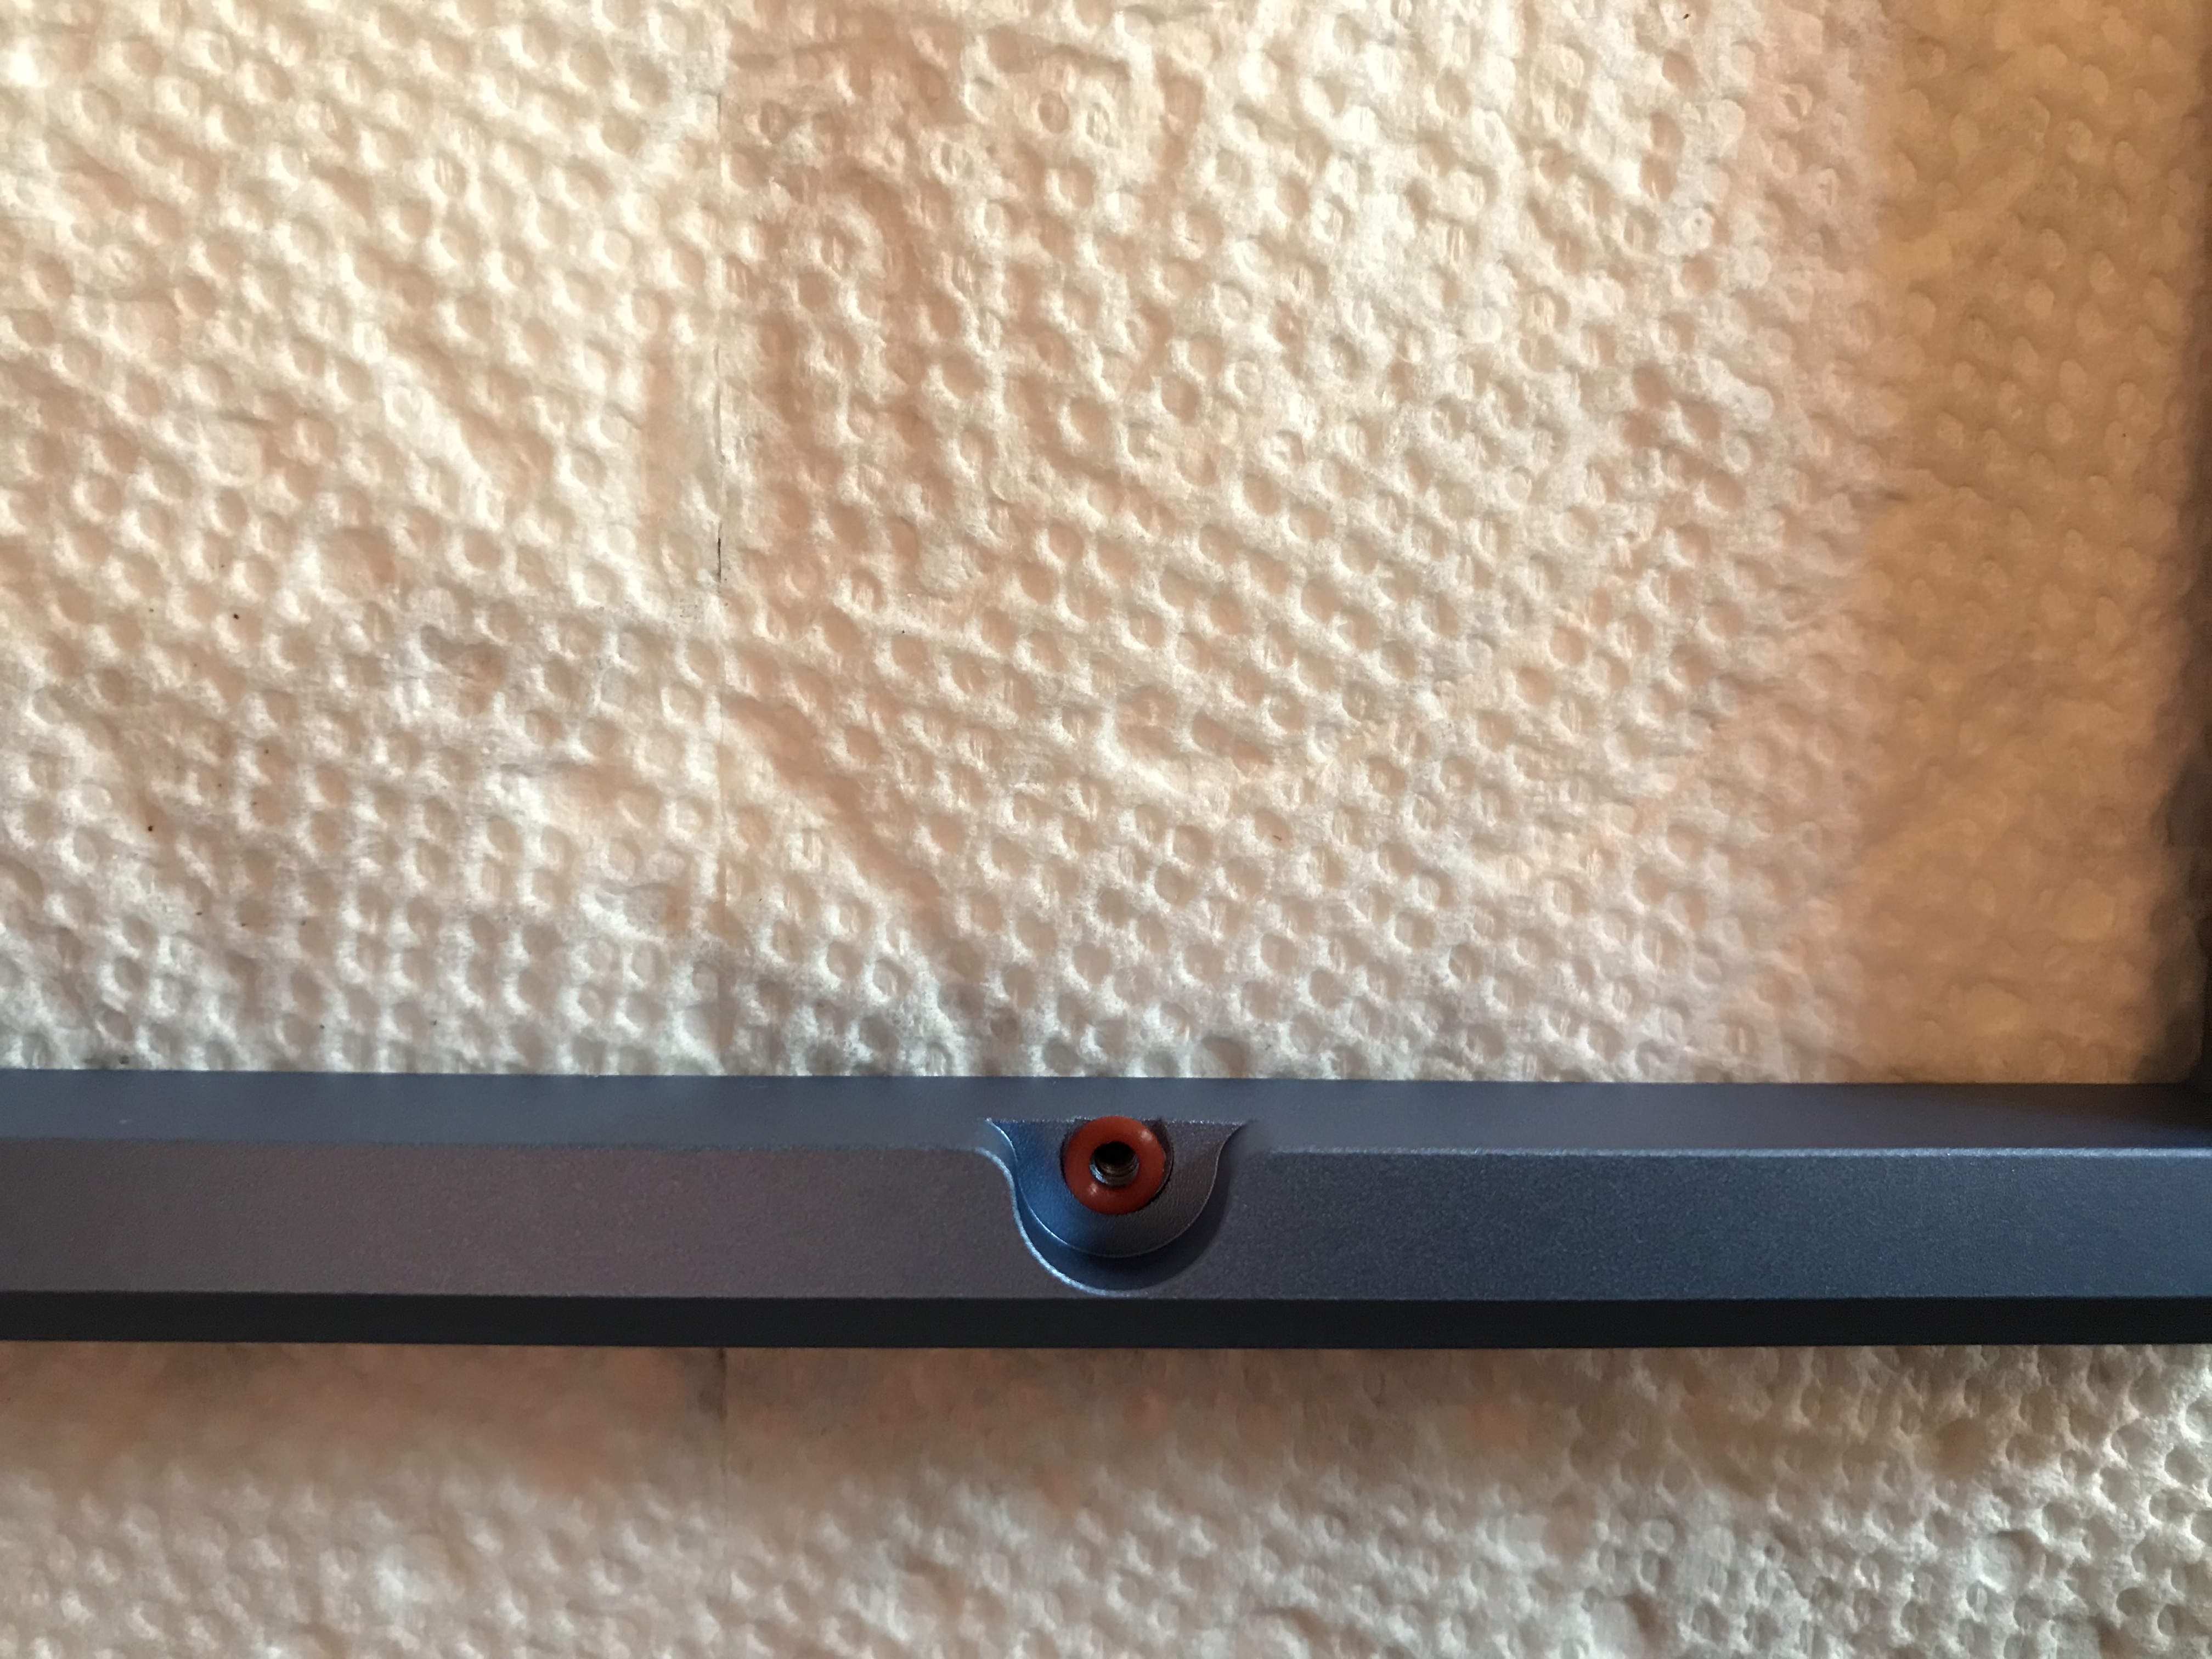
And here’s the plate with the other washer (the “top bun”) resting on top, before the screw is put into place to hold the whole thing together. As with many other things in keeb life, tweezers are your friends, and are essential for getting the washers exactly where you want them before threading the screws through the burger.
It’s important to make sure the screws are in far enough that they don’t stick out of the recessed areas in the case; aside from ensuring that the case top will fit cleanly on the case bottom, we don’t want vibrations traveling via screw contact with the bottom of the case, which would defeat the purpose of the burger mount.
Polyfill was provided with the Brutal60 kit for sound dampening, so, might as well try it, right? I’m not entirely sure if this was what was intended, but it seemed like the most plausible way to use the material.
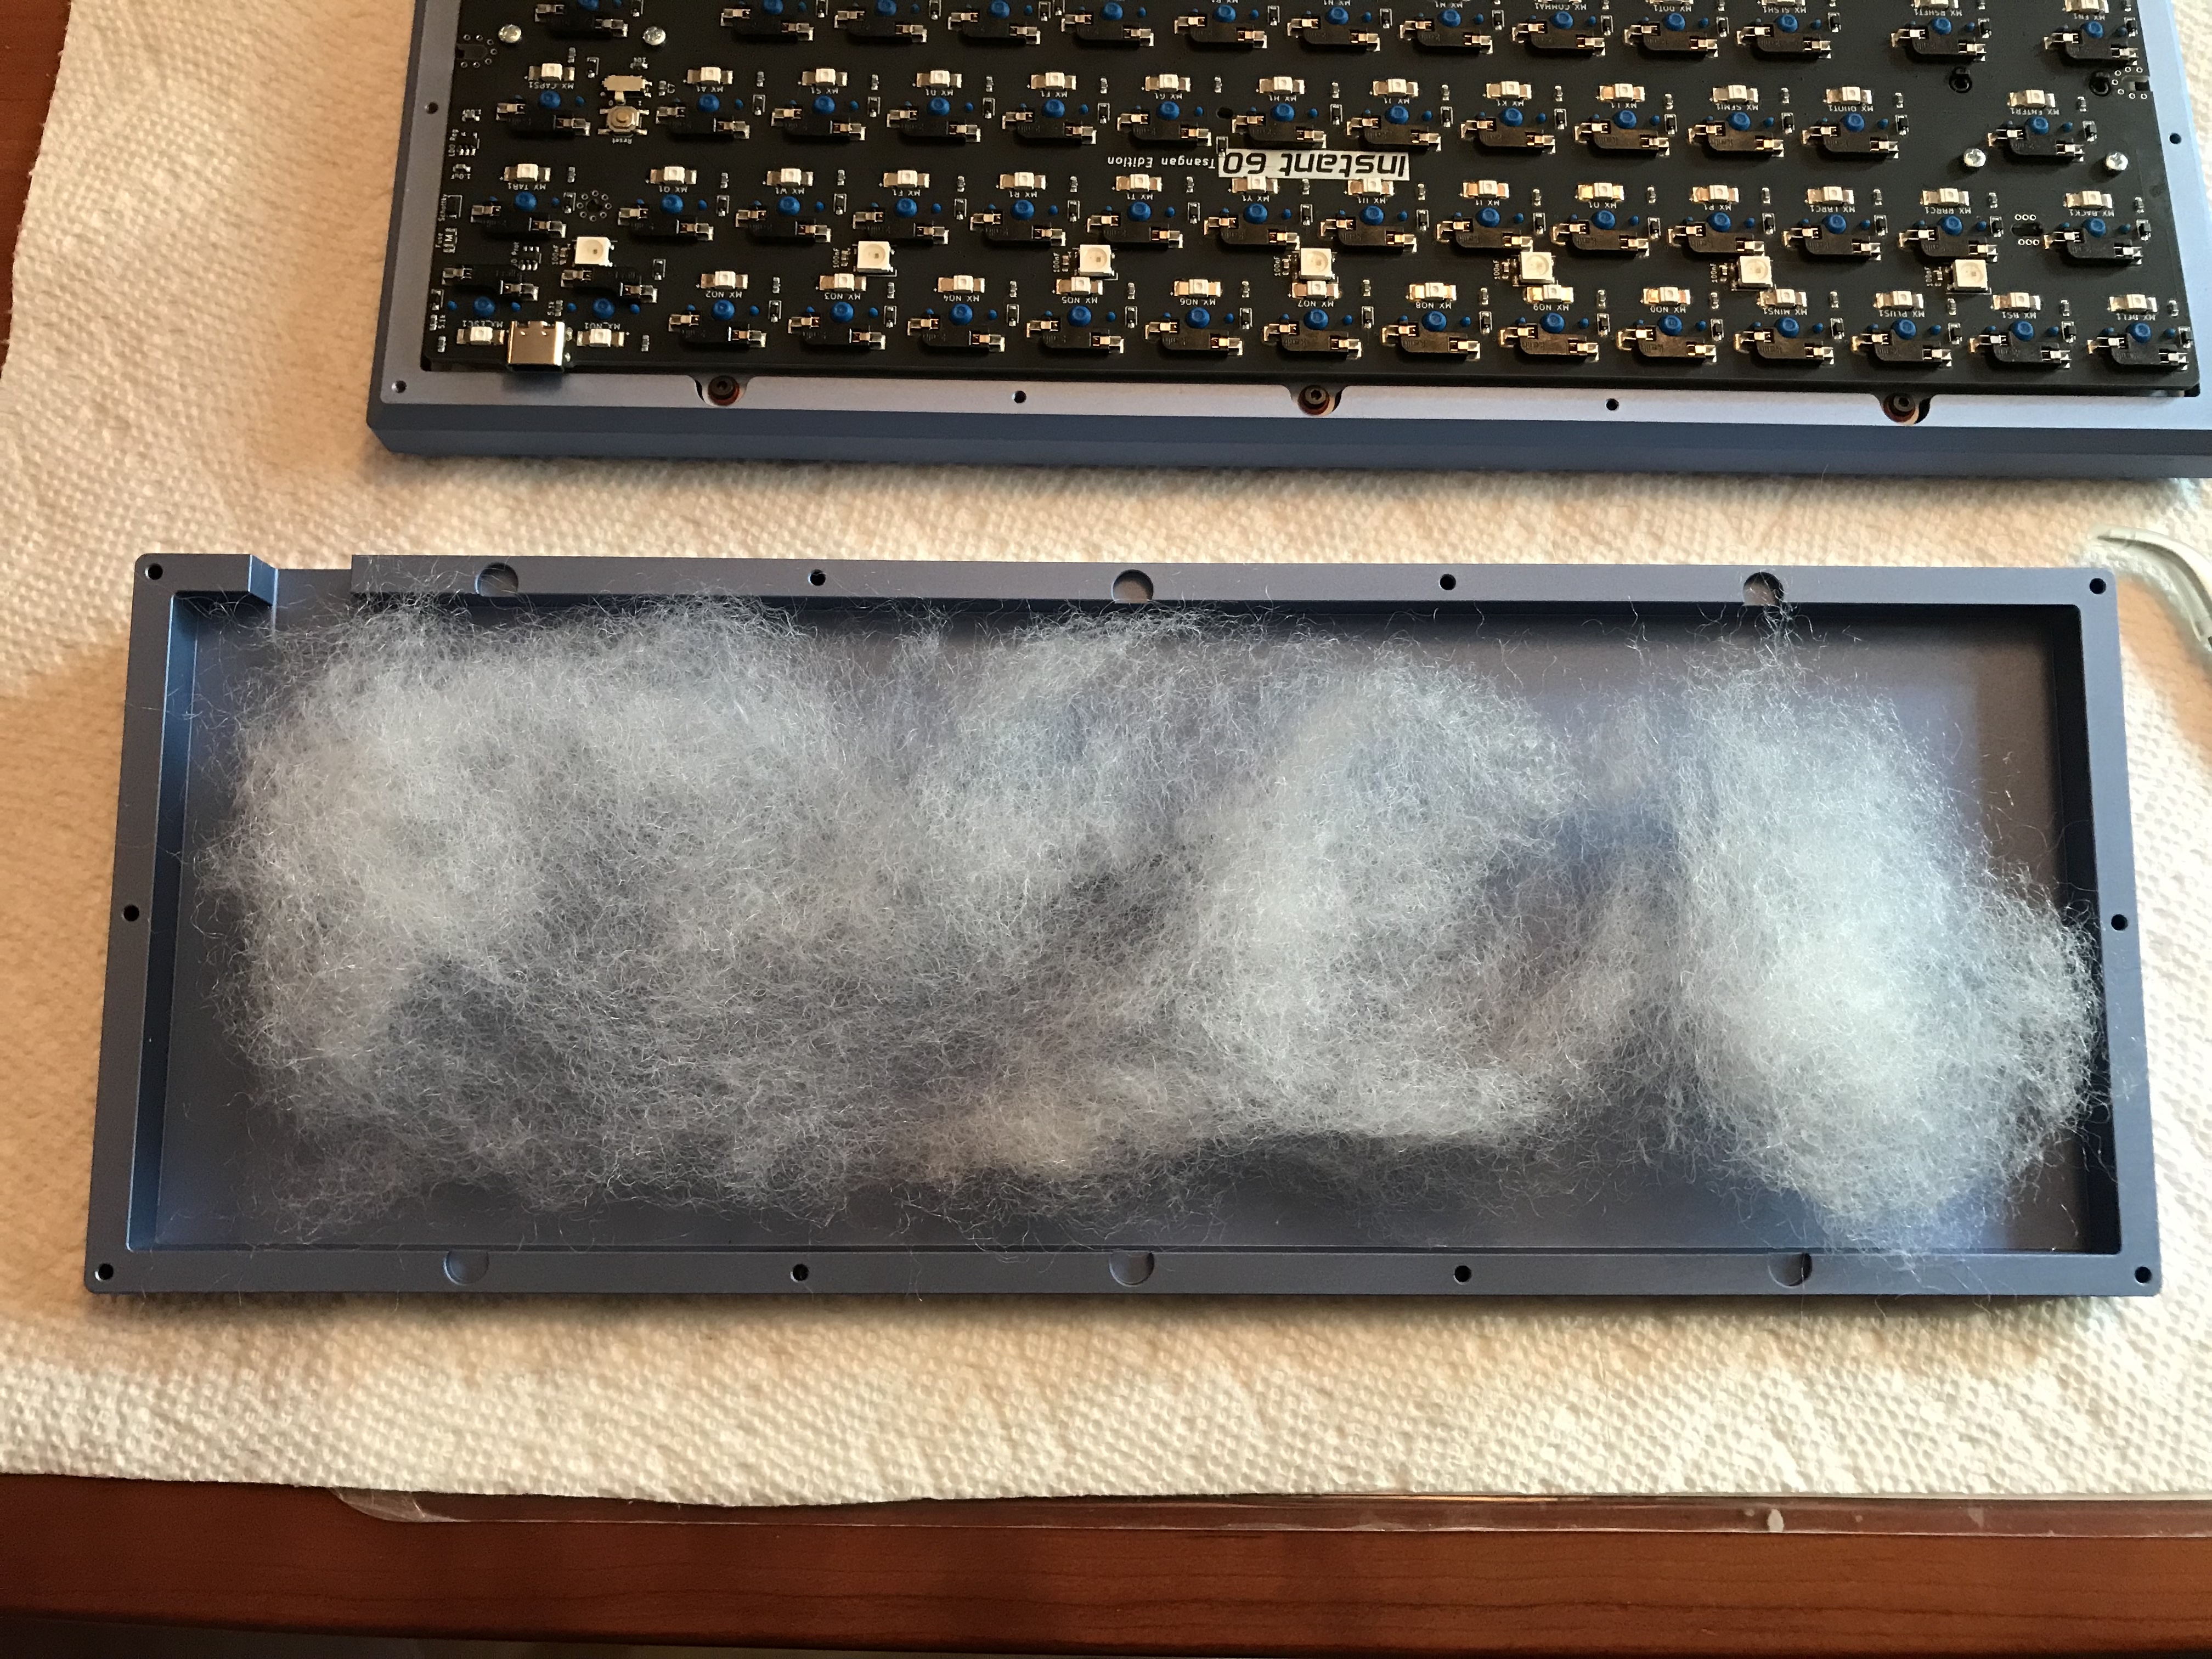
The top and bottom are held together by screws. See the side of the case? If you use polyfill for sound dampening, and you exercise the same lackadaisical approach to using it that I did, you’ll most likely find that your board needs a shave.
After some quick experimentation at this stage of the build, I determined a couple of things:
- Burger mount is pretty effective at eliminating plate ping (and the case ping that can also result). What it leaves behind is the hollow metallic sounds that result from the cavity between the PCB and the case. If you’ve never listened carefully to the quality of the sounds that your plate and case create, burger mount is a fun way to distinguish pings from echoes.
- For the remaining hollow sounds, polyfill doesn’t seem to do much of anything, at least to my ears.
Well, we tried. I went back in, removed the polyfill, and rough cut a couple of 2mm sheets of craft foam to size. Two sheets were necessary to get good contact and a bit of compression.
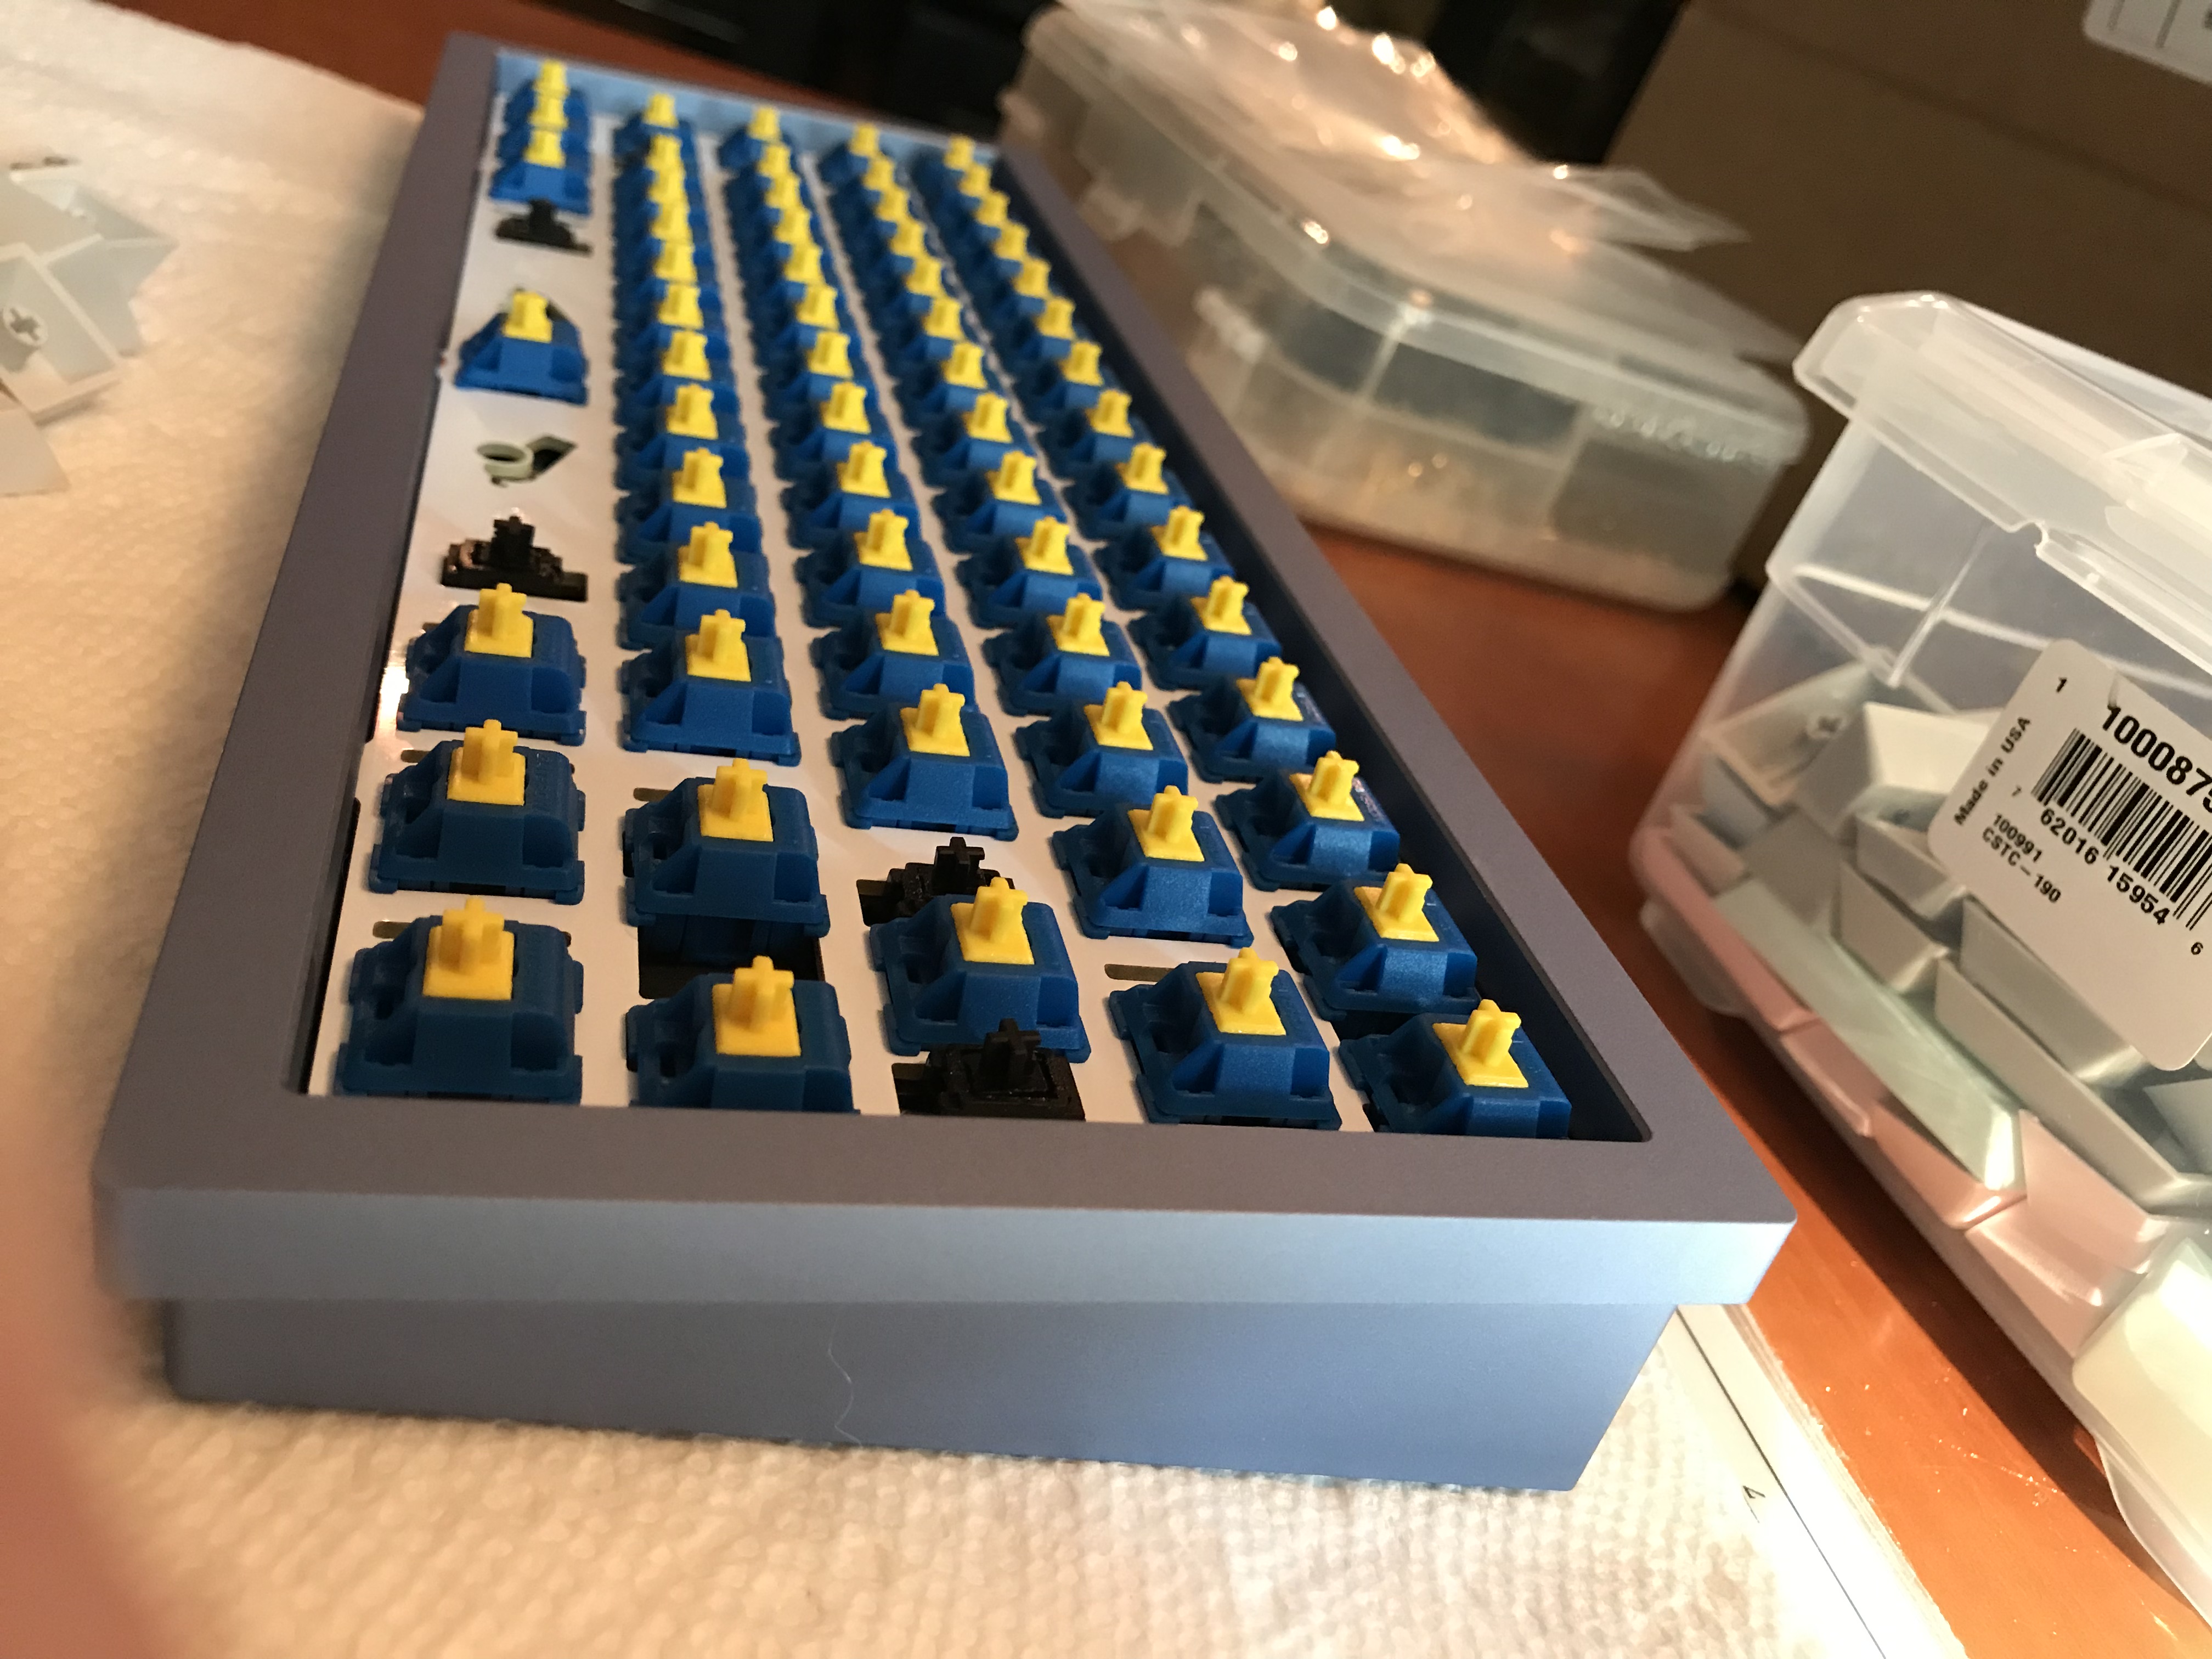
For keycaps, we’re using EPBT. I found these to be very smooth to the touch, almost too smooth; I’m pretty inconsistent with my typing form, and if my fingers were striking the keys at an angle, instead of vertically, they would slide around on the keys a bit. Sound-wise, with the FR4 plate, very crisp, and the lube job seems to have worked out quite well - this is the first linear board I don’t mind using. I didn’t expect Tsangan to be much of a change from ANSI, and it wasn’t.
One problem with the spacebar. As many others have reported with EPBT spacebars, there is some warp. In this case, it wasn’t bad enough to prevent the spacebar from fitting on the stabs and functioning normally, but it’s visible if you look at just the right angle.
And, one other remaining problem with that spacebar. It’s loud. Disproportionately so, with respect to all of the other keys. Because we’ve got a hotswap board, it was easy enough to try something I’ve wanted to try for a while: use a silent switch for the spacebar. I replaced the Linjär with an already-lubed Zilent I had lying around, and wow, that completely did the trick. Would I recommend this in general? If consistency of sound across the board is more important to you than consistency of feel, then absolutely give this a try. If it’s the other way around for you, maybe still give it a try (although perhaps use a Zilent with tactiles and a Healio with linears? What can I say, sometimes laziness wins.)
Lessons learned
- The stem-but-not-the-housing lube approach with 205g0 yielded smooth performance and crisp sound with no sluggishness. Since not lubing the housing is a time-saver as well, I’ll be trying this approach again soon.
- FR4 - I see the appeal if you like a high-pitched crisp clack with your flex. I prefer a lower pitch and flex is probably a secondary concern for me, so I’d personally prefer alu or POM as plate materials.
- Using a silent switch for the spacebar may be just what the doctor ordered to bring the sound volume in line with all of the other keys on the board.
- Burger mount seems quite effective for removing high frequency case ping, which makes mechanical sense, and as a learning tool for understanding how different factors contribute to keyboard sound, it’s good fun.
- Compressed craft foam does a solid job of mitigating hollow case sound, although I think Sorbothane is still better - if Sorb gets you 100% of the way there, craft foam is 80-85%. Polyfill, for me, was something like 5-10%.
Smell the brutality.
Specifications
case: Brutal60
case dampening: 2 layers of 2mm craft foam
PCB: Instant60 Tsangan
plate: FR4 Tsangan
plate/PCB dampening: none
stabilizers: GMK screw-in (1x7u, 2x2u)
stabilizer mods: clipped, lubed with SuperLube
switches: Linjär
switch mods:
- springs tub-lubed with Krytox GPL 104
- stems hand-lubed with Krytox GPL 205 grade 0
spacebar switch: 65g R11 V1 Zilent
- spring tub-lubed with Krytox GPL 104
- stem and housing hand-lubed with Tribosys 3204
keycaps: EPBT Grayscale
- base kit, blue spacebar kit
HxWxD (without caps or feet): 1.38" x 12.0" x 4.5"
HxWxD (without caps): 1.5" x 12.0" x 4.5"
HxWxD: 1.75" x 12.0" x 4.5"
assembled weight: 2.95 lb
10 Likes
Great write-up! I agree about sorbathane. The brutal60 top edge rings almost like a musical triangle when you tap a fingernail on it. Sorbathane helped my build dramatically. I was worried it would mitigate the top mount flex, but it doesn’t. I built mine with lubed and switch filmed creams.
Really like the light blues you have going here.
1 Like
Thx for the colorful build tale. Excellent Sunday read. 
If ePBT texture is too smooth, you’ll be horrified by POM keycap. I personally find it perfect for me, more so because it’ll be a long time before it starts to shine unlike ABS.
Re using silent switch for space bar, that’s what I do first when I build a new board. But what I want is not a silent space bar but a pleasant sounding one so, when I have the time to tinker, I try various tricks until I get the result I want.
Some tricks I use beyond stuffing lube into stabs:
- Try different spring weights. Heavier spring will push back just enough to prevent strong bottom out without causing excessive noise after release.
- Fill inside of space bar with foam or Sorbothane. Foam is recommended because it needs to be crazy glued due to the weight. I use epoxy polymer but it’s permanent and messy so I don’t recommend it.
- Holy Panda only trick: cut off the tip of Halo stem to mute HP’s signature sound.
1 Like
POM keycap - good to know. What’s odd is, I like the way ABS shine feels, and I don’t have the “slipping finger” problem there…but subjectively it seems just as smooth as the ePBT caps. I want to use this as an excuse to get a good microscope for some close-up key surface shots, but one financial battle at a time.
Thanks for sharing the spacebar tricks!
I probably didn’t make clear that the spacebar still isn’t silent in this build - it’s just muted enough so that the sound blends in with the other keys during typing.
You’ve also reminded me that I really need to start exploring the world of spring swapping. To some extent, I was waiting on enough reputable vendors to get into the spring game before diving in…
3 Likes
I highly recommend TX springs as they ship in a box that doubles as a spring lubing station and they come with their own thin lube as well… Something I’m sure you’d be interested in checking out. I’m currently running their 70g springs in Linjars on my alphas with 78g Sprit springs in Holy Pandas on my mods. Both springs I’d encourage checking out but TX gives you a bit more bang for your buck, and experimental value.
2 Likes
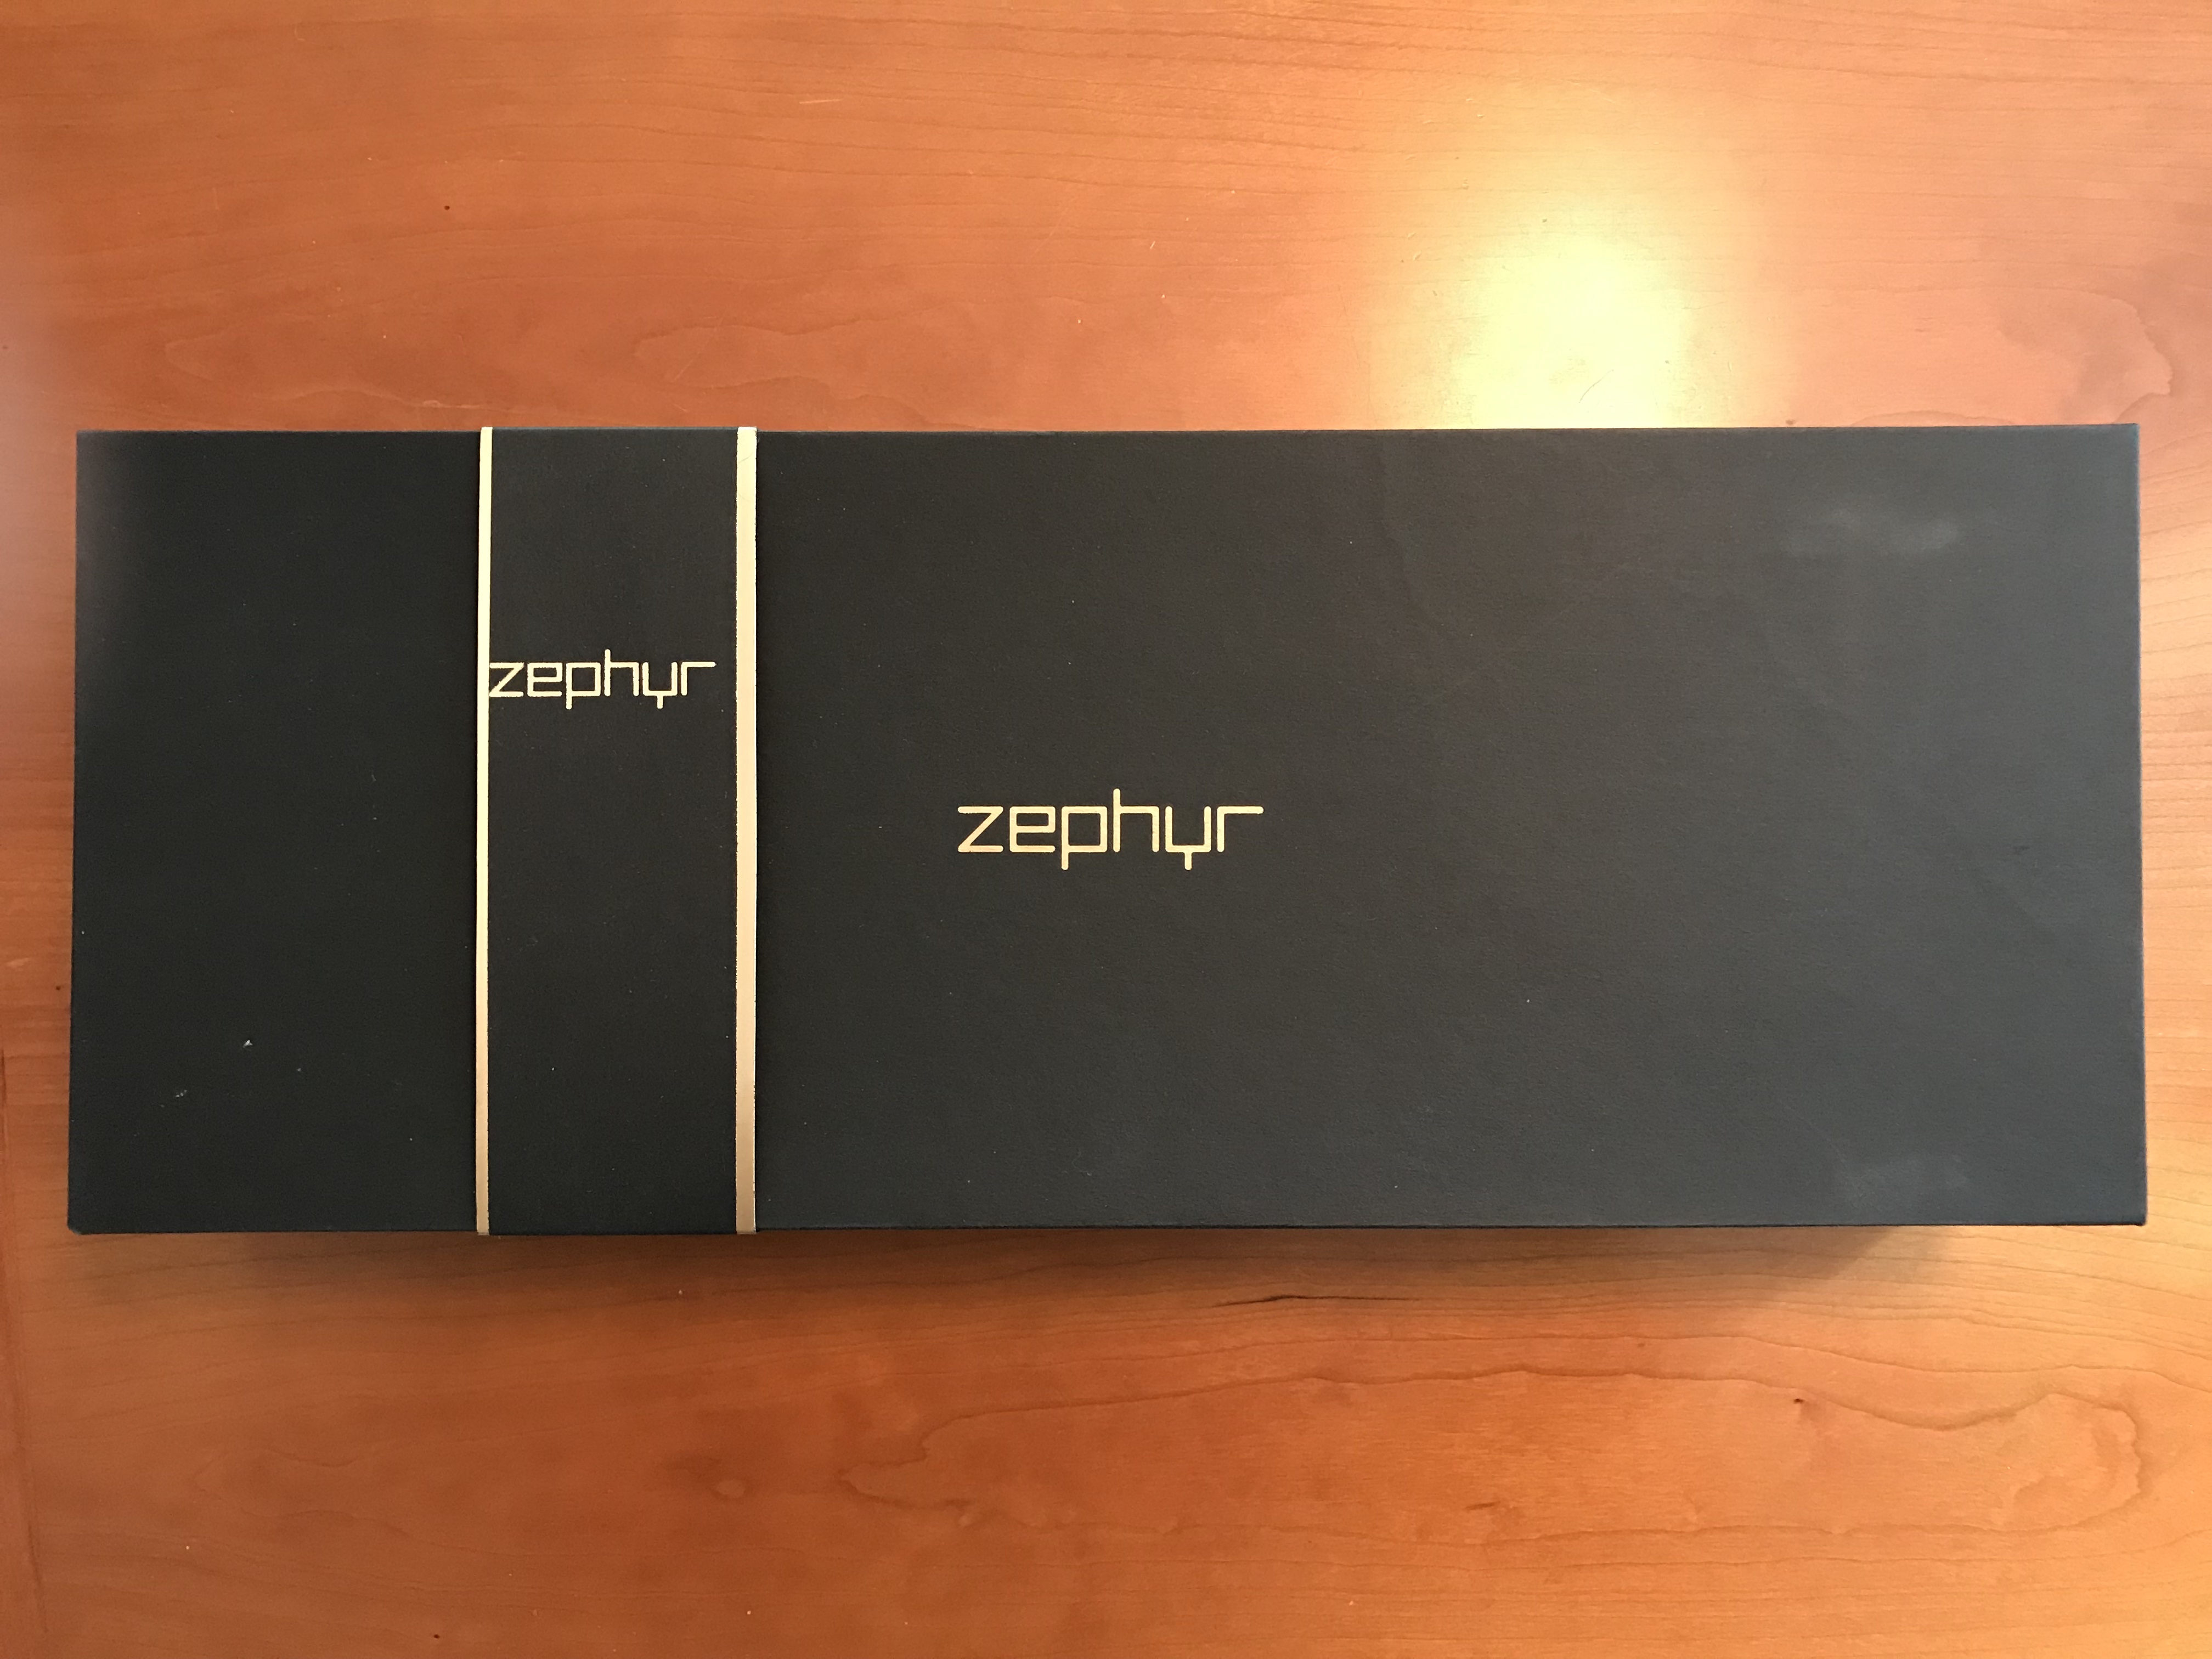
Build #25: Zephyr R2
25 builds! I think it’s safe to declare that I’ve officially fallen down the mechanical keyboard rabbit hole. Let’s celebrate that milestone by getting back to basics - simple, clean colorway, good stabs and switches, and heft. Oh, the heft.
Just in case I forgot what board I was building between looking at the middle of the box and shifting my gaze ever so slightly to look at the band around the box, there’s the brand name again. If that doesn’t trigger your OCD, I don’t know what will.
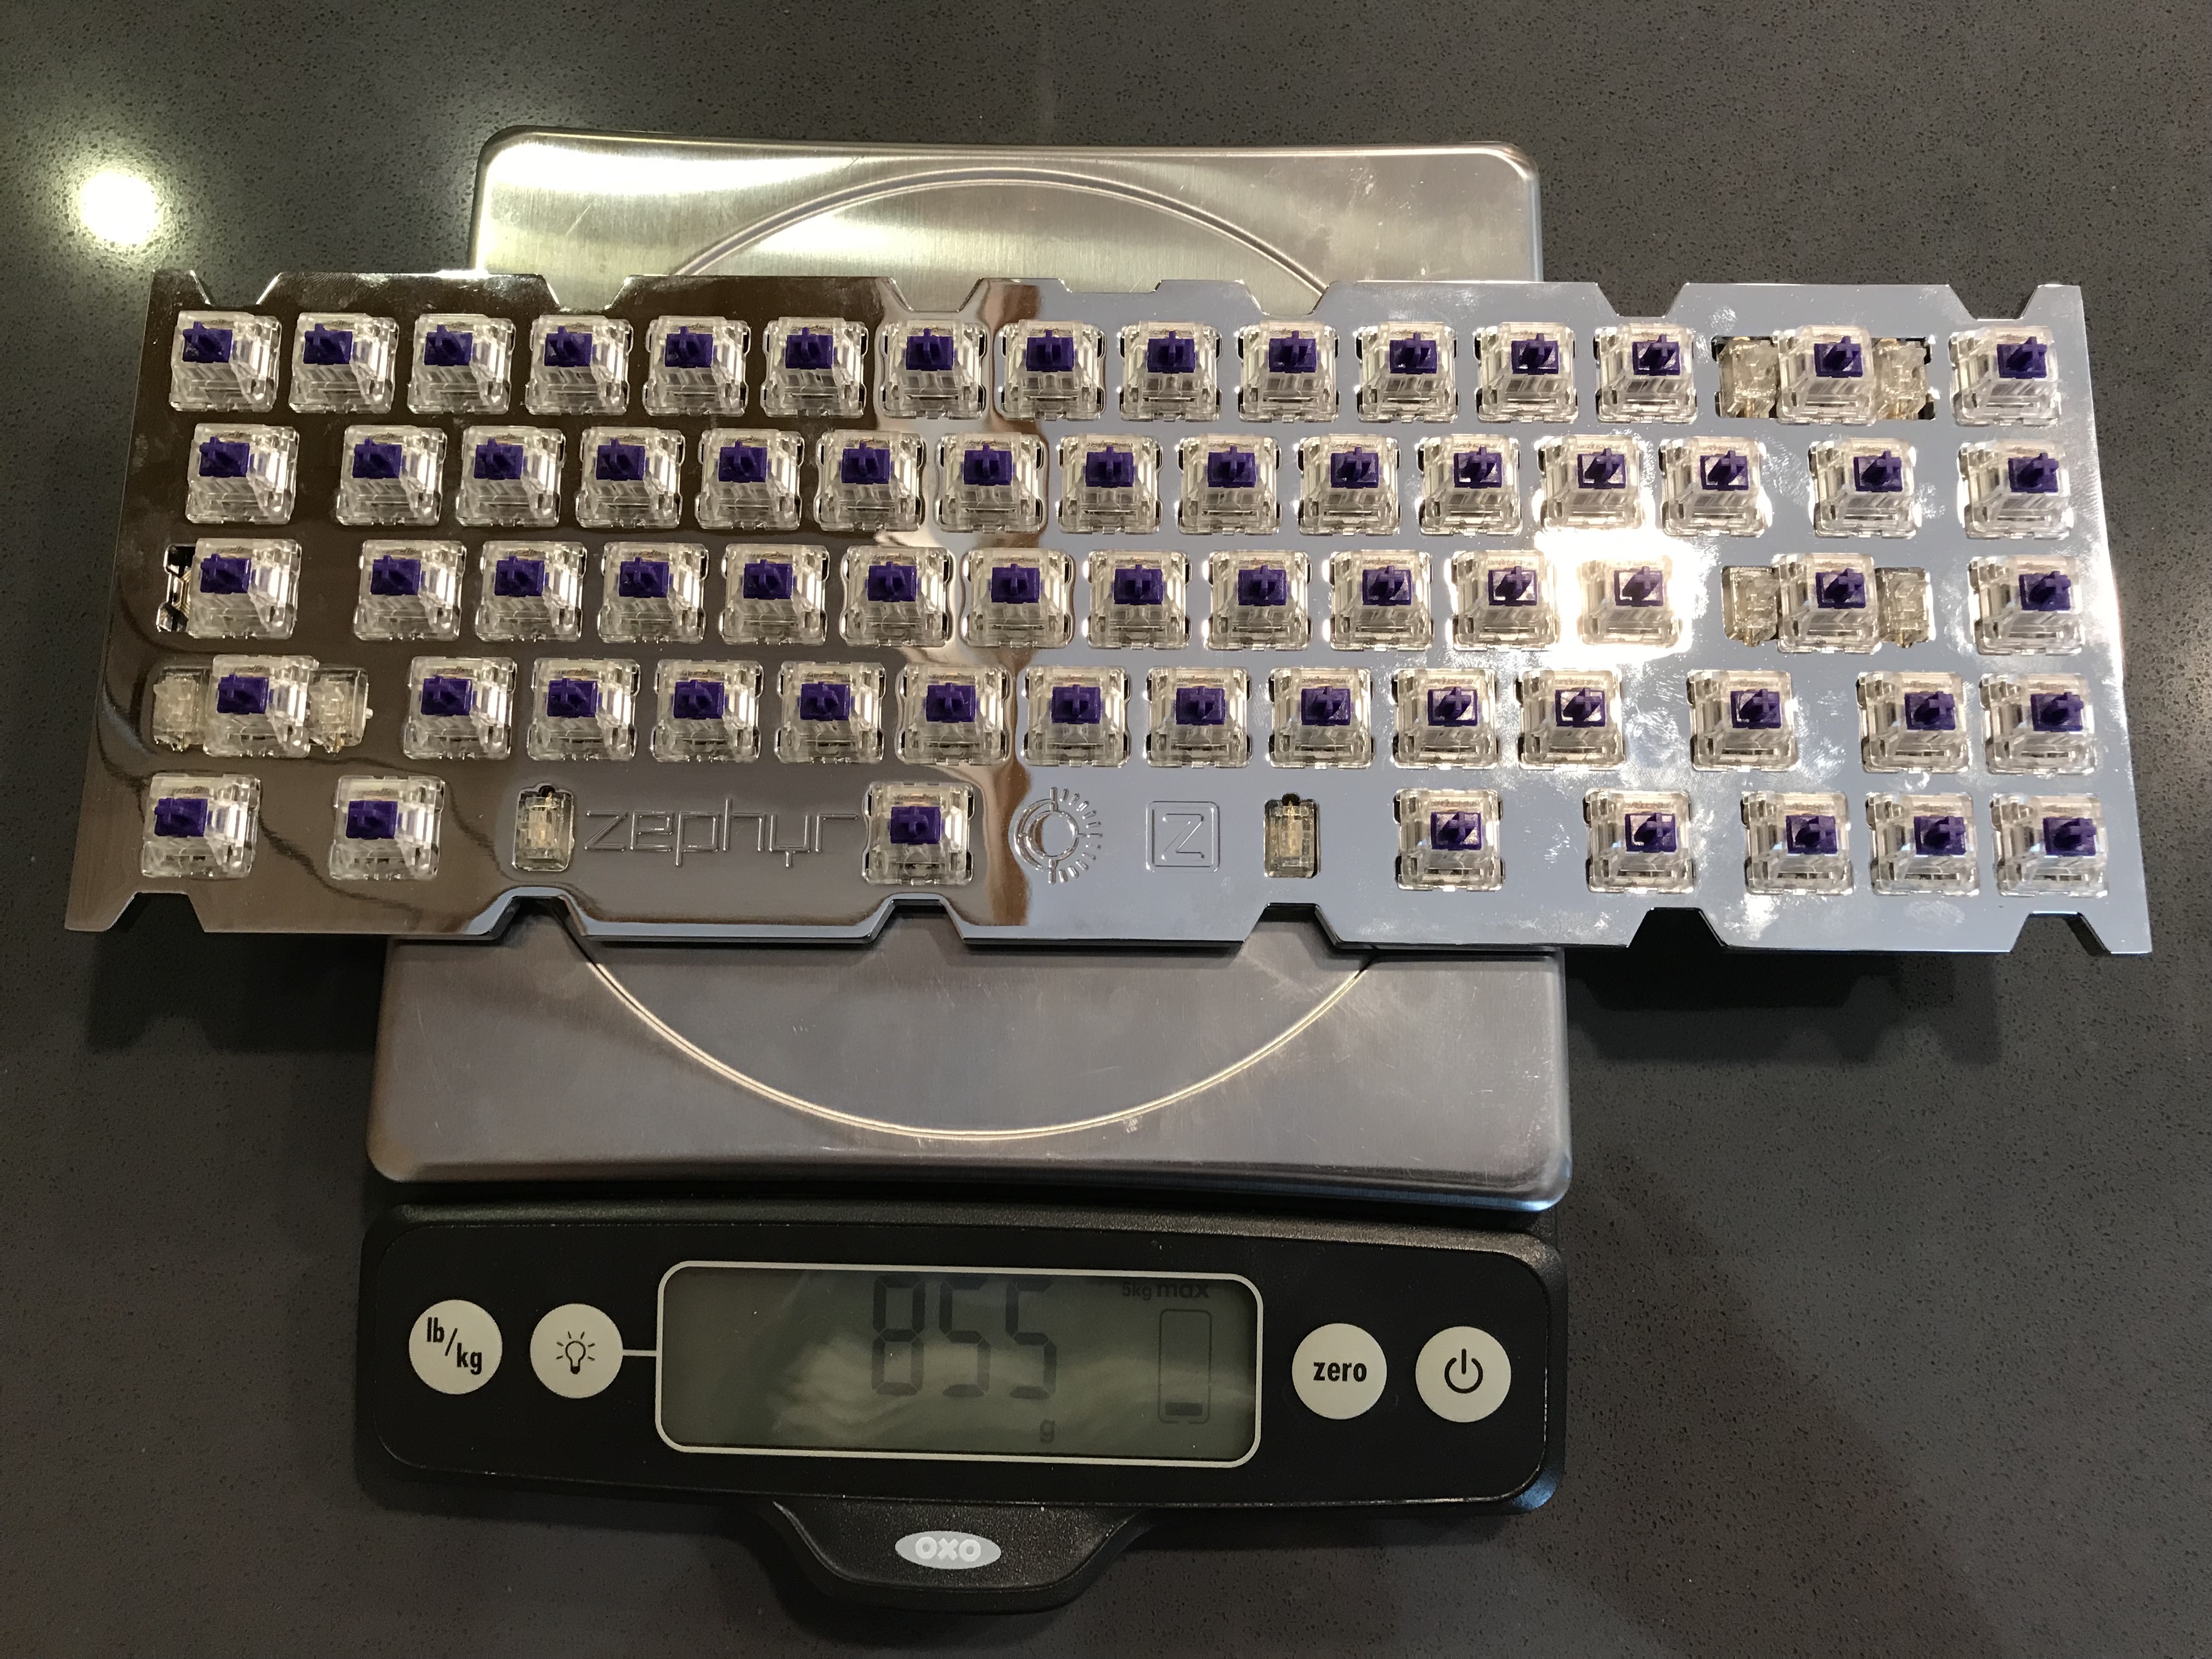
Opening it up, we’ve got rubber feet, stickers, and a lovely Wilba-designed Zeal65 PCB.
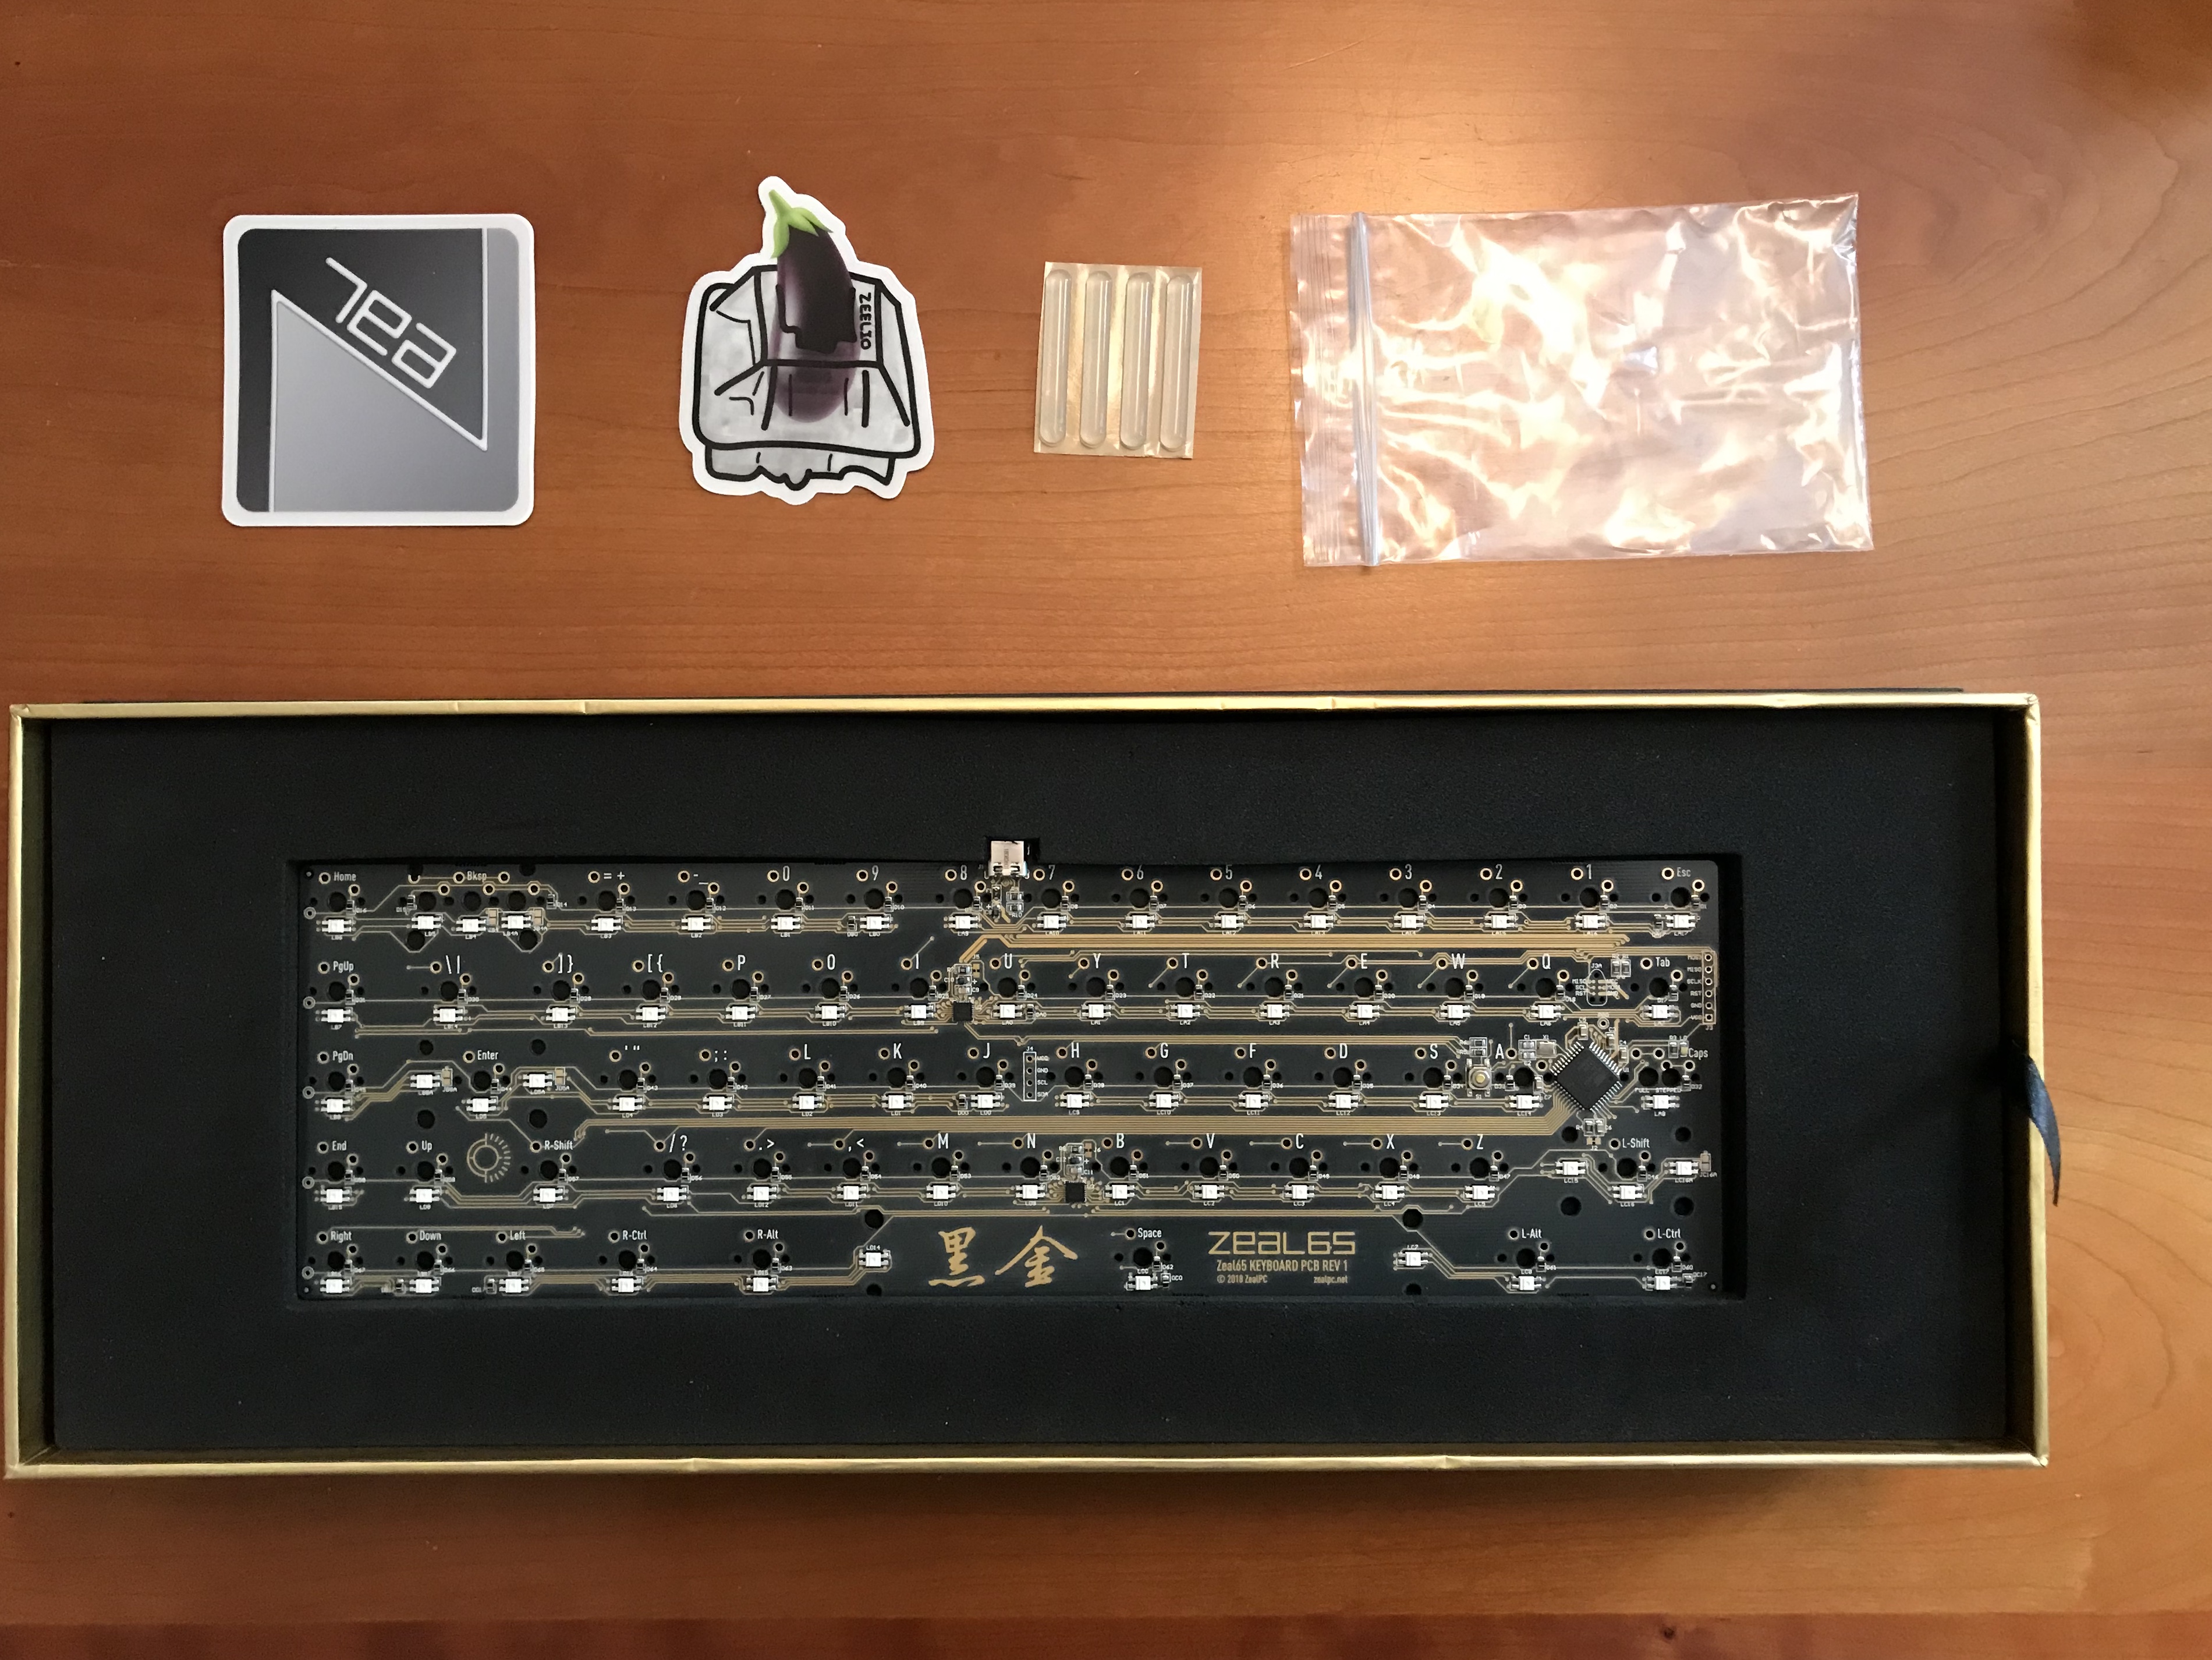
Putting that aside, we’ve got a boxful of Zealios, and tearing away at some tissue paper, our first look at the PVD plate. We’ll be admiring that plate throughout the build, but let’s just say it right now - gorgeous finish.

Here’s a closer look at the Zeal65. As expected, the PCB and artwork is quite lovely, and the key labeling is always a nice feature, particularly when it’s on both sides of the PCB. It’s by no means a necessary feature, but I wish more designers added it to their PCBs.
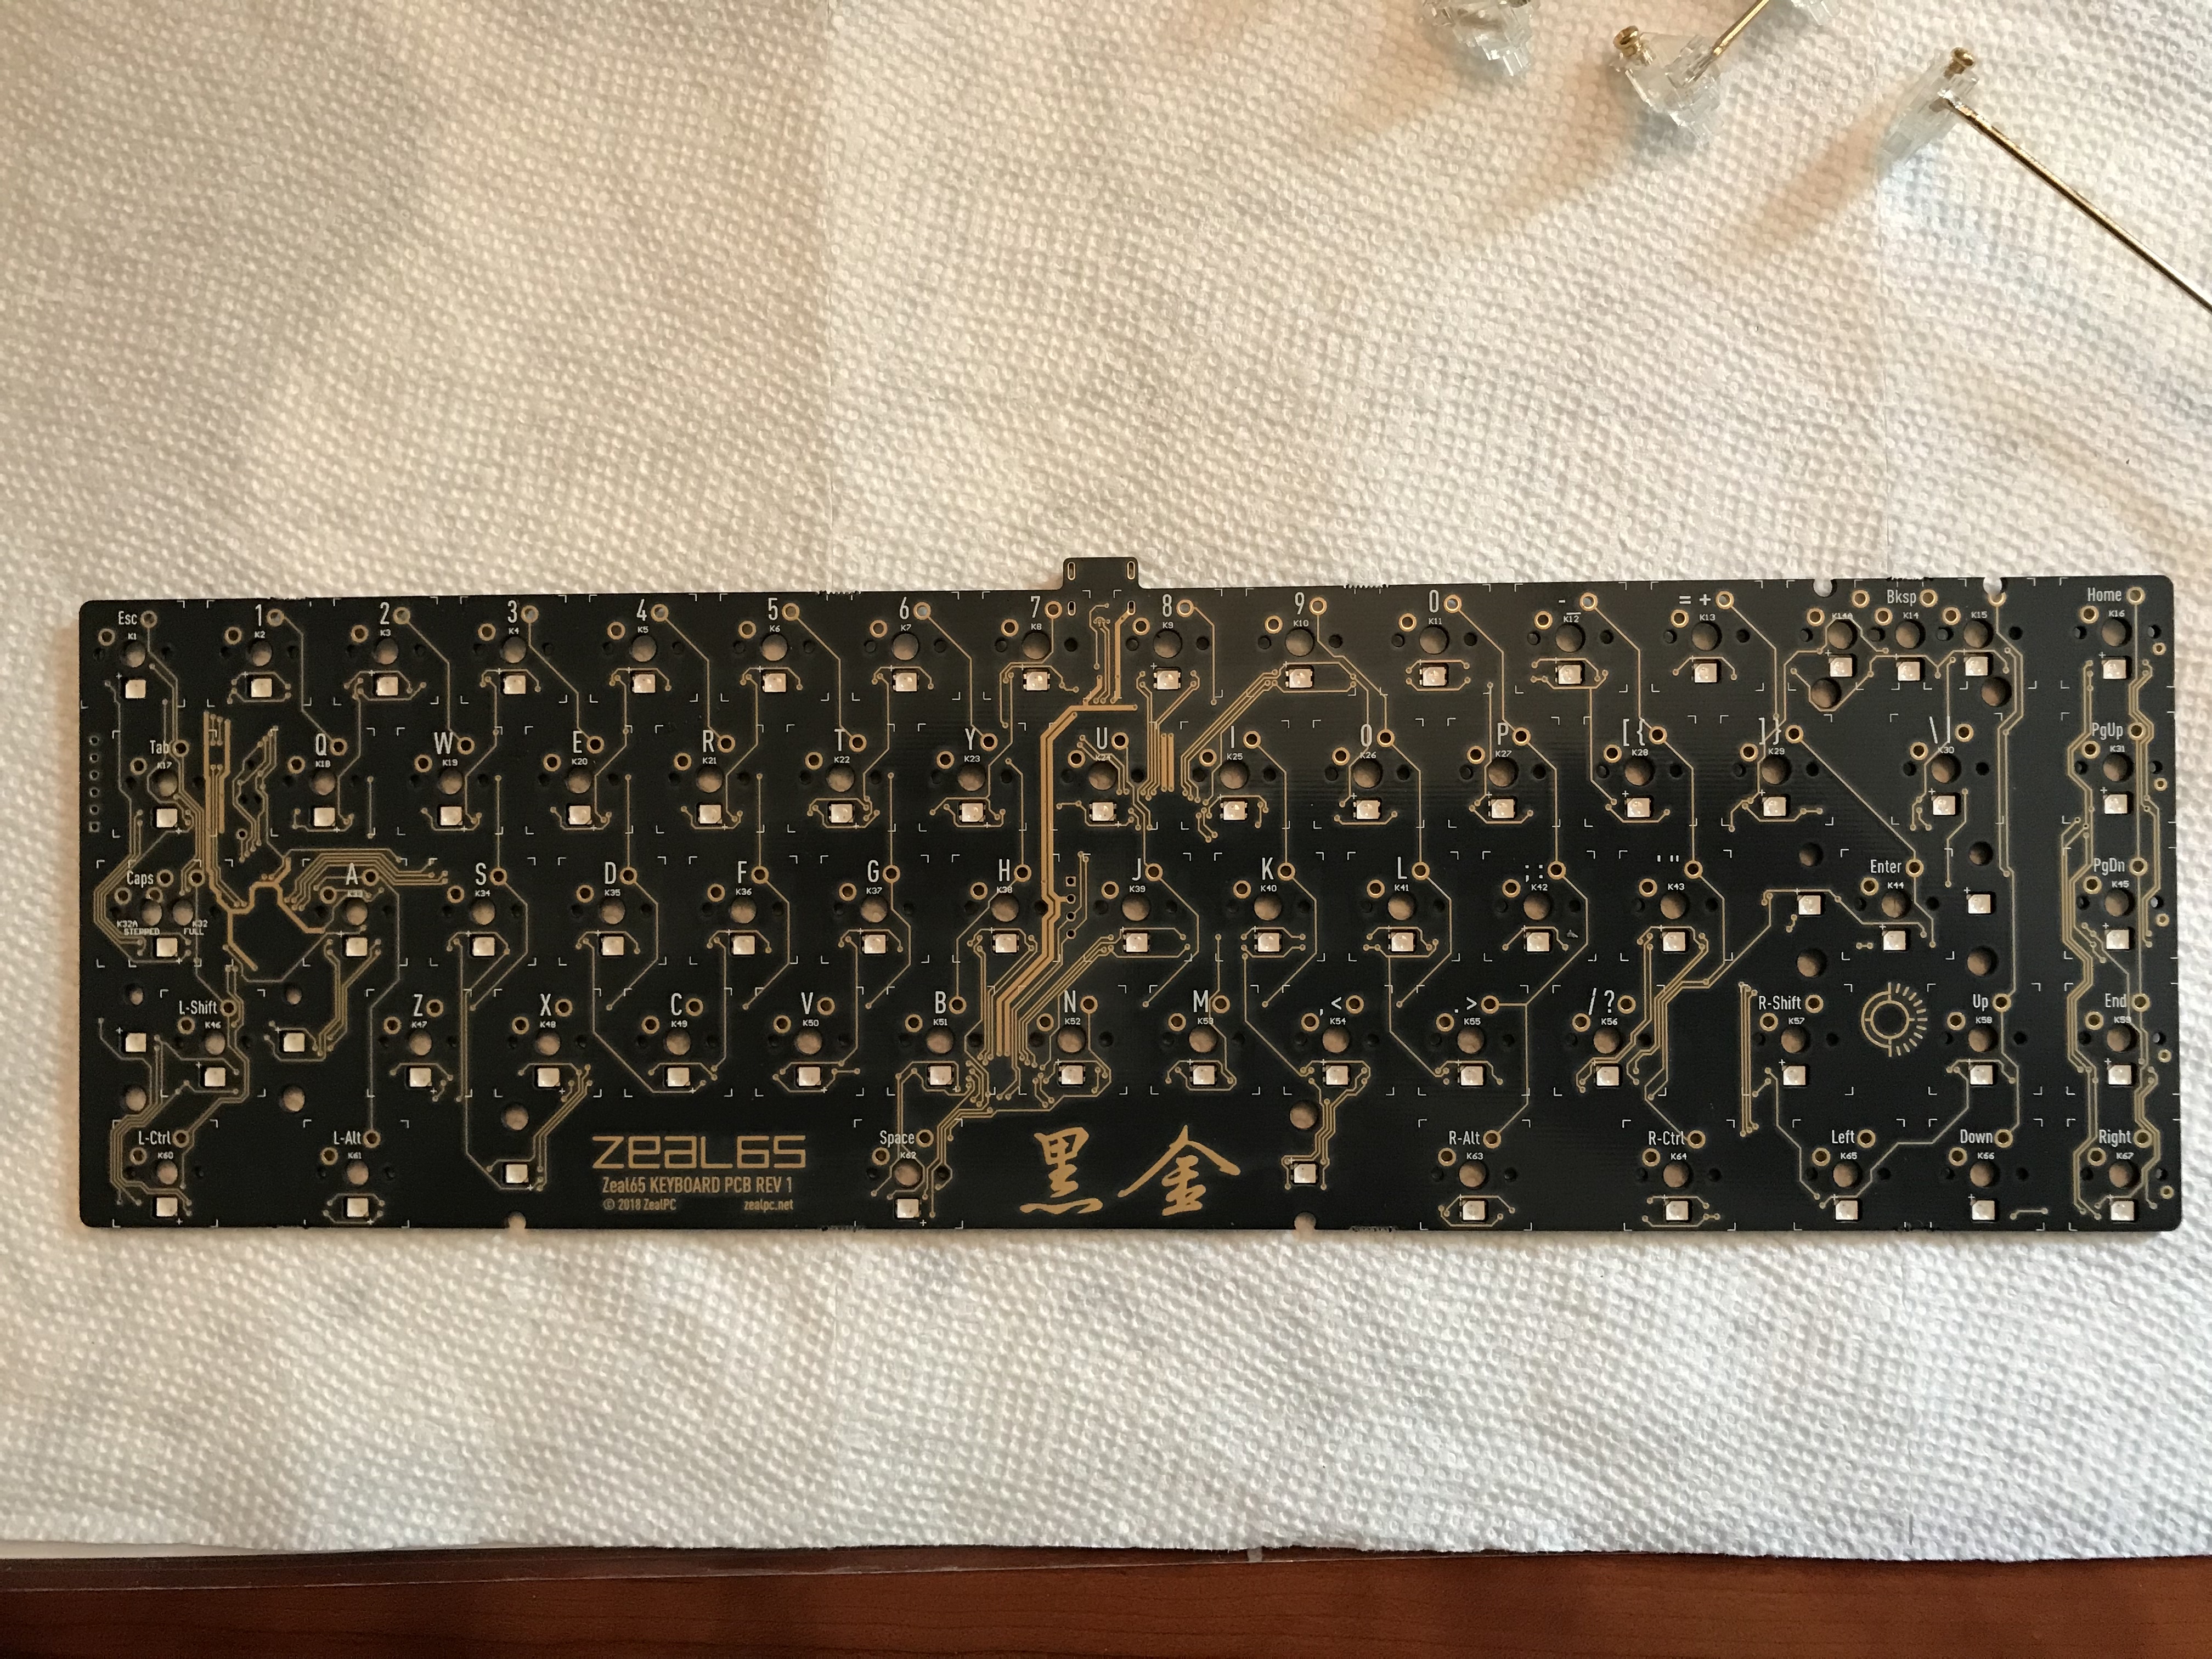
On a typical build with GMK stabs, I’d need to clip the stabs, lube, and possibly do a bandaid mod of some sort. However, we have pre-installed per-key RGB LEDs on the Zeal65, and in particular, we have LEDs under the stabilizers. The included Zeal stabs are clear, and it seems counterproductive to block the lights with a bandaid mod, so we can skip that step. Zeal stabs have nothing to clip, so we can skip that step too, which just leaves lubing. I originally considered using Christo 111 for the stabs, but I’ve found that 111 is an opaque white color when applied to stabs. So, back to good old SuperLube, which applies in a clear coat, and will let all of that RGB goodness through.

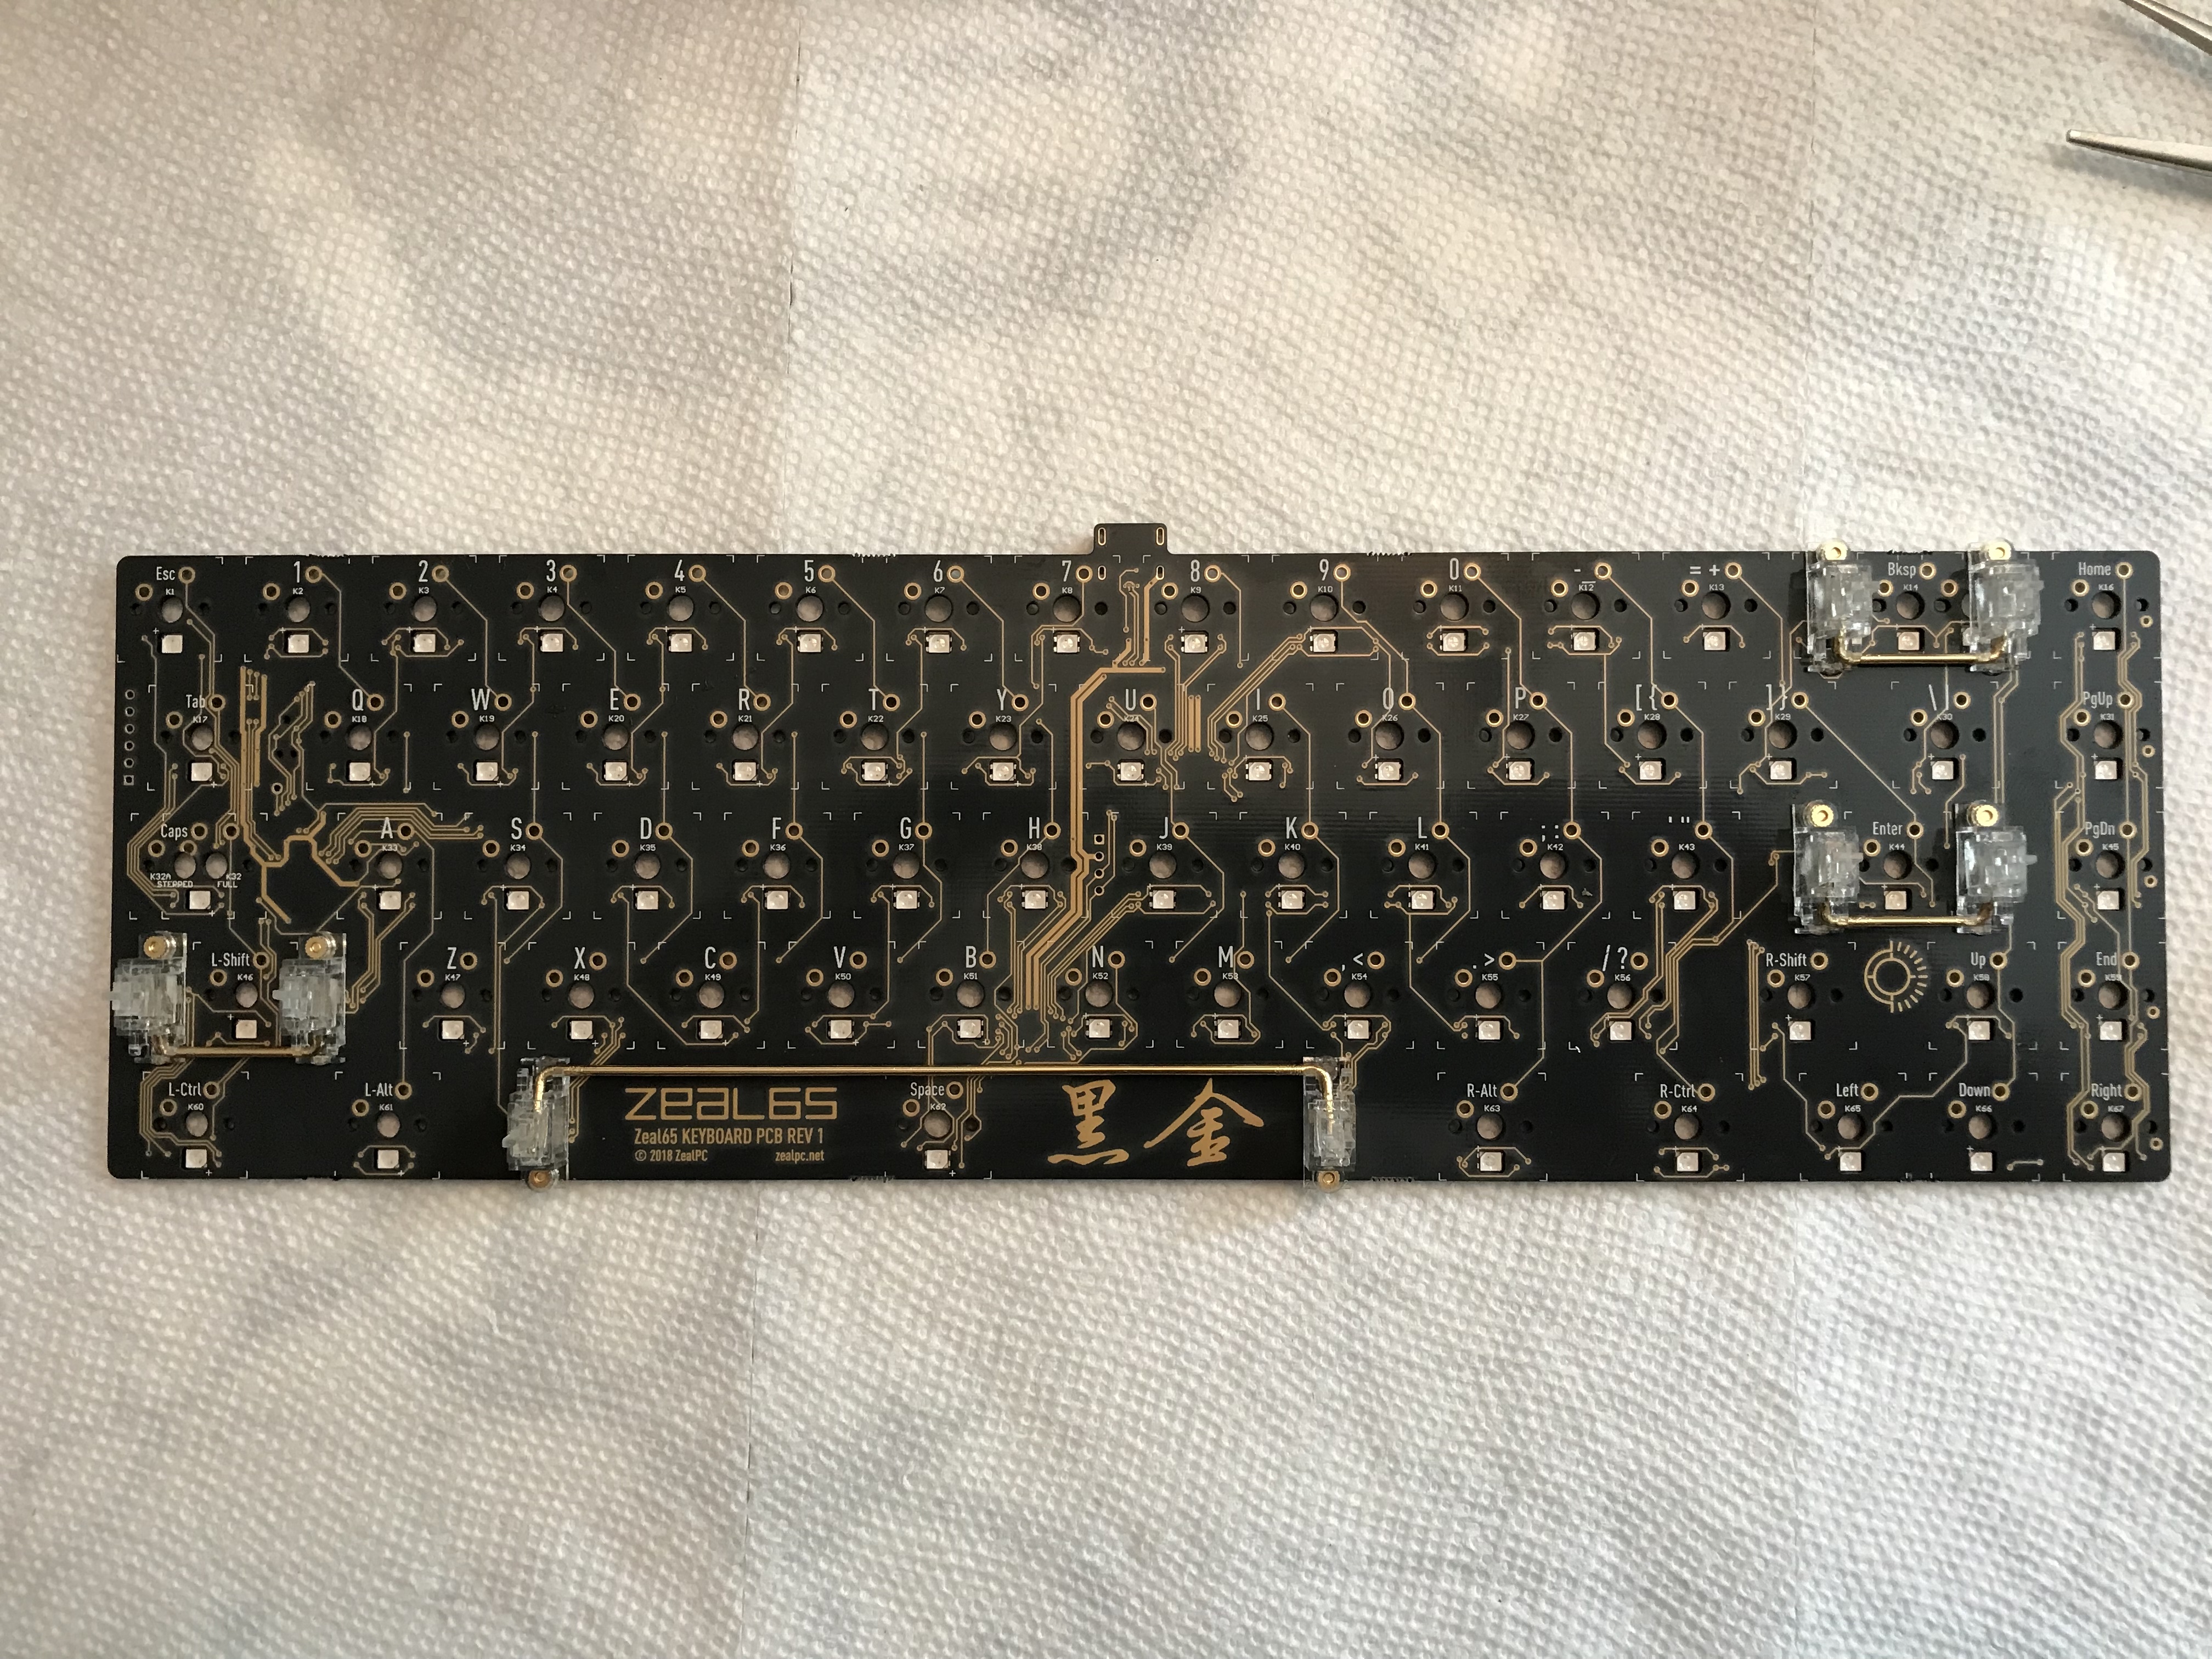
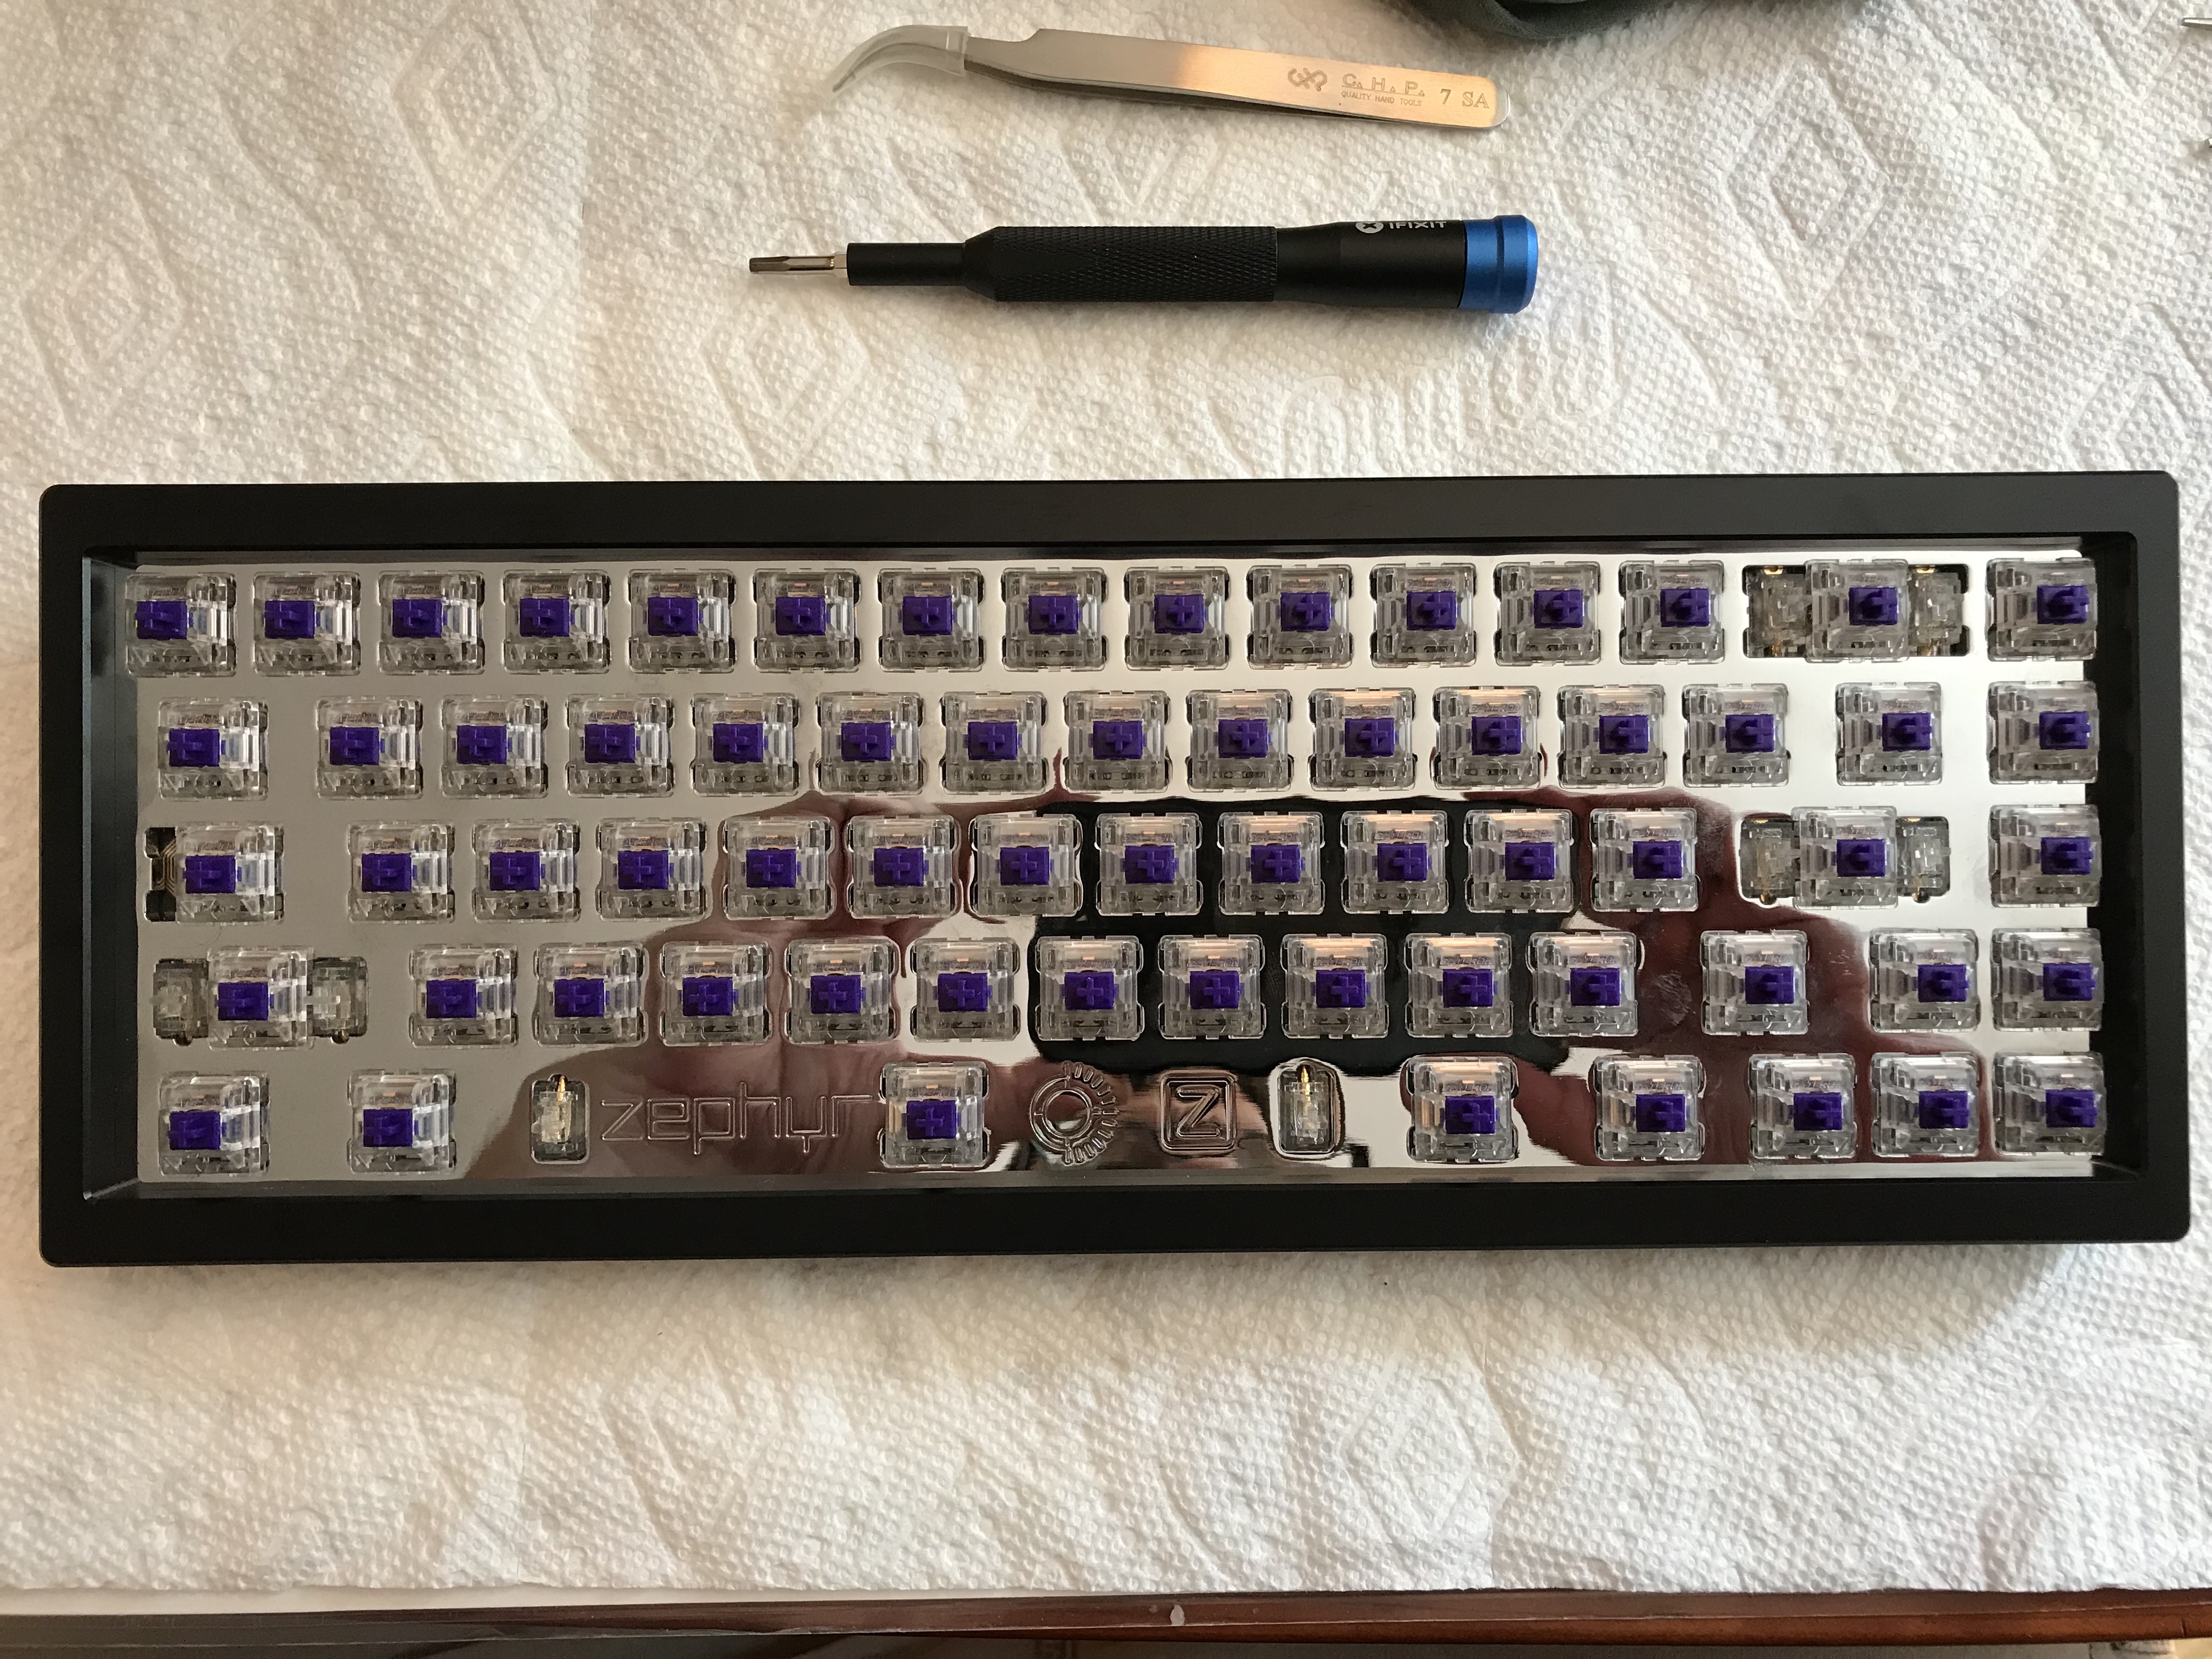
With the stabs installed, it’s always a good idea to check fit, especially with this thick plate. Tight fit, but comfortable.
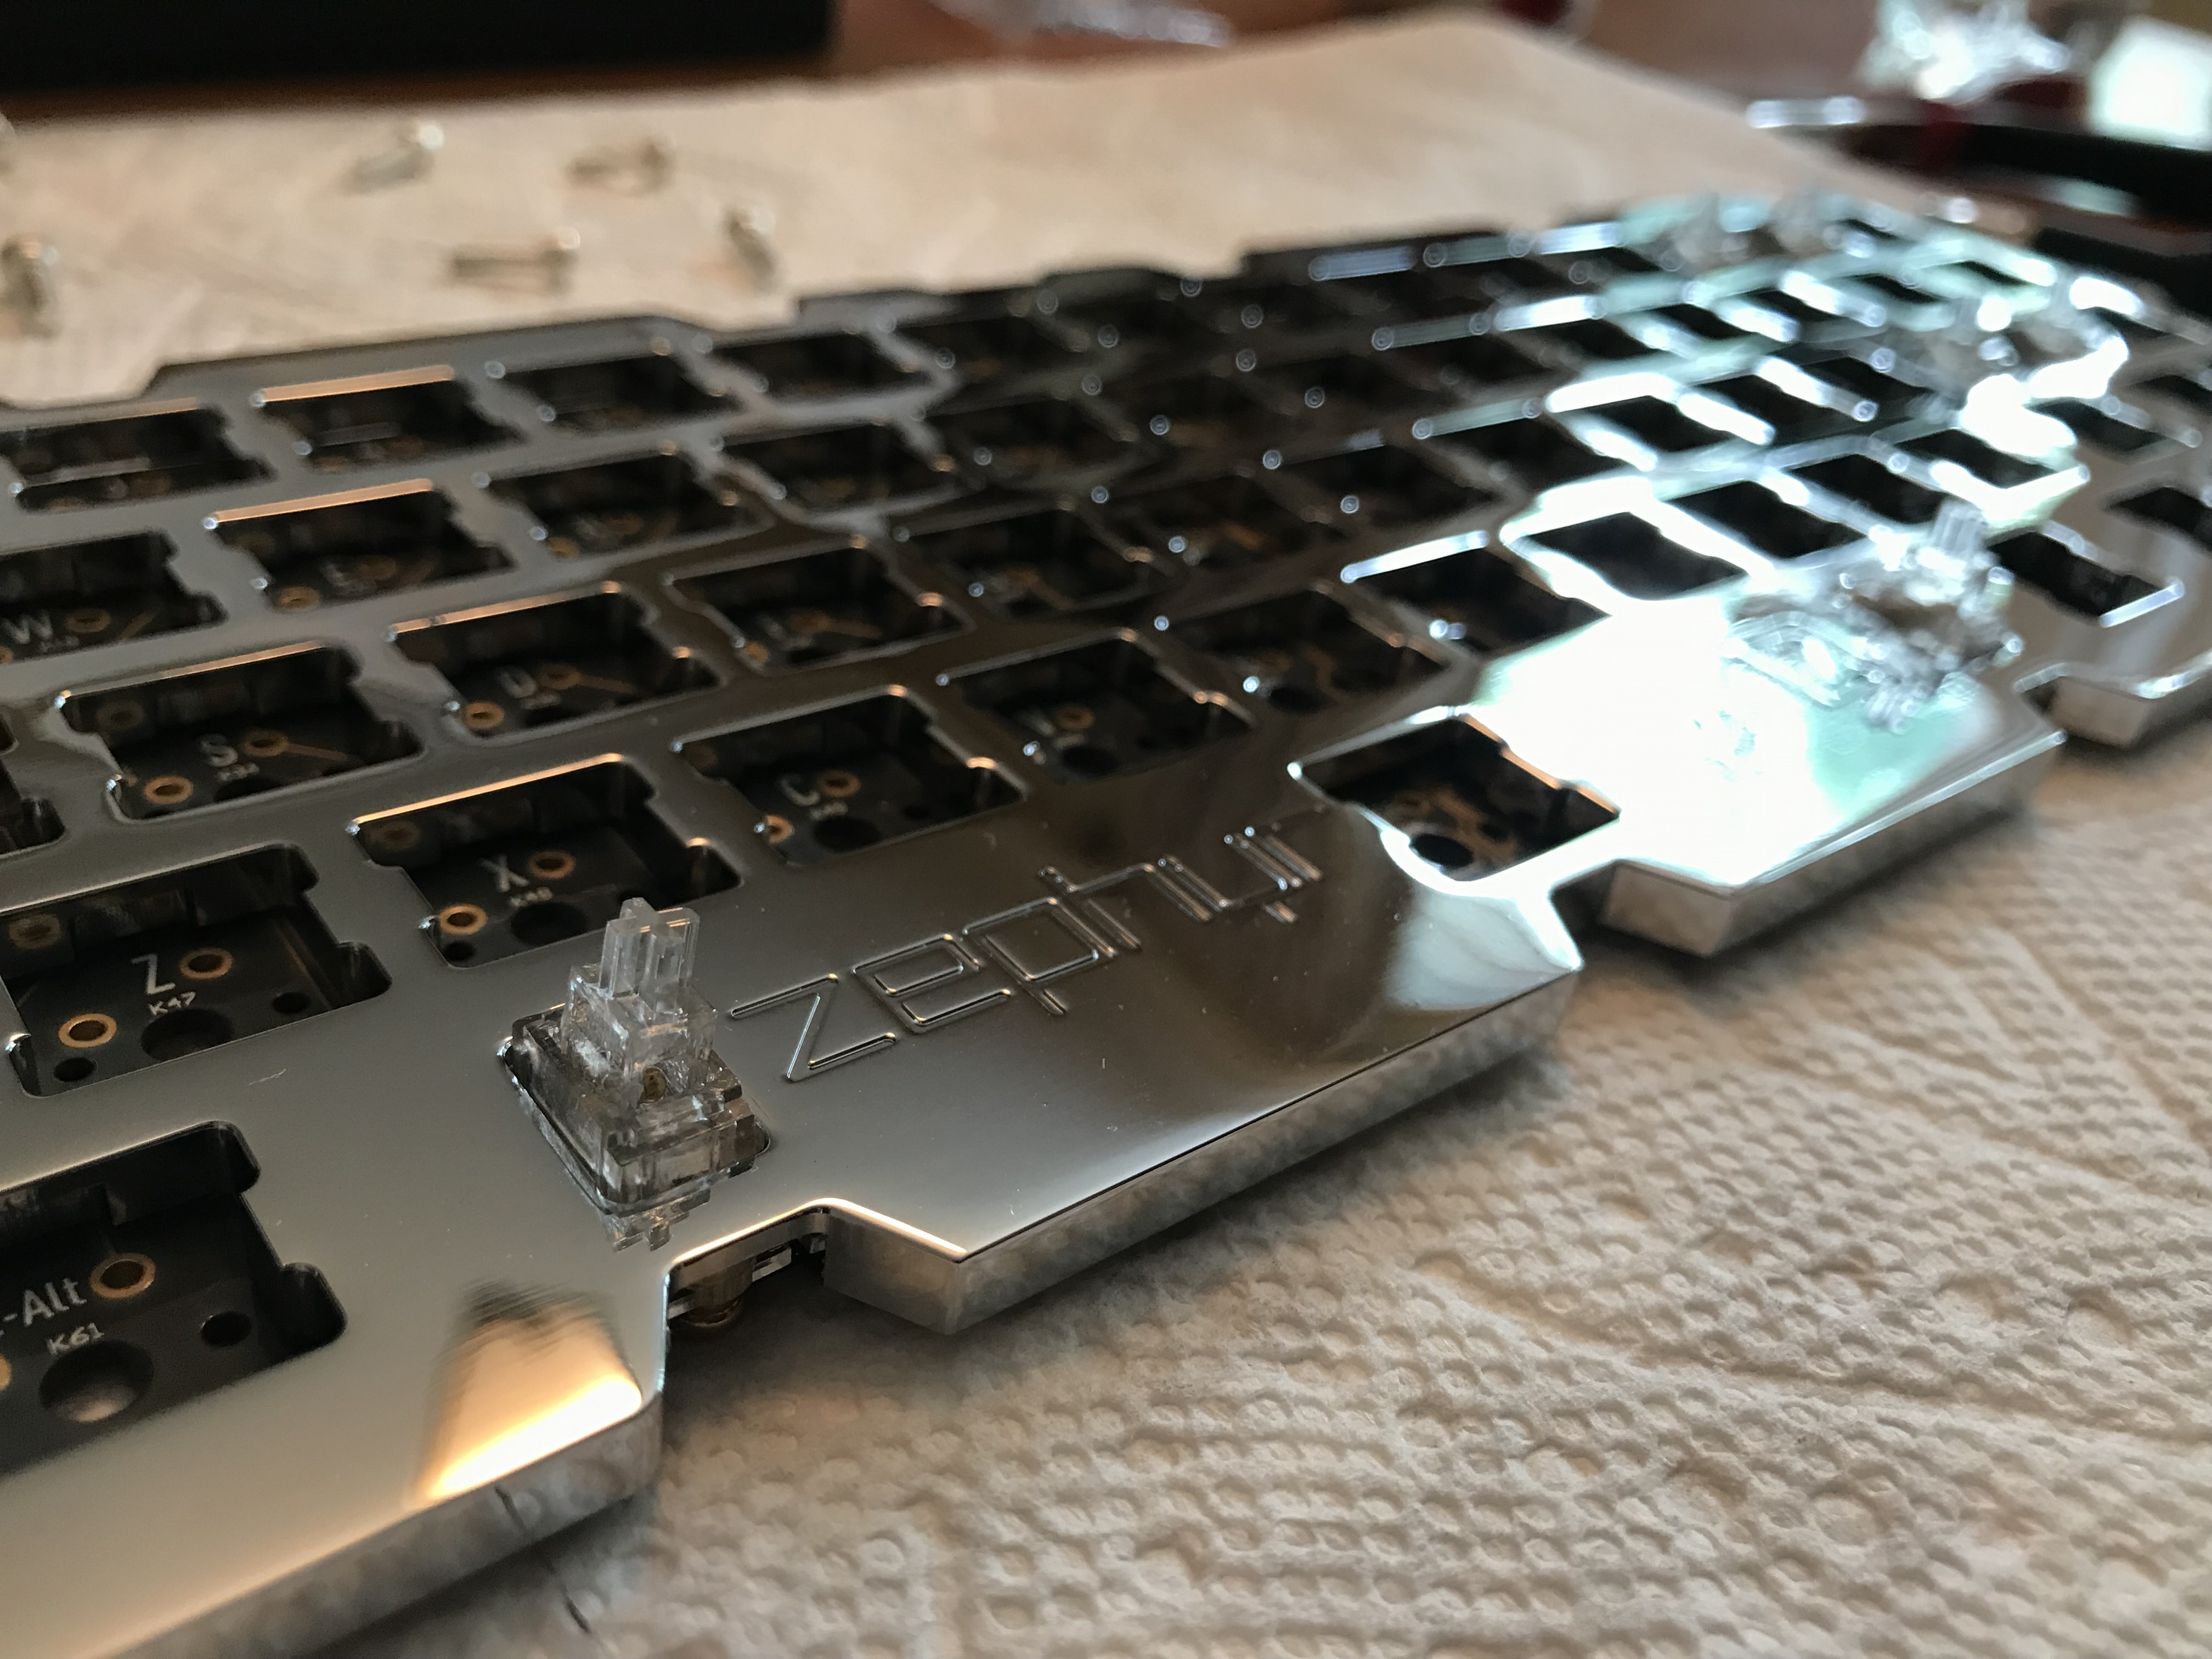
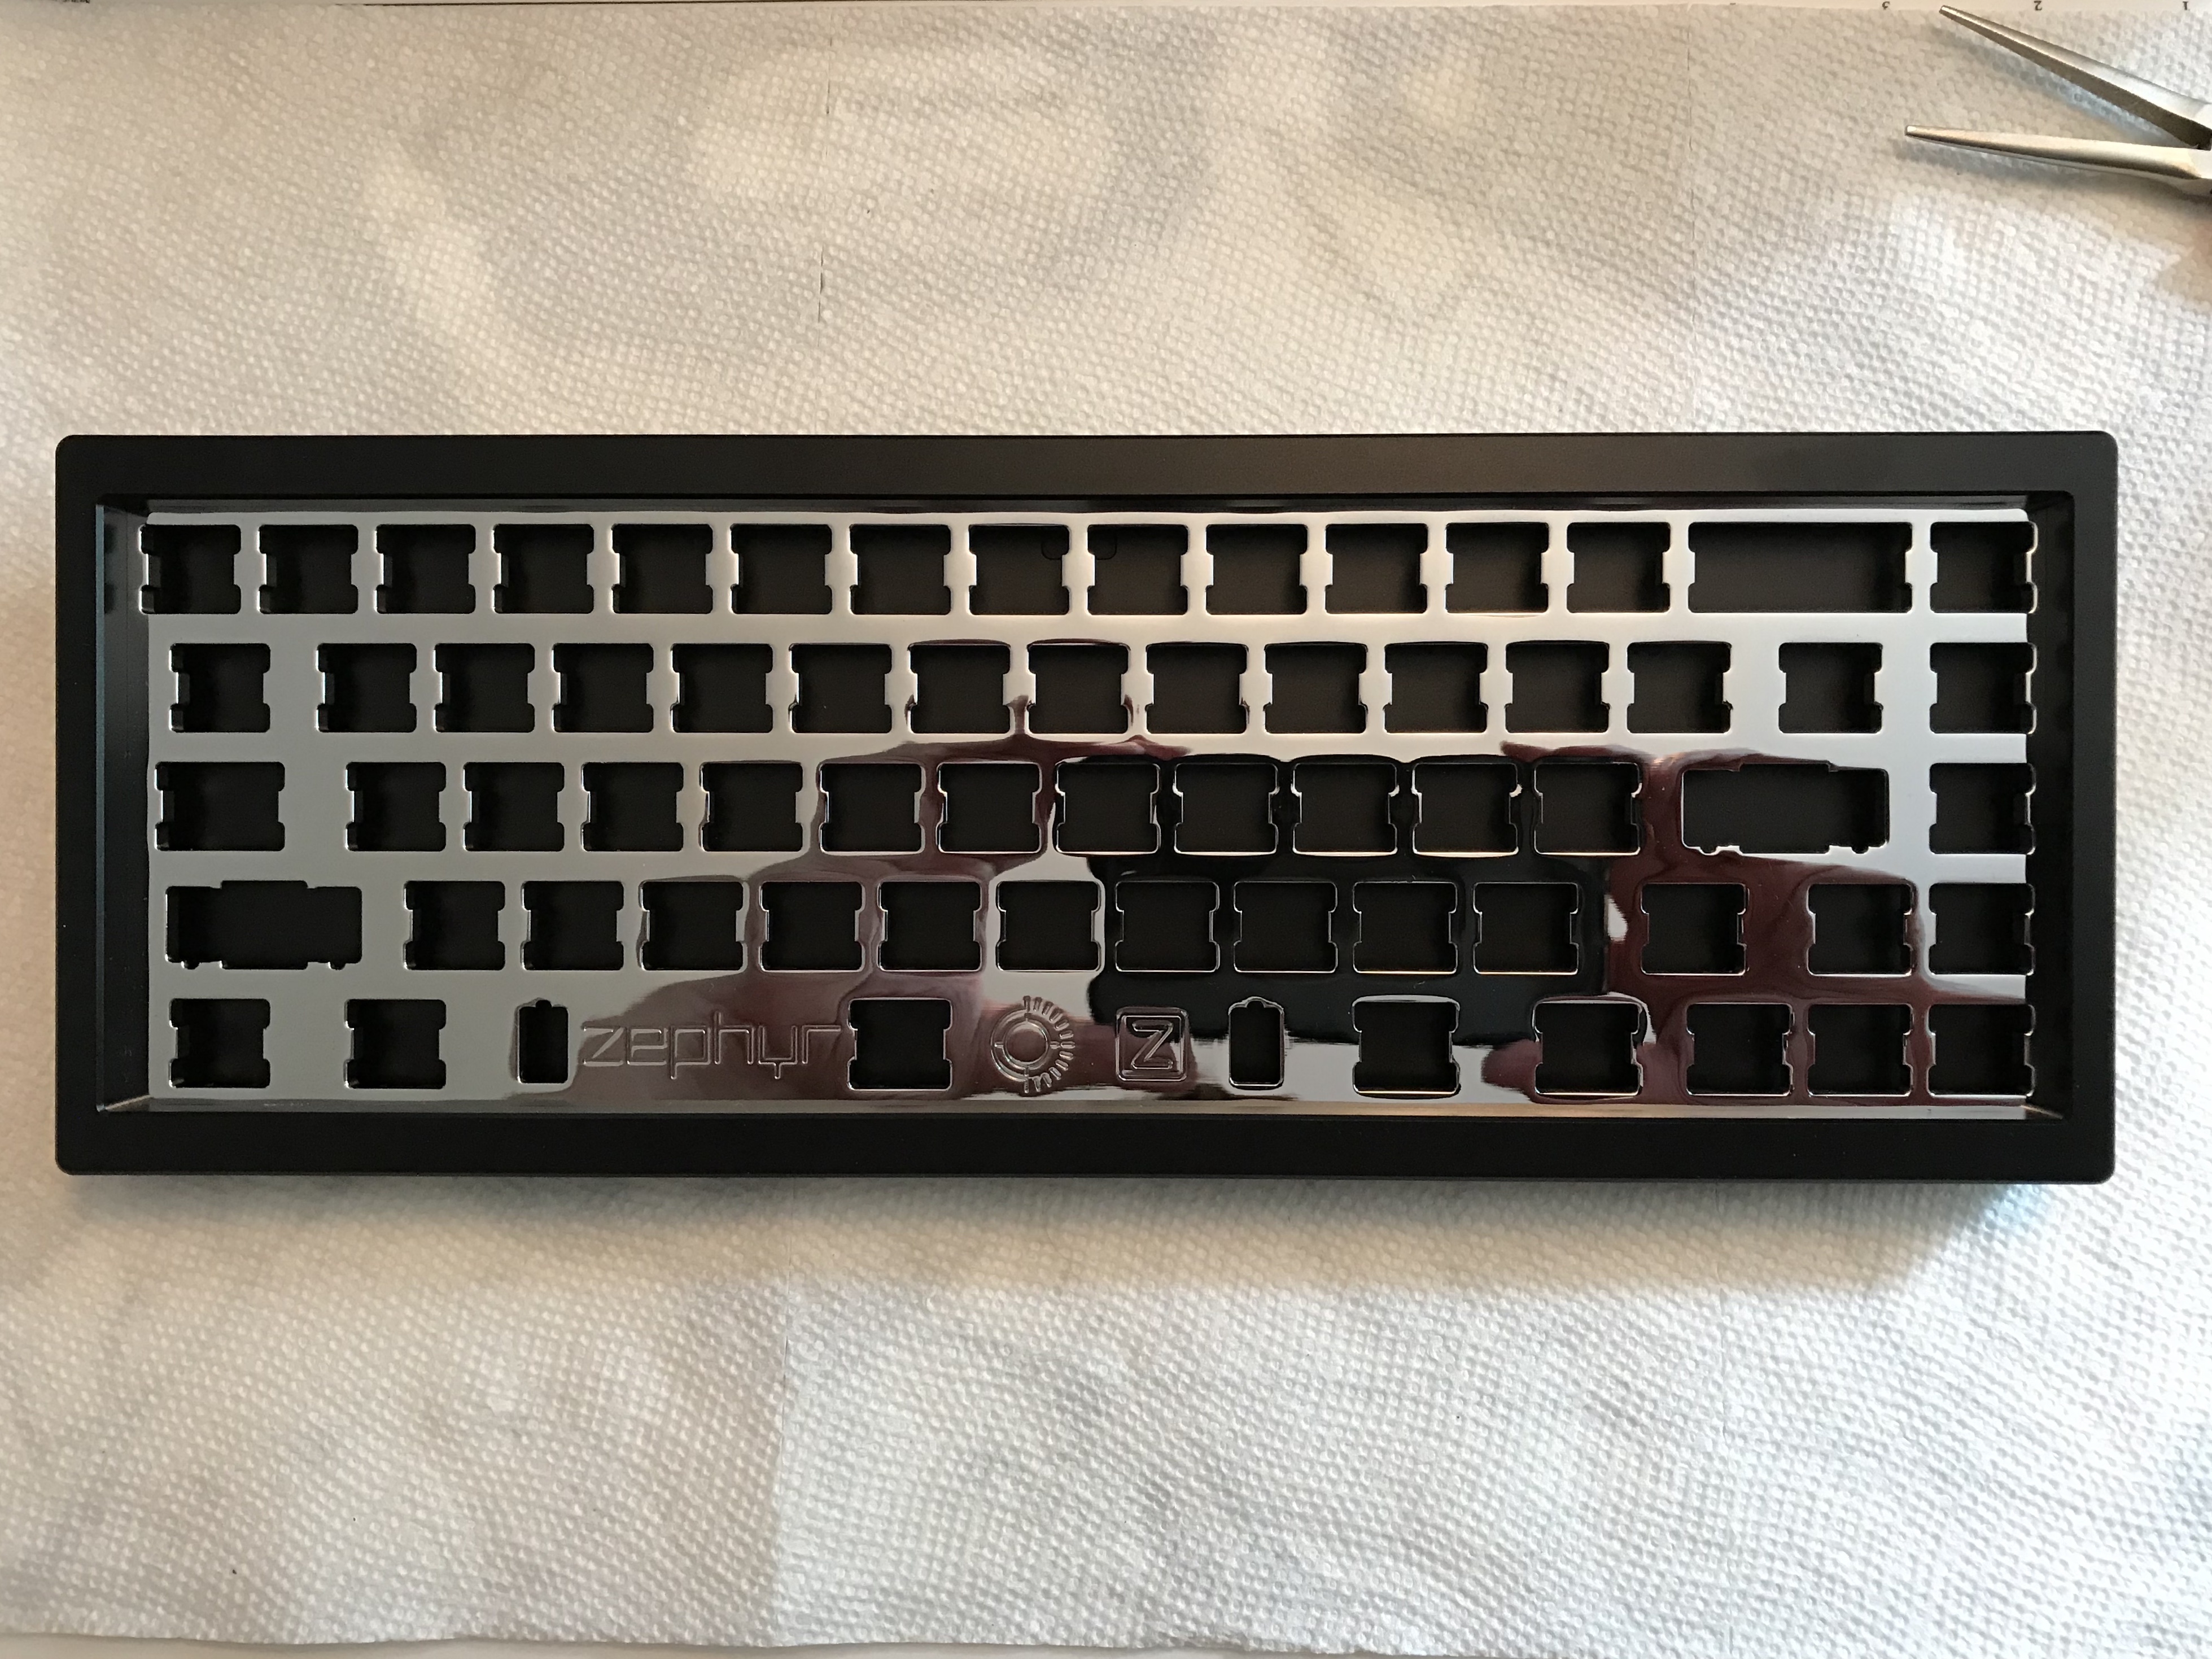
Before we start installing switches, let’s take a good look at the case and the plate. I went with a clean colorway; black anodized case, silver plate. You can see my potato-pic reflection in that plate, but even then, the photos don’t do it justice.
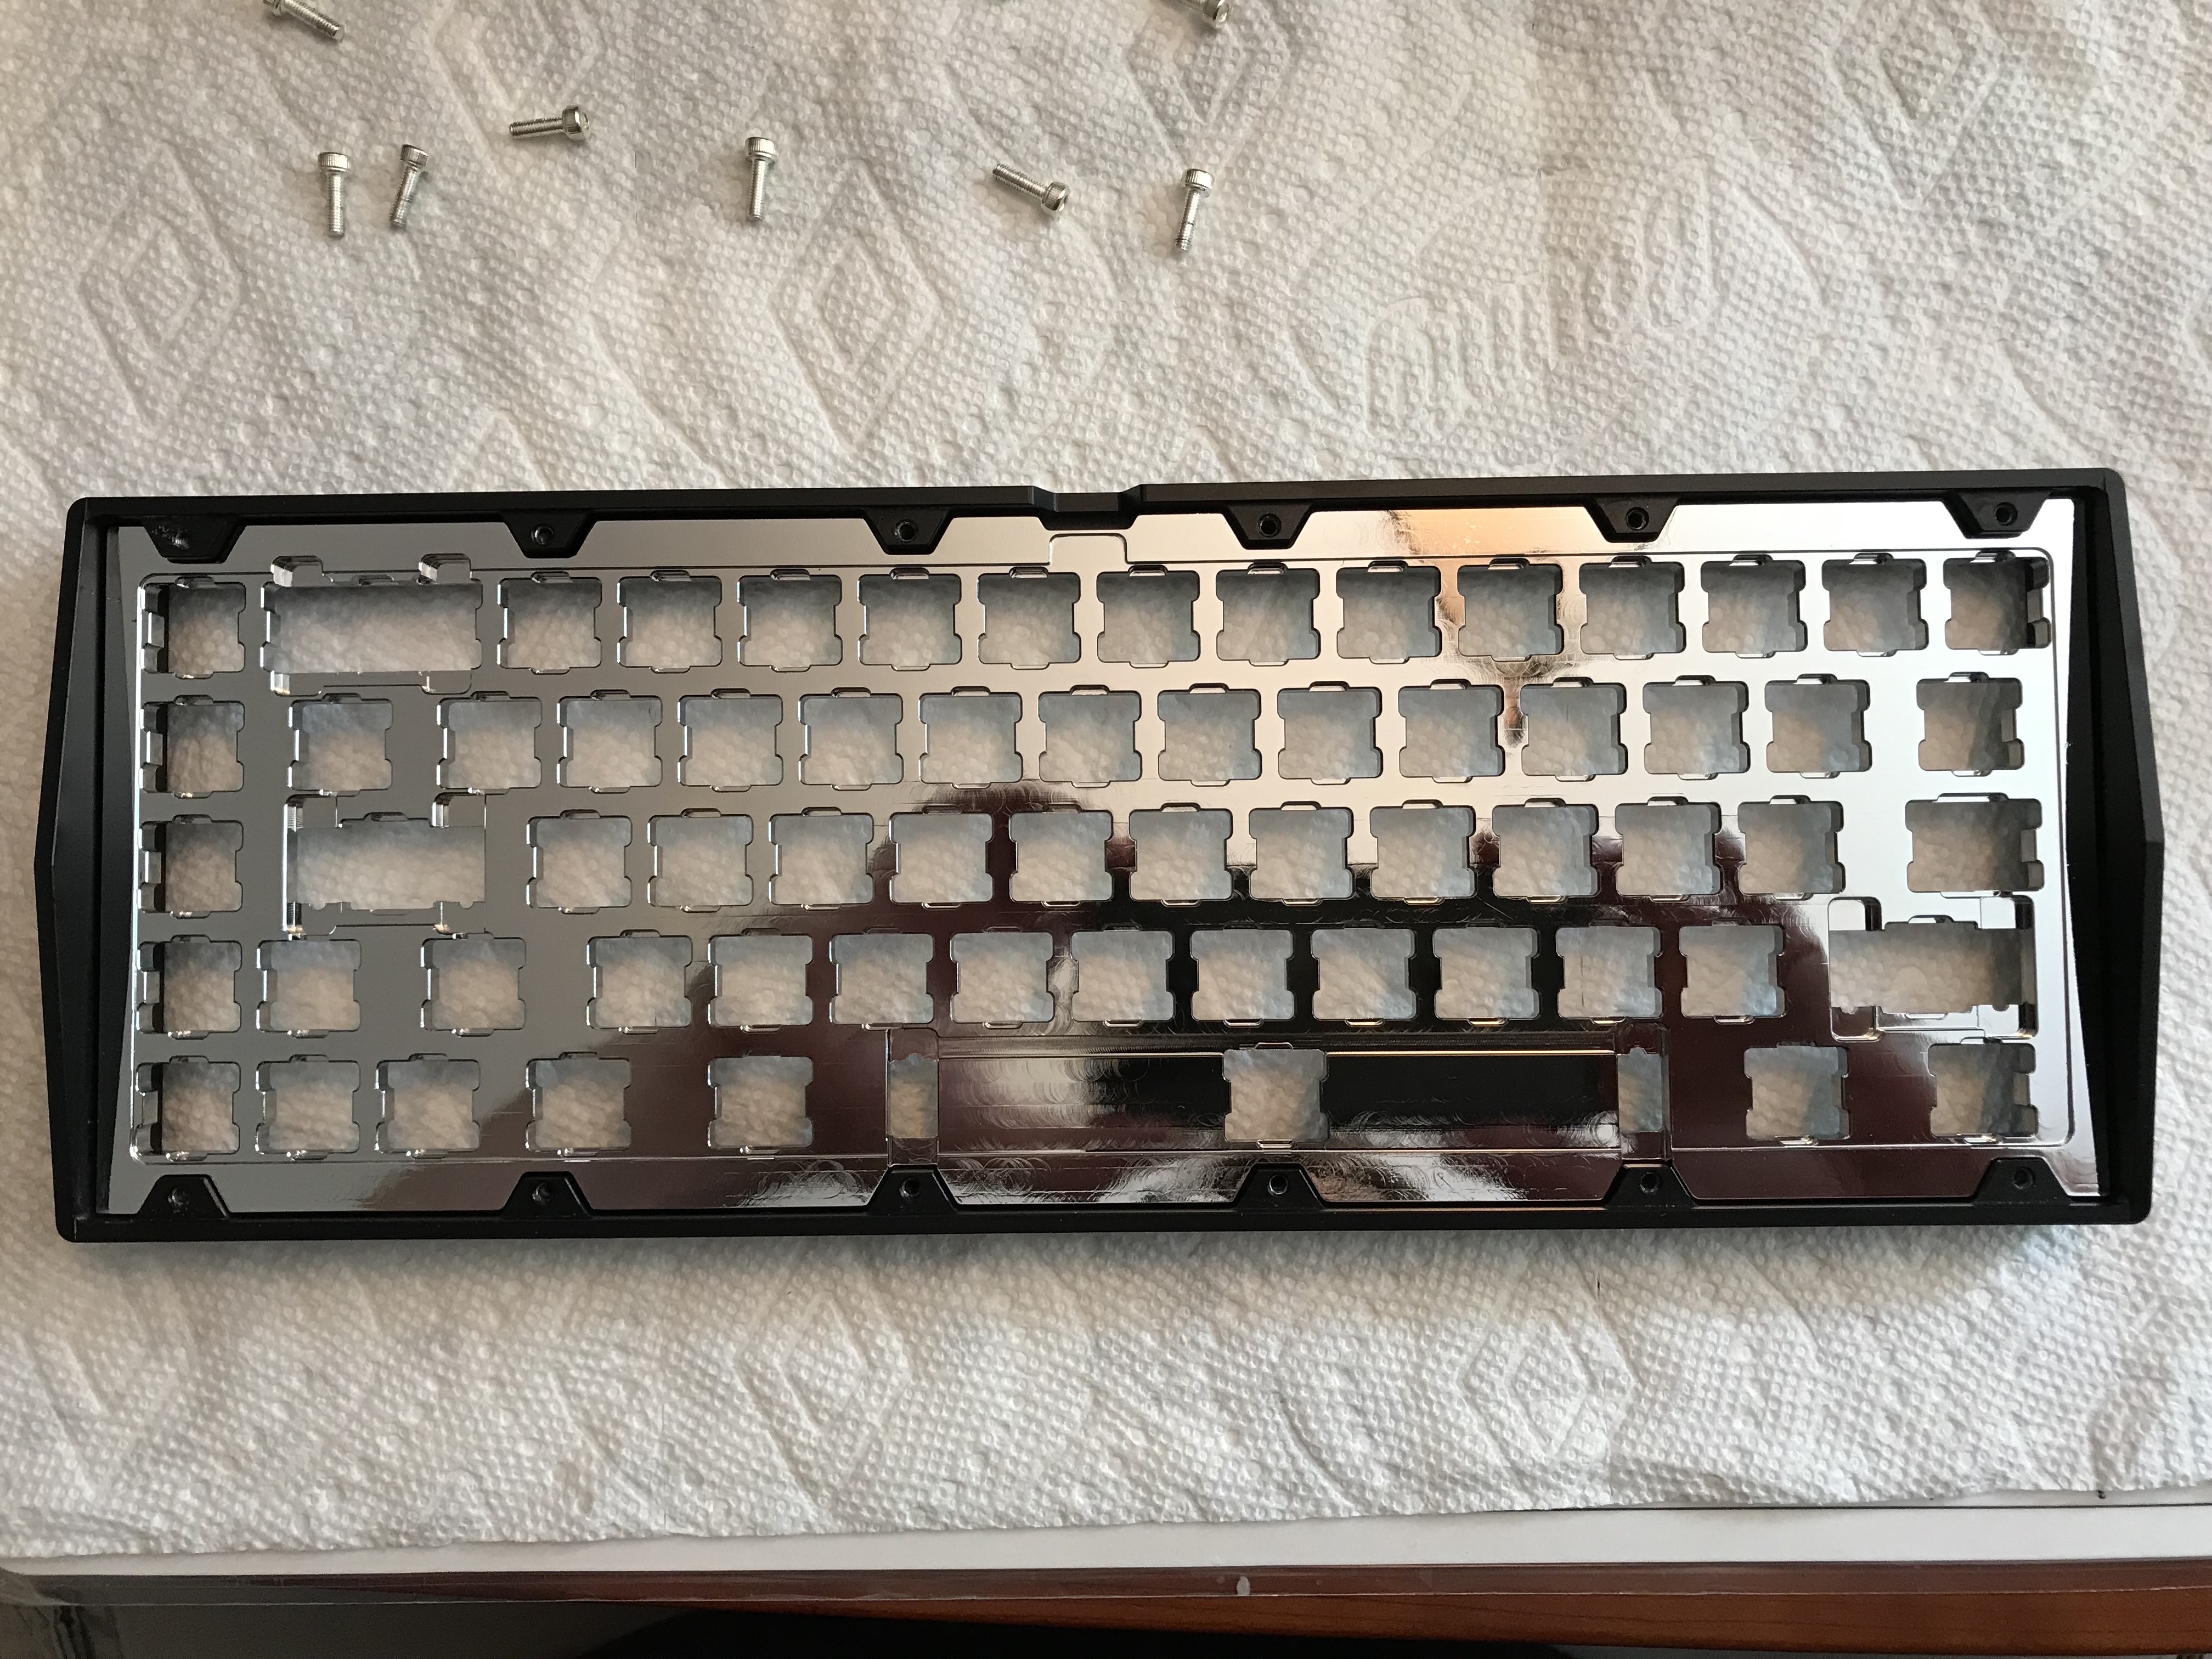
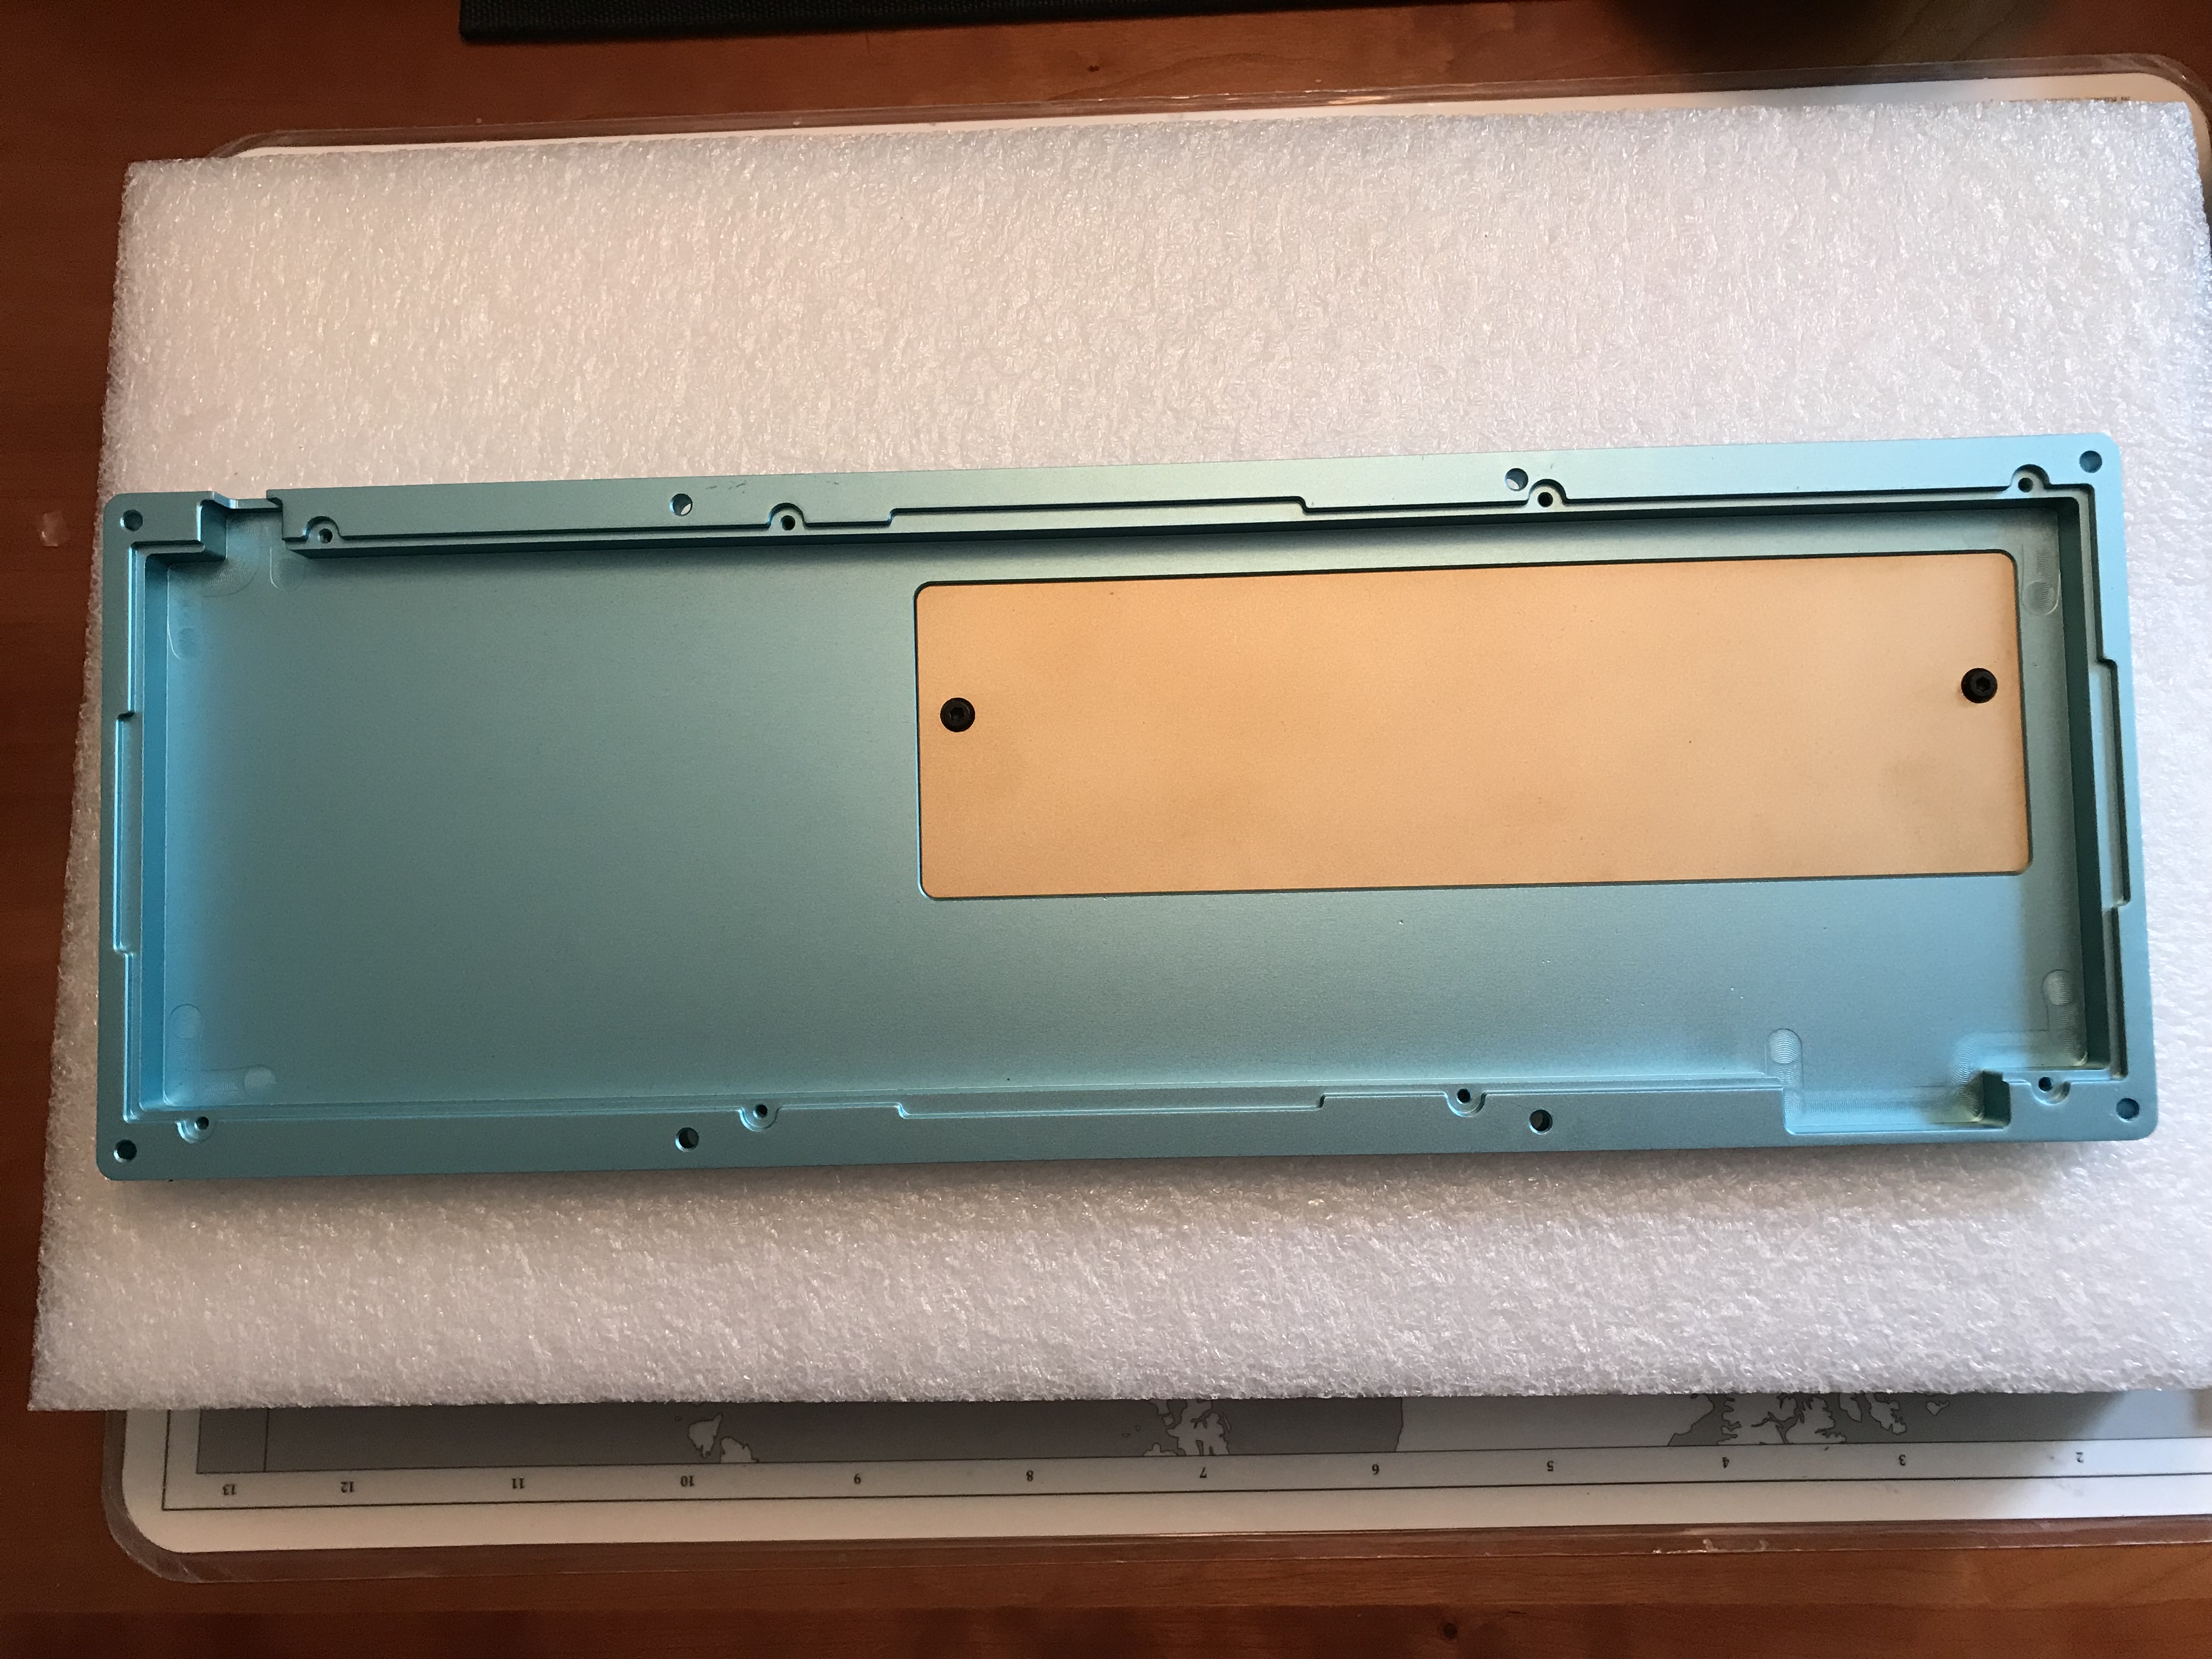
Likewise, the underside of the case has a PVD-coated weight. 12 screws hold the case assembly together. I might have preferred that those 12 screws be black, but I’m just nitpicking.
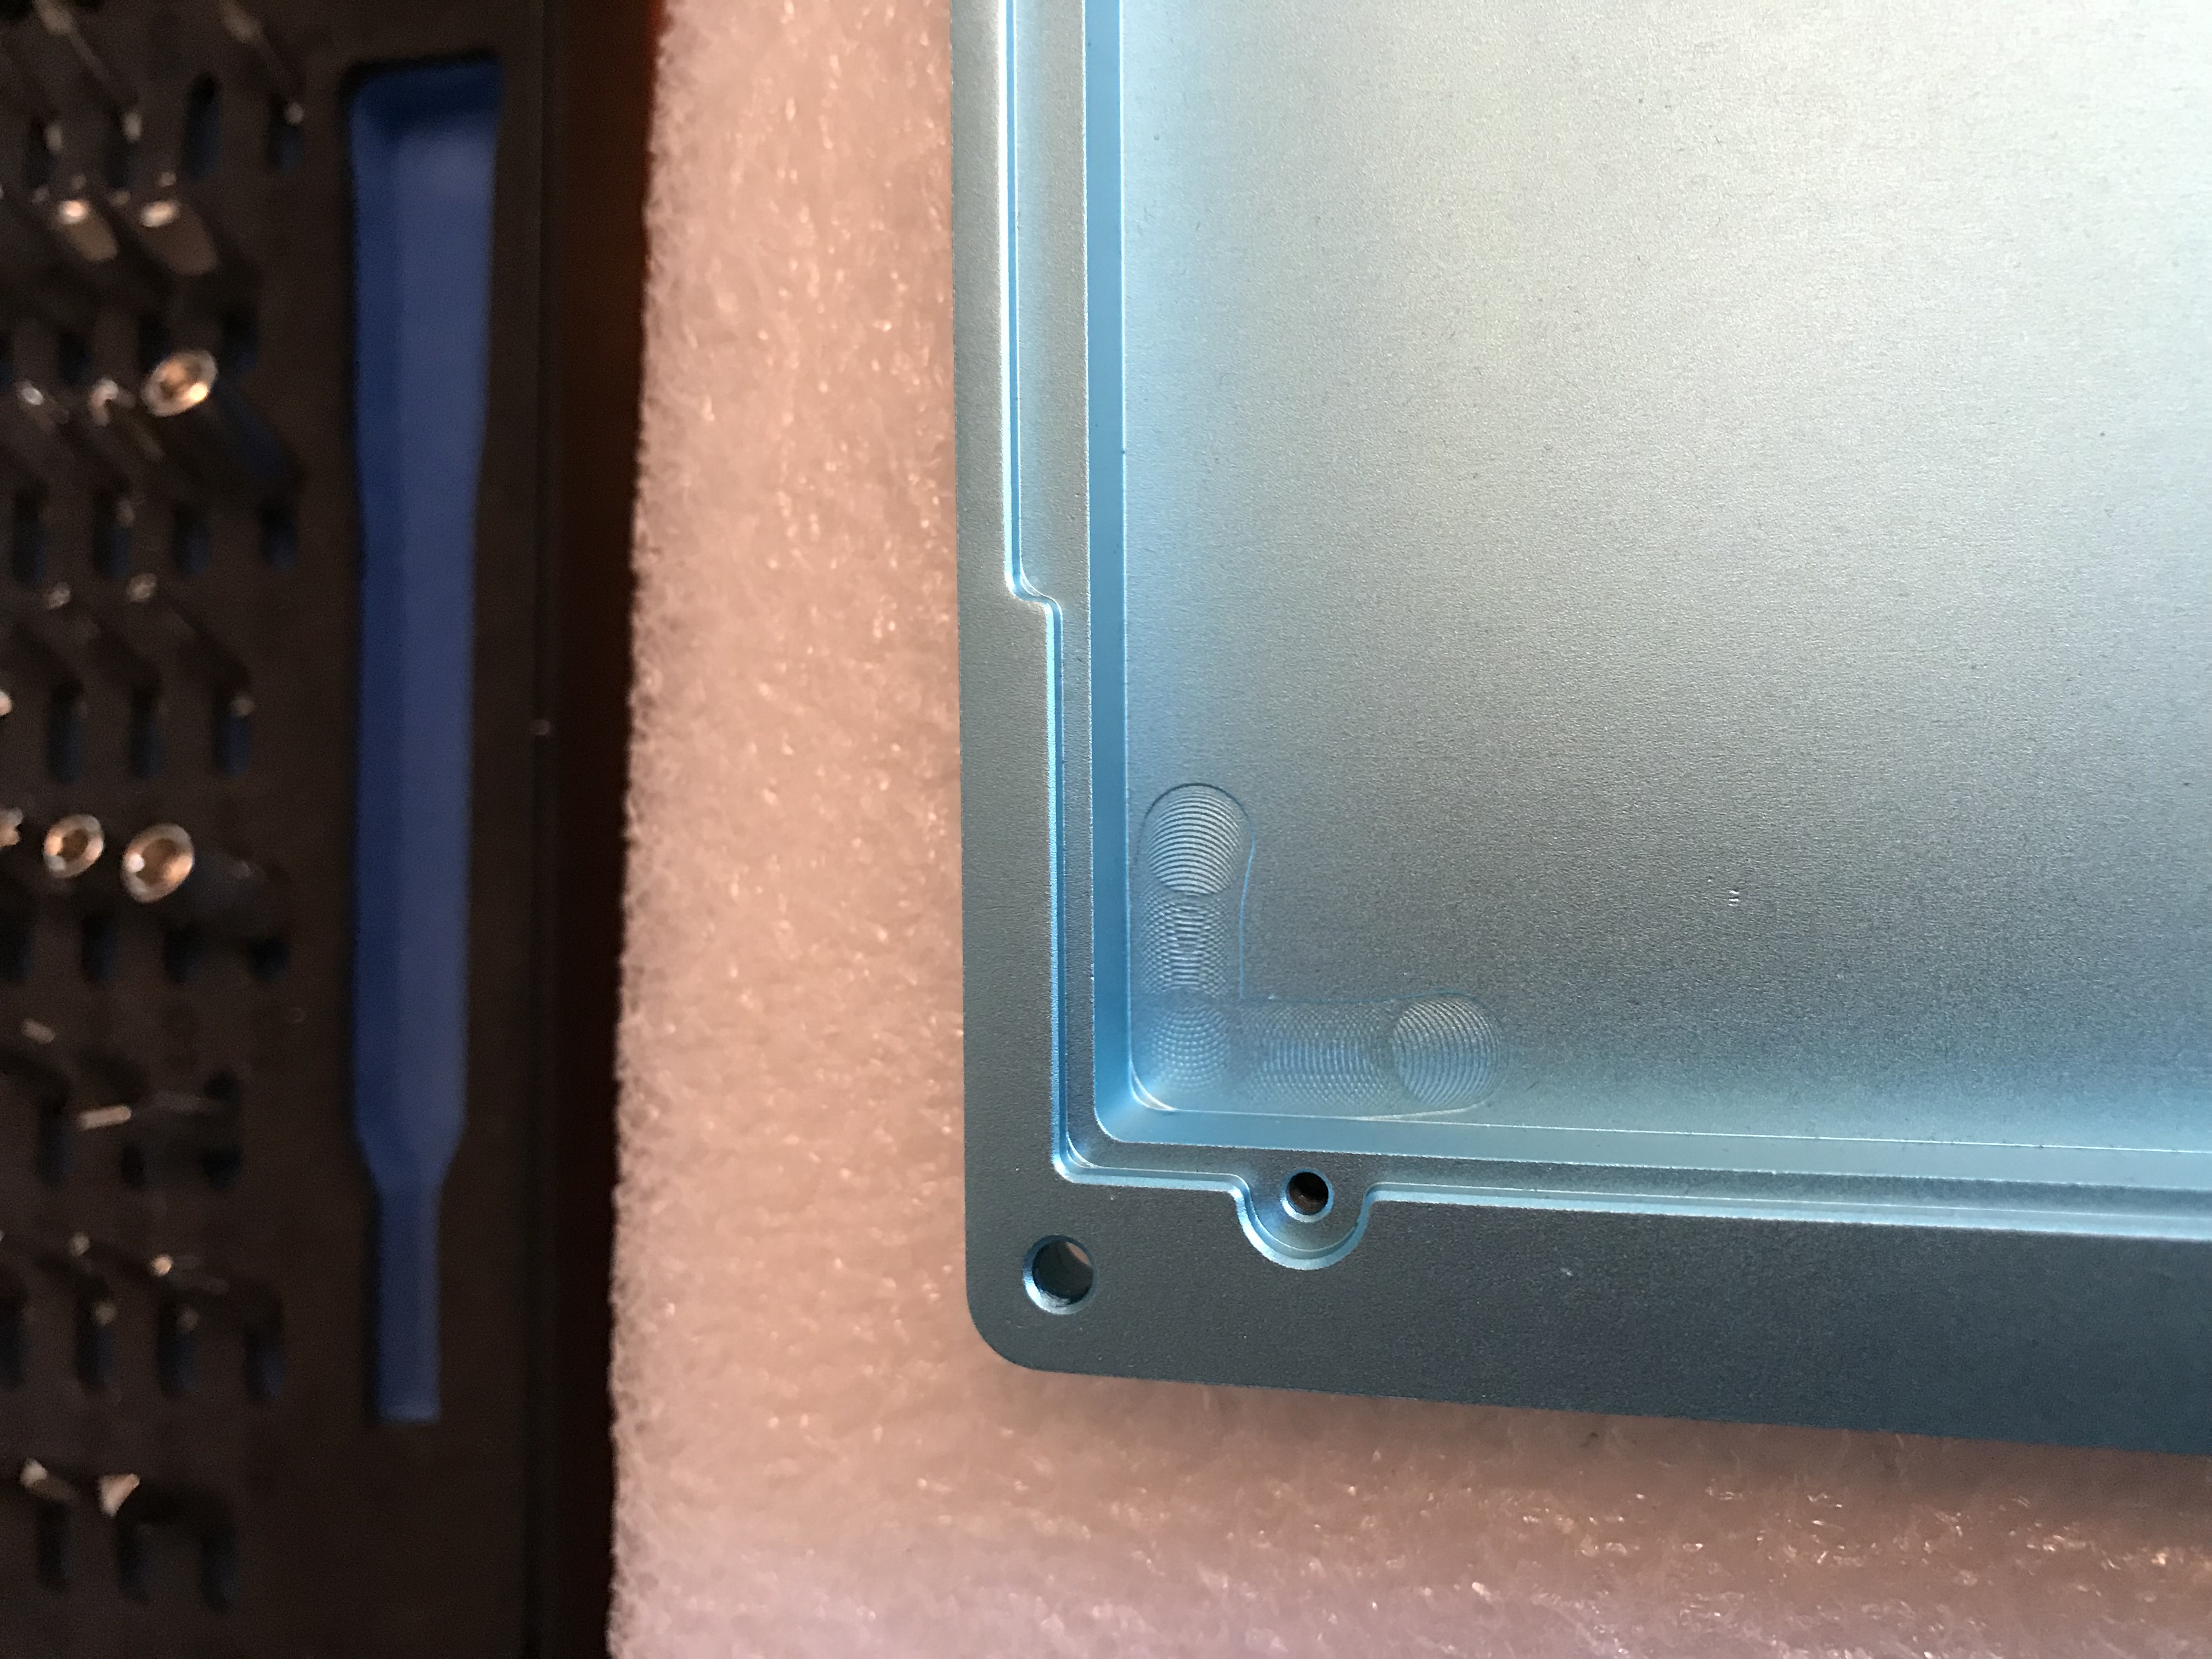
The case top and plate have matching cutouts to allow the plate to rest snugly in the case top. Note that we can see some finishing marks on the underside of the plate - look at the bottom edge of the plate, near the opening for the spacebar switch.
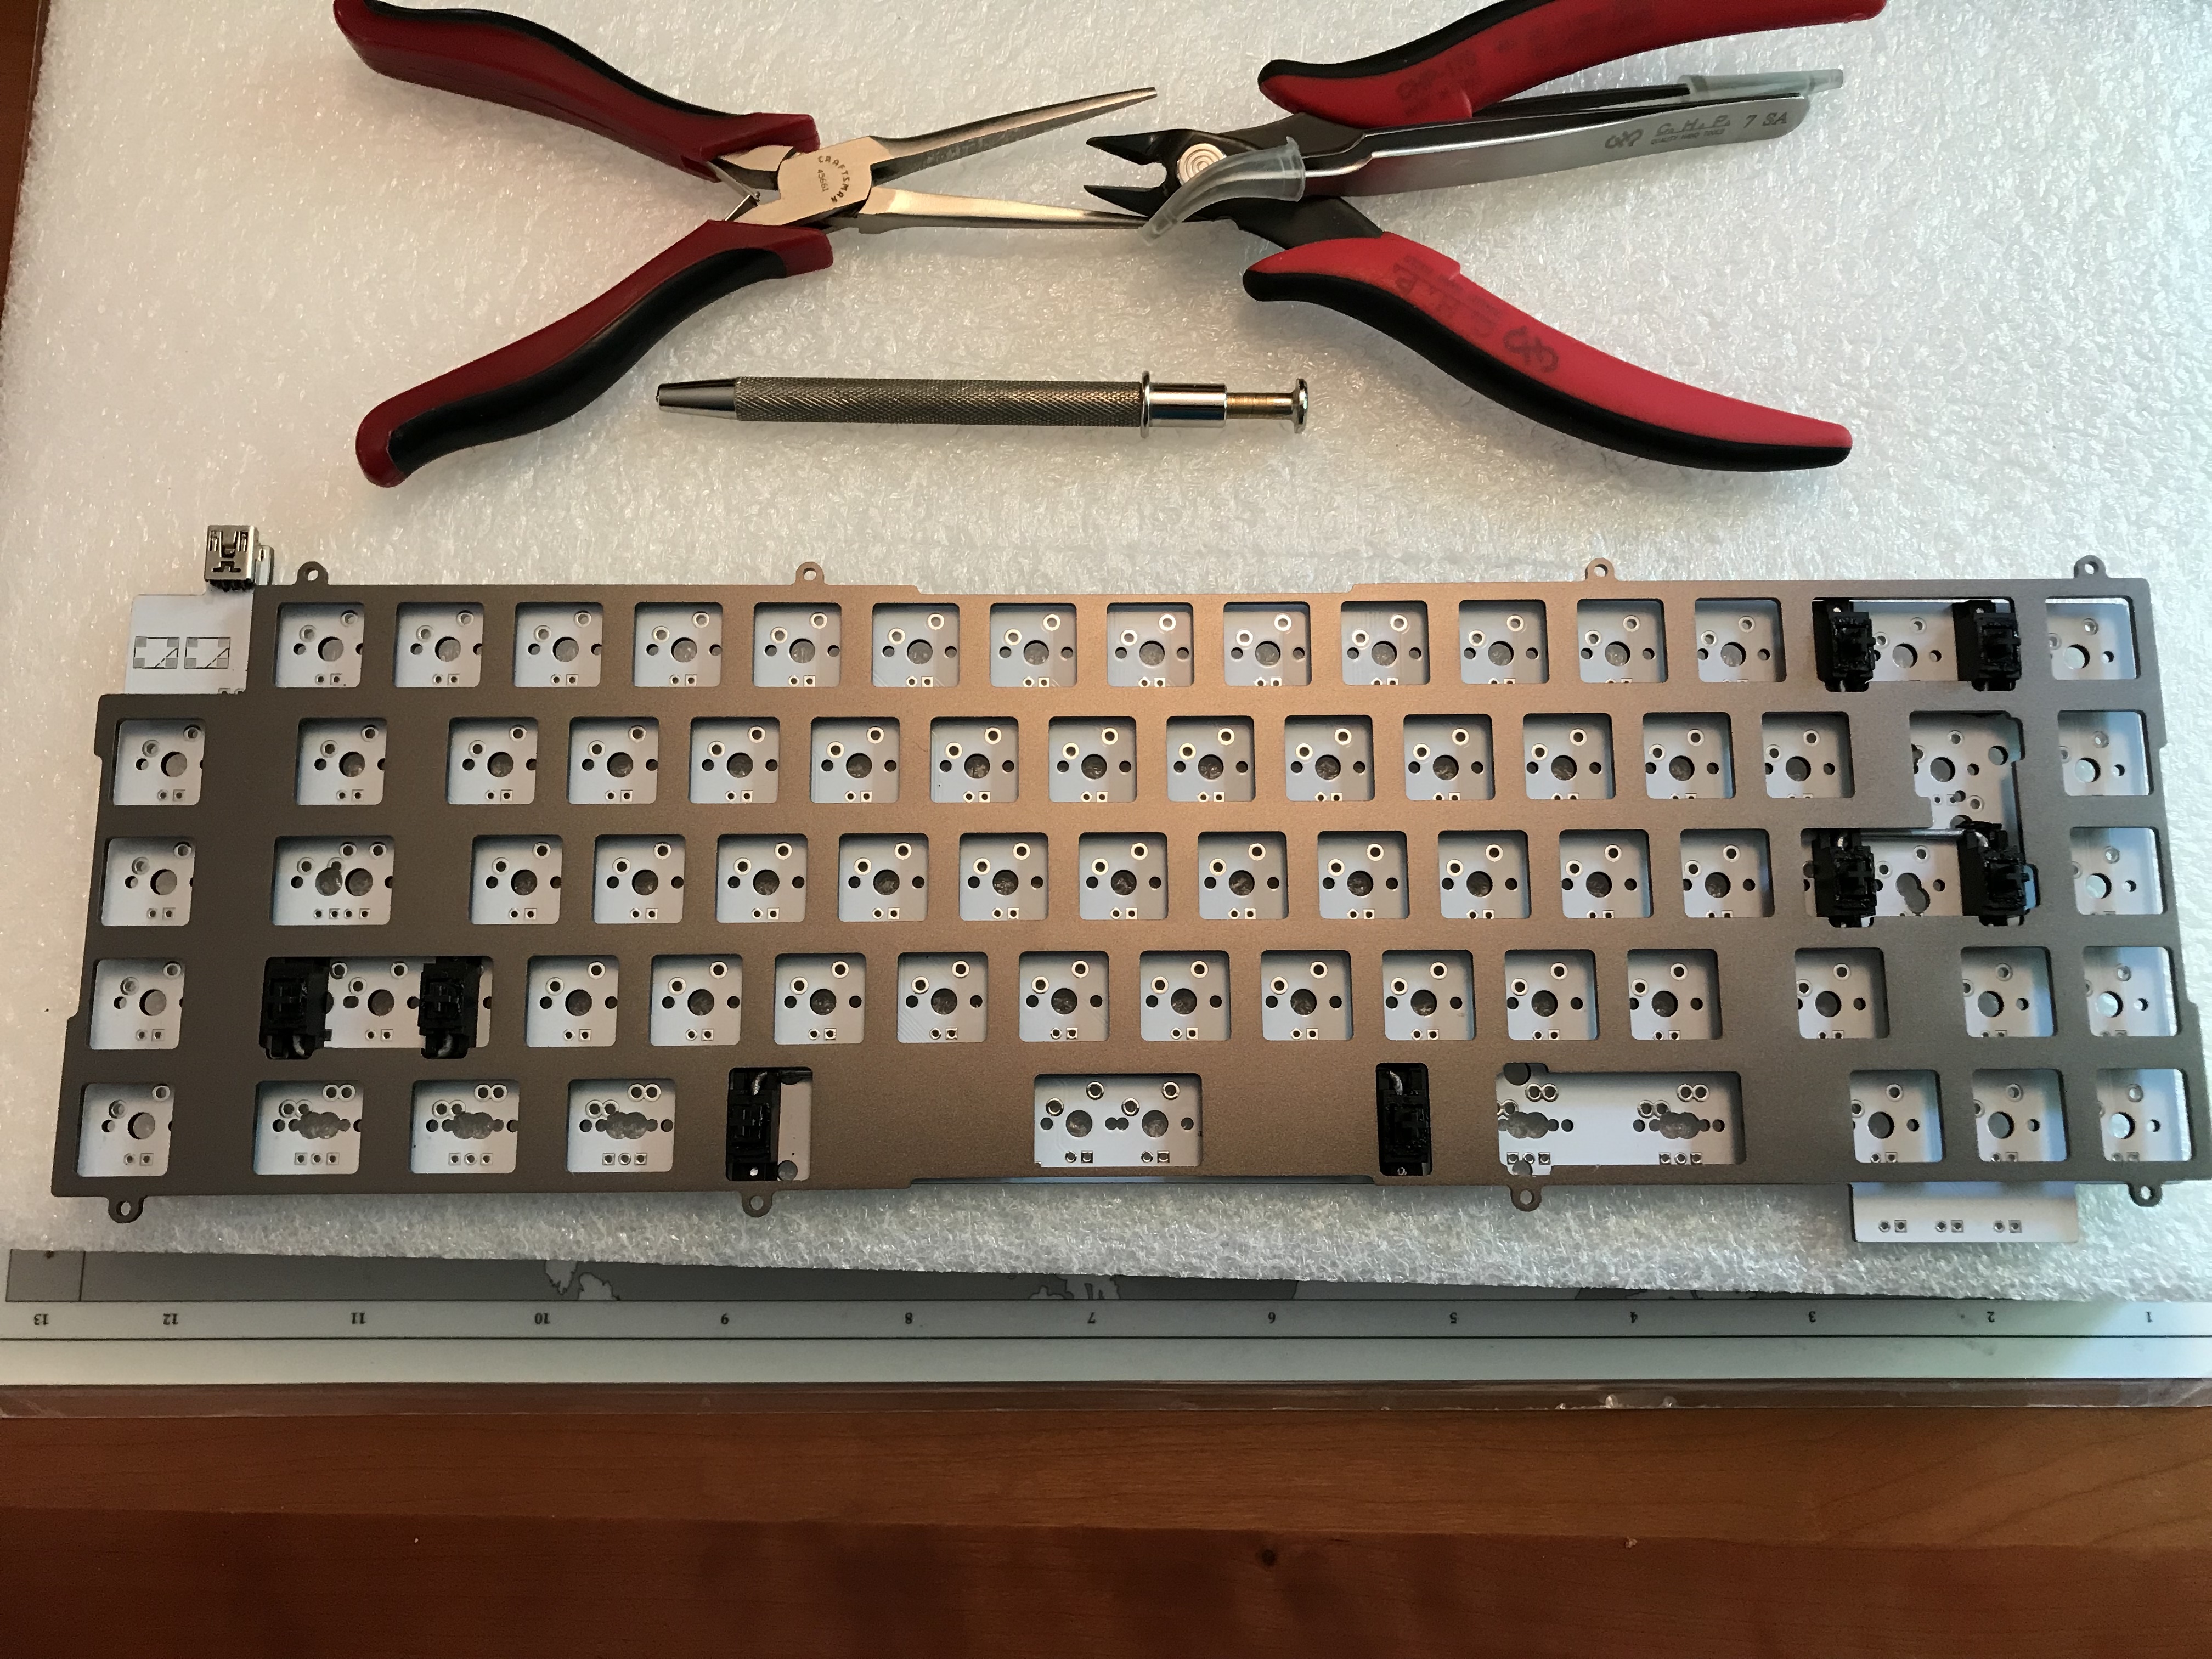
Next up - after lubing the switches, we mount them in the plate and solder to the PCB.
The plate is 5mm thick, so even if we wanted to do PCB/plate sound dampening, there’s no room for any dampening material, which further simplifies the build.
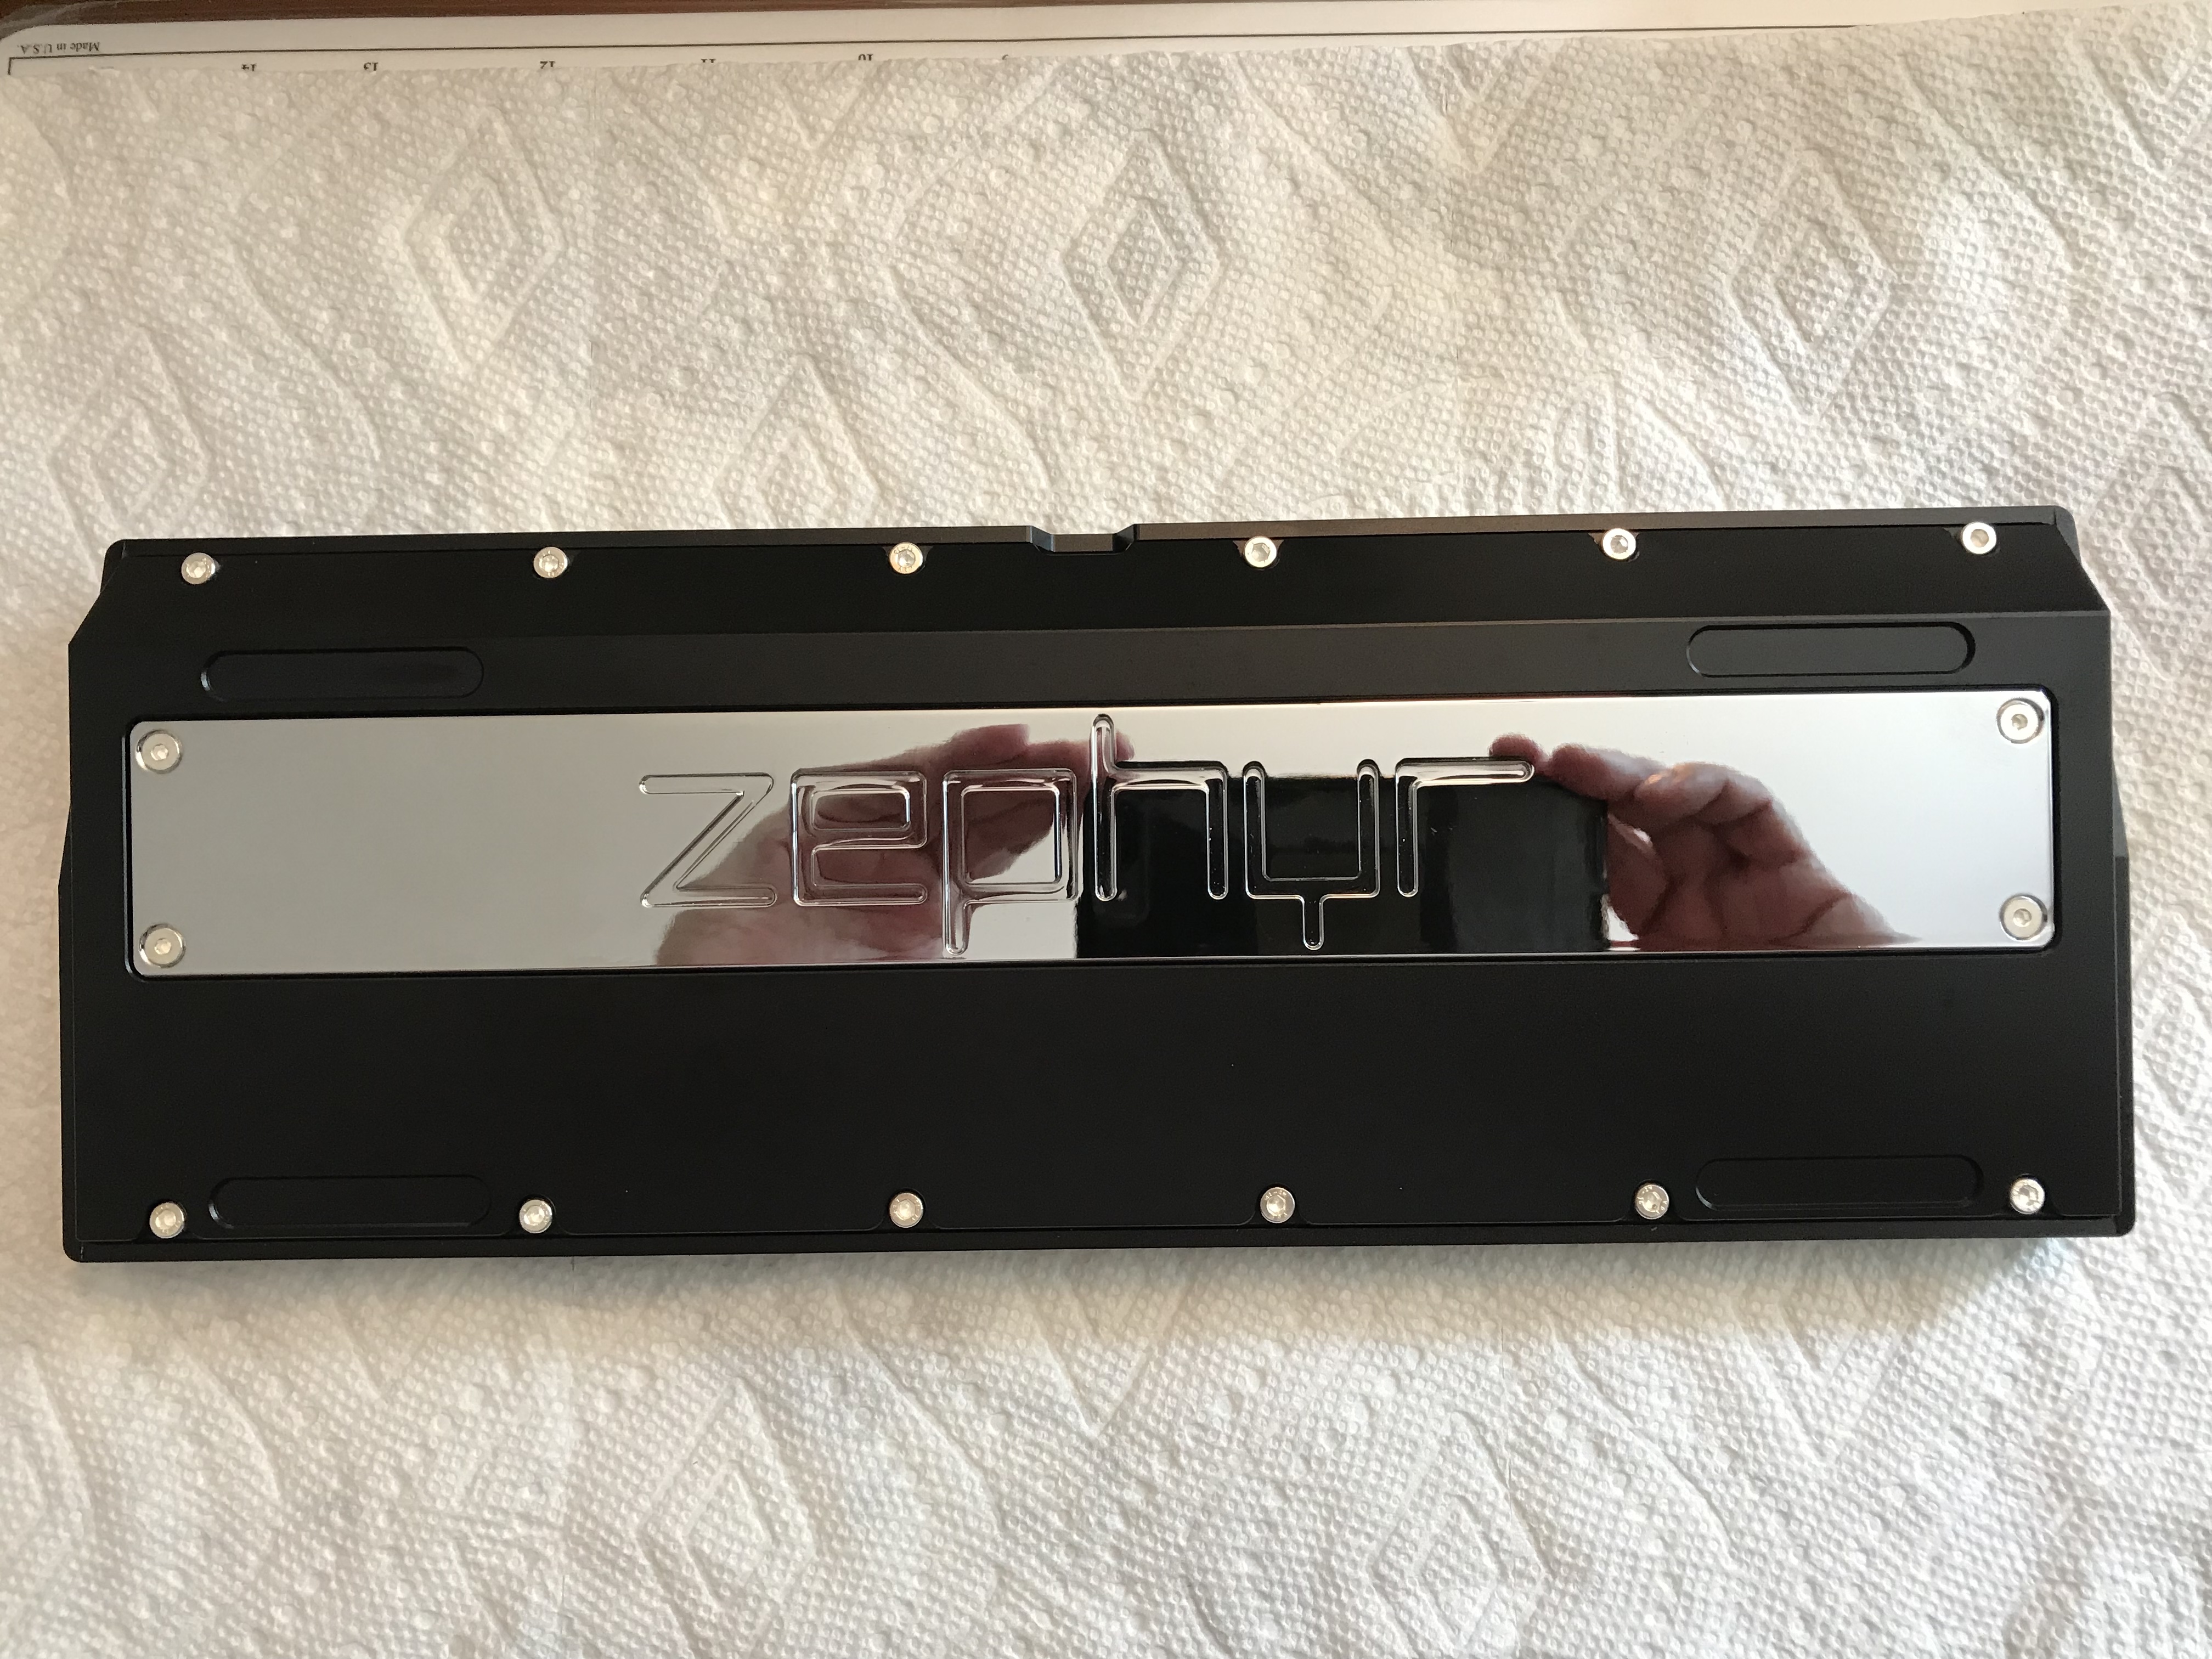
With the PVD finish, the plate is a fingerprint magnet - and because it’s made of brass, it’s heavy. How heavy? This heavy.
From this point, it’s just a matter of screwing things together. Normally, I would apply a Sorbothane or perhaps a craft foam layer between the PCB and the case, but between the 5mm brass plate and the heavy case, I wanted to see how this board sounded without those treatments - further simplifying this build. Here’s another potato-pic mirror shot just prior to installing keycaps.
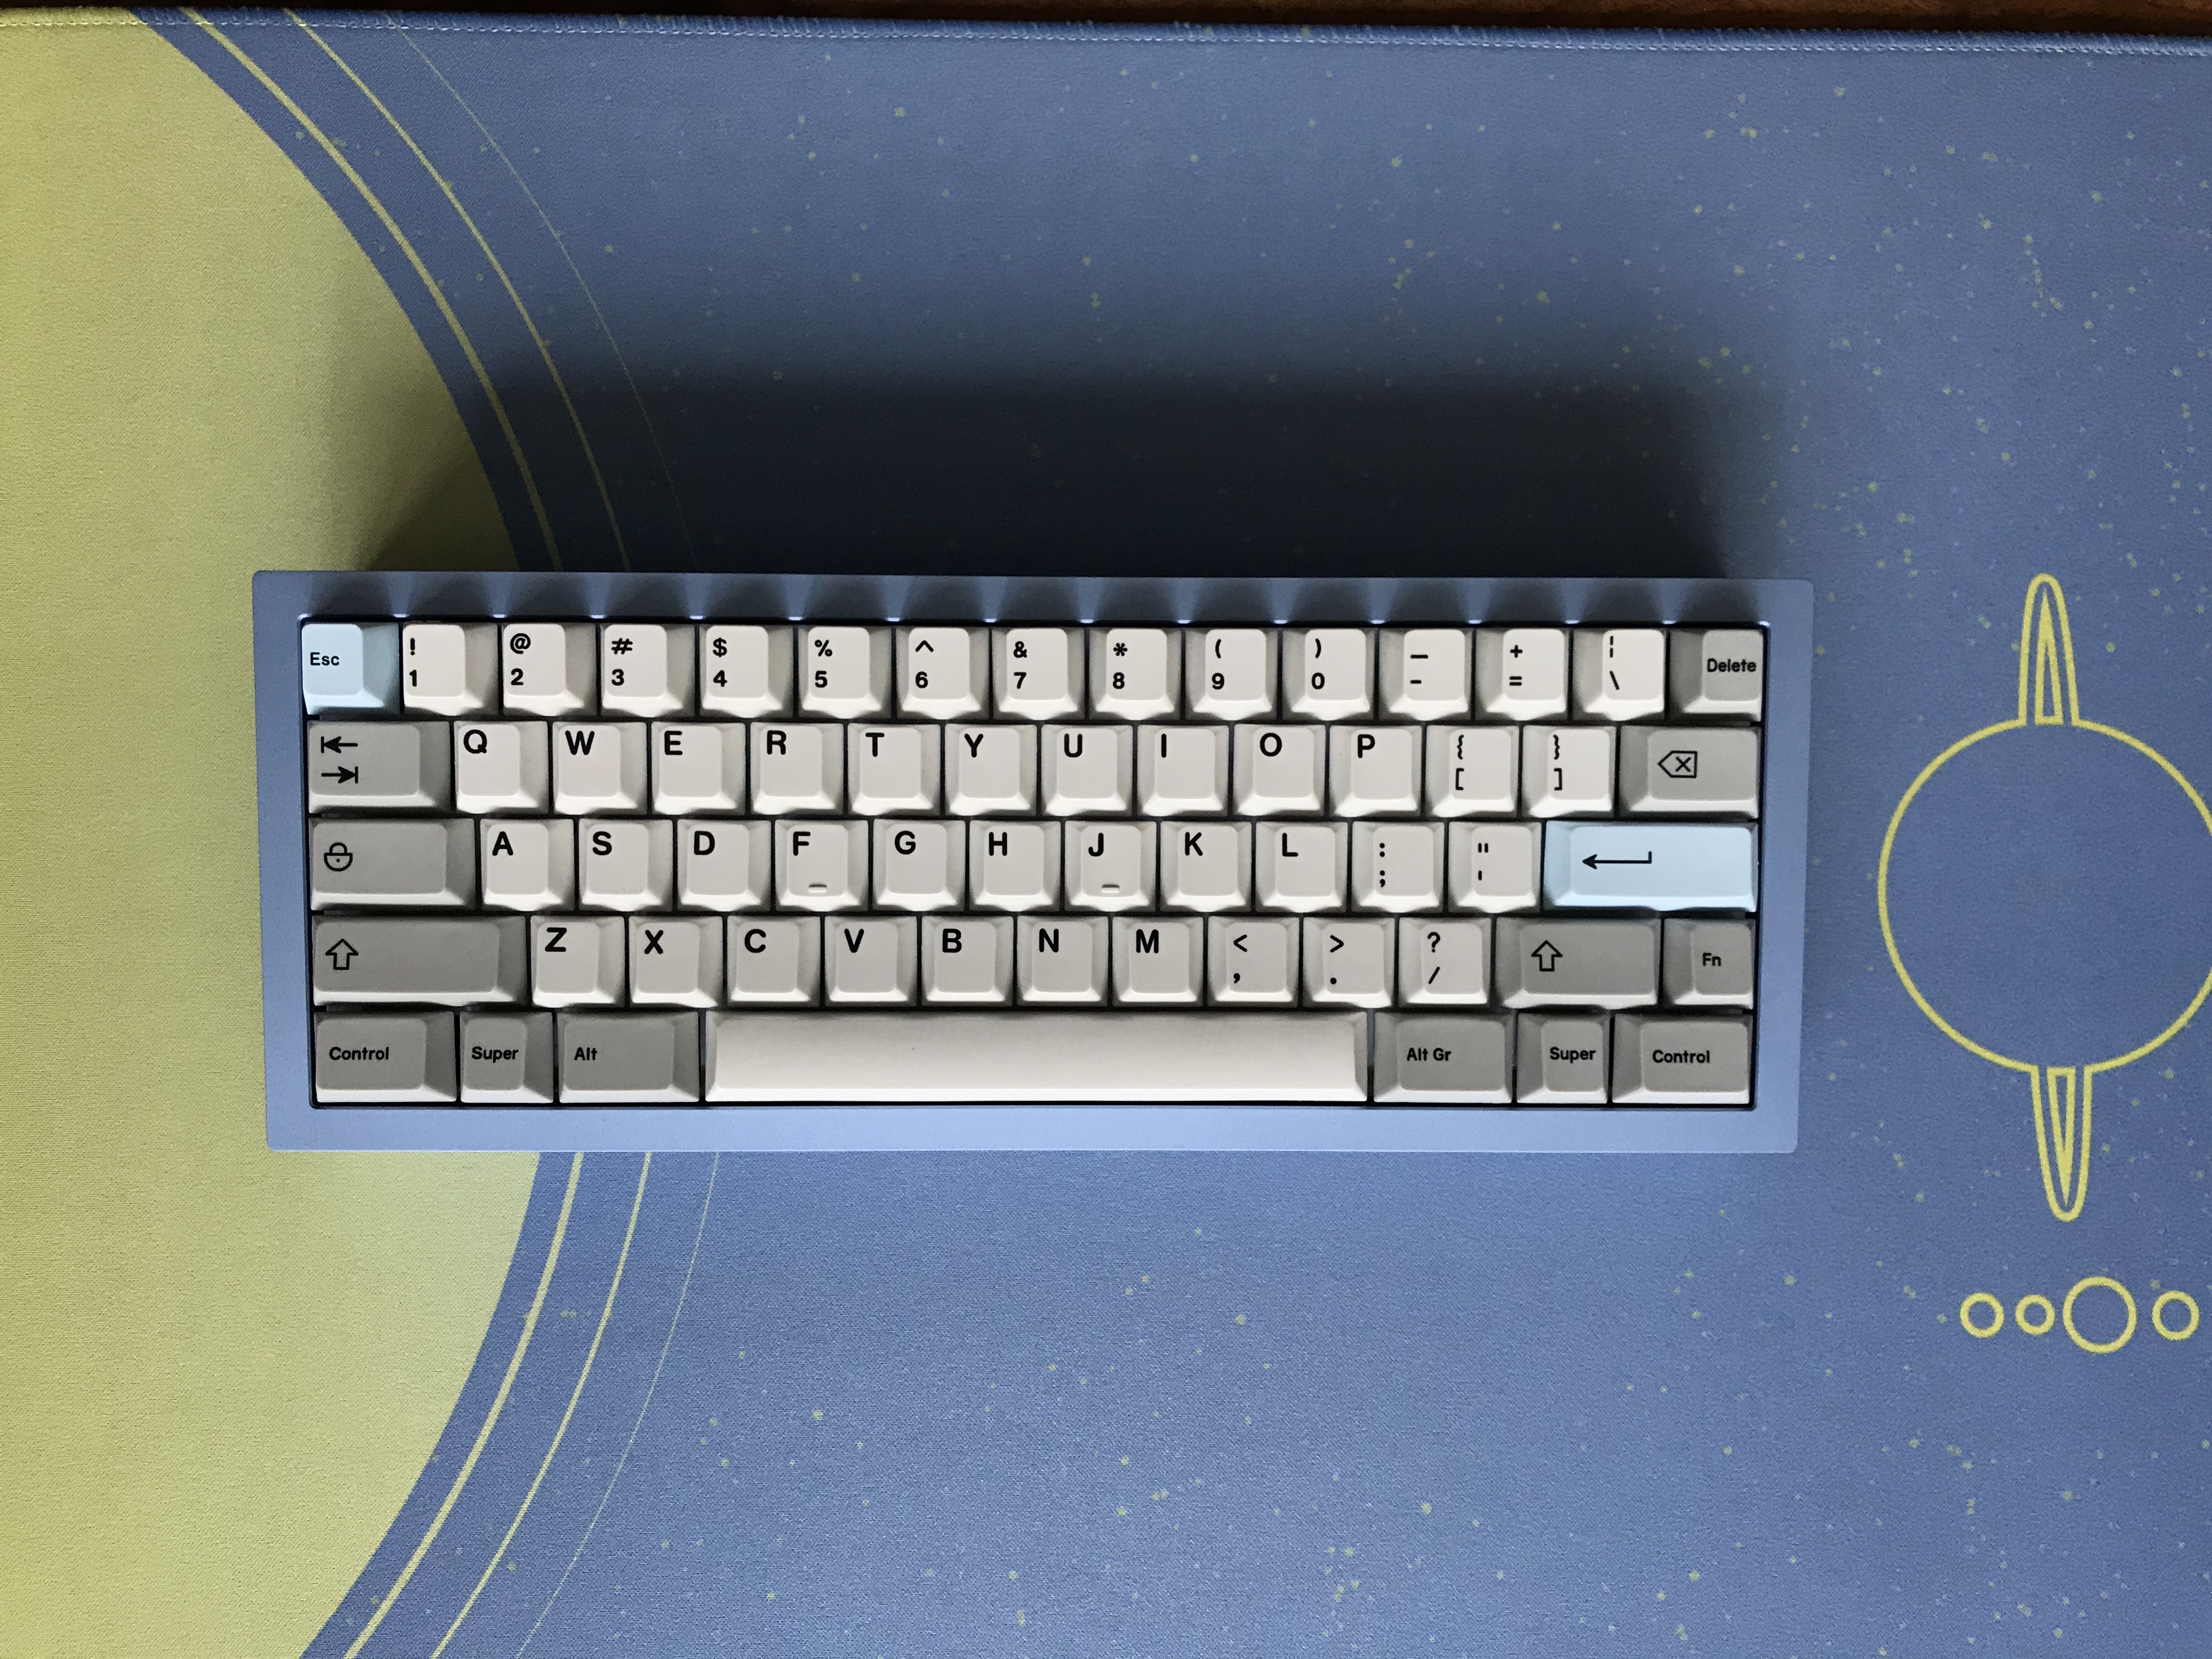
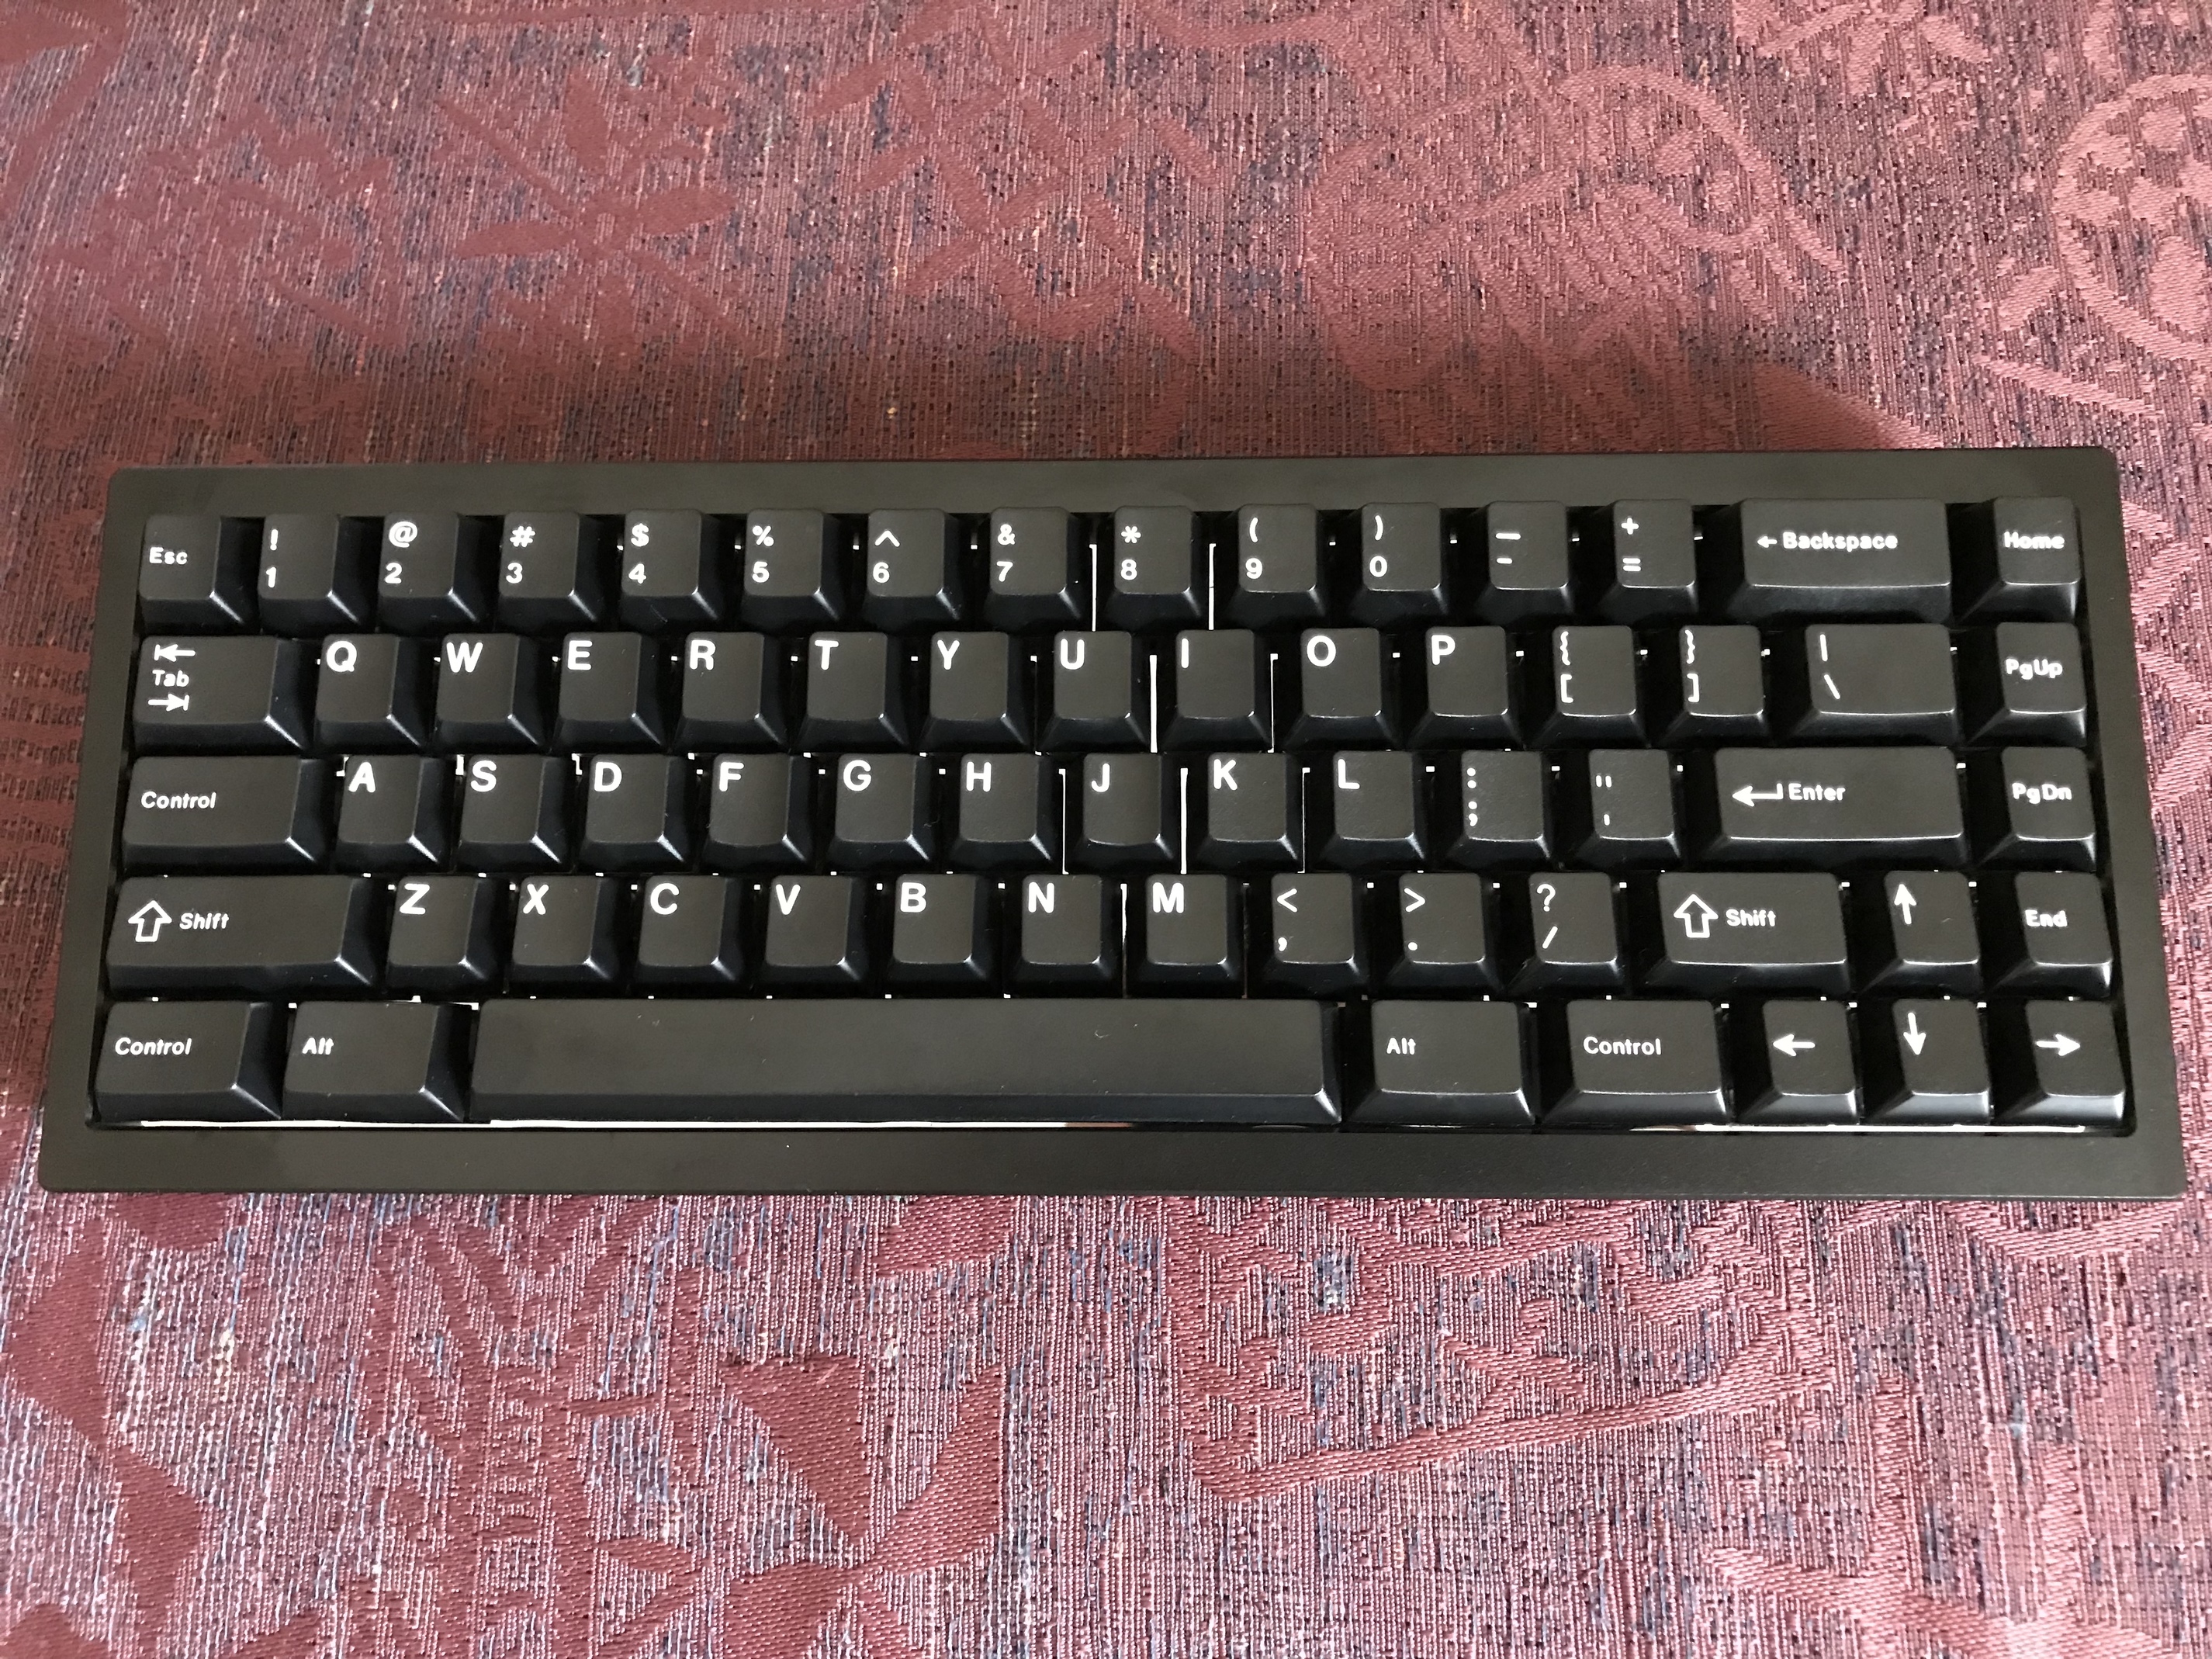
For keycaps, I continued the austere, clean theme, with GMK White on Black. After a lot of flashy over-the-top colorways recently, it’s nice to do one with a classic, simple look.
Lessons learned
- 5mm brass plates are interesting - I’m not sure whether it’s the weight, the enclosing of each switch housing, or some combination of the two, but there is no plate ping at all. Not a cheap alternative to doing Sorbothane strut mods, but it does make for a quick build with no sound compromises. This makes me curious to try a thick PC or POM plate.
- I’m torn on PVD finish. It looks so good…for the 0.0023 seconds before the PVD coating is replaced by a smudge and fingerprint coating.
- There might be a slight sound improvement to be gained from a thin layer of Sorbothane between the PCB and case, but overall, the board has a crisp typing sound which I enjoy. It would be worth trying Sorbo, though, to try to get a handle on how much of the sound is driven by the case vs. the 5mm plate.
- While it can be fun to get a bunch of disparate components to work together and feel and sound good in a build, there is definitely something to be said for a case/plate/PCB kit with tight tolerances and attention to detail across components. This was a very fast build, because generally, things just worked out of the box.
- At some point I need to come to terms with layout. I make heavy use of the Windows key, I use CTRL heavily in editors, and I’ve become attached to the QMK left-desktop/right-desktop bindings for the Alt keys. I can still have those things with the 65 layout, but for some reason I haven’t been able to get my fingers to adapt to R3 CTRL, even though it’s clearly an ergonomic improvement.
Mirror-finish PVD, shiny black ano…and dust and fingerprints. Overdue for an upgrade to my photo game.
Specifications
case: Zephyr R2
case dampening: n/a
PCB: Zeal65 R1
plate: 5mm silver PVD brass
plate/PCB dampening: n/a
stabilizers: Zeal (1x7u, 3x2u)
stabilizer mods: lubed with SuperLube
switches: 67g V2 Zealios
switch mods:
- springs tub-lubed with Krytox GPL 104
- stem and housing hand-lubed with Tribosys 3204
keycaps: GMK White on Black
HxWxD (without caps or feet): 1.31" x 12.62" x 4.5"
HxWxD (without caps): 1.38" x 12.62" x 4.5"
HxWxD: 1.56" x 12.62" x 4.5"
assembled weight: 4.89 lb
14 Likes
This is a beautiful, simple, clean Zephyr.
You know, the things Zephyrs never should be? /s
(all jokes aside this is gorgeous)
1 Like
Great build, simple and so classy, love it !
1 Like
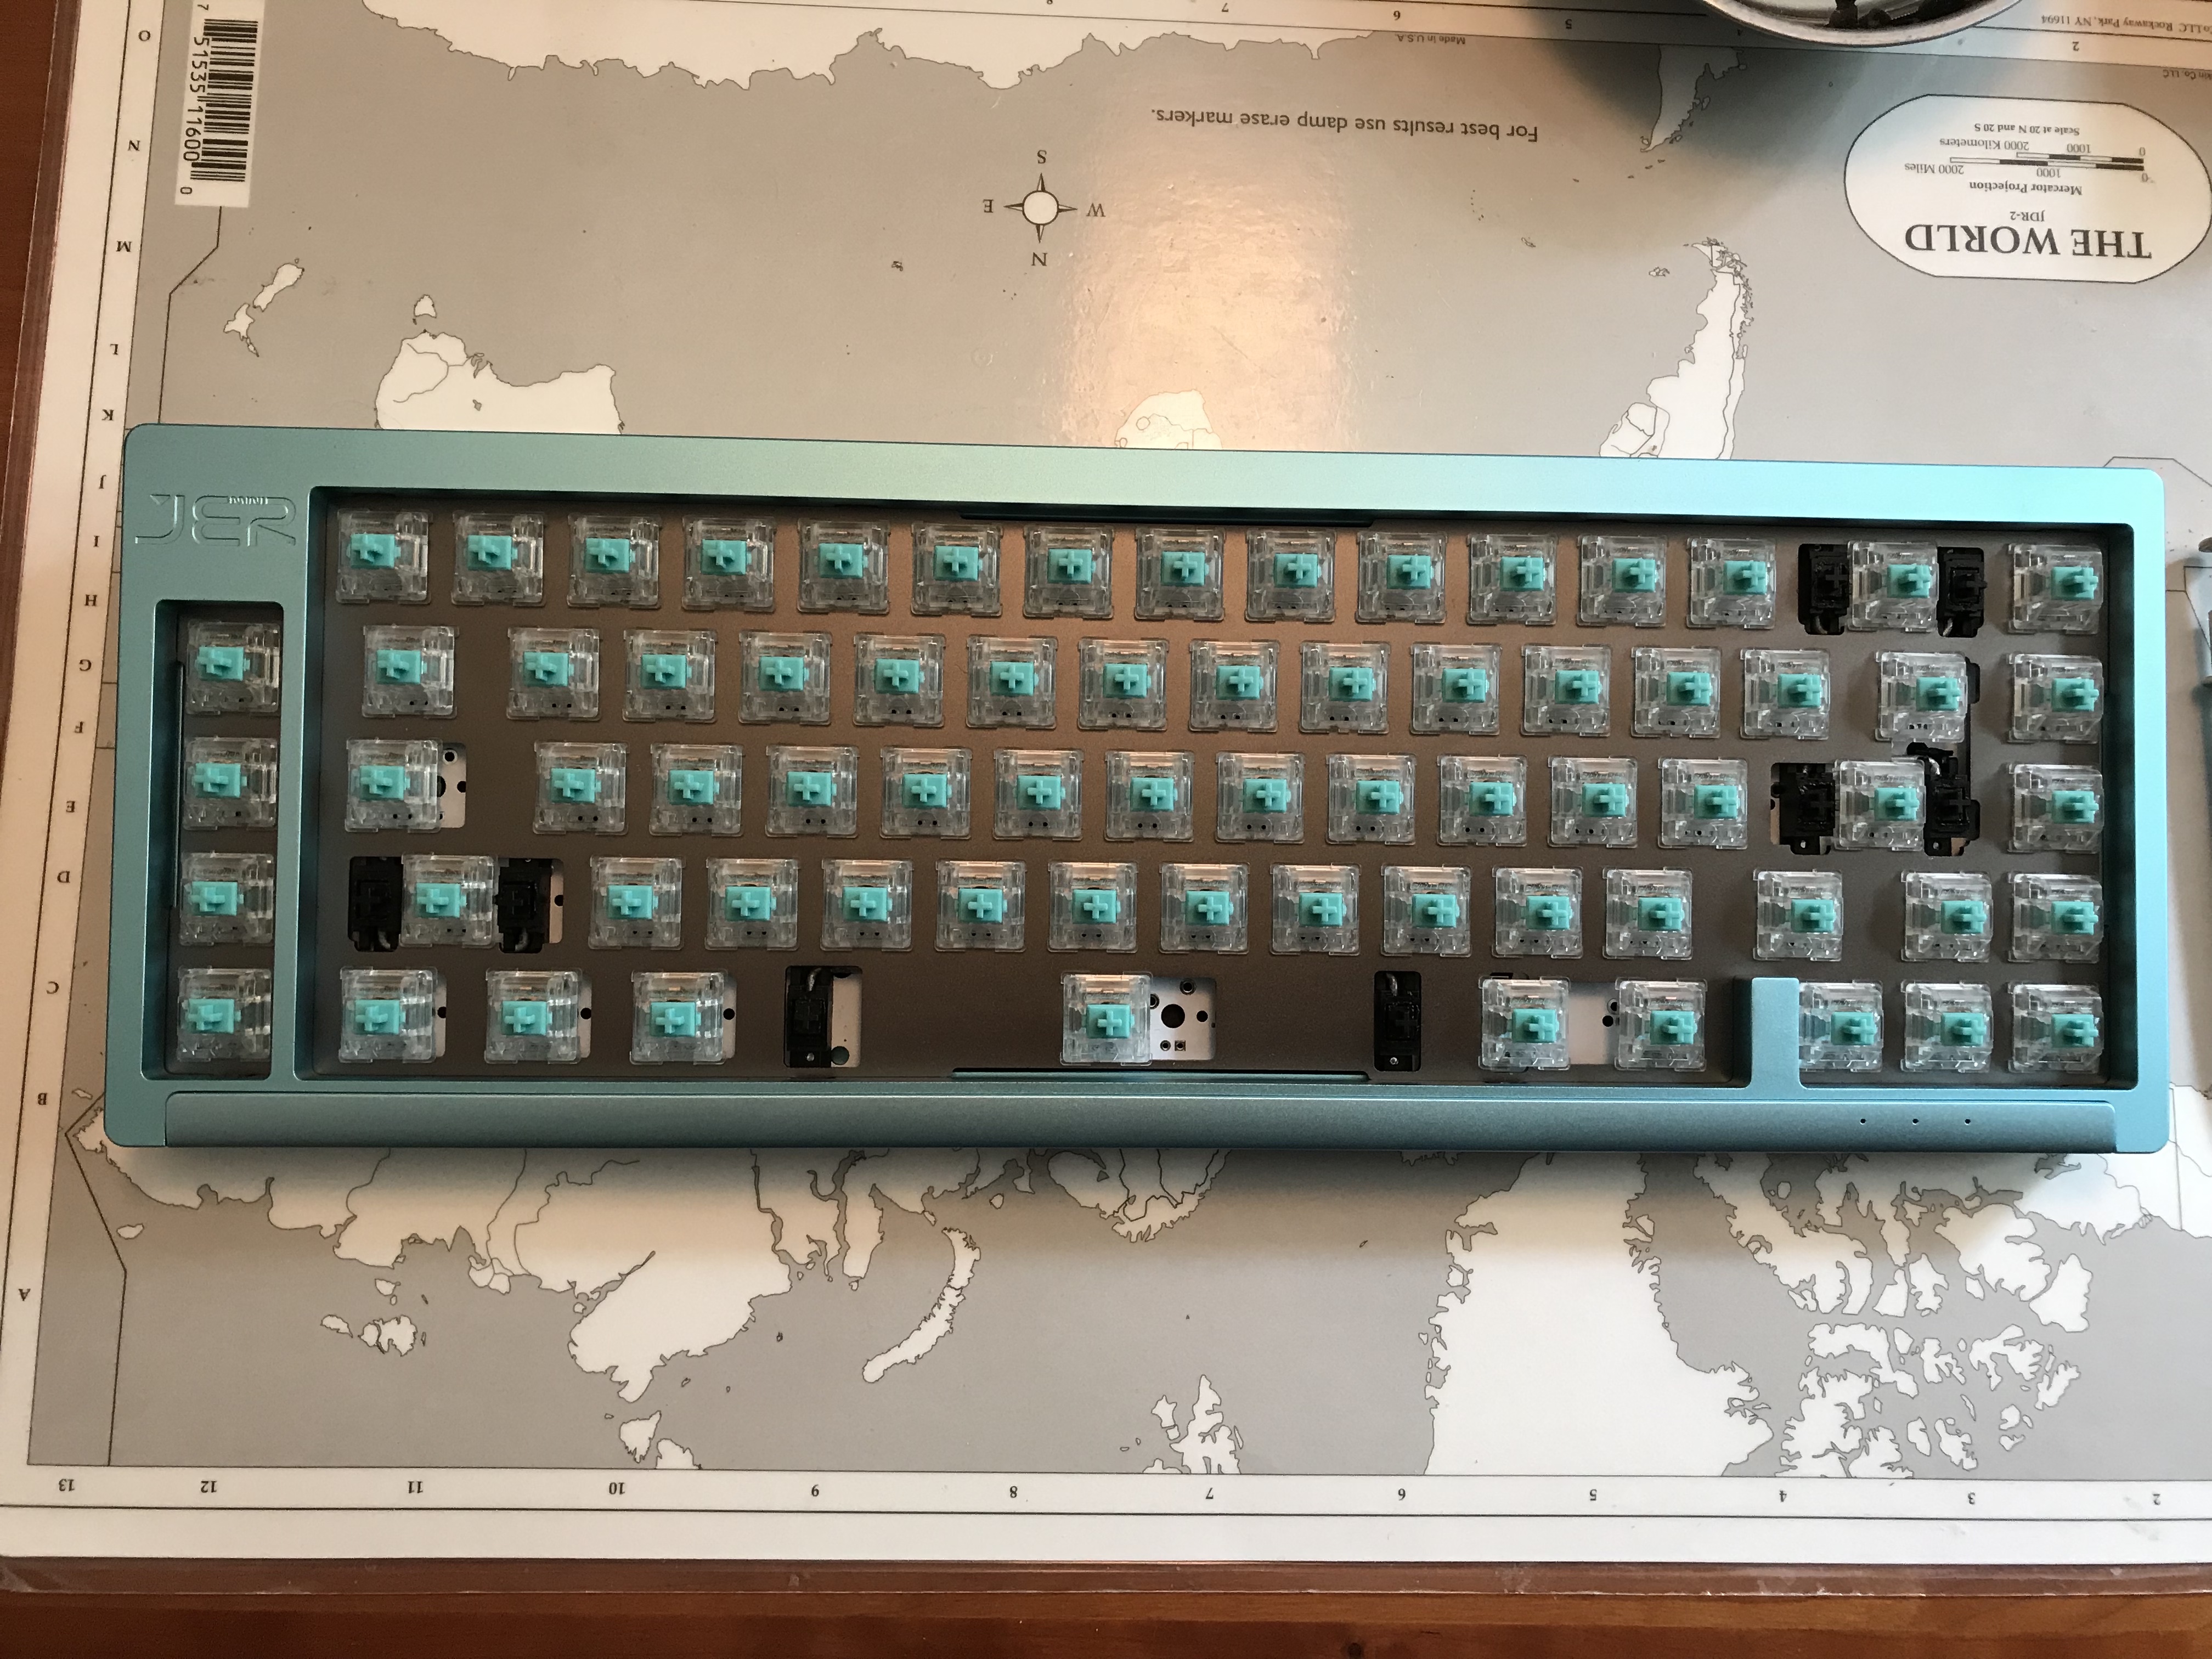
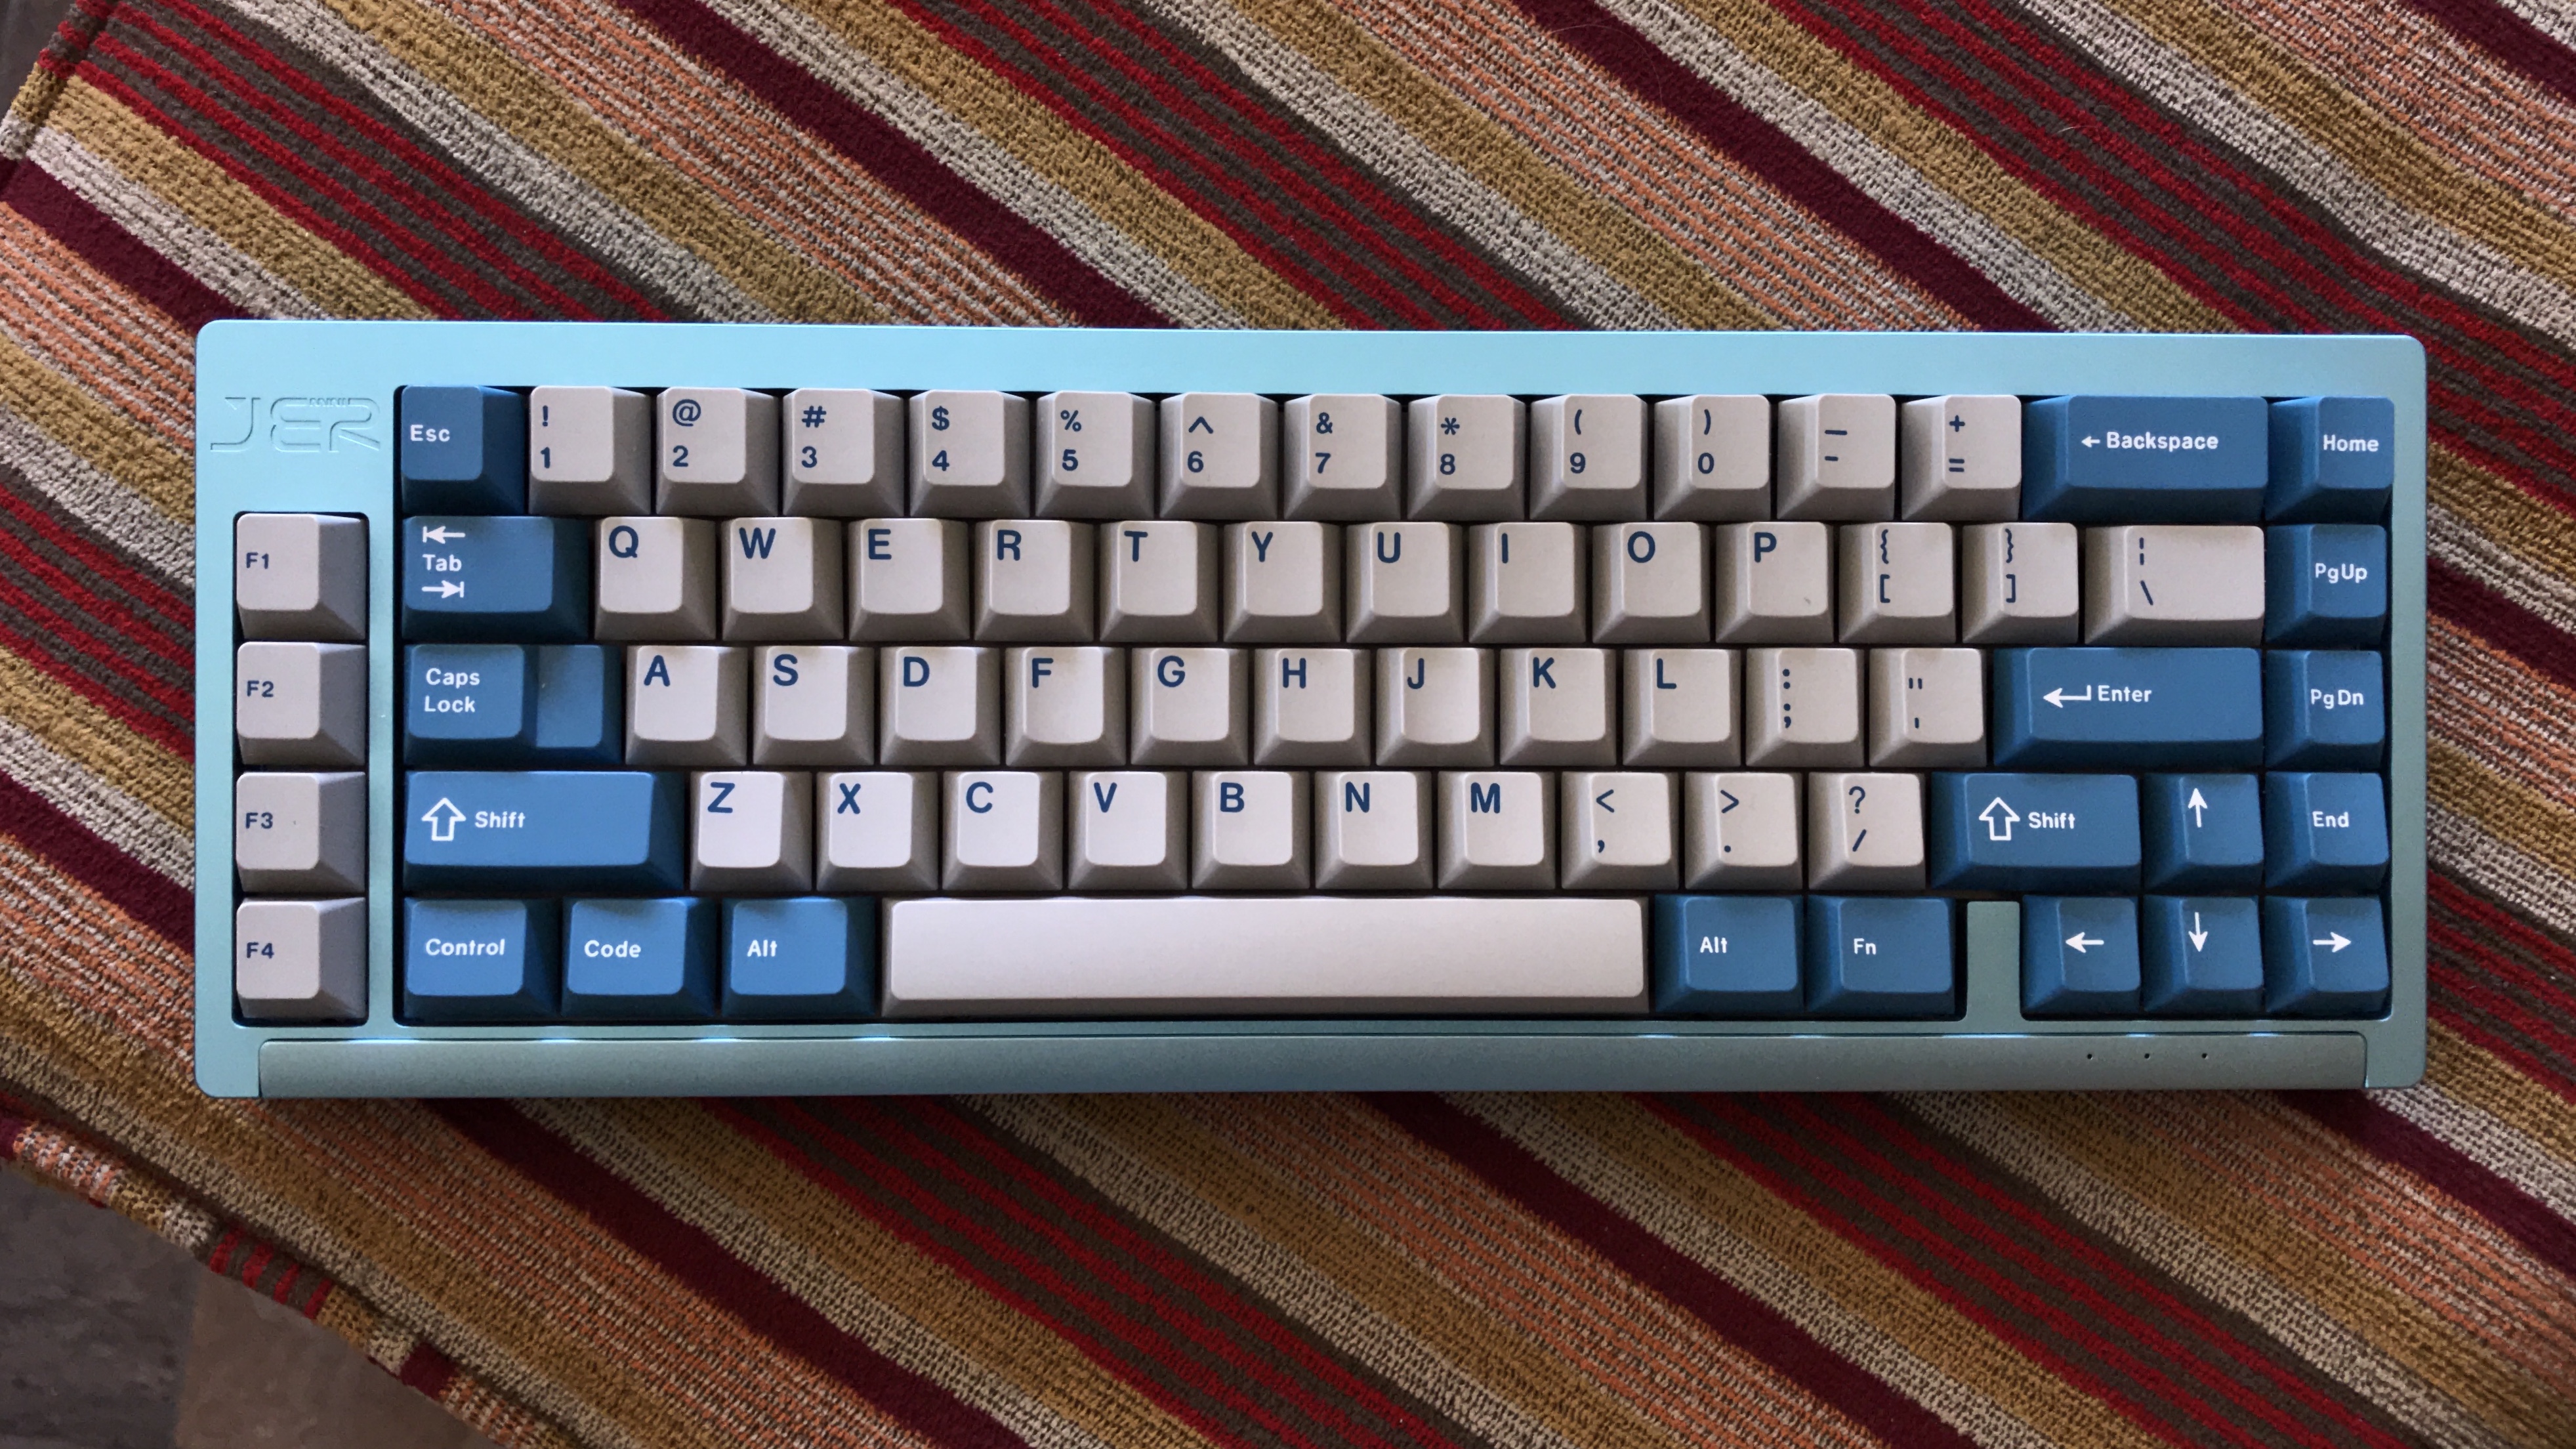
Build #26: JER mini
Ever since I first saw them, I thought the keycaps in the GMK Triumph Adler 90 numpad kit were great. Just that simple touch of a circle around the legends gives them a unique character (pun intended). When I saw the JER mini, a 65% with an additional four-key column on the left side of the board, I knew I had found the perfect pairing of keyset and kit.
Or so I thought…
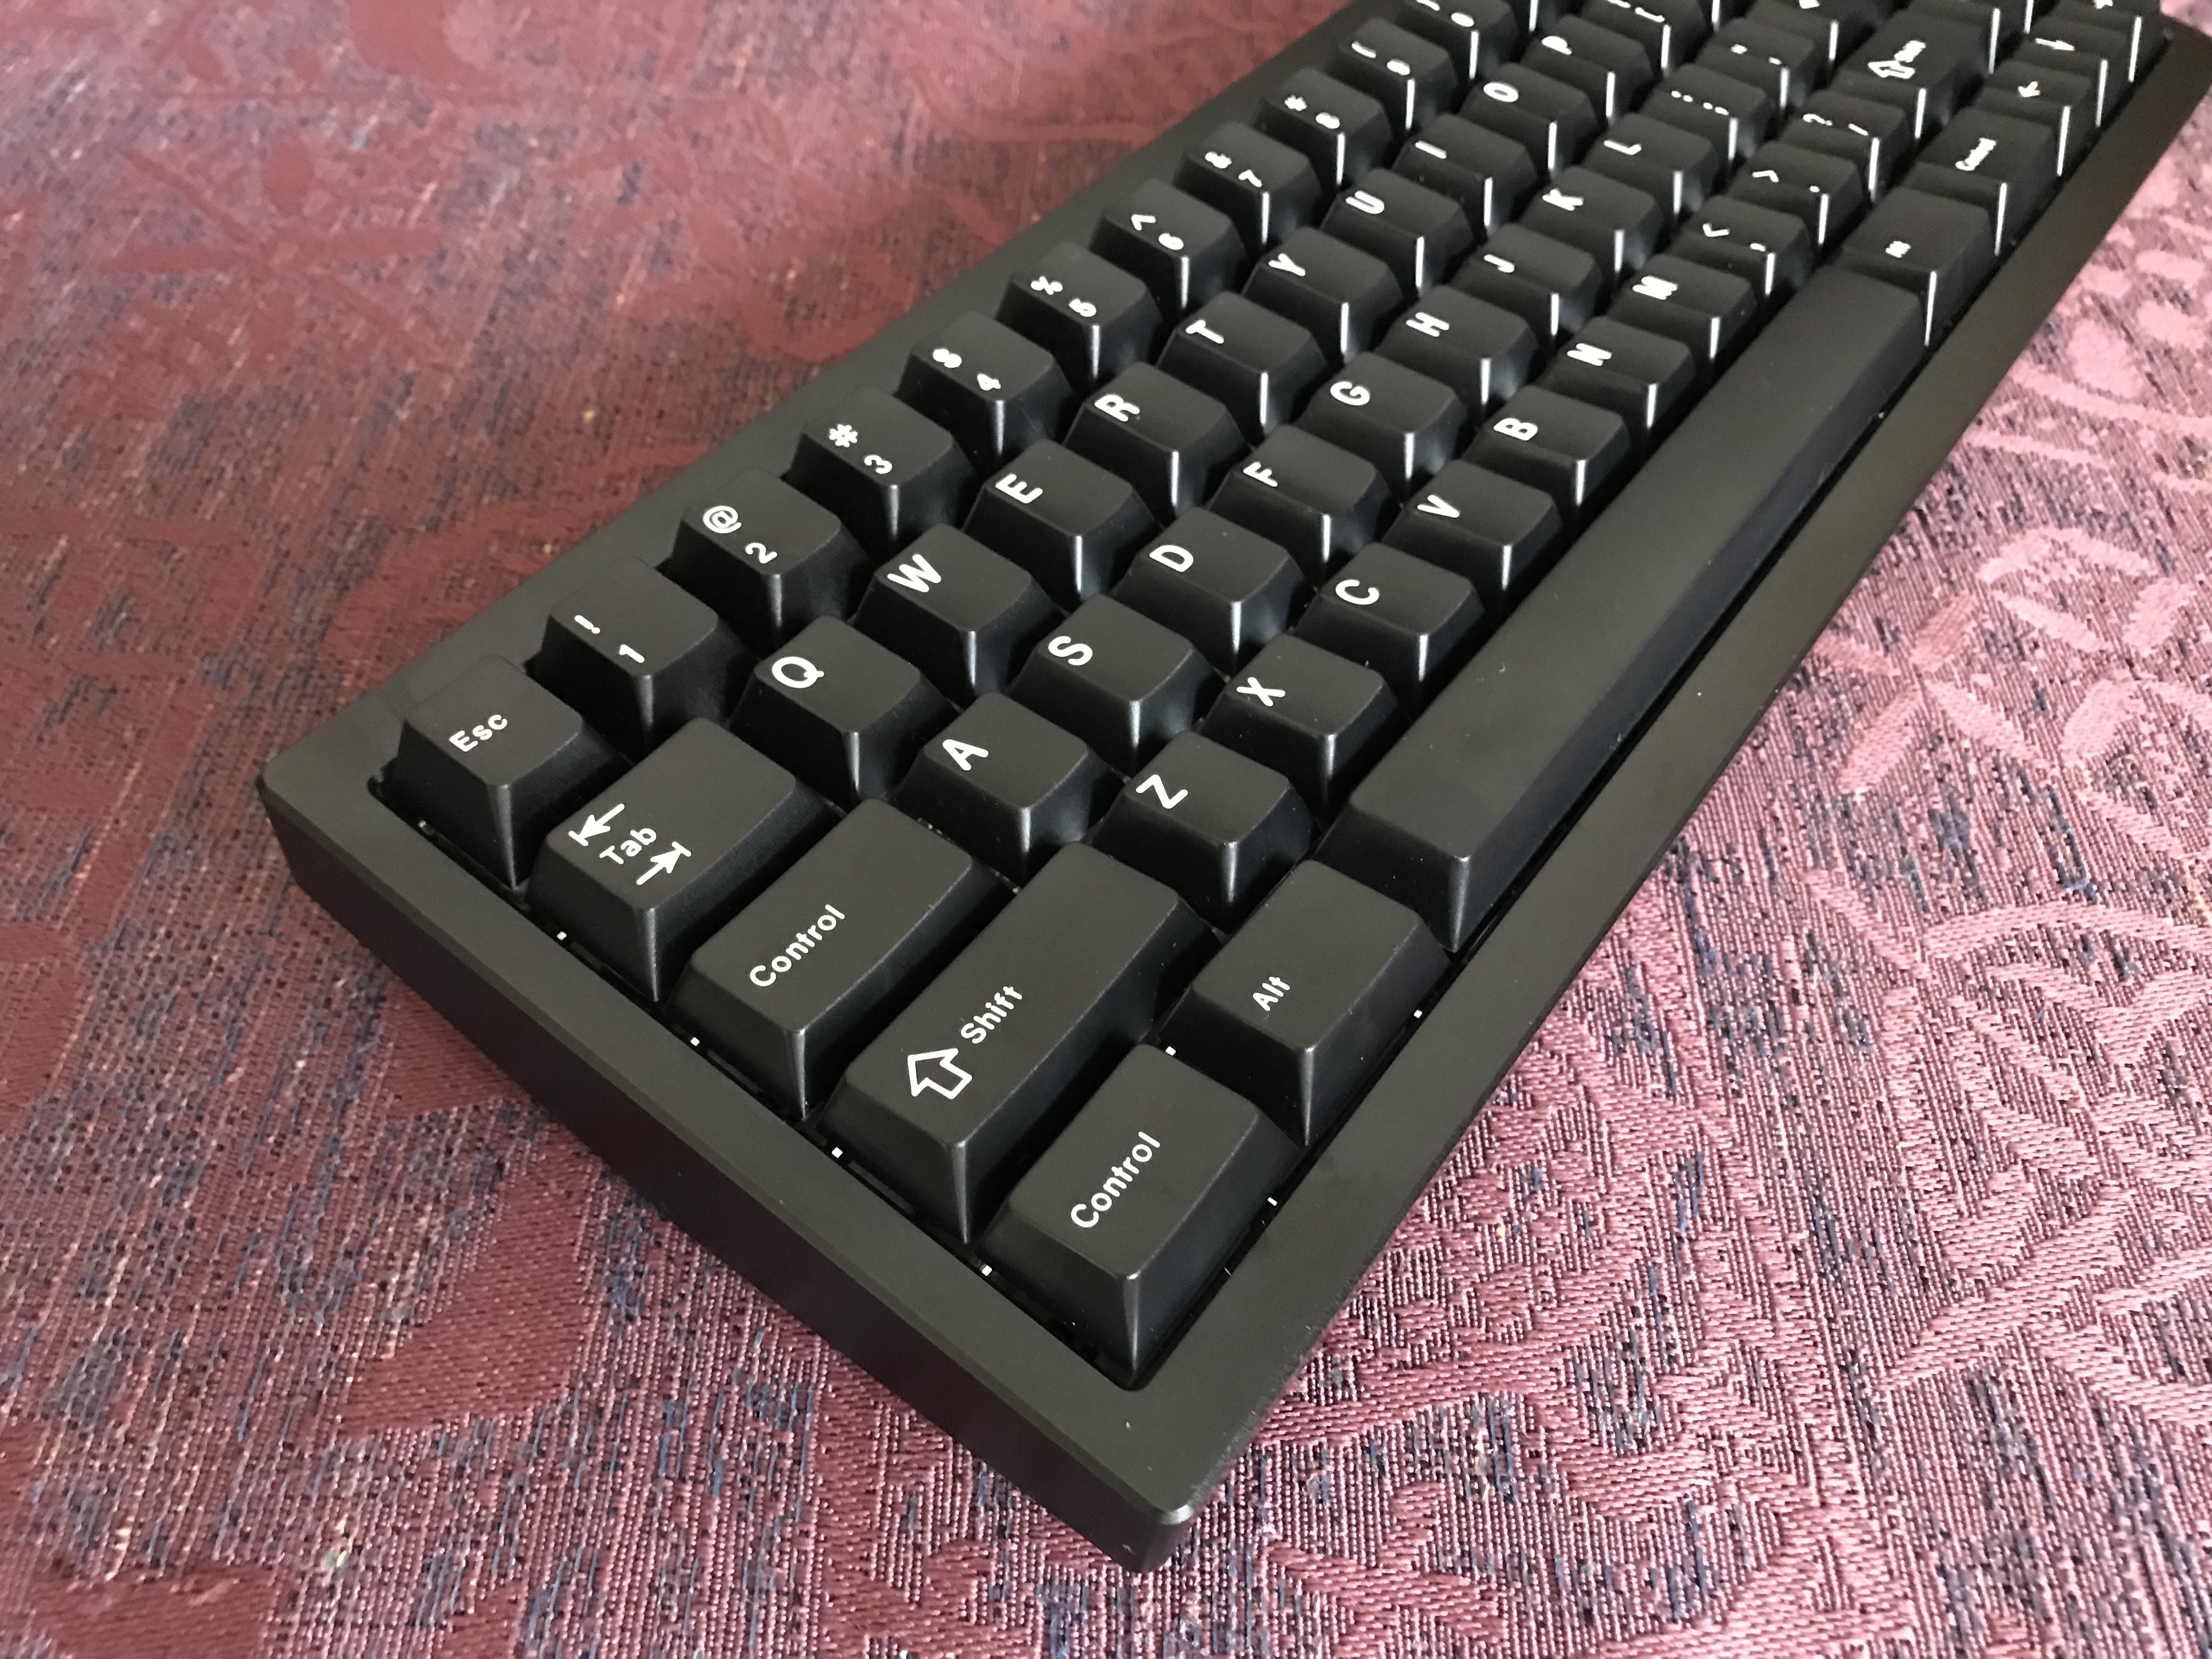
Let’s begin with a look at the PCB included with the JER mini kit. You’ll notice the four-key column on the left, but another interesting feature of this board is the indicator placement for the number lock, caps lock, and scroll lock keys, in the lower right of the PCB on a tab that juts out from the board.
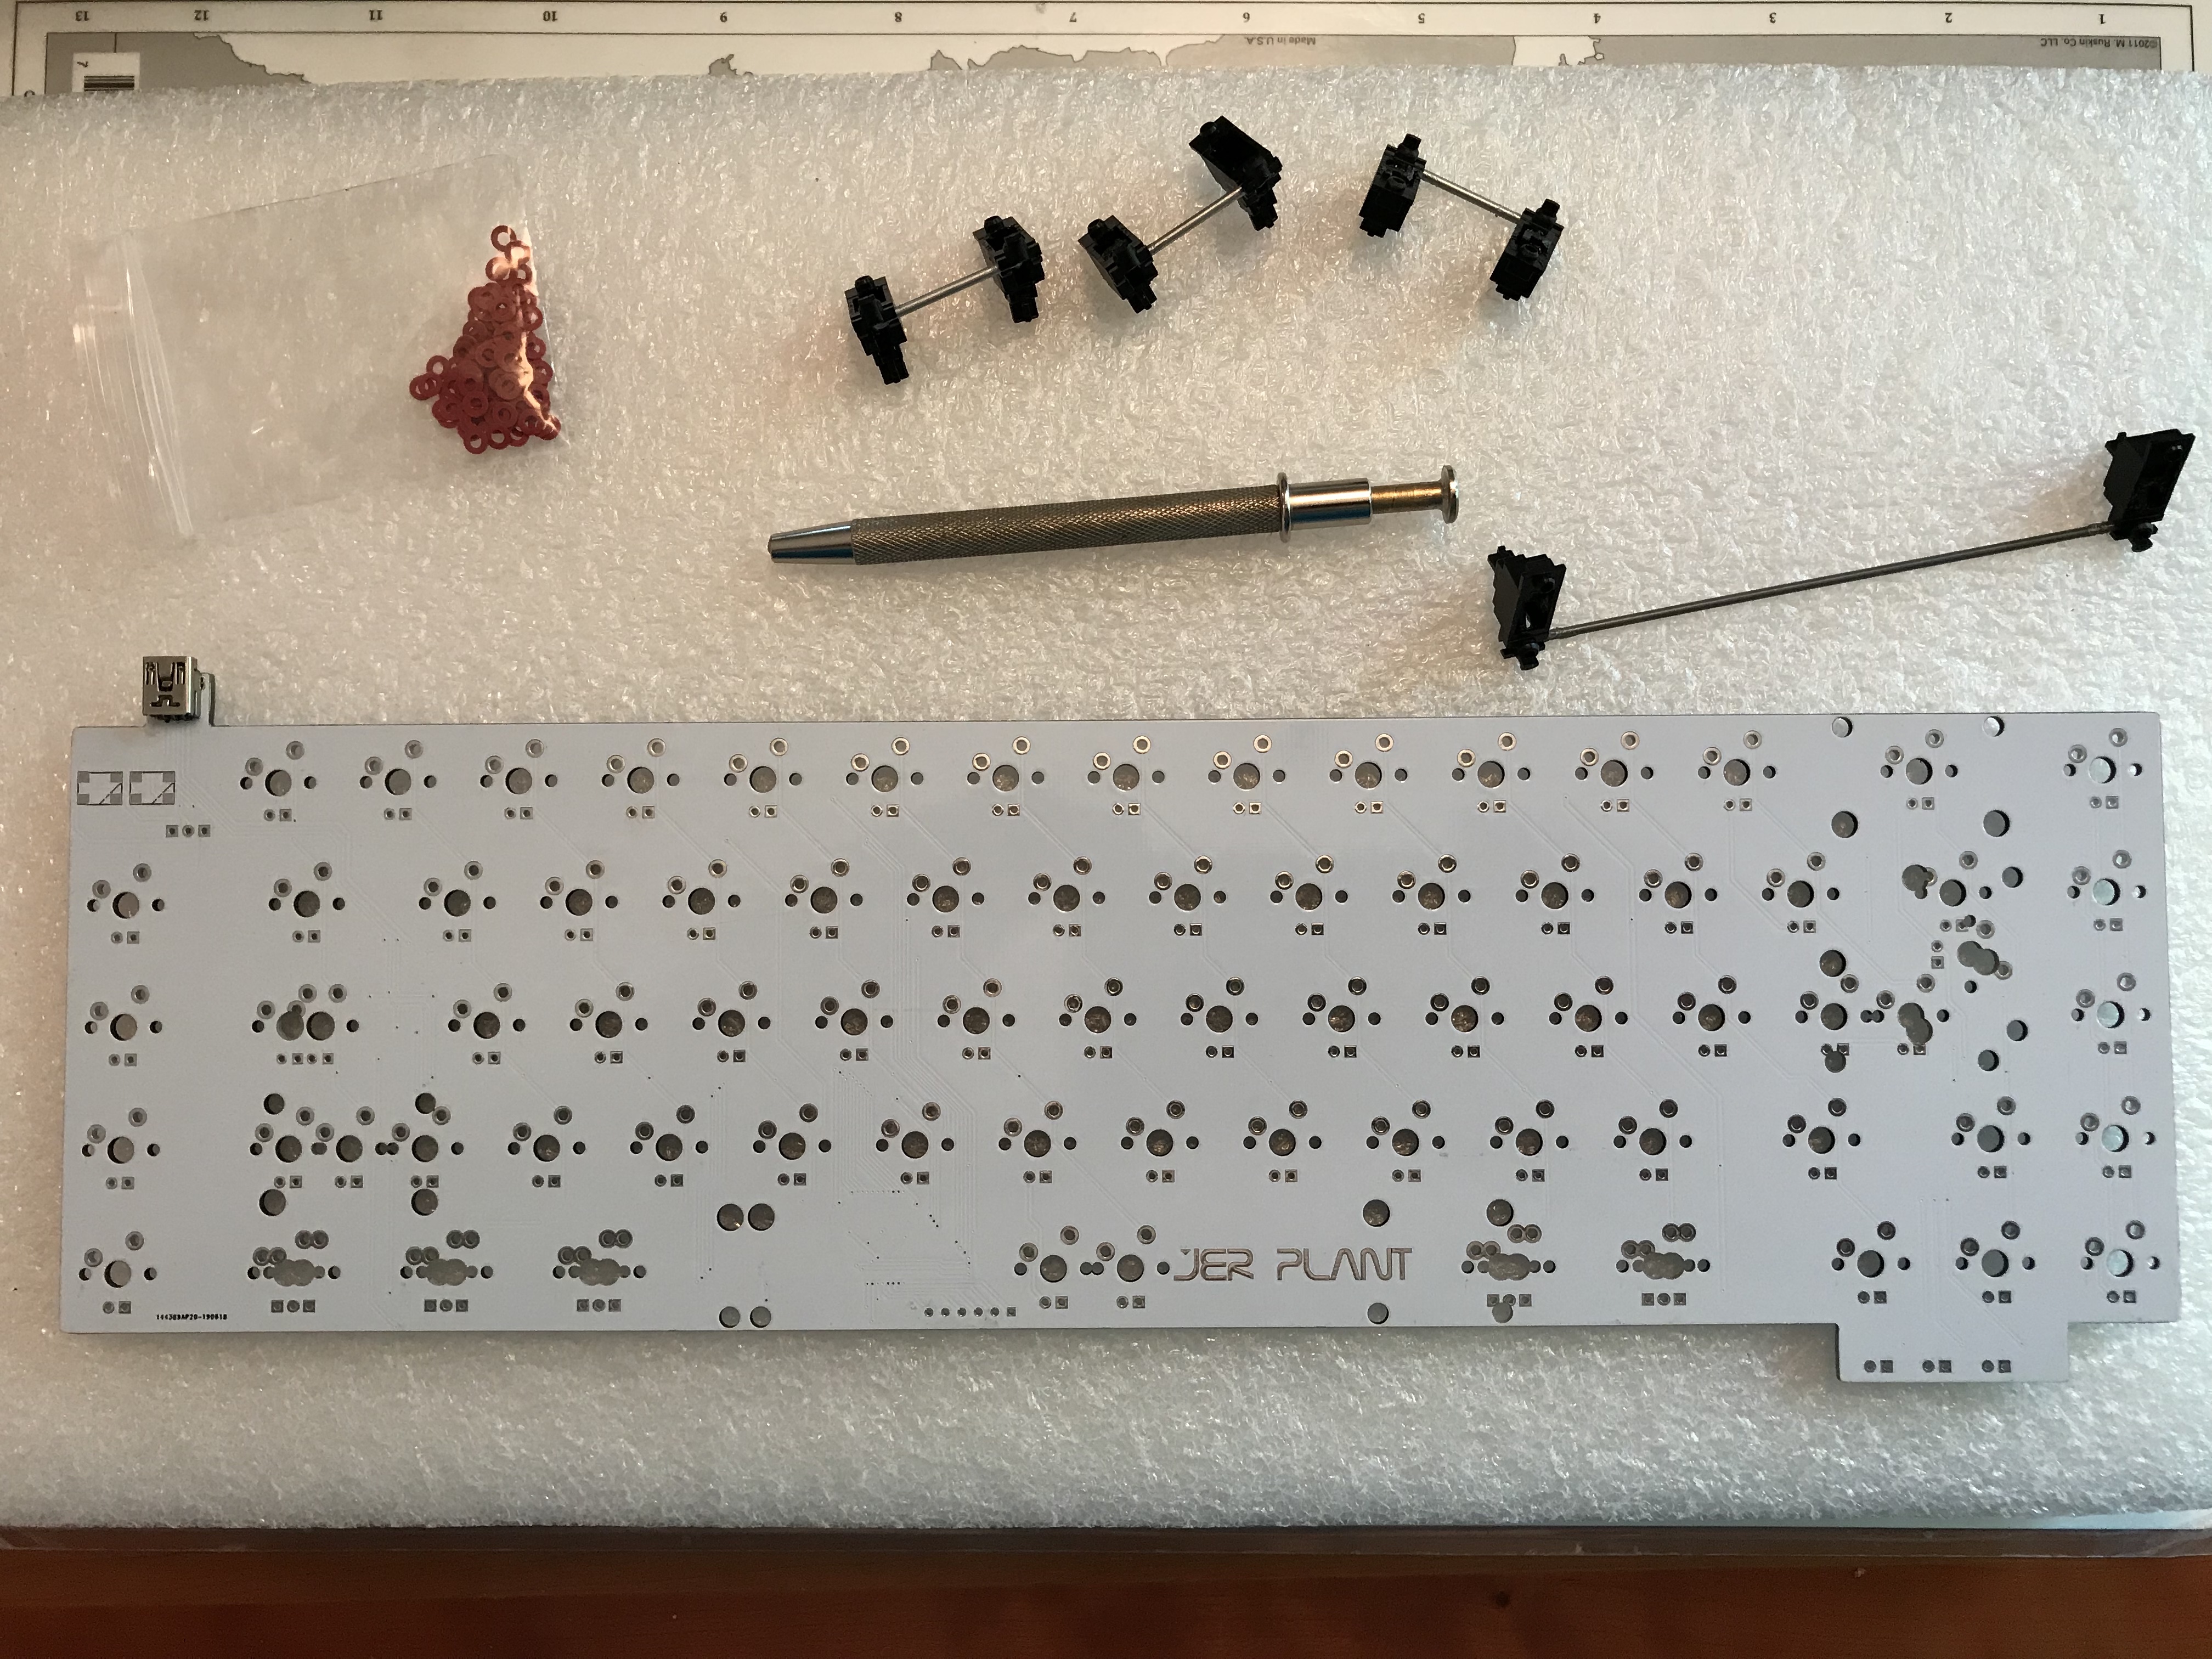
Flipping it over.
Clipped and lubed GMK screw-in stabs, in place on the PCB.
If you didn’t already notice, the bag of insulating washers in the first couple of photos wasn’t there for show. For this board, at least one of the stab mount holes looked like a prime candidate for a screw short, so I preemptively placed washers on all of the stab screws. Here’s a closer look at the problem child.
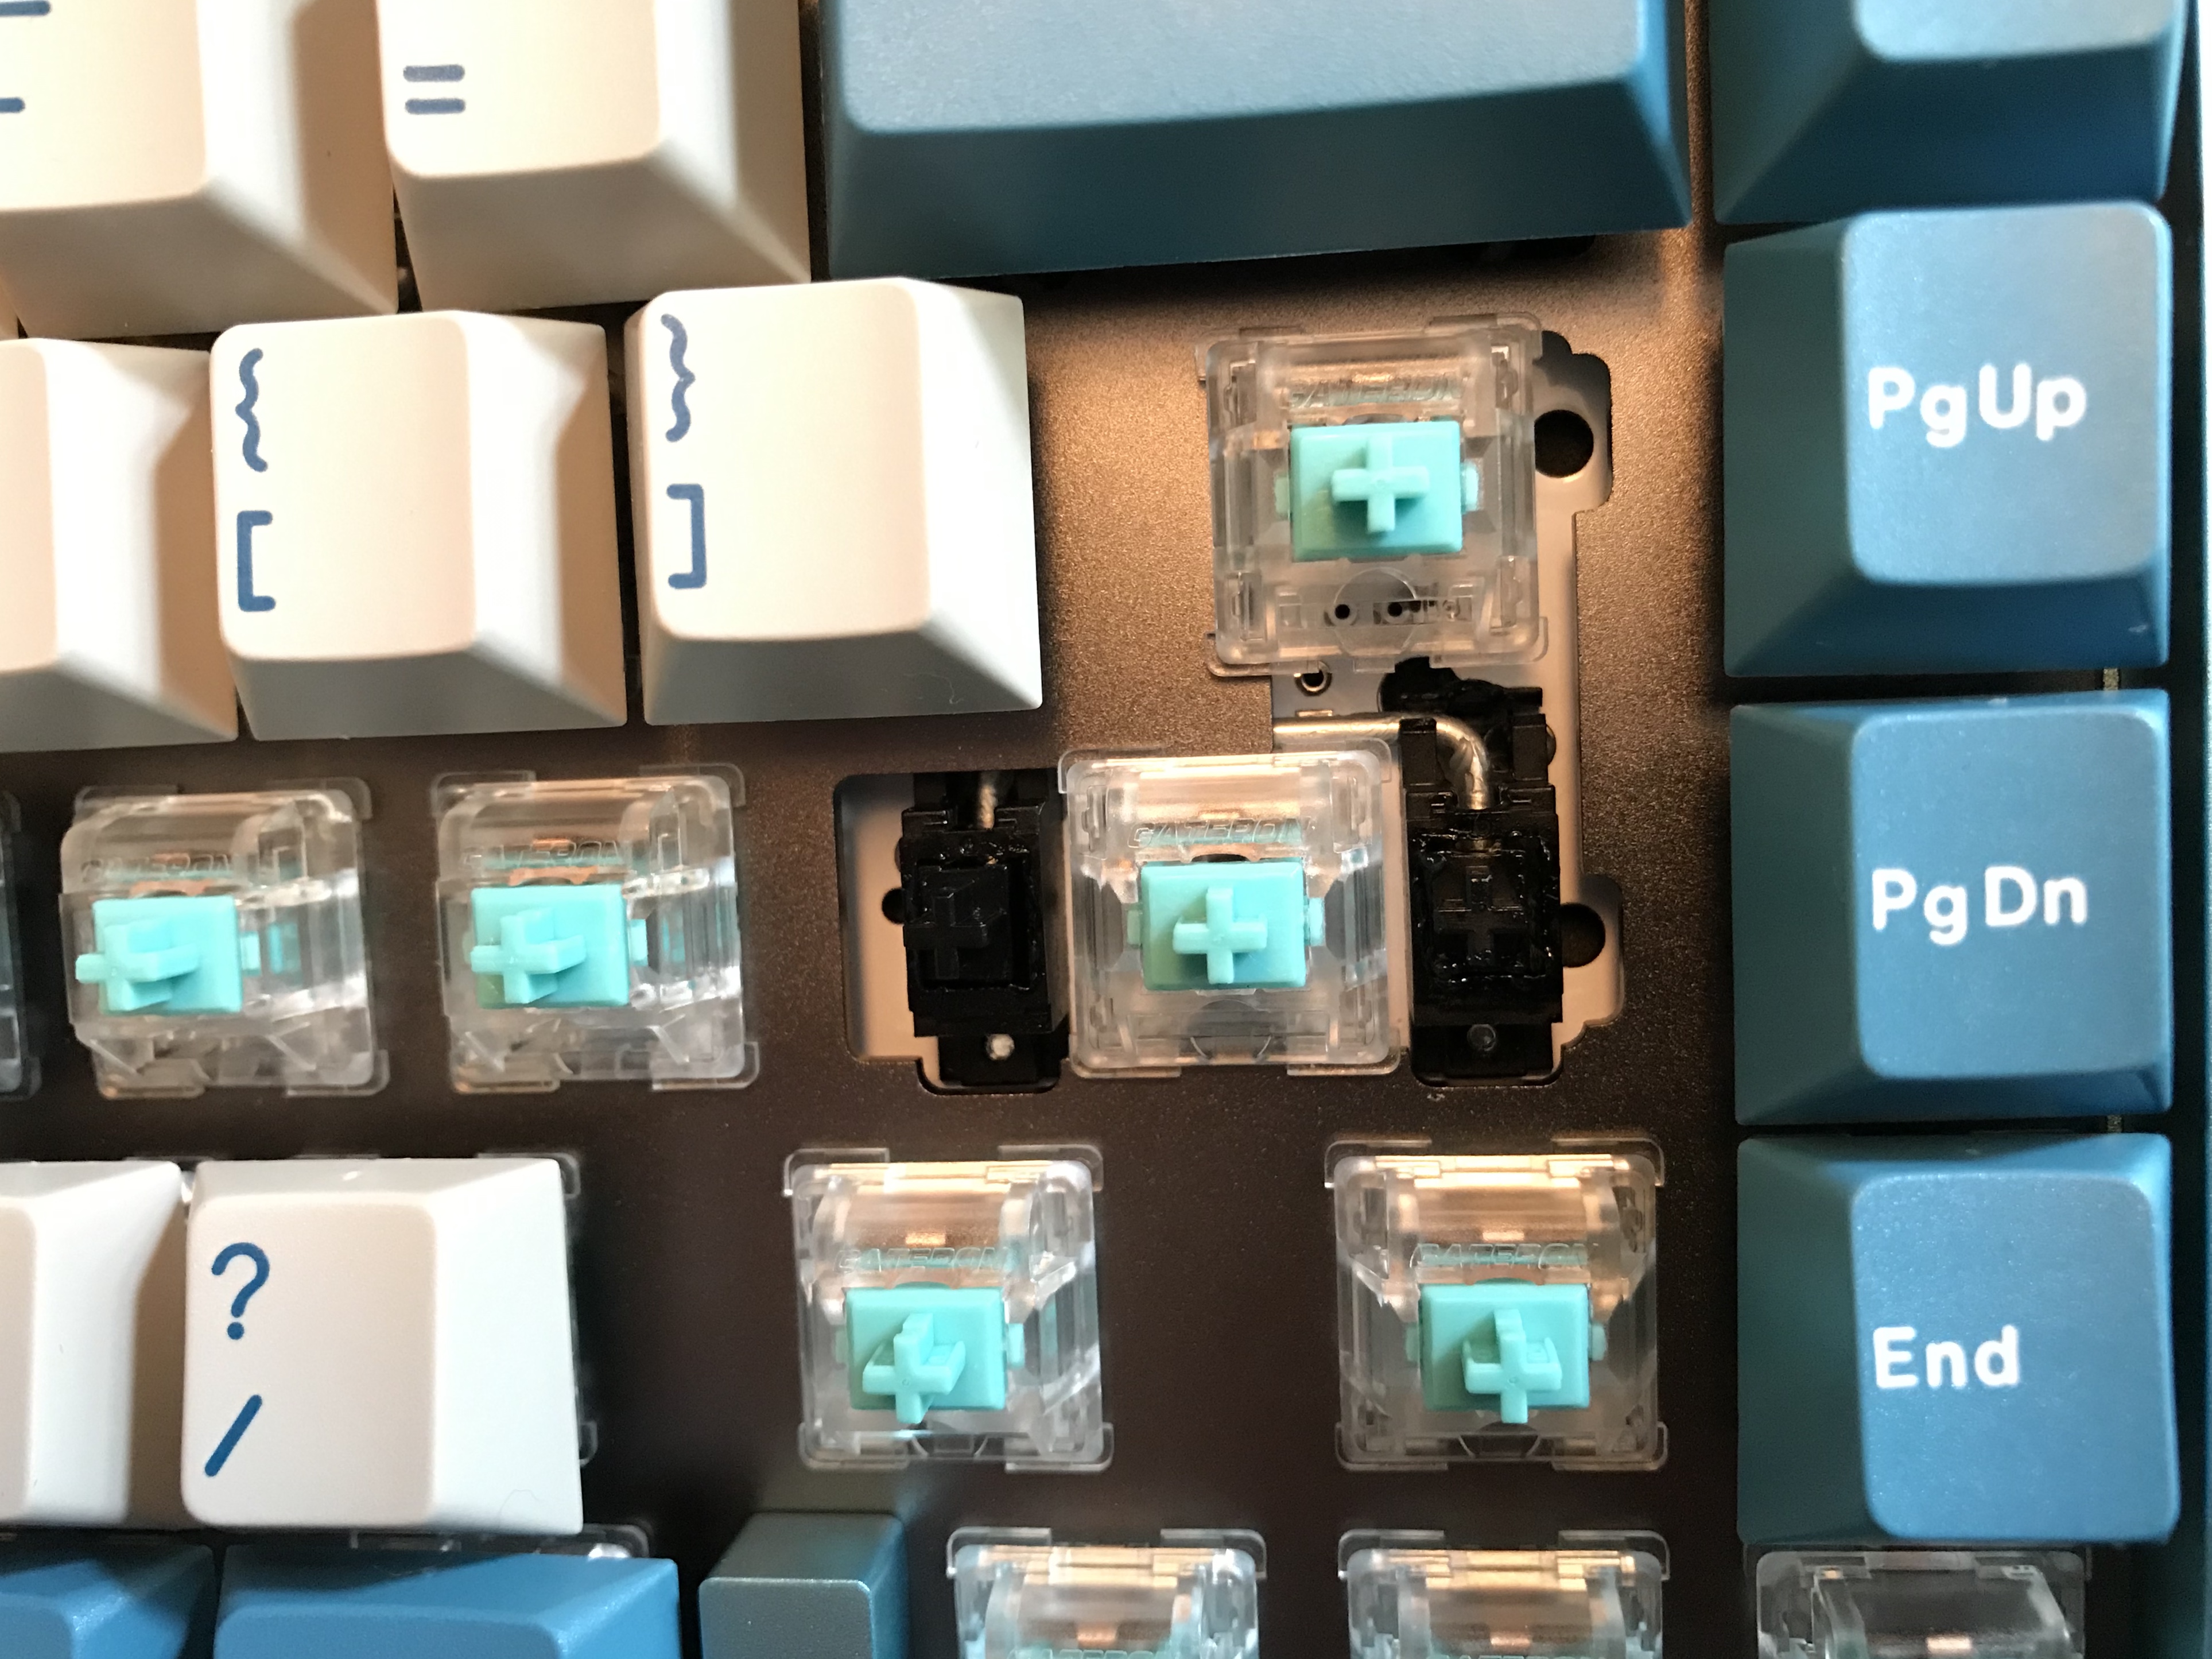
The plate for the JER mini is attractively finished. So attractive, in fact, that I didn’t notice one issue until later in the build. Do you see the problem? We’ll come back to it later.
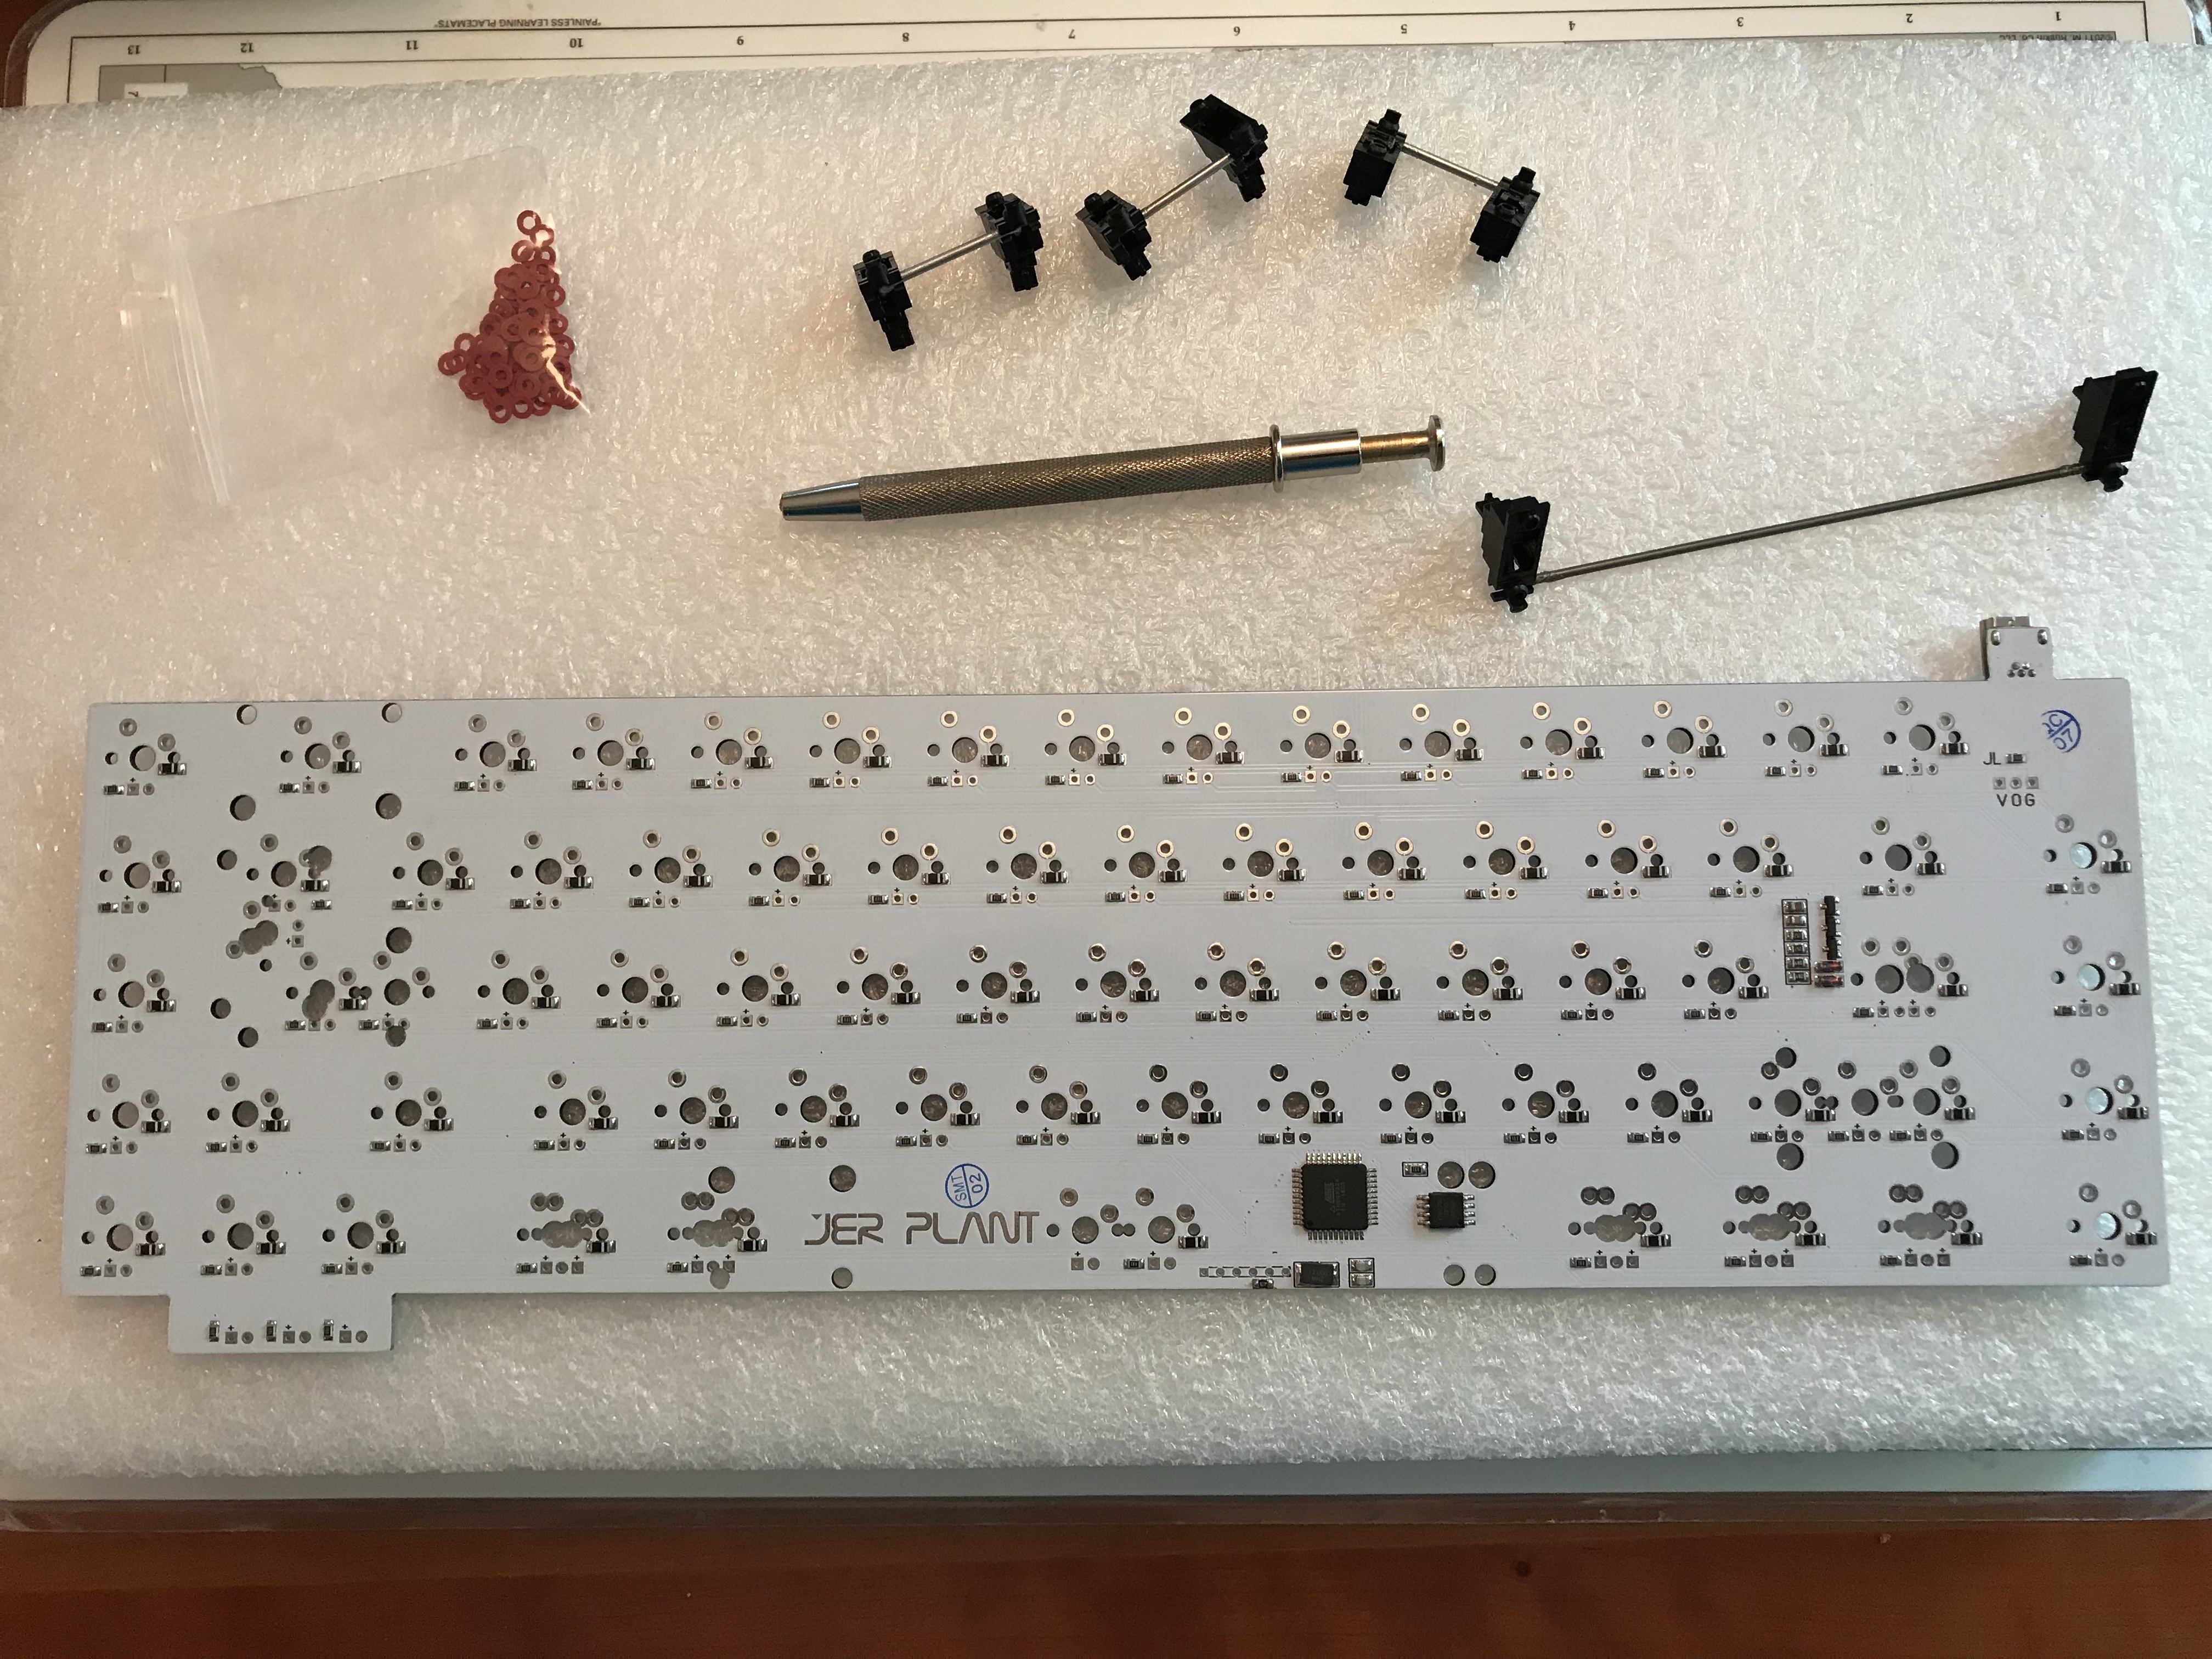
Here, I’ve mounted three LEDs in the NCS pads just prior to soldering.
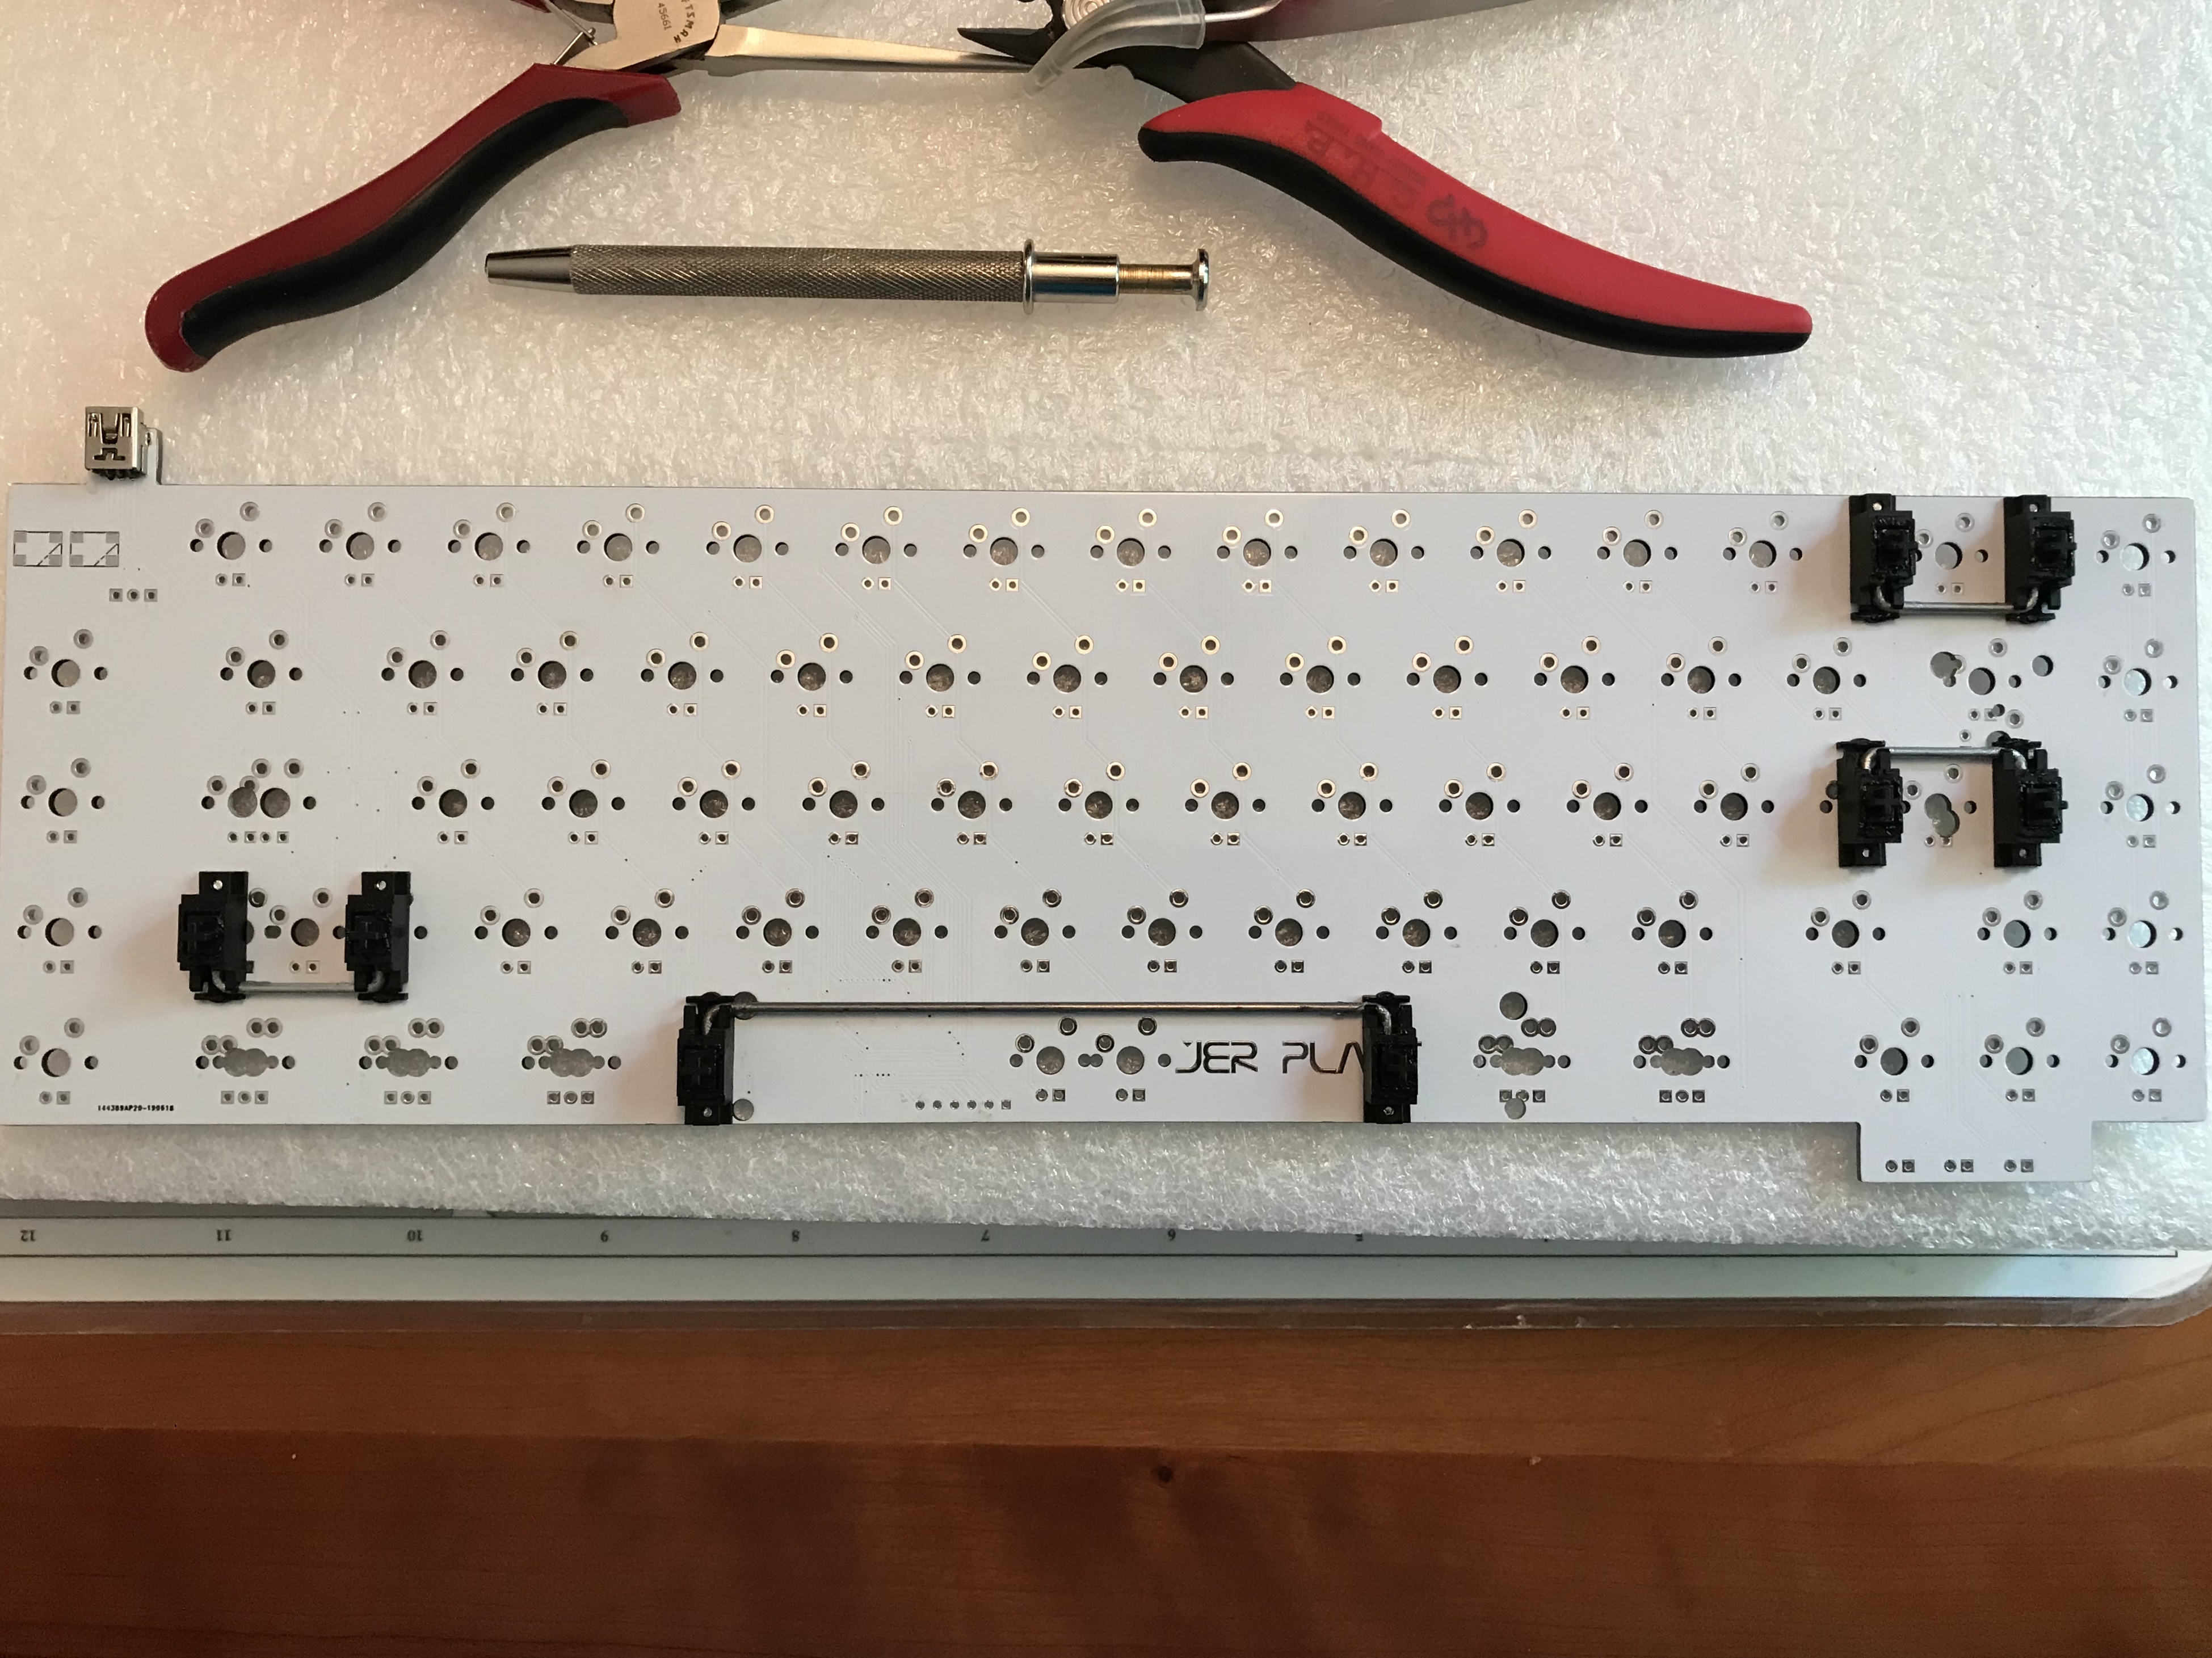
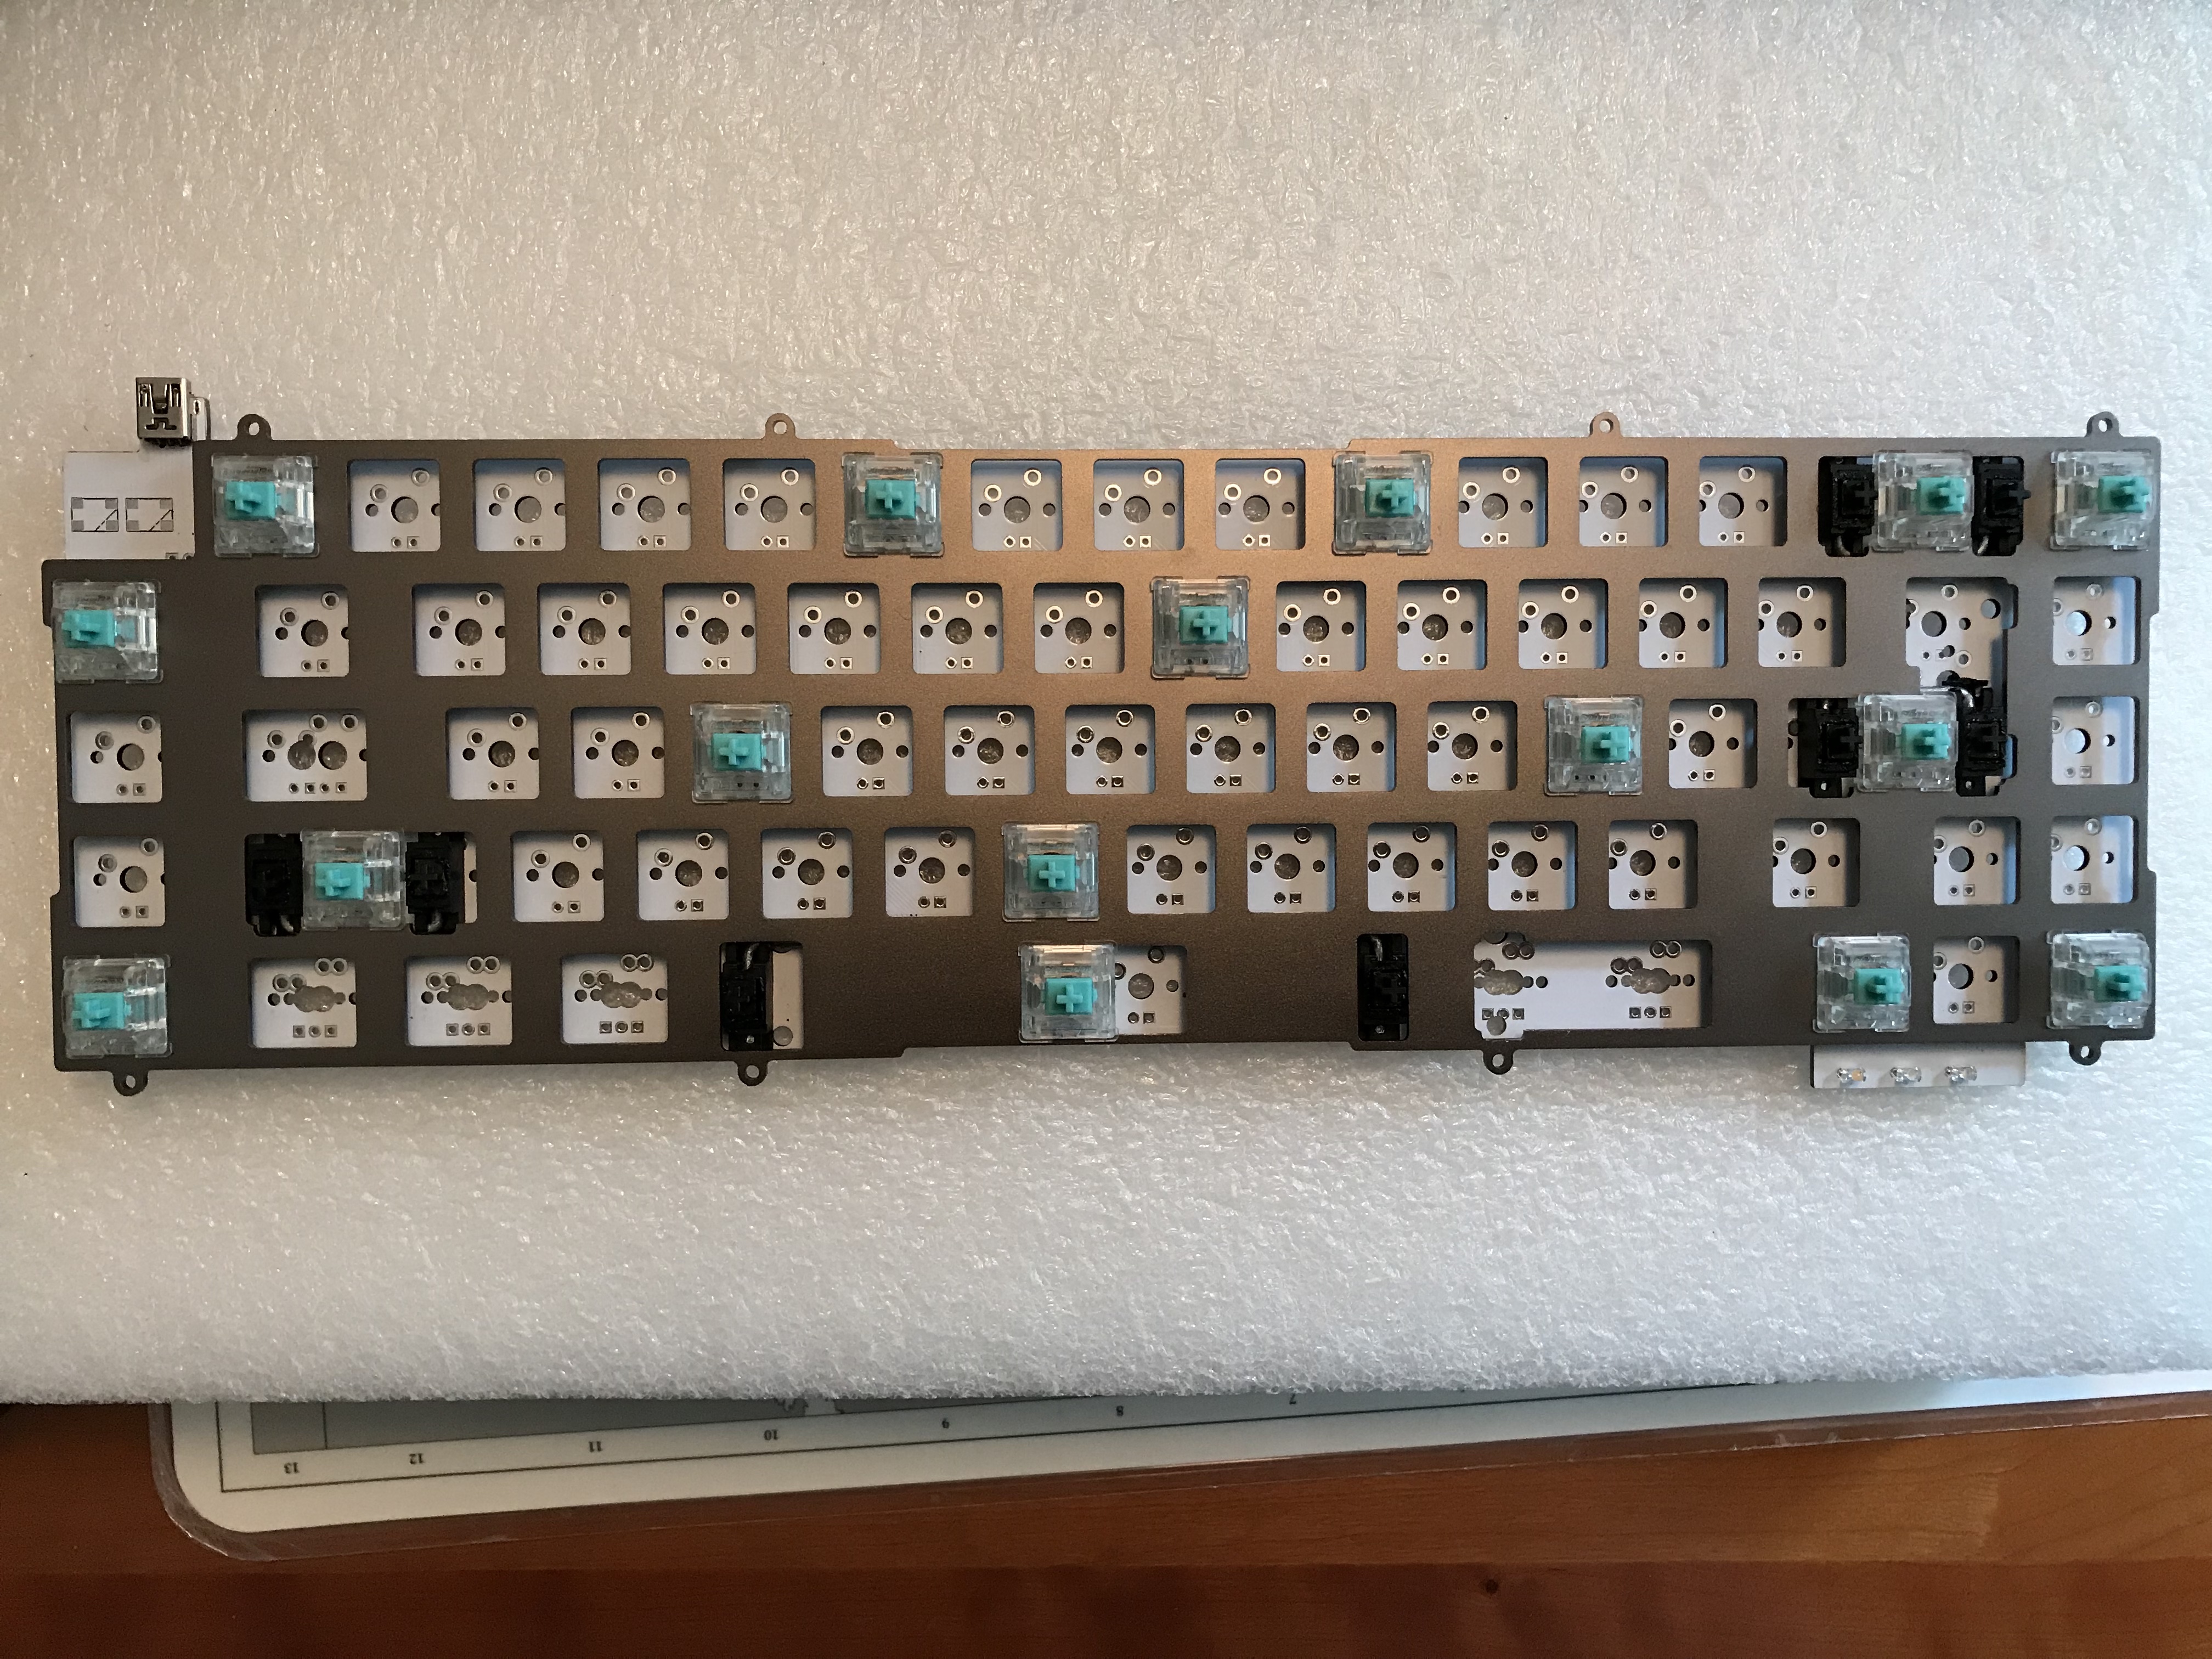
A few Tealios have been mounted in the plate and soldered in place for good fit, prior to doing the whole board.
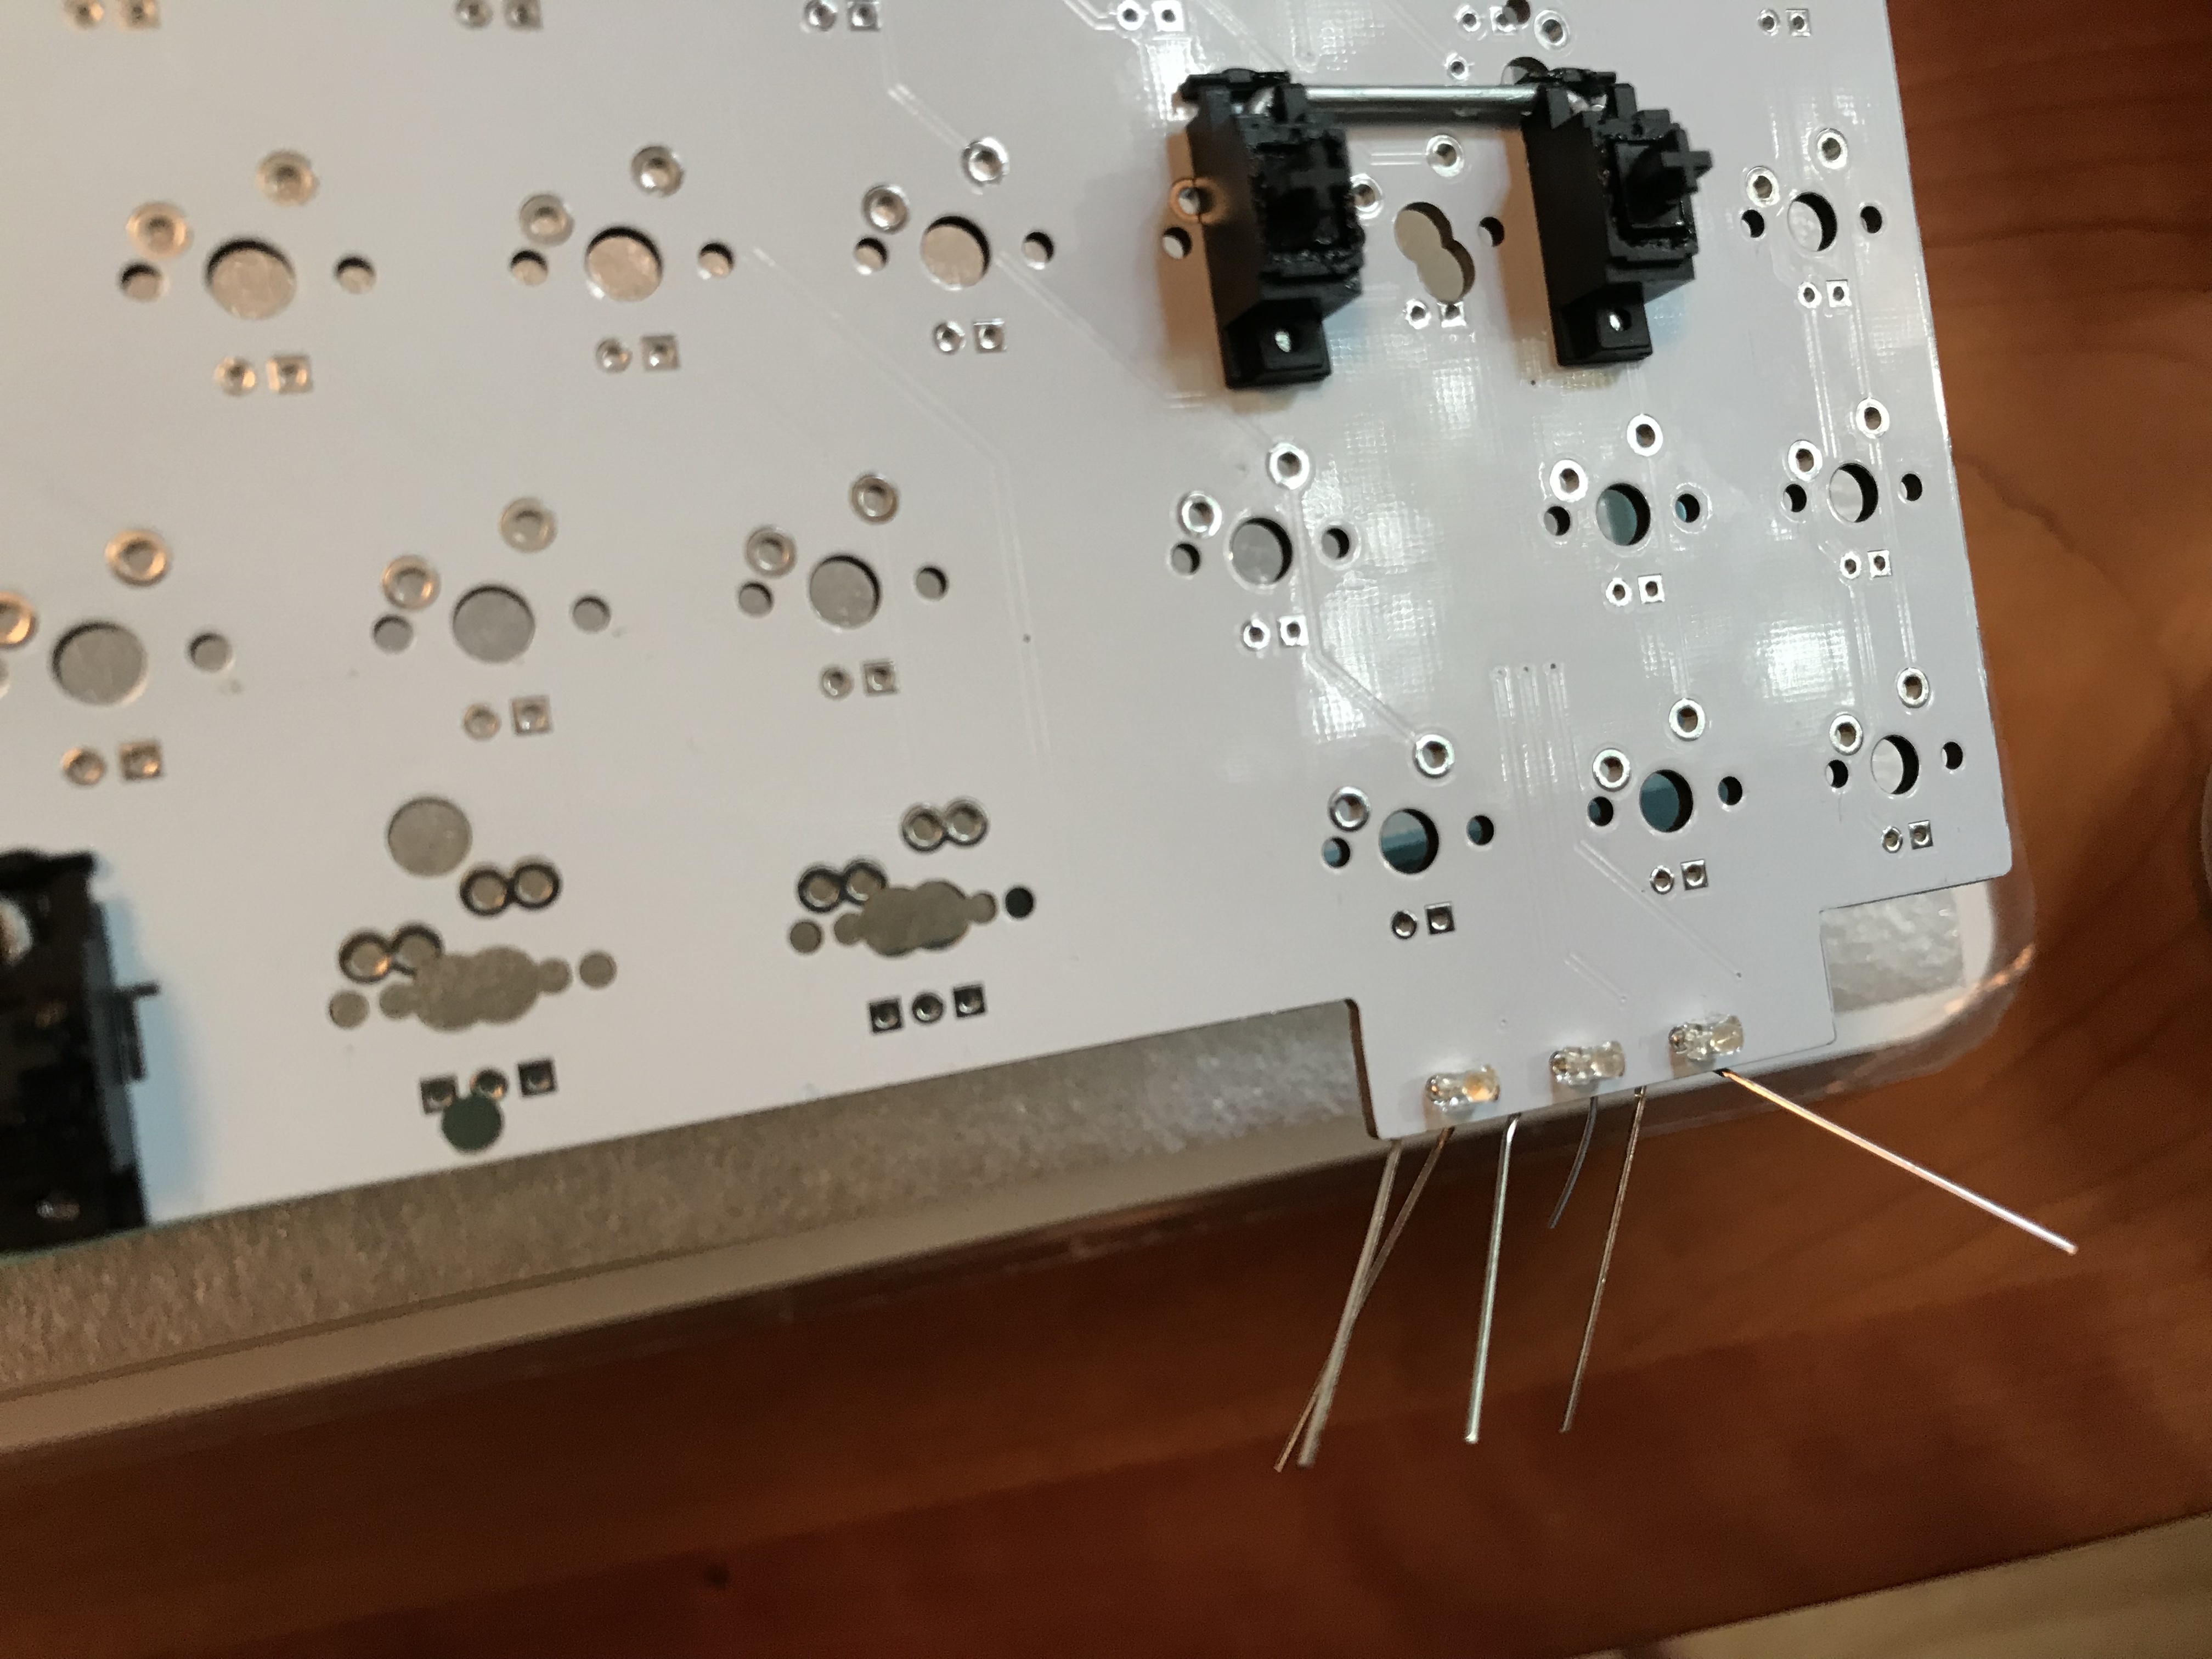
Aside from getting the PCB and plate properly fitted, installing switches in stages also allows me to do the Sorbothane strut mod for sound dampening. Here’s a closer look at one such strut, placed just to the left of the left arrow keyswitch.
All soldered and ready for installation. See the problem with the plate yet? Don’t worry, we’ll get there.
Moving onward, the base of the JER mini has an offset brass weight, screw-mounted into the base. It’s an interesting design choice, and I like it. I’m less fond of the obvious machining marks around the interior corners of the board, but there were no marks of this sort on the exterior, so life goes on.
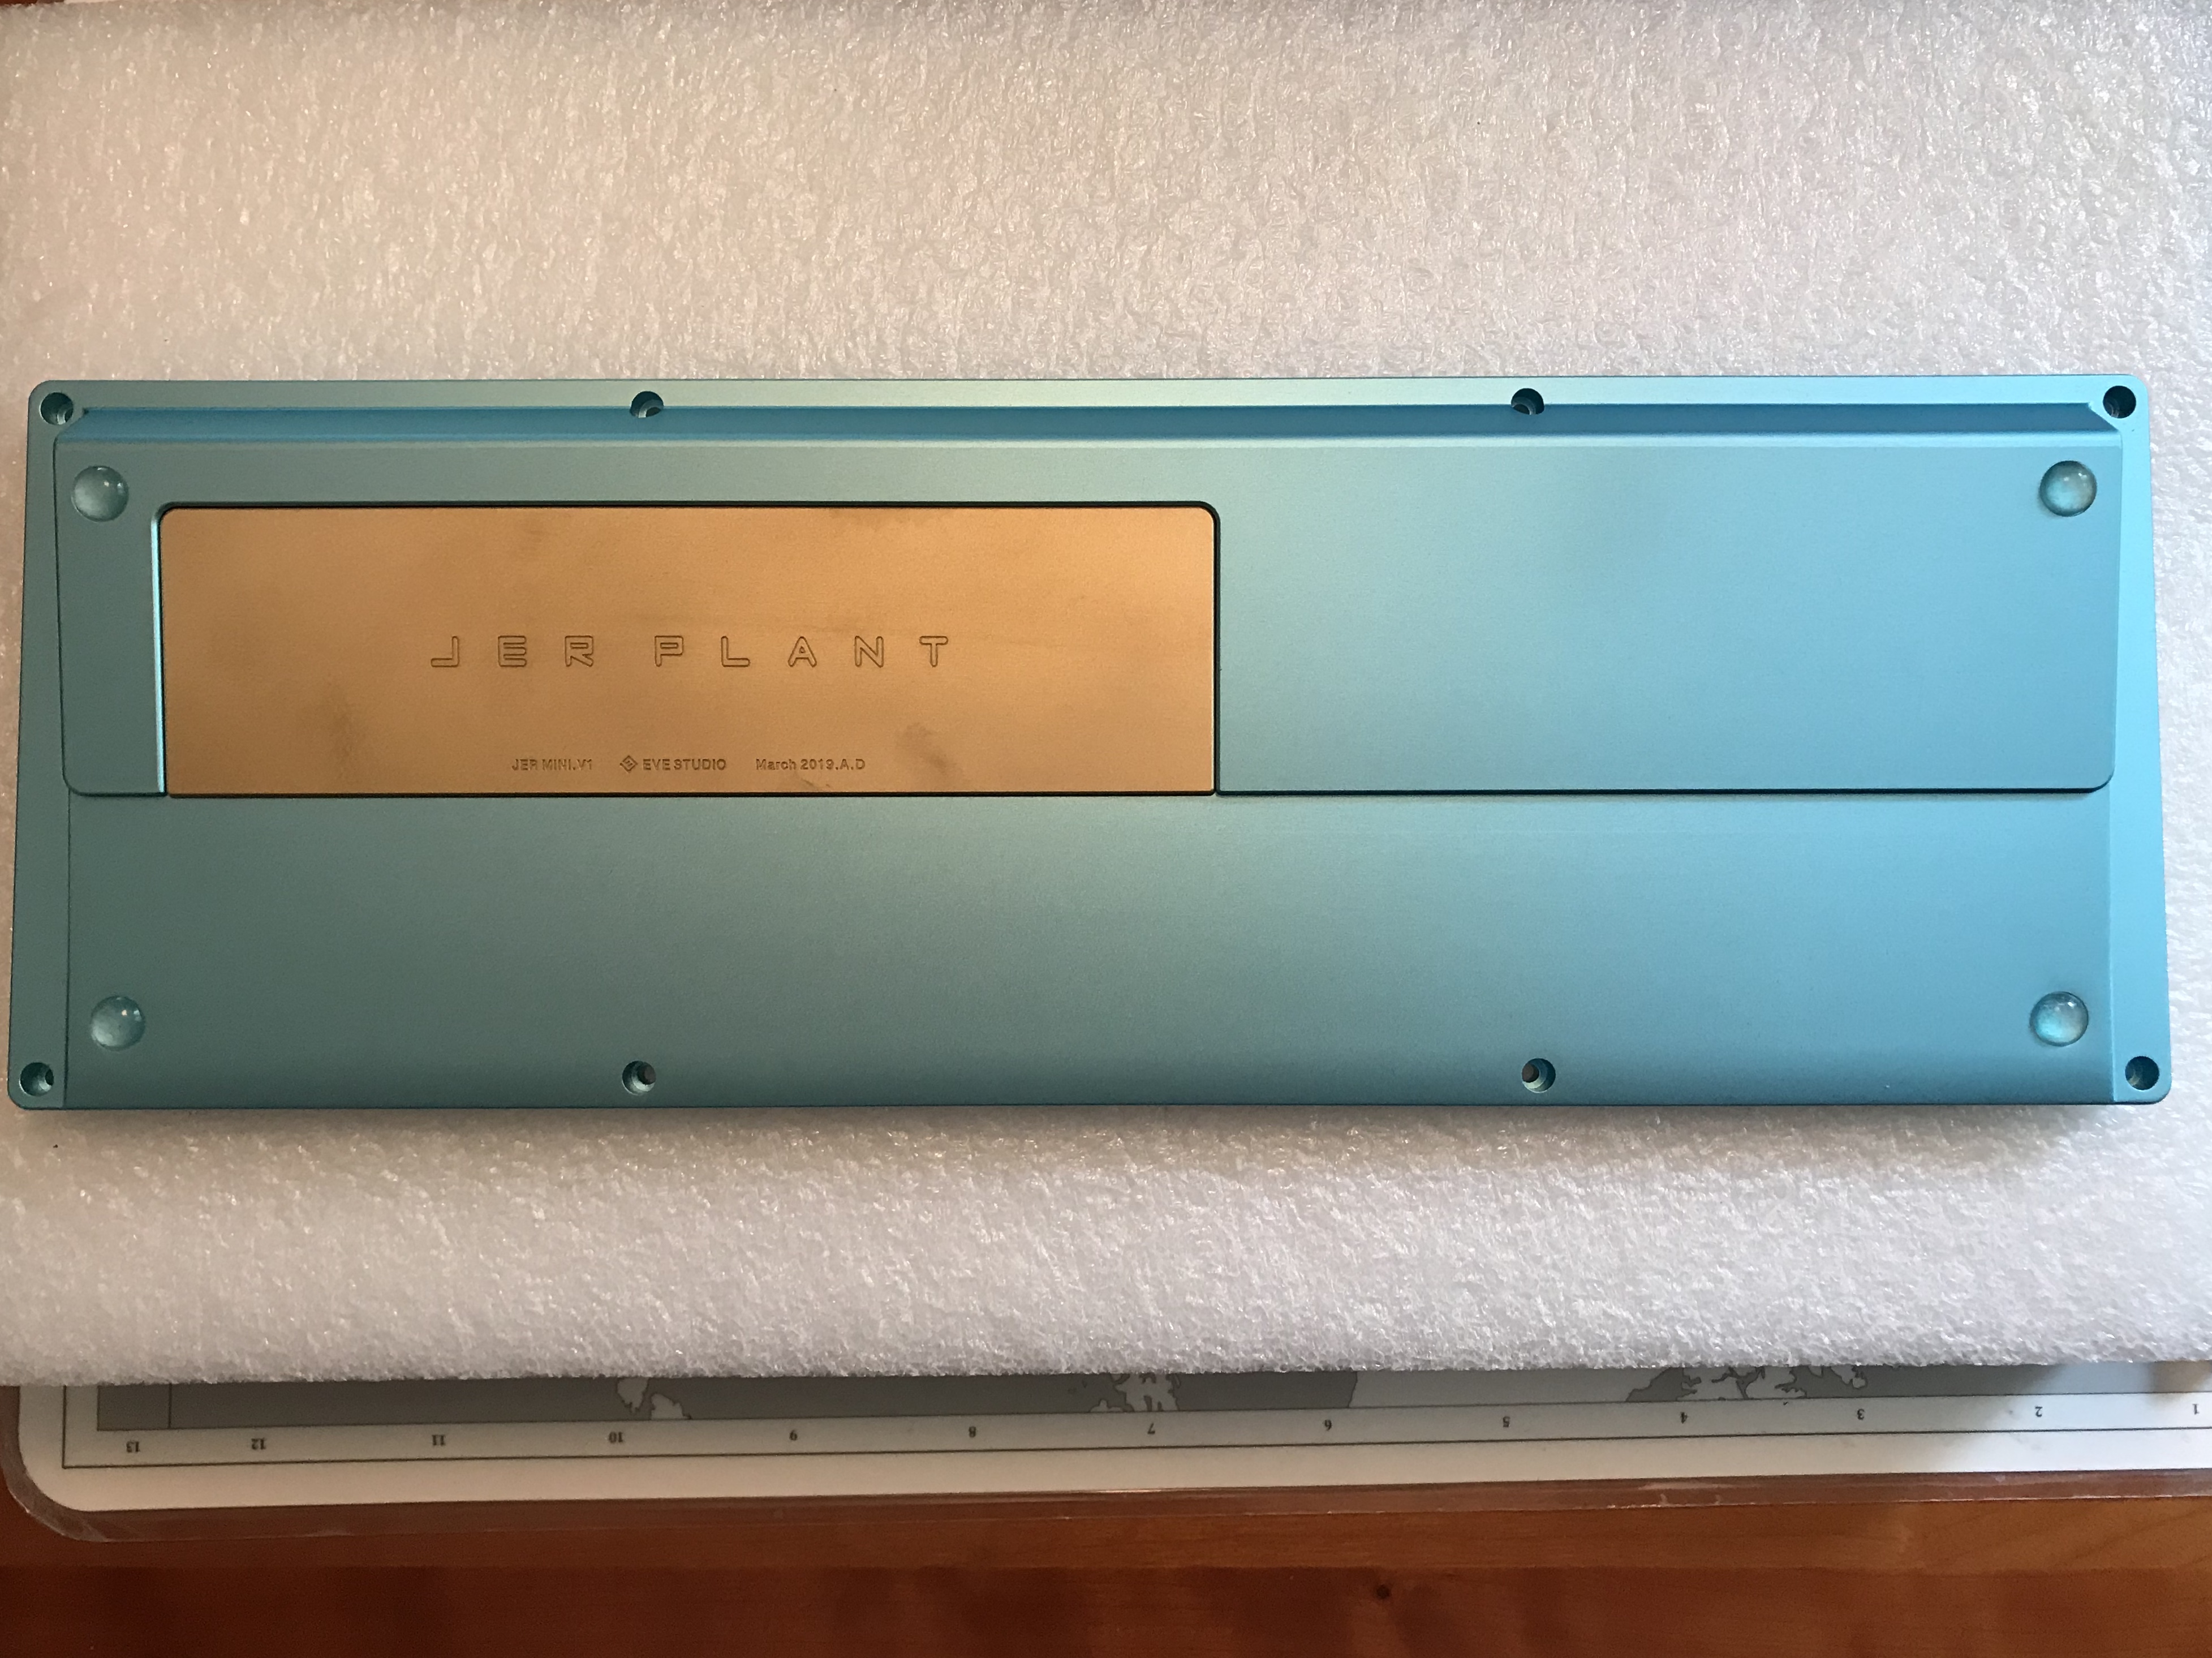
Smudged brass. It arrived like this. I still haven’t decided if I’m going to try to clean it, or just let it get smudged and develop a “lovely patina”. While we’re here, notice the unusual design of the base, consisting of a front base and back base with different slopes. A little odd, but in an appealingly quirky way. Also endearing: “March 2019.A.D”. Assisting future keyboard historians trying to place this board’s millennium of origin, perhaps?
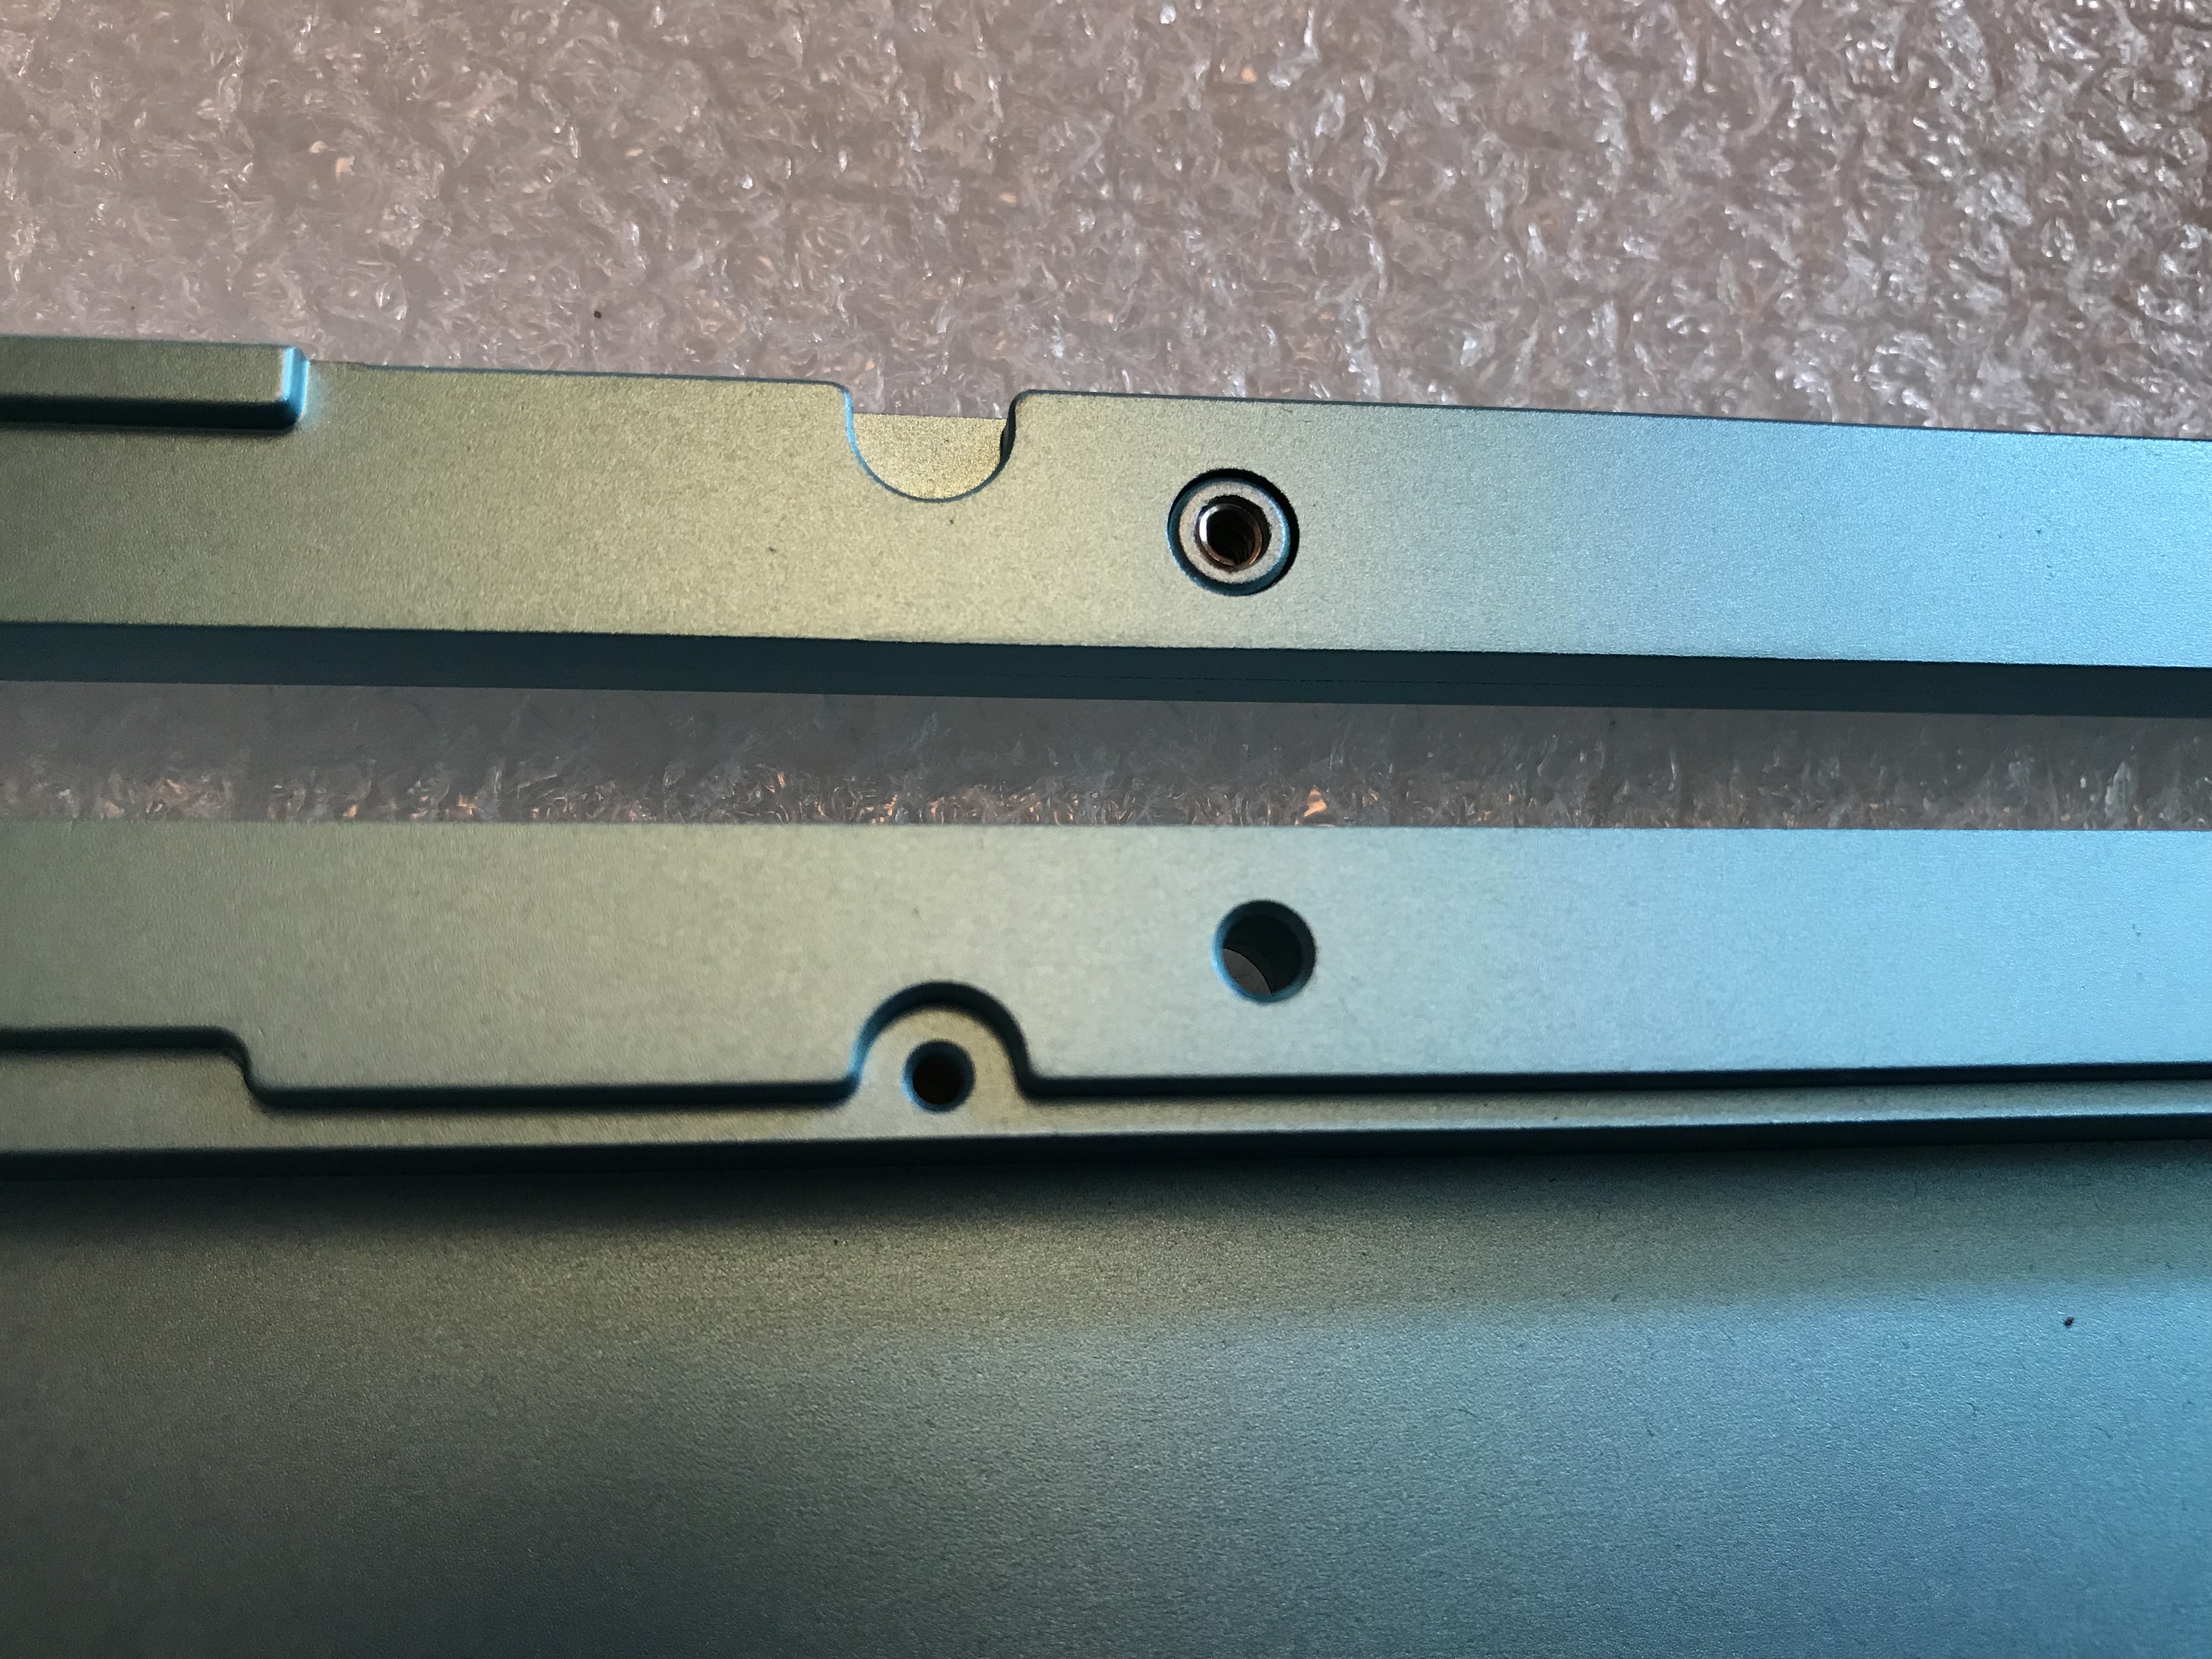
The user-facing edge of the top of the JER mini also has a quirky look to it. The front edge has a bar which is screw-mounted to the top of the case; this bar covers the NCS indicator LEDs, and provides a slightly rounded bezel on the front of the keyboard. That’s all good and well, but less good and well is what I found when I attempted to attach the bar. I wasn’t getting good fit initially, and upon unscrewing, what do we have here? A helicoil.
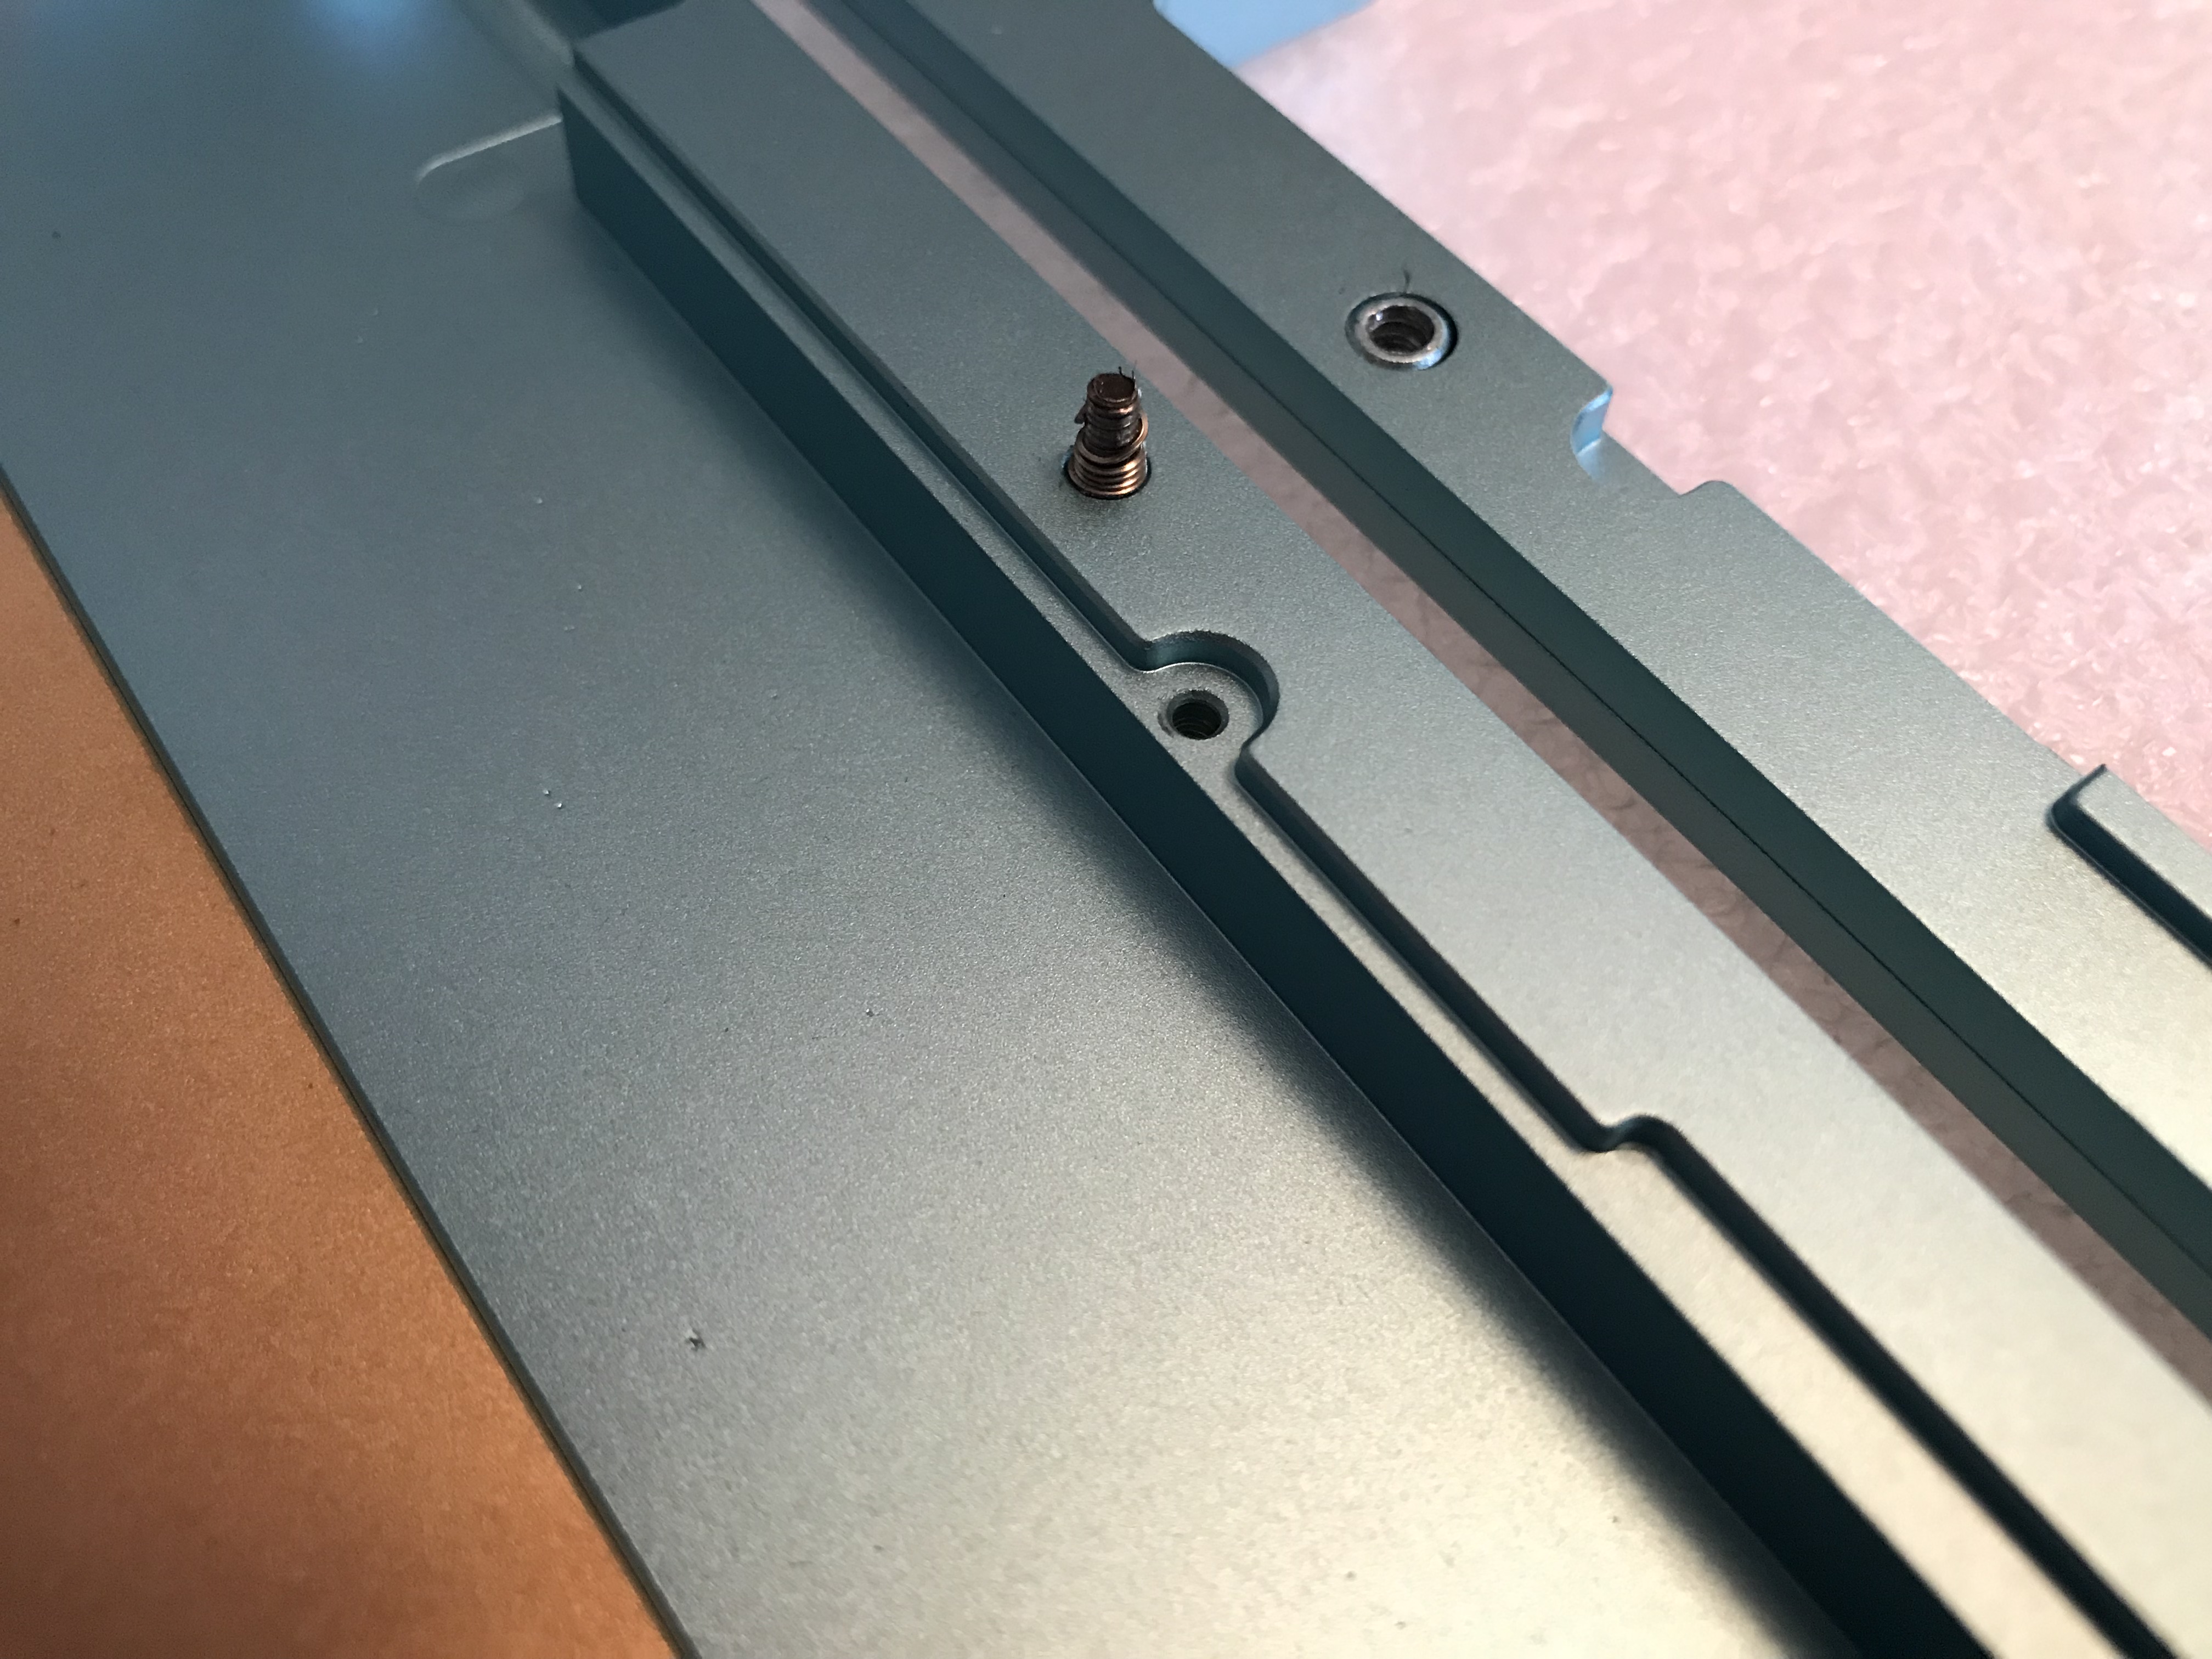
The other screw hole had one as well, but at least that one didn’t come out with the screw. Still, disappointing that this was the choice that was made, instead of properly tapping screw holes. This is the first time I’ve seen this in a kit.
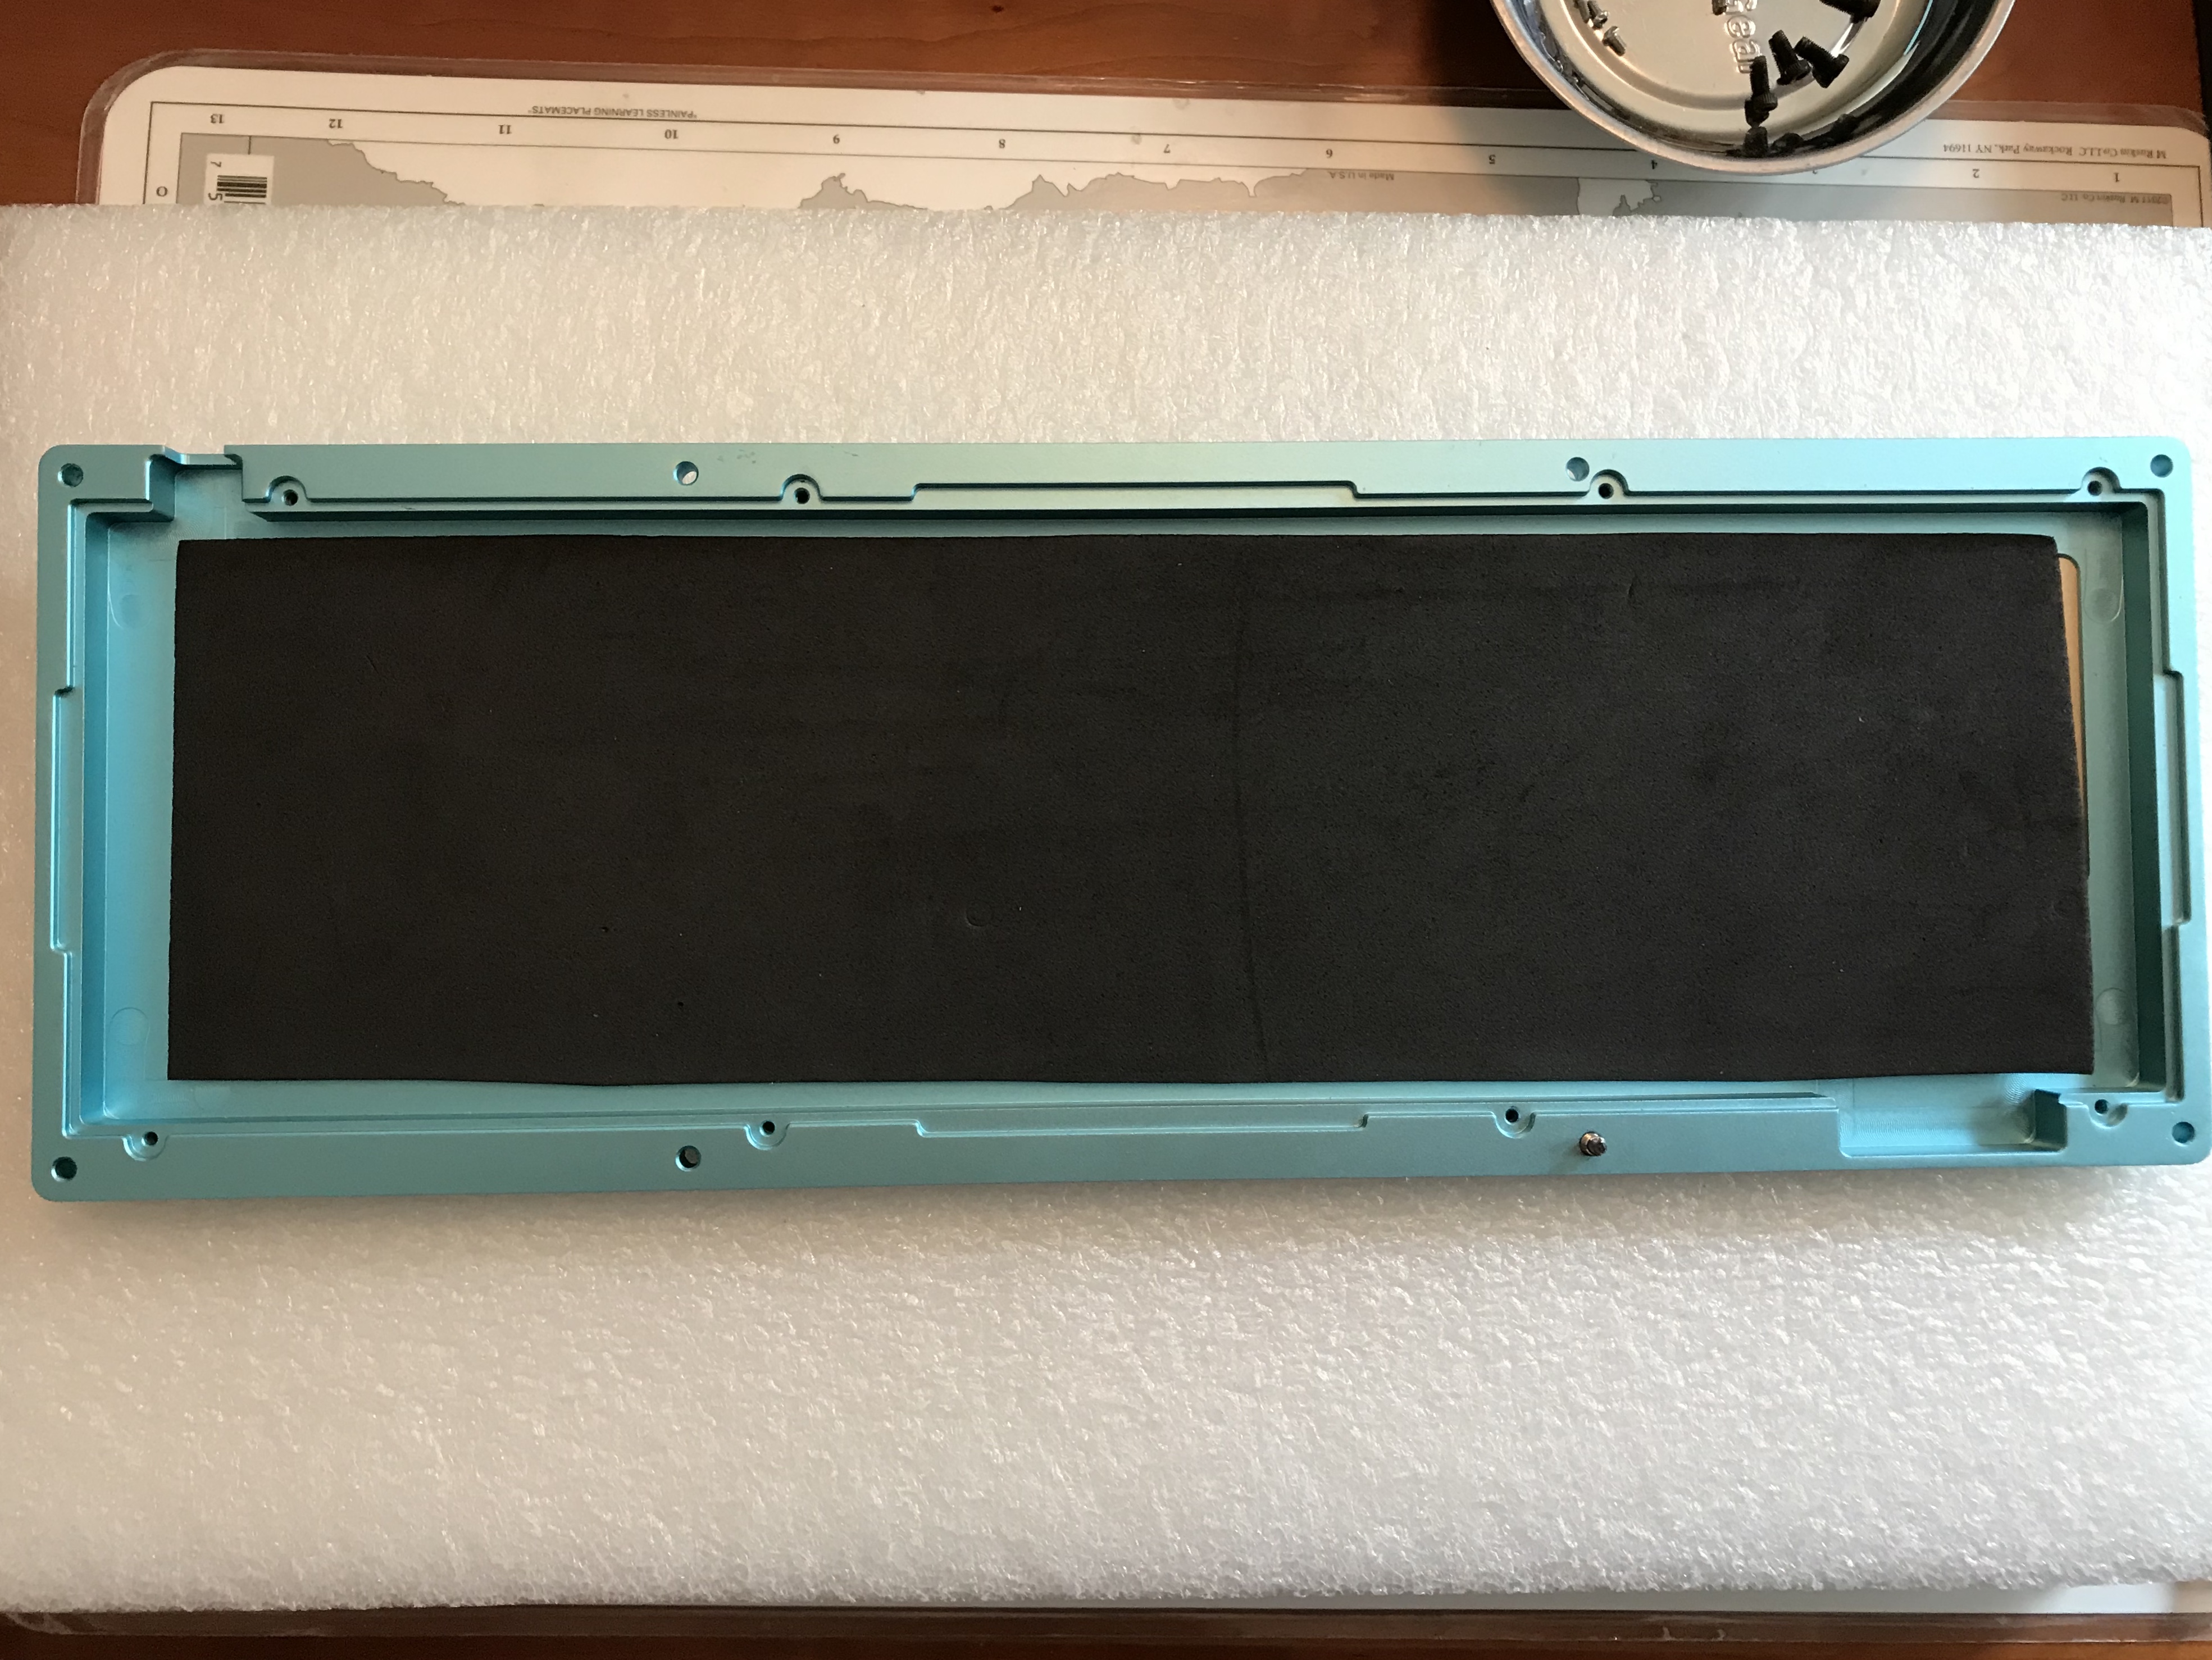
I was originally planning to use Sorbothane for PCB/case interaction, but I didn’t have Sorbothane thin enough. I switched to 2mm craft foam, which was about the right thickness - at least given the next issue.
All screwed together, but not well; the screws meant to attach the plate to the case weren’t long enough, so initially, this ended up being a sandwich mount board, look Ma, no screws. Also note that the bar in front is a little out of alignment, due to the screw problems I mentioned earlier, but we’ll correct that later.
Did you figure out the problem with the plate? The cutouts for the plate are on the wrong side for the Enter key’s stabilizer wire, so on the upstroke, the left wire makes contact with the plate. A little bit of additional lube on the underside of the plate above the wire mitigates this to an extent. Still, starting to form an impression of the QC for the design and the kit…
The next issue is all on me, though. Finally, let’s put those beautiful TA90 numpad caps on that southpaw function column, the really cool lettered ones. Nice! Nice? Wait a minute.
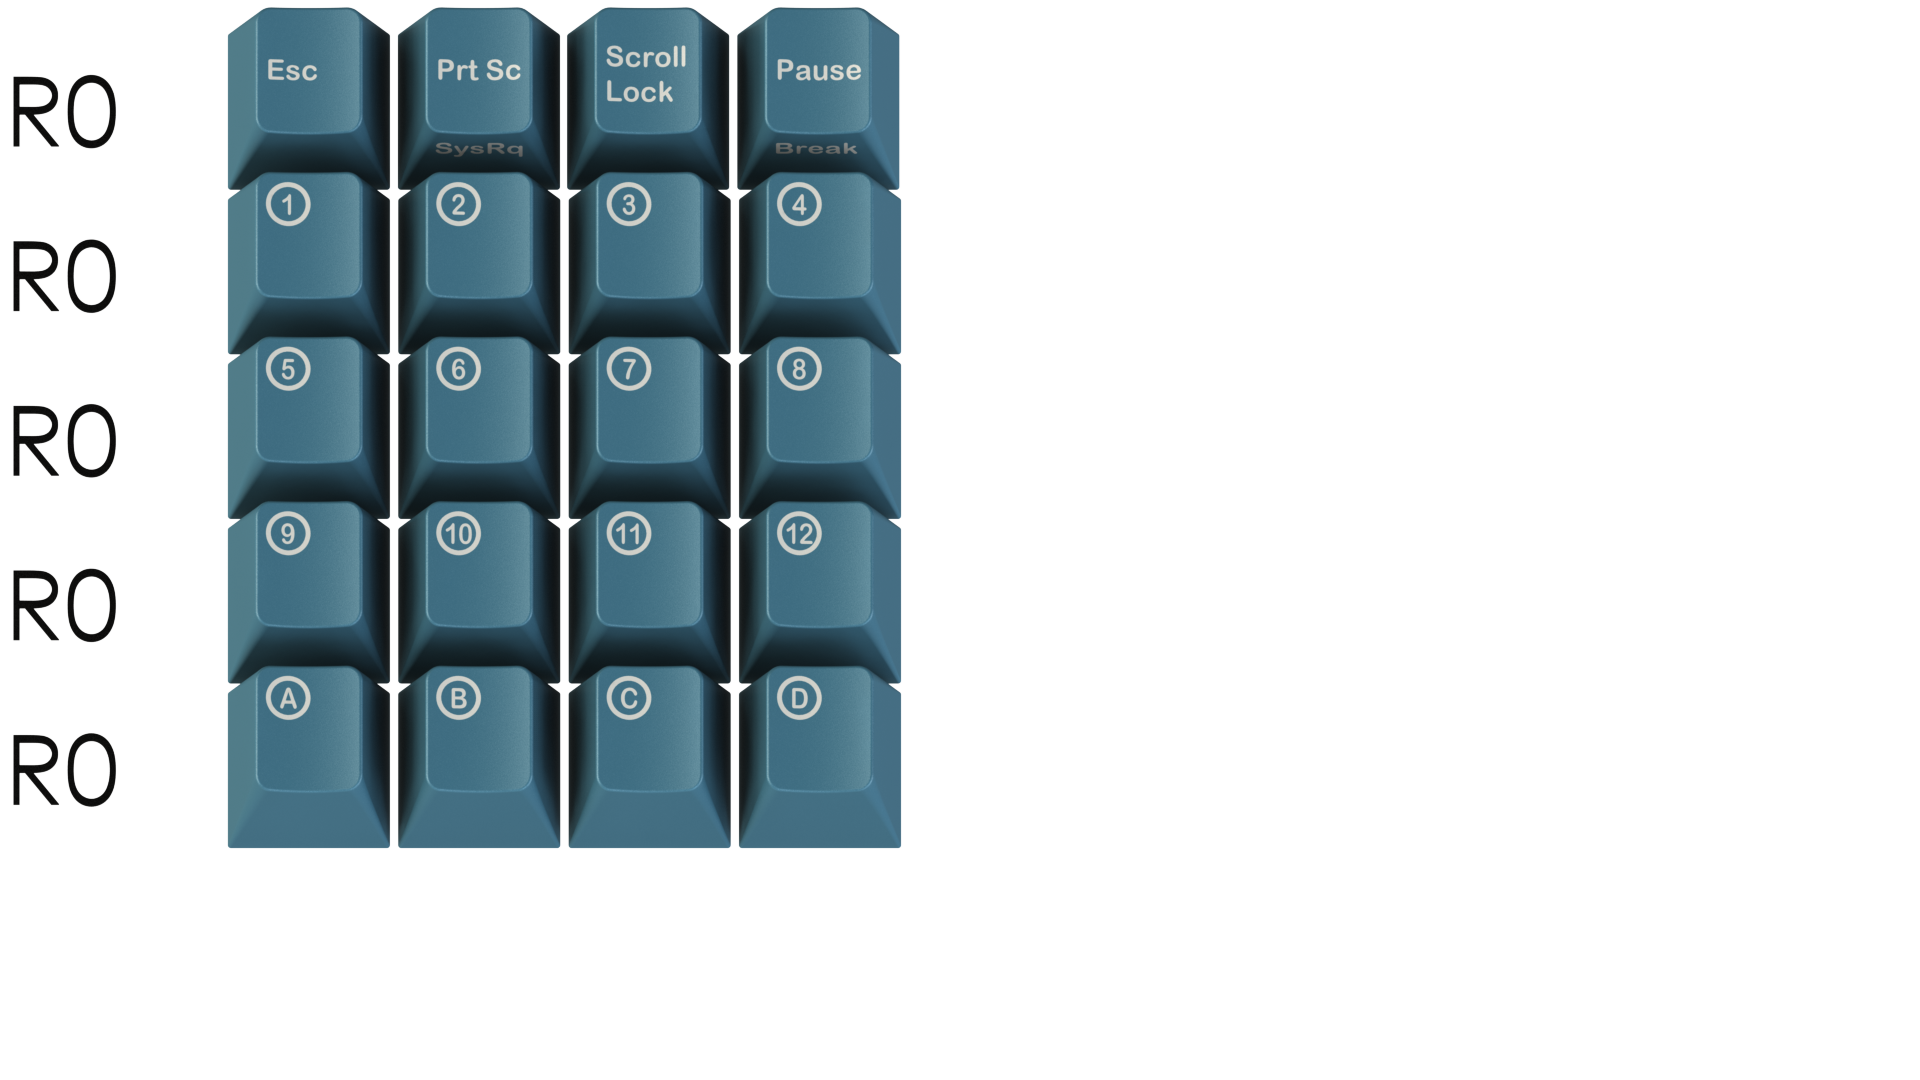
When I mentioned the TA90 numpad kit, I left out an important piece of information. This isn’t just a numpad kit - it’s an R0 numpad kit. Somehow, I failed to understand the significance of that until I put the caps on the board. Welcome to the Great Wall of Keycaps. Look at the height of those monsters relative to their partners across the aisle.
So, we switch back to regular R1 function keys. Sigh.
What about the other problems with the board?
- I switched to M2x6 screws to attach the plate to the case, where I discovered that these holes weren’t tapped much better than the helicoiled ones, but I was able to get enough screws in to hold things together. With the plate mounted as intended, I had to take the craft foam out of the case as there wasn’t enough room for that any longer, but fortunately, the sound wasn’t negatively impacted.
- I installed a new helicoil in the screw hole for the front bar - not great, but enough to hold things together. I suspect I will need to return to this hole and redo the helicoil or retap the hole.
After all of that, how is the board? Despite all of the QC failures, I like it. The external aesthetics match expectations, and the sound is crisp and clacky without being irritatingly clacky. I suspect the tight tolerance between the PCB and the case has something to do with this clean sound.
Lessons learned
- This was my first time using bootmapper. A quirky interface, to be sure, but it was able to define macros interactively, something I’ve found missing from other interactive programming tools. All things being equal, however, I’d still prefer QMK if that was an option here. What can I say, I like to code.
- This was my second time using 205g0 on switches, and I think my application this time around was right on the edge of being too much - I wouldn’t say the switches are sluggish, but they do feel just a tiny bit slower. I’m a bit surprised by this, though, as I only lubed the stems, not the housings, in an attempt to keep exactly this problem from happening, under the theory that switch use would be enough to spread the lube where it needed to go. Clearly more experience is needed.
- When it comes to fit, finish, and QC, not all kits are created equal. I’m afraid I’ve been spoiled by the level of QC in several other kits I’ve built, and I understand the risks involved in group buys. On the other hand, at the price points of typical custom kits, unmet expectations sting. Welcome to the hobby! In fairness, I note that the GB runner is attempting to address issues that have come up with this GB.
- I’d really like to understand the effect of internal case volume on sound. I need more boards with tight PCB-to-case tolerances.
- R0. Gotta pay attention to row profiles! With that said, I see why R0 would be appealing on larger boards and/or boards with wide bezels.
How about GMK TA 90 R2 with an R2-4 numpad?
Specifications
case: JER mini (light blue)
case dampening: 2mm craft foam
PCB: JER mini (Bootmapper)
plate: gray aluminum
plate/PCB dampening: Sorbothane strut mod (50 Duro)
stabilizers: GMK screw-in (1x6.25u, 3x2u)
stabilizer mods: clipped, lubed with SuperLube, installed with fiber washers
switches: V2 Tealios
switch mods:
- springs tub-lubed with Krytox GPL 104
- stems hand-lubed with Krytox GPL 205g0
- no housing lube
keycaps: GMK Triumph Adler 90
HxWxD (without caps or feet): 1.13" x 13.38" x 4.56"
HxWxD (without caps): 1.19" x 13.38" x 4.56"
HxWxD: 1.38" x 13.38" x 4.56"
assembled weight: 3.64 lb
8 Likes
Build #27: Koyu Alchemist
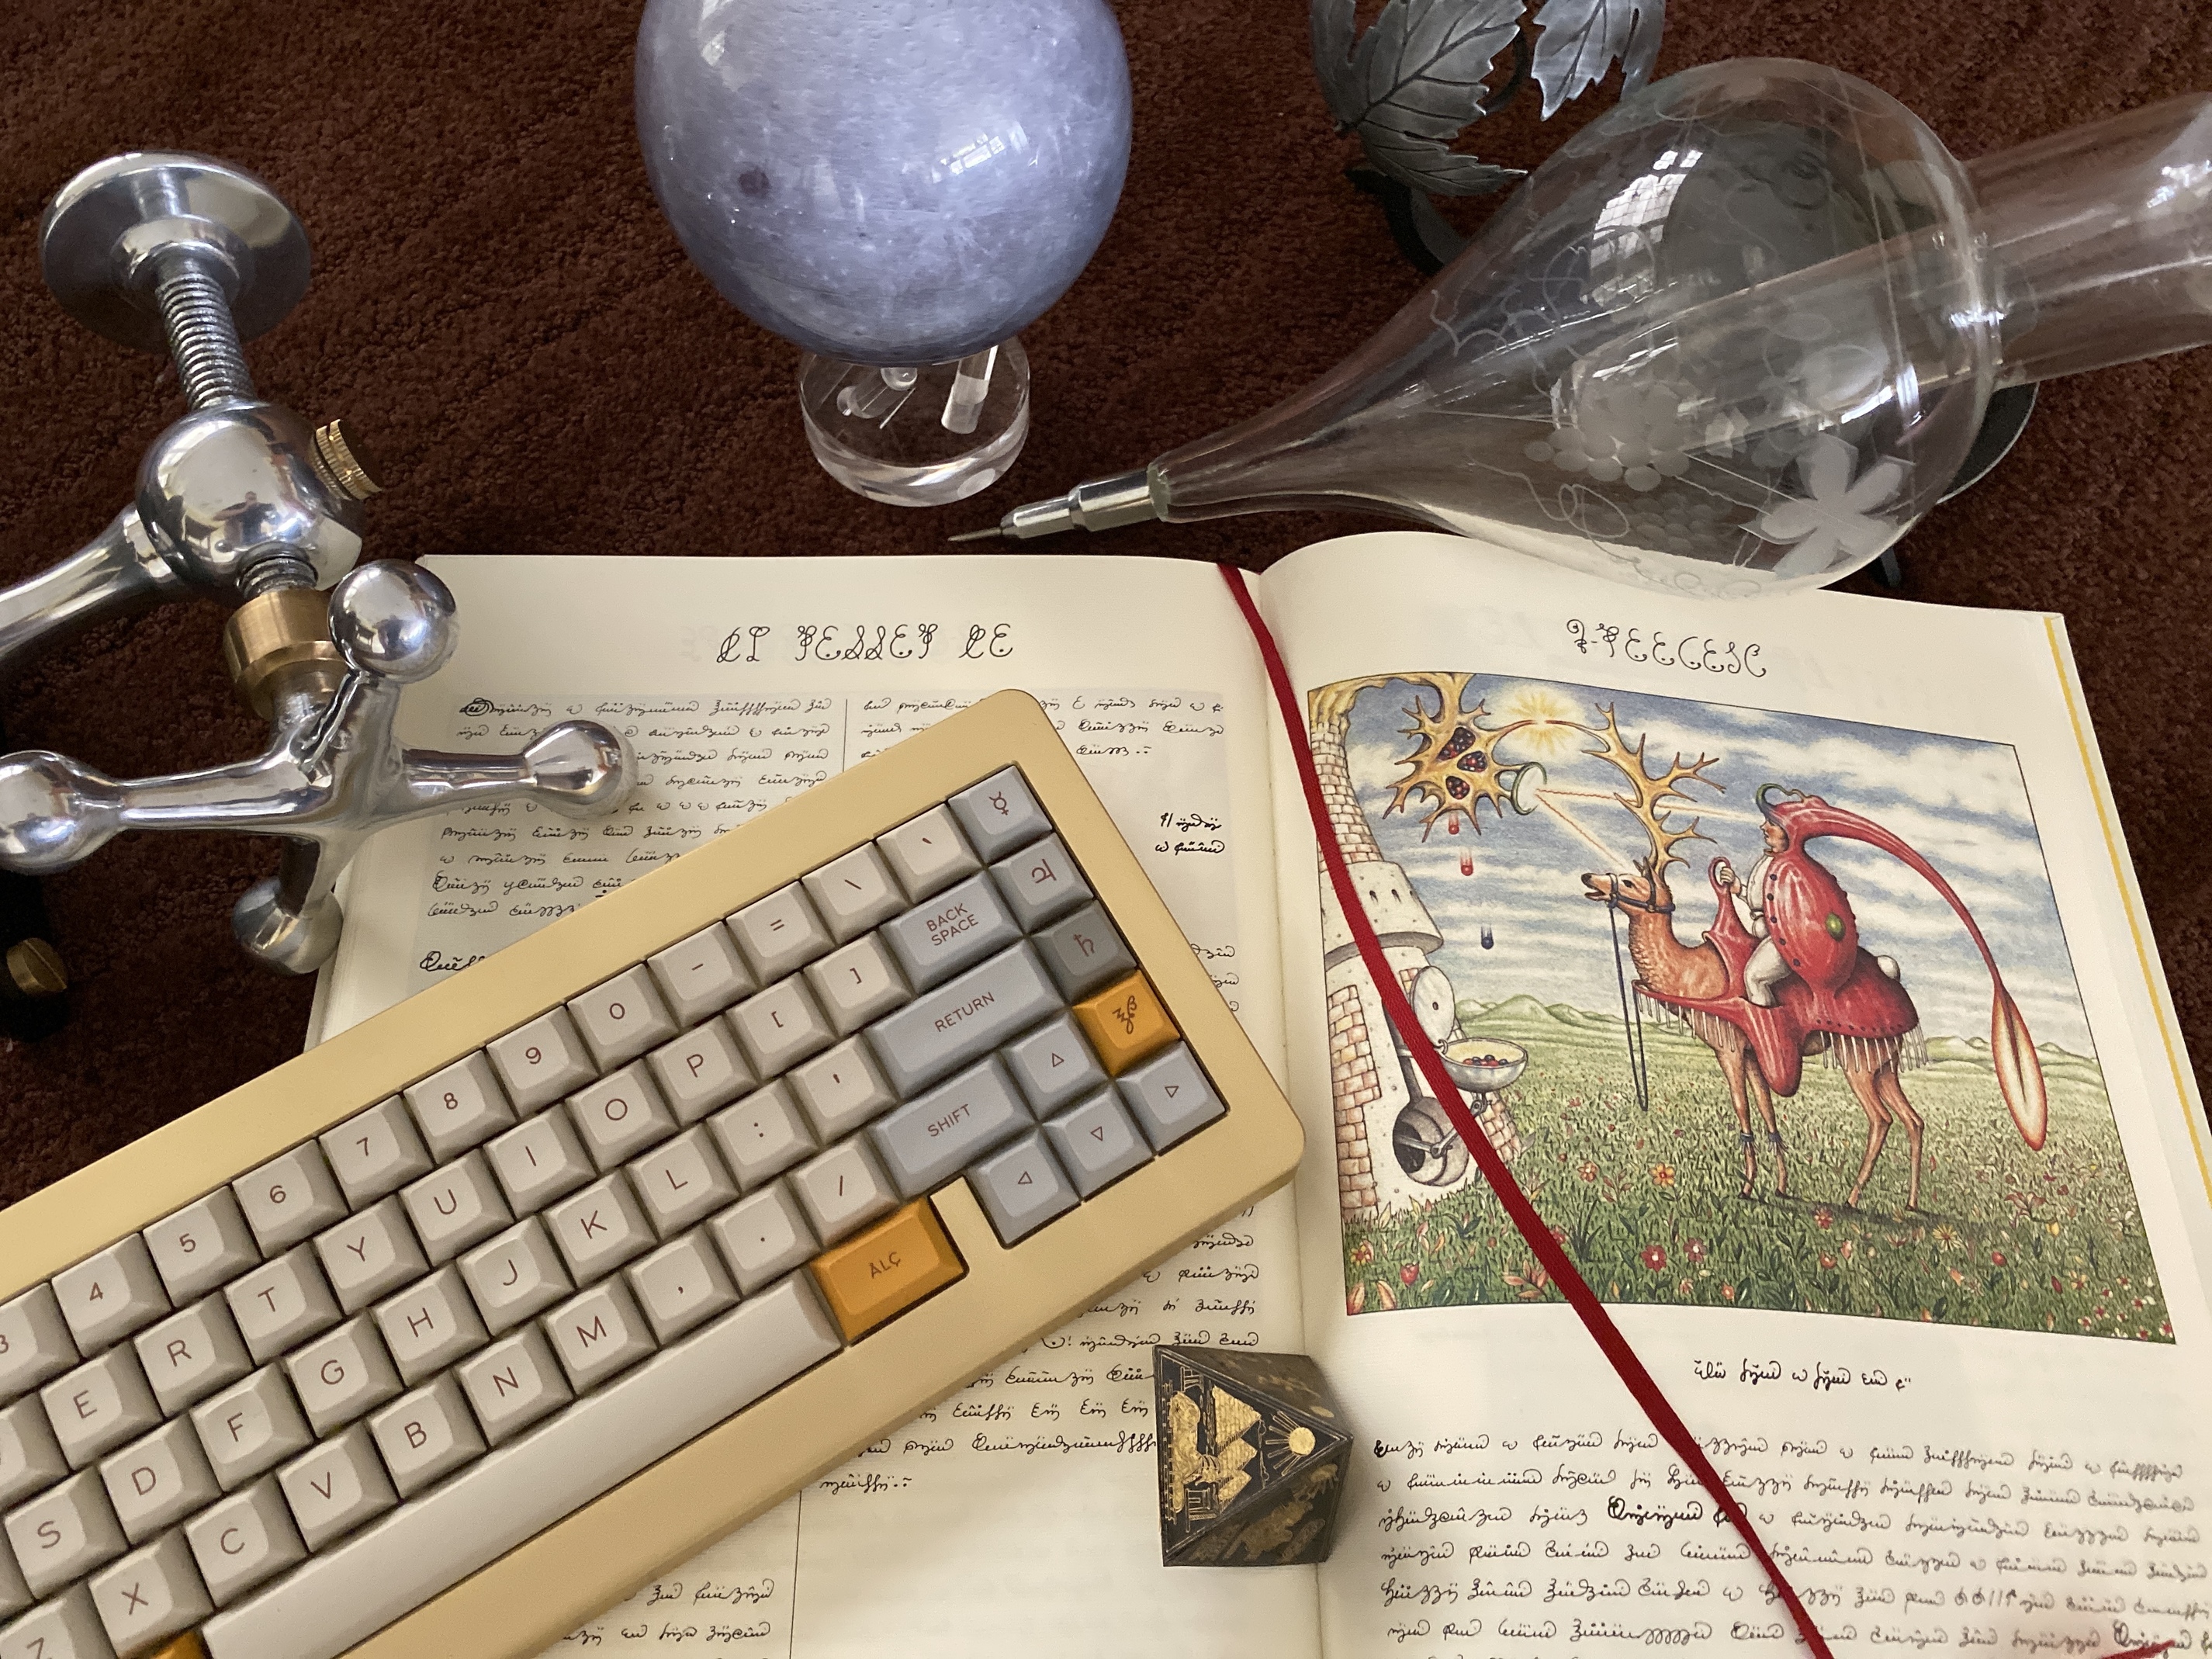
In its original sense, alchemy’s concern was the transmutation of matter - the attempt, long discredited, to turn base metals into precious ones. In a more modern sense, alchemy refers to any apparently magical process of transformation. In a mechanical keyboard sense, alchemy most likely refers to DSA Alchemy by @ChrisSwires, a keycap set with muted metal-inspired hues and alchemical symbols for novelties.
When the colorways for the Rama Koyu were revealed, it occurred to me that I might be able to practice some build alchemy of my own…
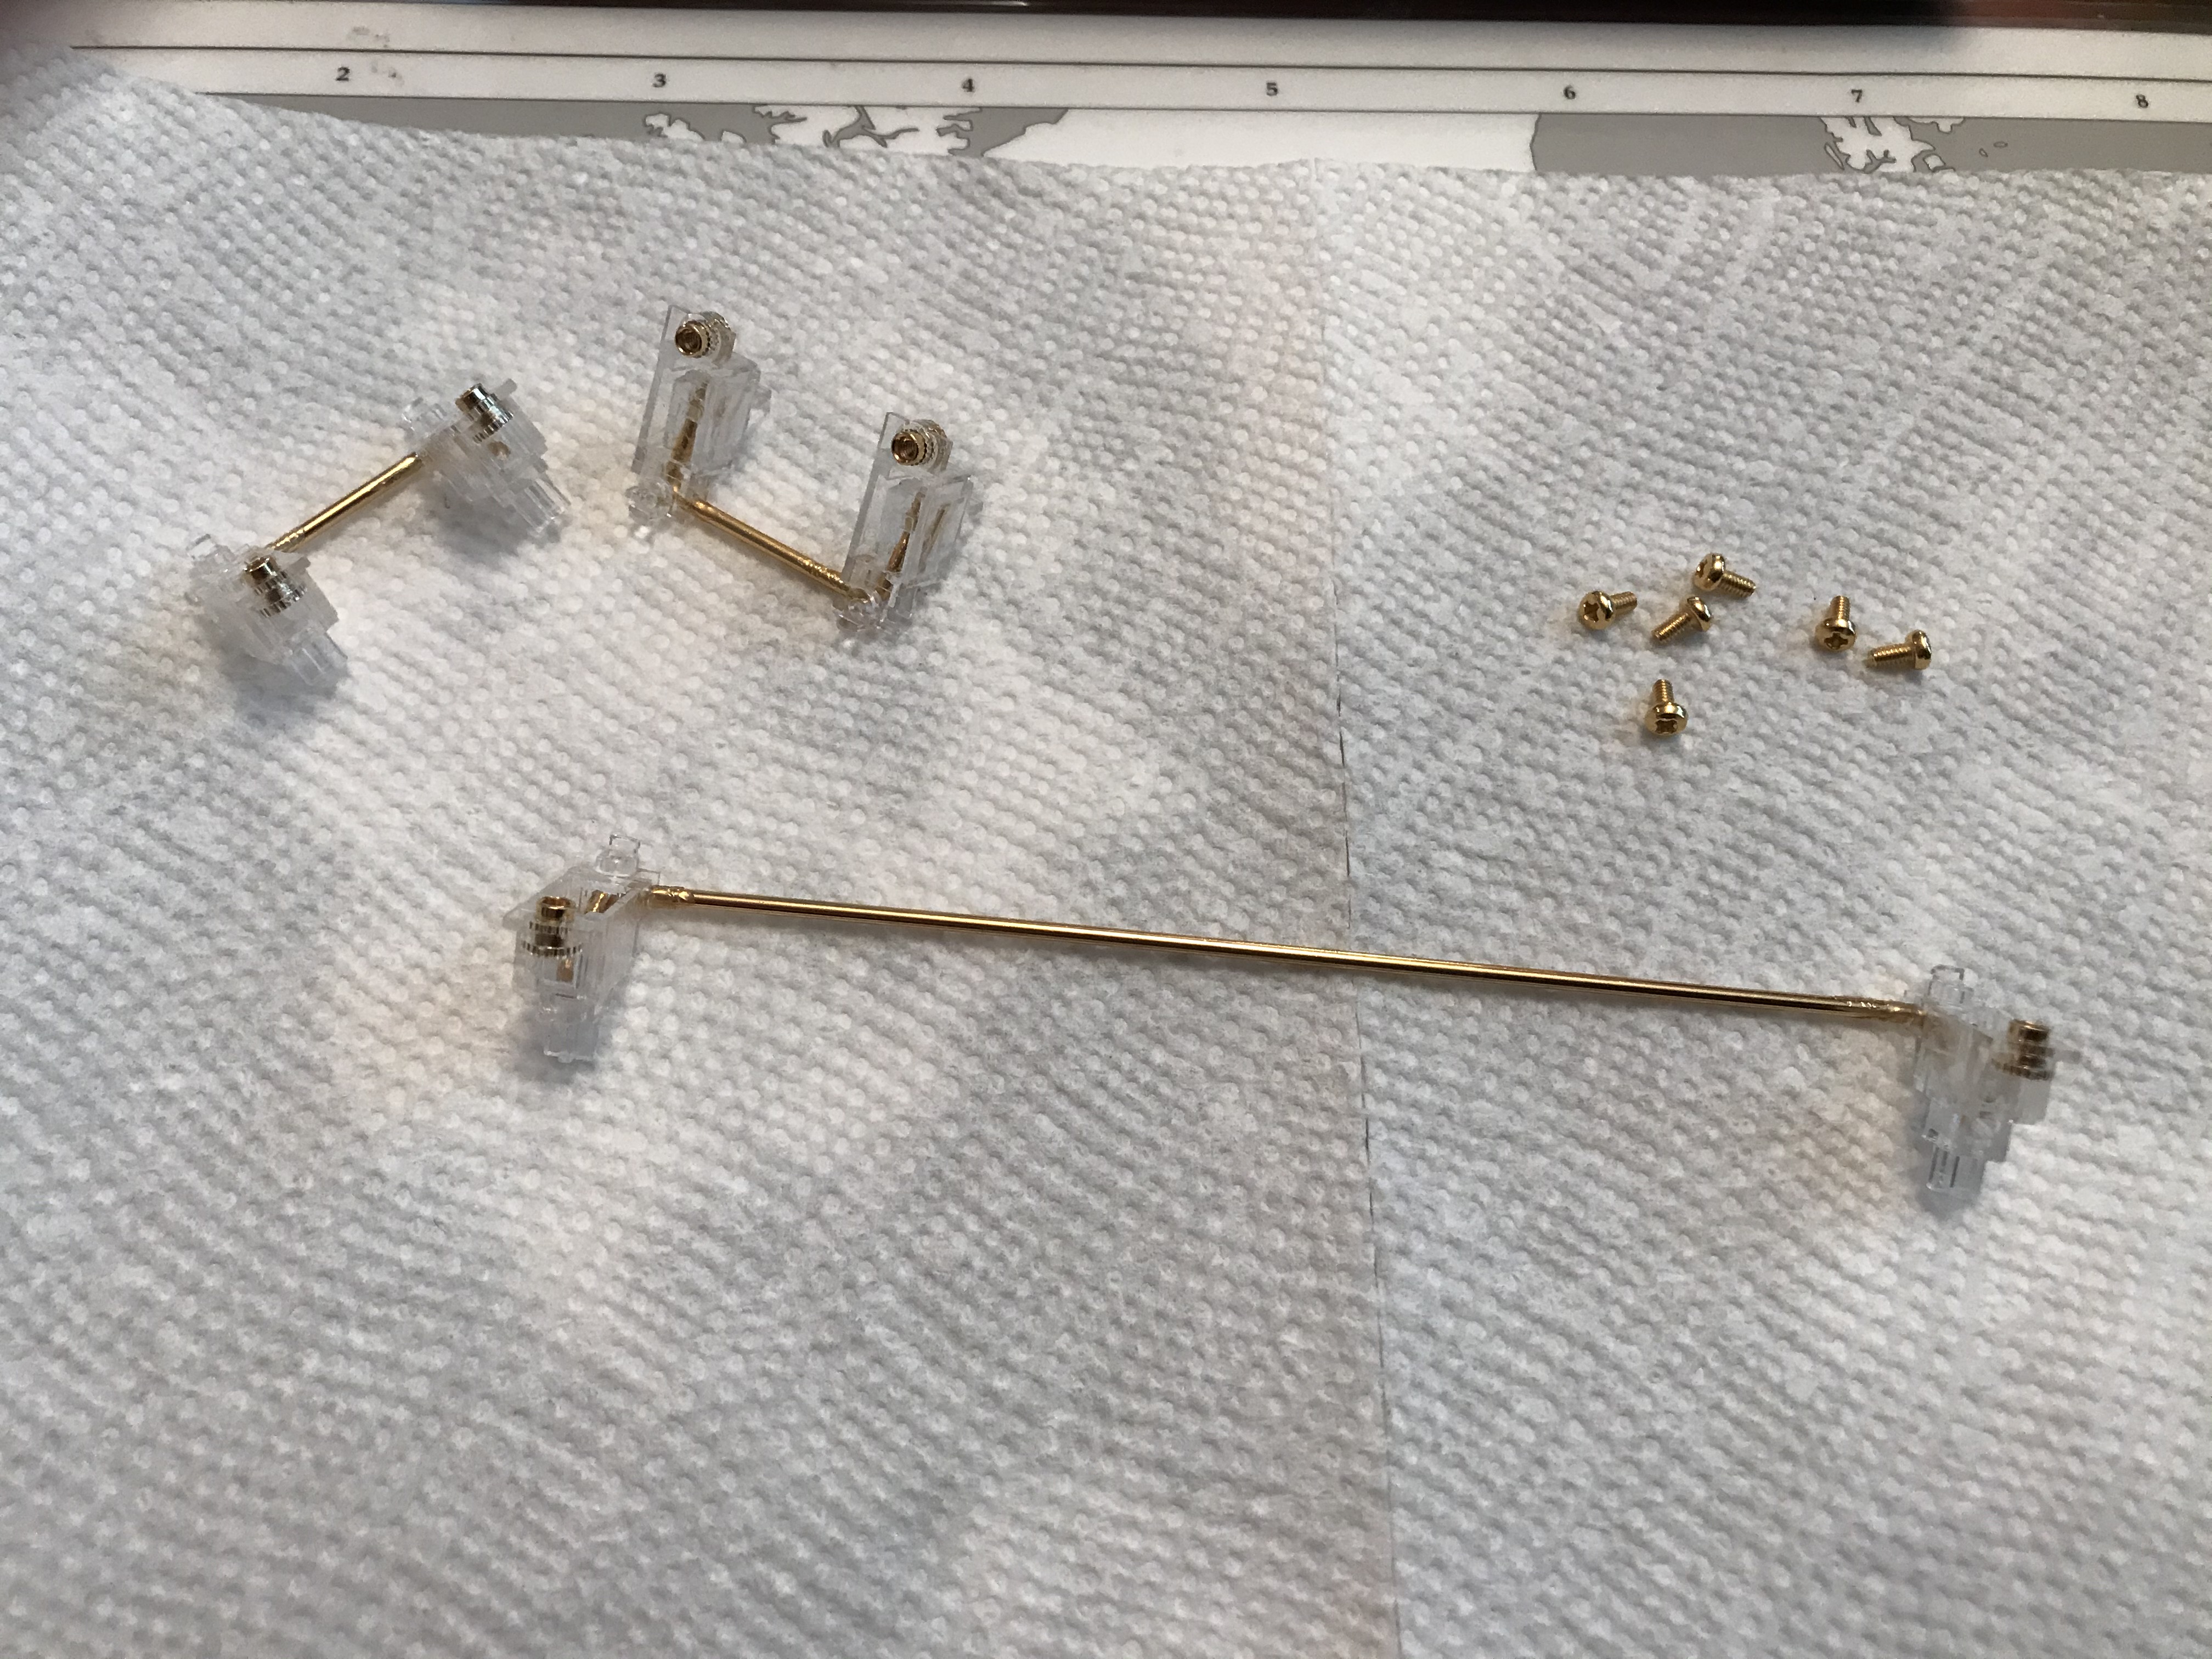
Let’s start, as we do, with stabilizers. The Koyu PCB has in-switch RGB, and in-spacebar-stabilizer RGB as well. Even though I’ve more or less evolved to the point that I make no use of RGB in my builds or in QMK, the idea of blocking them off triggers my OCD, so I went with translucent Zeal stabs. Gotta keep those lighting options open. Here, we’ve disassembled the stabs just prior to lubing.
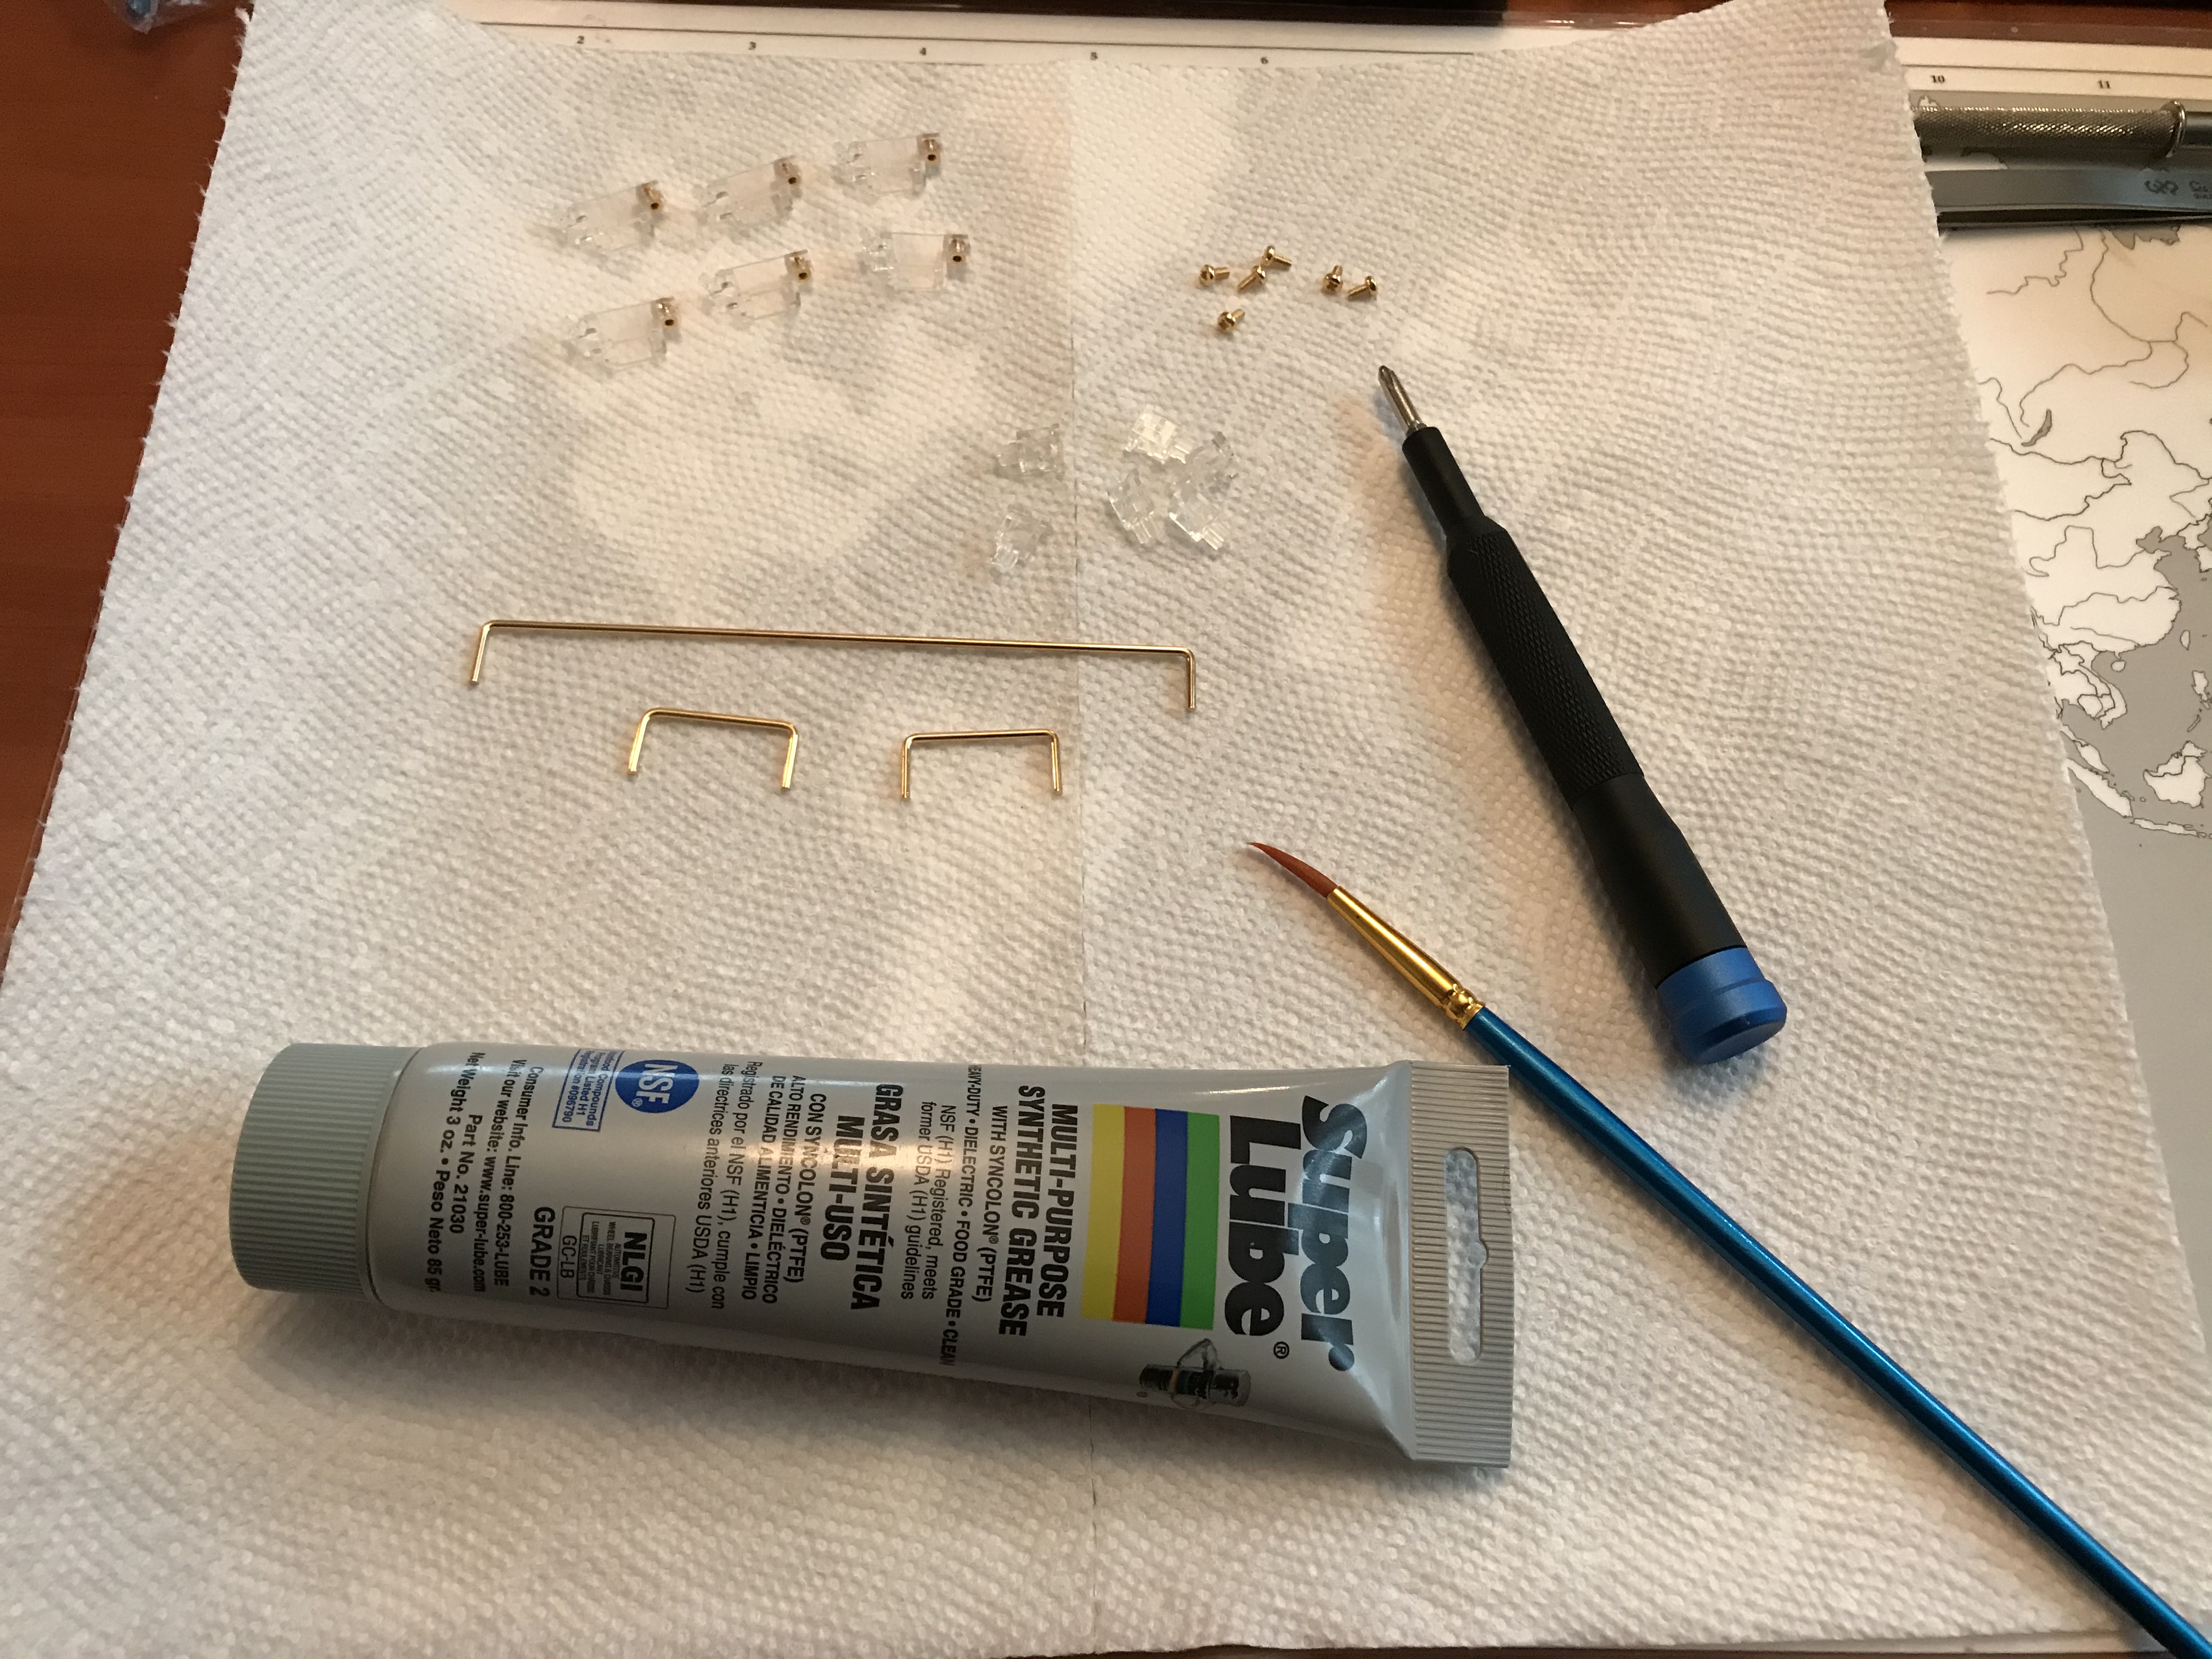
And here we are after lubing and reassembly are complete. The Koyu uses 1x7u and 2x2u stabilizers.
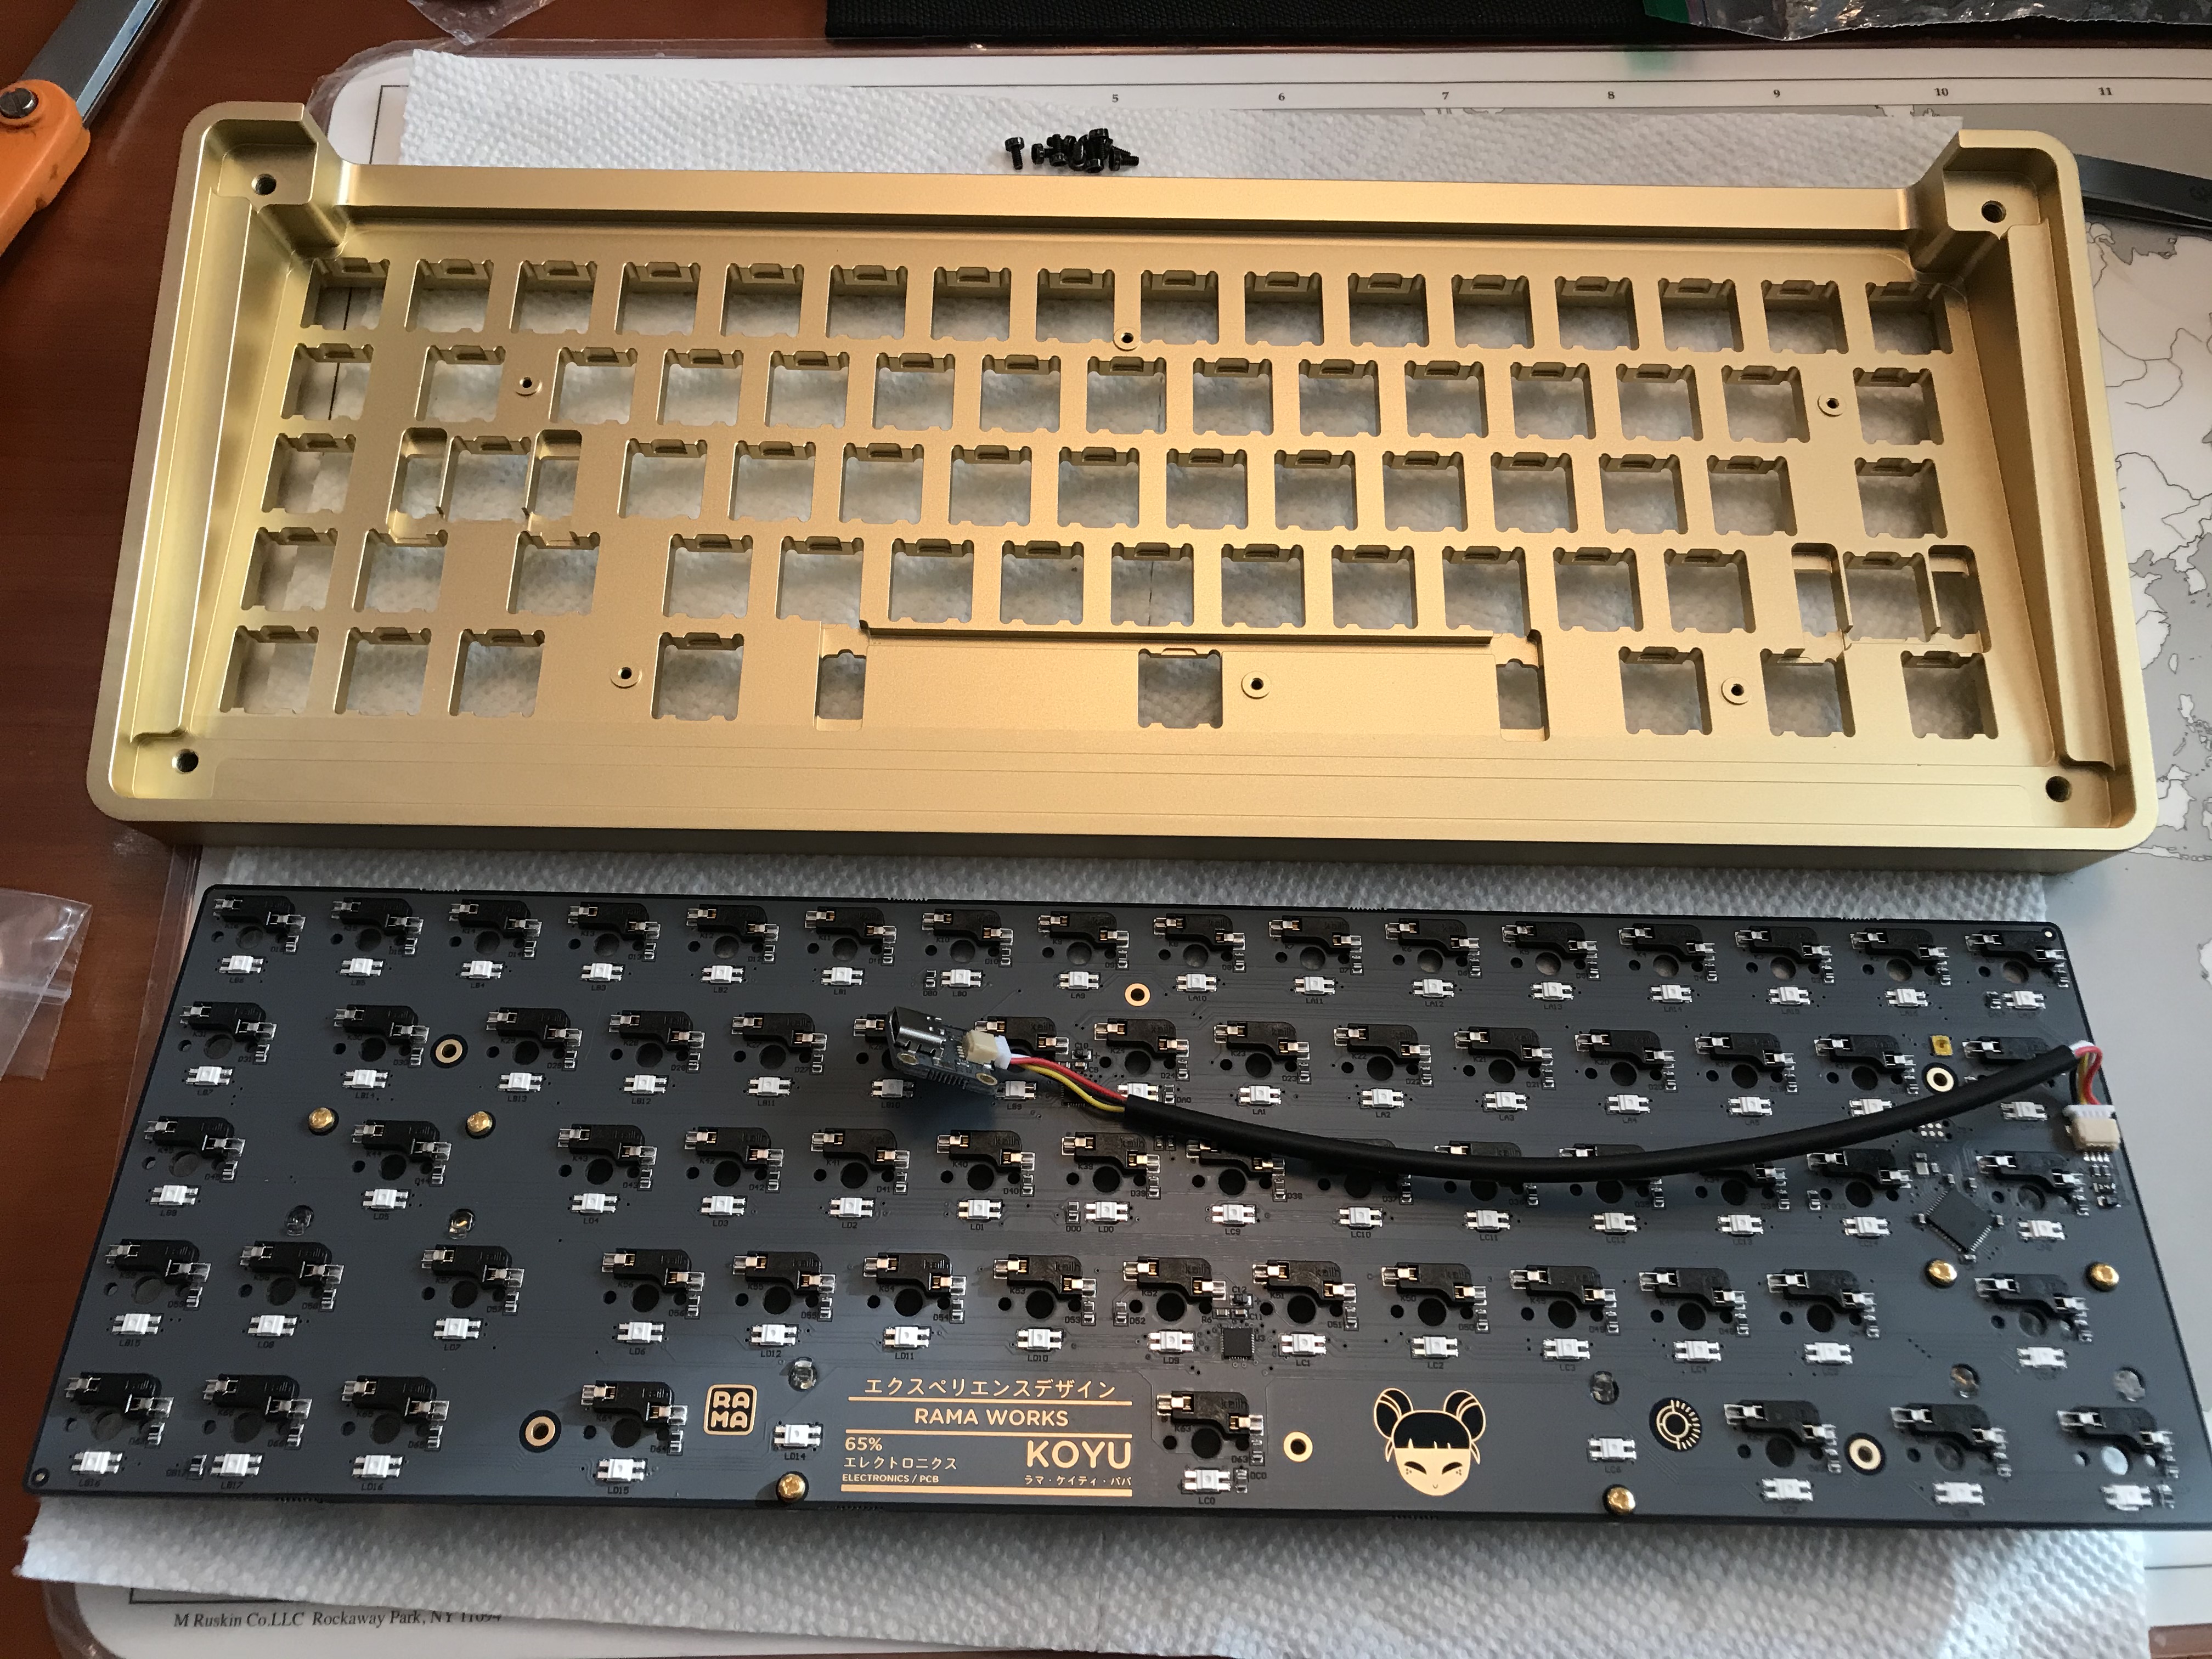
The Koyu uses a Wilba-designed PCB, and as you would expect, it’s a lovely PCB.
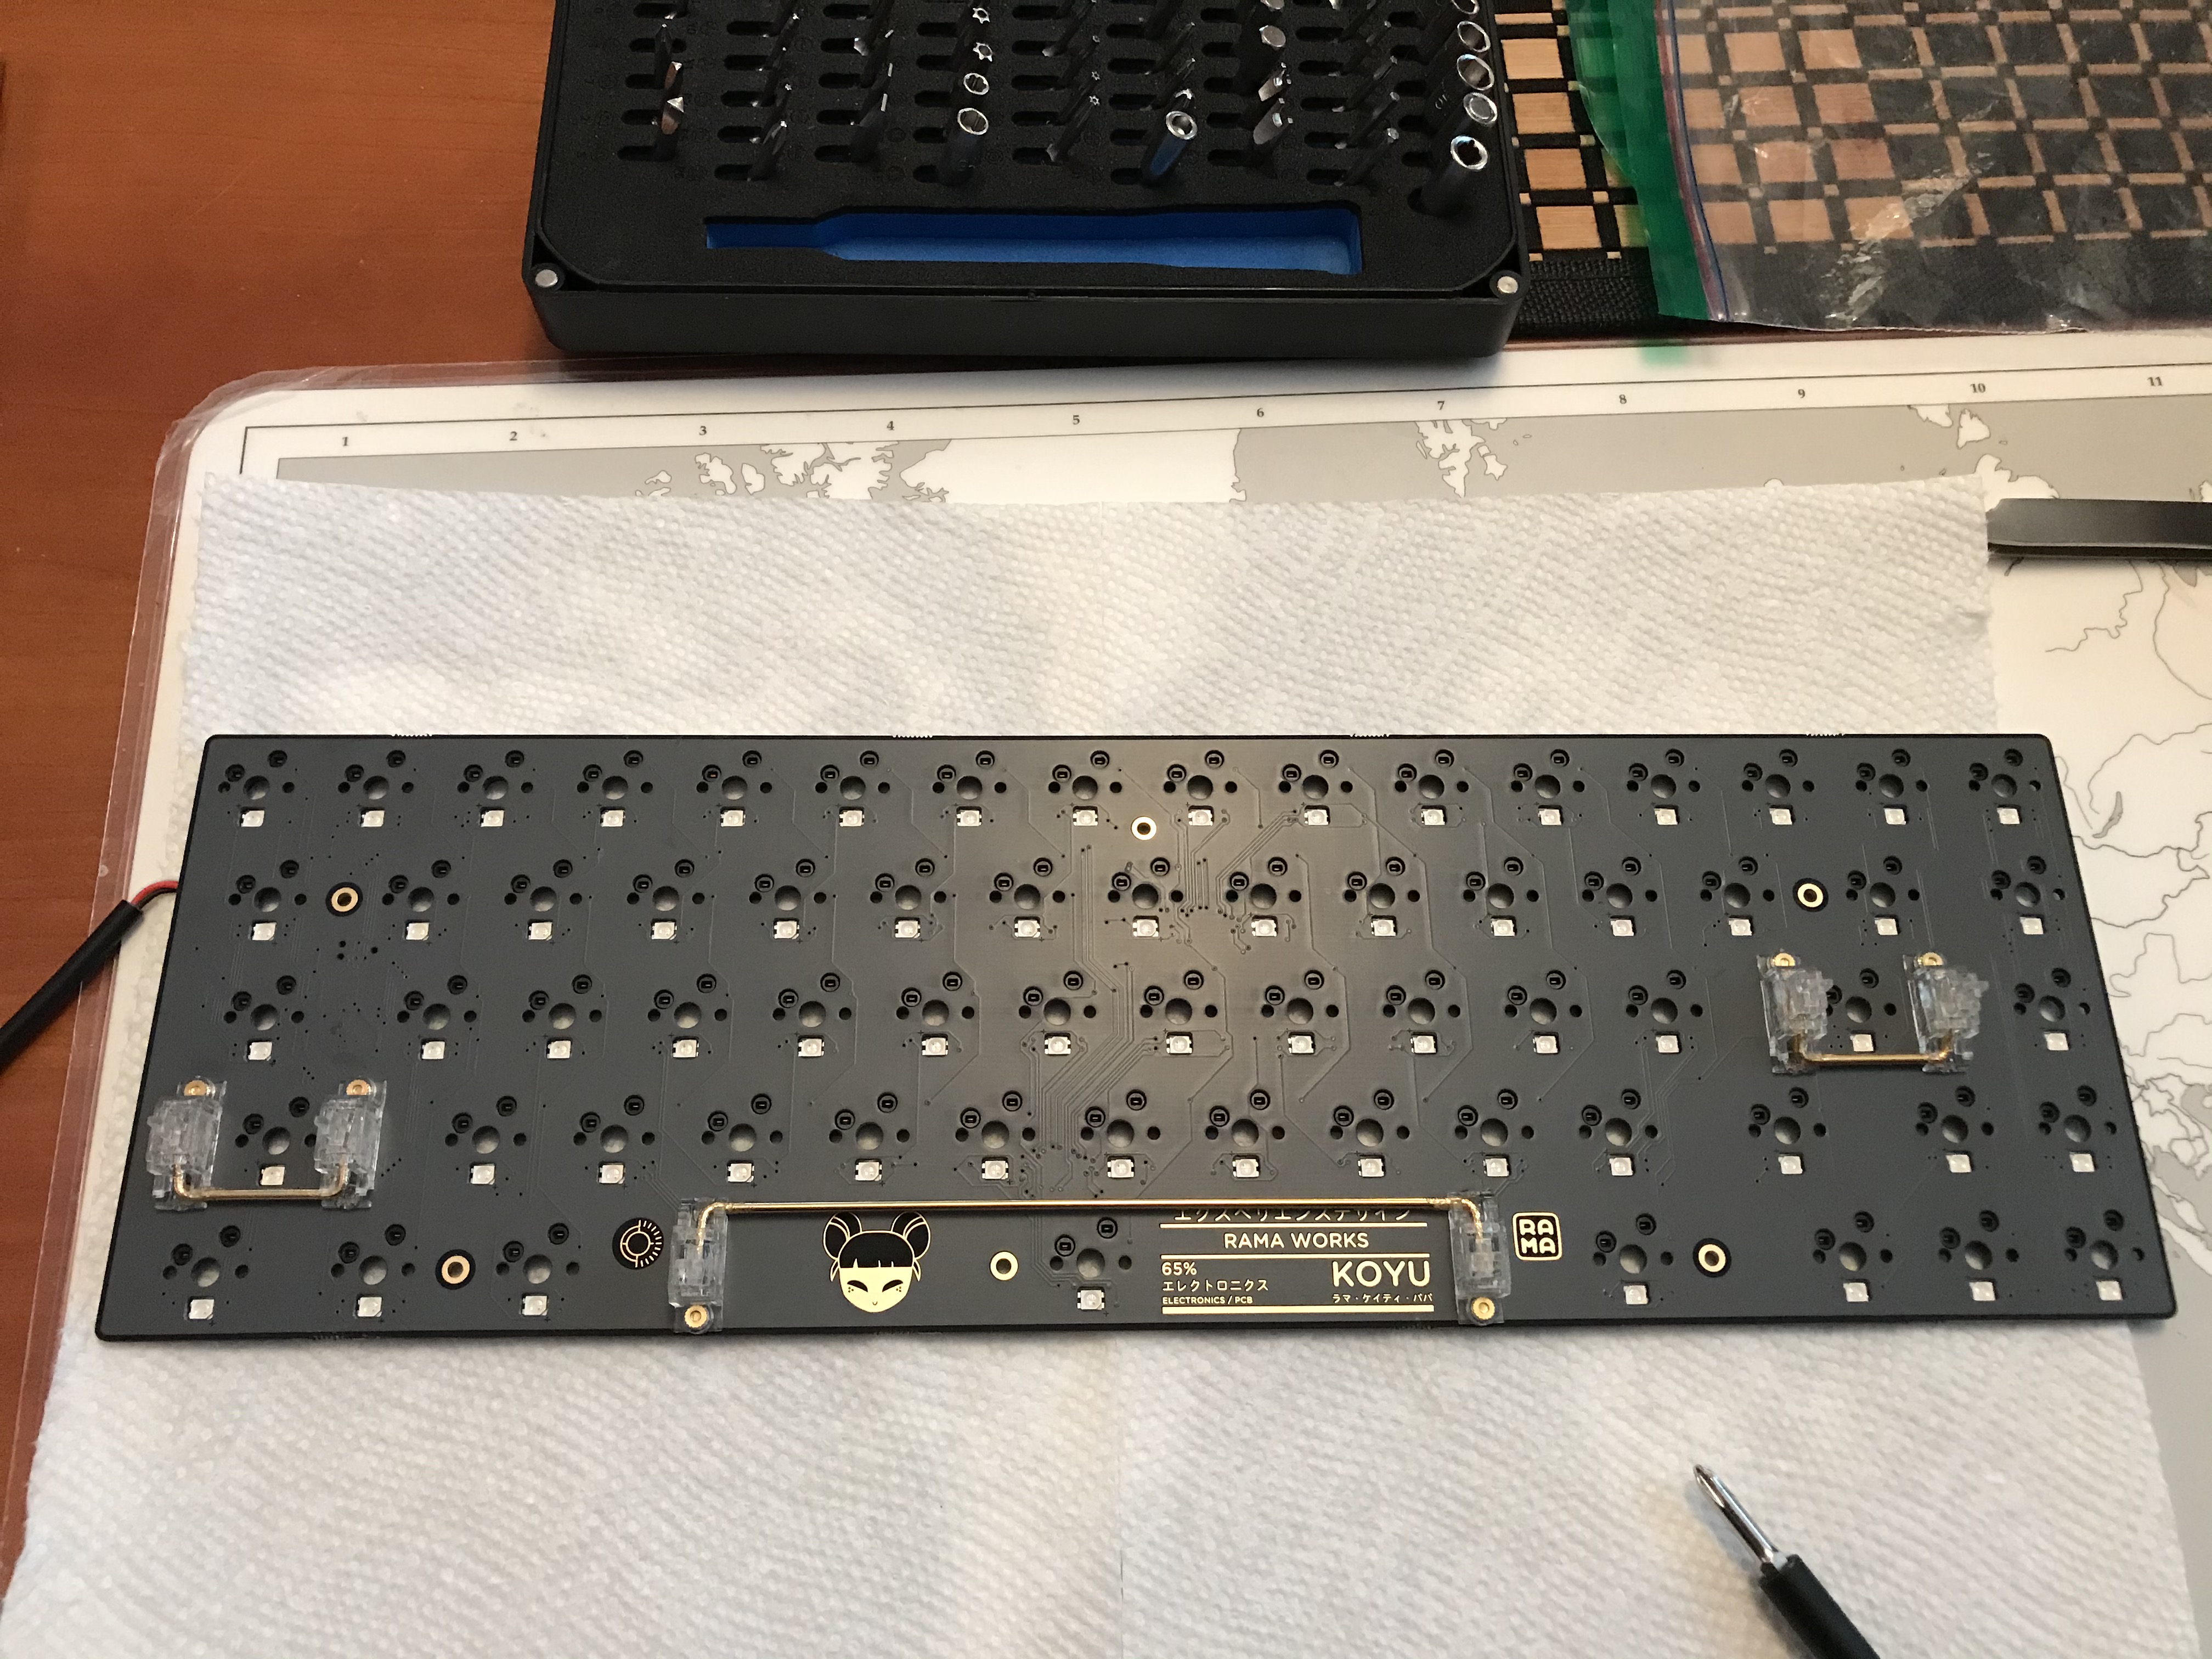
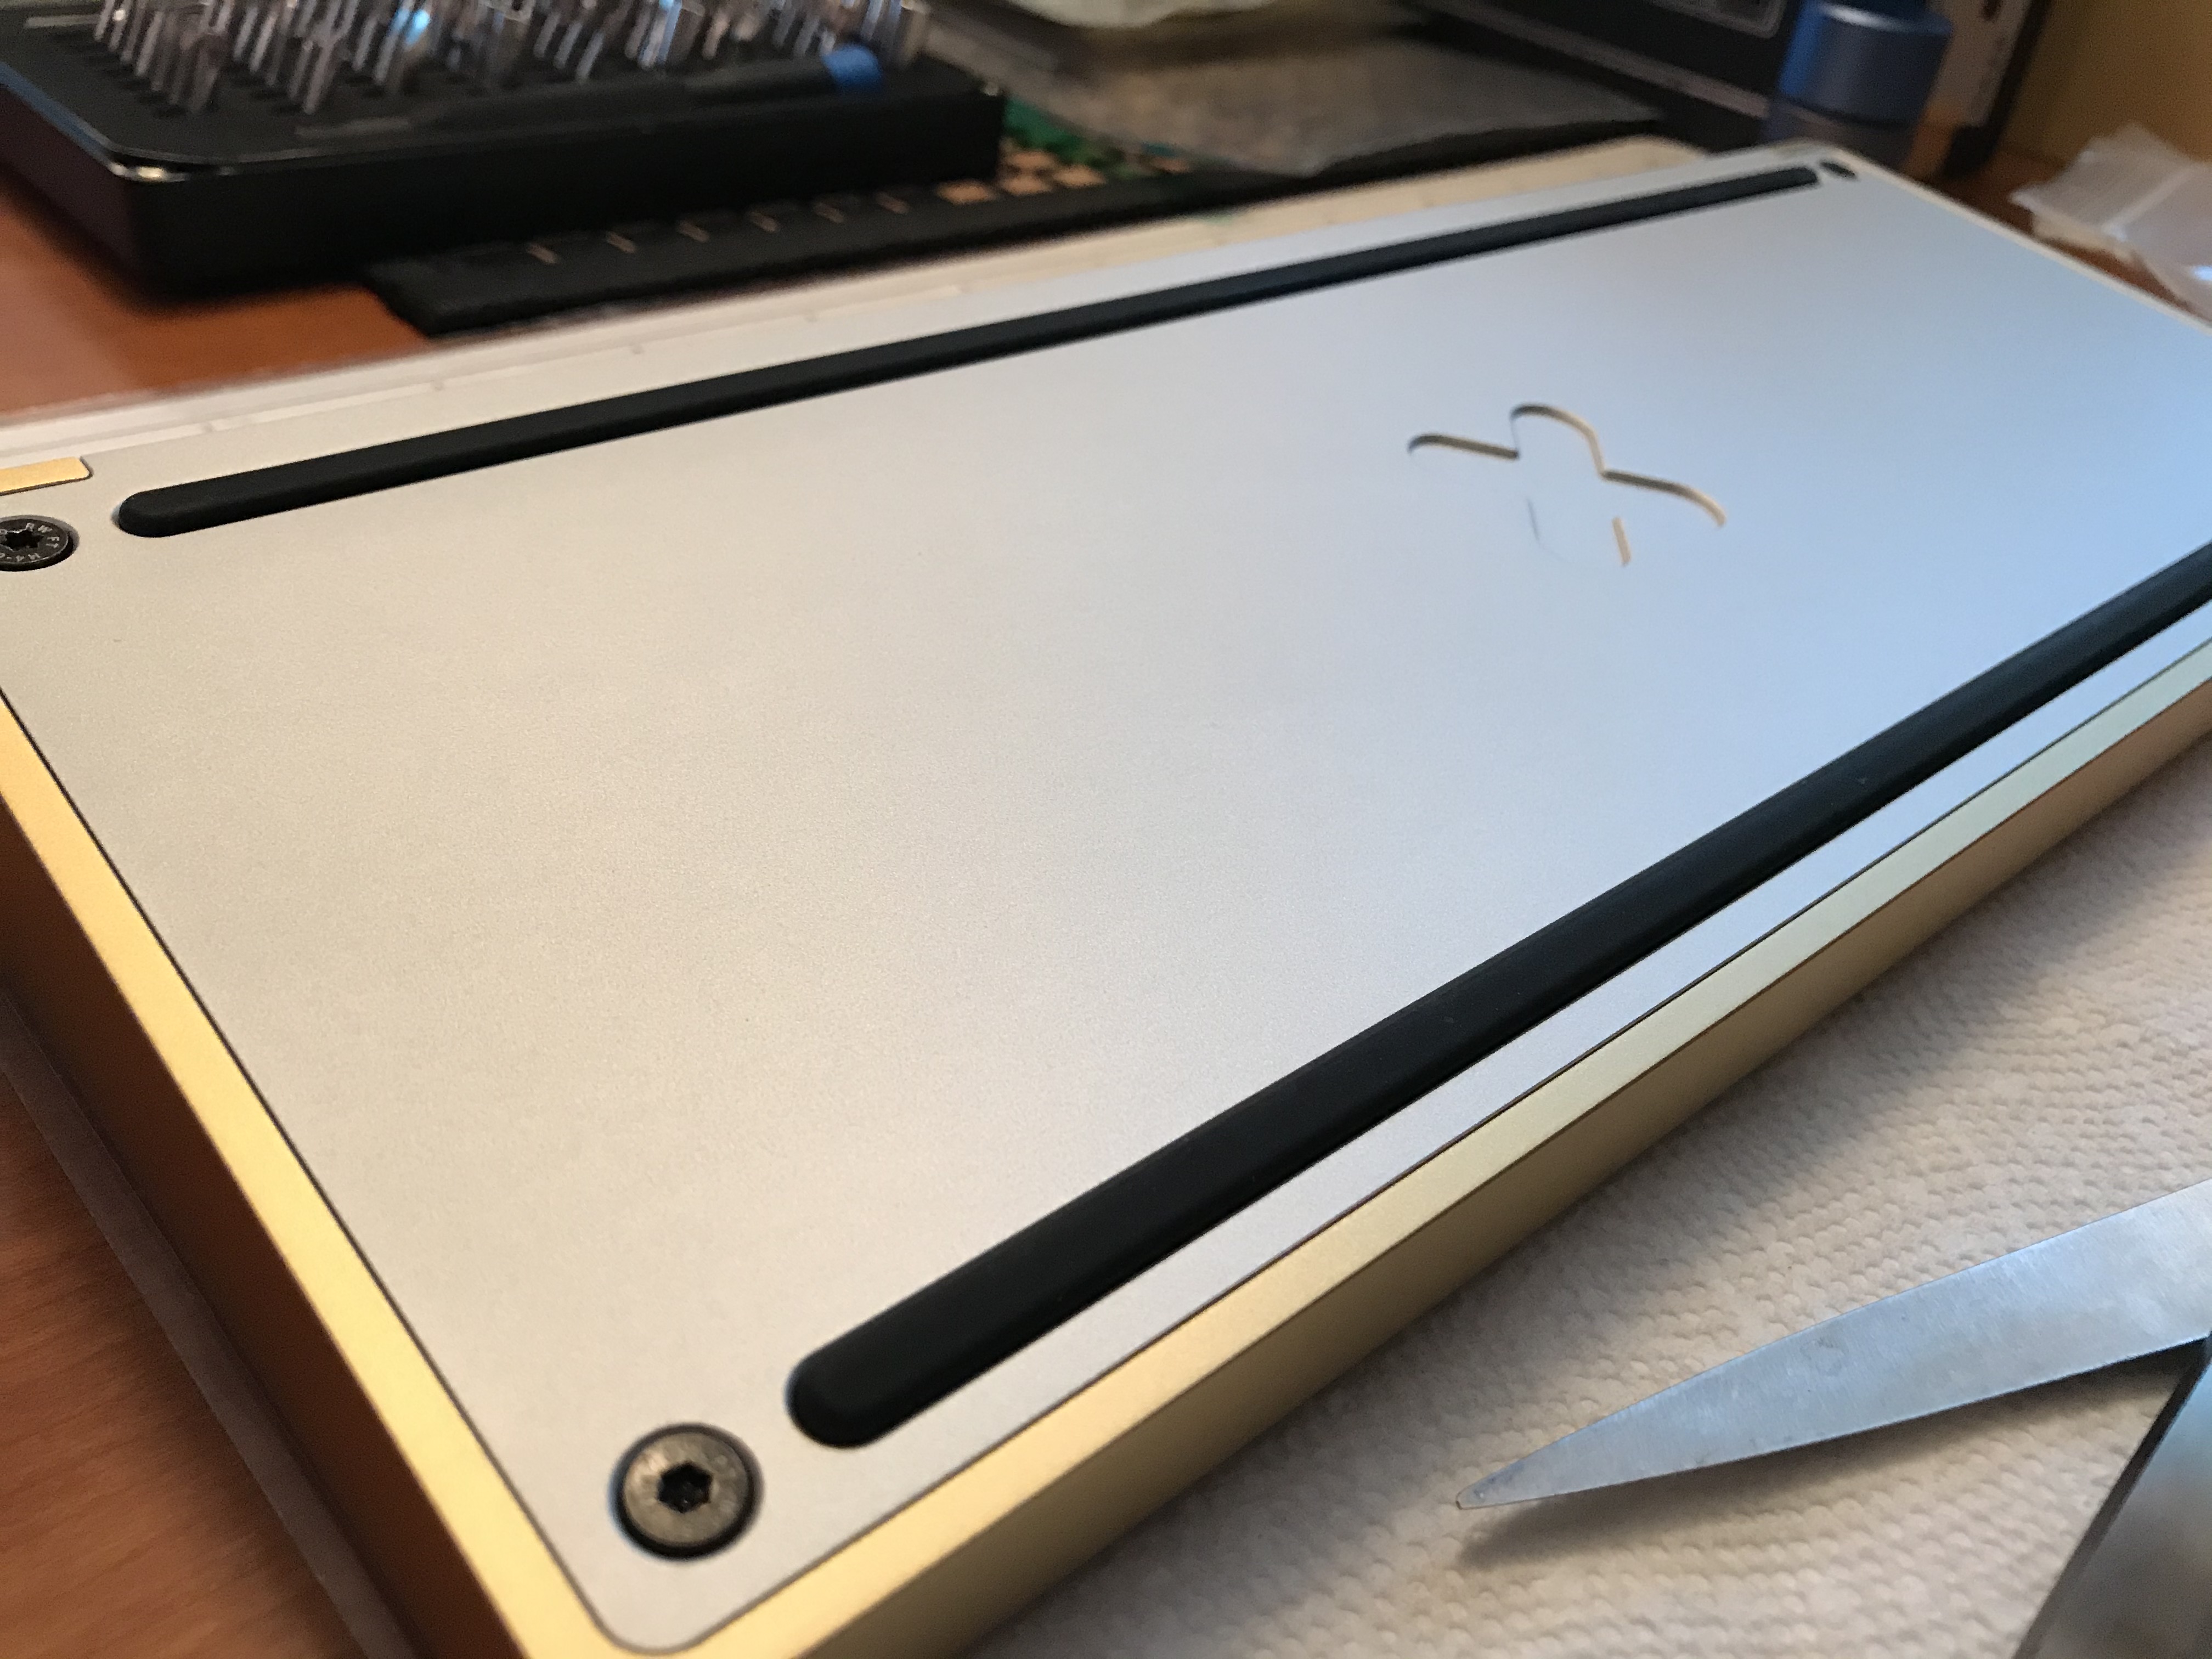
The Koyu Haze colorway consists of gold for the top half of the case, which includes an integrated plate, as well as a purple base. The PCB is attached to the case top by six screws: three along the bottom row, two on either end of R2, and one centered between R1 and R2. You can see the corresponding gold screw holes on the underside of the PCB, as well as the aforementioned spacebar stabilizer RGB LEDs.
Mounting the PCB with Torx screws.
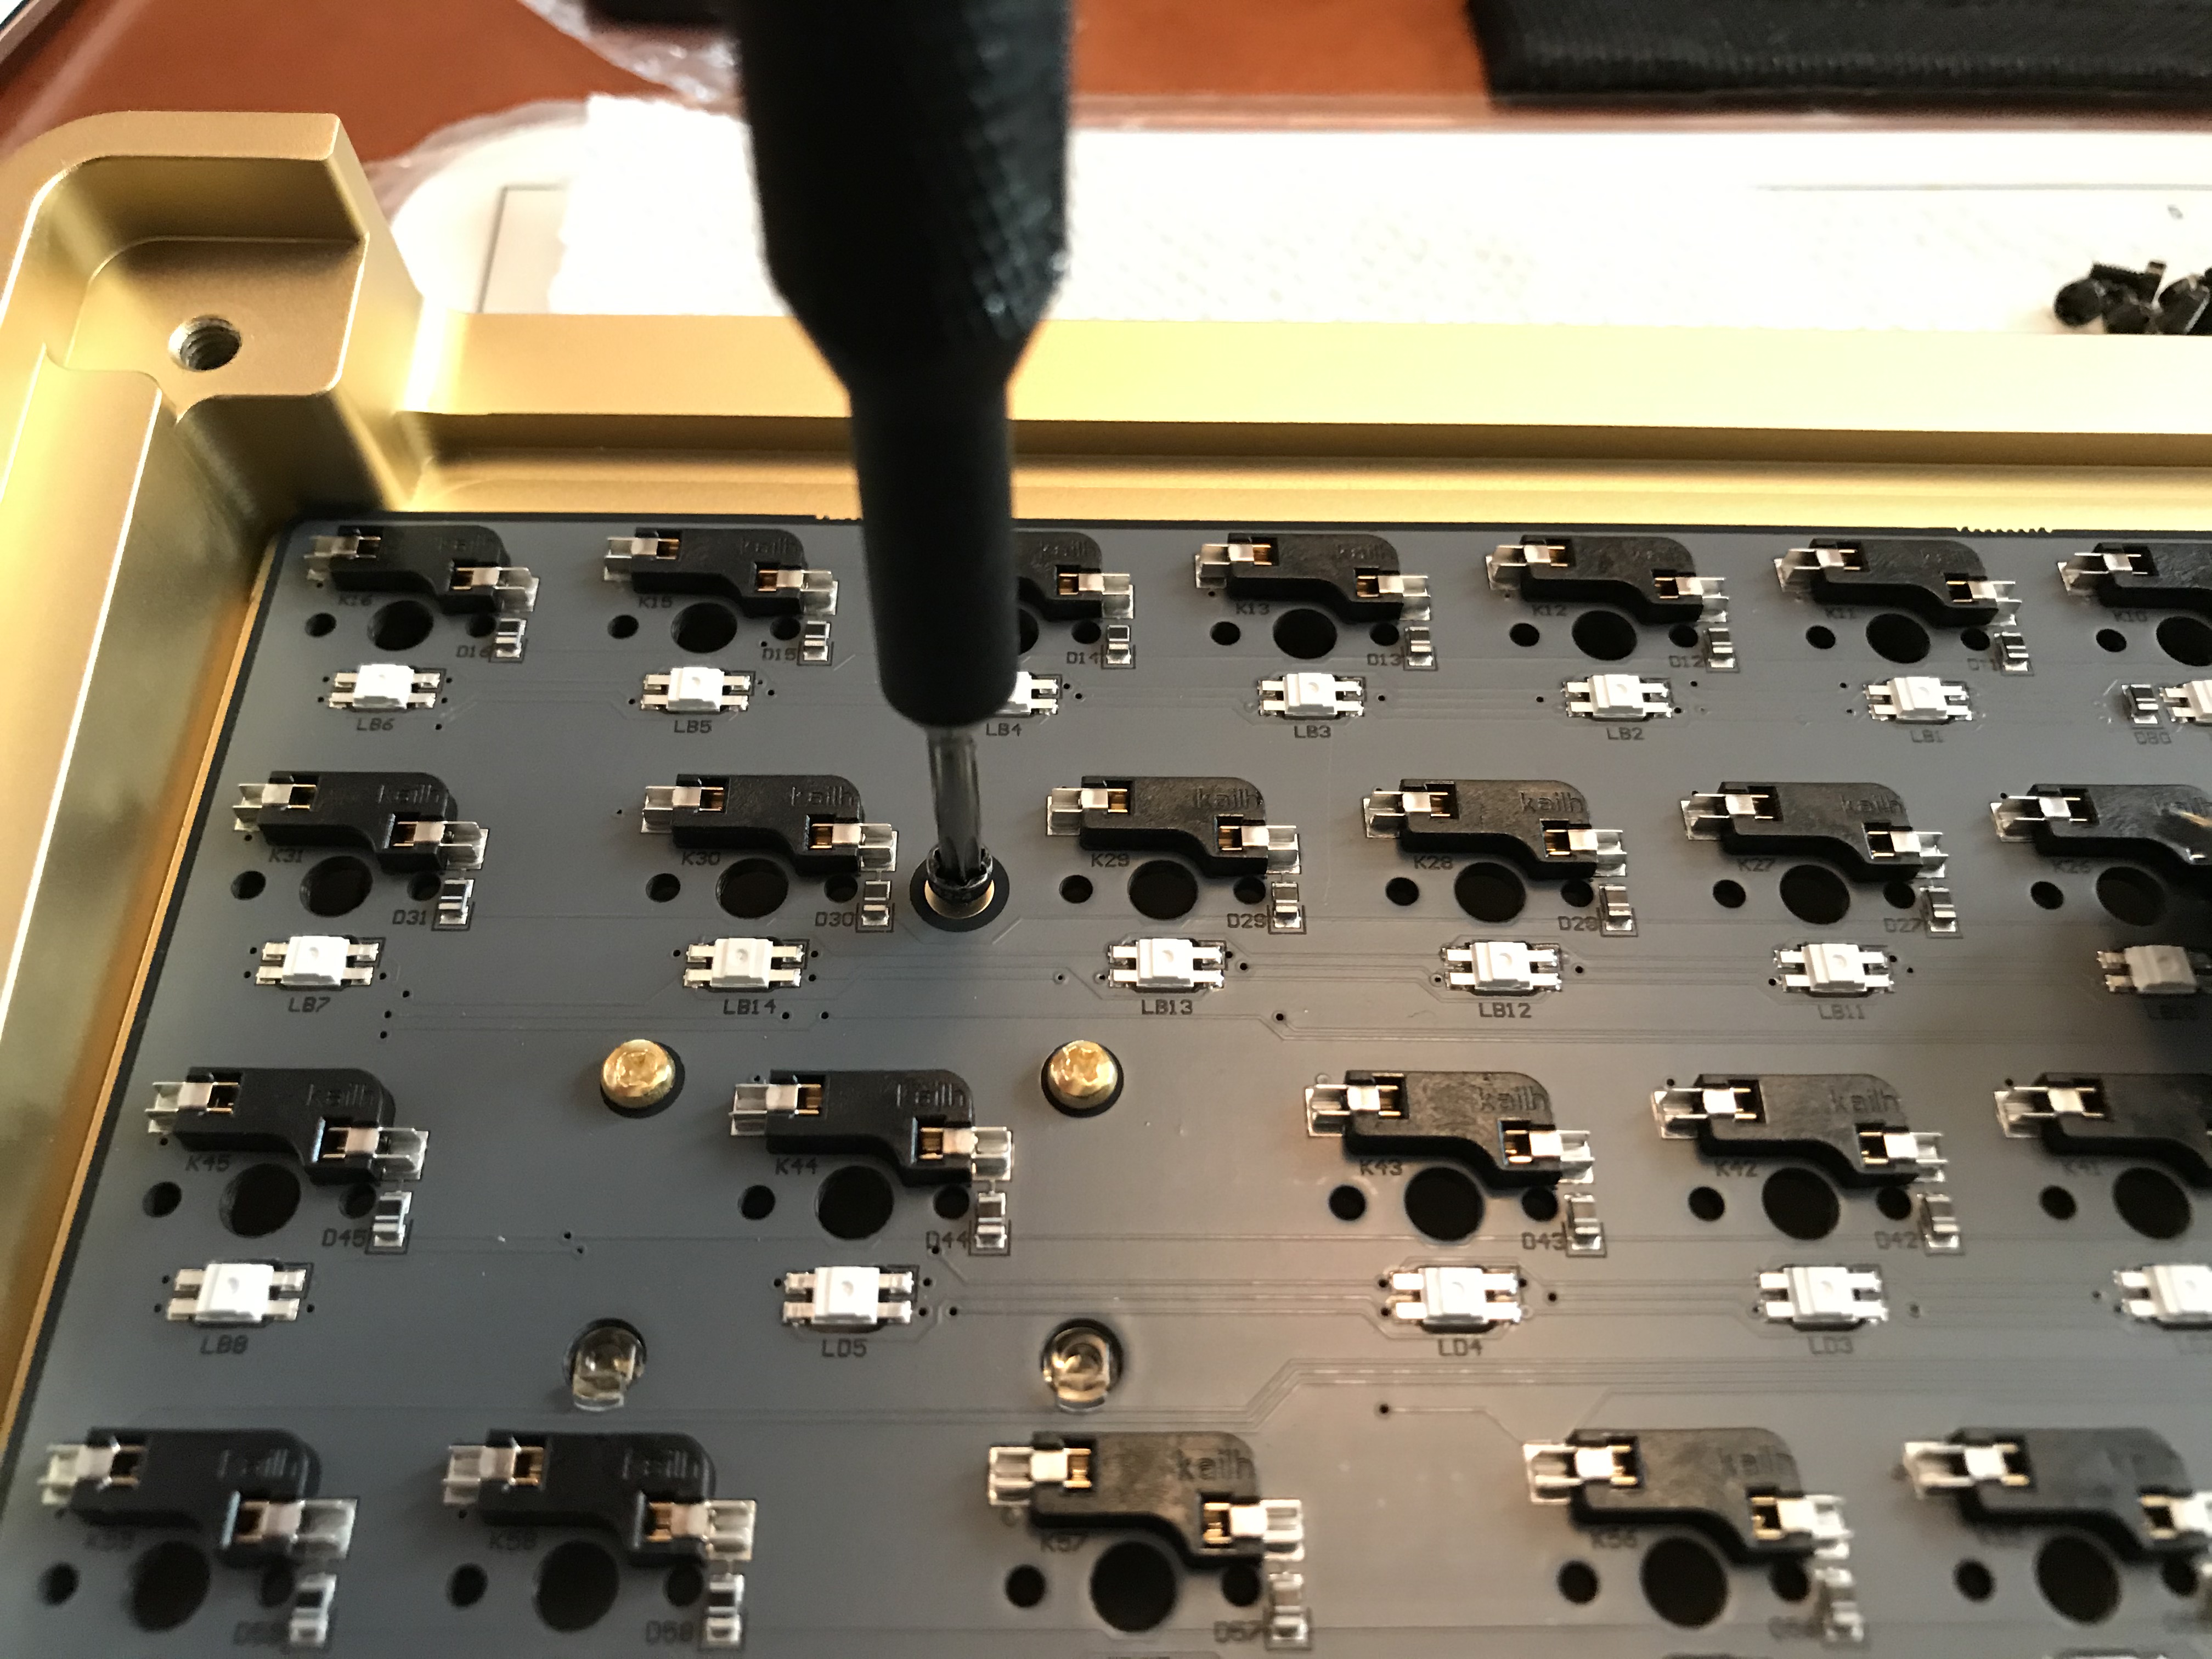
Checking fit. Satisfying tight tolerances on the stabilizer housings. Note also that the integrated plate is 4.5mm thick, so we won’t be doing any PCB/plate sound treatments - no room for any dampening material!

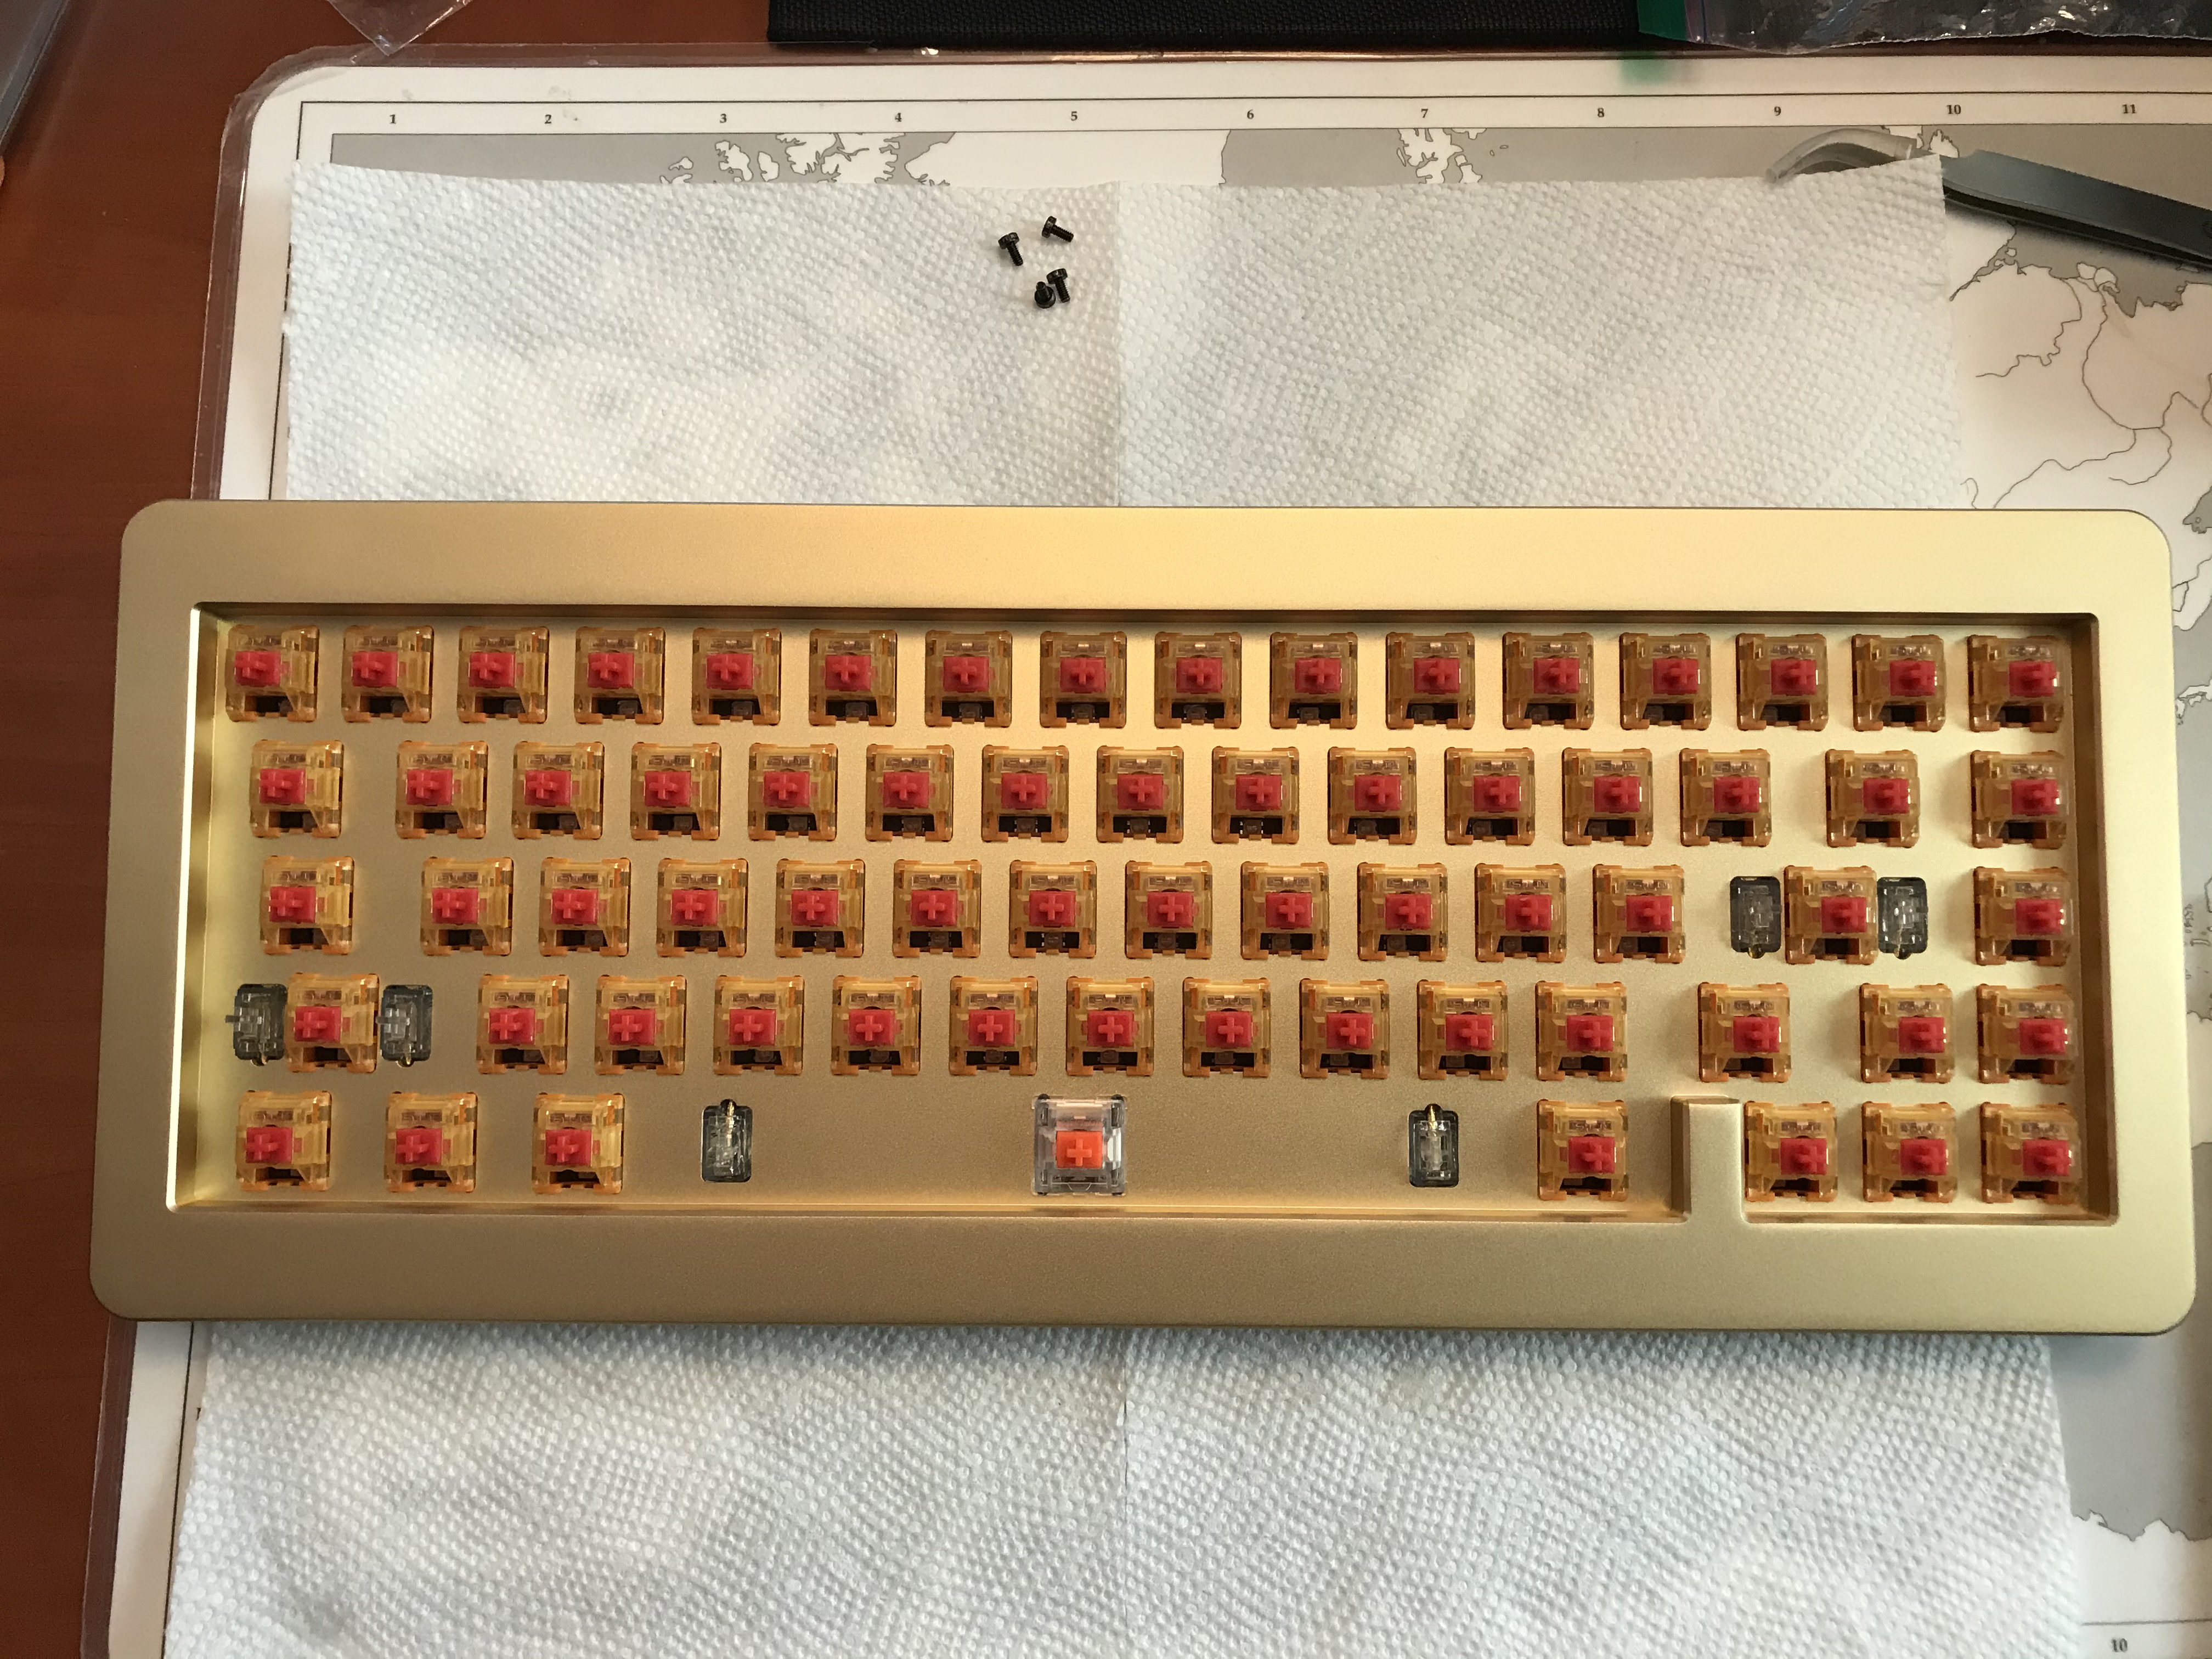
In keeping with the gold theme, it seems appropriate to use gold switches - TTC Gold V2 reds, specifically. The only exception is the spacebar switch, where I opted to use a Healio to help keep that 7u spacebar volume at a level more consistent with all of the other keys. For all of the switches, I did my usual tub lubing treatment for the springs, but for the stems and housings, I tried a different approach which I used on the JER mini build; specifically, I only lubed the stems, with a focus on making sure that I lubed every possible contact point between the stem and housing. The idea is that time is saved by not doing the housing at all, and allowing contact between the stem and housing to get the lube where it needs to go on the housing.
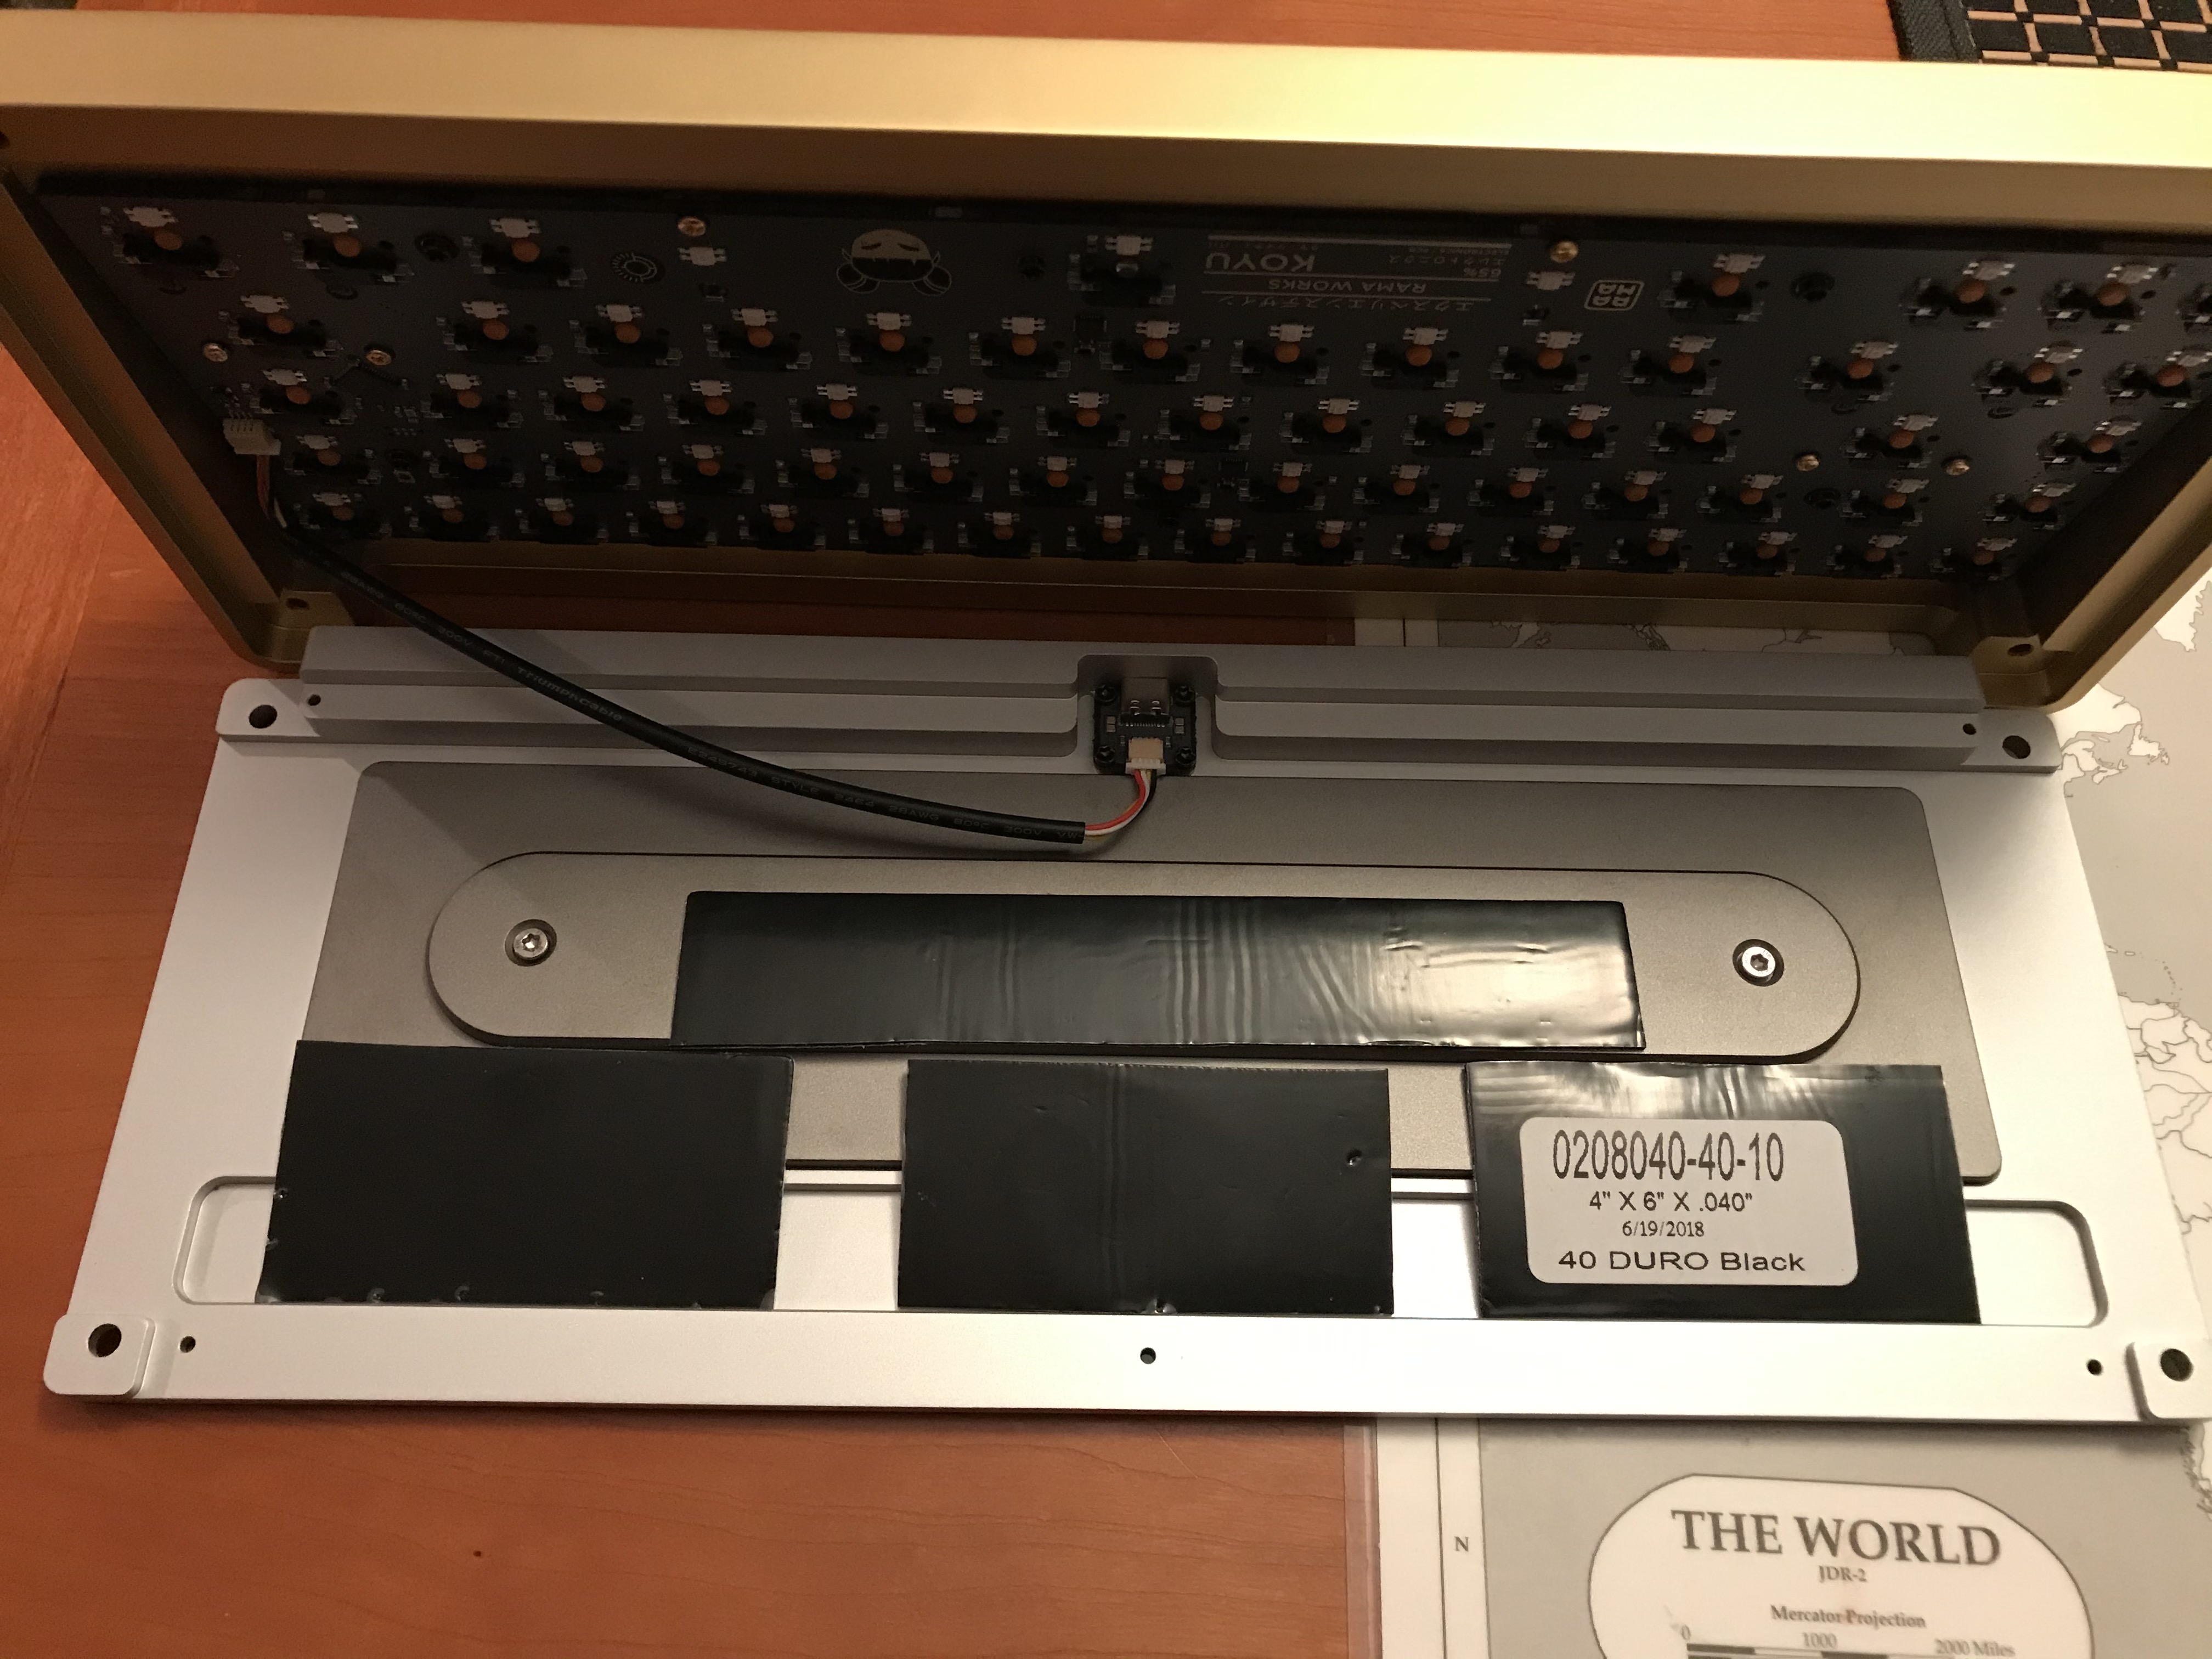
The Koyu PCB is hotswap, so here we are after mounting switches in sockets:
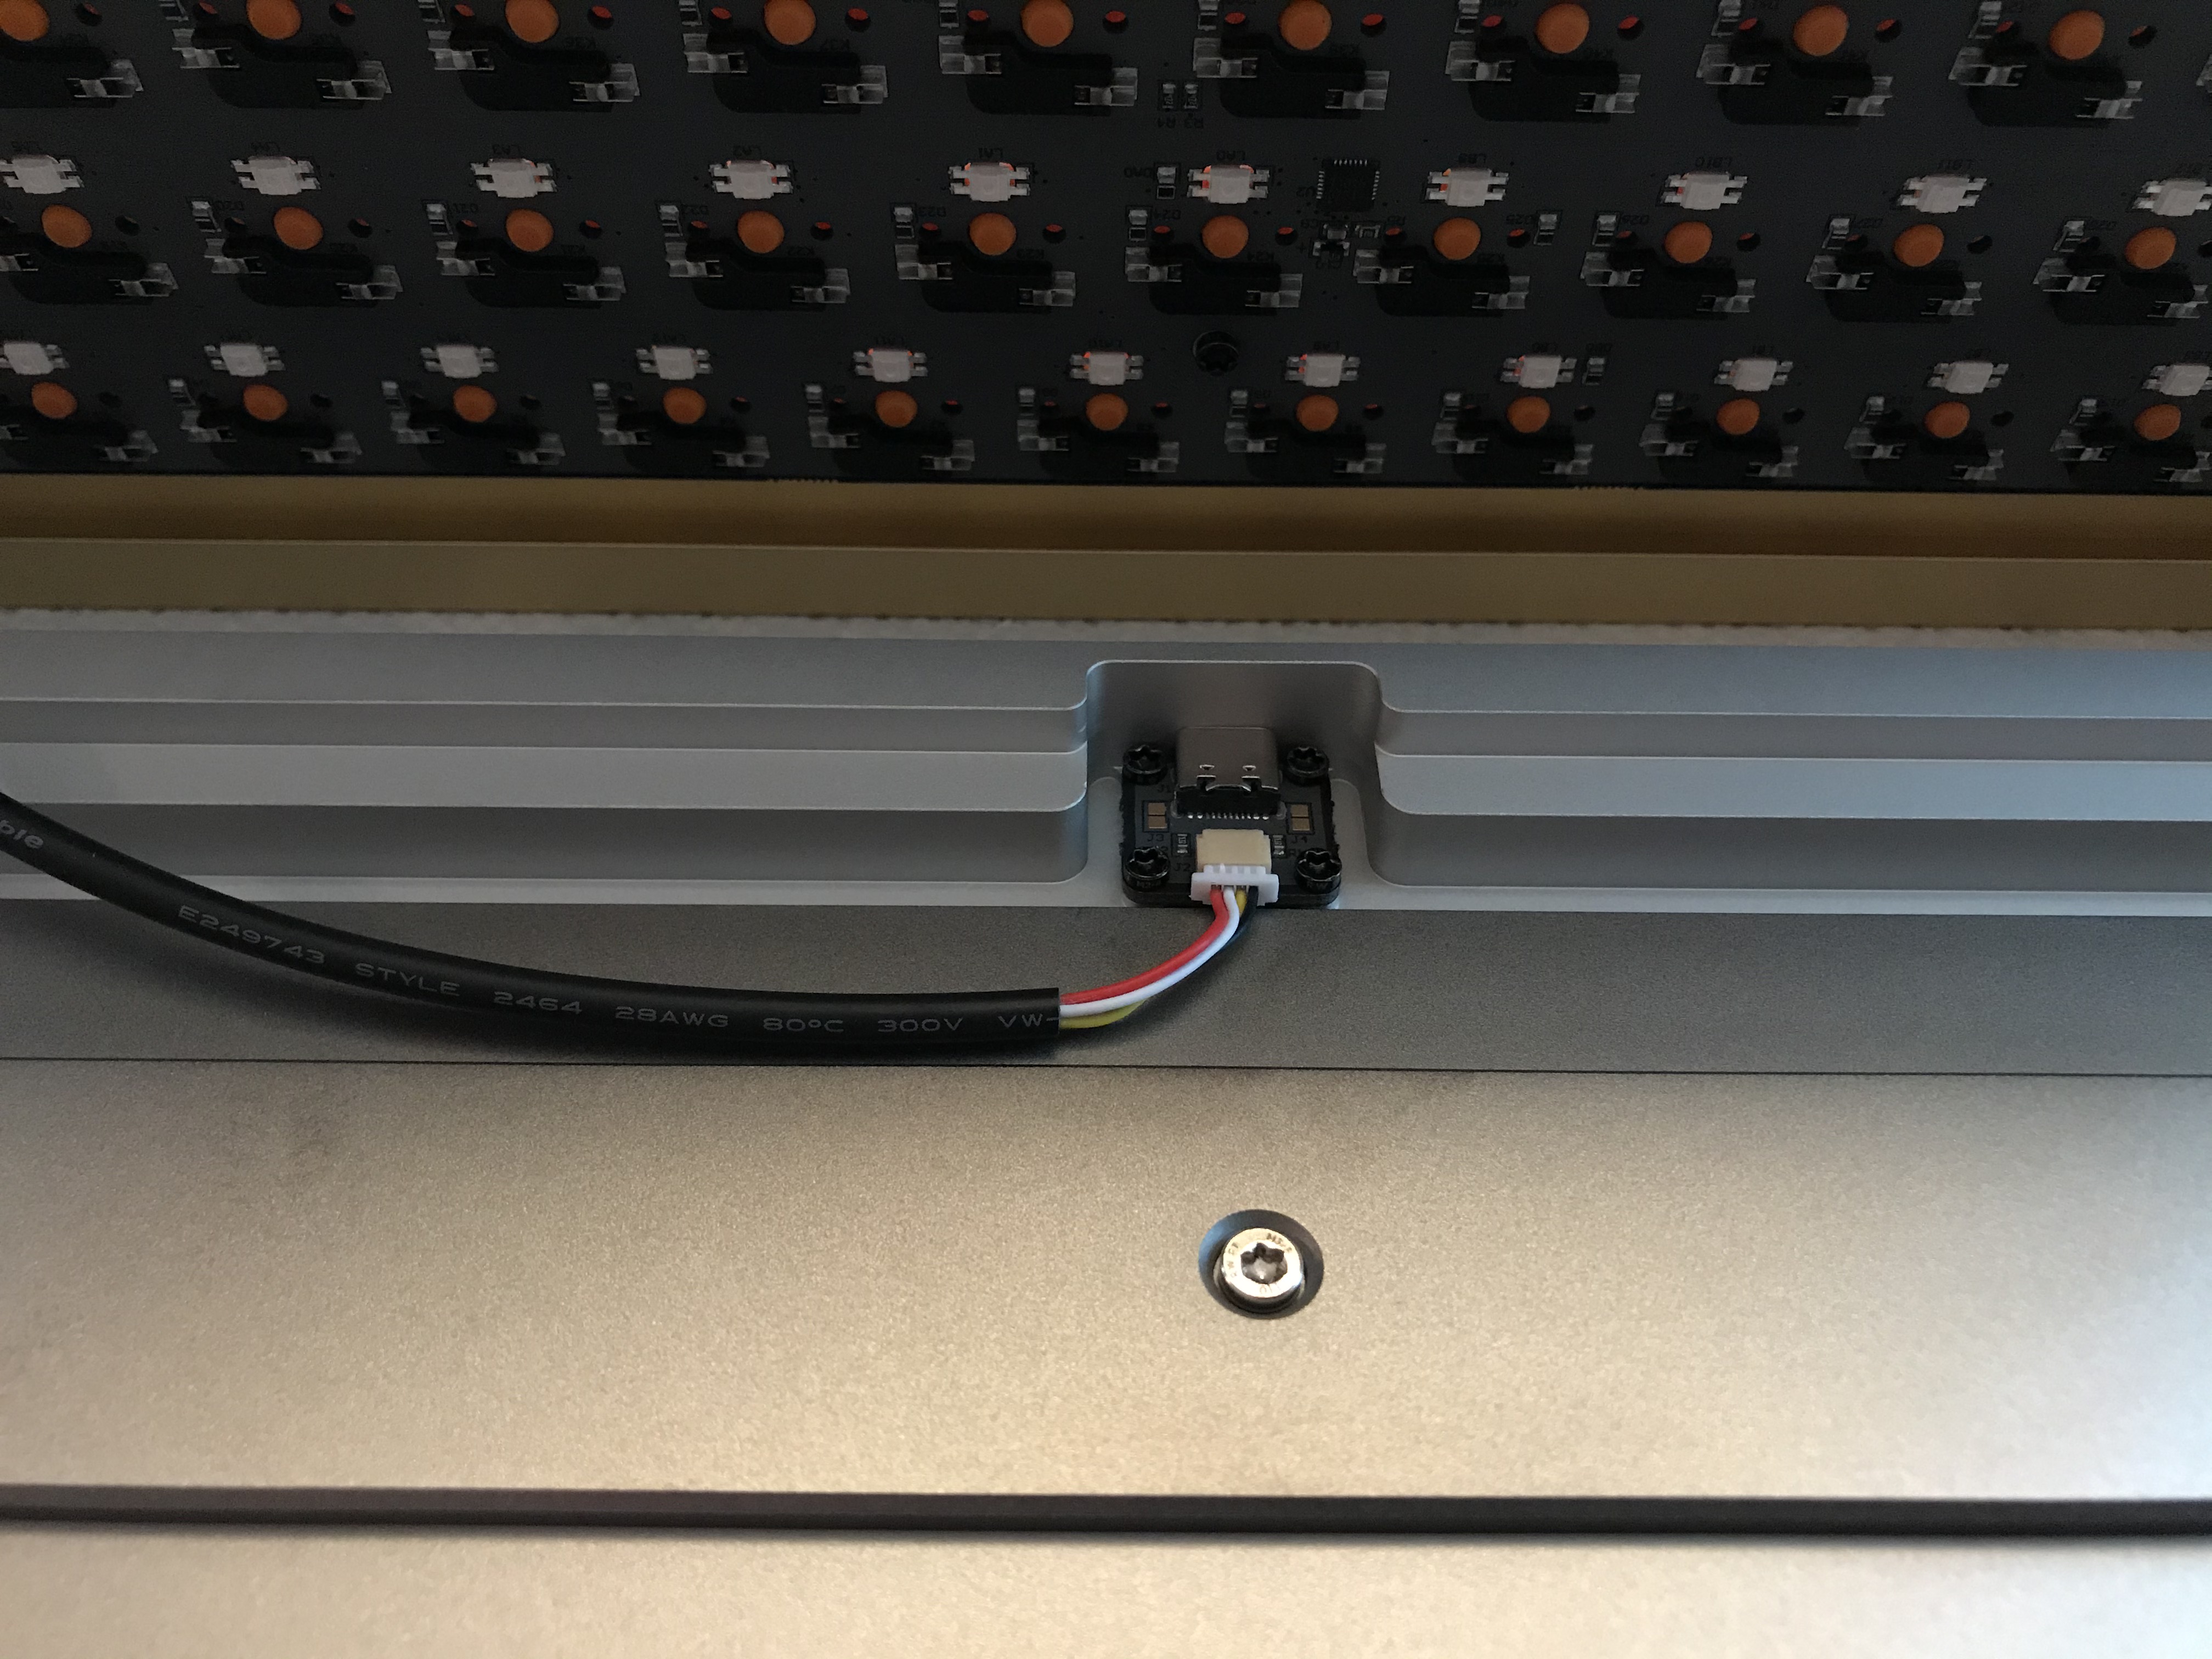
A daughterboard is used to provide the USB-C connection, and it’s mounted to the Koyu base with more Torx screws. I found it easiest to just stand up the Koyu top vertically alongside the Koyu base while installing these screws. Note also the Koyu weight screwed to the base, adding more heft.
If you didn’t notice the alchemy in the previous photo, we’ll bring it to your attention now. The Koyu Haze colorway consists of a gold top and a purple base. But - that base is silver? Let the transmutation begin! One of the nice features of the Koyu is the interchangeability of the bases and tops from different colorways. I’ve swapped the Haze base for the Mist base, which uses a silver anodization, to better complement (I hope) the silver and gold hues of the DSA Alchemy set.
One of the common complaints about the Rama M60-A was its sound. The case essentially enclosed a significant volume of open space inside the aluminum housing, and keystrokes had a hollow metallic sound on that board when left untreated. The Koyu design is similar (and, in fact, the internal weight from the M60-A is usable on the Koyu as well), and without any dampening, I observed the same metallic, hollow acoustics here, even with the internal weight installed. Further complicating matters, the base does not have the same slope as the PCB above it, which makes the application of materials like Sorbothane more difficult, as those materials work best with even contact between the PCB and the case.
So, I opted for the next best approach - I experimented with some very thin (.04", .08") Sorbothane layers to determine where I might be able to get good contact between the PCB, Sorbothane, and case base. I found that the following placement achieved good contact along R3 and R4, although this picture shows the .04" sheets; I ended up using the .08" sheets in this arrangement. You’ll also note that I left the clear plastic on the Sorb sheets - I didn’t want to run the risk of staining that lovely Rama ano with plasticizers.
In any case, this arrangement proved satisfactory for overall board sound.
In fact, the sound was better than satisfactory. The TTC Gold V2 reds are really quite nice; they deliver a smooth feel on par with Gateron Inks or Tealios IMO, paired with a very tight, crisp sound. I’ll definitely be using these switches again.
As far as DSA Alchemy - other than being DSA, which as a matter of personal preference is not my favorite profile, it’s a very nice keyset. The legends are very clean and the colors are on point for the theme. I originally tried the board with the brightly colored ‘Alchemist’ modifiers, but found that the silver and gold tones exclusively worked best with the gold and silver ano.
Lessons learned
- Tub lubing switch springs and stem-only manual lubing has been yielding good results for me, both in terms of time efficiency and the end result. I think the key is to get a thin layer of lube around the top “ridge” of the stem; on upstroke, it’s this ridge that impacts the housing.
- A bit of thin Sorbothane can work wonders for sound dampening, particularly in places like this where tight tolerances make it difficult to do other sound treatments.
- TTC Golds have a nice sound - in addition to using them stock, it may be worth experimenting with them as an alternative to Pandas for frankenswitches.
- I prefer solderable boards to hotswap, but when it comes to tuning spacebar sound, being able to quickly swap switches is convenient.
I haven’t yet managed the right incantation to transmute DSA into GMK. But my alchemical labors continue…
Specifications
case: Rama Koyu Haze (top) + Mist (bottom)
case dampening: squares of 0.08" 40 Duro Sorbothane
PCB: Koyu (hotswap, in-switch RGB)
plate: 4.5mm integrated
plate/PCB dampening: n/a
stabilizers: Zeal V2 (1x7u, 2x2u)
stabilizer mods: lubed with SuperLube
switches: 66x TTC Gold V2 Red, 1x Healio (spacebar)
switch mods:
- springs tub-lubed with Krytox GPL-104
- stems hand-lubed with Tribosys 3203
- no housing lube
keycaps: DSA Alchemy
- alphas, TKL modifiers, alternate, metalic, spacebars
HxWxD (without caps or feet): 1.31" x 13.0" x 5.13"
HxWxD (without caps): 1.38" x 13.0" x 5.13"
HxWxD: 1.56" x 13.0" x 5.13"
assembled weight: 5.27 lb
9 Likes
Amazing as always!
That book illustration is quite the idea. No wonder they weren’t successful at alchemy!
But, I think you were. The build looks really good and the keyset is very complimentary to the board and concept.
I’ve also been focusing more lube on the top parts of the stem just above the rails to help with sound dampening and found that it seems to have the largest impact on sound at least.
Super nice build!
2 Likes
I’m curious to see if anyone correctly identifies the book…
2 Likes
Yeah, I’m thinking that if I can get my desk clean enough, I’ll take enough pictures to get a build log together once my HHKB Tofu comes back from MKUltra. These always wow me, and I definitely want to make one.
So, what’s your verdict on the TTC Golds altogether? I’m deciding between them and a Gateron variant (Fei, Yellows) or Cherry Nature Whites for my Tofu.
1 Like
I feel that one lol, biggest reason I haven’t done one of these
Let me at least guess the author with the help of Google 
Is it the Persian Jabir ibn Hayyan ?
Your build logs are nicer each time and this last picture is stunning.
Are you able to read the book ?
1 Like
Love your build logs man, please keep them coming when you can. I really should do the same as much as I’m building/fixing/changing boards lately. Thing is with me, I always intend on doing a build log & try to take pics of each step. Unfortunately I also always get tunnel vision when building & can just never seem to document the whole process so I can put up a cohesive build log, LOL!
On another note, I agree the helicoils used for mounting points on the JER mini is a disappointing & bad choice. Especially in alum as it’s soft enough of a metal you can tap it by hand. Also I think they installed the helicoils wrong resulting you being able to pull some out. Do they have the helicoils installed in smooth holes like I’m thinking? AFAIK the process for installing helicoils is to first tap the bare hole, next screw the helicoil all the way into the tapped hole, & then bust off the tang of the helicoil to allow it to open up a tiny bit. Using loctite will help hold the helicoil in place even better. Definitely some curious design choices on the JER mini. Glad you got it all together & working well though!
1 Like
I only have experience with the V2 TTC Golds. The reds (linears) seem quite good to me - give them your favorite linear lube treatment, and you’re in business. I was using the Koyu again today, and I really like the sound and feel of the reds. The browns (tactiles) don’t feel nearly as crisp - I haven’t built with them yet, but I’m not expecting to be wowed like I was with the reds. They seem a little loose and sloppy on the bump, and that looseness also takes away some of the sound that makes the reds so appealing.
Nope, that’s not the author - and I’m not able to read the book either. Puts a damper on my transmutation experiments…
2 Likes
Yup, as I remember, the holes were smooth. I think maybe one of them looked like it might have been tapped (poorly). I’m considering retapping the holes and perhaps switching to a screw with wider threads so that I can skip using helicoils entirely (but I have no experience tapping metal, so for all I know this plan might be DOA).
1 Like