While I enjoy the shape and feel of Tai-Hao Cubic profile, it’s rather thin and light in weight. One remedy I thought of is filling inside of each keycap with something. After looking available options, I decided to try Apoxie Sculpt which is a popular epoxy clay brand. Epoxy clay is ideal because it hardens over time. No heating. There is air-dried clay also but they’re not as dense nor hard as epoxy clay.
Here is a keycap I filled to try the clay. Spacebar above is used to avoid wasting leftover because who doesn’t like hefty spacebar? As you can see, I misjudged how much clay I’d need by quite a bit.
Before filling, keycap was about 1g. Afterward, 2g. There is plenty of space left over so I think 3g is not impossible. Added clay not only changed the weight of the keycap but also changed the acoustic profile, lower in pitch and reducing reverb. Feel improved as well because it doesn’t feel flimsy. Result is top-heavy like a loaded dice but haven’t noticed any unpleasant side-effects from that…yet.
As to difficulty of the mod, it’s not that hard. Just mix two parts of epoxy clay, make small balls out of them to insert into 4 quads then flatten into place with a Q-tip. Each keycap should take no more time than it takes to lube a switch. With small plastic stamping tools, it should also take no time to add tiny sound-dampening cones on the surface.
Do you think you could do a sounds test at some point? I wanted to do something similar to my Tai-Hao keycaps as well but didn’t know what would be the best way to add an additional layer to the inside was. I was thinking a tool could be made like a pastry tool to quickly add the material to the inside? Any thoughts?
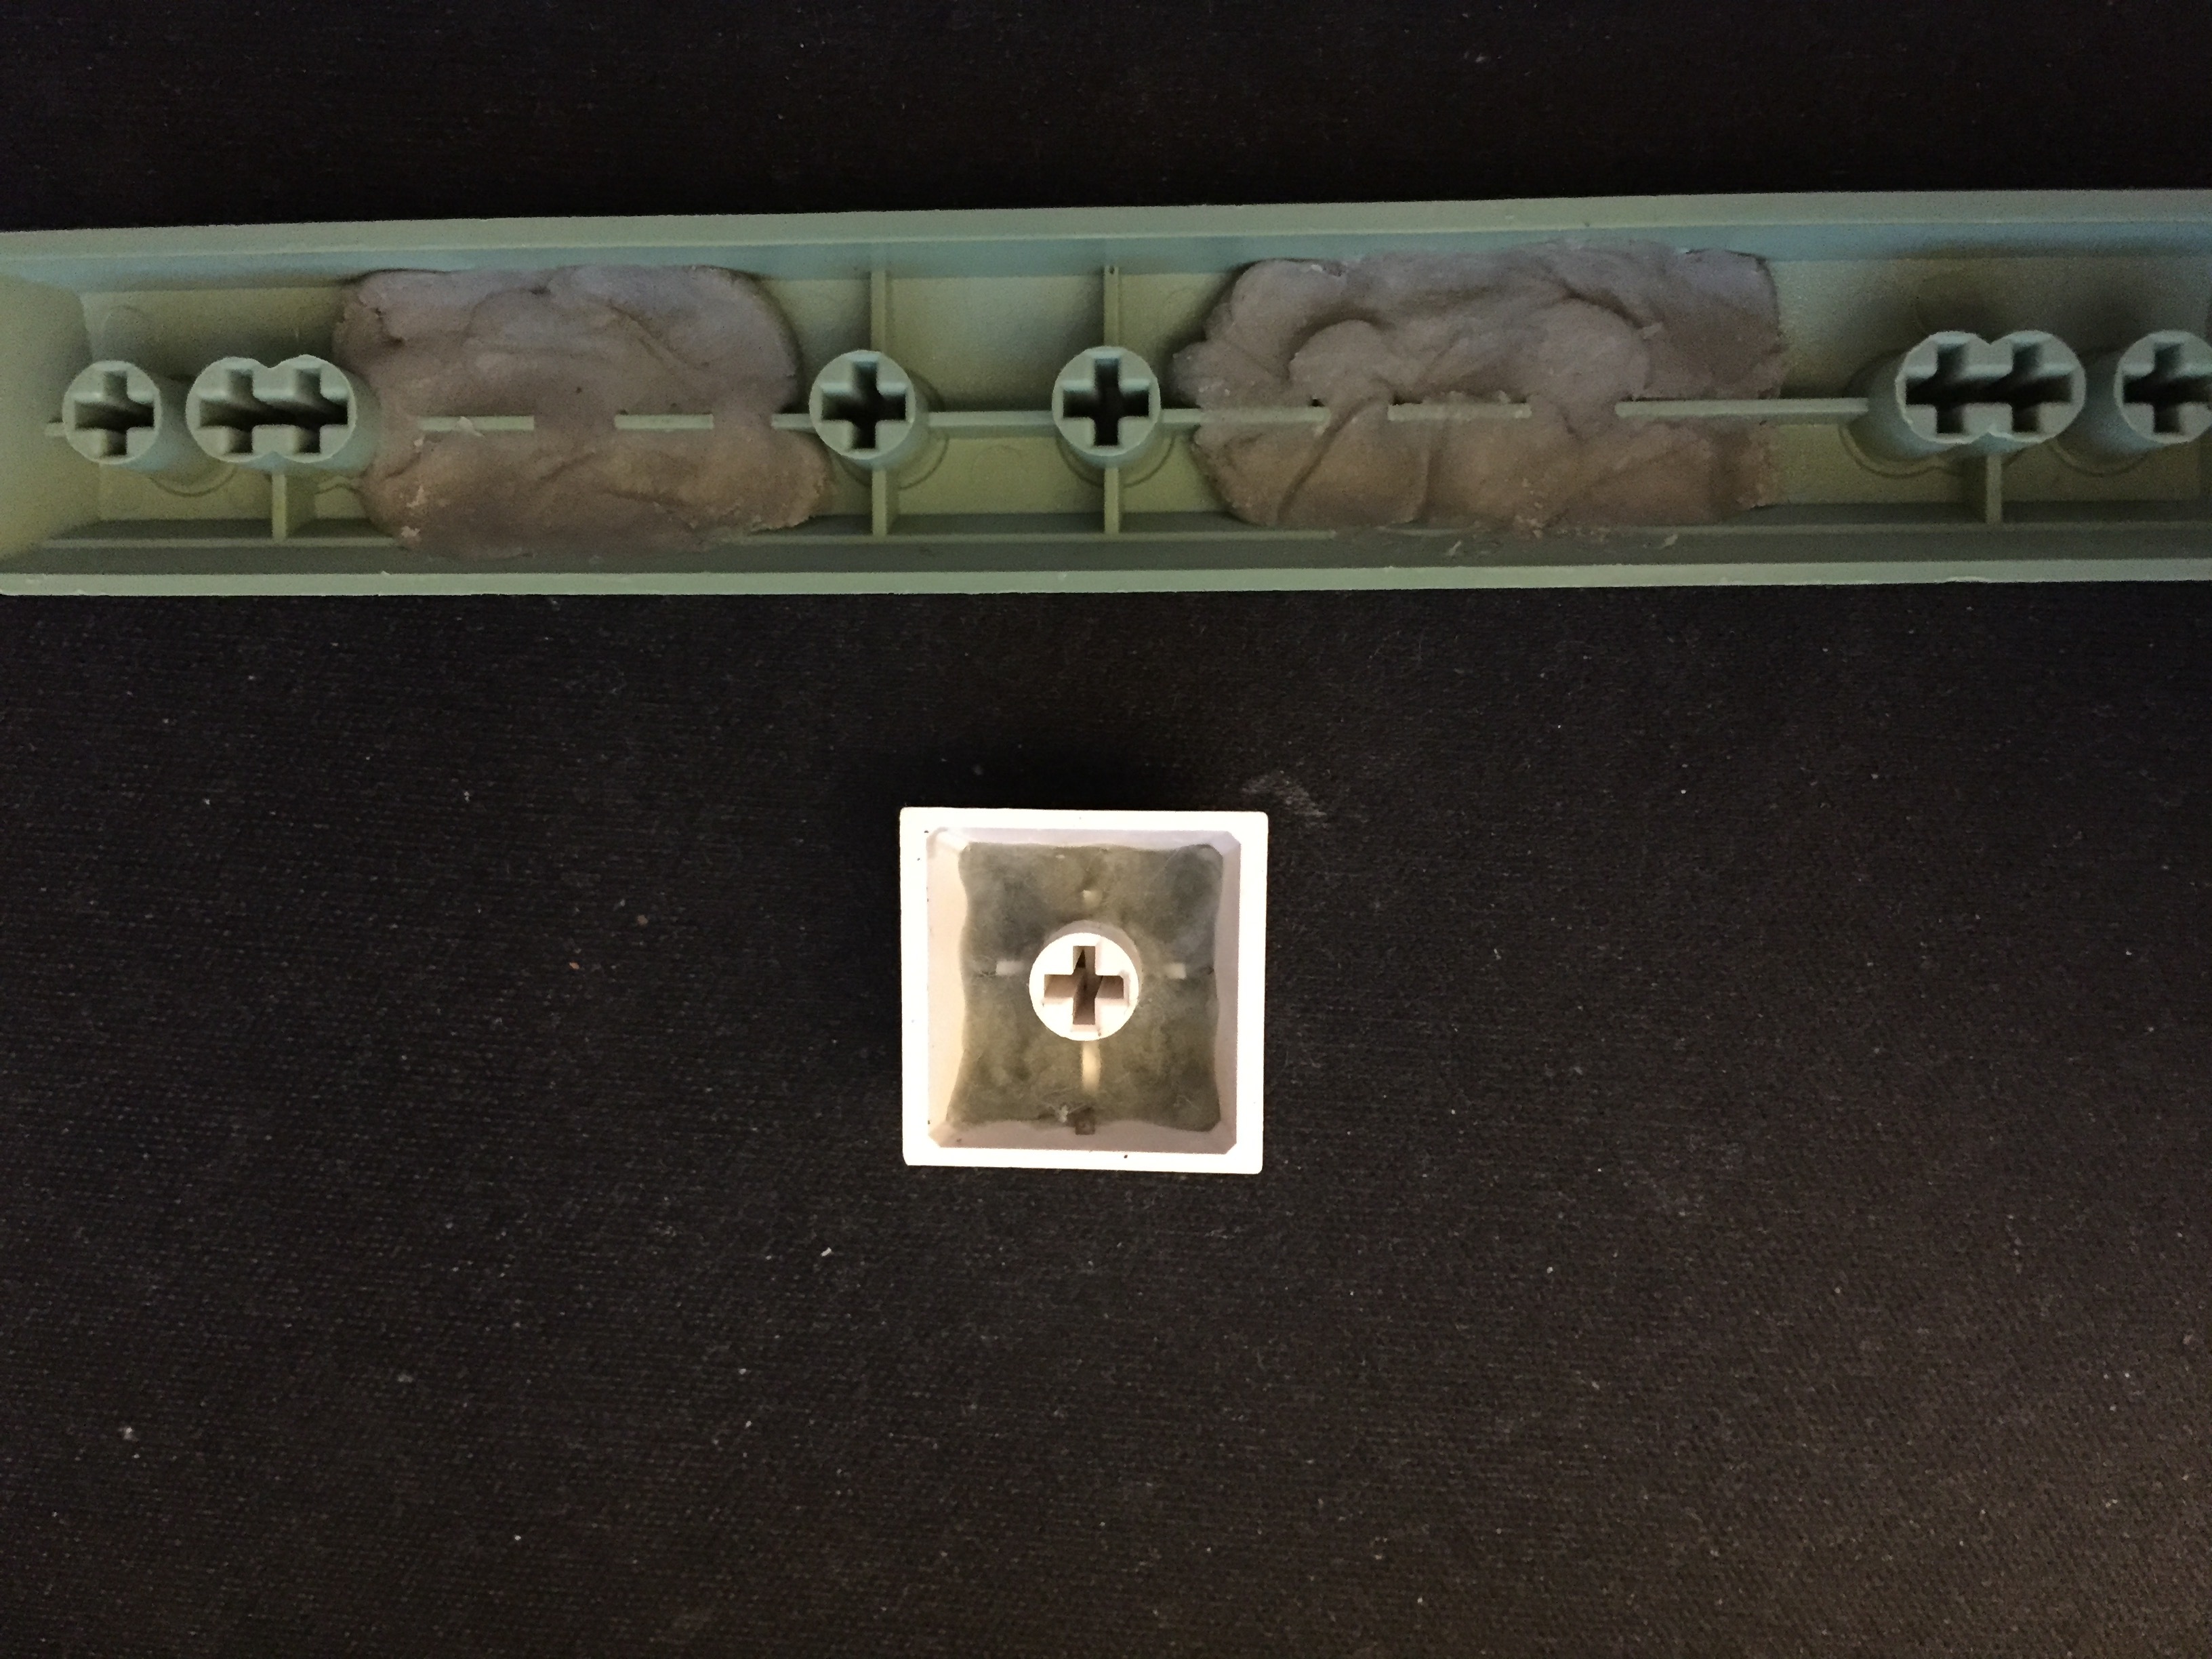
Did the home row alphas today. It took some tinkering because home row keycaps don’t have much room since they’re typically the shortest in most keycap profiles.
Keycap weight inconsistency may become a problem. Should be OK up to a point but I don’t yet have full control over how much epoxy putty I’m adding to each keycap.
Alternate solutions I looked into:
Apoxie Paste - this is 2-part liquid form of Apoxie Sculpt. Since it’s liquid, it should easier to apply (just pour and let it settle) and result could be more consistent if I use a syringe. Density should be same.
ThermoMorph - I think these are PCL pellets, kind used in 3D-printers. Since they’re pellets, I just need to find out how many pellets keycap for each row needs. Density is the main problem. It’s just slightly lower than ABS which is lower than PBT, POM, PPS and far lower than epoxy putty. Adding even a small amount to a keycap makes it sound like a pebble.
Anyway, ordered some sculpting tools. Today’s tinkering was to mostly to identify tooling needs, particularly doing several.
When I was a kid (early 70s), I would amuse myself by pouring Elmer’s glue into a small plastic water basin used for dunking watercolor brushes. Add some torn up paper or glitter or whatever what was at hand and wait a couple days for it to dry. It would form a translucent disk with a rubbery feel.
Now, look, I’m not suggesting you should dump some Elmer’s glue into your caps. That would be irresponsible. But, that stuff is self-leveling, and would hold to the plastic.
And you could always put a couple of BBs in the quadrants that should certainly stick when the gloop dries.
Anyway, getting the hardened glue out of the basin was pretty easy. Elmer’s is made for sticking to paper, not smooth plastic. It clings, but peels out without much fuss.
glue+BB is a cool idea although BB diameter will have to be pretty small.
Three reasons I like epoxy putty/clay are:
High density (2g/cm³). While no where near as heavy as BB (lead density is 11.34g/cm³), it’s significantly heavier than plastic (ABS ~1g/cm³, PBT ~1.3g/cm³).
You can sculpt it over 2 hrs.
You don’t have to do it all at once. With epoxy paste, in particular, I can make side-walls as thick as I want by adding more layers with a brush.
Probably not the best material if I was picking from many options, but I’m going to fill my cubic profile spacebar with some leftover Sugru packs before they dry out (individually sealed portions that came from a larger pack). Not sure how well it will dampen sound…but I’ll find out soon enough
I’m actually kinda curious how Playdoh would work for this. If it would dry & stay inside the cap I think it would be ideal since it would be easily removable in the future & should add a good bit of weight. Although I got sneaking suspicion it would crumble as it dries & leave you with a huge mess inside your board… I also like @beaker’s ideal of filling a cap with Elmer’s glue & letting & letting it dry. That is another one that could be easily removable as well & one you wouldn’t have to worry about breaking apart. The actual density & how much weight it would added is questionable though. Think I’m gonna have to experiment with some of my cheaper thin caps I won’t mind losing if thing go awry also. Awesome ideal & work here @donpark!
I think you’re right that the playdough would crumble, and I don’t think it would stay in place as it started to dry. I wonder how sticky tack would fair? For me at least sound dampening is the number one goal over weight (I know they are correlated however). I also wonder how a silicone based potting compound would work. I’m not sure what compounds would react poorly with abs as they cured.
Sticky tack (I’m assuming you’re talking about the blue stuff used to hang posters & such?) might be a good material for this, same with the silicone based potting compound. Although I have no ideal how either would react with ABS or PBT so I would try a few caps you won’t mind losing first if you give it a go. If you do please report back here. I think this may be a good way to bring slightly cheaper & thinner, yet still nice sets of caps up to snuff!
Main takeaway from this thread is that there is a lot of unexplored areas in keycap modding. We can tinker with shape and form of keycaps inside and outside using a large variety of materials without expensive 3D-printer. Cost of materials and tools is reasonable.
Beside tinkering with keycap filling, I’m going to try a hand at sculpting artisans. No need to mold if I just sculpt epoxy putty atop cheap blank XDA caps. All it should take is sculpting, polishing, and paining. oh, yeah. skillz too. lol
So I tried filling the middle portion of my Cubic profile spacebar with Sticky Tack (aka Blu-Tack, Poster Tack) and it worked wonderfully! I didn’t want to put in the more permanent Sugru until I had exhausted my removable material options. The sound went from a high pitched tink sound to a deep thud, and it definitely increased the mass in a good way (stays in place as well). The best part is that it won’t react with plastics, is removable, and any residue left behind can be wiped away with a damp cloth (from a little research on its use with posing ABS Lego people). I’m not ambitious enough to use it on every key, but I may consider applying it to the right shift key (ansi size). I bet a similar application to my ePBT spacebars would make them sound as if made out of concrete, lol.