It turns out in my case Costar stabilizers sucked. For the spacebar I am using (SP, DCS profile) there was a loud click on bottom out.
With a few mods the Cherry plate mount stabilizers are ideal – smooth, quiet, and sturdy.
Here is a guide showing you how I modded them to work on my FC660C.
First, a typing test

Notes
If you follow the steps below it should take you about 30 to 45 minutes. With a 6.25u spacebar on the FC660C you will need to use 1u Alt/Mod keys, leaving small gaps but you could always use a 6u stab and space bar with this mod.
Required items
- Niz or equivalent Topre MX housing (part of it will be trimmed off so heads up)
- Cherry 6.25u plate mount stabilizer
- 3.6 mm nylon zip ties x 4 (If you need to remove the stabilizer you will have to cut these)
- Hobby knife (X-acto, Olta, etc.)
- Plastic nippers or nail clippers
- Needle nose pliers
- Tweezers (recommended)
- Cloth type bandaid
- Electrical tape
- Dielectric grease (Superlube, etc.)
- Your plastic lube of choice ( Krytox 205 grade 0, 105, etc.)
Steps
-
Open the board and unscrew the plate from the PCB
-
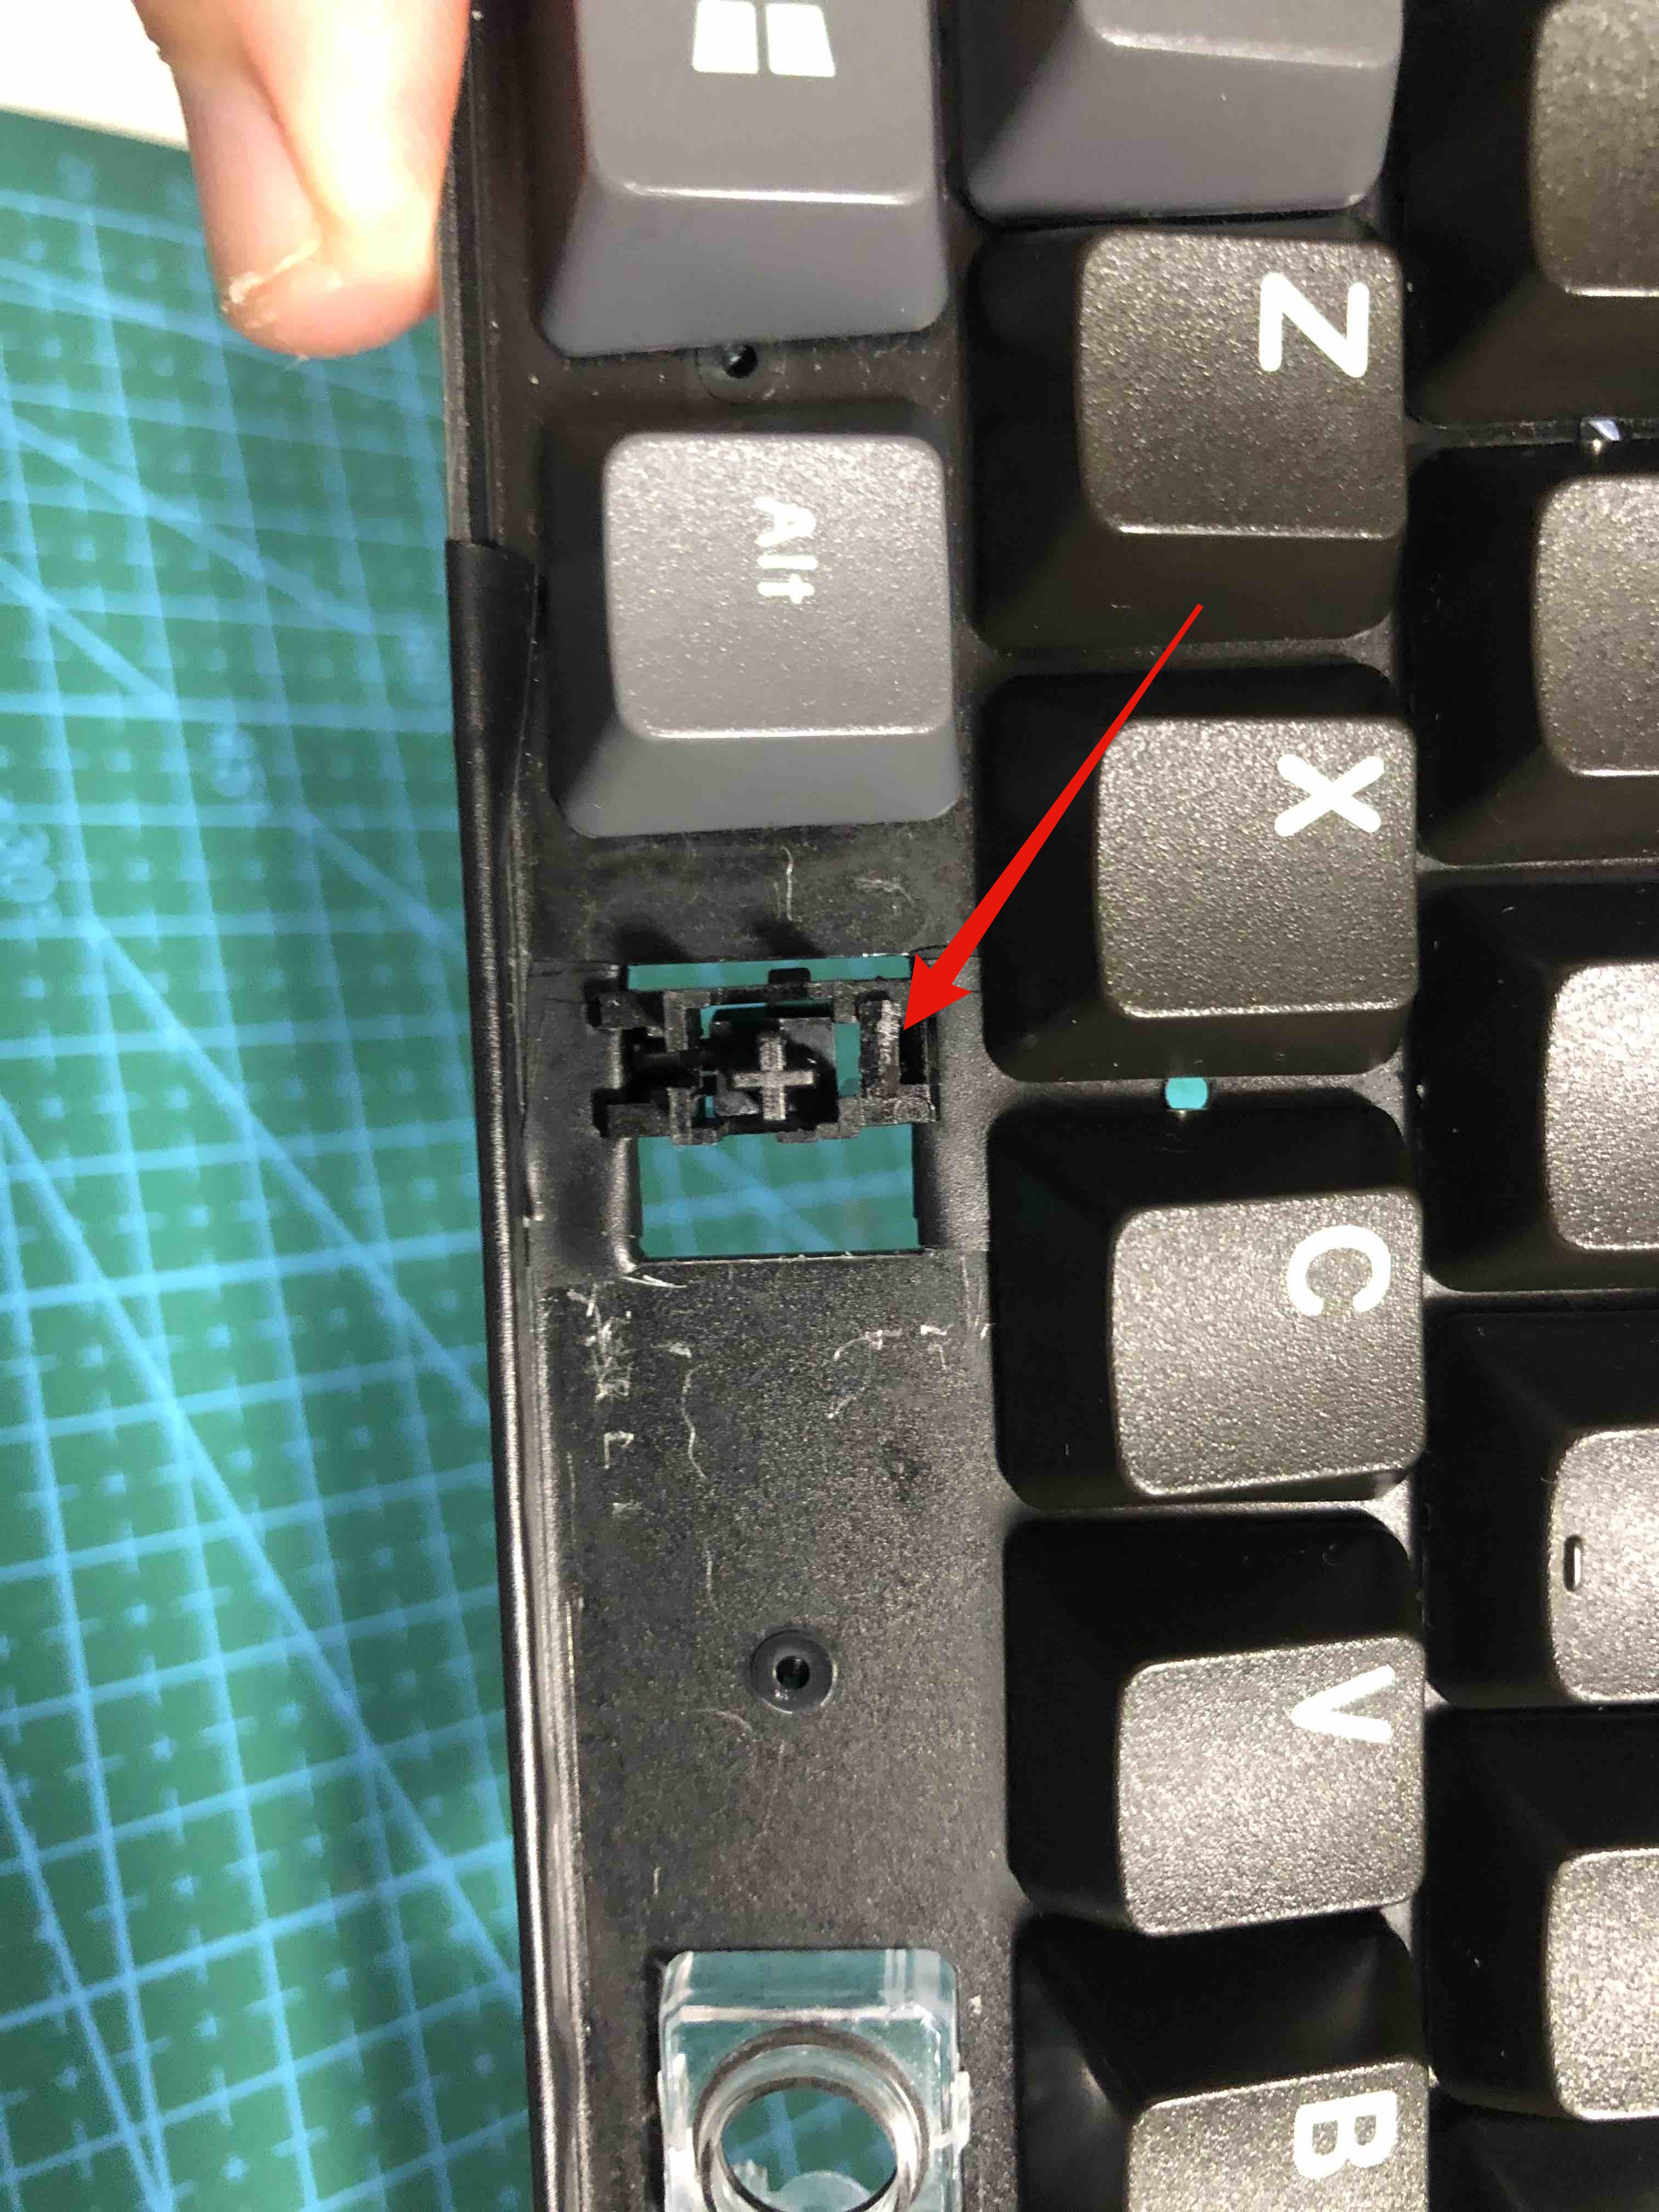
Remove any stabilizers and remove the space bar slider housing. Pinch the locking tabs from the top and push the housing through.
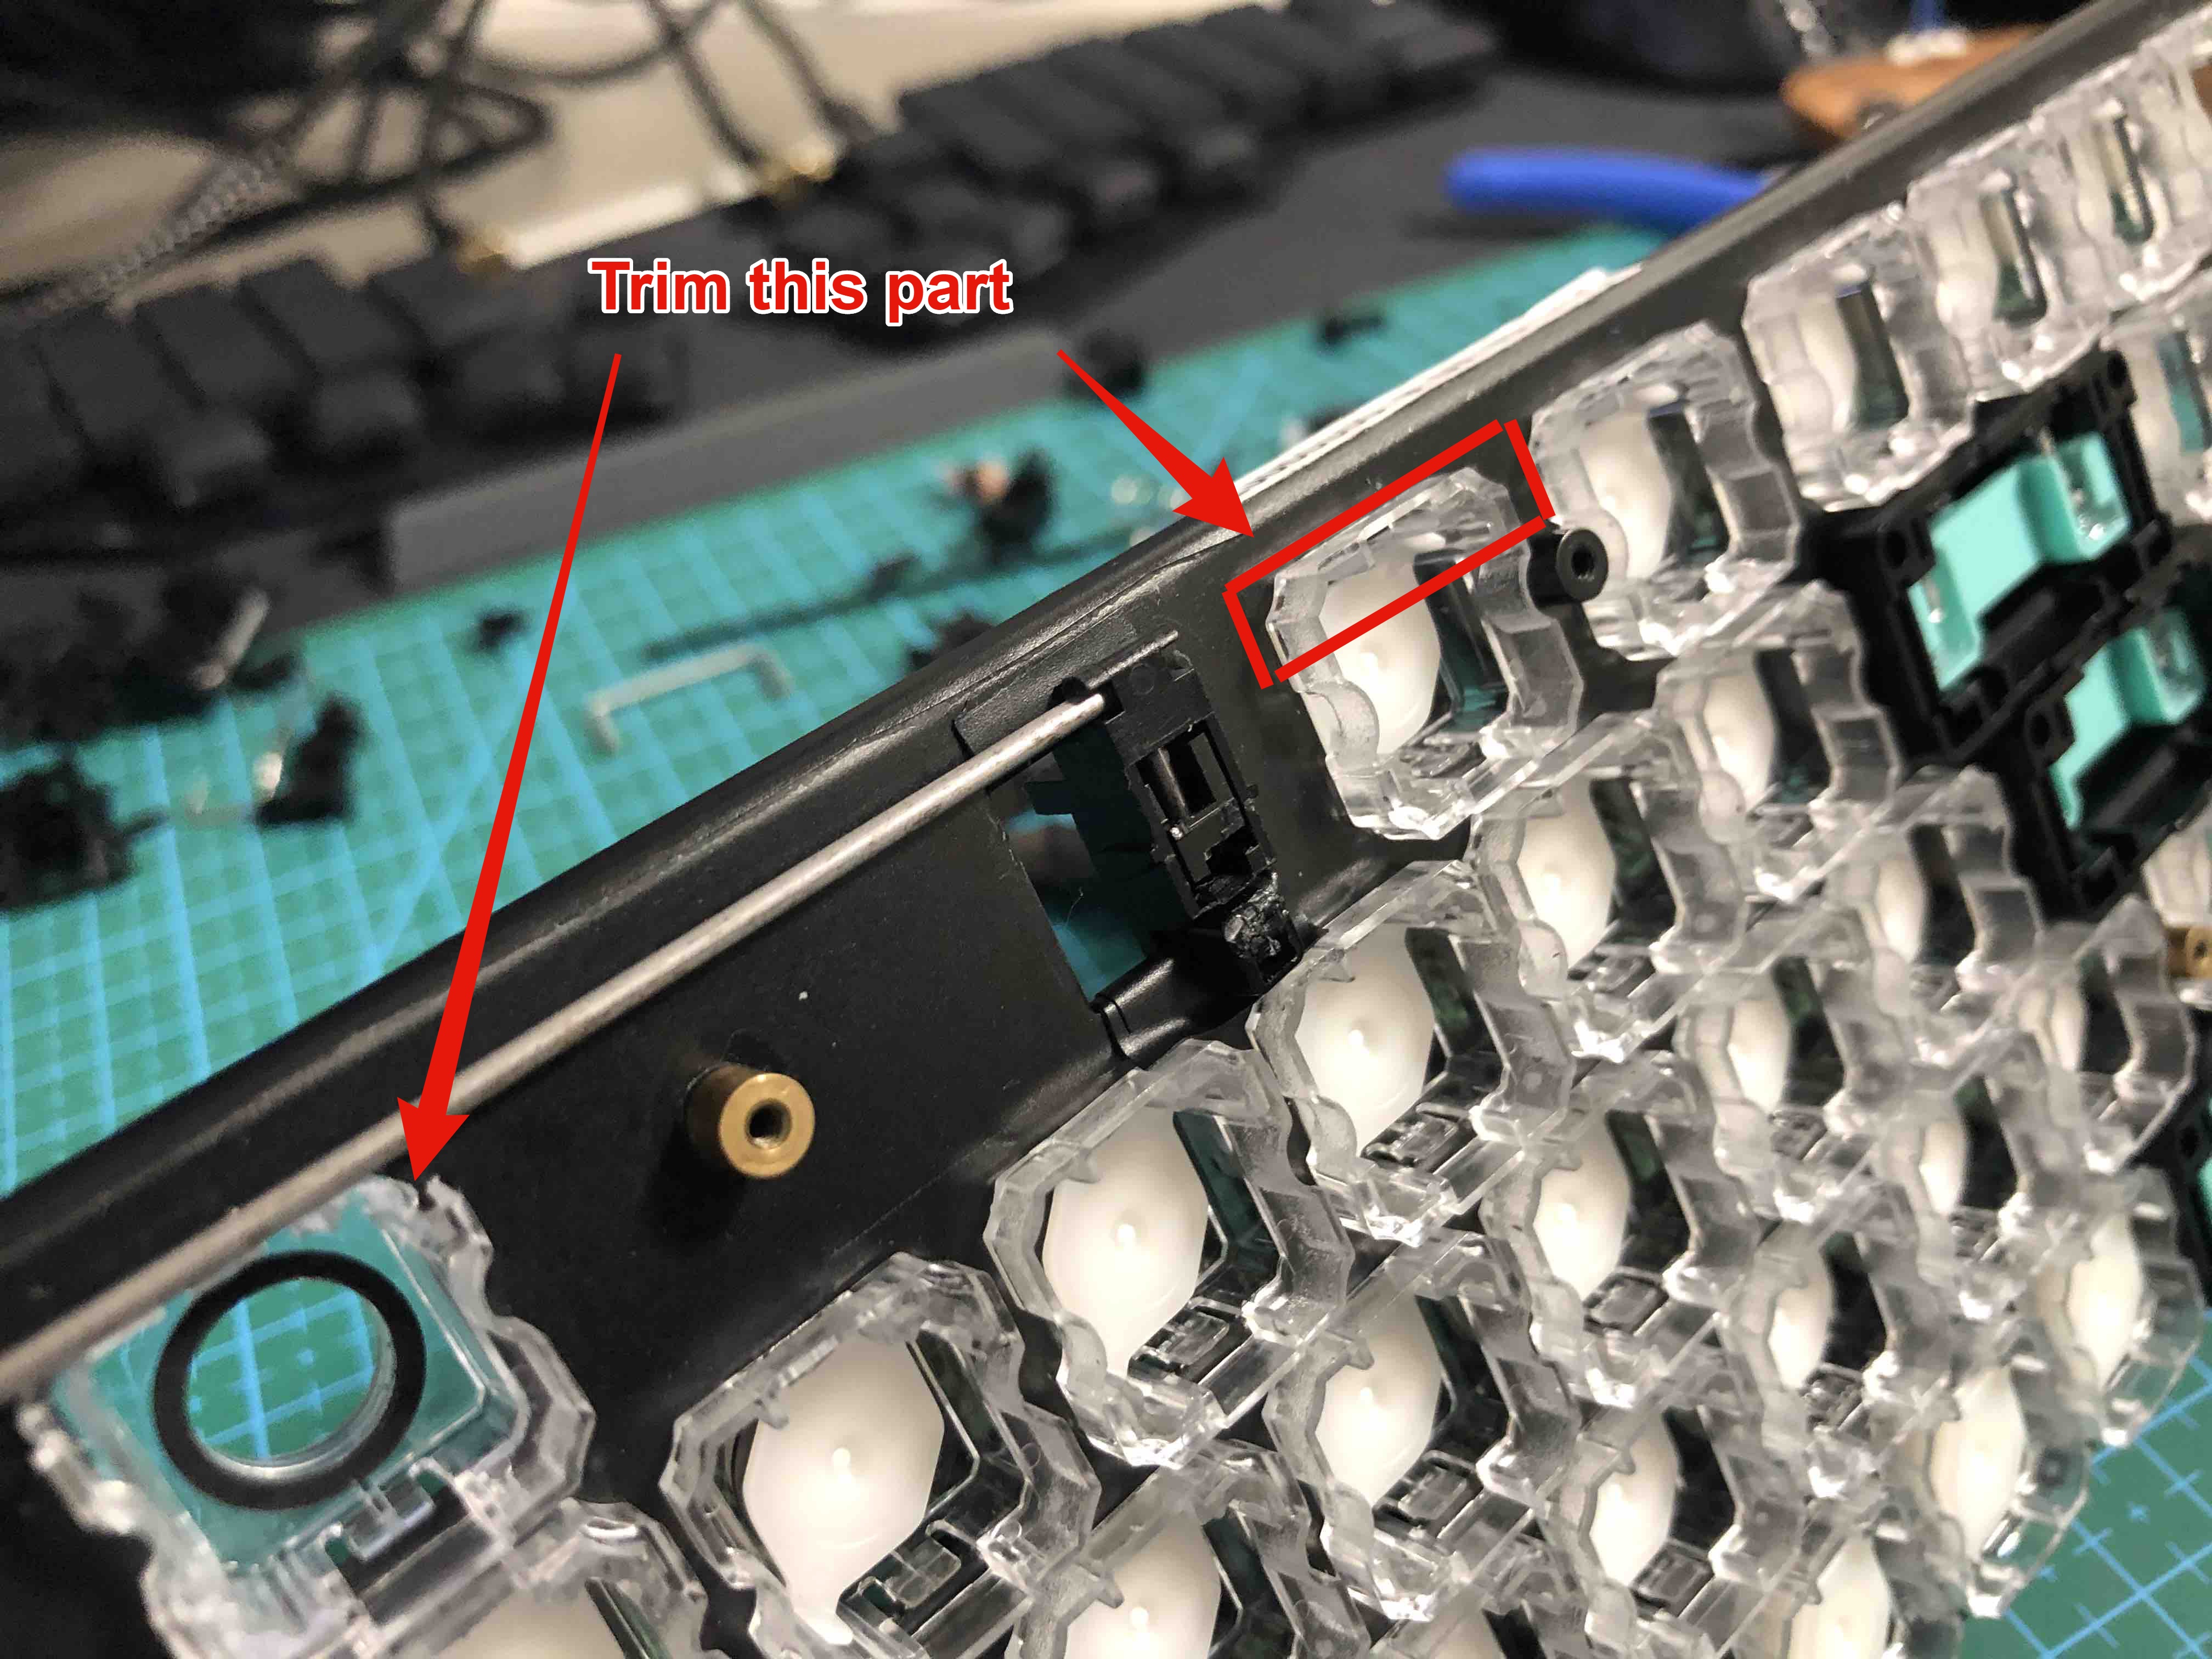
-
Using a hobby knife, carefully trim off the front lip of the slider housing you want to use. This is to make space for the stabilizer bar. Don’t worry there is plenty of material to keep it locked in and stable.
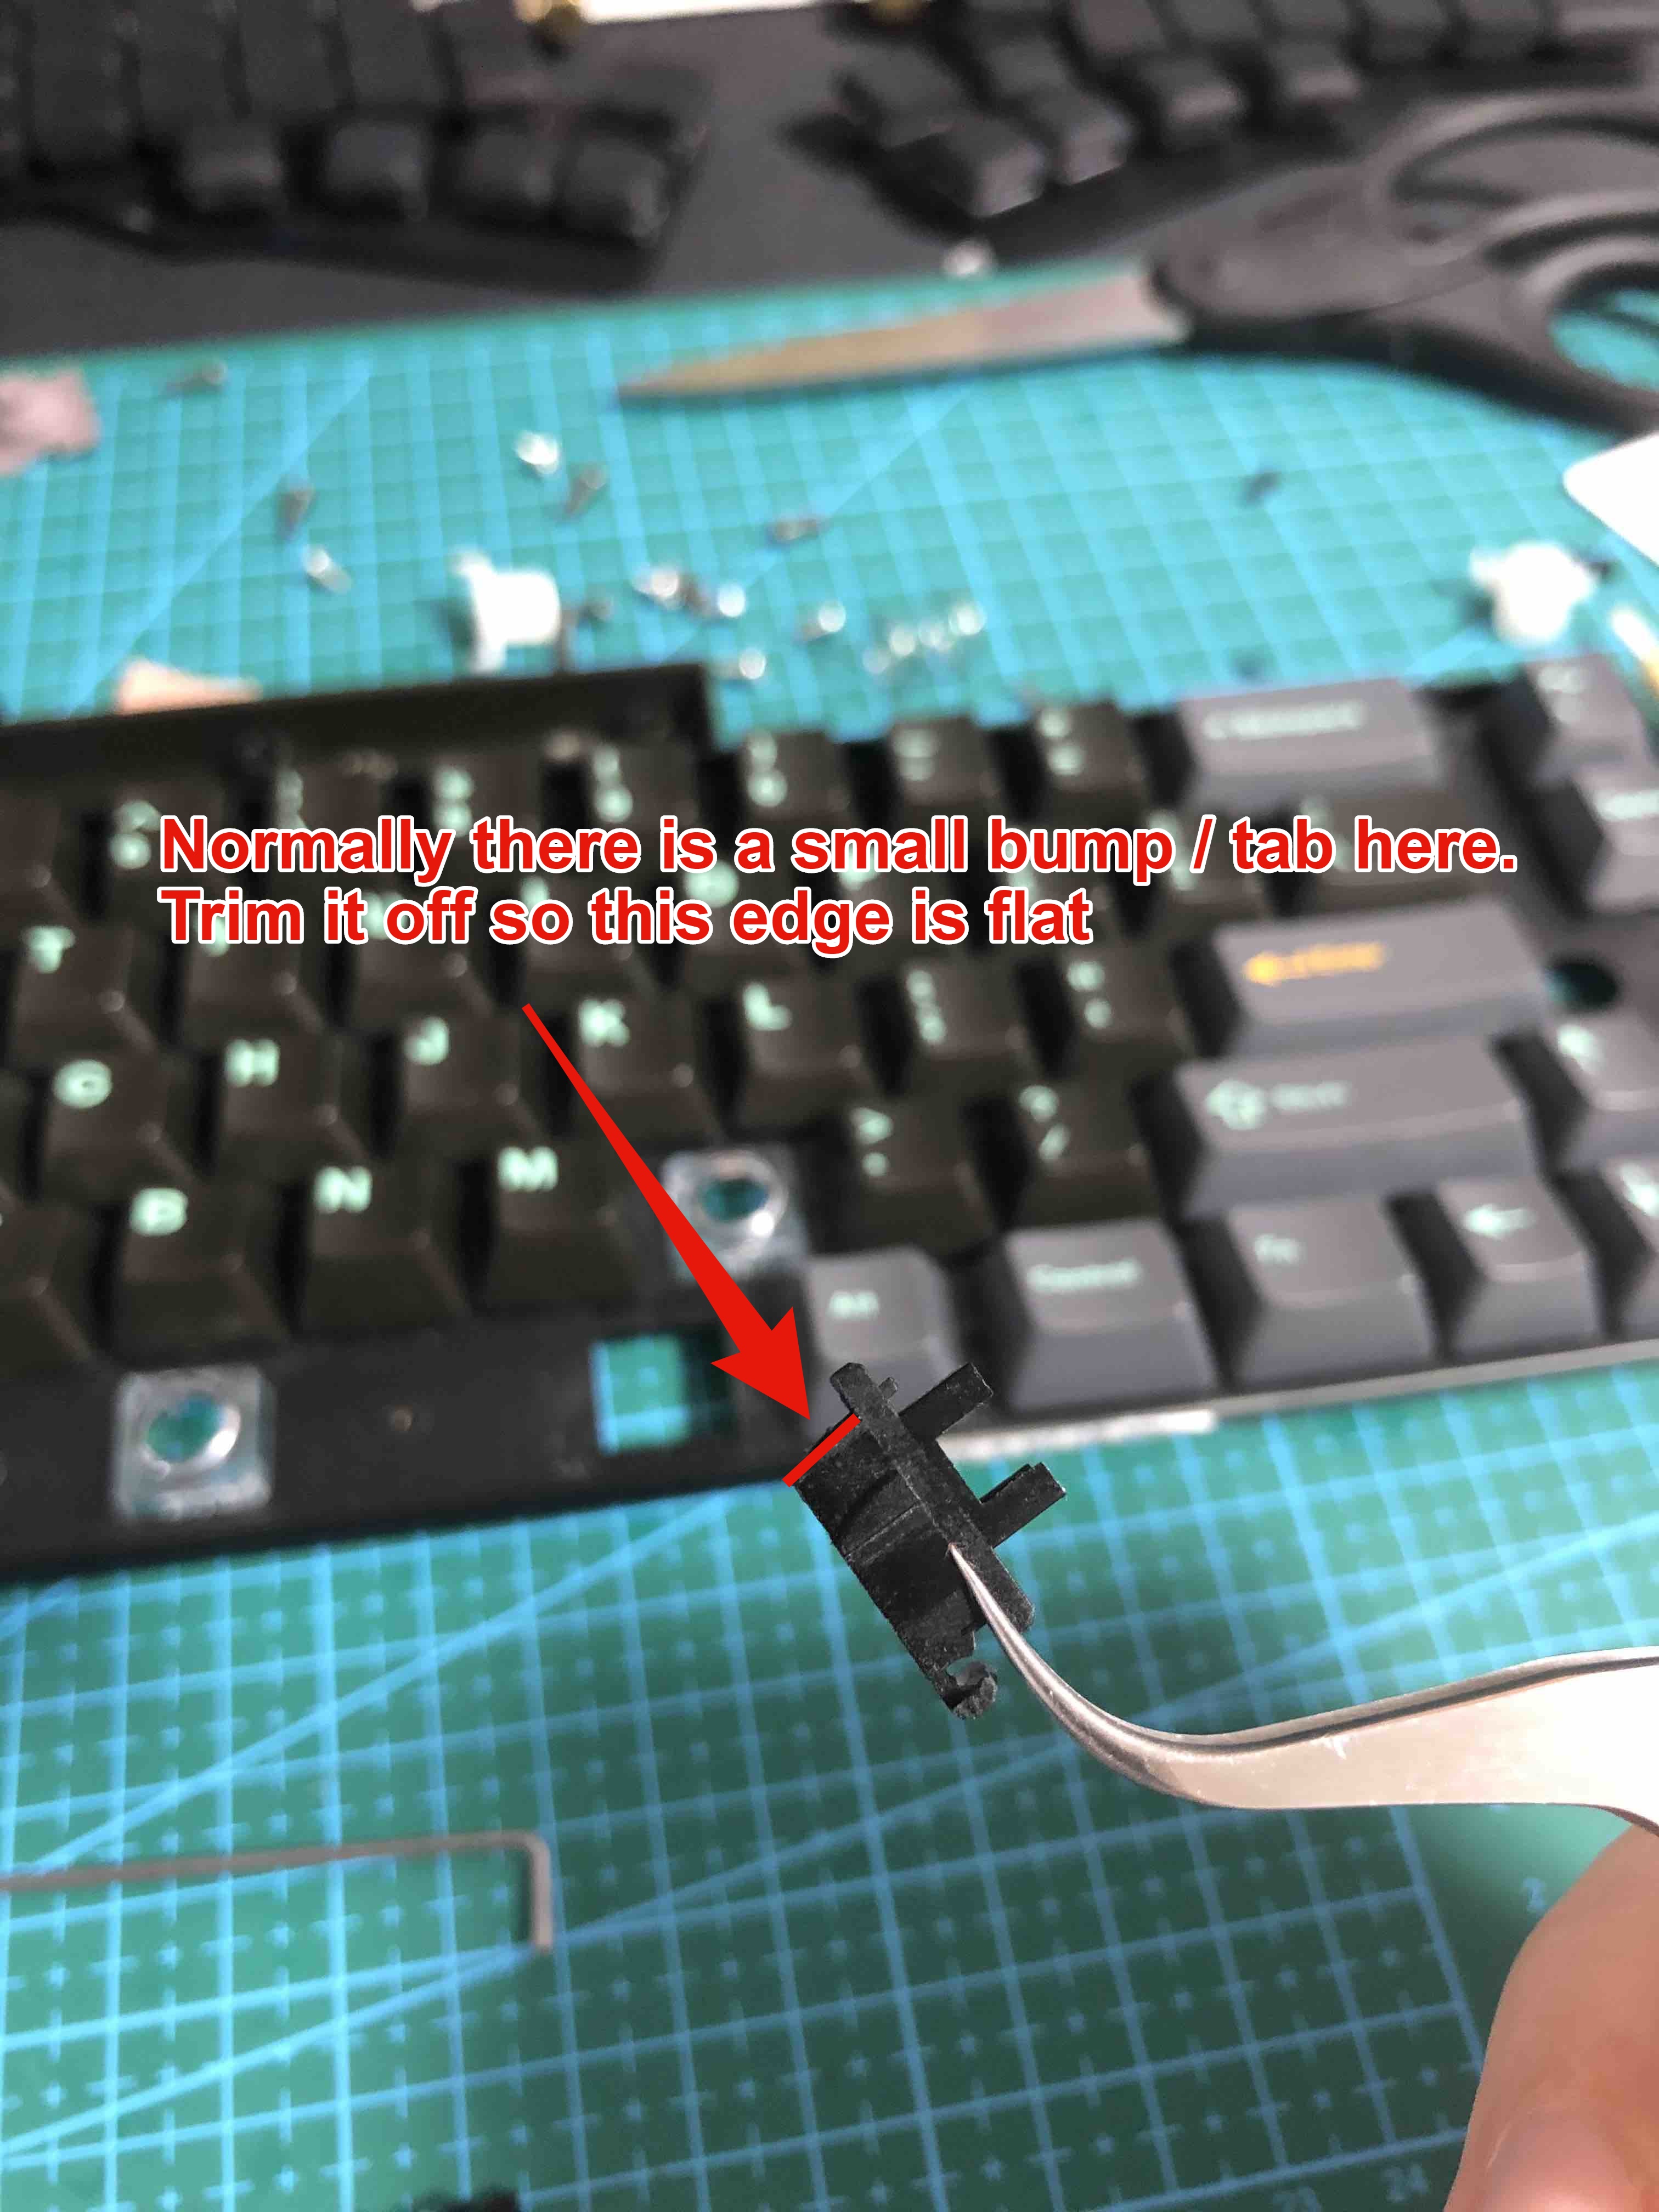
-
Take apart the stabilizer and trim off the small tab on the side so it’s flat. This will prevent it from pushing in and catching on the slider later
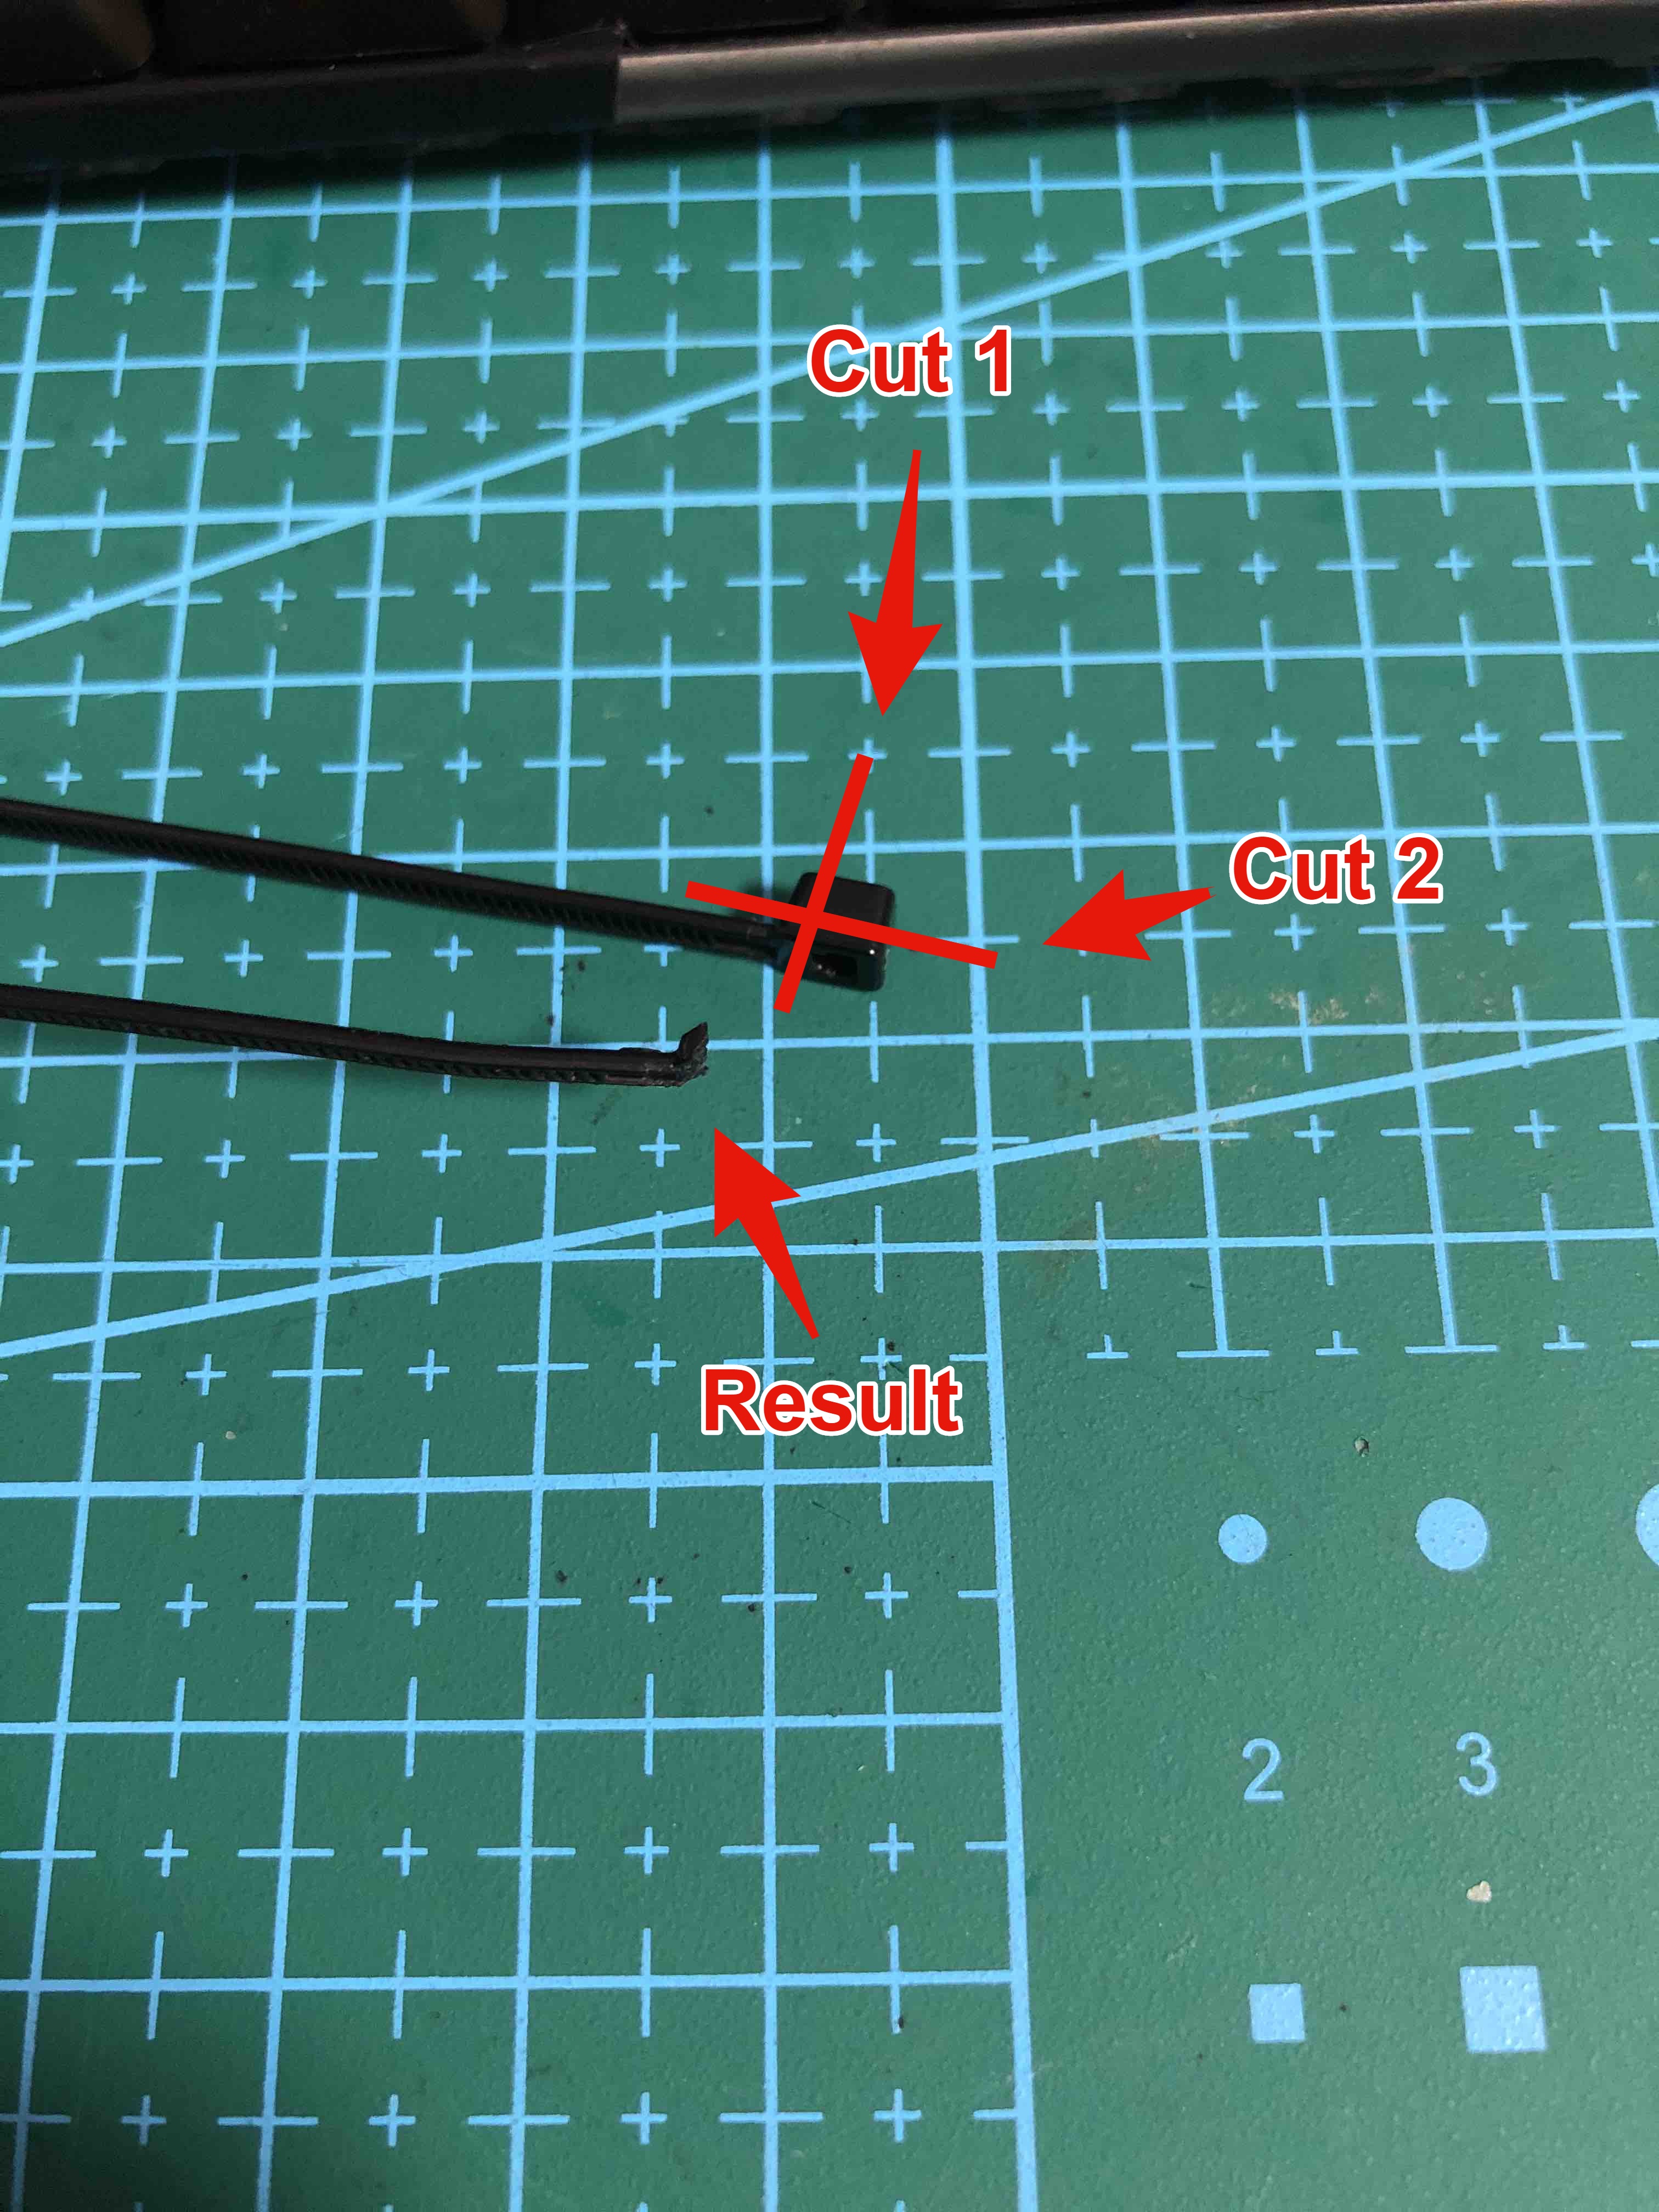
-
Trim two of the zip ties leaving a very small T-shaped piece where the head attaches to the strip. For the other two zip ties, clip the whole head off where it meets the strip. Here’s a pic of the cuts for the T-shape ones:
-
Trim 12 small pieces of electrical tape wide enough to shim the stabilizer holes in the plate and apply 3 to the top and bottom of each hole
-
Trim and apply thin slivers of cloth bandaid that fit the top of the lower hole where the stabilizer bar goes in, making sure it covers the full length. This will stop the bar from making a loud click when you tap it
-
Lube the stabilizer – I followed the TaehaTypes method on youtube except in the end I didn’t clip the stabilizer legs because it never actually bottoms out. You may put electrical tape on the bottom to stop lube from coming out depending on your situation.
-
Wiggle the stabilizer into place and put on your spacebar, using it to adjust the alignment so the sliders move without getting pinched on the housing walls. Take this chance to adjust your lubing and make sure everything fits because it’s about to be locked in
-
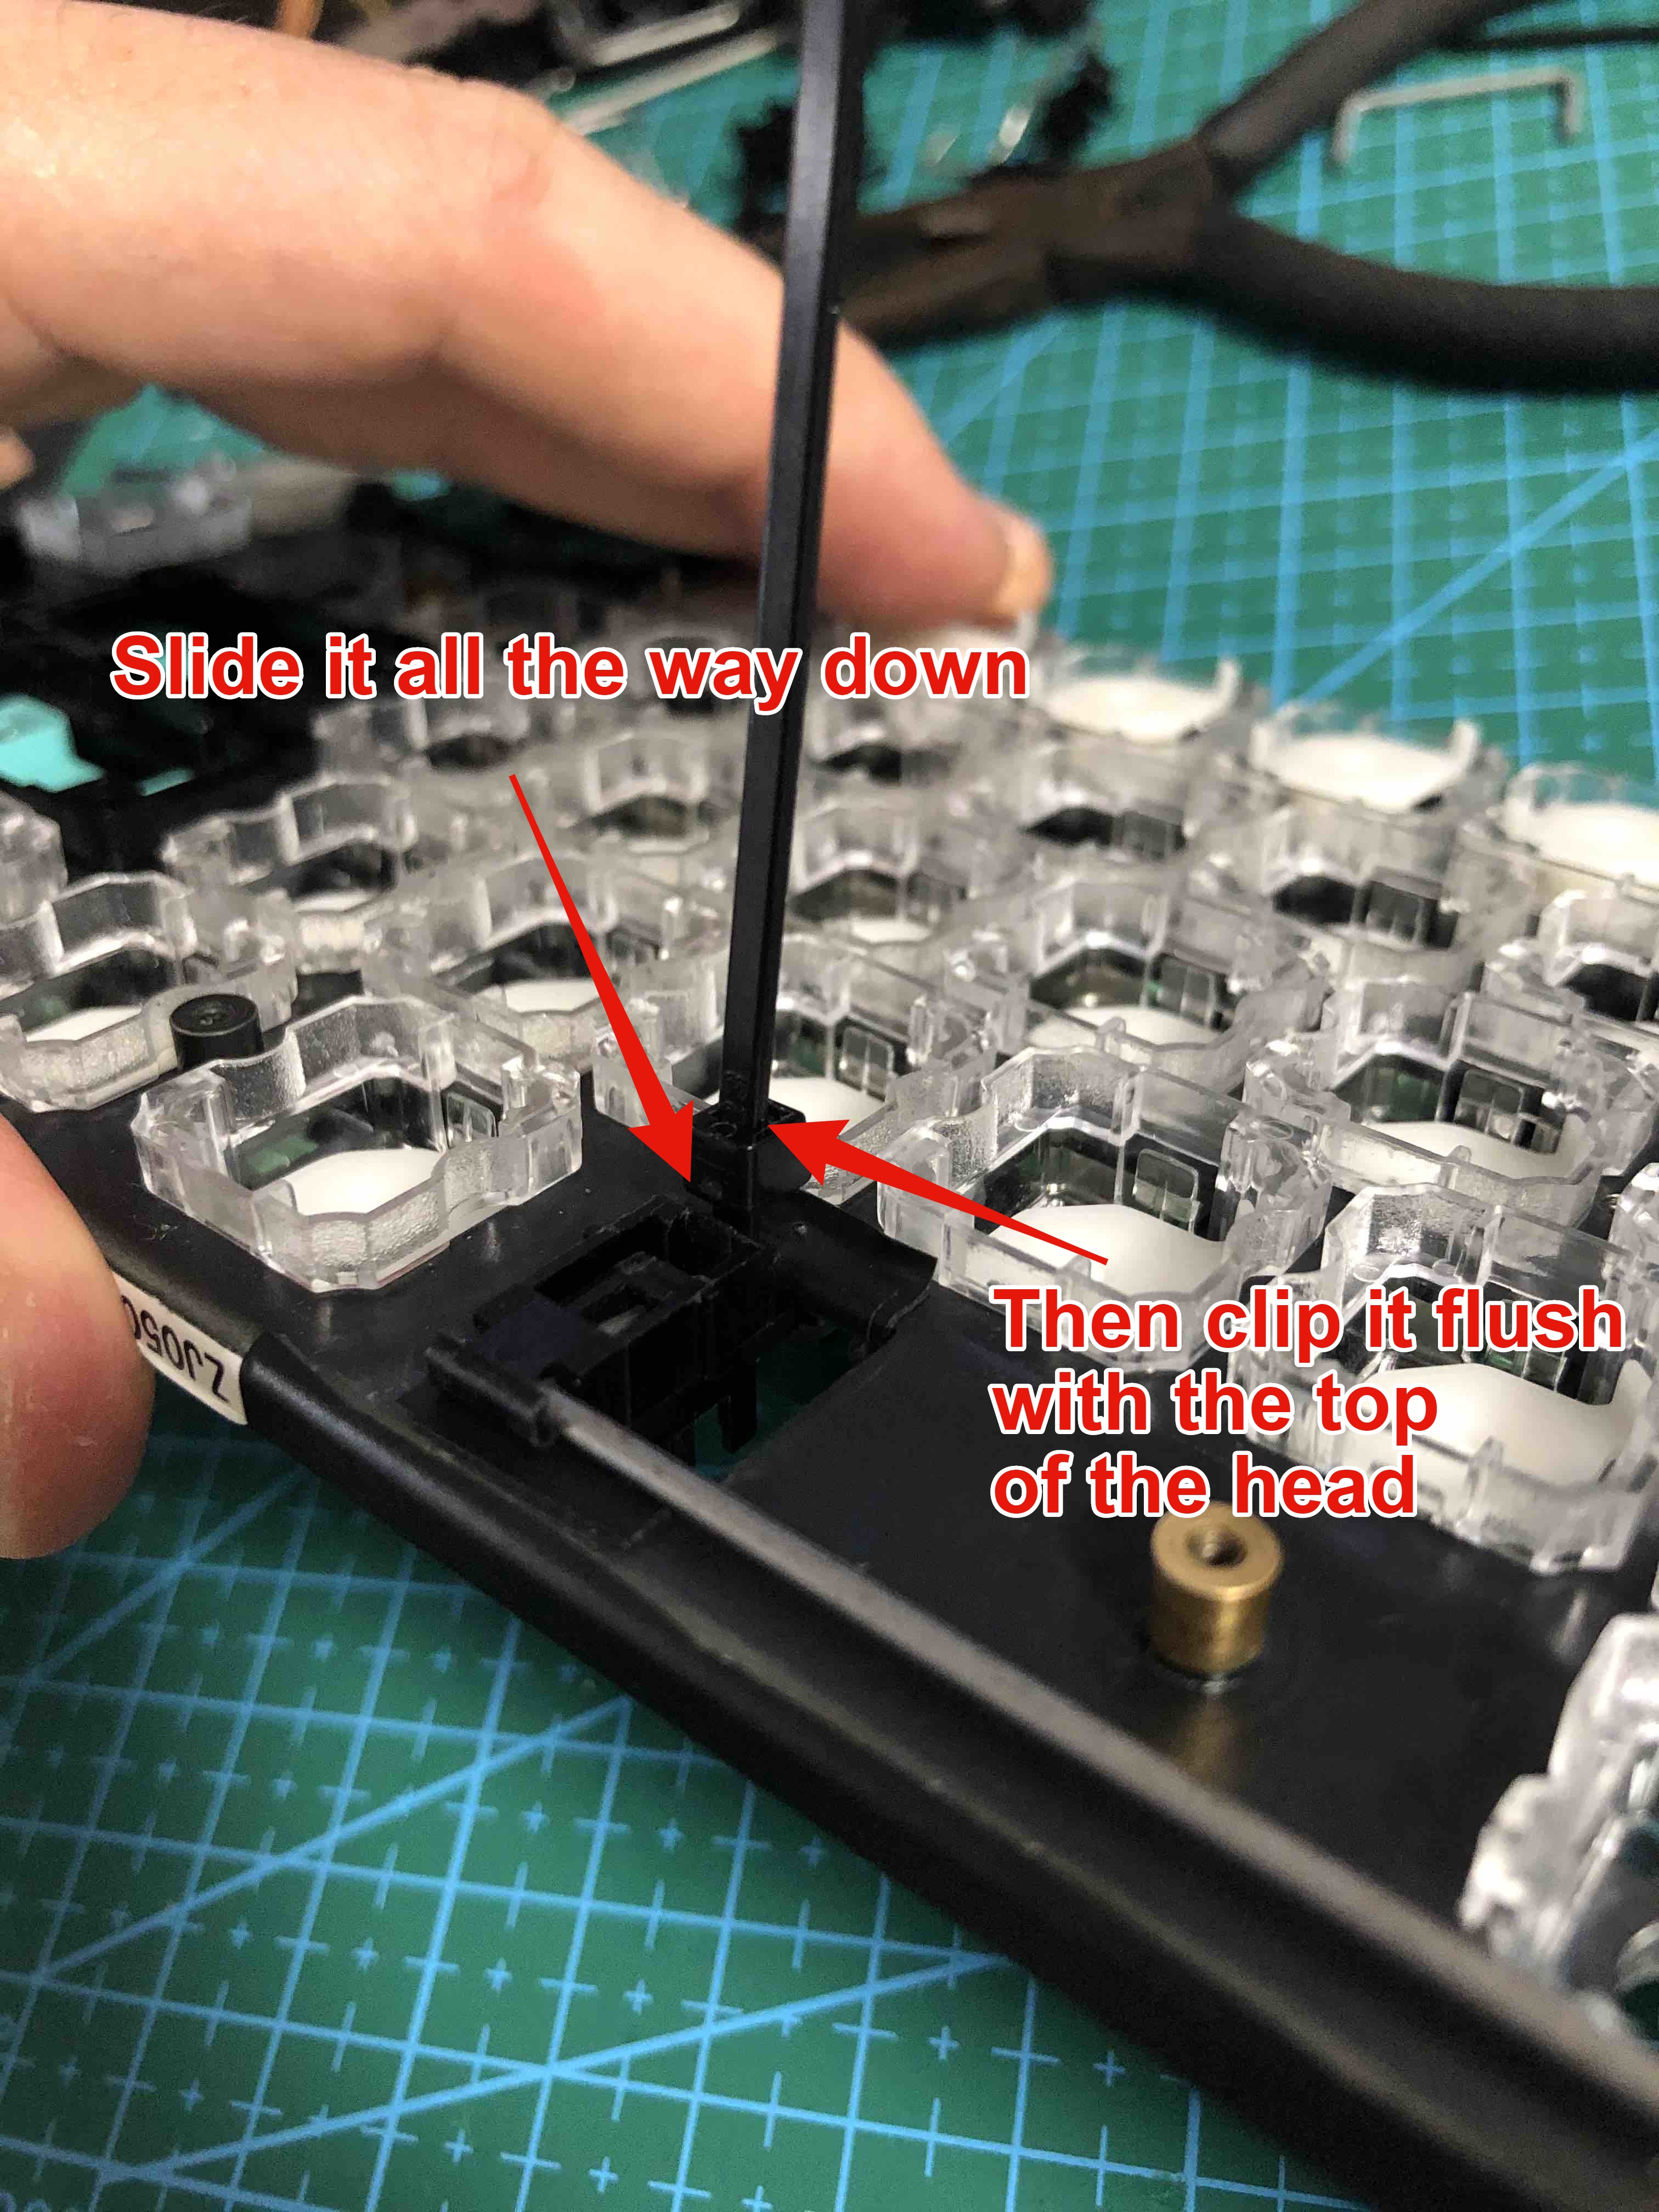
Carefully take the space bar off and seat the stabilizers again. Slide the T-head zip ties into the gaps in the top of the stabilizer housing, with the little teeth facing up towards the home row
-
Flip the plate upside down. Take the two spare zip tie heads and slide them on the strips, cinching down the housing on each side. Use needle nose pliers to pull the strip, and at the same time use the tweezers to hold the head down, locking the stabilizer in place. Clip off the excess zip tie strips so they are flush with the top of the heads.
-
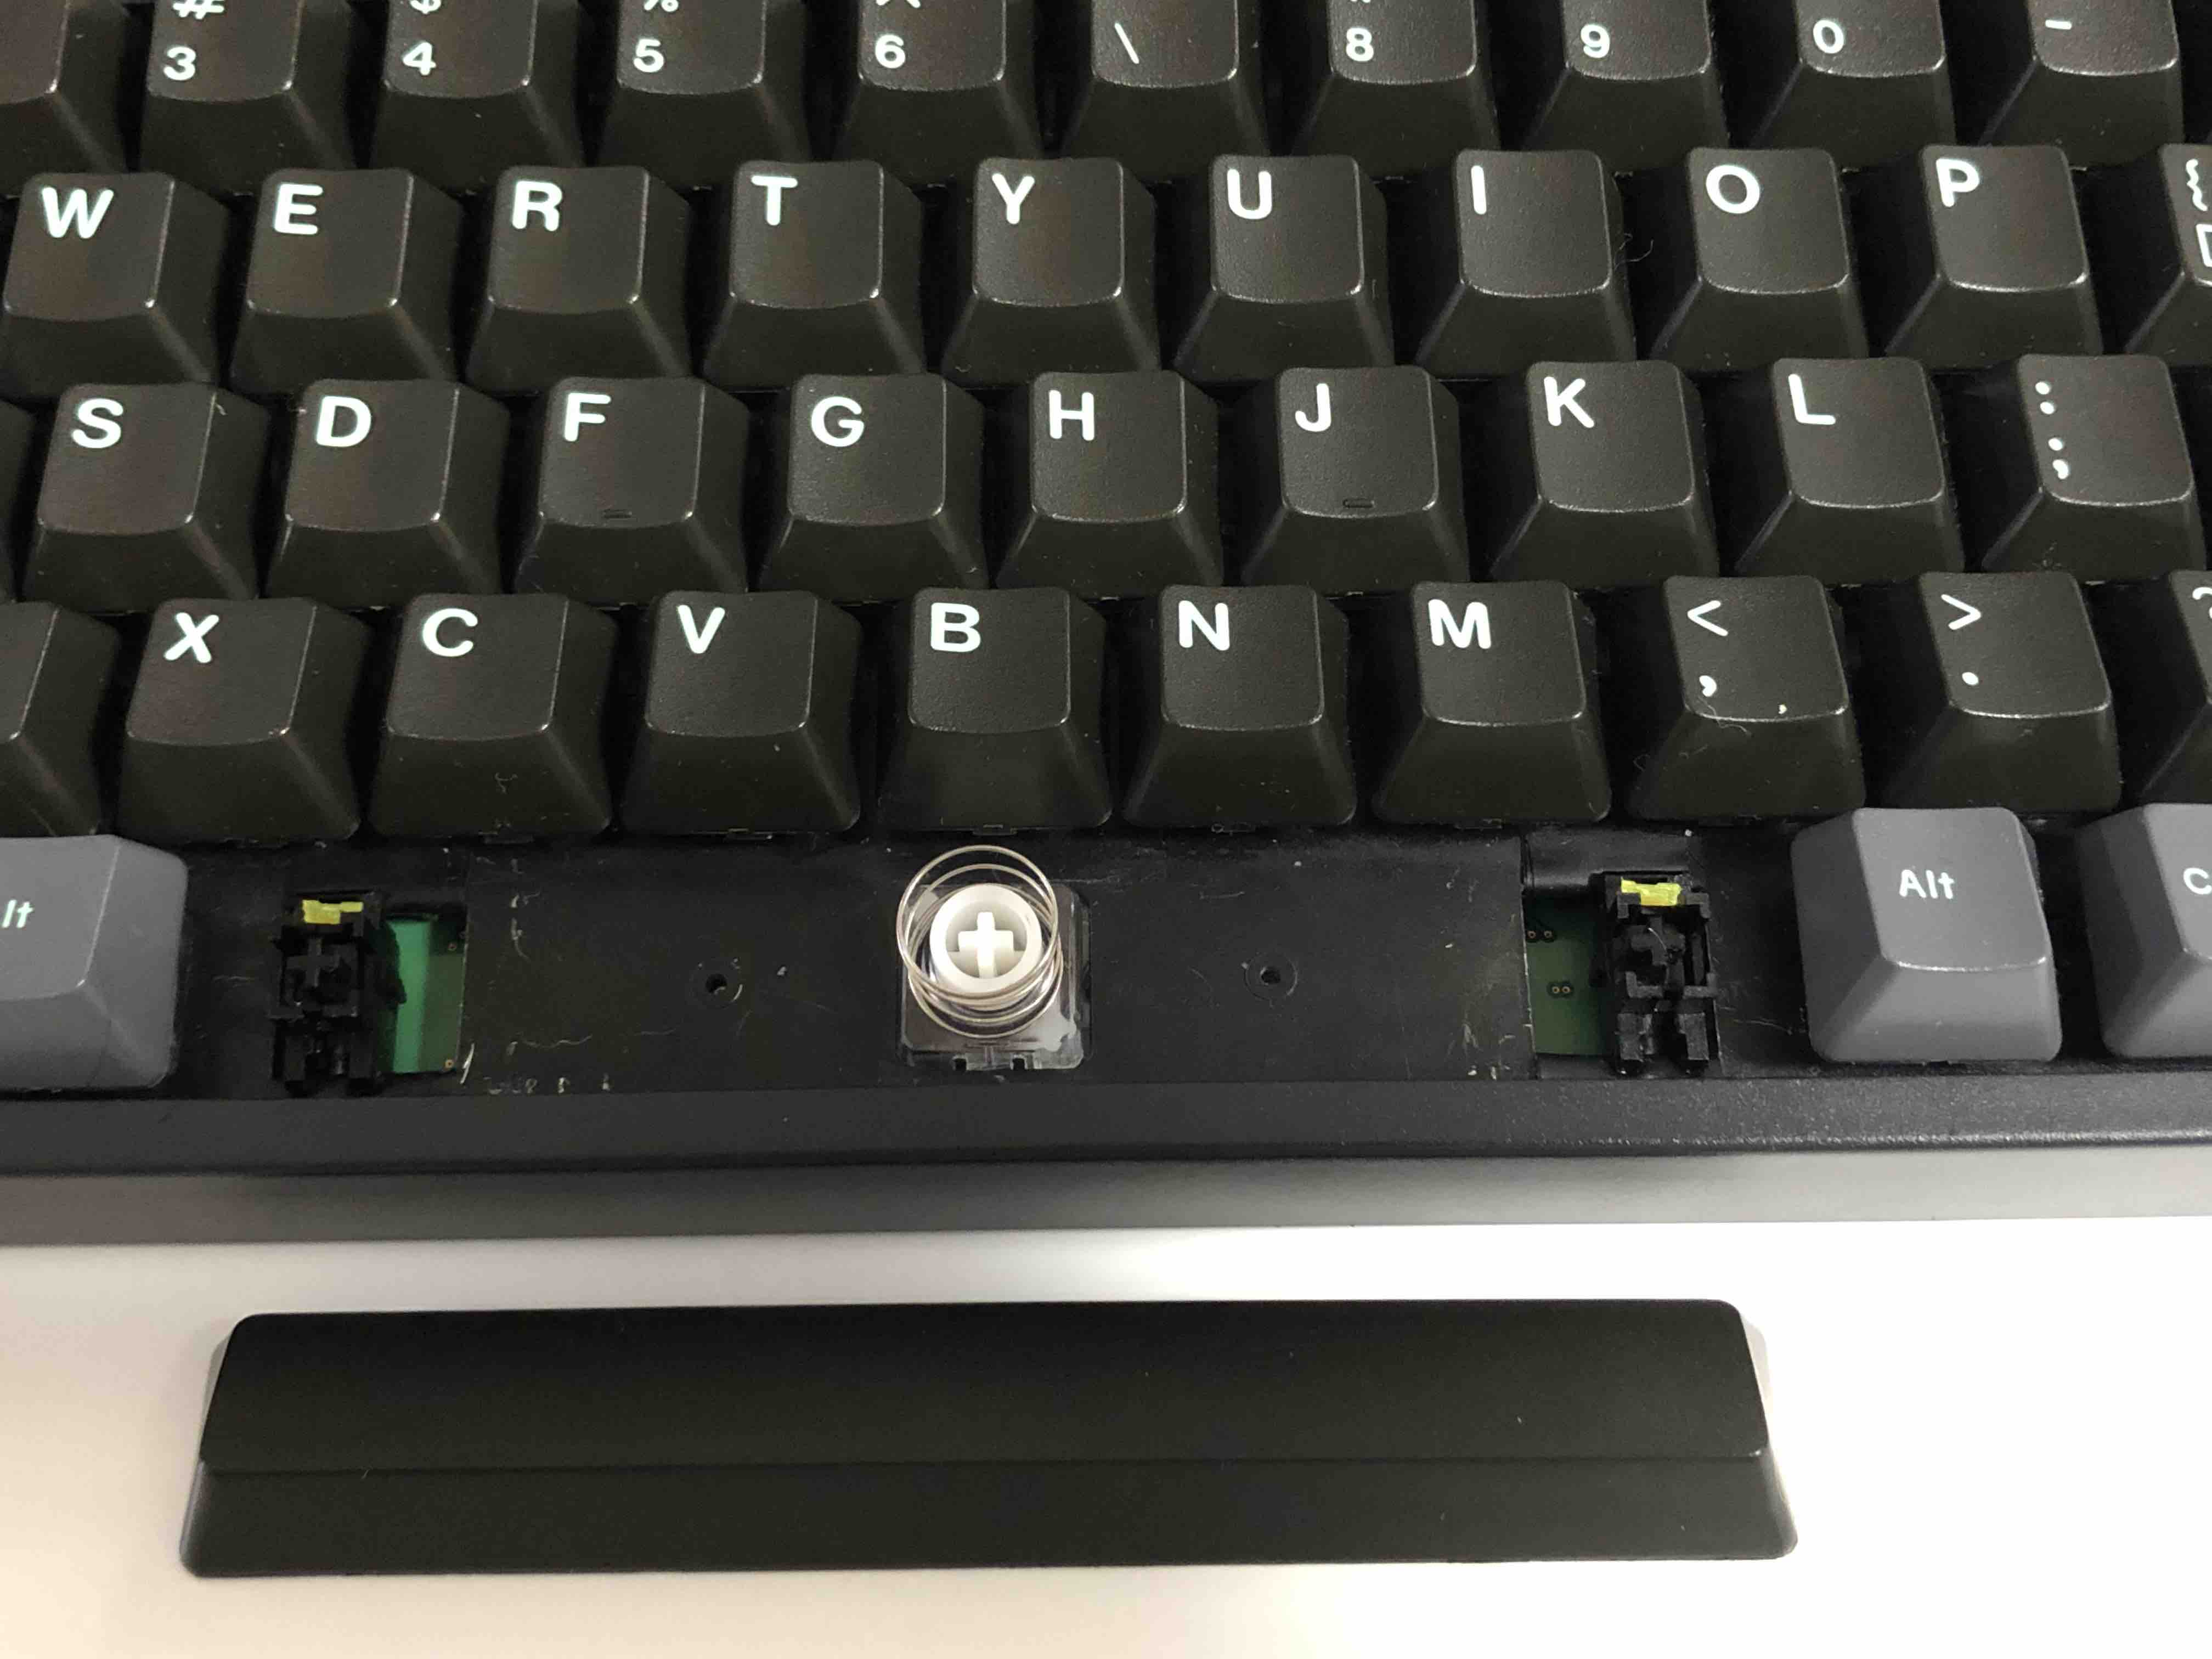
Hurray! A nice stabilizer that is very firmly locked in place. Now just reassemble the board and enjoy. Here I used yellow zip ties so you can see the top of the little T-shaped bits clearly.