You are correct. The Realfoce uses a 6U bar stock but most MX sets have a 6.25. I thought I could make it work well enough with some smaller blank keys I had but I was not satisfied with how the bottom row looked in the end and the spacebar operation was bad. I hope you can figure out a solution for your project, good luck!
Late edit: The costar stabilizer only worked with this thin and crappy Razer spacebar. With a thicker, normal spacebar it taps the bar on bottom-out creating a terrible loud click.
See my post later in this thread to see how I set up a cherry plate mount stabilizer which works great.
I recently used the costar stabilizers to install a 6u spacebar from an old razer on my fc660c while i’m waiting for my new keycaps to come in. For me it is working nicely.
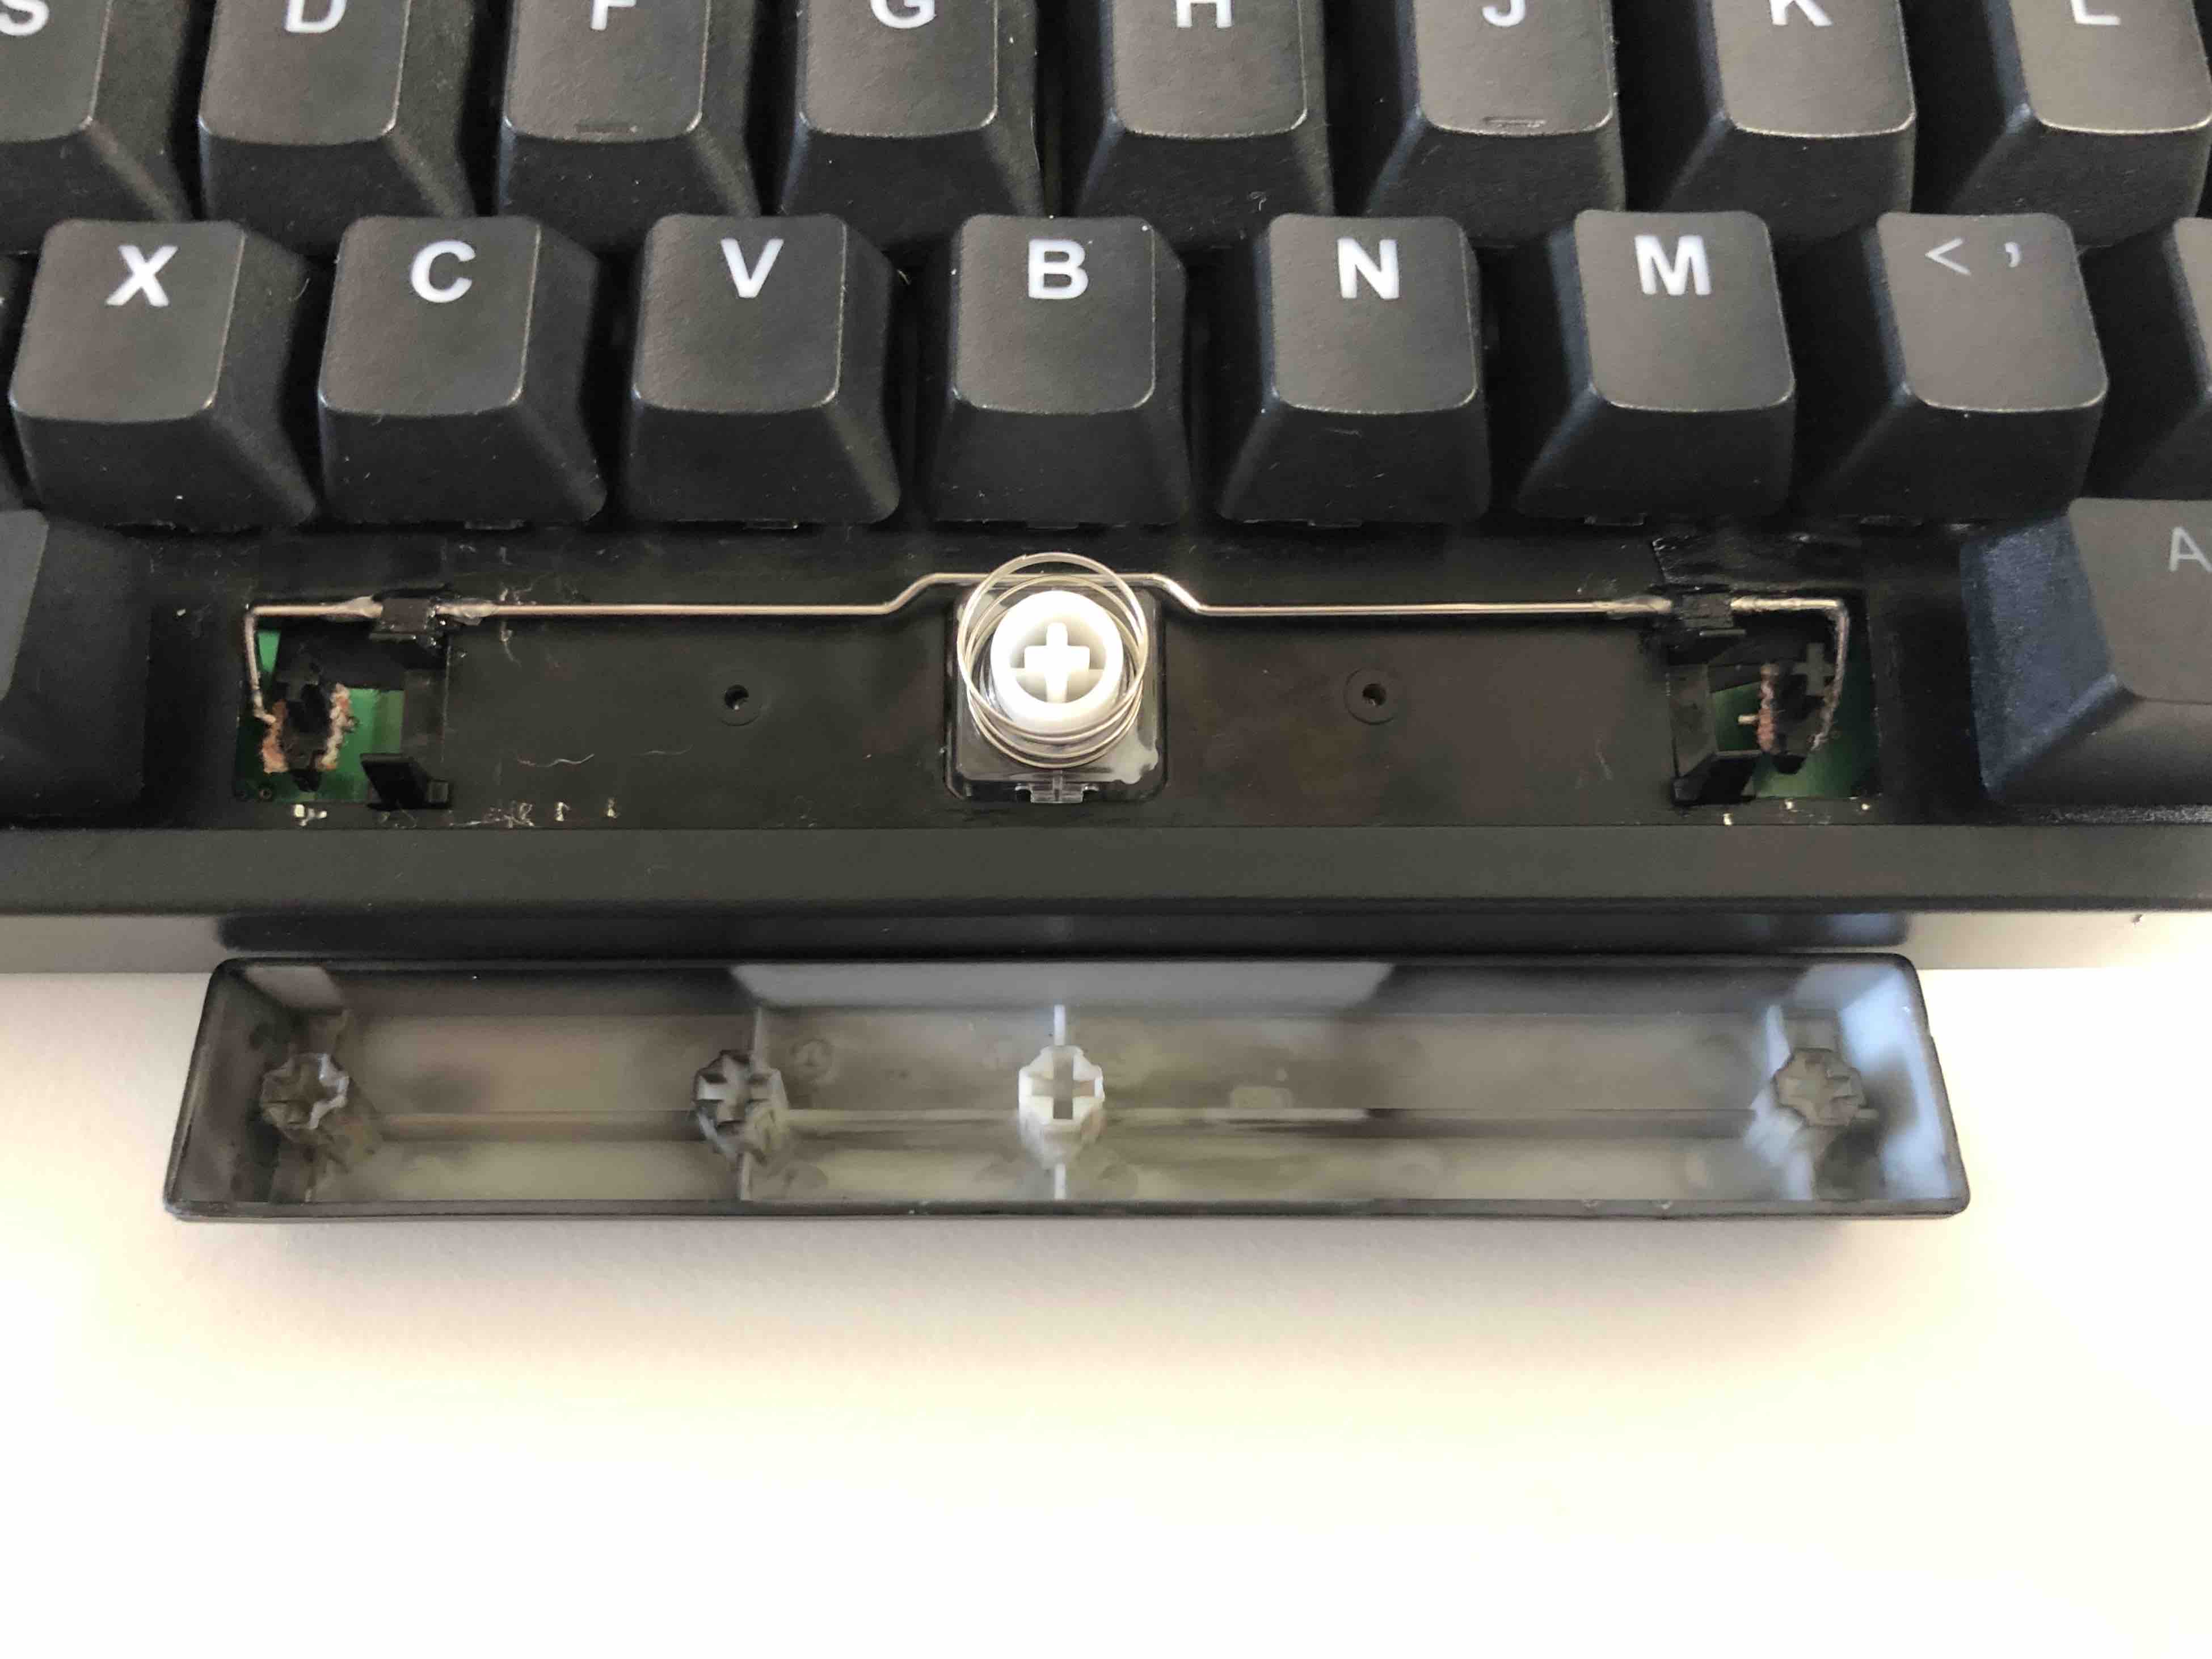
After removing the stock topre stabilizers I used a little electrical tape inside the holes in the plate to remove any gap / rattling and squeezed in the costar clips.
Also as mentioned earlier in this thread by Eloi, I added little fabric bandaid strips where the bar meets the spacebar sliders to further cut rattle and lubed it all up. I clipped the wire on the top of the holes and put the long end of the spacebar sliders towards the bottom after noticing it was sticking the other way around.
It looks a bit messy here but it actually works very well and doesn’t rattle at all.
Here are some pics:
And a quick video
This cheap razer spacebar is super high pitched but in general the costar stabilizer is working perfectly for me.
Notes: I did have to use some tweezers to adjust the alignment of the stabilizer bar because it was catching a bit due to being too far one way over to one side. I also had an issue with the bar sticking at the bottom of the stroke when trying to use two costar clips on each side so i just used one each. This may be due to the razer spacebar having non-standard spacing.
Thanks to everyone who has shared comments and tips in this thread so far. With the Niz sliders, topre 2u stabilized sliders, and costar spacebar stabilizer I’ve now got a fully mx-compatible fc660c that sounds and feels great to type on. Now I just need to get some new caps on this board…
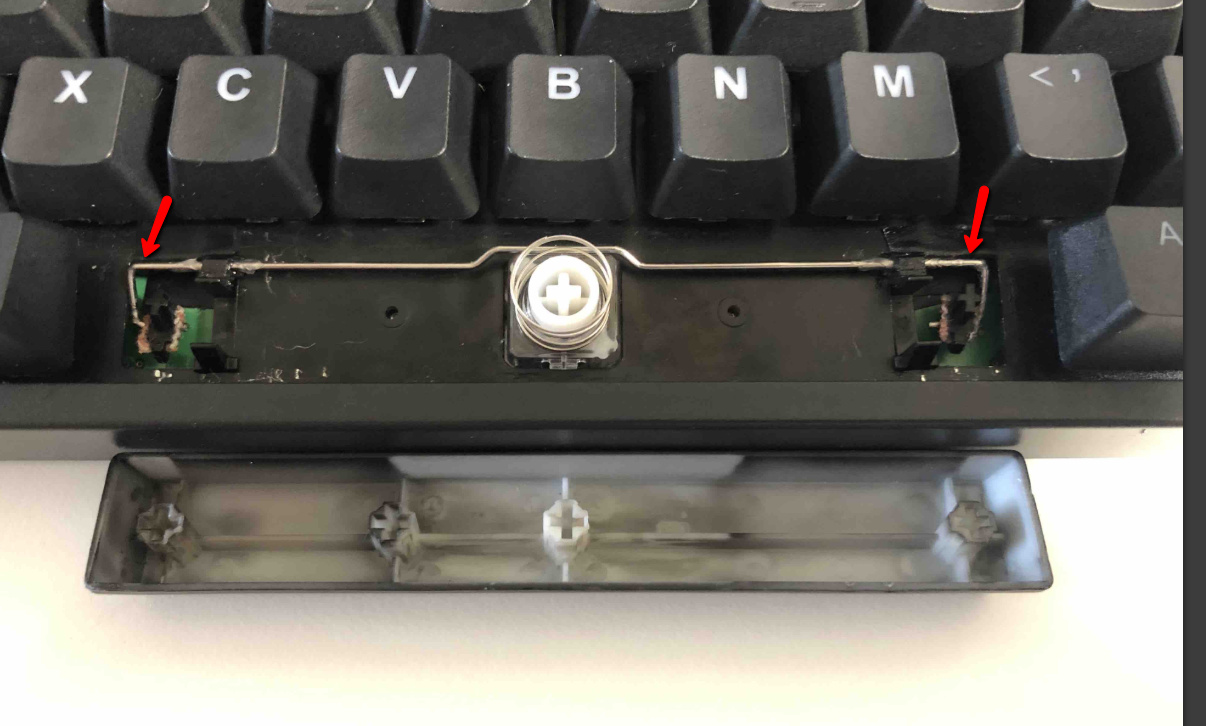
If you put the stabilizers base at the end of the wire, it will stop the wire from moving left/right.
2 Likes
Thanks for the tip. I feel like it may conflict with the particular position of the stems on this razer spacebar but i’ll try it out.
1 Like
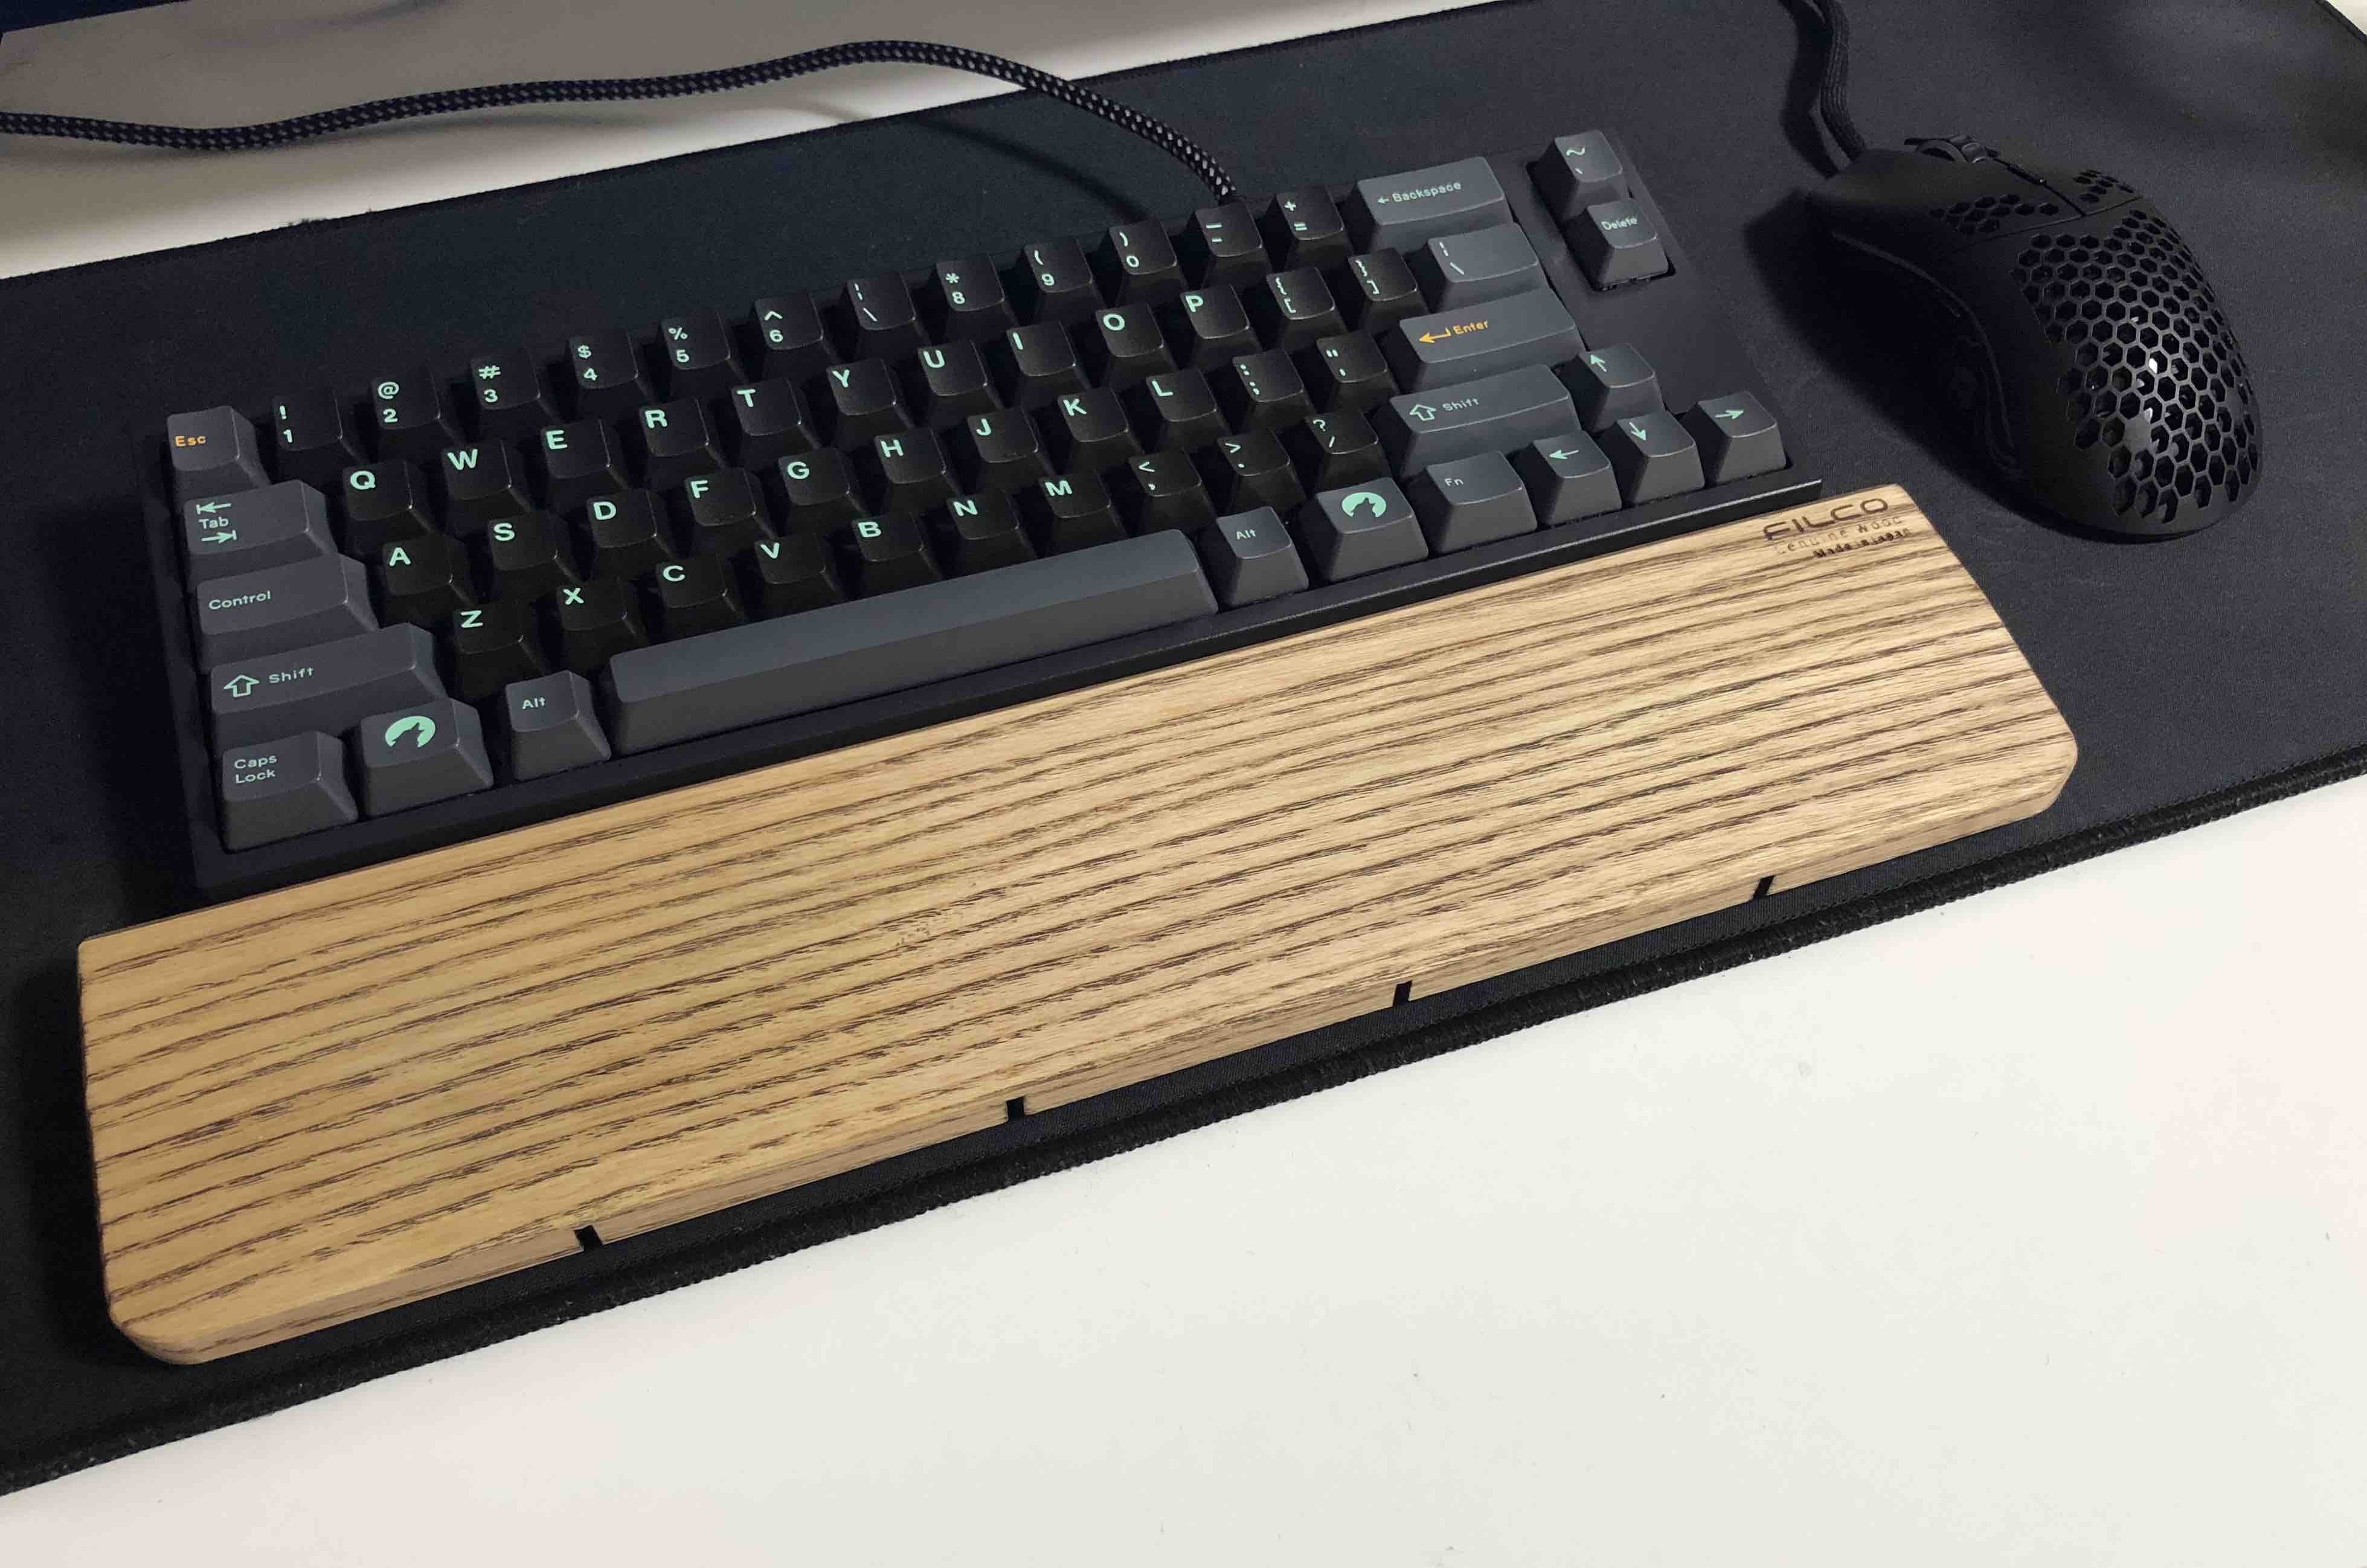
Hey look, I made a kee-board.
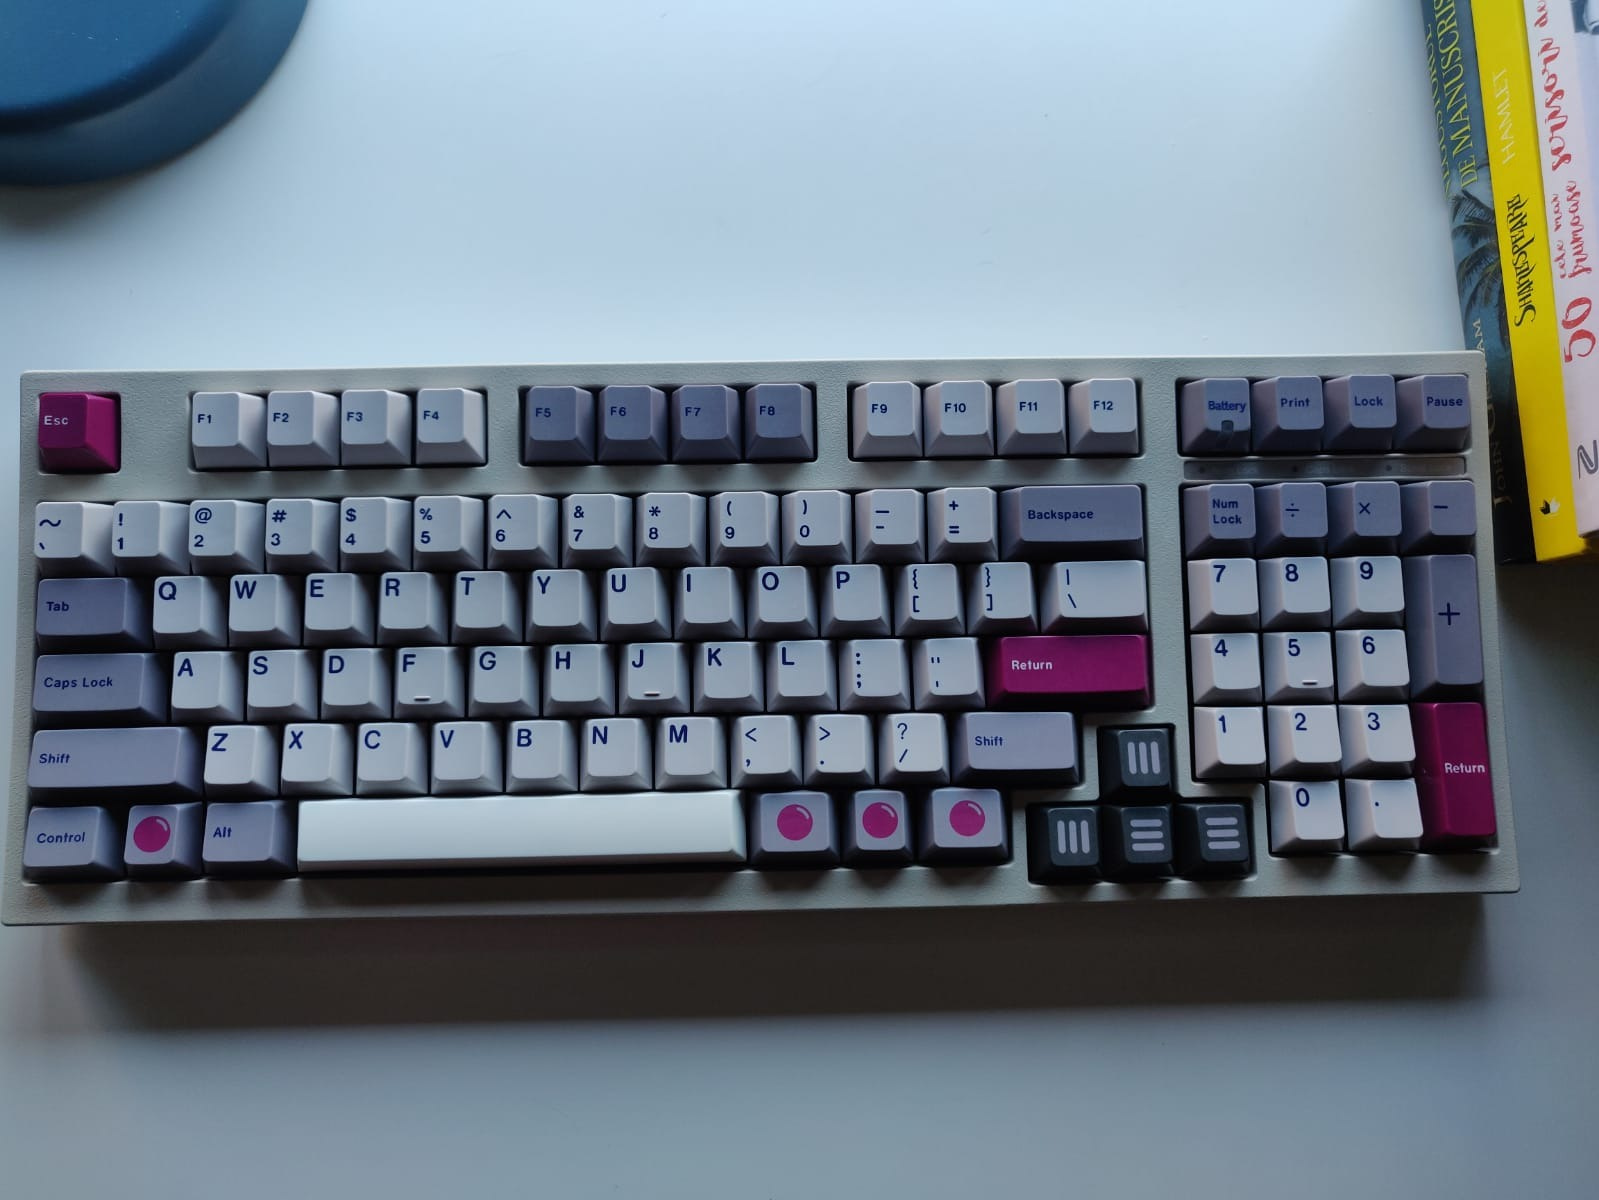
Here is a fully mx-compatible fc660c silent
Typing test:

Notes:
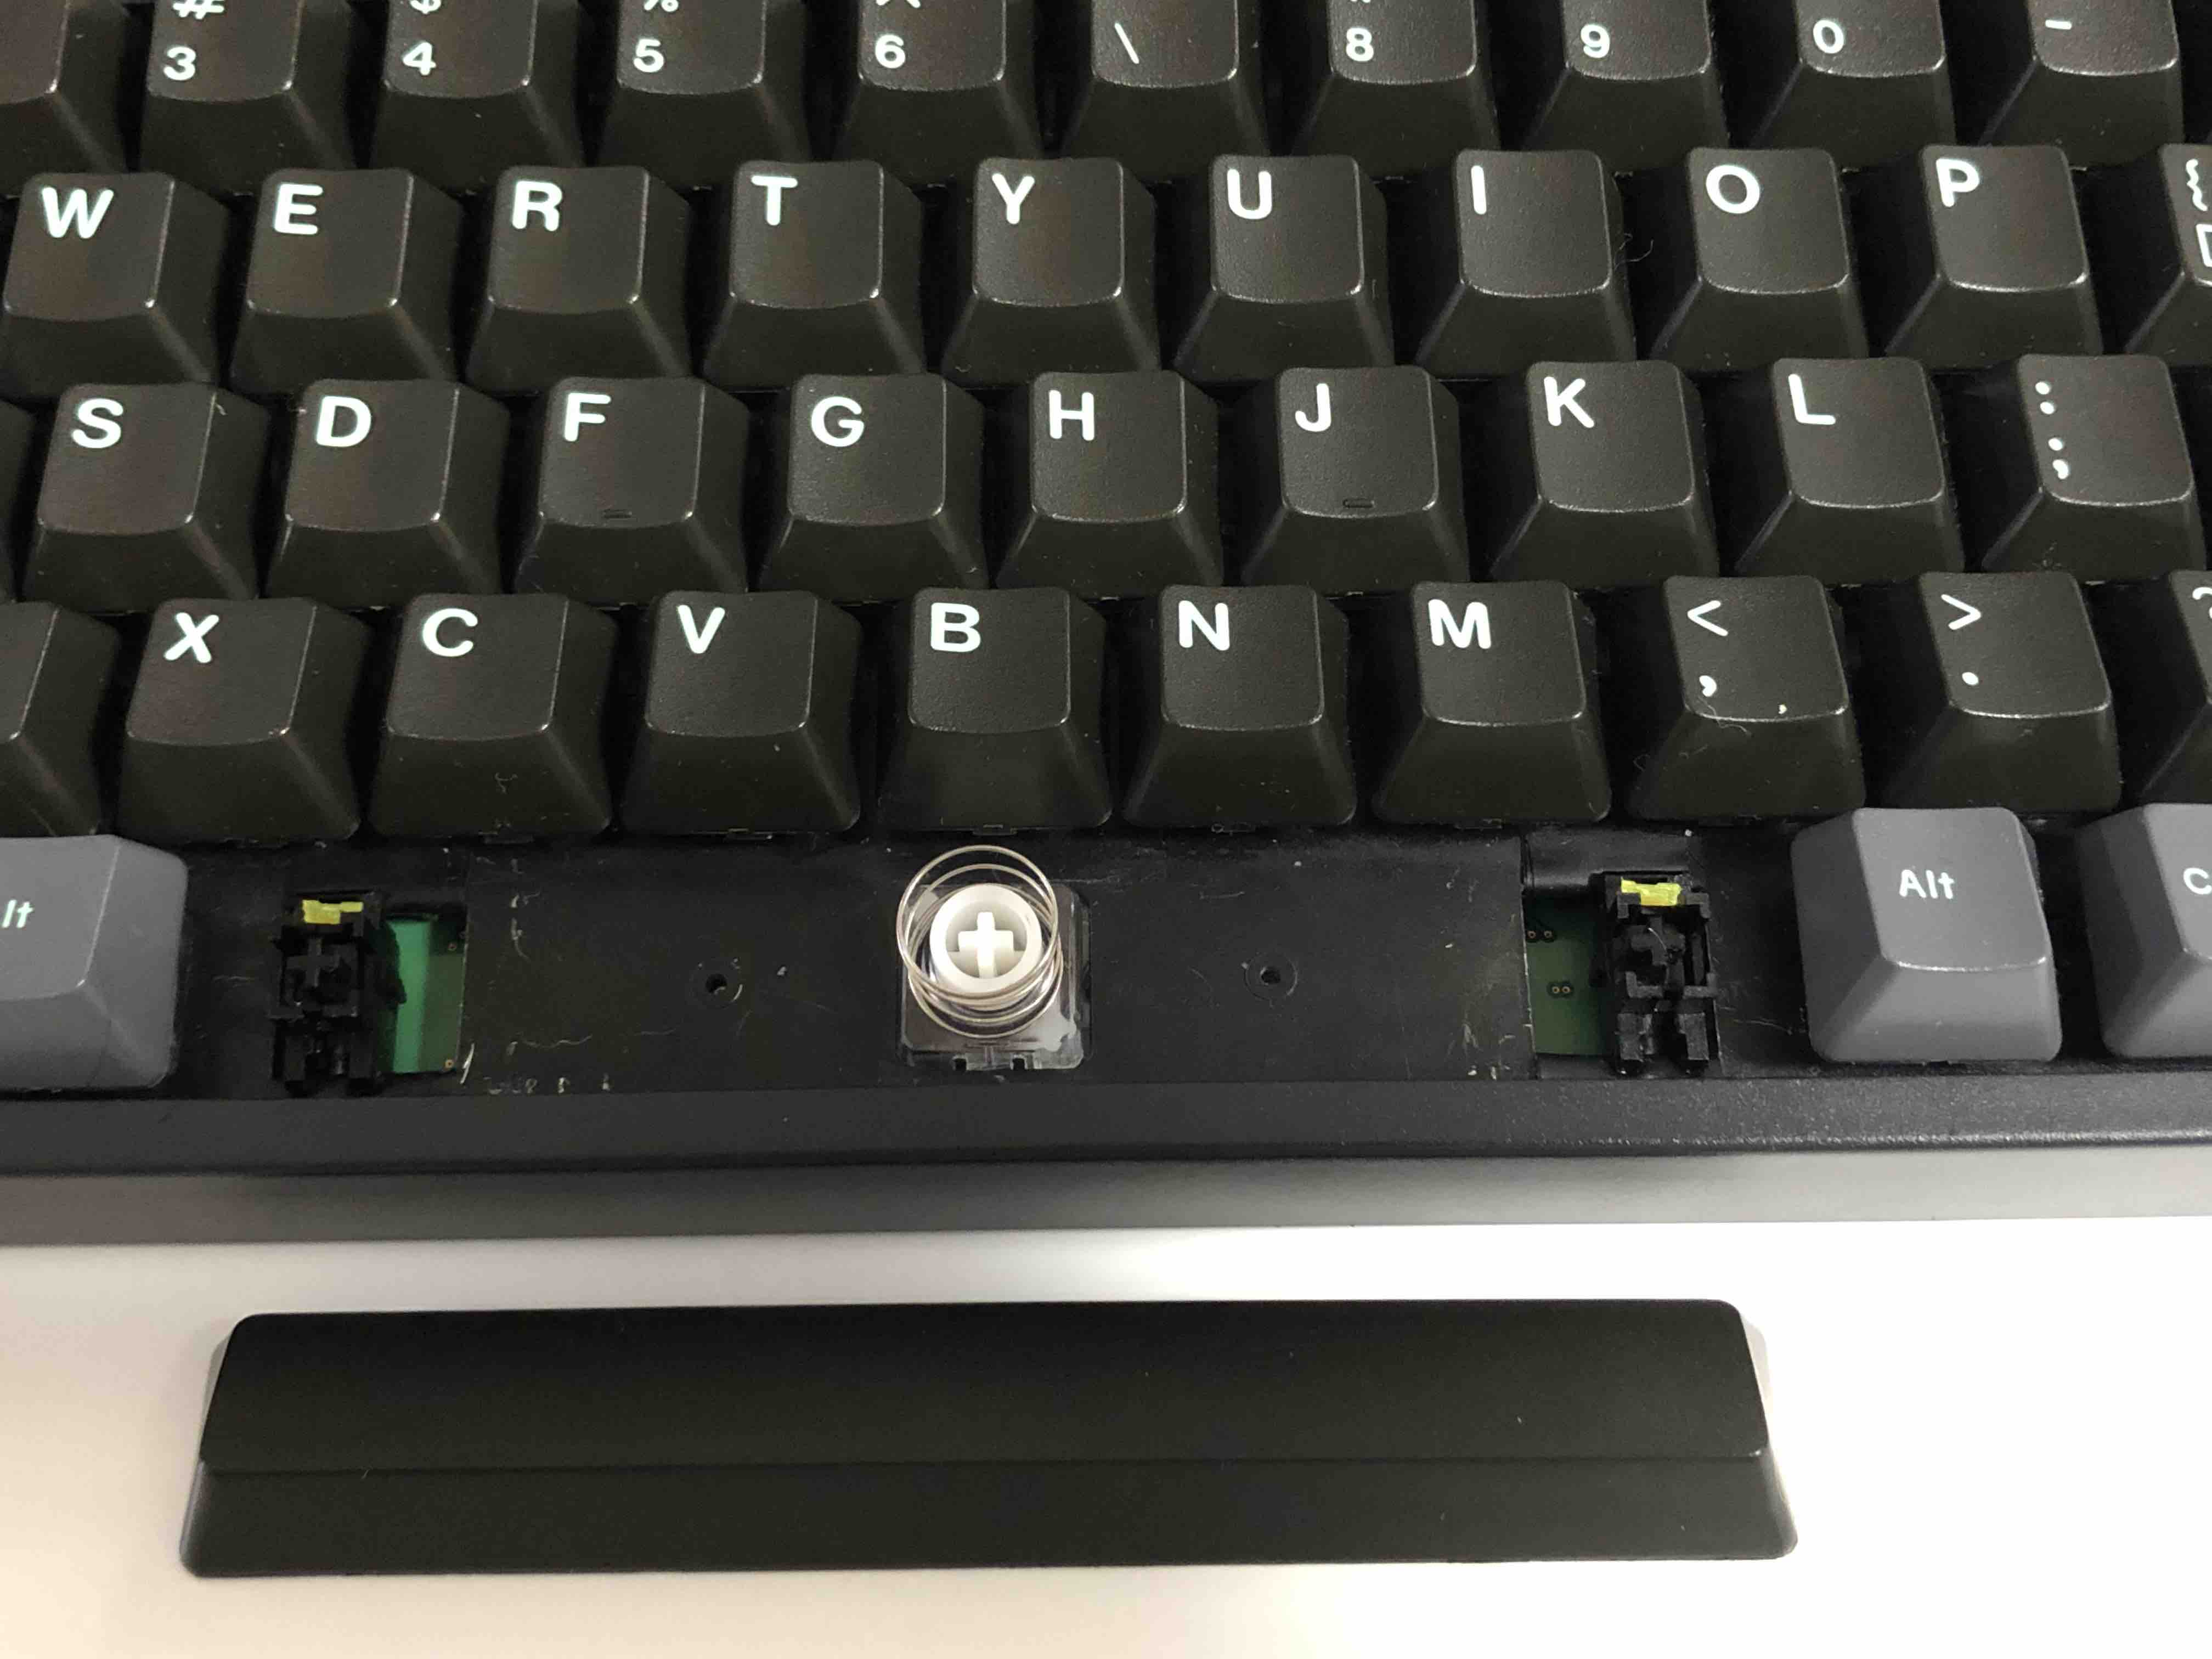
The spacebar is 6.25u and to make it fit I am using the 1u alts with those little gaps unfortunately. The 6u spacebar I ordered from SP did not have the right stem positions – if you can get one that is “6u with razer stem positions” it should work. Also you may notice I am missing the 7 key because SP forgot to add it ![]()
Setting up the spacebar was quite fiddly – I found that the costar stabilizer was bumping the slider housing when pushed down and that caused it to be super firm and also created a loud click. In the end I used a hand-bent stabilizer wire salvaged from my junk razer board which has the bump 90 degrees off axis. It works fine now but it was really fiddly to get working.
4 Likes
It turns out in my case Costar stabilizers sucked. For the spacebar I am using (SP, DCS profile) there was a loud click on bottom out.
With a few mods the Cherry plate mount stabilizers are ideal – smooth, quiet, and sturdy.
Here is a guide showing you how I modded them to work on my FC660C.
First, a typing test

Notes
If you follow the steps below it should take you about 30 to 45 minutes. With a 6.25u spacebar on the FC660C you will need to use 1u Alt/Mod keys, leaving small gaps but you could always use a 6u stab and space bar with this mod.
Required items
- Niz or equivalent Topre MX housing (part of it will be trimmed off so heads up)
- Cherry 6.25u plate mount stabilizer
- 3.6 mm nylon zip ties x 4 (If you need to remove the stabilizer you will have to cut these)
- Hobby knife (X-acto, Olta, etc.)
- Plastic nippers or nail clippers
- Needle nose pliers
- Tweezers (recommended)
- Cloth type bandaid
- Electrical tape
- Dielectric grease (Superlube, etc.)
- Your plastic lube of choice ( Krytox 205 grade 0, 105, etc.)
Steps
-
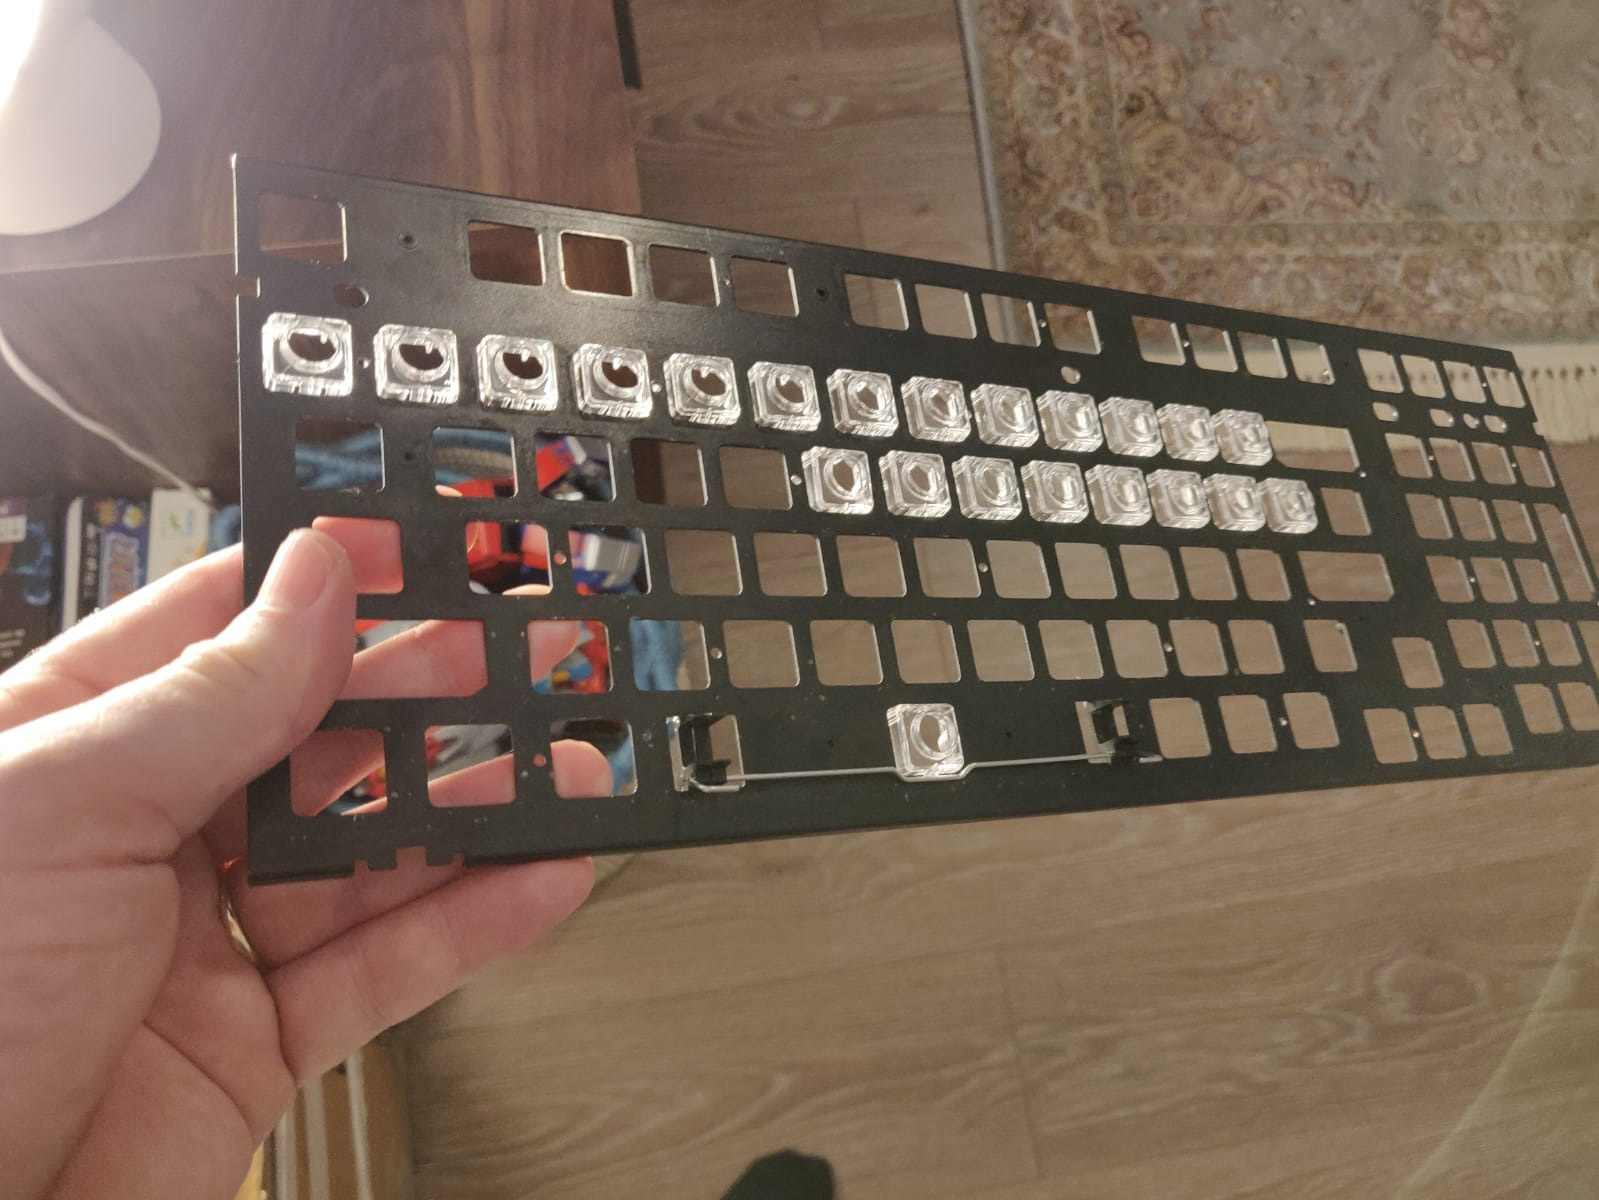
Open the board and unscrew the plate from the PCB
-
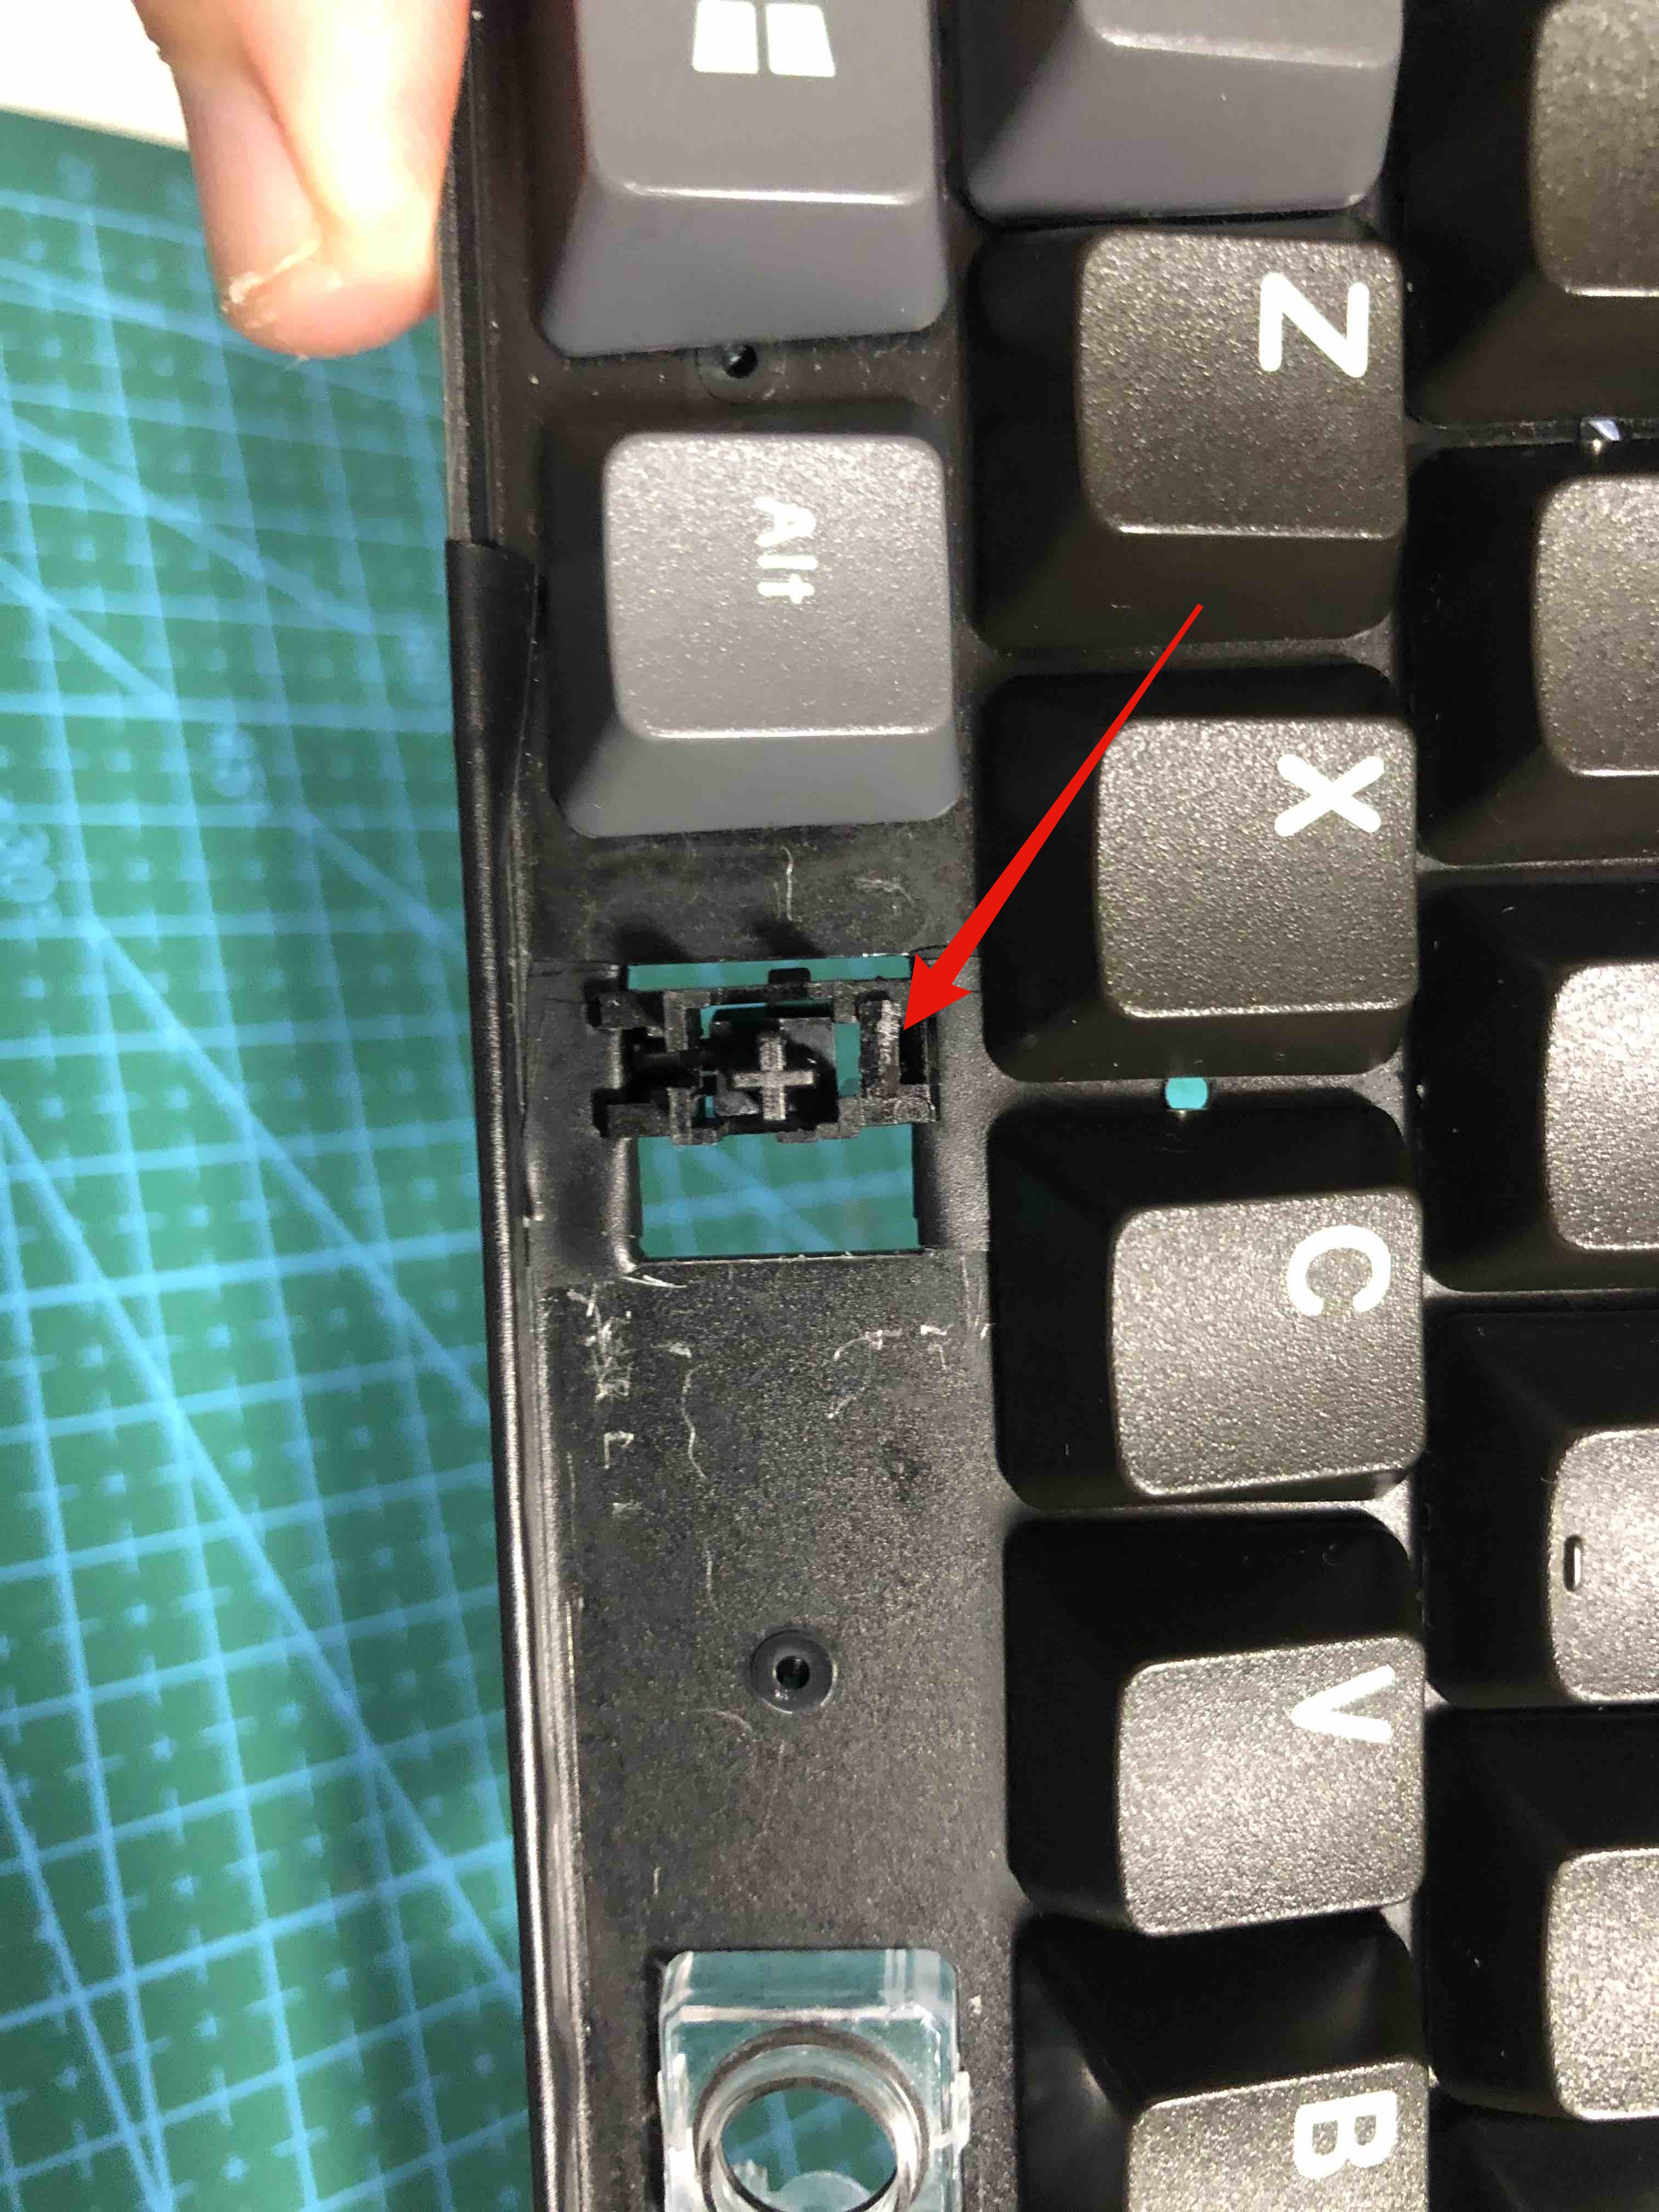
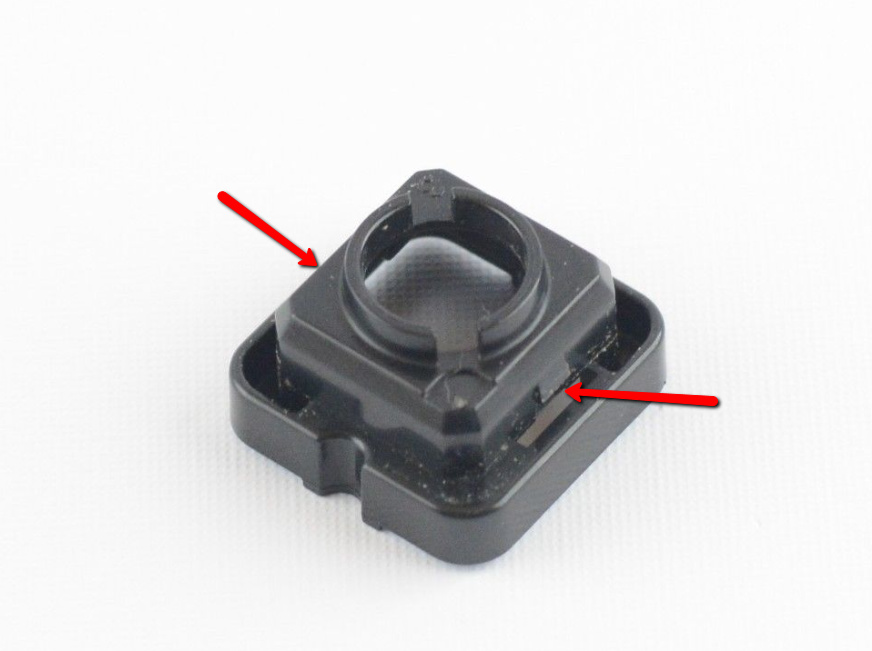
Remove any stabilizers and remove the space bar slider housing. Pinch the locking tabs from the top and push the housing through.
-
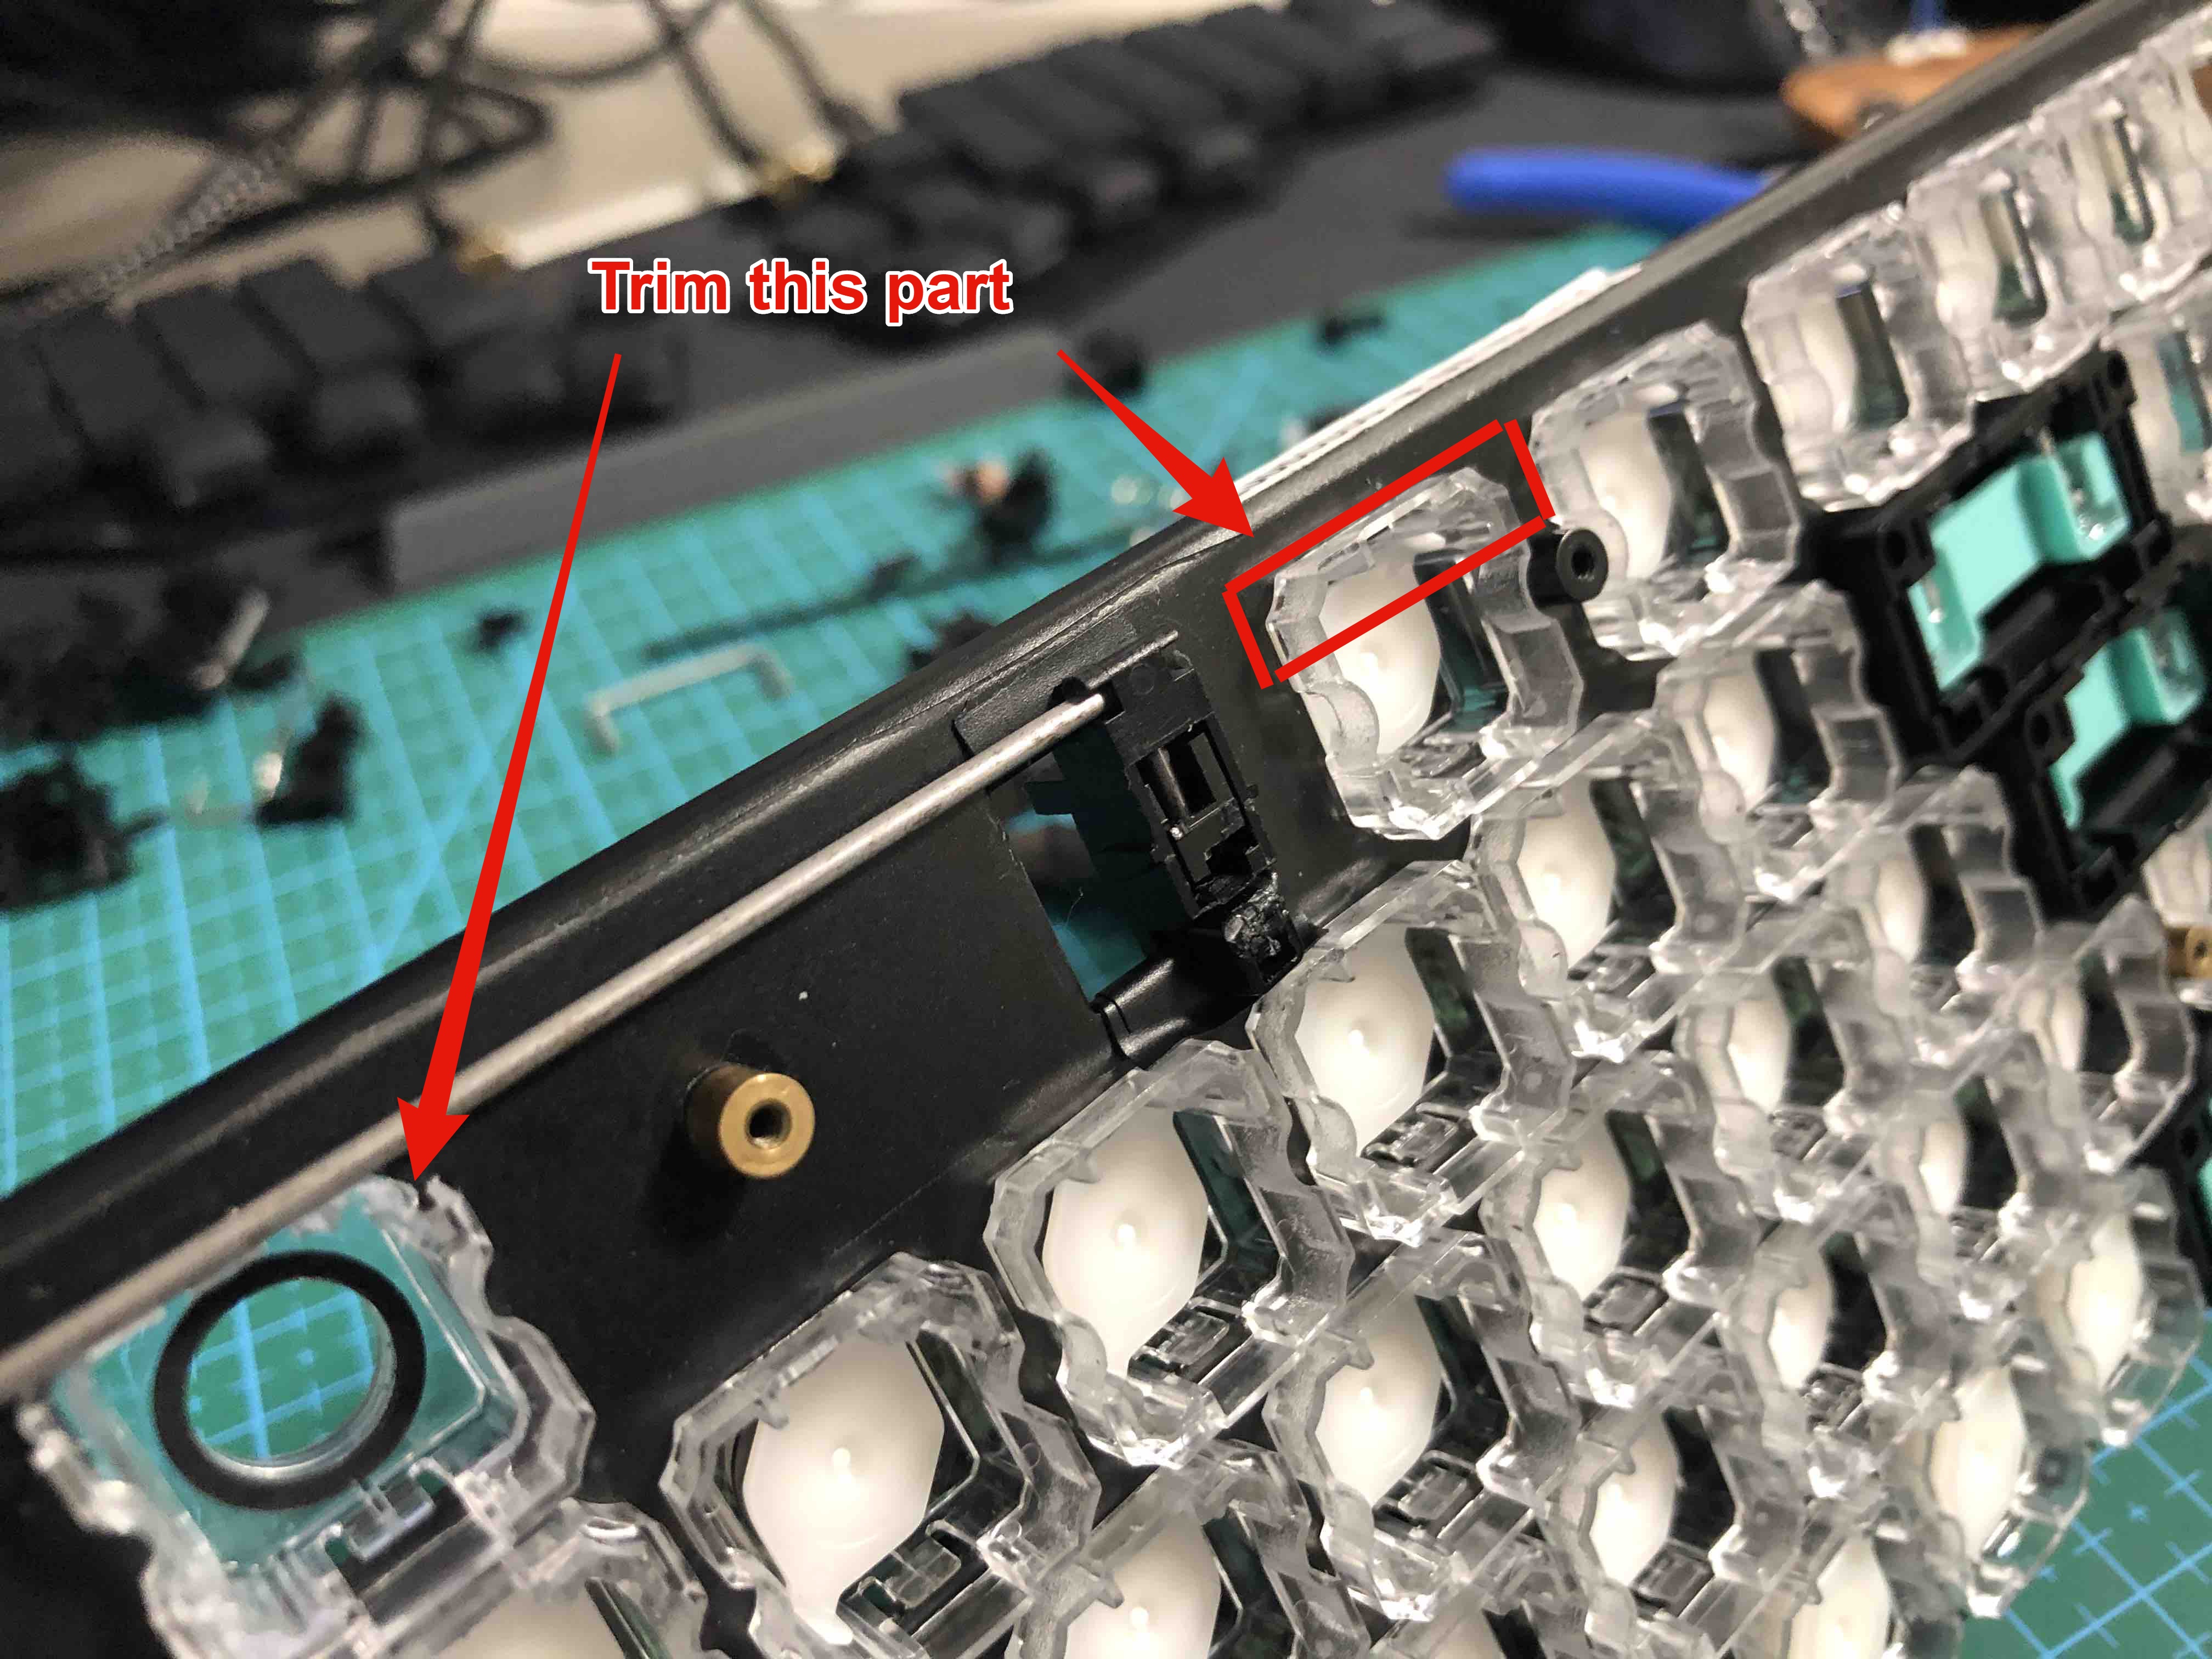
Using a hobby knife, carefully trim off the front lip of the slider housing you want to use. This is to make space for the stabilizer bar. Don’t worry there is plenty of material to keep it locked in and stable.
-
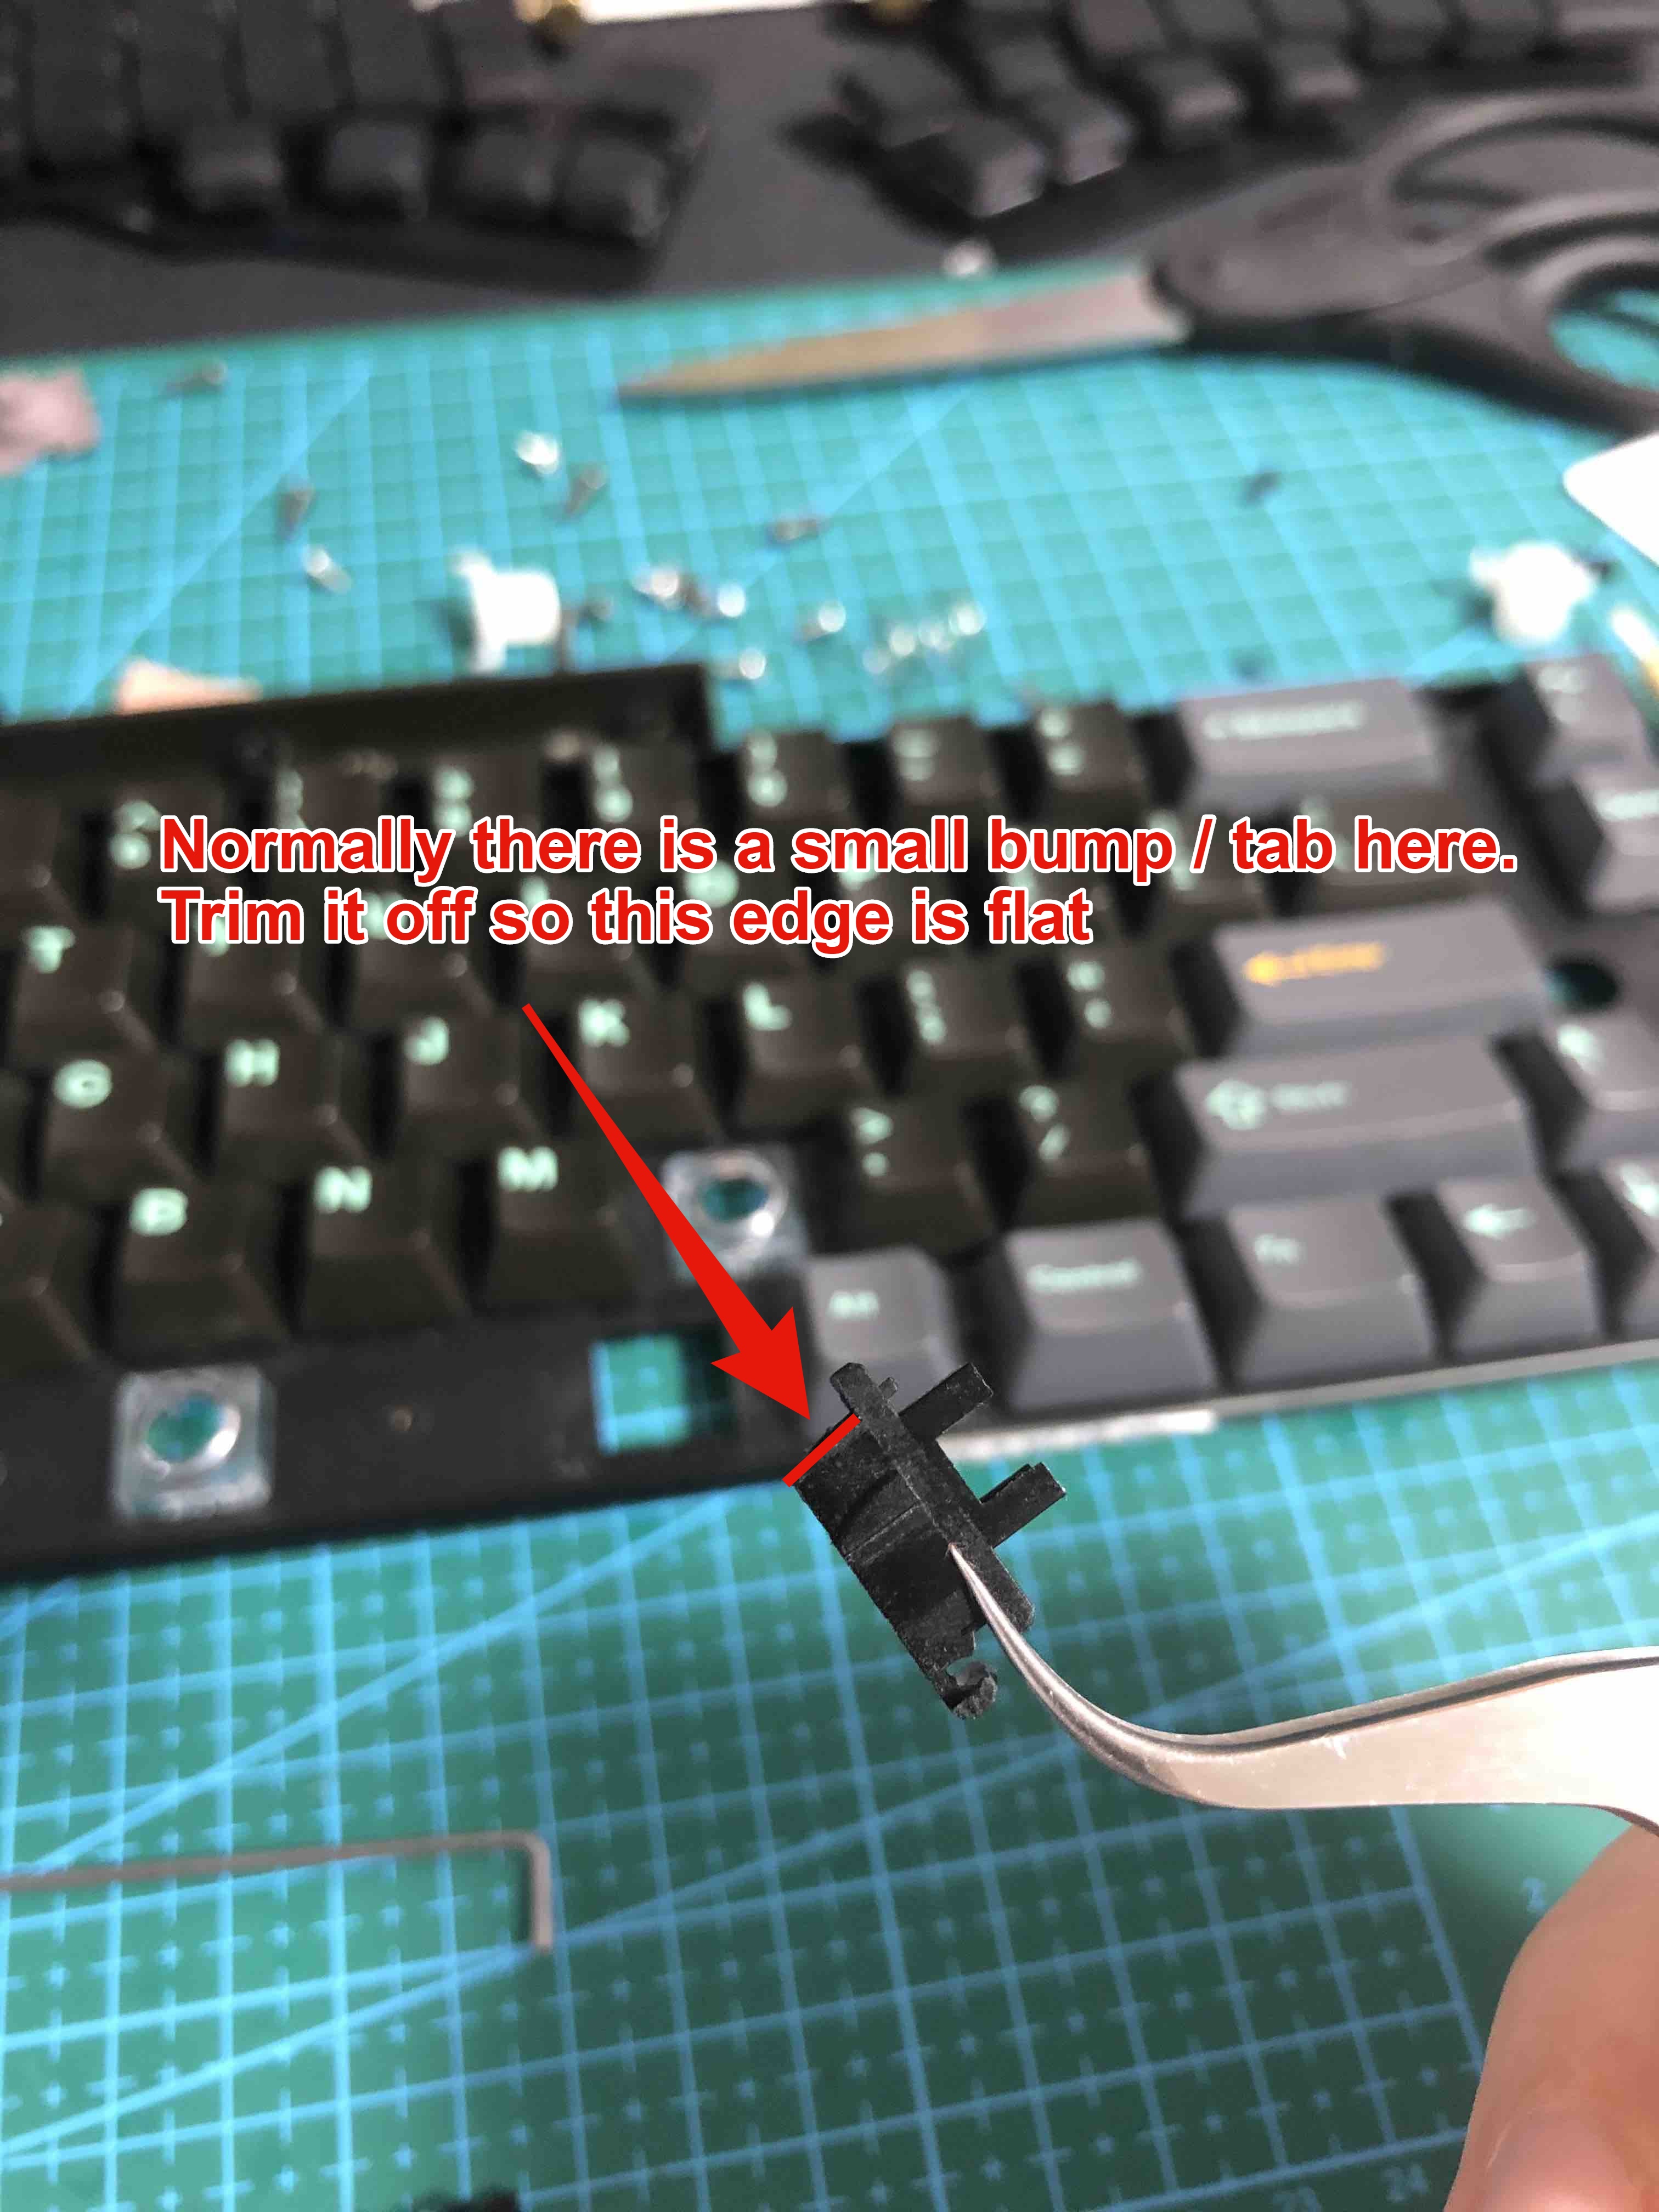
Take apart the stabilizer and trim off the small tab on the side so it’s flat. This will prevent it from pushing in and catching on the slider later
-
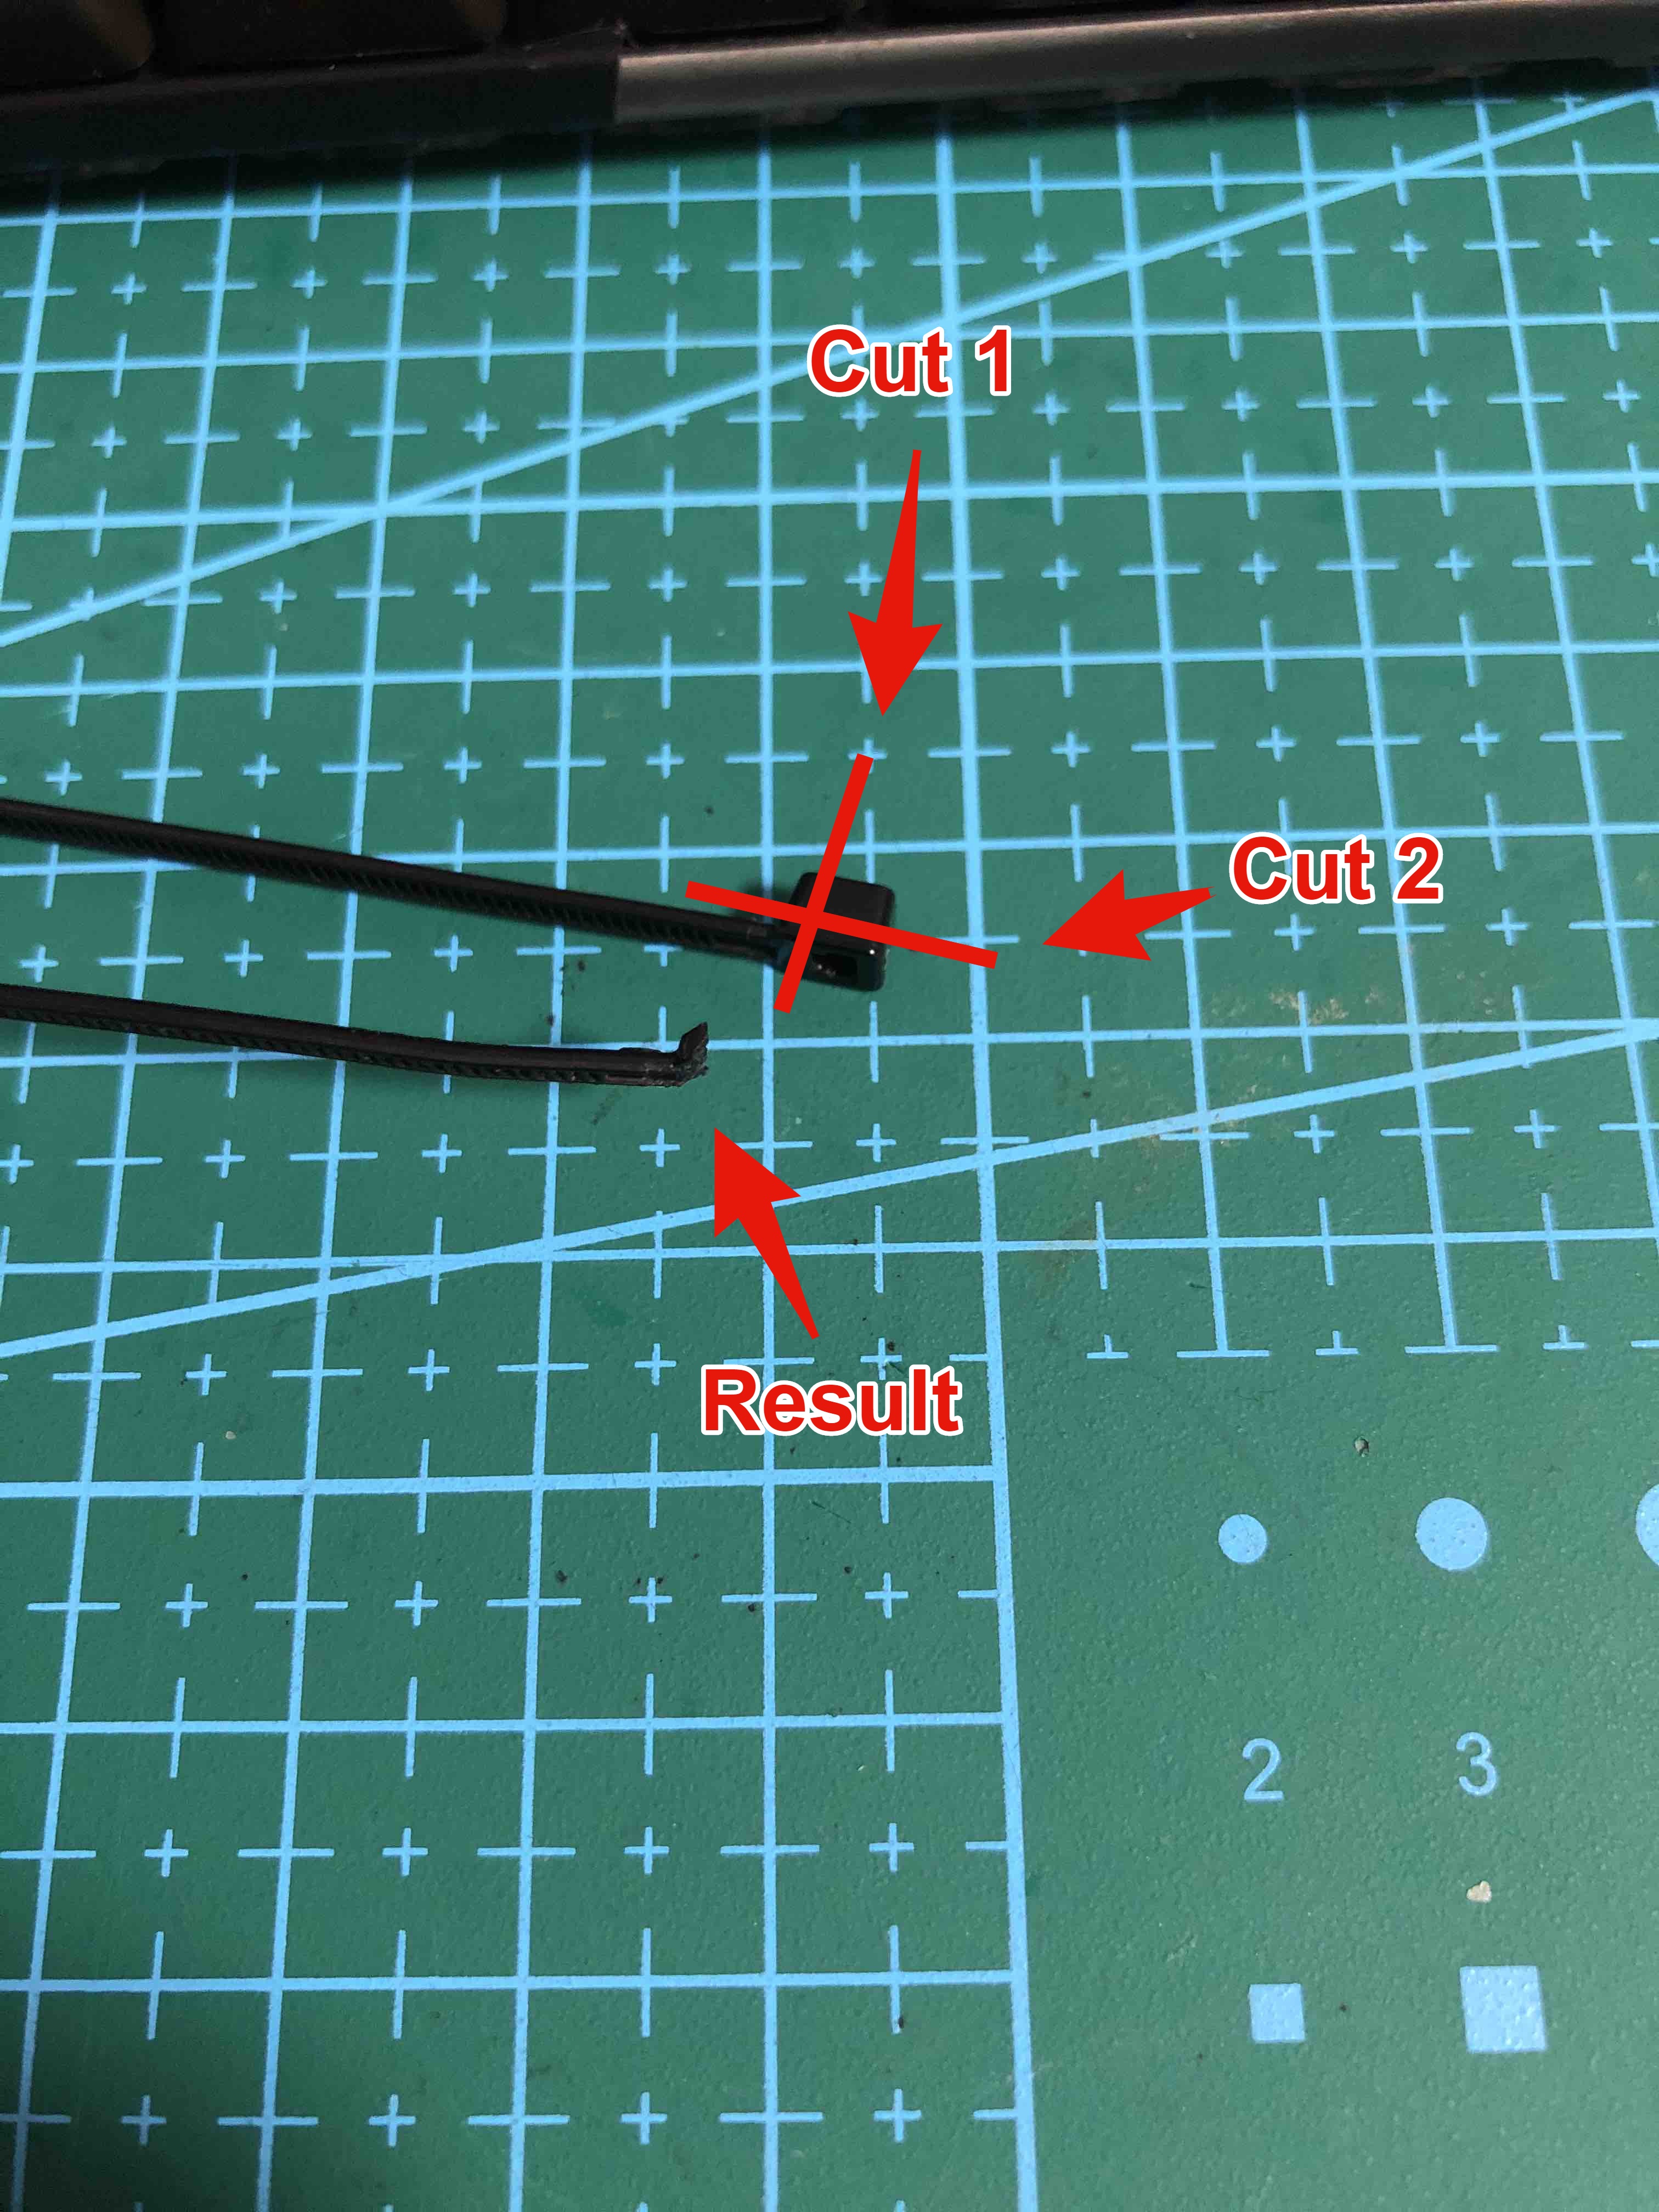
Trim two of the zip ties leaving a very small T-shaped piece where the head attaches to the strip. For the other two zip ties, clip the whole head off where it meets the strip. Here’s a pic of the cuts for the T-shape ones:
-
Trim 12 small pieces of electrical tape wide enough to shim the stabilizer holes in the plate and apply 3 to the top and bottom of each hole
-
Trim and apply thin slivers of cloth bandaid that fit the top of the lower hole where the stabilizer bar goes in, making sure it covers the full length. This will stop the bar from making a loud click when you tap it
-
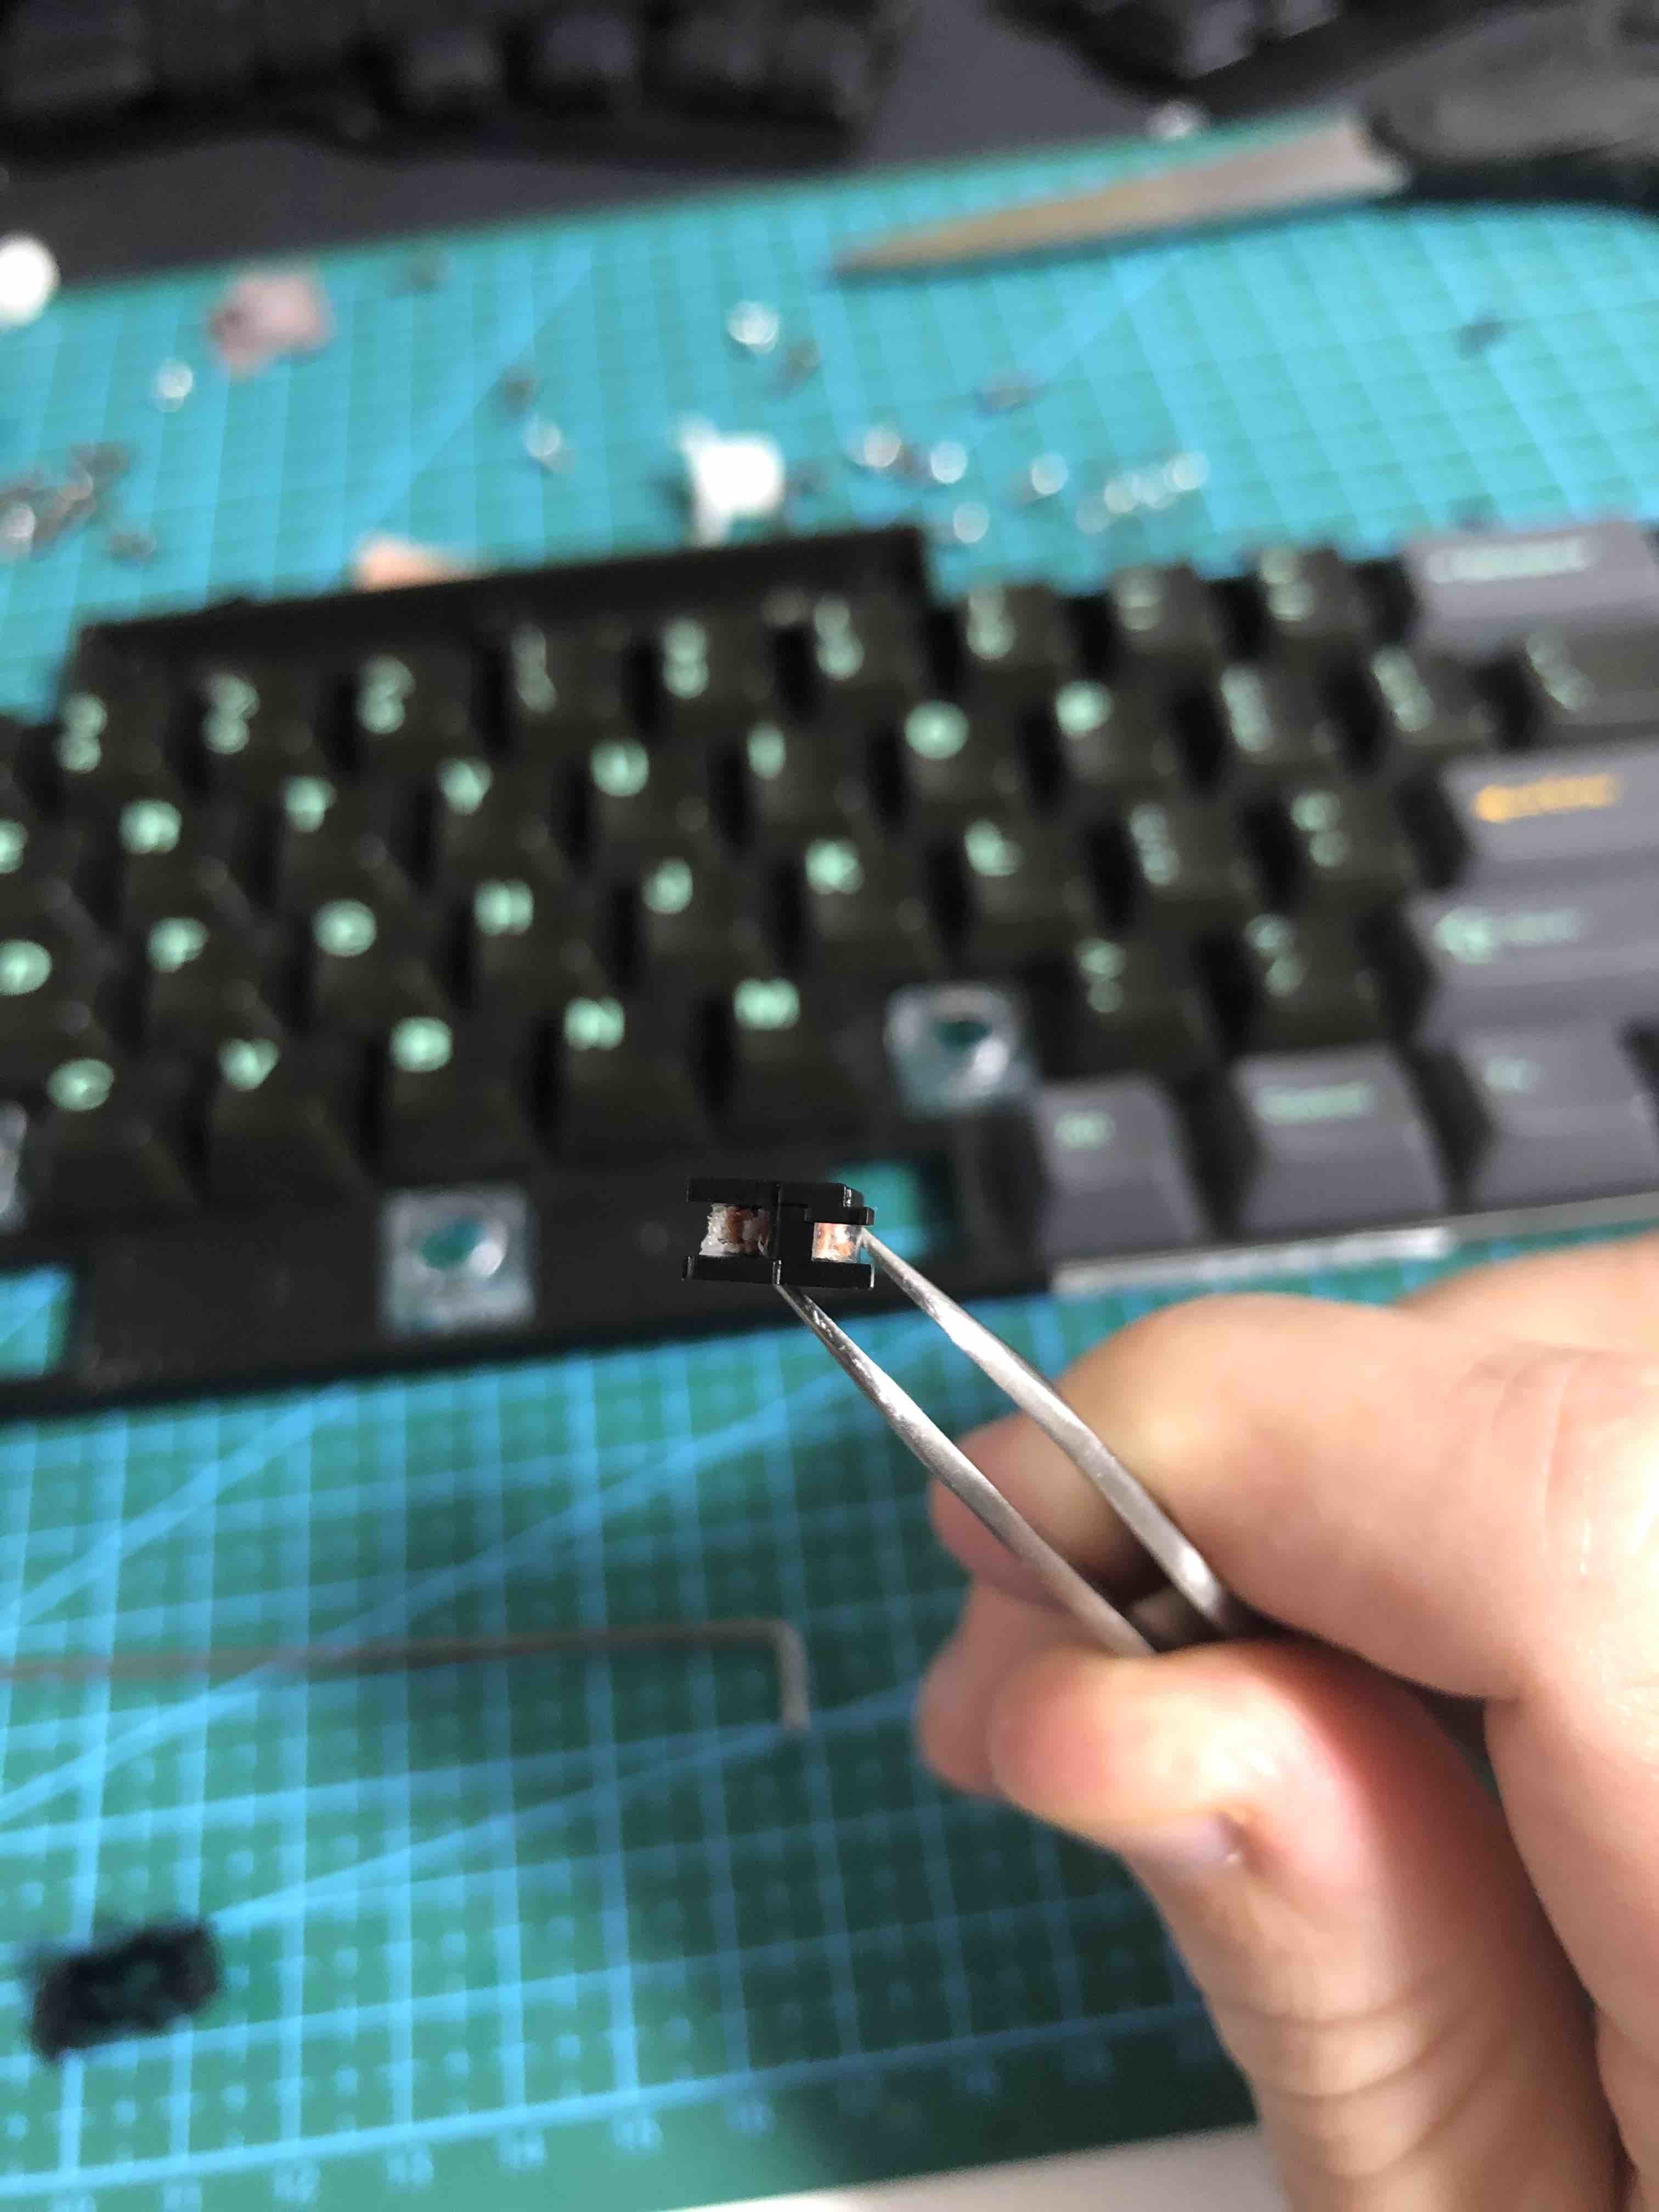
Lube the stabilizer – I followed the TaehaTypes method on youtube except in the end I didn’t clip the stabilizer legs because it never actually bottoms out. You may put electrical tape on the bottom to stop lube from coming out depending on your situation.
-
Wiggle the stabilizer into place and put on your spacebar, using it to adjust the alignment so the sliders move without getting pinched on the housing walls. Take this chance to adjust your lubing and make sure everything fits because it’s about to be locked in
-
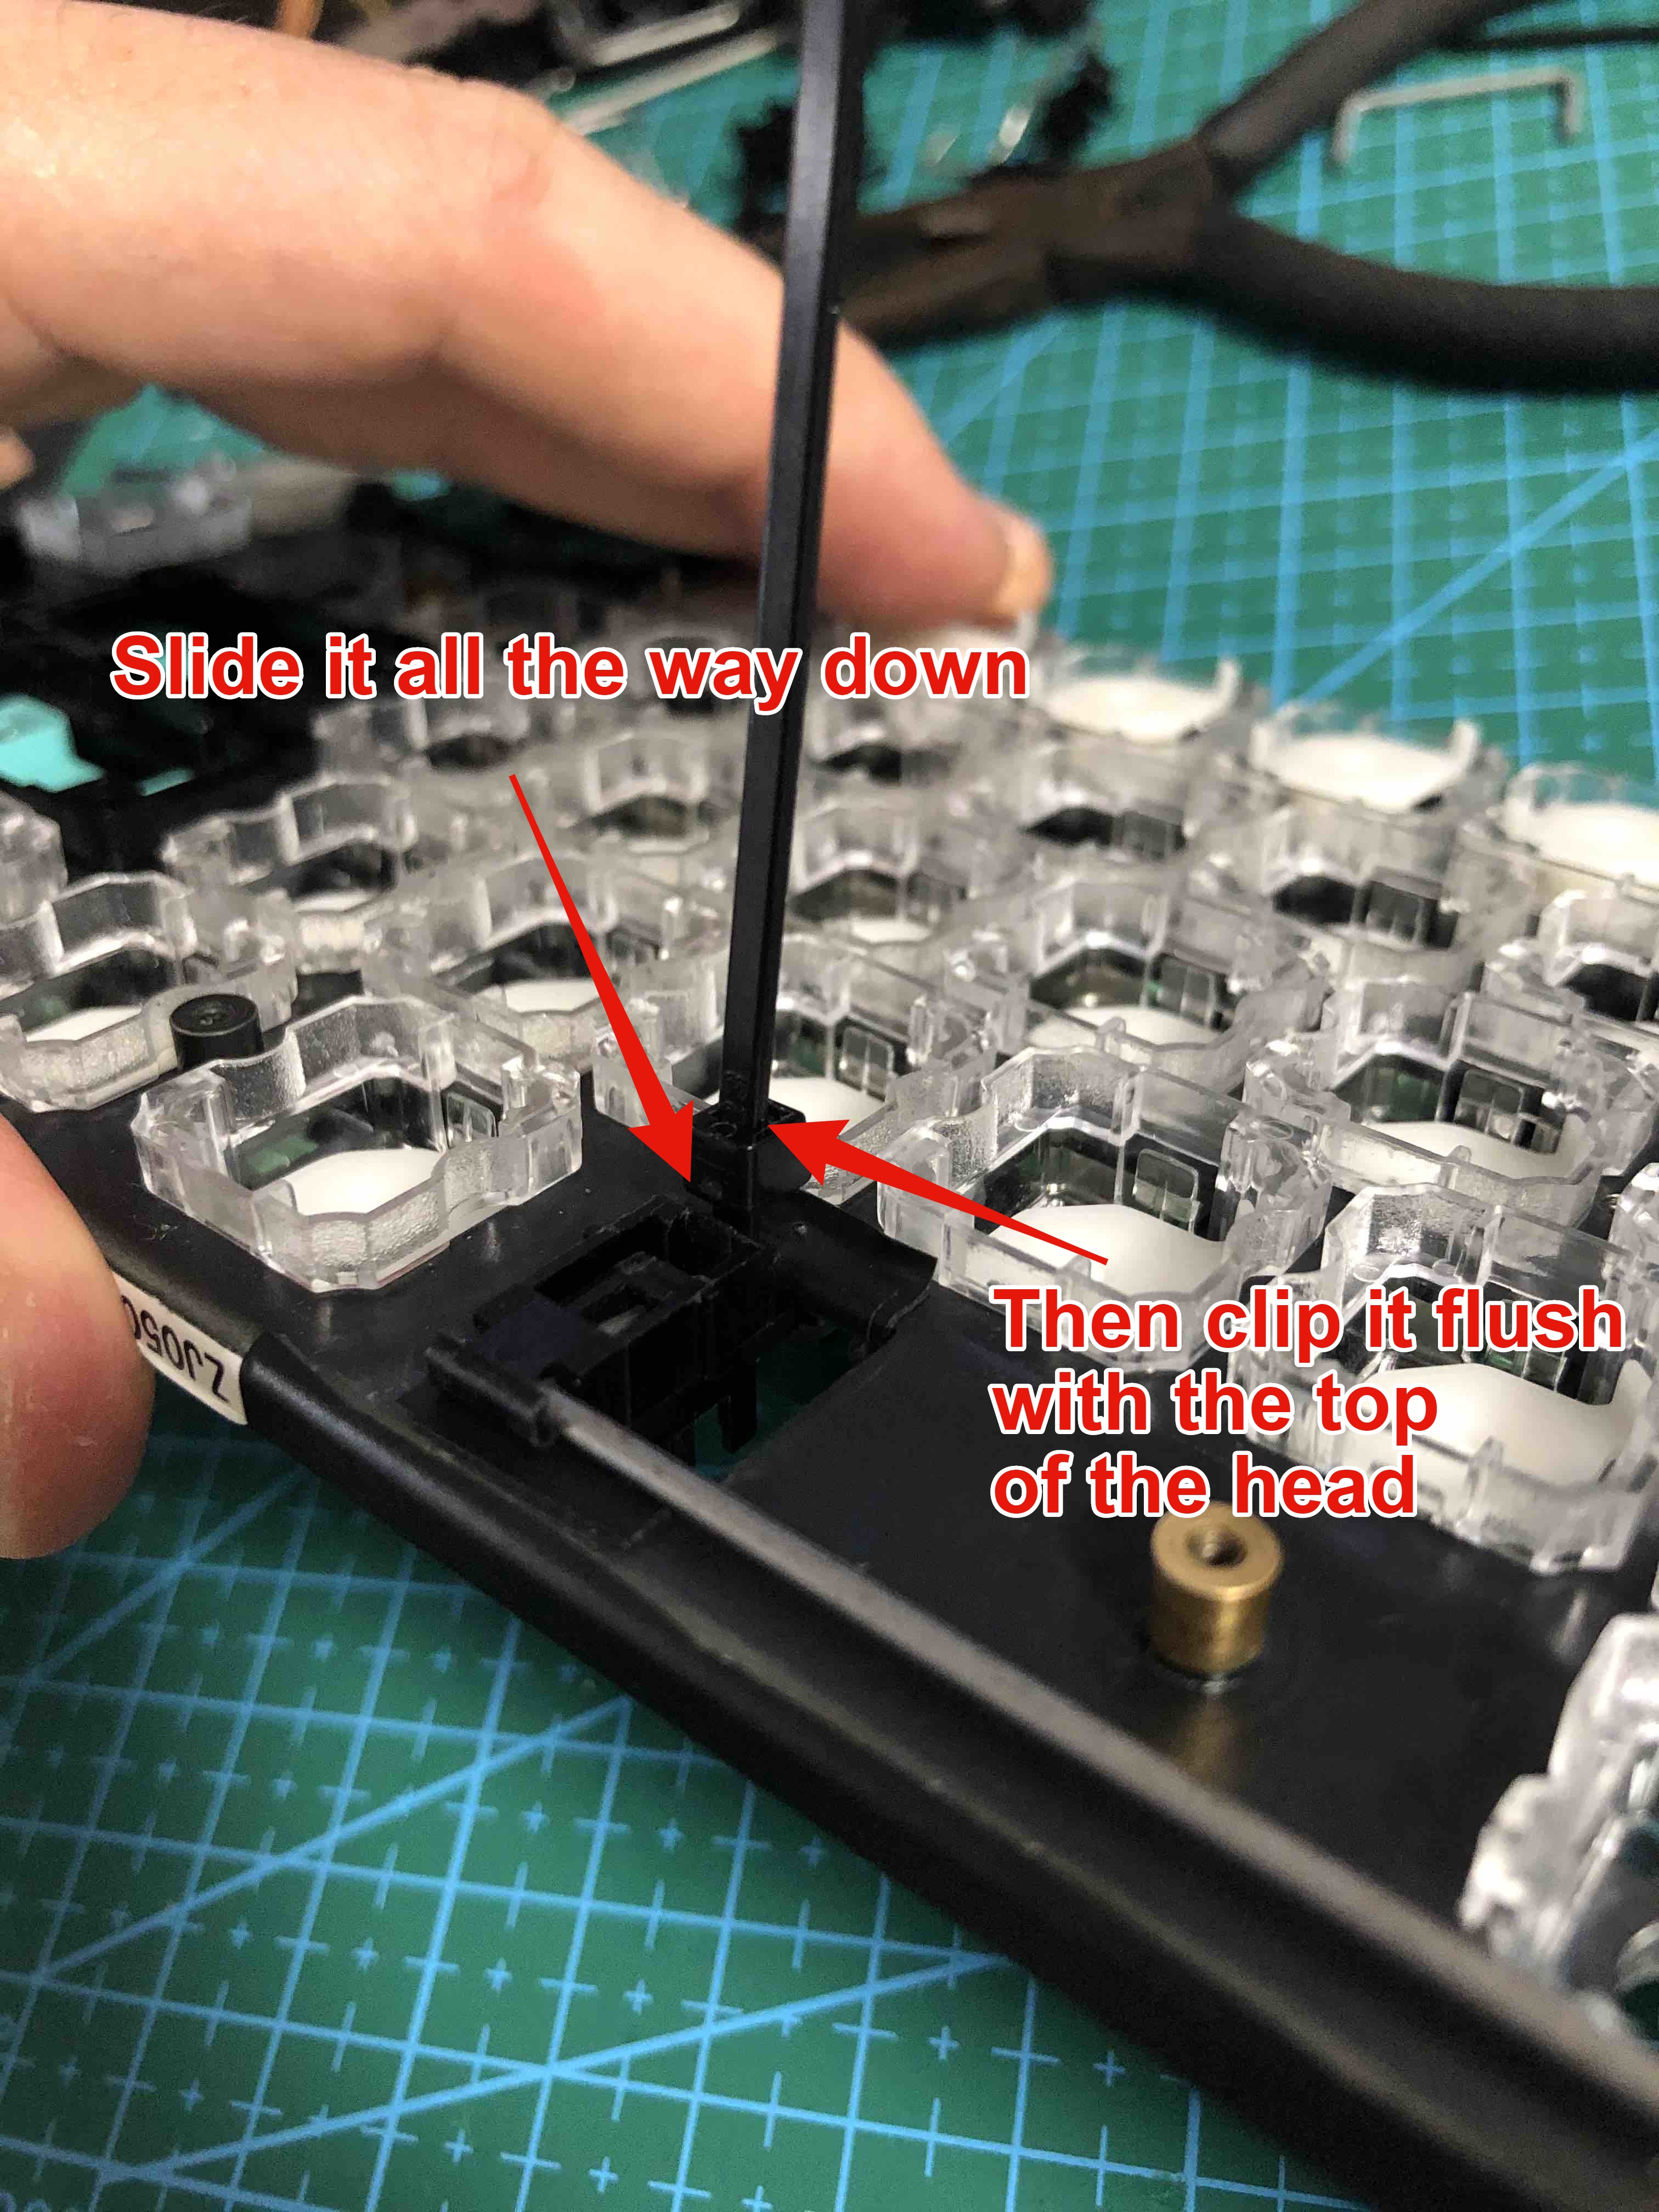
Carefully take the space bar off and seat the stabilizers again. Slide the T-head zip ties into the gaps in the top of the stabilizer housing, with the little teeth facing up towards the home row
-
Flip the plate upside down. Take the two spare zip tie heads and slide them on the strips, cinching down the housing on each side. Use needle nose pliers to pull the strip, and at the same time use the tweezers to hold the head down, locking the stabilizer in place. Clip off the excess zip tie strips so they are flush with the top of the heads.
-
Hurray! A nice stabilizer that is very firmly locked in place. Now just reassemble the board and enjoy. Here I used yellow zip ties so you can see the top of the little T-shaped bits clearly.
11 Likes
You have simultaneously impressed me and convinced me to leave my 87U stock, lol.
7 Likes
I don’t blame you for deciding to keep it stock one bit. This process was time-consuming and fiddly but I love this kind of stuff for some reason.
At the same time, the result has been excellent. I have used this board daily since I posted the tutorial and it’s been delightful. The space bar is still my favorite of any I’ve used.
1 Like
But RF87u modding can be so much fun! 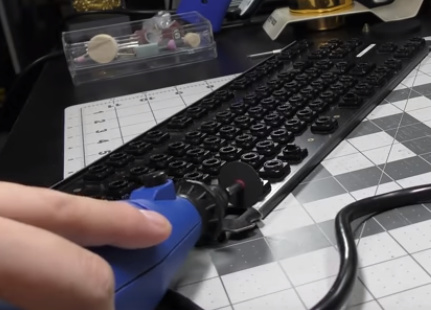
4 Likes
11 Likes
How do you remove the topre housings from the plate?
1 Like
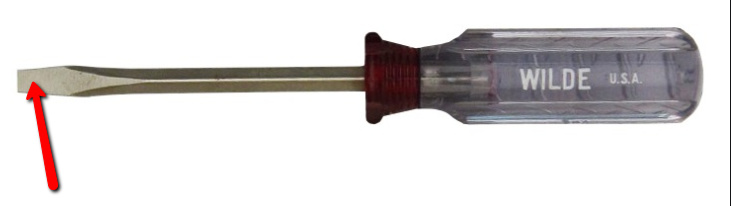
They have two clips that “grab” the plate, one on the top and one on the bottom.
The housing material is pretty brittle, so you have to be careful when pushing the clips.
I have used a flathead screwdriver and pushed with the side, rather than the tip.
5 Likes
Wow, I did not expect such a detailed response, Thnaks so much dude!
2 Likes
This is such a good resource!
Does anyone have any tips or links to guides on drilling the stock Topre 2u housings?
I’ve harvested my Novatouch to use its sliders on my FC660C but as it is an ISO version it comes with one less stabilizer. I plan on getting a KBD or JTK slider and then drilling the stock 2u housing.
2 Likes
Just measure twice, drill once 
I also got a rounded file to smooth the holes afterwards.
4 Likes
Has anyone tried these in a HHKB? Is the fit less snug like on the Realforce boards or more snug like on the Leopolds?
1 Like
Less snug, basically the same fit as in realforce/leopold housings. The snugness comes from the niz 2019 housing+stem, so you have to replace both for max impact&feel. Still better than kbdfans sliders and for now the best for hhkb are still novatouch sliders in terms of snugness, but niz 2019 should be okay too.
1 Like
Oh, missed the “their housing” part. Whoops
2 Likes
I came late to this thread. Very interesting thread.
I recently purchased an ABKO K935P V2. It’s my understanding that these use NiZ 45G domes.
In terms of the 2019-version Niz sliders that people are buying for their Topre boards, are the Niz domes on the ABKO going to be using comparable sliders in stock form? [The ABKO is MX-compatible, using Niz.]
I’m just trying to get a sense of how close people are bringing Topre boards to a stock Niz/ABKO board with these sliders. And how the Niz/ABKO 45G compares to Topre with the Niz sliders.
2 Likes