Taking inspiration from @Rico’s recent project chronicles on here, I’ll venture sharing something. But only because I’m now at a point where I’m reasonably confident it won’t be a total fail.
I want to retro-fit my Maxi-Switch 630107-02 so that it can take MX switches (the OG switches are crap) and communicate over USB / Bluetooth. I’m calling it “Maxi Switch Medley” both because the project will be a mix of old and new, and because I’m hoping the final product will sound quite musical given its acoustic features.
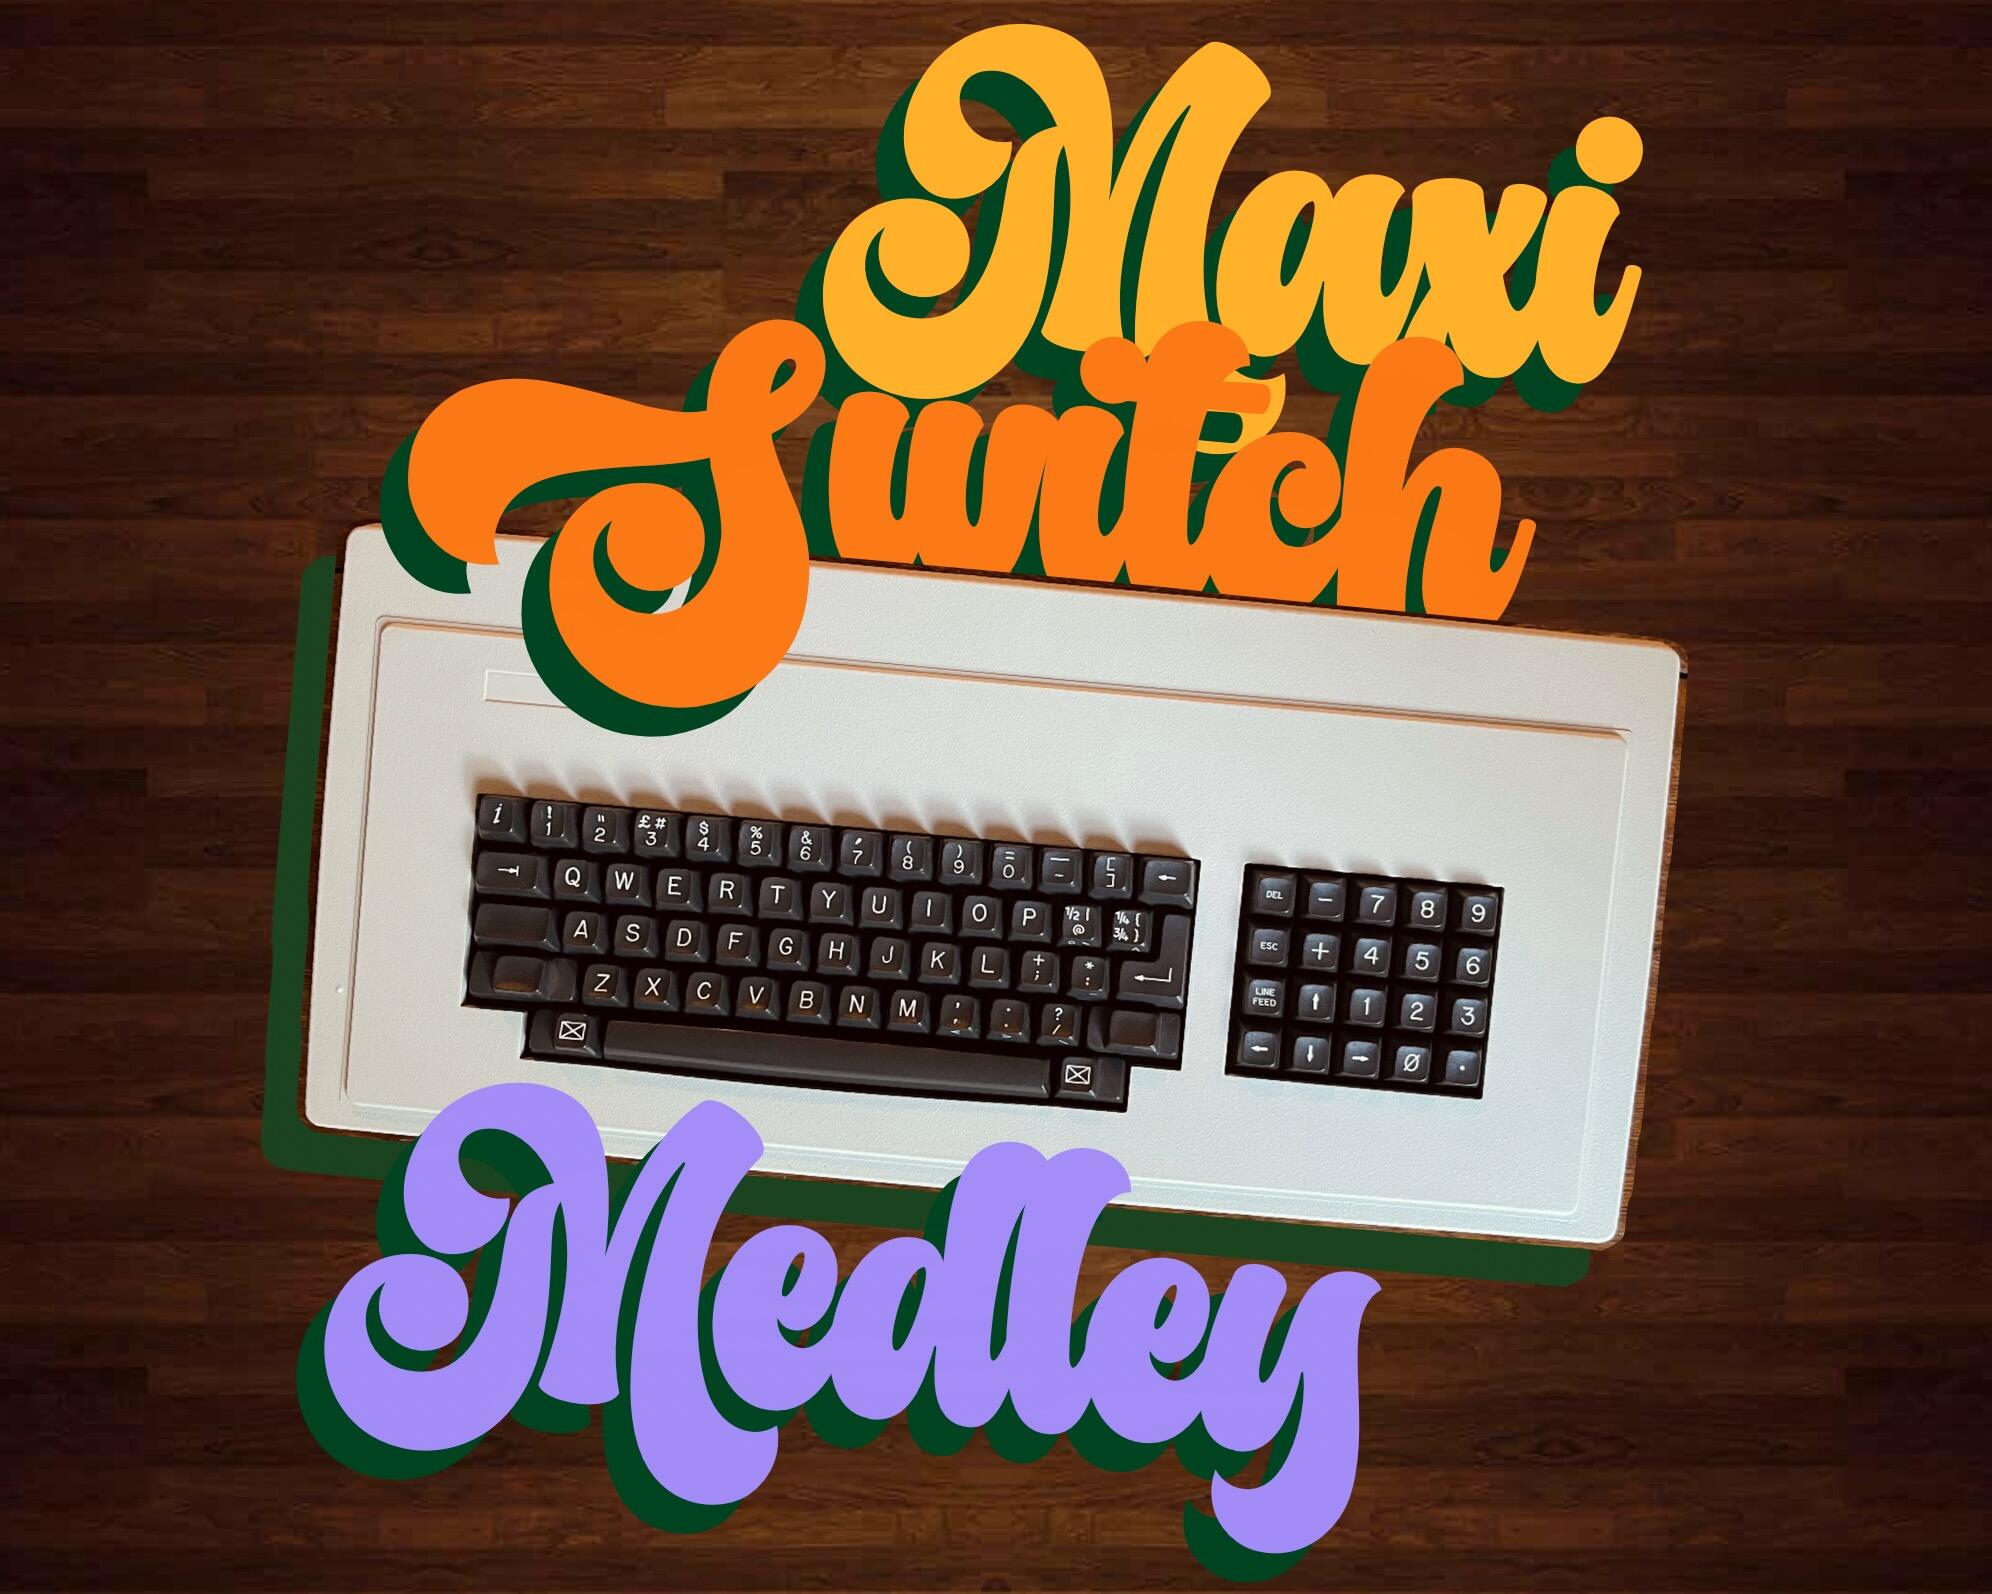
No AI was used in the making of this image
A few practical reasons why I thought this keyboard would be a good candidate for a retro-fit project:
- The keycap mounts fit MX-stems if you use a plastic film mod. Noticing this was what first gave me the project idea, since otherwise making custom keycap adapters just wouldn’t have seemed feasible to me. With the Maxi-Switch, all I have to do is order MX stem risers for keycap clearance.
- The case is also extremely roomy, making it ideal for adding a LiPo battery of pretty much any size, maybe eventually a solenoid, or any other components I want.
- The keyboard case has a big access hole at the bottom where it looks like it might have docked onto a terminal or something. This makes it really easy to switch to a USB-interface without the finicky job of making the new hardware fit old port sizes and placement.
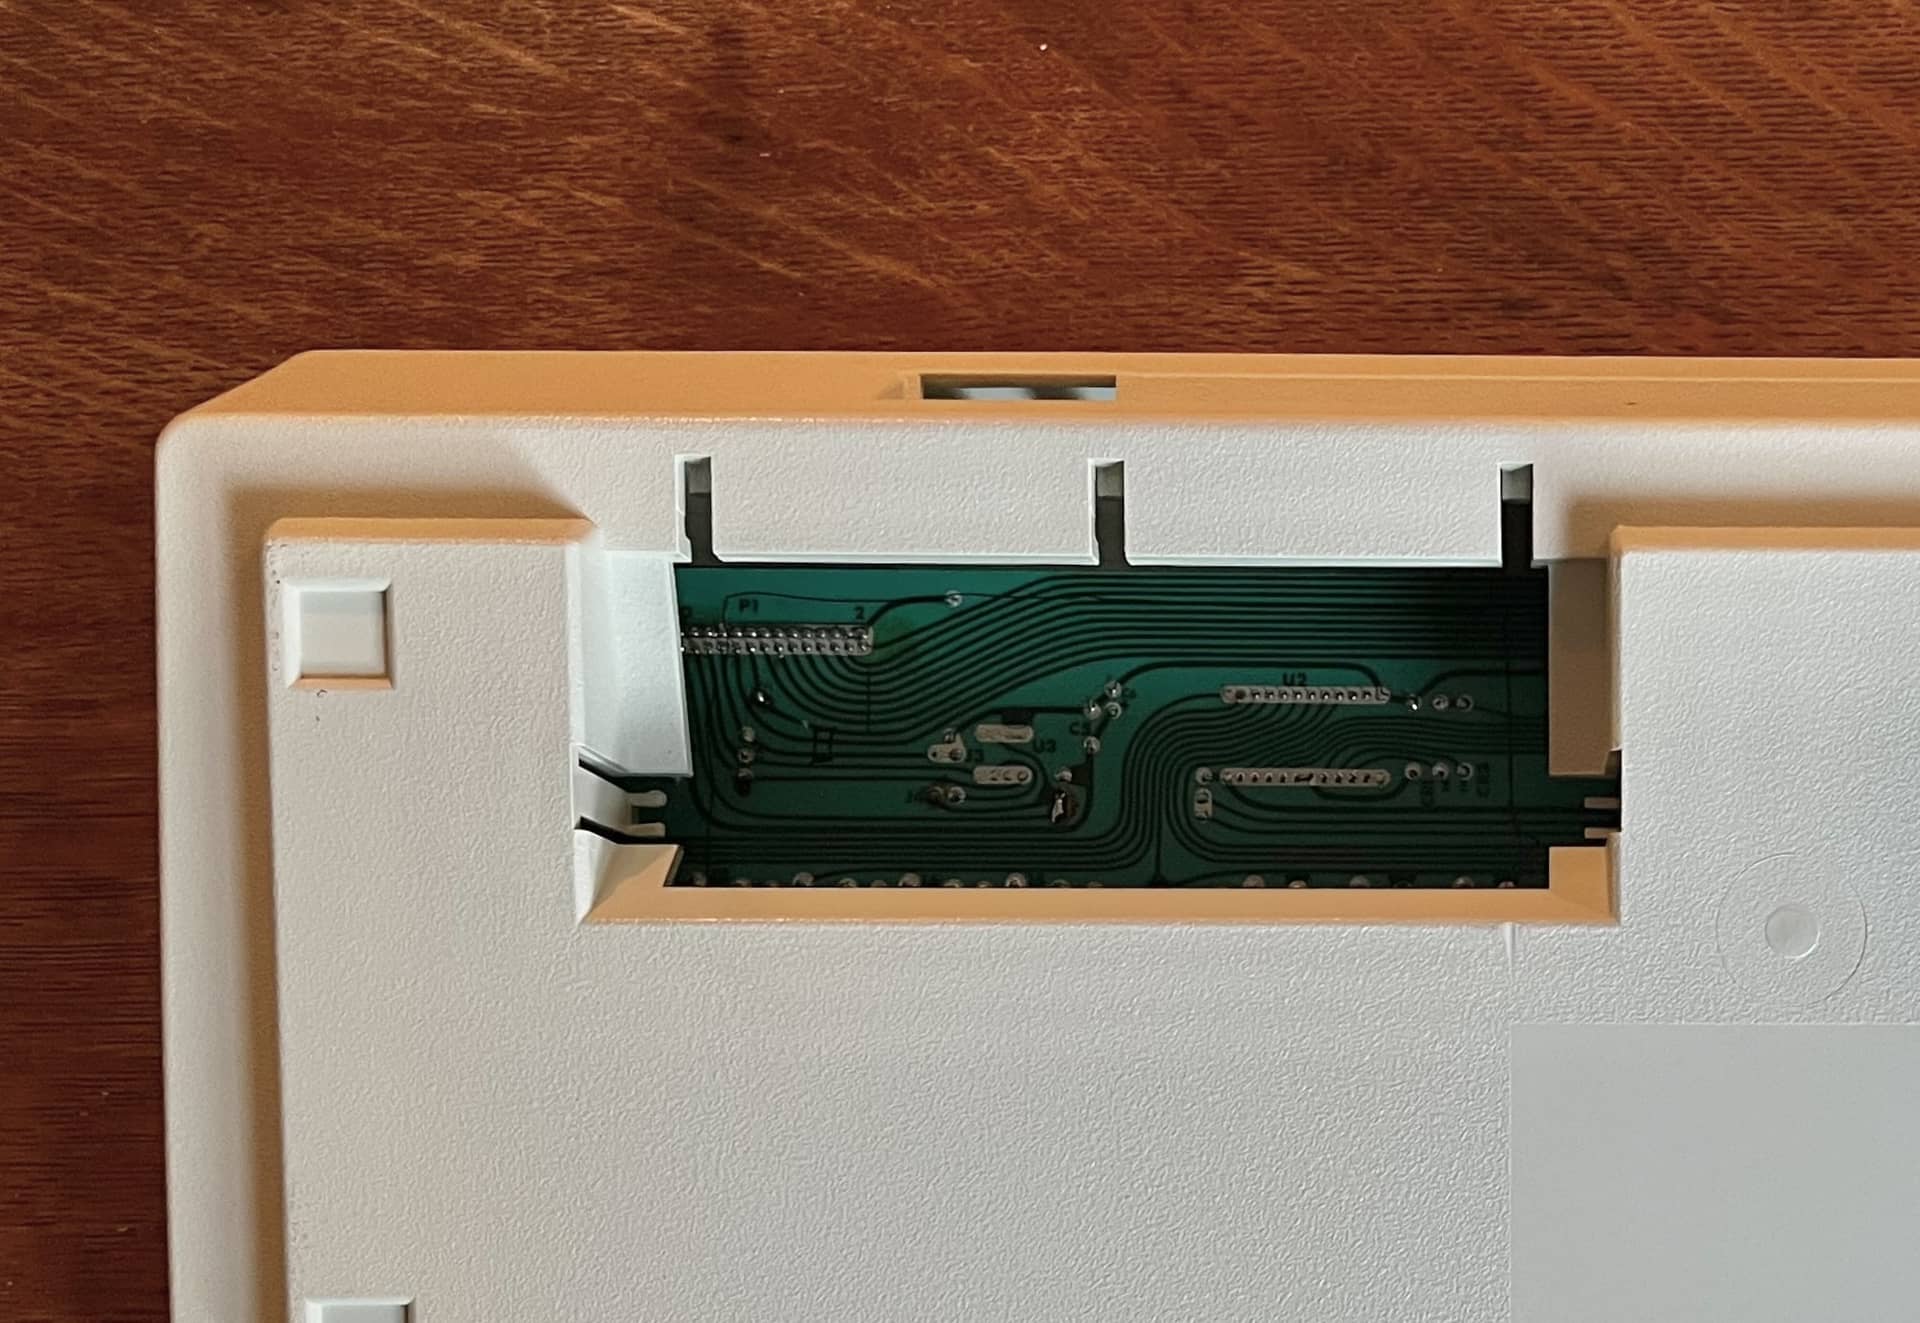
There was massive ribbon cable hooked up through this hole, I removed it
1. Keycaps
The first thing I did was order MX stem risers since keycap compatibility is what would make or break the project, as far as I was concerned.
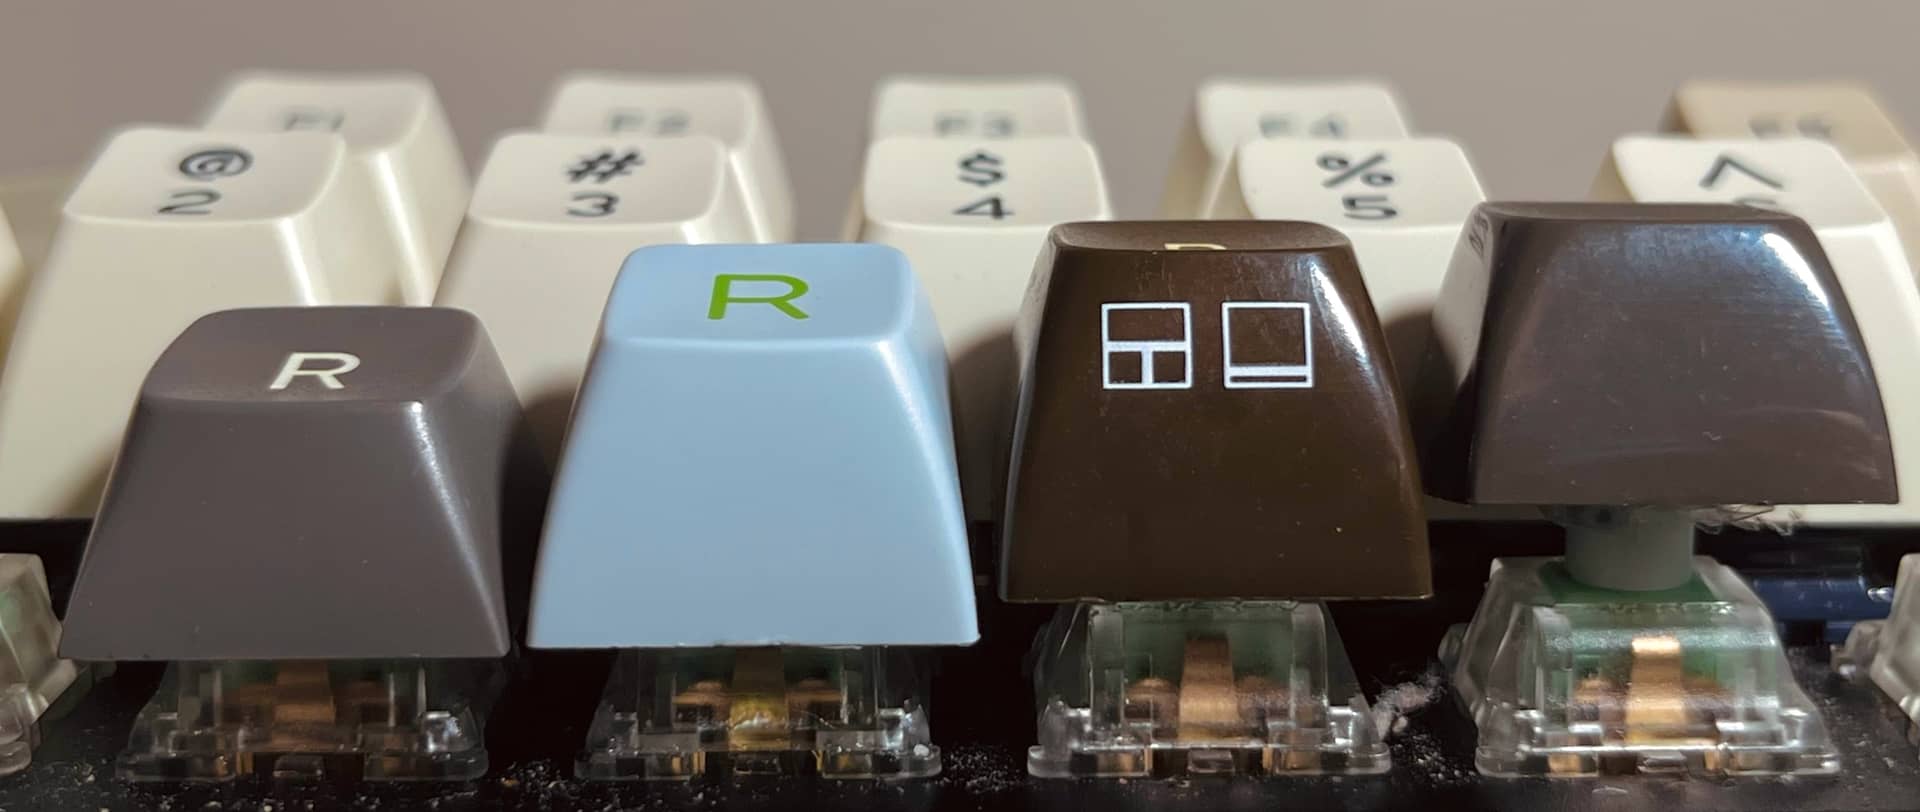
Left to right: MT3, SA, C64 + MX adapter, Maxi-Switch + MX riser
The risers do work, although I am a little nervous to find out what it will feel like to type on something with this sheer amount of height for extended periods of time. For comparison, my keycaps will be as tall as if you stuck an SA set on 4mm risers.
2. PCB
Next up was to see if I could wrap my head around designing a PCB in KiCad, which I’ve never done before.
I tried to keep everything as simple and basic as possible. I chose to use a Pro-Mico footprint. In order to accommodate such a large keyboard (19 columns) with only 18 GPIO pins, I had to do some matrix folding on the PCB, but that seemed worth being able to stick with a widely supported and widely understood footprint.
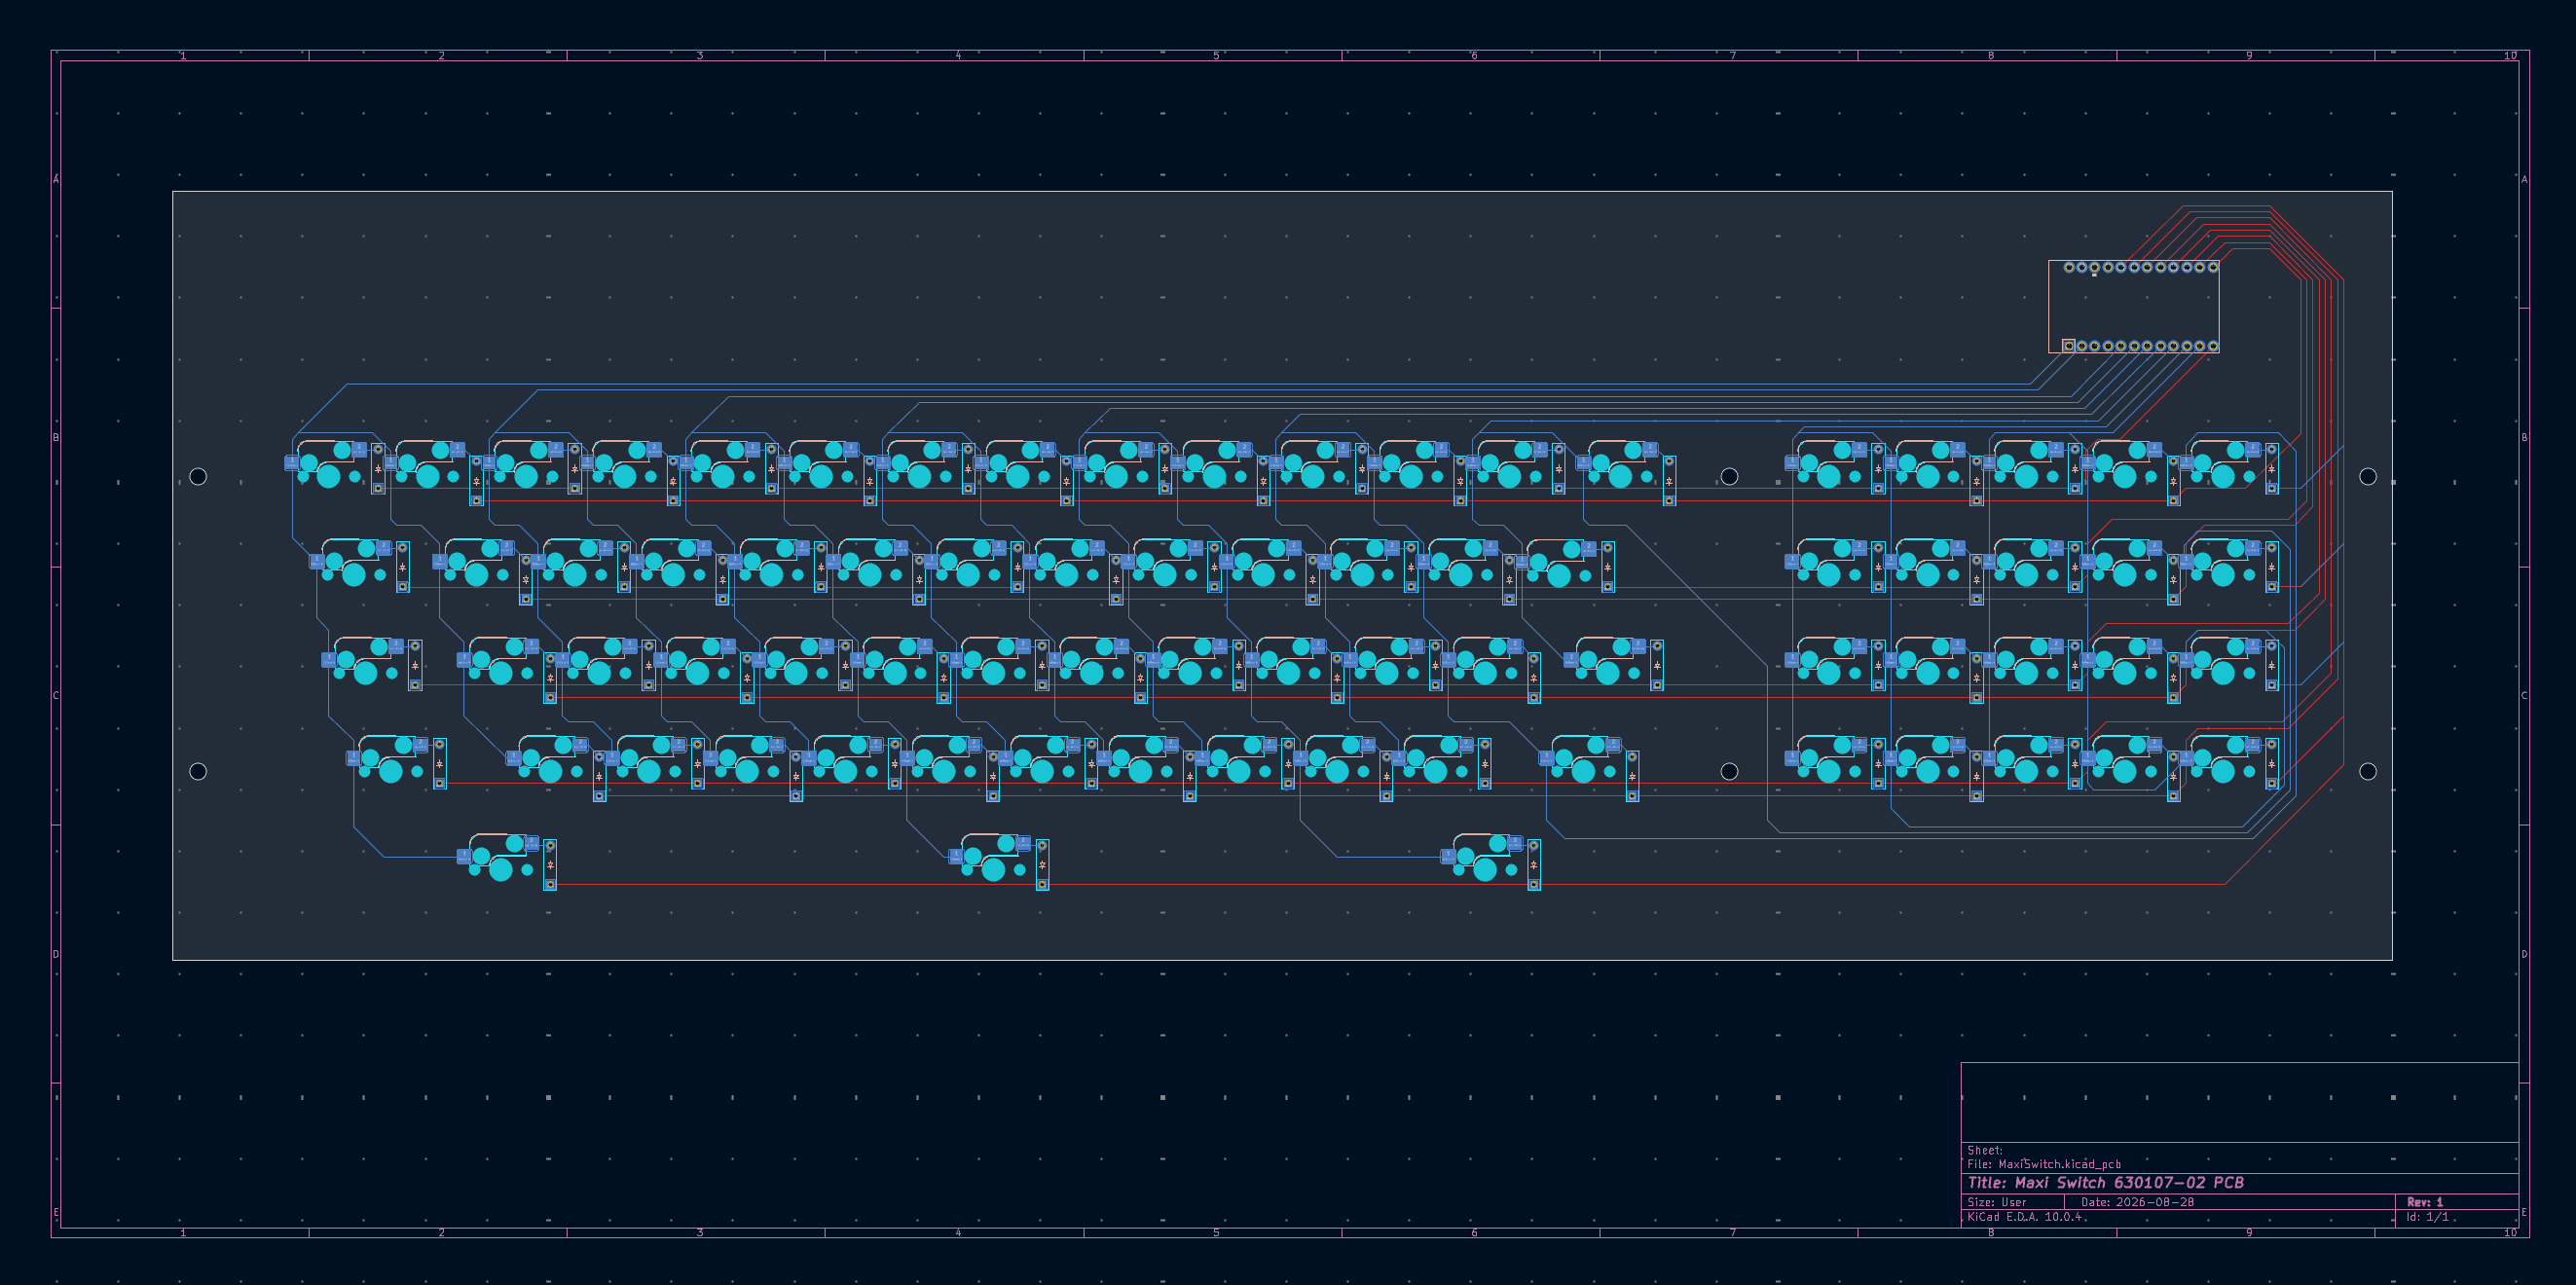
The PCB arrived last week:
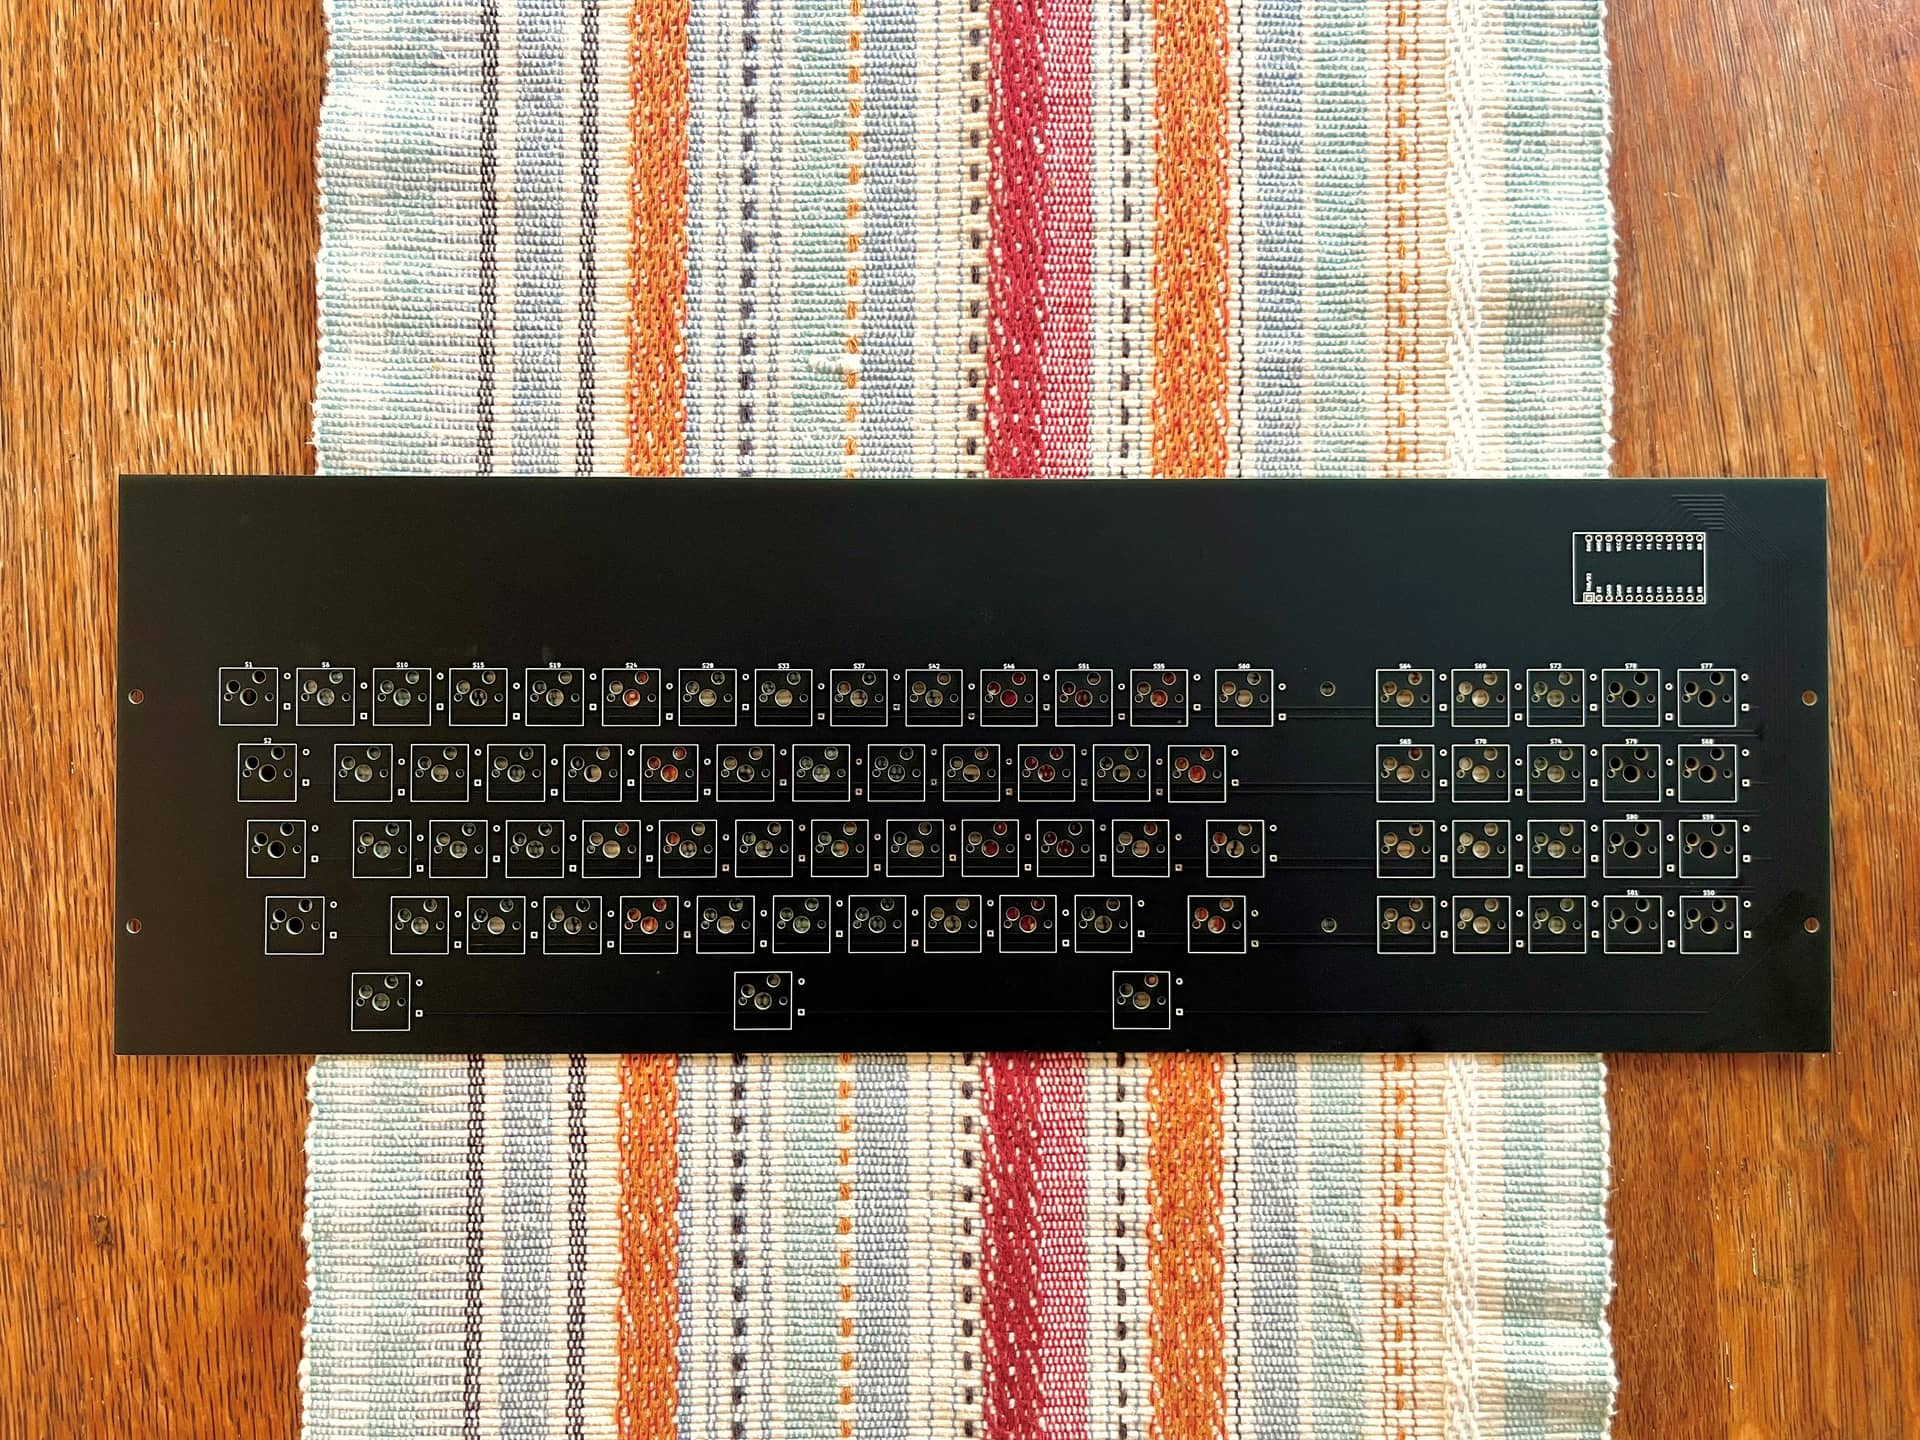
I’ve done some basic continuity testing with a multimeter, but haven’t yet been able to fully test the PCB with firmware.
3. Firmware
I picked ZMK as my firmware so that I could use a nice!nano and have the option to go wireless in the future. While I have used ZMK before, I’ve never had to define a new matrix and new physical layout before, so figuring that out was new:
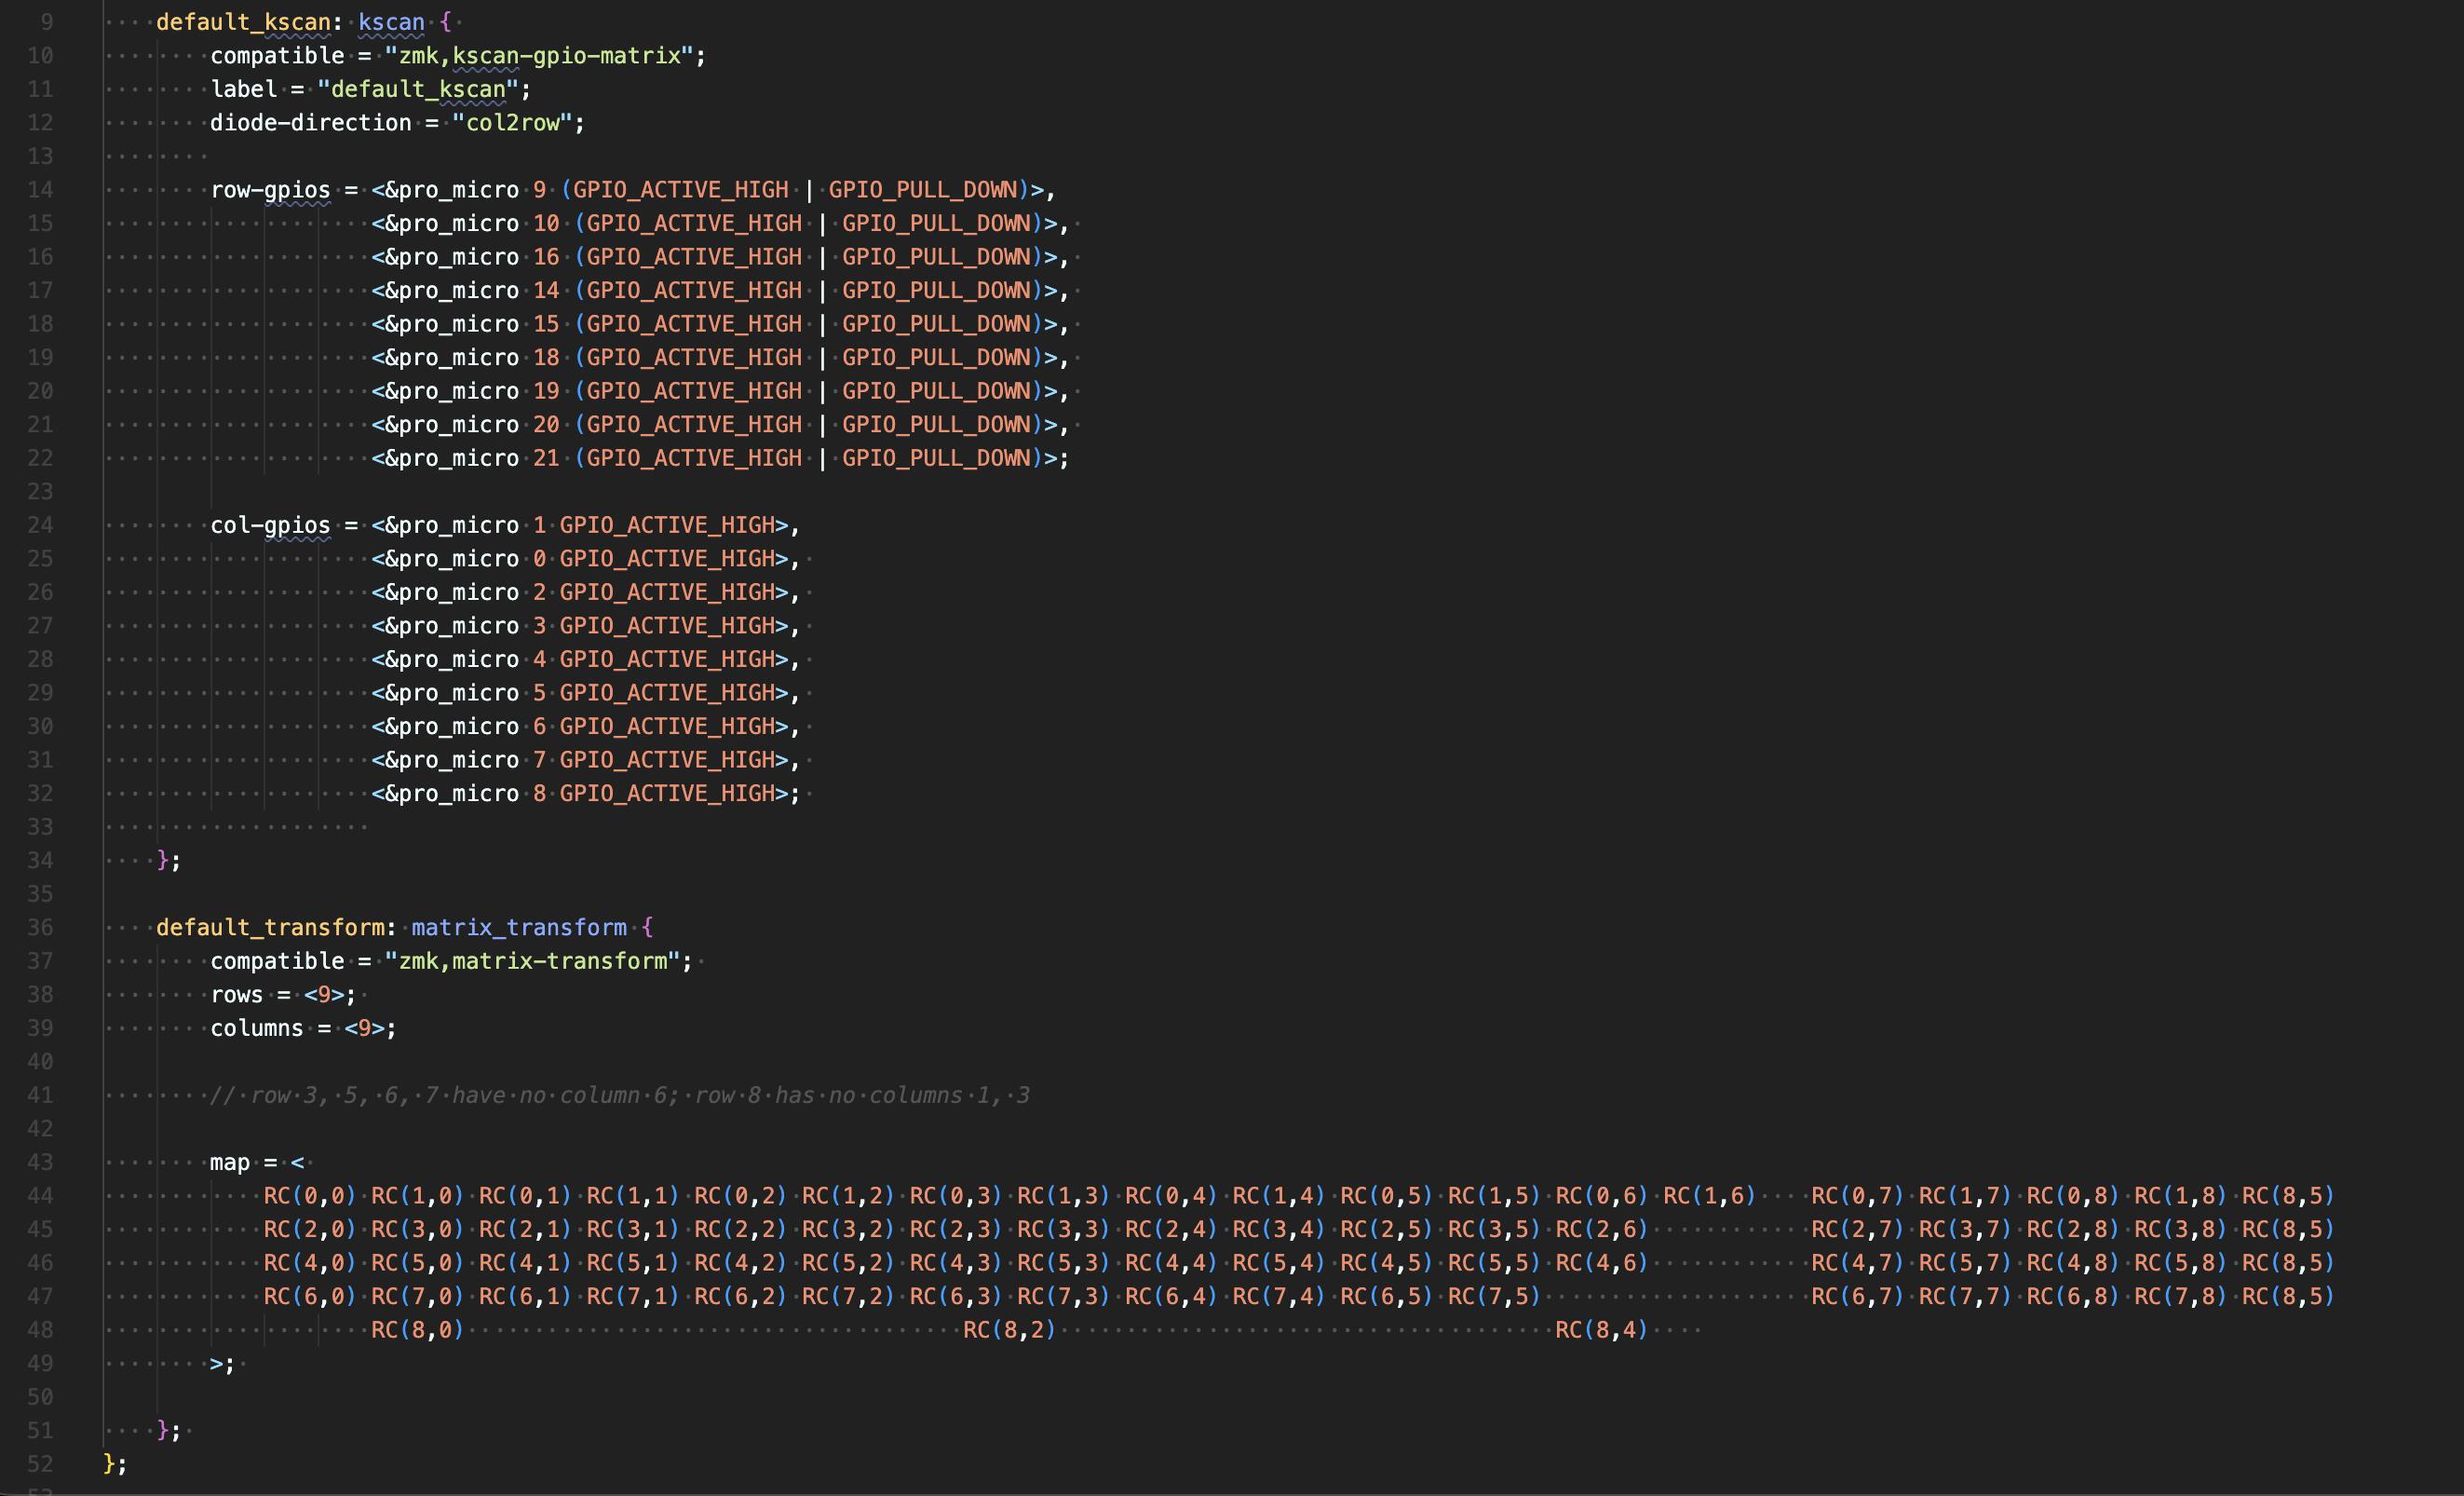
Late last night I was finally able to get the firmware to compile successfully, which is a relief. After the PCB, that’s what I was most nervous about not being able to figure out.
I have been making my way through my to-do list in decreasing order of what seems most challenging, so I feel reasonably good about what’s left.
To-do list
- Order stem risers and confirm keycap compatibility
- Design and order PCB + other components (diodes etc.)
- Compile firmware
- Design and order switch plate + spacers etc.
- Assemble, test, and troubleshoot
All for now!
