I’m brand new to the mechanical keyboard scene and can’t believe it’s taken me this long to actually start on making my first mechanical keyboard. I especially love that keyboards can be so much more than a simple tool, but moreso a beautiful work of art… or at least I think so
So after digging around for some time around 6 months ago, I pulled the trigger and bought the Keychron K2. It’s a great board. I love that it can be connected via bluetooth, and also has a layout for Mac computers built in. In full transparency, I use a Mac probably 90% of the time for work.
Although it is awesome, there were a few things about the K2 that I wasn’t crazy about. Those are:
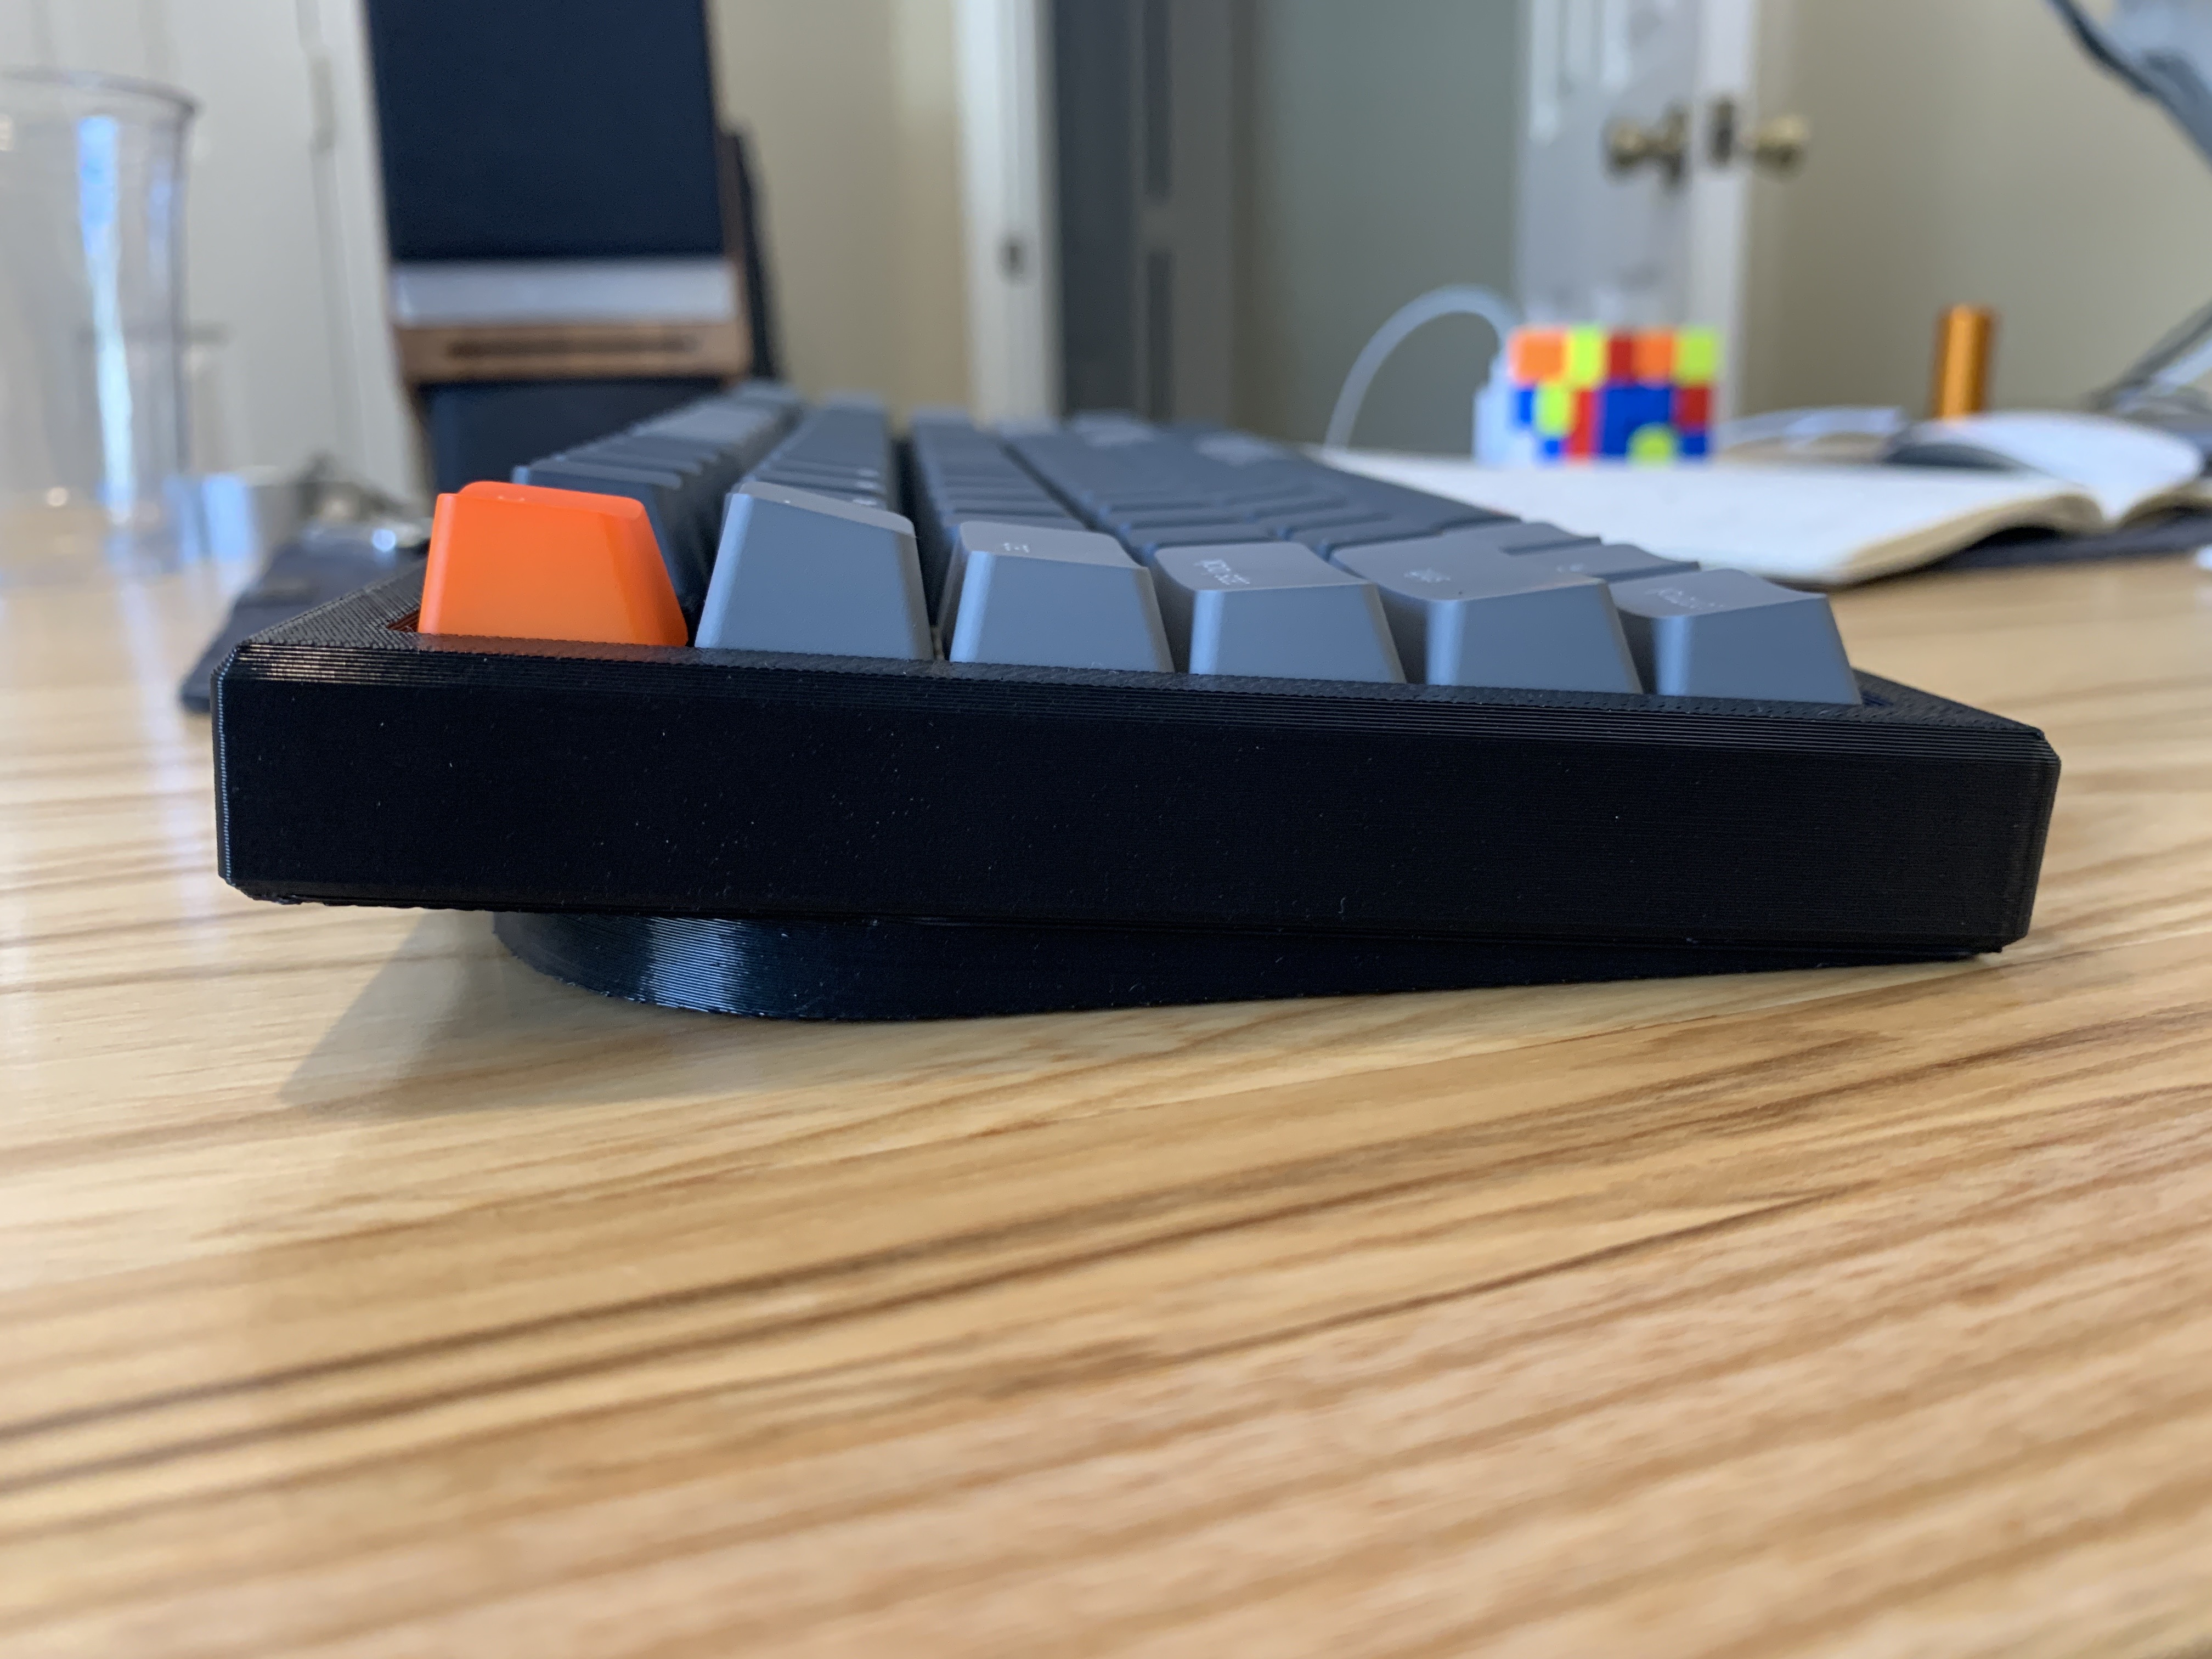
The board is sooooo high off the desk that you need a wrist rest to even use the thing. Being familiar with the Mac design aesthetic, I wanted a keyboard that didn’t need this wrist boost.
My board came with Brown switches. Awesome to start with, but after I started learning more, I realized there was a whole world out there! So I wanted a keyboard that I could swap switches out easily without soldering.
The keycaps felt a bit cheap, so I wanted something better there too.
I realized that I’m not an RGB fan-boy, lol. It’s cool, but I learned that I like artful design over flashy lighting. Just personal preferences.
And I wanted something a bit… prettier. It’s a functional design, but after seeing some of the other custom stuff out there, I wanted something made with beautiful metals, and a clean design feel.
Sooo… that led me to explore buying parts and putting together something custom, but with pieces made by other companies. And well… we know how hard it is to buy the stuff we want these days! But I had an idea, instead and waiting and hoping that someone was looking to sell the exact parts I wanted… and for a reasonable price which is never going to happen… I started exploring what it would take to design something awesome myself from the ground up. And in particular, building a case, plate, and PCB all spec’d to what I really wanted.
So that’s what I’m going to do, and I’m going to try and share that journey here with everyone! If you like what I’m making, I’d love to hear your feedback. I’m making this keyboard for what I want out of it, but if anyone really likes it, please let me know and maybe I can make more of them!
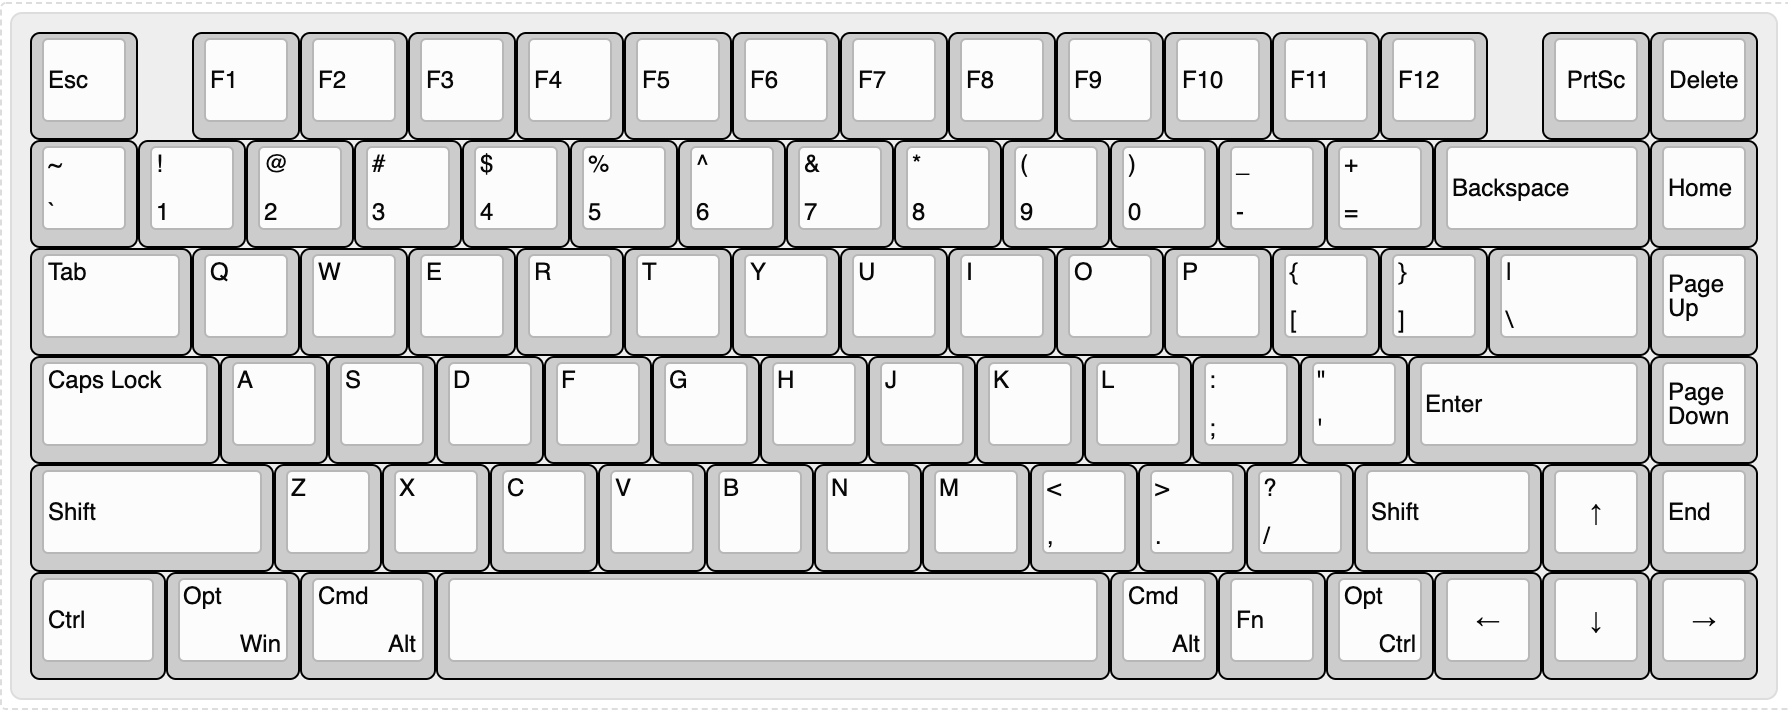
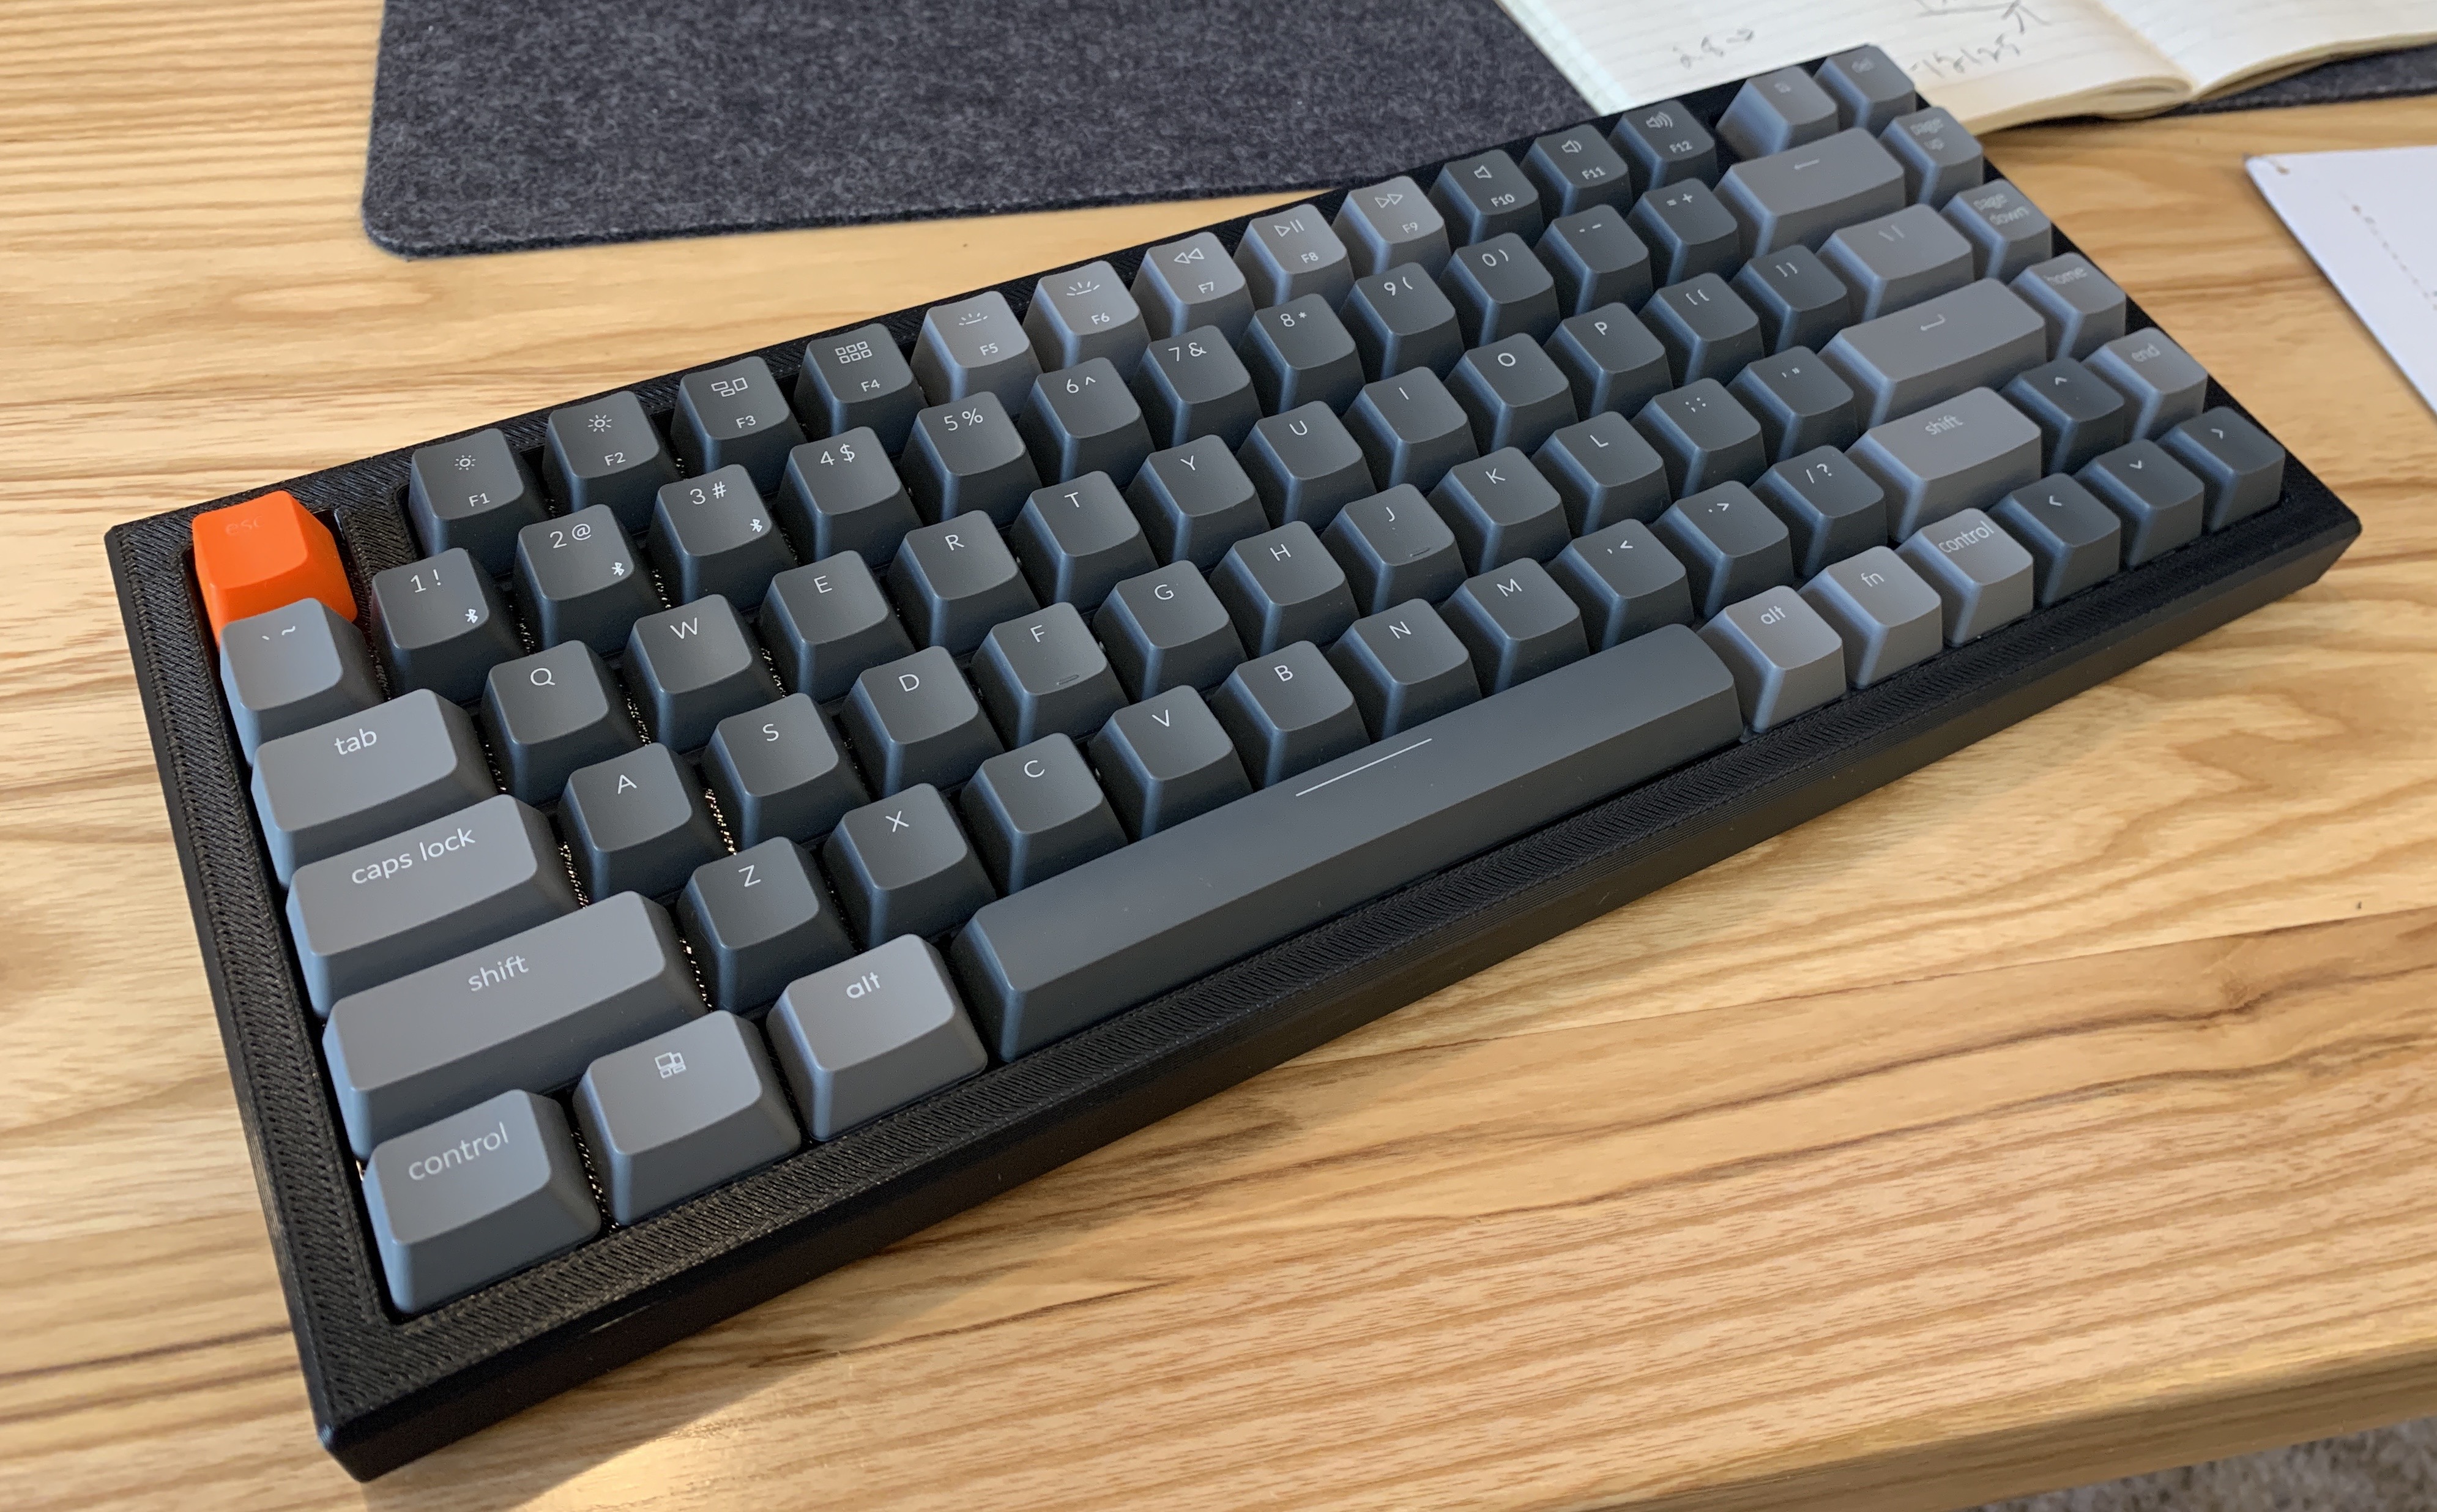
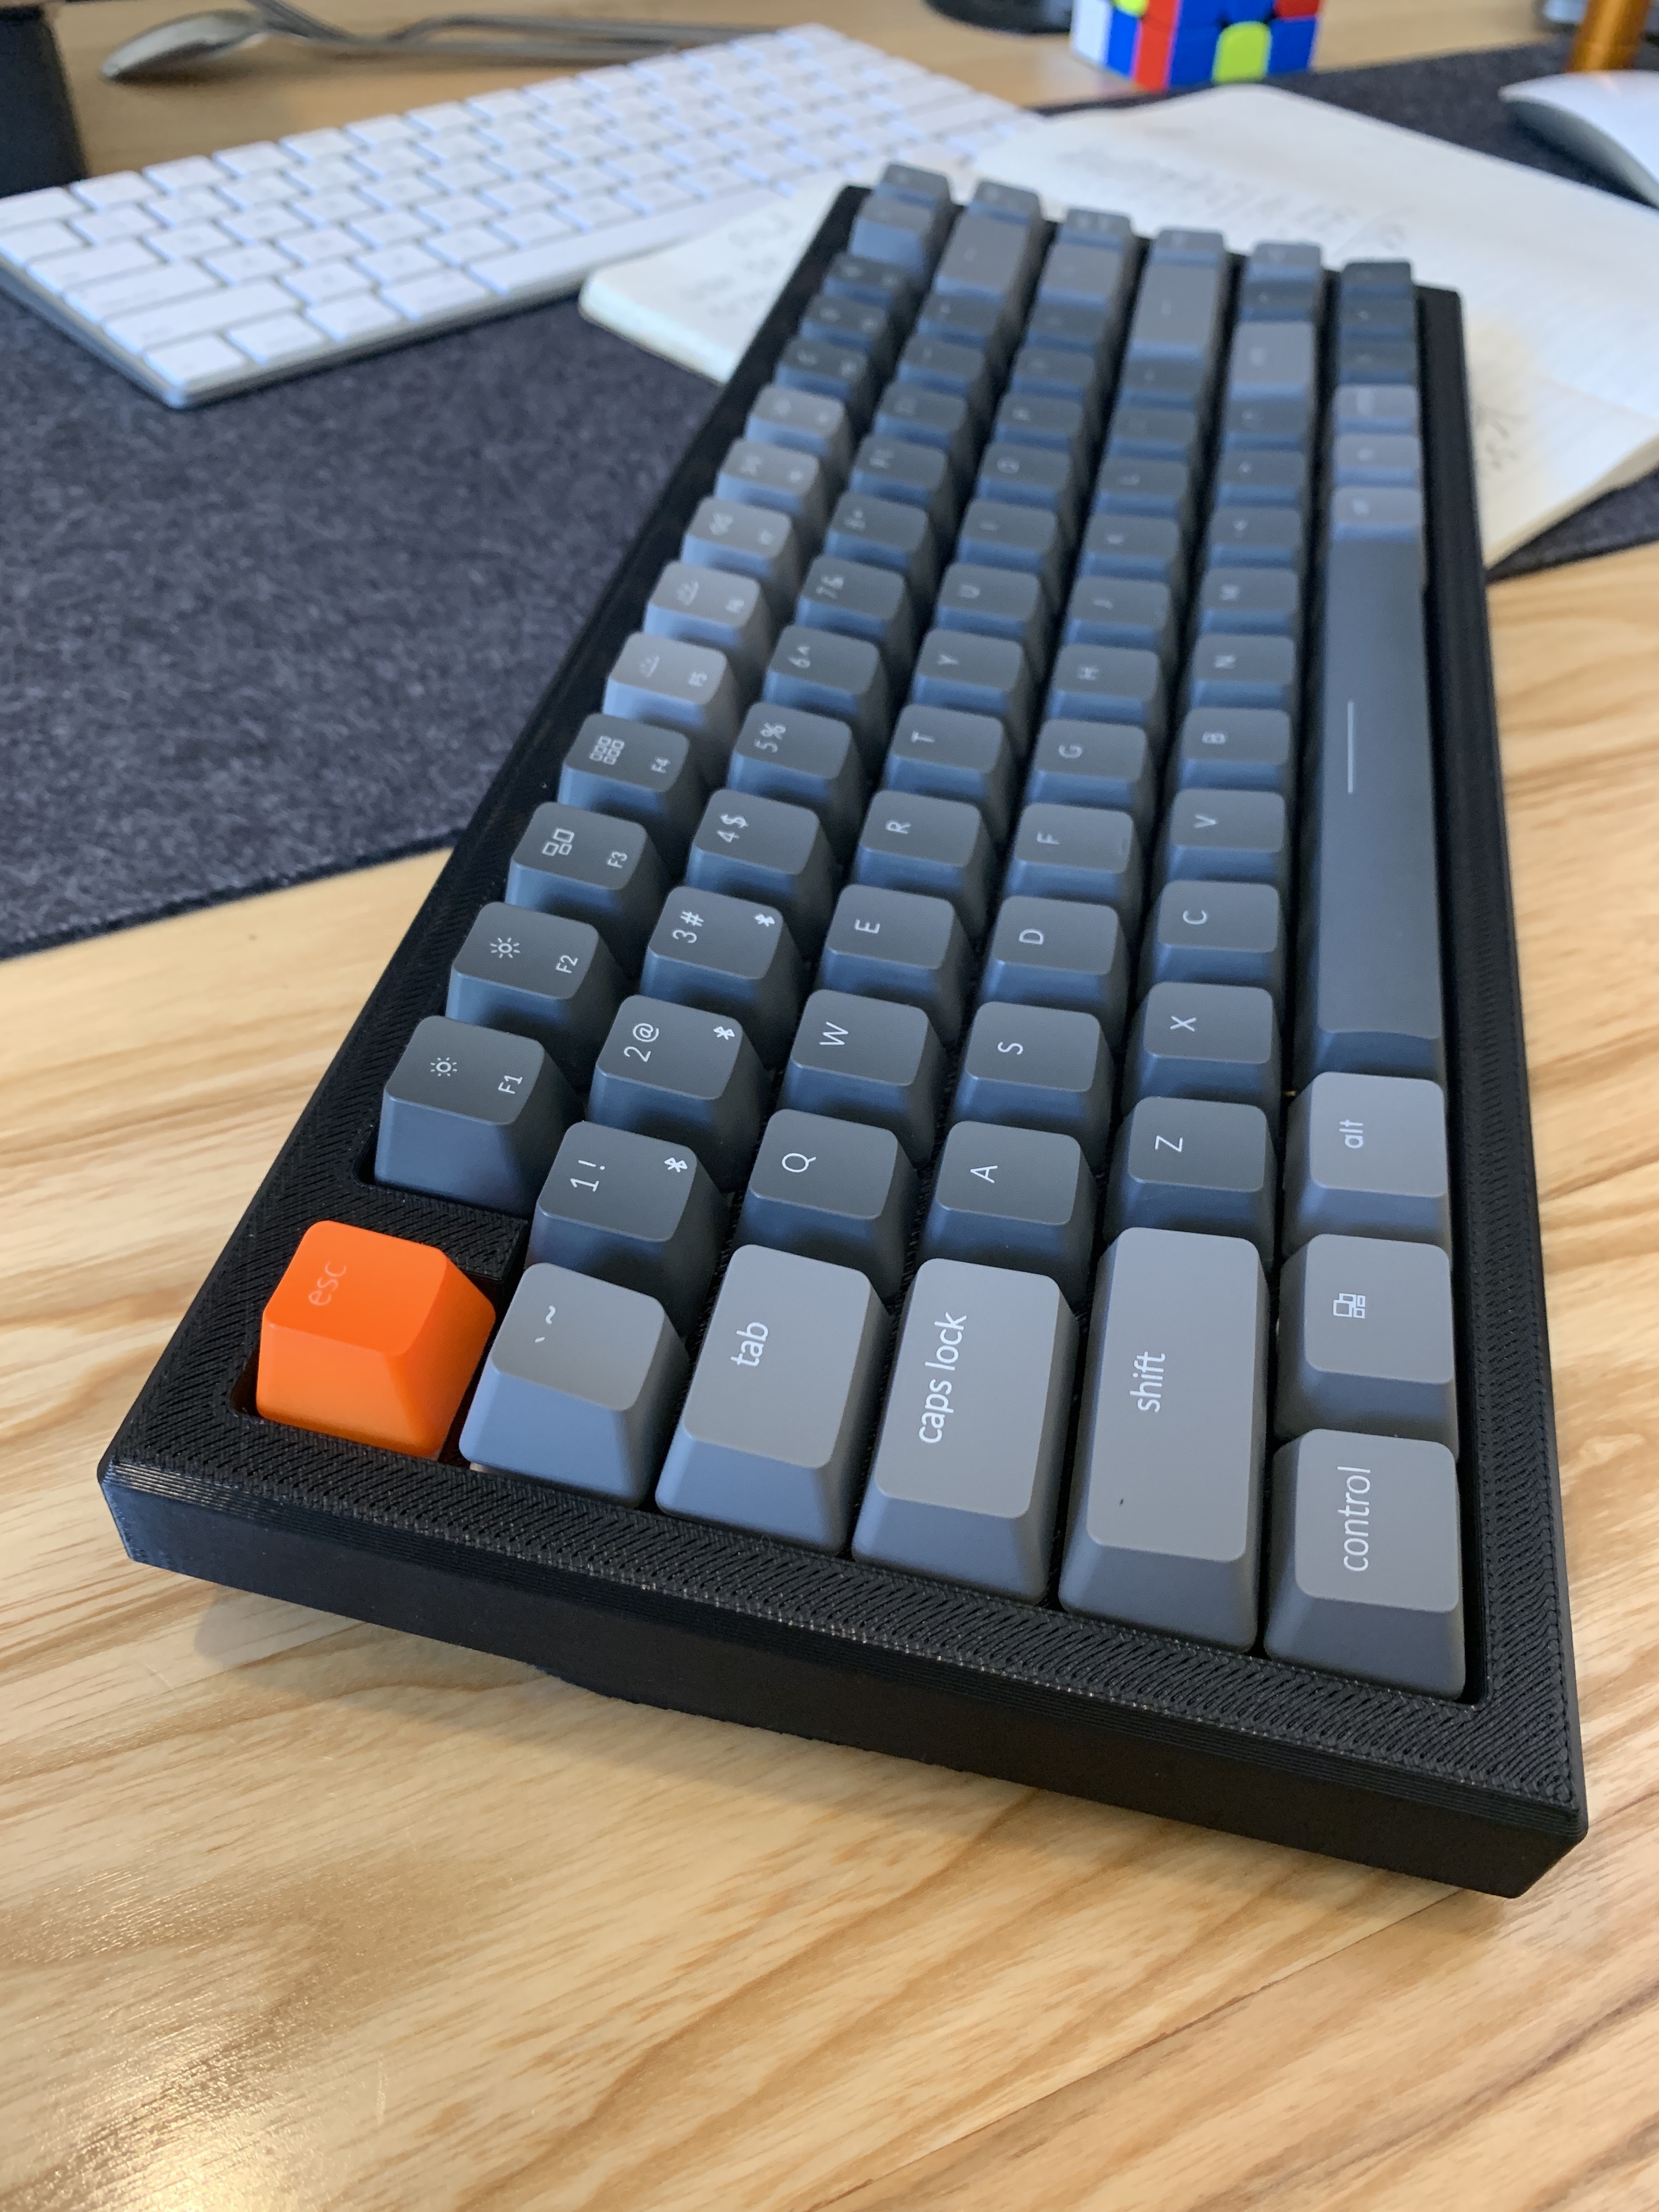
Ok, to kick this off, I want to make a keyboard that I could use across both my Mac and my PC. And I also wanted it to be as small as I could make it while still being very functional. In general, the Mac Magic Keyboard layout is awesome, as it’s effectively a 65% but with the function keys. So this was my attempt at something similar:
It’s essentially the same setup as a Keycool 84, but with one of the top keys, I think the scroll lock key, removed, and all the function keys shifted half-way over so that they are not just perfectly above the numeral keys. I think this looks so much better.
Now there is 4 extra keys on here, Home, End, Pg Up, & Pg Dn. I never use them, but the alternative was to just leave them off and have a metal blank spot, so I just left them in, and maybe I’ll program them to do something else… or maybe I’ll learn to use them on my PC more!
Oh, I like this layout with the F row placement, not something I saw previously in other 75% layouts.
You obviously remove one key on the top row but there is already plenty of keys available so no biggies
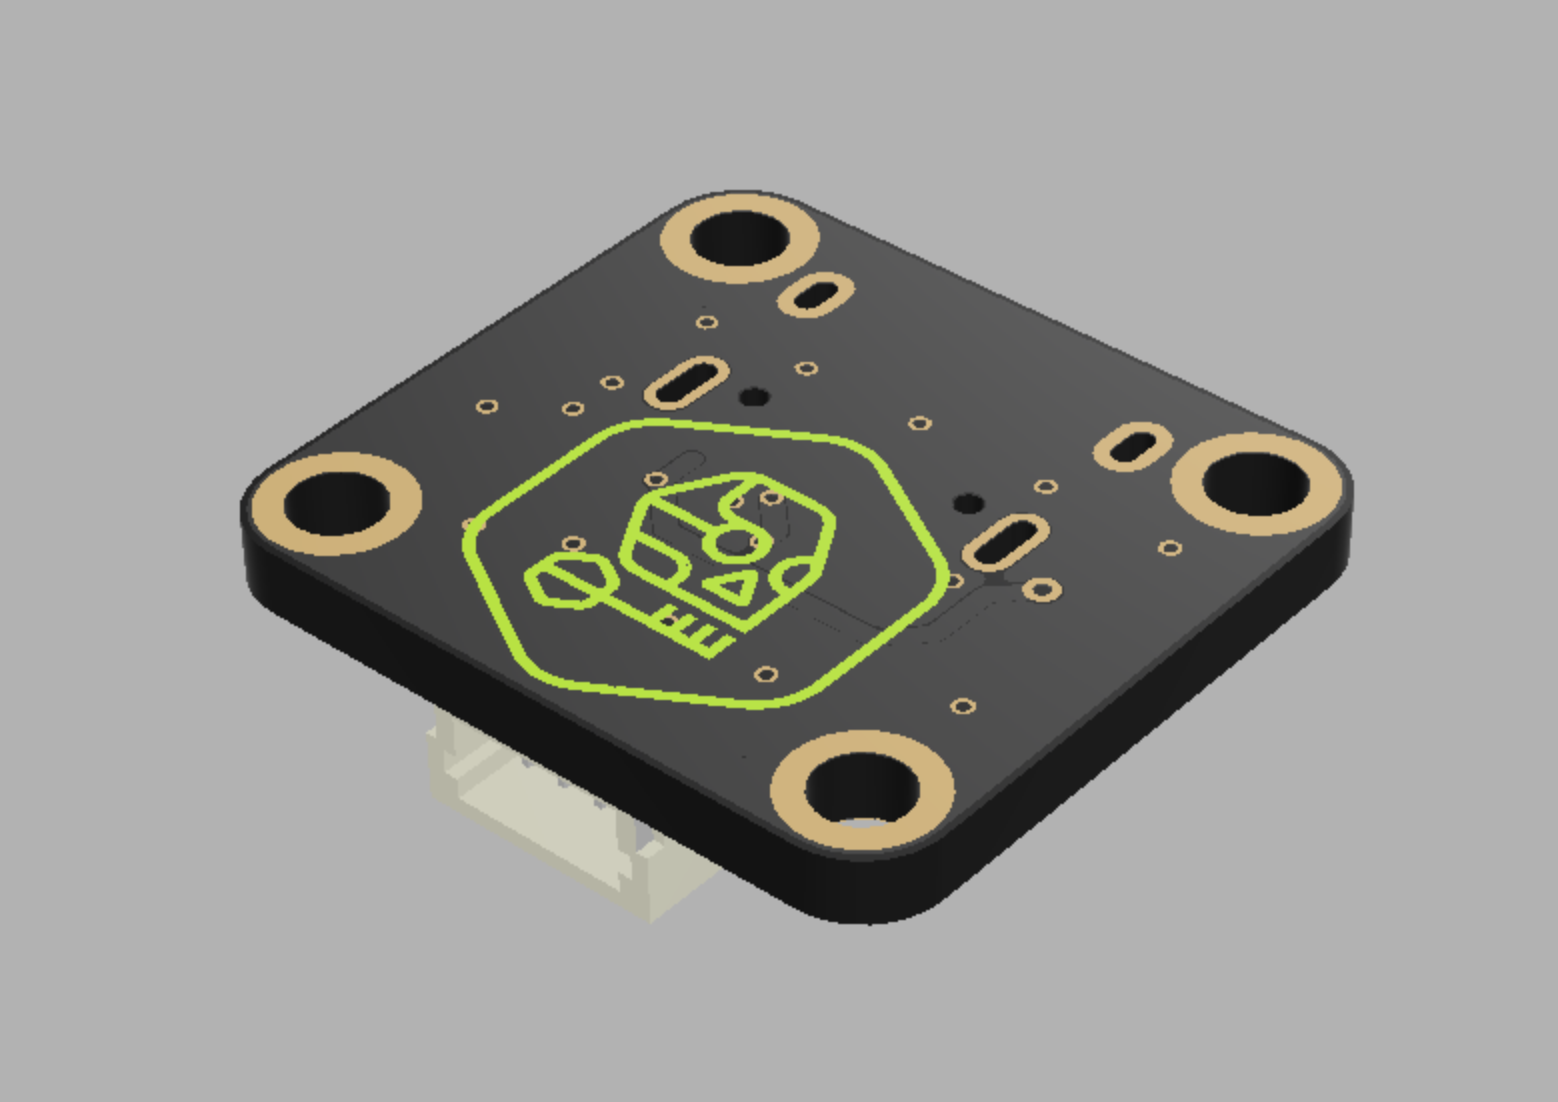
As you can tell, we added a touch of branding to it. We’re going to call this effort of love, Skeleton Keys. I’ve always loved Halloween and Skeletons, so it just felt right to play off the Key in Keyboard to create something super cool. Still working on other ideas of how to create a really BA brand. If you have any suggestions, I’m super open to ideas!
Oh and the board is going to be a super dark blue/purple type of “Nightshade” color, with a radioactive green Skeleton logo on top! And of course, hot swaps on the bottom.
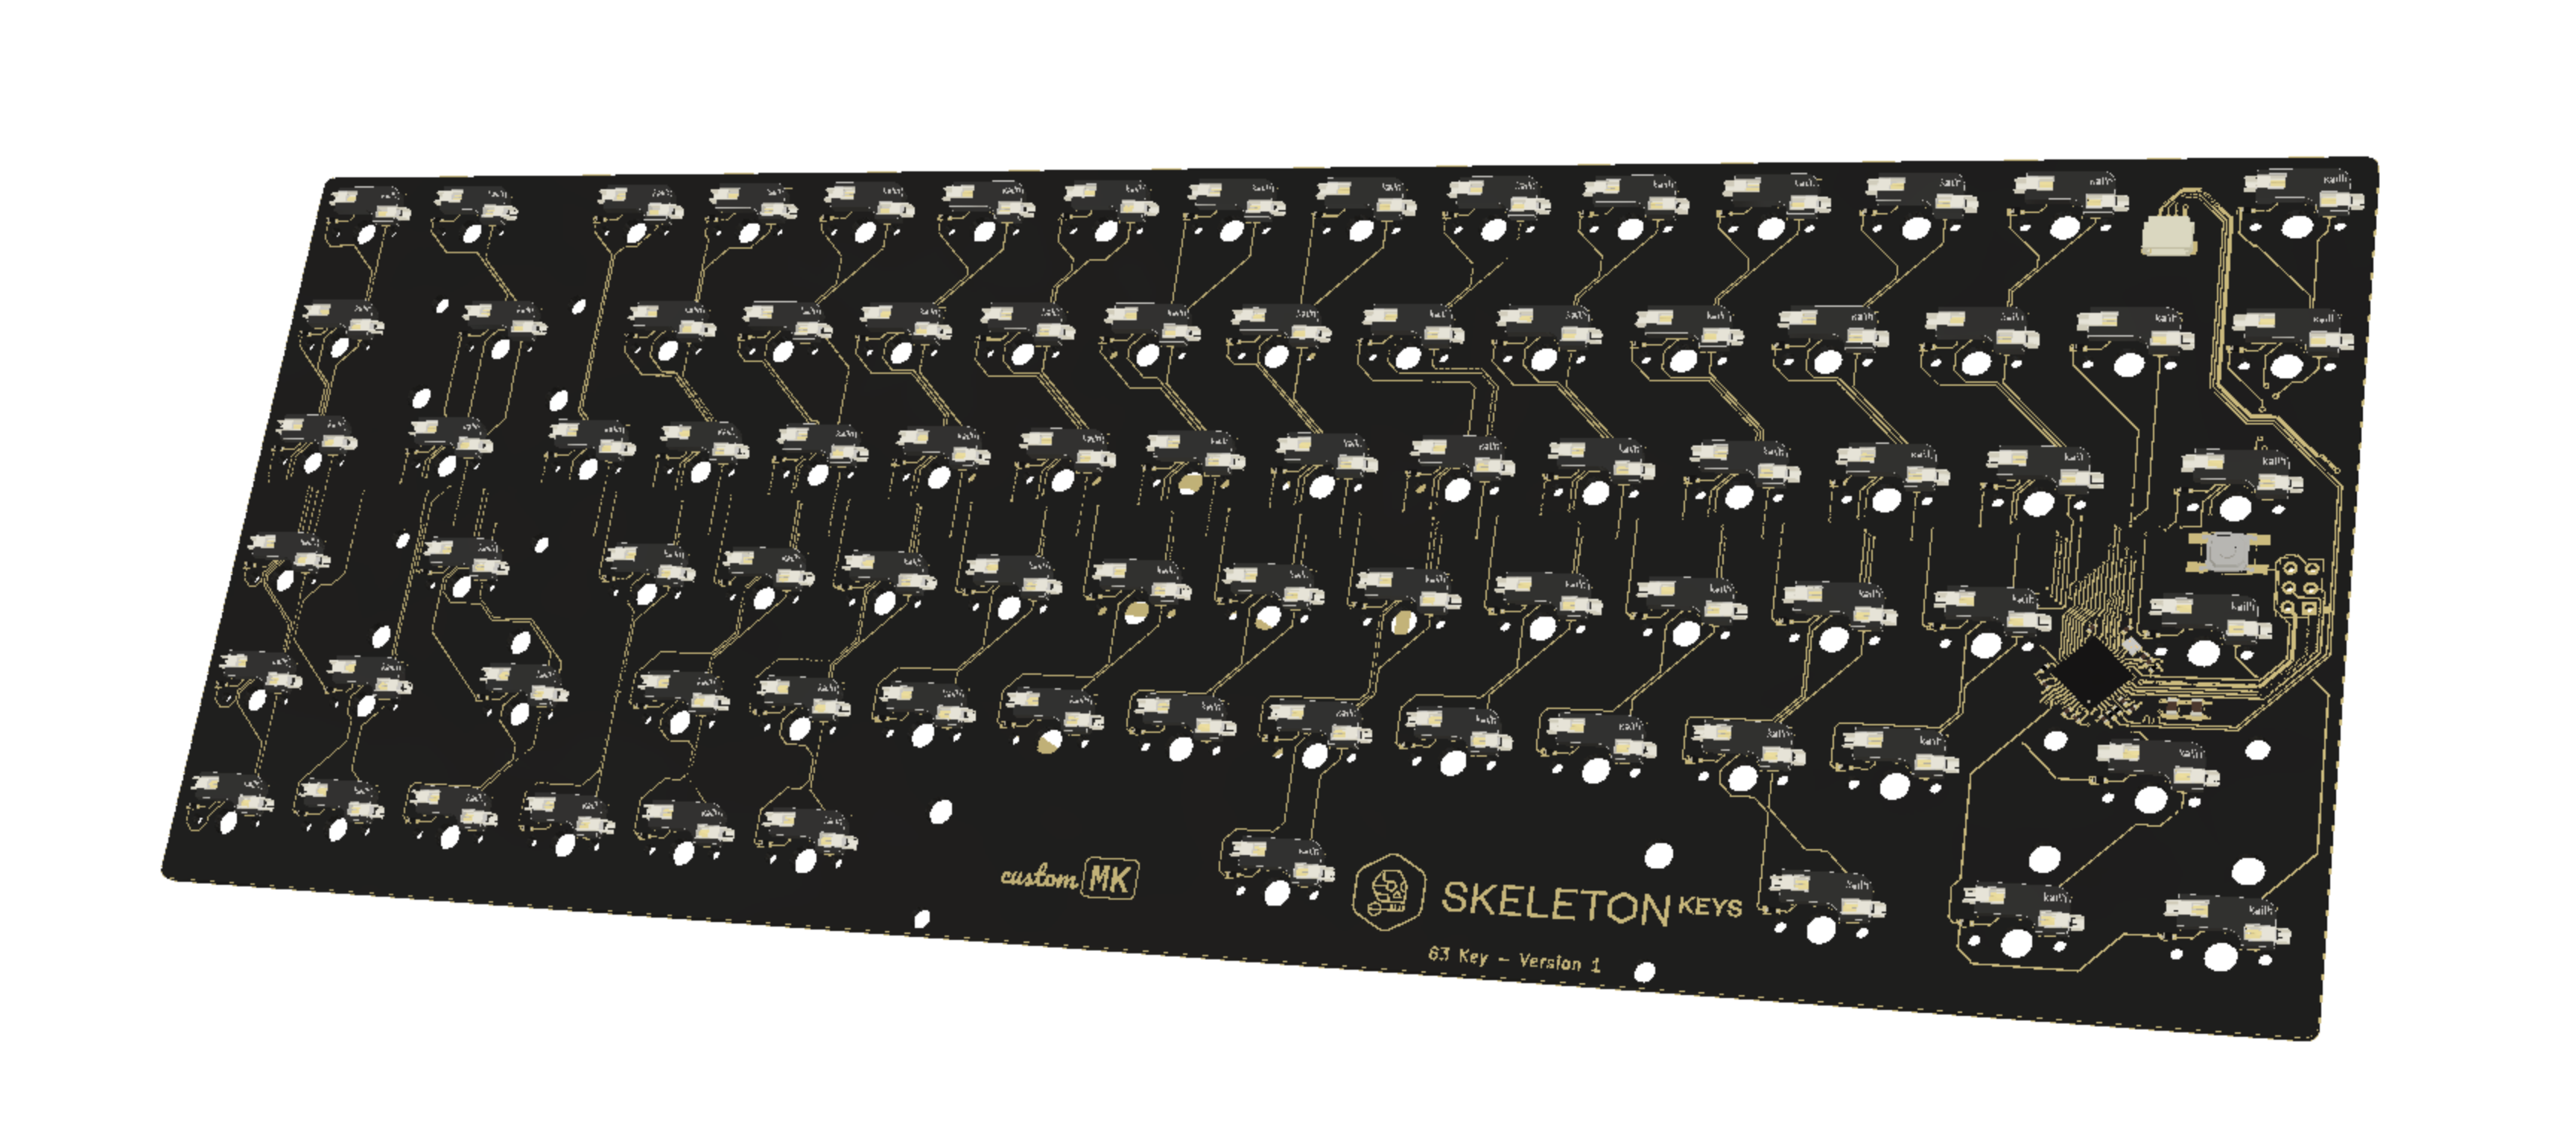
We’re also going to be using the USB-C daughterboard idea that wilba.tech uses on their boards. We also added a touch of Skeleton Keys love to it:
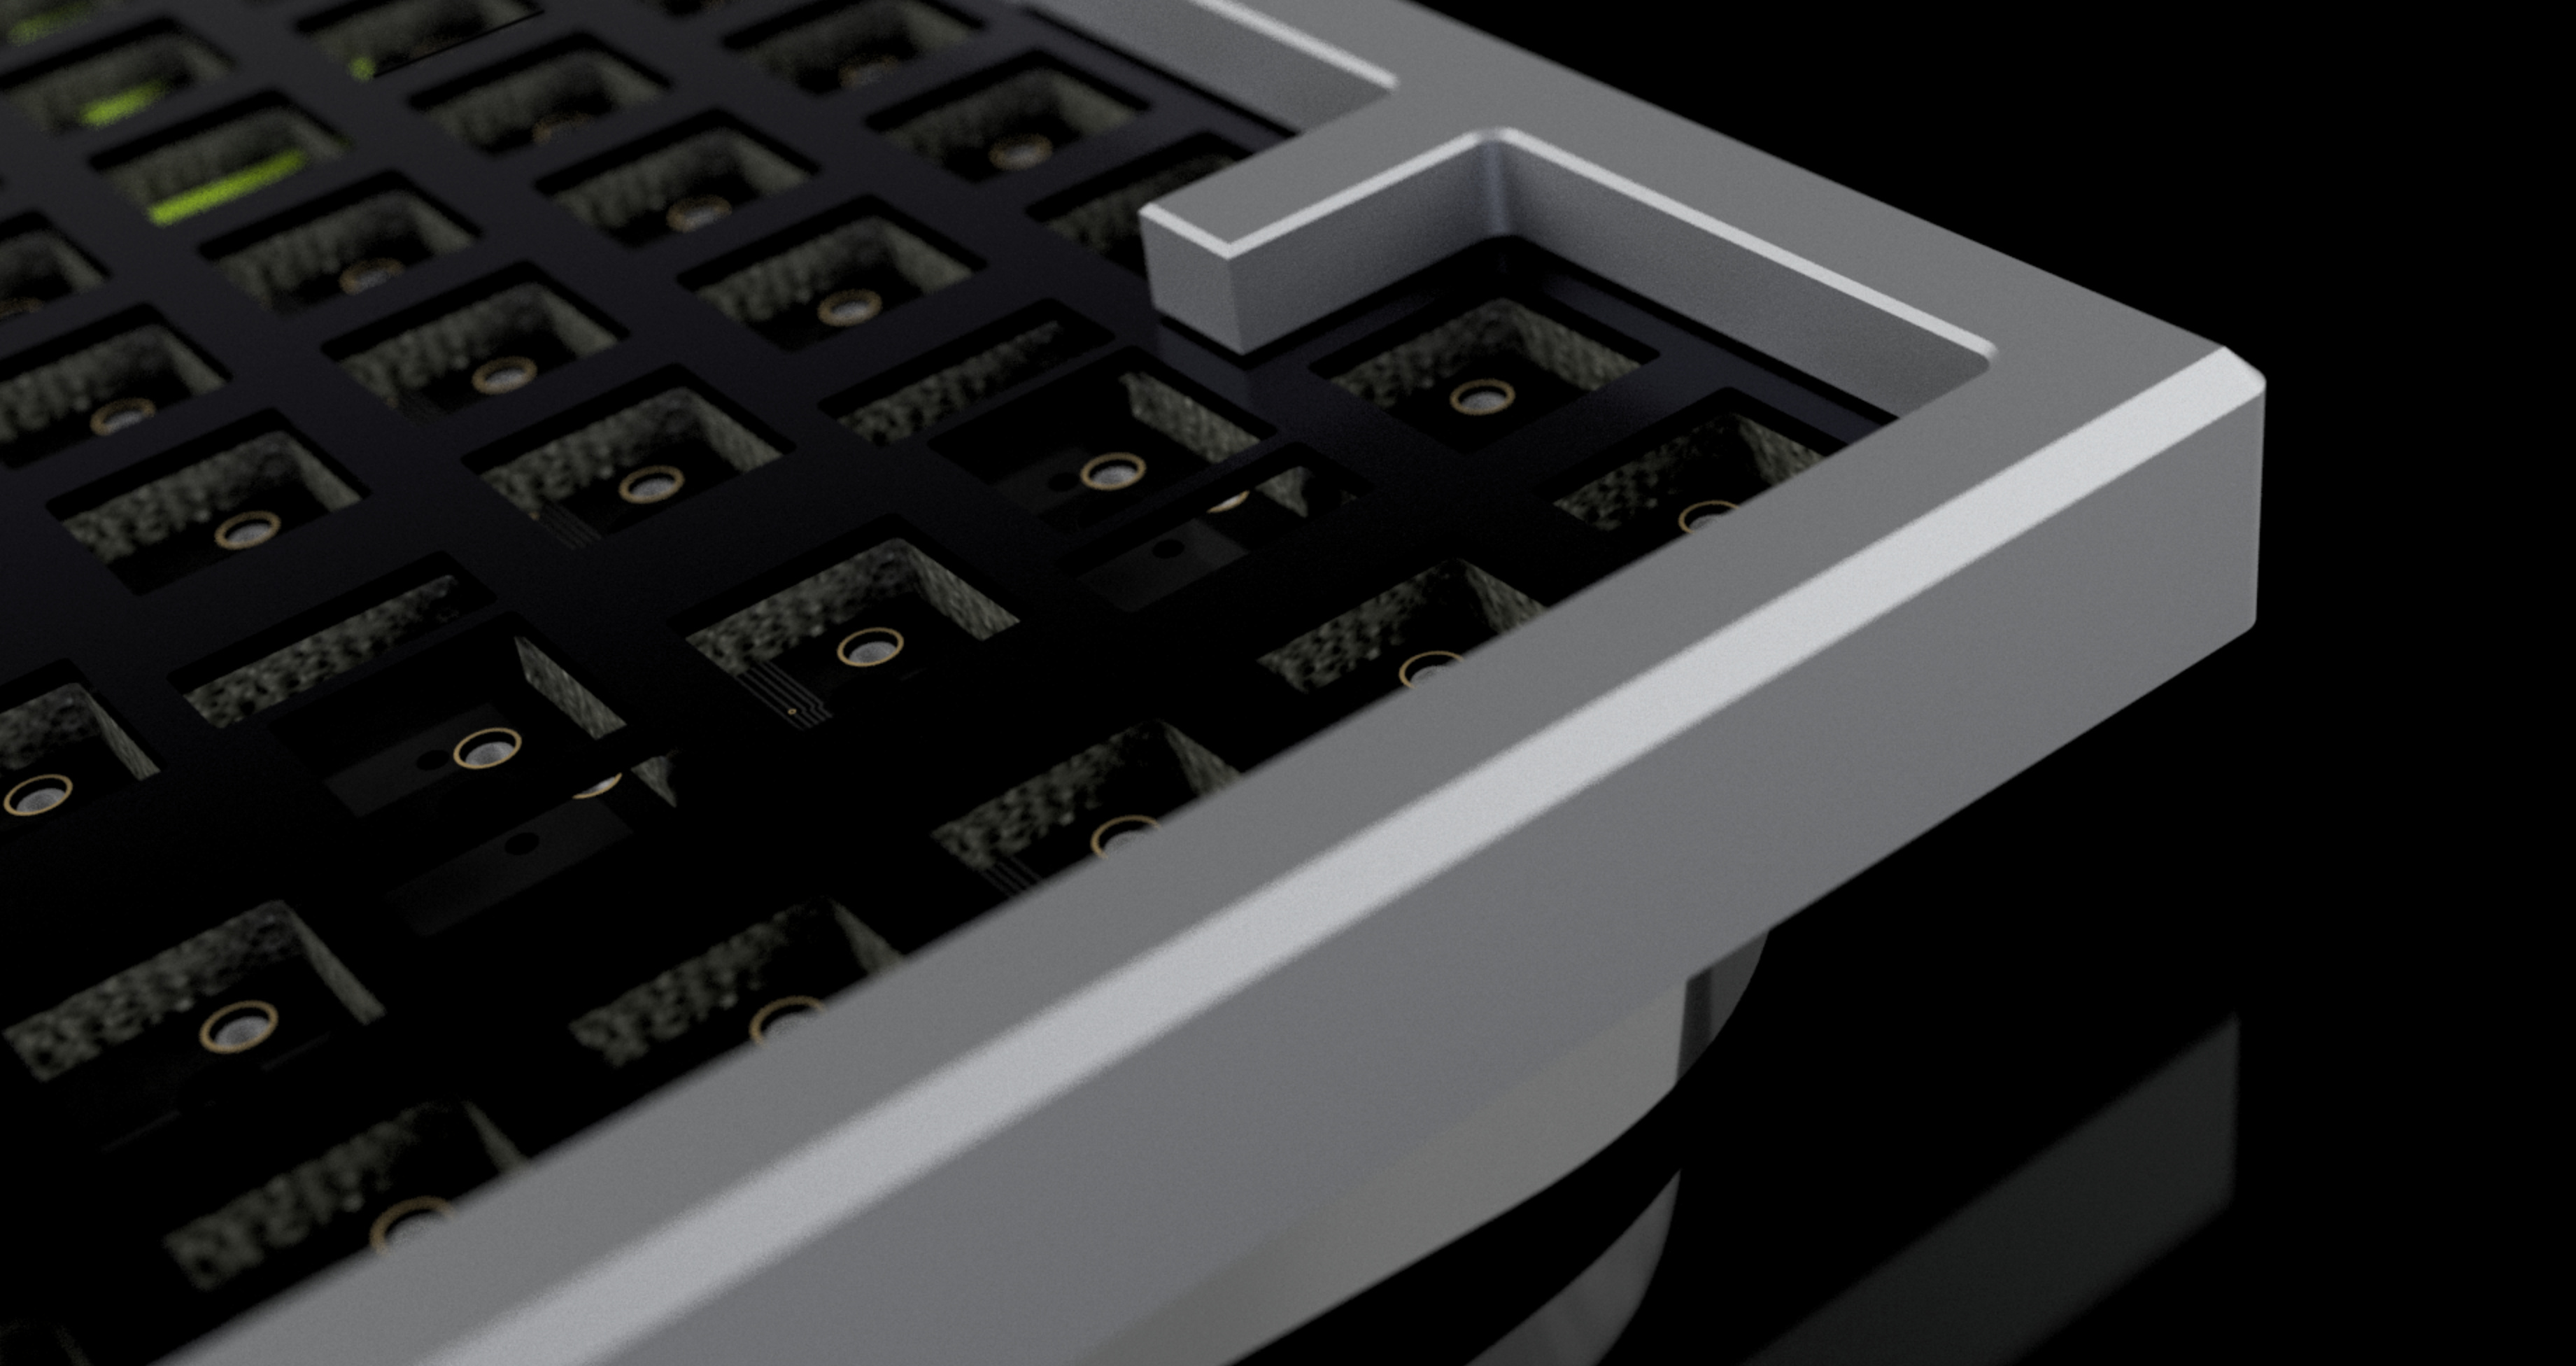
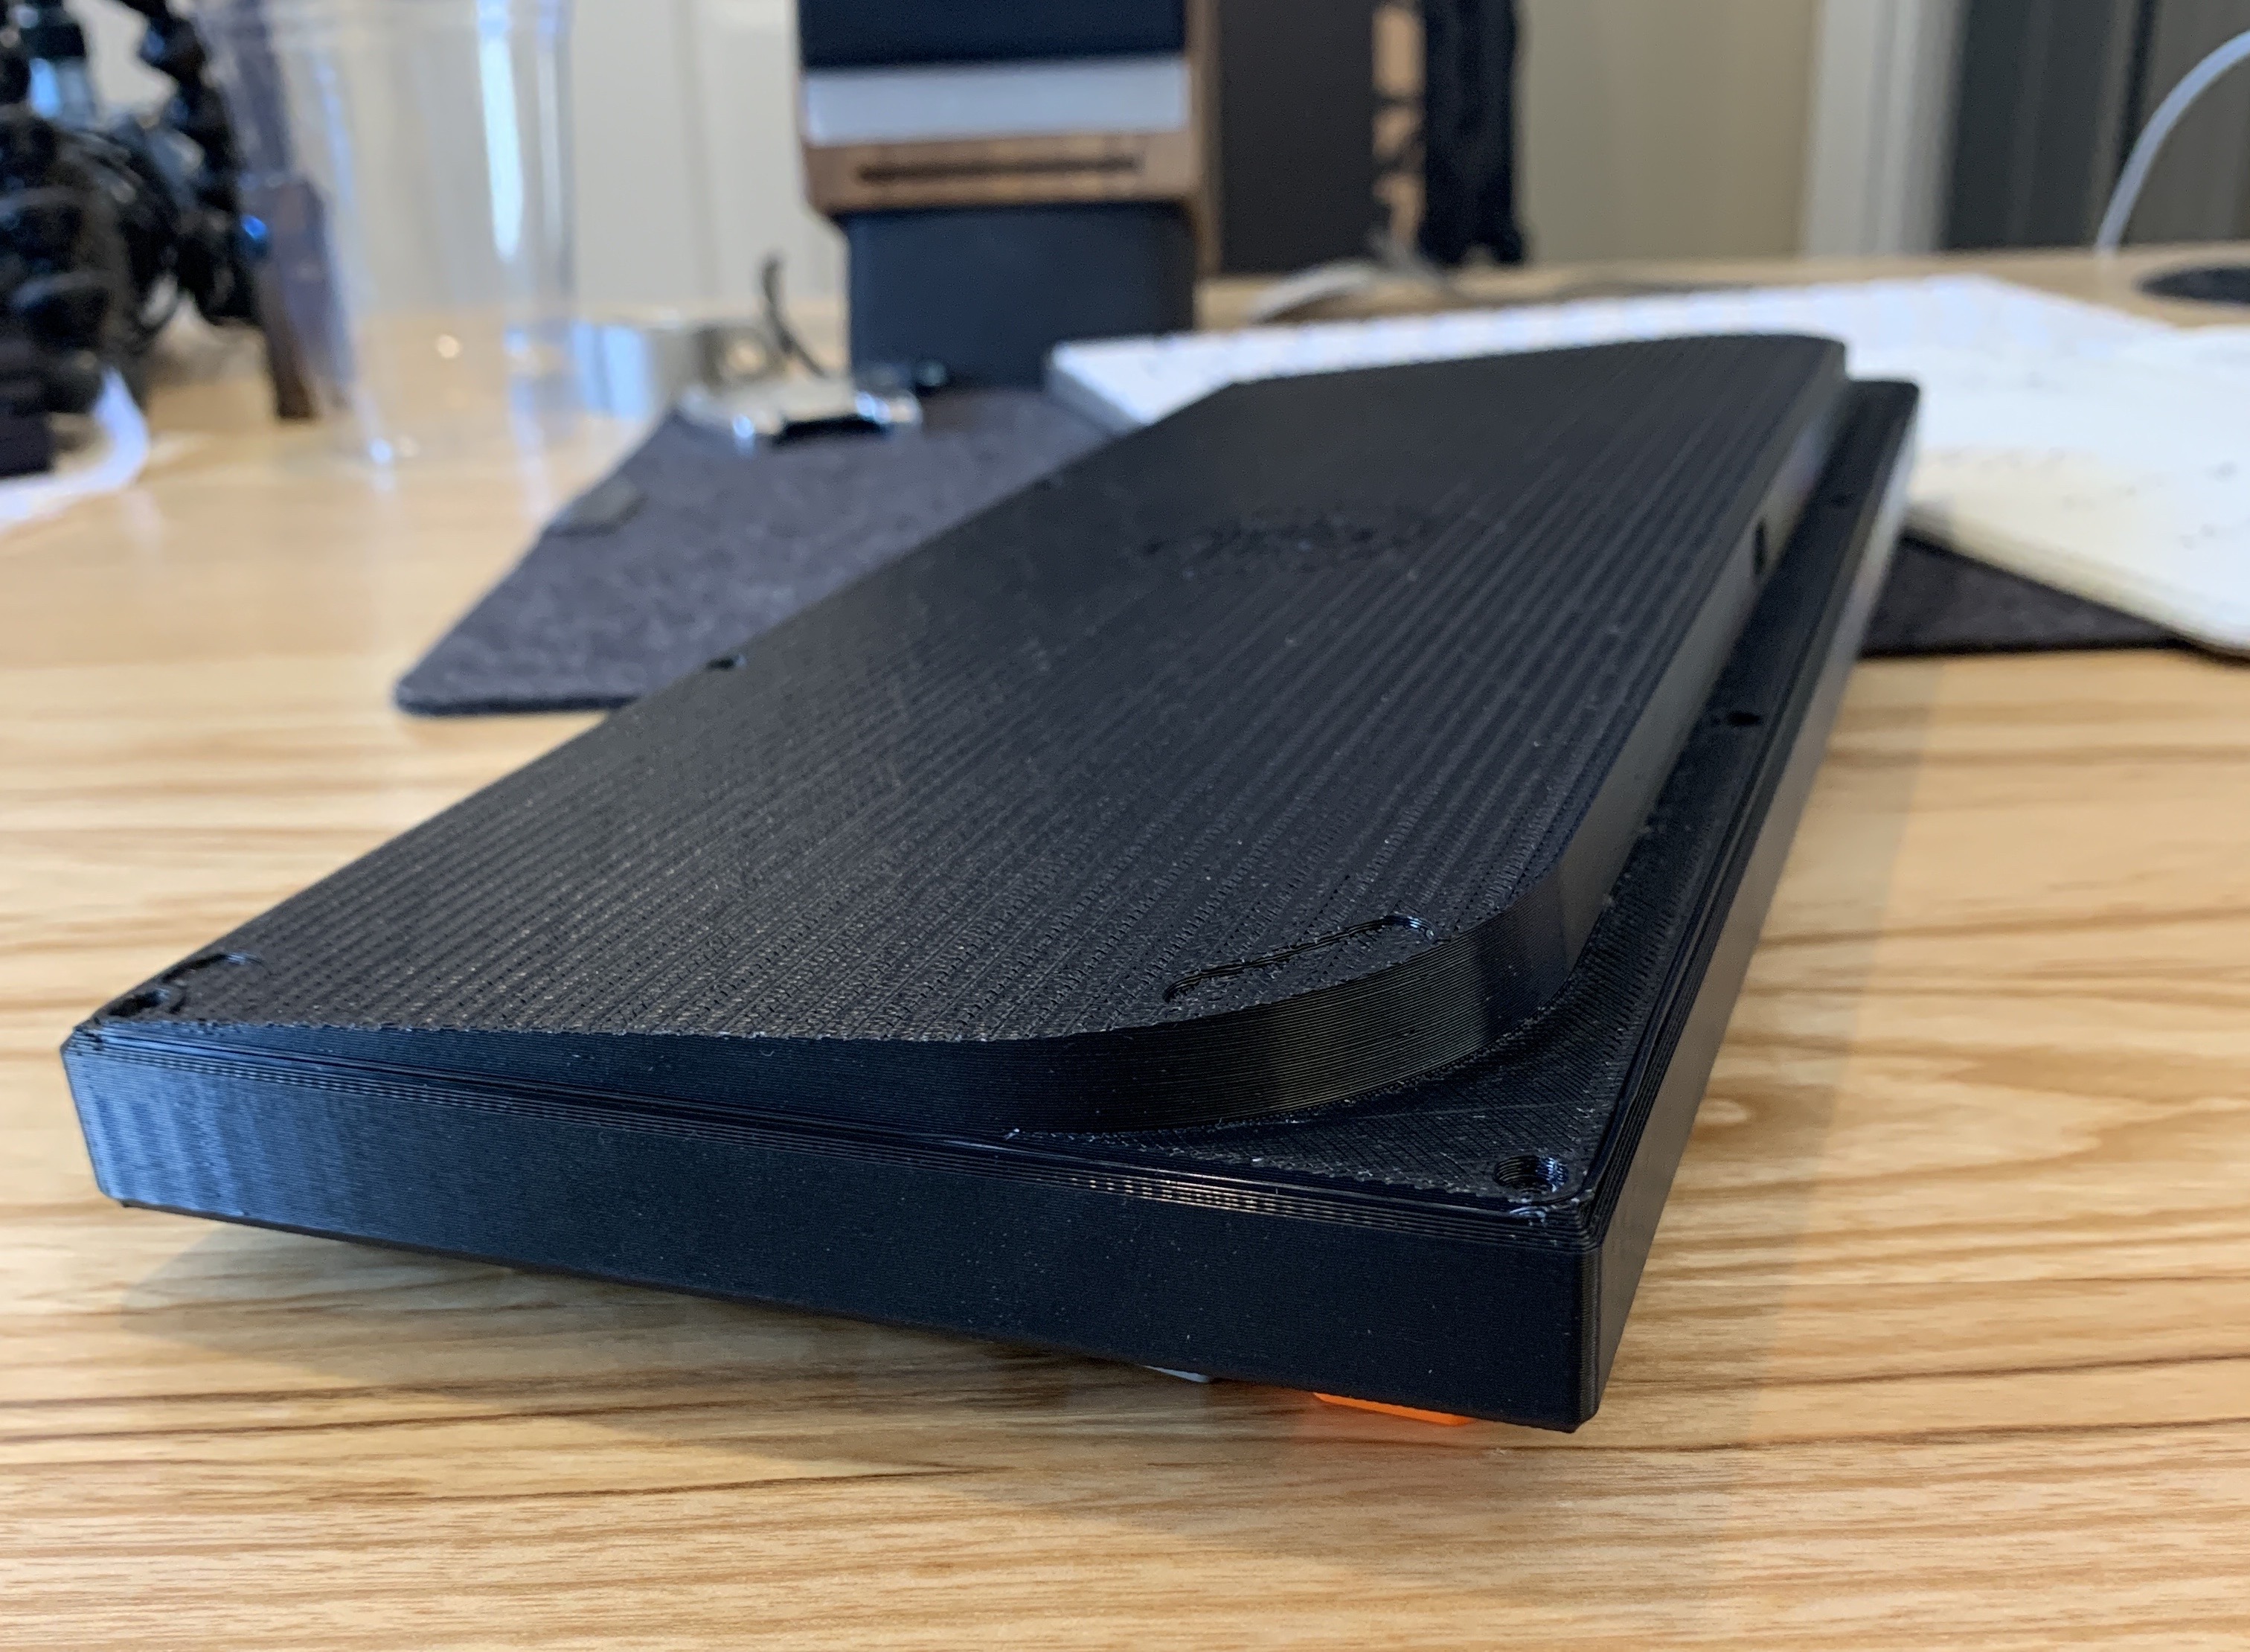
I’m currently working on the finalized design for the case. It’s going to be a gasket mount case with sound absorbing foam built into it, both above and below the plate. I’m so excited as this is turning out to be a beauty.
I promise to not let 2 months go by before updating again. But I think I’ve definitely lost some hair trying to figure out how to make these things!
The effort shows - love the logo and how it relates to the name and brand, and I love the idea of a dark purple pcb with those gorgeous gold traces. Looking forward to seeing more of your work when it’s ready!
Hey there, same situation with me too. I got the non-hotswap K6, and it sounded really hollow and loud (which is now with its new owner). Once I discovered that switches can be lubed plus all the other sound tests, it was all down the rabbit hole, and bought quite a few entry boards to begin with like Tofu65, ID80 and KBD67 in the matter of 2-3 months.
So far this journey is really fun! Starting from ID80 which was amazing, then I got my hands on the Tofu and Kbd67 and the world changed. It is like levelling up with the different quality of board.
What boards are you looking for next or have gotten your hands on?
Yeah, it was so crazy hard to get any case, so that’s actually partially why I started this project! I bought a KBD67V2 a couple months ago (which still likely won’t arrive for another few months), so my goal now is to make this case before that one arrives. Wish me luck
PS - I’m going to get 10 copies made up, so I might sell a couple, give them to friends, and share them with the community if they turn out nice! Already have an order of 10 PCBs in.
oh yes…same here, moved on to the kbdfans’ boards. I was so lucky to land myself a kbd67 PC in stock item (guessed someone cancelled their order) when I was trying for the preorder. Initially I was quite scared to pull the trigger because those soundtests of the kbd67 were so hollow. But just jumped on it anyway, didn’t regret because mine came with the plate and case foam which I would say removed close to 100% of the hollowness and I am super loving it!
Hope yours will arrive soon and with the foams, it will be superb! The top mount with brass plate really provided an interesting typing experience. Bouncy yet firm.
I’m always looking for a good Manu, or for shops that offert finish services like anodisation, powder coat, cetakote…
Living in Europe(France), so if you have some adresses I will certainly have a look at them;)
For my first two projets I worked with Weerg and Xometry. Both have good machining services but offer limites options for finishes.
Ok, we’ve sent off the PCBs to get manufactured. As well, all the soft rubber/foam/silicon/Poron type parts are getting made too. And, I’ve also asked a couple manufacturers/finishers to make us some prototypes, so I’ve going to have a lot extra prototype boards so we can figure out who makes the most beautiful results Should be about 2 months before everything gets completed.
When I have some more time, I’ll take some pictures of the 3D printed prototypes that I’ve been getting made to make sure everything fits together nicely. No one tells you how to make sure parts fit together right and what the right tolerances/fits are. So that has been the source of way too much frustration! …but it should be solved! Would be happy to help and share my learnings with anyone who ever wants to make their own!

 which is never going to happen… I started exploring what it would take to design something awesome myself from the ground up. And in particular, building a case, plate, and PCB all spec’d to what I really wanted.