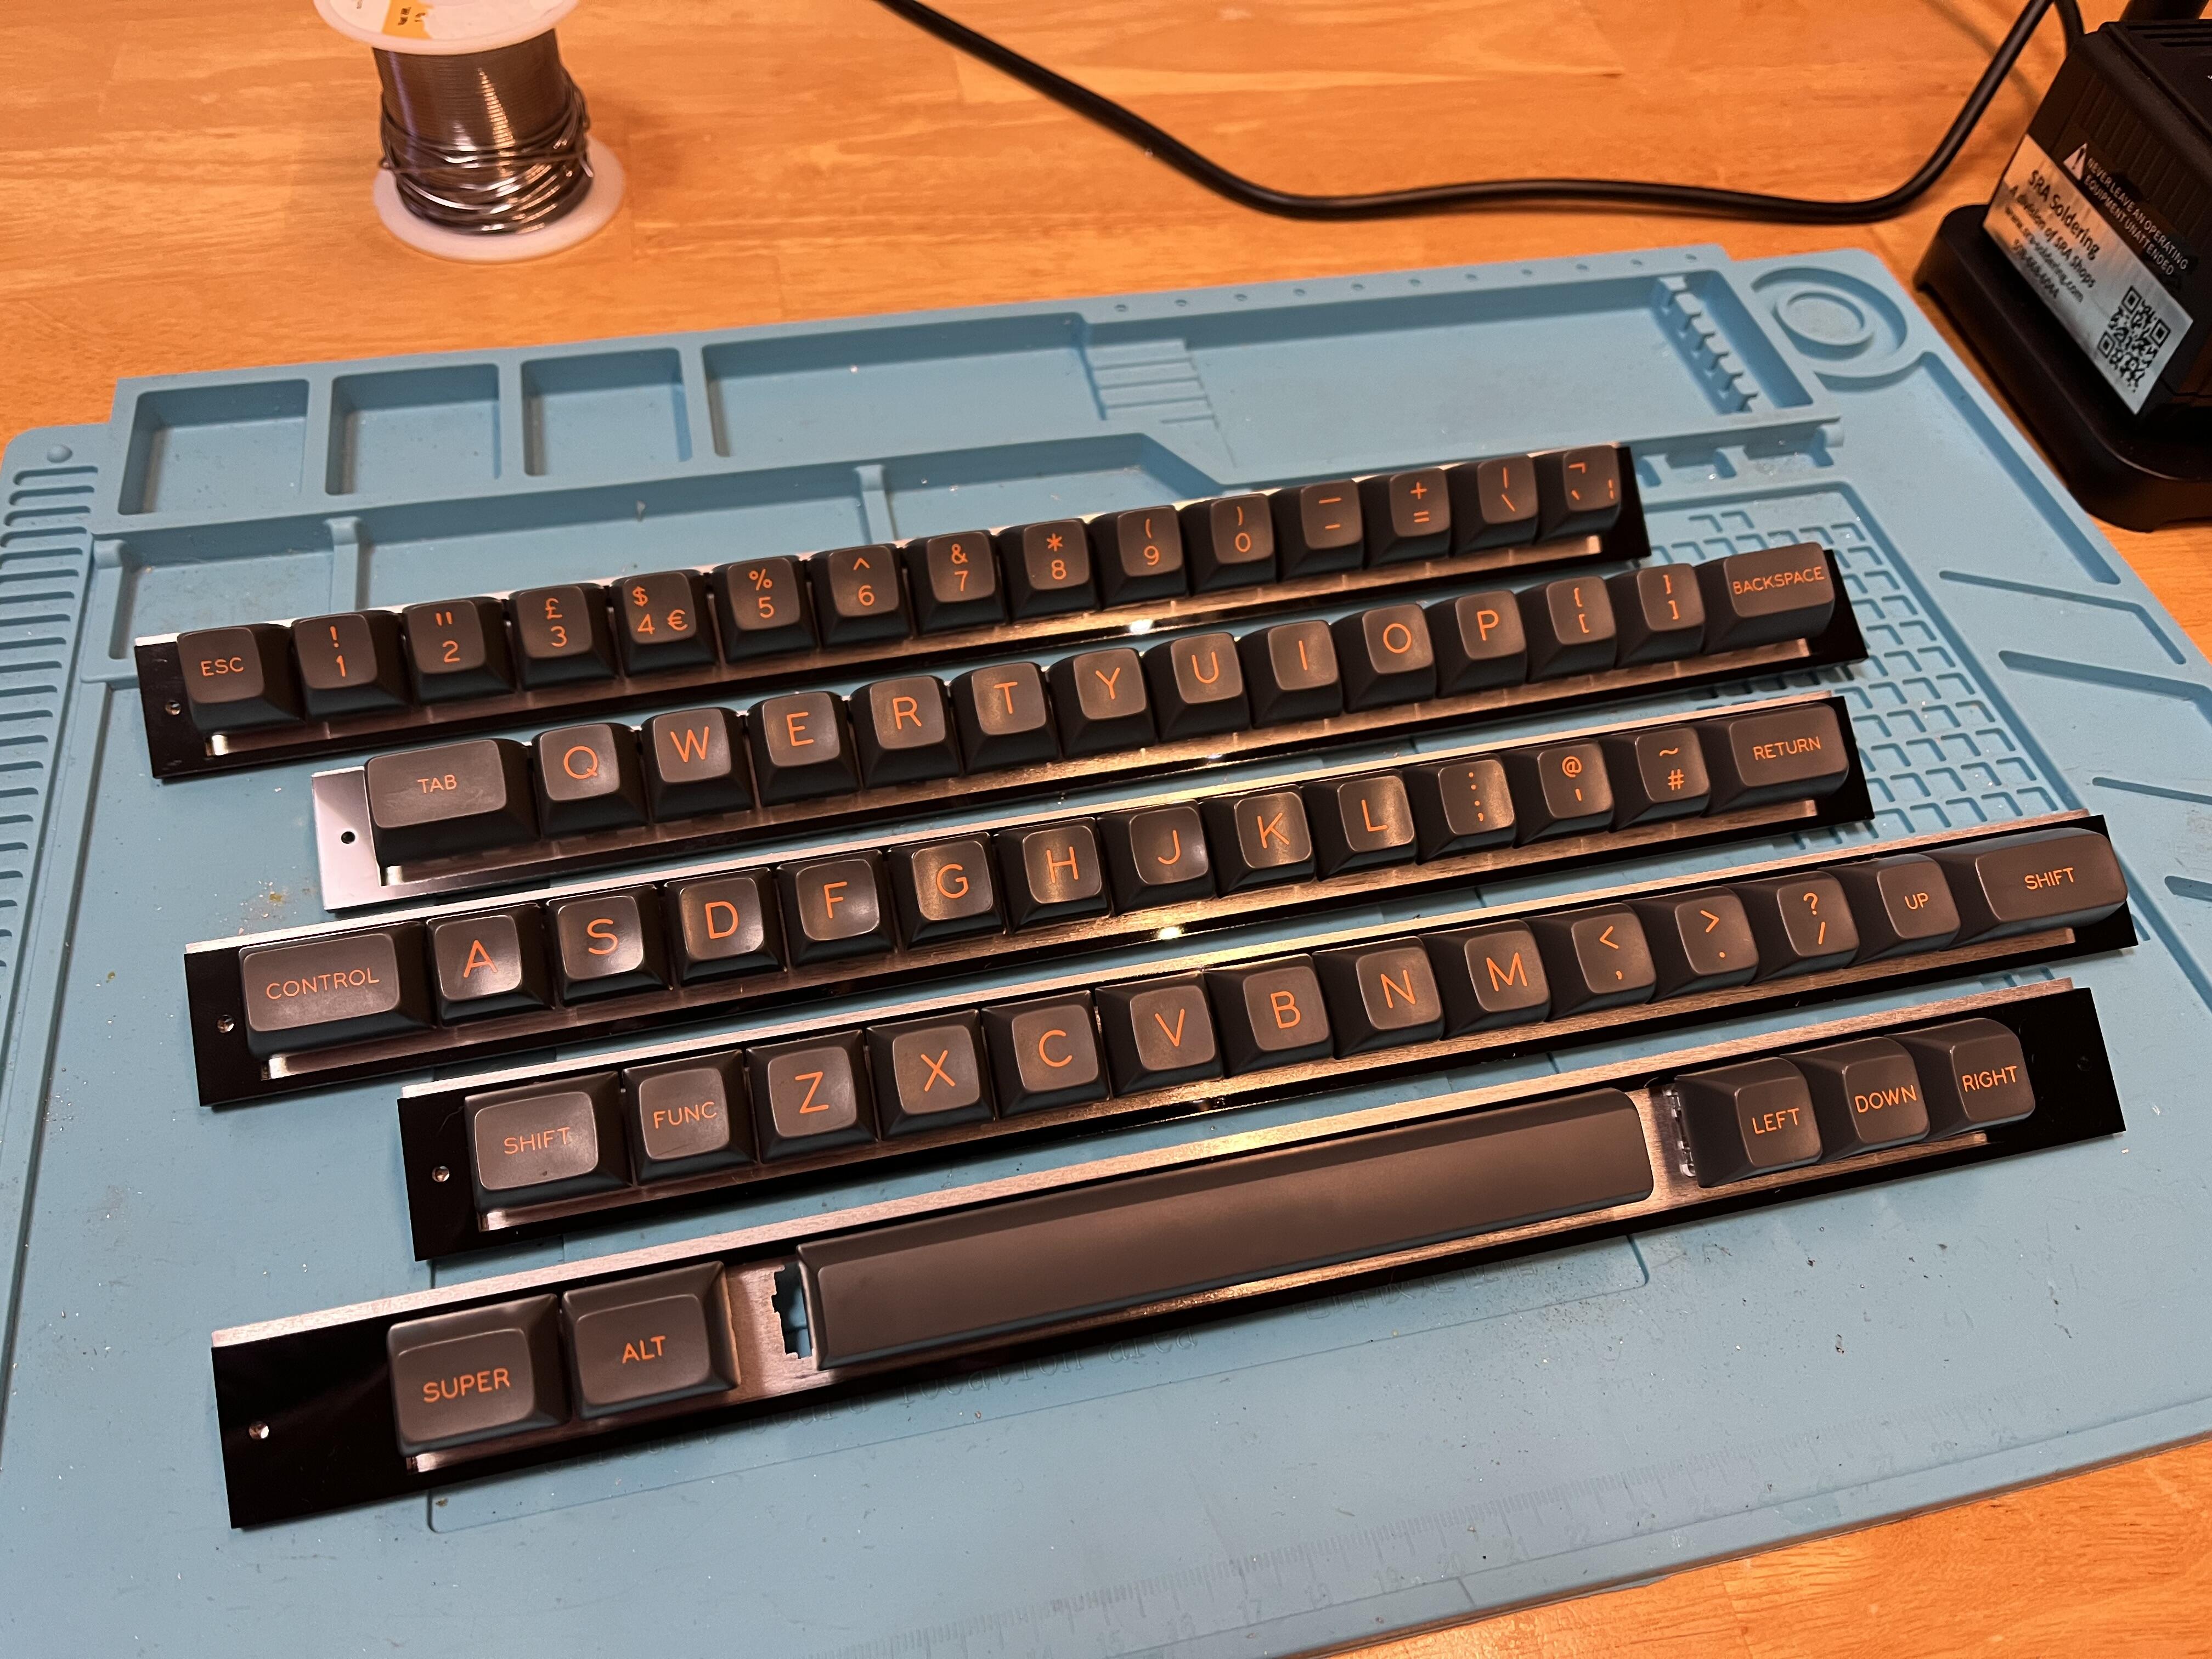
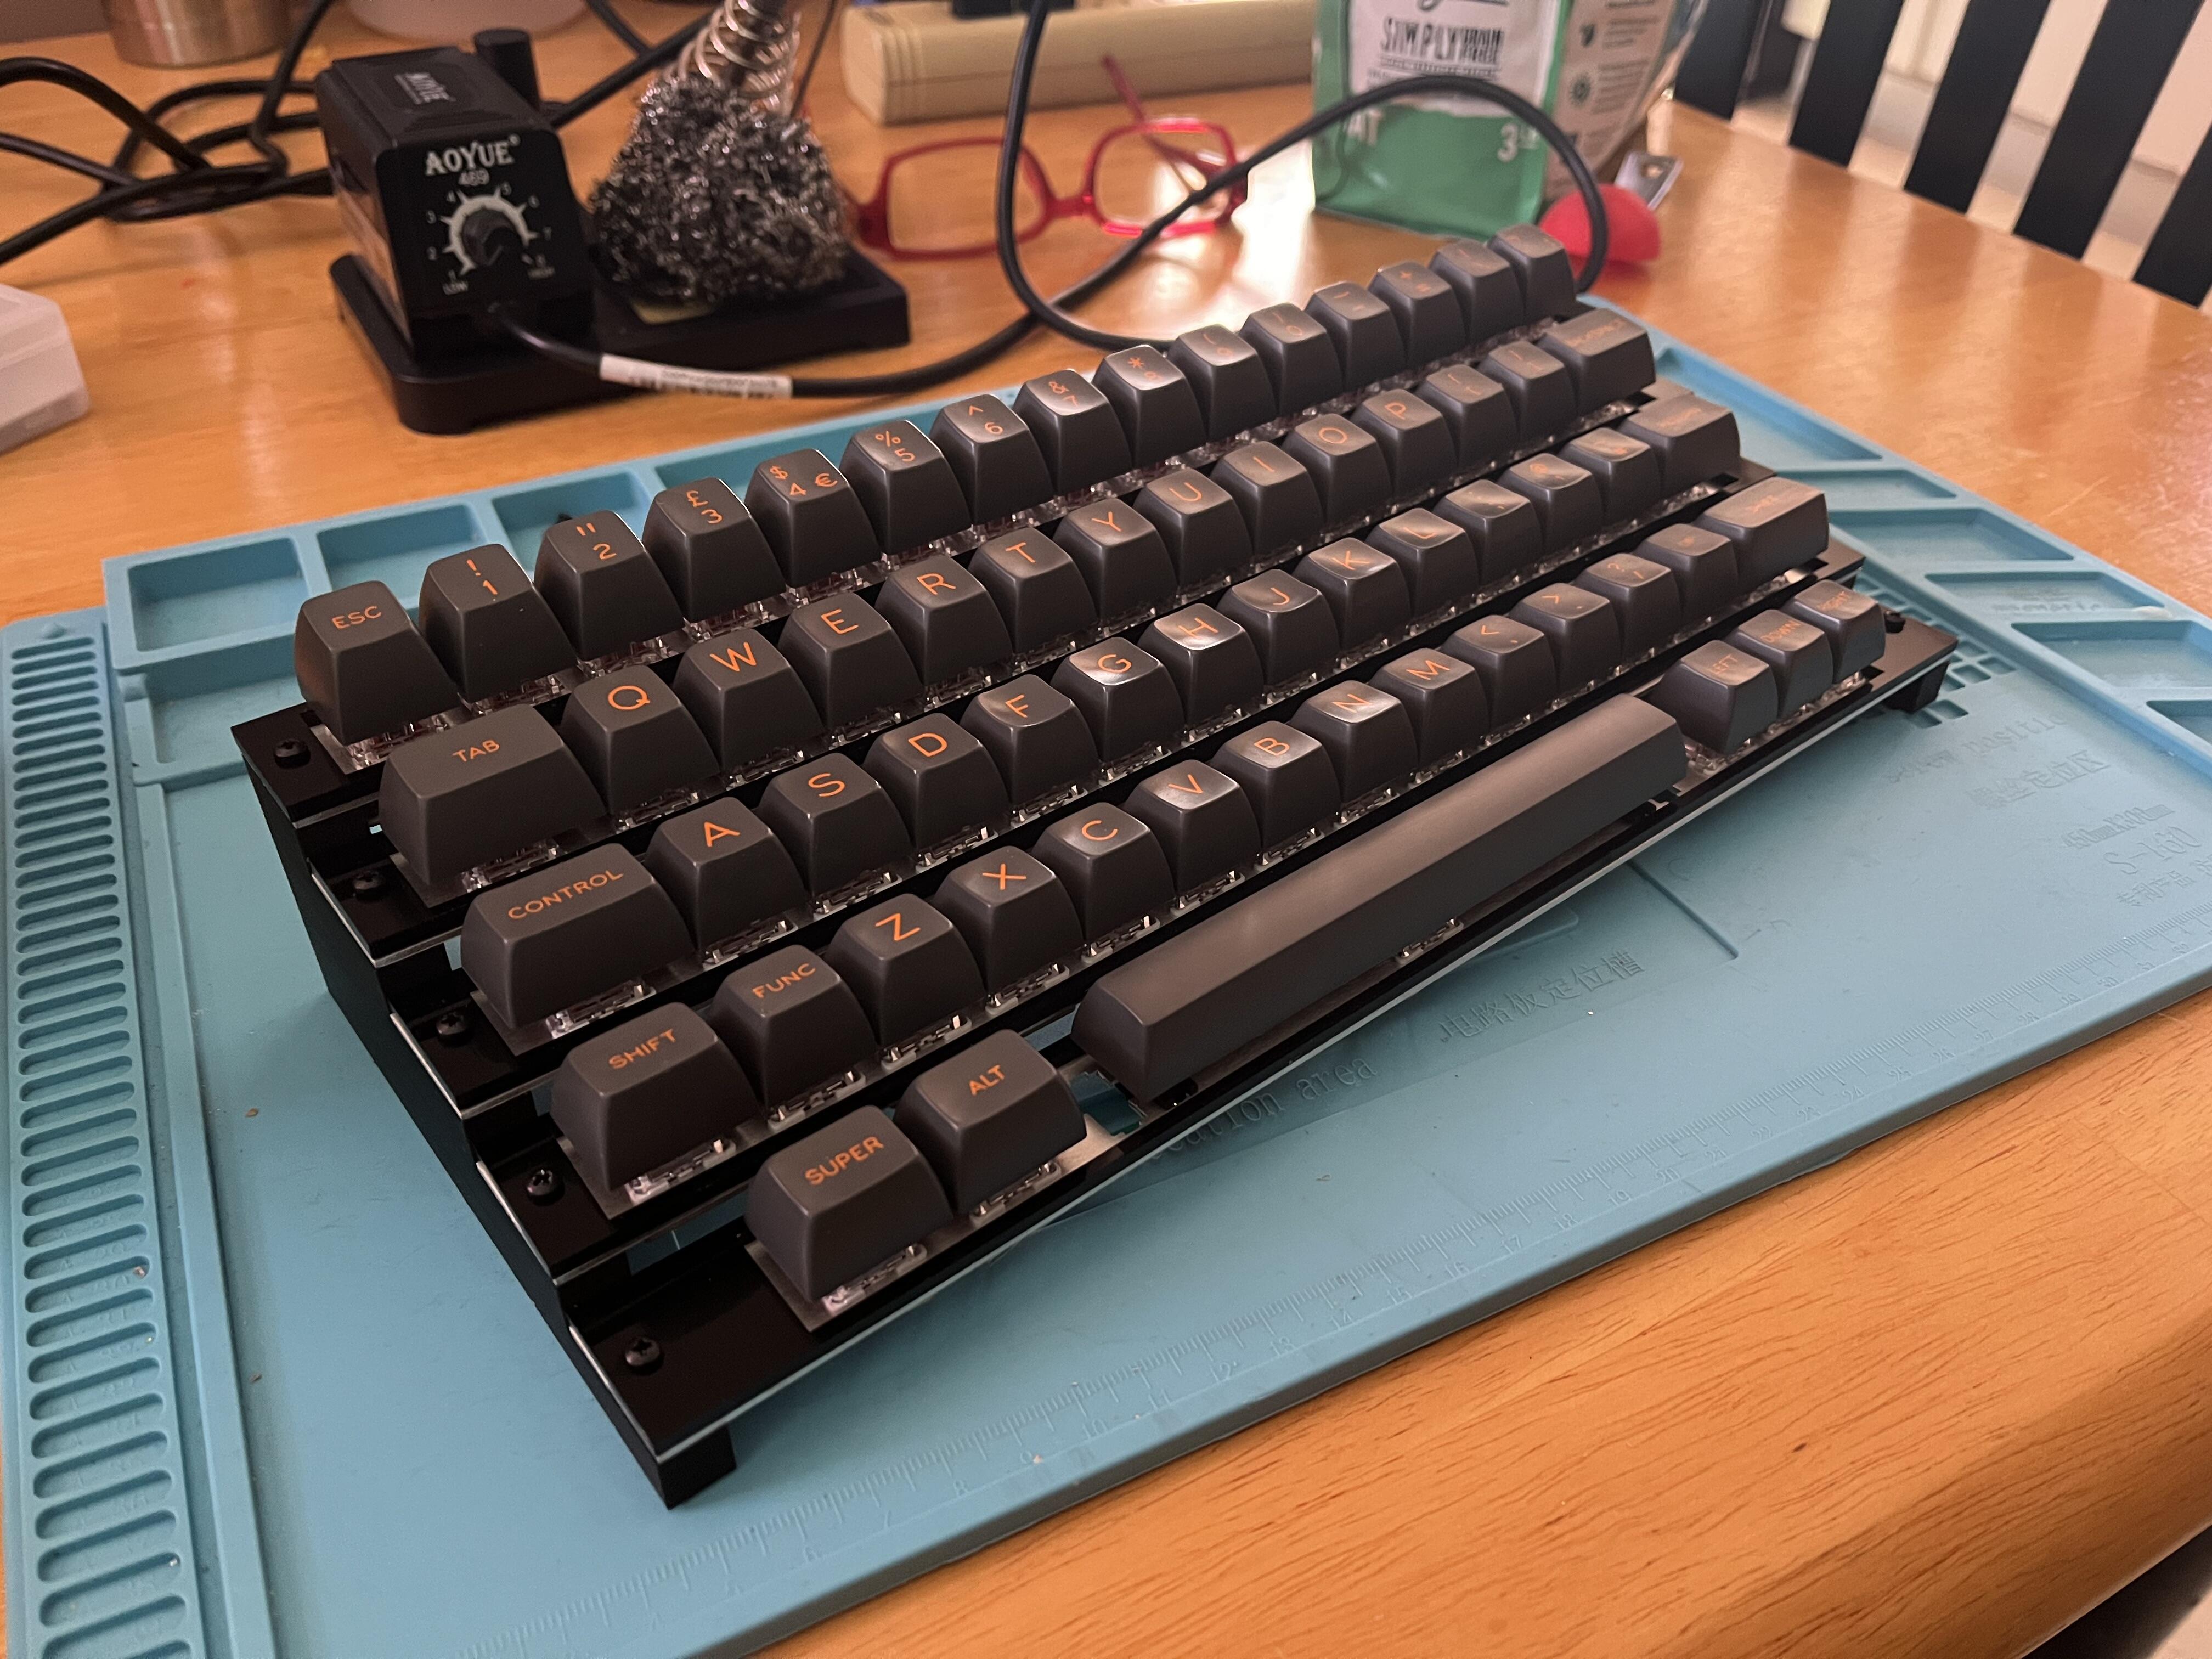
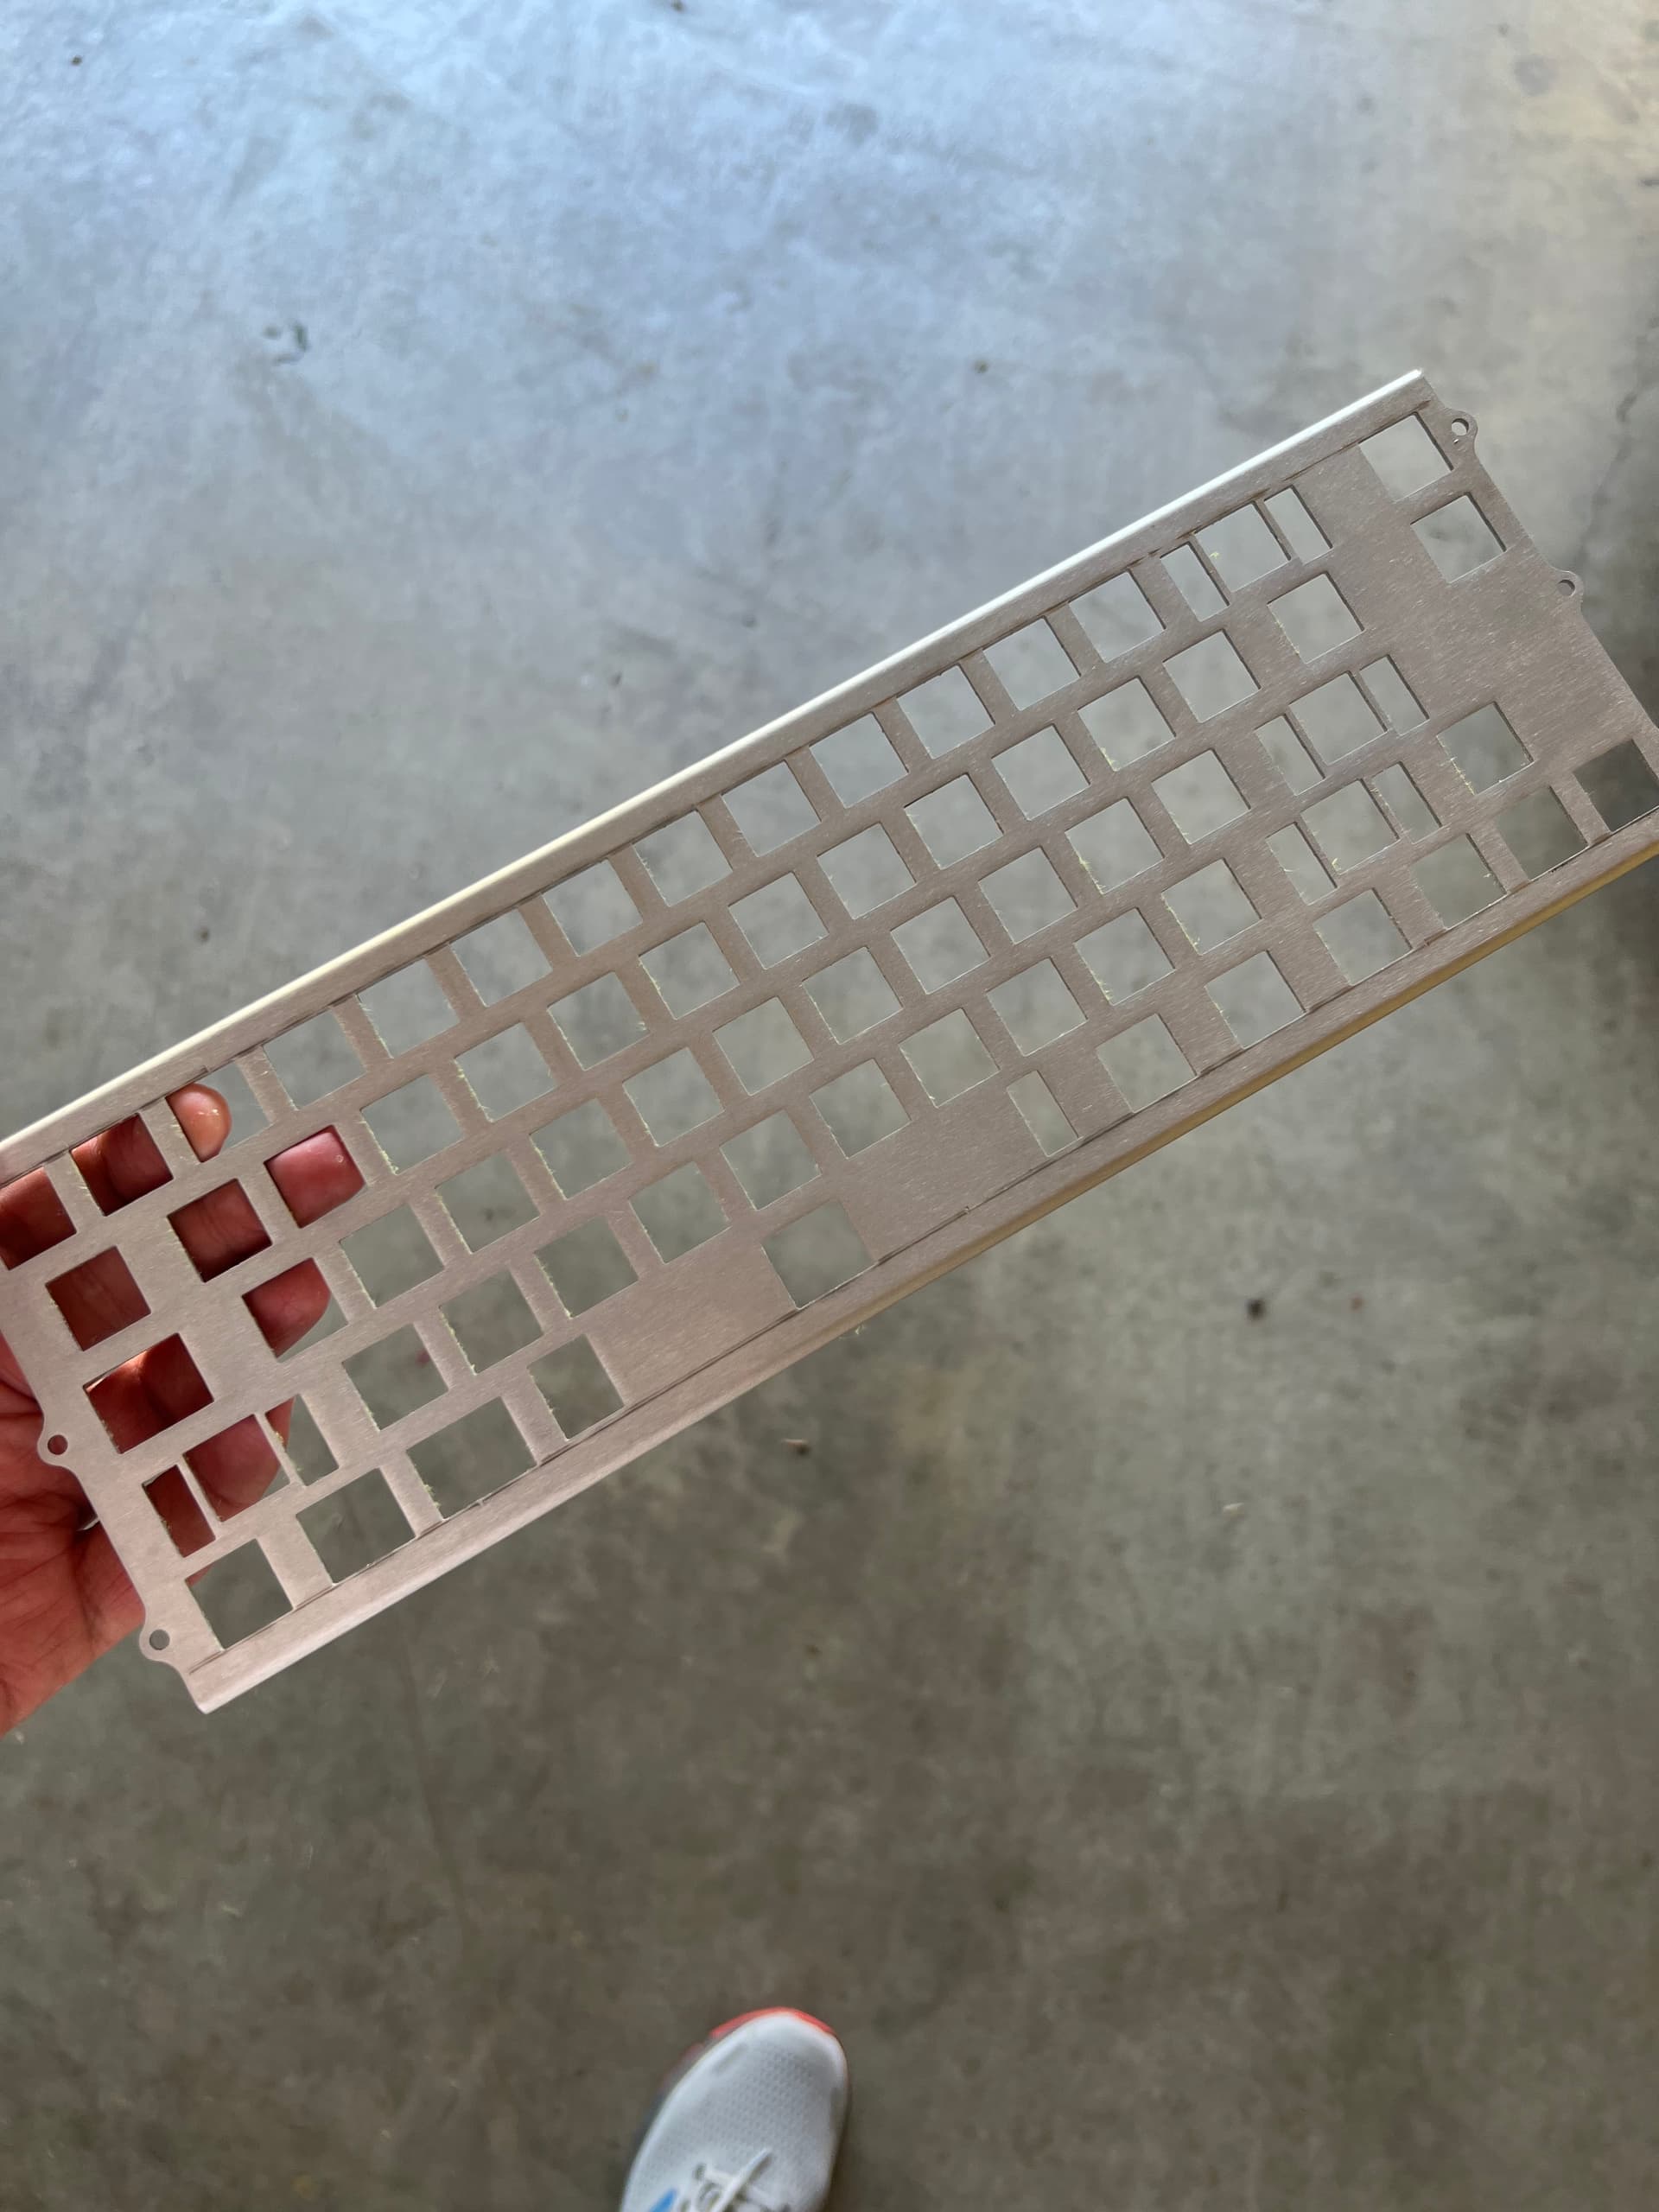
Potato pic of the individual switchplates. I need to order smaller screws, and adjust the hole sizes in the tiers to accommodate m2 threaded inserts instead of m3; these holes are way smaller than they should have been drilled. I also needed to snap apart all the amoebas before soldering; leaving them together in strips warped the plates.

4 Likes
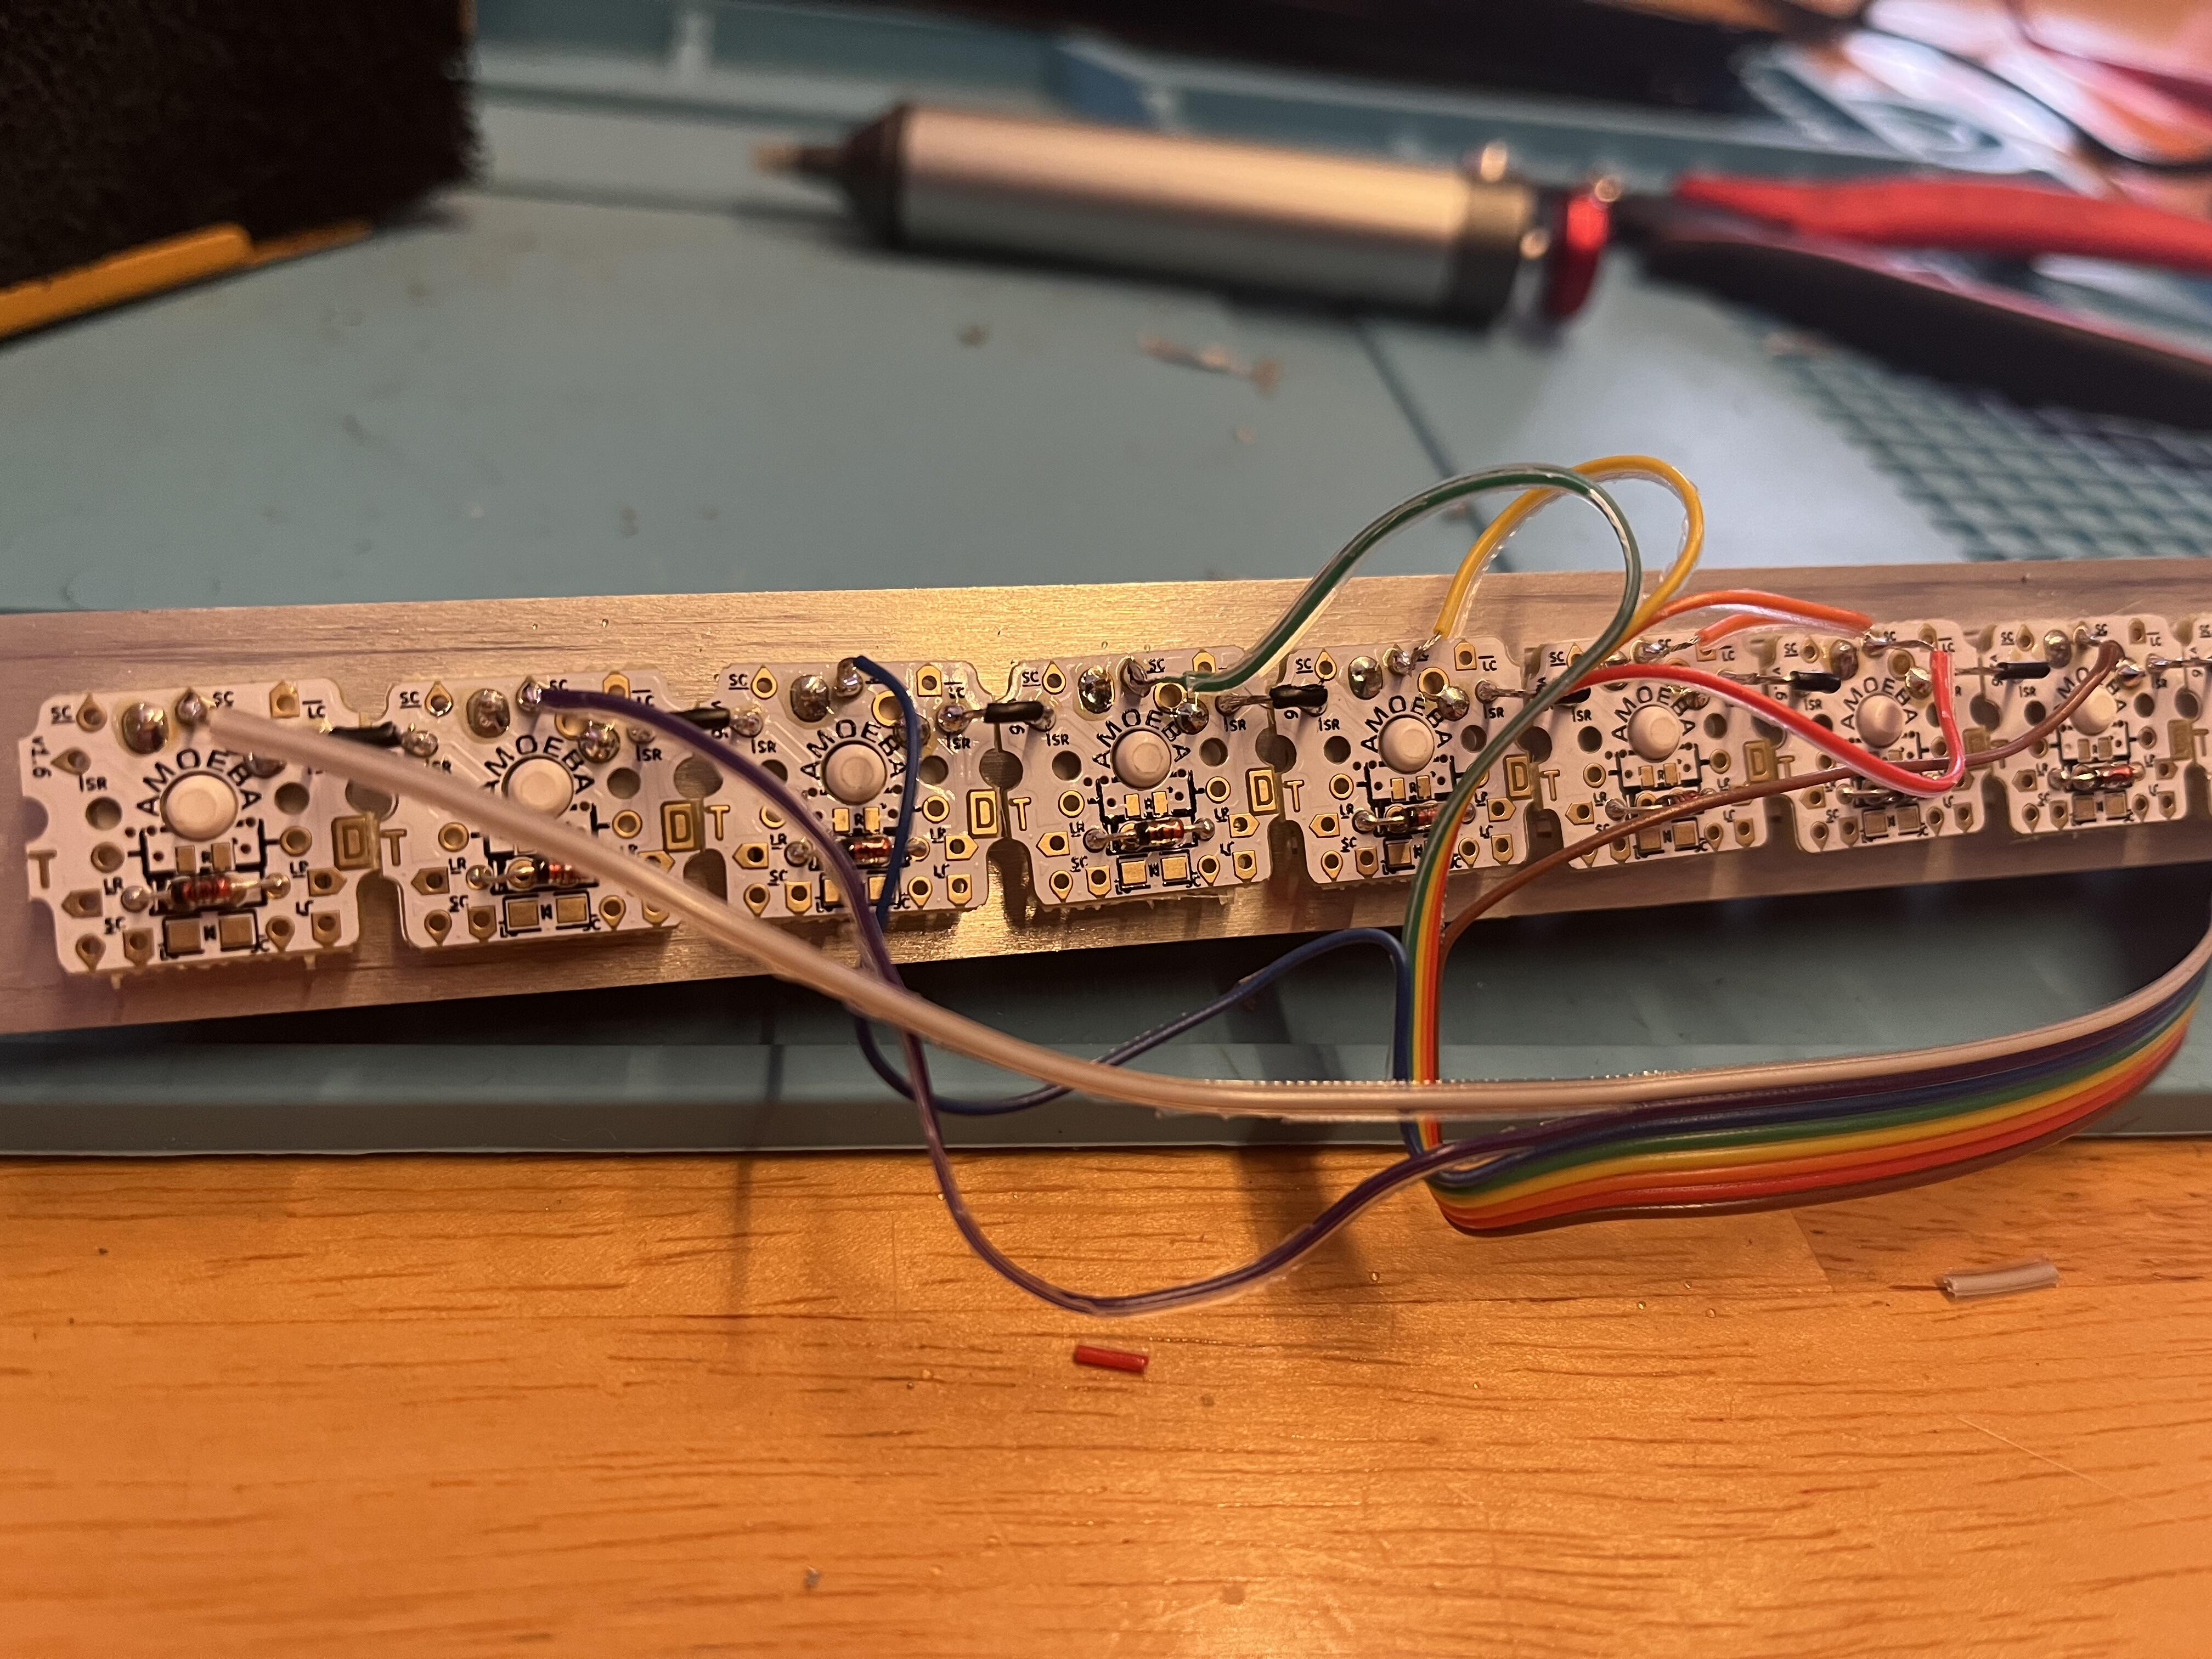
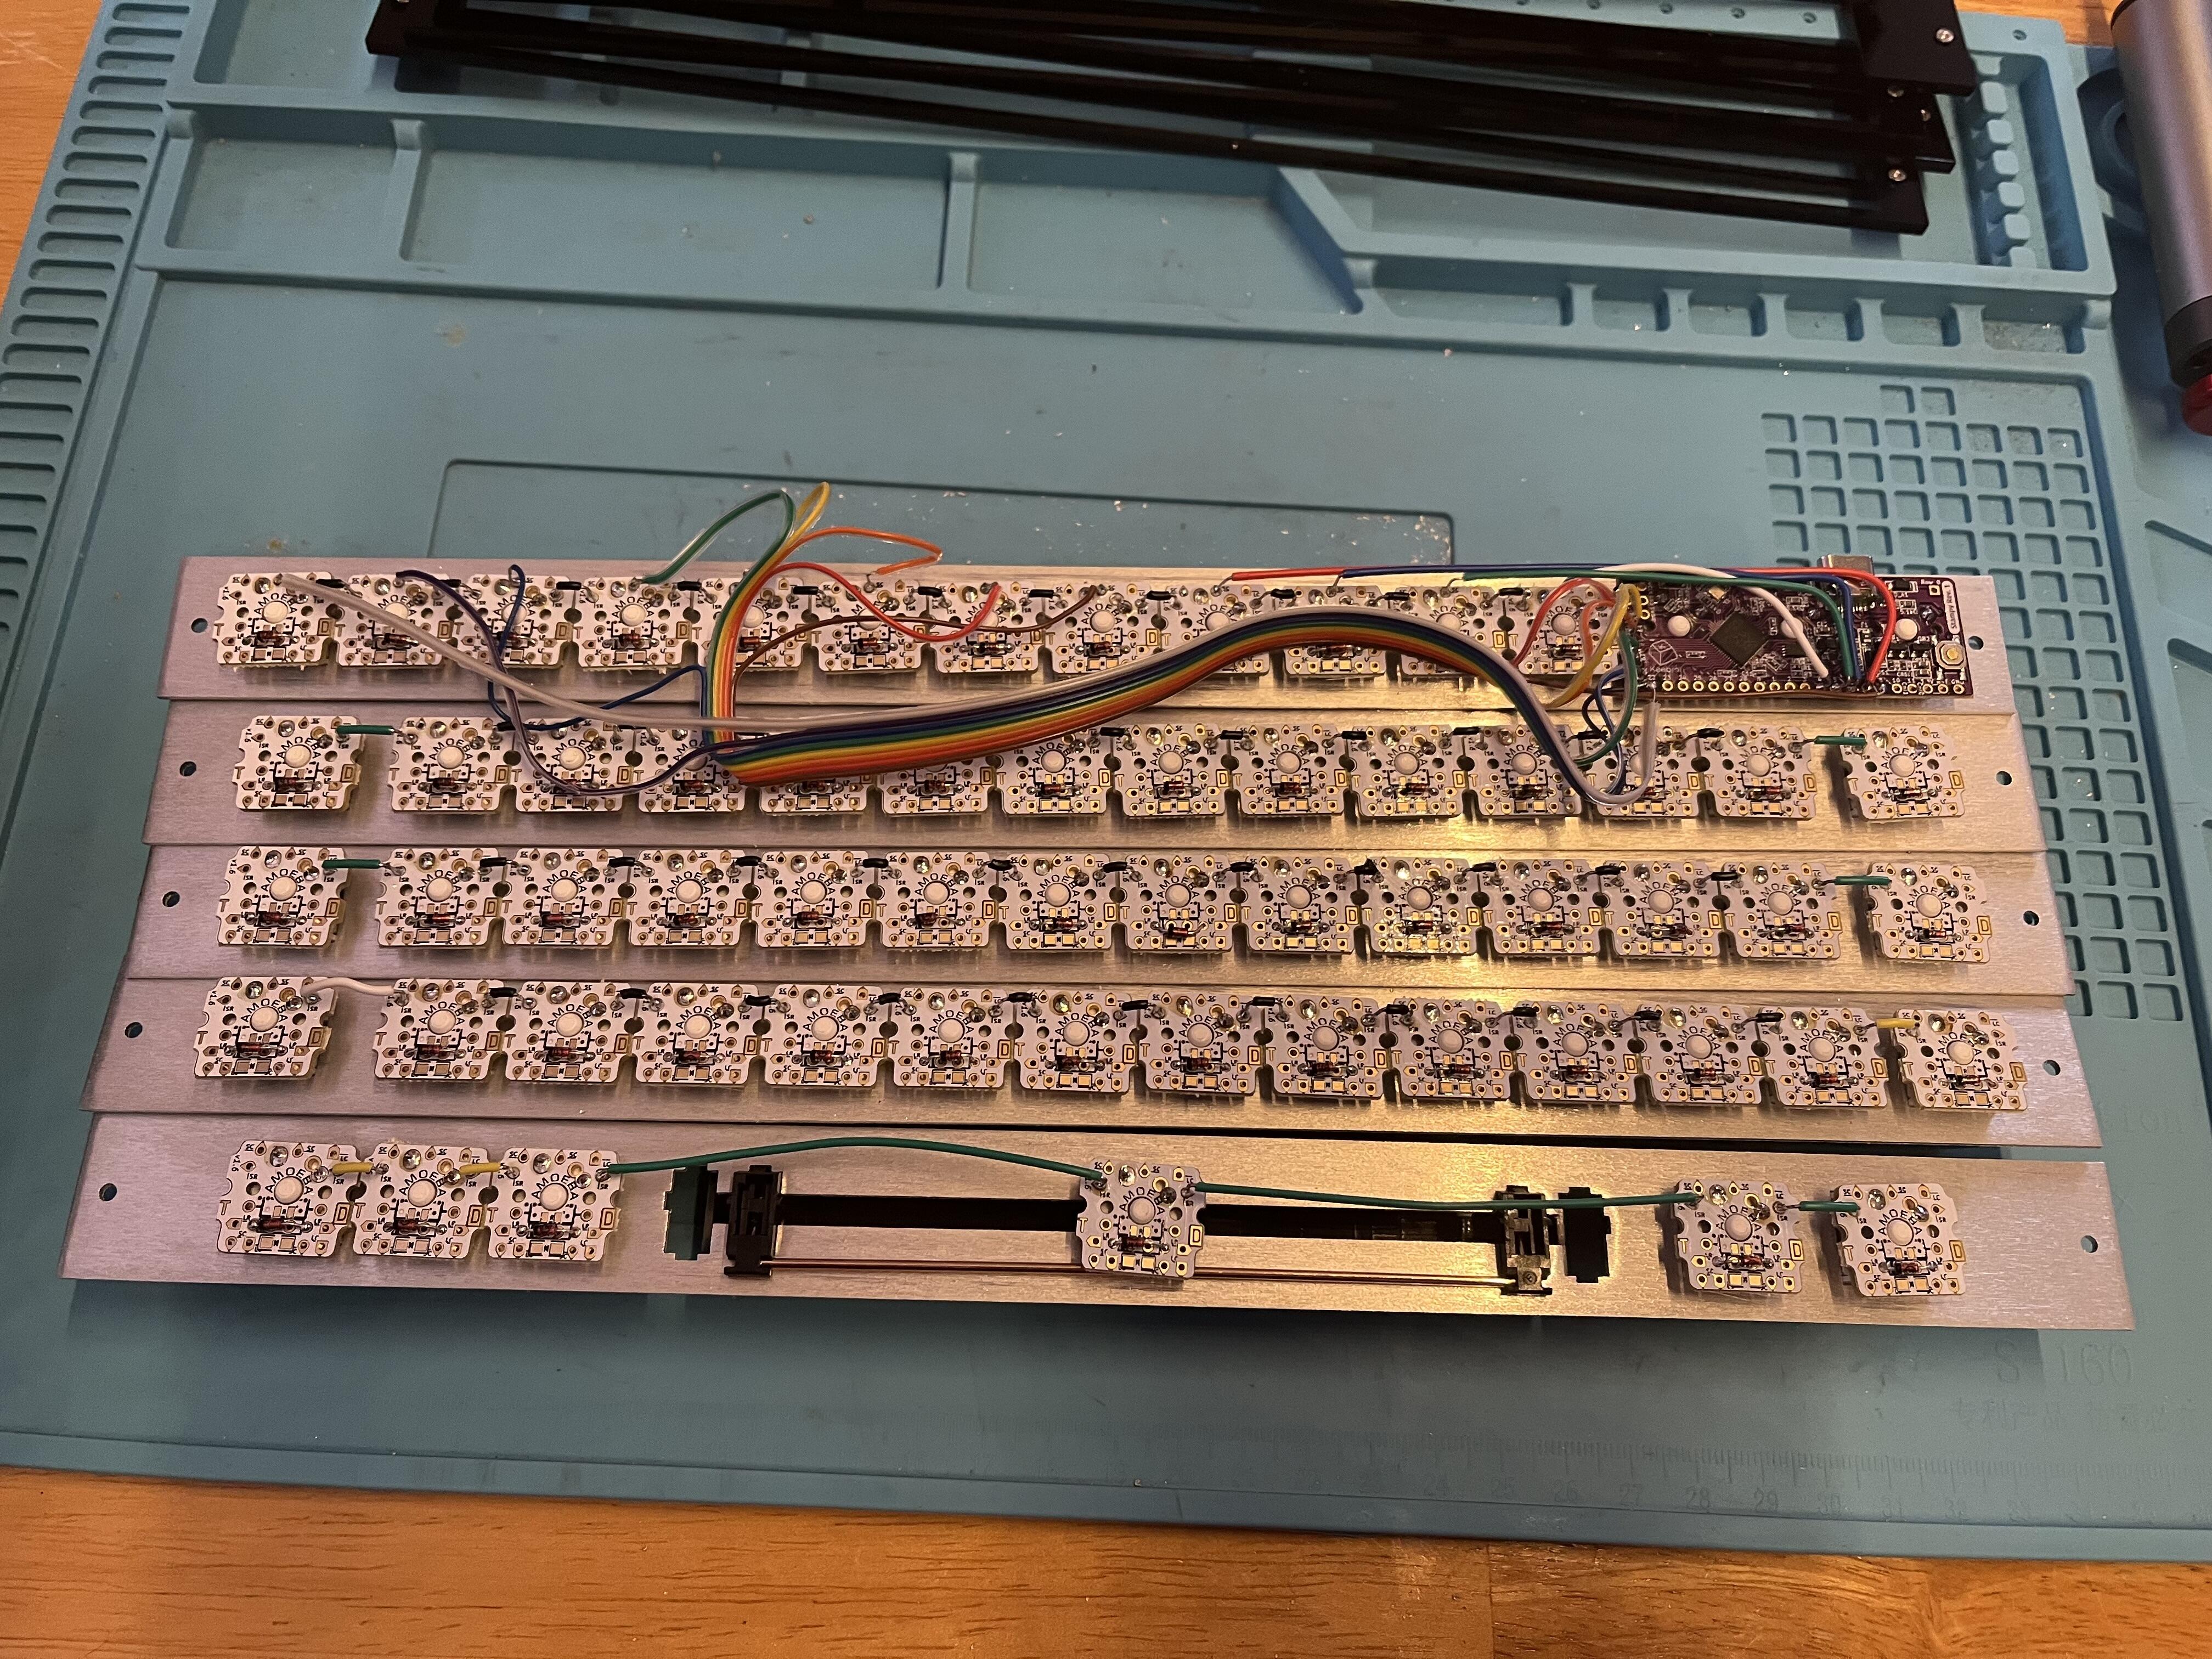
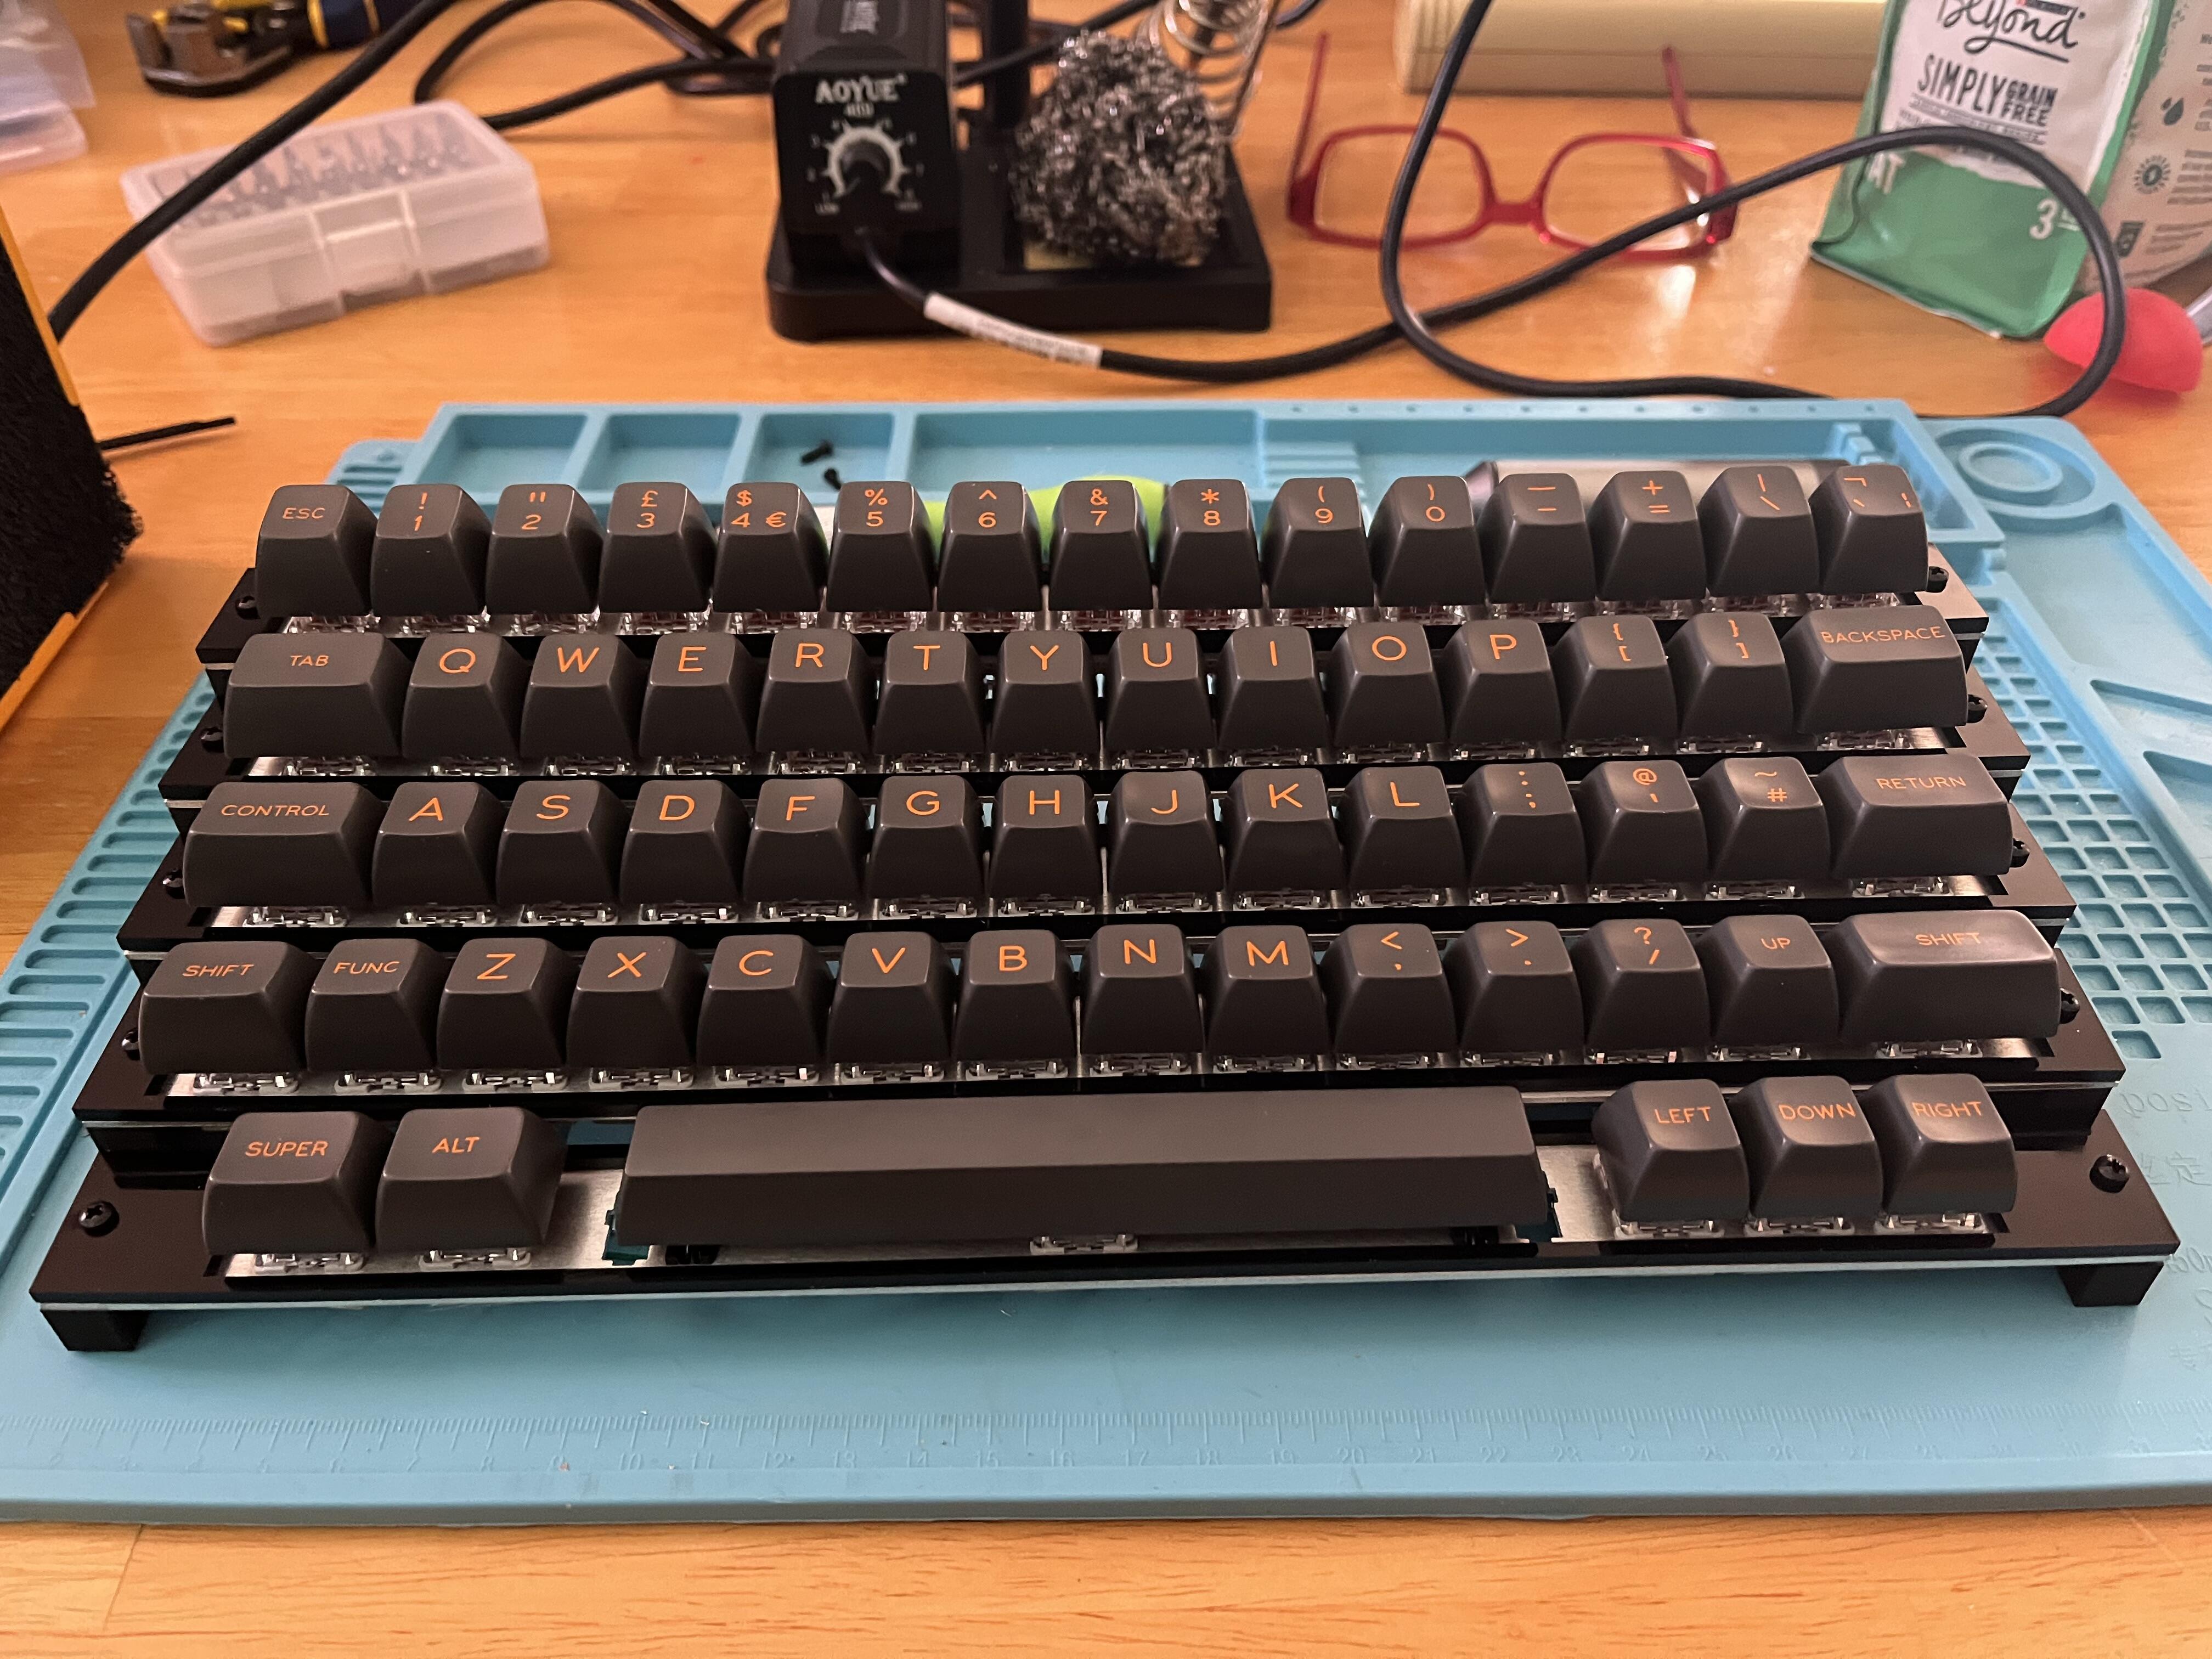
I’ve never handwired before, so it’s a bit messy. But all the keys on row 0 work, and once I have the tiers I can connect the remaining rows, and extend the columns down to the other plates.
2 Likes
Just want to say never order laser cut parts from SendCutSend. Asides from drilling the holes in my aluminum and acrylic plates too small (and off a few mm from where they should have been on some pieces), the acrylic bottom plate arrived smashed so badly I couldn’t glue it together.
I had ordered the same plates from Ponoko at the same time, so I could make a comparison. Way more expensive, but the drill holes were the correct size and in the correct places, and nothing was damaged.
1 Like
Xometry might also be a good option to try out, or even just talking to a local place.
1 Like
I definitely need to go local next time. The remaining parts I’m waiting on have bounced around the suburbs, back and forth between the same two USPS distribution centers, before the tracking number mysteriously stopped working. It’s working again, and they’re now in another state, with no estimated arrival date. I was hoping to have the prototype finished this past weekend.
I took advantage of the downtime while I wait on (lost?) parts to arrive, to completely redesign the casing and support structure for the next round of prototyping. Instead of a bunch of separate pieces that need to be screwed together, the casing and tiers are now one unified assembly, with a detachable bottom plate. The bottom plate has Pi 4 mounting holes, and there’s cutouts in the side and rear walls to expose the Pi’s ports.
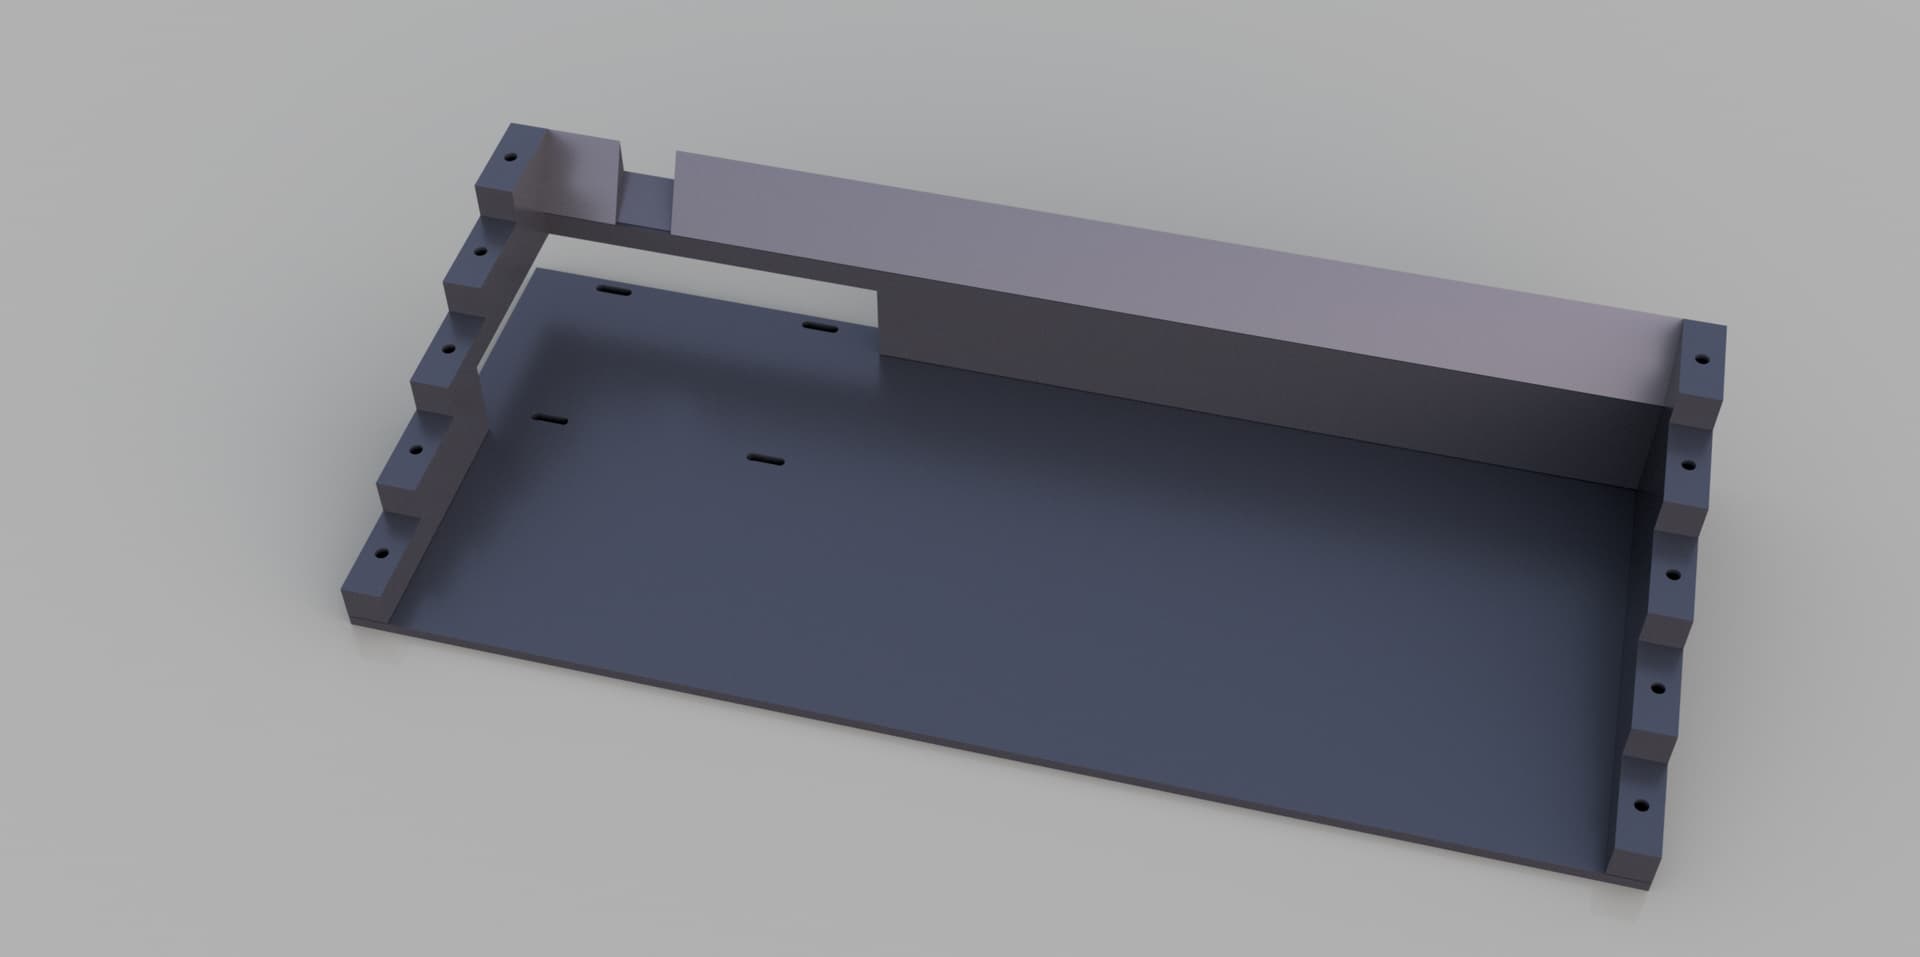
The downside is that the whole thing no longer fits inside the hollowed-out decorative typewriter casing I had found earlier. But at this point, it’s starting to look typewriter-shaped on its own. A few decorative flourishes and some curves could do the trick.
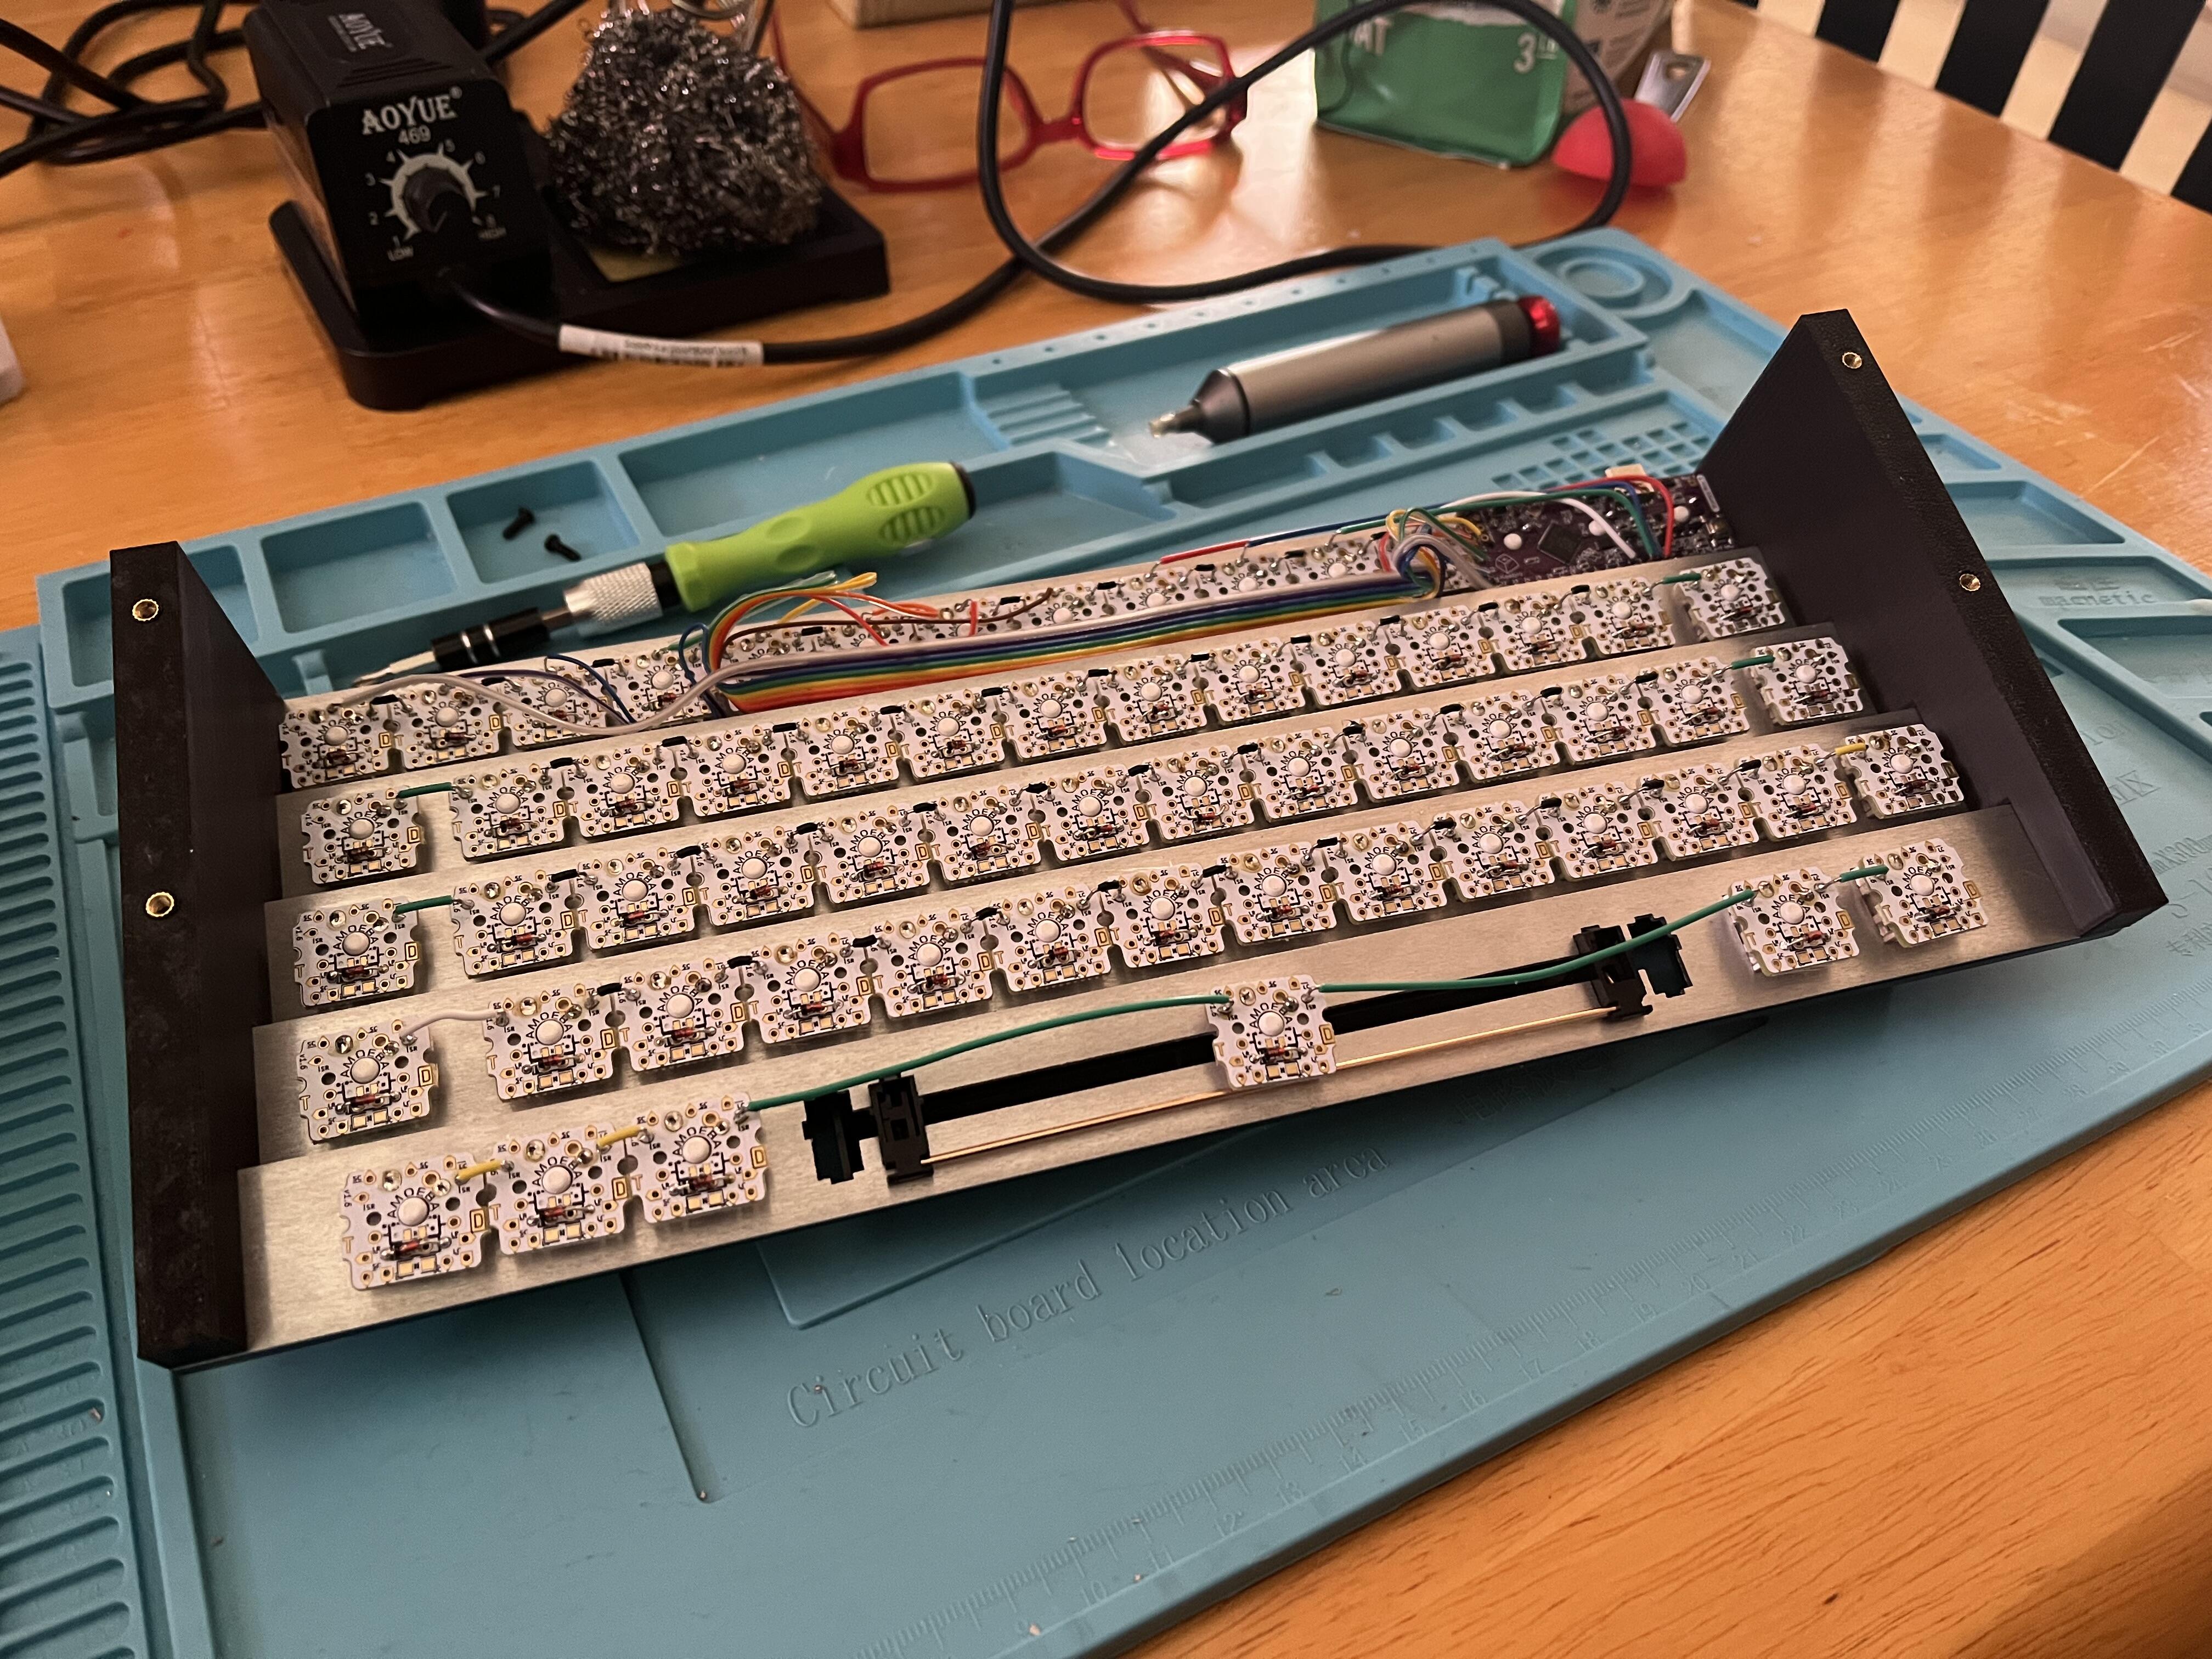
It lives! The good news is that everything works, even with my janky prototype design tiers, which I’ve since improved.
The bad(?) news is that it’s VERY bouncy. Every row is essentially a flex board, with no middle support. It’s absolutely the weirdest typing experience I’ve ever had. I think either a middle support tier, or brass plates, would help.
I’m going to solder the columns and rows to the controller, and take it for a more thorough test drive.
4 Likes
This project is fun and interesting, thanks for posting about it!
I have been wondering about a couple of things:
Your original diagrams had 25.01 mm spacing between the rows. Any particular reason for that, instead of the usual 19.05 mm?
While toying with ideas, I thought it might be fun to make the plate of one row and the PCB of the row behind it out of the same piece of FR-4. This would make the steps 5 mm high instead of your design’s 10 mm. Might make it a bit stiffer, dunno.
1 Like
If you’re trying for a more rigid plate, you should go with steel and not brass. Maybe even carbon steel?
You can also go with aluminum and put in a bend along the edges that faces down. I think 5mm would be more than enough to make it rock solid. If they can do 3mm that’s better
Very cool that it works!
1 Like
Honestly I just took what swillkb spit out when I put single-row layouts into it to generate each row’s plate. I had to factor in some padding in order for it to let me place the screw holes - I had to say it needed four holes initially since it wouldn’t let me do only two, and then I just removed two and centered the remaining ones. So that number was the result of me messing with the minimal amount of padding I could get away with at that stage.
Thanks! It works in theory; i still need to solder some remaining rows and columns to the controller tonight, since I had to pause to do my day job.
I should definitely go thicker on the plates, these are just 1.5mm. I wasn’t sure how anything thicker would work with the lone stabilizer (on the spacebar).
You don’t necessarily have to go thicker, although that will work. If you engineer a lip at the top and bottom of the plate that bends down, that will make it very rigid. Think of it as a C channel with very shallow edges.
You can see this in OEM boards like the FC660c (except the lip bends upwards on that one.
It was a solution that @r4bbl3d4bbl3 came up with for the 660c-x, an mx replacement board for the heavy-6. Initial aluminum plate was way too flexible and had a sag.
@Dave helped me out with a custom plate for my build on that one. It depends on the manufacture and their capabilites. But most cutting places now have press brakes that can do fairly intricate bends. a 5mm bend at the top and the bottom should be doable and will make the plate extremely rigid. That is what dave did for me, and I ended up taking about 2mm extra off of it to get some spring back in the plate.
2 Likes
@Dave solution was to use this design:
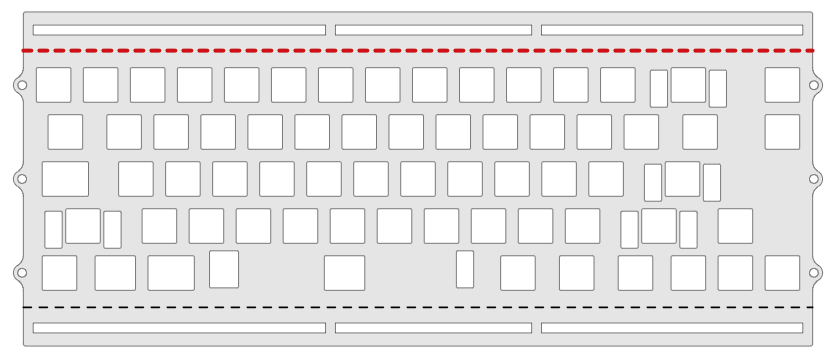
where the red dashes were bends 90degrees downward
Resulting in this:
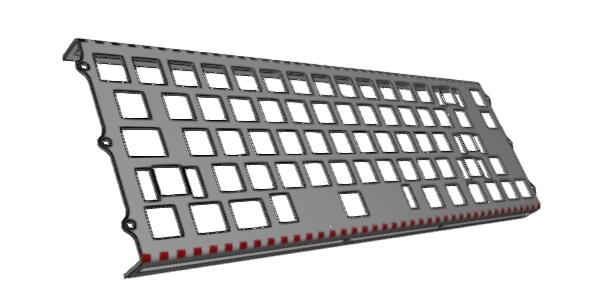
Then I cut off the tabs to end up with something shorter
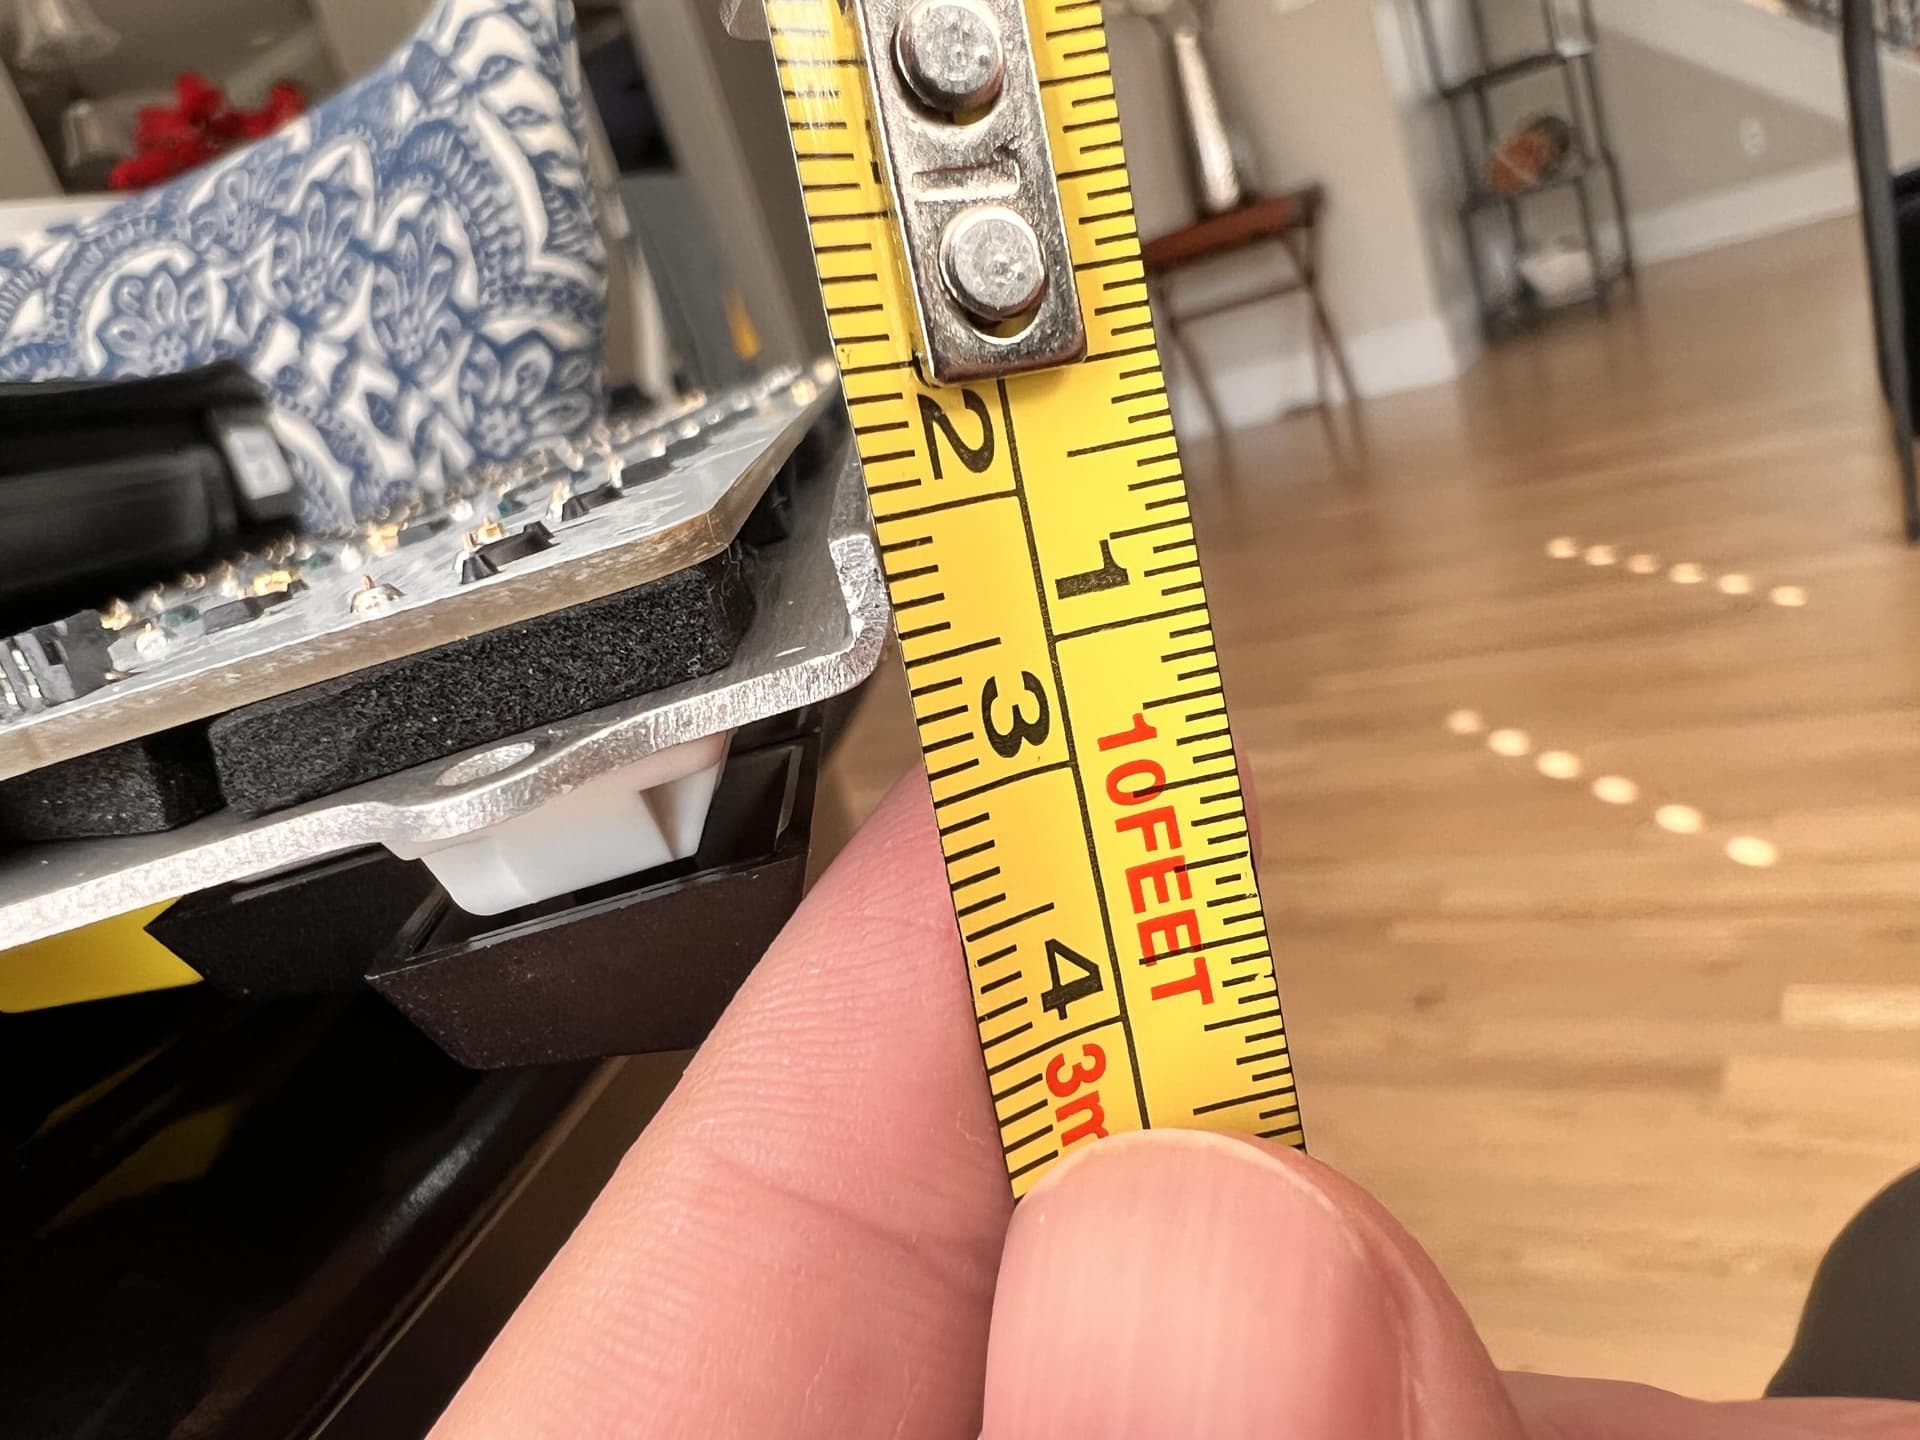
Hard to tell what’s going on here, but I’m showing the final height of the “lip” after the bend on my board. Note, the assembly is upside down in this photo:
2 Likes
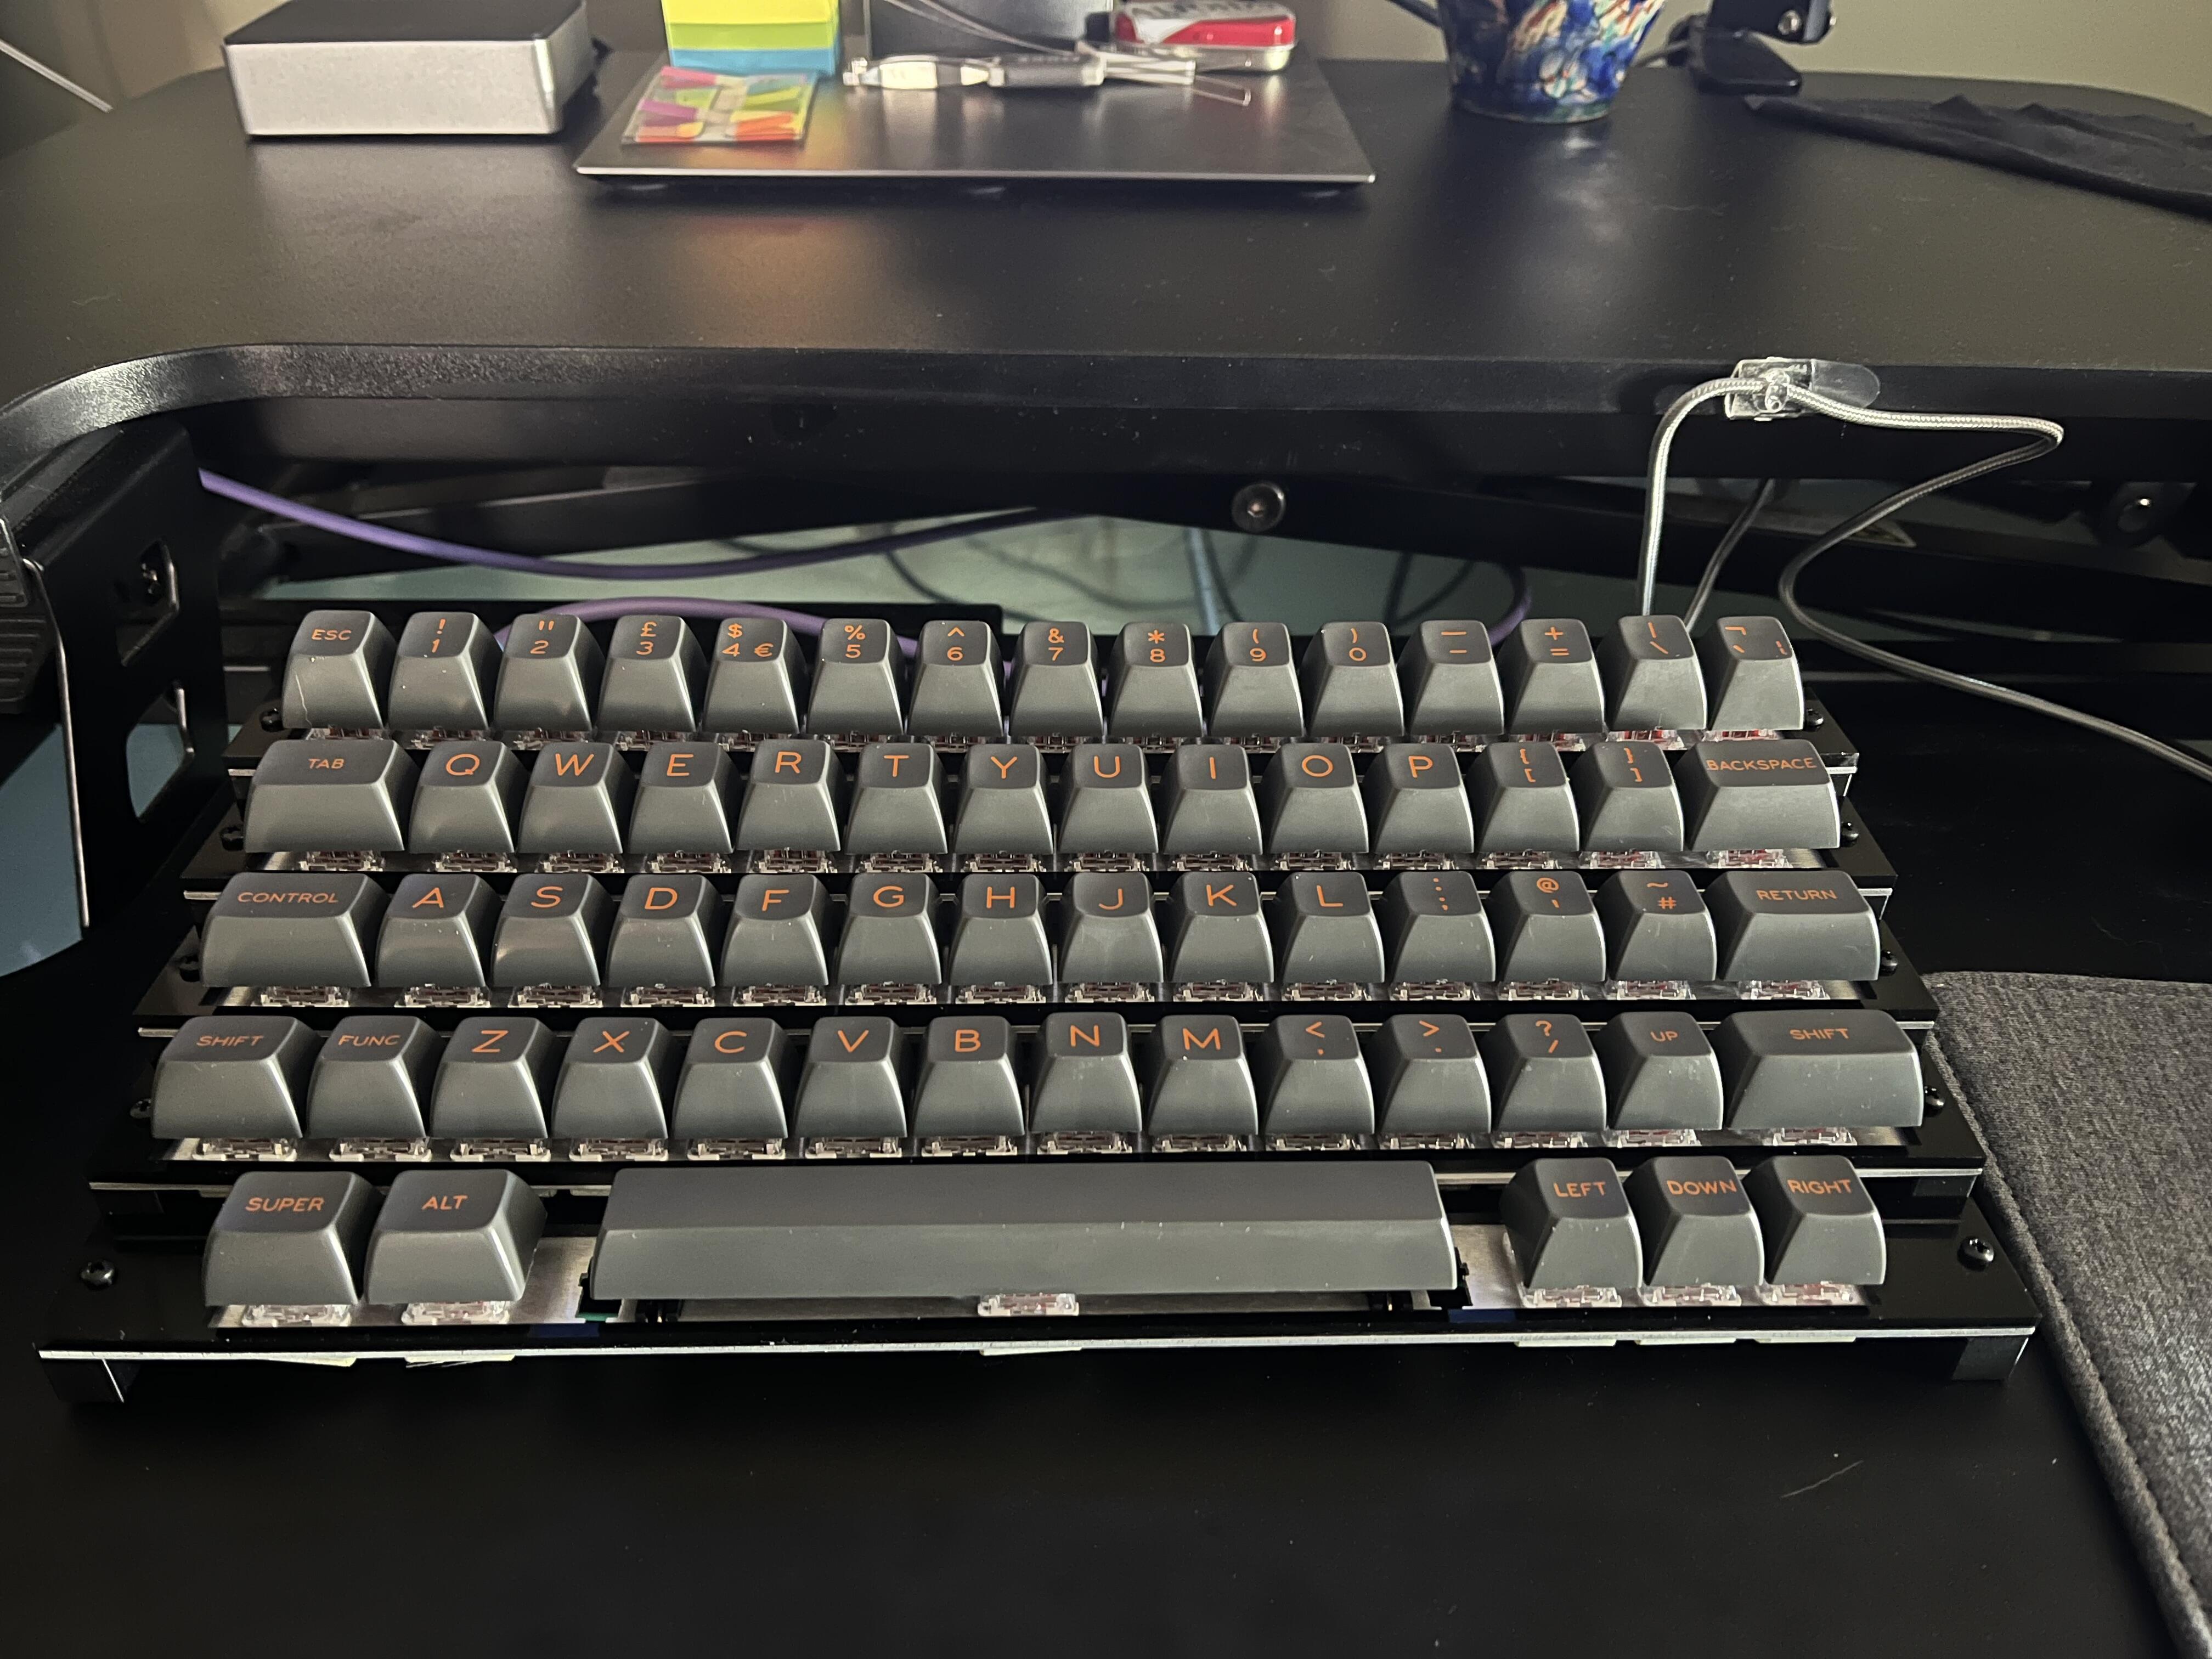
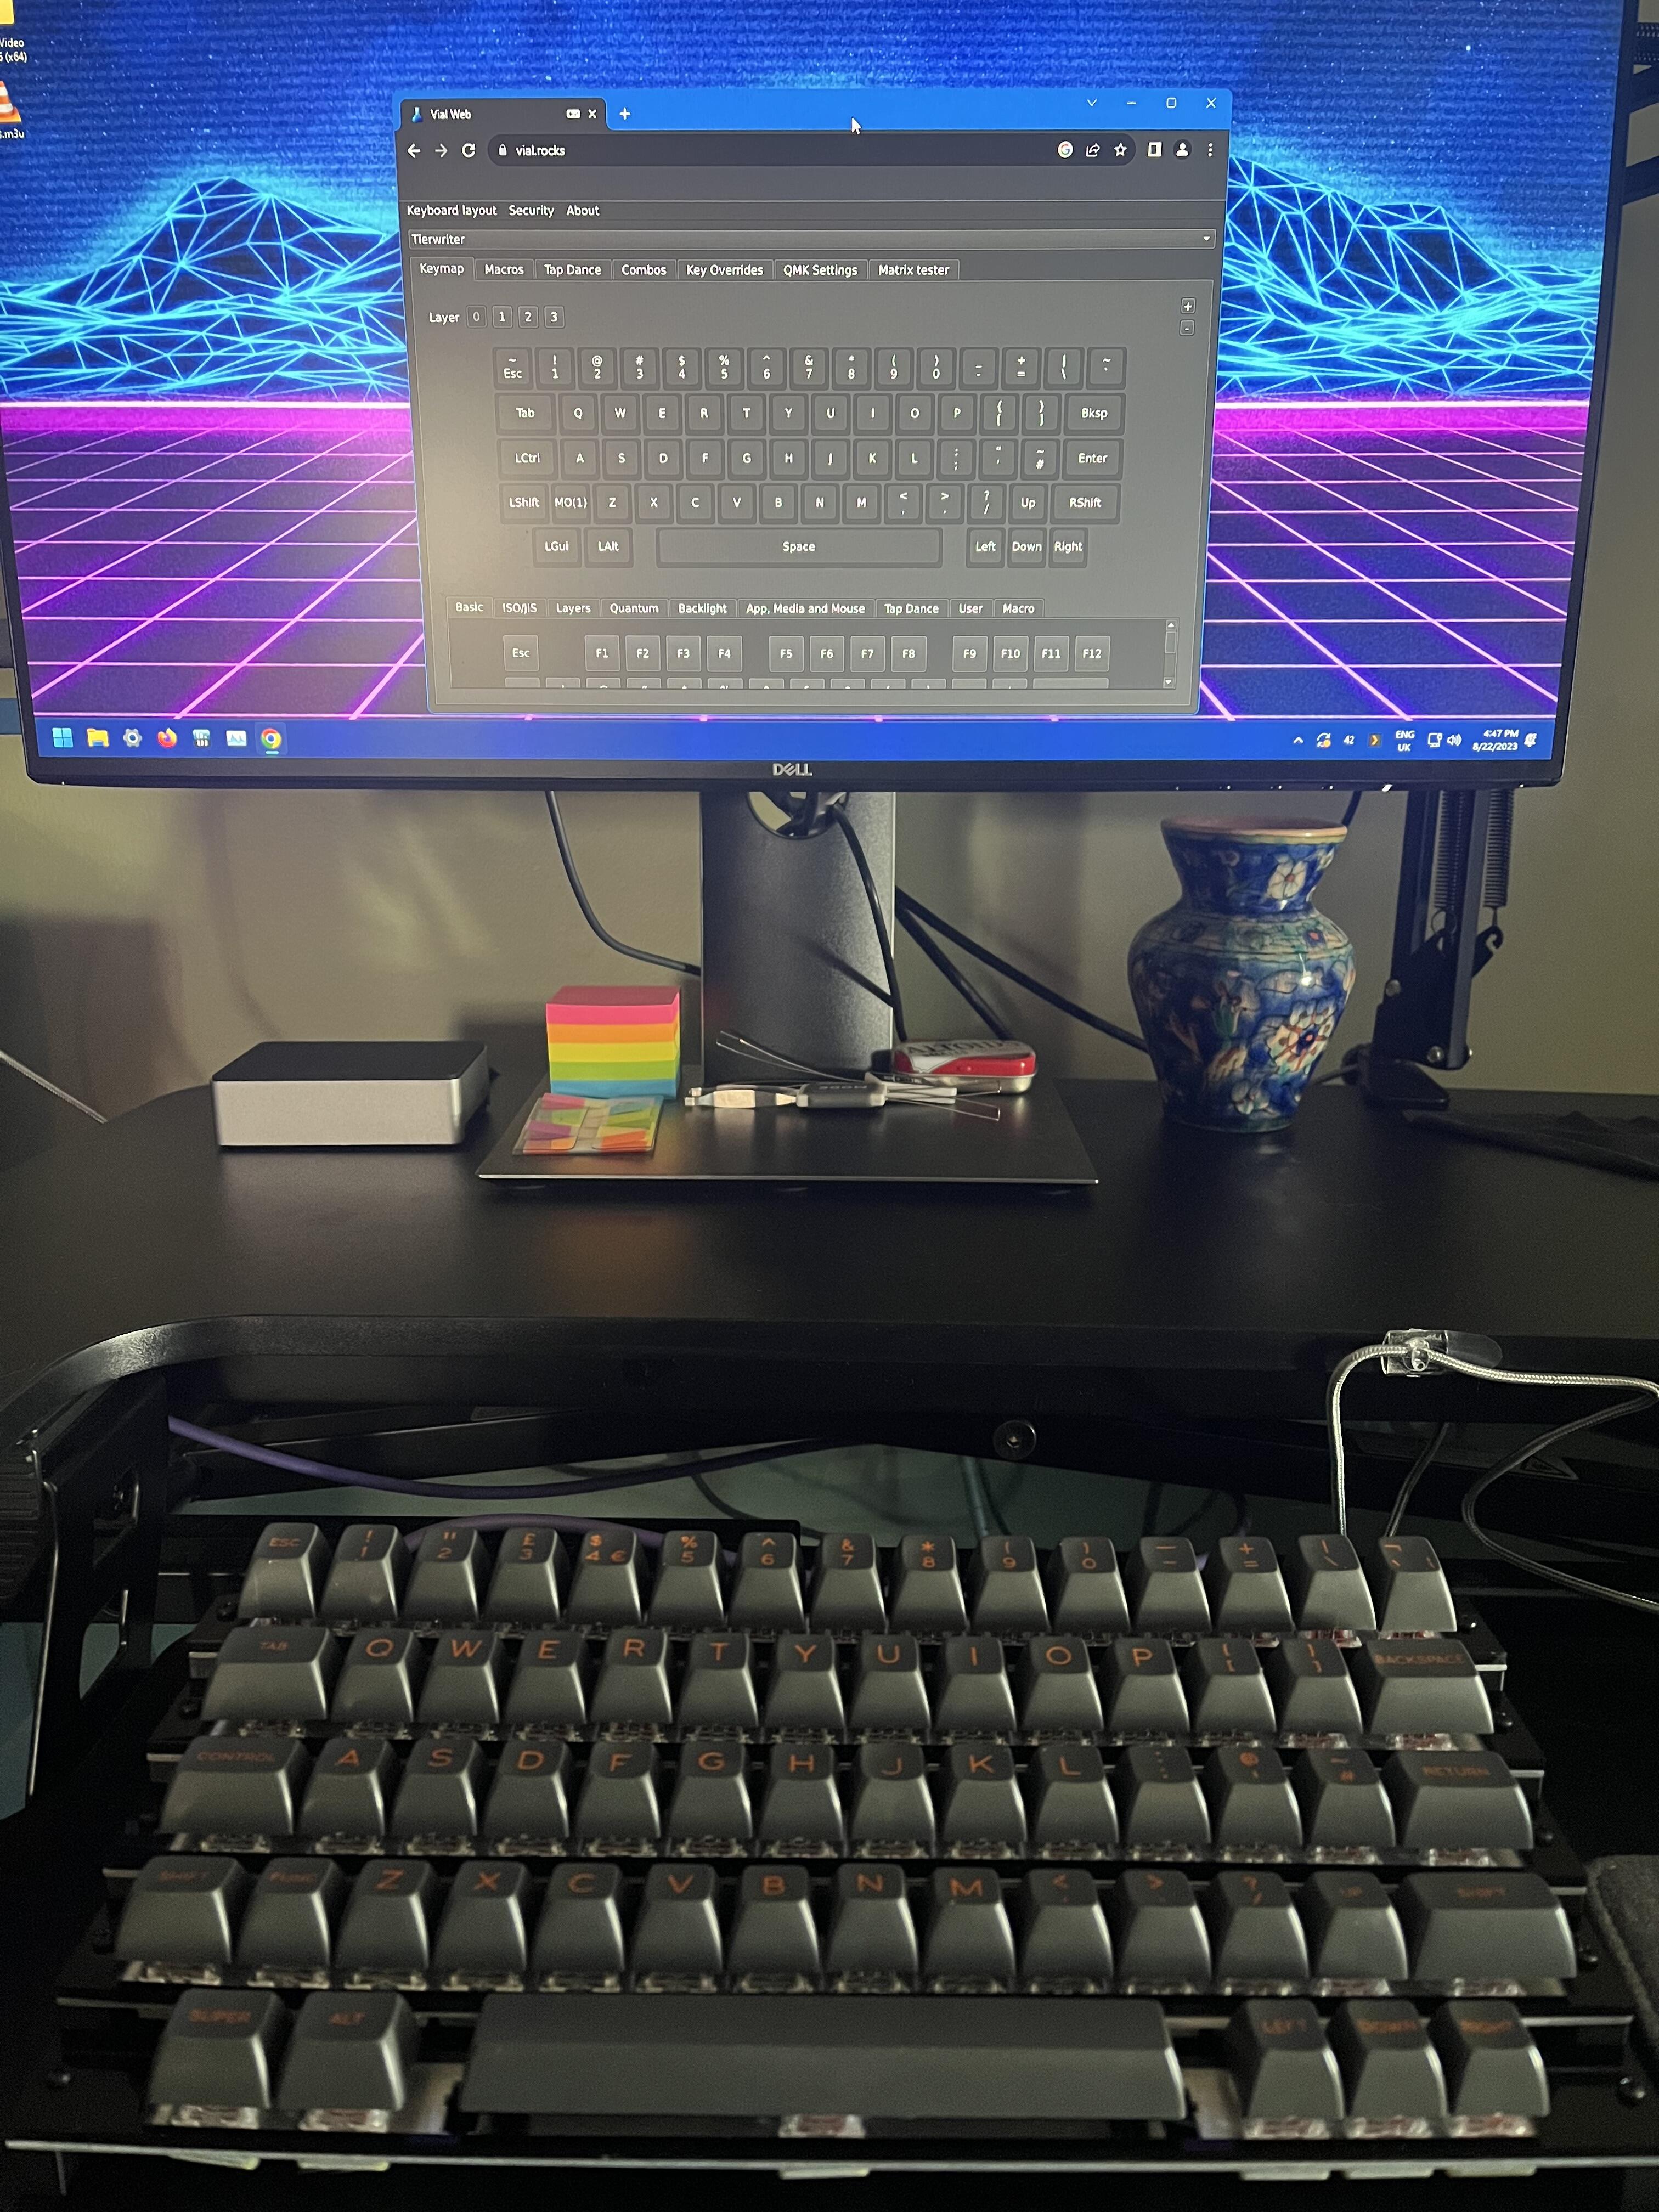
Finished the build! It’s waaay less bouncy with the columns soldered together - solder strengthened it a ton! Vial detects it, and the matrix tested successfully. It’s a real, weird keyboard!
5 Likes
So cool. Do you like typing on it?
2 Likes
Unexpectedly, yes! I wasn’t expecting it to even work, let alone be usable, and I was really worried when I tested it and saw how bouncy it was before I finished soldering the columns. I’m glad I went ahead and finished it anyway, because it’s a neat novelty to use. It feels like something out of 1895.
3 Likes
Can you touch type on it or do you have to look down a bit more? I never touch typed on an old typewriter because the keys were so heavy so I would use my index fingers for everything.
I can’t touch type on a regular keyboard, I never learned. I just hunt and peck very quickly with my two middle fingers. On this, I have to look down, because the height difference throws me off. Normally I don’t often need to look.
3 Likes