For some unfathomable reason, I’ve been wanting to build a tiered, typewriter-style board, where each row is stepped up higher than the one in front of it. Not slanted, or curved like a Model M, but like stairs. This is going to be a handwired project, since I’m not aware of any PCBs where the individual rows are broken out like this. I’ve only recently learned to handwire custom boards and compile GMK firmware for them.
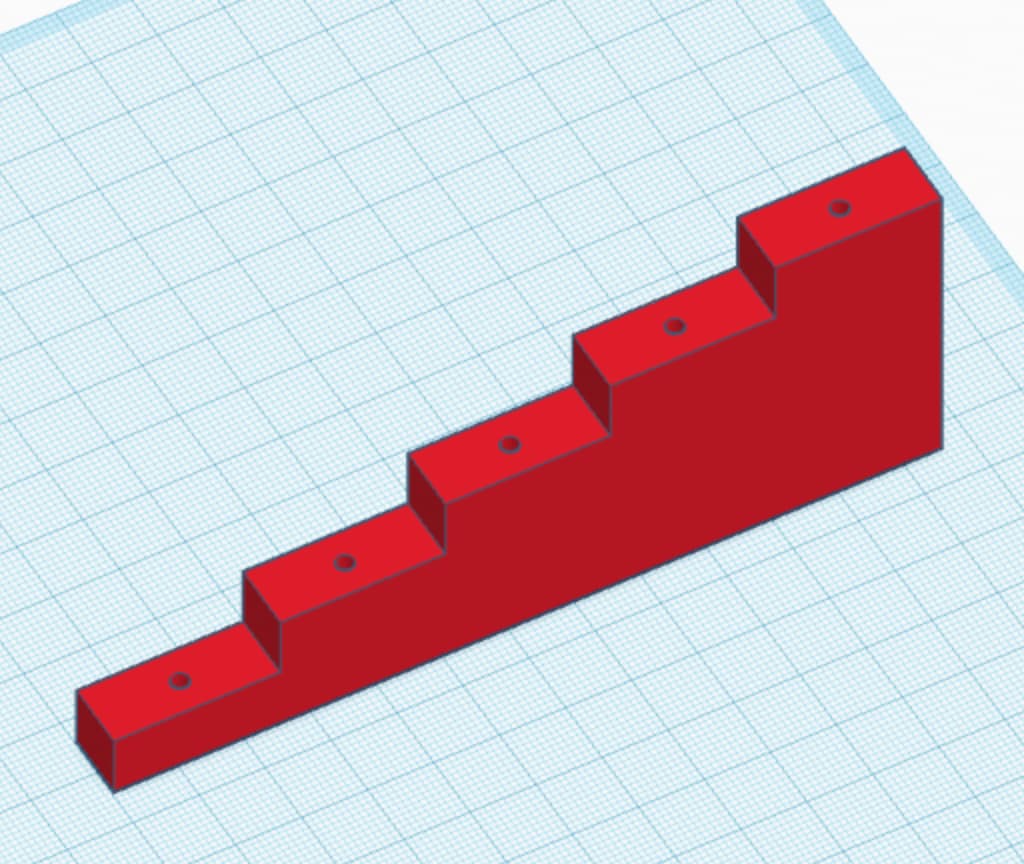
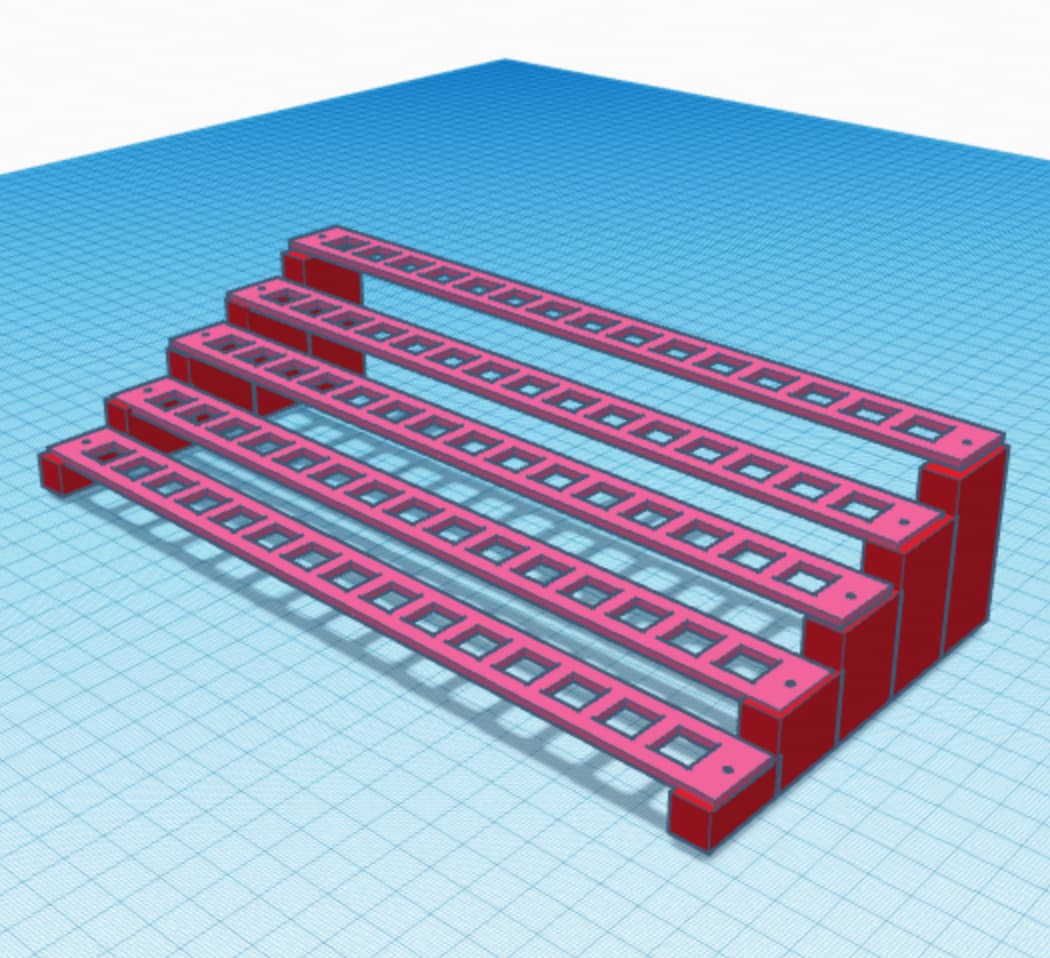
Right now, I’m trying to learn CAD so I can make an STL for the stepped platforms. If I manage to get everything working, a fancy case can come later. I’ll be happy if I can just get five tiered individual rows mounted and functioning as a proof of concept.
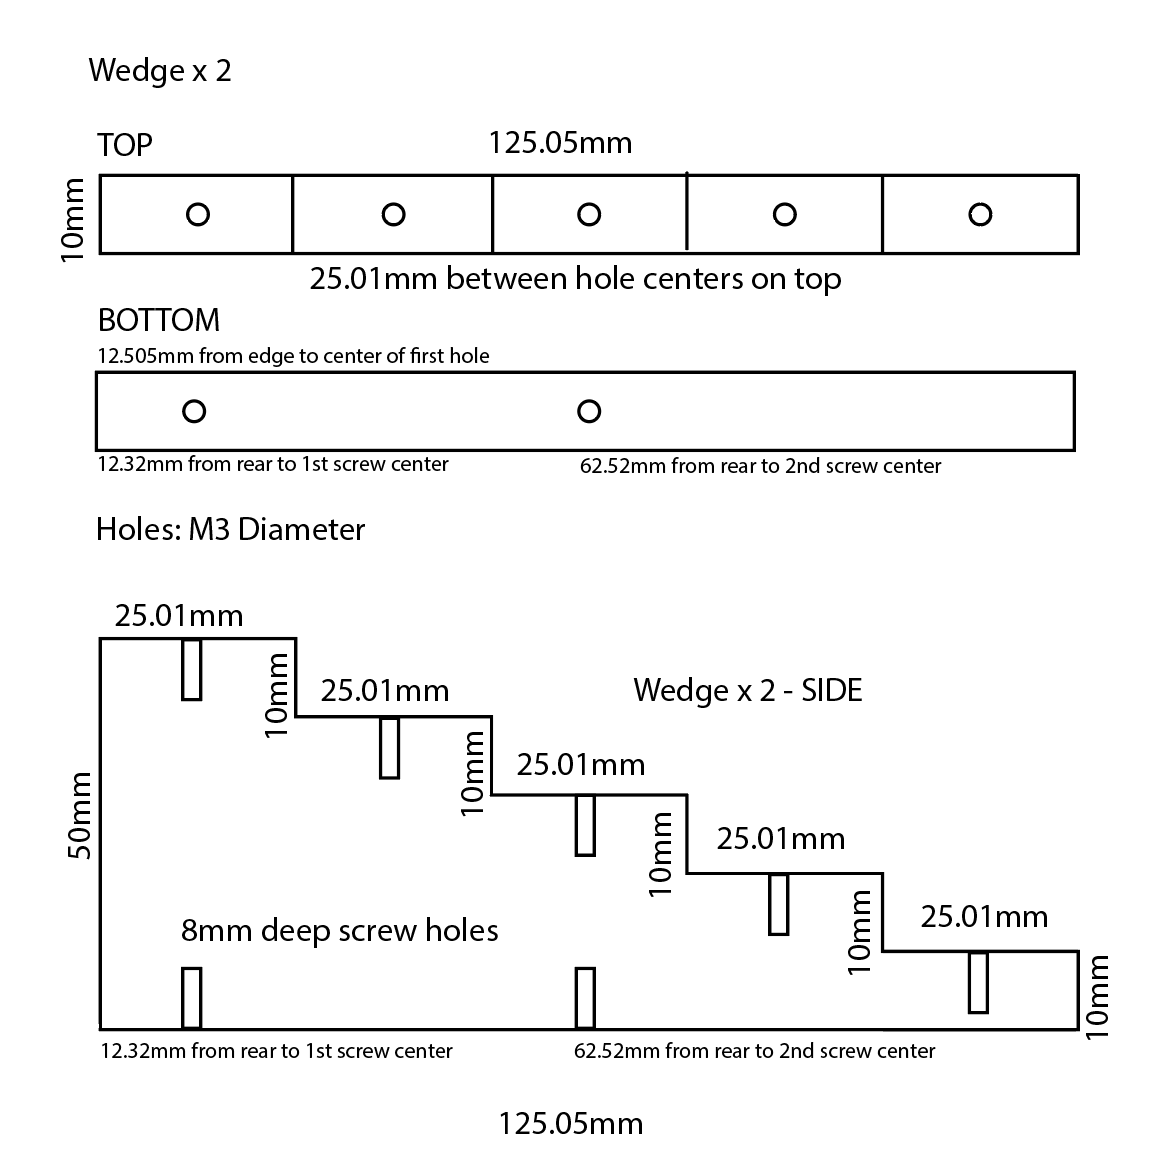
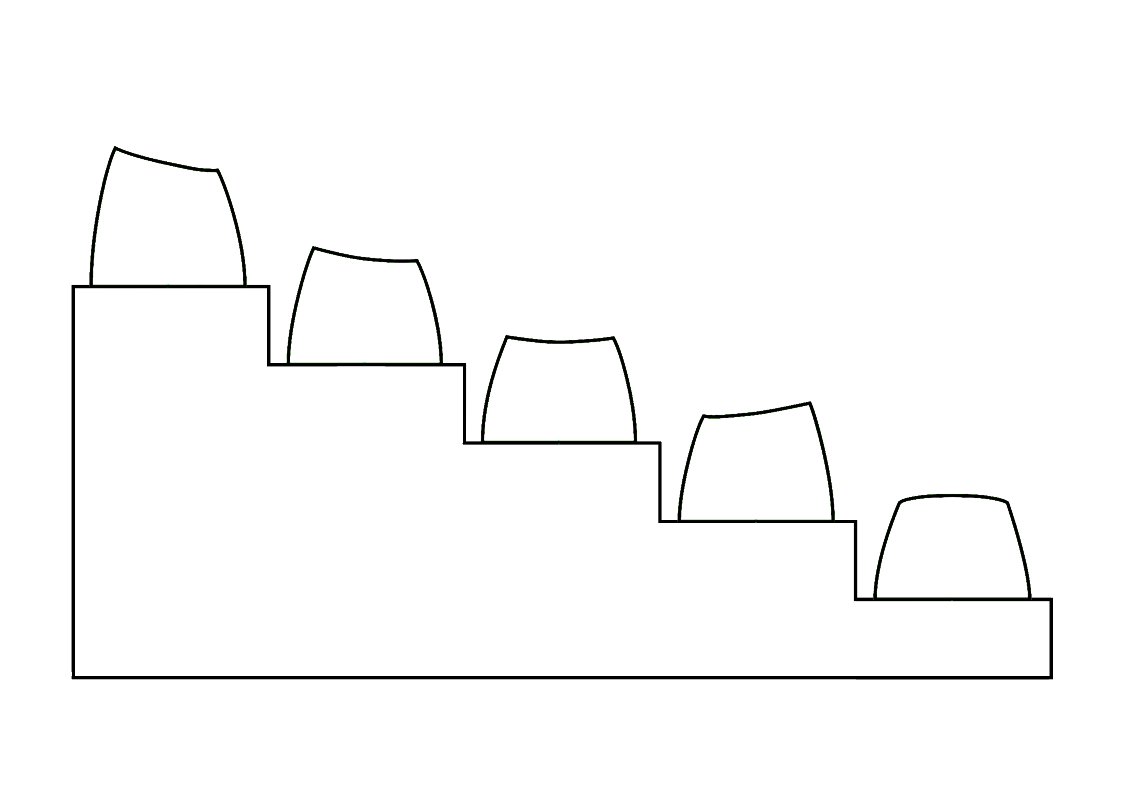
The steps seem more extreme drawn up like this than they really will be; total height of the platform itself will be 5cm, plus the 1.5mm plates.
These are very preliminary plans I’m still tweaking; just Illustrator mockups.
Cool project! Consider me intrigued. I don’t know if there is a 15u PCB but keebio does make this 12U PCB that might at least serve as inspirational:
Stacking 5 of these would probably not be cost efficient but it would be cool ;). To be honest I don’t know too much about PCBs so I don’t know how hard it would be to wire these together (I wanna say “in parallel” but I know that has a special meaning in electronics talk).
Ooh! That is neat, but I don’t think you can Daisy-chain PCBs like that; at least, not that type. My plan so far has been to use a 3-key Stampy RP2040 as the controller, and then strips of Amoeba 1u PCBs wired to that to try to keep everything tidy and relatively linear.
I can’t touch-type; after mumblemumble years of typing, starting on a C64, I still just rapidly hunt and peck with my two middle fingers.
If I can get this working, I’ll throw everything related to it up on GitHub for anyone to make and tinker with. Right now I’m stuck, since I don’t know how to sketch up the stepped wedges for printing. I’m using the Saturn 60’s wedges (for fitting custom plates into its casing) as an inspiration, and watching TinkerCad tutorial videos to see if I can get the hang of it.
I’d love someday to encase it in something that looks like a real typewriter housing, but one step at a time.
It was NOT well received, for many reasons but certainly the big miss for me was that it did not really attempt to do what you’re doing which is replicate the typewriter outside of the color and a few curves.
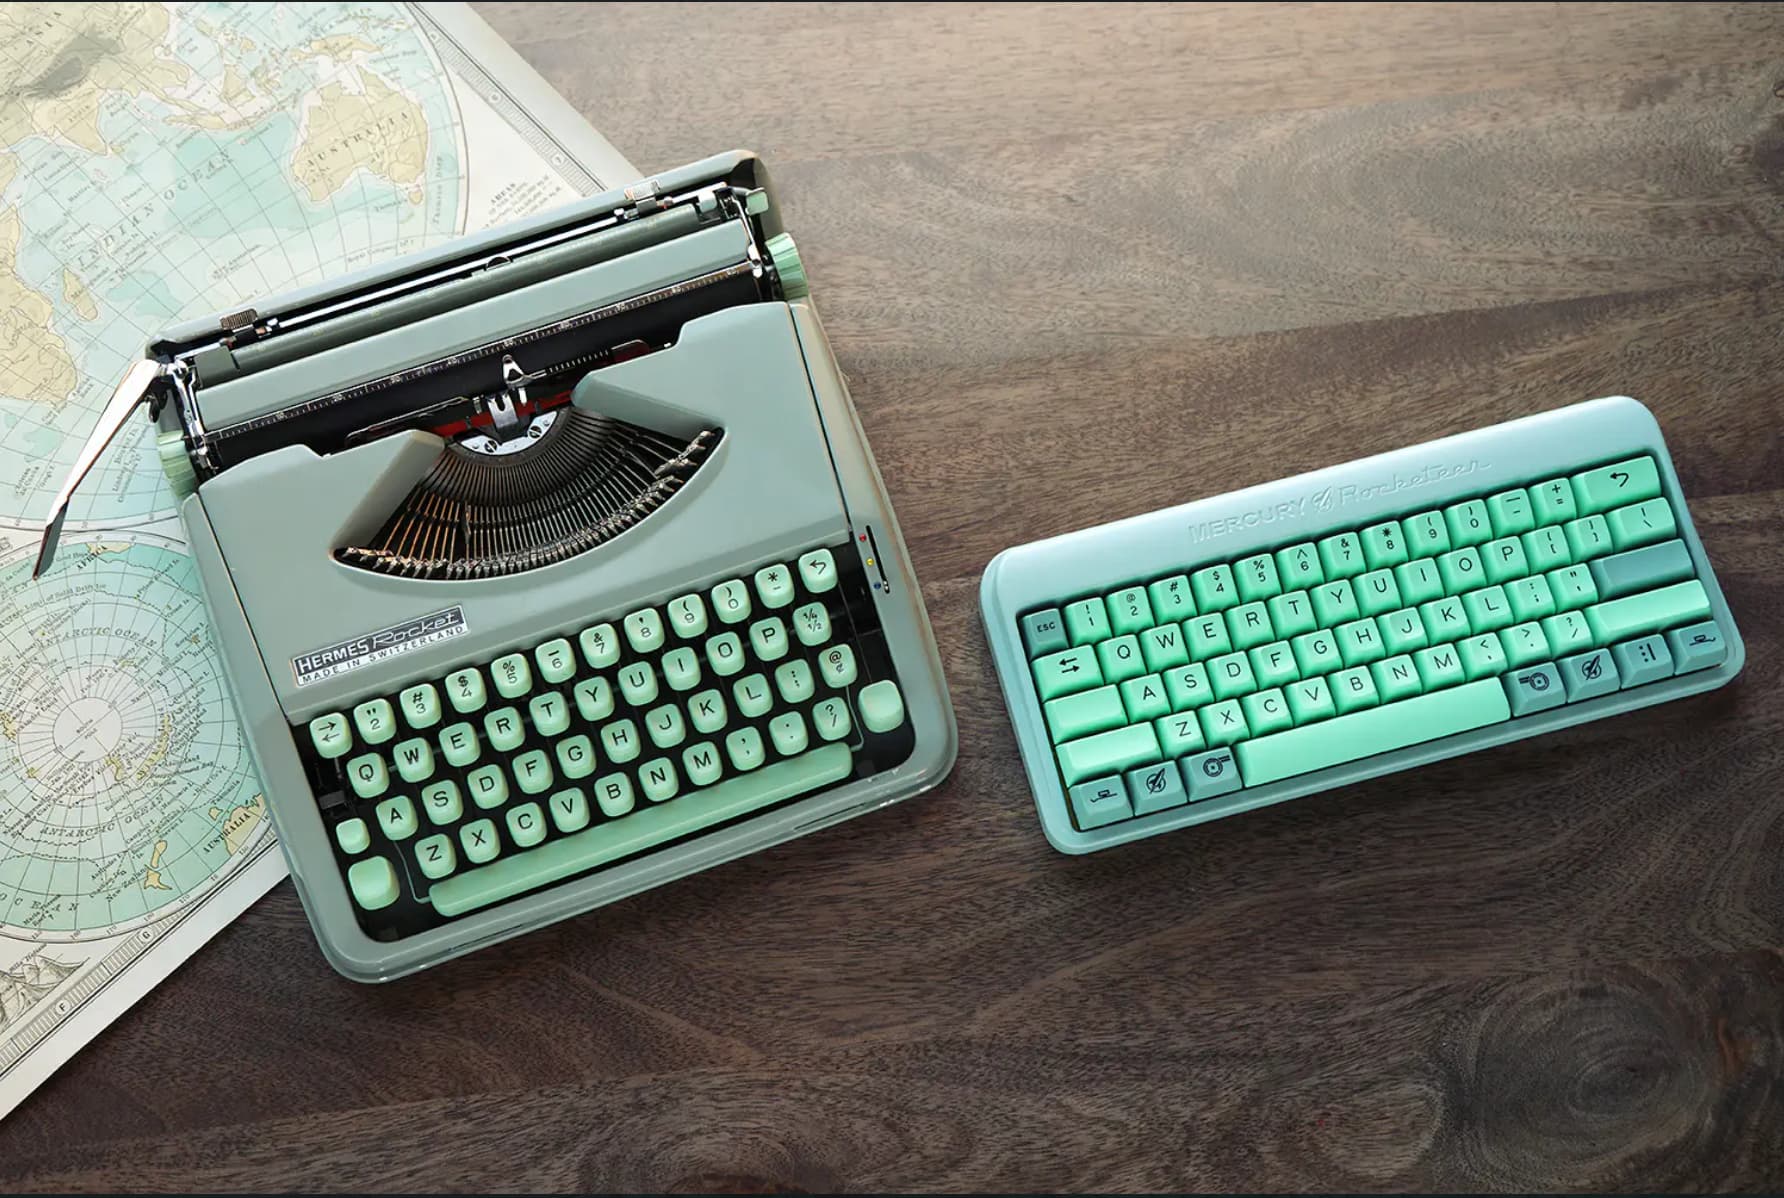
That was just slightly before I got into the hobby, but I’ve read a lot about it. Yeah, when I looked to see if anyone had tried this before, all I found was this and cheap round “typewriter” keycaps. I like the idea and the colors, but wish it had the stepped rows like the typewriter that inspired it.
Who knows, maybe no one has tried this because it’s a terrible idea from an ergonomics perspective…
I should mention I am doing a couple weird layout things to cram everything I want/need in a 60% layout, and try to mimic a typewriter aesthetic (small non-alpha keys, big space bar):
1.5u Backspace on row 2
1.5u Control on row 3 (in the Caps Lock place)
1.5u Enter, to accommodate an extra key for row 3 hash (I’m a ISO UK user)
1u Caps Lock on row 4
1.25u left shift, 1.75 right shift
Arrows!
7u space, but an 8u bar can fit too!
I wanted to minimize the number of row 5 keys, and also approximate UK ISO layout without using an Enter key that spans two rows, since that’s just not possible here. Thankfully the SA Carbon set has all the needed keys between its base, UK, 7u bar, and 40’s kit.
I’m not a connoisseur of anything CAD yet; before this morning I couldn’t even draw a box. I’ve messed with Blender in the past in an effort to resize a spacebar STL, but I didn’t succeed. The interface had a severe learning curve, and all the tutorial videos I found were outdated. If I need to design more than just this stepped wedge with holes for threaded inserts, I should probably learn a “real” CAD program. But this did the trick for now.
I even made a (layout inaccurate) mockup so my non-keyboard friends would know what I was talking about.
Ordered the 3D-printed wedges and some decorative top plates today. Still need to order the actual metal switchplates, and find some non-clicky but still typerwriter-esque switches for the prototype. Got a bunch of handwiring supplies on their way, too.
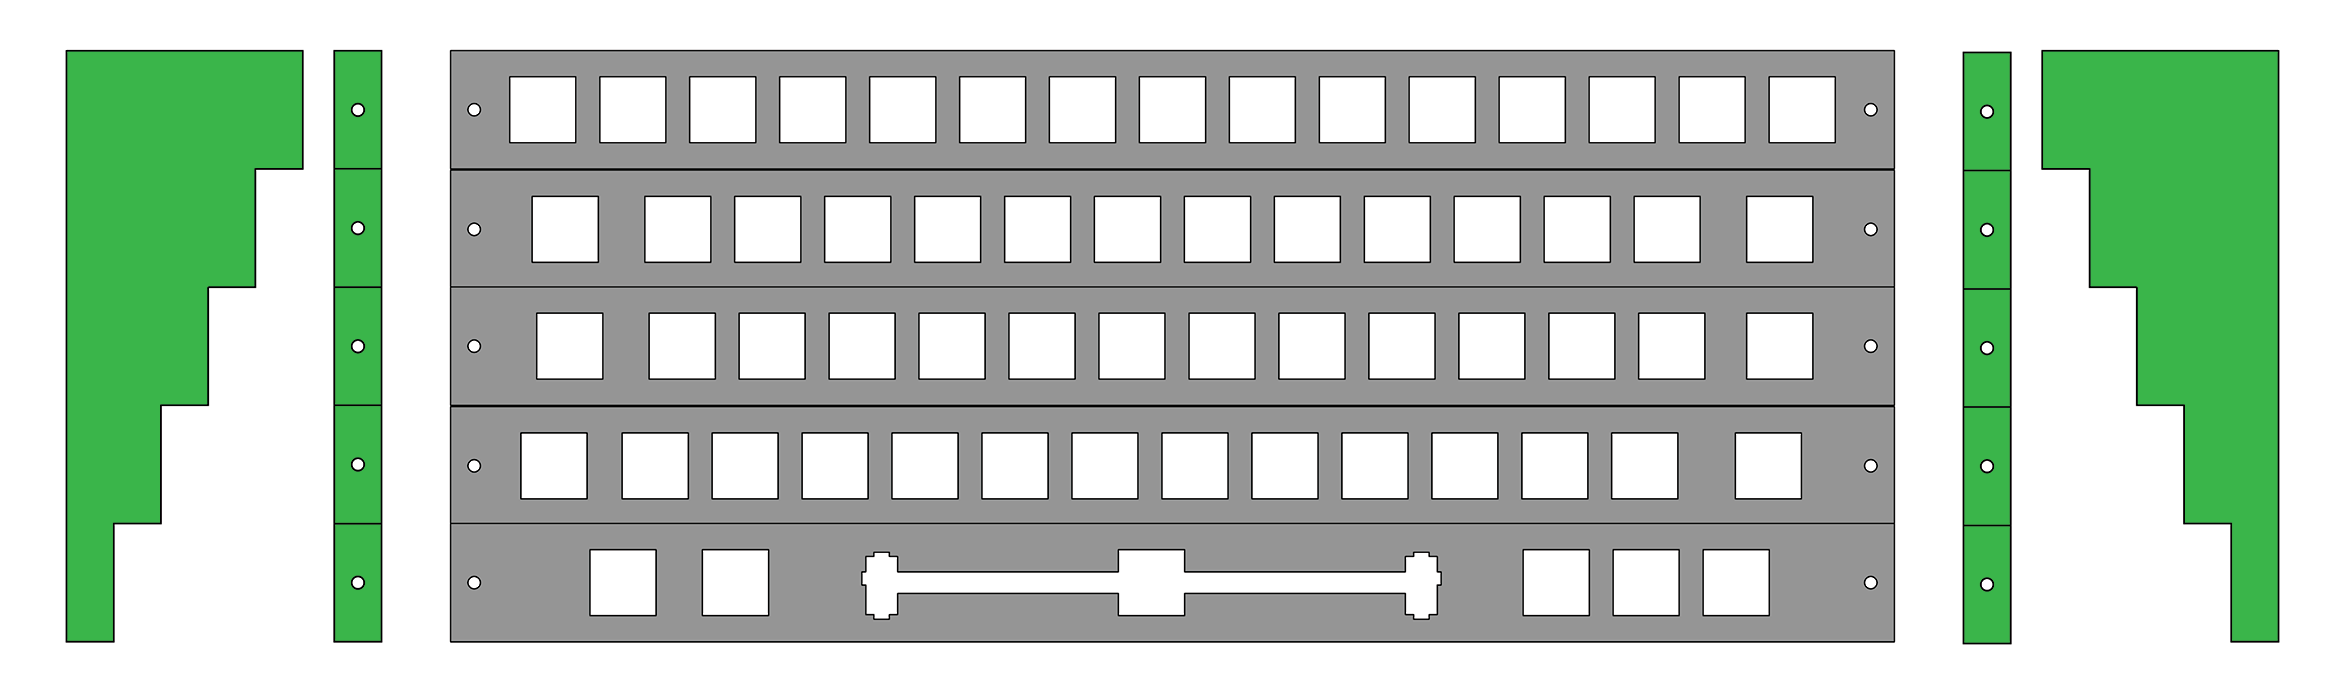
Well, I did it. I made some final tweaks to the plates (added an Alps/MX combo version, support for an 8u spacebar, and optional decorative top plates), and then sent both the switchplate and top plate designs off to be lasercut.
(I also factored in an extra .5mm tolerance on all sides for the keyholes in the top plates, so hopefully there won’t be any collision issues when using bigger caps.)
By the end of the month, I should have everything here to build a (hopefully) working prototype.
I’m intrigued by your plans! I’ve previously researched just what it was about earlier designs that gave them the stepped row aesthetic, because I wanted a keyboard that did something similar.
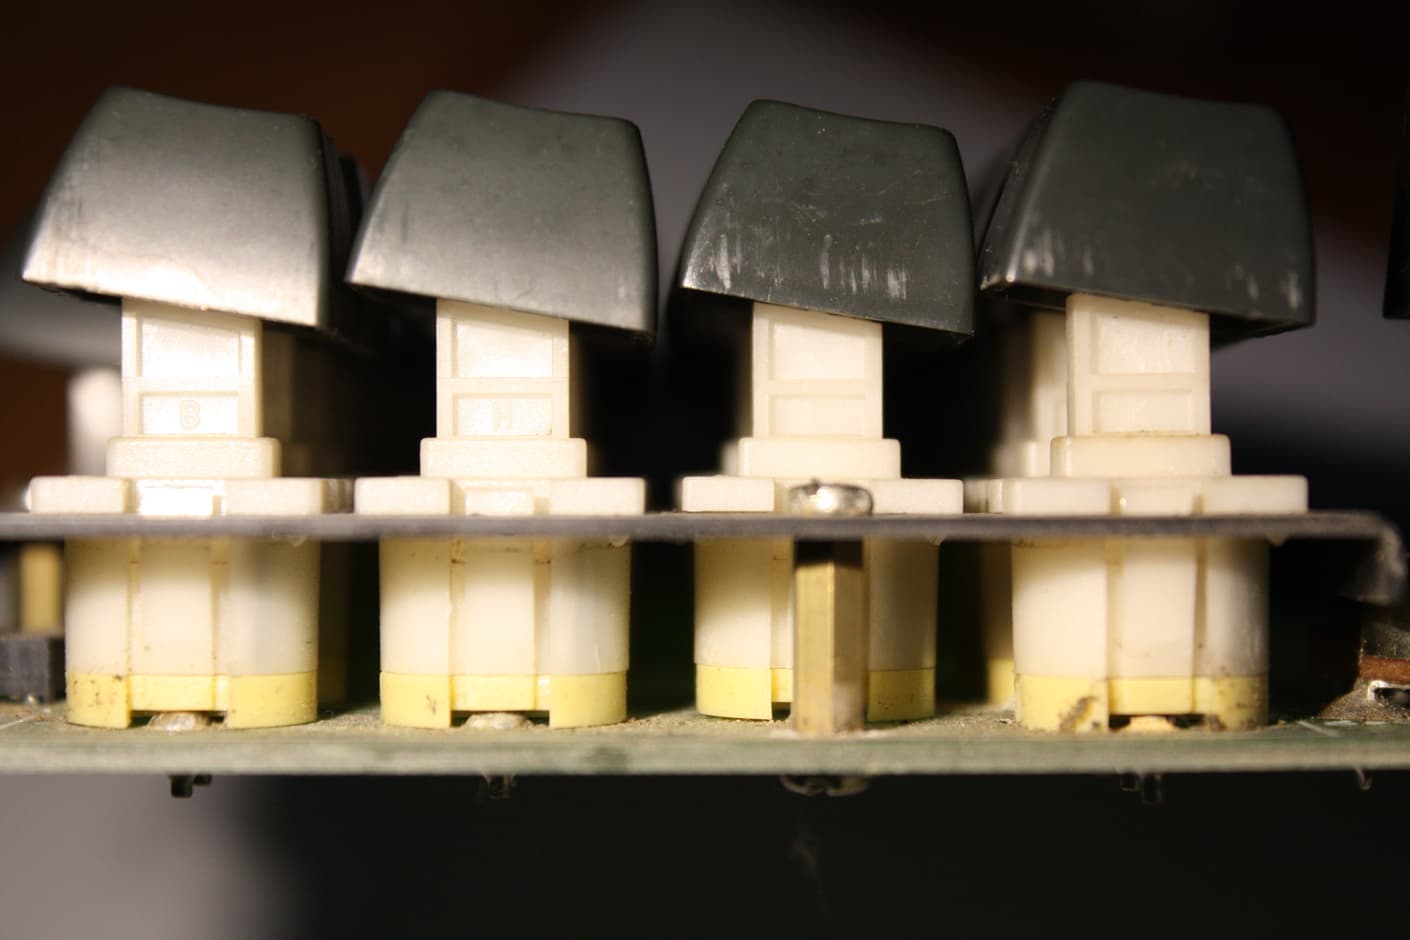
Specifically, the Lear Siegler ADM-3A, a dumb terminal I used extensively way back, had slightly stepped rows. It achieved this by sloping the entire circuit board, keyboard included, and then it used keys placed on slanted stems corresponding with the same angle as the sloped circuit board. This caused the key rows to be stepped. The image below comes from a great page on the ADM-3A, and shows the slanted stems.
Oh, that looks neat! The keys look like they’re sitting at like a 45-degree angle atop the stems, but are uniformly flat themselves. I am wondering if sculpted SA will wind up working with this, or if I should go for a uniform profile. We’ll see!
Reached a couple milestones today. The Stampy RP2040 controller arrived, and I was able to successfully test the VIAL firmware I compiled for it. I flashed it, and my system recognized it as a keyboard. I was able to short the holes for the three onboard switch mounts to simulate typing Esc, 1, and 2. Finally, I loaded VIAL and edited the mappings for those three keys, and made sure the new mappings registered when shorting the switch holes. Everything seems good on the firmware front.
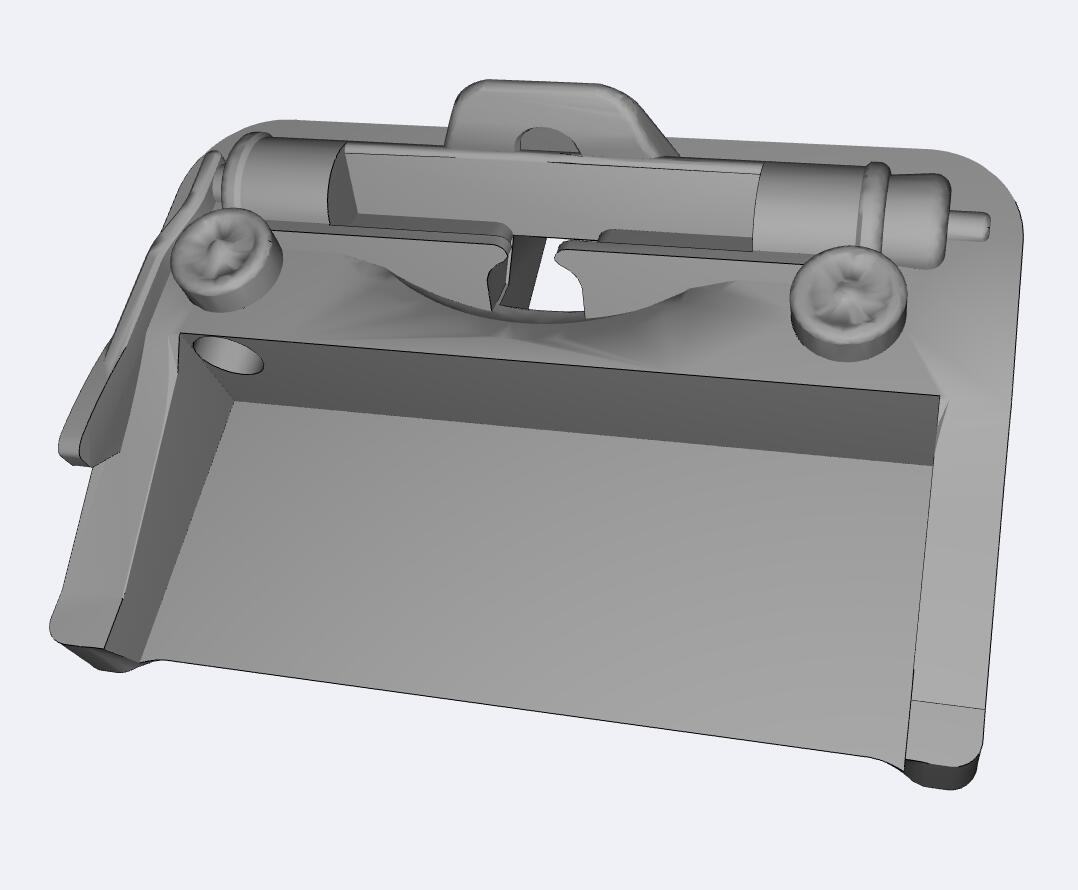
I found a 3D typewriter model with a CC-BY license, that I was able to modify to act as a decorative outer shell for my board. You can (theoretically) just plop the tier and plate assembly into a hollowed-out chamber at the front, and run the USB cable through a hole I added running out the back. Once I have a working board and confirm everything in the basic build works, I’ll try printing the shell and see if everything fits.
Been wanting to dip my toes into this (Blender and/or CAD) and I’m curious, is Blender a good tool for just doing CAD? I’d like to create a few STLs for printing (simple shapes for the most part) but I’m also blown away by the stuff I see made in Blender. Learning curve aside would Blender be a good option for both paths? The price is right for sure.
The ADM-3A circuit board and stems are tilted by about 8 degrees. (I measured this with the rotate tool in Gimp, using online images as source material.) In my notes, I also see I wrote that the keycaps are uniform spherical, and possibly all R4.
Switchplates should be arriving today. The baseplate got lost in the mail, so I may need to get that remade.
The tiered wedges have yet to be manufactured, let alone shipped, which has me pretty annoyed. I can’t really do much in terms of proof-of-concept without those.