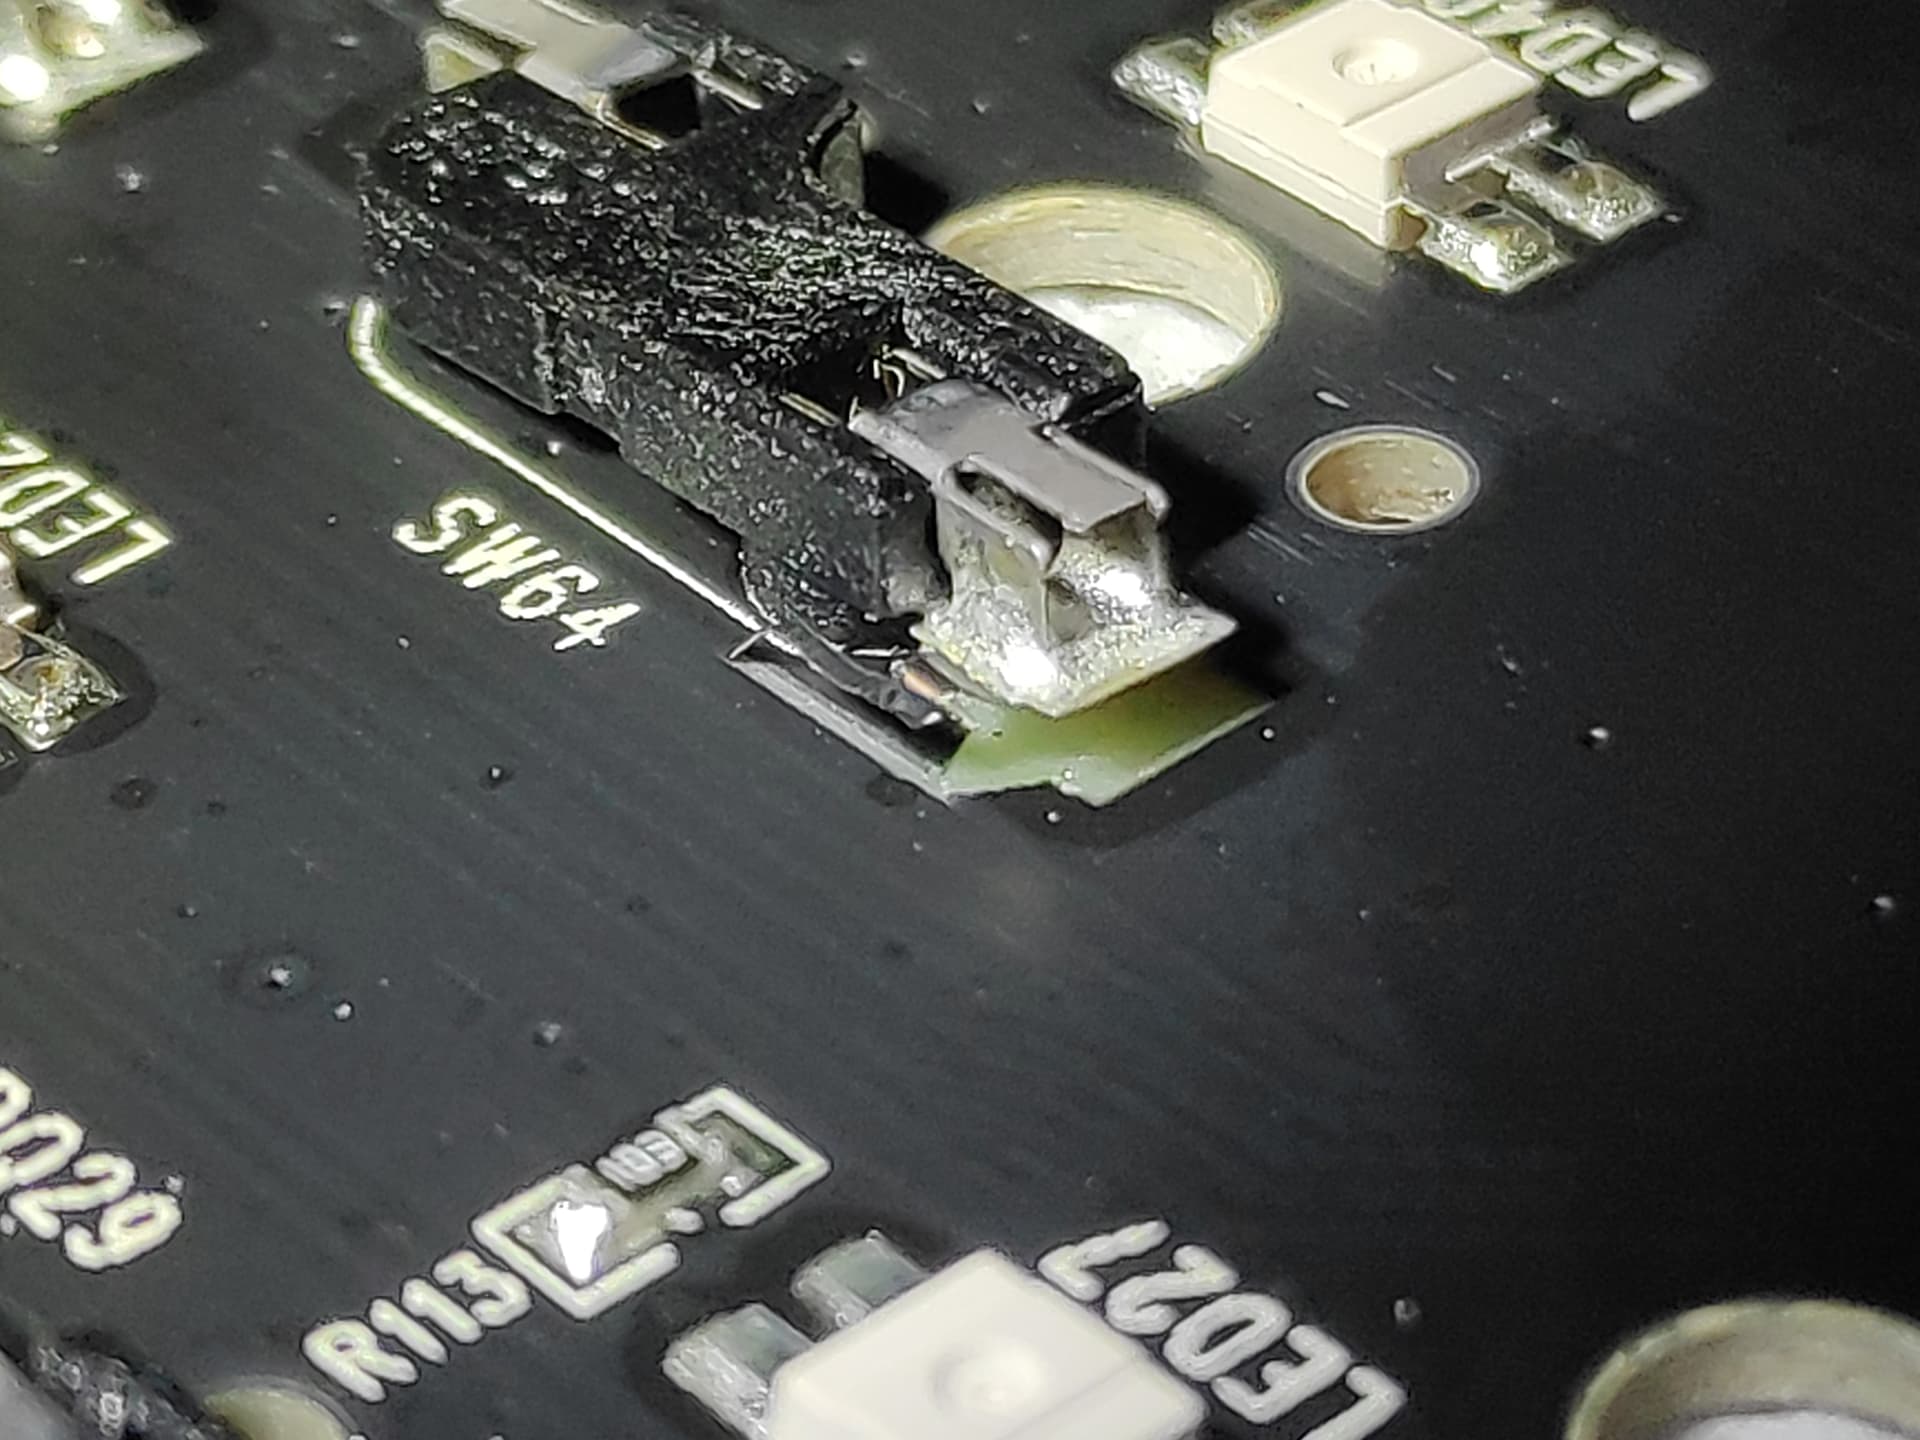
I’ve posted this a few places, haven’t had any replies. I’ve got an Epomaker RT100 that doesn’t work and when I opened it up I found that one of the hotswap sockets had been pushed out on one side, along with the solder pad.
Now it’s my understanding that when hotswap sockets break they usually only break that key, they don’t kill the whole thing. But that’s the situation that I have here, the keyboard doesn’t turn on or do anything. (Well the battery light seems to work. Nothing else.) There’s no other visible damage to any of the circuit boards.
If you look closely at the picture, you can see that the socket didn’t merely pull away from the circuit board, it also took a little piece with it on the side. And it’s my guess that the little piece there is a broken trace and that’s what the real problem is. Maybe.
I can do some very basic soldering but I don’t really know what I’m doing here so I thought I’d ask for advice. What do you all think?
I’ve tried messing around with it a bit already. I soldered on a wire from that contact to the far contact of the next socket over, and was a little pleased with what a neat job I did. I didn’t work. Then I had to remove that wire and screw around with it some more… I think the socket has basically pulled up the pad on the other side now as well, thanks to all the handling, so now I need to fix that too.