UPDATED: _Added a new update (#2) about received replacement parts and latest findings. Added an important note on one of my design suggestions as well as a complete gallery plus a boot-sequence GIF as well as an update (#1) with parts of Kono’s response about some of the issues and concerns discussed plus a link to the Facebook version of this post that contains an unabridged video rather than a short low-resolution and short GIF of just the boot-sequence.
NOTE: Also published on Facebook at the following address as that post substitutes the low-resolution and shorter version GIF of the boot-sequence with a high-quality unabridged video plus has more photos: https://www.facebook.com/Mr.Andreas.Toth/media_set?set=a.2315623551782280&type=3.
Day 1 – December 20, 2018
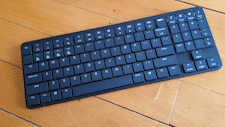
My very first Kickstarter order, and also my first ever backing of a crowdfunded project, arrived today, a brand-spanking new Kono’s black ultra-thin RGB mechanical Hexgears X-1 keyboard with US Windows layout, Bluetooth, and the ability to operate in wired mode using a removable USB-C cord - the mode I mostly intend to use it in. In fact, today is two days after my birthday and three days before Christmas (as a European I celebrate on the 24th)! The timing couldn’t have been more perfect!
Of course, I couldn’t wait to get my hands on this little beauty, so I ripped open the courier bag and got to unboxing and give the keyboard a quick whirl. This is what followed…
The first thing I found in the bag was a boring and non-nondescript keyboard-shaped mat-black box. I didn’t buy the keyboard for the packaging, though, so all good there.
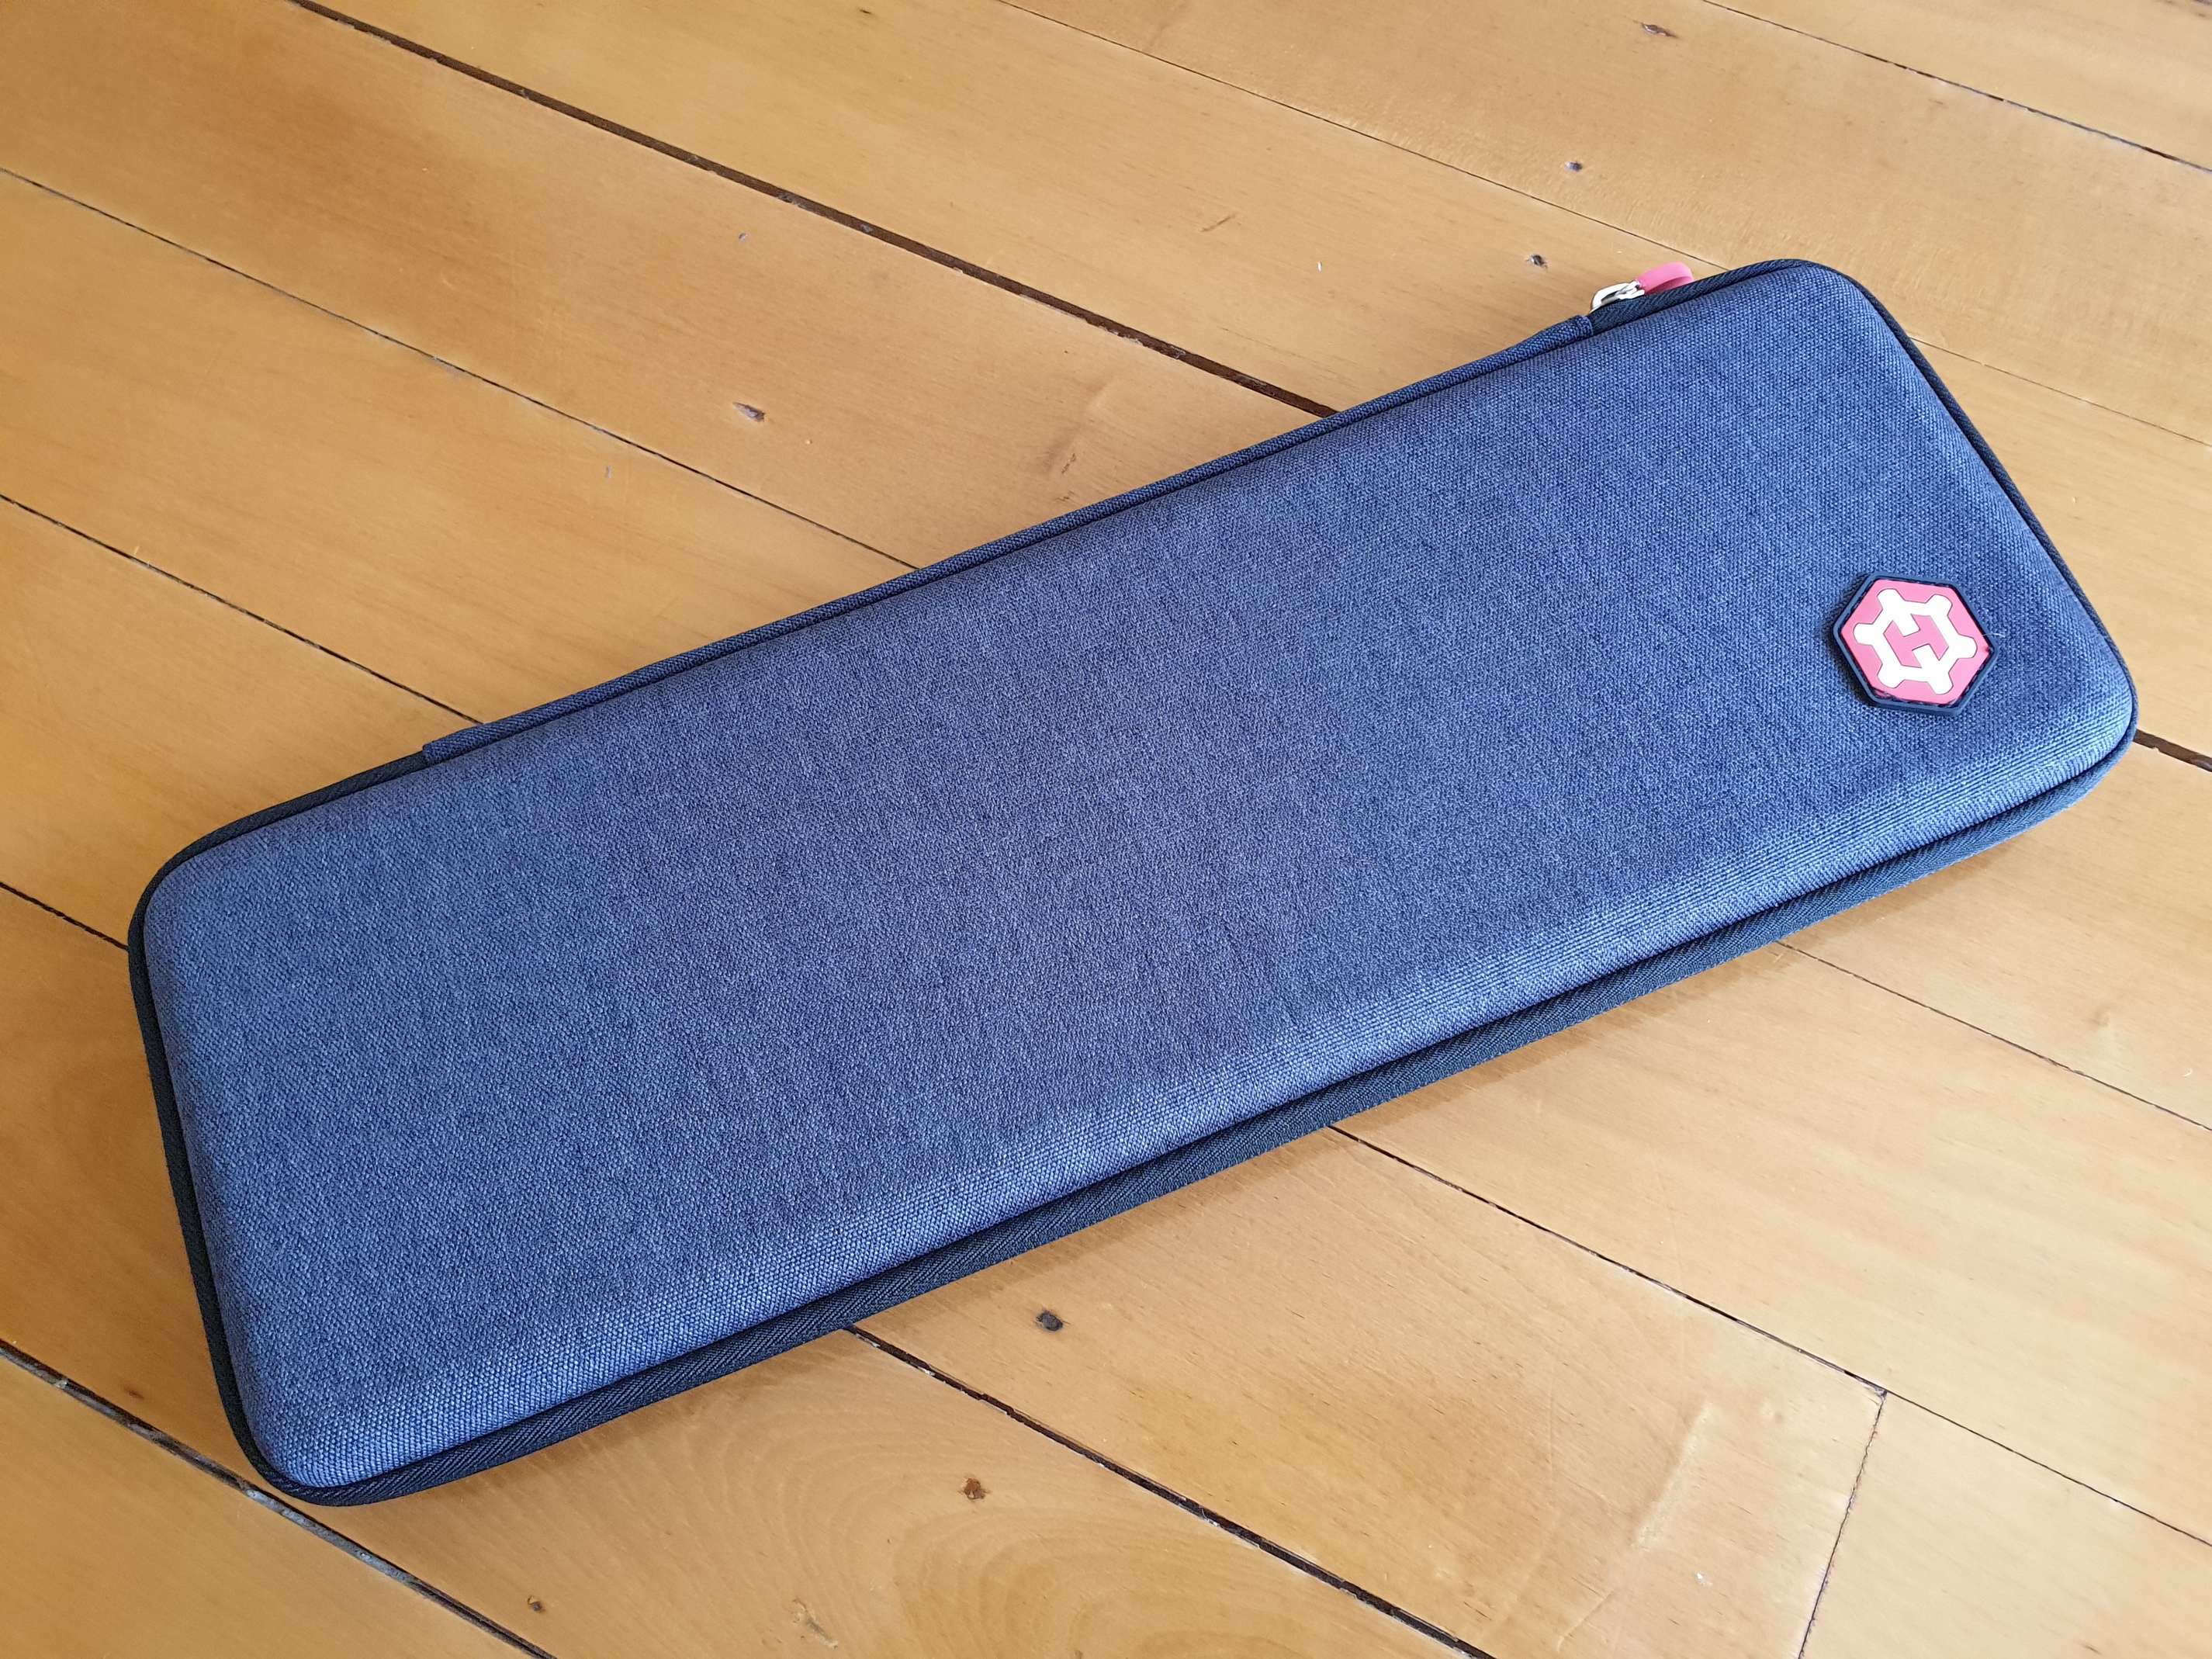
I opened the box to find a dark greyish fabric case with a red and white silicone Hexgears logo emblazoning the case and a red silicone tag for the zip. It looked rather good. I did, however, notice that two of the black stitches were crossing over the surface of two of the corners of the logo and ruining the otherwise pristine look.
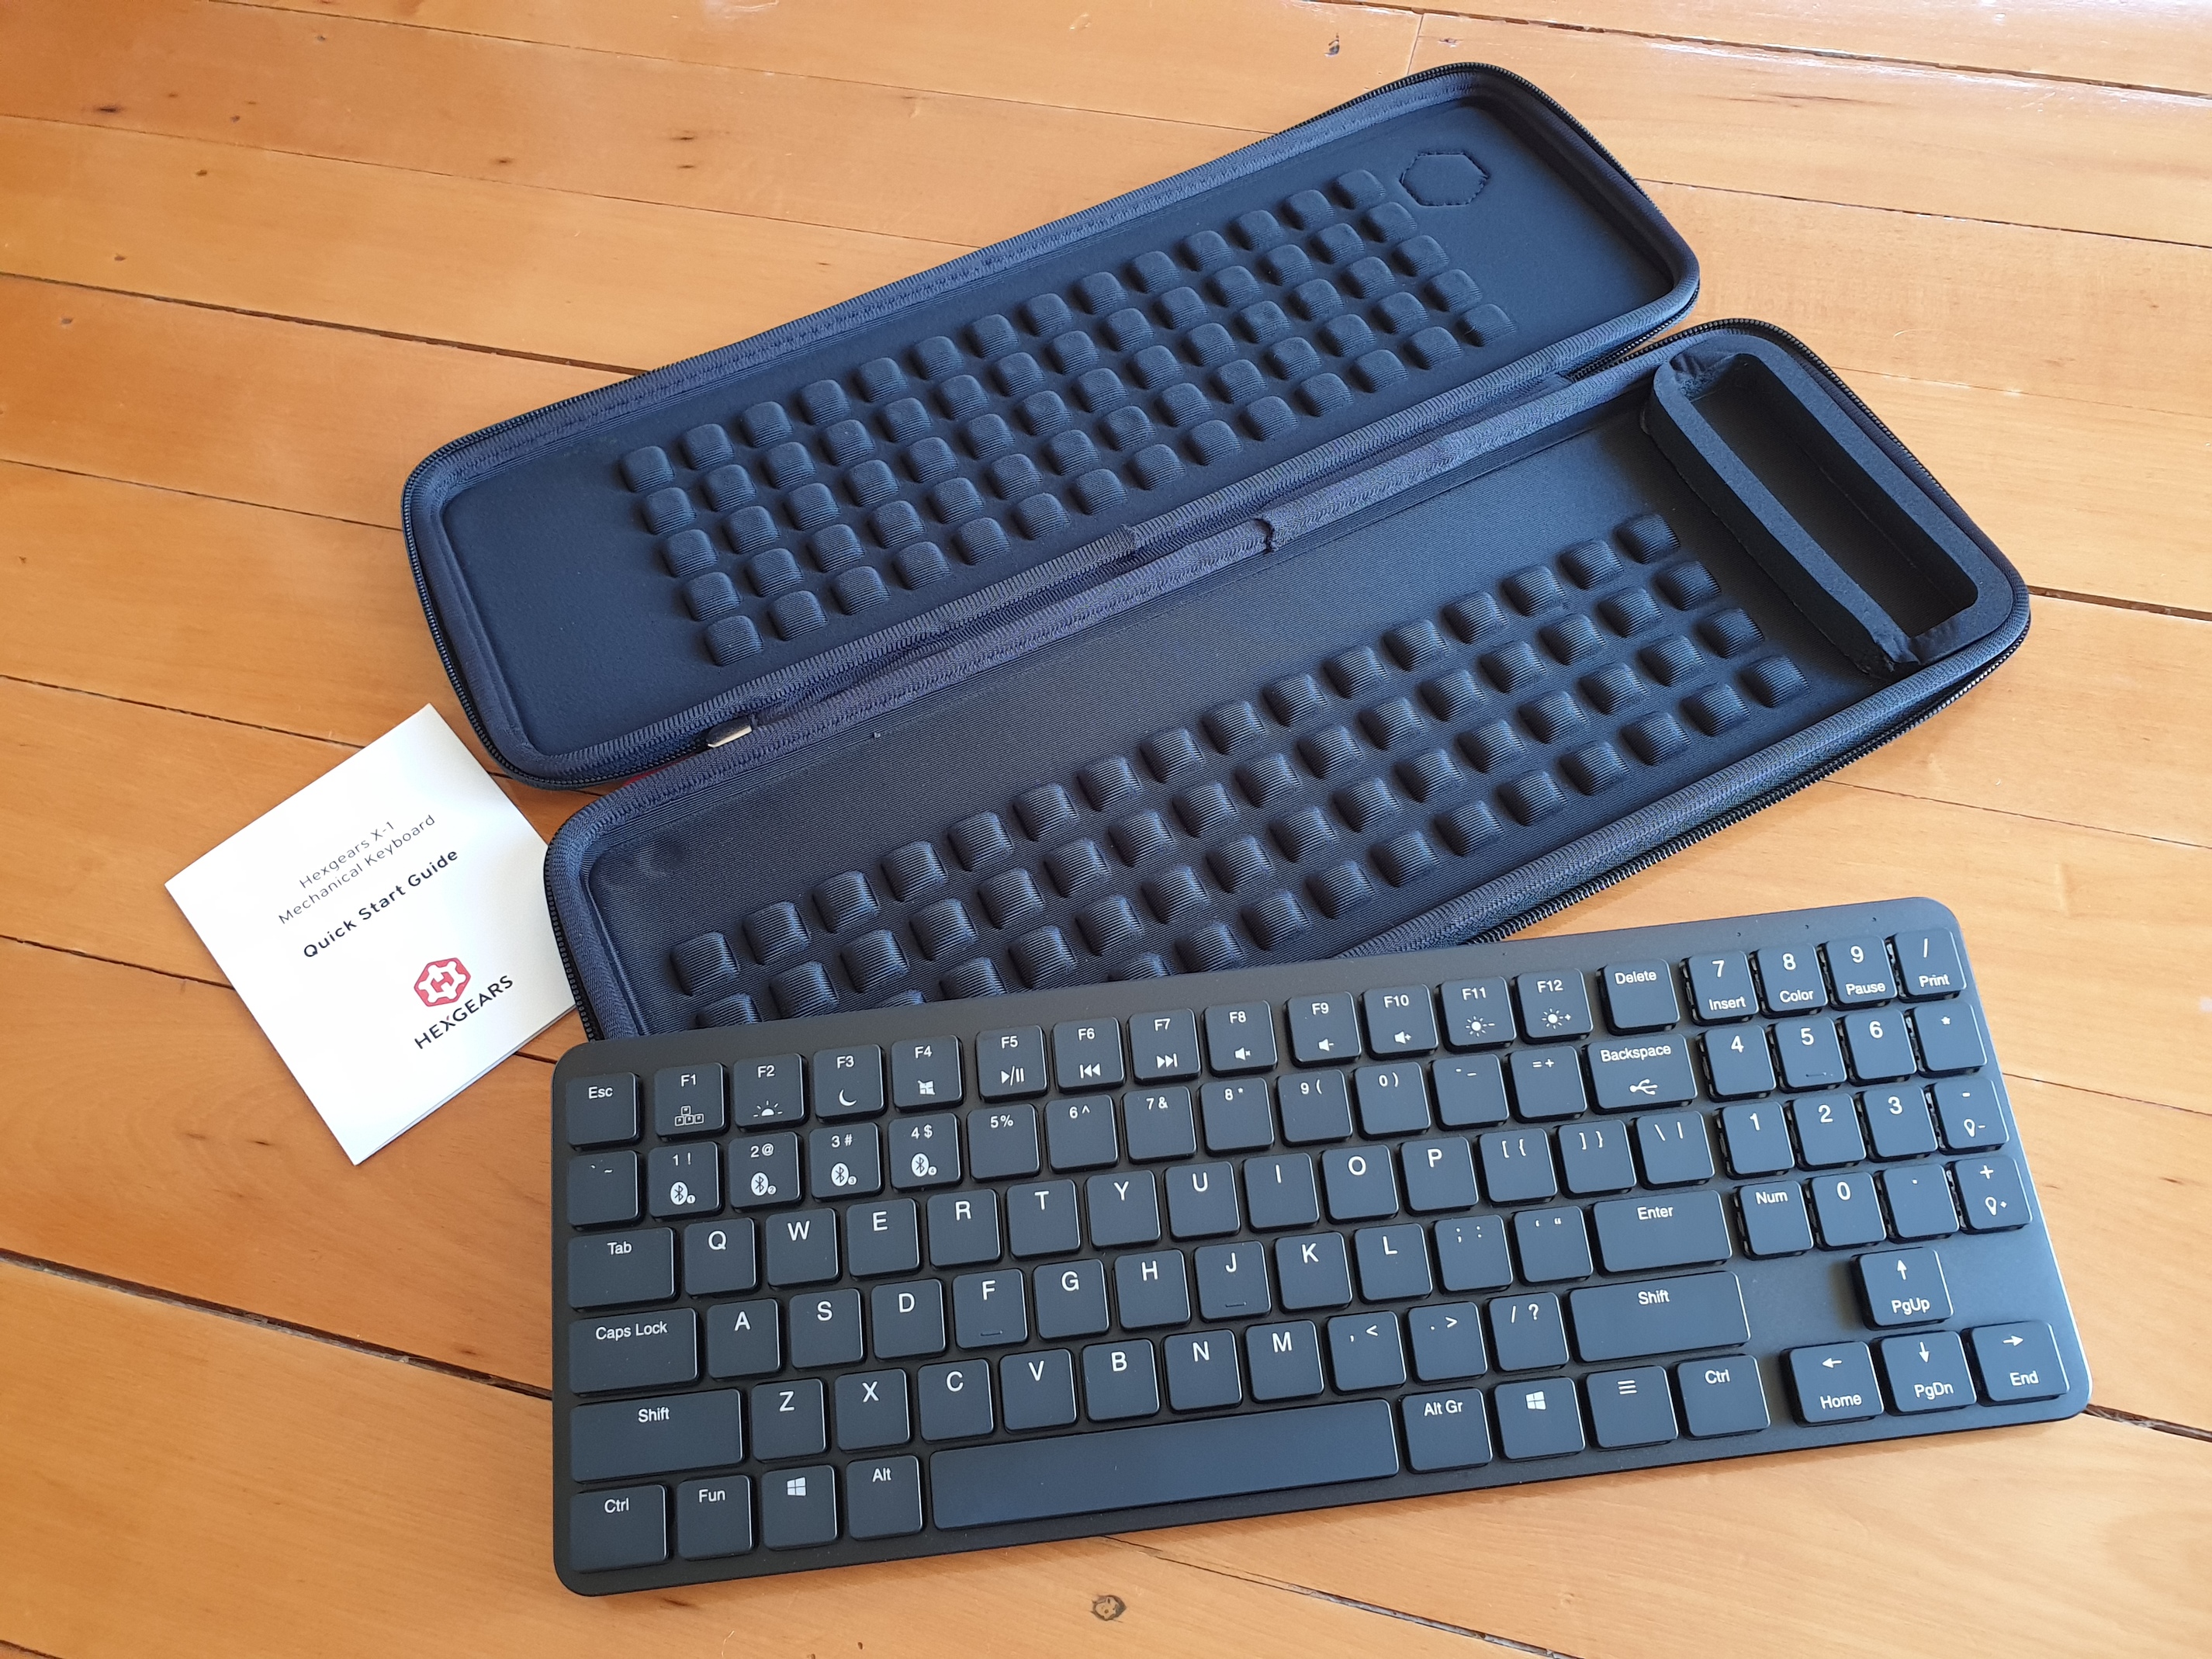
On opening the case, I found it to be well padded protecting the lovely black Hexgears X-1 keyboard. It looked really good.
Then I noticed the case itself and the stitching on the hinge-side was showing the joins in two places. In fact, the material wasn’t even glued down, but peeled back and frayed as I inspected it. Not only do these joins look bad but they are the weak-points where the case will fail failing over time. I will most likely have to glue down these joins without somehow ruing the case even more.
It’s a pity the otherwise nice-looking and well-constructed case has these issues.
I then noticed that the keyboard must have shifted during transit and that it had not only lifted the clever little side-pocket, which had only been glued in place, but actually ripped the foam. It then occurred to me that that the pocket was meant for the USB-C cord used not only for charging the wireless Bluetooth keyboard but optionally operating it in wired mode - the mode I am intending to use it in the majority of times. I wasn’t sure, though, if the cord was meant to have been included, but I will be looking into this.
Either way, had the cord been included, it may actually have prevented the pocket from compressing and becoming damaged. However, the other problem with not having the cord included is that I don’t actually have any spare USB-C cords around and will have to be borrowing the one for my phone until I buy one, which is going to be inconvenient.
When I quickly dry-tapped a few keys, I was surprised by how loud the choc brown keys actually were and also quite surprised by their long travel. I had wished for quieter keys with half the travel and had actually spent a lot of time researching this to ensure as good a fit as possible having both asked Kono as well as one of their consultants about the best fit compared to my requirements - to match the keyboard from the 2011 model of the MacBook Air as closely as possible. Note that I am not actually interested if this means having a mechanical keyboard or not. All I am after is the sound, feel, and features.
I then checked out the little quick-start guide that was included in the case and instantly went to look for the section about battery care but couldn’t find anything on this. Battery care is one of the first things I want to know about any device with a non-user replaceable battery. I was therefore disappointed not to find anything about this in the one place where such information belongs. I then assumed(!) that the battery must have been charged to the right capacity (probably 60-80%) and ready for use, and so I plugged in the keyboard and was greeted by a multi-coloured playful RGB light-show display. I was impressed since I actually had not remembered anything about the keyboard supporting individual RGB control. This isn’t really anything I want, though, so I returned to the quick start guide to figure out how to change this to suit my needs.
Before I configure the keyboard, I decide to see what would happen if I unplugged it and turned it back on keyboard. Voila! The light-show came back before morphing to my configuration. This was surprise. I liked it more so because I just hadn’t expected the LEDs to come on but to default to off in order to preserve battery. But knowing the keyboard is on is a good thing. One can always just turn off the backlight.
About the backlight, or RGBs as some would refer to them, it was really simple to configure the lighting mode and colour I wanted. To toggle lighting mode, simply hold down the Fun key and tap the space-bar until the right mode appears. The annoying thing with this, though, is that each mode is followed by turning off all LEDs instead of having a separate Fun combination for toggling backlighting on and off and returning to the previous mode. In fact, the design means one have to cycle through each mode each time one wants to simple toggle backlighting back on again. But not only that, the colour configuration is reset each time one returns to the same lighting mode. This is simply frustrating.
About changing the backlighting colour, for that I didn’t even have to look in the quick-start guide since this is clearly indicated by the word Color (US English) on the number eight key on the number pad, which I instinctively knew was accessed by holding down the Fun key.
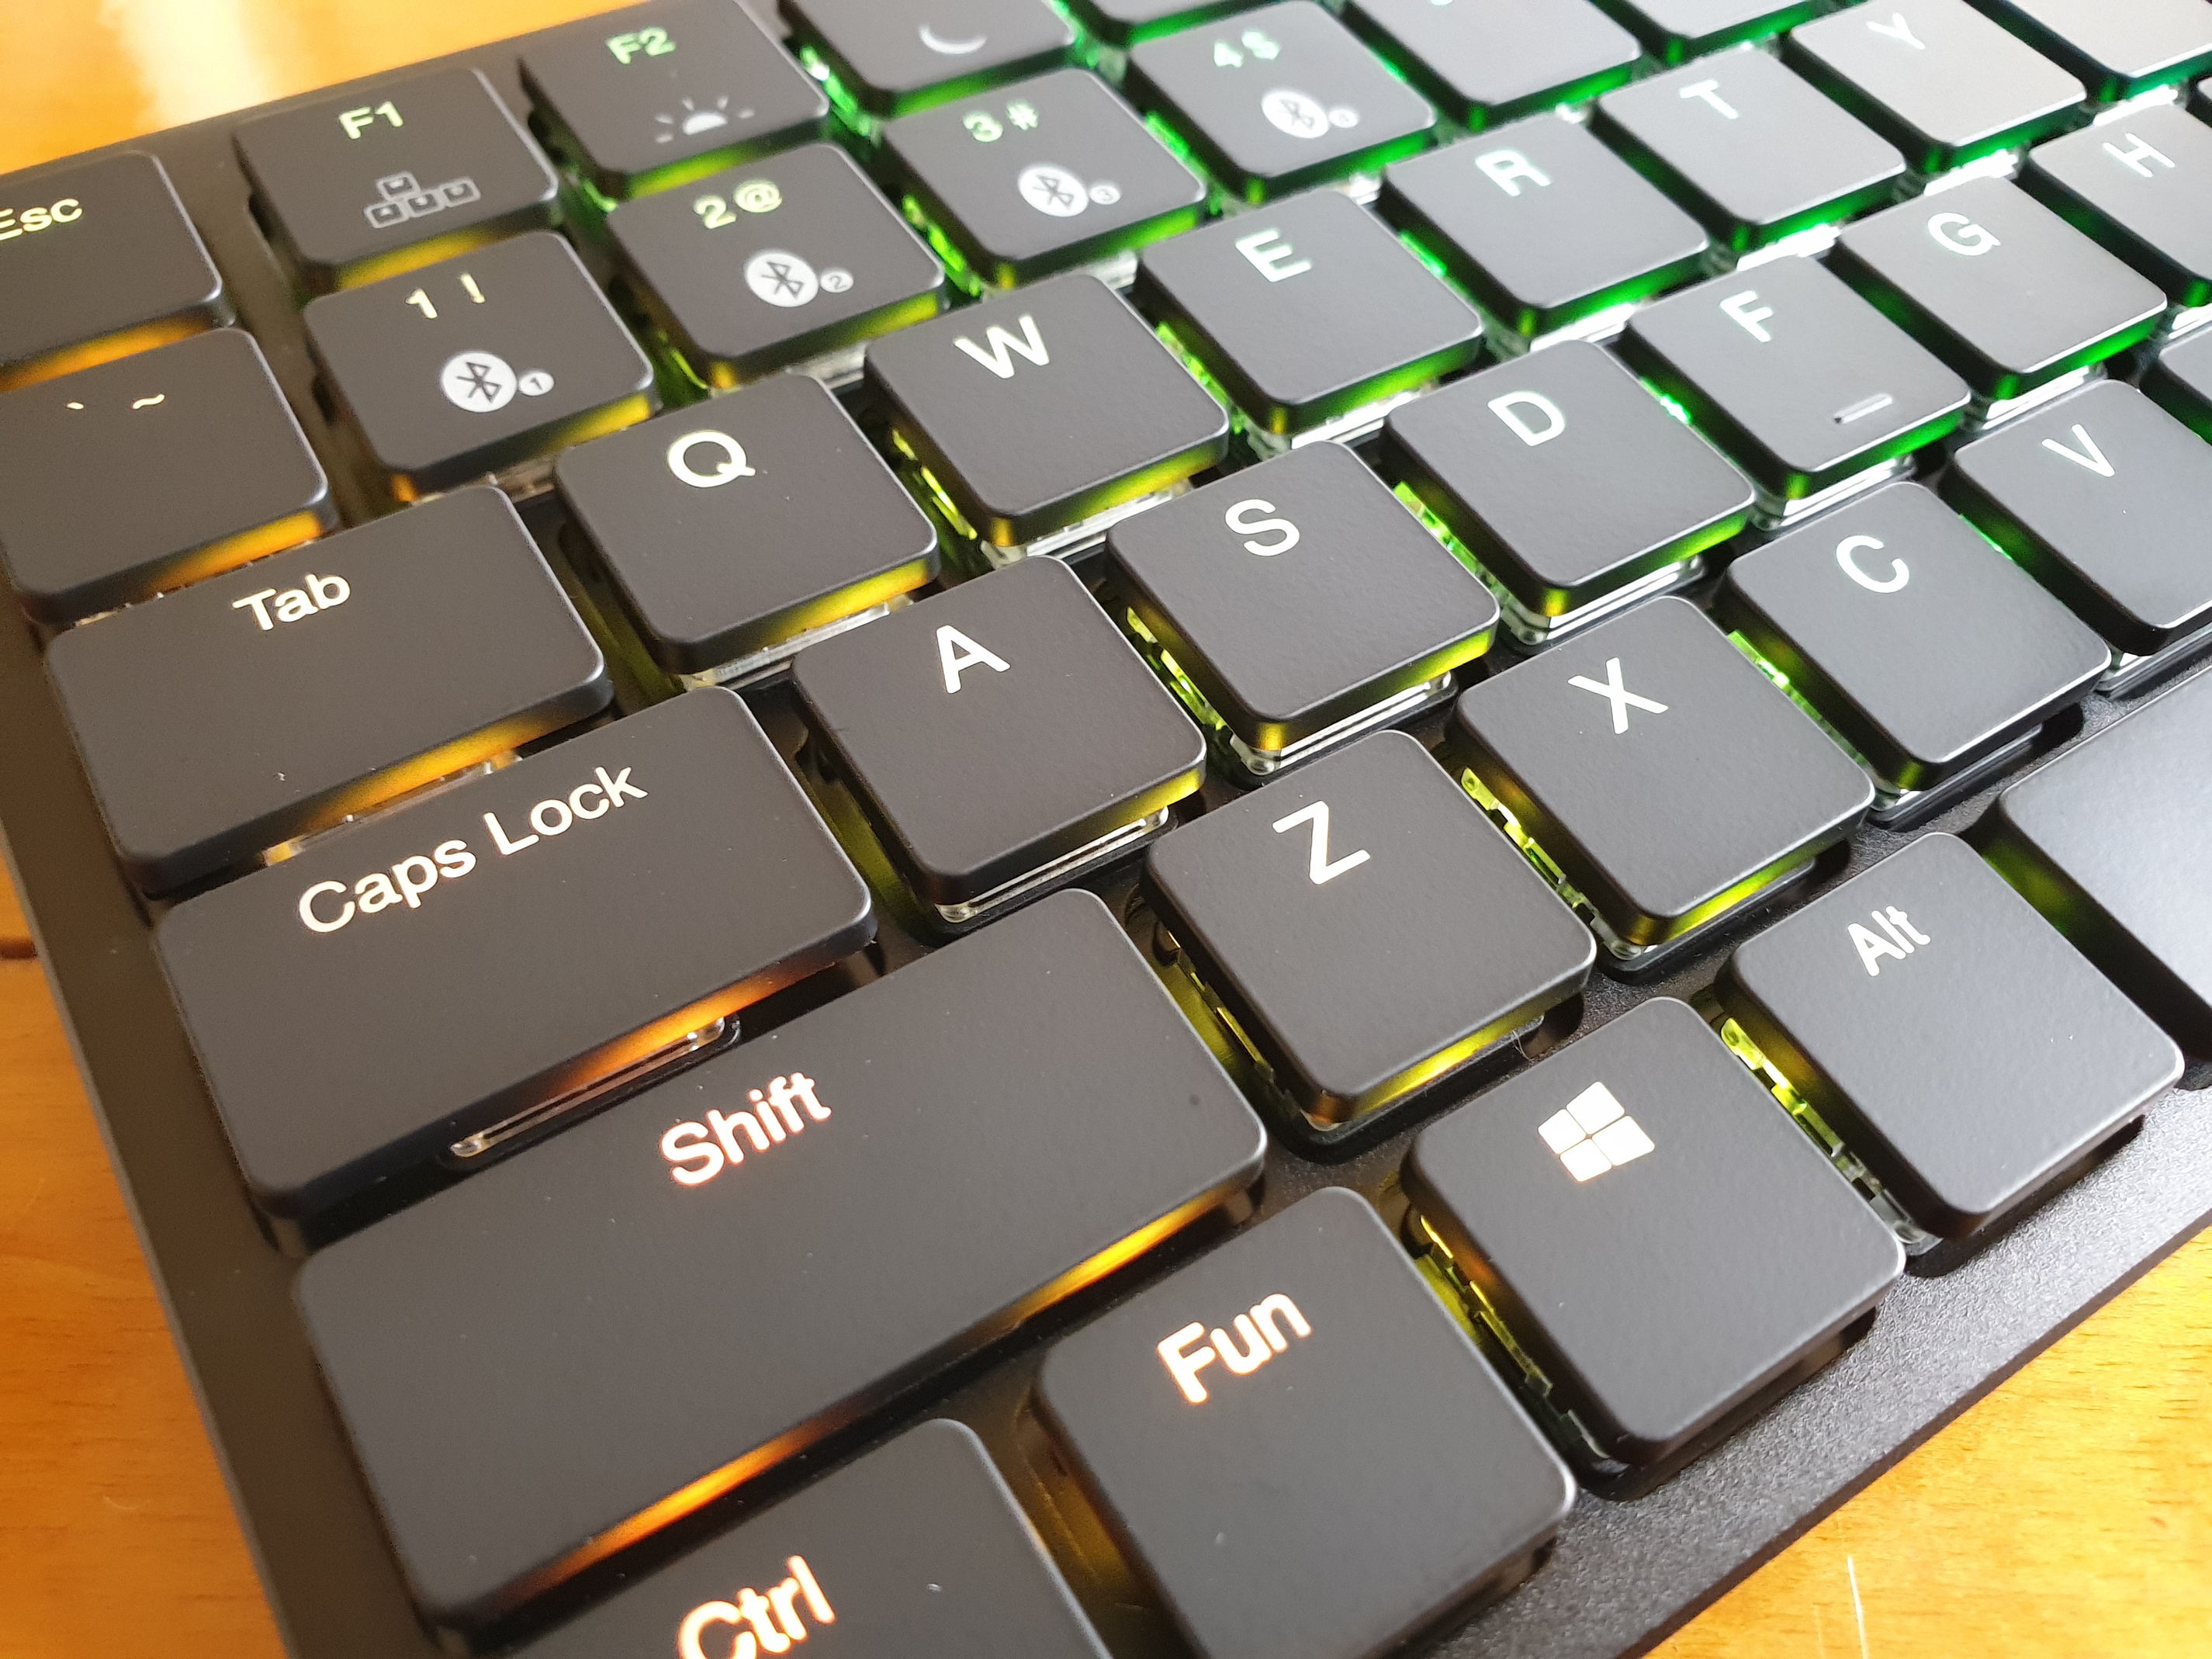
Yes, this keyboard has a number pad, which is awesome for a compact keyboard like this.
I configured the keyboard to be static green. I LOVE it since this matches my green RGB configuration of my workstation that I will be mostly using the keyboard with.
I then toggled on the WASD key mode, a mode that illuminates only those keys in red and nothing else. Not that I am much of a gamer, but when I do, this will certainly come in handy. However, when I toggled back to normal mode, instead of taking me back to the previous configuration, I had to go through the whole setup process from the beginning which means cycling through to the correct lighting mode and then change the colour back to green. I had expected to exit WASD mode to be put back into the last configuration. In fact, I expect to be able to configure the colours of each mode and have each configuration remembered, including for the WASD mode; that, and a key combination to simply toggle backlighting on and off and returning to the previous configuration, including WASD, if that was the last mode.
I really hope a future firmware update will improve on the RGB configuration management.
After setting the illumination to my liking, I did a quick typing test including trying out every key on the keyboard. When typing and seeing words actually appearing one the screen, I felt that, compared to my first dry-run, the travel wasn’t so bad after all. Still a bit far, but bearable. The keys are still a bit too noisy for my liking, though. Mostly the keys sound and feel the same, except for a few, especially the backspace key that isn’t just noisy, but it actually squeaks like it could do with some grease. I won’t be doing anything like that until I have spoken to Kono to see what they recommenced. The squeak really annoys me, though, as it gets me every time I hit the key.
Why the backspace key squeaks is beyond me especially since the tab key, which is about the same size, doesn’t do this. Either way, no key should squeak.
The other key that distracts me is the space-bar and the way it sounds so differently to the others. It doesn’t have a squeak, though. I guess there’s not much that can be done about this without spending a lot of time and money on research and development in designing the backspace key in such a way that it is tuned like the others.
Anyway, these are my first impressions. A more detailed review will follow after I have had more time using my new Hexgears. Argh! That squeaky backspace key got me again!
Day 2 – December 21, 2018
This is day two and sees me frustrated with the Hexgears X-1 as I have now needed to connect it to my PC via Bluetooth since my USB-C cord is unavailable. But I can’t figure out how, and the quick-start guide is of no help whatsoever. Unfortunately, the keyboard is too new to find anything about it online other than video reviews, and I shouldn’t have to watch a review to hopefully find the answer I am looking for. This information needs to be online in text and should also have been included in the guide. Frustrating.
The other issue I am having is with the USB-C socket. First of all, the socket is just that bit too large meaning that, as I plug my cord into it, it easily goes in on a slight angle knocking the very thin and flimsy board in the centre of the socket where all the important pins are. Not only that, but then the plug wobbles slightly and feels all flimsily and lose while in place. In fact, I knocked the plug on several occasions and had the keyboard disconnect on me. Frustrating. But the worst part of the design is that the protruding plug is just trouble waiting to happen, especially when the feet, to keep the keyboard on a slight incline, are out, as then the plug would have the furthers to drop causing the highest amount of undue stress on the socket. I just know that, one day, something is going to accidentally drop on that protruding USB-C plug and the socket will break. I can just see it.
Personally, I would have set the socket further in so that the actual plug is covered by the keyboard. In fact, I may even have the keyboard envelope the plug in order to protect the socket from getting damaged by something coming down on the plug form above.
Alternatively, one could add a third middle foot that combines the USB connector into one clever little connector/foot that folds down to not only keep the connector close and level with the surface the keyboard rests on but also to provide a third foot for the keyboard. This alternative design may put undue stress on both the socket and the plug, though, and may require a special lead, something I would not be keen on.
UPDATE: I just realised that the foldable design wouldn’t put much stress on the socket or the plug since the folding mechanism would just give way and fold up as much as needed. The main weight would still be on the two main feet.
Oh, and why oh why isn’t the USB-C socket on the back in the centre? I just don’t get it. It looks awful with the cord protruding off-centre like it does. How could this have been overlooked?
I’m also not sold on the compact layout. It frustrates me that the keys are not in a standard configuration as I instinctively go to tap on some keys and hit something else. I especially don’t like the placement of the function key. I rather have had it next to the spacebar. And why call it “Fun” and not the standard “Fn”?
Also, due to the low-profile keys, I find the tops of my fingers sometimes catching just a fraction under the keys. All these niggly little annoyances including the loud keys and that squeaky backspace key all distract from a pleasant typing experience.
Other than this I think the build quality good except for the base that is plastic and just sounds flimsy when I pick up and hold the keyboard in my hands, something I intend doing when I control my media centre. An aluminium base would also have helped cool the keyboard, and cooling it needs when the backlights are on because this little beast generates heat alright. Not burning, but it’s still heat that could have done with the added cooling of an all-aluminium body and not just the visible parts.
Otherwise the black surface and the mat finish of the keyboard does show dust and smudges but it’s more smudge-proof than if it had been high-gloss.
Oh, and one more thing: the dimmest brightness level of the backlighting isn’t dim enough and then then it it switches off. Sure this can probably be used to toggle the brightness on and off without having to reconfigure the settings every time, but that could still remain a feature but there needs to be more brightness levels than what’s provided. Hopefully a future firmware update can take care of this.
UPDATE 1:
_Talking about firmware updates, Kono just replied to my e-mail which is a shorter version of this post. They told me that the keyboard should have come with a USB-C cable but that they can send me one plus a replacement case unless I would like a refund since the damaged case means I am eligible. I was happy with just the cable and a replacement case and so accepted the offer.
Regarding the firmware, Kono said “You’re correct that the keyboard has limited memory for lighting configuration options — I think this is related to the low power microcontroller used for the X-1 and doubt that firmware updates will improve it.” Personally, I don’t see how a low-powered microcontroller would affect this, but if it was a reference to the available memory on it, then yes, I can see that to be an issue.
My reply to Kono’s response was “Something has to be done about storing lighting configurations even if it means wiping some code for some of the lighting effects, if that would allow additional user-memory to be freed up, that is. Perhaps provide two versions of the firmware, one with all the lighting effects but no ability to save settings per effect and one with less and the ability to save settings per effect. Of course, do keep the static lighting effect. This is the most useful one.”_
UPDATE 2:
I received a replacement case and the missing USB-C cable from Kono a little while ago but have only now had time to update this post with this and some additional findings as per the following…
The USB-C cable I received is all good. The replacement case, however, is another story as it still has the same issue with the join, albeit it is just less so, but it is still going to fray over time unless I glue it down. Something I have to take care of when I take out the toolbox next.
Other than that, I have successful paired the keyboard following instructions I’ve received from Kono. Basically one holds down the Fun key and one of the three slot keys, i.e., keys 1 to 4, until the pairing occurs. The host must have a compatible Bluetooth 4.0 device, though.
I have success paired the Hexgears X-1 with my Samsung Note 9 but not with Windows 10 Pro on my workstation although my PC’s motherboard is an Asus 99X-Deluxe II that uses a Bluetooth 4.0 module. But then I do also run the very latest Windows Insider build in the Fast Ring, and that does have known issues with Bluetooth connectivity.
I can live with the keyboard not pairing with my Windows machine as I am currently only interested in wired use since my separate home theatre setup uses a Logitech K830 wireless keyboard that I’m quite happy with. In fact, had the Hexgears X-1 had the same non-mechanical keys as the Logitech K830, then, to me, that would be a better keyboard; although, I must say that the keys on the Logitech do have a bit more resistance, which I don’t really like either. However, I also really don’t like the travel of the X-1’s keys nor their noise. I am getting used to it, but, to me a keyboard should feel and sound right from the start and not be something one forces onto oneself because that’s all there is.
Additionally there’s an issue with the Hexgears X-1 not fully waking up when I boot up from having had the computer fully powered off, something I do every night since the APC Back-UPS Pro 1500 UPS it sits on gives off an irritating high-pitched noise that keeps me up unless I place the the UPS in standby which disconnects the power to the outputs. I actually prefer this as it also fully powers down all peripherals so my room doesn’t look like a Christmas tree at night. However, when I then power up the system, after having had it powered off, the X-1’s backlight come and and so appears to be on, but, when I go to log in, then Windows does not register any input unless I unplug and plug back the keyboard again. Toggling the X-1’s power switch does not work. I have to physically unplug and plug back the USB-C cable. It’s a bit of an inconvenience once a day that I can live with.
Oh, and that backspace key still squeaks. I have received instructions from Kono for how to potentially fix this, something about popping off the key and oil it or grease it, I can’t remember. This, however, is something that also has to wait until I get the toolbox out.
That’s all for now.
Cheers,
-Andreas
Design suggestions
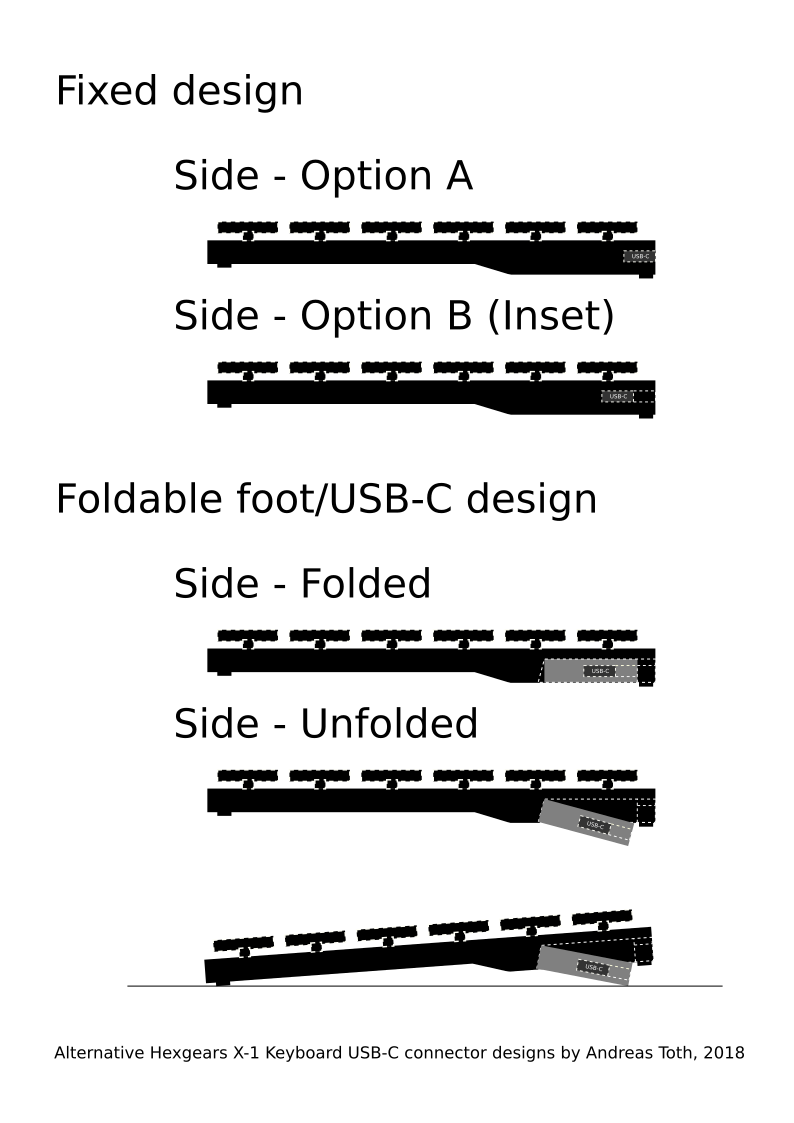
The foldable design wouldn’t put much stress on the socket or the plug since the folding mechanism would just give way and fold up as much as needed. The main weight would still be on the two main feet that are not shown in these illustrations.
Gallery


Boot-sequence