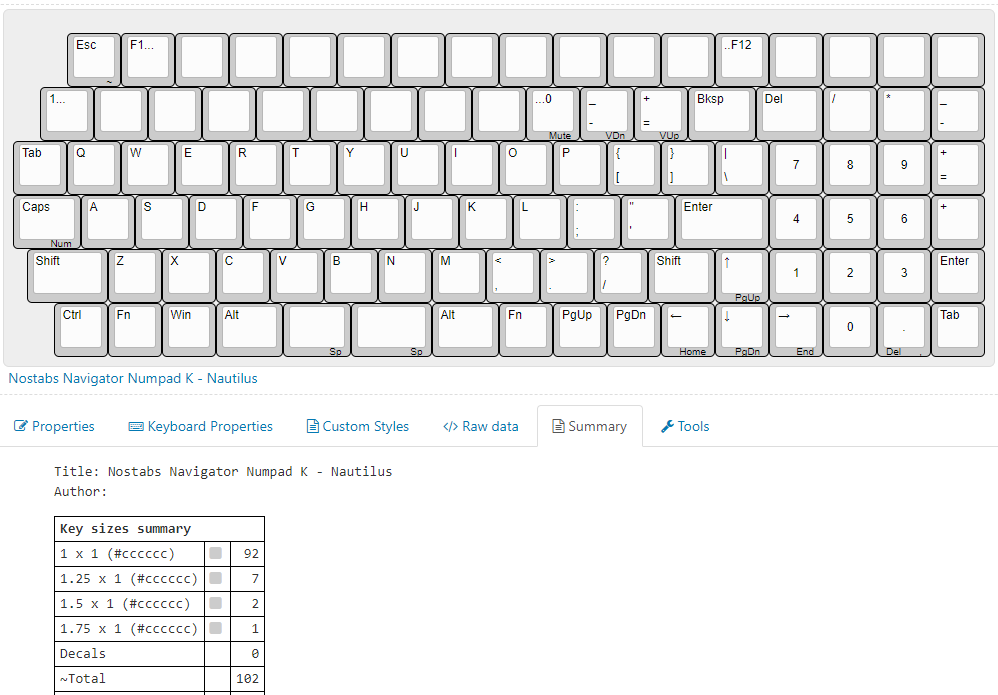
More 3D work here as well. At some point, a man needs to understand what he’s about. First I added one column to the mini-1800 to add some operators to the numpad. Then I thought that I’m not even saving that much width versus keyboards I already have. Then I thought about how deep my desk is and how I don’t stay on the home row anyway. Finally I thought, jeez I sure have a lot of extra XDA keycaps, why should I bind myself to the 86 or 90 in a standard cheap AE set made to work on a full size or its clean subset layouts?
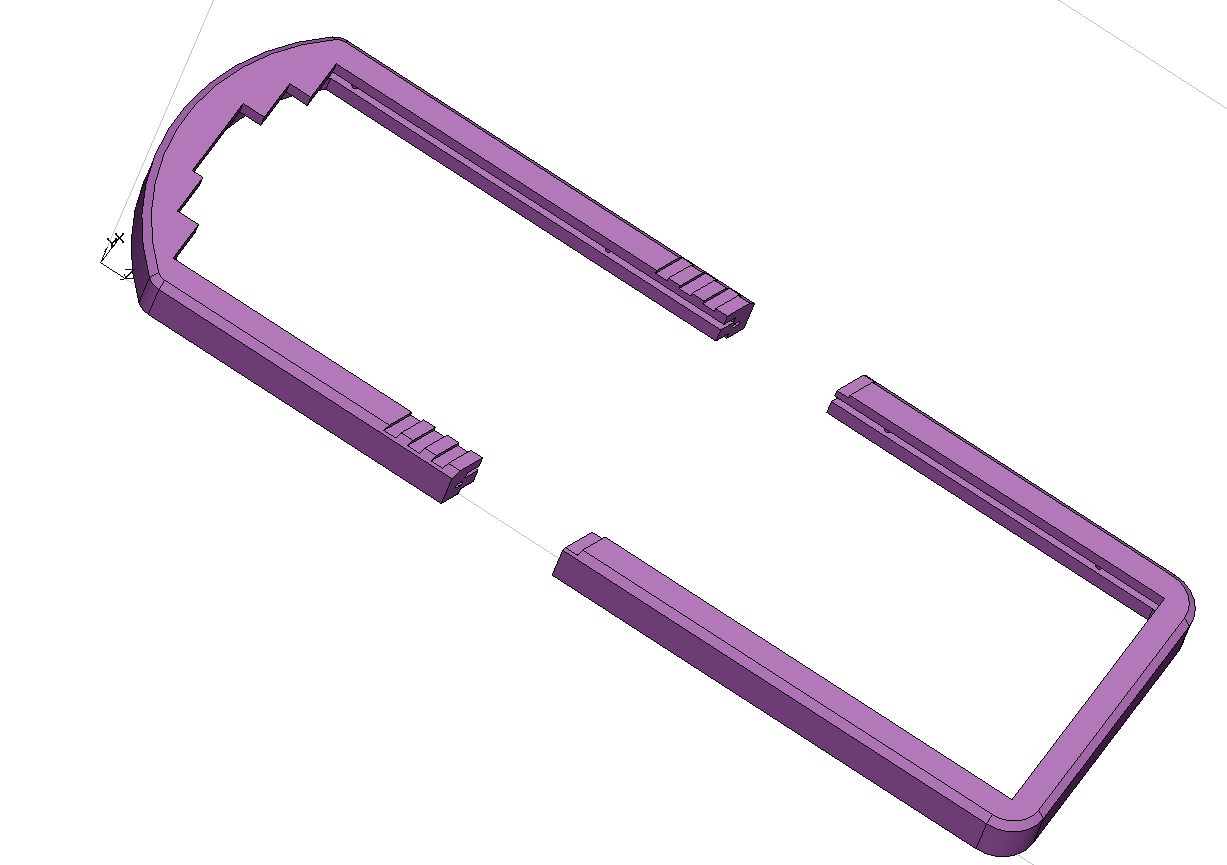
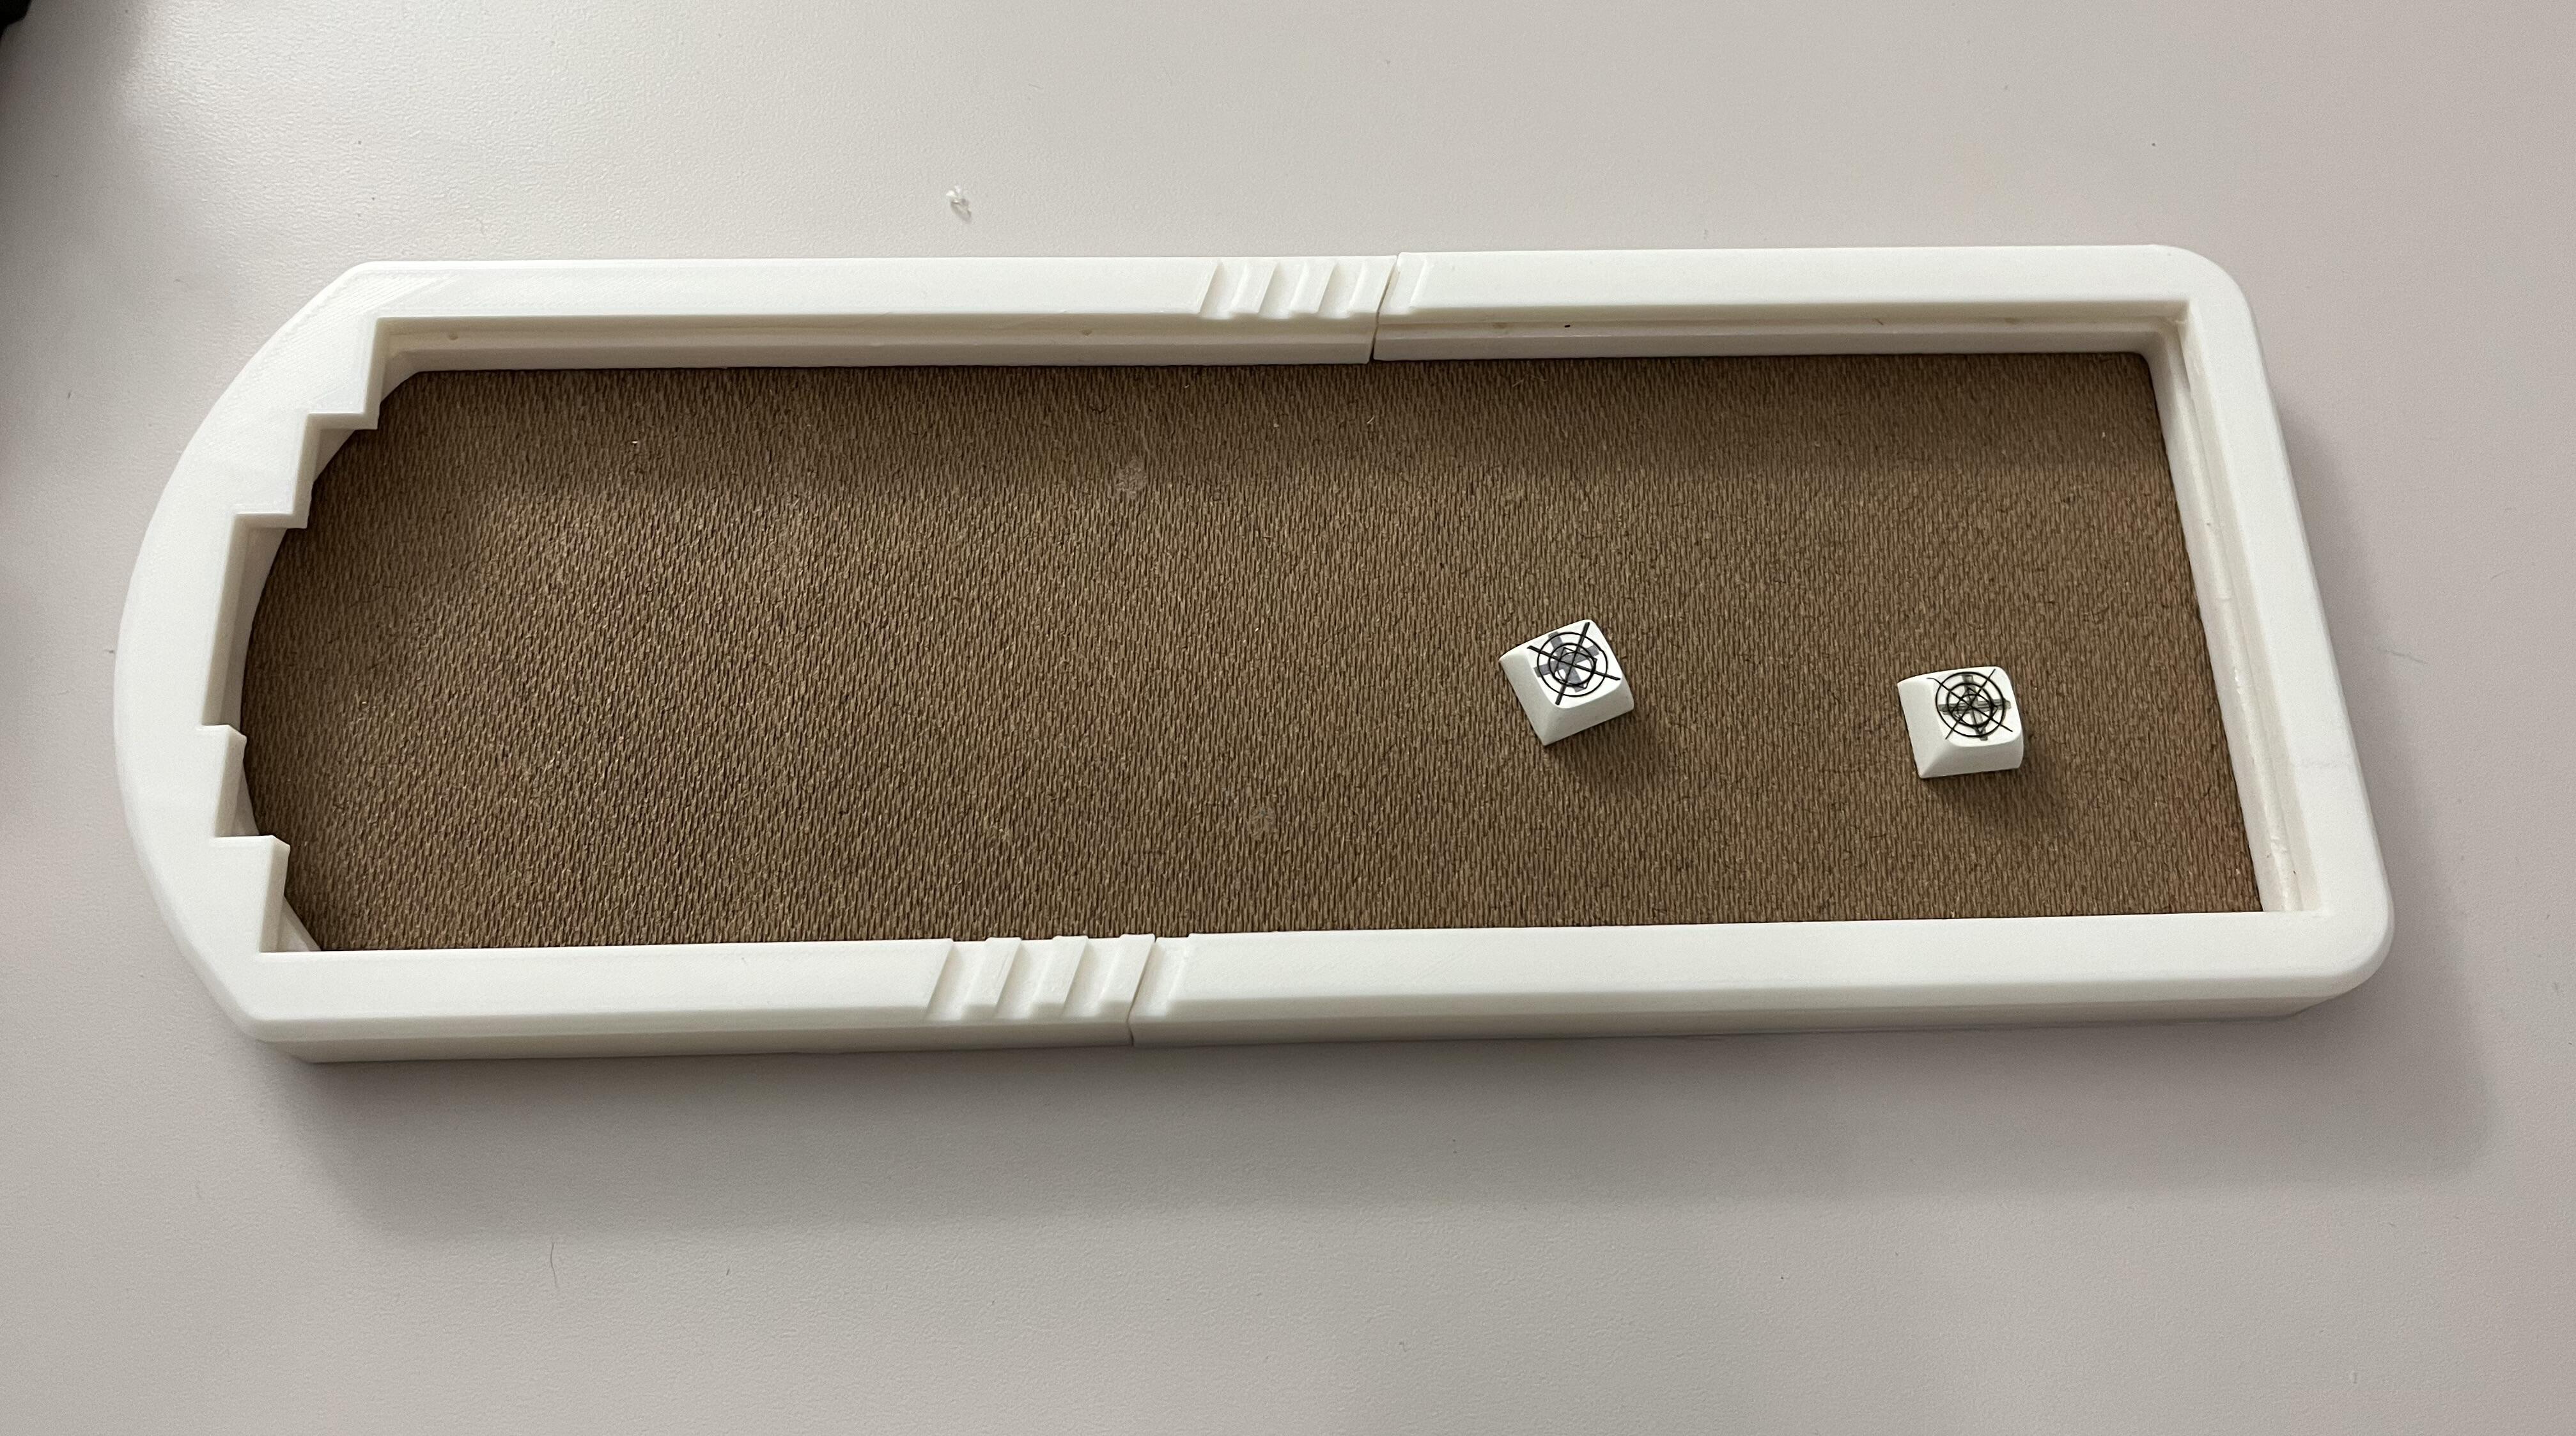
I managed to wrench a certain kind of symmetry out of the layout, and while you need a few spare 1u keycaps lying around, you could still get by with the modifiers from one “normal” board. I figured I’d lean into the weirdness of the layout with the case. I’m staying with the sliding “captive plate” case, though I’ve simplified a few things from the last build and tried to give myself looser tolerances for plate thickness (tape shims are easier than glue repairs).
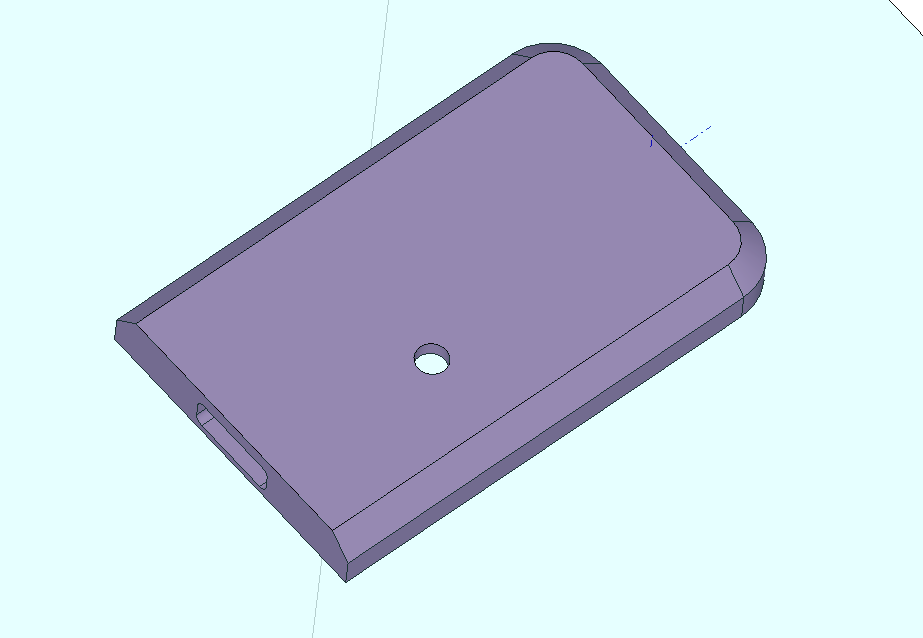
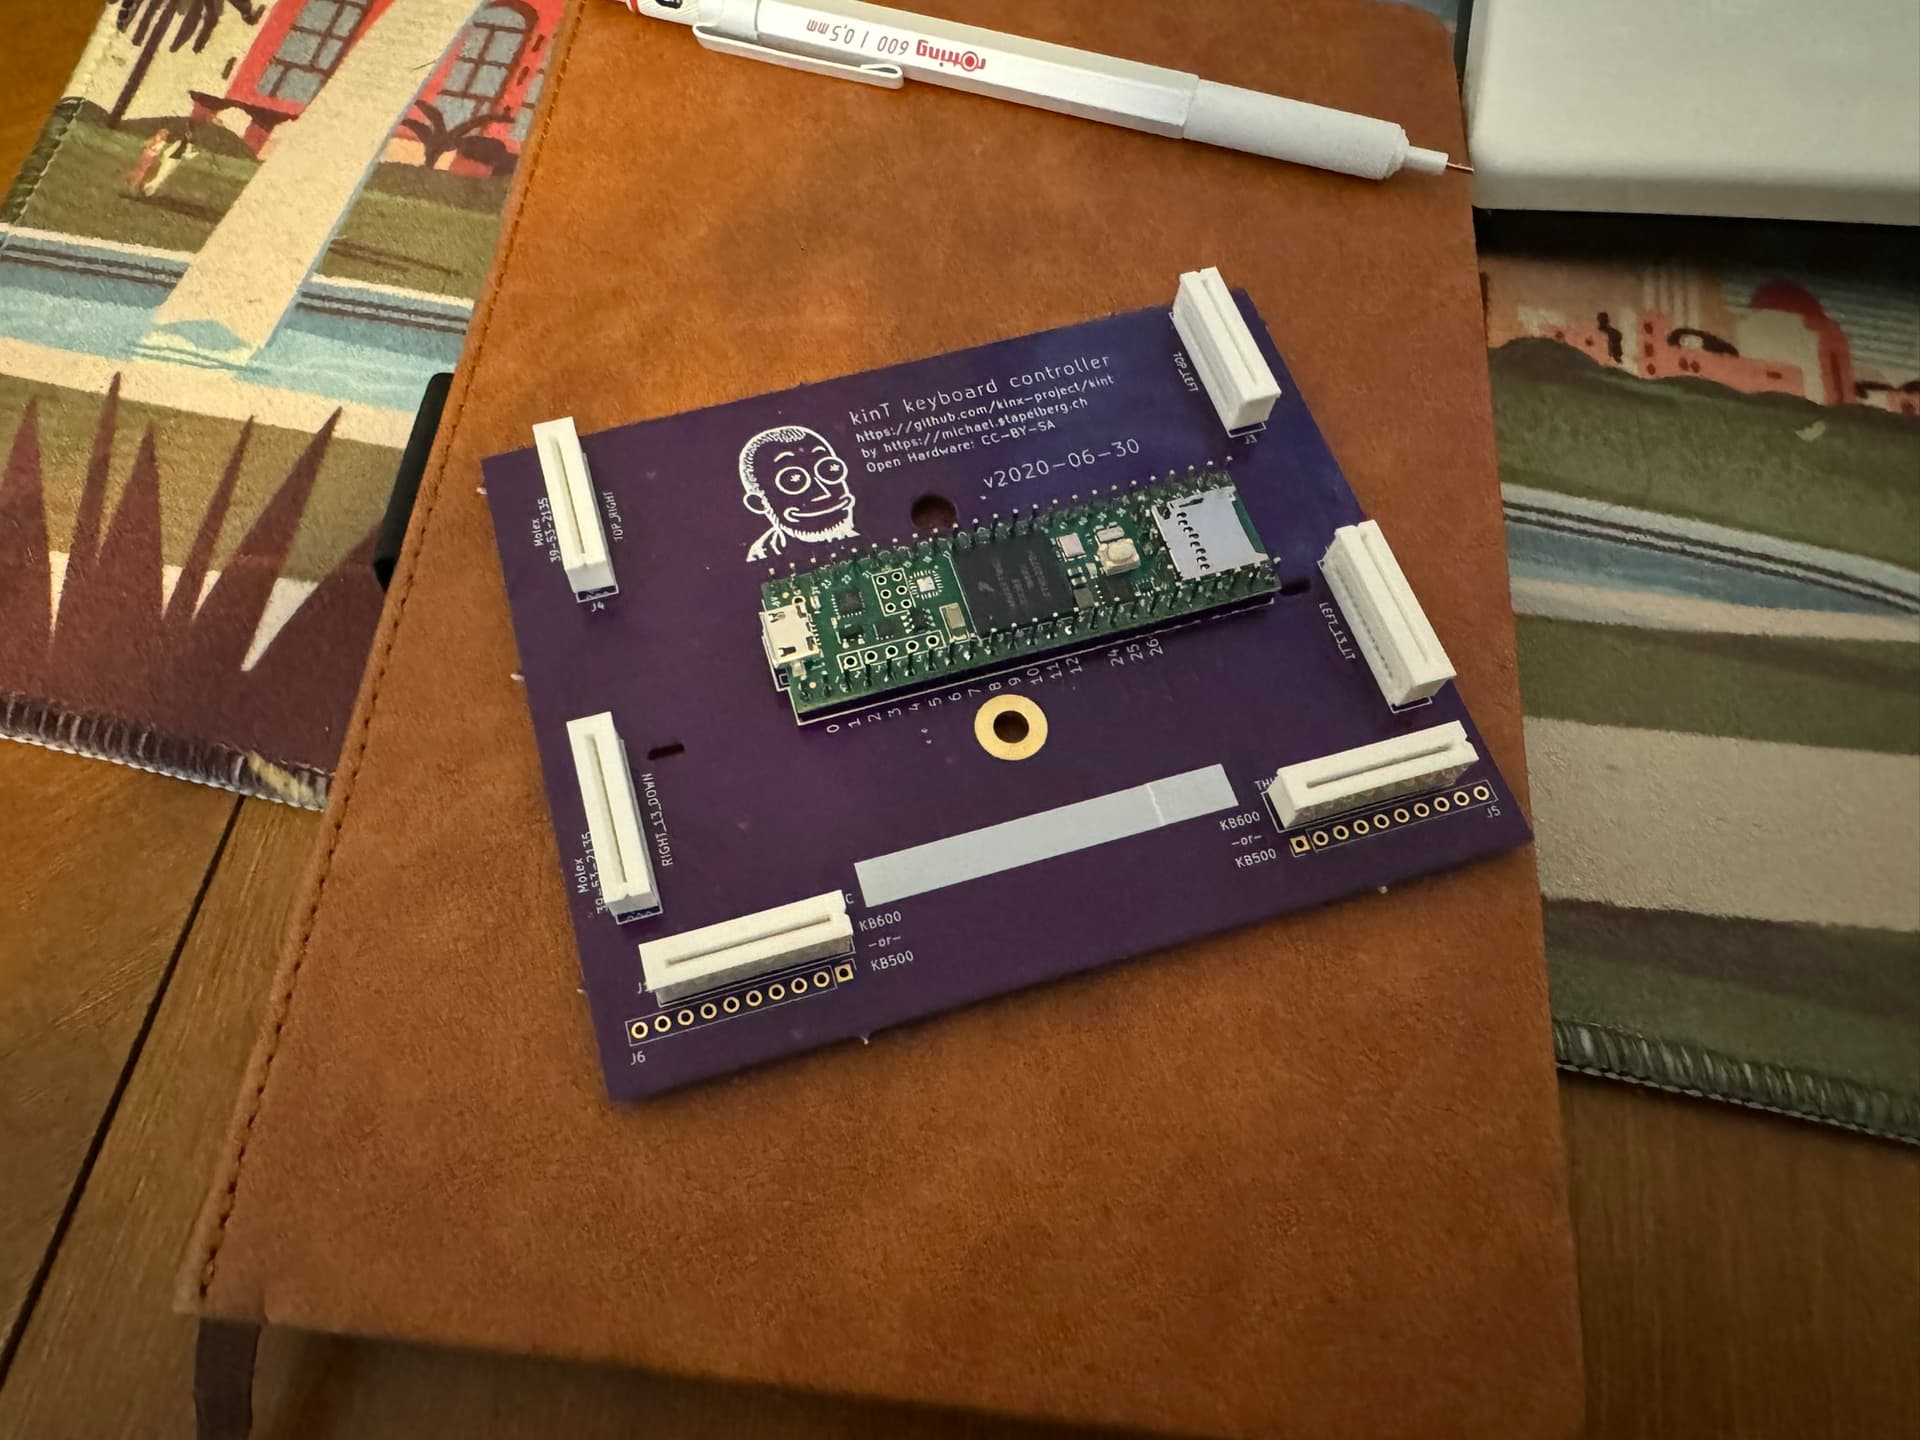
Since the plates will be hardboard, I can also fine tune on the disc sander and/or cheaply iterate there as well. The little flourish on the case is mostly for looks, but I put the seam in it, so hopefully it will keep the eye from lingering on the seam itself. I didn’t leave much room for the MCU, so building off the grommet from my last board, I drew up a little underslung “blister” to stick to the bottom plate and expose the USB port. The plan right now is to make two more of the 3D-printed feet from my previous no-stabs build. Once I establish that I didn’t screw up the dimensions, I will just need rubber feet and Box Navy switches. Well, those, and if I want to have a set of keycaps that make any sense, I will also need to design those and laser them onto the PBT. I do have set of knockoff Apple XDA where I could pretend I don’t know what the little glyphs mean, but really I need to properly zero-in my lasering jig.
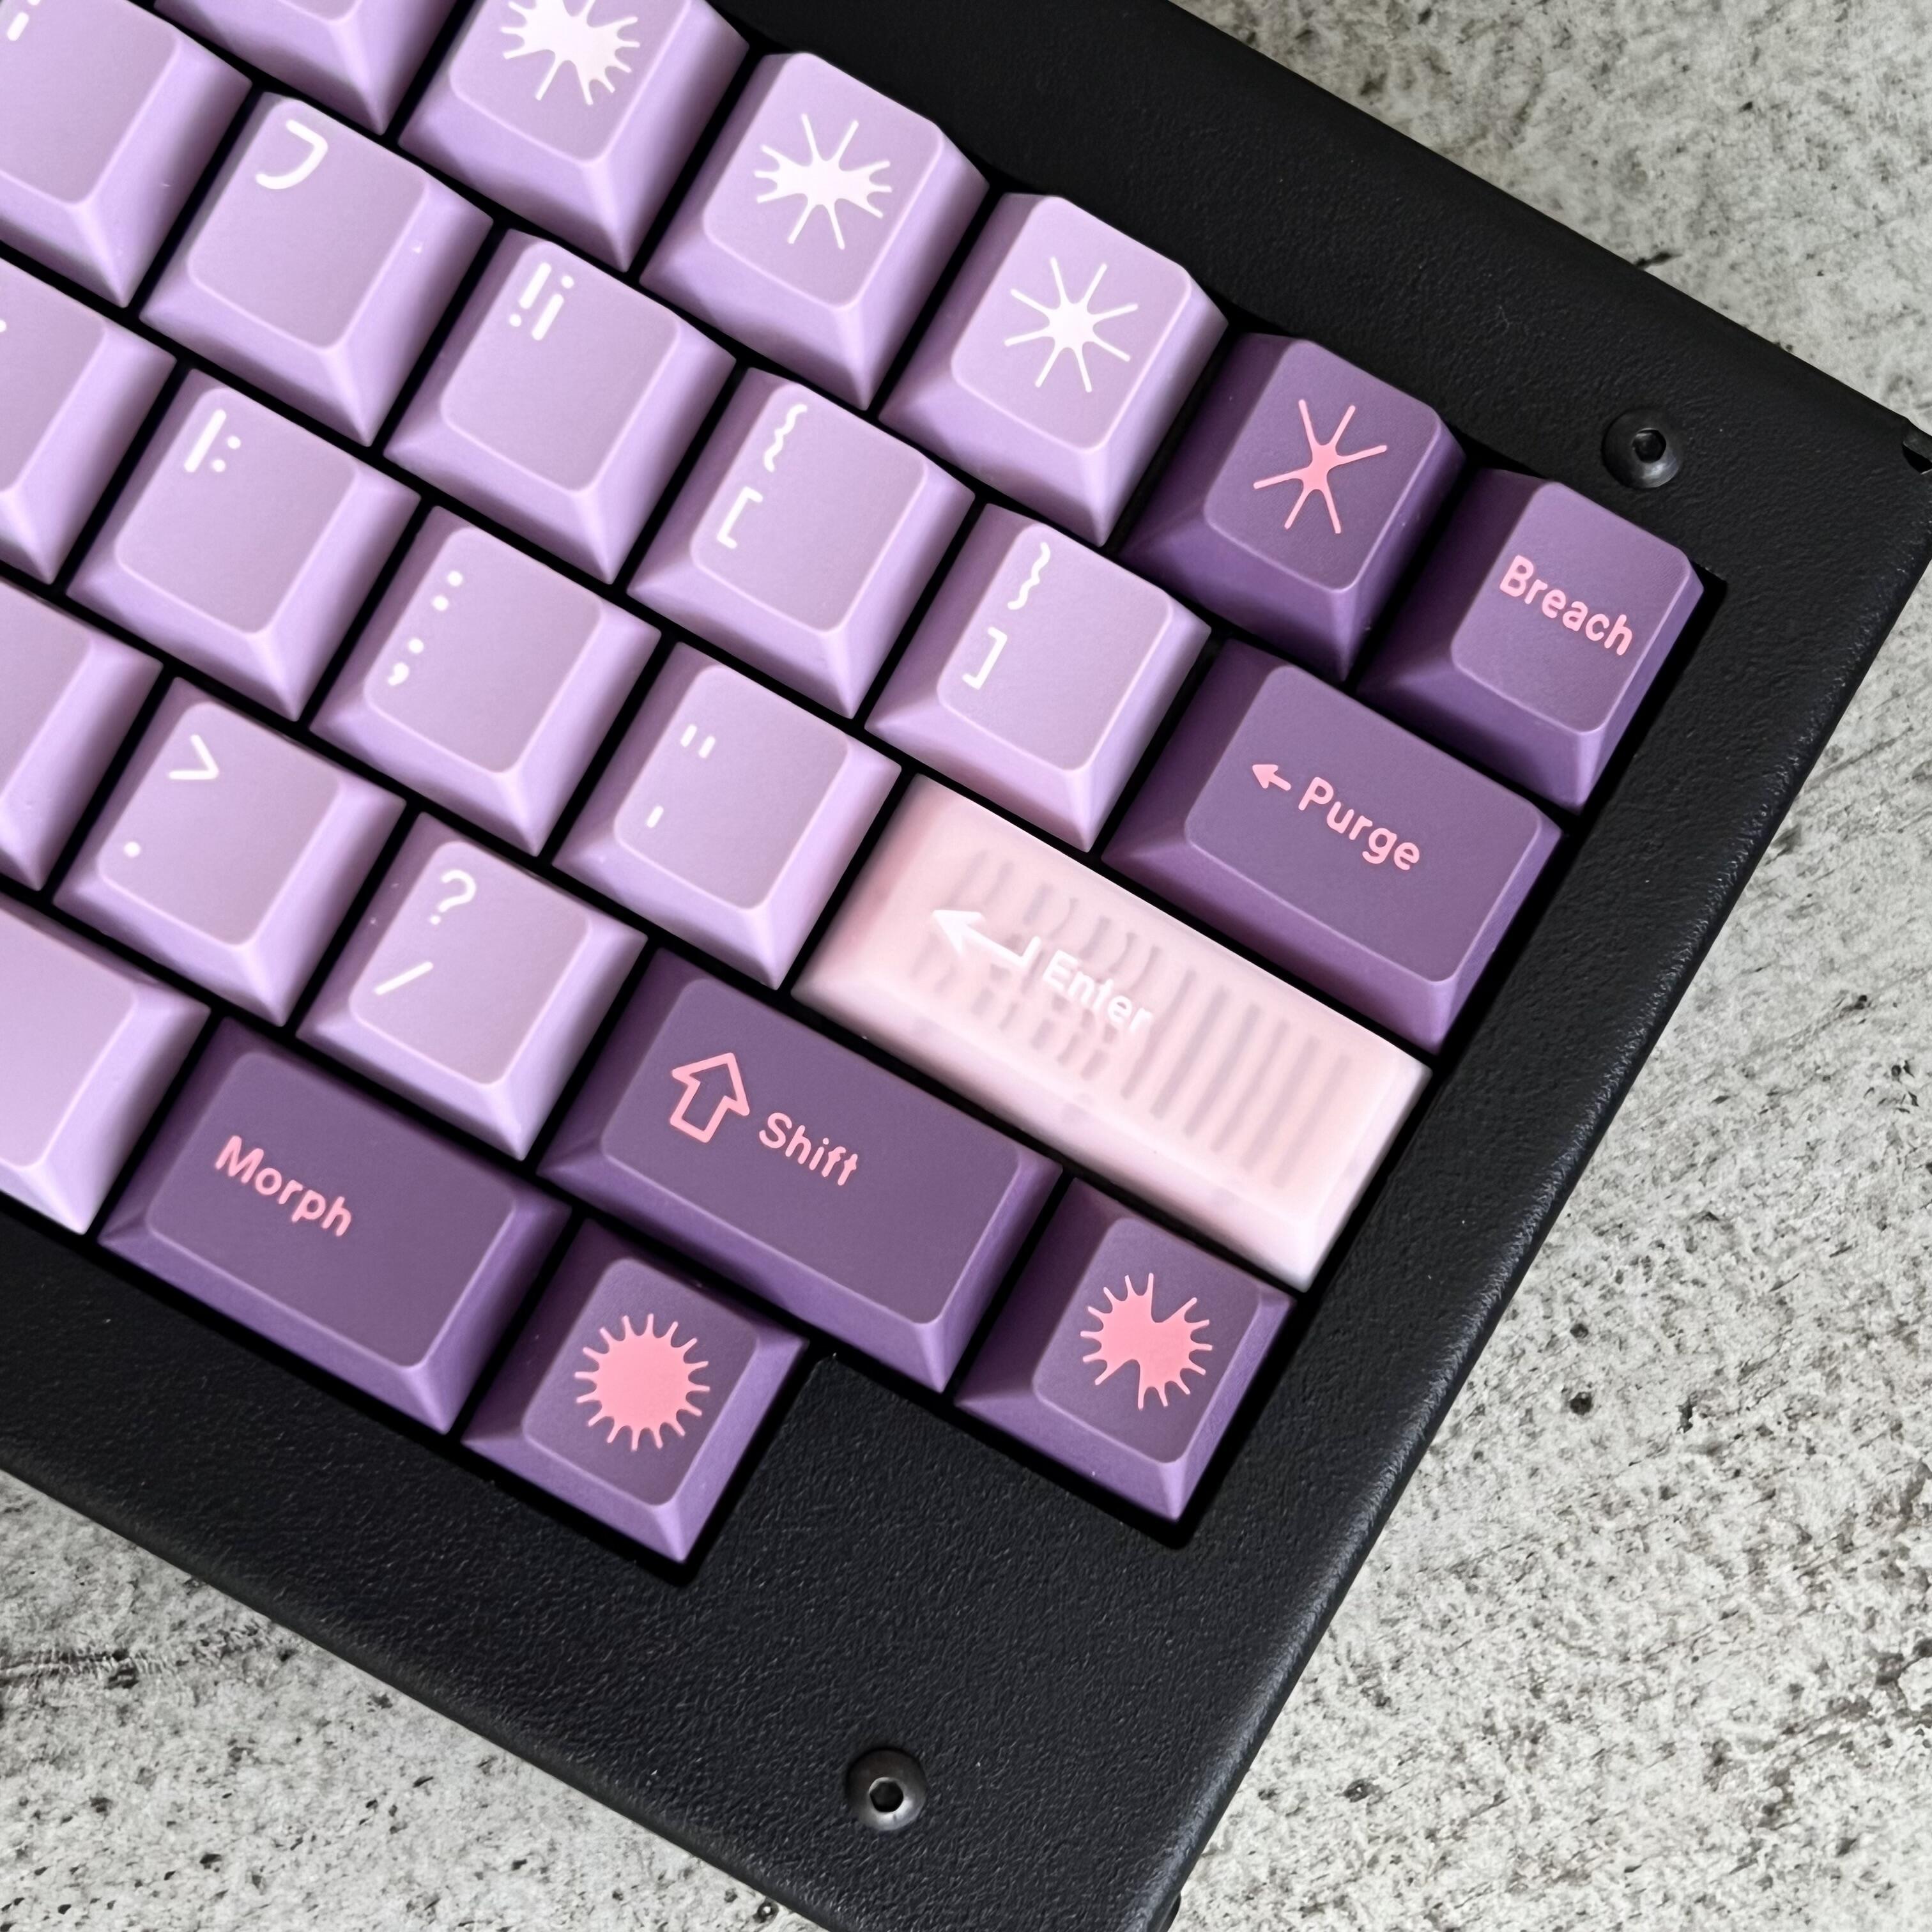
I have ventured into the obscure depths of OpenCascade and its Python bindings, and I have returned with the arcane knowledge necessary for drawing pictures that are not eye-searingly awful to look at. This time the font is matt3o’s Son of a Doubleshot to go with his OPK keycaps and susu colourway.
The postie arrived with some midnight black frosted acrylic parts cut by Mechboards for my keybird69 cases, which will surround the space between the plate and keycaps. The good news is that its surface texture and colour are a very good match for MTNU Susu; the bad news is my screws are about 1mm too short to reassemble the cases So, more fasteners have been ordered.
NICE design there. I’m getting 90’s vibes on this one. Love it. I guess you would have to use it flat to keep it from tipping when you use the keys on the side
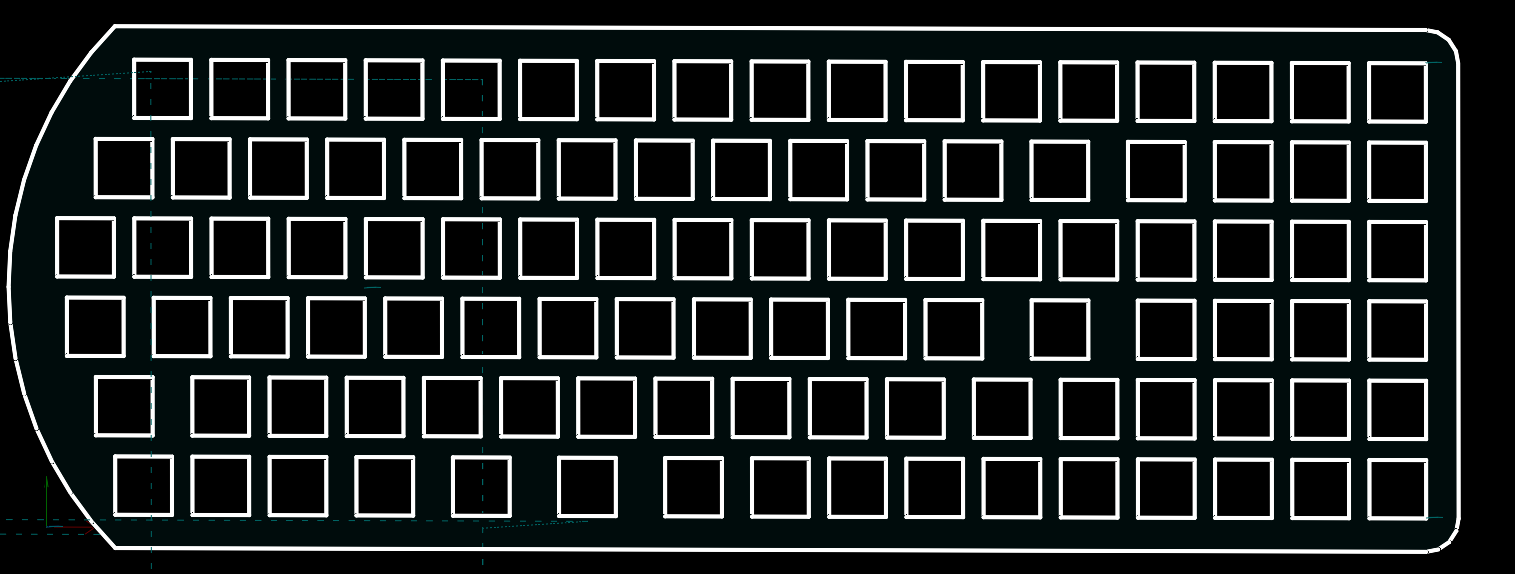
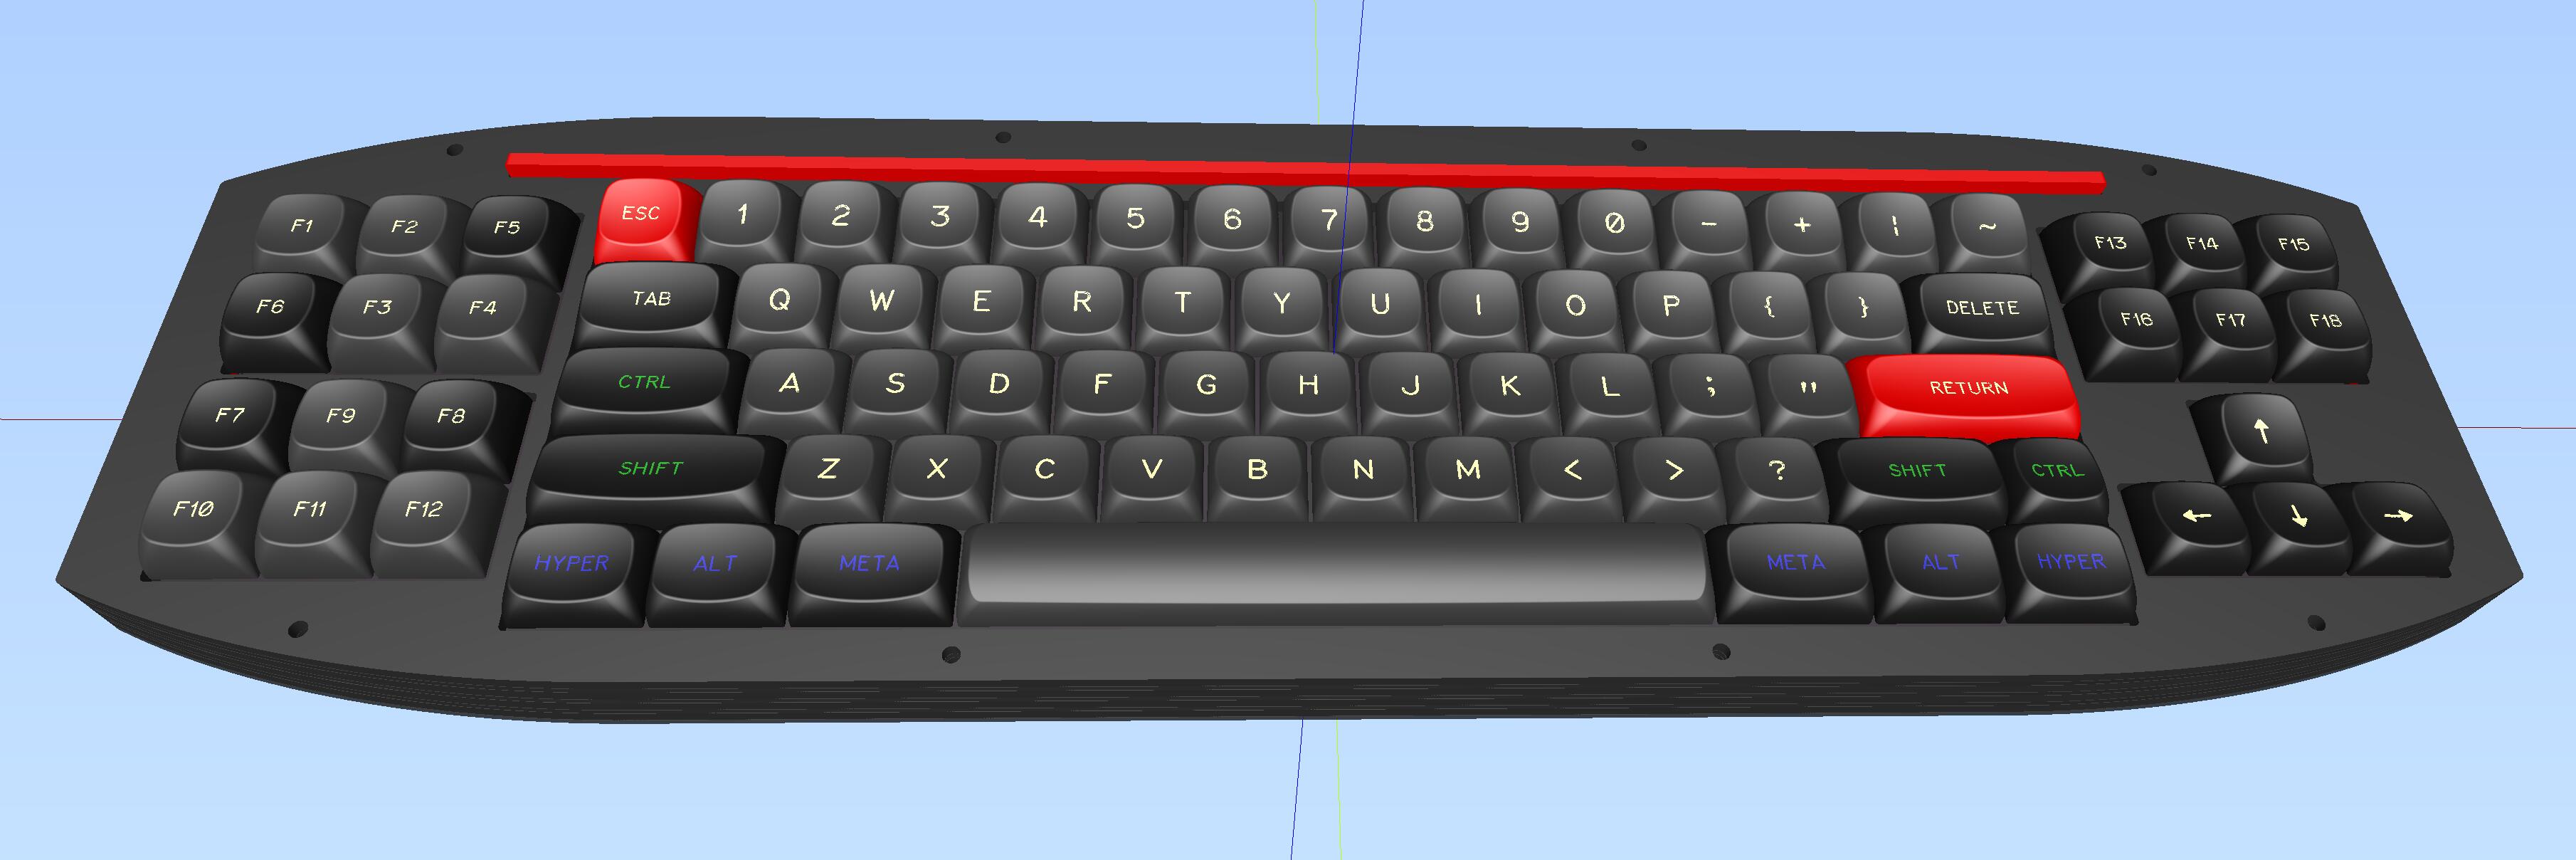
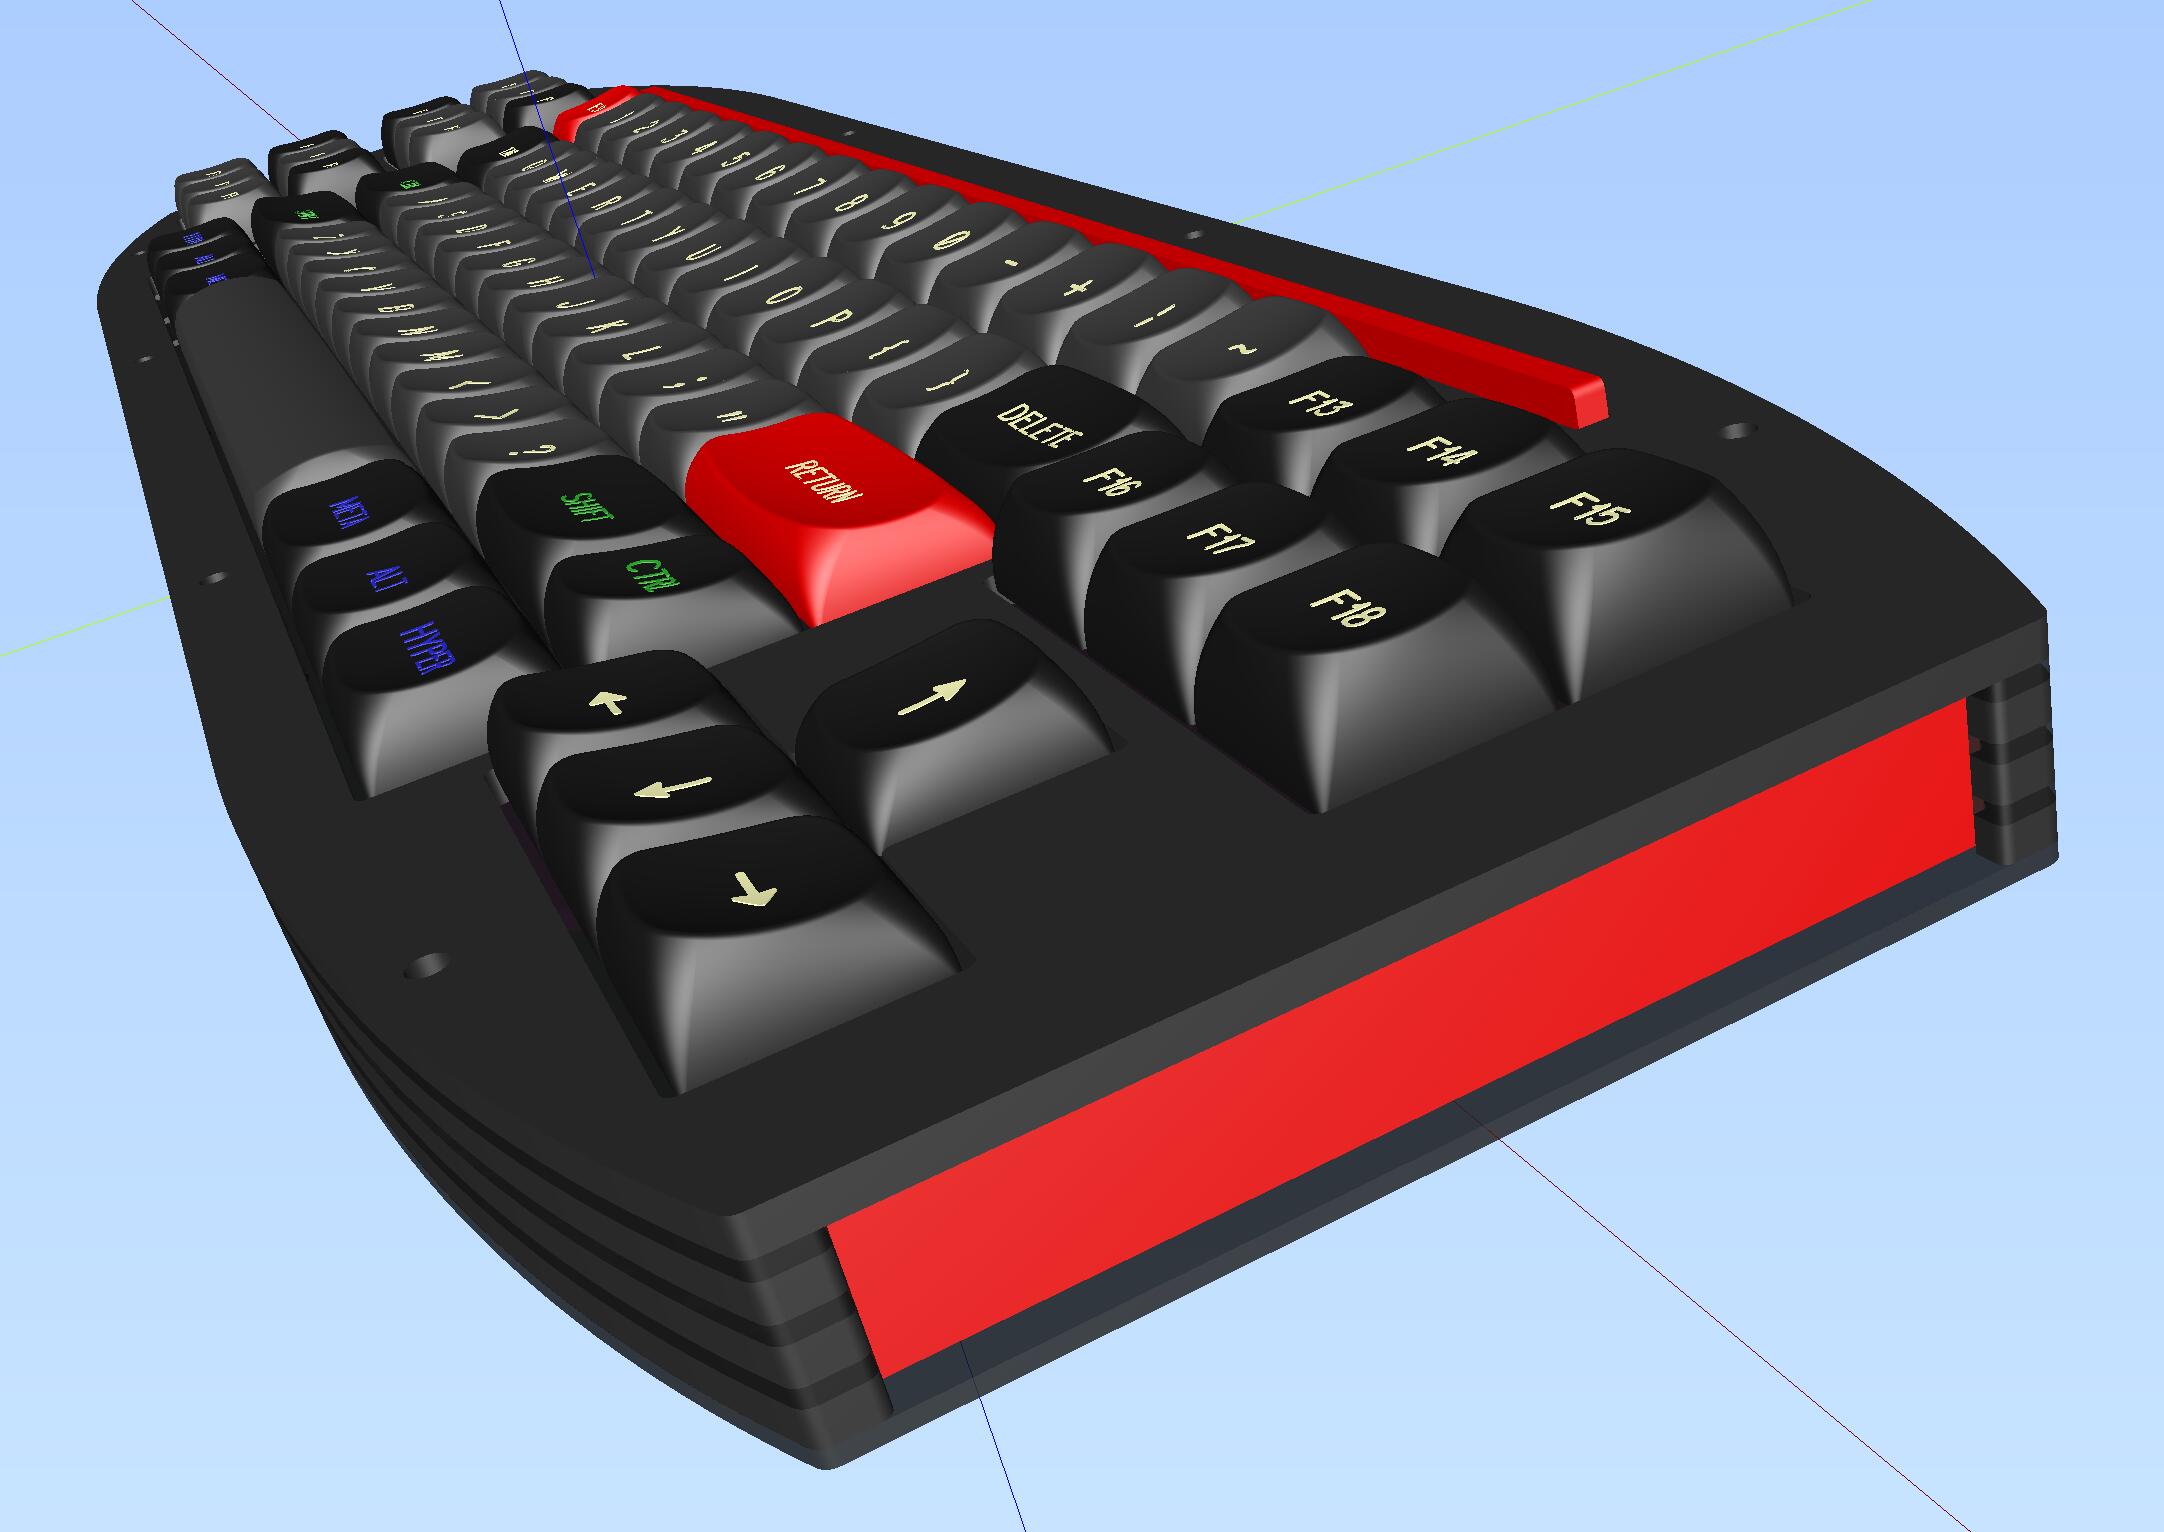
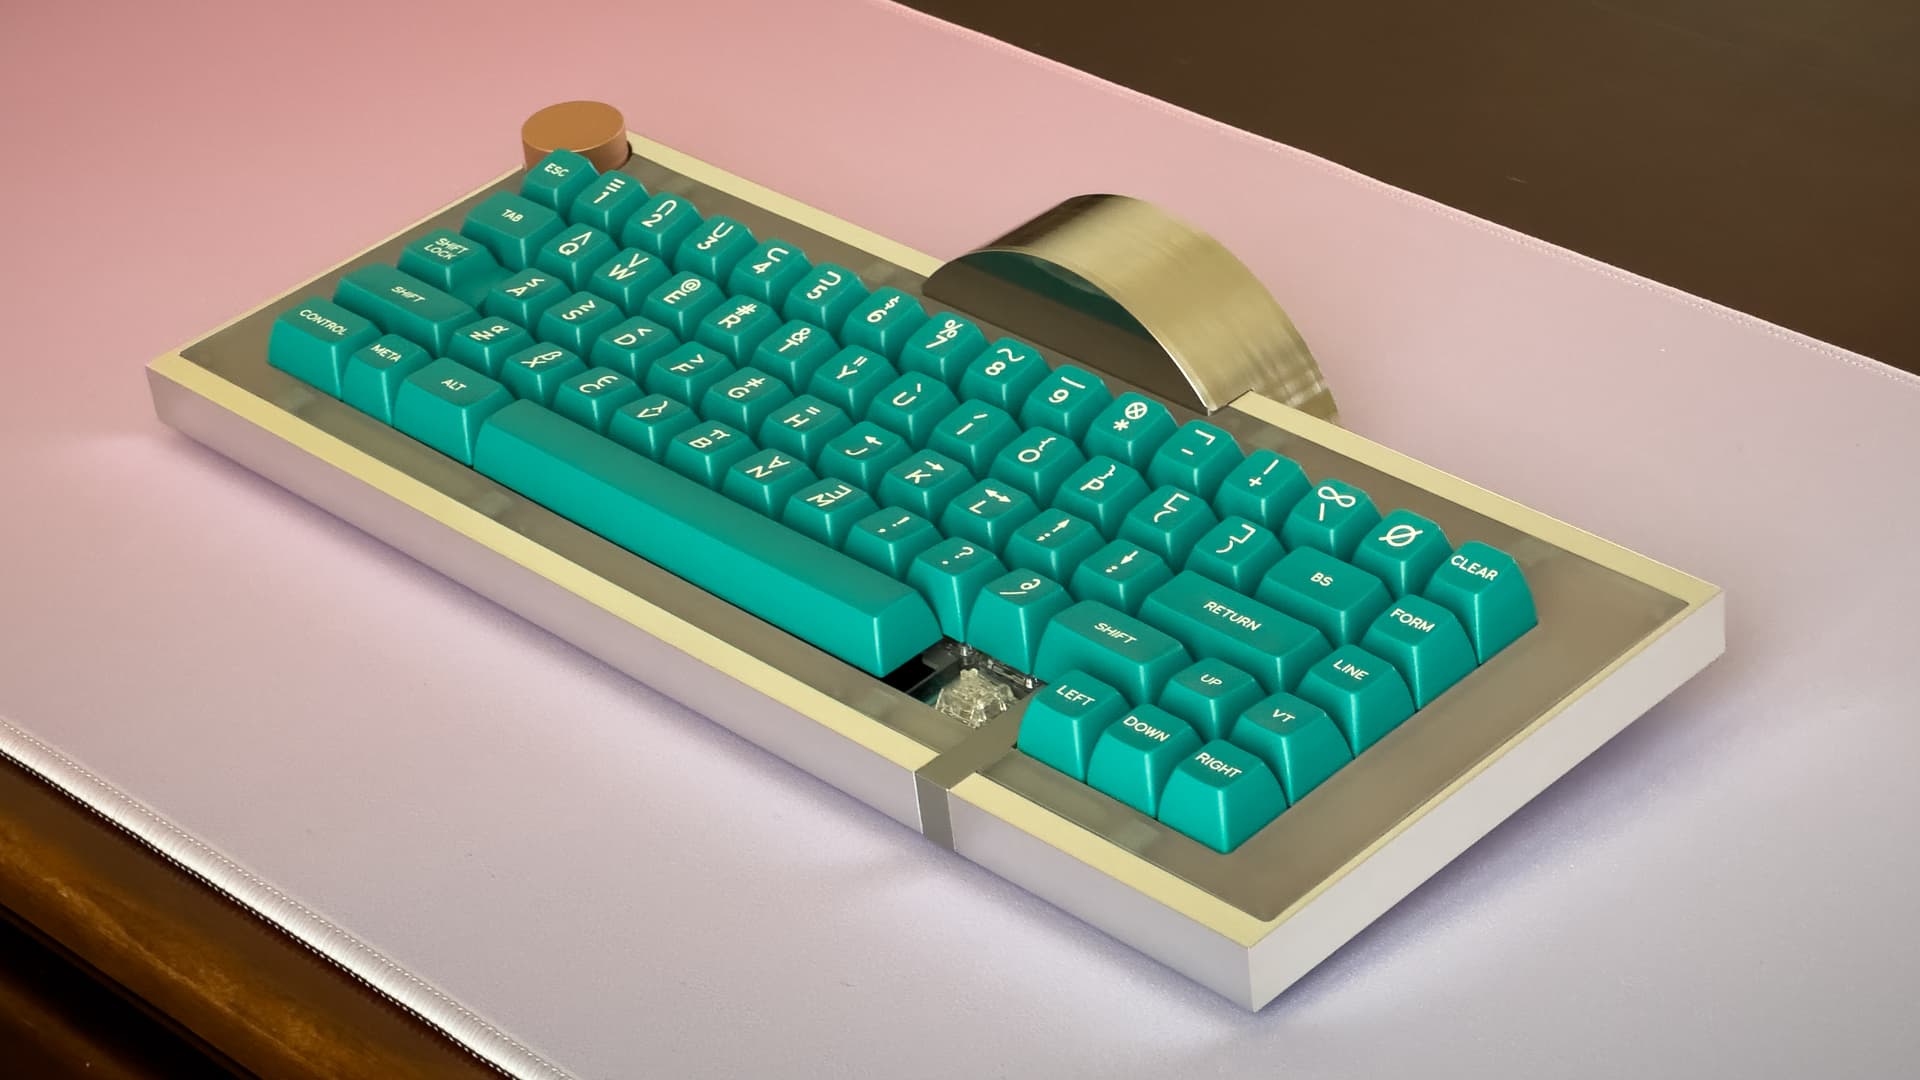
The primary design criterion for the overall shape is that it is Not A Rectangle, which I guess you are right is a bit 1990s. The penrest and left-hand function keys are inspired by the Model F AT (but with more symmetry), the squished nav cluster is from @wjrii of this parish, the main key block is HHKB with late-apple instead of early-apple quantity of modifiers.
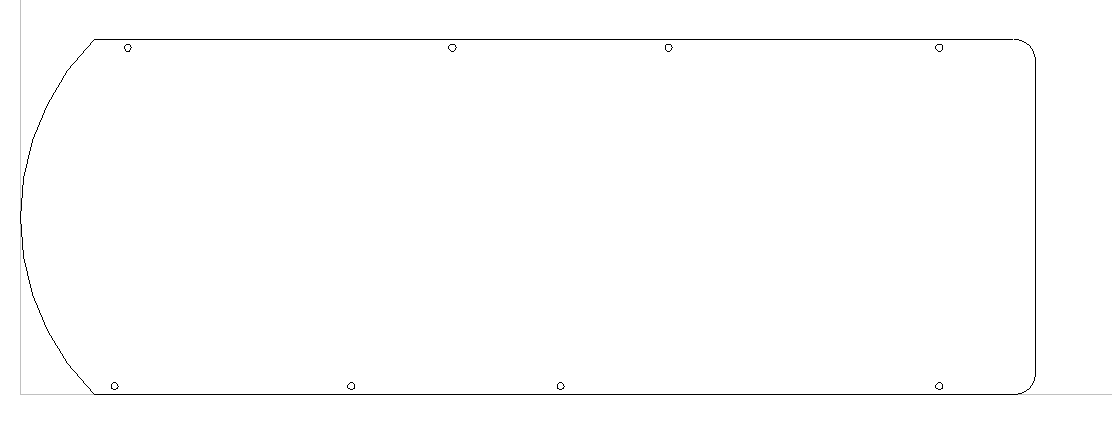
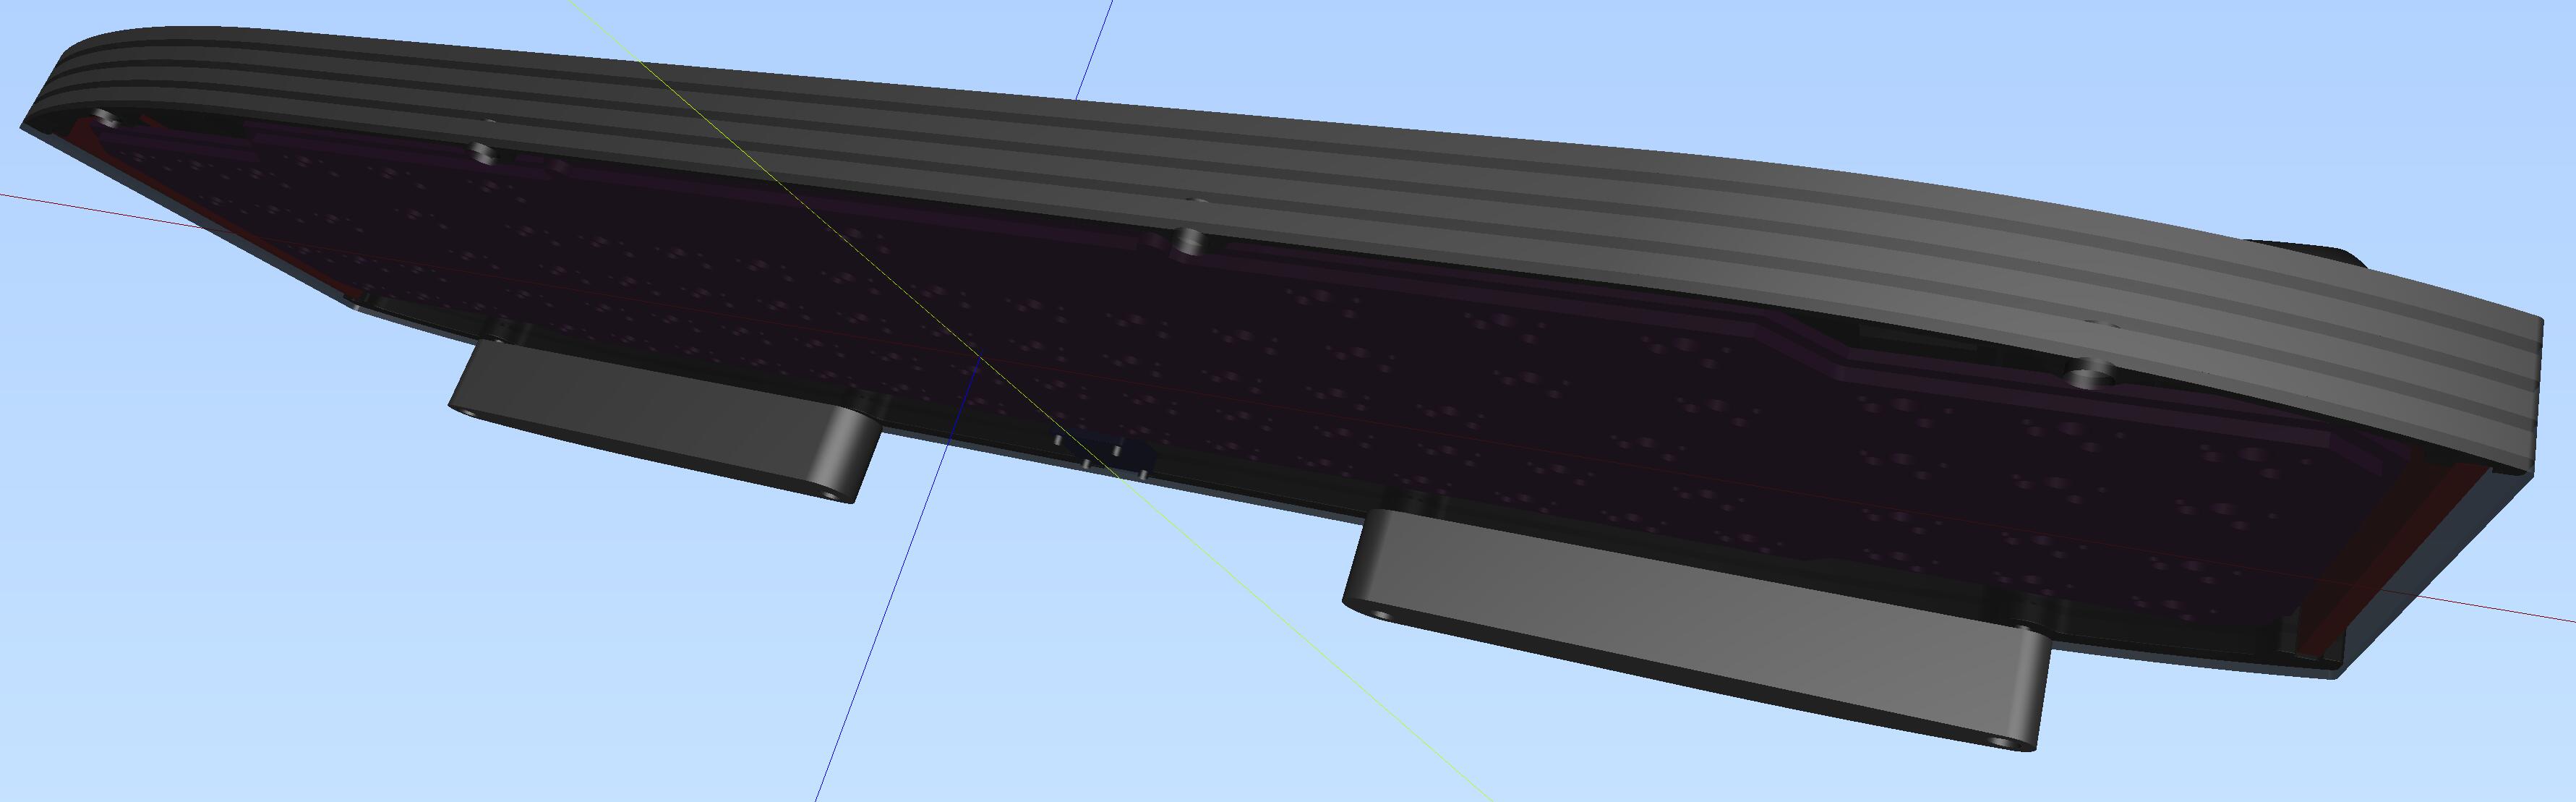
Working on my keybird69 boards requires Way Too Much Screwing, so this time I tried to use a more reasonable number of fasteners. It’s not six partly because the USB port is in the middle at the back, and partly because there is one screw at each end of each foot, and partly to avoid clearance issues with the stabs and RP2040-Tiny under the spacebar. I don’t expect any problems with unwanted tipping.
Some progress today with the laser-cut plate (bottom only so far) and 3D printed slide-on case. I also found a halfway decent deal on Amazon for Box Jades (only about a $6-7 premium versus AE for 108 of them). I’ve actually never actually tried Jades; I’m curious how they’ll compare to Navies.
I had been experimenting with various whiteboard-veneered hardboards, but while my little 5w diode laser can eventually scorch its way through, it’s inefficient, unreliable, and usually doesn’t look good. So slightly reluctantly, I grabbed a $13 4’x8’ sheet of the old “burlap back” hardboard, which cuts quite well in two passes. I took my cordless circular saw and some sawhorses with me, and broke it down there in the parking lot so it would fit in my Subaru (I hate waiting for the panel saw guys). The one panel could make plates and modular sides for 8 or more garbage-boards.
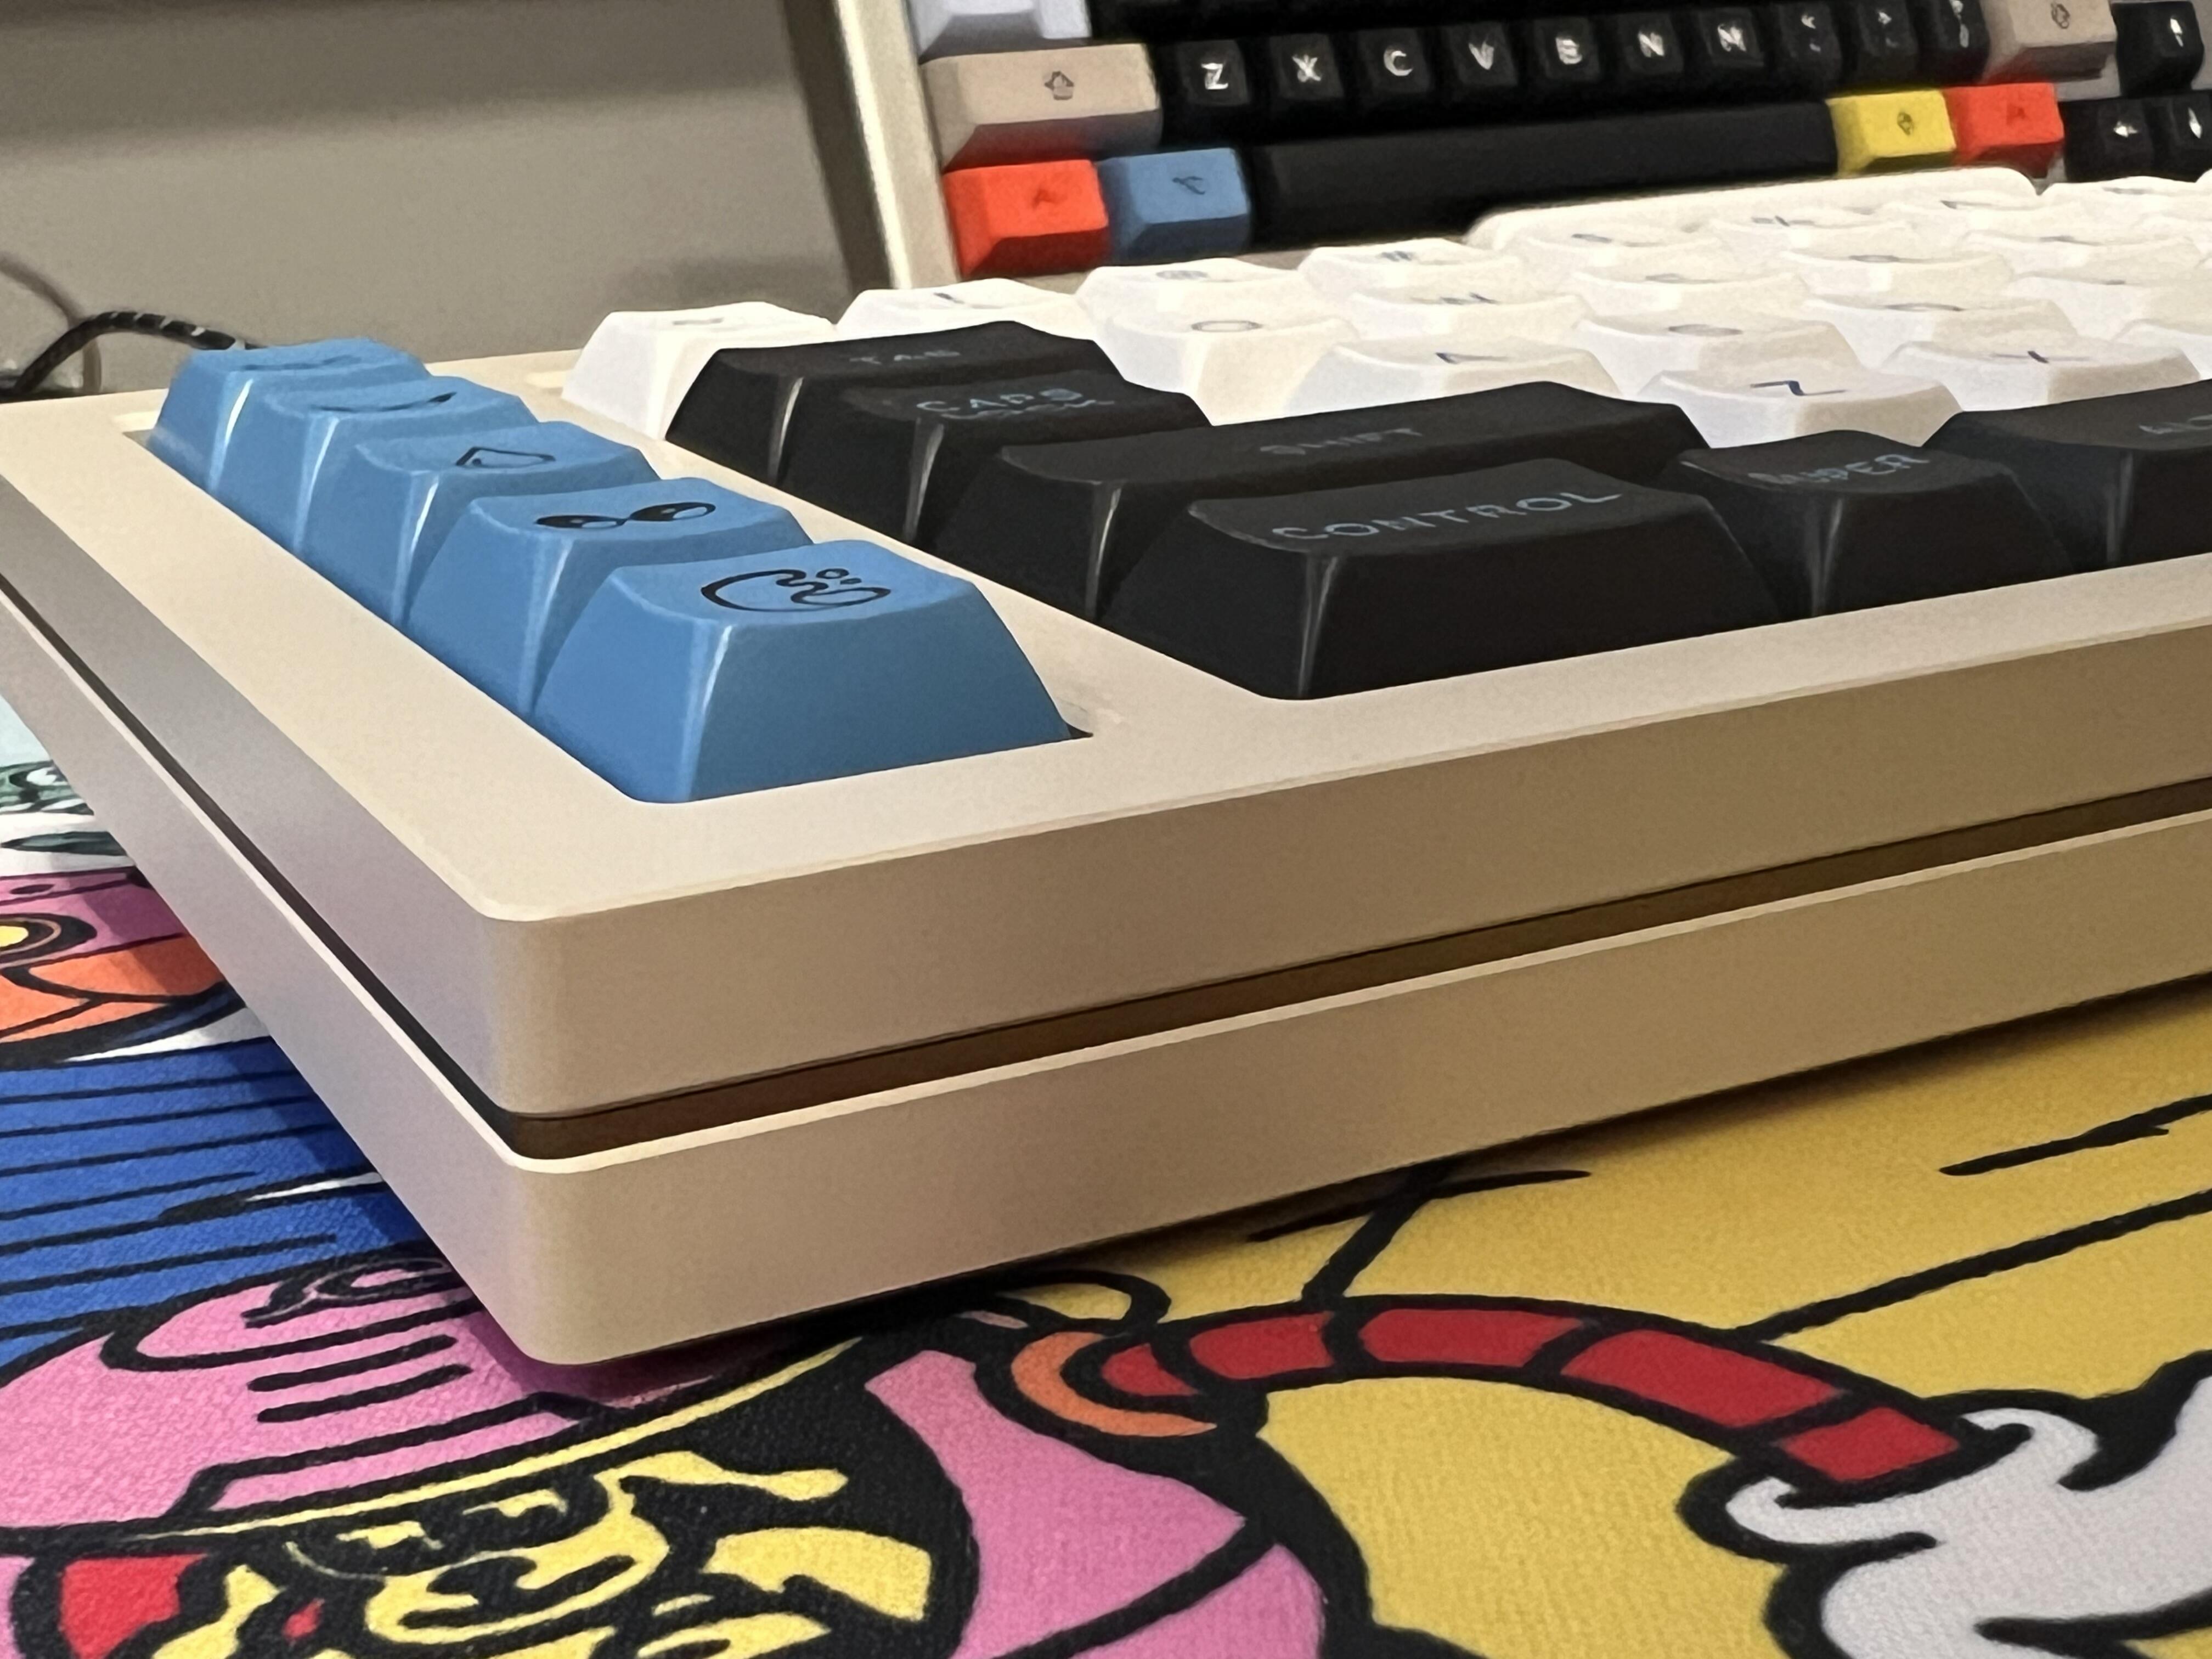
Then, the 3D print seemed to go pretty smoothly. I was especially pleased that I guesstimated the remaining filament well enough that it didn’t run out mid-print. It was also nice to get both halves onto the build plate at once; it saves zero print time, but it is convenient. This case is in some ways less sophisticated than the last one, but it’s also got fewer failure points and the key layout sorta works with the case design to de-emphaize the “3D printeryness” of the thing. It’s still perfectly obvious how it was made, but IMHO it doesn’t rub your nose in it quite so much. I haven’t decided if I’ll paint it.
Finally, I haven’t even begun trying to come up with a new keycap legends design, but I’m optimistic that it will work out well enough, given the new jig and lessons learned about how to design around the limitations of my talent and my tooling. It’s only been a few weeks, but the legends on my other board have held up well to daily use.
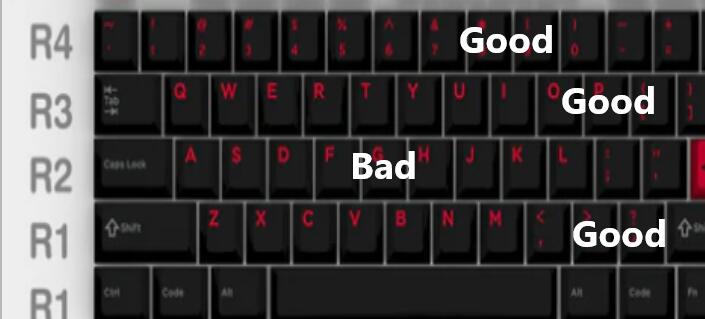
I decided to install them on the d45 and keycaps of Domikey. And then it turned out that a number of ASDFG have a feature or a bug. The switch became tactile, or even stuck.
Of the three I built yesterday, this is the only one not in a board yet. Waiting for my Advantage 2 with cherry blacks to come in for this to be installed.
Is this an issue with the keycaps or the switches themselves? I was seriously considering ordering a batch of these switches to try out but want to know more about this issue you’re experiencing first.
Tomorrow. Or you can say in 9 hours I’ll check the other mouth guards. The problem is just one row. I usually test switches with different keycaps and different manufacturers, but the row is always the same. ZXCVB.
That’s why I didn’t identify the problem right away.
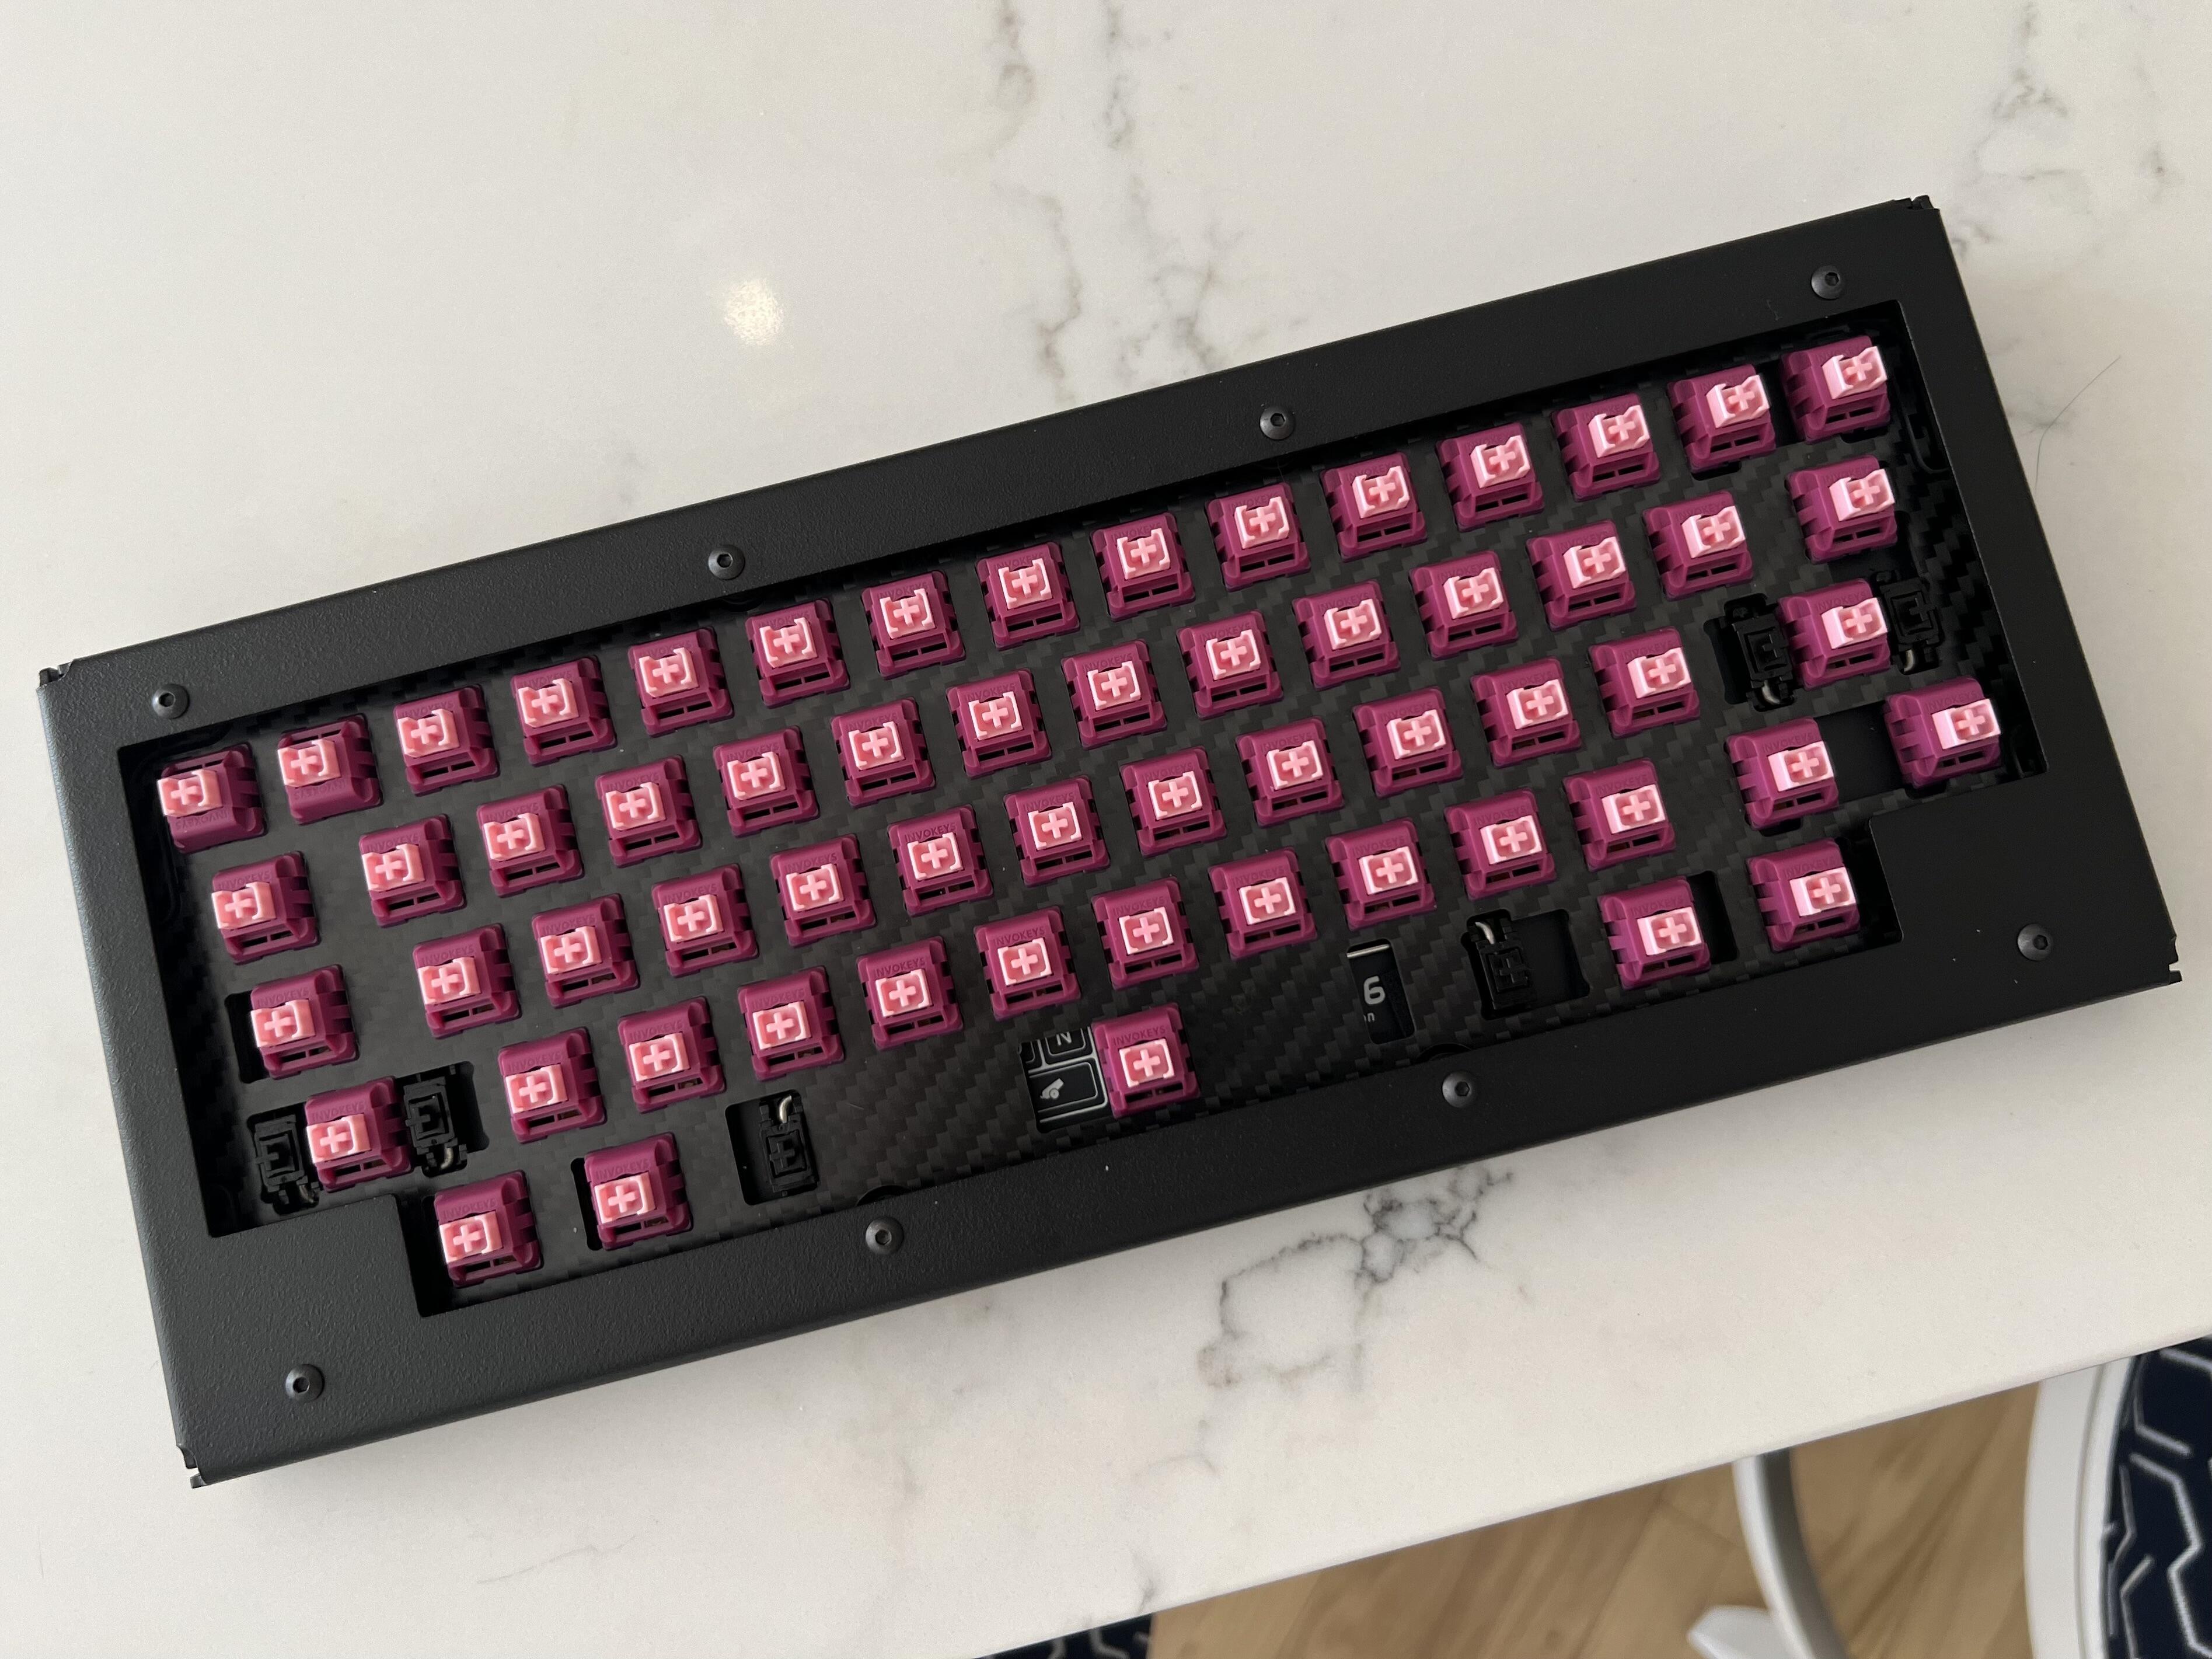
It’s rocking a prototype plate that is Carbon Fiber with leaf spring cuts around the mounting points. I paired with Invokeys Night Shade silent switches.
I really didn’t want to build anything today, but I really wanted to see and feel my Tecsee medium tactiles in the DR-70F. So… I rebuilt it, begrudgingly.
I prefer the feel of the linears more, but I didn’t want to take those out of the board they’re already in. The result is quite nice and unique. I think the DR-70 sounds better without one of the foam sheets behind the PCB. It gives it a bit more character.
I love how low the medium switches make your keycaps sit in the board. I can easily use this one without a wrist rest. Now, to practice typing on them some.
Also, I need to do some more experimenting with these switches to see what keycaps you can use on them. I know you cannot use DCS or GMK caps or any kind of thick PBT caps because they all collide with the switch housing. I seem to remember DSS not working either. DSA works great though.
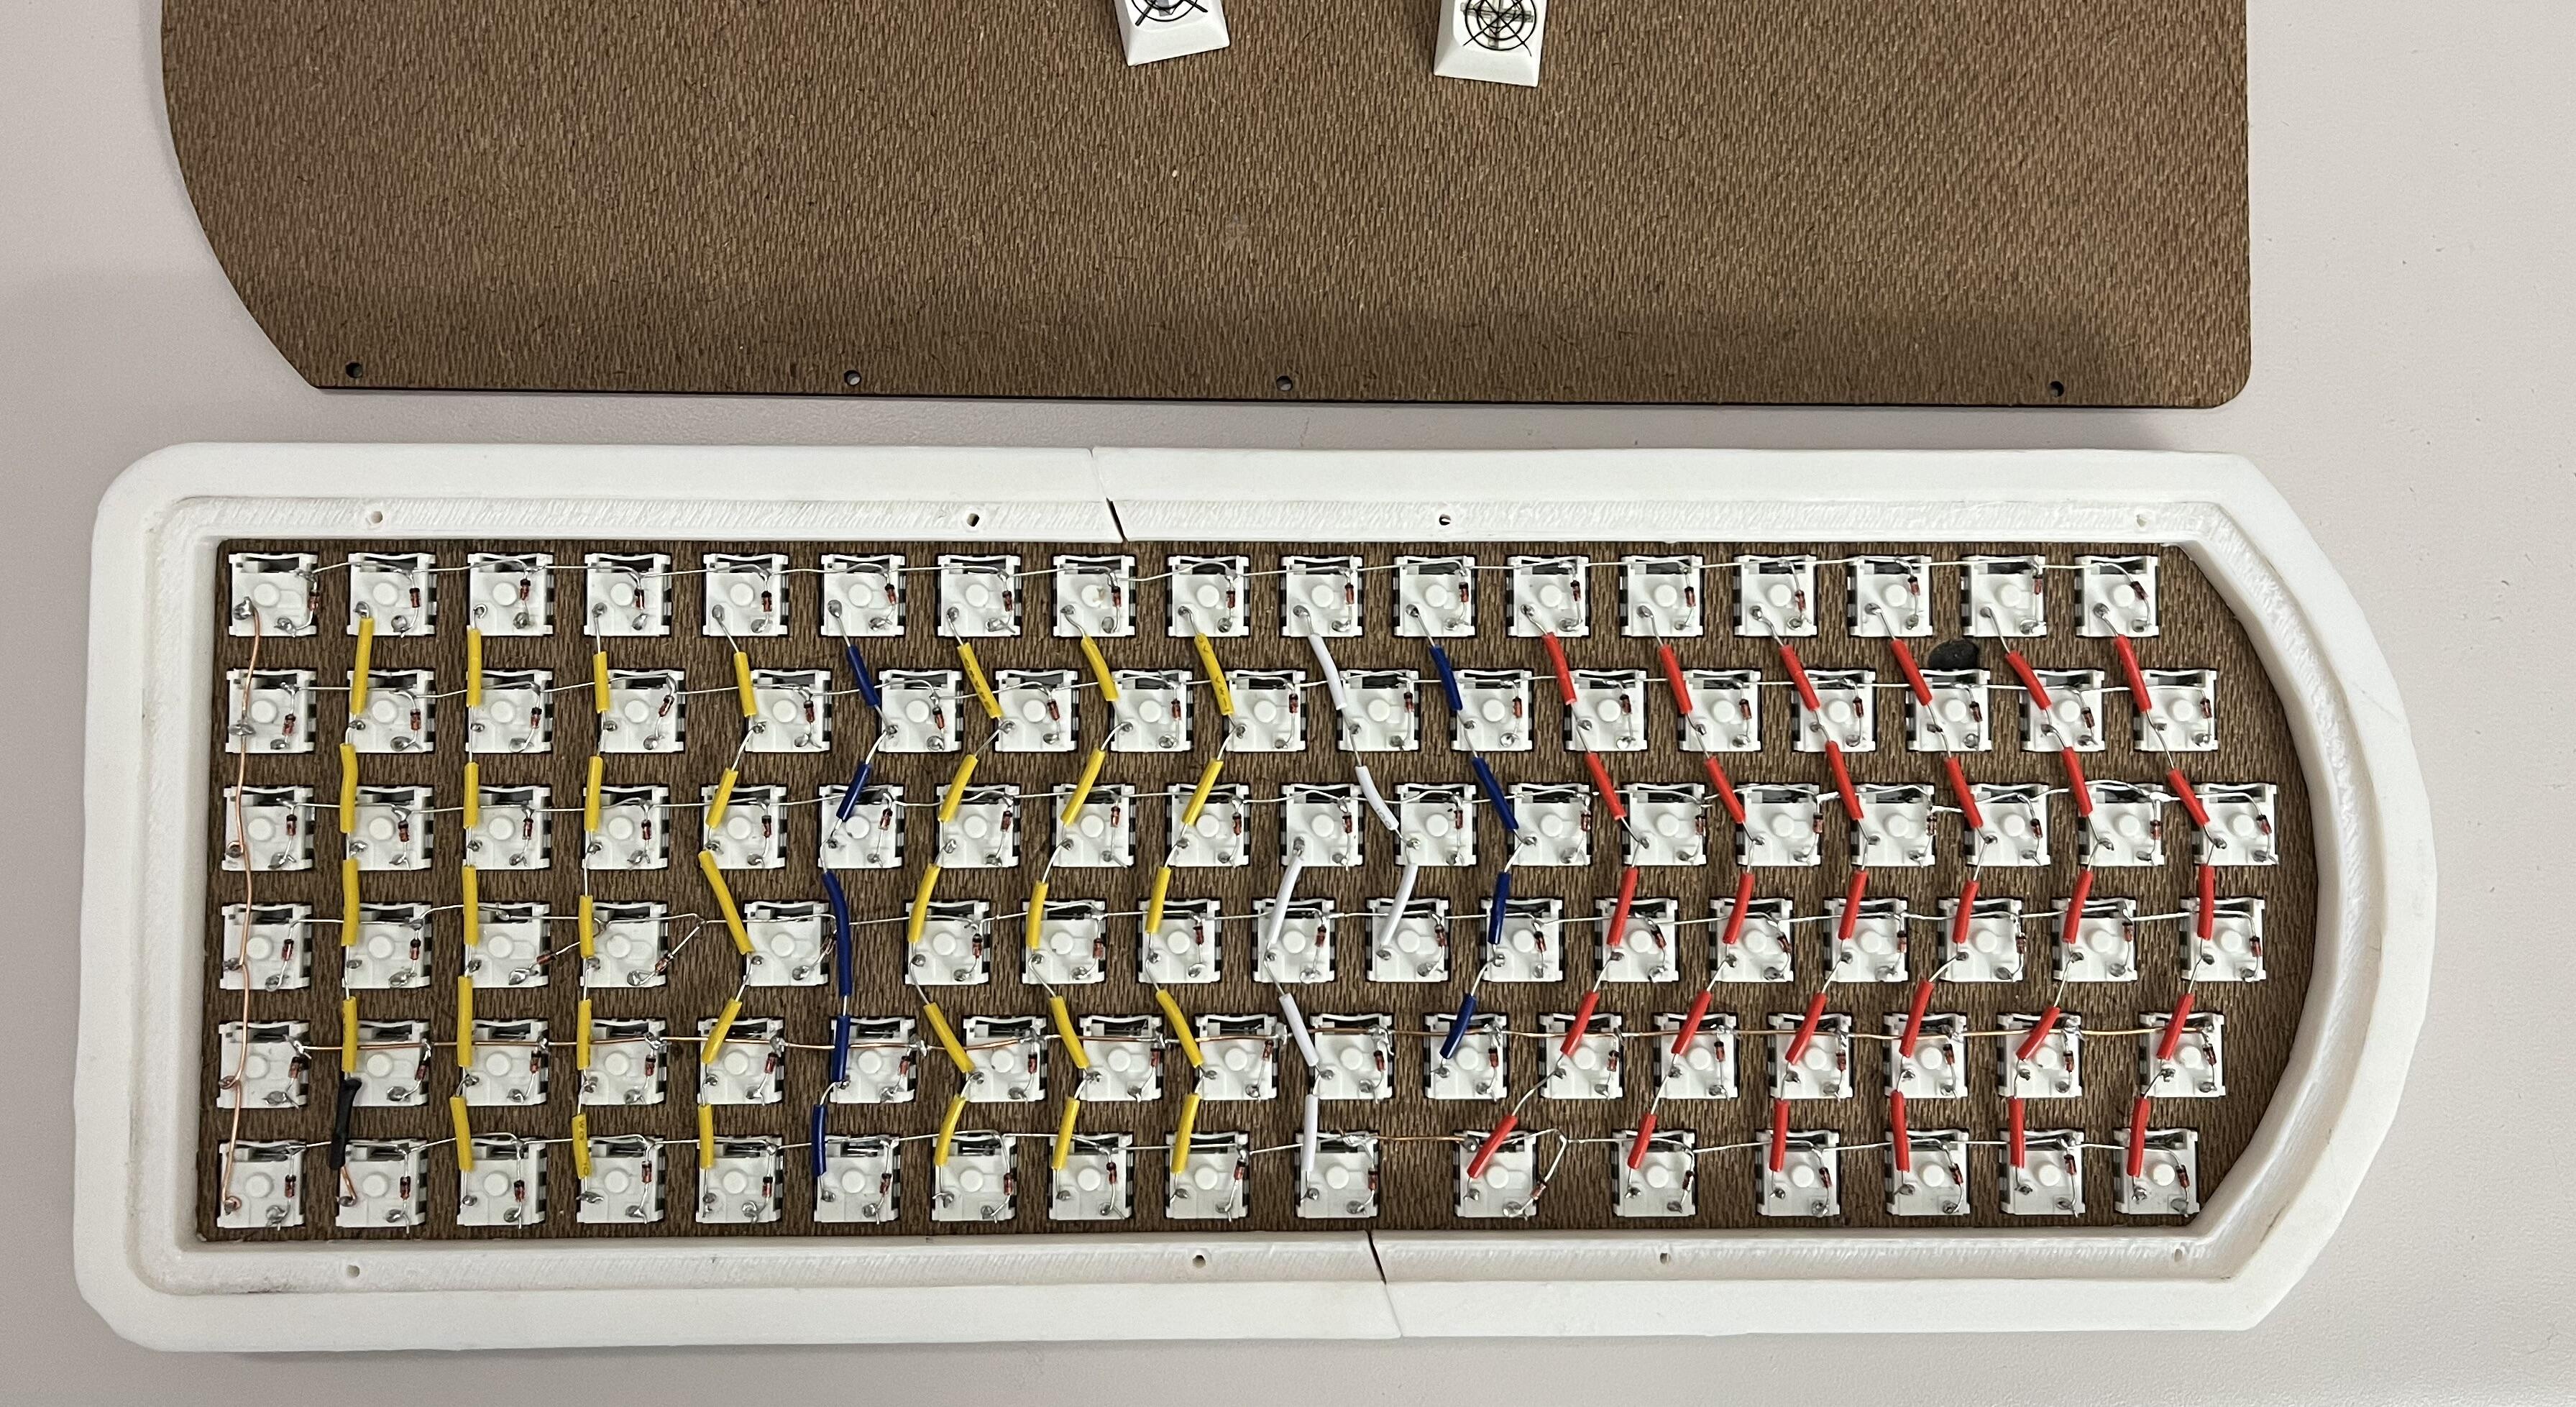
Box Jade switches for the new build came in, and the matrix is wired up. There is basically zero depth for the MCU, but that was anicipated and the underslung blister mount is printing.
Still procrastinating on designing the keycap legends and pretending the Amazon set I have will be good enough, when deep down I know that (1) it won’t be, and (2) removing keycaps will require the tedious use of something like a plate-support fork (but reversed versus how it’s usually used) unless I glue the switches to the plate.