I found Yang’s tmk repo, so it may be possible to alter the program and compile locally. Looks like there are other examples of RGB in that repo you could pull from.
I’d have to read up on TMK in order to do it, but again, potentially feasible.
Quick update to all interested (@Extra_Fox, @Dave, @pixelpusher); I’ve streamlined the firmware into a simple keymap folder that you can drop into an existing QMK repo (see original post’s edits). I’ve submitted those same files via PR to the QMK master, so hopefully anyone can enjoy them soon.
If any of you are QMK contributors and would like to test these changes, please do so and leave your feedback. Cheers!
So cool, man. I’m running the RGB via version. Granted… I don’t have any LEDs yet (LOL) but it’s gonna work like a charm. Now to get some leds!
I usually compile my qmk with the configurator, so I didn’t realize that they have QMK_MSYS now. Makes life a lot easier for sure.
My insert light just stays on now permanently. Is there a way to turn it off? I’m guessing there’s not since that’s where you are grabbing power and data, but I thought I’d ask. Perhaps I can simply desolder it
@Dave did you have any progress using those angle connectors? I’m thinking about ordering the same kit as you
Ahh, that’s good to know that the insert LED stays on permanent in units that have one (mine didn’t). The answer is, yes, you can absolute disable that. Let me see if there is an easy solution in my implementation before trying to walk you through the underlying fix.
I have the right angle connectors and confirm they work. They are slightly thick at 4.9 mm. Will probably use a clear command strip to hold them down if I choose to go with the PCB side facing down. I confirmed 27 LEDs work fine which is way more then should be used.
Just waiting on the Polycarb heavy-6 to come in to see how it looks before finalizing the connection.
Got leds today. Tested with a quick holding wires to pins and it works! Next is soldering and sticking. I’ll hopefully have photos of this mod in the PC heavy-6 tomorrow!
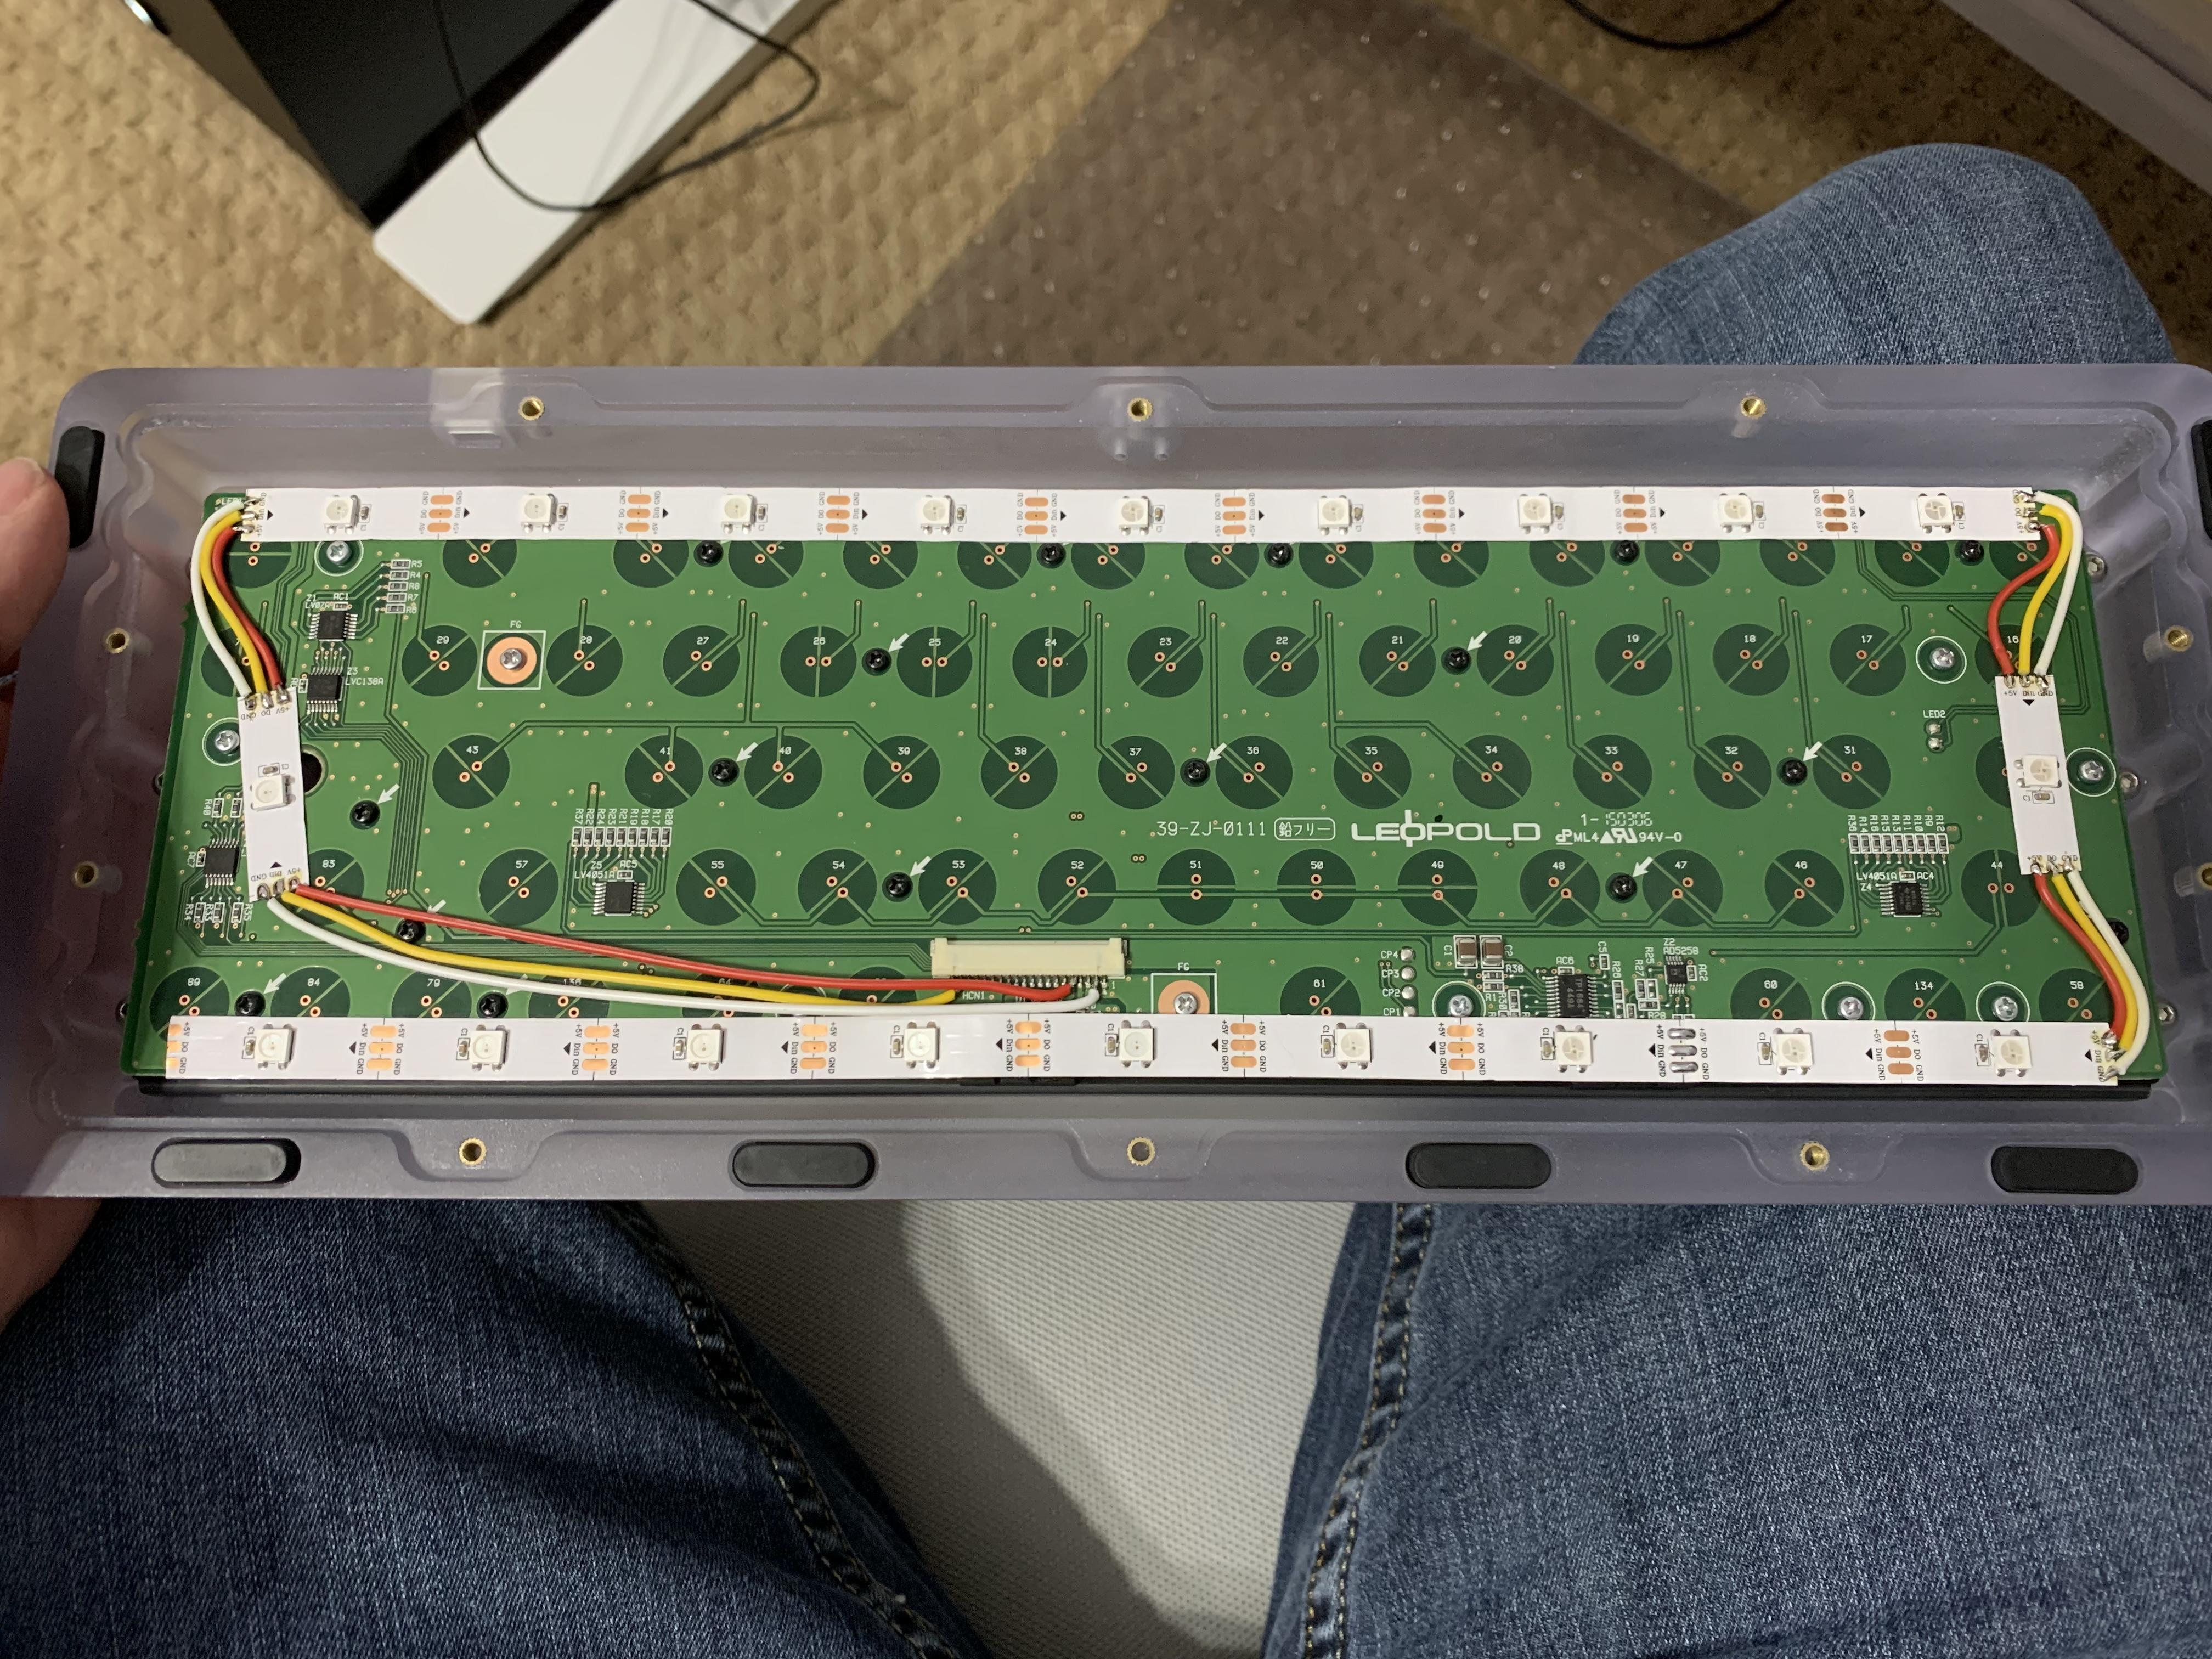
This led strip is handy handy because I have to do less soldering. However, the downside is that I don’t have a lot of options for placement of large strips. I didn’t want to make it overly complicated, so this is what I chose. Less joints to solder since I don’t even know if it’s going to look good.
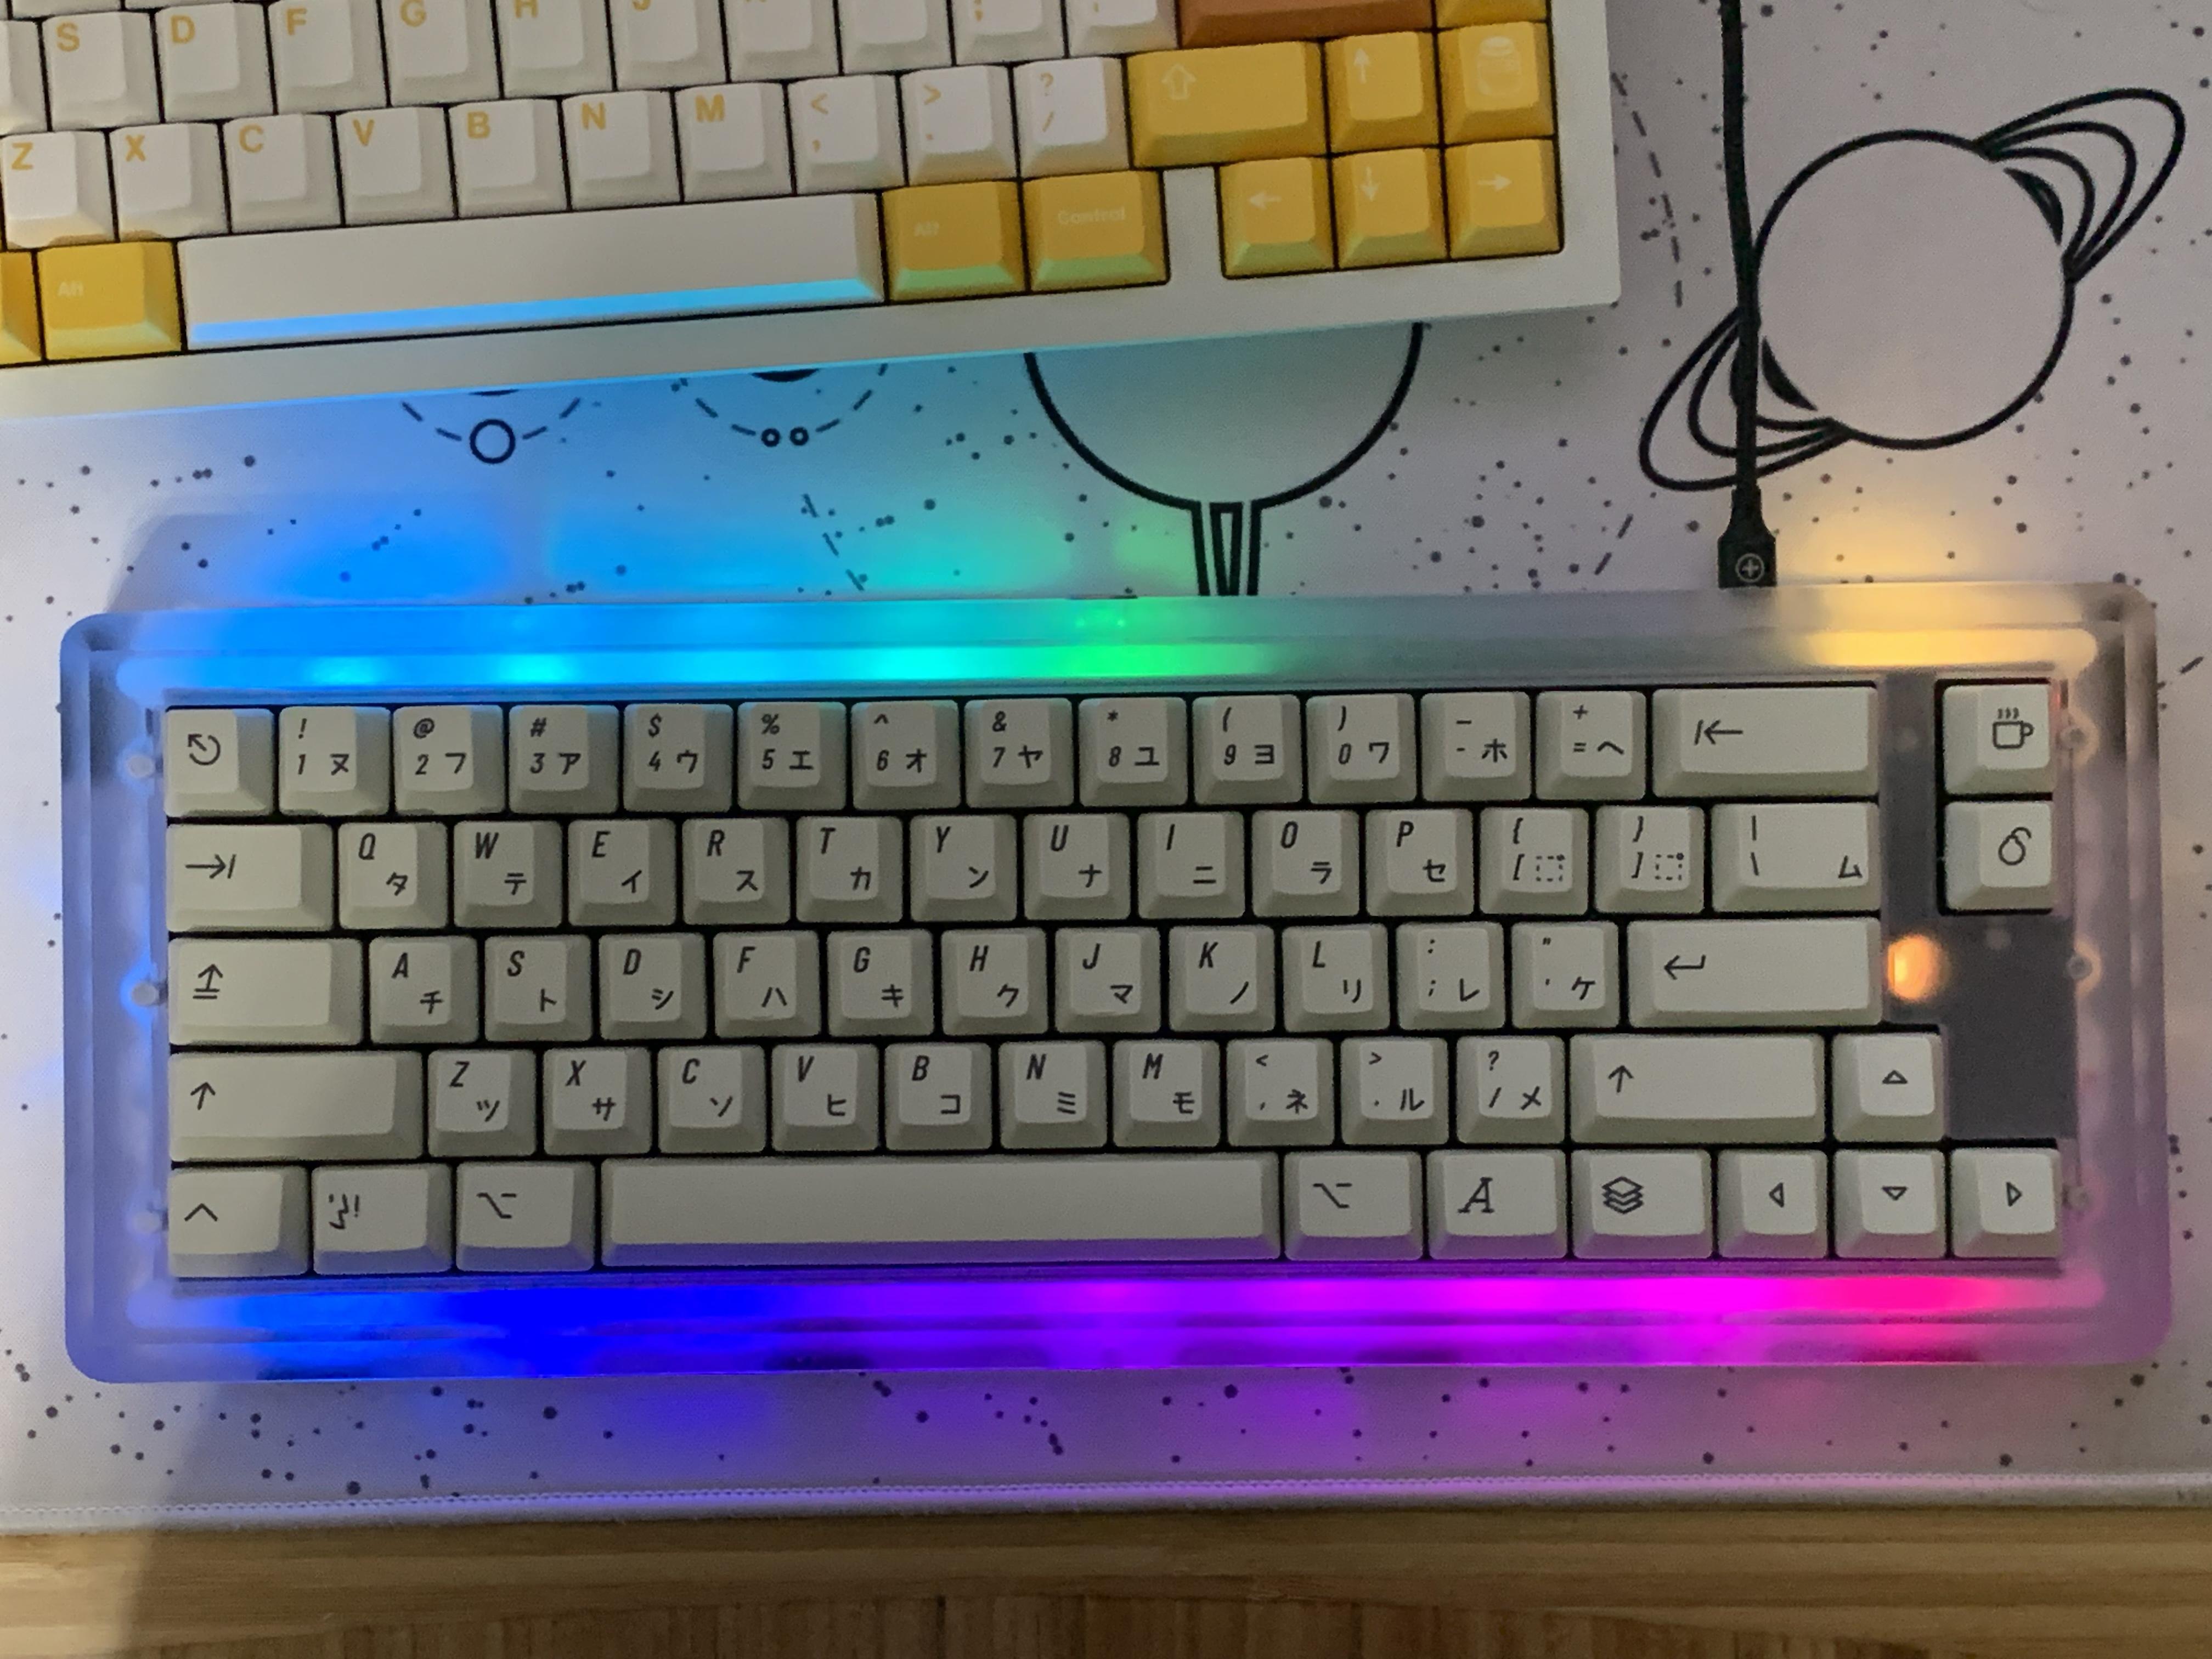
20 LEDs in total. It’s fun but not perfect. Since I decided to put the top and bottom LEDs close to the edge, you can see they are brighter than the side leds. There was no way to place the side leds closer to the edge without covering a screw on the pcb. I wanted to be able to access the domes with the leds attached. So, the sides look a bit dark. I also wish there could be two on each side instead of one, but my strip wouldn’t really allow that with room to solder wires easily.
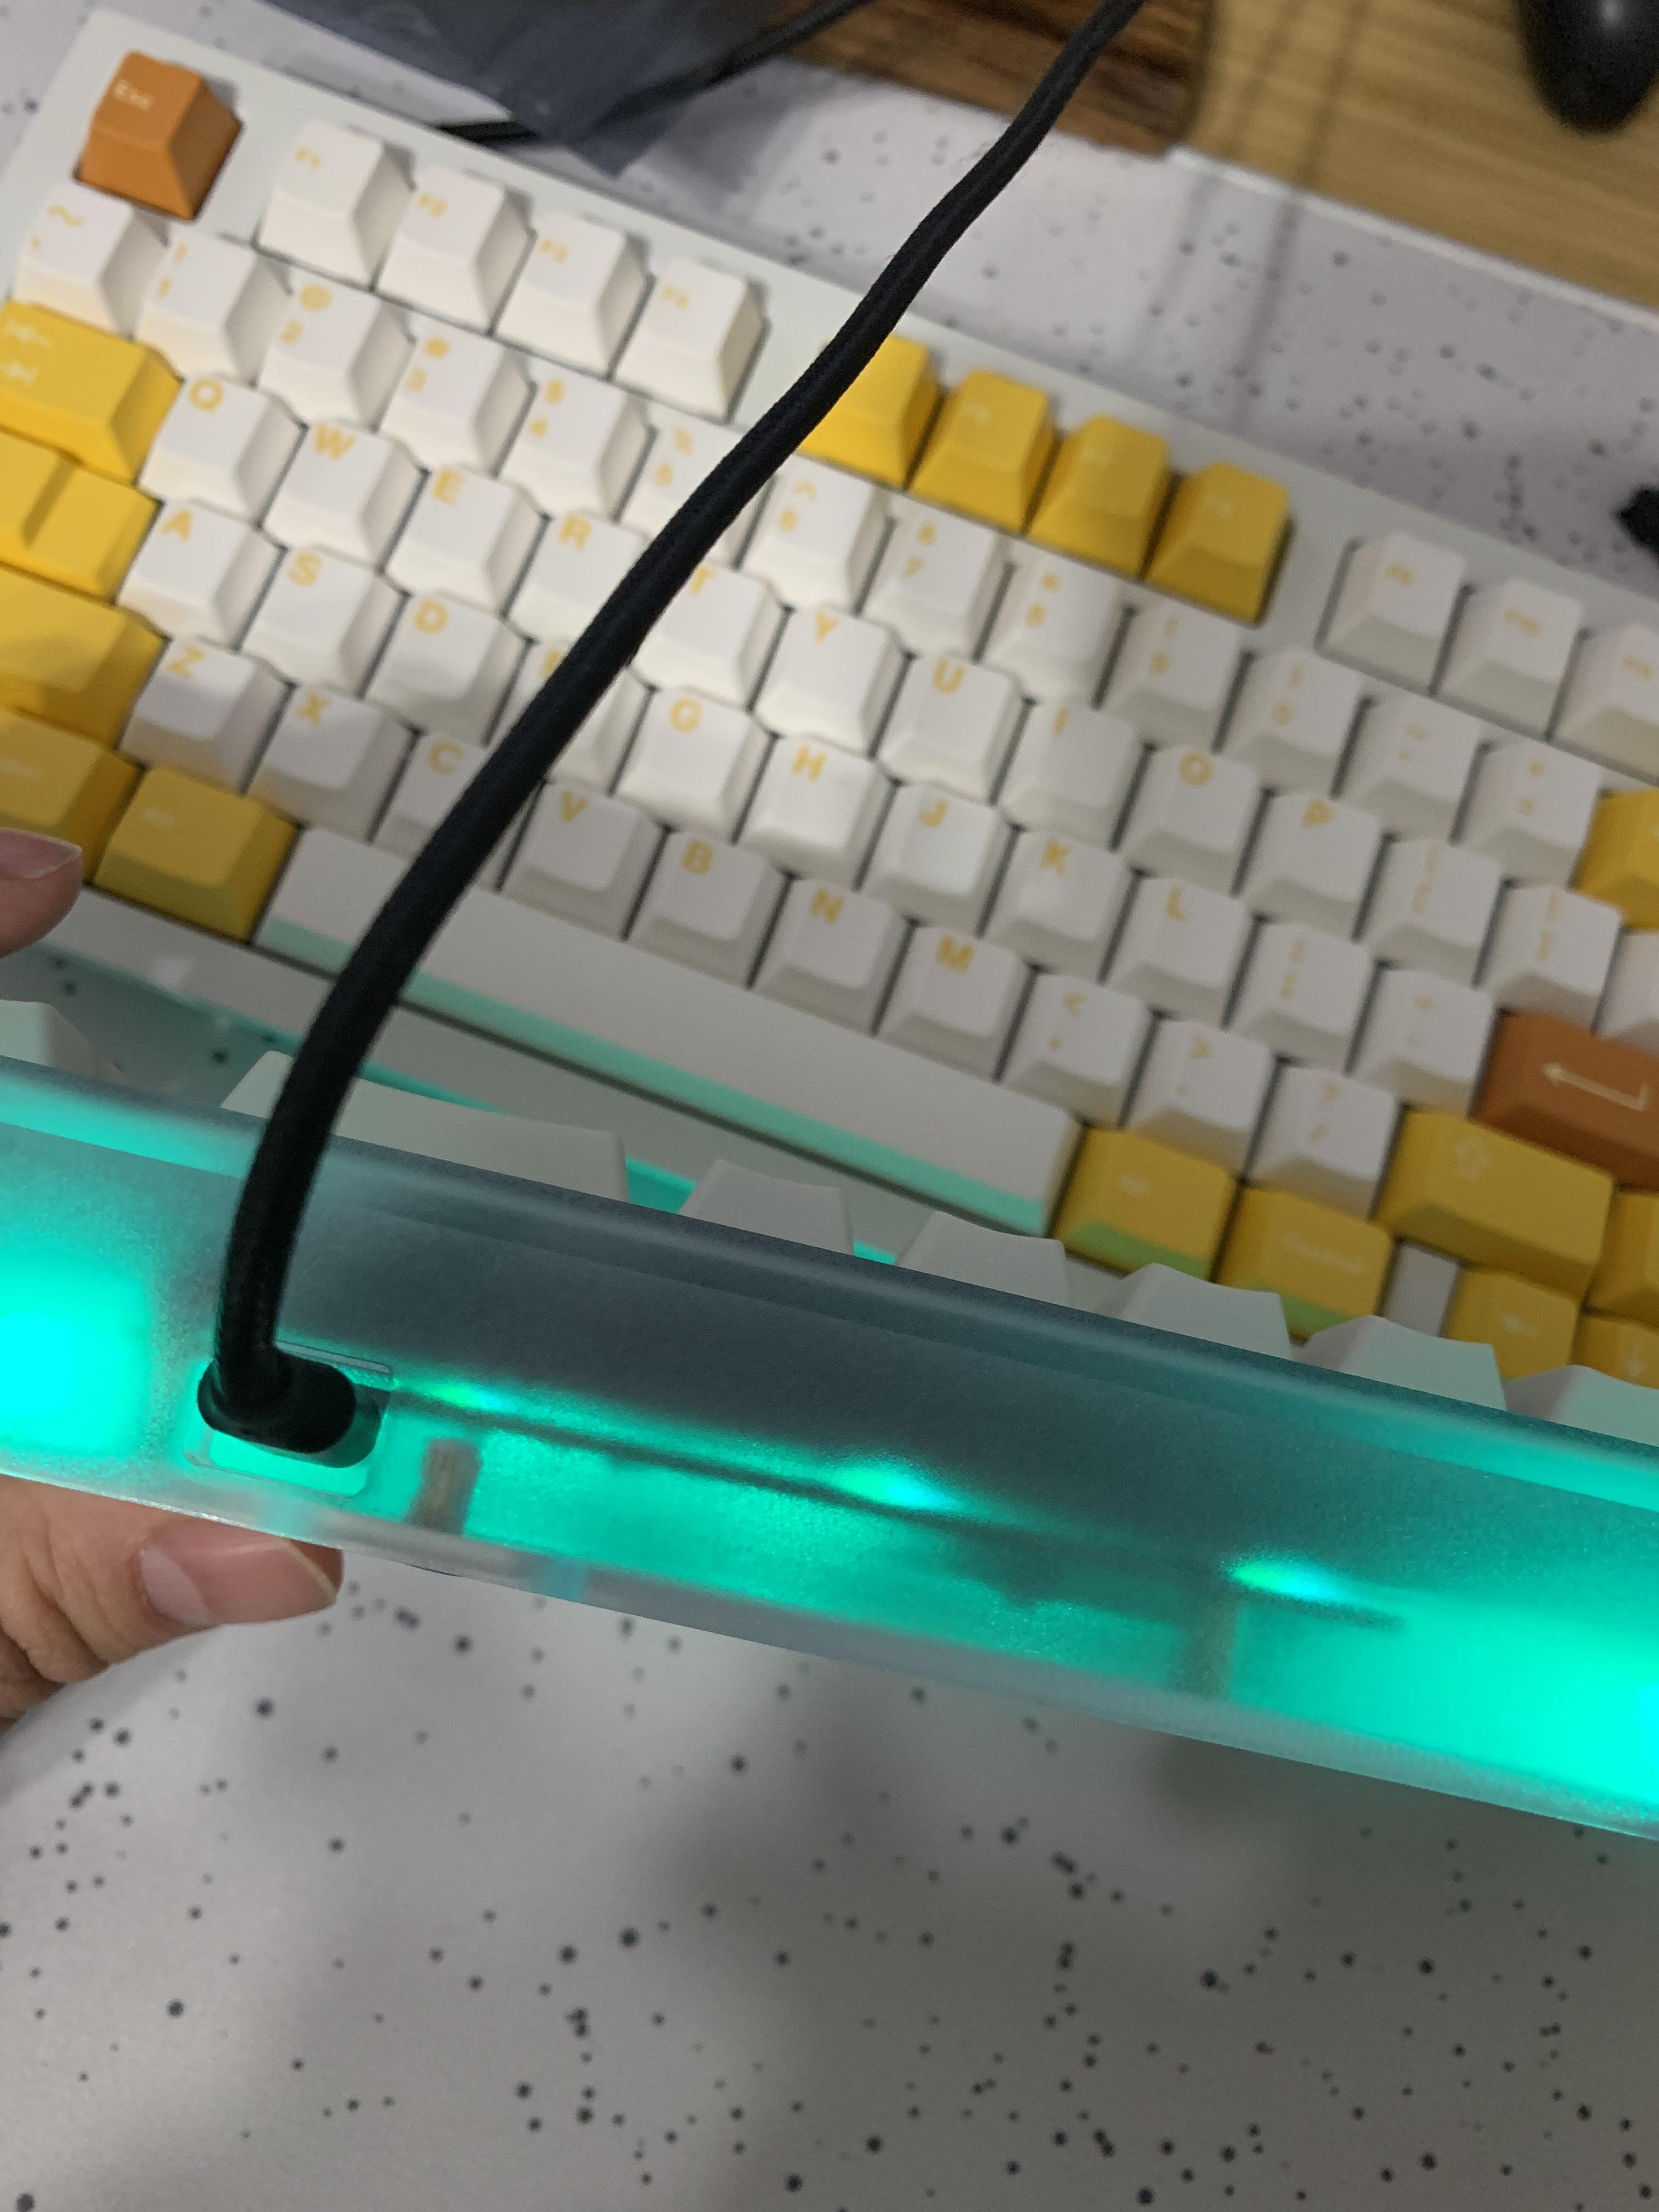
The back is dark by the USB. Unfortunately that is because the controller sits between the leds and the bottom. So there’s nothing you can do about that dark patch.
Also, I added in the Twinkle animation. For some reason this hasn’t made it into most qmk repos, but it’s been in the code for a while now. It’s good for cases like this where the lighting is a bit uneven… and it’s magical You can do a single color twinkle as well. That’s acutally what I have it on now. White twinkle.
Okay, edit. I think i see why twinkle is overlooked. Sometimes it lags out for a bit. Ha. Back to a beautiful gradient for now. It looks really nice. iPhone doesn’t do the LEDs justice in my post.
That came out looking great! Now I’m even more excited to get mine.
I didn’t think about the controller; that’s a problem I’ll have to think on. I might just make a 1-led pig-tail and attach it directly to the controller if I find it bugs me.
Also, I’ve gotta go find the twinkle code and add it to this firmware now.
Still, I’m excited to see this mod in the wild finally
A quick bump to let you all know my PR got approved. RGB FC660C firmware is now in the main branch! and should be supported from the qmk online configurator
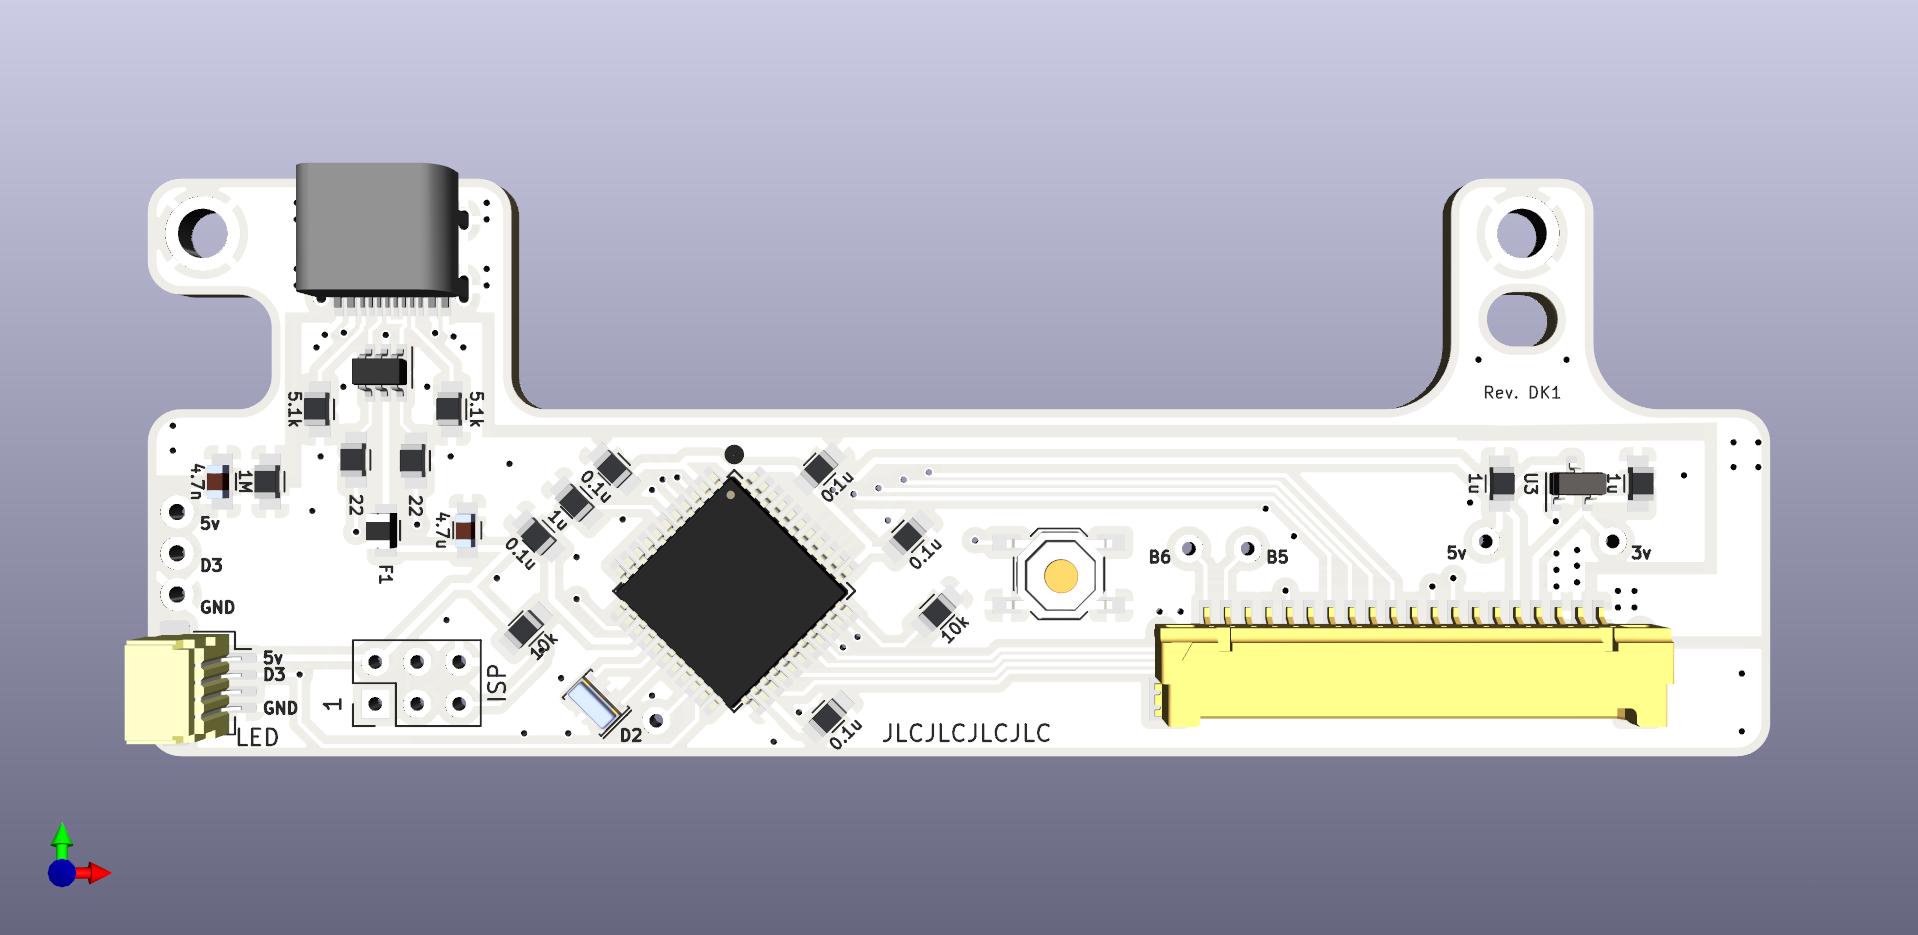
Rooski send some photos of his heavy 6 set up which is looking pretty good. Spent a quite a few hours redoing the footprint of the controller. The led strip will run horizontal under the 2 screw holes. We’ll see if this layout will eliminate gap in the LEDs in about 1 month.