So I’ve finally had some free time to get back into keyboards so I’m working on
a new revision of the Bloomer. If you haven’t seen the existing versions and
you’re interested, here are a few links:
Anyways, the major change I’m looking to make next is to make the keyboard
wireless. Between the chimera, mitosis, redox wireless, and a few other
keyboards making wireless more popular, I feel like there’s a decent desire for
wireless options (Including my own :P) and enough other resources I’ll be able
to learn from.
That said, I’ll be removing the RGB lighting from the board as I’d imagine it
would have a pretty big impact on battery life.
Also, now that I’ve been using the previous iterations of the board for around
6 months, I plan to make a couple minor layout adjustments I think will be
positive:
Move Home, End, Page Up, Page down close to clusters
Move brackets
Increase keys from 87 → 90
Condense the middle cluster to make room for the wireless components
Intentionally leave the pcb & case rectangular so that TKL wrist rests are
compatible
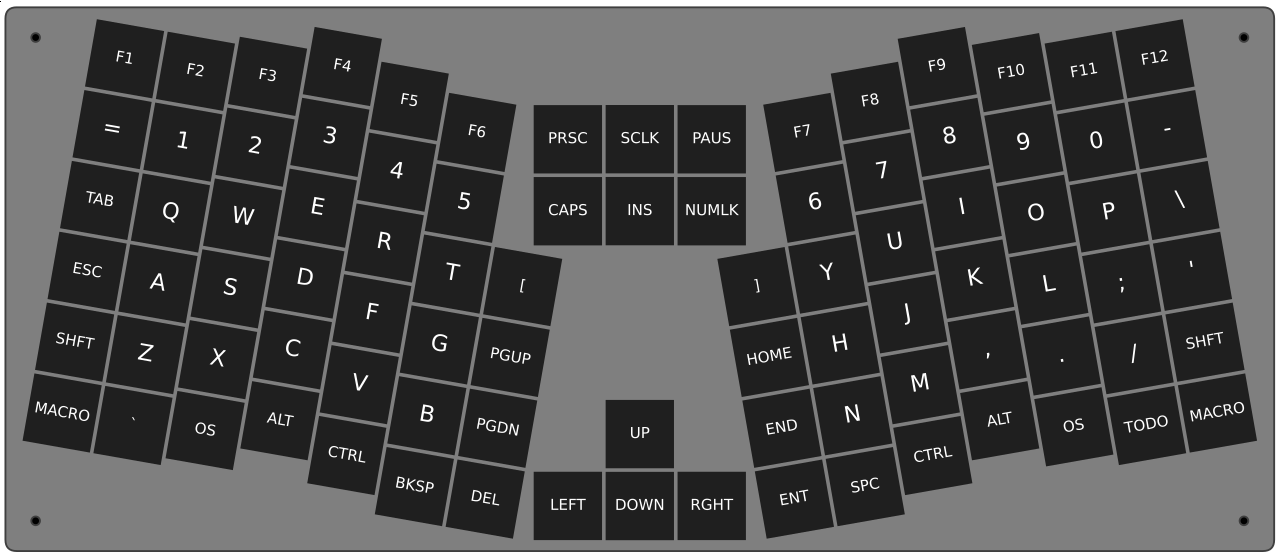
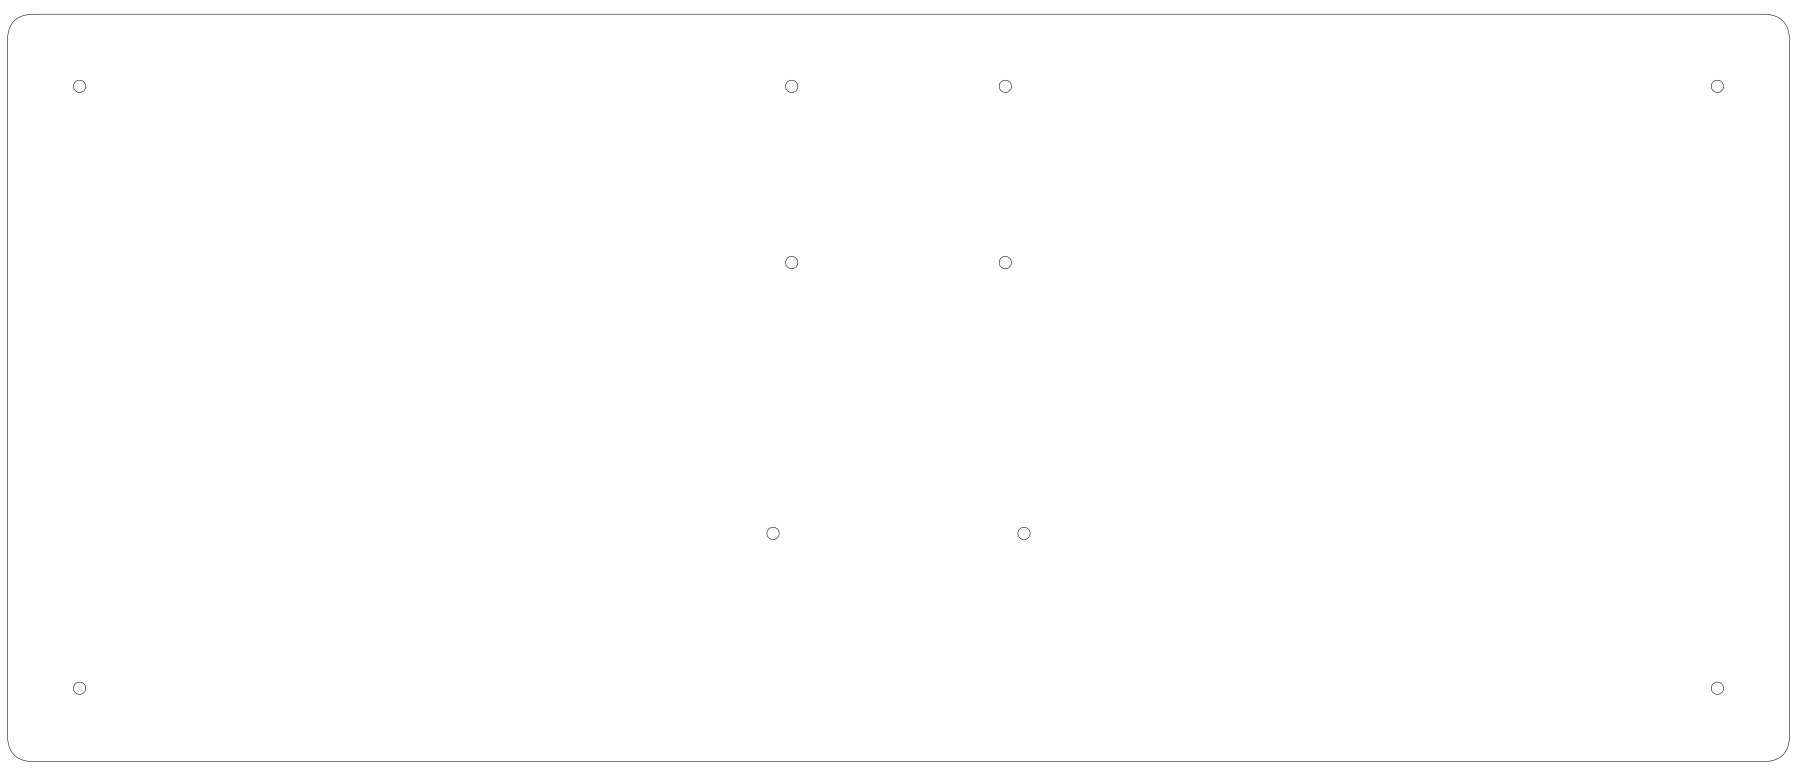
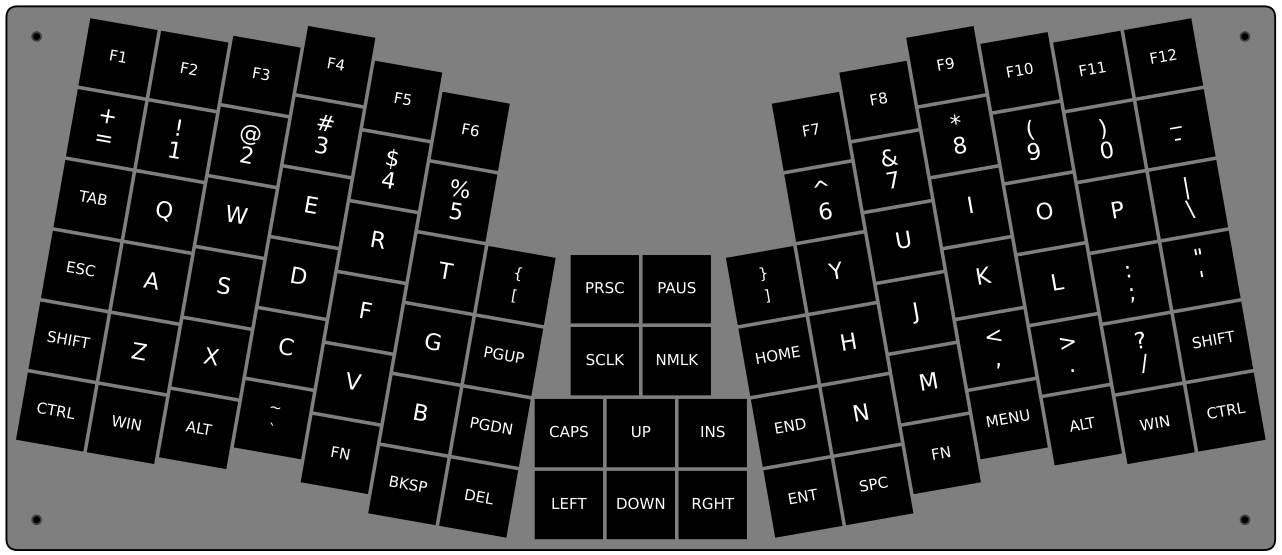
Here’s a rough svg render of what the keyboard will look like:
The one thing I’m trying to do is keep all of the electrical components on the
top side of the PCB to ensure that the keys are as low profile as possible.
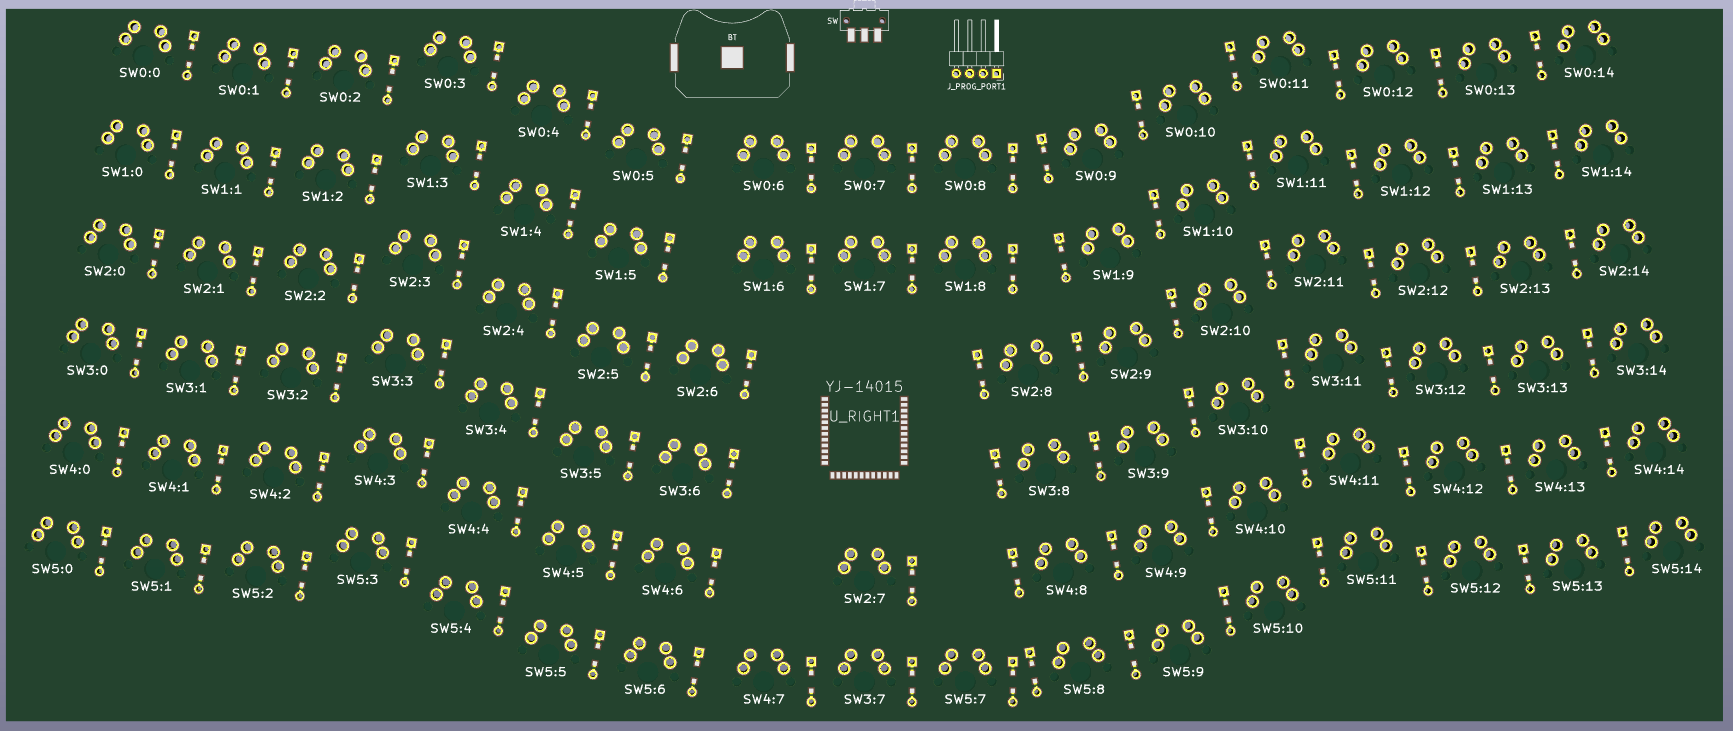
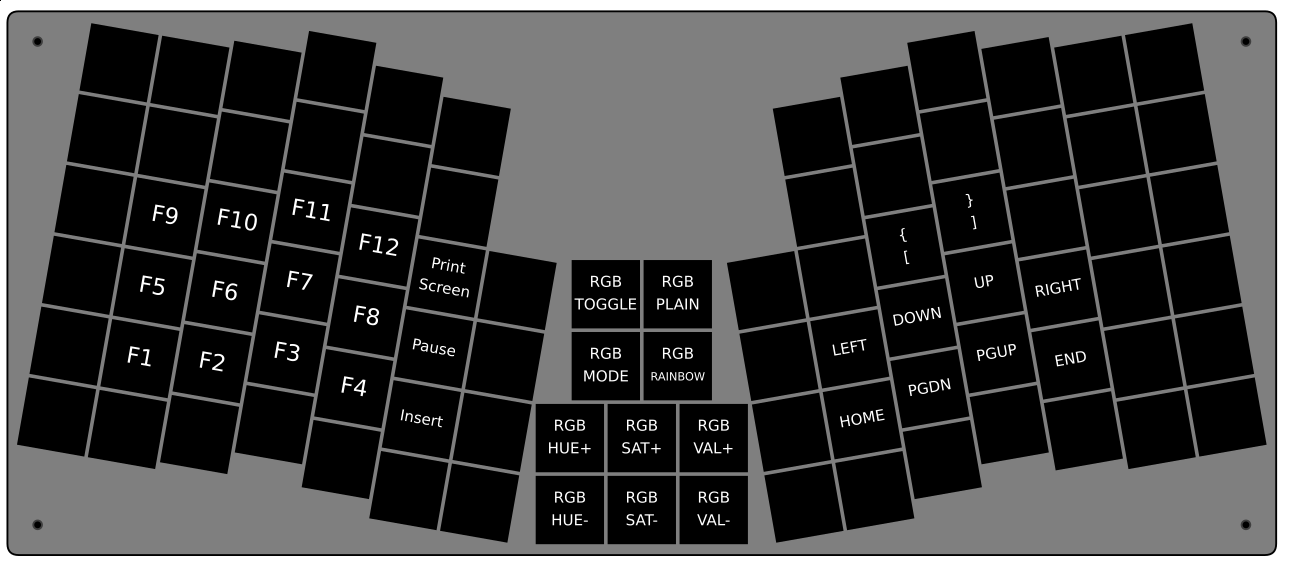
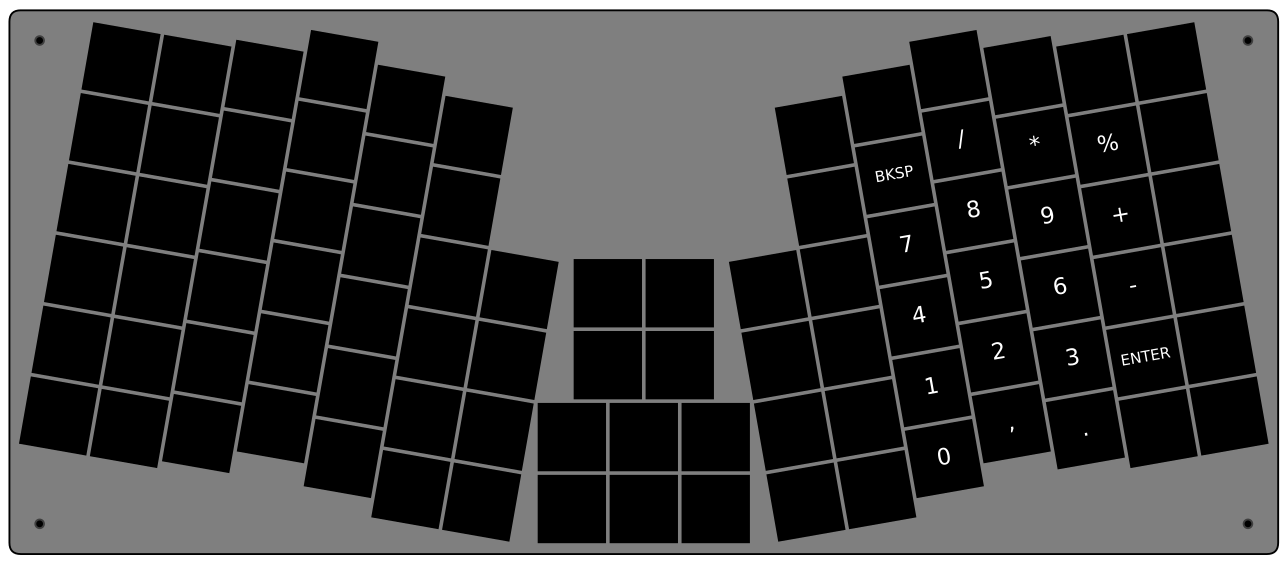
This is where I’m at so far but I haven’t set up any of the connections just
yet:
I’ll be trying to post my progress but it’s a bit slow going as I can only
spend a few hours here and there working on it. Hopefully within a few weeks or
so I’ll be ready to order some prototype PCBs.
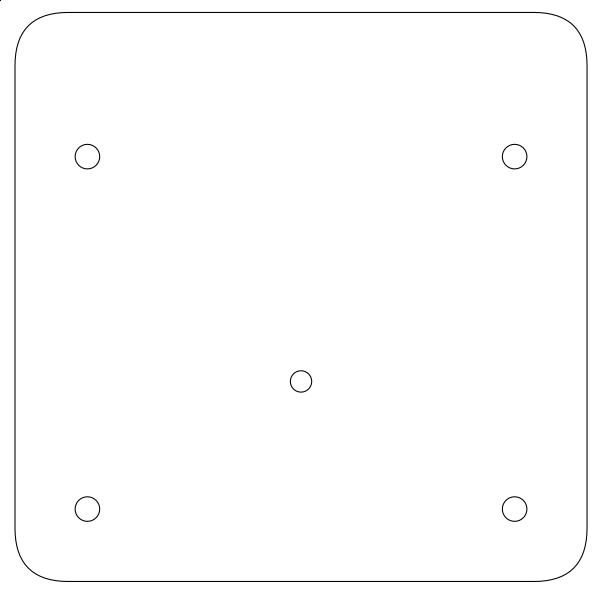
So, after realizing that making the keyboard wireless is a little more involved than I had thought due to having to write the NRF firmware, I decided to continue making a new version of the Bloomer but keep it wired and shift the focus to a few other goals:
Move the controller to the top of the keyboard to make it lower profile
This also obviates the need for a separate reset switch
This will also make converting it to wireless easier in the future
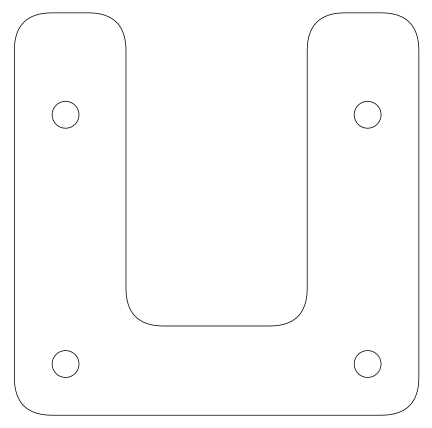
Utilize all 90 keys
rev2 is a 15*6 matrix but only uses 87 switches
Improve the layout a bit by moving more keys closer to the home rows
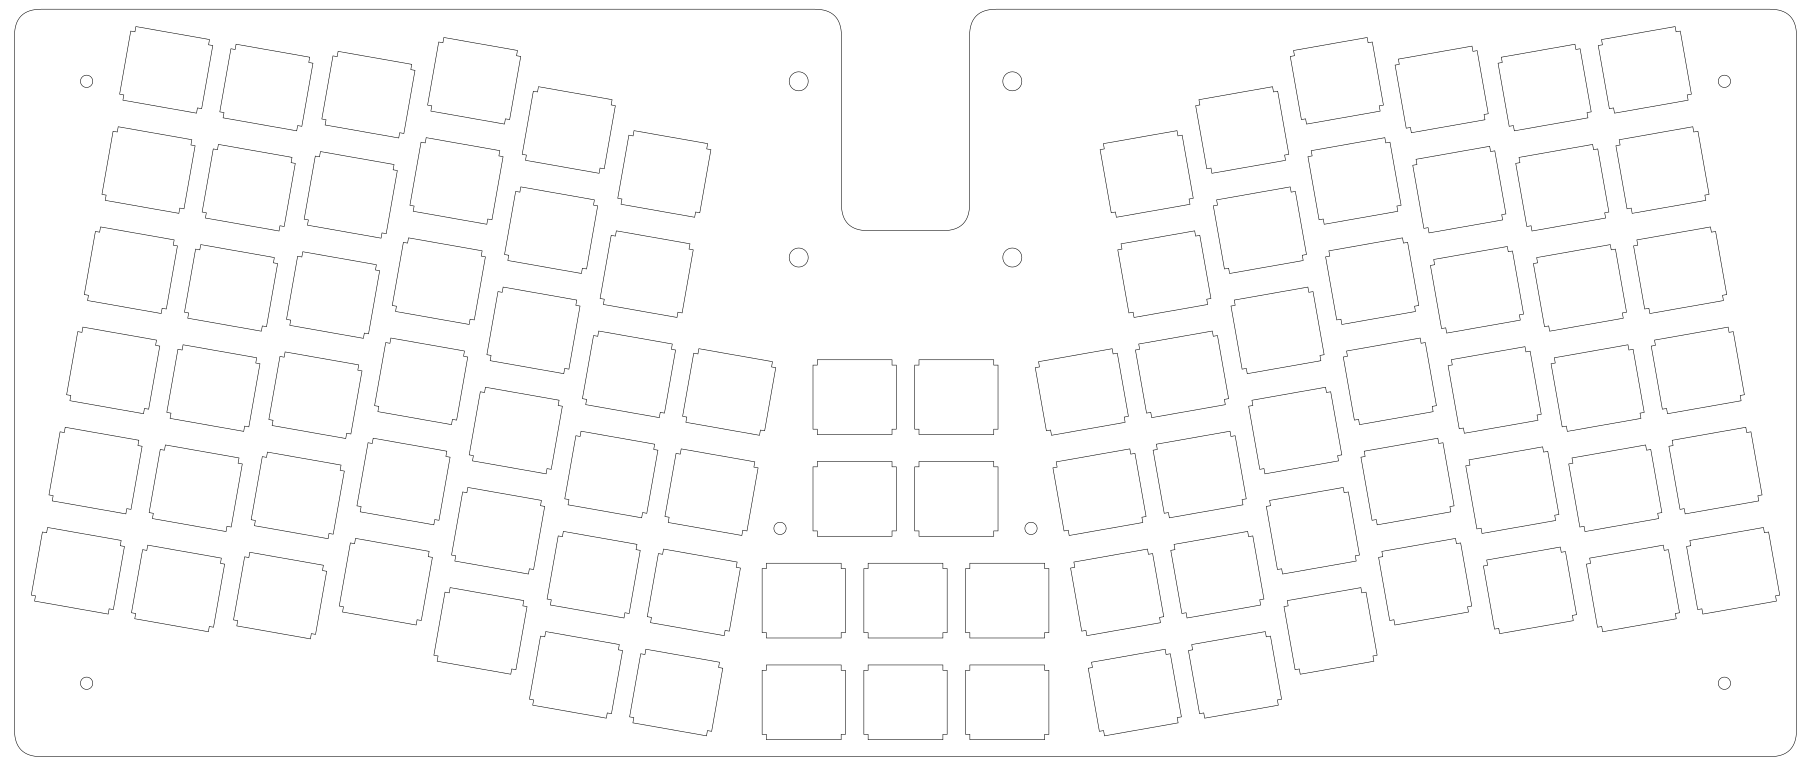
Make the keyboard rectangular
Whether or not this is an improvement is likely subjective but I like it for a few reasons
TKL wrist rests are compatible
Designing a 3D printable case will be much simpler
More room on the PCB for better RGB placement
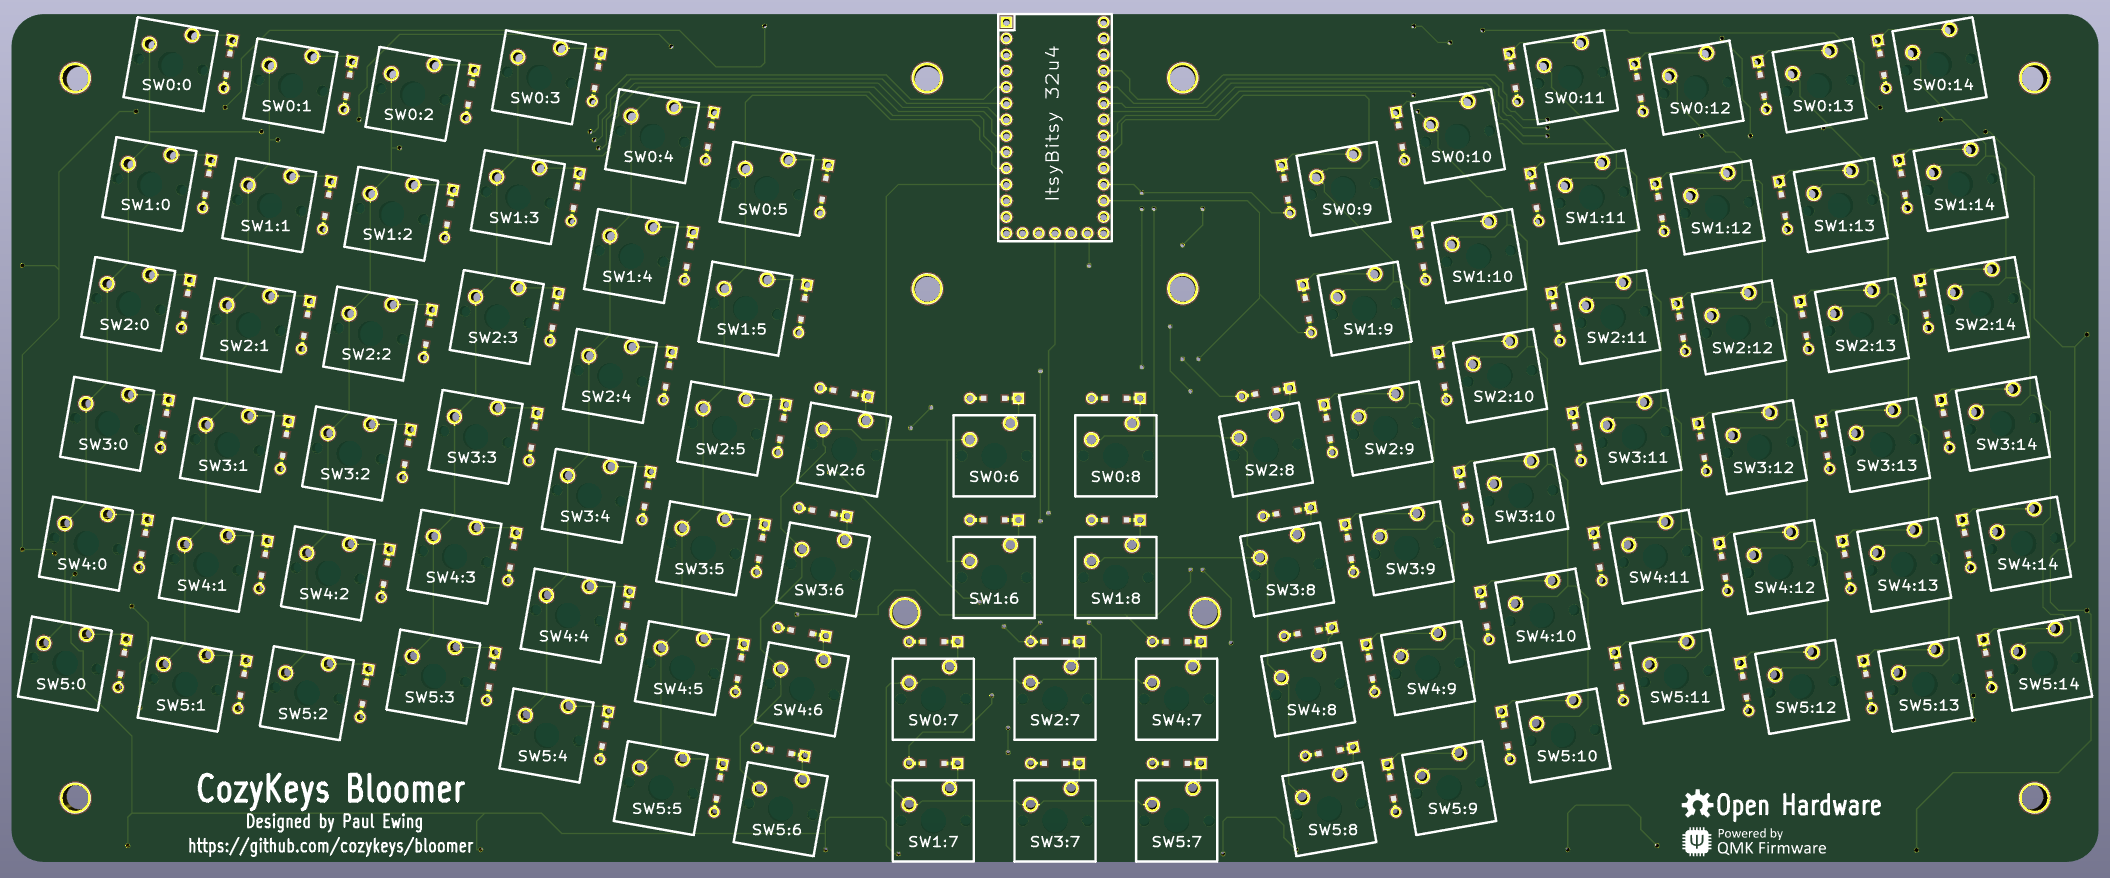
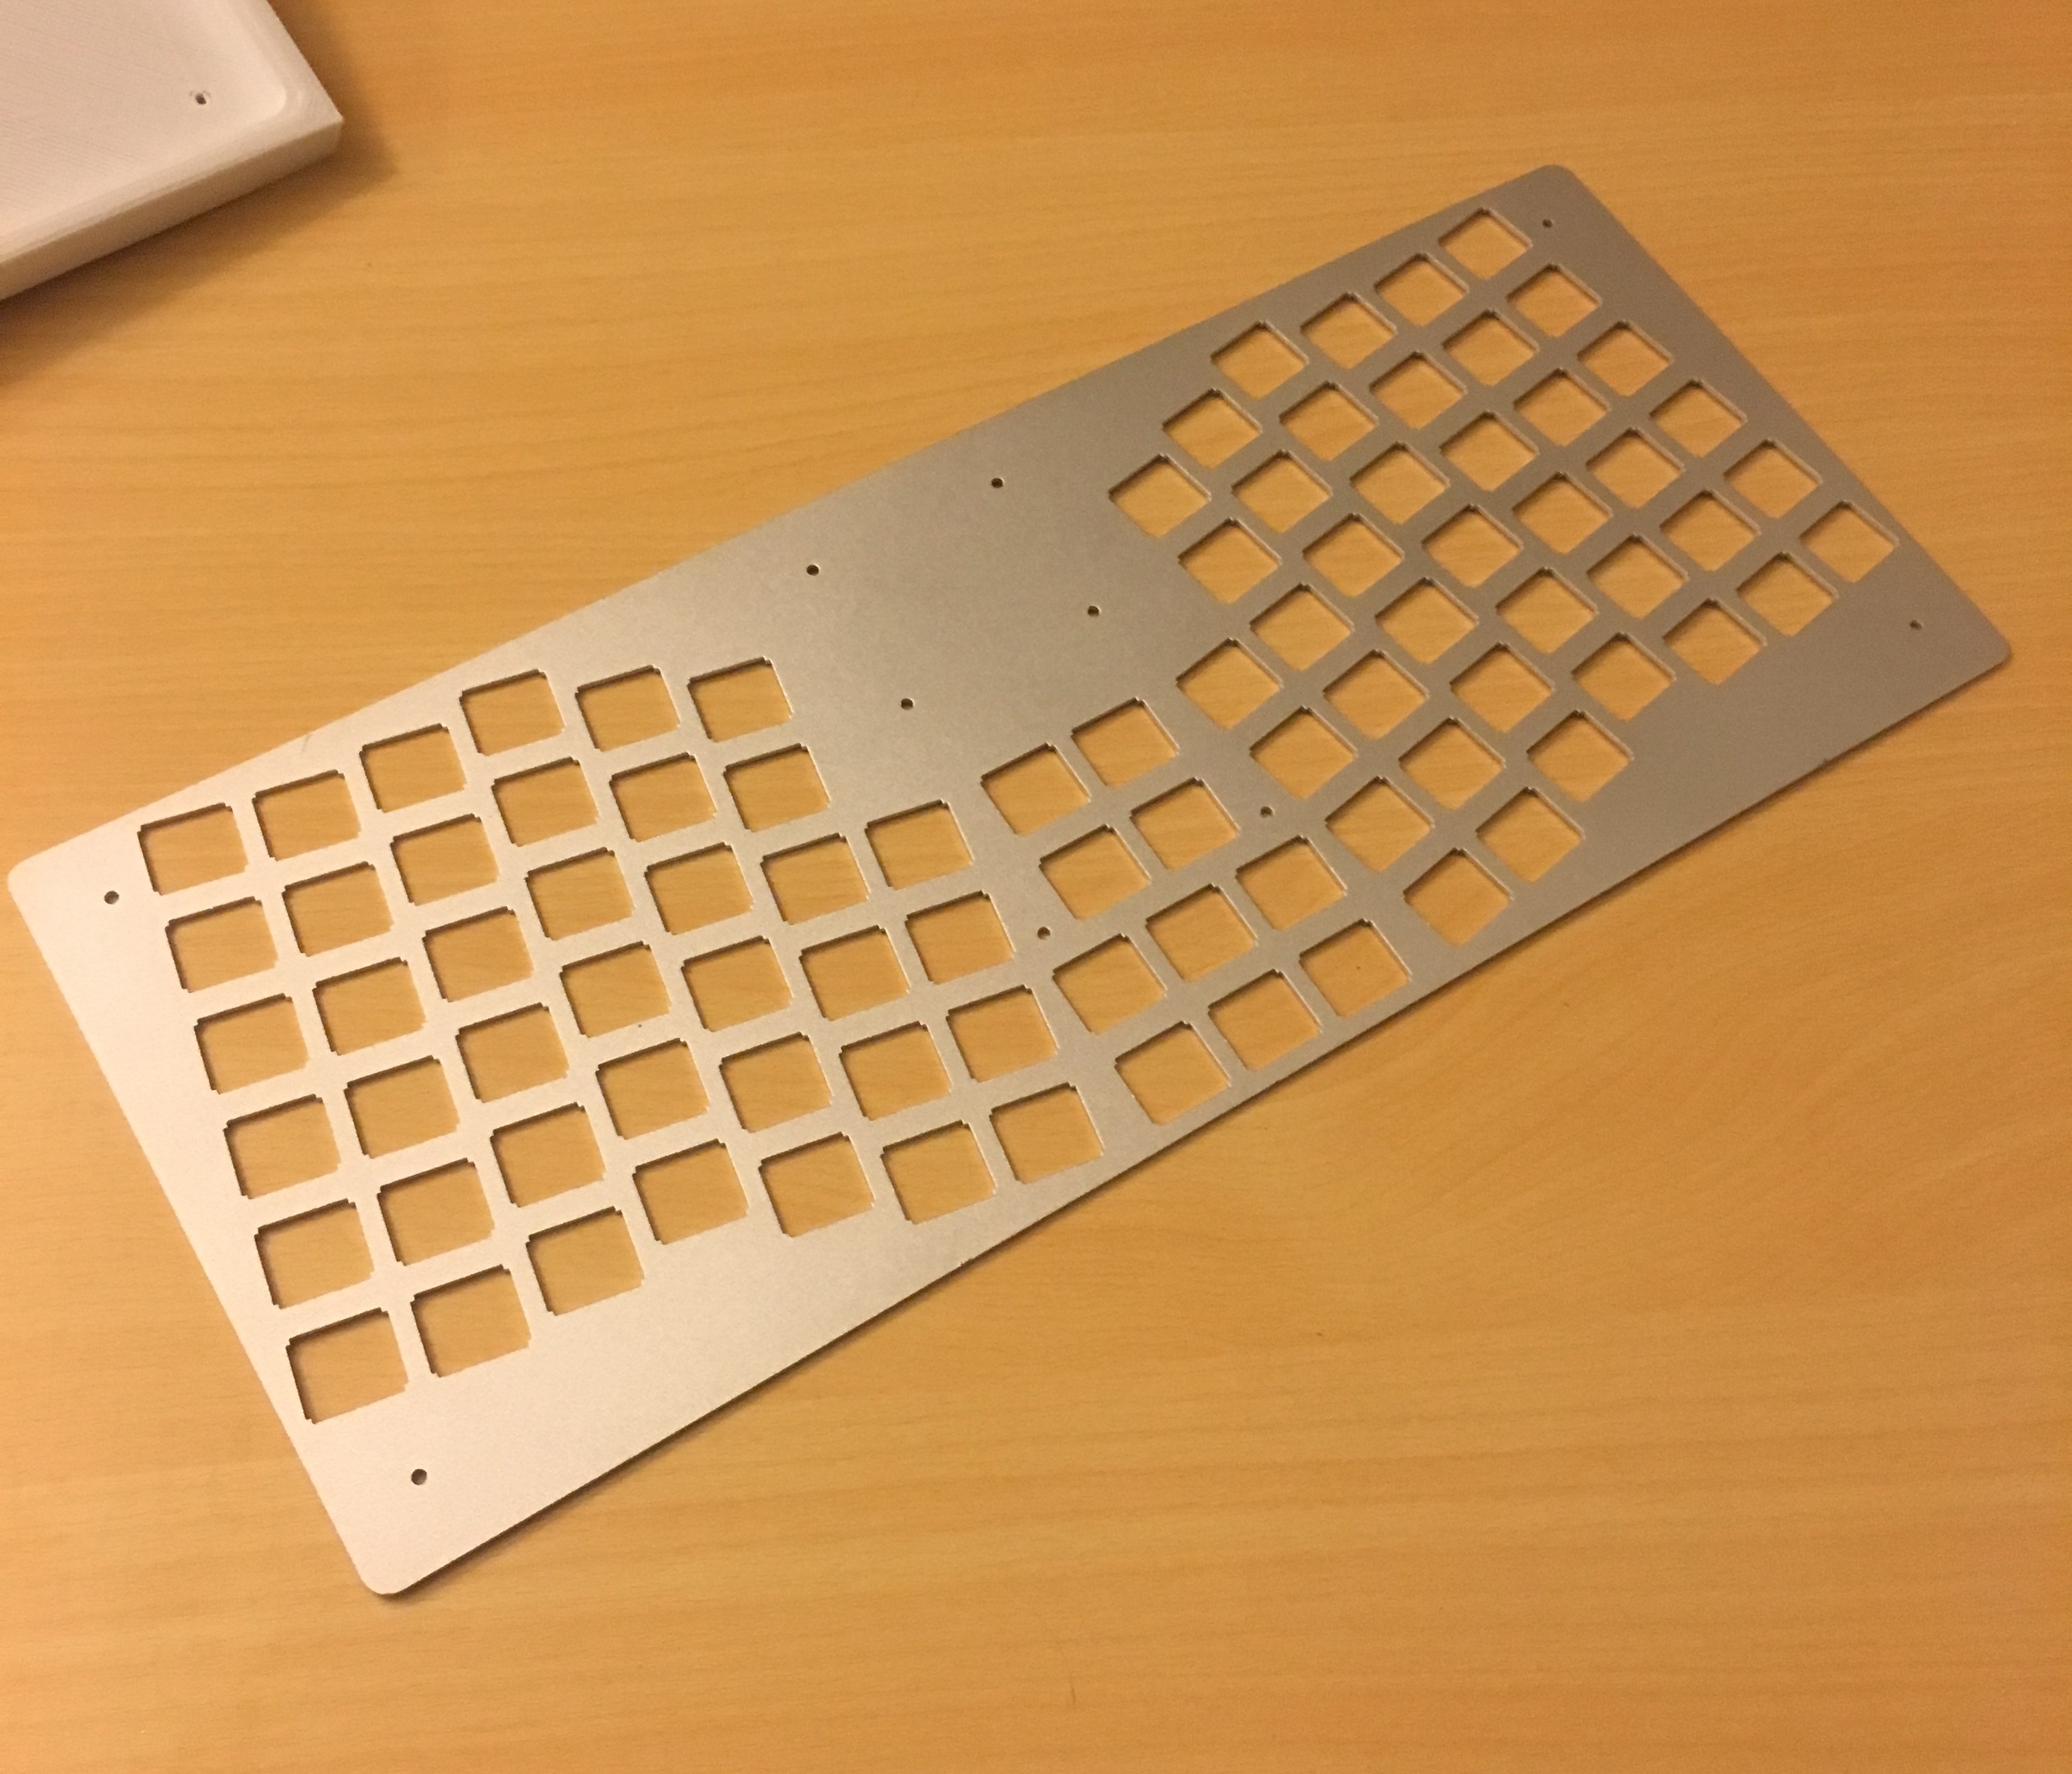
Overall I’m quite happy with how it’s turned out. Here are some renders of the PCB:
Because the microcontroller will sit on the top of the PCB now, there is a cutout in the switch plate to ensure it fits and then there is a small cover that will protect the controller; however, it has a hole to make the reset switch accessible.
This design doesn’t allow for middle layers but that was actually intentional as I’m hoping to design a case that can be 3D printed or potentially even CNCed.
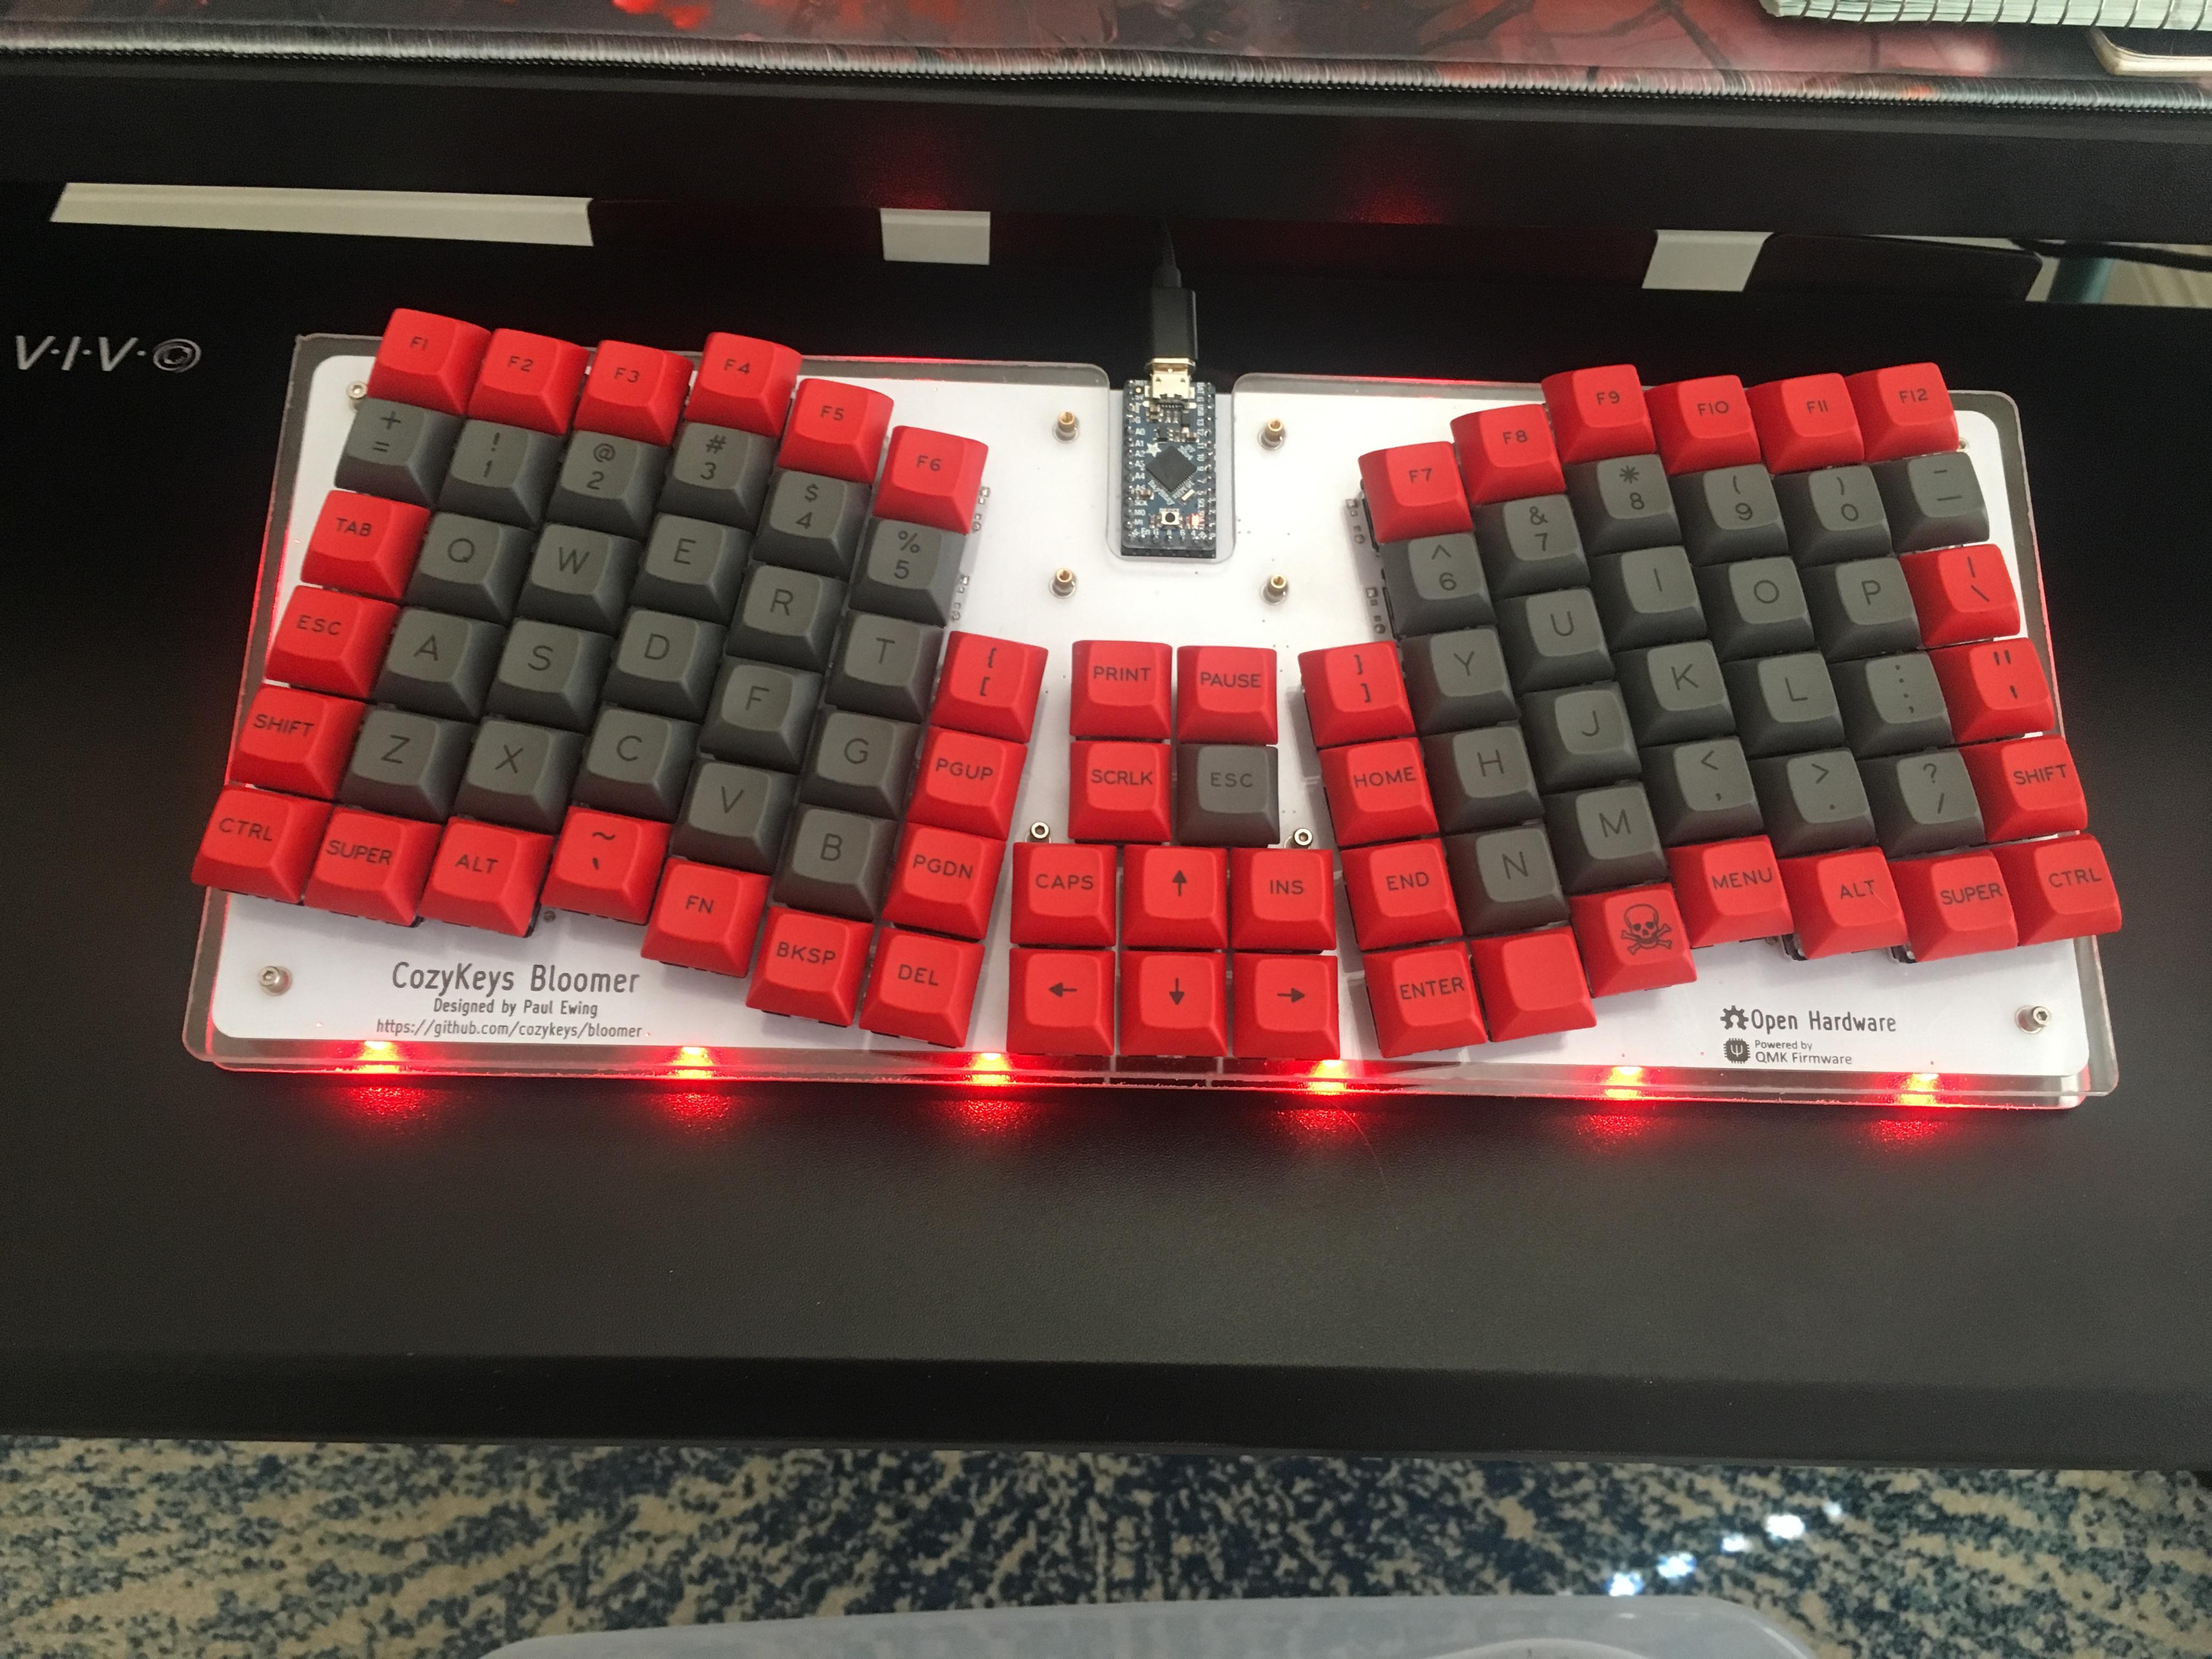
Just ordered 10 sets of PCBs and case components. It was worth bumping the quantities to 10 because the price reduction per piece from 5 to 10 is pretty huge from the manufacturers I chose (Pcbway and BigBlueSaw respectively). I used 1.5mm polycarbonate for the case with the exception of the riser which is 3mm acrylic.
I’ll likely build a few of them for myself and then, if I feel confident with the result, sell the rest off as kits to recover some of the manufacturing costs. I said this the last time as well but never ended up selling the extras due to issues with the RGBs shorting out because they were too close to the stainless steel bottom plate.
There also just happens to be a GB for GMK blanks right now so I put together this kit to cover the keys on the board that are either:
Difficult to find with the correct legend, size, and profile
Commonly reprogrammed
I also put in R0 because it makes the function keys much easier to press without looking down. To my knowledge, only 3 GMK sets have been made with R0 (Iris, Carbon Round 2, and TA 90)
It’s looking like the only 1u R0 color that will hit MOQ is CR so that will likely be the only color I get. It should also be the cheapest because the numbers are high enough to hit price drops and it’s also the easiest to source alphas for because Massdrop constantly sells GMK WoB.
So, only thing left to do is wait for everything to arrive (And maybe sell a few of my spare keyboards to feel better about the costs lol).
Not really for me because I’m afraid of jumping into the ortho world.
But I have a colleague that likes ortholinear keyboards and find itself limited to the number of keys of it’s Ergodox.
Also he finds the Ergodox thumb key cluster not very practical.
So he is still using it’s Truly Ergonomic for these reasons
But your design have rows for Fn keys and a key cluster in-between the two halves and it may be very interesting for him
Thanks! My original intent was to make something that was a bit more approachable than more extreme ergonomic boards like the Kinesis Advantage. I used to use an Advantage but it took almost a month to fully adapt to so I completely understand the barrier to entry. I also like having the function keys for gaming.
There is a working PCB in the repository linked in the original post but it’s for the older version of the board. I never sold the extra parts I have for that version because the materials I chose made the build process somewhat tricky and I didn’t want to pass that risk on to buyers.
I’m hoping that this next version I just ordered the materials for will address those issues but if anyone is interested in the older versions, I would be happy to provide any of the extra PCBs for just the cost of shipping.
I still need to figure out the right way to set up numlock on QMK. I could easily just make a third layer and toggle it but I’d prefer to use the real num lock feature.
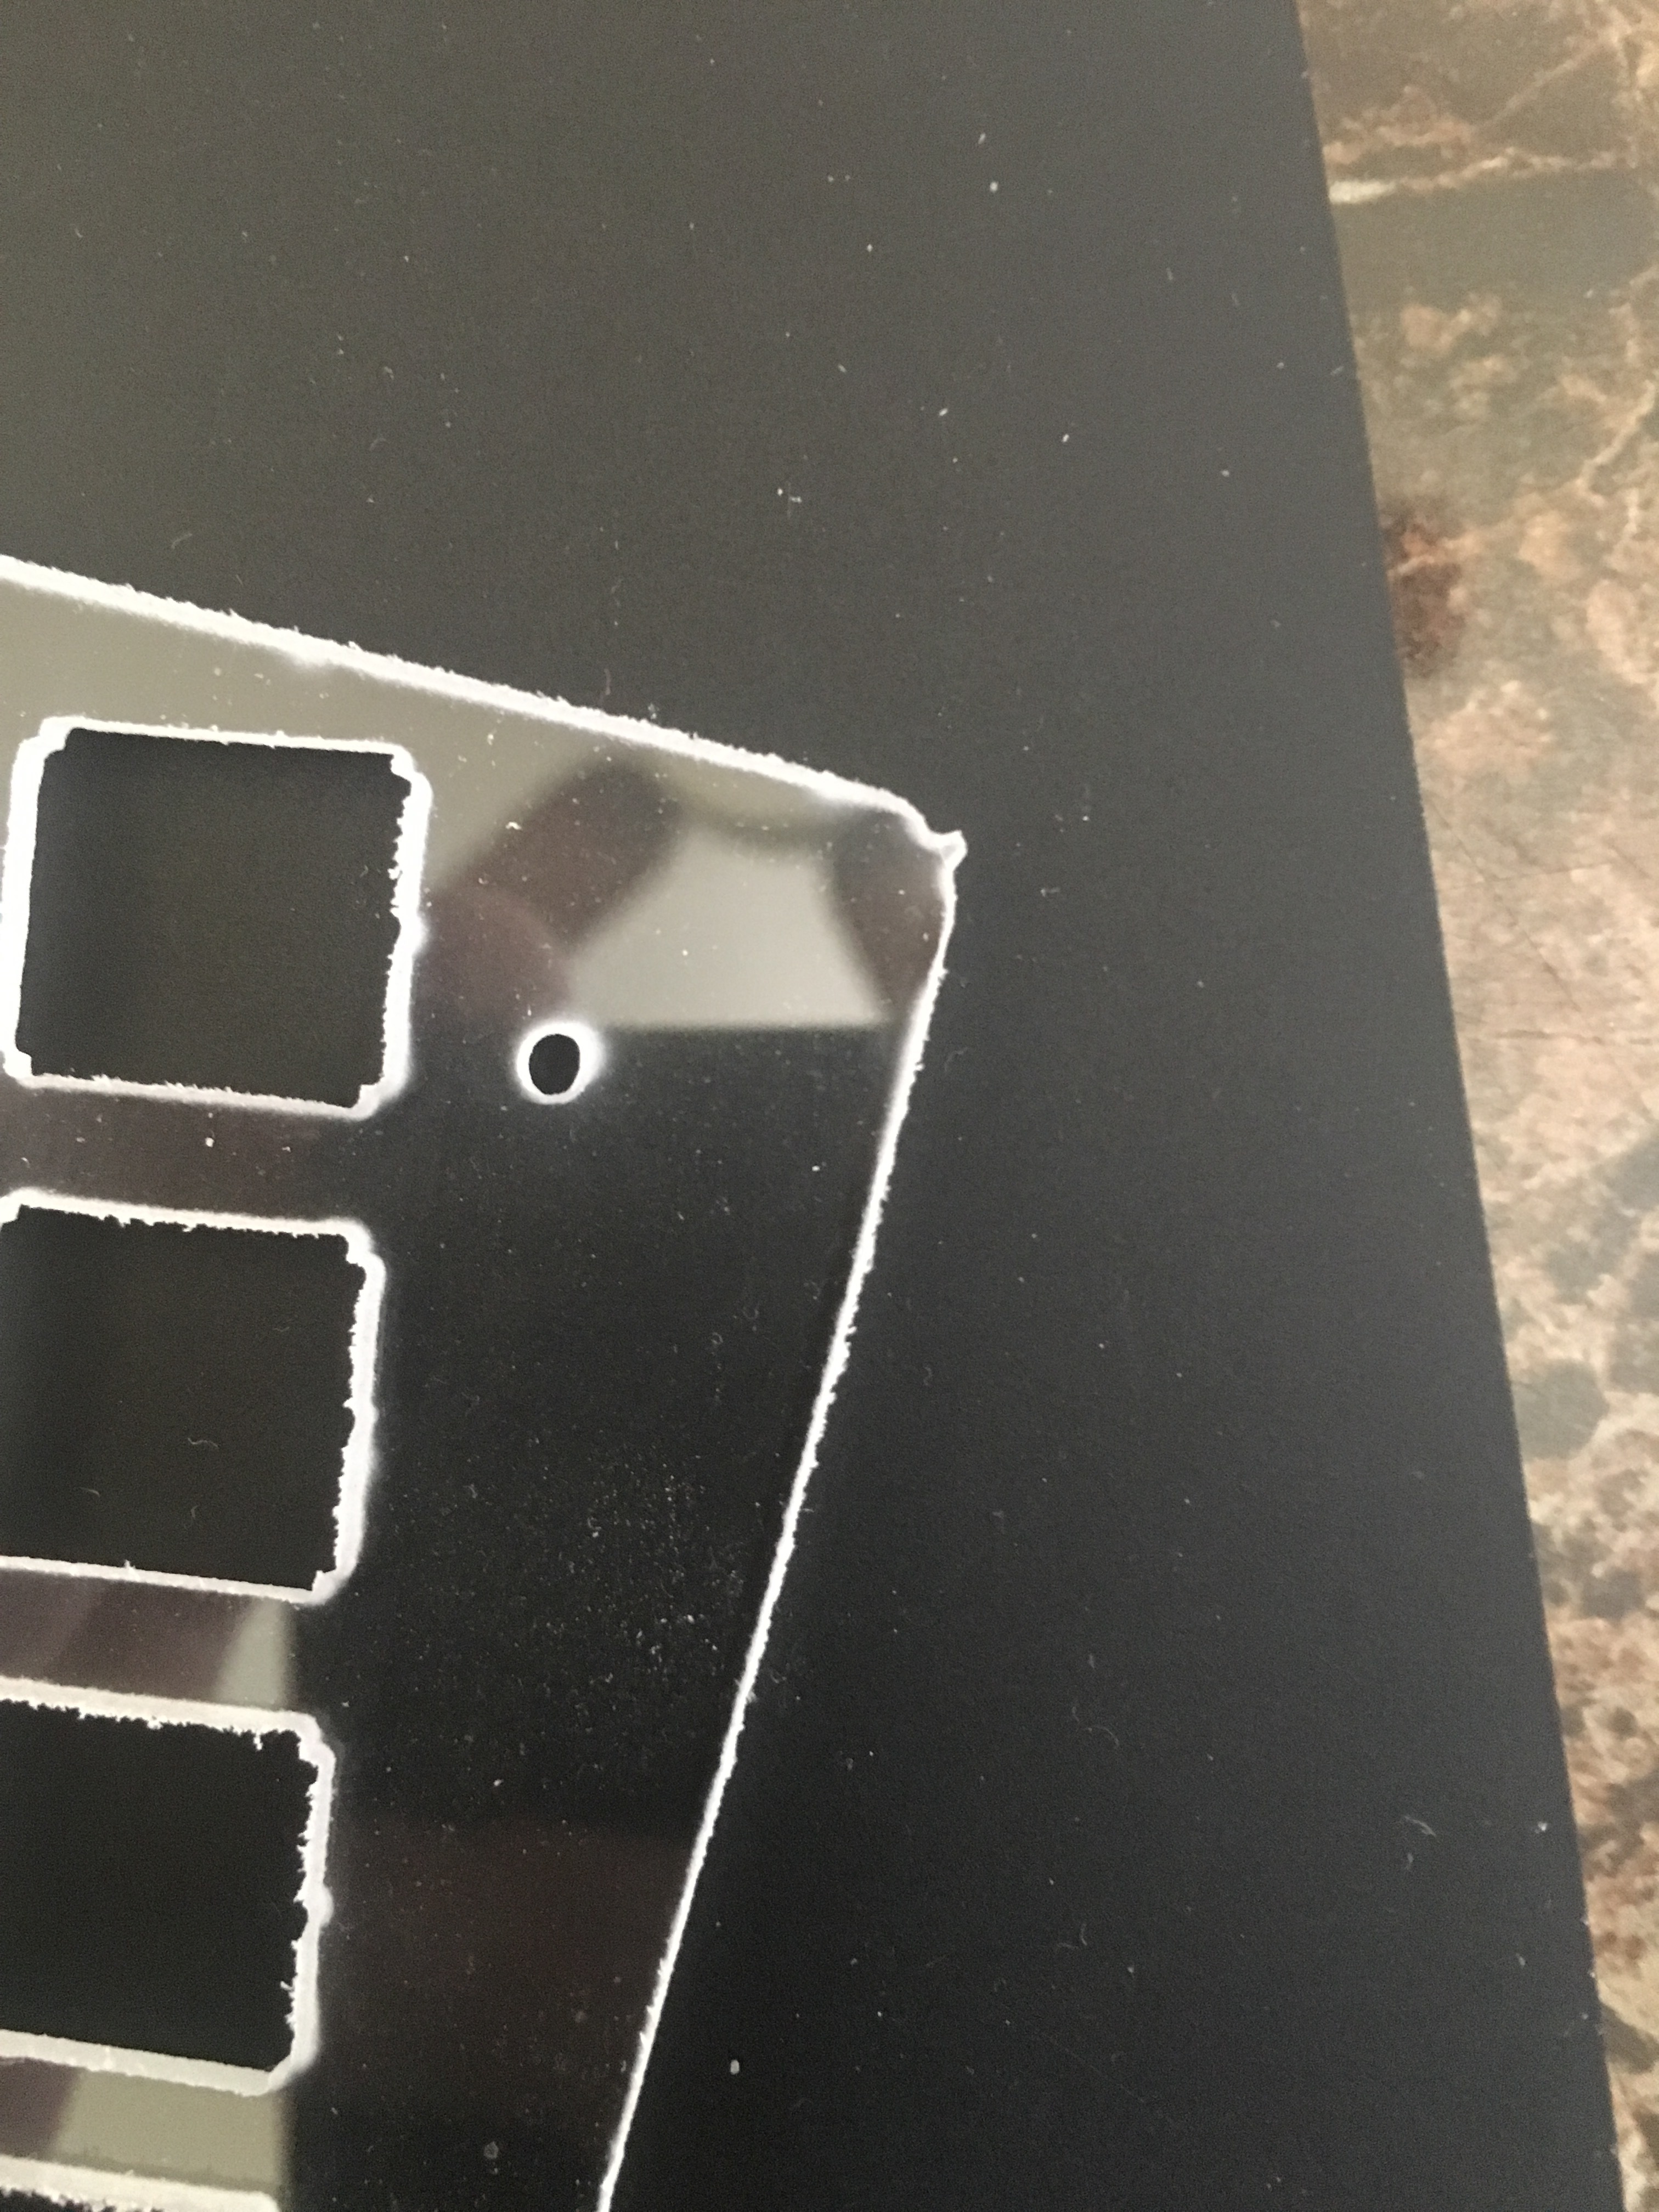
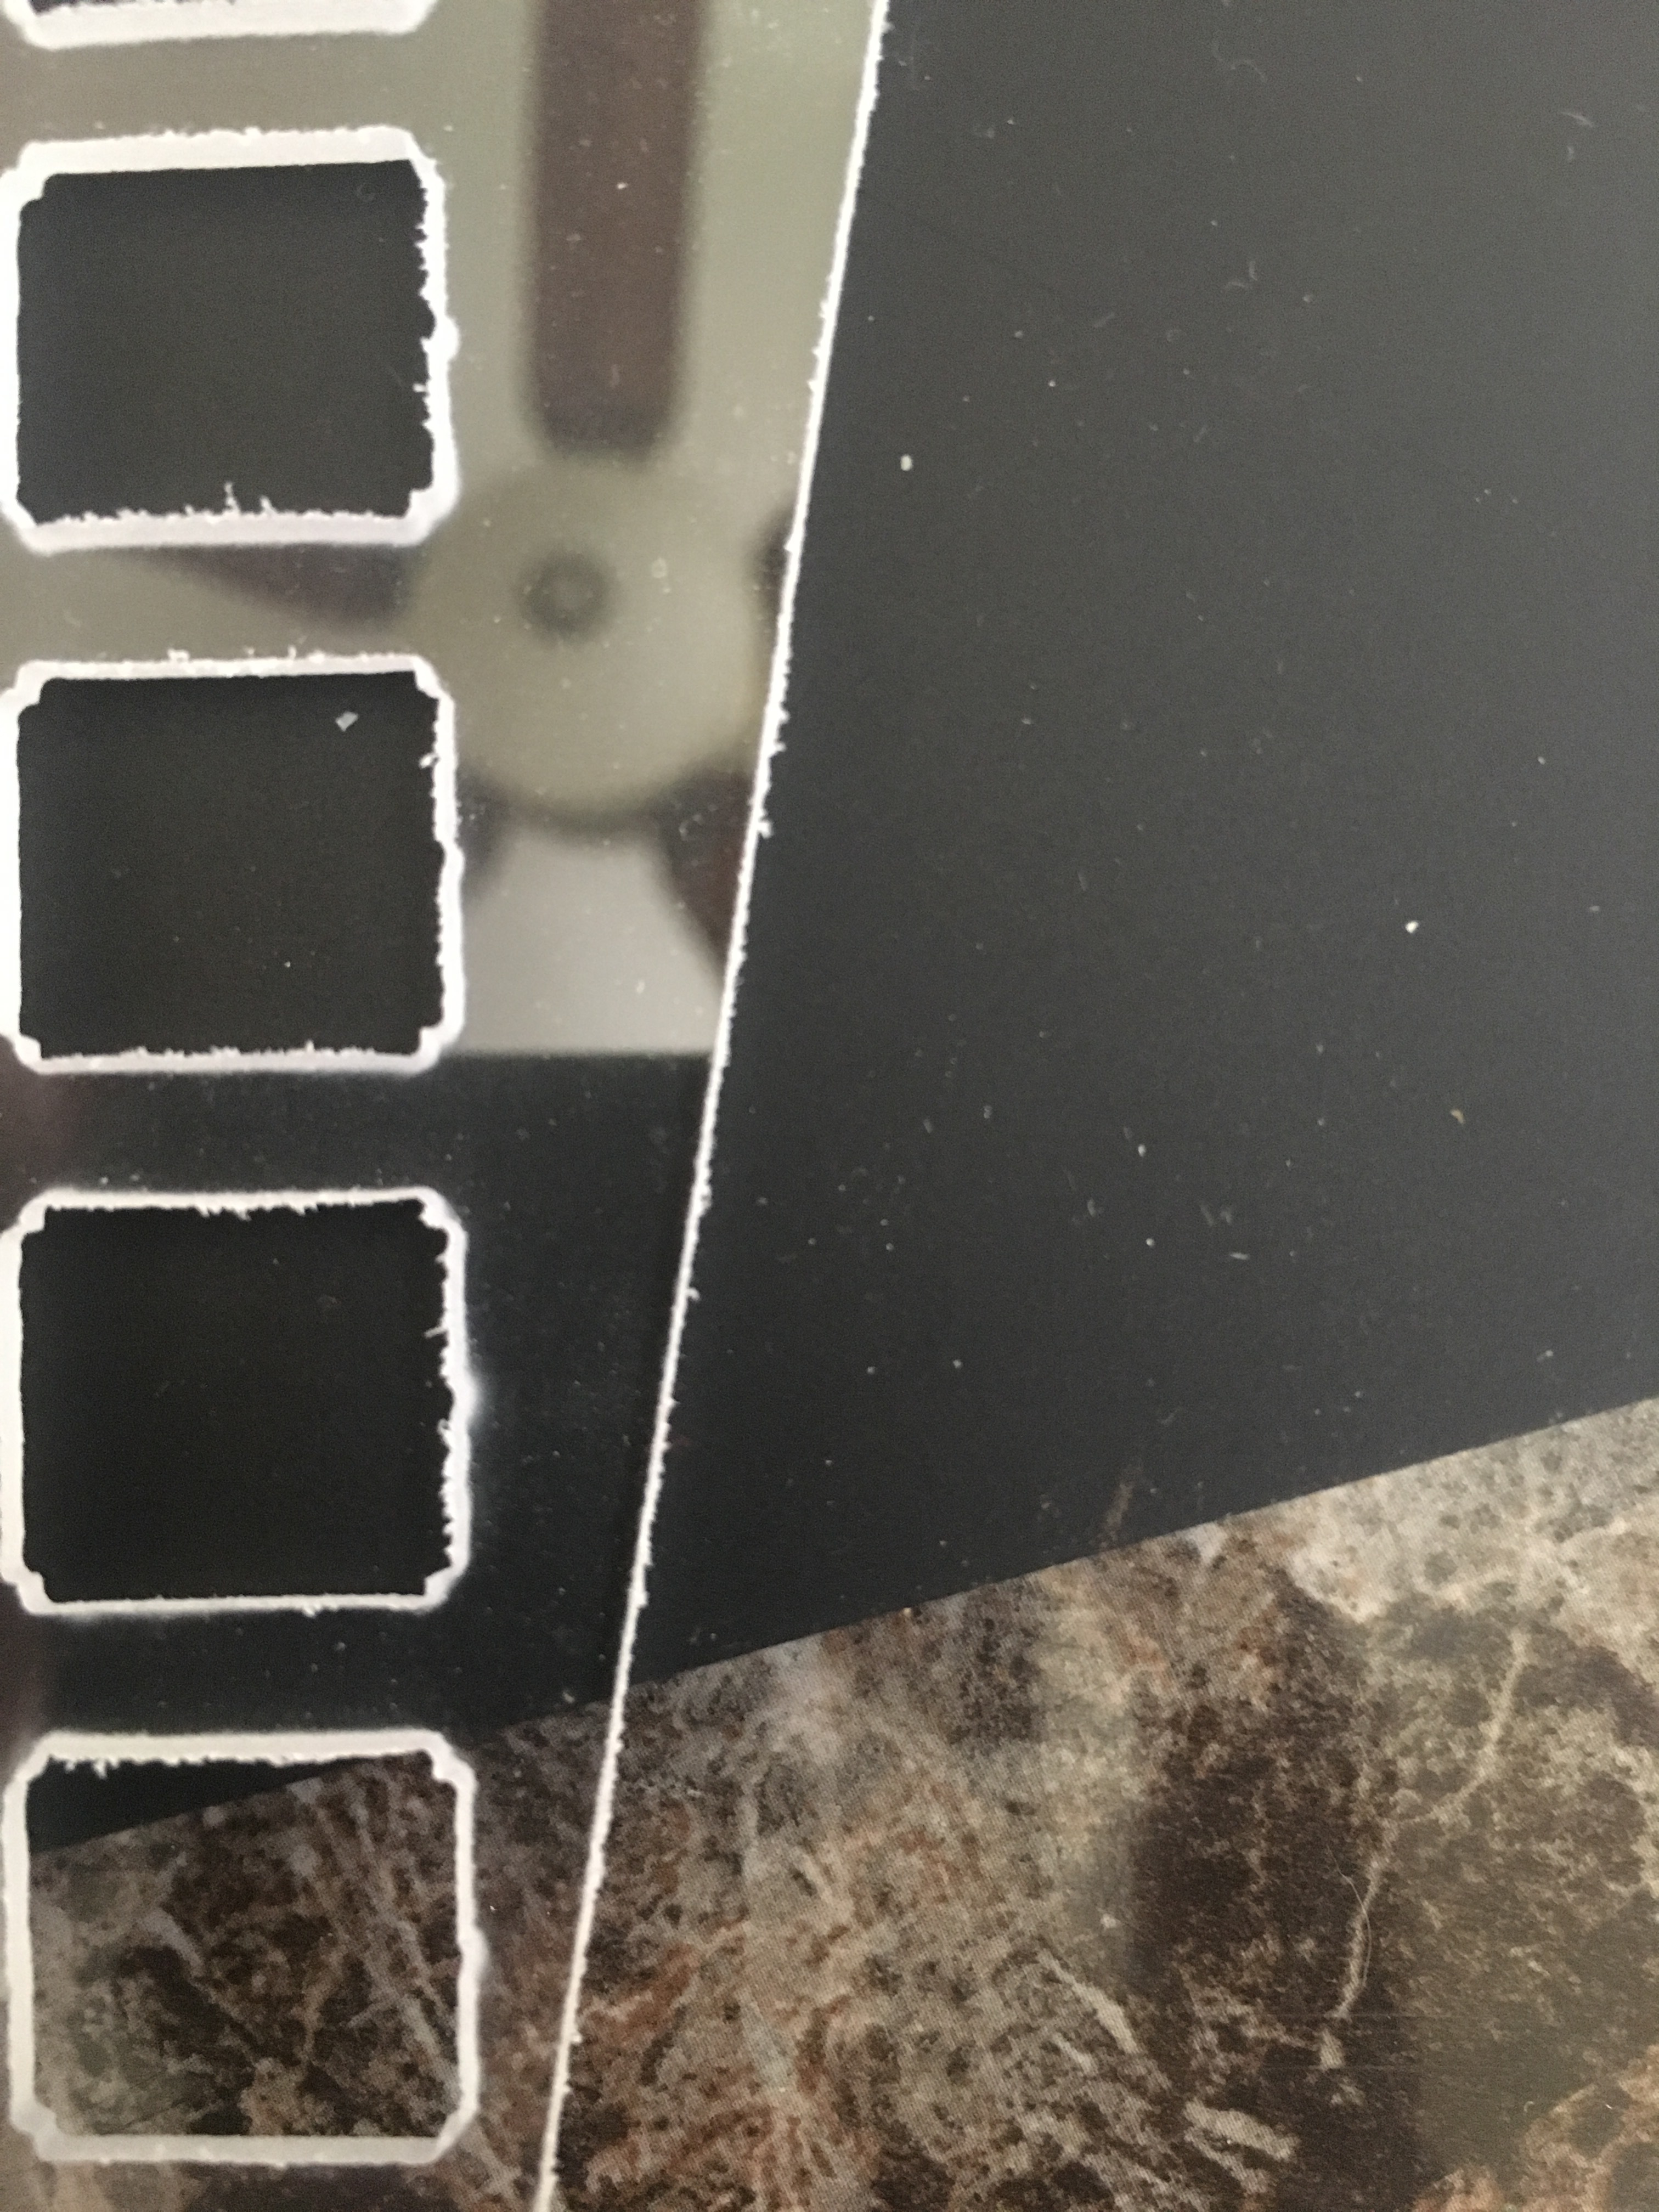
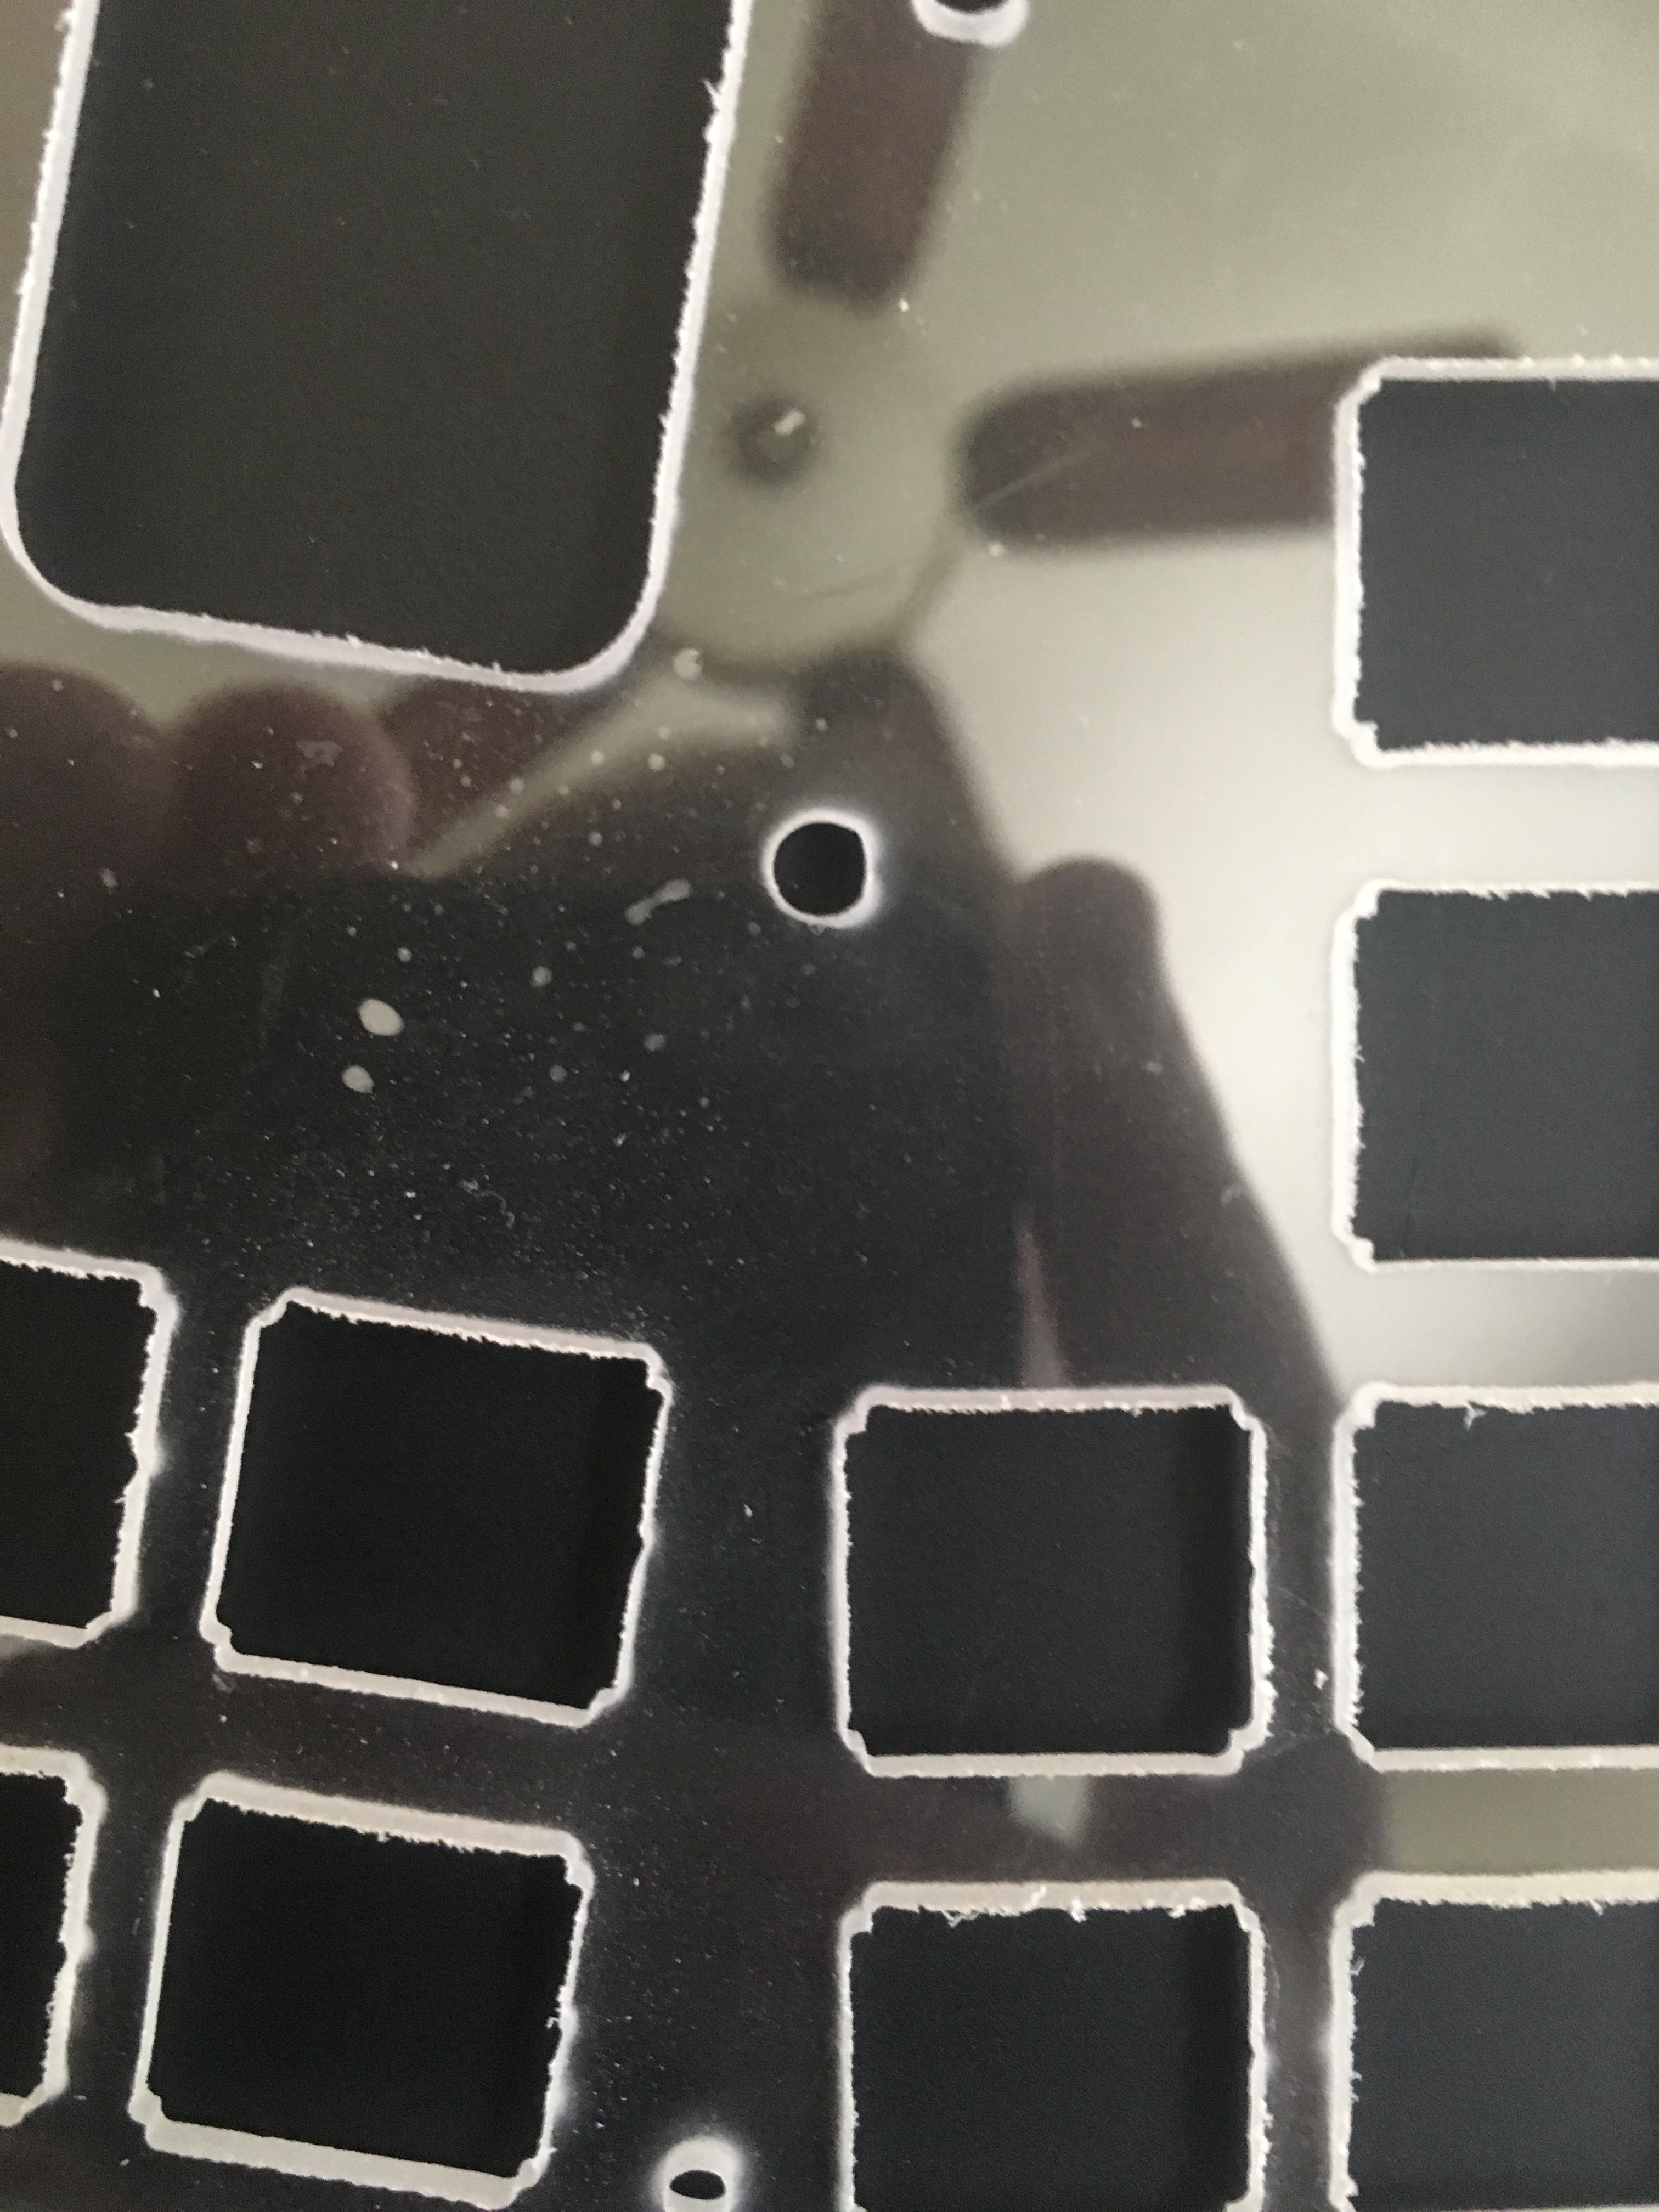
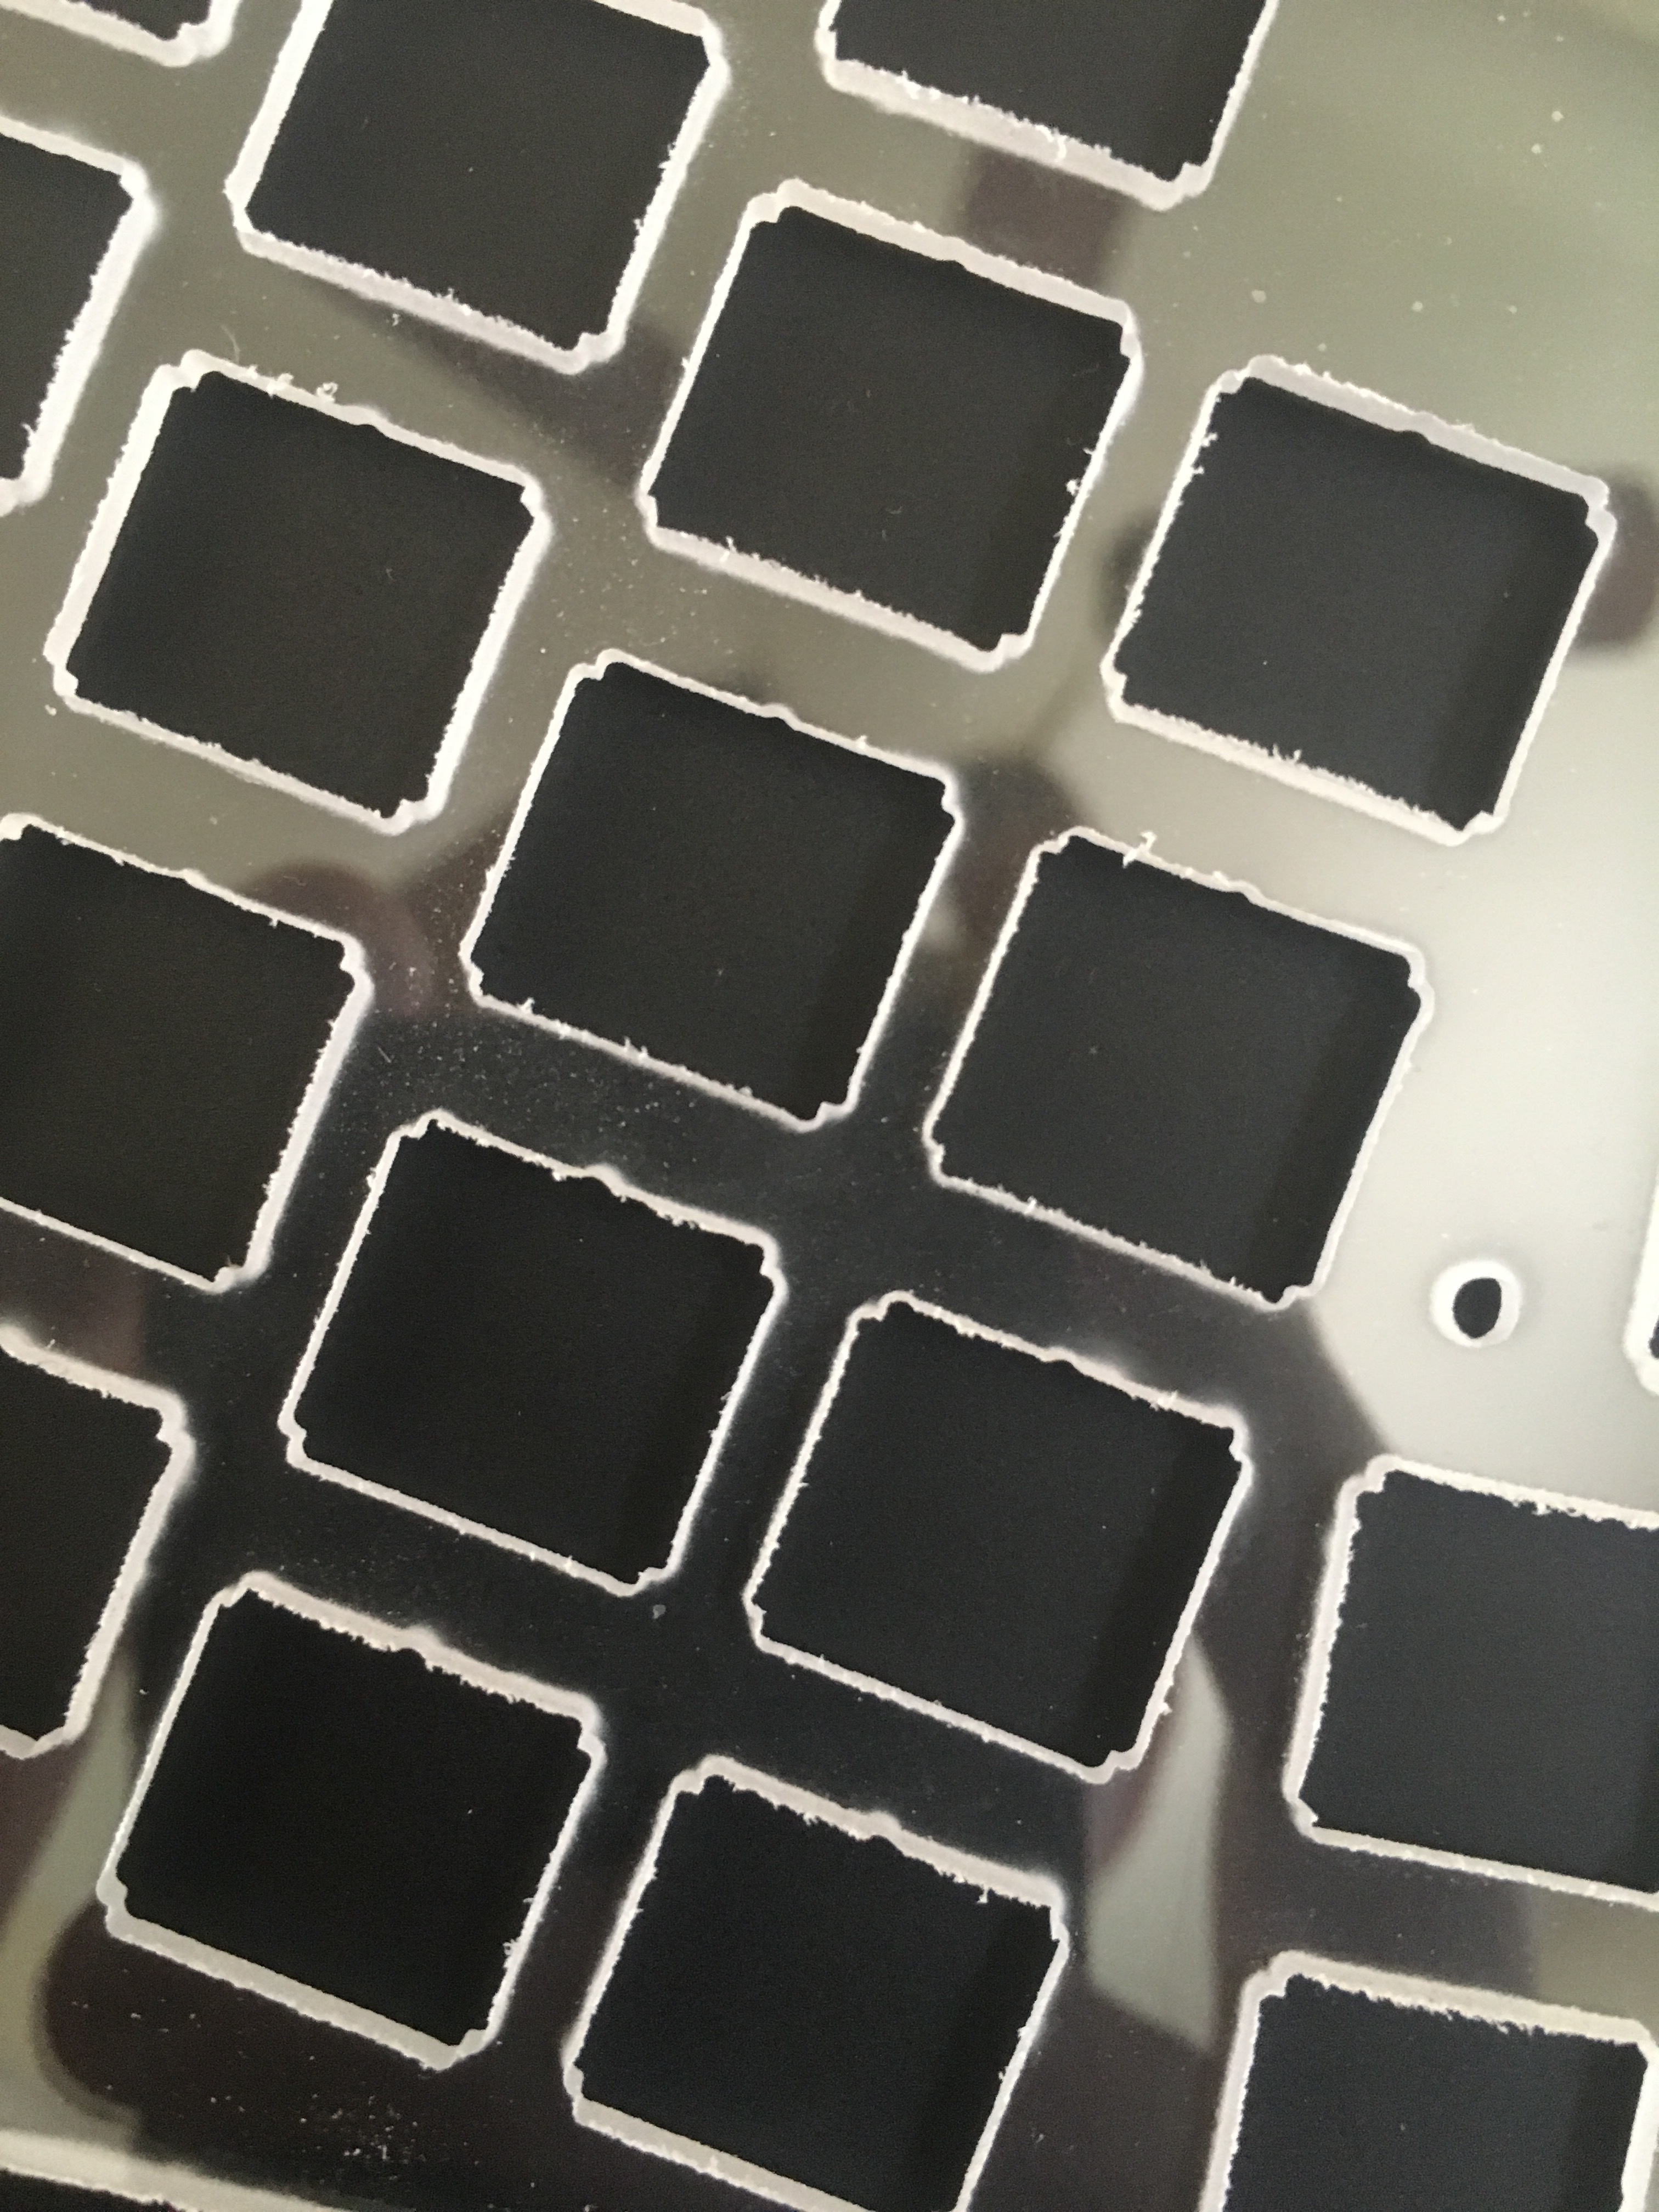
Sadly, I’m pretty unhappy with the quality of the polycarbonate I got from BigBlueSaw. I’m not sure if it’s because of their water jet cutting process but the edges are horrible and several spots are very noticeably cloudy instead of being clean and clear the way acrylic has been in the past.
I’m going to be contacting them to see if this is all expected and potentially ask for acrylic replacements, which they cut with a laser instead. Had I known they would look this bad I never would have went with polycarbonate.
I should be submitting a pull request with the QMK firmware relatively soon and if anyone is interested in building one of these let me know. I’d be happy to send you PCBs/case parts at cost. I’ll post an update here when I hear back from BBS about the case issues.
Thanks! The PCB is actually pretty cheap to have manufactured so running a GB for it shouldn’t be hard. I just want to settle on a design I’m happy with first.
Wanted to follow up about this ASAP to make sure I don’t do any harm to BigBlueSaw’s reputation. I reached out to them about the issues with polycarbonate and they were very understanding and offered to replace all of the parts with acrylic instead.
From my understanding, the rough edges are expected because polycarbonate is a softer material and the waterjet can make the material vibrate during the cutting process. For more context, this is what the result can look like:
Anyways, lesson learned. In the future, I’ll stick to either acrylic, which is laser cut, or metal, which doesn’t exhibit these issues when cut with the waterjet.
I would still happily order from BigBlueSaw again and recommend them. Just avoid polycarbonate if you want clean, precise cuts.
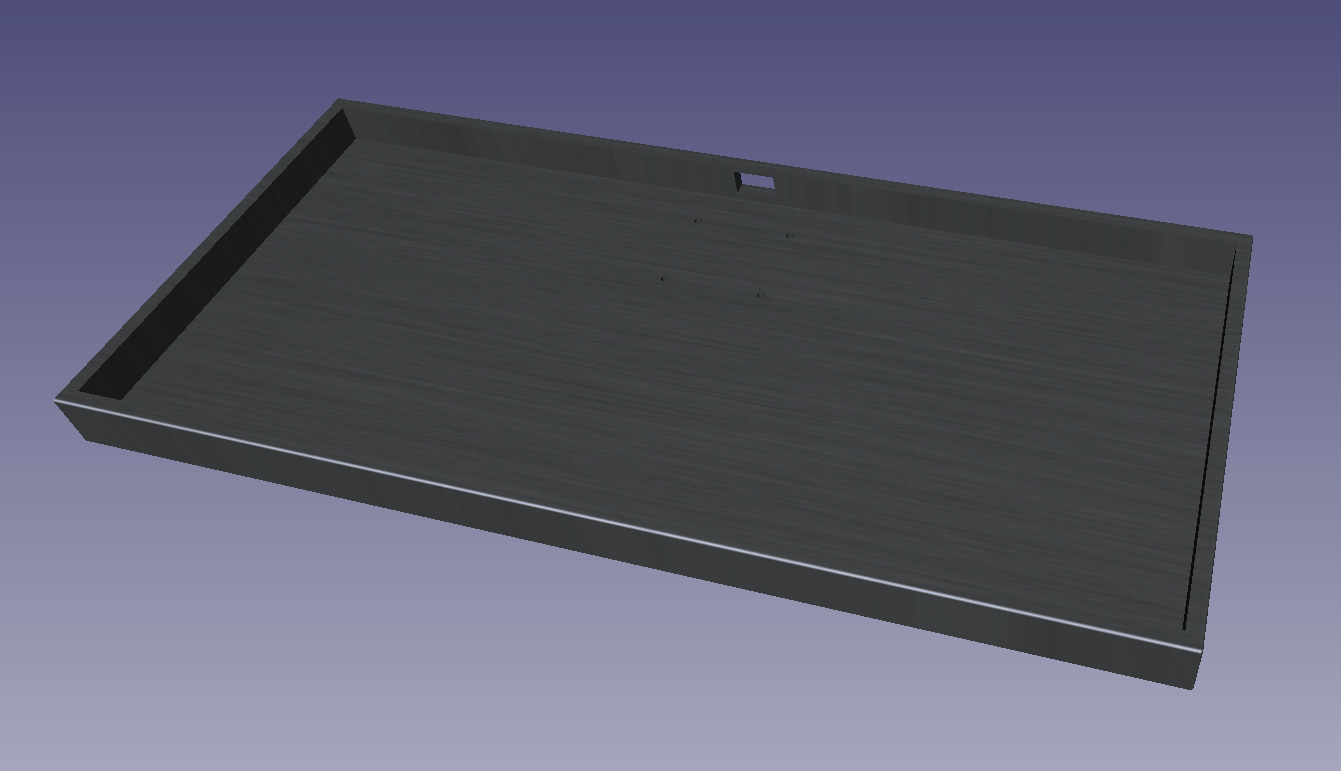
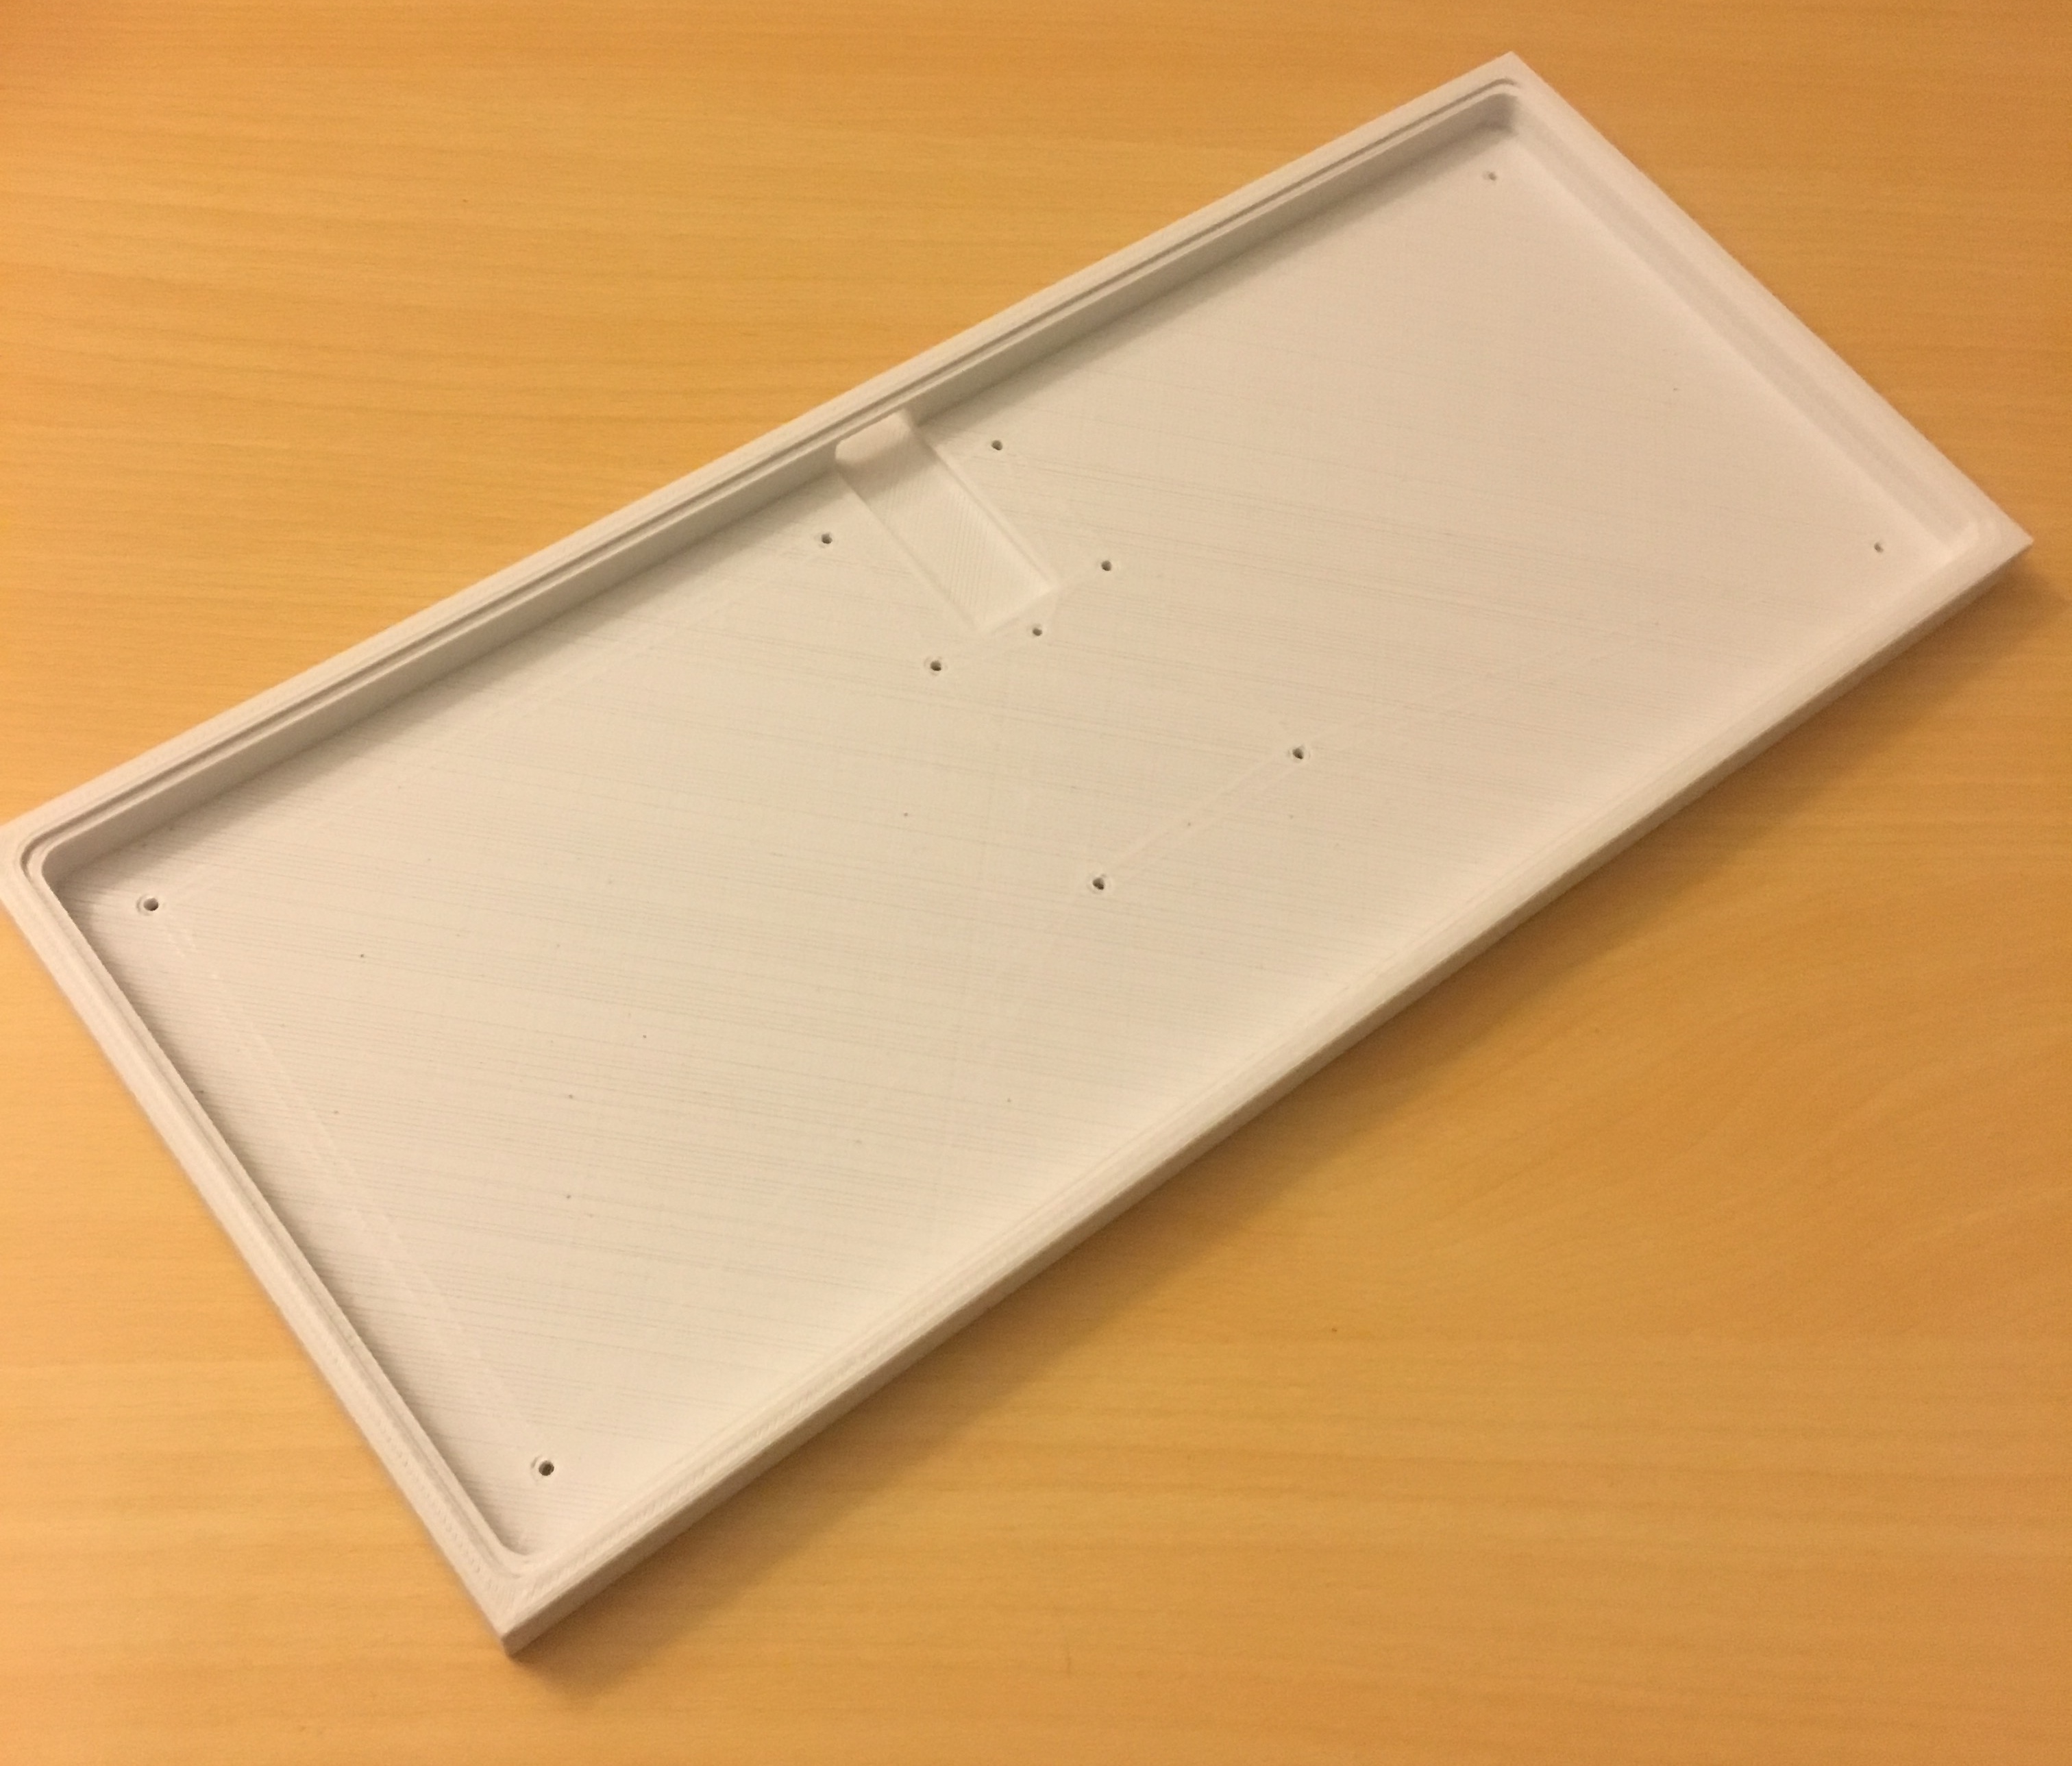
While I wait for the acryllic case parts to ship I’m going to be working on a 3D printable case. I’ve never done any 3D modeling before so I’m learning FreeCAD. Progress so far:
Yea I actually realized that as I was playing around with FreeCAD. I ended up leaving the shape of the plate and PCB the same. The finished case is up on Thingiverse now:
I took some inspiration from the Let’s Split case by Woodkeys:
I like that it’s a simple 1 piece case that can be both milled and 3D printed. Also, it makes for a flat top which is ideal for this keyboard. There is a lot of empty space such as the area below Z,X,C,V so having raised edges around the perimeter would probably lead to a ton of crumb/dirt build-up.
I don’t have my own 3D printer but I was surprised to see how reasonable the prices were on 3dhubs so I just ordered a prototype made of white PLA with 60% infill. I’ve never worked with PLA so I’m curious to see if it will diffuse the LEDs or if it’s too thick.
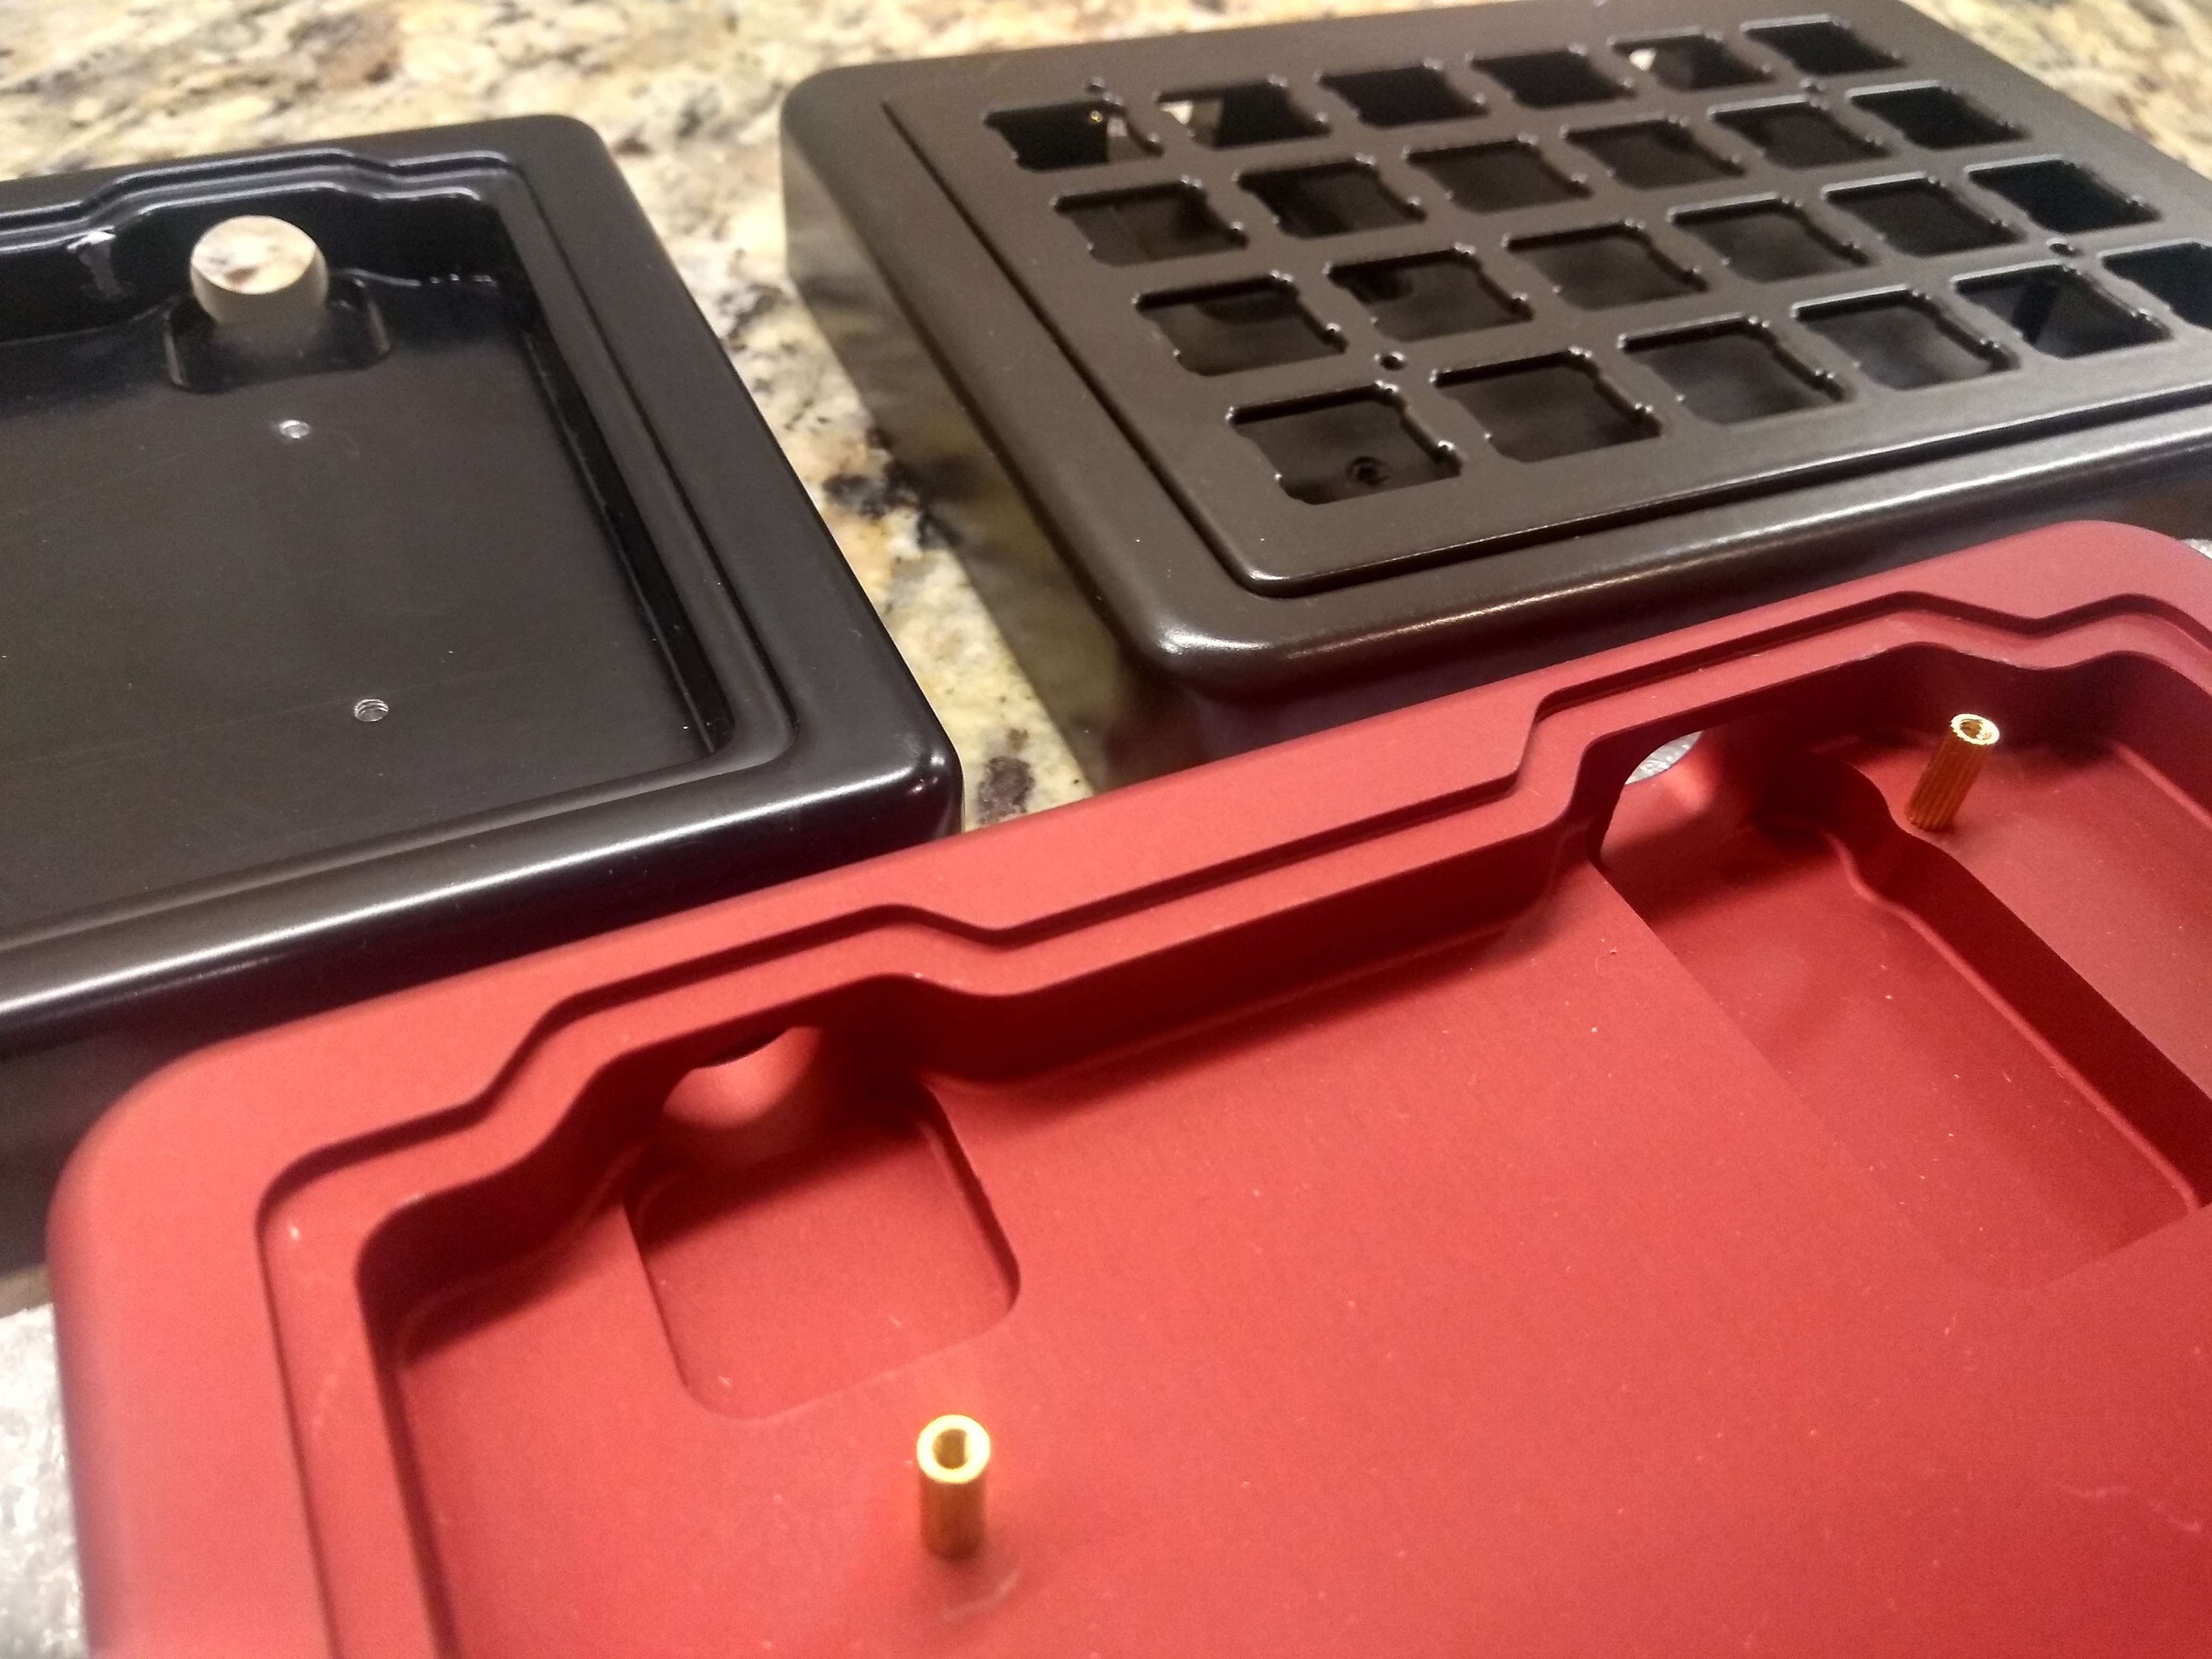
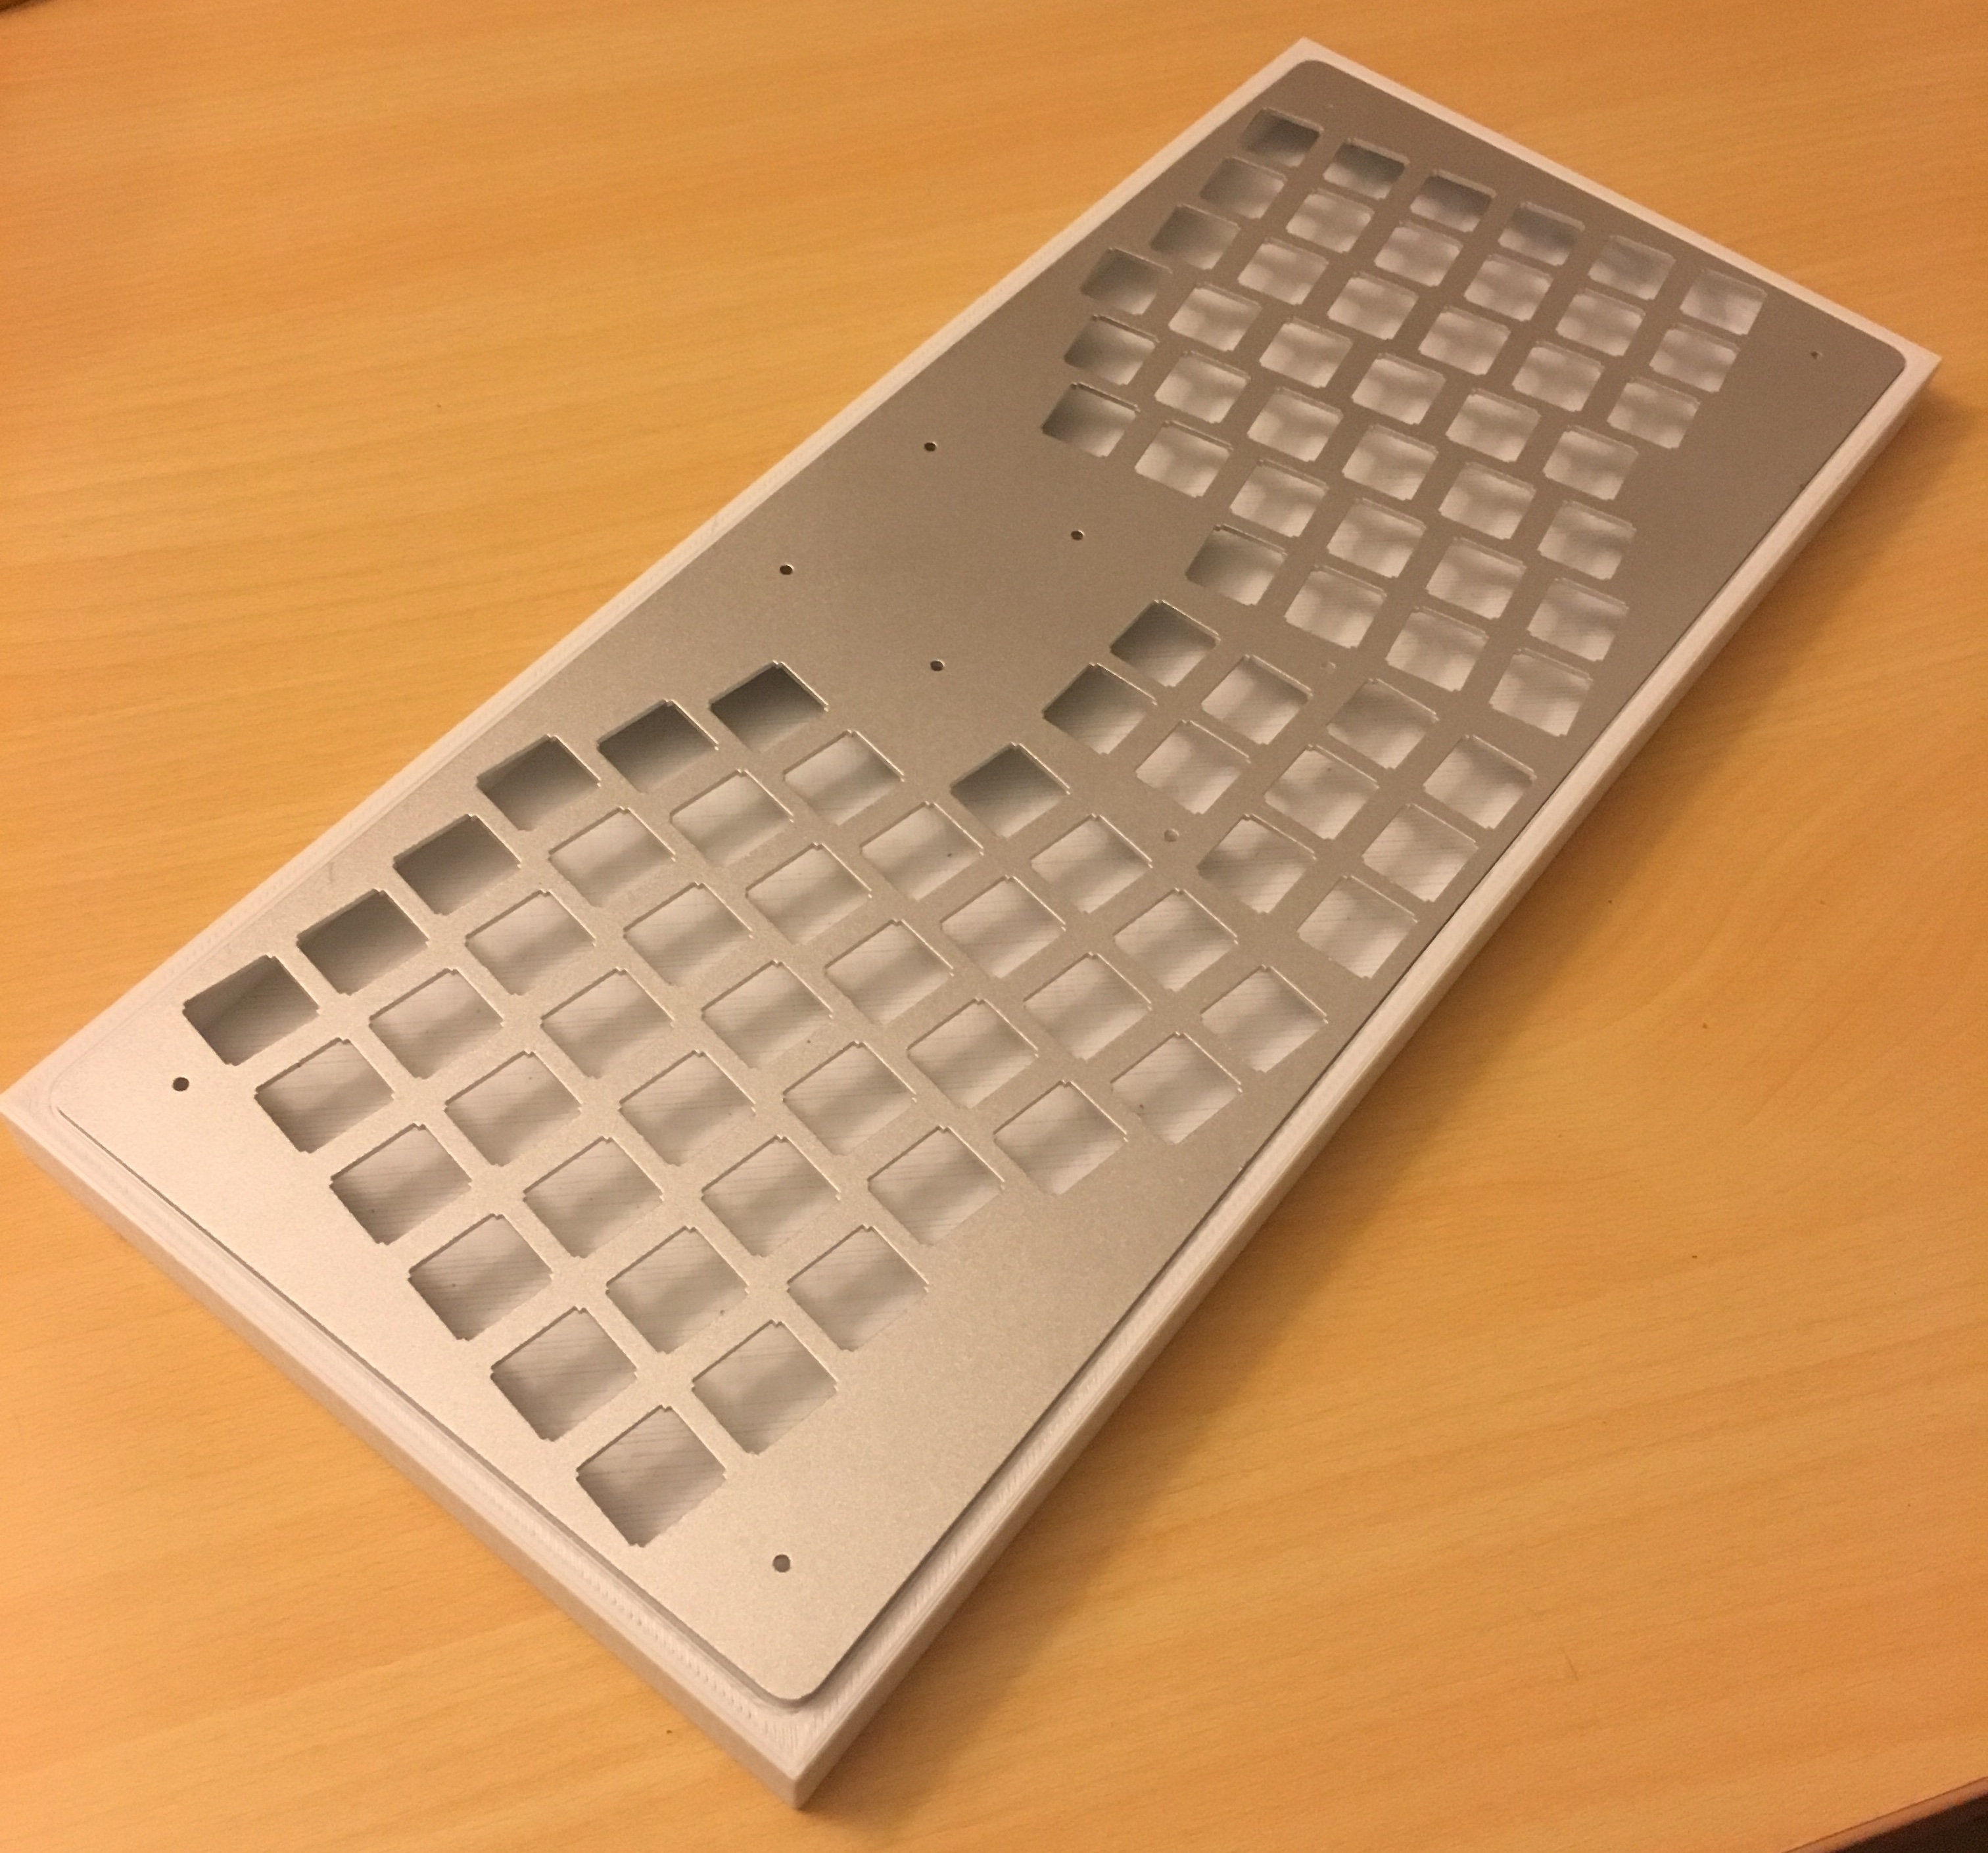
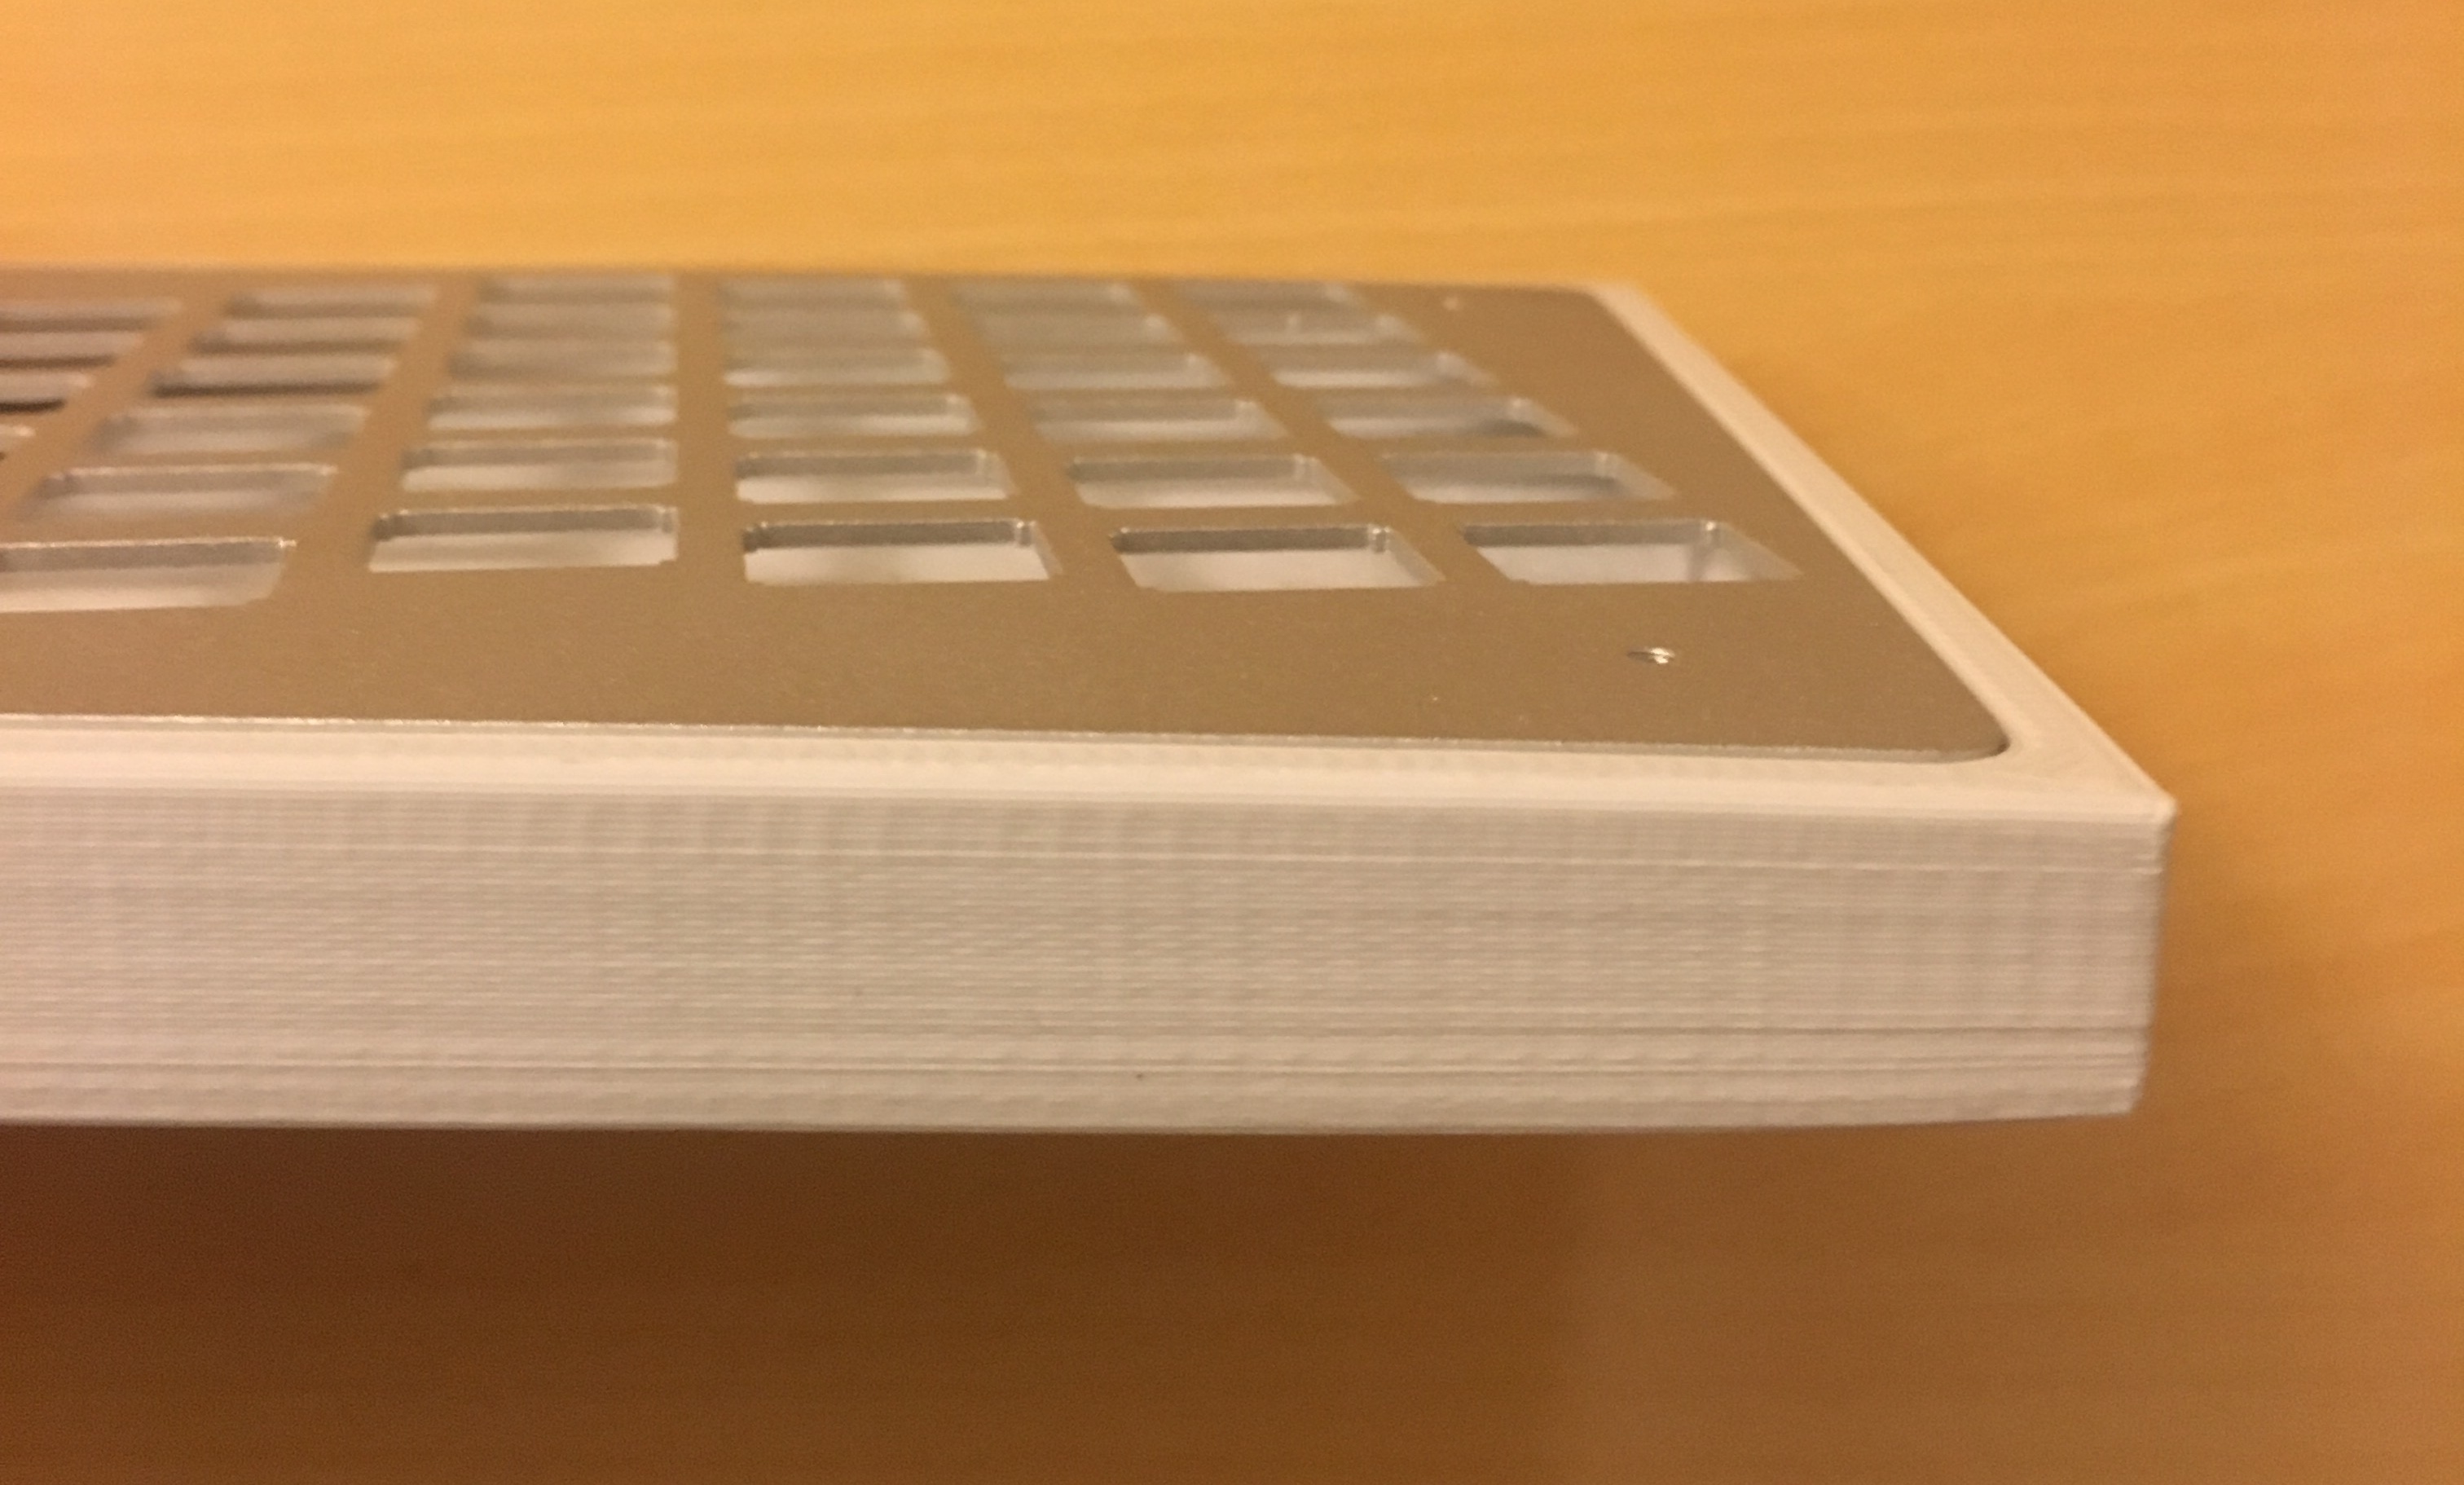
I got the 3D printed case I ordered as well as the plate replacements from BBS and new PCBs. I also ordered a single bead blasted aluminum plate without the controller cutout from LaserBoost.
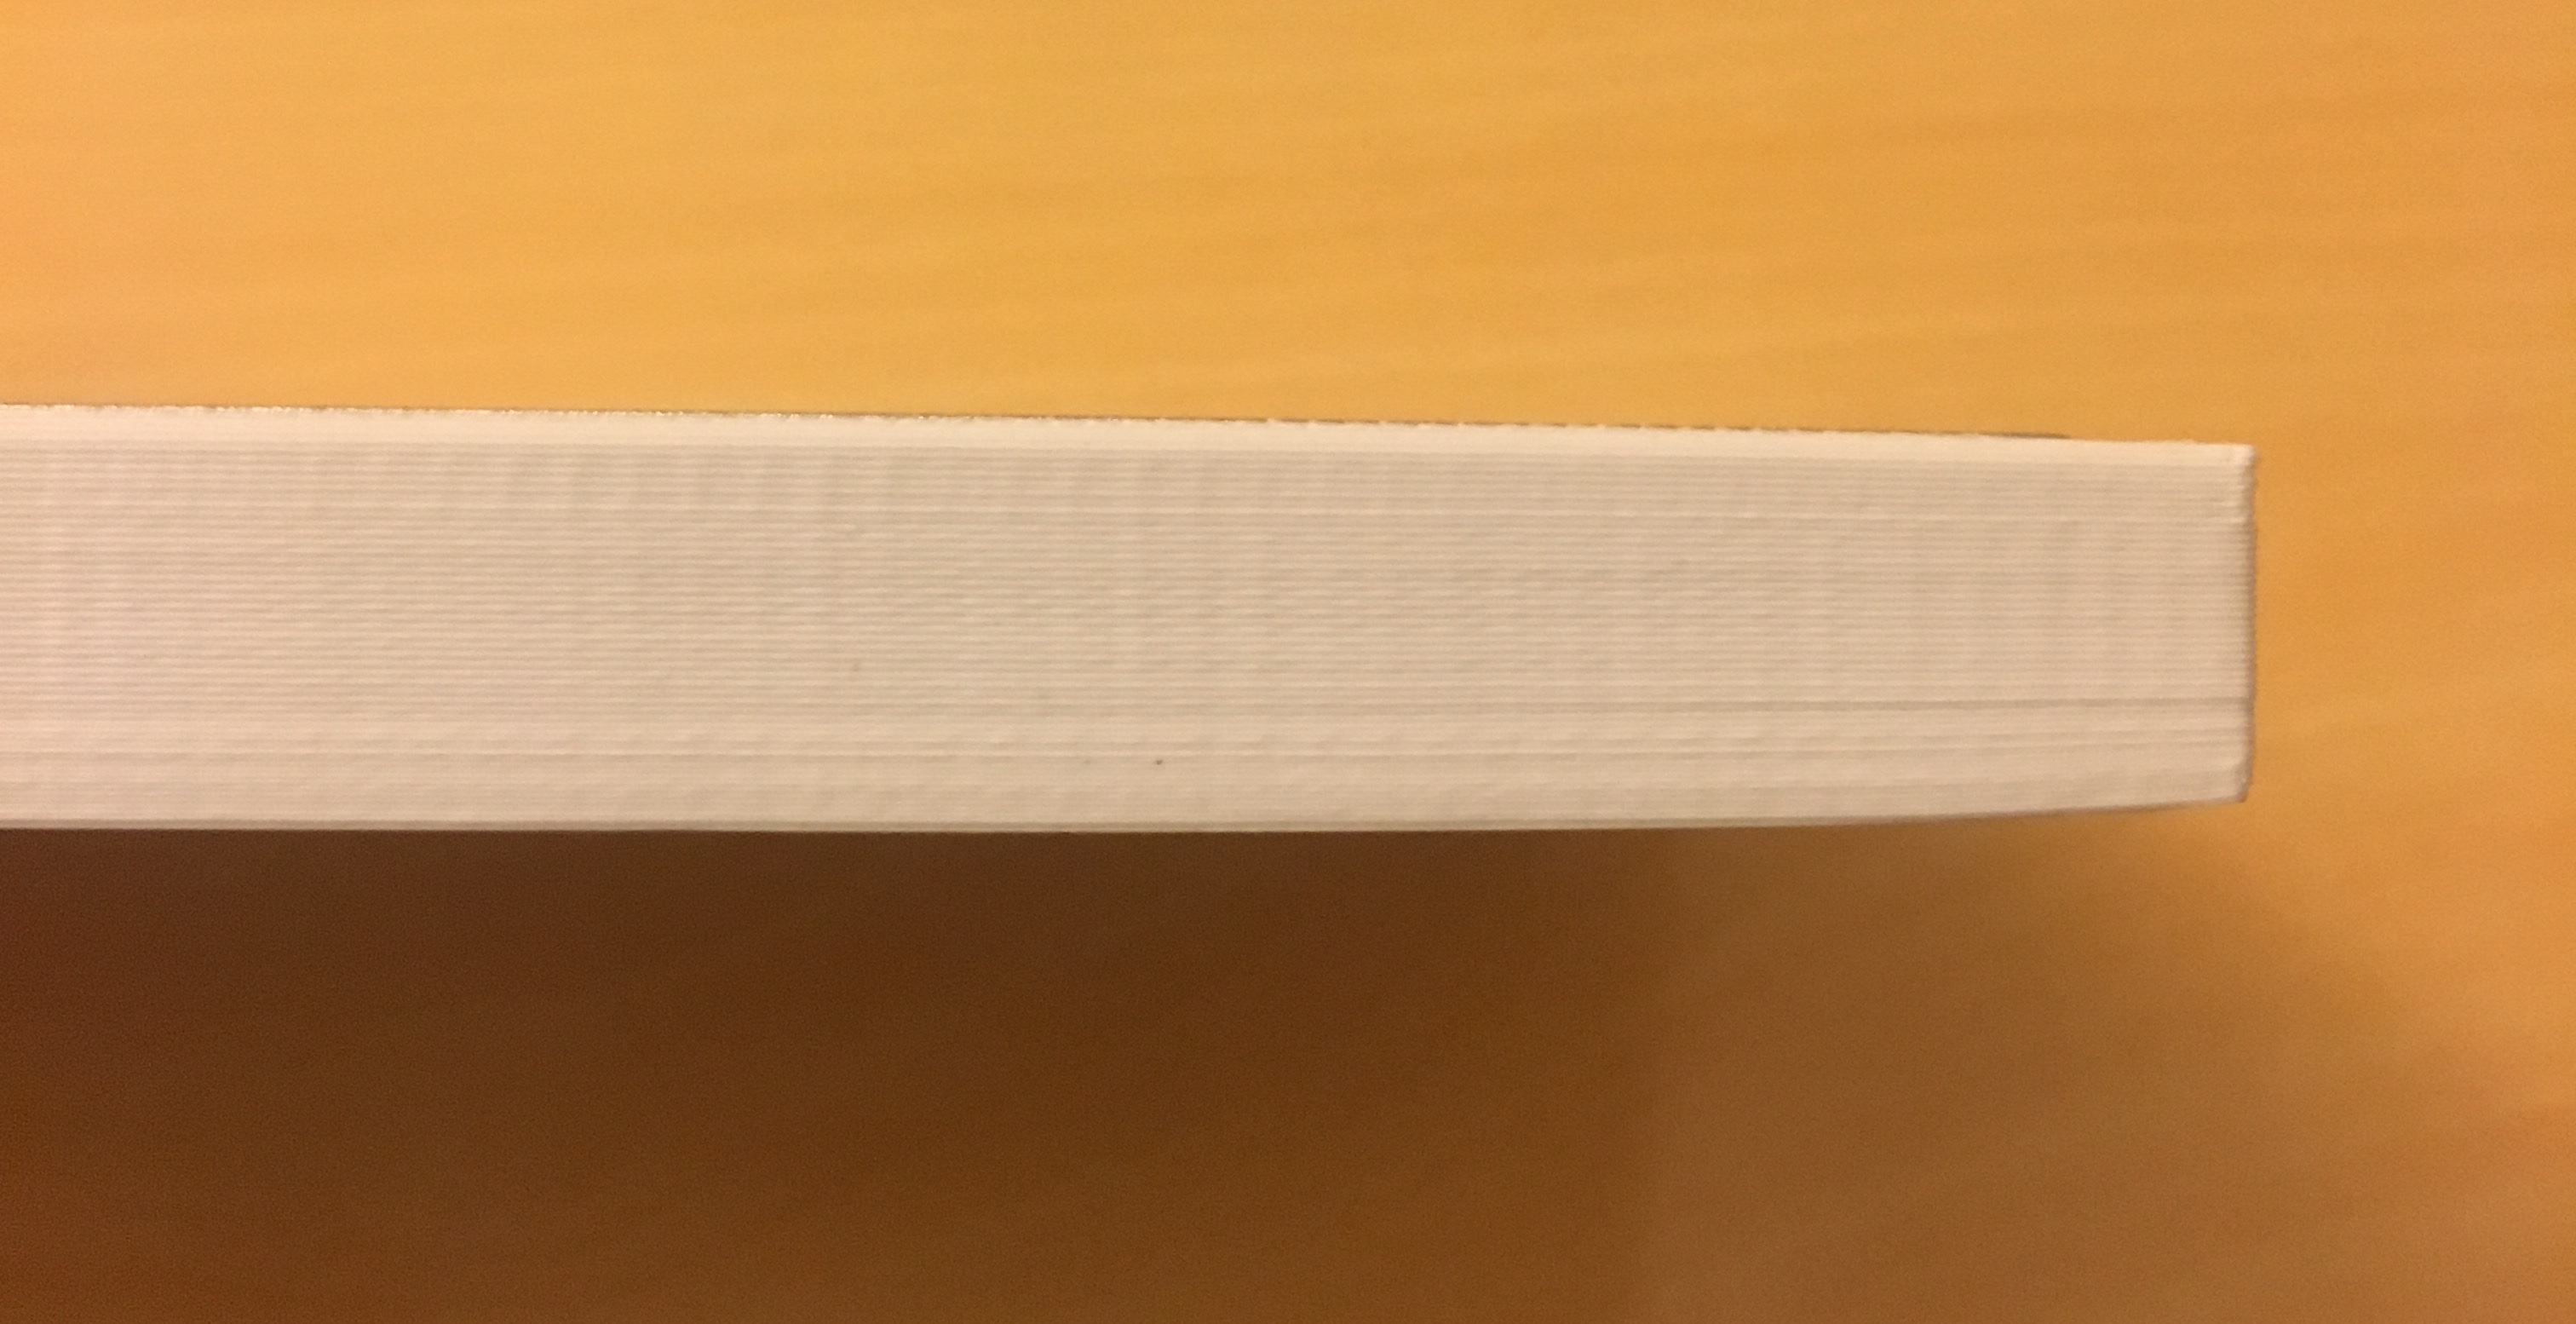
Overall I’m pleased with the results and will hopefully be building it this weekend. The 3D printed case has a handful of flaws such as:
The corners bow up on the bottom side as shown above
The tolerance of the lip where the plate lays isn’t great
Despite leaving .25mm of clearance on all sides the fit is very tight around the plate; I have to firmly push in the corners
I imagine these wouldn’t be a problem if I had the case CNCed from aluminum/polycarbonate instead.
Anyways, there are still many improvements I could make but I think this will be the last iteration for a while. I’d like to get it built, write up a build guide, merge everything into the master branch, and commit the firmware to QMK. After that, I may post an IC to see if anyone would want a group buy organized in either its current state or for a more professional design.
The dream would be to have someone like oldcat/greystudio (The folks who made the Think6.5) take my work and improve upon it in a group buy with some of the things that make the Think6.5 awesome:
Pre-soldered PCB components
Integreated 4.5mm plate
Case angling
Brass case weight
Tasteful branding
That said, it’s probably unrealistic unless there is a massive interest shown but I do think having an ergonomic keyboard of artisanal quality would be cool.
It’s been awesome watching this evolve bit by bit. I really hope you are to do a GB in the future, or find a vendor to help facilitate this for you
I’m definitely be interested
Very nice plate that you have!
I also ordered a bead blasted 2mm stainless steel backplate for my keyboard project at LaserBoost, I was really impressed by the quality.
I still haven’t talked about your project to my ortho lover colleague but I’ll sure do it.
It really does! So far I have nothing but praise for LaserBoost
And thanks for the support! I’m hoping a reputable vendor might be interested because I have no experience running a GB and would want it to go smoothly. I’ll probably start asking around once it’s ready to go
Thank you! I actually used stainless steel on the previous version and found it to be too uncomfortable for my fingers because it’s so heavy/hard and I generally bottom out when I type.
Sandpaper or an exacto (scraping sideways) takes it off really fast and perfectly clean. Takes 5min or less to do a 60% plate. I had one cut from big blue saw a few years back.
Be careful with sandpaper around polycarbonate. Scratches very easily