Would you mind sharing the quefrency plate/case design? 
because i’m looking for an alternative to the standard “skeleton case”.
2 Likes
Honestly I’ve been super lazy with that project so there isn’t much to show besides a test fit plate for them. 
if/whenever it’s finished though I definitely intend to share :3
2 Likes
So I ordered a 5mm carbon fiber plate. Will i need to use plate mount stabilizers with a plate this thick? I chose the “Cherry only” option on swillkb.
1 Like
That is not going to work. @buck To have a true thick plate, you either have to machine, or 3d print. or you layer different thickness and different cutouts on top of one another.
1 Like
Cool idea. I was thinking on something similar myself with two layers of acrylic bonded together to build one fat plate. Would someone who has already build one mind posting a typing test video or sound recording of your build? I would like to listen to it before going further in that direction. Thanks in advance.
2 Likes
This post is tempting me to build a thick plate out of 3 layers of 1.5mm plates since 1.5mm x 3 = 4.5mm.
2 Likes
I’m back, this time with KUMO.
I have been enjoying the KUMO keyboard for the past two weeks.
It is light and portable, the switches are responsive, and putting it together took no time at all.
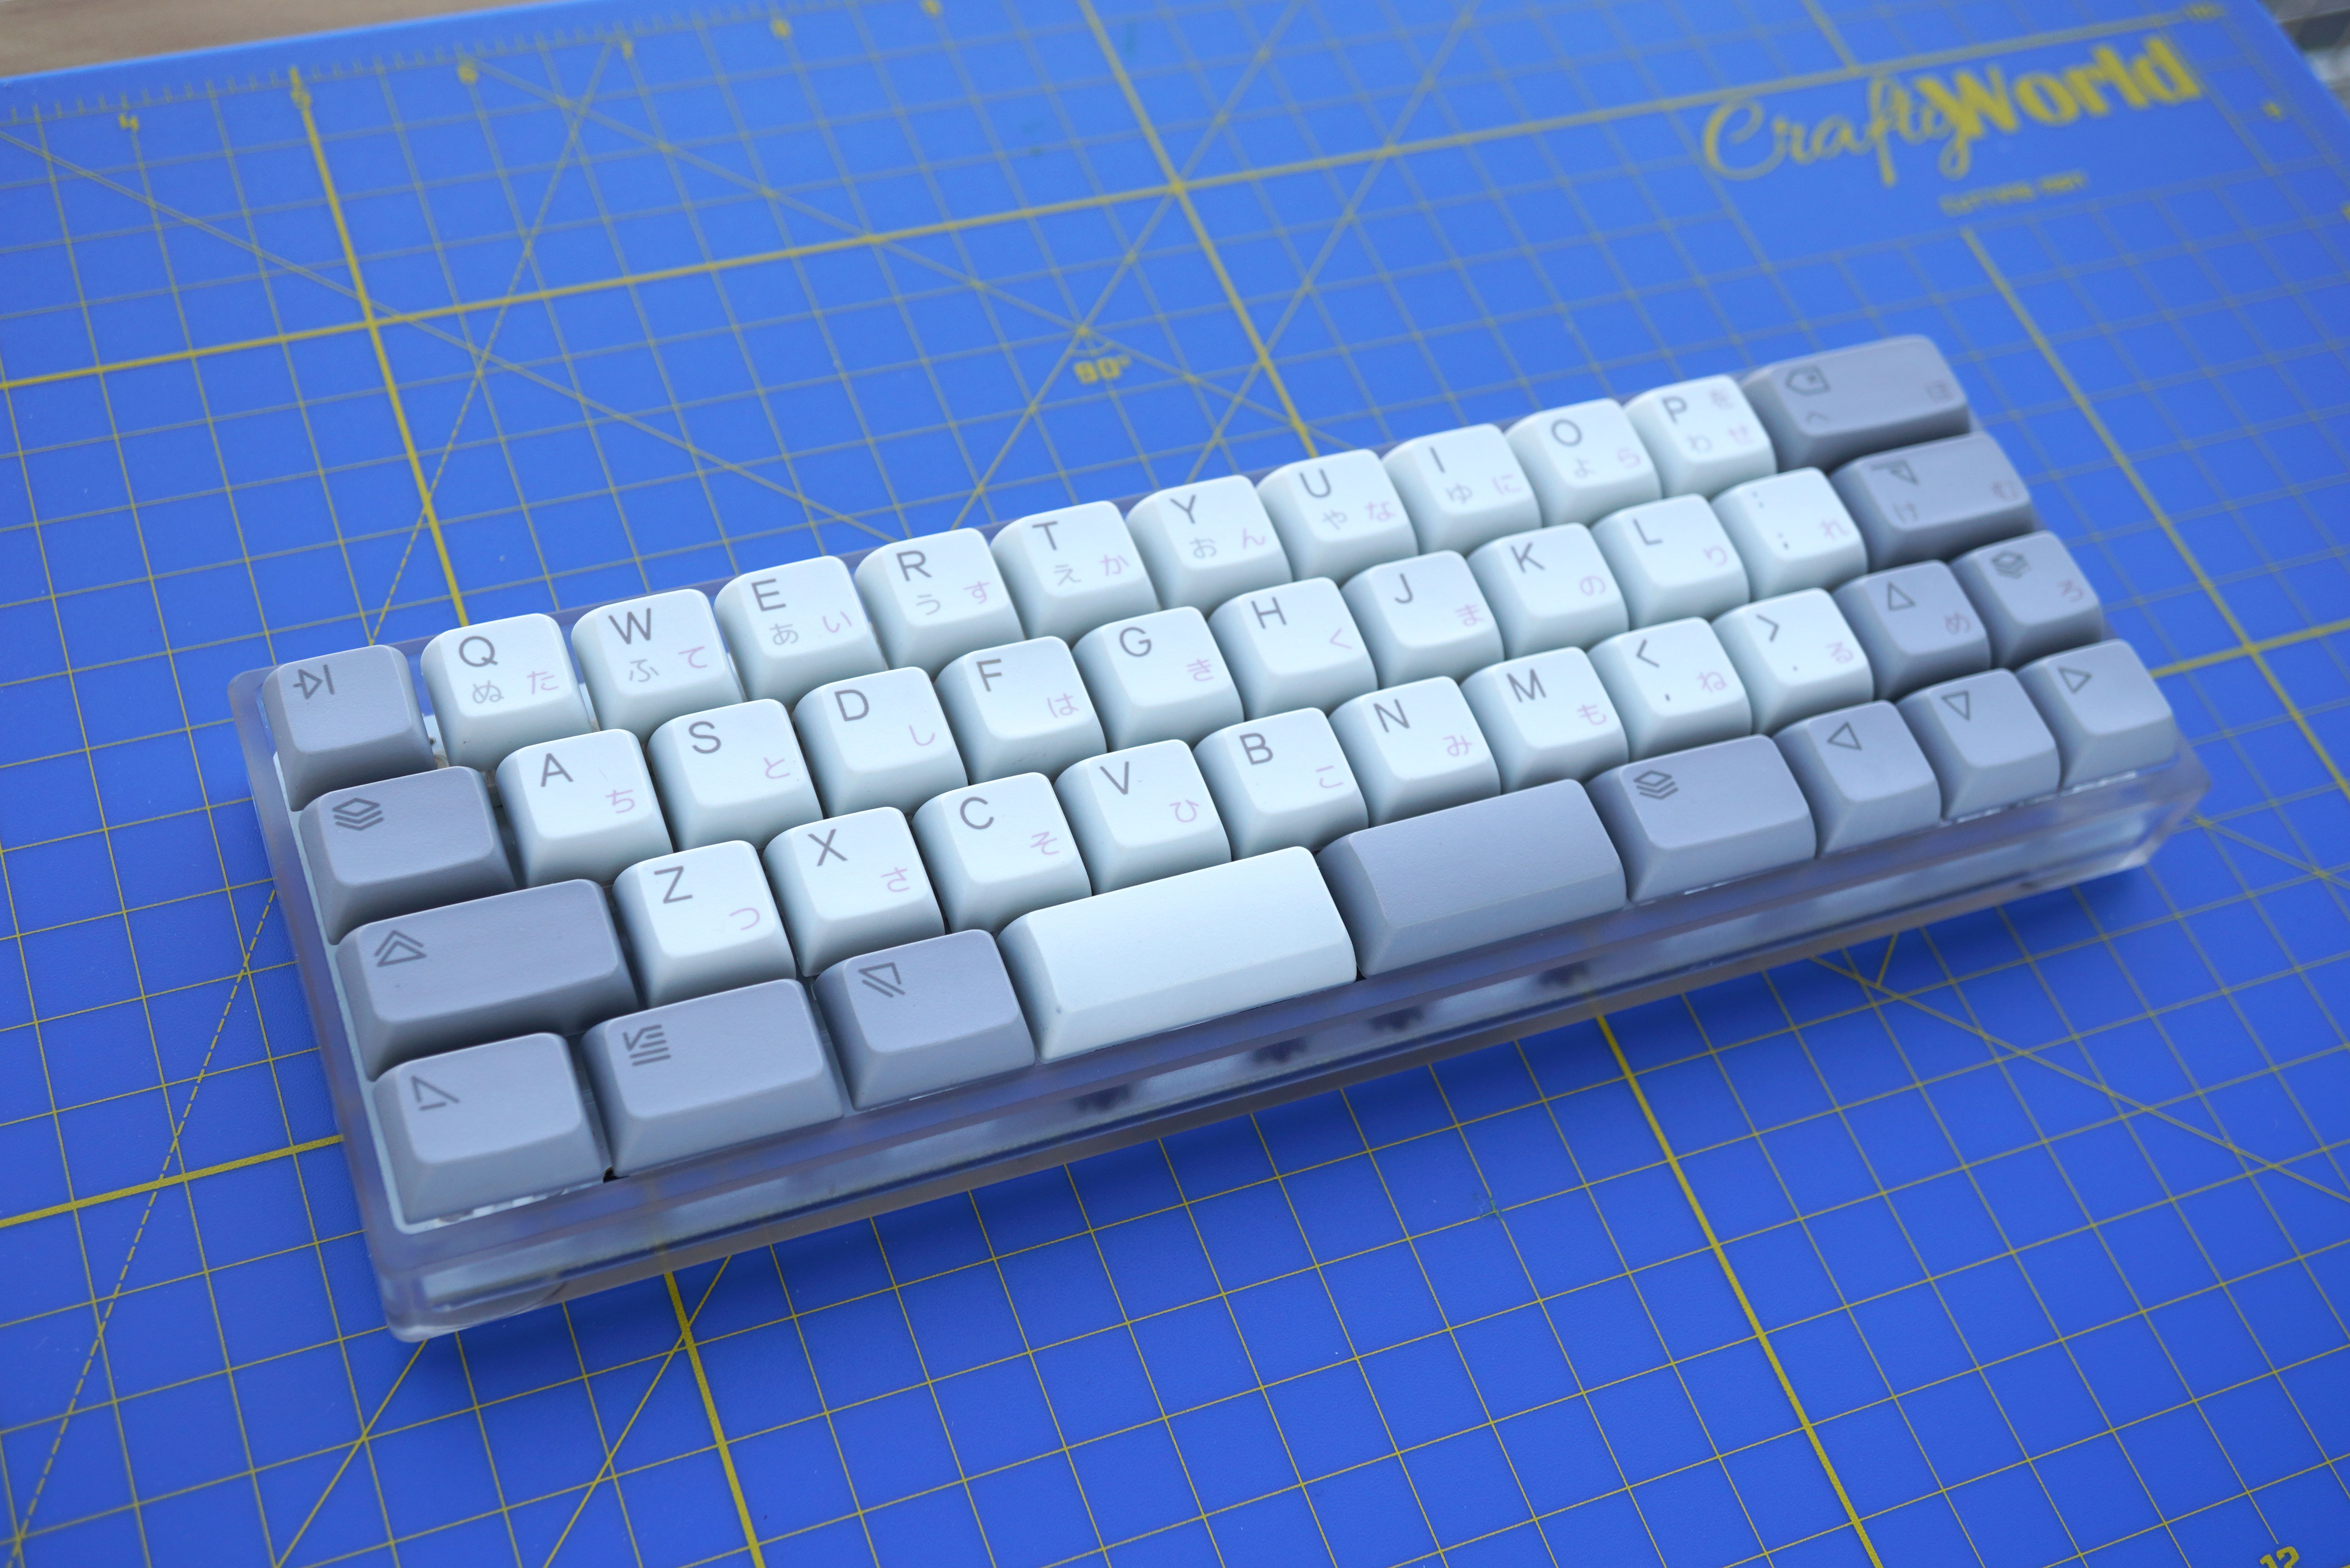
There are, however, a few things that can be improved.
The keyboard does not seem to be perfectly flat. In the images below you will notice the lines between the keyboard and the PCB are slightly curved. It is not a big issue, but it is interesting given this is a supposed to be a flat keyboard.
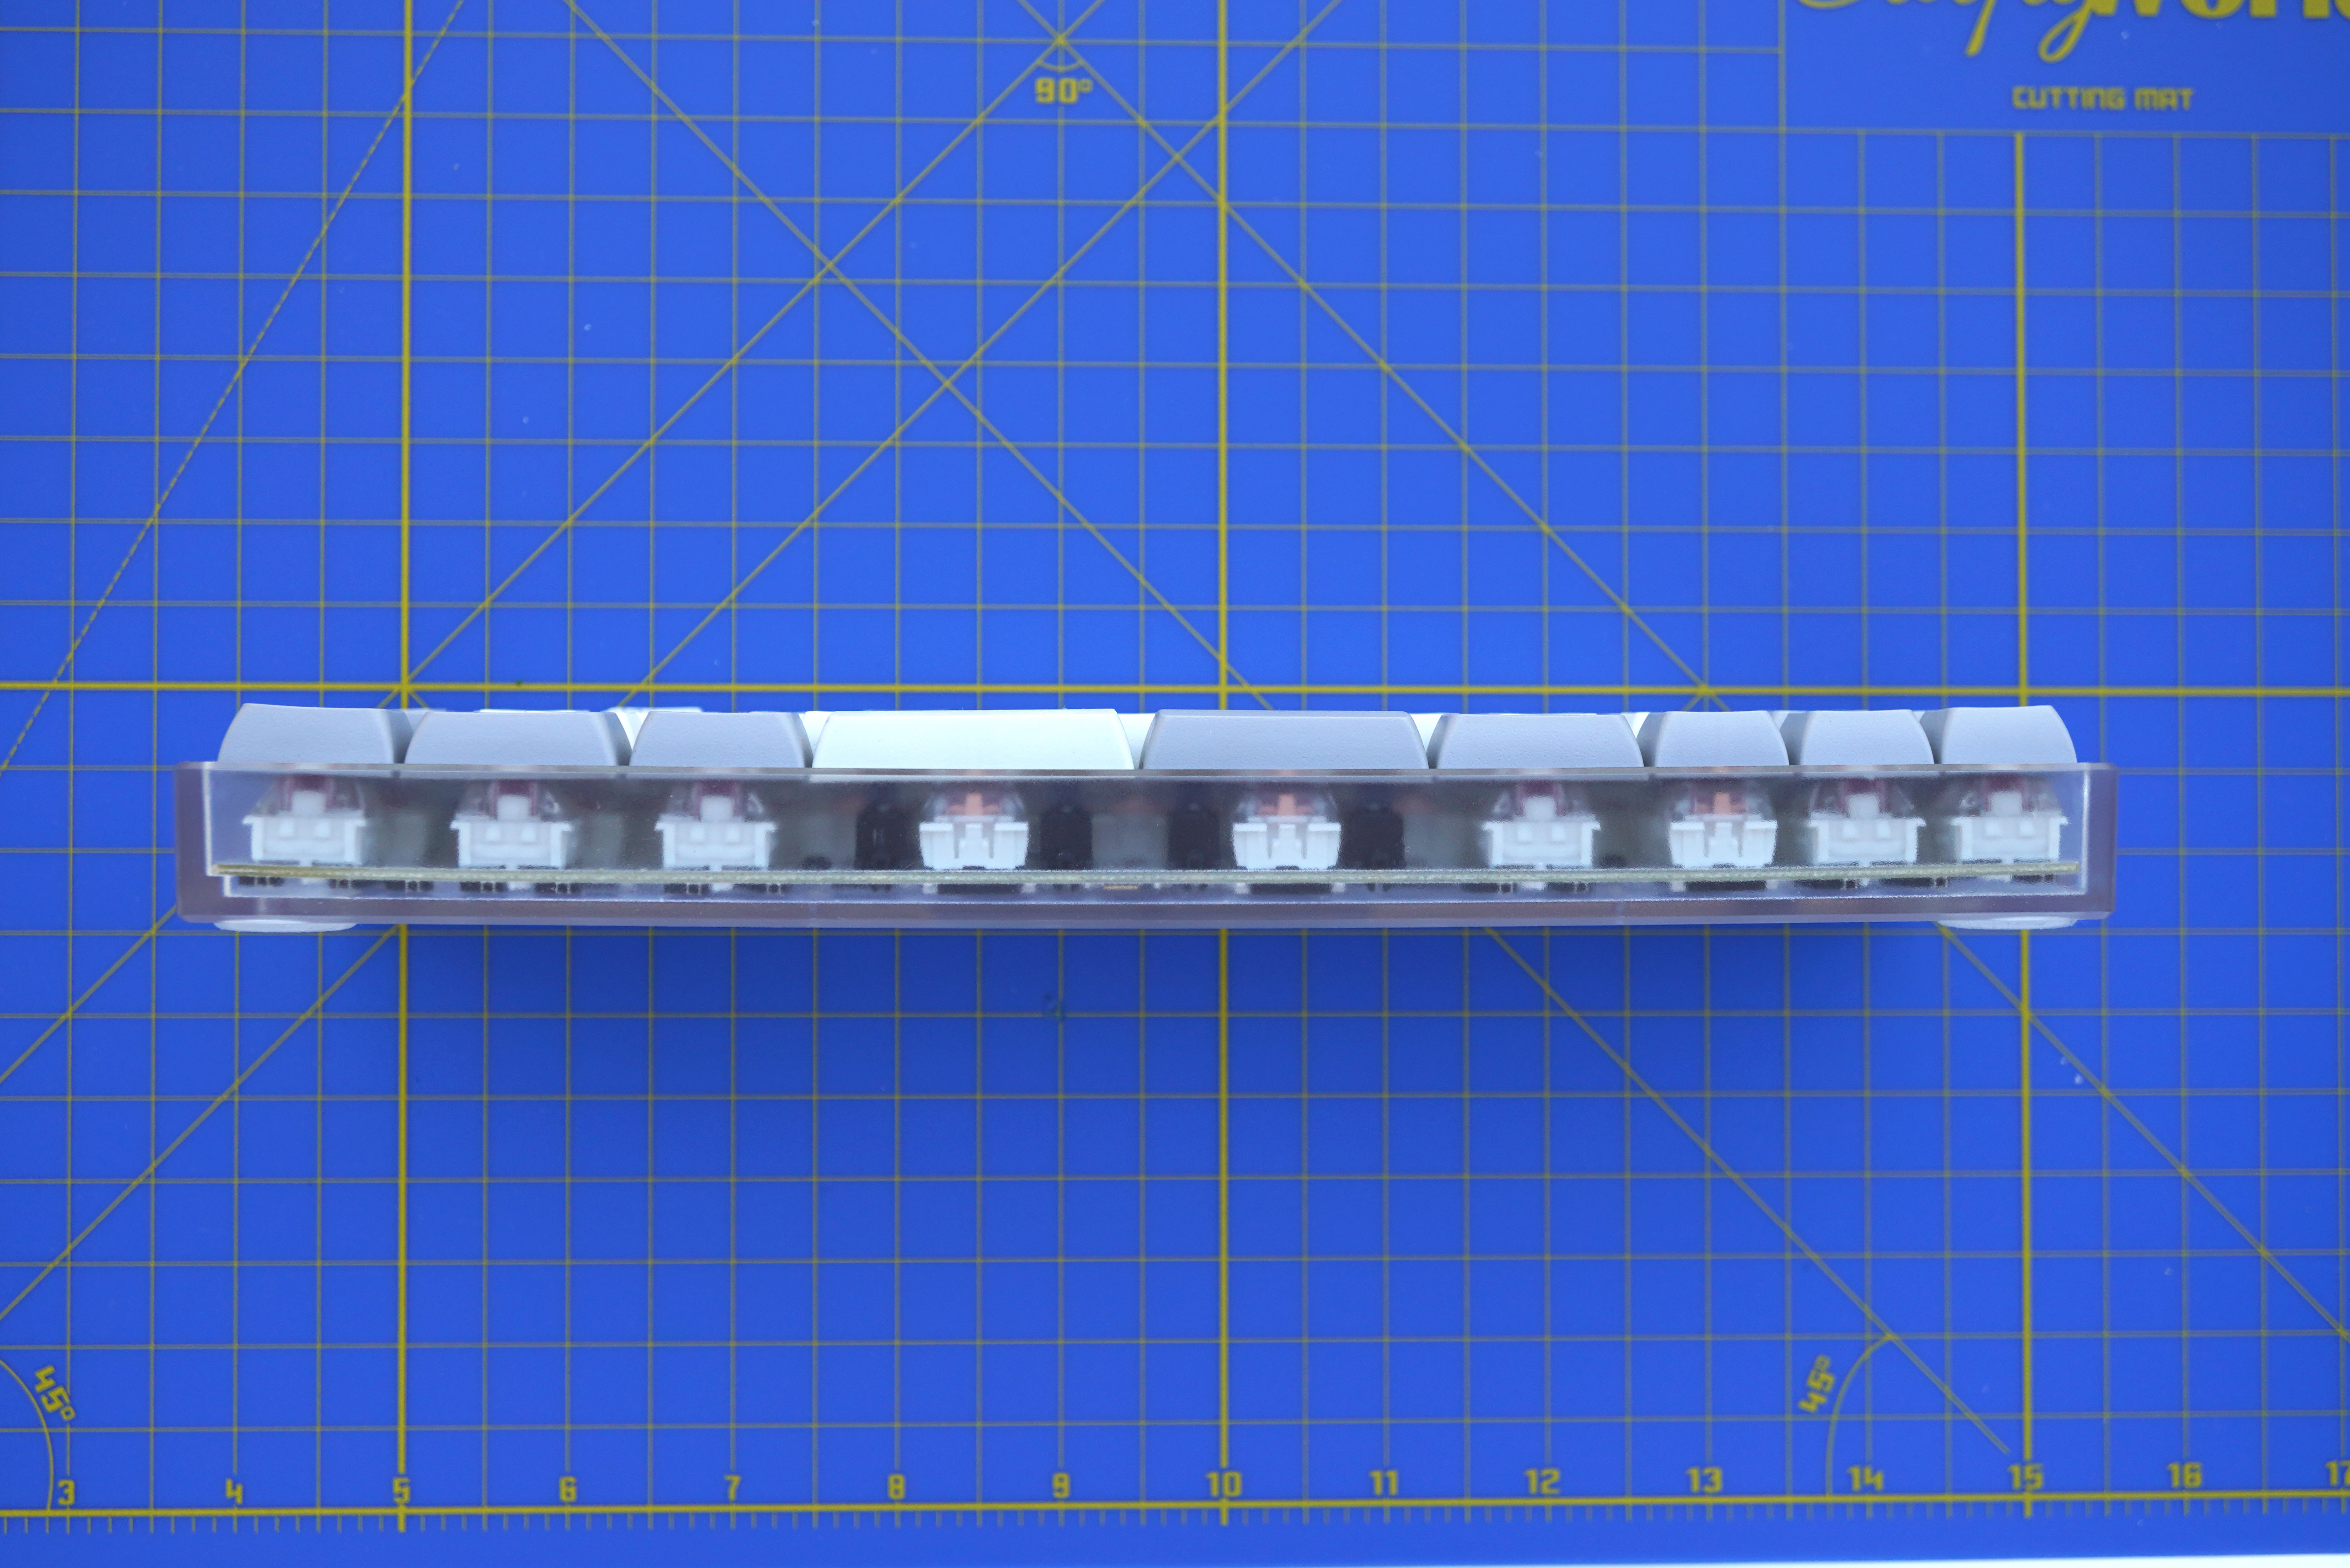
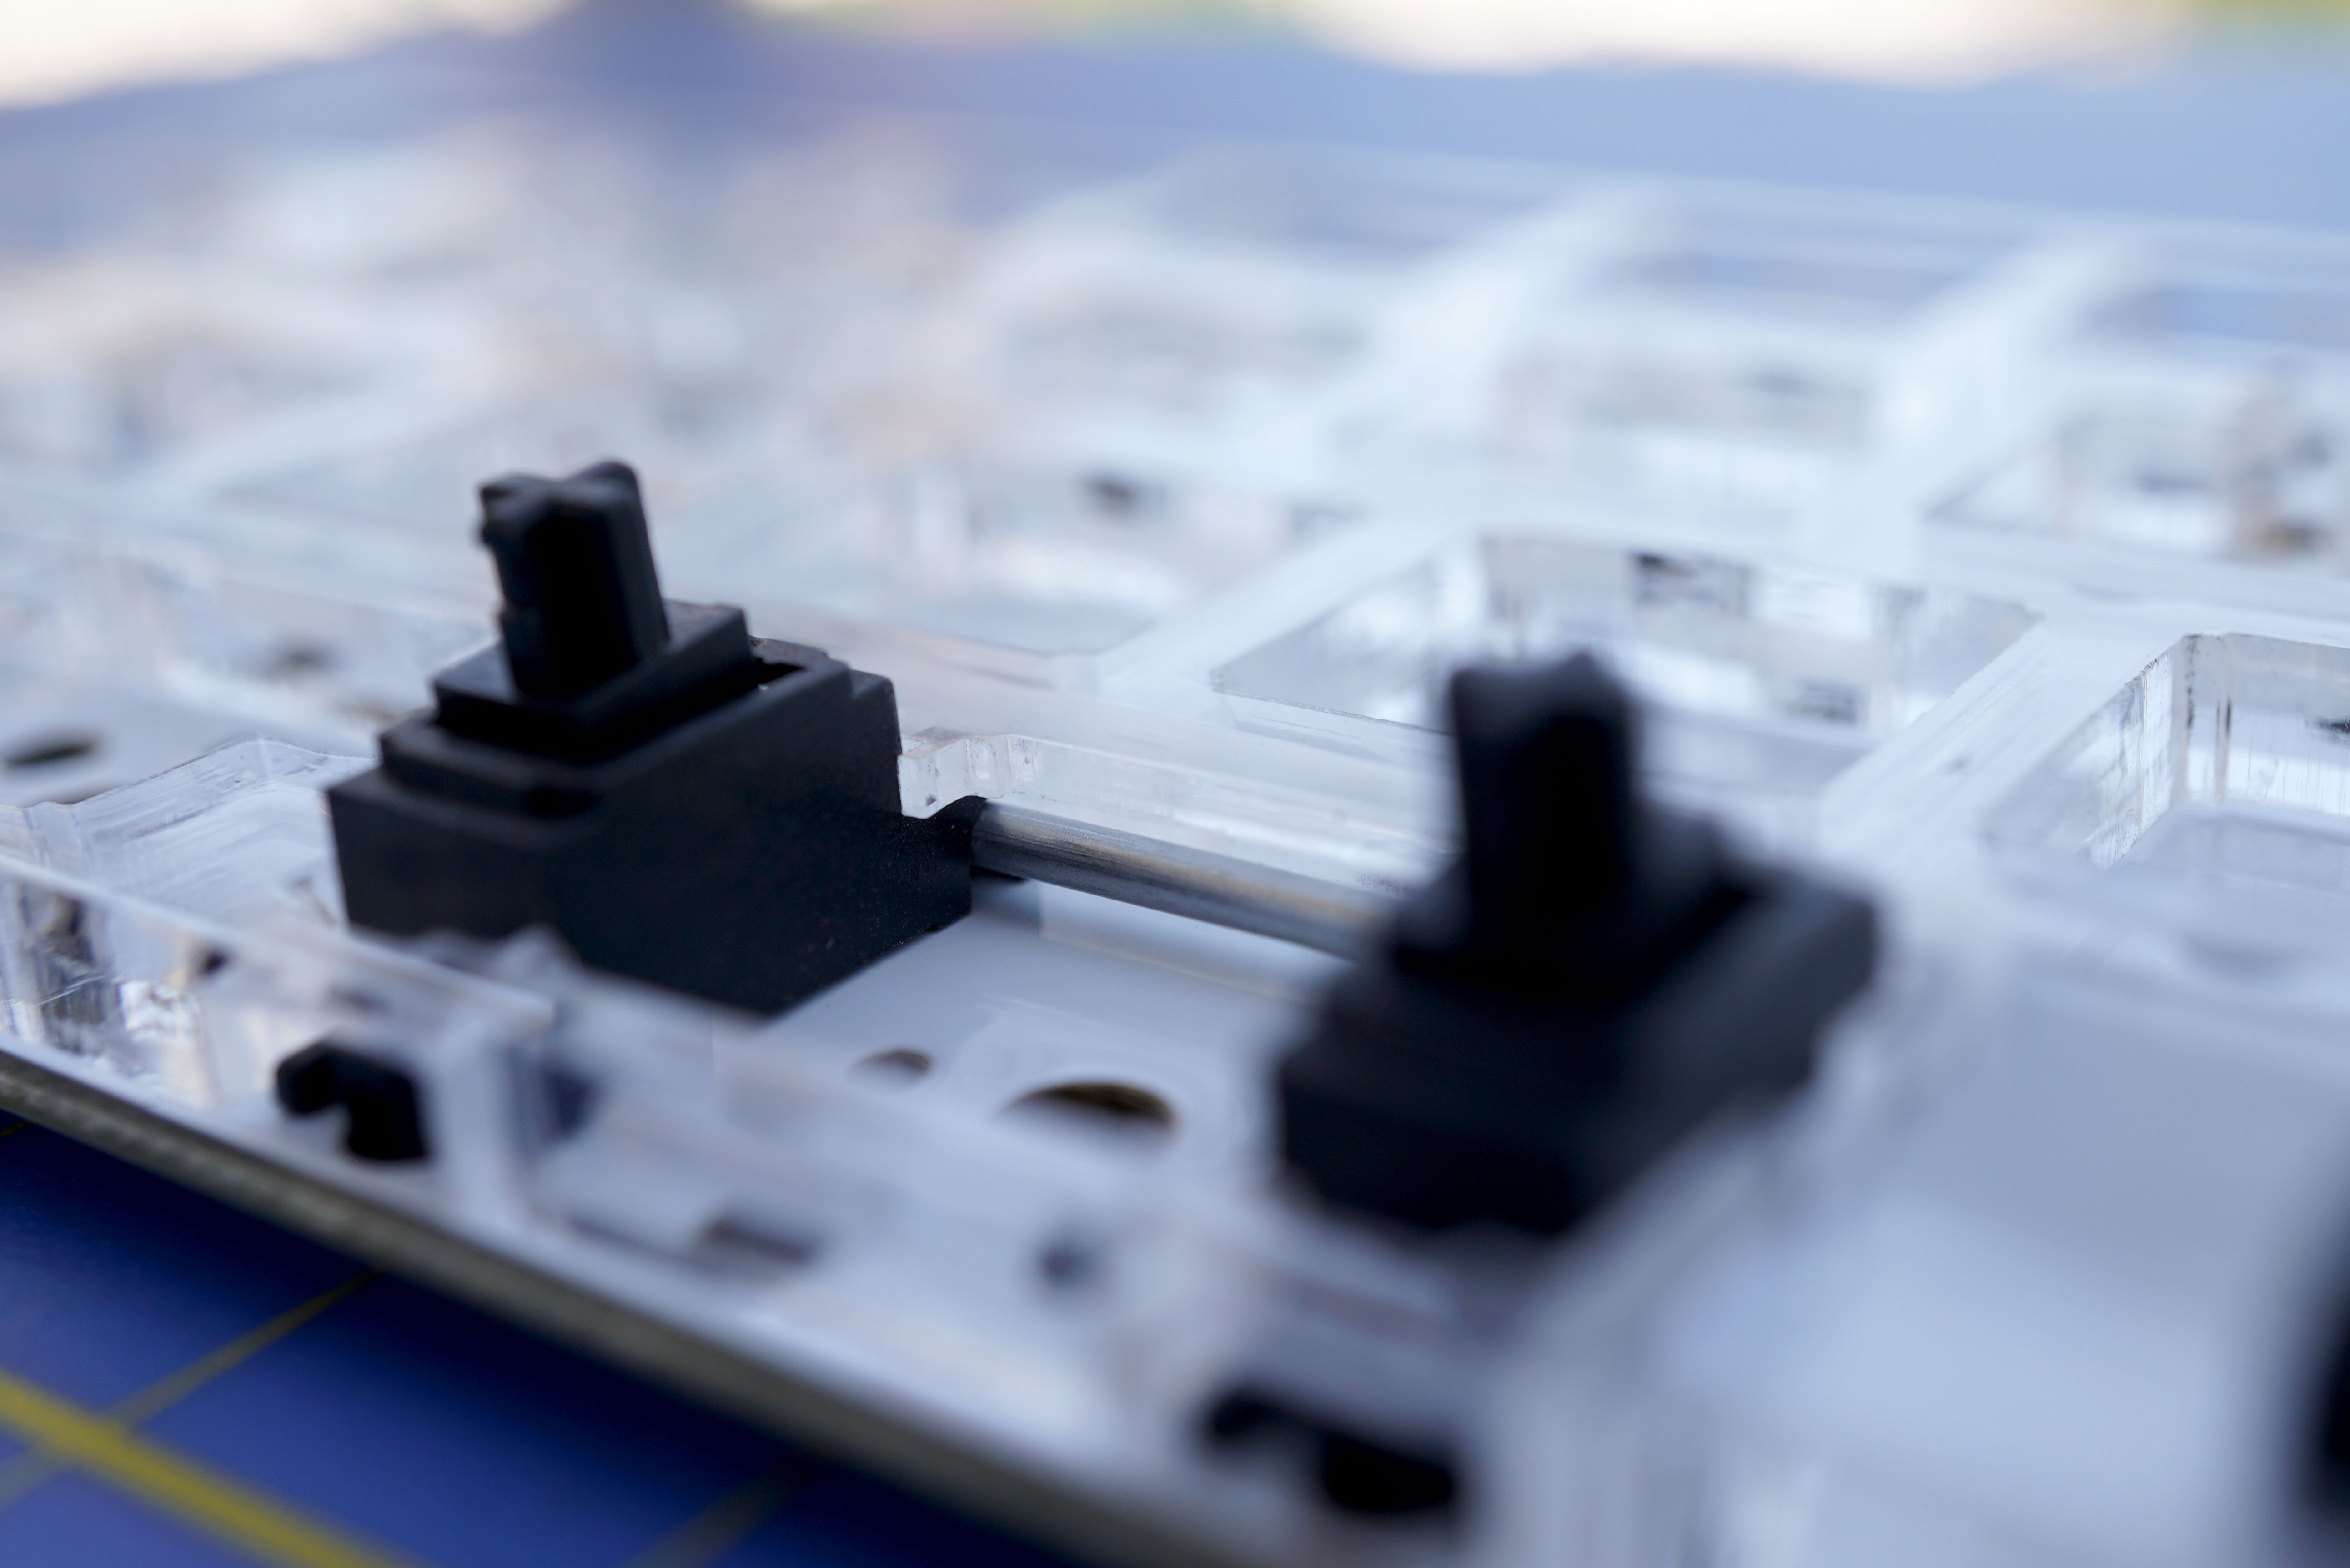
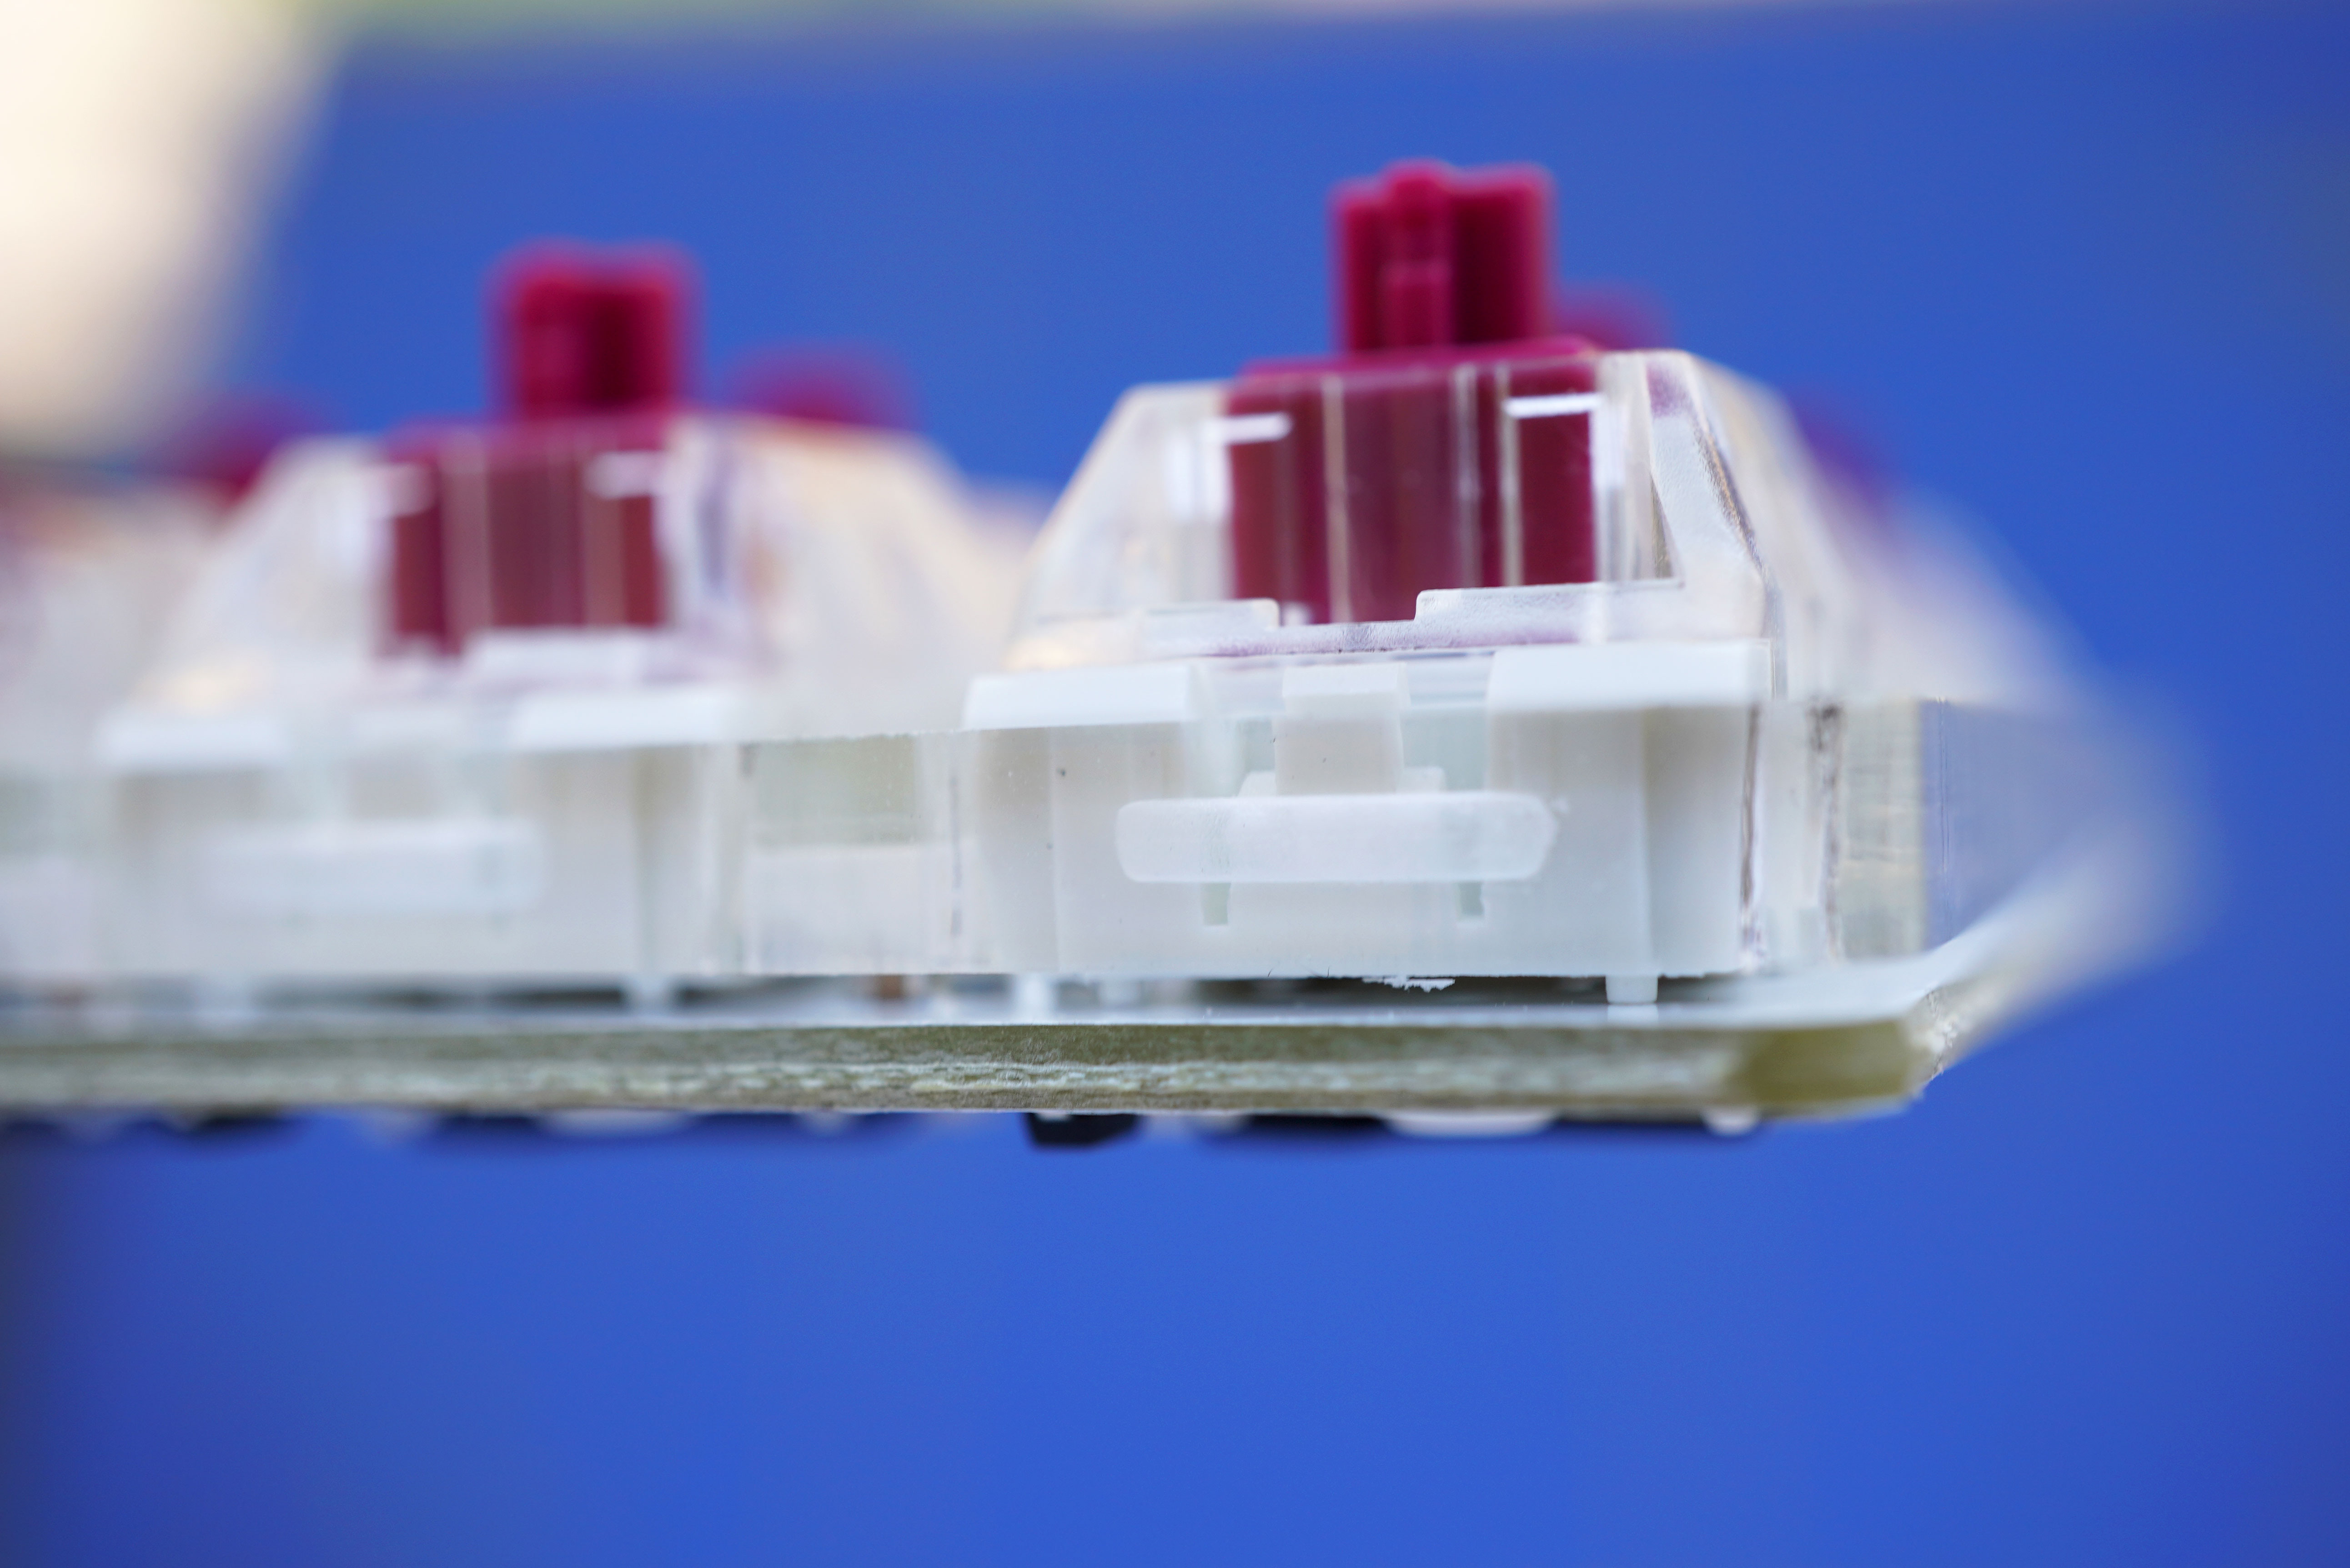
Because the keyboard doesn’t have a plate and the switches are not soldered, there is an excess of movement on the keys, which happens because the switch rocks back and forth on top of the plate:
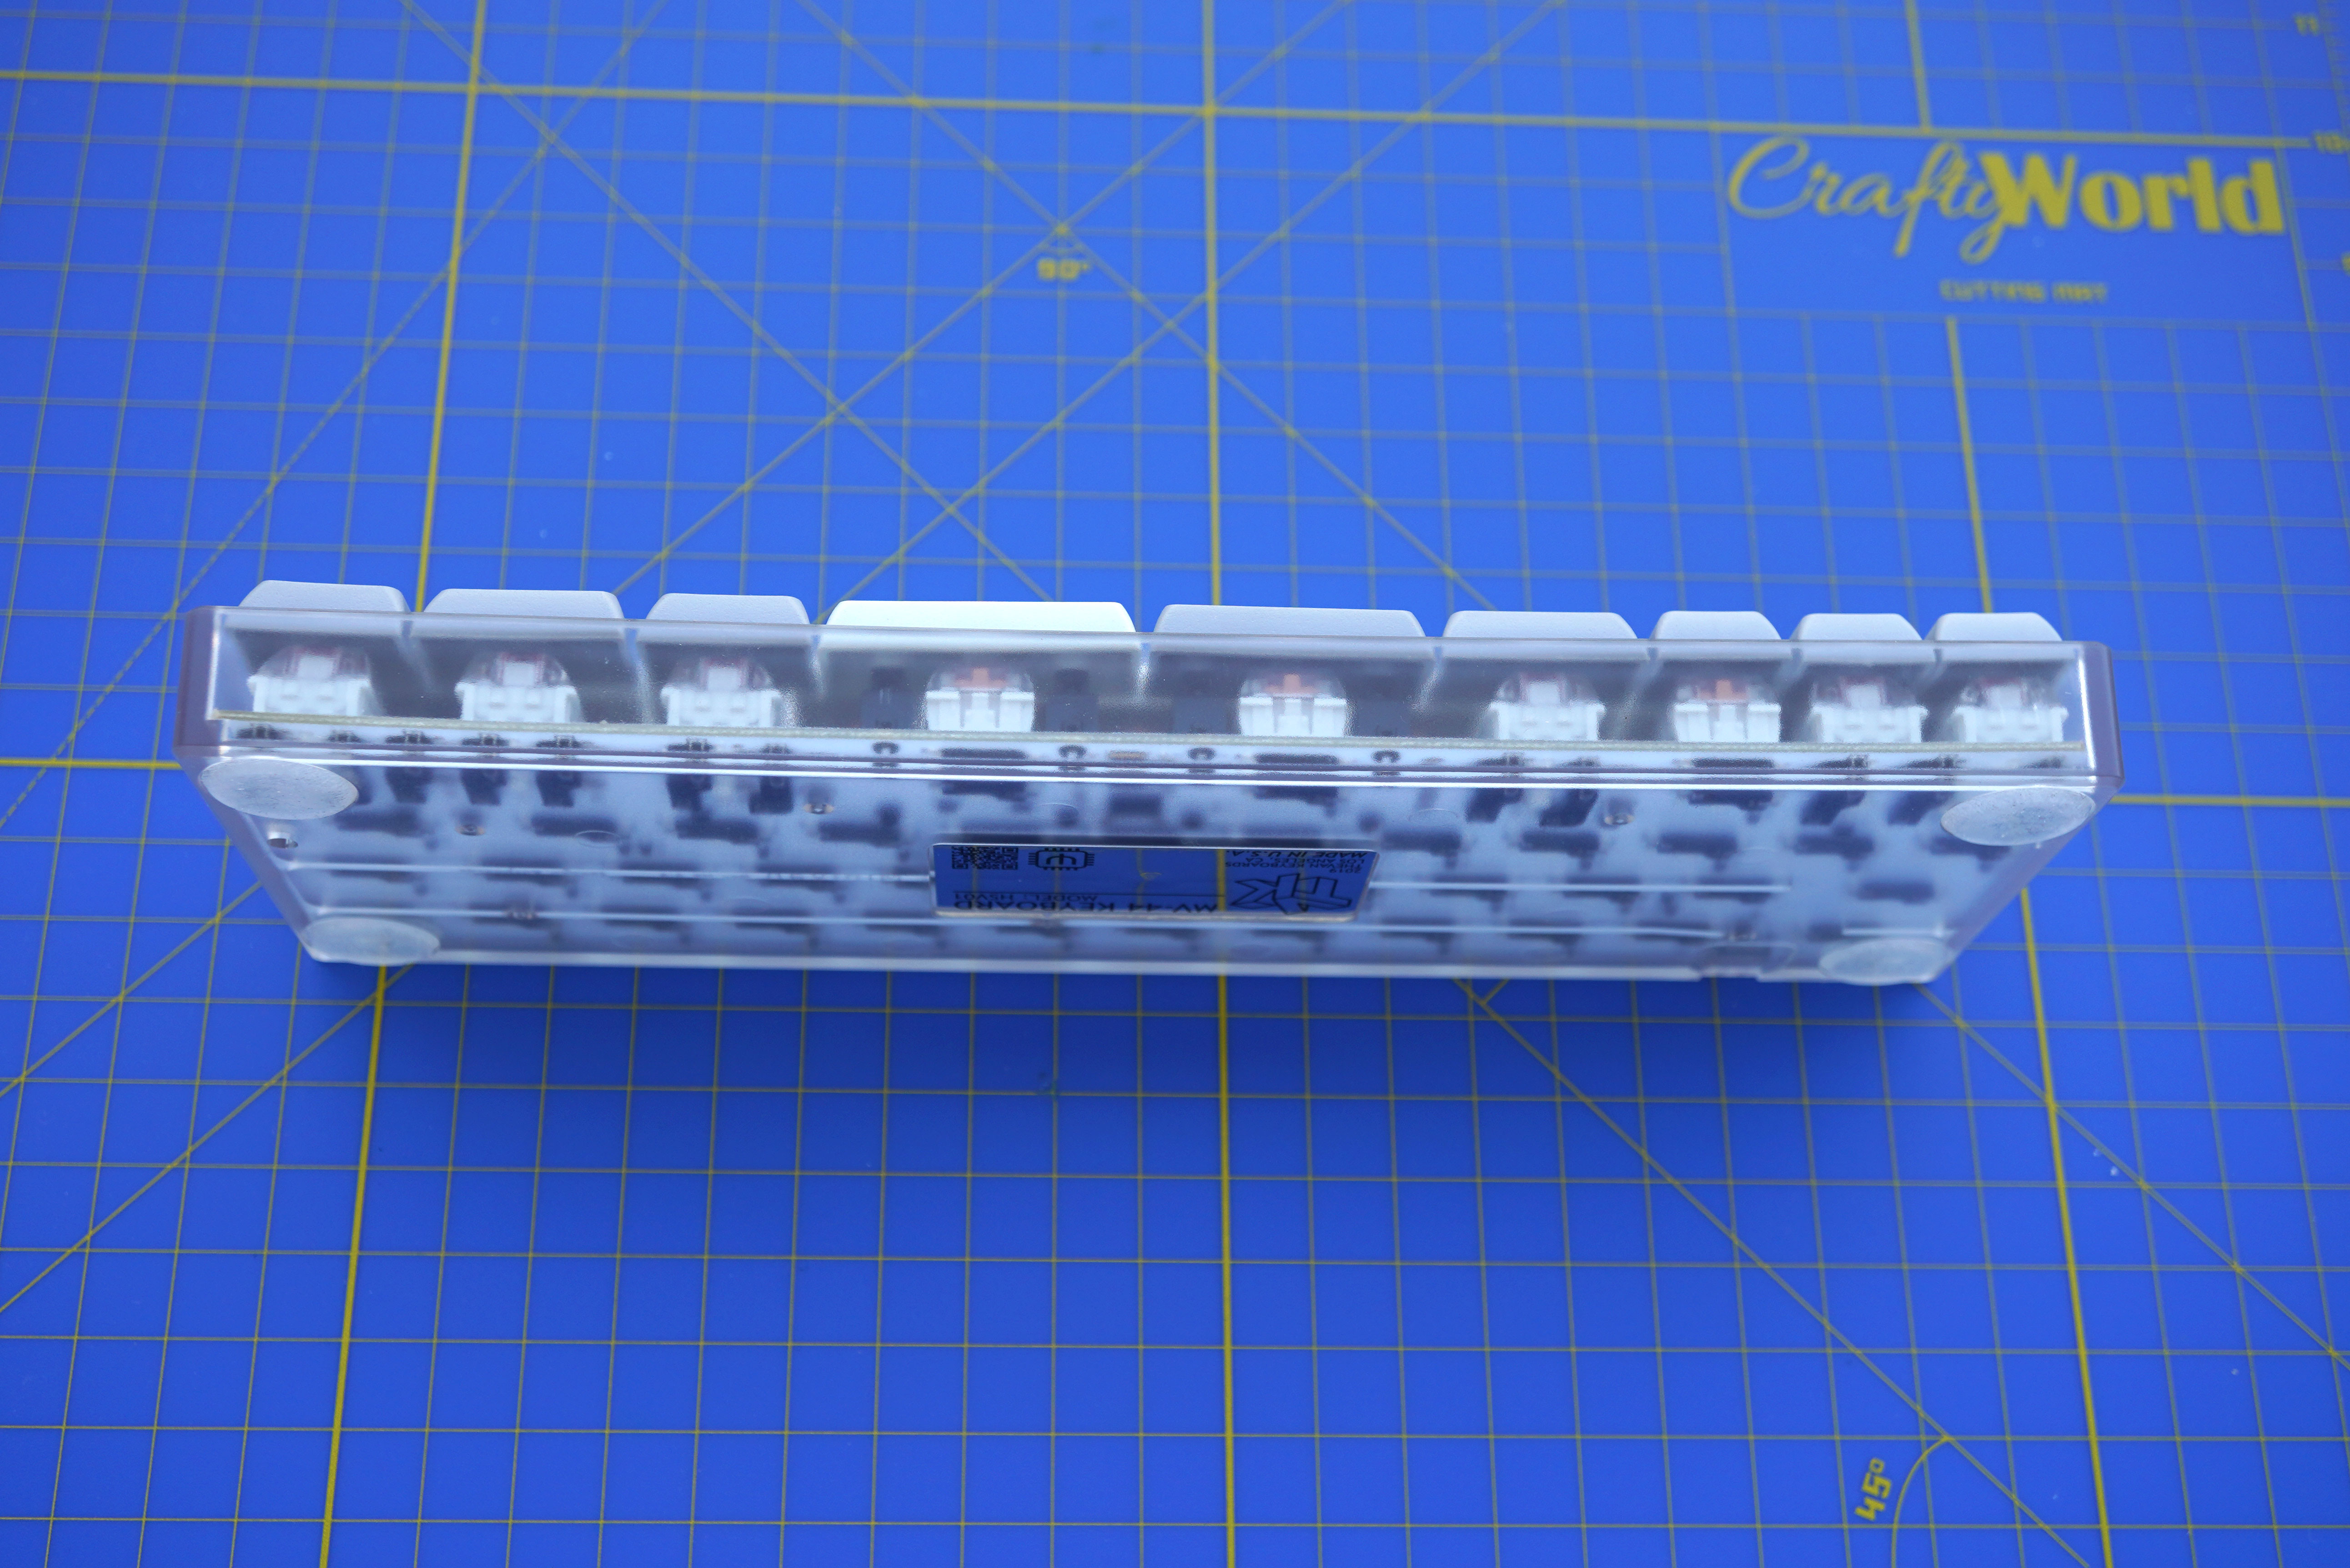
The switch is only attached to the PCB by the hot swappable tiny clamps that connect the switch to the PCB. The PCB stands help with the lateral wobble, but the switch is not firmly attached. If you want to change keycaps you will end up dissembling the whole keyboard:
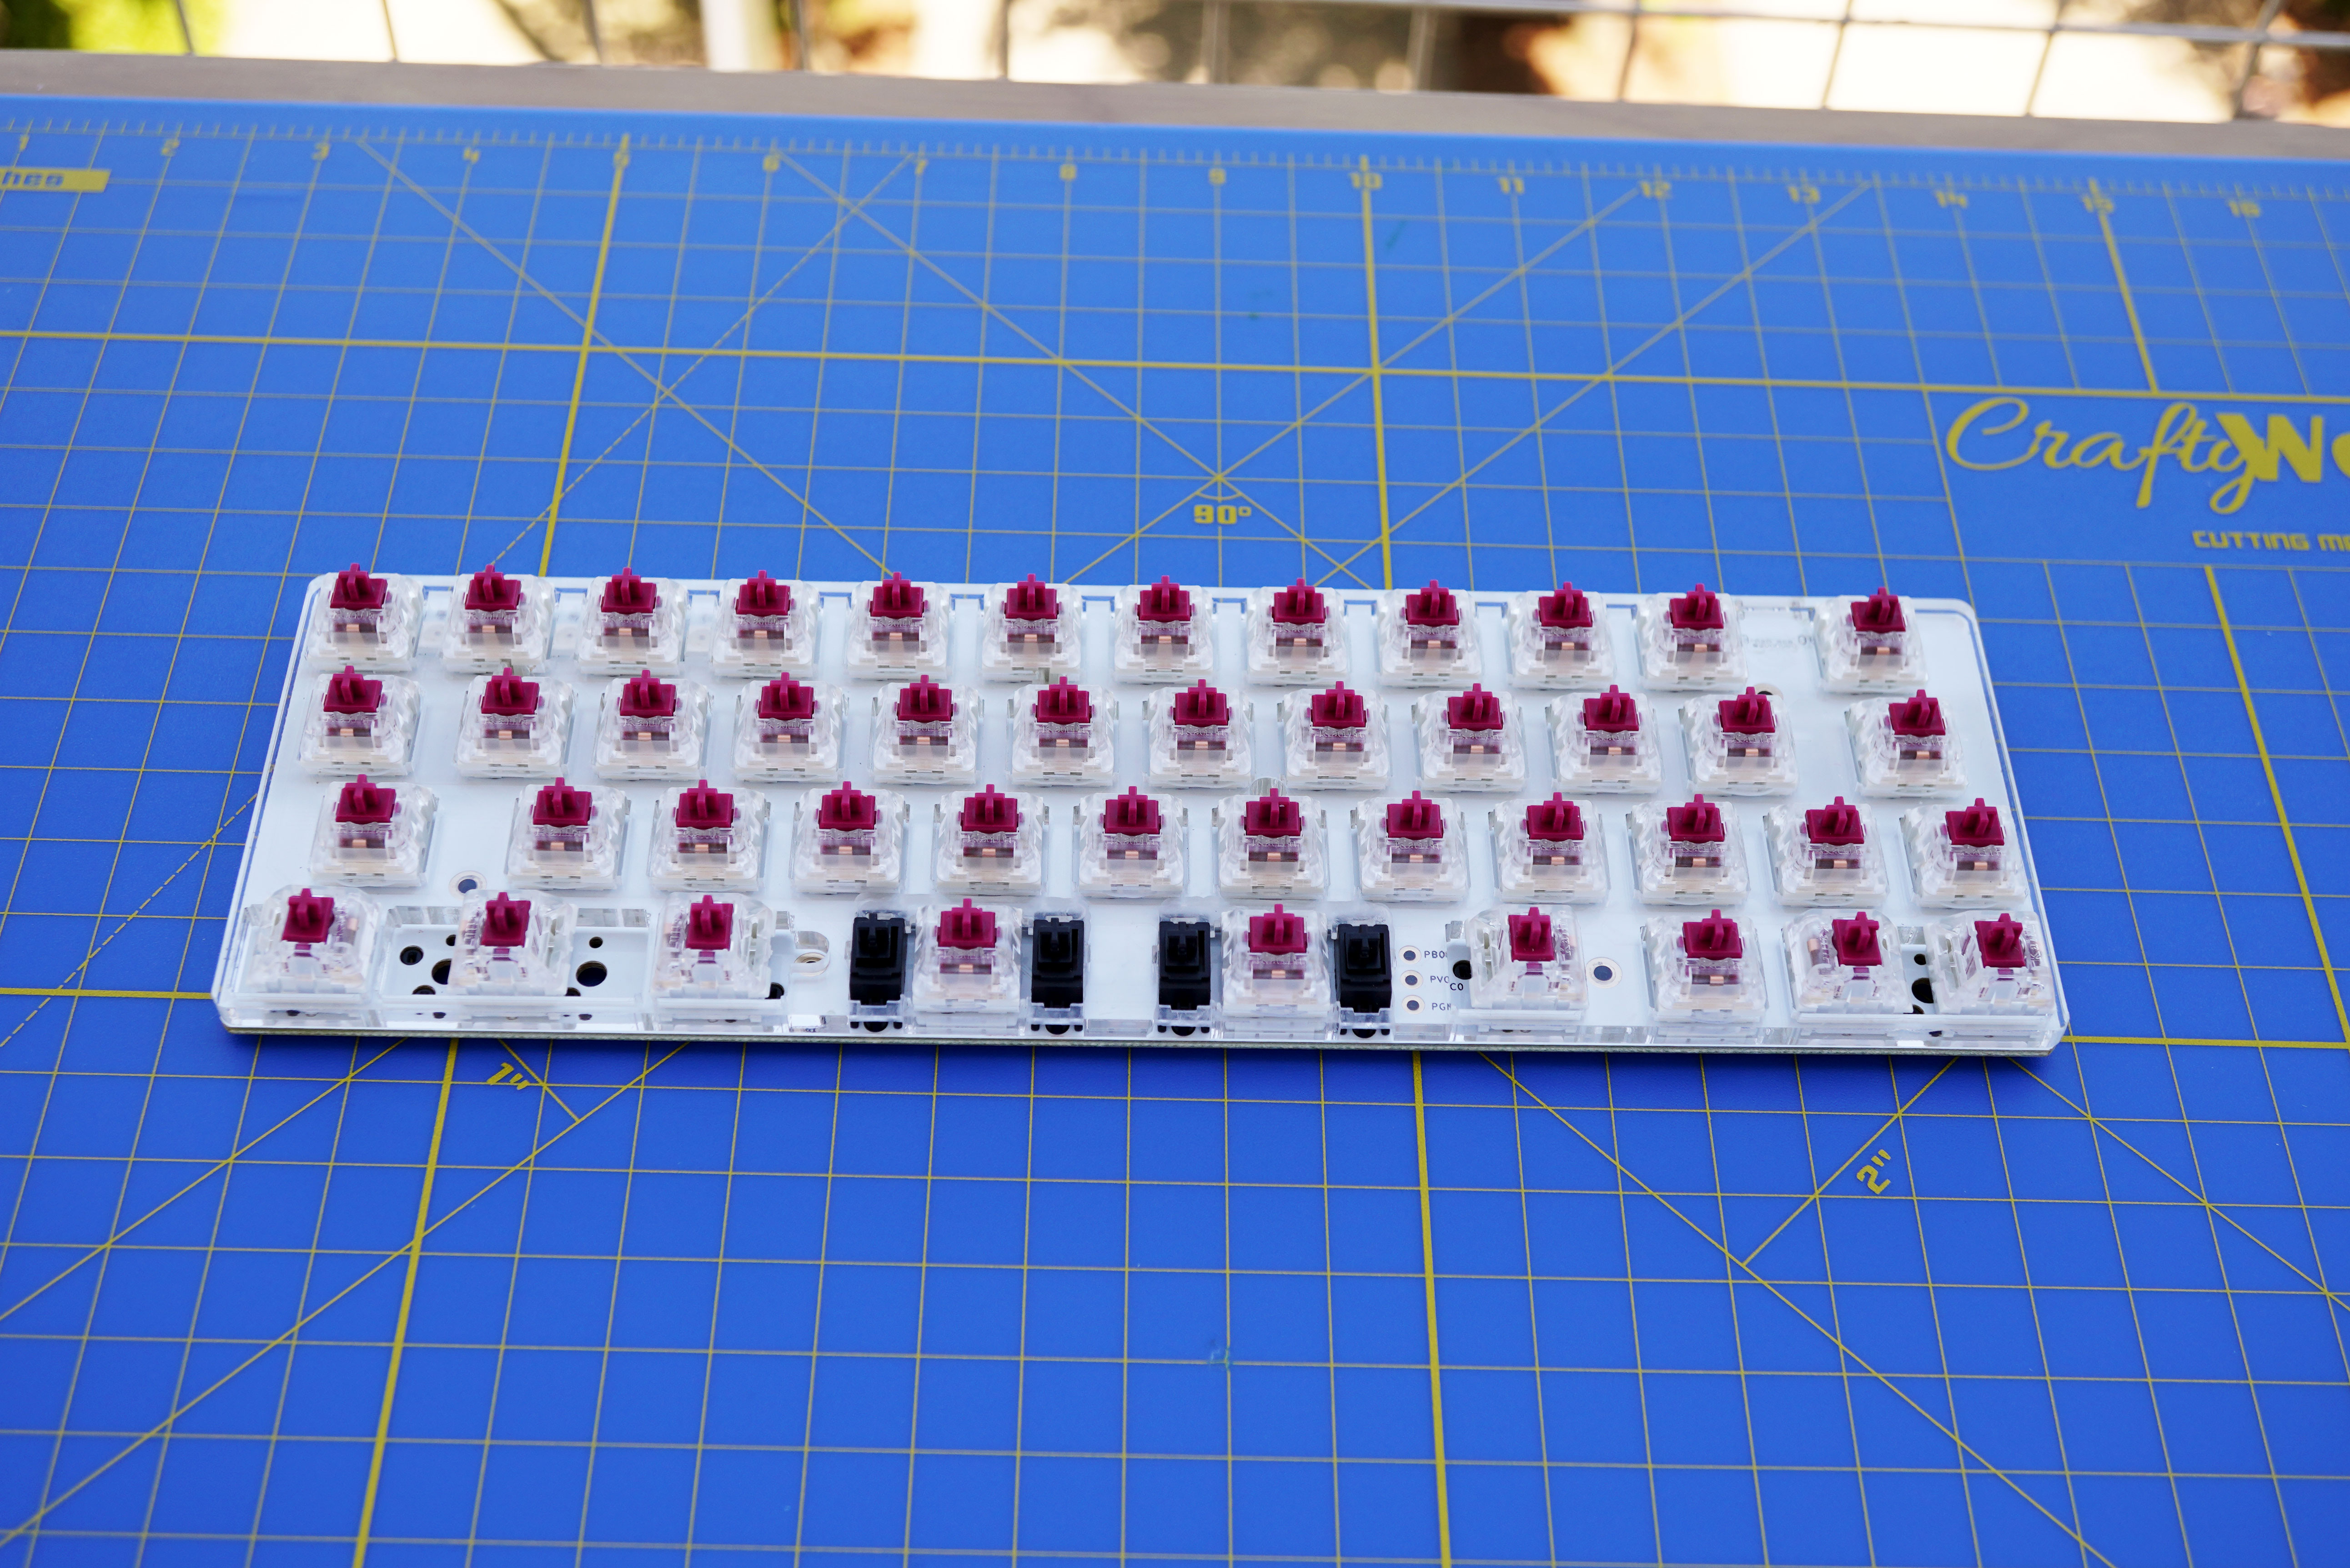
Of course, I had to give it a Fat Plate!
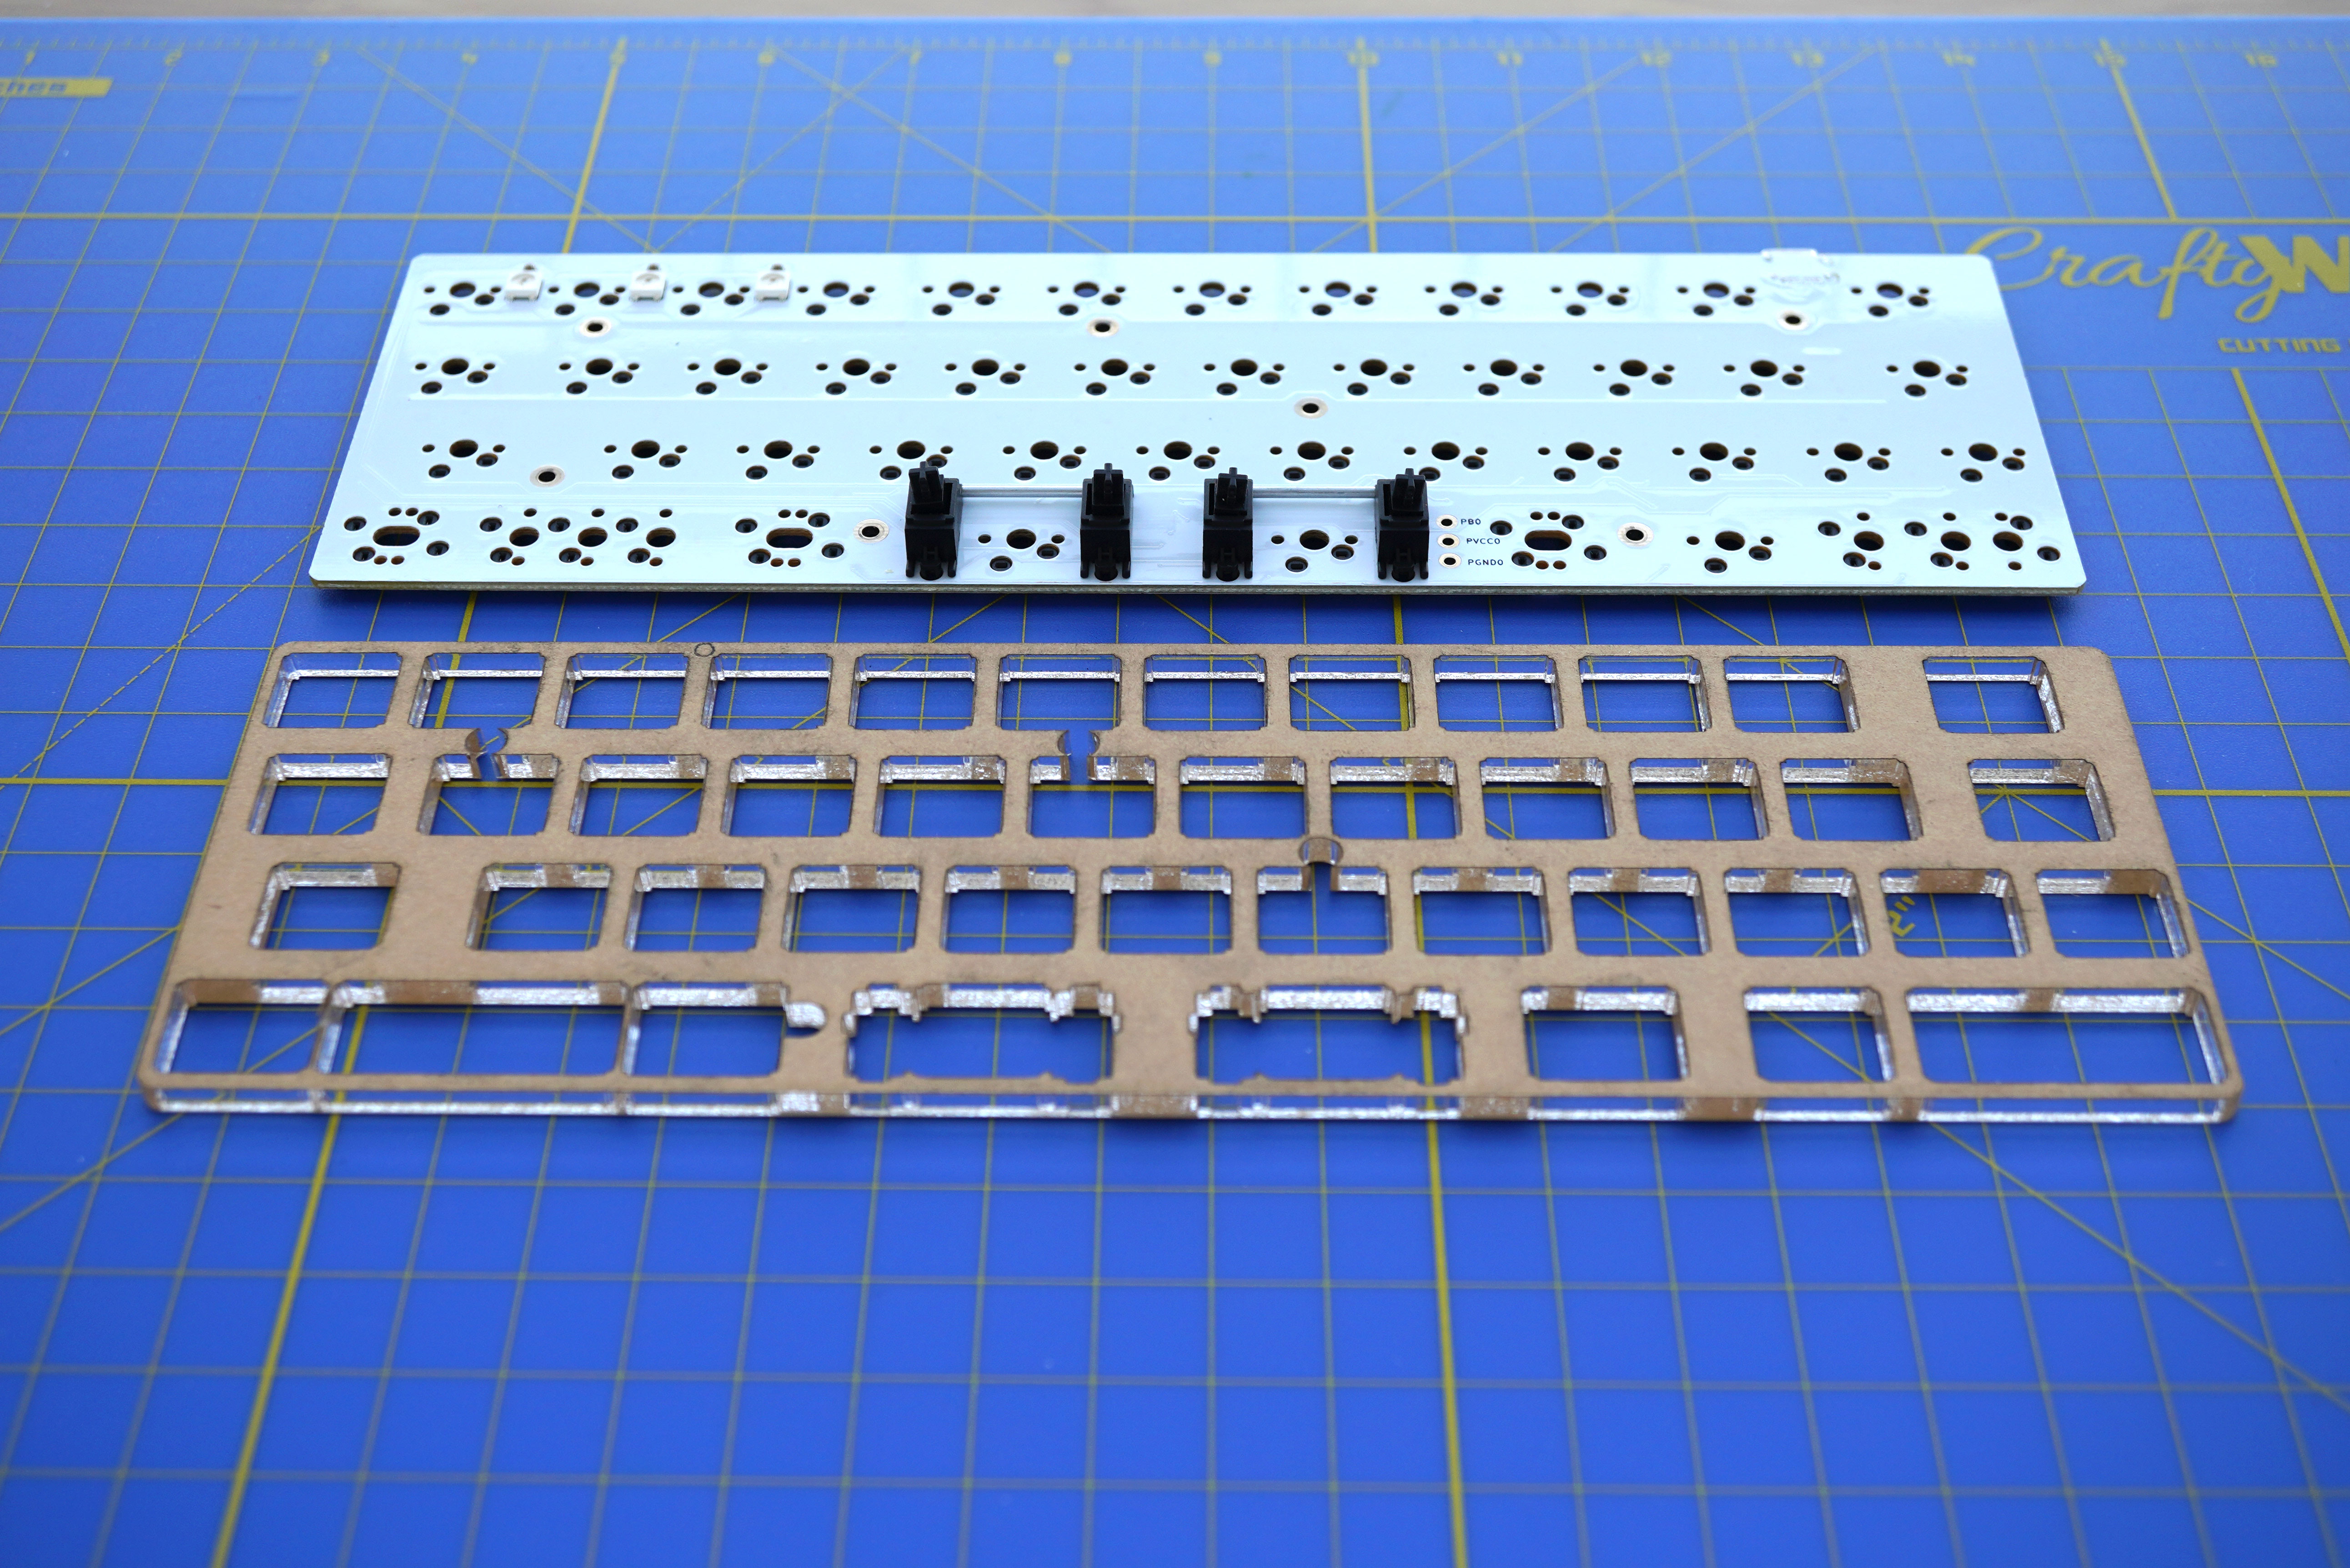
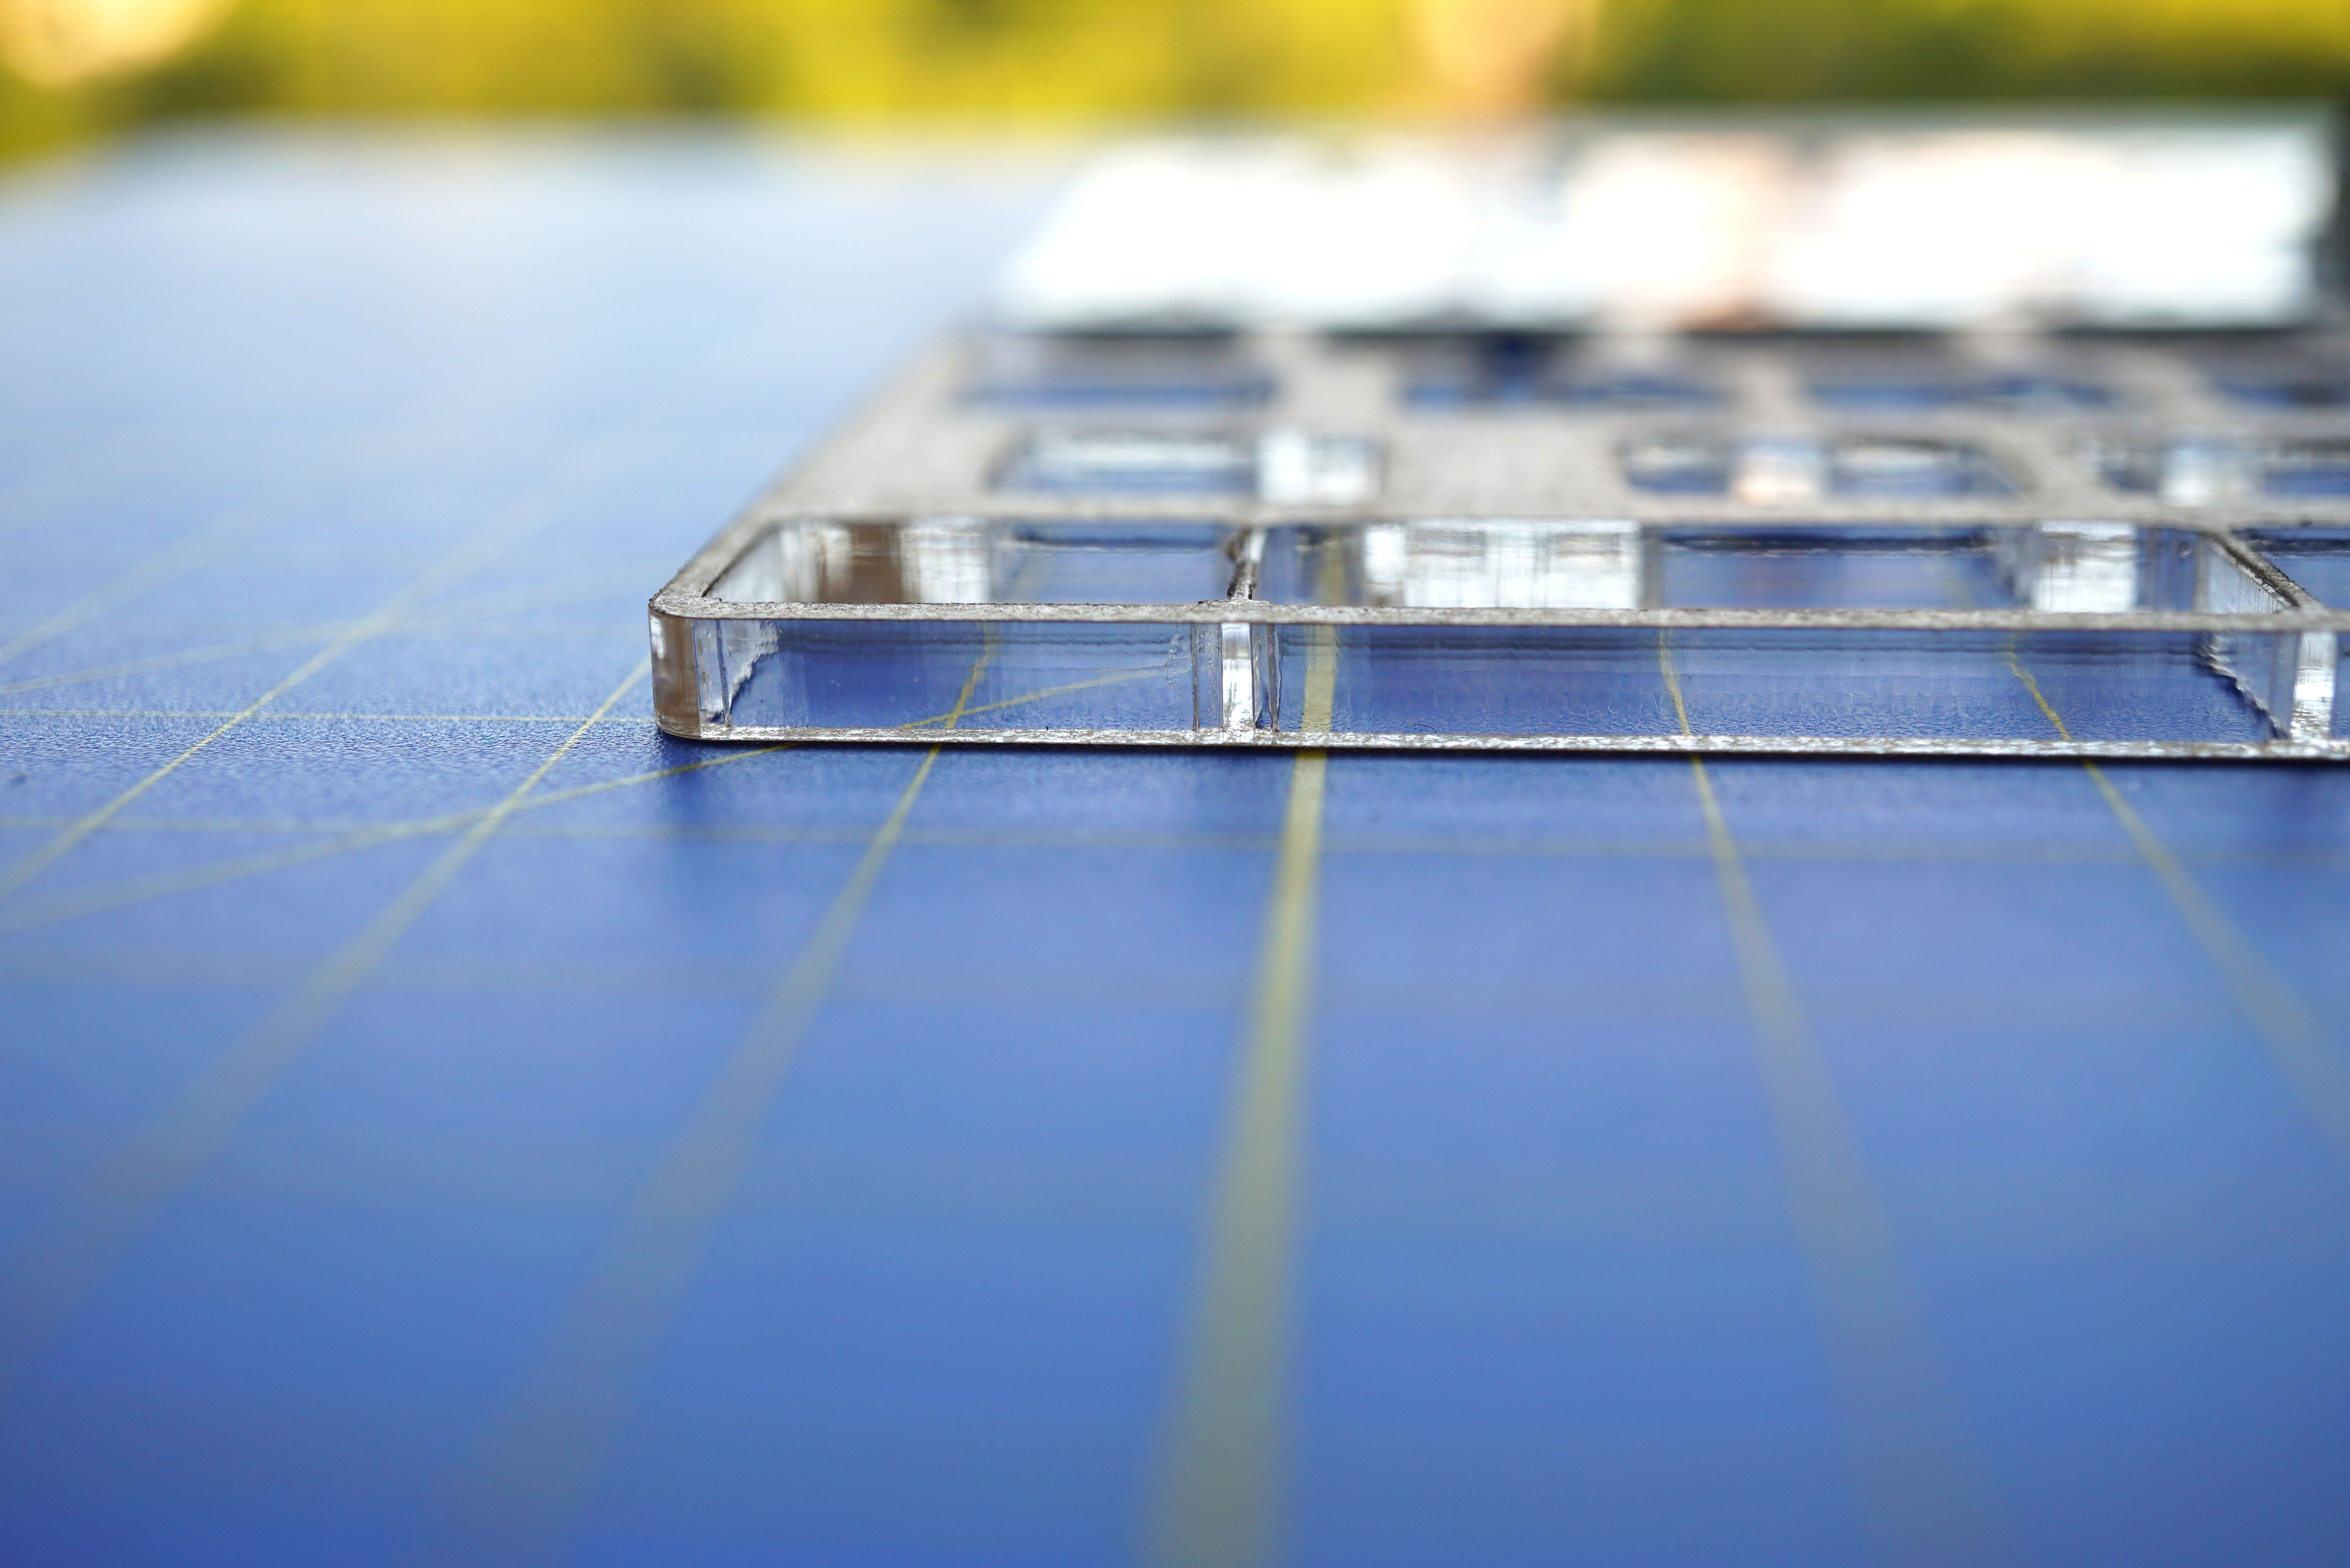
As always, there are a few challenges:
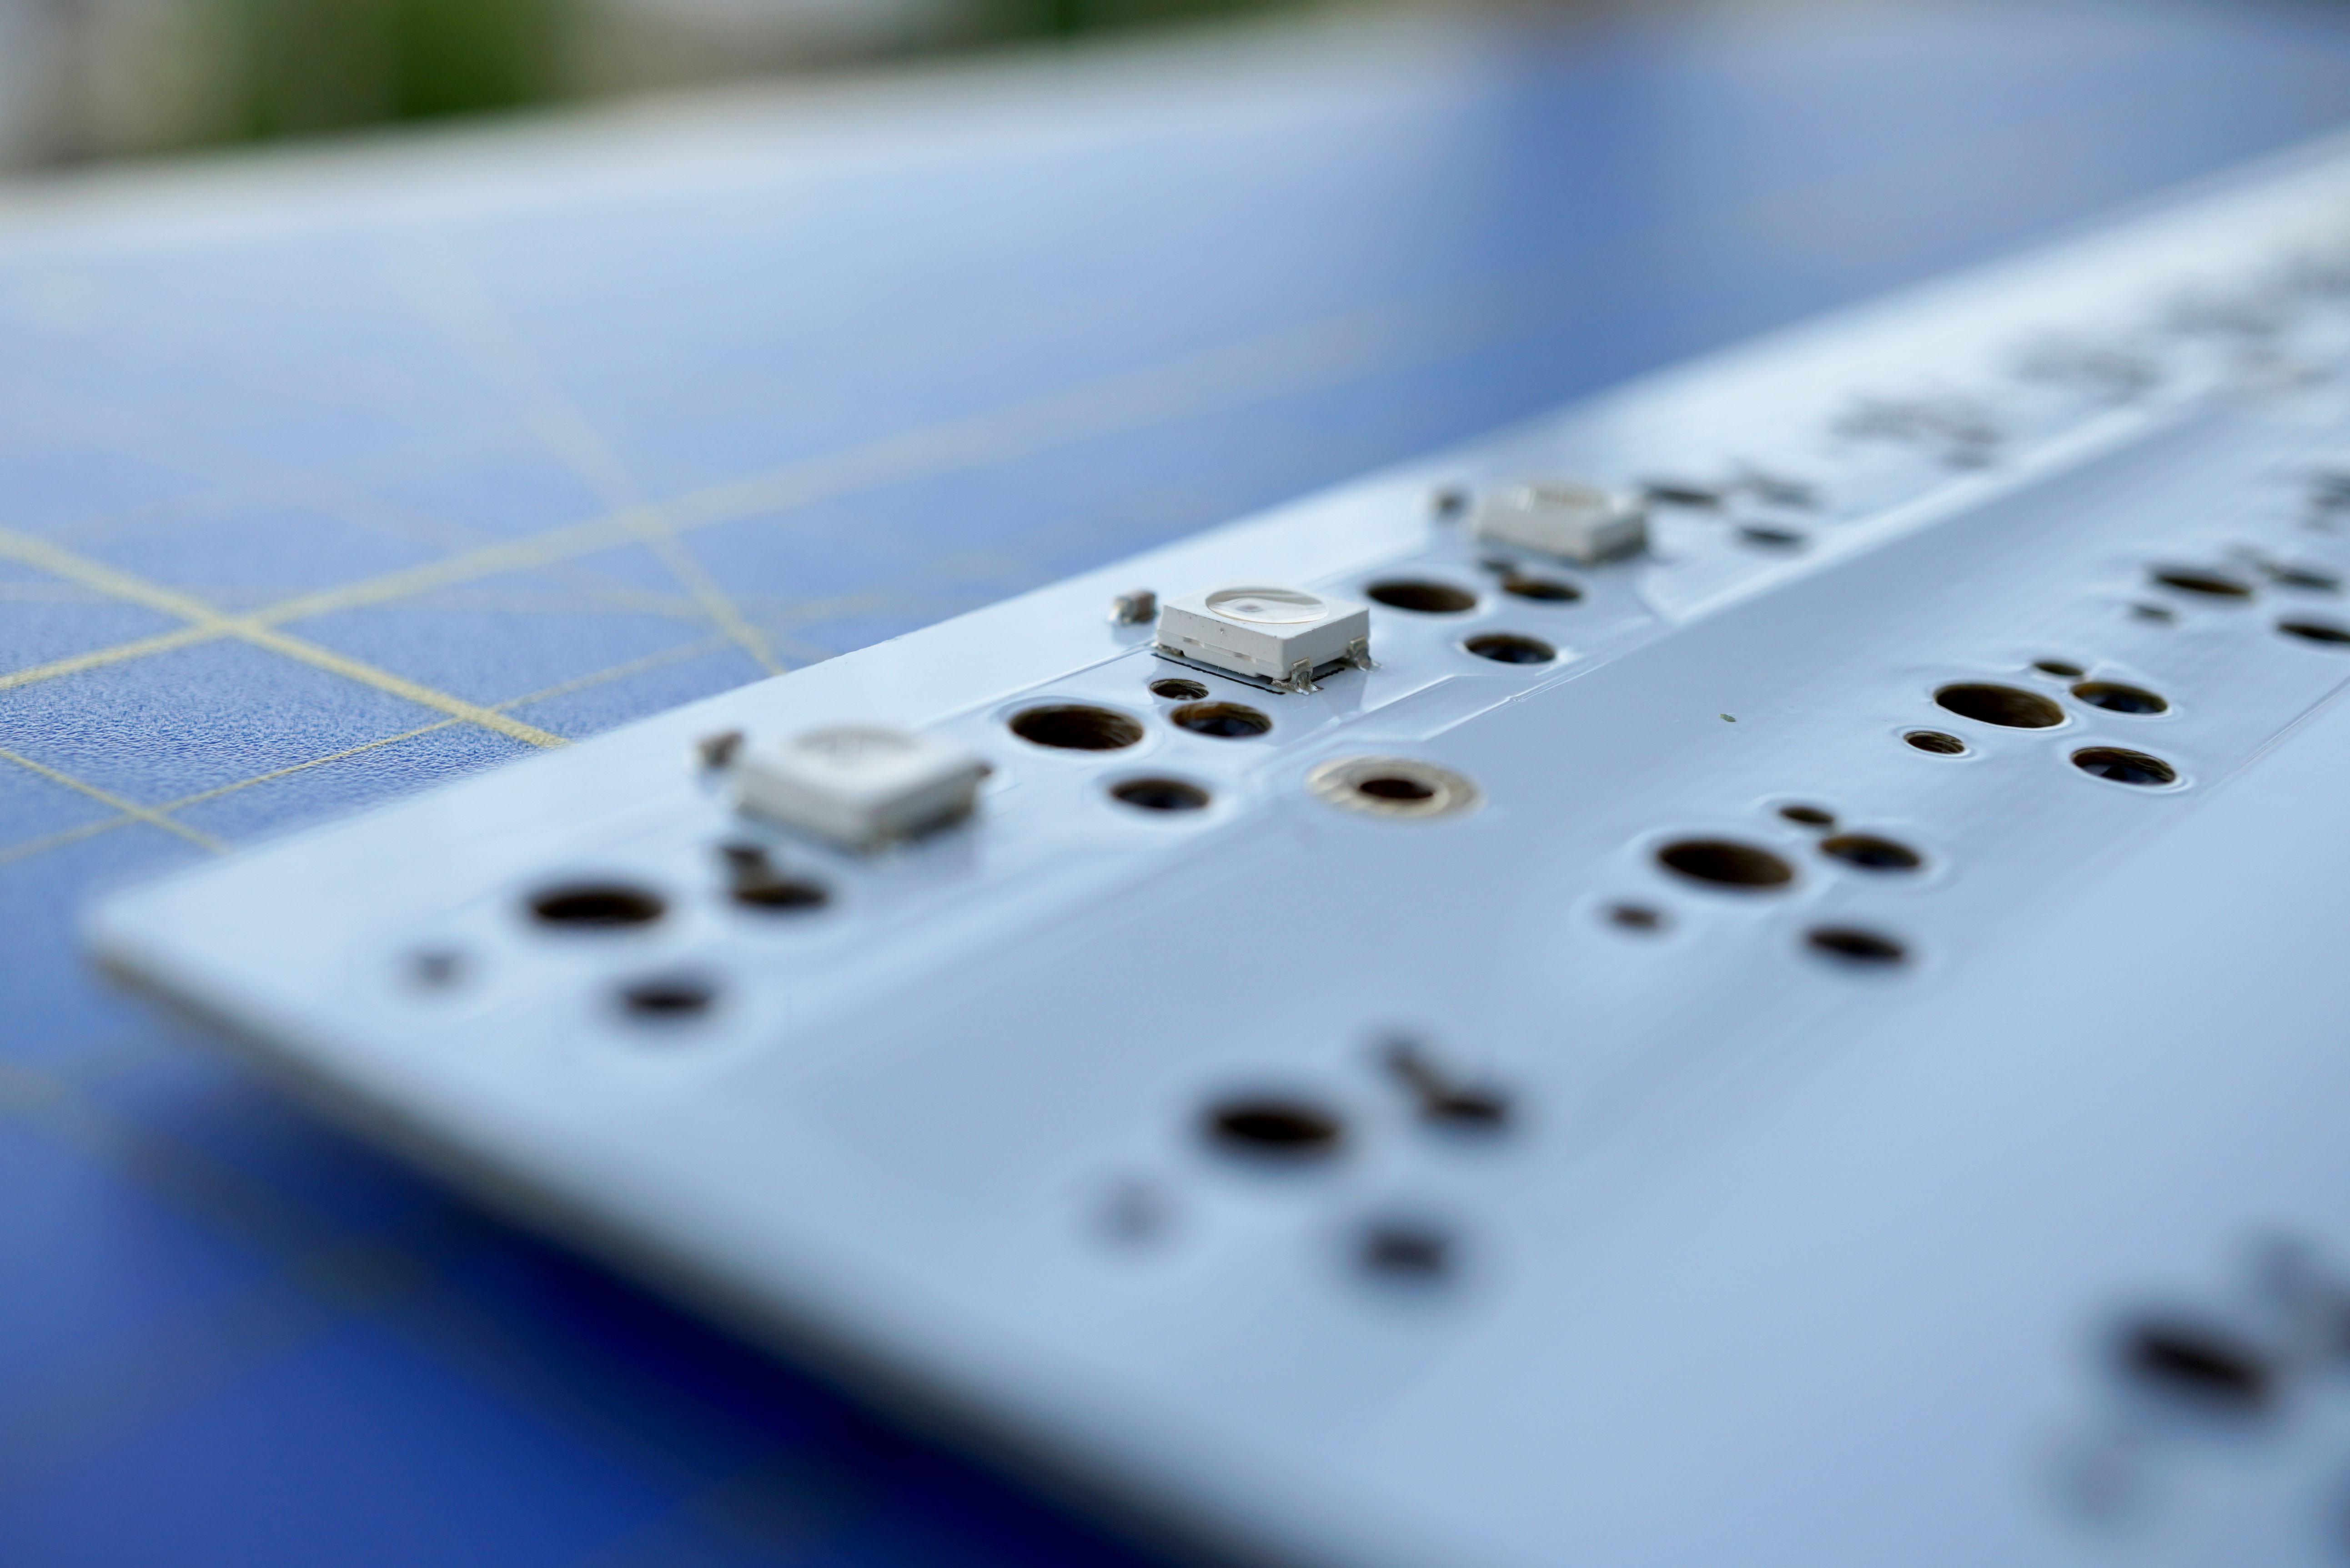
- The LEDs protrude; in order for the plate to lay flat I will have to carve a few pockets in the plate
- If I want to use the included PCB stabilizers, I will have to carve pockets for those too
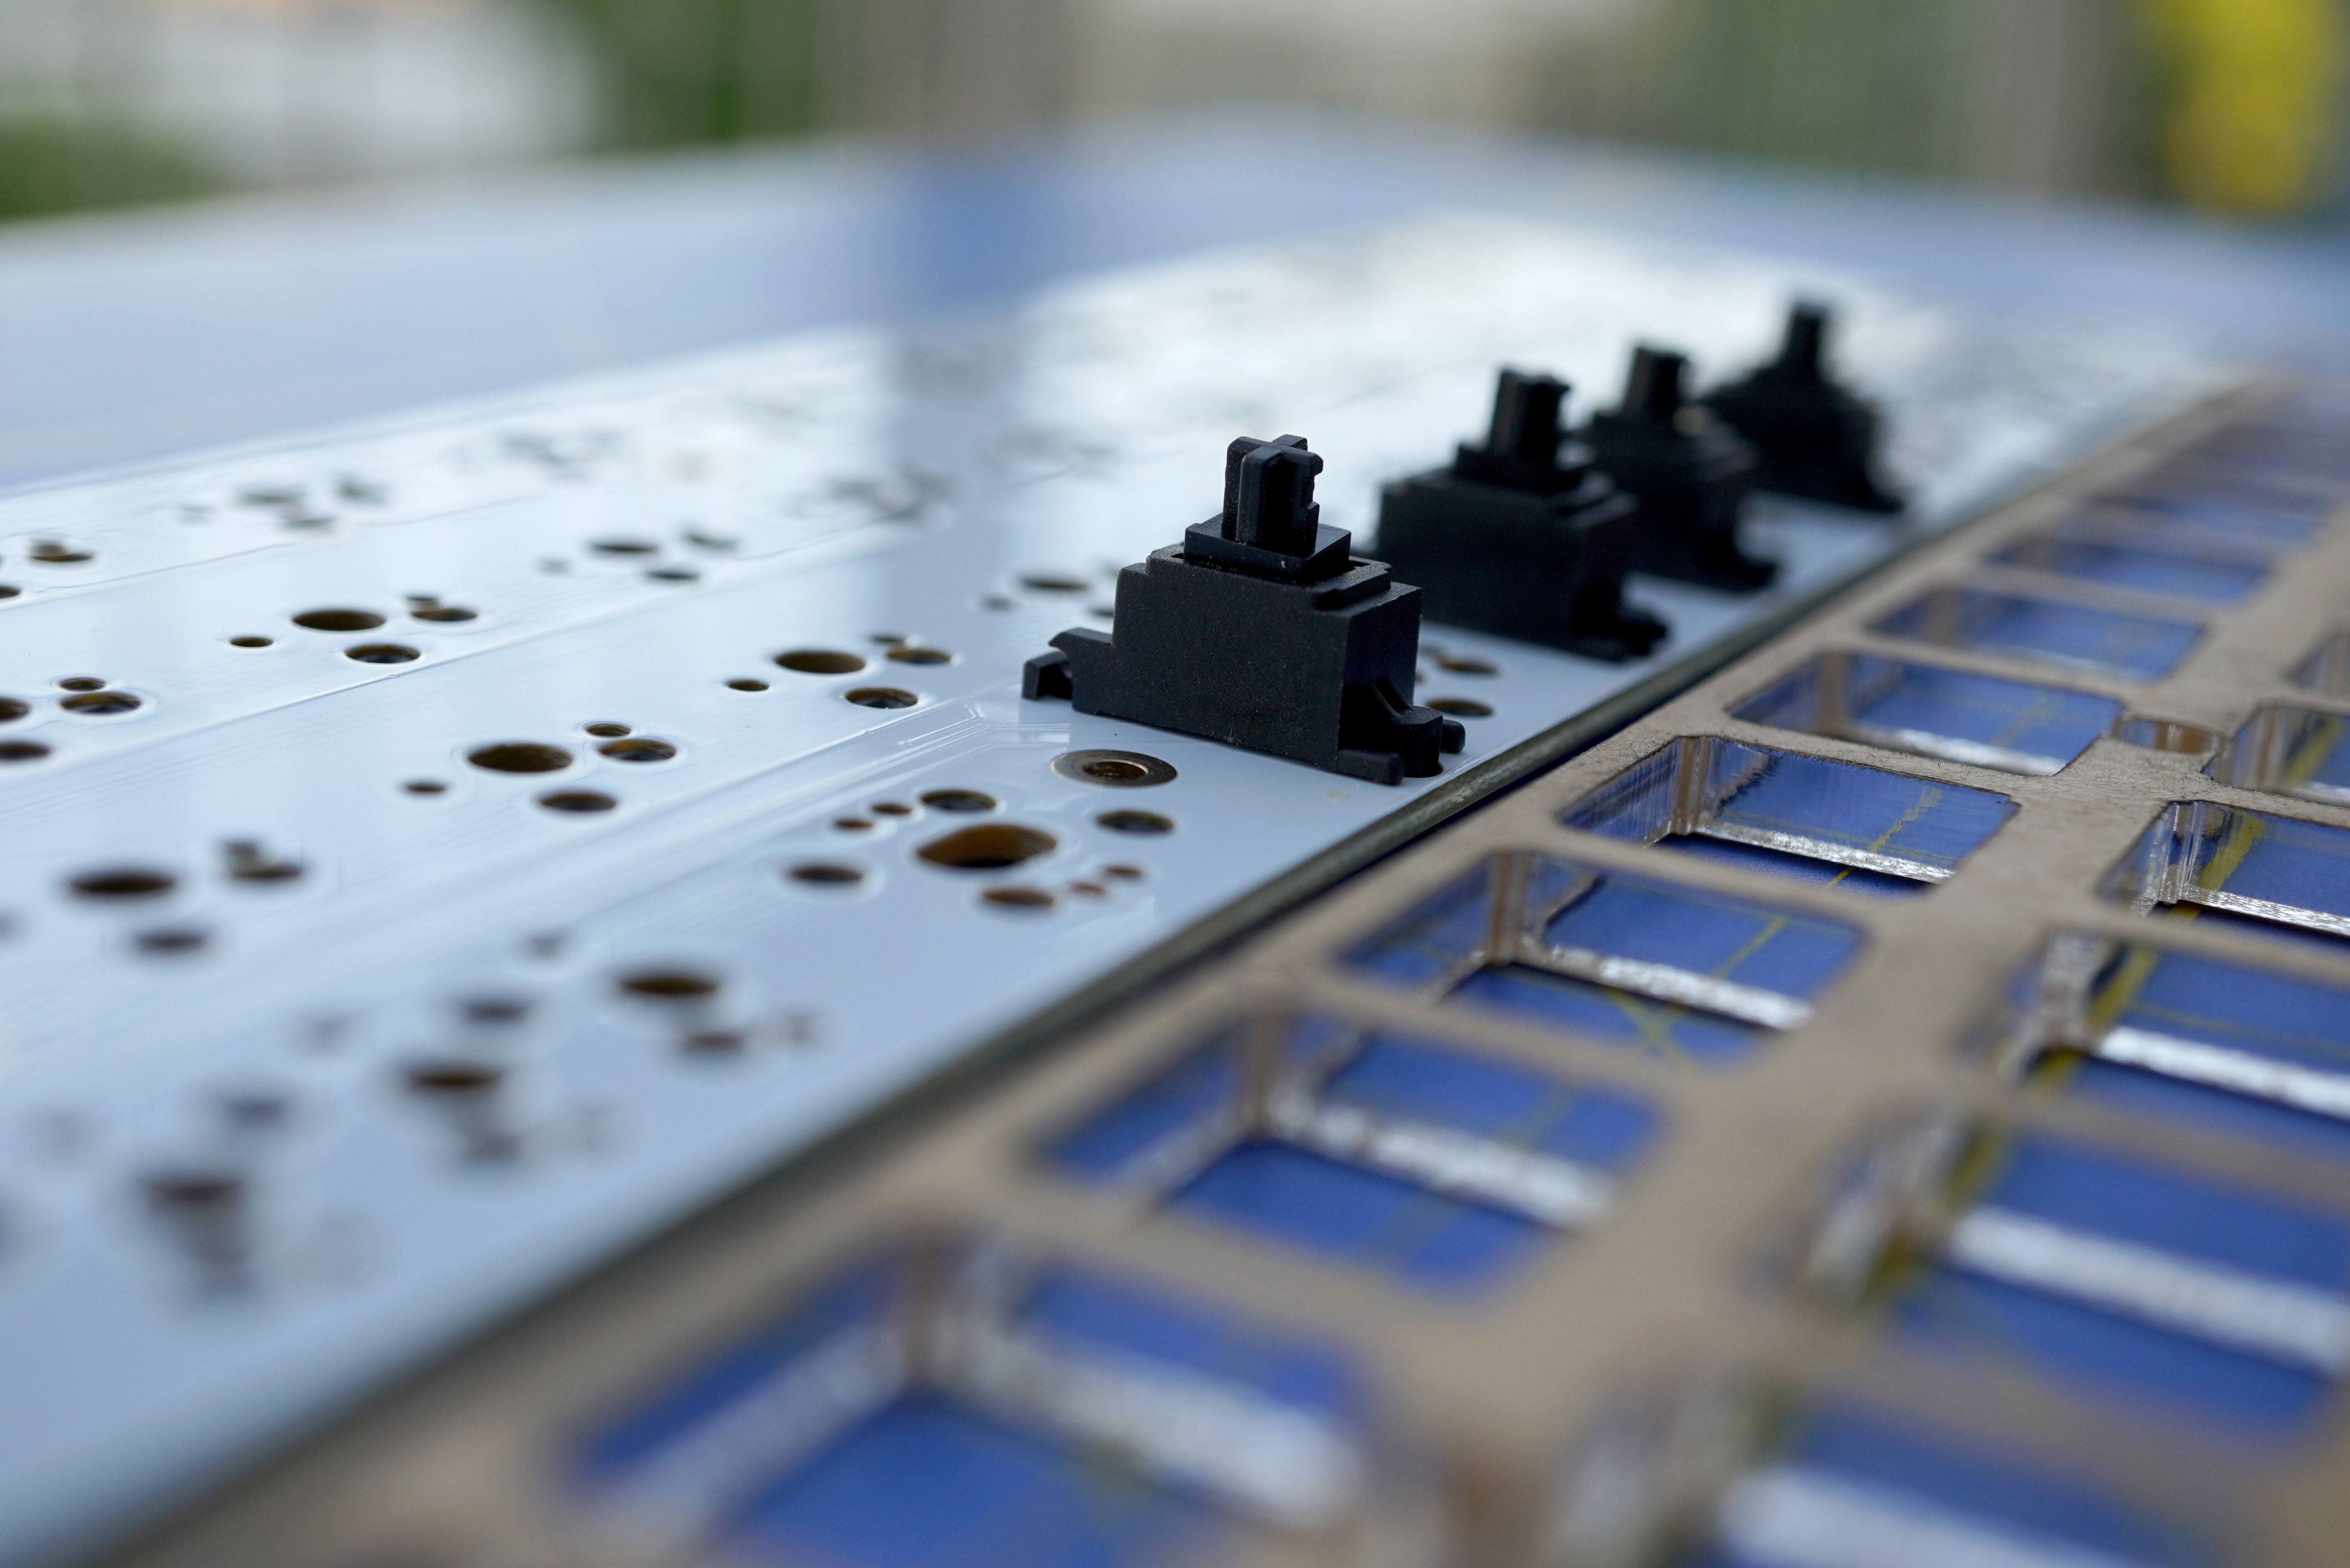
- As mentioned before, in order to let the switches click in place I will have to carve notches for the clips.
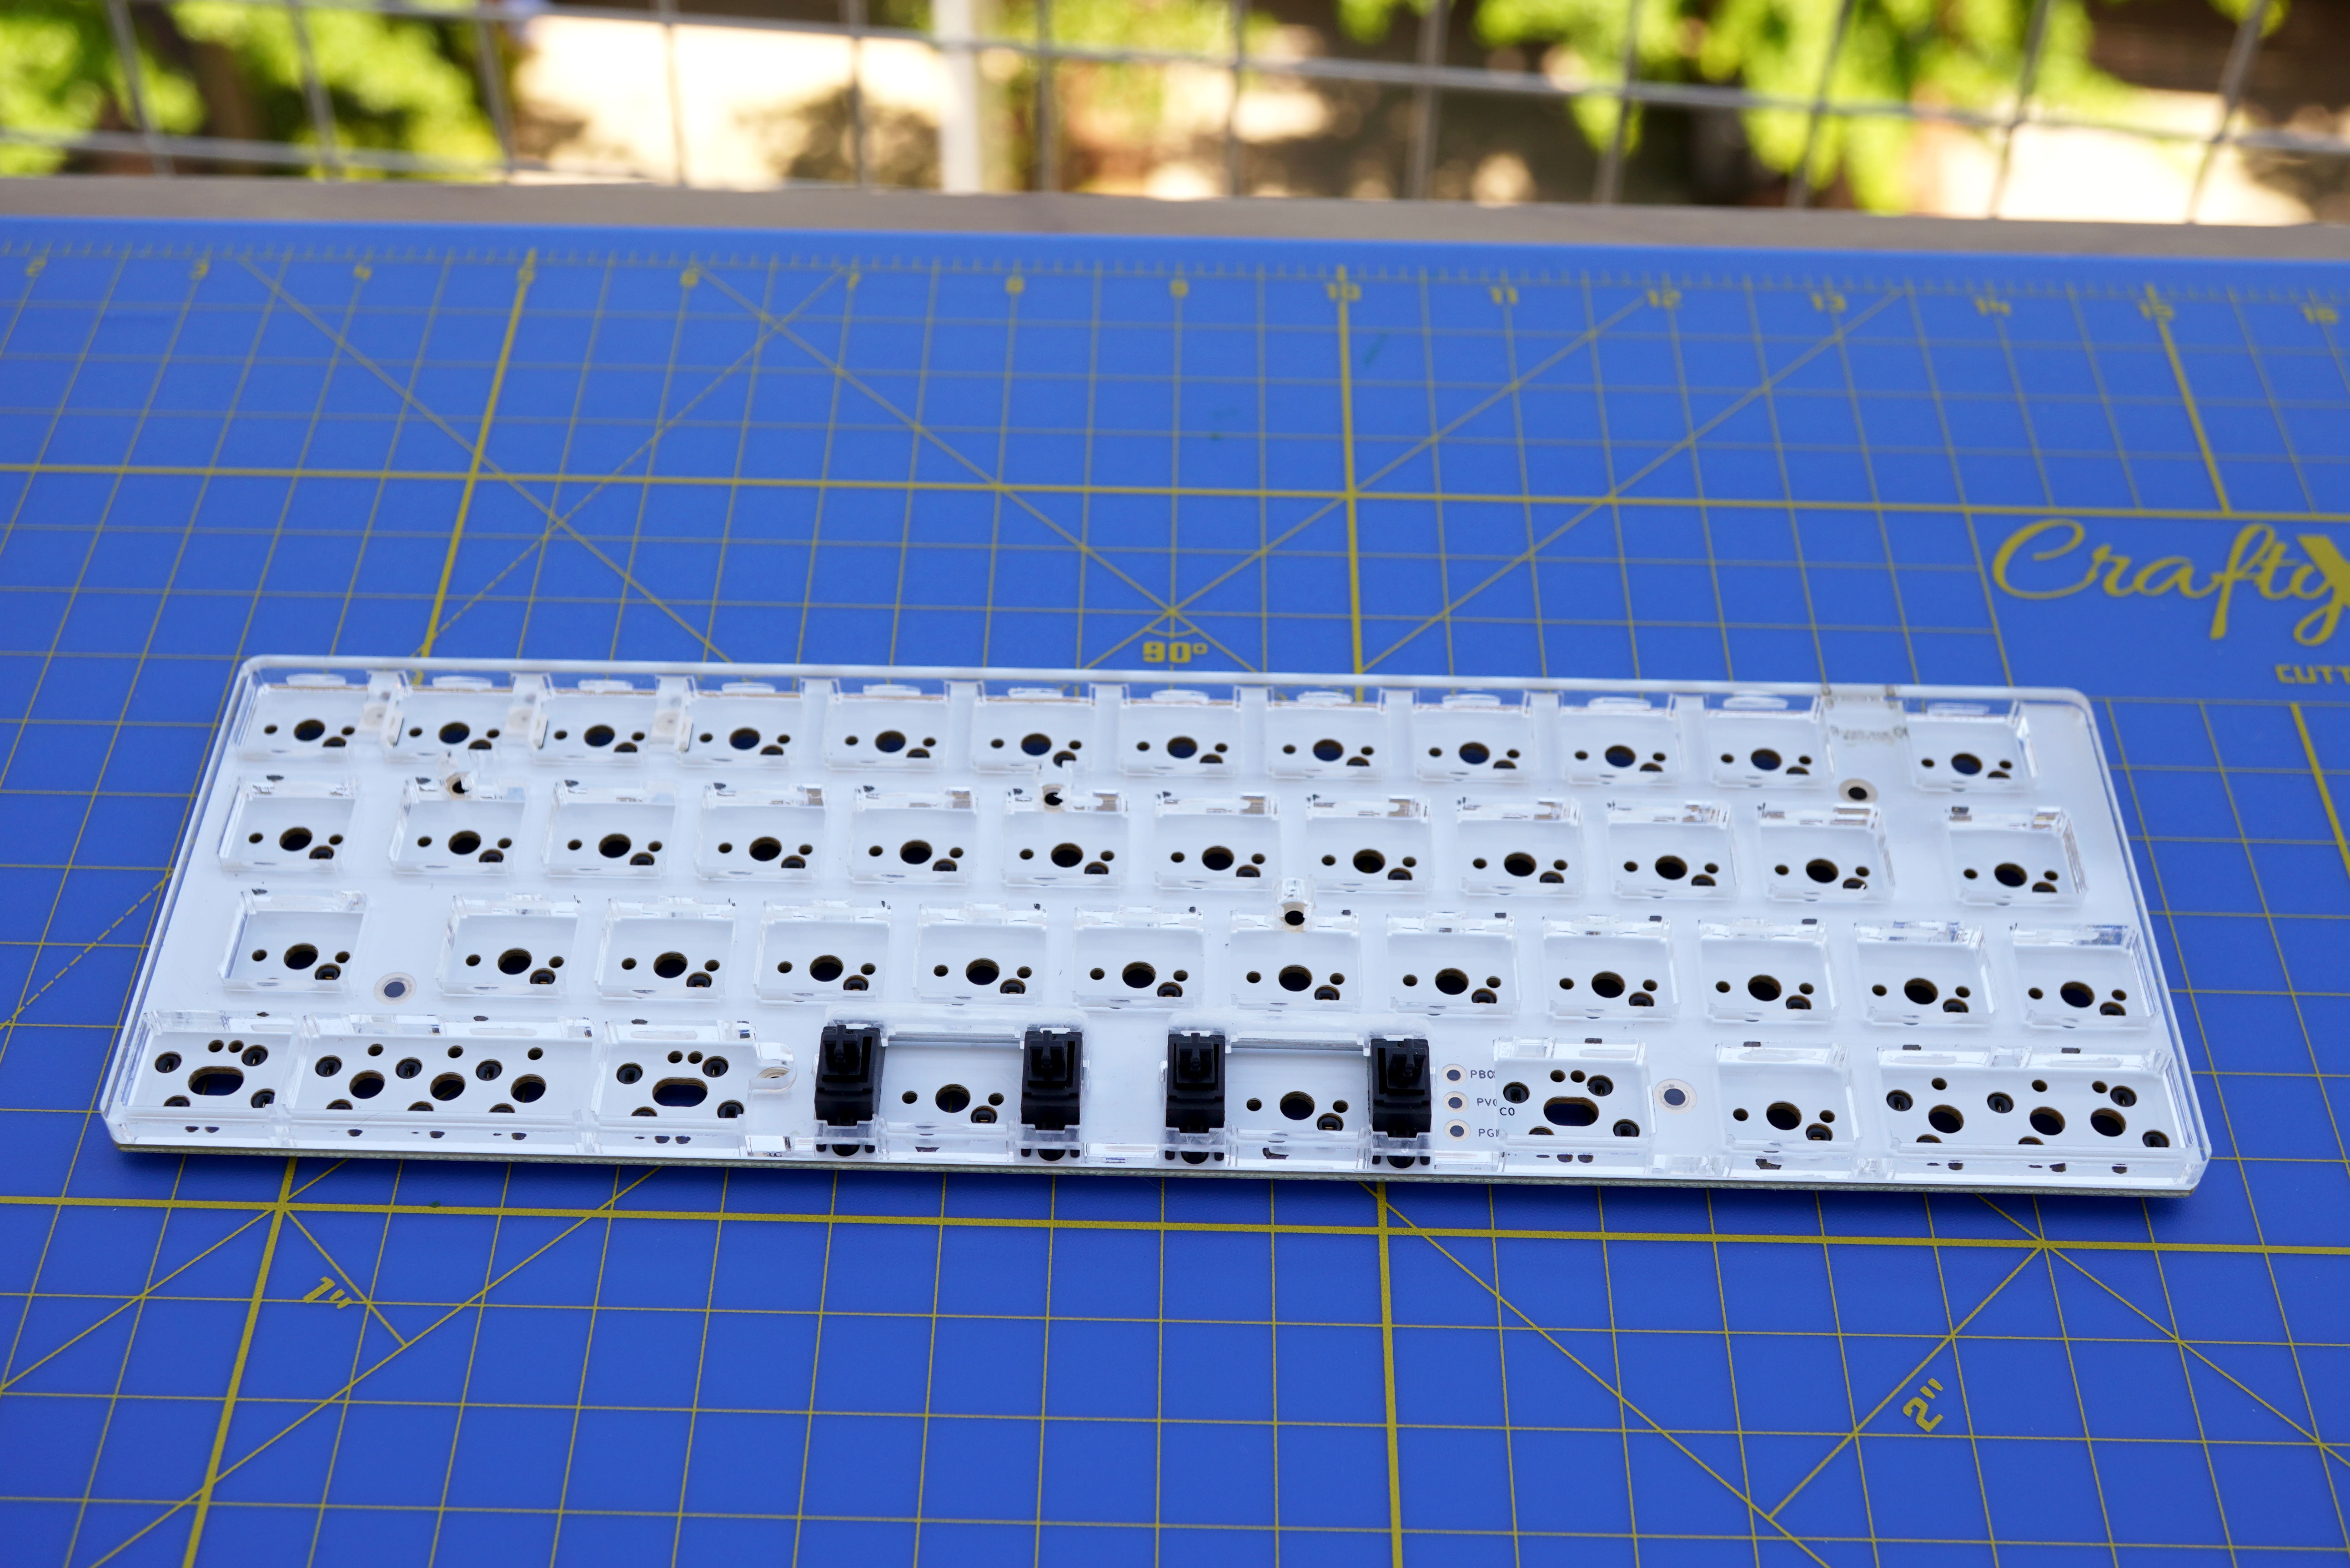
So I made all the changes using my Dremel and now the plate is flush against the PCB:
LEDs pockets carved; and because the plate is made with polycarbonate, the emitters can shine through with no restriction:
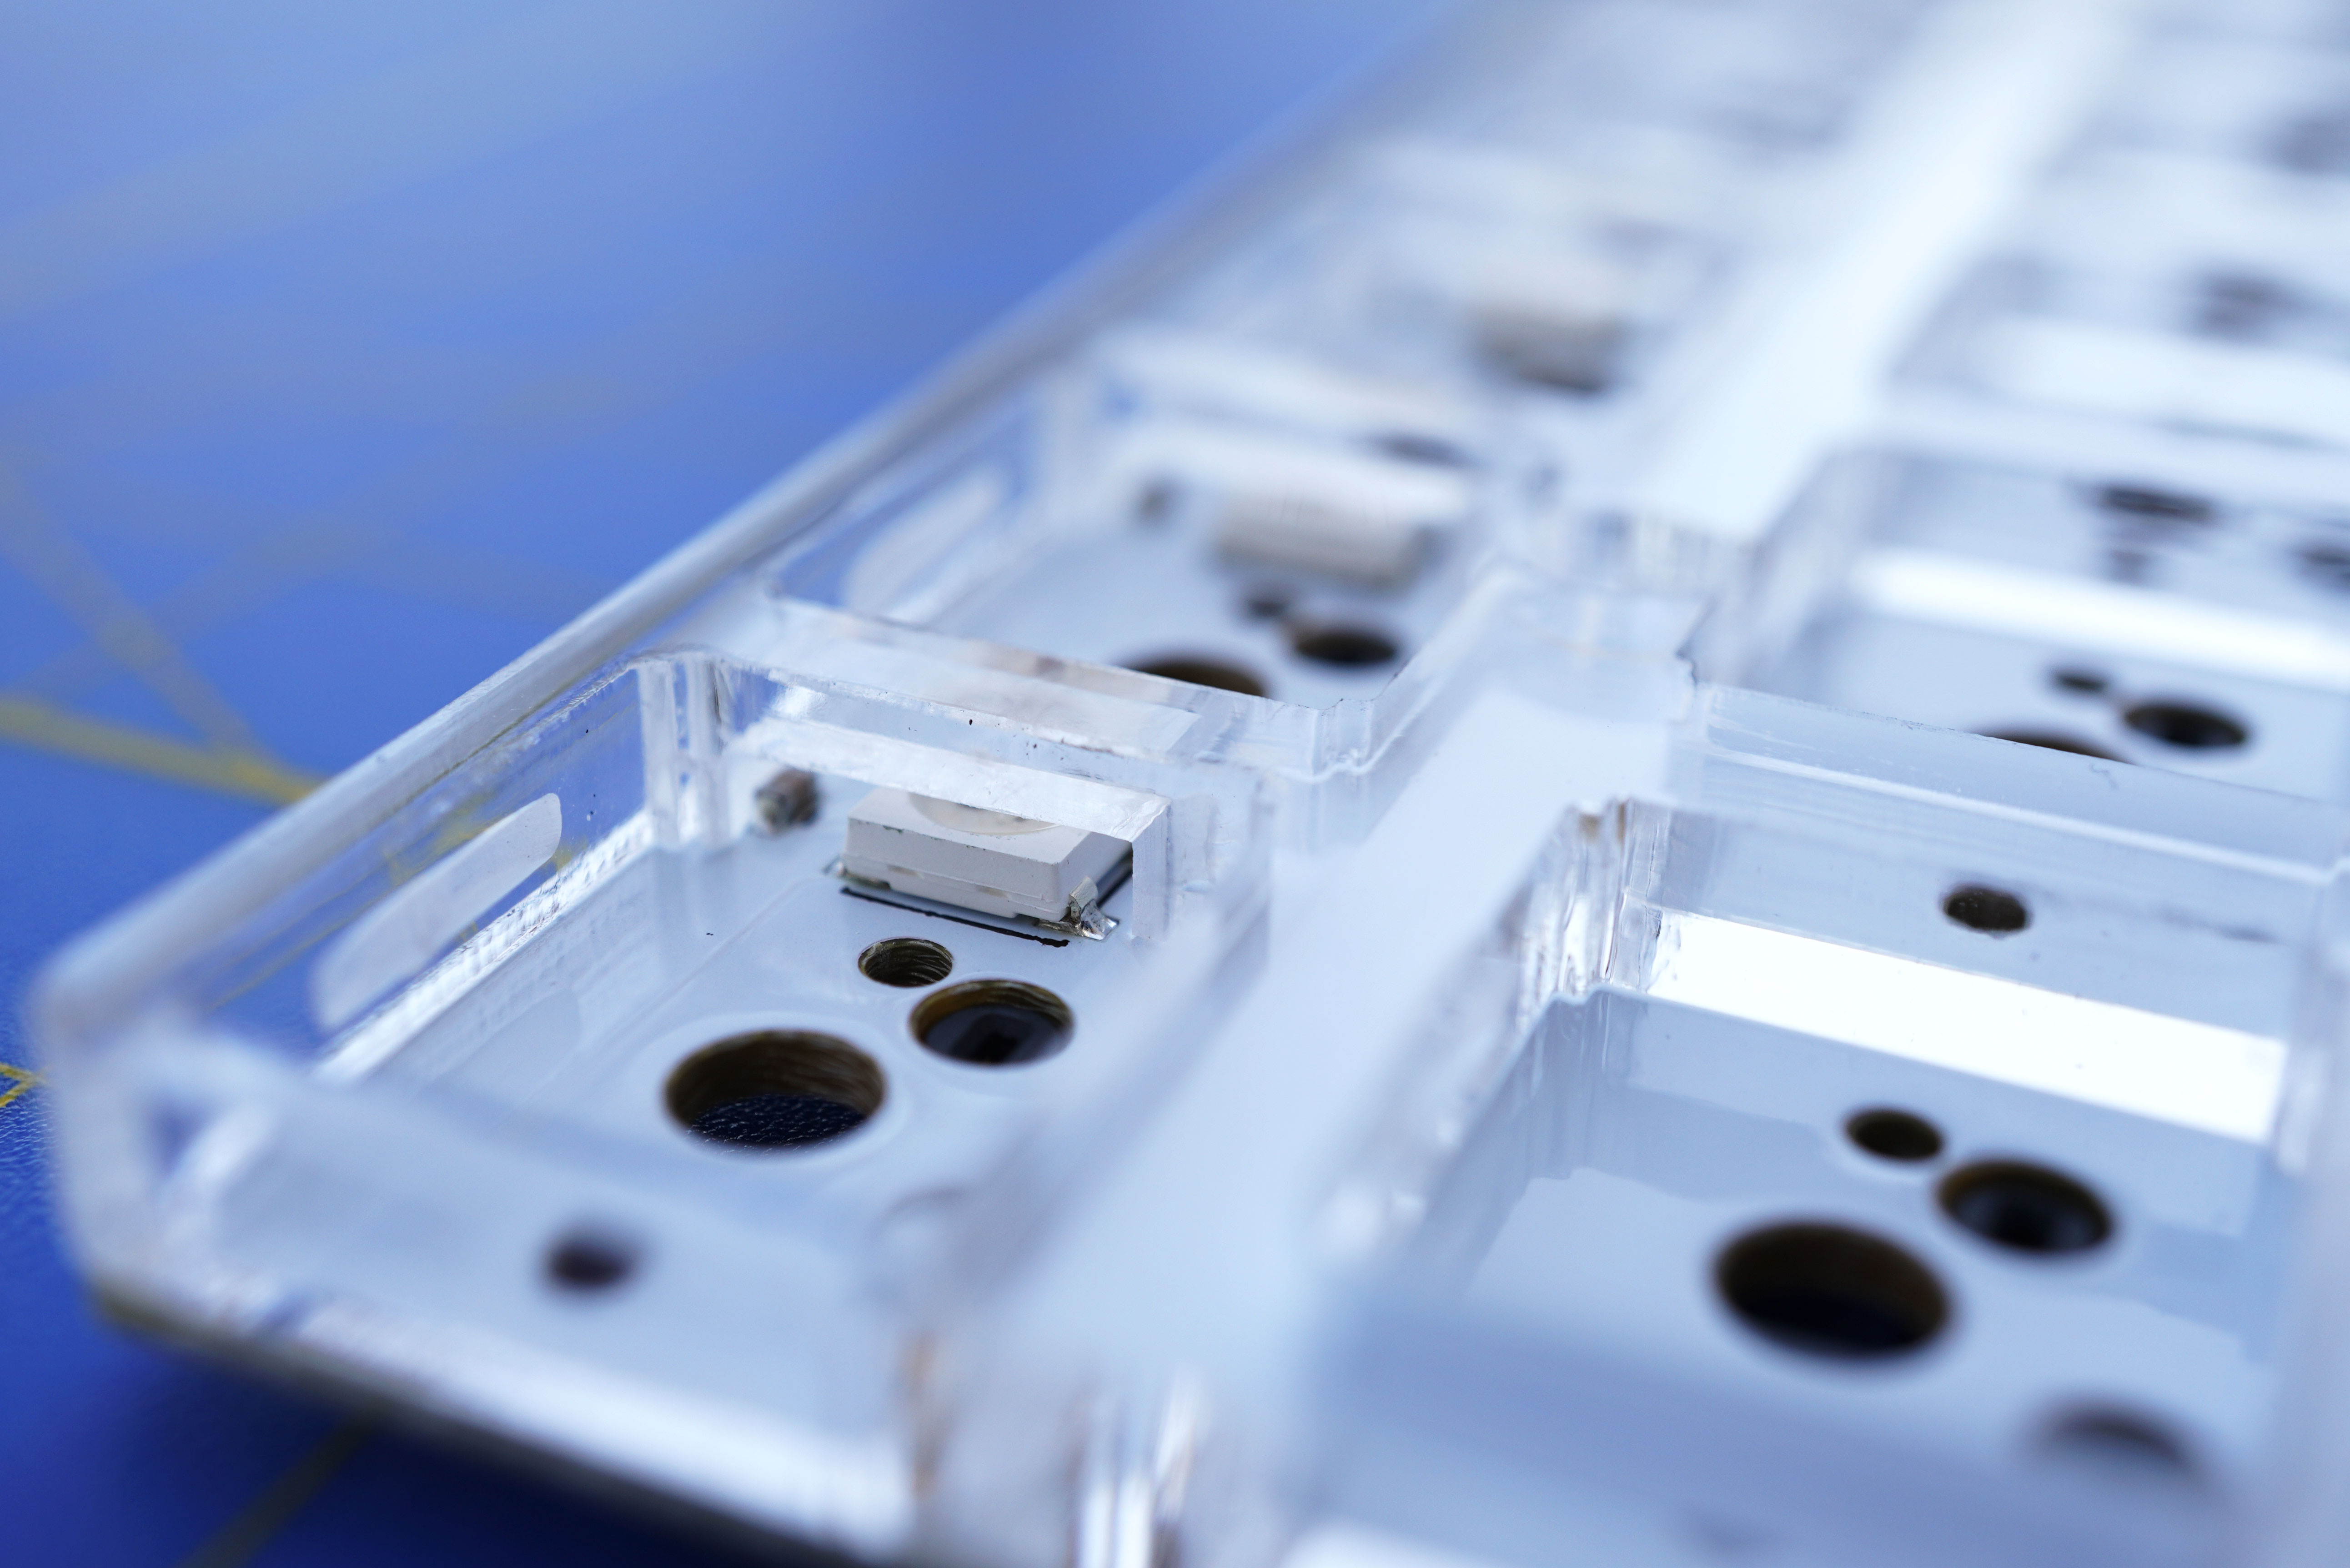
Pockets for the stabilizers including, front and back.
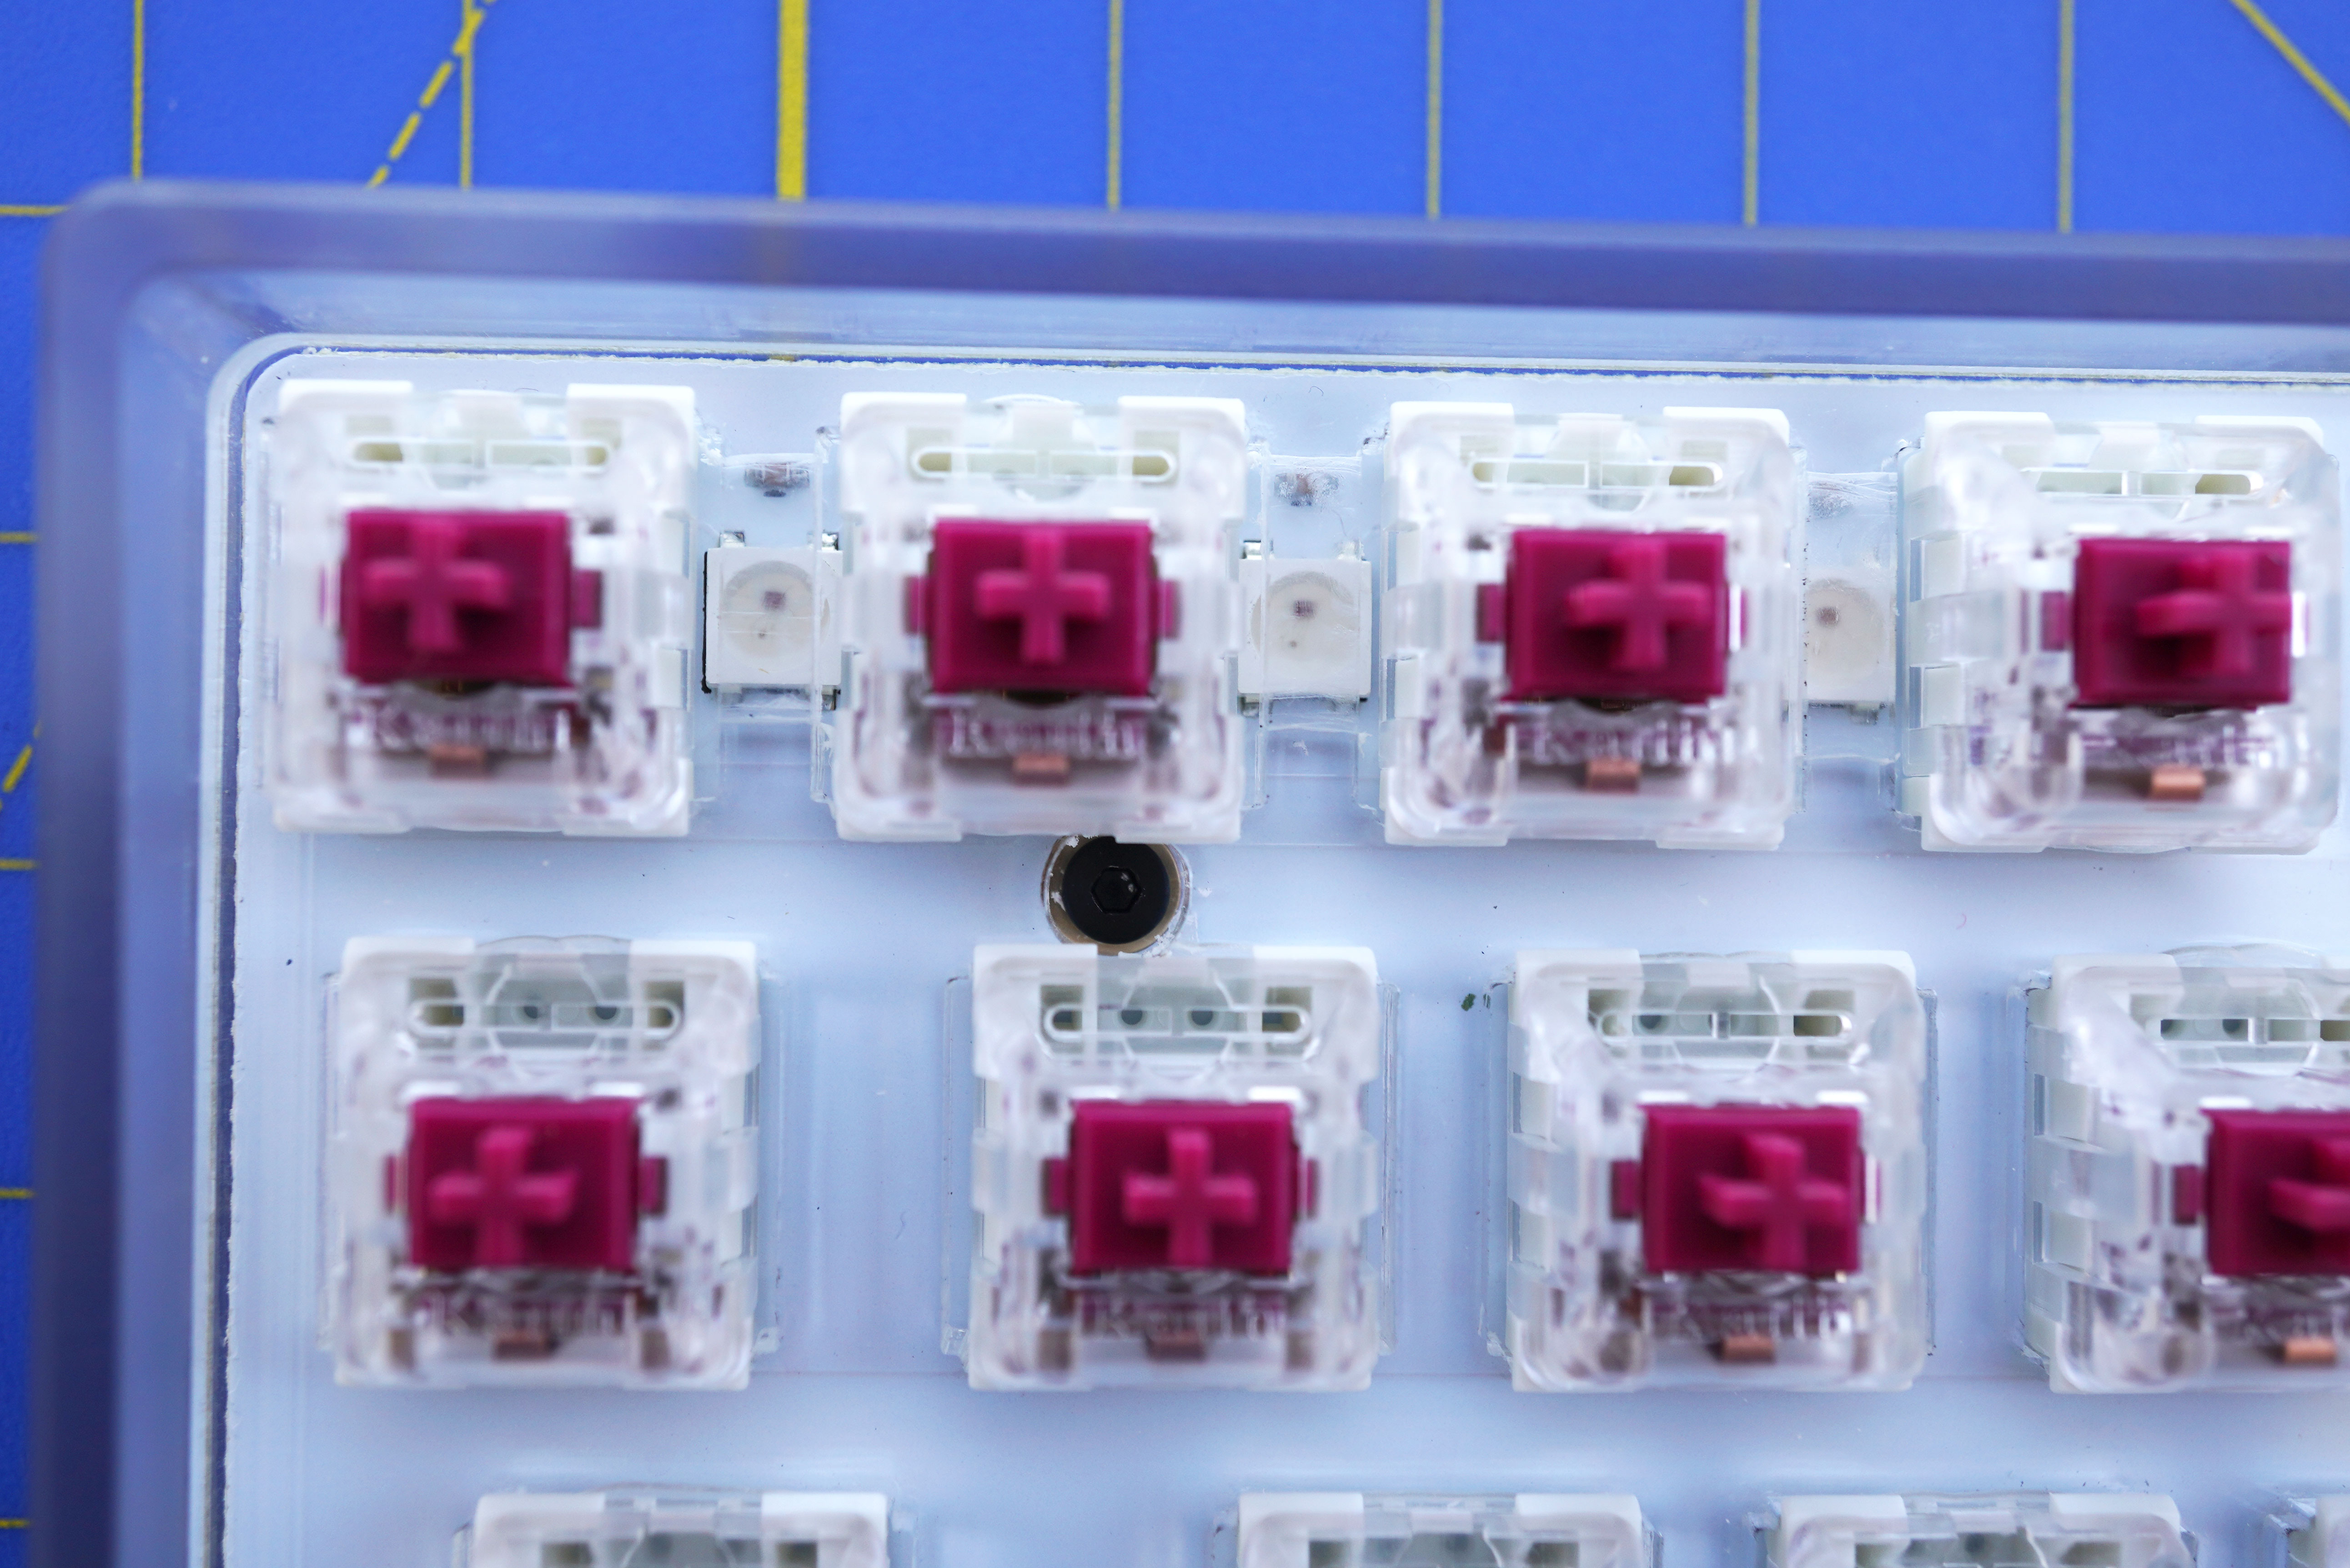
Notches for each switch:
Here is the plate, PCB, and switches all assembled:
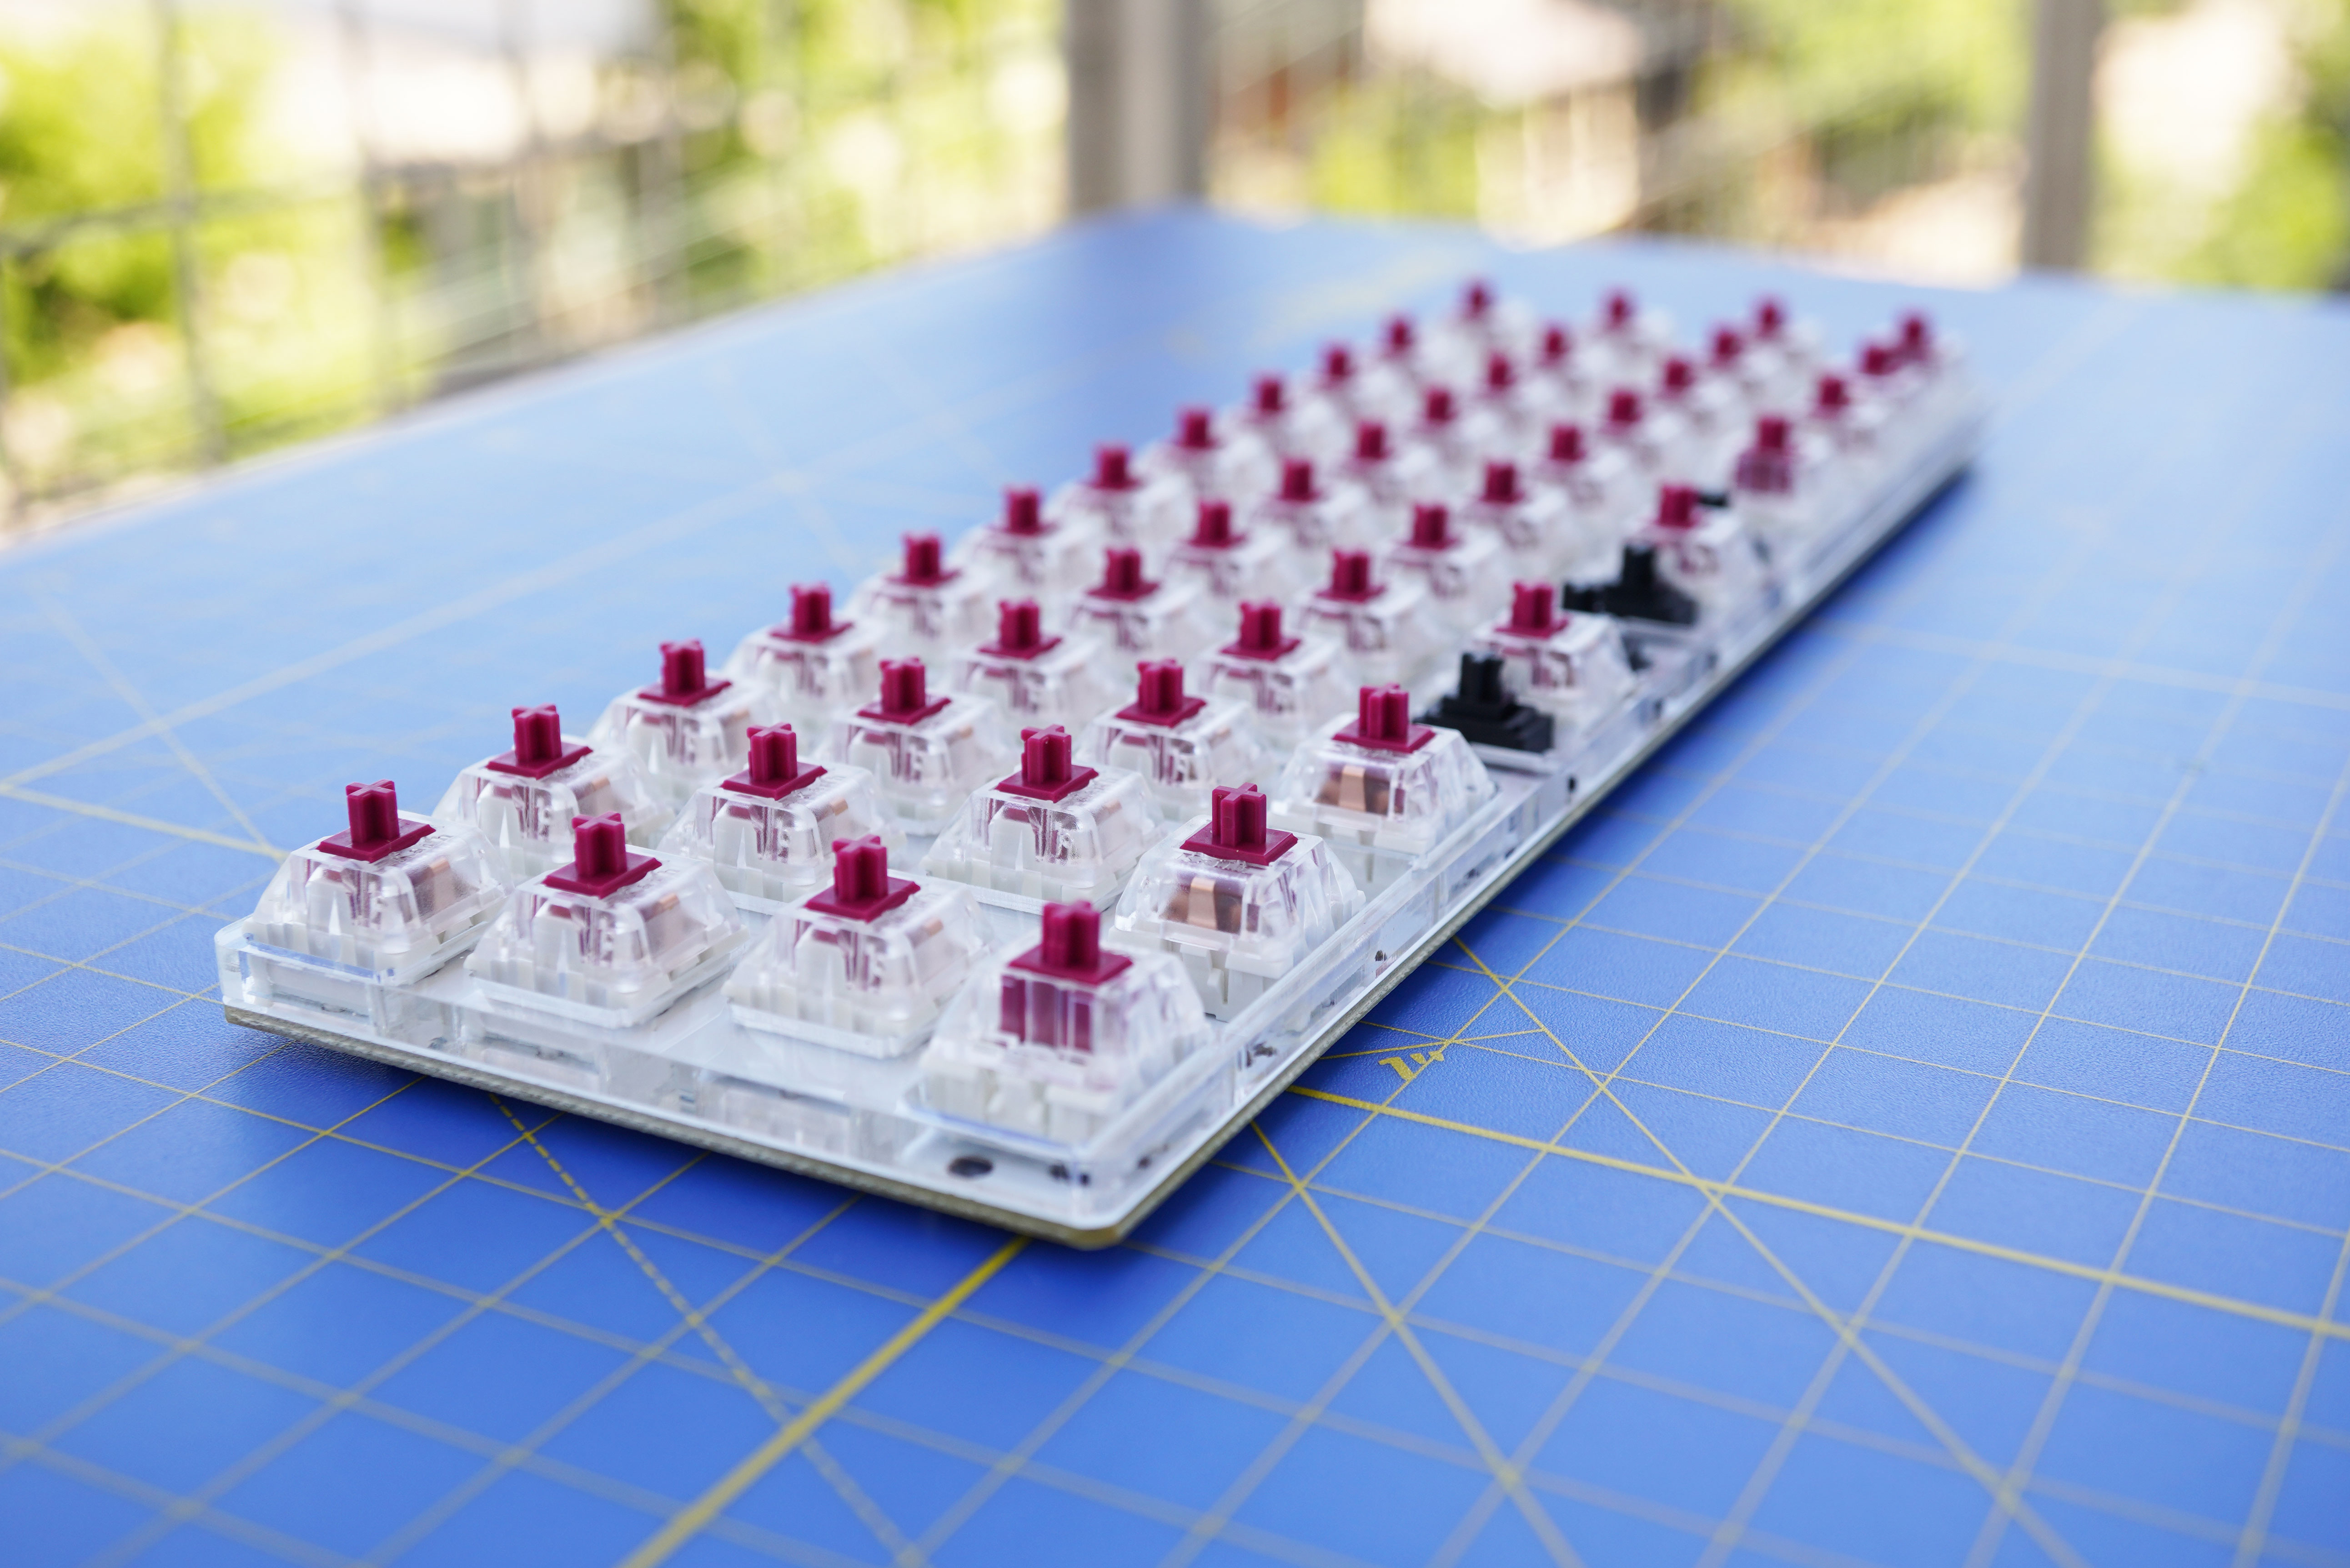
The plate makes almost no aesthetic impact on the keyboard, you can barely notice it:
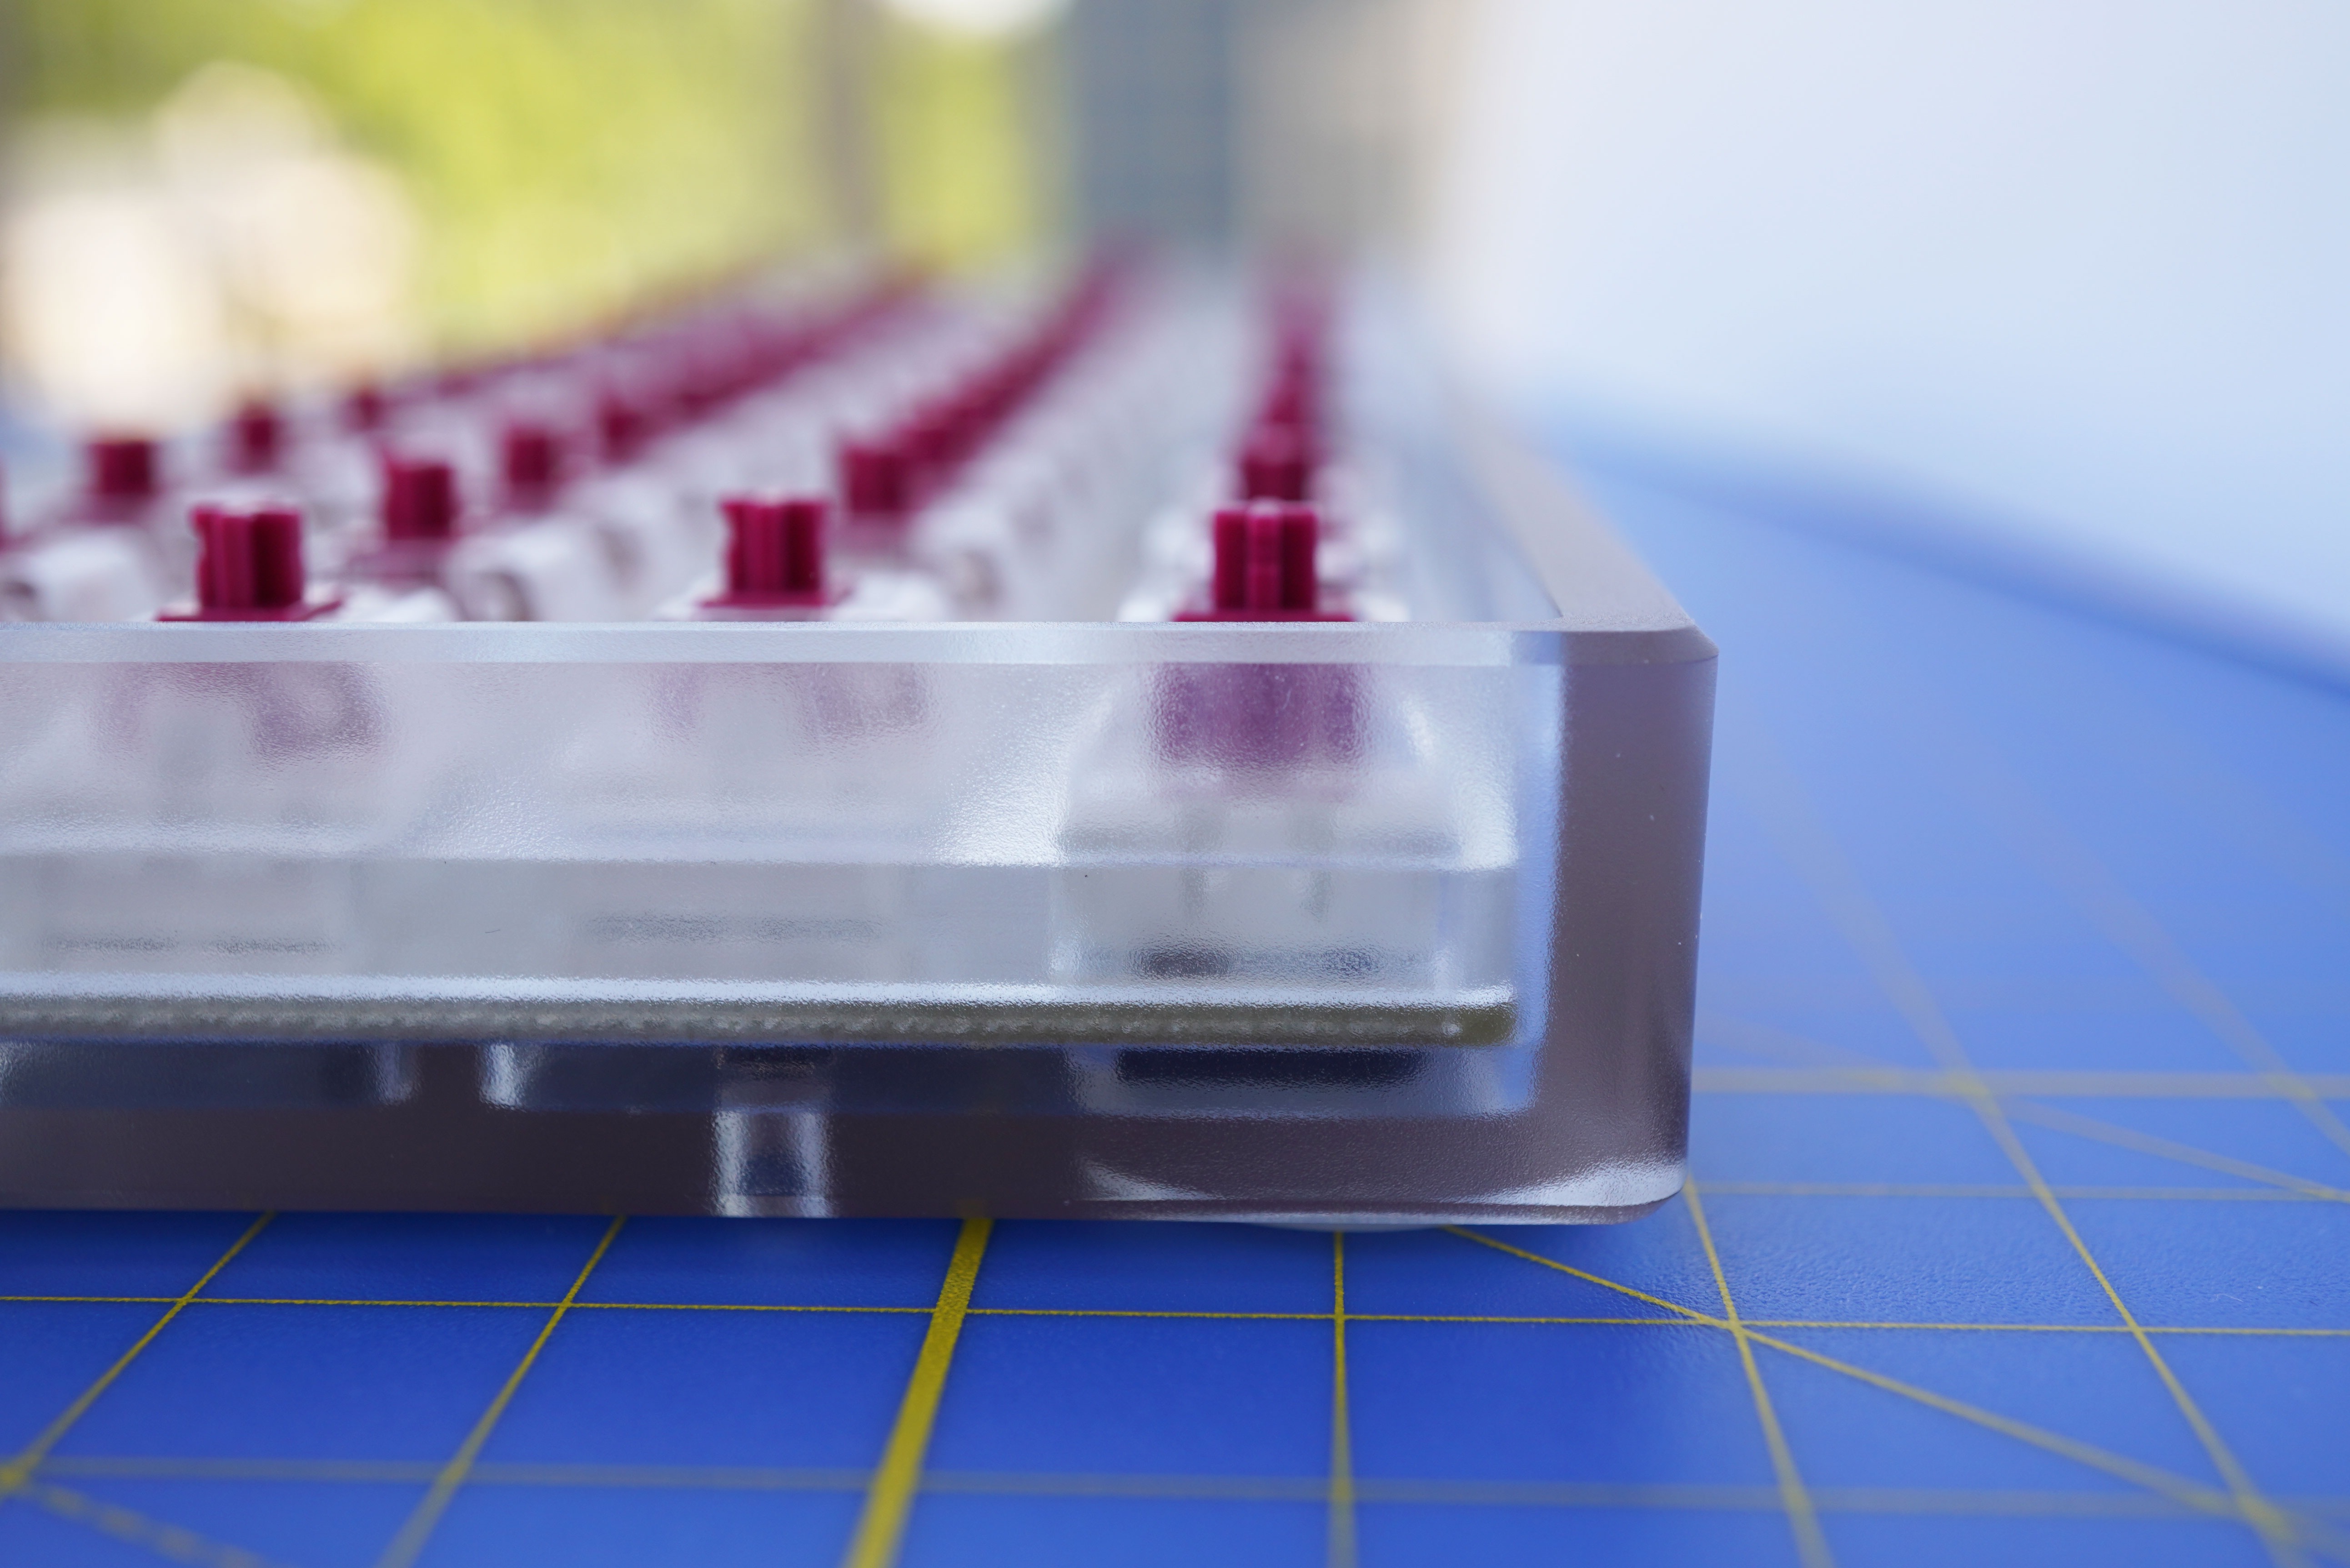
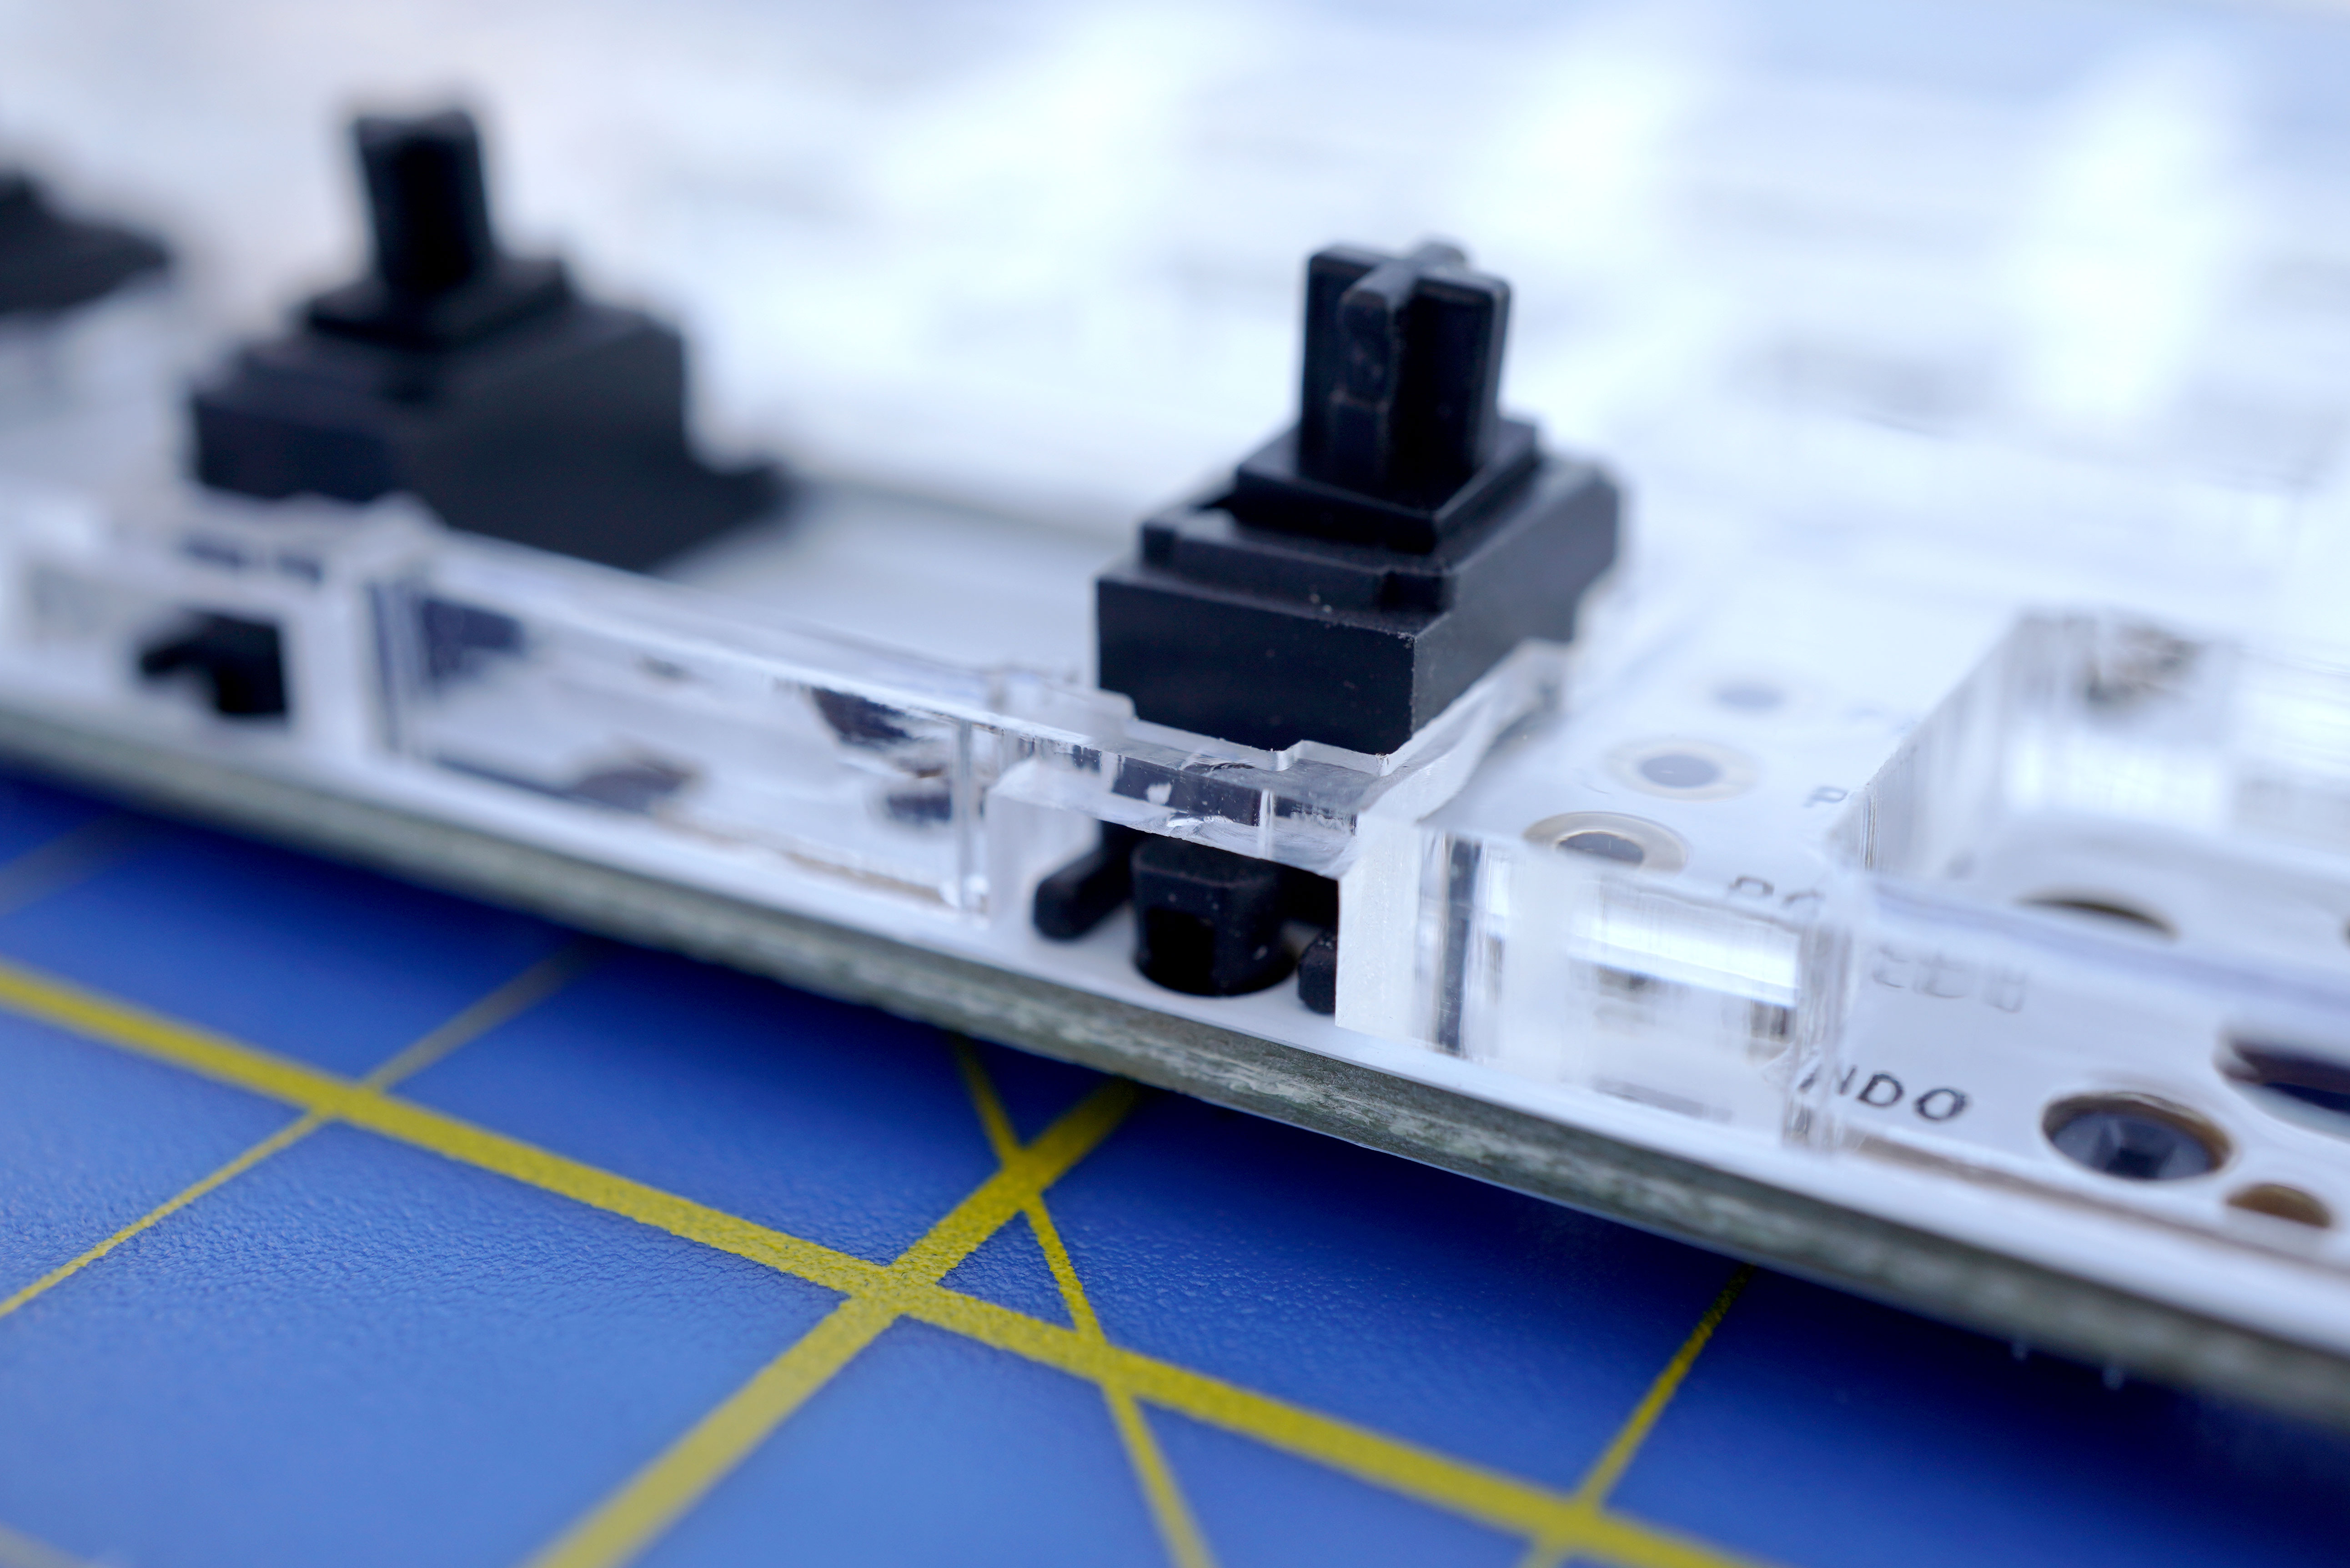
The problems mentioned seem to be fixed with the plate:
There is no more switch wobble
And removing the keycaps does not disconnect the switch:
Assembling the keyboard is a bit different; I found it better to insert all the switches into the plate making sure all the pins are perfectly straight (VERY IMPORTANT). Then I placed the PCB on the switches while upside down and pressed one by one until all of them were connected. The connections aligned perfectly.
@evangs: I noticed that you posted a new plate for KUMO, I think you will find these steps interesting.
I have a few extra polycarbonate plates for the KUMO I might carve later.
Now onto another fat plate.
17 Likes
Really cool idea. I also have a Kumo. Mine is also curved as you mentioned. I rock the switches around for fun when I’m bored. Ha. Would love to try a plate for it some day
2 Likes
Wow! Really interesting! We offer laser cut up to 3mm in out online configurator, but we can reach up to 10mm! (depends on the coplexity of the geometry) Here is a 4mm Brass recently done (vibration finish). We can perform a shiny, brushed, vibrated & Sandbralsted finish in all materials ![]()
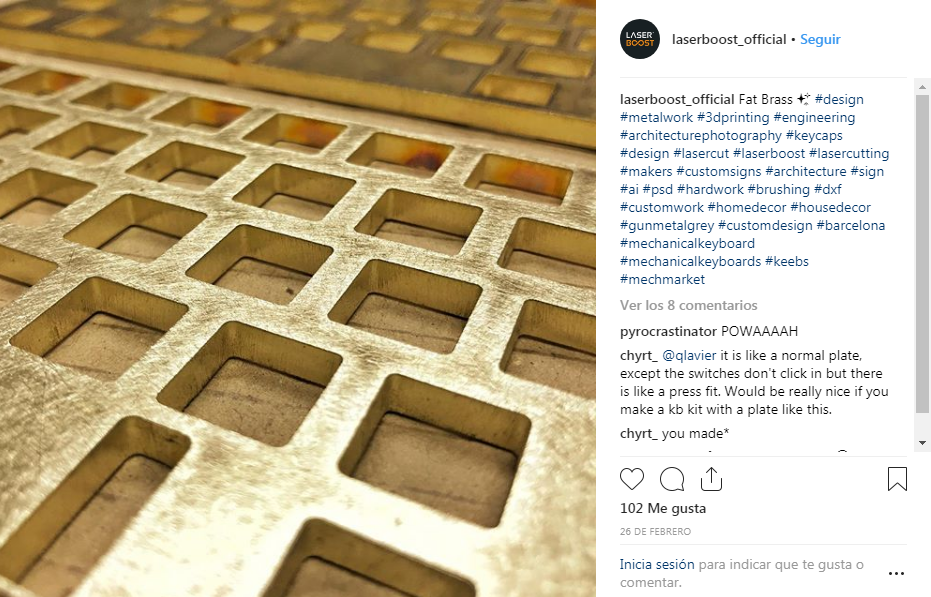
10 Likes
Thanks, I hate it.
1 Like
how do these work with stabilizers? Are the stabilizer cutouts extra large to keep them from rubbing?
3 Likes
Don’t exatcly know how it works, it’s a customer part, no more info 
I would love to buy one of those if evan doesnt take them. If there is still one left how much would be a fair price for your frontier work?
Also mad respect for the efford you put in
Sooo im still very much interested in those plates and i thought id try my luck again and ask If picking one up from you would be possible
Hey @m00nkeyboy, I haven’t been keeping up with my keebtalk account. Sorry.
I can get you a plate. It would take me a few weeks because I have to mod the templates with my dremel, but it’s totally doable. I’ll send you an IM when I have one.
1 Like
Awesome. Thanks a lot. 
Hello, seems like this thread is dead but I will still write and ask, I am recently working on my own keyboard design from scratch and decided to do a 4mm sandwich plate and wanted to ask if it’s possible to obtain a DXF file of your design?
@pixelpusher I’d imagine you’d have to go the acrylic plate design approach where you have to make space for the entire stab housing and wire. I actually prefer being able to take off stabs, so it definitely has its benefits.
@Ti7z:
Exactly what osumkeyboards mentioned.
There are a couple useful tools out there. I usually start by drawing my layout using:
http://www.keyboard-layout-editor.com/
Once I confirm the layout is supported by my PCB and case, I will grab the raw data and and pop it to http://builder.swillkb.com/
This site will get the CAD file generated. Usually a DXF file if you are using a laser or water jet cutting service. I have used STL files for 3D printing, if that’s what you prefer.
If you are using a laser/water cutting service, the thickness of the plate is defined when negotiating with the vendor. 4mm should work, but be mindful of the pockets of each switch.
Hope this helps and welcome to Keebtalk!
2 Likes
Alright, I see, I have done exactly something like that but I used Fusion 360 to create my 4mm plate using the layout editor and plate DXF generator. I will manufacture it somewhere around next week. Its for a 60% keyboard
2 Likes