Hi, I'm jshufelt

Seems that stock ones are 8.3mm in outer diameter, and the Niz ones 8.21

Someone on reddit did a wobble comparision on a realforce R1 vs a new Archon EX TKL with the improved sliders. It’s clearly visible for me that the wobble has been reduced as I’ve owned a Niz Plum75 and that one had pretty wobbly sliders !

https://photos.google.com/share/AF1QipP9m7SpfO1ywM07r4mB3_rSKk5EoGtzwLcCgBmMqjD9RCVe7Oc3kj33nzY10gcpAg/photo/AF1QipOUwsSdqxn8UZV0SekxlpIABAZ1d7o0uKMremt_?key=cFMtSW9JMldiR2cxZkNKQXJzZ3BXZjM0NkpfU1B3

Build #17: TX108se

As even relatively new members to the community can quickly ascertain, most of the action in the custom mechanical keyboard world takes place in the 60/65/75/TKL space, with the occasional foray into 1800-land. And there are good reasons for that - sacrificing unused blocks of keys is a good way to reclaim desk space, whether for reasons of aesthetics, ergonomics, or some combination of the two.

Sometimes, however, you just gotta go big. To find out for ourselves whether size matters, I decided to take a run at the tx108se, a full-size design from Kin of TX Keyboards. Before we get into the build, a quick look at the case, which seems well-constructed and durable - a good thing, given the hefty monster inside.

The first thing we’ll have to contend with is the PCB. As shipped, it has two extra strips of material attached to the top and bottom of the PCB. The top one effectively blocks the USB connector, which is your clue that it’s meant to be removed. I neglected to get a shot of the PCB with both strips attached, but here’s a look at the PCB with the bottom strip intact.

That seam doesn’t look like it’s cut deeply enough to permit the strip to snap off, and it doesn’t feel like it, either. But with enough force on the ends, it can be pried off manually, and once it’s begun to break away, removing the remainder of the strip becomes easier.

Once that was done, I tested the PCB (and a spare) with tweezers to make sure they were working.
Things I like about this PCB: clear labeling of all keys, LED polarities, and switch placements.
Granted, switch and stab placement aren’t exactly ambiguous on a full-size layout, but it’s still
nice.

Things I don’t like: we’re going to have to be careful with the GMK screw-in stabilizers to make sure we don’t short anything out with the screws. Take a look at the overlapping screw holes and pads.

This board actually supports a number of split layouts, to the degree that if I had opted to split backspace, both shifts, the spacebar, and the three 2u numpad keys, I would have needed only 3x2u stabs, for left and right space and enter. But in the end, I decided to keep things conventional, and so I needed 1x6.25u and 7x2u stabs. Here, I’ve just finished disassembling and clipping the stabs:

After lubing the stabs, here’s a look midway through installation. Looking at the numpad, we see white gaffer tape for the bandaid mod, and, above the PCB, the remaining stabs, screws, and the washers I use to prevent any possibility of shorts with the screws.

All done with the stabs.

Here’s the first look at the top of the tx108se case. The anodization is very nice, as is the finish on the brass plate. Less nice from a build perspective - the tight fit for switches, exacerbated here by the choice of Holy GSUS switches. I got about this far pressing switches into the plate before my thumbs demanded a break. Painful. To finish placing the switches, I ended up folding a paper towel into a thick square and using that to distribute the force a bit more evenly on my thumb.

A look at the reverse side of the case top, showing the screw mounts for the plate, as well as the 12 screw holes for joining the case halves.

With all of that brass, and the use of heavily tactile switches, we can expect significant ping, so it’s time to address acoustics. Before soldering, I placed a few strips of 4mm-thick Sorbothane on the plate, to be sandwiched between the plate and the PCB.

Normally, I wouldn’t seat all of the switches in the plate before soldering even a single switch into the PCB. However, two factors pushed me in this direction. First, the extremely tight fit of the switches in the plate, and the level of force needed to properly seat them, made me think it might be safer to fit the switches first to avoid any potential damage to the PCB. Second, a quick test of fit led me to believe that it wouldn’t be hard to drop the PCB into position (the absence of PCB mounting pins on the GSUS housings helps as well).

Because the gap between a 1.5mm plate and the PCB for an MX build is nominally 3.5mm, the 4mm Sorbothane will compress a little bit when the PCB is properly in place. With the Sorbothane placed on the plate before soldering, this can make it difficult to ensure that the switches are seated properly and making good contact with the PCB, since the Sorbothane compression is pushing the other way. It helps here to have a child willing to apply pressure while soldering takes place, although C-clamps would presumably be a much more cost-effective solution than having a child. Your call.

With the soldering done, more Sorbothane is laid in place on the PCB. There’s no particular reason for the gap between the sheets - I had two pieces of about the right size, and used them with the plastic backing left in place.

There is a polycarbonate diffuser for the RGB backlighting, which is sandwiched between the top and bottom pieces of the case and held in place by the case screws.

In case you’re wondering, the Sorbothane sheets do not block the RGB backlighting. The LEDs are triangular, mounted on the perimeter of the PCB, and illuminate directly outward. Here’s a close-up of one such LED, before the extra strip of material was snapped off of the PCB:

Big boi’s got back. I have to be honest; this is my least favorite part of the design. I’m not convinced by the grill work, nor by the color/texture combination of shiny brass and matte grey. On the other hand, the anodization is really good. This photo does not do it justice.

I note in passing that getting this screwed back together was a bit more work than I anticipated; the tolerances on the screw holes and screws were very tight, to the point that certain combinations of screws and screw holes would not work. I ended up playing whack-a-mole with the screws to figure out which ones would actually seat properly in each hole.

I particularly enjoy the new feature I’m pioneering with this board, which I call “top-mounted RGB”.

I kid, I kid. While we’re here, have a gander at the side view of the controversial new design feature Kin has introduced on the latest round of the TX lineup, the curved notches on the board sides. While I get that it’s a big change stylistically from previous rounds, and may not be everyone’s cup of tea, I will say this: I’m happy those finger grips are there when I have to move this beast.

With this board, Kin has moved away from Jigon to a new custom tool, but it is definitely a work in progress; I’ve been able to control lighting with it, but so far I’ve had zero luck configuring the keys. The good news, I suppose, is that the PCB came with all keys in a reasonable default configuration. At some point, I’m thinking of porting this to QMK with a spare suo108 PCB, but that’s a longer-term goal.

Lessons learned

  • It’s one of those little steps that’s easy to forget - be sure to check the stab holes for overlaps with pads, and in the event of overlap, place non-conductive washers to guard against shorts with screw-mount stabs.
  • Unfortunately, this build was completed before @donpark shared his approach for placing Sorbothane between the PCB and plate. I’ve since tried that approach; it works well, and it’s the way I will likely approach the mod going forward.
  • All of the sound dampening does a great job eliminating plate and case ping. With that said, this is still a loud boi, particularly the spacebar. Not unexpected, since I chose loud switches, but still.
  • This build was literally painful - bruised my thumbs getting all of the switches into that plate. It’s probably worth investing in a pair of heavy-duty work gloves if and when I have to deal with another plate like this.
  • Keep track of screw locations during disassembly, when the tolerances are as tight as they are on this board. It will be easier to reassemble if you put the screws in the same holes from which they were removed.
  • I generally associate increased heft with increased potential for improved acoustics, but somewhere between 5 and 9 pounds, increased heft is just increased heft.
  • The hype on TX finish and tolerances seems to be justified. Very smooth ano, and very clean seams.

Let’s wrap this up with another object lesson in lighting and color. GMK Dolch, particularly on this board, is a chameleon. Indoors, under incandescent lighting:

Indoors, under natural daylight through the window. A chameleon. An attractively plump 9.97-pound chameleon.

Specifications

case: TX108se anodized aluminum (grey)
case dampening: 0.1" 30 Duro Sorbothane sheets
PCB: suo108
plate: 1.5mm brass
LEDs: RGB underglow built into PCB
switches: Holy GSUS
- Bsun GSUS housing & springs
- Halo Clear stems
switch lubing:
- manually lubed housings/stems with Tribosys 3204
- tub lubed springs with Krytox GPL 104
keycaps:
- GMK Dolch
- 4x Rama Wave SEQ2 AL
stabilizers: GMK screw-in
stabilizer mods: clipped, lubed with SuperLube,
  bandaid-style mod with gaffer tape
plate/PCB dampening: 0.25" 50 Duro Sorbothane, ~4mm wide strips
HxWxD (without feet or caps): 1.63"x17.31"x5.63"
HxWxD (without caps): 1.69"x17.31"x5.63"
HxWxD: 2.0"x17.31"x5.63"
assembled weight: 9.97 lbs
8 Likes

Absolutely killer builds man! I love how informative your posts are, this really should become the new standard.

1 Like

I really appreciate the kind words. Putting all of those build details into a log takes me more time than I would like (I’m almost five boards behind at the moment!) so it always makes my day when someone notices. Thank you!

2 Likes

Build #18: Singa R2

When I originally came up with the idea for this build, it was really envisioned as an exercise in color pairing. I liked the idea of an orange case together with brown caps, to play off of the shared earth tones. And if this hobby wasn’t as group-buy driven as it is, that might have been the only thing to talk
about - here, look at the photos, colors, hooray. Next.

But those group buys, and the long waits that come with them, give the build time to grow. When I first imagined this build several months ago, a number of things weren’t, well, things: affordable Holy Panda components, easy availability of replacement plates using different materials, the use of scuba-gear lubricants for switches and stabilizers, and, perhaps most importantly, my experience with a few builds between then and now. Put all of that together, and this build became a lot more interesting (for me, at least). Let’s get to it.

The Singa R2 PCB supports a number of layouts, but if you’ve opted for the WKL top with blockers, your bottom row is going to have a 7u spacebar, 3 1.25u keys, and 3 1u keys, which you will be using as arrow keys. That, in turn, means you will have a 1.75u right shift to make room for the up-arrow key, which means you don’t need a stabilizer for right shift. Straightforward, right? Let’s get set up
for some stab work.

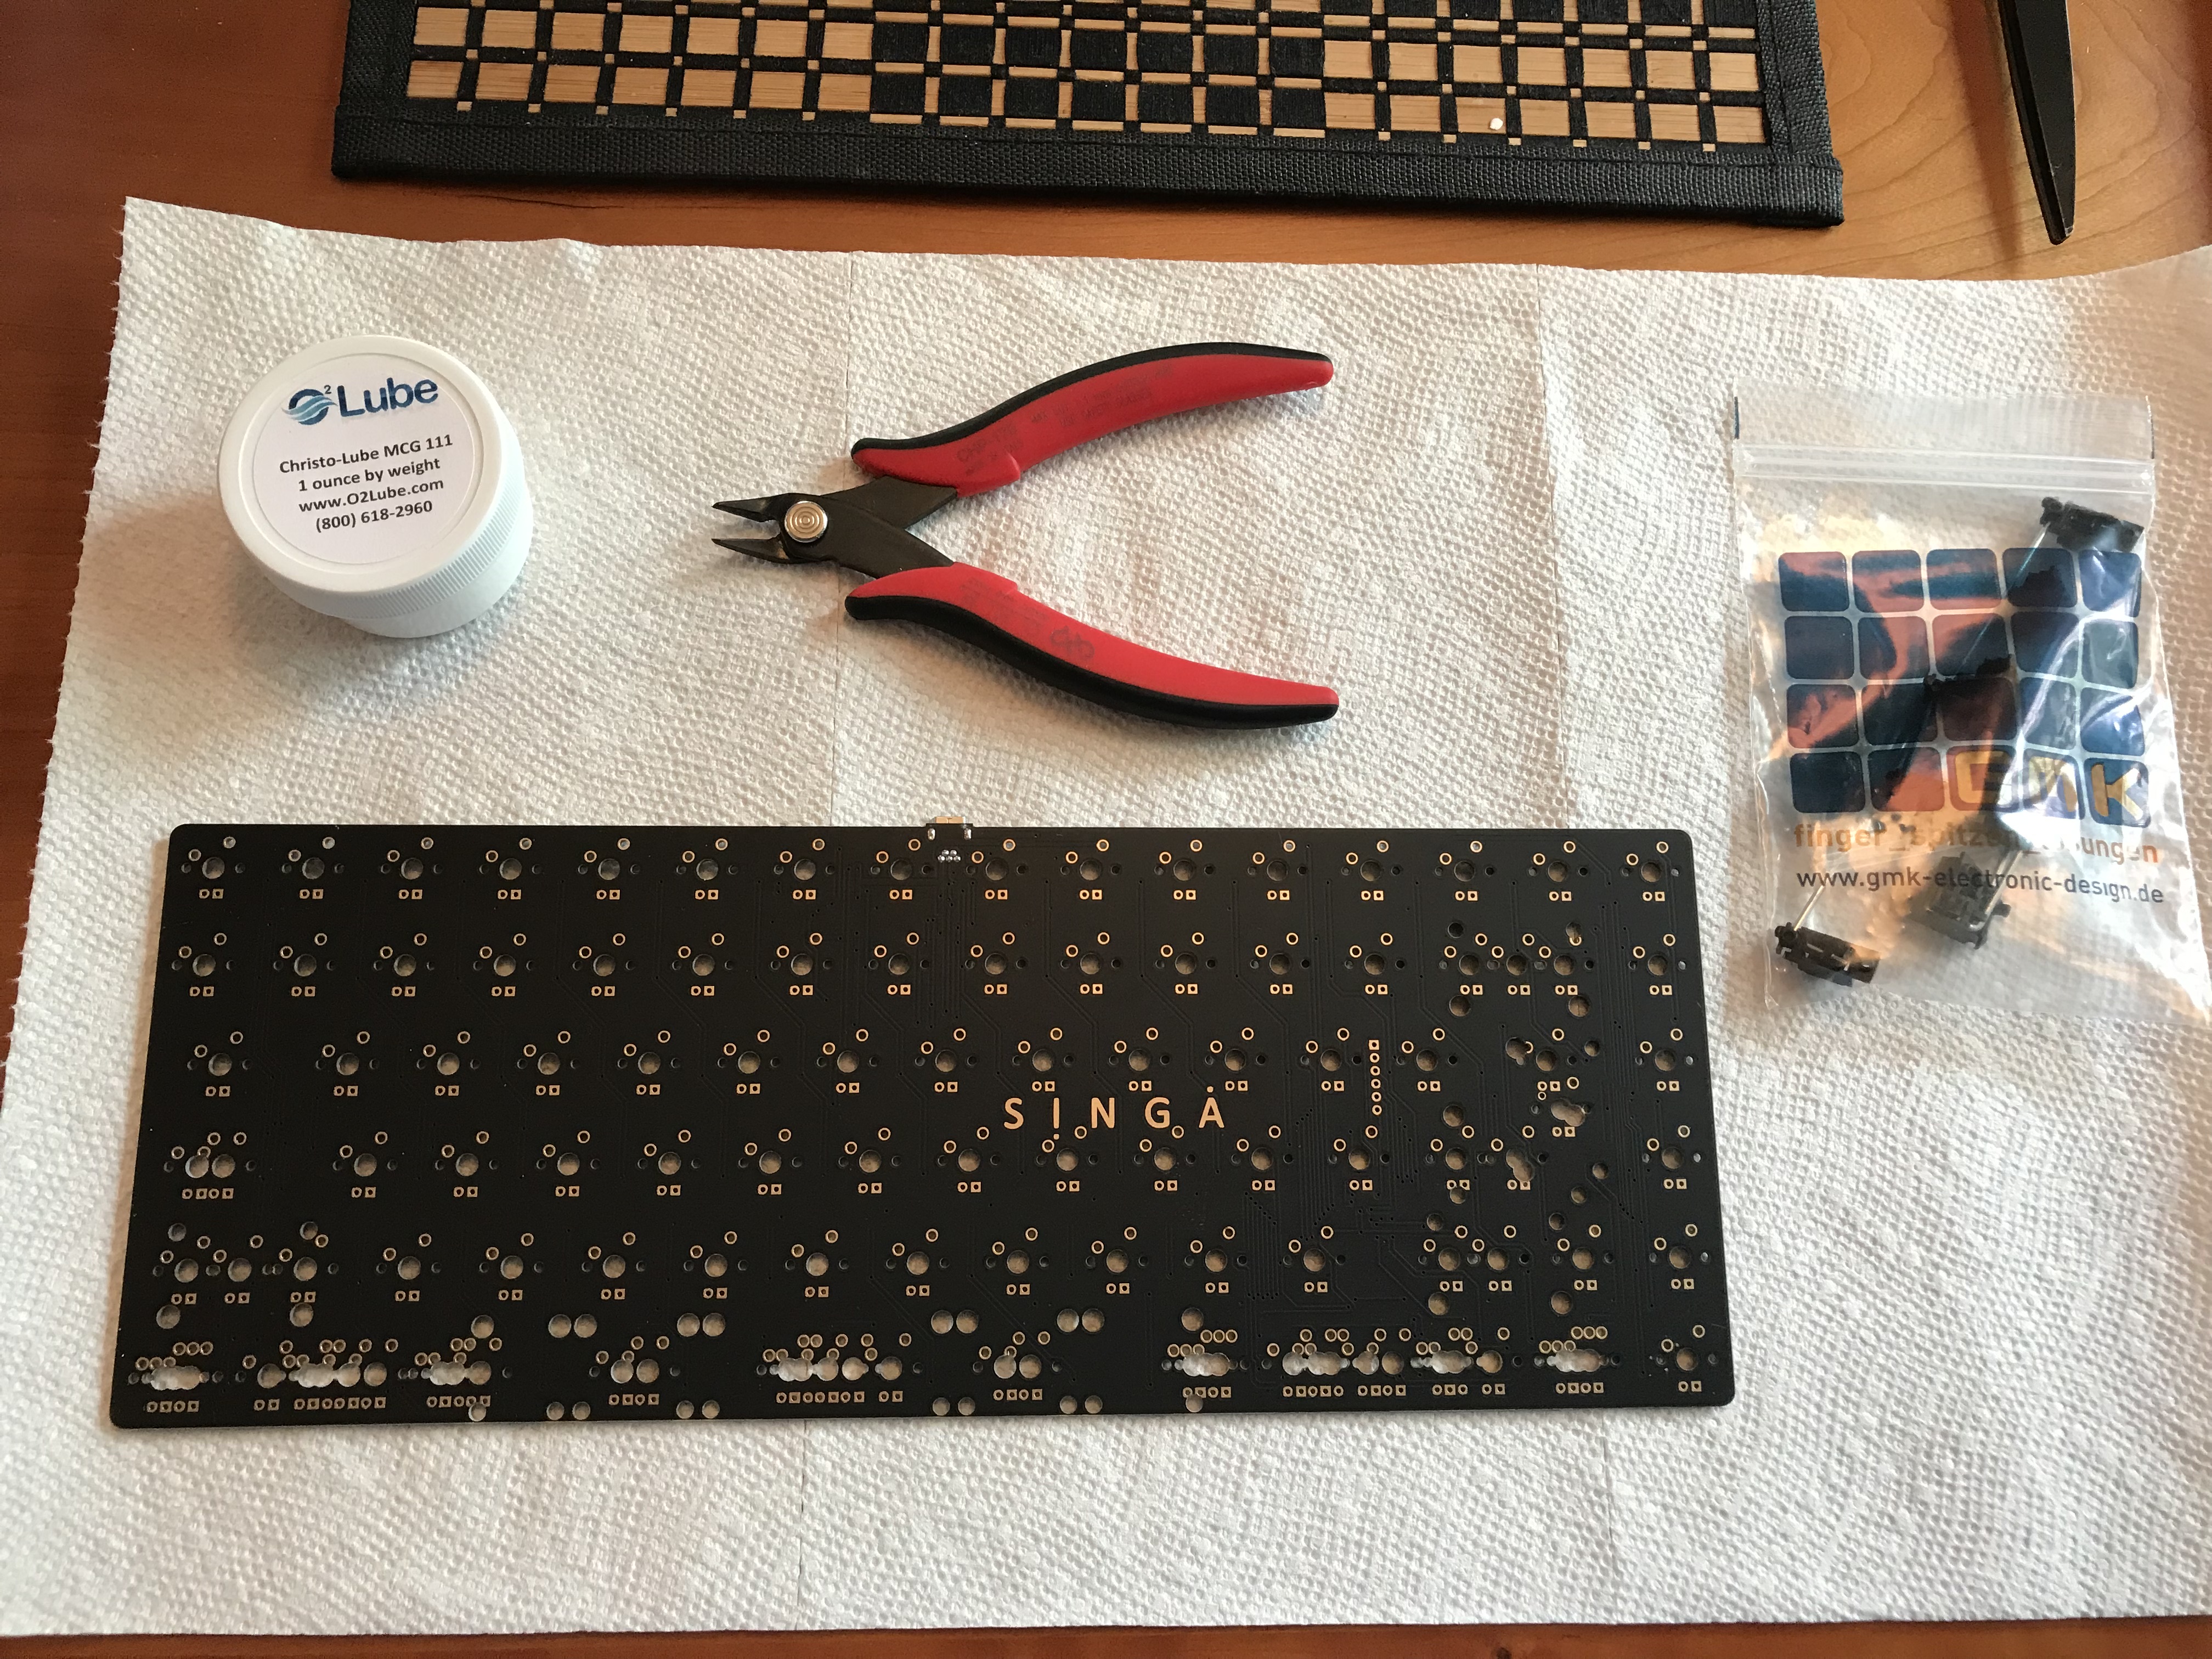
For this build, I wanted to try Christo-Lube 111 for stabilizers. While I’m more or less happy with SuperLube for stabs, and feel like I can achieve acceptable results with it, it can take a bit of tuning to avoid sluggishness on the stabilized keys. The word on the street indicated that 111 killed all the rattle
and noise without affecting travel. Coupled with the low cost of 111, that made it worth a try in my book. As far as consistency goes,111 is relatively stiff. It clings to the side of the jar and holds its shape, and while it’s not stiff enough to hold a dental applicator upright, it has enough grip to keep the applicator from sliding out of the jar. 111 is also noticeably less greasy to the touch than SuperLube, and less dense.

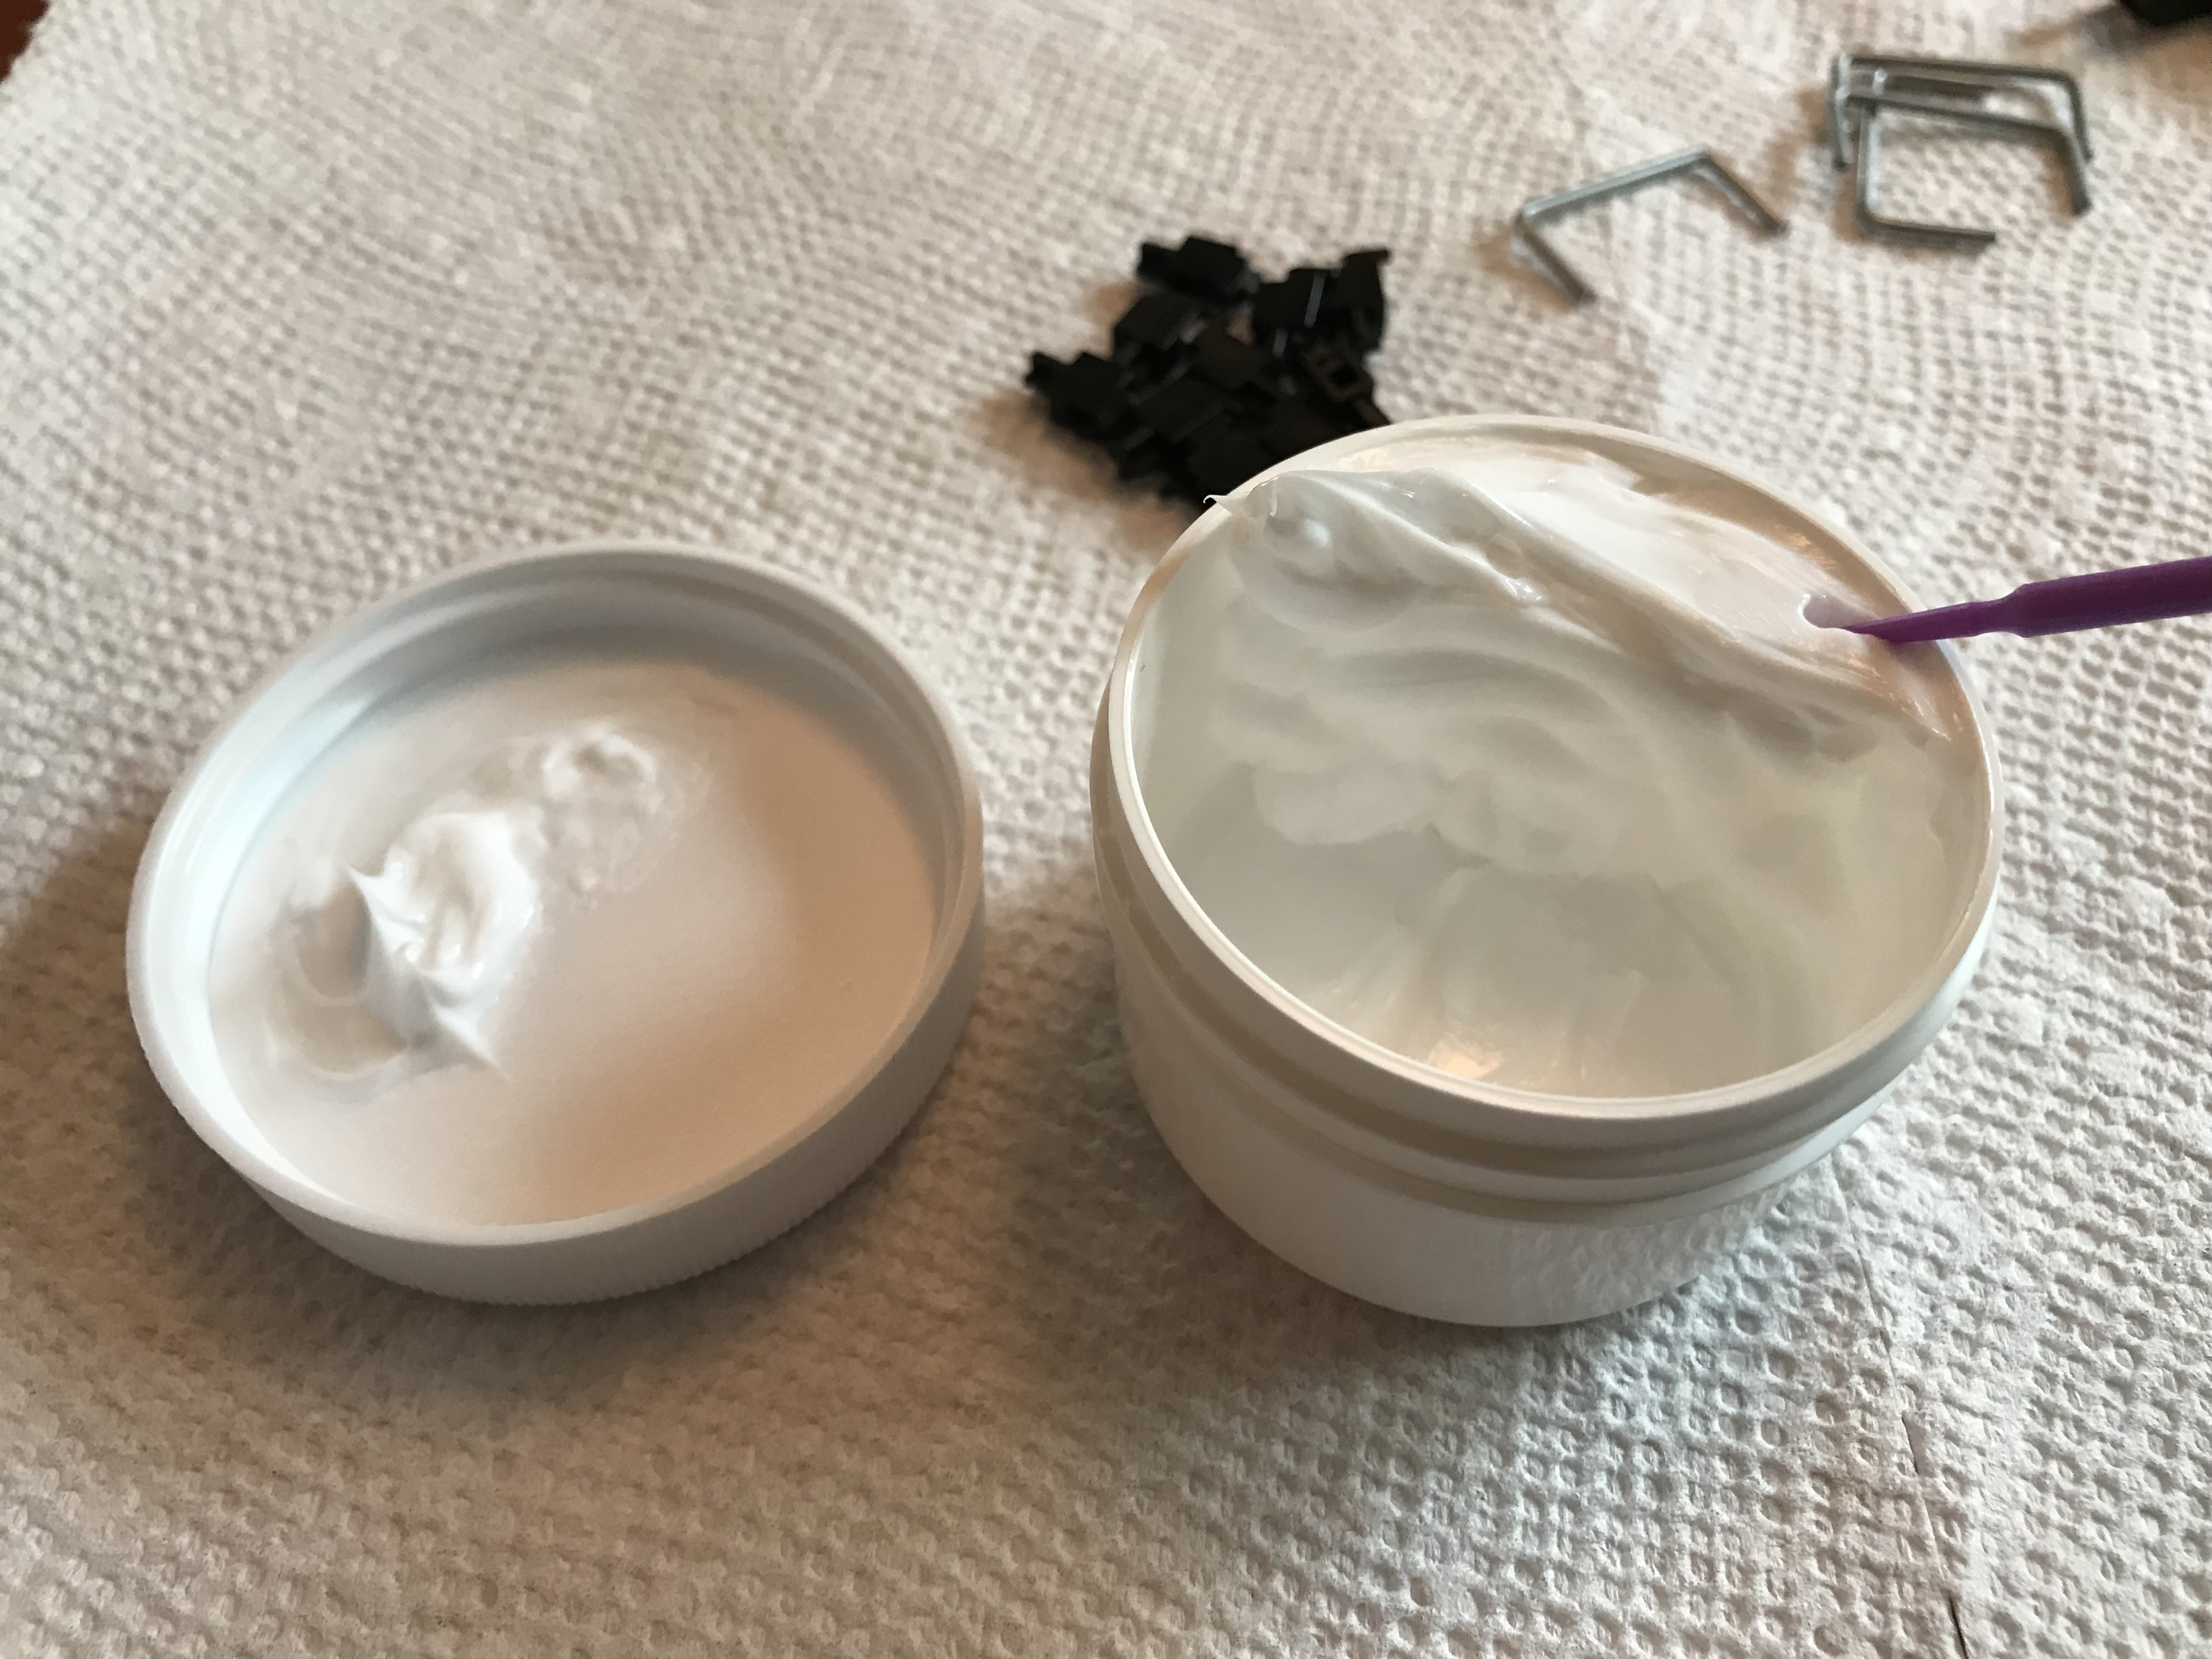
Because of the lighter density, I felt comfortable applying the lube more heavily, certainly more heavily than I would apply SuperLube or Permatex dielectric grease. It’s difficult to capture that in a photo, but hopefully the left stab housing on the 7u stab gives you an idea:

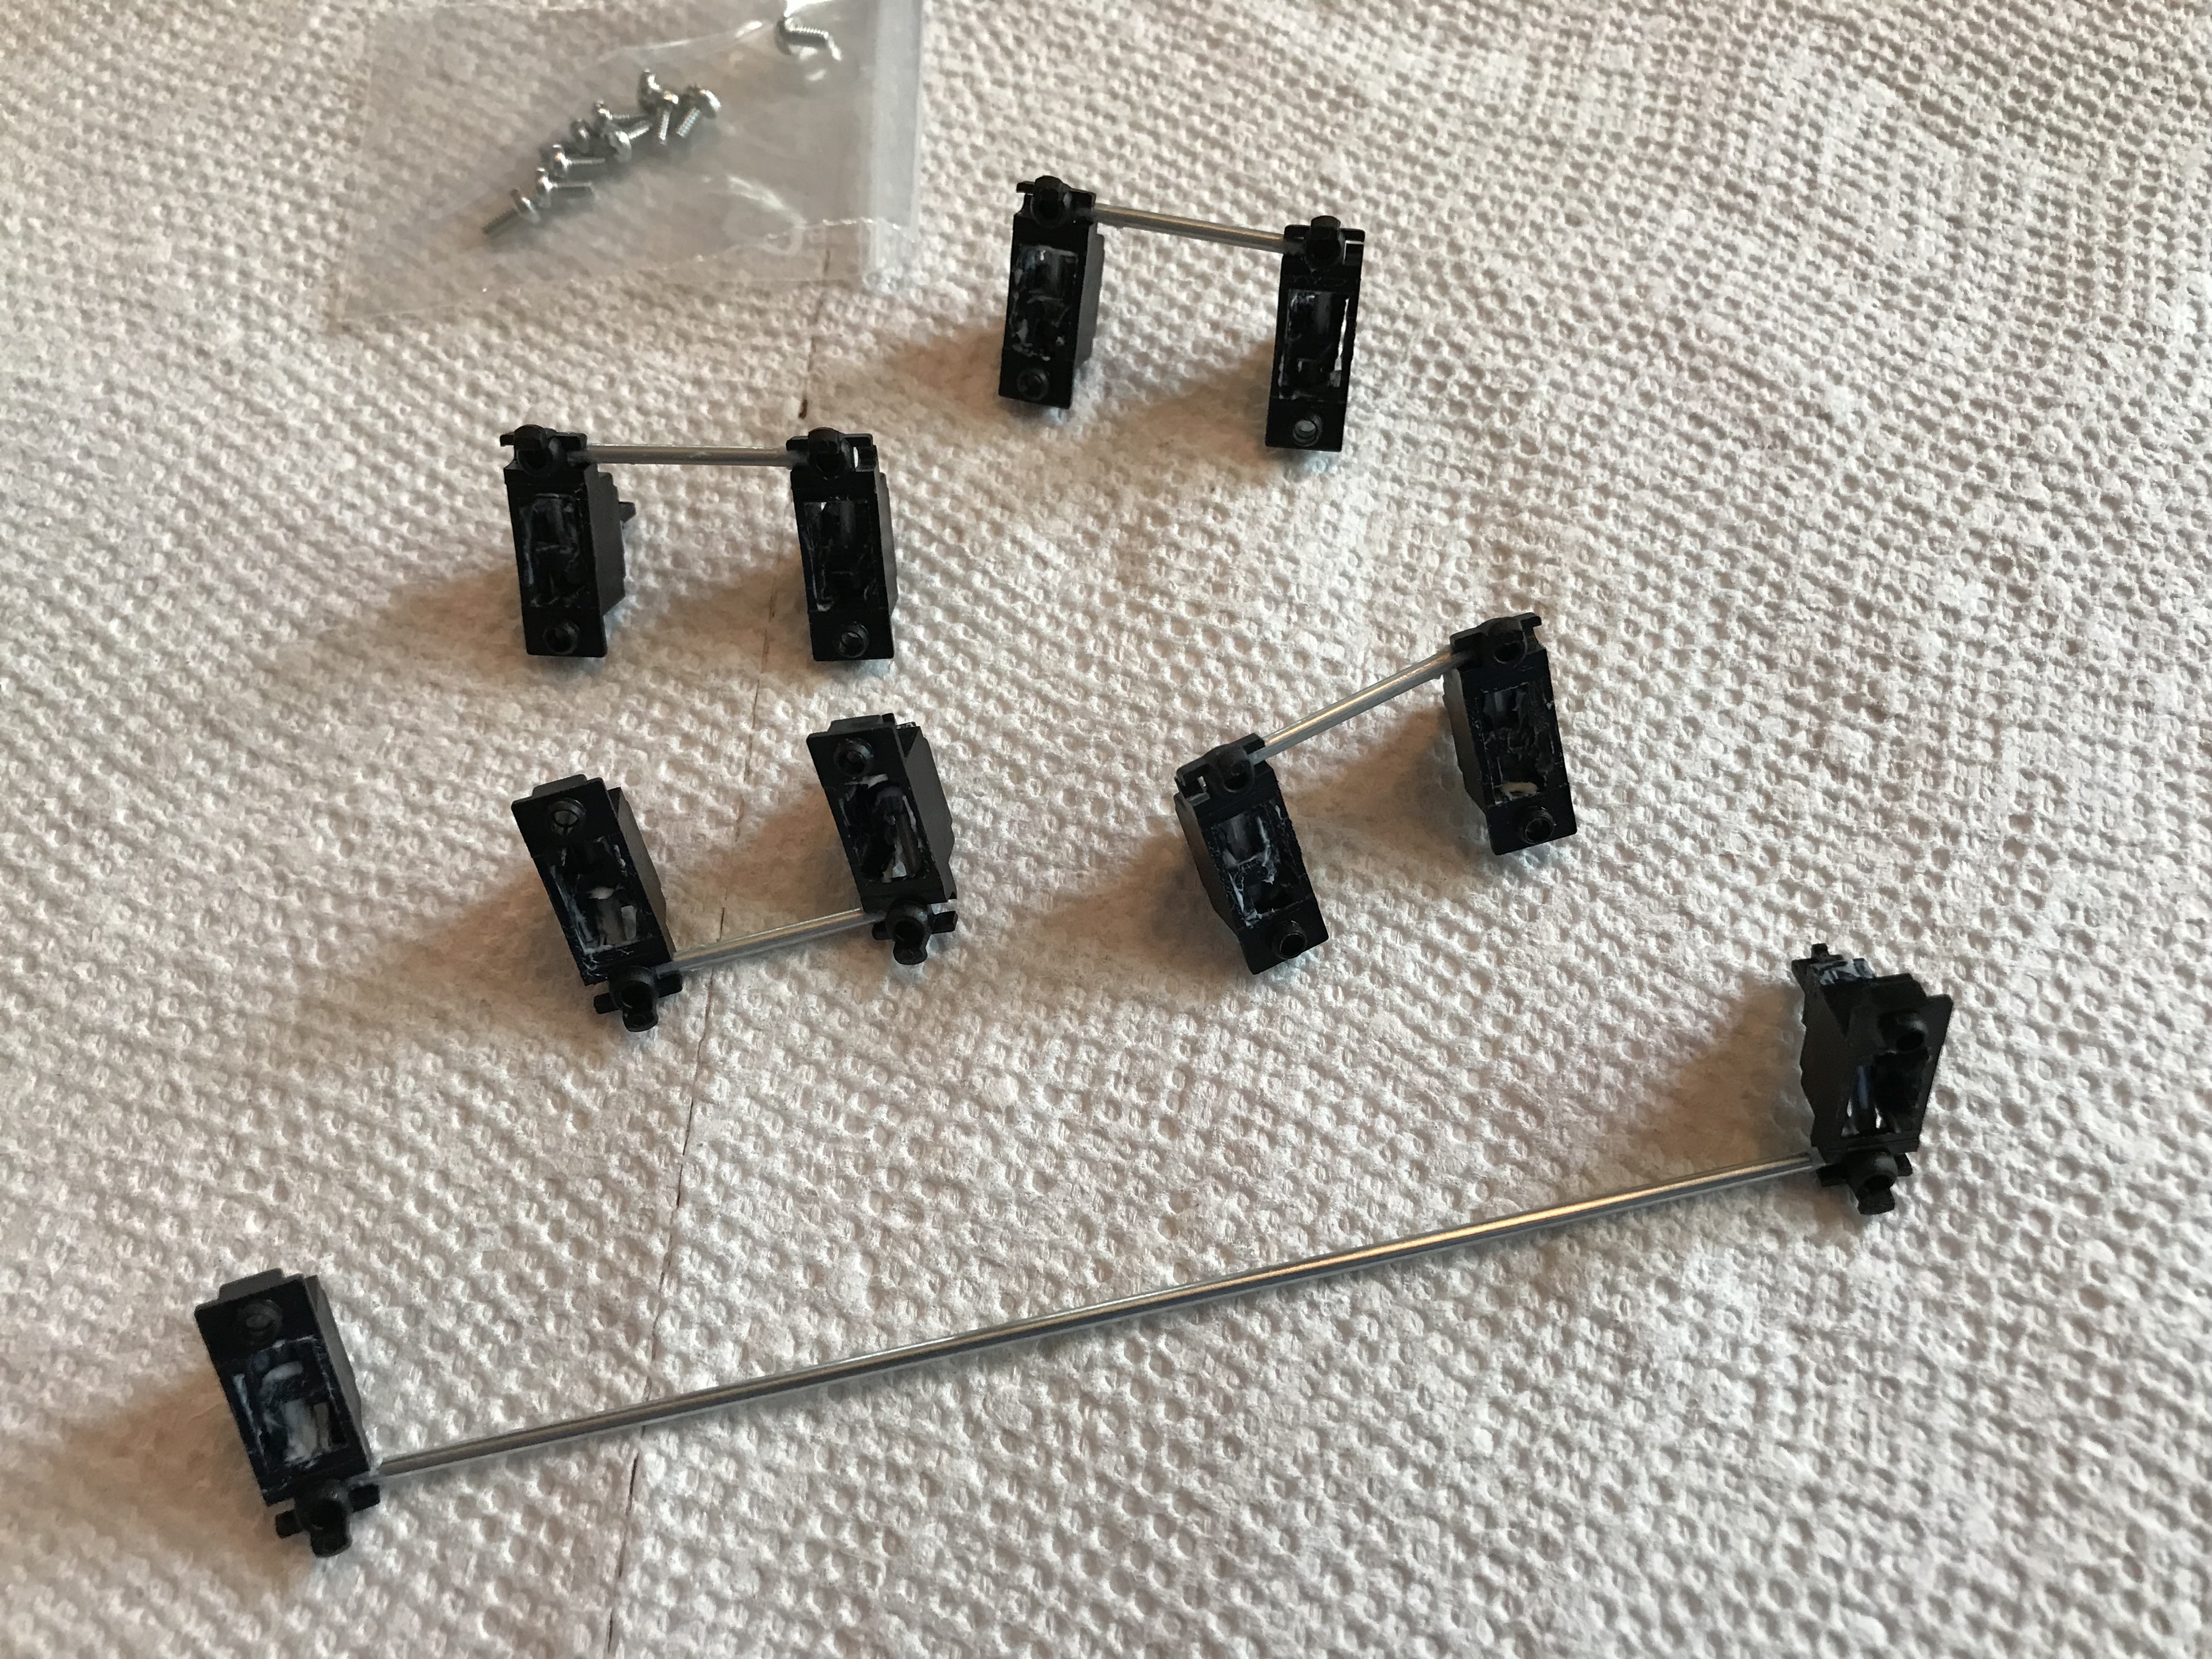
And, there we are, lubed stabs installed. All good. Wait, what?

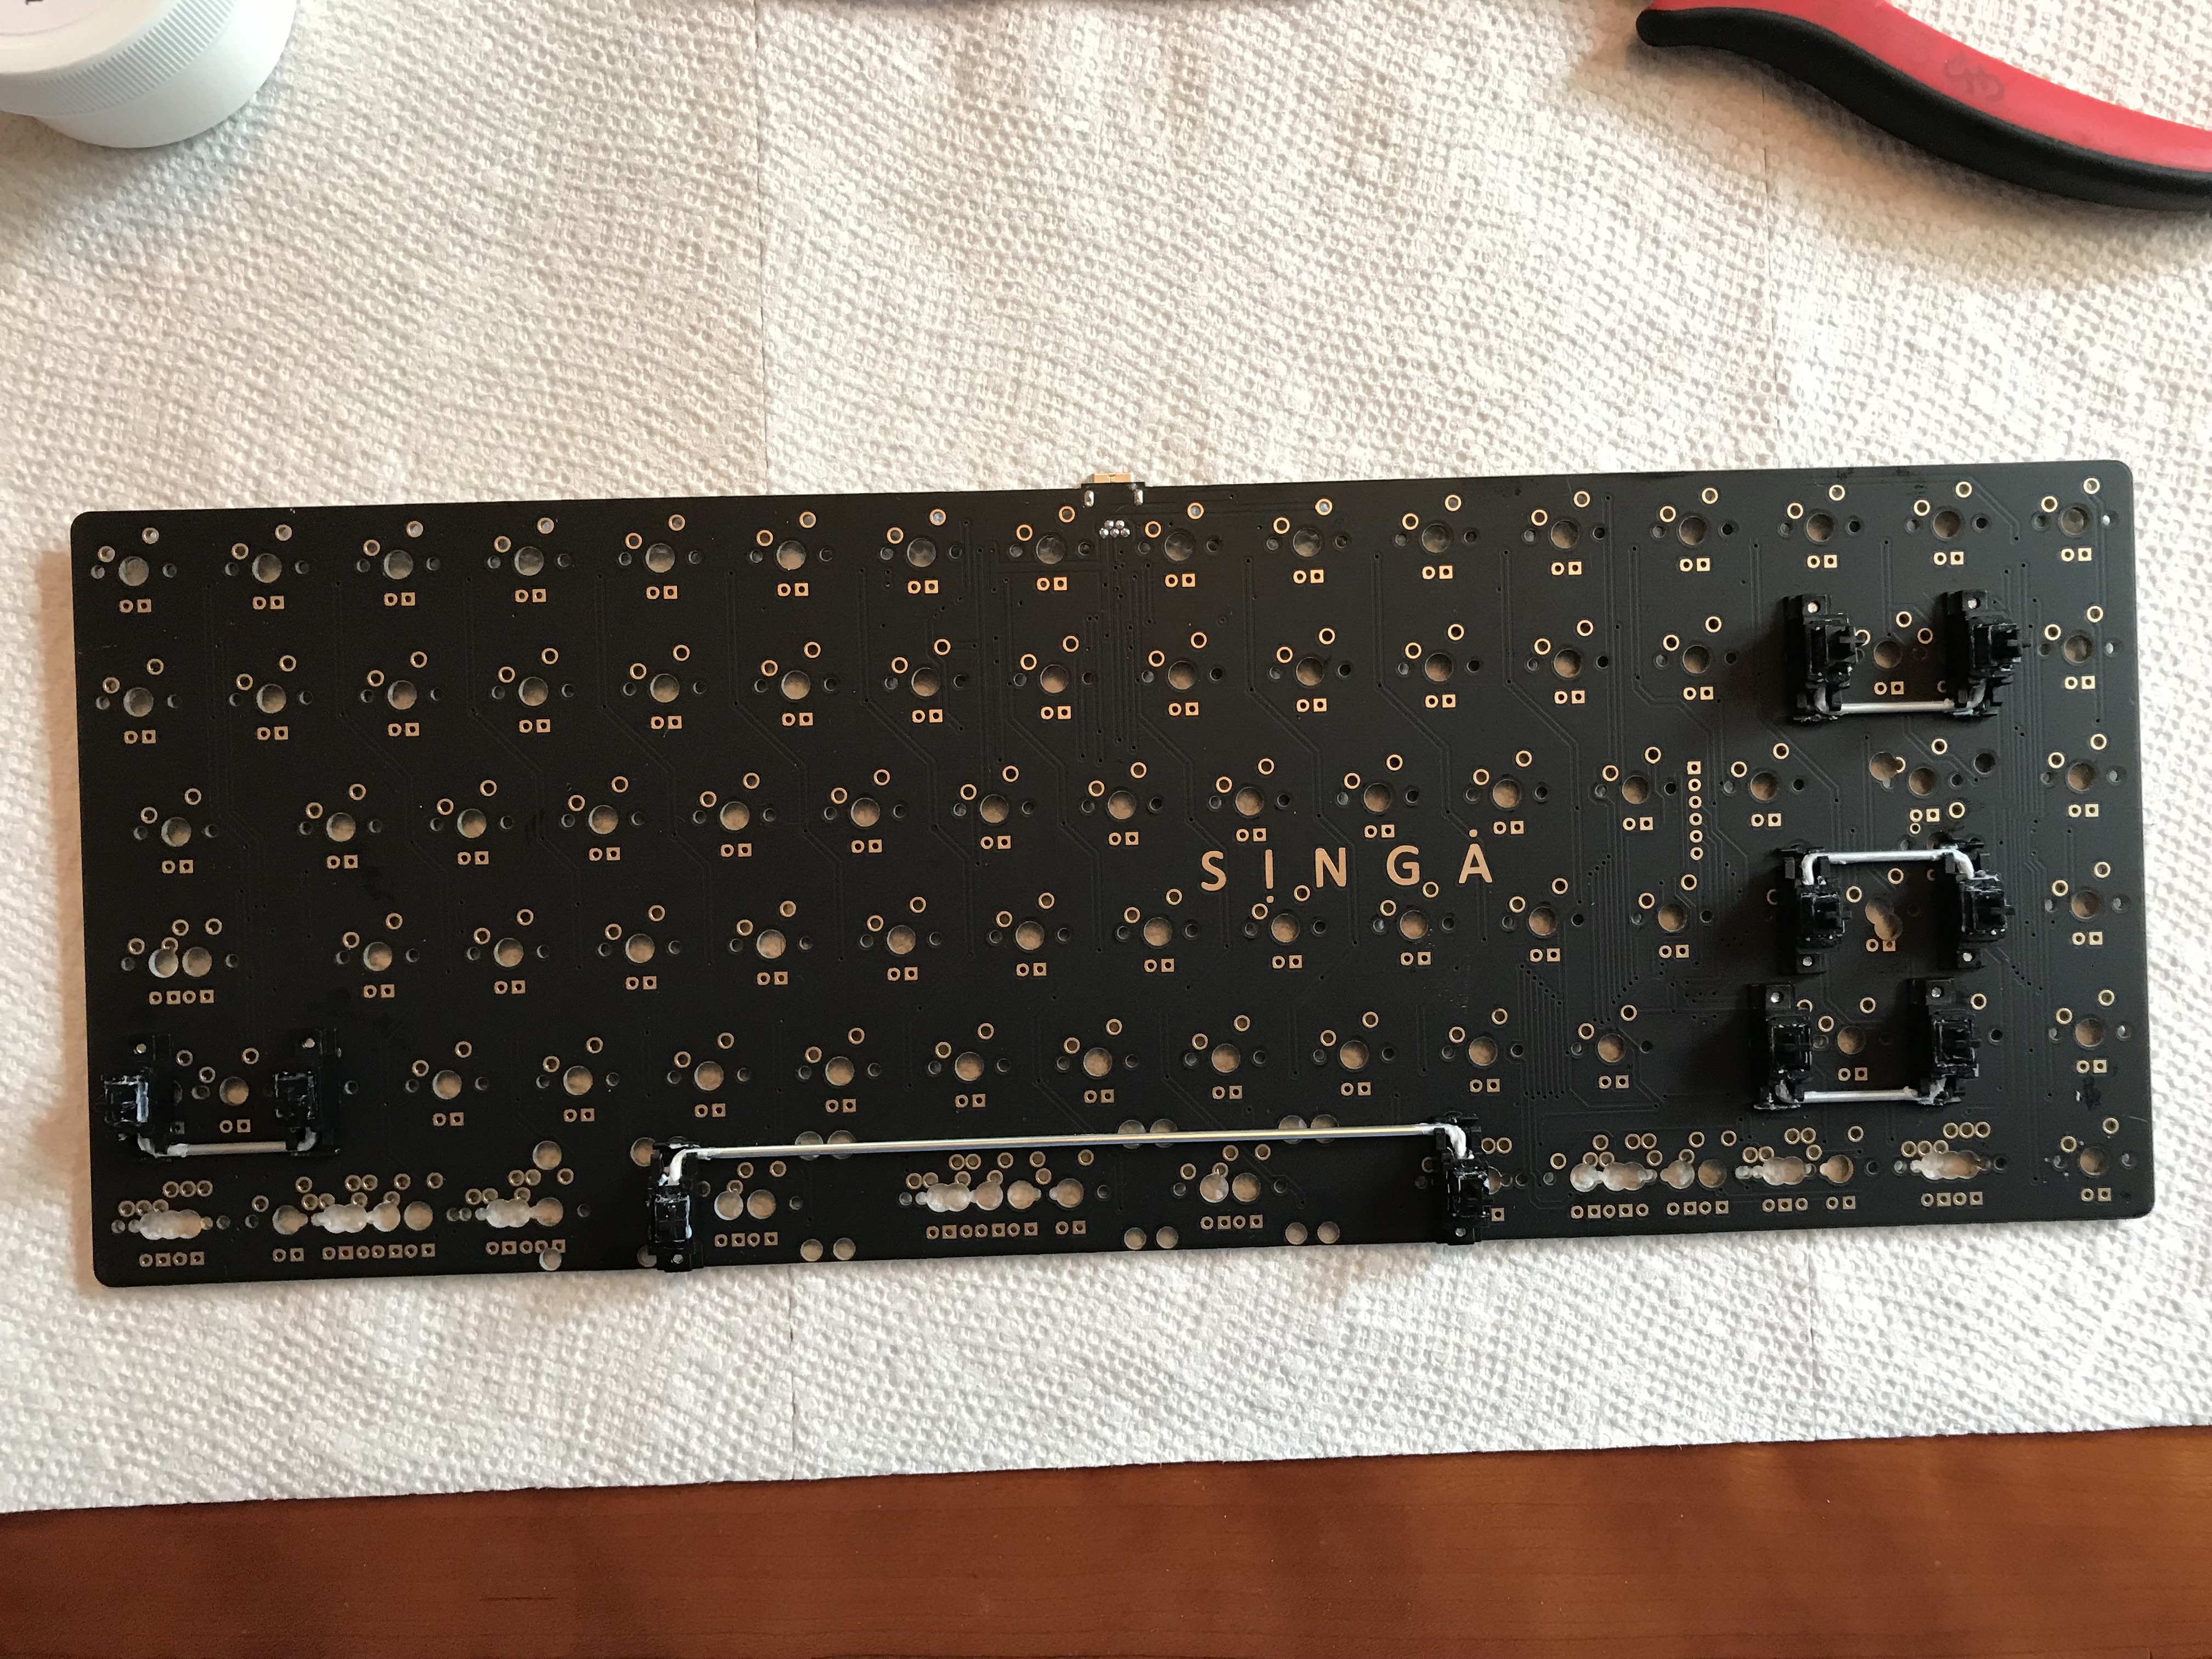
I wish the “build log writing” me, the one that outlined layout considerations for you, had been present when the “keeb building” me blithely lubed that extra 2u stab and installed it on the right shift. Sigh. Let me just unscrew that and we’ll pretend that never happened. Look on the bright side - if 111 works out, I have one less 2u stab to lube for the next build!

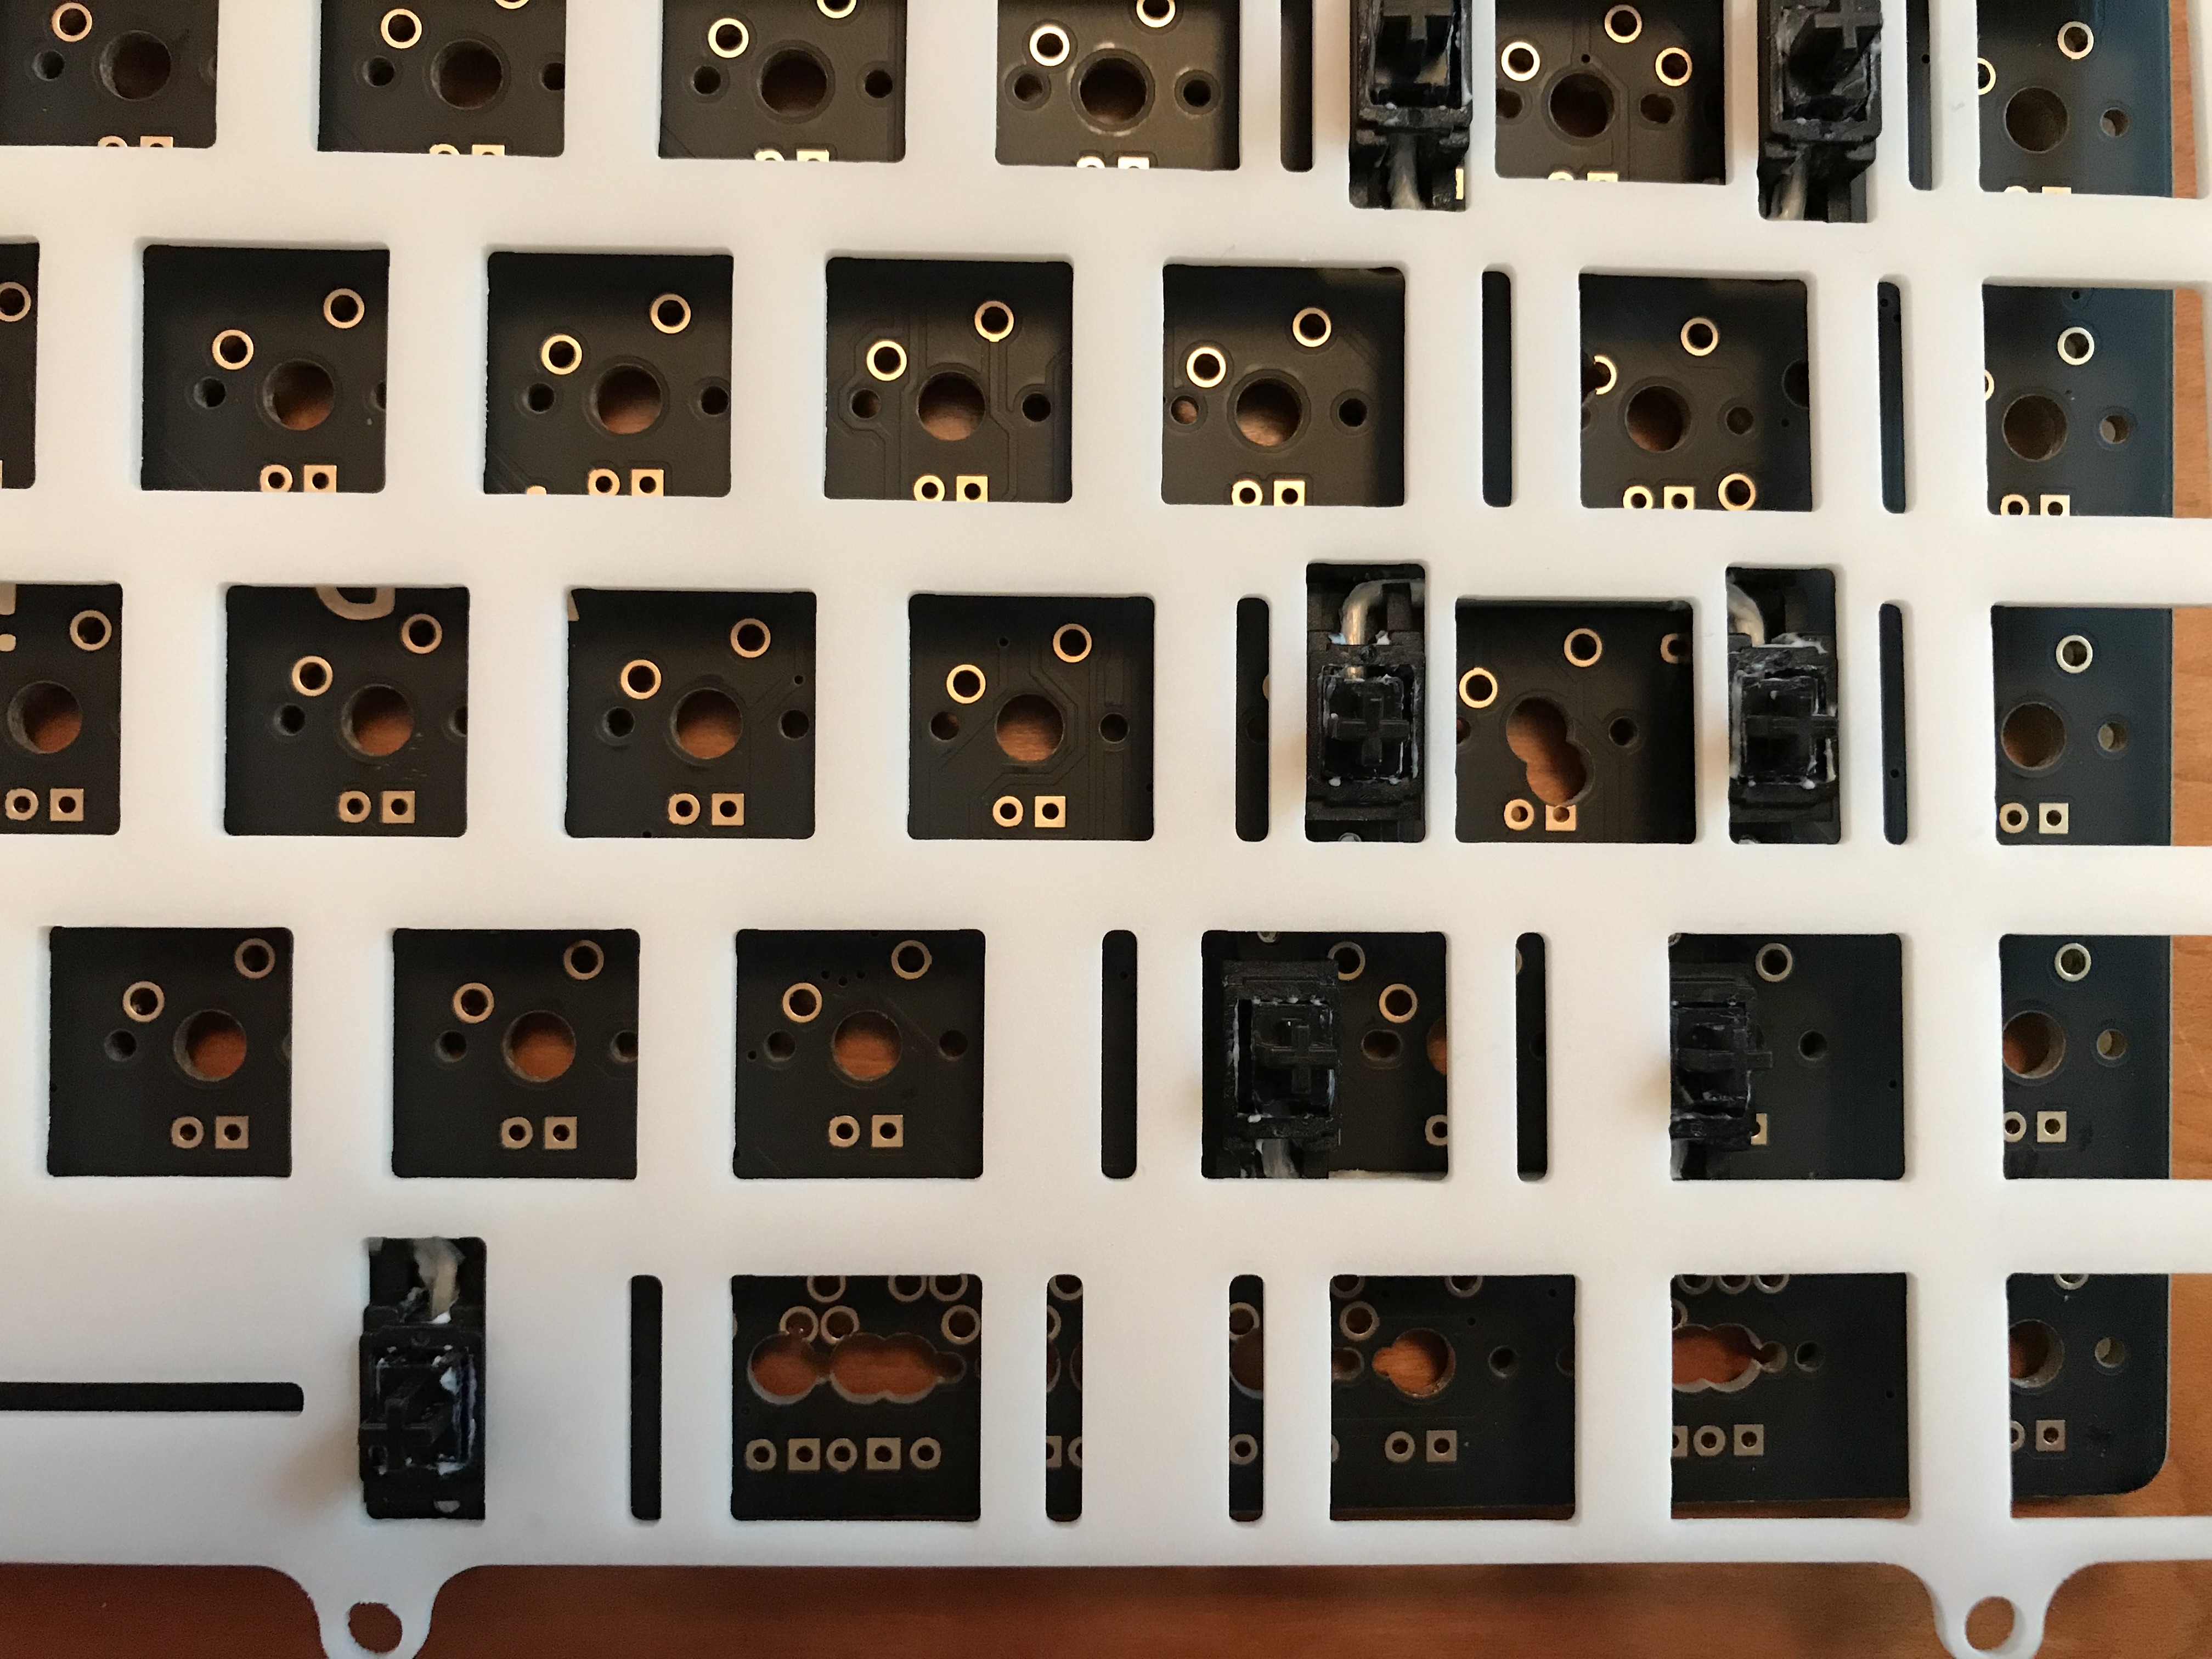
In the previous build log for the tx108se, one of the least pleasant aspects of the build was insertion of switches, switches with Panda-style housings in particular, into the brass plate. Panda housings are known to be slightly wider than other MX switch housings, and the tolerances on the TX plates are known to be tight. I ended up bruising my thumbs pushing switches into the plate, and from what I had seen online regarding Singa builds, I was not looking forward to repeating that experience. Fortunately, by the time I got around to this build, an interesting option had emerged.

Rather than use the sandblasted brass plate that came with the Singa kit (which, granted, is lovely), I picked up a POM plate. In addition to being far easier on the fingers when mounting switches, this also gave me an opportunity to check out the sound signature of POM, something I’d been itching to try for a while. I’m also finding that I’m not a big fan of brass plates, as they feel too unforgiving for me. Feel is subjective, of course - YMMV. Tolerances were good, and stabilizer housings lined up cleanly with the cutouts.

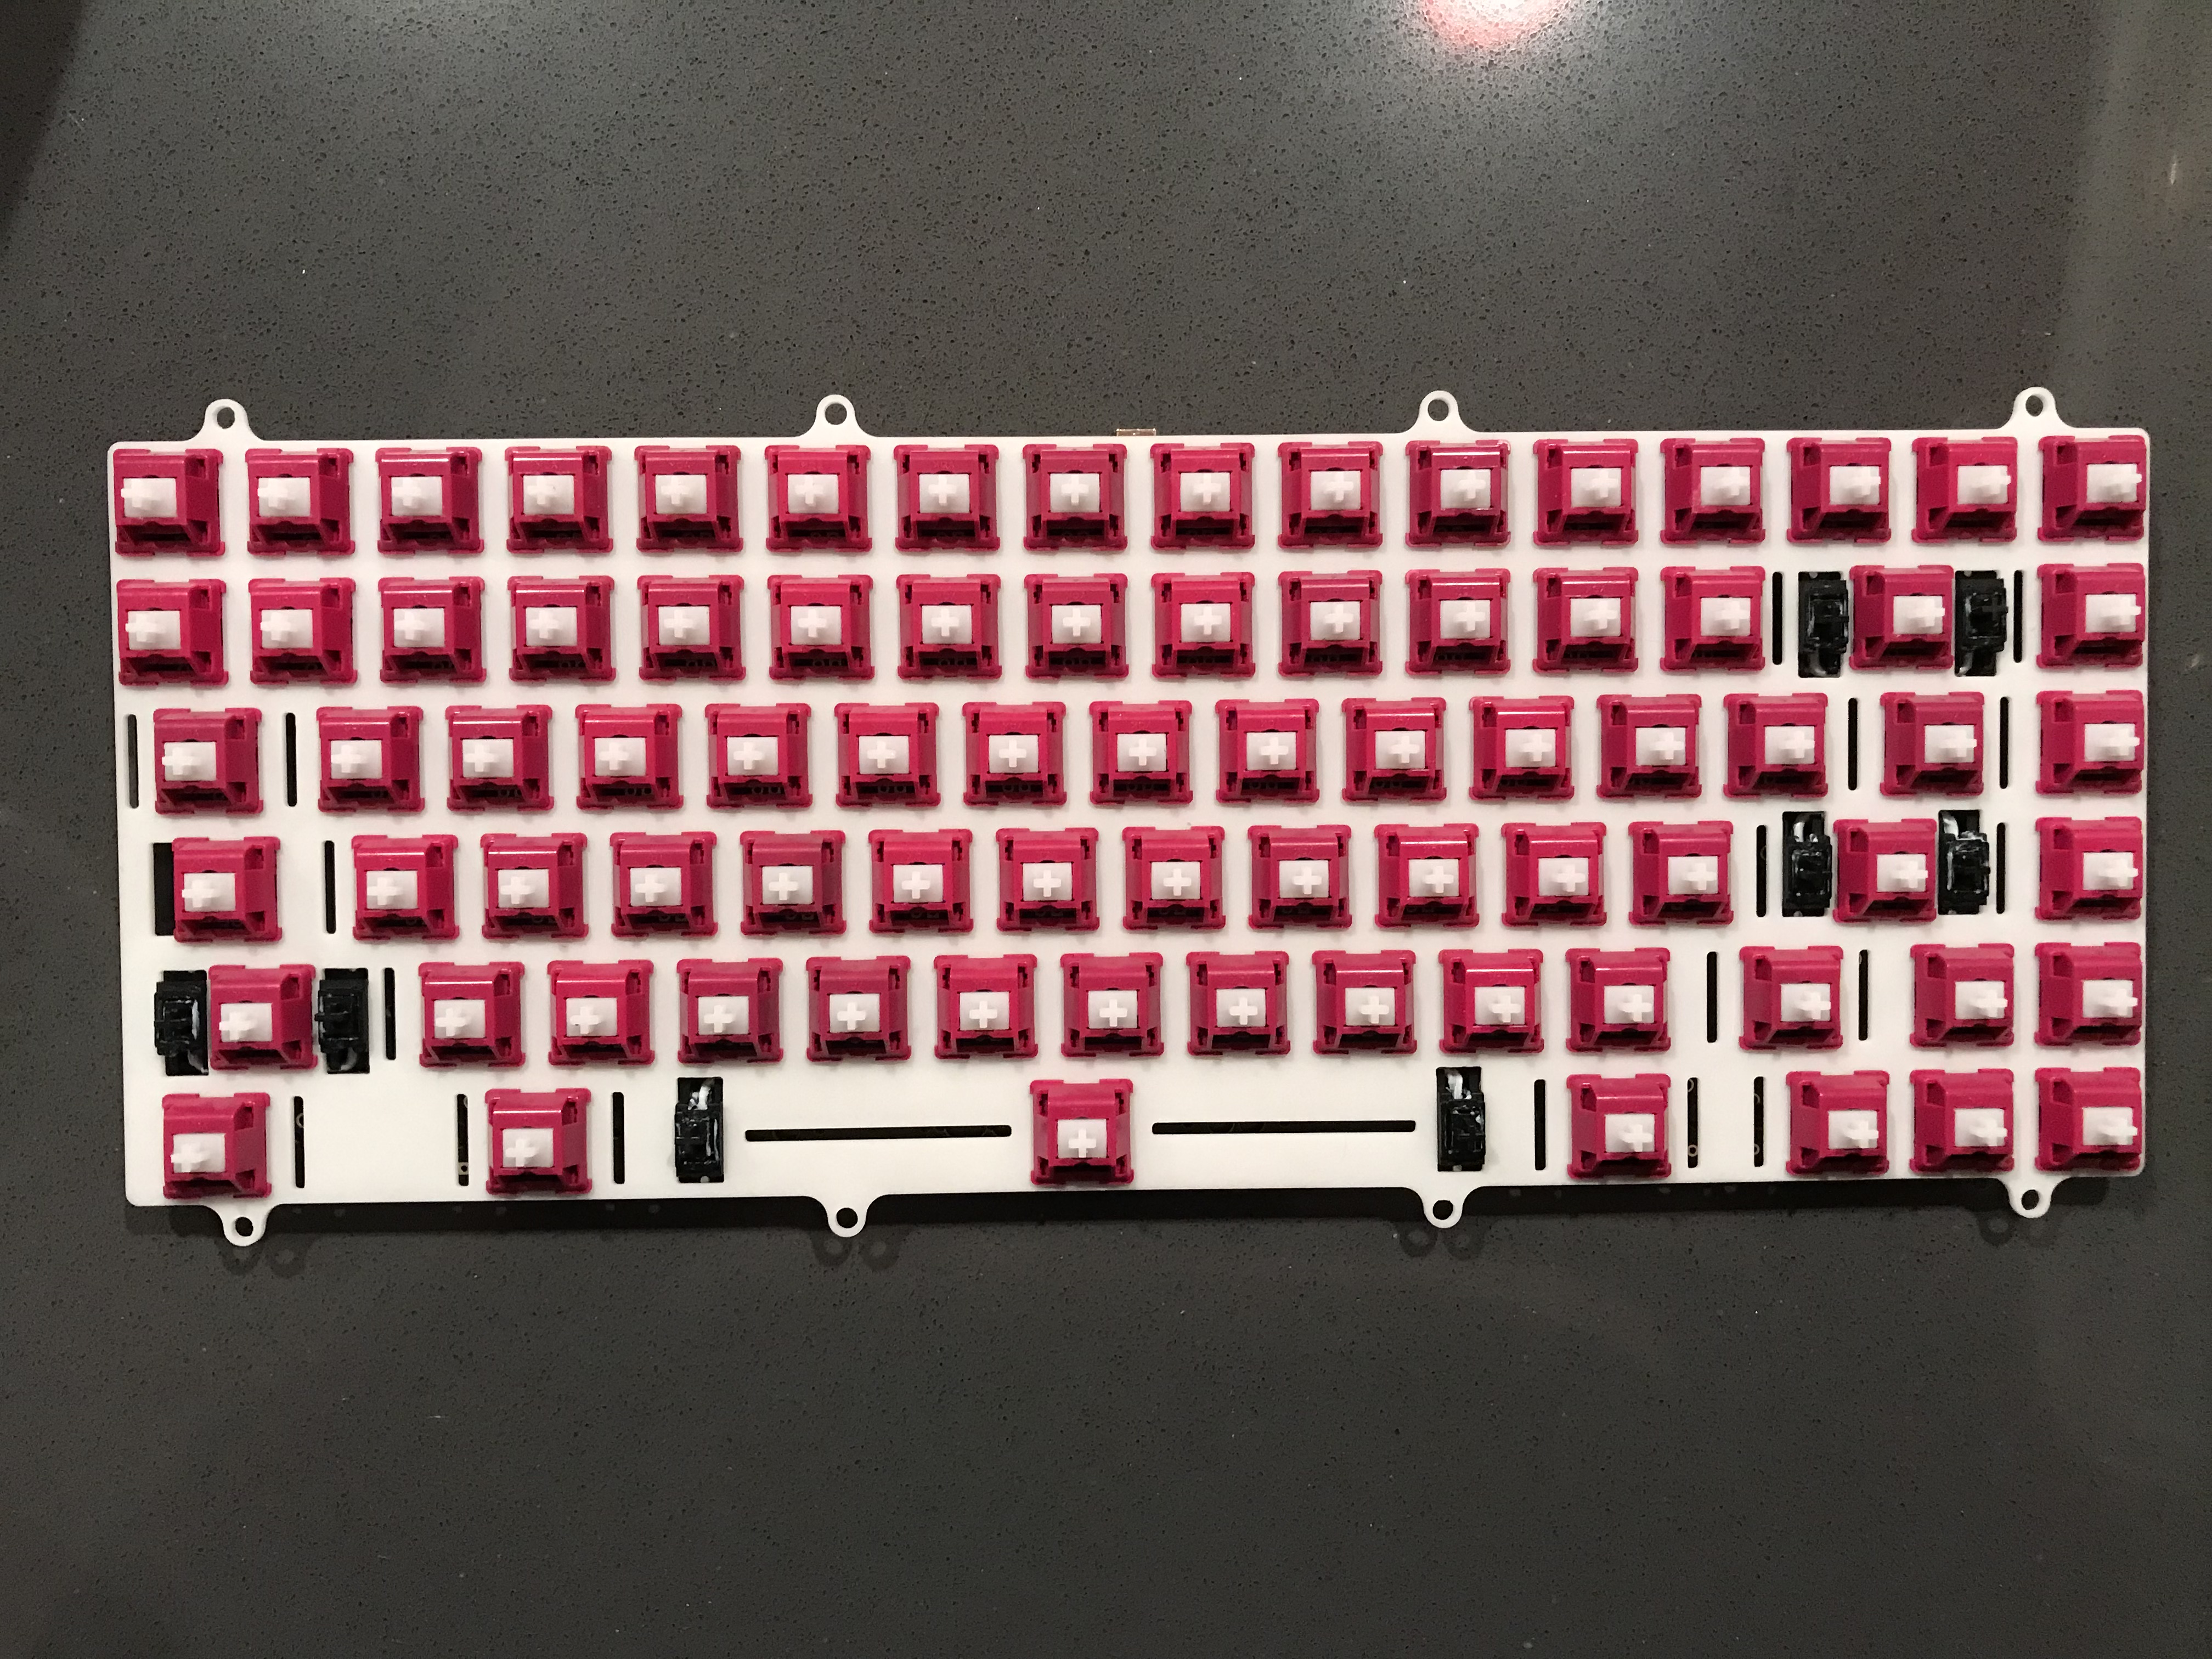
81 Holy Red Pandas, ready for action…


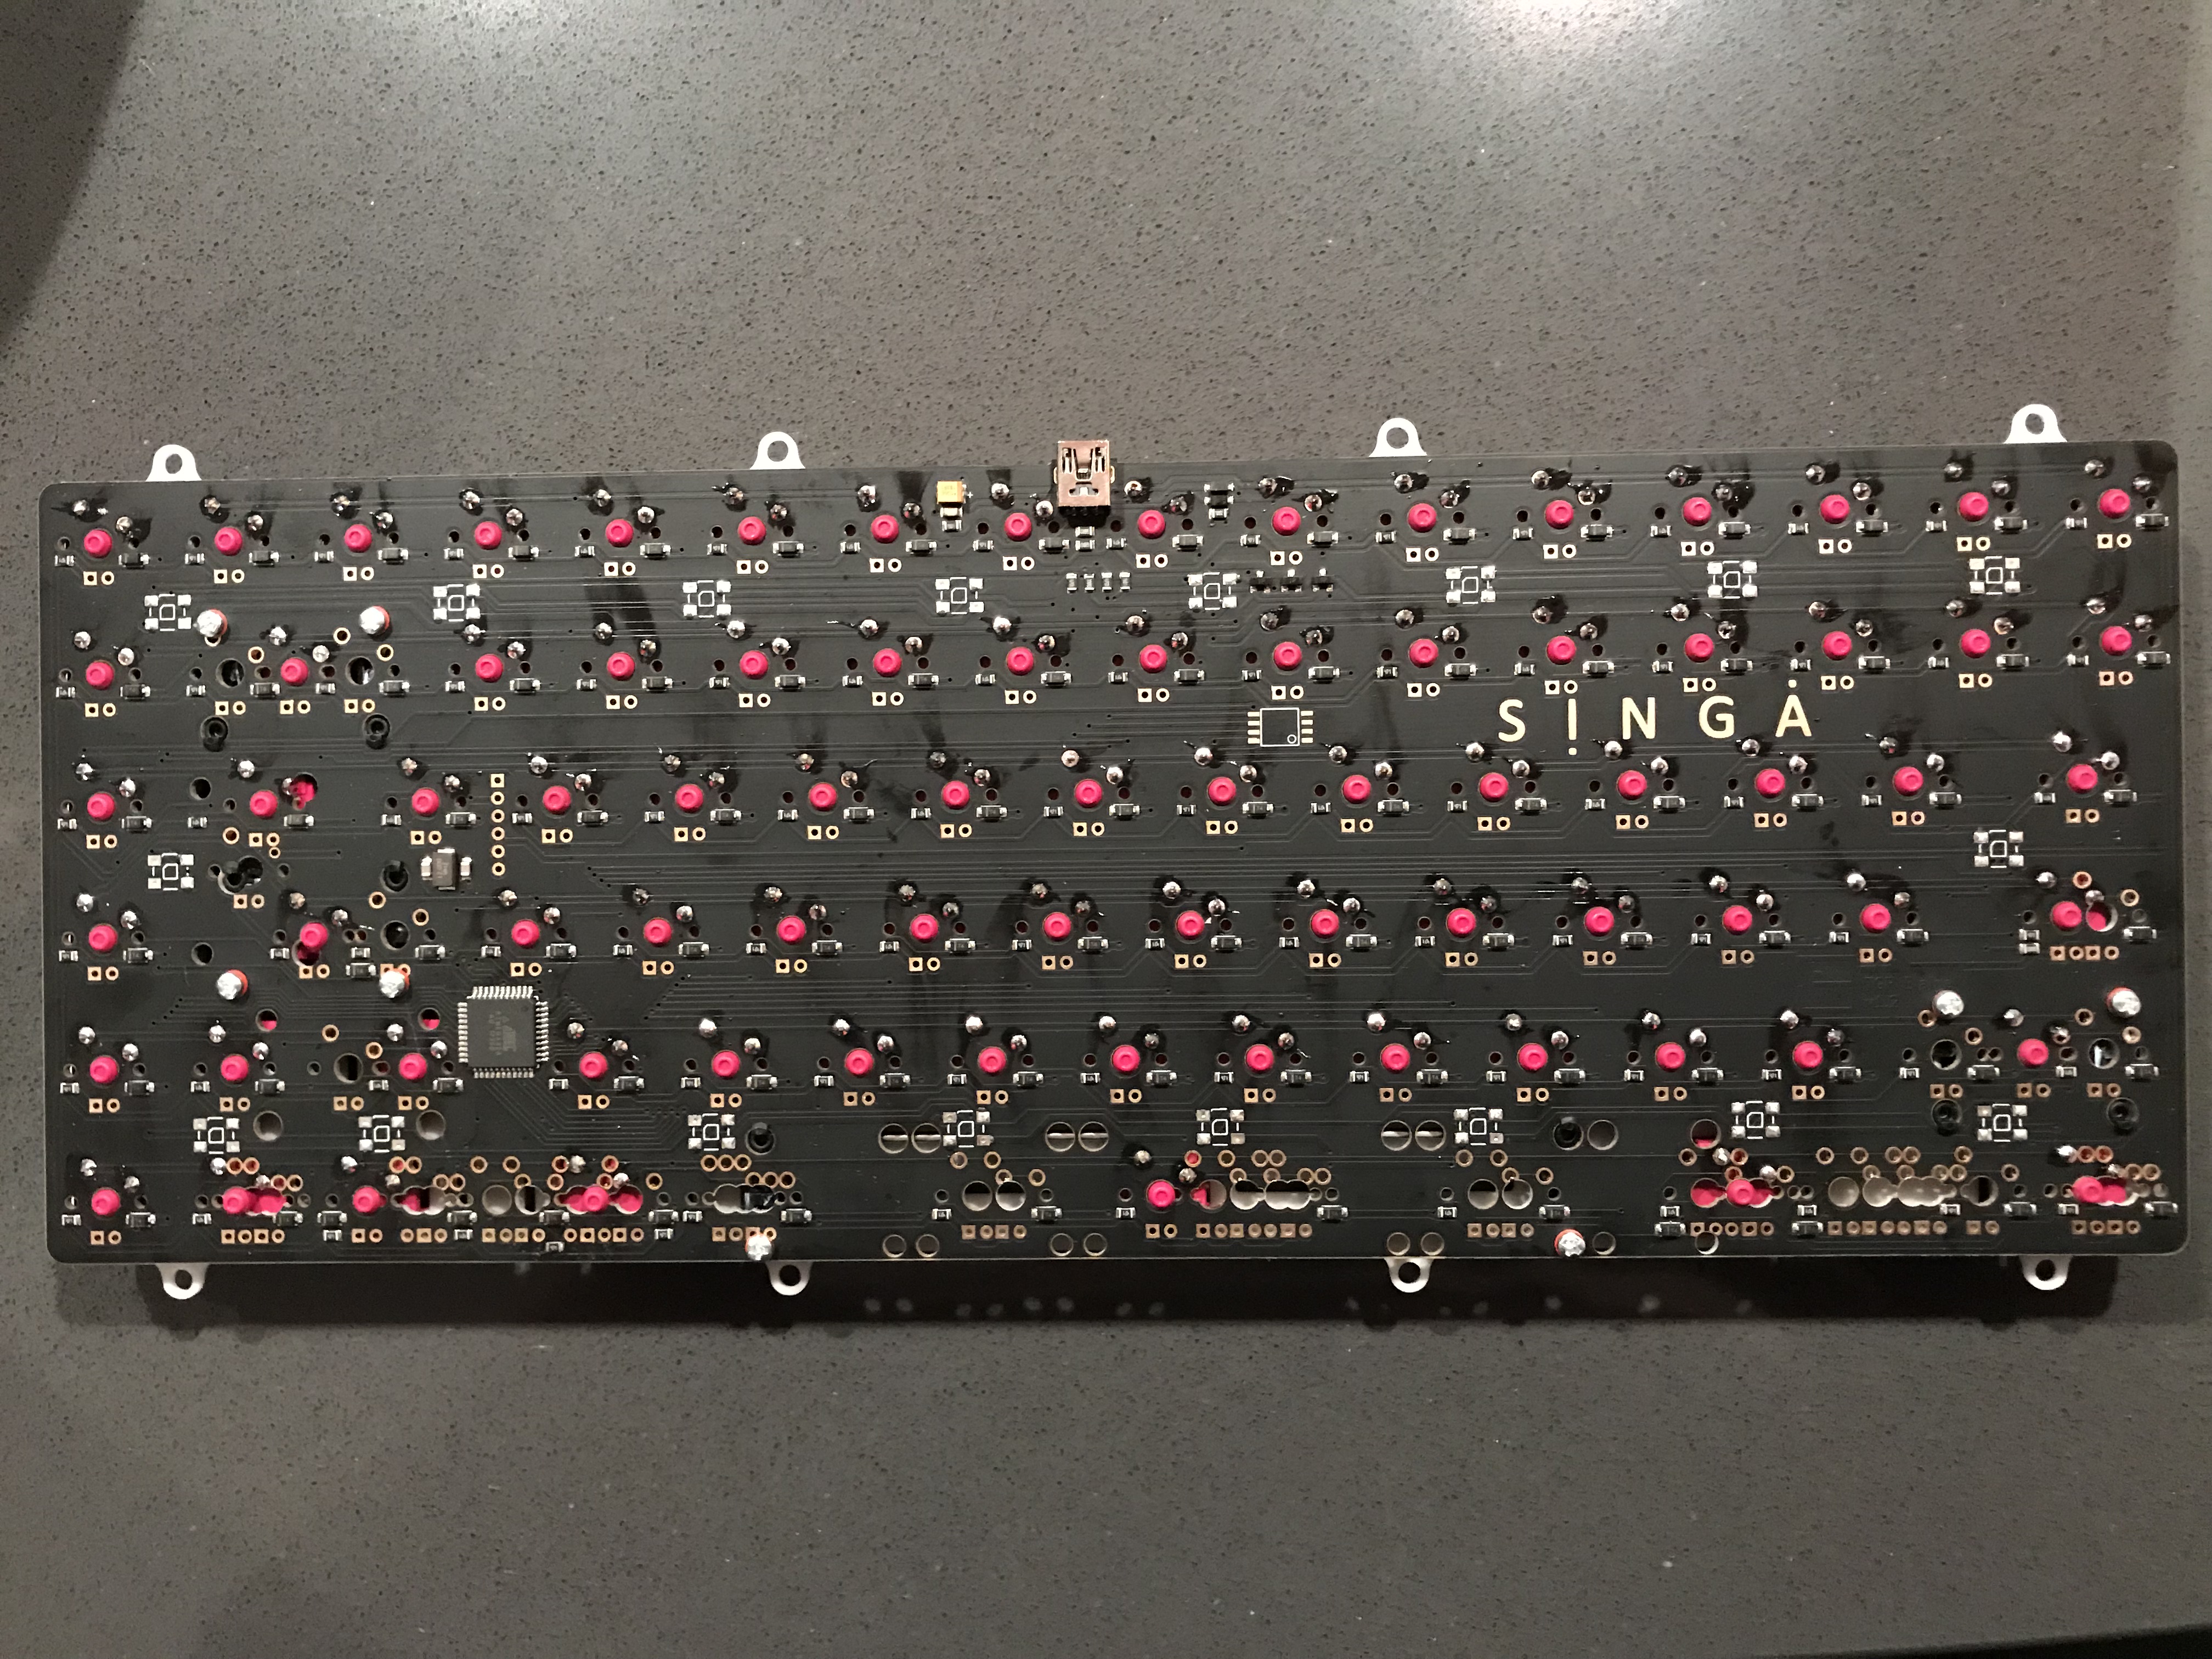
…and soldered in place. I didn’t use either the bandaid mod for the stabs or any Sorbothane between the PCB and the plate, as I wanted to get a clean impression of POM’s sound, and I felt that with a top-mount board, if any sound dampening proved necessary, a bit of Sorbothane between the case and the PCB would be sufficient.

Top-mount installation is straightforward on the Singa; just screw the plate into the recessed screw holes on the underside of the top of the case.

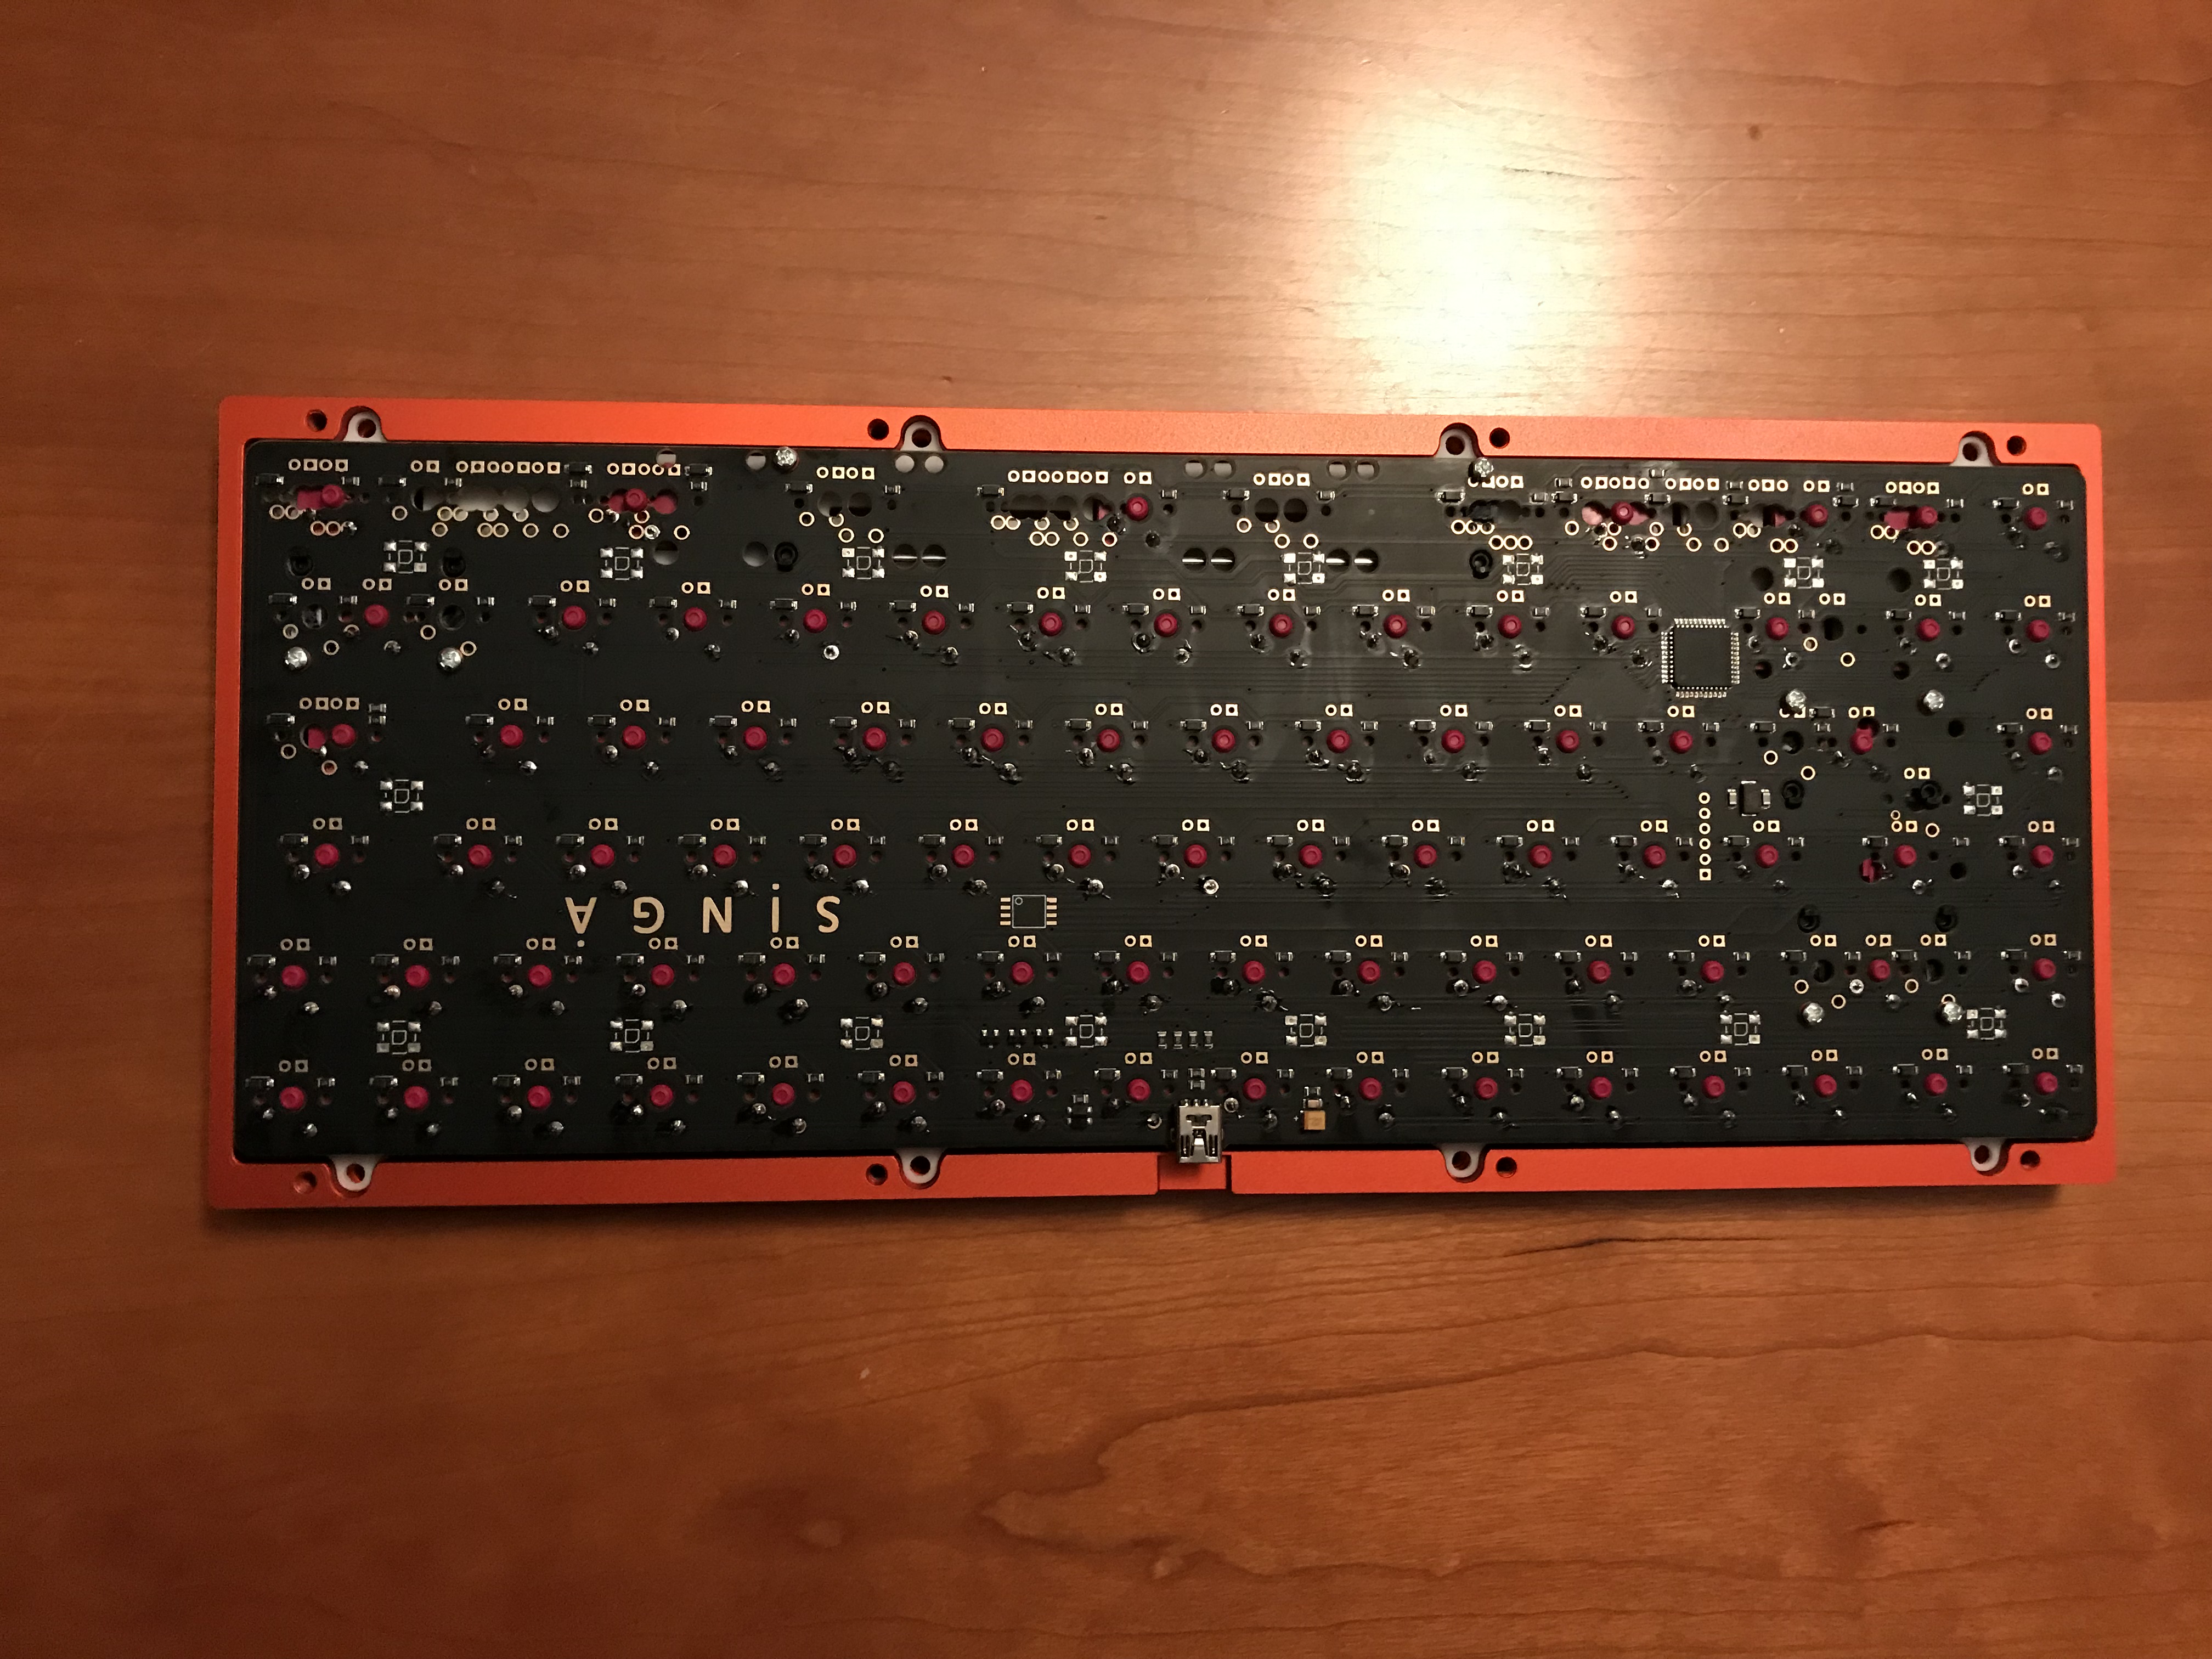
Attaching the two case halves is also straightforward; the case bottom has eight screw holes through which the top can be attached to the bottom.

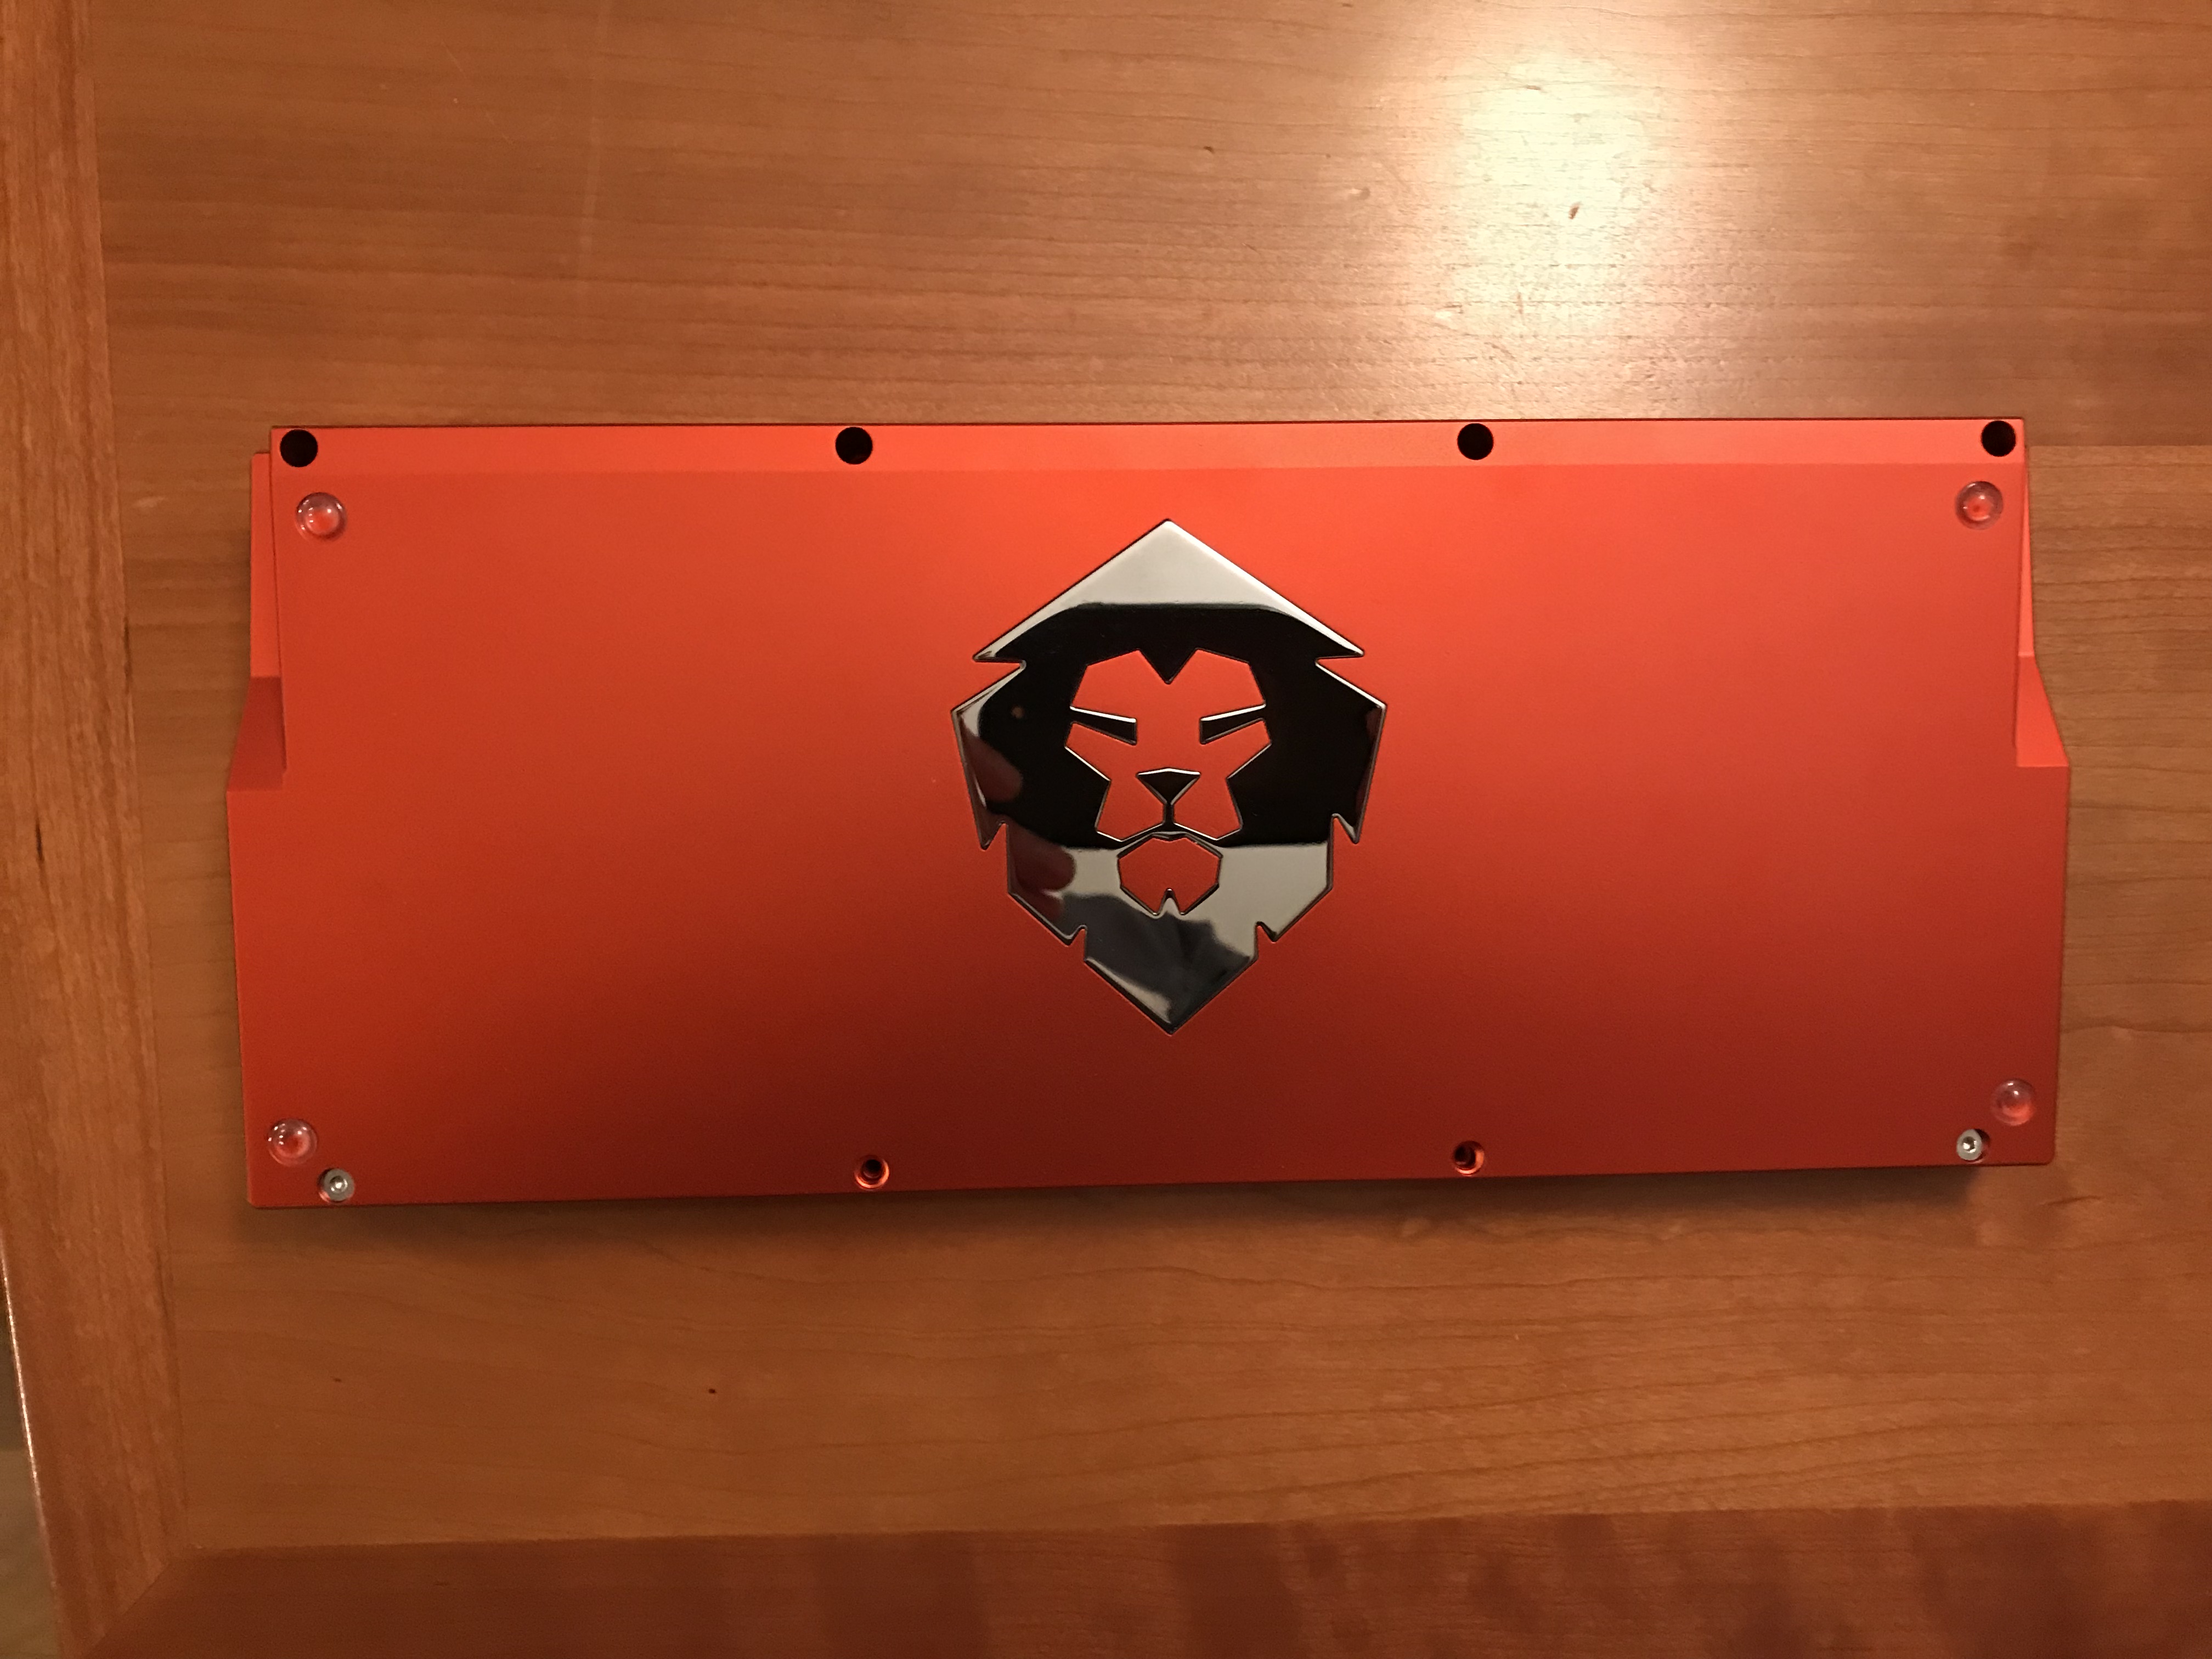
You can see the holes here, as well as the cutouts on the sides for lifting the board, but the real reason for showing you this view is clear - just look at that polished lion’s head weight. Gorgeous.

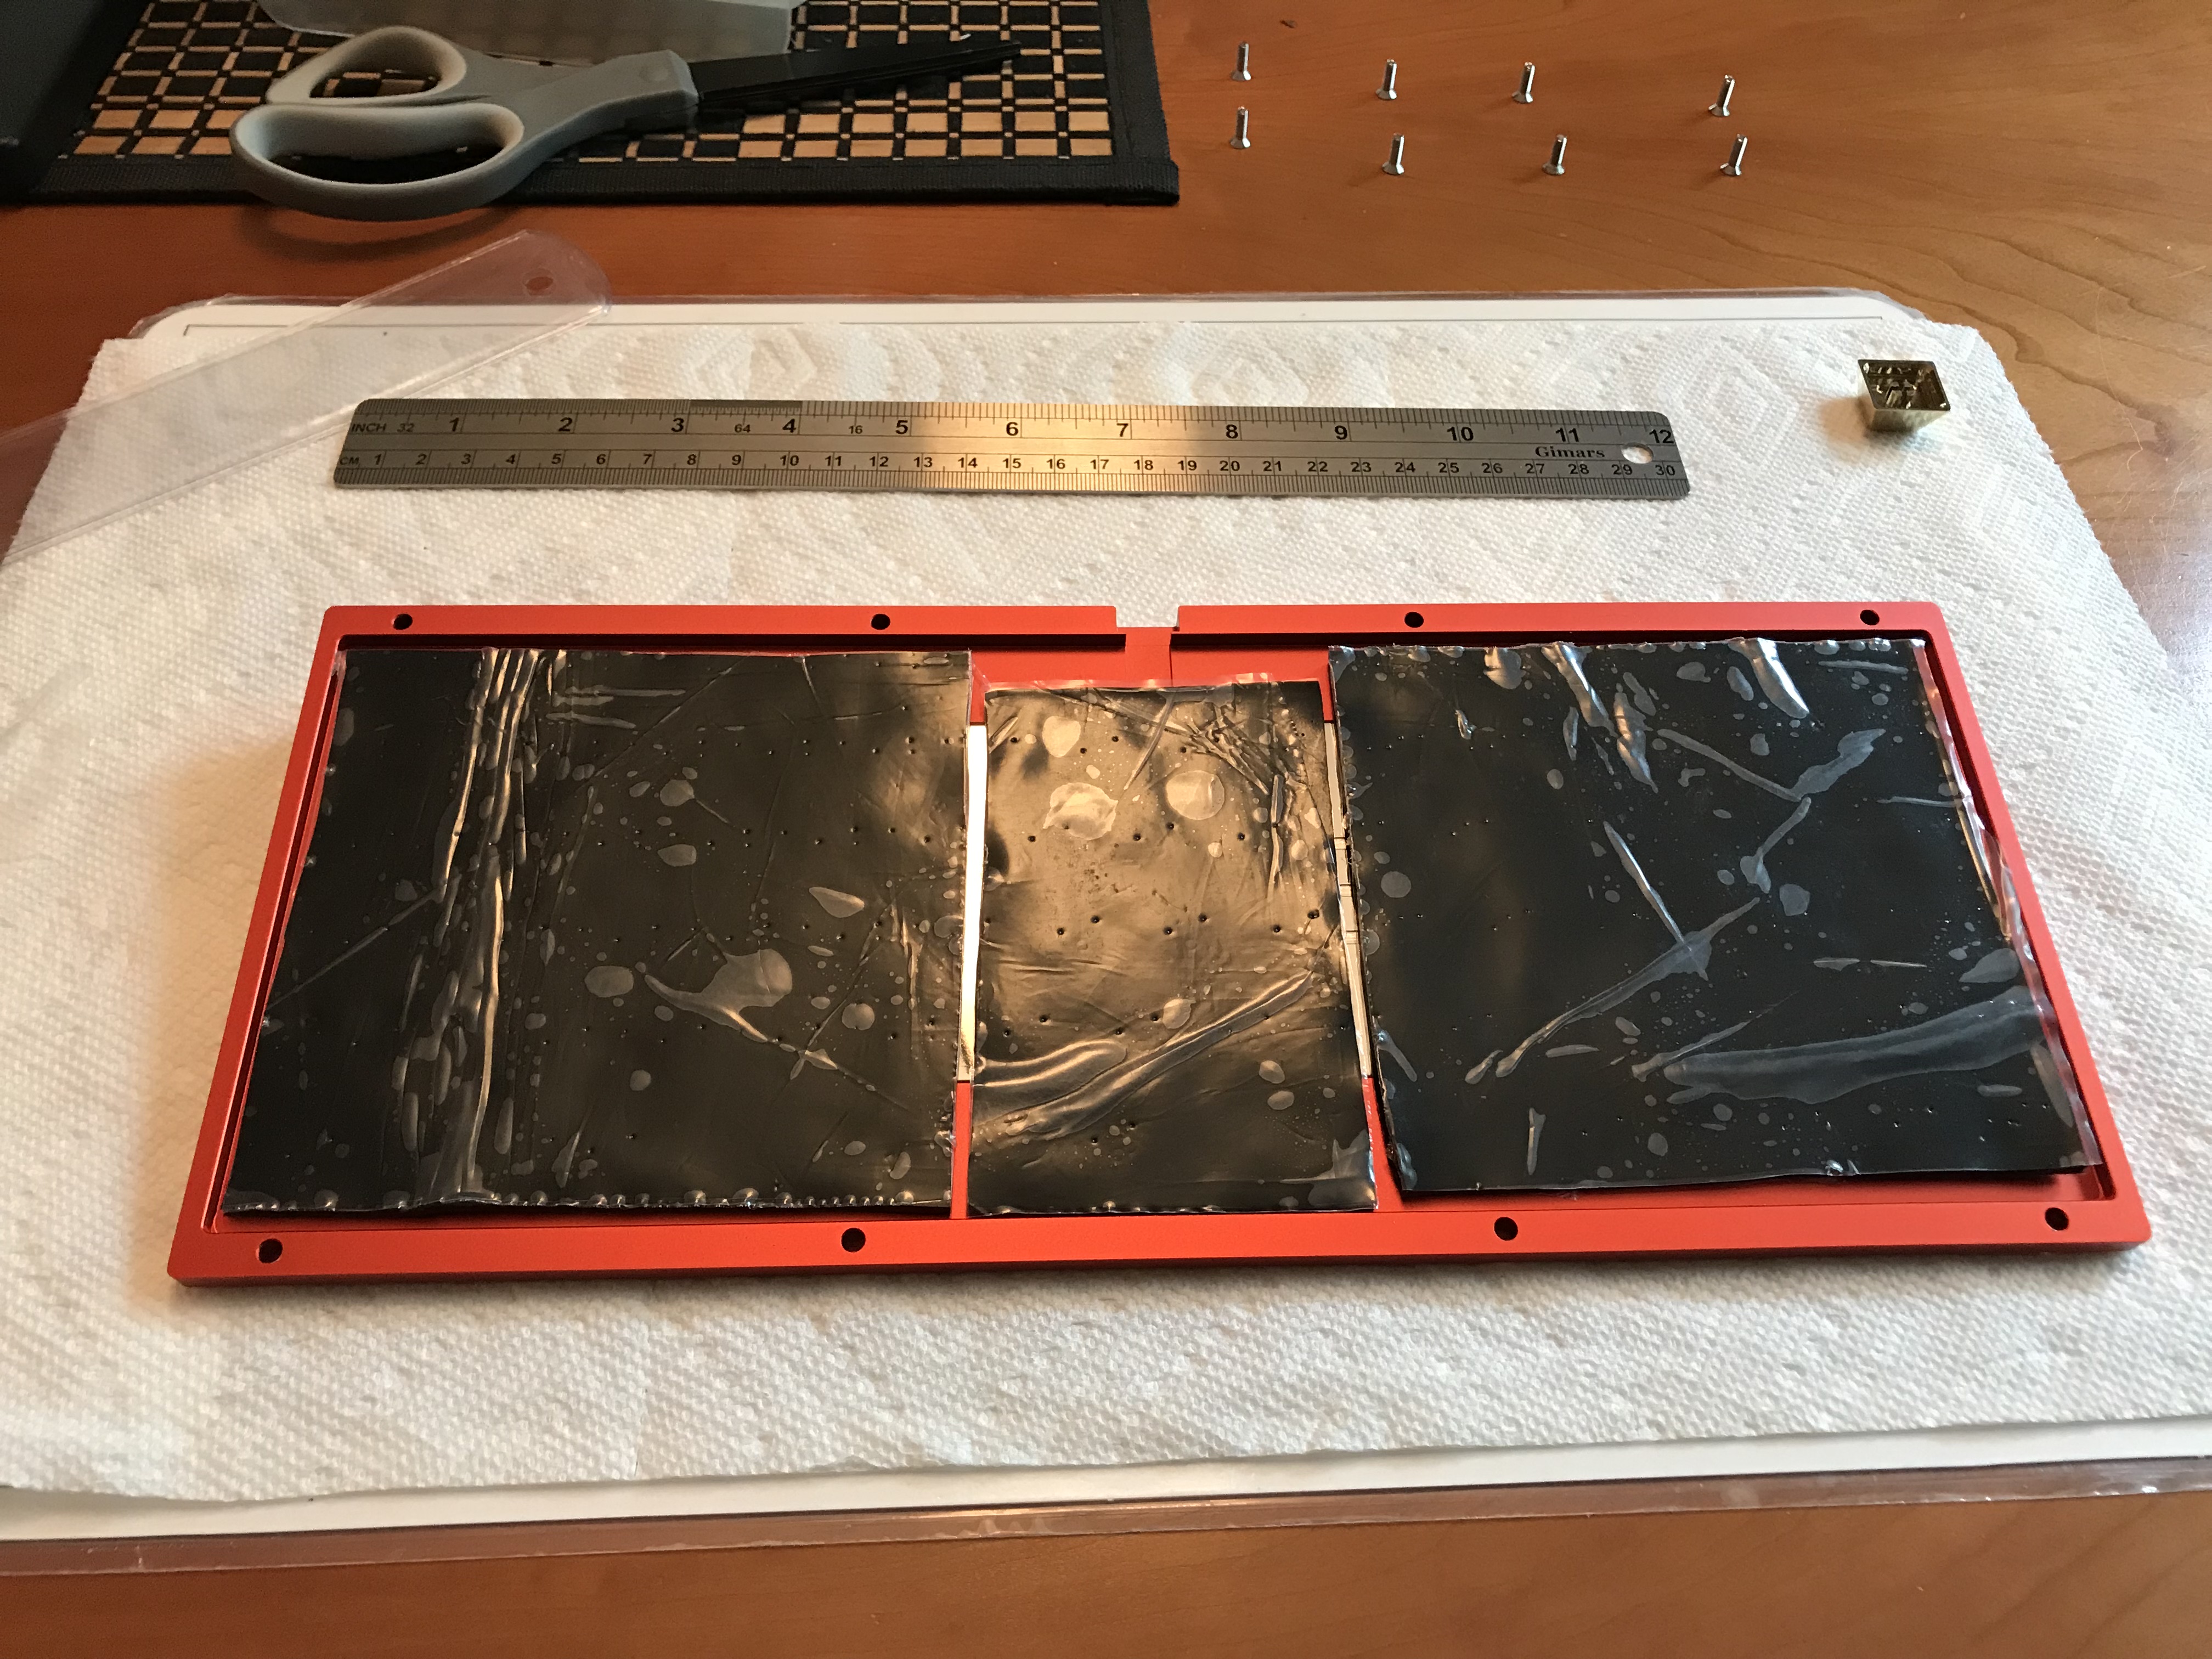
On initial assembly and testing, I found that there was some metallic case ping on key impact, so I opened the board back up and applied Sorbothane. Normally, I’d cut a few thin strips, peel the plastic backing, and wrap the strips in gaffer tape before placing them in the case, but when I realized I had spare sheets that more or less matched the case shape, I just went with it, and left the plastic backing on, to avoid getting any plasticizer on that lovely weight. You can see the pressure points in the center sheet where the switch pins are pressing down, and I’ve been finding that’s about the level of compression I like to see for best performance.

Finally, one last bit of work before the board is ready for prime time. While the Singa supports QMK, the PCB uses a ps2avr bootloader and an Atmega32a controller, so I couldn’t use the QMK Toolbox to install firmware in the usual way. Fortunately, the readme.md file in the keyboards/singa directory of QMK gives clear instructions for downloading and using the HIDBootFlash tool, and after building the firmware with the keymappings I prefer, flashing the resulting firmware proceeded exactly as described in the readme. Always a good thing.

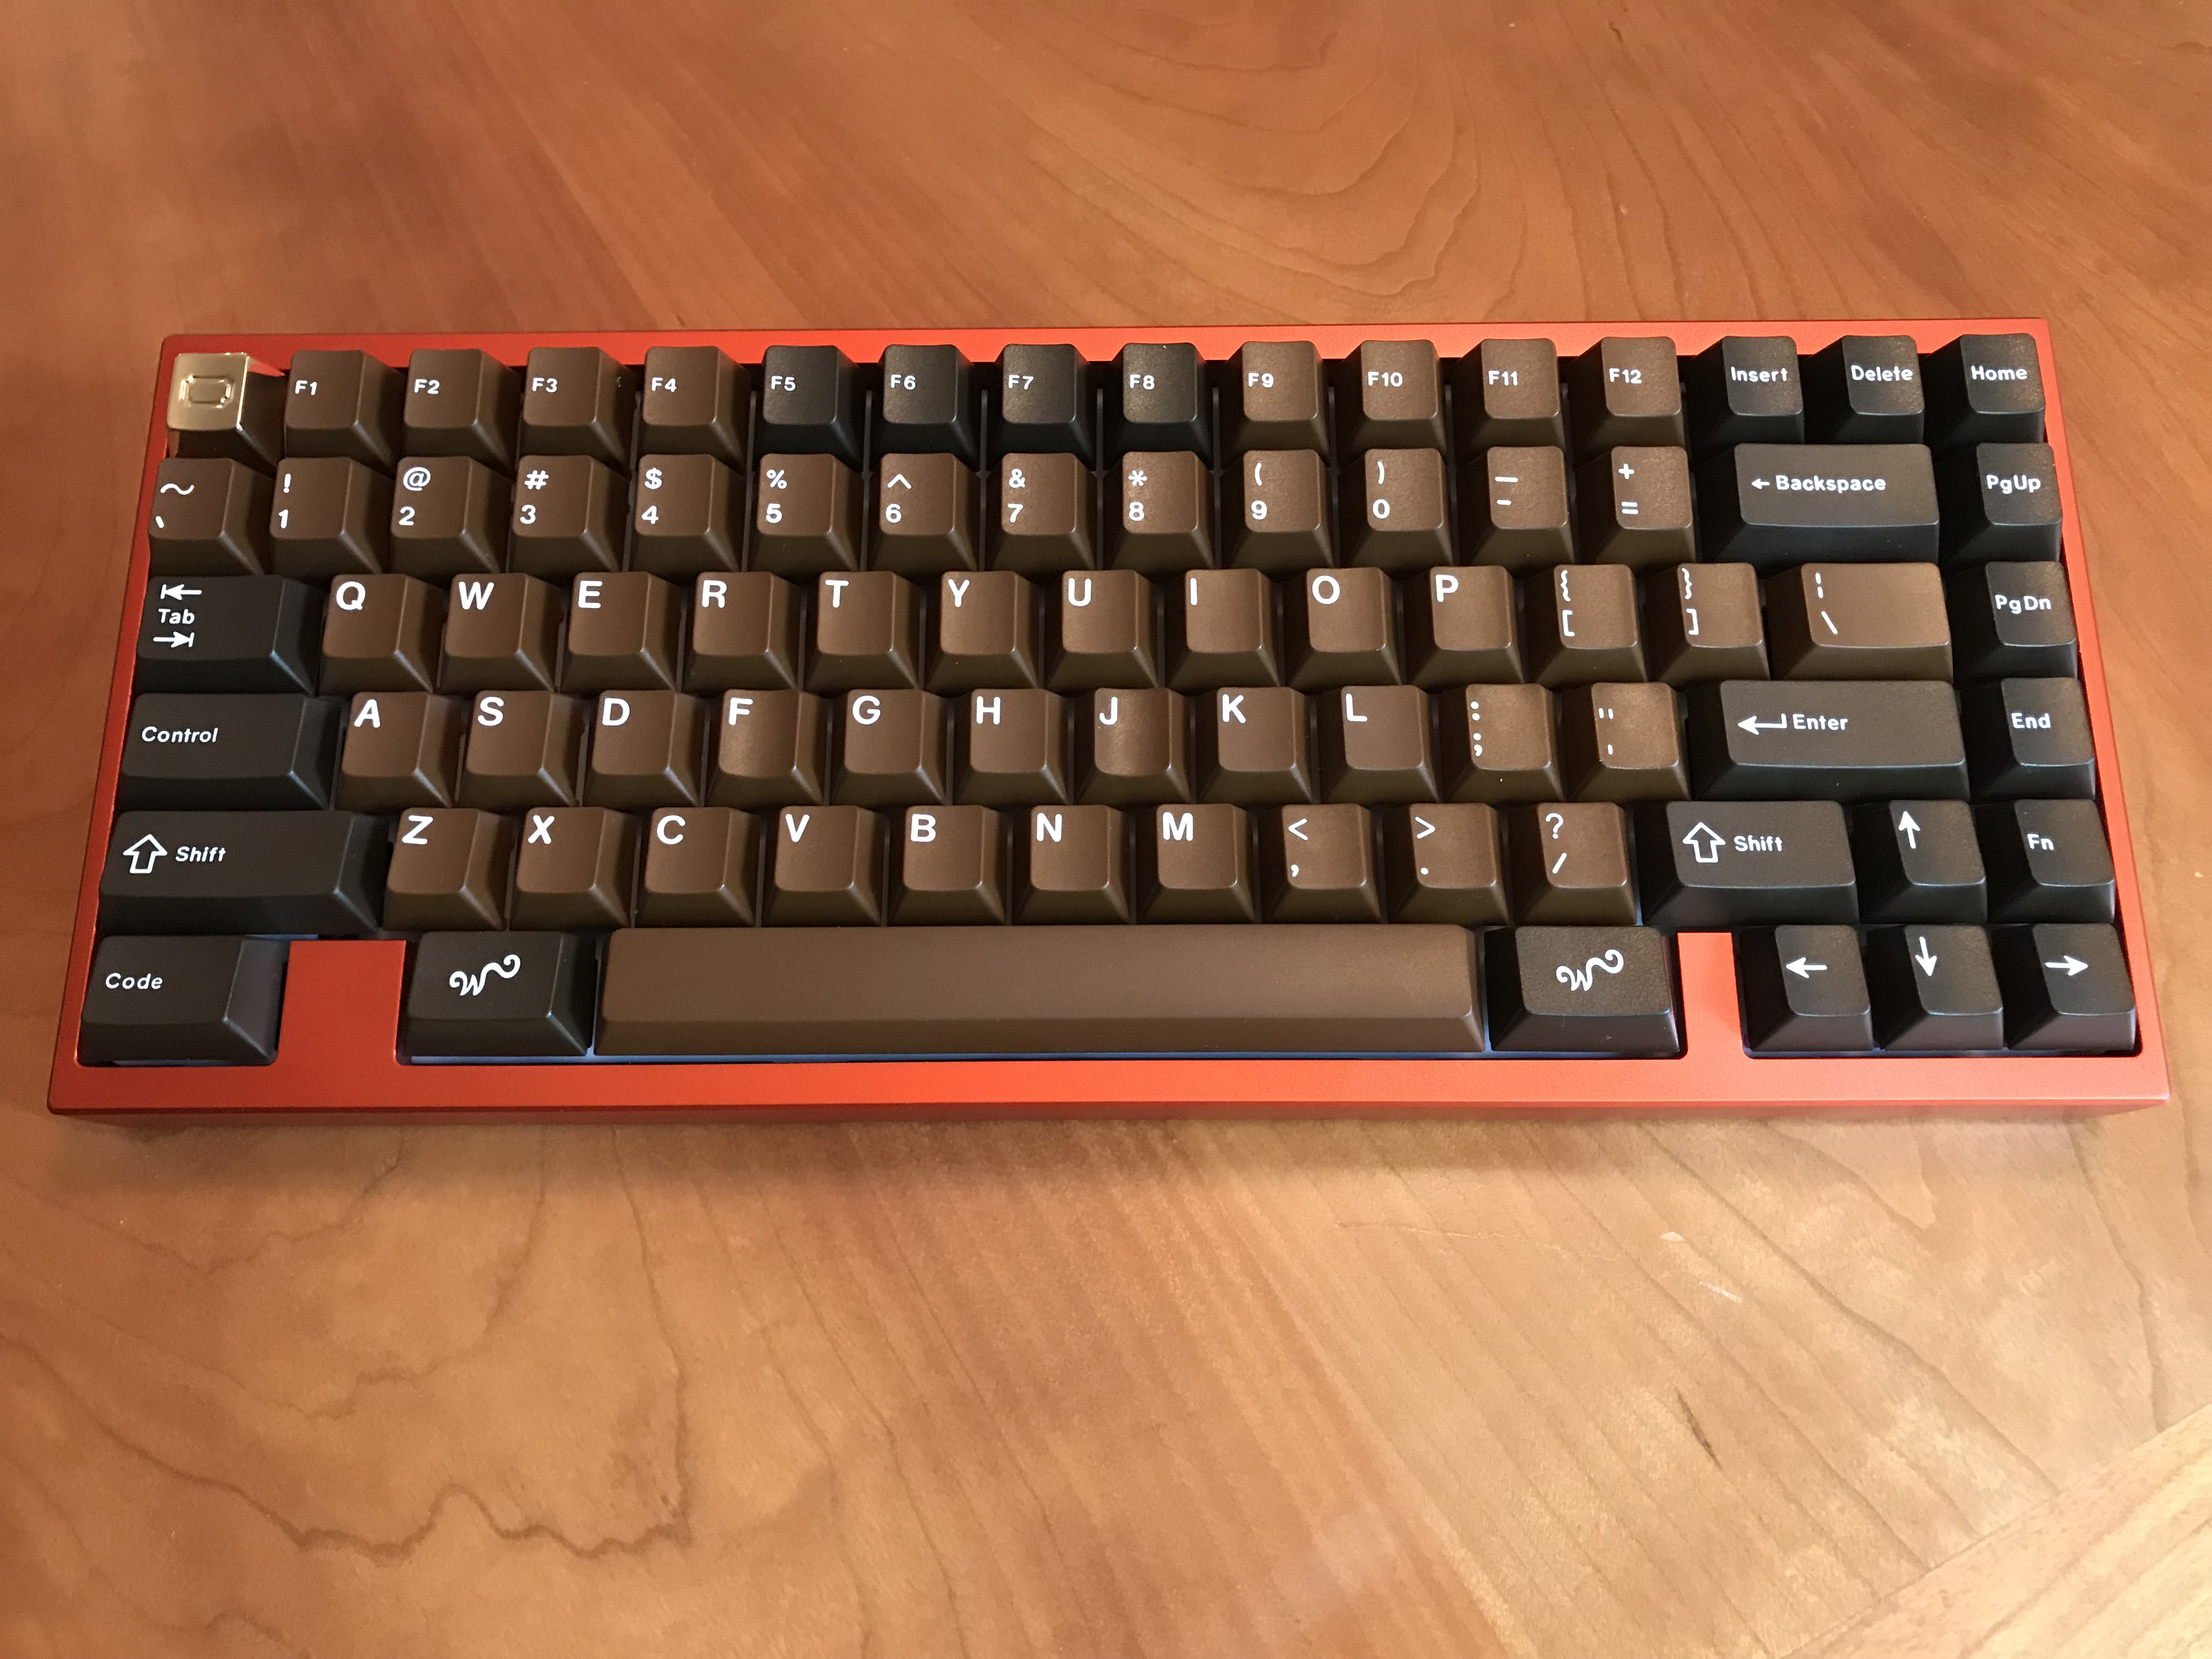
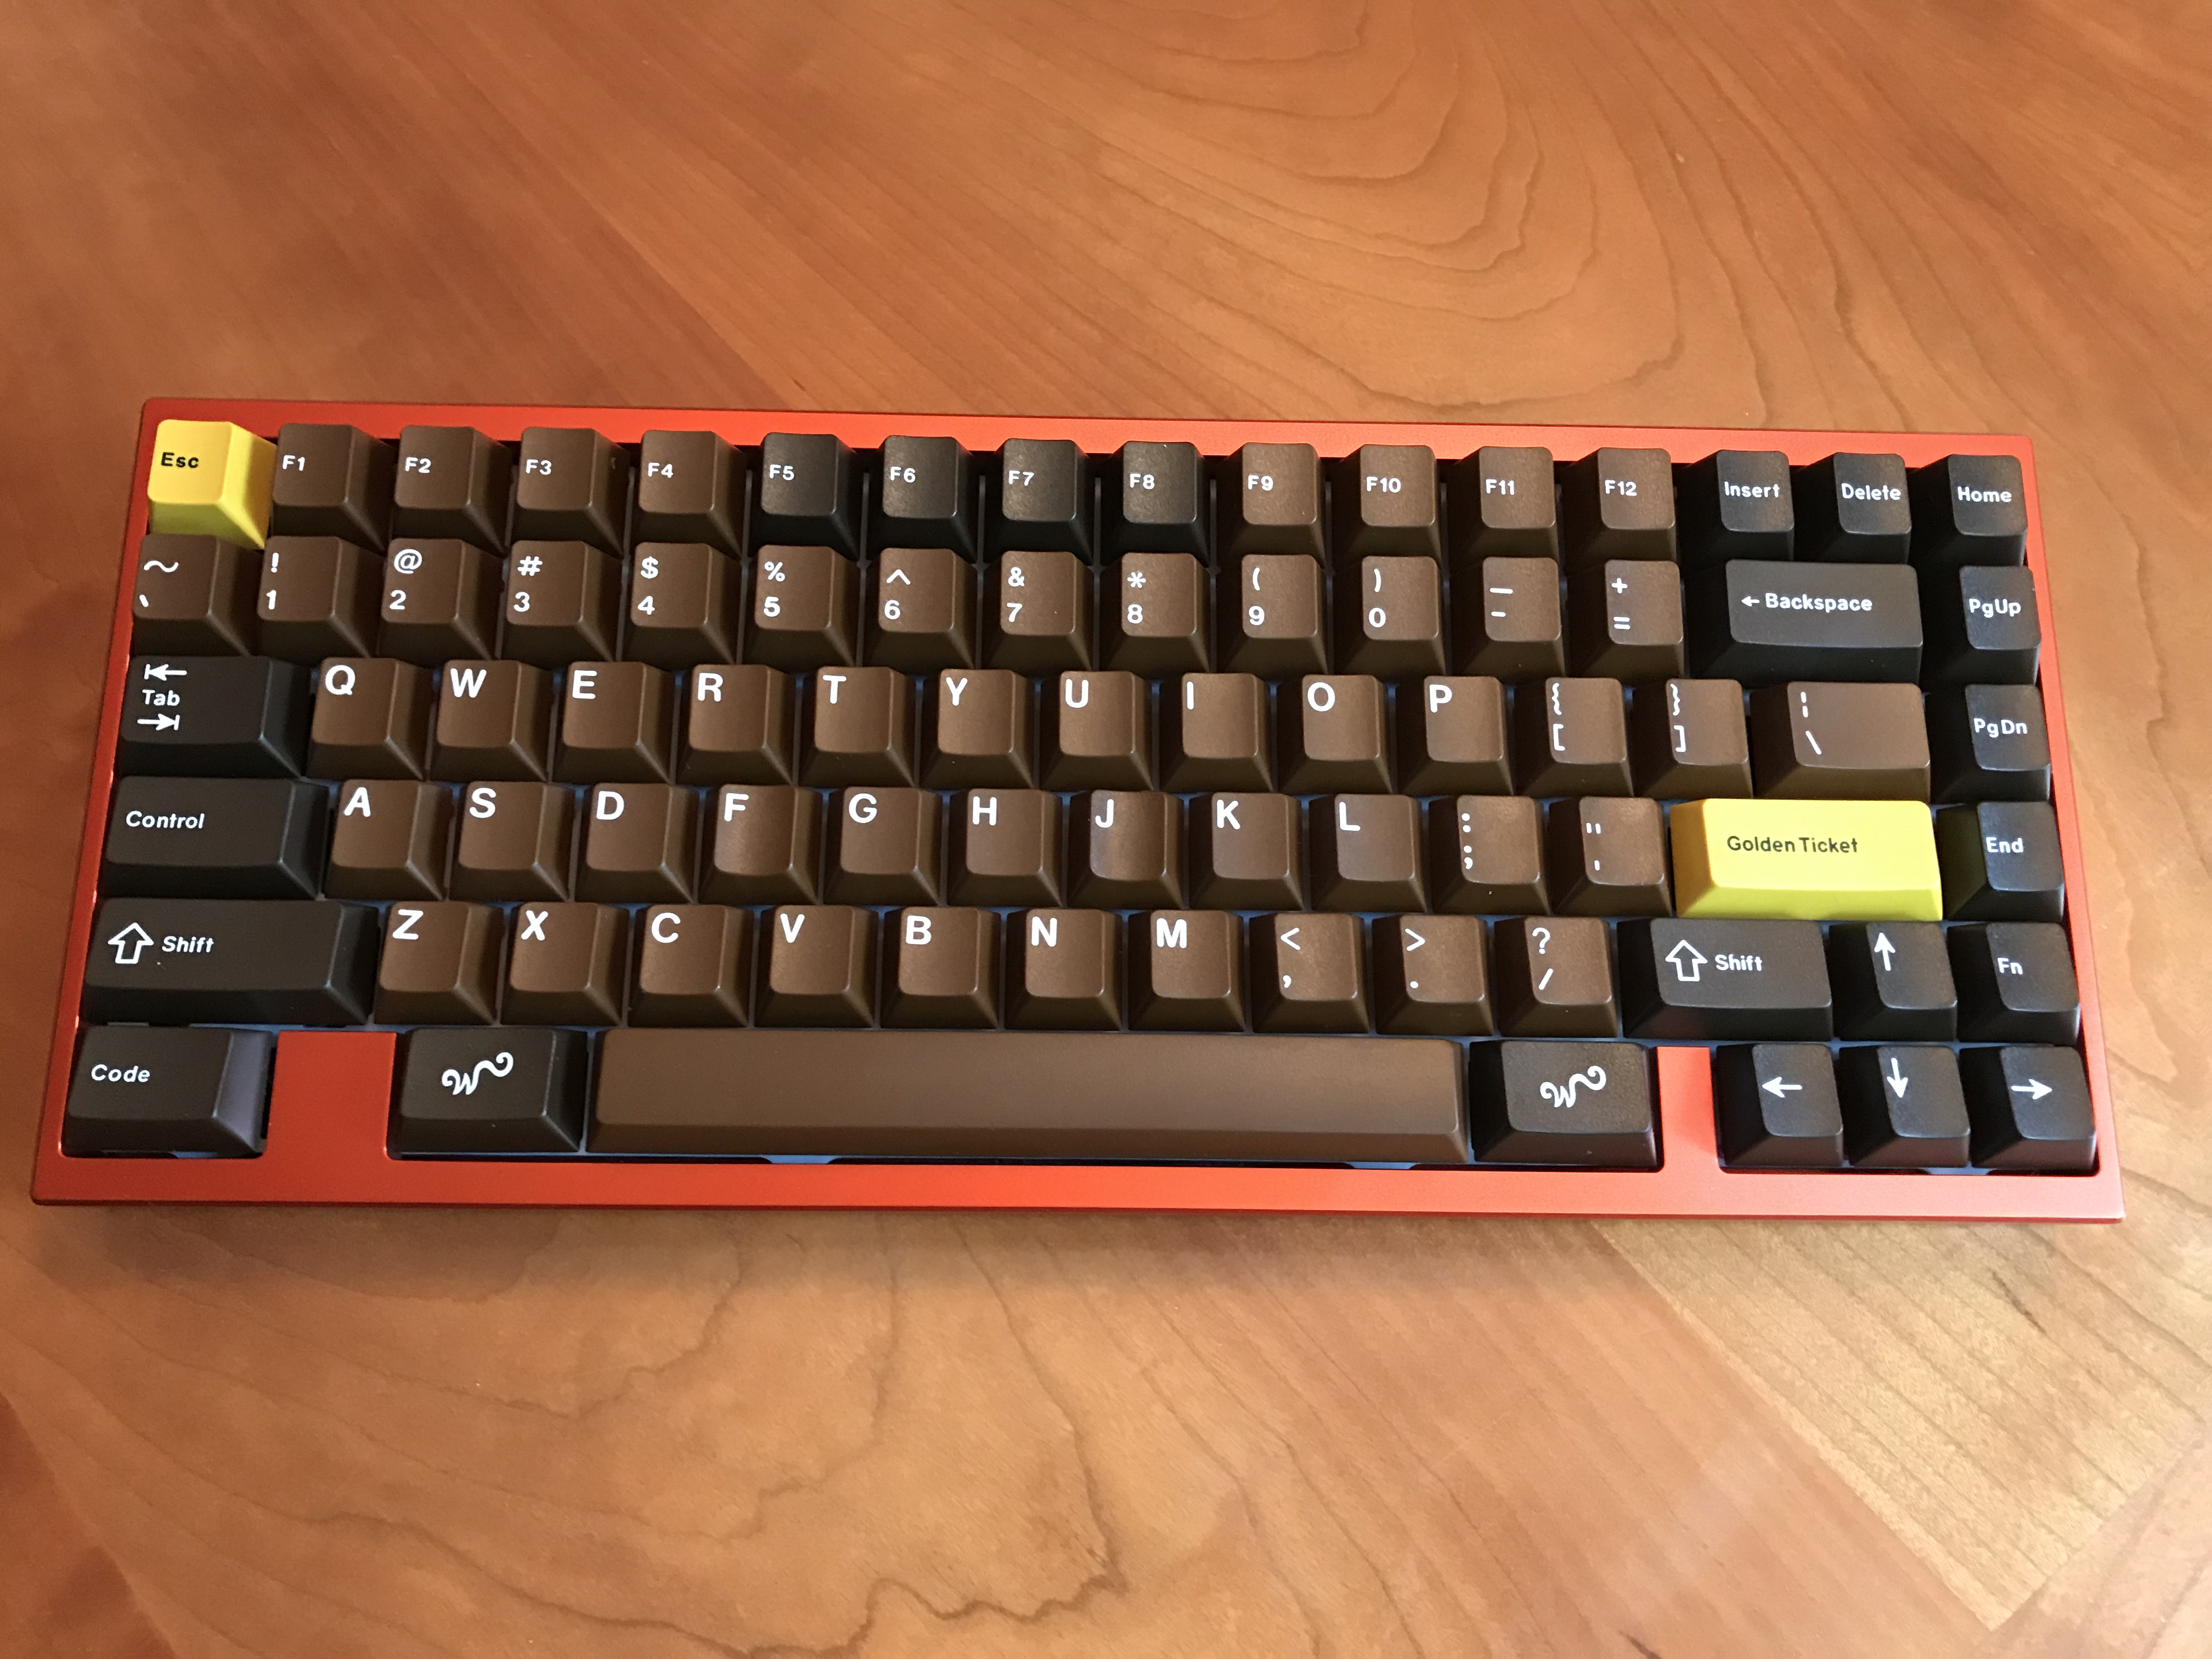
From the moment I saw the burnt orange tone of the Singa, I thought Chocolatier would make an excellent pairing, capitalizing on those shared earth tones. The RAMA Golden Ticket artisan adds a nice accent, although I discovered that it’s heavy enough that keystroke feel is affected; much less pressure is necessary to cause the switch to trigger with this cap. My kitchen scale doesn’t have sub-gram precision, but a single GMK cap registers as 1g, while the RAMA cap registers as 12g - so even allowing for measurement error, it’s not surprising that this would happen. Easy enough to fix, if I can decide which way to go with the modifiers…

Lessons learned

  • I’m enjoying the POM plate - nice, crisp sound (and way easier on the fingers than the brass plate, although I will grant you that the brass plate looks better with the color scheme. Sometimes, there are unavoidable tradeoffs to be made).
  • Holy Pandas on POM - this is a nice combination. While I wouldn’t say there was really much flex on the Singa, typing feels noticeably more forgiving on bottom-out than the Pandas did on the brass plate in the tx108se.
  • At least for this build, I’m not missing the bandaid mod, nor the usual dampening I would apply between the plate and PCB. I don’t have enough experience with top-mount to know if this result will generalize to all top-mount boards, but it’s something to evaluate further.
  • Stab lubing with 111 - I like it quite a bit, enough that it is a serious contender to replace SuperLube as my stab lube of choice. Eliminates all rattle and undesirable noise, but stab motion is not sluggish in any way. The sound and feel of the non-spacebar stabilized keys is quite consistent with other keys, probably the most consistent I’ve observed in any build. I’ll be trying this again soon.
  • WKL blockers: the aesthetics vs functionality tradeoff is real. The bulk of my time is spent in front of Windows, and not having a Win key is like missing a finger. Yes, I know we can remap keys, and I’ve done so here, but decades of muscle memory make this a difficult proposition.
  • I don’t use artisans often, but when I do, I need to check the artisan weight and adjust spring weight in the appropriate switch if the artisan is substantially heavier than a normal keycap.

So what would you pick here to set off GMK Chocolatier - the RAMA golden ticket cap…

…or the yellow accents? Choices, choices…

Specifications

case: Singa R2 anodized aluminum (burnt orange)
case dampening: 0.1" 40 Duro Sorbothane sheets
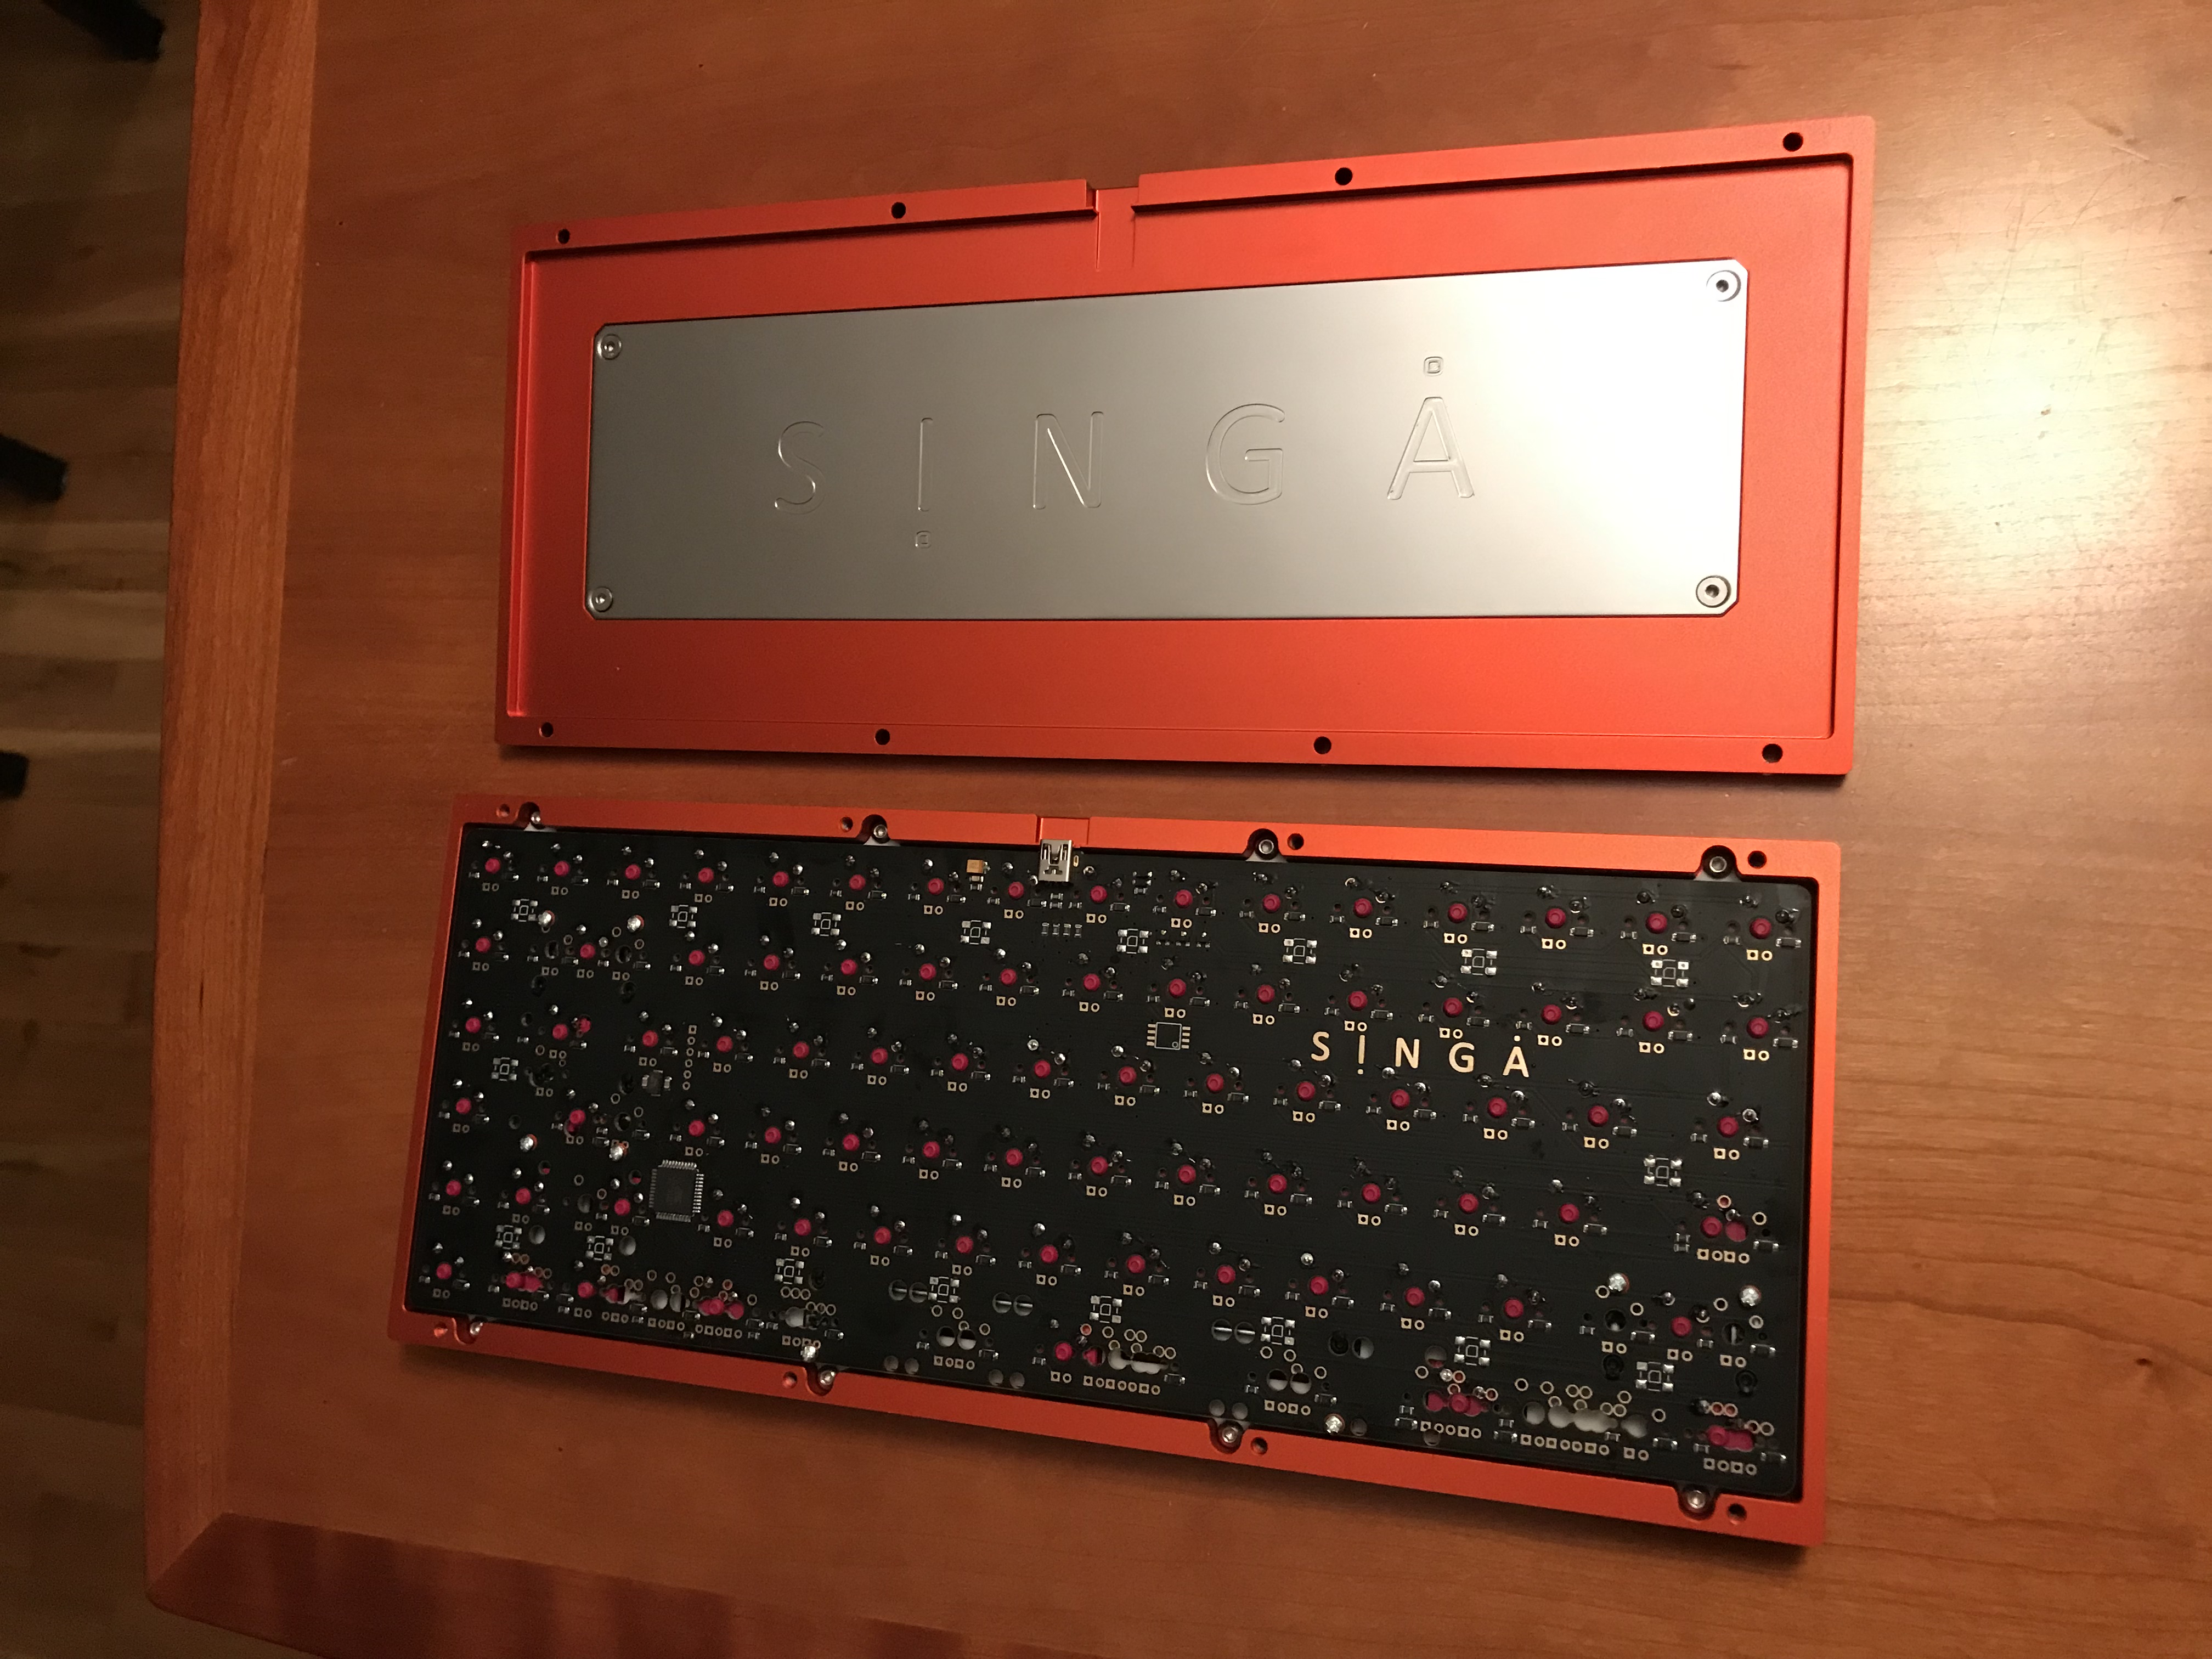
PCB: Singa/TGR PCB (ps2avr)
plate: POM
LEDs: n/a
switches: Holy Red Pandas
- YOK Red Panda housing & springs
- Halo Clear stems
switch lubing:
- manually lubed housings/stems with Tribosys 3204
- tub lubed springs with Krytox GPL 104
keycaps:
- GMK Chocolatier
- Rama Golden Ticket
stabilizers: GMK screw-in (1x7u, 3x2u)
stabilizer mods: clipped, lubed with Christo-Lube MCG 111
plate/PCB dampening: n/a
HxWxD (without caps): 1.38"x12.25"x5.13"
HxWxD: 1.69"x12.25"x5.13"
assembled weight: 4.78 lb
5 Likes

Very nice as always!

I like how you think out your builds so far into the future. I do the same and often they evolve as new GBs emerge.

I’m curious as you use this more, how you like the stabs with MCG111? I’m finding it hard to balance lubing enough to cut out the rattle while not getting too sluggish.

1 Like

It’s still early, but I’m really liking 111 on the stabs. It doesn’t have the stickiness or density that Permatex or SuperLube have, to the point that I’m tempted to try filling a syringe with 111 and just filling the stab housings that way, rather than painting the lube on. I think that approach would be a complete failure with dielectric grease, but with 111, I think there’s a decent chance it would work well.

But that lack of density and stickiness does lead me to wonder how well it will wear over time - if 111 ends up not working for stabs, I think it will be because it wears off of the contact points more quickly and/or to a greater degree than other greases would. Time will tell.

1 Like

I really do love your build stories, these are very informative and so well written that they are entertaining at the same time.
You inspired me for writing my own build log.

Thank you for sharing all that with us!

1 Like

That’s really great to hear, made my day. Thank you!

1 Like

This Singa build is definitely one of my favorites. I’m really glad you do these build logs!

1 Like

Yellow accents!

2 Likes

Build #19: Norbatouch Pi Aerospace Aluminum

Let’s suppose that in some hypothetical timeline, apart from our own, a well-known fruit-named computer company had made some slightly different design choices for its hardware offerings. Let’s suppose that instead of pursuing a relentless and misguided march towards a featureless plane as the platonic ideal for text input, this company instead acknowledged that its users have fingers, and those fingers (and the minds that guide them) react positively to texture, to feel, to tactile feedback. In this alternate history, imagine that function remains at least competitive in the race towards form. What would the keyboard produced by this company, in this timeline ever so slightly displaced from our own, have looked like?

Perhaps it might have looked like the keyboard in this build log. You be the judge.

Let’s start by introducing the raw materials for this build as they arrive in pre-op - a CoolerMaster MasterKeys Pro S keyboard, which will be donating its PCB and plate for transplant into a Norbatouch Pi, fresh from group buy.

The Norbatouch housing can accept three discontinued CoolerMaster TKL models: the Novatouch, the Rapid-i, and the MasterKeys Pro S. Of these, the Novatouch has been the most popular choice to receive the Norbatouch treatment, as it offers Topre switches with MX-compatible sliders. Because of that combination of features, however, and the ability to harvest the board’s infamous purple sliders for other Topre builds to enable MX keycap compatibility, its price on the secondary market is skyrocketing. The MasterKeys Pro S is the easiest to find and cheapest to purchase, so if we’re willing to do the necessary surgery on the MasterKeys, it can serve as a good base for the build.

And surgery will be necessary. As is typical of OEM boards, the stabilizers are loud and rattle with every keypress, so we’ll need to mod and/or replace the stabilizers. The MasterKeys Pro S line uses Cherry switches, and this particular donor board has Cherry Blues, so we’re going to have to desolder the board to put new switches in. Finally, to even accomplish either of these improvements, we’ll first need to disassemble the MasterKeys Pro S.

Disassembling a MasterKeys Pro S

The patient is ready.

After removing the keycaps, we get our first look at the plate for the board. It’s an aluminum plate, with
plate-mount stabilizers.

Flipping the board over, we can begin disassembly. There are four screws to remove, two of which are visible (green arrows), and two of which are hidden under stickers (red arrows).

Next, we have to separate the top and bottom halves of the case. The two halves of the plastic case are held together by little tabs along the inside of the seam between the halves. To separate the halves, I used an old credit card wedged into the seam along the back of the case, and worked the card along the seam to pop the tabs out of their holes.

Eventually, once you’ve separated the two case halves along the back, you can gently apply force (and more prying with a credit card) to separate the halves along the other three case sides. To give you some idea of what you’re prying apart, here’s a look at the tabs on the inside edge of the top half of the case.

Next, there are two screws attaching the PCB/plate assembly to the bottom half of the case.

Once those two screws are removed, you can now separate the PCB/plate assembly from the bottom half of the case, but be careful - the USB cable port is still attached to the bottom half of the case by two more screws, which you will also have to remove.


At this point, we’re left with just the PCB/plate assembly, and there are no more screws to remove…

…but there is one last gotcha (after desoldering switches, which we’ll talk about in a moment). On the underside of the plate, there is a metal alignment pin, right next
to the Enter key cutout, that slides into a hole on the PCB. To separate the plate from the PCB, I found I had to rotate the PCB slightly, gently bending it just a little bit so that it would clear the flanged edges of the plate. Here’s what that alignment pin looks like, once you get the plate removed:

Finally, we’ve got the plate and PCB apart!

Desoldering

Before we begin desoldering switches, it’s worth taking a look around the PCB, to identify any potential trouble spots where we might need to exercise extra caution. There was one area that concerned me, right next to the connector for the USB cable (highlighted below with the red circle). The solder joints for this switch sit right next to two solder pads that aren’t connected. We’ll want to be sure that when we solder a new switch into this location, we don’t bridge those pads to the new solder joints.

While we’re inspecting the PCB, there is one more issue I want to highlight. Although it’s not a desoldering issue, and it’s not an issue we need to worry about for this build, it is an issue worth considering for anyone attempting to renovate a MasterKeys board. The MasterKeys PCB has north-facing switch LEDs:

This means that the switches will be oriented “upside-down” relative to their usual orientation.
GMK keycaps will impact north-facing housings on key presses, interfering with both feel and sound.
In the event you want to use GMK keycaps with north-facing switches, the current best solution
is to place washers on the stems of the switches, elevating the keycaps just enough to avoid
impacting the switch housing.

Back to our regularly scheduled program. It’s time to desolder a bunch of Cherry Blues, and for that job, I use a Hakko FR-301 desoldering gun. Expensive, yes, but it makes very short work of a job like this. If you think you might be desoldering more than a small handful of times, I’d strongly recommend it.

If you invest in this tool, here’s a quick primer on the technique I use. I don’t claim this is the best or only way to use this soldering gun, just that it works for me.

  • Set the temperature to 700F, and let the gun come fully up to temperature before using it. You want to work quickly at this temperature to avoid damage to the PCB, but this temperature also allows you to remove solder quickly.
  • I place the tip of the gun on the switch pin and bring it down over the pin to make contact with the solder. As soon I see the solder “give way”, usually a fraction of a second after contact, I immediately trigger the vacuum, working the tip on the gun gently in a circular motion to “mop up” solder, and then pull the gun away. The entire process from first contact to removal of the gun, at this temperature, is no more than three seconds.
  • Clean the tip of the gun periodically, just as you would clean the tip of your soldering iron.
  • If you find that the suction is not working well, there are three likely causes.
    • The suction chamber has filled up with solder. You’ll need to remove the chamber once the solder has cooled down, and pry the solder chunks out of the chamber. I find that it’s best to clean out the chamber every time I get ready to use the gun, before I have turned it on. Ever used a vacuum to clean your rug? Same maintenance idea - you’ll get better suction if the chamber is empty.
    • The chamber is not seated properly in the top of the gun. Both ends need to be properly seated for good suction to be produced.
    • The little white pad at the butt end of the chamber is completely covered with solder dust and grime, and needs to be replaced.
  • Sometimes, even after desoldering, a switch doesn’t want to come out easily. In this case, don’t apply force - you can easily damage the PCB. The likely cause is that a bit of solder is still attaching the switch to the PCB. In this case, the solution is counterintuitive, but it really works - add new solder and redo the solder joint, and then apply the desoldering gun again on the new joint.
  • Use the included wire to clean out the desoldering gun nozzle before it cools down and you store it, and do this every time you’ve finished a session with the gun. This helps to prevent any buildup of solder residue inside the nozzle.
  • Be aware that all solder is not created equal. In this particular case, the difference in cleanliness and flow between the OEM solder and the new Kester 63/37 solder I used was significant - the latter flowed much more cleanly, and desoldered much more easily.

Goodbye, Cherry Blues.

Switches and mods

To replace the clickies, I opted for silent tactile switches, the V2 Zilents. It’s worth noting at this stage that the Zilents have clear housings, which is relevant if you care about the built-in per-key RGB supported by the MasterKeys RGB PCB (I’ll also note in passing that the MasterKeys Pro S comes in two models, one with per-key RGB, and one with per-key white LEDs). Here are the switches after disassembly, in preparation for lubing.

Using a dental applicator, I applied Tribosys 3204 to the housing rails and the stems. I don’t apply any
lube to the stem legs with the bump, to avoid losing any of the tactility. For the springs, I tub lube with Krytox GPL 104, about 1 drop per 6 springs, and give it a good 2-3 minute shake, using tweezers to remove the springs when I’m done. If you tub lube, note that as you remove springs from the tub, you’ll eventually reach a point where your tub contains only intertwined springs. Be gentle when you separate the springs, and remember that tweezers are your friends.

After reassembling the switches, there’s one last task we have to do to ready them for installation and soldering. The MasterKeys PCB does not have mounting holes for the plastic switch pins, so in order to use Zilents, which do have these pins, we’ll have to clip the pins off, flush to the switch housing to ensure that the switches will sit properly on the PCB. Flush cutters are essential for this task. Here’s a before-and-after shot of one Zilent switch - the pins sit on either side of the central mounting post in the first picture, and have been removed with flush cutters in the second picture.


Stabilizers and mods

The OEM plate-mount stabilizers that came with the CoolerMaster were rattly, and lubing wasn’t going to be sufficient; part of the rattle was due to a loose fit on the plate. To resolve that, I switched to GMK plate-mount stabilizers, which had a tighter fit on the plate.

For plate-mount stabs, I used the same methods I employed with the Phantom build - I clipped all four legs of each stab stems, lubed the stab stems, housings, and wires, and performed the @walkerstop O-ring mod. I find that with plate-mount stabs, the O-ring mod is essential to address upstroke noise, and as with the Phantom build, it made a huge difference here. The reason I know it made a huge difference is that I first tried both the OEM and the GMK stabs without that mod, and the upstroke noise was quite harsh, particularly for the spacebar. With the O-ring mod in place, there is no upstroke noise. It’s magical. I really wish GMK screw-in stabs had the same internal geometry as the plate-mount stabs, because I would love to apply this mod on those stabs as well.

It’s not clear to me that there is any stab impact on the PCB when plate-mount stabs are used, but out of an abundance of caution, I used gaffer tape for a bandaid mod. I will say that if you’re doing the bandaid mod, it’s quite convenient when the PCB has graphics showing exactly where the switches and stabilizers sit.

PCB/plate dampening

After placing a few switches at the corners of the plate and at a few locations in the interior of the board, and double-checking to make sure everything was seated and aligned properly, I soldered them in place. This is a good time to address sound dampening for the plate, while we still have access to the gap between the plate and PCB.

In the past, I’ve used thin strips of Sorbothane, placed between the plate and PCB along the gaps between switches, to dampen plate ping. This has worked, but in the past I’ve done this before any soldering takes place. Sorbothane works best under a bit of compressive load, but that’s problematic, since the same load makes it difficult to get switches properly seated on the PCB for soldering when the Sorbo is “pushing back” as you try to solder. I used this build as an opportunity to try @donpark’s Sorbothane strut mod, which involves pressing small pieces of Sorbothane into the gap between the PCB and plate after a few switches have been soldered in.

After cutting a few very small squares of Sorbothane, as in the picture above, I used tweezers to push them into place at various points between the plate and PCB, making sure that their placement would not interfere with switch installation. It’s almost impossible to see the Sorbo in pictures once it’s been installed, but trust me - it’s there, right underneath the plate. Here’s one example:

Doing the dampening in this way, it’s also easy to test the sound before and after the mod, by rapping the plate with your knuckle. In this case, putting 6-7 of these little squares in was enough to remove all of the ping and introduce a more bassy tone.

Once the Sorbothane struts are in, it remains to place and solder all of the remaining switches. With that task done, our PCB/plate assembly is now ready for the Norbatouch treatment.

Norbatouch installation

Because our hypothetical history is close to the real one, we’ll have to go with the “Aerospace Aluminum” finish. The top and bottom halves of the case are held together by eight screws. Also, gotta love the Pi.

Also, gotta love the little details - @Norbauer kindly includes extra bumpers and screws for assembly,
as well as extra wrenches. By the way, if you’ve been keeping the MasterKeys screws around for reassembly, no worries; you’re not going to need them anymore.

As with the Norbatouch R2.5 I covered in a previous build log, we’re going to want to apply a sound dampening treatment to the case. 0.1" Sorbothane wasn’t enough to make good contact with the underside of the PCB and the case, but stacking two layers was enough:

So, we need a bunch of 0.2" packets of Sorbothane. I quickly cut eight approximately-equal sized strips of 0.1" Sorbo, no need to get too fussy with measurements:

From there, I stacked the strips in pairs, removing the plastic backing from the sides that make contact with each other, while leaving the plastic backing on the other sides for the moment. This makes it easier to handle the Sorbothane while stacking.

And there we are, four packets of 0.2" Sorbothane. All that’s left is to peel the remaining plastic backing and wrap the stacks in gaffer tape.

Before we place the Sorbothane packets in the bottom of the case, we’ll first need to attach the USB connector to the case with two screws.


At this point, you can place the packets in the case. I’ve tried a few different arrangements, and haven’t noticed any difference in sound dampening quality. The only important thing is to be sure that you’re getting good contact with the underside of the PCB and the case. Here, I’ve opened the case back up to show the packets after they’ve spent some time under compression - you can see the switch pin indentations.

Once the packets are in place and the USB connector is screwed to the case, two more screws need to be installed to keep the plate from moving around, at least if you’re not using any case dampening material. I found that putting the screws in gave me a little better compression with 0.2" of Sorbothane, but I also found that because the screws are offset from the center of the case, screwing too tightly led to the Sorbothane pushing the lower half of the PCB/plate assembly upward to compensate for the pressure. You can see that effect in the photo below, on the right side of the case.

You can back off the screw tension up to a point to resolve that, but the recessed areas on the underside of the top of the case are only so deep, and eventually, if the screw isn’t tight enough, the top half of the case won’t seat cleanly on the bottom. If you’re using Sorbothane, or shelf liner, or some other dampening material, I’d recommend trying assembly with and without these two screws, to see which you prefer.

With the board assembled, it’s worth noting that you have one more choice to make. If you want to fully exploit the per-key RGB built into the MasterKeys PCB, you’ll have to use the CoolerMaster software to control the lighting behavior, as well as the “CoolerMaster” key commands, which are handled natively by the board’s hardware, but you’ll give up full board programmability if you choose that route. Conversely, if you want full programmability, you can use a Hasu USB-to-USB adapter to get the QMK features you know and love, except for lighting control, and except for control of the “CoolerMaster” key, for which keypresses are never passed to USB. Finally, if you’re feeling especially hardcore, it’s worth mentioning that there also exists a CoolerMaster Windows API for controlling the MasterKeys Pro S - but that software runs on the host, not on the keyboard, and requires you to write and compile code. Pick your poison.

References

It’s always nice when someone else has worked out the details for OEM disassembly. Here are the references I used for this project:

Lessons learned

  • As expected, the Sorbothane strut mod worked well. 6 small pieces inserted into strategic points between the plate and PCB deadened nearly all of the plate ping, and installing these pieces after a few switches were already soldered in was a much easier process. Sorbothane packets between the PCB and case took care of all remaining metallic ping.
  • 3203 is good lube, but I think I prefer 3204 on silent switches. 3203 seems to let more of the feel and sound of the switch come through, which isn’t necessarily what I’m after when I’m using silent switches. For pretty much the same reason, I suspect Christo 111 and 112 will probably not be ideal choices for silent switches either. As with all things feel-related, YMMV.
  • For GMK plate-mount stabs, clipping all four legs, lubing, and O-ring modding are the way to go. The default CoolerMaster stabs were rattly and loose, even after clipping and ample lubing, and the first GMK plate-mount installation with only two legs clipped and no O-ring mods suffered greatly from upstroke clack. With all four legs gone and O-rings in place, the stabilized keys sound and feel much like all the others, which is exactly where we want to be.
  • With the desoldering gun, it really wasn’t a big deal at all to rebuild the stabs a couple of times after the initial installation, to get things dialed in just right. Sure, it also helped that only the five stabilized switches needed to come off (plate-mount stabs FTW), but even so, the entire disassembly/O-ring mod/rebuild cycle took no more than an hour.
  • It’s too bad that XDA is one of my least favorite profiles for typing, because it really does look nice on this board, and the XDA Oblique legends really do create nostalgia for the keyboards from an earlier era. So it goes. On the other hand, we did say this timeline was only slightly different from the original…
  • For future Norbatouch + MasterKeys builds, it’s worth remembering that the PCB has north-facing switches, so GMK caps are going to require the washer treatment for the switch stems, at least if you want consistent feel and sound from row to row.
  • The Norbatouch Pi housing is a worthy successor to the R2.5. The anodization on this case has a lovely, very fine light-reflecting grain that plays with the light in pleasing ways. Chamfering and corners are perfect. The screw hole tightness issue from the R2.5 build has been resolved; no problem with tolerances here. Finally, the inclusion of hex wrenches, extra screws, and extra bumpons is a small but welcome detail. It only remains to convince Ryan to use magnetic screws, and our work here is done!

To think that some people believe alternate timelines are nothing more than science fiction…

Specifications

donor board: CoolerMaster MasterKeys Pro S RGB
case: Norbatouch Pi (Aerospace Aluminum finish)
case dampening: 0.1" 40 Duro Sorbothane, stacked to 0.2", wrapped with gaffer tape
PCB: donor
plate: donor
LEDs: per-key RGB, integrated in PCB
plate/PCB dampening: @donpark Sorbothane strut mod, 0.25" 50 Duro Sorbothane
stabilizers: GMK plate-mount
stabilizer mods: clipped (all four legs), lubed with SuperLube,
  O-ring modded, and bandaid-style mod with gaffer tape
switches: replaced donor Cherry Blues with 65g V2 Zilents
switch lubing:
- manually lubed housings/stems with Tribosys 3203
- tub lubed springs with Krytox GPL 104
keycaps: XDA Oblique
HxWxD (without feet or caps): 1.0"x14.63"x5.75"
HxWxD (without caps): 1.63"x14.63"x5.75"
HxWxD: 1.93"x14.63"x5.75"
assembled weight: 4.74 lb
11 Likes

Oh yes another sweet build.

I enjoy every one of them and I’m grabbing popcorn/beer and enjoy each one that comes out !

1 Like

Thank you very much for this great build log!
Very nice to read and instructive as always :wink:

Didn’t know that Norbatouch case could accept Cherry MX base PCBs!
I really love @norbauer case designs, your last keyboard is simply gorgeous!

2 Likes

Yes! Keep the builds coming. Another great build man, really like this one although I would have enjoyed to see it be a Topre build lol

1 Like

Good things come to those who wait…

4 Likes

Build #20: KBD67 Jamón

Some good friends of ours make artisanal salumi for a living, which means that every so often, out of the goodness of their hearts, the contents of our fridge look like this. What can I say? It’s truly a glorious thing.

Suppose these were your friends, and, upon discovering your second life as a keyboard builder, these friends requested a build from you. What theme should this build have? What current keyset seems as apropos as any keyset could possibly be? What set might @Zambumon ask us to please consider?

Let’s get to the build. To stay true to the color scheme, I selected a kbd67 kit in burgundy, with a brass plate. The kbd67 came with PCB snap-in stabs, and as these didn’t seem appreciably different from GMK PCB snap-in stabs, I used them. The standard layout for the kbd67 uses 3x2u and 1x6.25u stabilizers, which have been disassembled here.

The stab stems, after clipping.

Recently, I’ve been getting good results with Christo-Lube 111 for stabilizers, and I used that lubricant here. 111 is very forgiving on stabs, and can really be slathered on. Here are a couple of looks at a stabilizer stem with 111 applied; this is substantially more lube than I would use if I was using SuperLube or some other dielectric grease.


You can also see that a significant amount of 111 is being used in the stab housings as well. Granted, 111 is white, and is more visible than SuperLube would be in a similar photo, but take my word for it; liberal application of 111 on stabs is just fine.

Let’s have our first look at the brass plate. While the finish on this is noticeably rougher than you might expect from a plate billed as “PVD brass”, it’s not bad. The kbd67 supports split spacebar and ISO layouts, so the plate does have some swiss cheese action, particularly on the bottom row.

Because of that bottom row, and because it’s a wise thing to do in any case, we double check to make sure we’ll be installing stabilizers in the proper locations before clipping them into place.


Before starting the build, I asked our friends a few questions to try to dial in their preferences, since this was going to be their first custom keyboard experience. One of those questions involved sound - on a scale of 1-10, where 1, 5, and 10 were these sound tests of Healios, Creams, and Holy Pandas, respectively, what seemed acceptable and/or desirable?

The answer: 7-10! I decided to split the difference, and take advantage the opportunity to build with a switch I hadn’t tried yet: 67g V2 Zealios. Tactile and clacky, to be sure, but to my ears and fingers, just a half-step dialed back from Holy Pandas.

These days, I tend to set up four Tupperware bins for switch disassembly. One of the bins is reserved for tub-lubing springs, and I mark it so I know which of the bins is “wet”.

I prefer to lube switches in batches of 15-20, so that I can take breaks as needed to stretch my legs, make dinner, whatever. Here, I’ve just finished applying 3204 to the bottom housing and tub-lubing the springs with 104, and I’ve used tweezers to put the first spring back in place.

I’ve already showed you how much 111 I use on stabs; here’s how much 3204 I use on switch stems. You can also see that I try to avoid applying any lube to the legs - I want to keep as much of the tactility as I possibly can, even though this requires an extra level of diligence during lubing. Again, it’s good to have opportunities to take breaks and do other things in the middle of a switch lube job…

I was hoping the thumb-bruising experience I had with the tx108se was a one-off, but no. Several of the switches required significant force to be properly seated. But not all of them - the tolerances on this plate’s switch holes were all over the place. Possibly the least consistent plate from hole to hole that I’ve worked with. Here, the stabs and a handful of switches are placed, for a quick bit of initial soldering to establish good fit between the plate and PCB.

Where the magic happens.

We can now resume seating switches, but now is also a good time to address PCB/plate sound dampening.

I’ve pretty much switched over to the @donpark Sorbothane strut mod approach, cutting a few very small squares of Sorbothane, and wedging them into spaces between the plate and PCB. Here’s one of those squares, tucked into the space below the backspace key:

From here, it’s just seating all of those switches in that stubborn plate, more soldering work, and a quick round with a keytester to make sure everything is functioning as expected. The complete PCB/plate assembly:

If the keyboard thing doesn’t work out, maybe there’s a second career as a hibachi.

Let’s get it out there right now - if you’ve never built a kbd67 before, you are going to need sound dampening. Without any treatment, the sound of the board (especially with a brass plate) is harsh, pingy, and hollow. Normally, I use Sorbothane for all sound dampening applications in my builds, but I do like to try new things, and this seemed like a good build to try out craft foam.

Here, after making the cutout for USB jack clearance, I’ve marked the locations of the underglow RGBs on the PCB, in preparation for making more cutouts to allow the LEDs clearance.

Also can’t hurt to avoid undue pressure on the controller or the reset button.

The final foam layout (two sheets, black and white) is held in place by pressure from the PCB. Here, you can see the indentations produced by the switch pins when the plate and PCB are mounted in place:

The kbd67 case separates into two pieces. The plate is attached to the bottom of the case by six screws; the top has cutouts to make room for the screw heads. You then put the top and bottom of the case together, flip it upside down, and use six long screws to attach the case halves.

Before you screw everything together on a kbd67, note that the reset button on the PCB is not accessible once the case is put together, so now is the time to flash new firmware to the PCB if you’re going that route. I’ve learned that lesson the hard way, so in addition to flashing before final assembly, I also make sure the flashed firmware provides the RESET keycode on another layer, so that we don’t have to open it up again to flash it if we don’t want to.

In addition, our friends are Mac users, so I had to spend a bit of time setting up a new keymap with Mac-centric keycodes, something I hadn’t done before, but that wasn’t a big deal. One minor gotcha - the Mission Control and Dashboard function keys aren’t available as QMK keycodes, so strictly speaking, they can’t be built into the firmware in the same way that media control keys can be (this is a simplification of the underlying technical issue, which is described in much more detail on GitHub). However, on a Mac you can use the Keyboard preferences to set up macros to do the same thing, so I just had those function keys send the default macros that the Mac uses. Not perfect, but I suspect most users would never notice.

To complete this entire package of fun, I threw in a Jamon-themed deskpad, and sleeved and soldered a couple of color-appropriate USB cables. Before we partake of a slice or two of fine ham, let’s review.

Lessons learned

  • Thin layers of craft foam, with sufficient pressure between the case and PCB, can do 80-90% of the sound job that Sorbothane does, and for this build, it worked well. With that said, if no metallic ping of any kind is tolerable, then Sorbothane is still the best option.
  • 67g V2 Zealios are definitely heavier-feeling than their V1 counterparts. Neither here nor there, just an observation. The sound is not quite as focused as a Holy Panda, but that’s also just an observation. I find the sound from both switches to be quite pleasing.
  • I glossed over the cable builds, but that was the first time I’ve done that project. If you’re sleeving the cable with paracord, it’s really important to have the ends of the cut cable be flush; otherwise, the wires inside the cable will eventually snag on the paracord as you’re threading it, and at that point, not only is it impossible to proceed further with the sleeving, but any snag will likely crimp the paracord in such a way that no further sleeving attempt will make it past that crimp, either. I found it best to stretch the wire sheath outward to effectively recess the internal wires an 1/8th of an inch or so, to completely avoid the issue.

With that, it’s time to return the favor of meat.

Specifications

case: kbd67 (burgundy, PVD brass weight)
case dampening: two layers of thin craft foam
PCB: kbd67 rev1 non-hotswap USB-C
plate: brass
plate/PCB dampening: 0.25" 50-Duro Sorbothane "struts"
stabilizers: PCB snap-in
stabilizer mods: clipped and lubed with Christo-Lube MCG 111
switches: 67g V2 Zealios
switch mods:
- springs tub-lubed with Krytox GPL 104
- housings and stems hand-lubed with Tribosys 3204
keycaps: GMK Jamón
- base, Jamonelties
HxWxD (without feet or caps): 1.19"x12.19"x4.19"
HxWxD (without caps): 1.25"x12.19"x4.19"
HxWxD: 1.50"x12.19"x4.19"
assembled weight: 3.14 lb
13 Likes

Well done! I hope that cured your friend of the custom keyboard itch.

1 Like

that was a good read

1 Like