Hi, I'm jshufelt

It’s still early, but I’m really liking 111 on the stabs. It doesn’t have the stickiness or density that Permatex or SuperLube have, to the point that I’m tempted to try filling a syringe with 111 and just filling the stab housings that way, rather than painting the lube on. I think that approach would be a complete failure with dielectric grease, but with 111, I think there’s a decent chance it would work well.

But that lack of density and stickiness does lead me to wonder how well it will wear over time - if 111 ends up not working for stabs, I think it will be because it wears off of the contact points more quickly and/or to a greater degree than other greases would. Time will tell.

1 Like

I really do love your build stories, these are very informative and so well written that they are entertaining at the same time.
You inspired me for writing my own build log.

Thank you for sharing all that with us!

1 Like

That’s really great to hear, made my day. Thank you!

1 Like

This Singa build is definitely one of my favorites. I’m really glad you do these build logs!

1 Like

Yellow accents!

2 Likes

Build #19: Norbatouch Pi Aerospace Aluminum

Let’s suppose that in some hypothetical timeline, apart from our own, a well-known fruit-named computer company had made some slightly different design choices for its hardware offerings. Let’s suppose that instead of pursuing a relentless and misguided march towards a featureless plane as the platonic ideal for text input, this company instead acknowledged that its users have fingers, and those fingers (and the minds that guide them) react positively to texture, to feel, to tactile feedback. In this alternate history, imagine that function remains at least competitive in the race towards form. What would the keyboard produced by this company, in this timeline ever so slightly displaced from our own, have looked like?

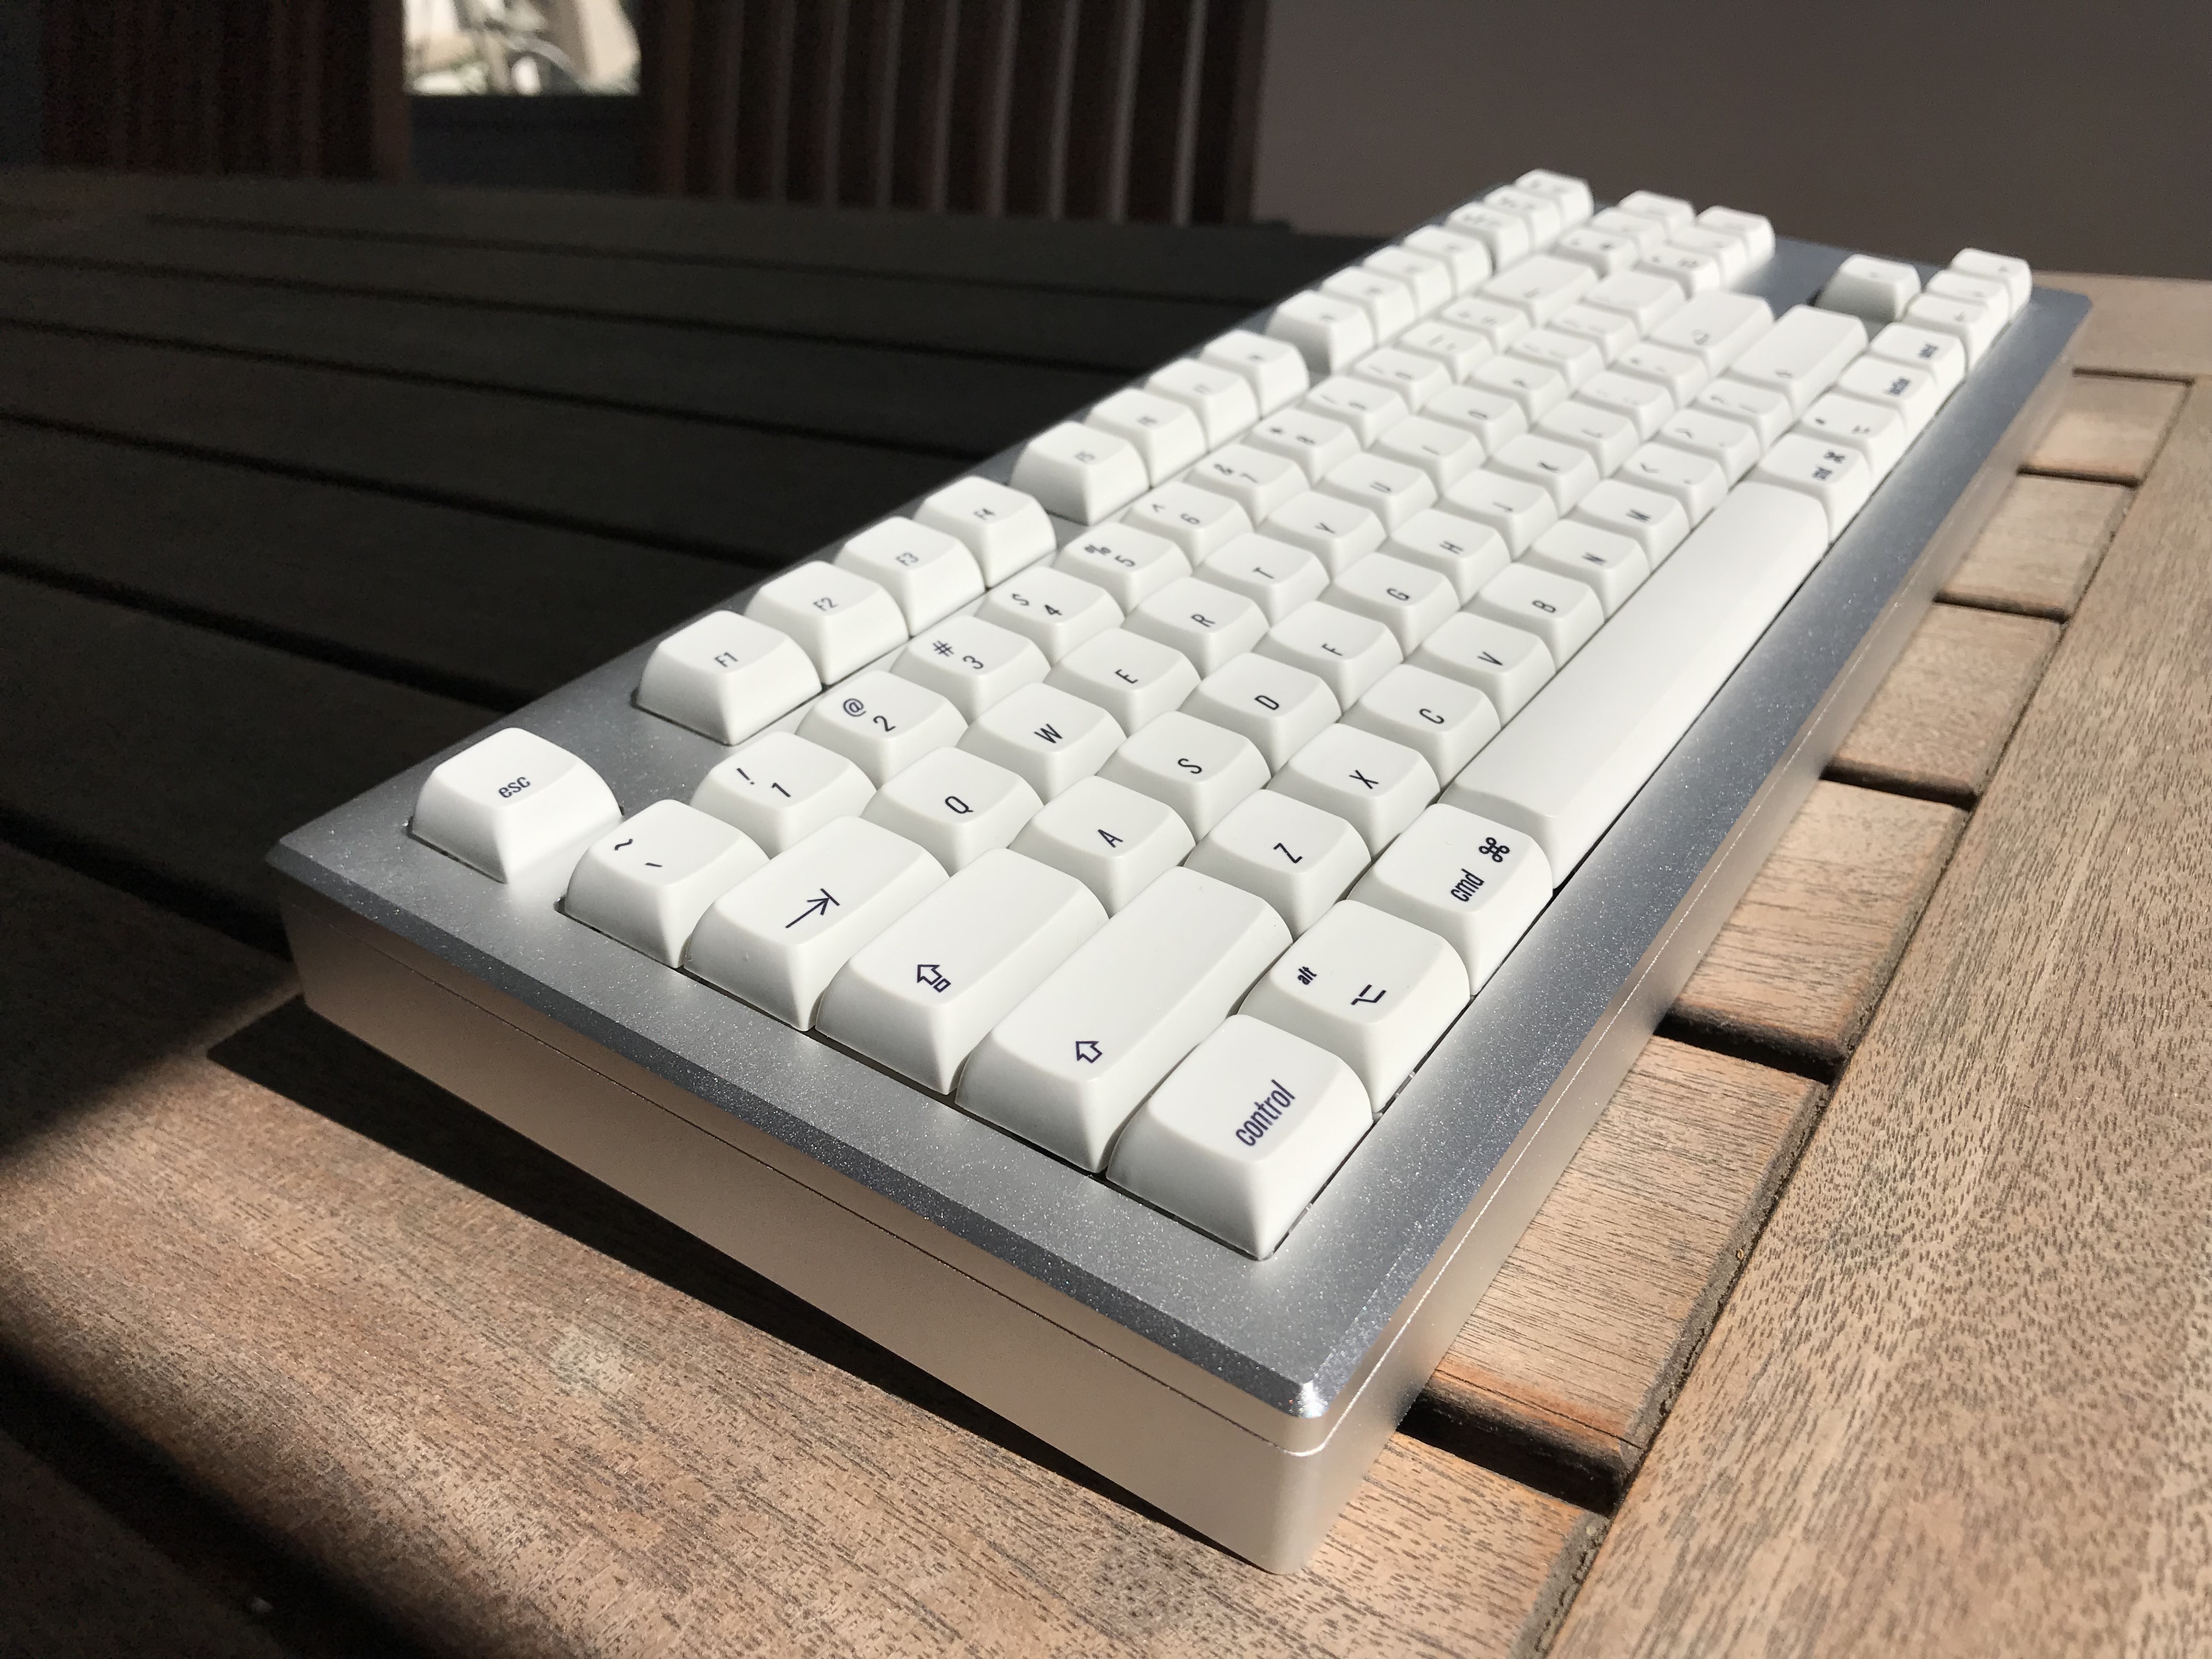
Perhaps it might have looked like the keyboard in this build log. You be the judge.

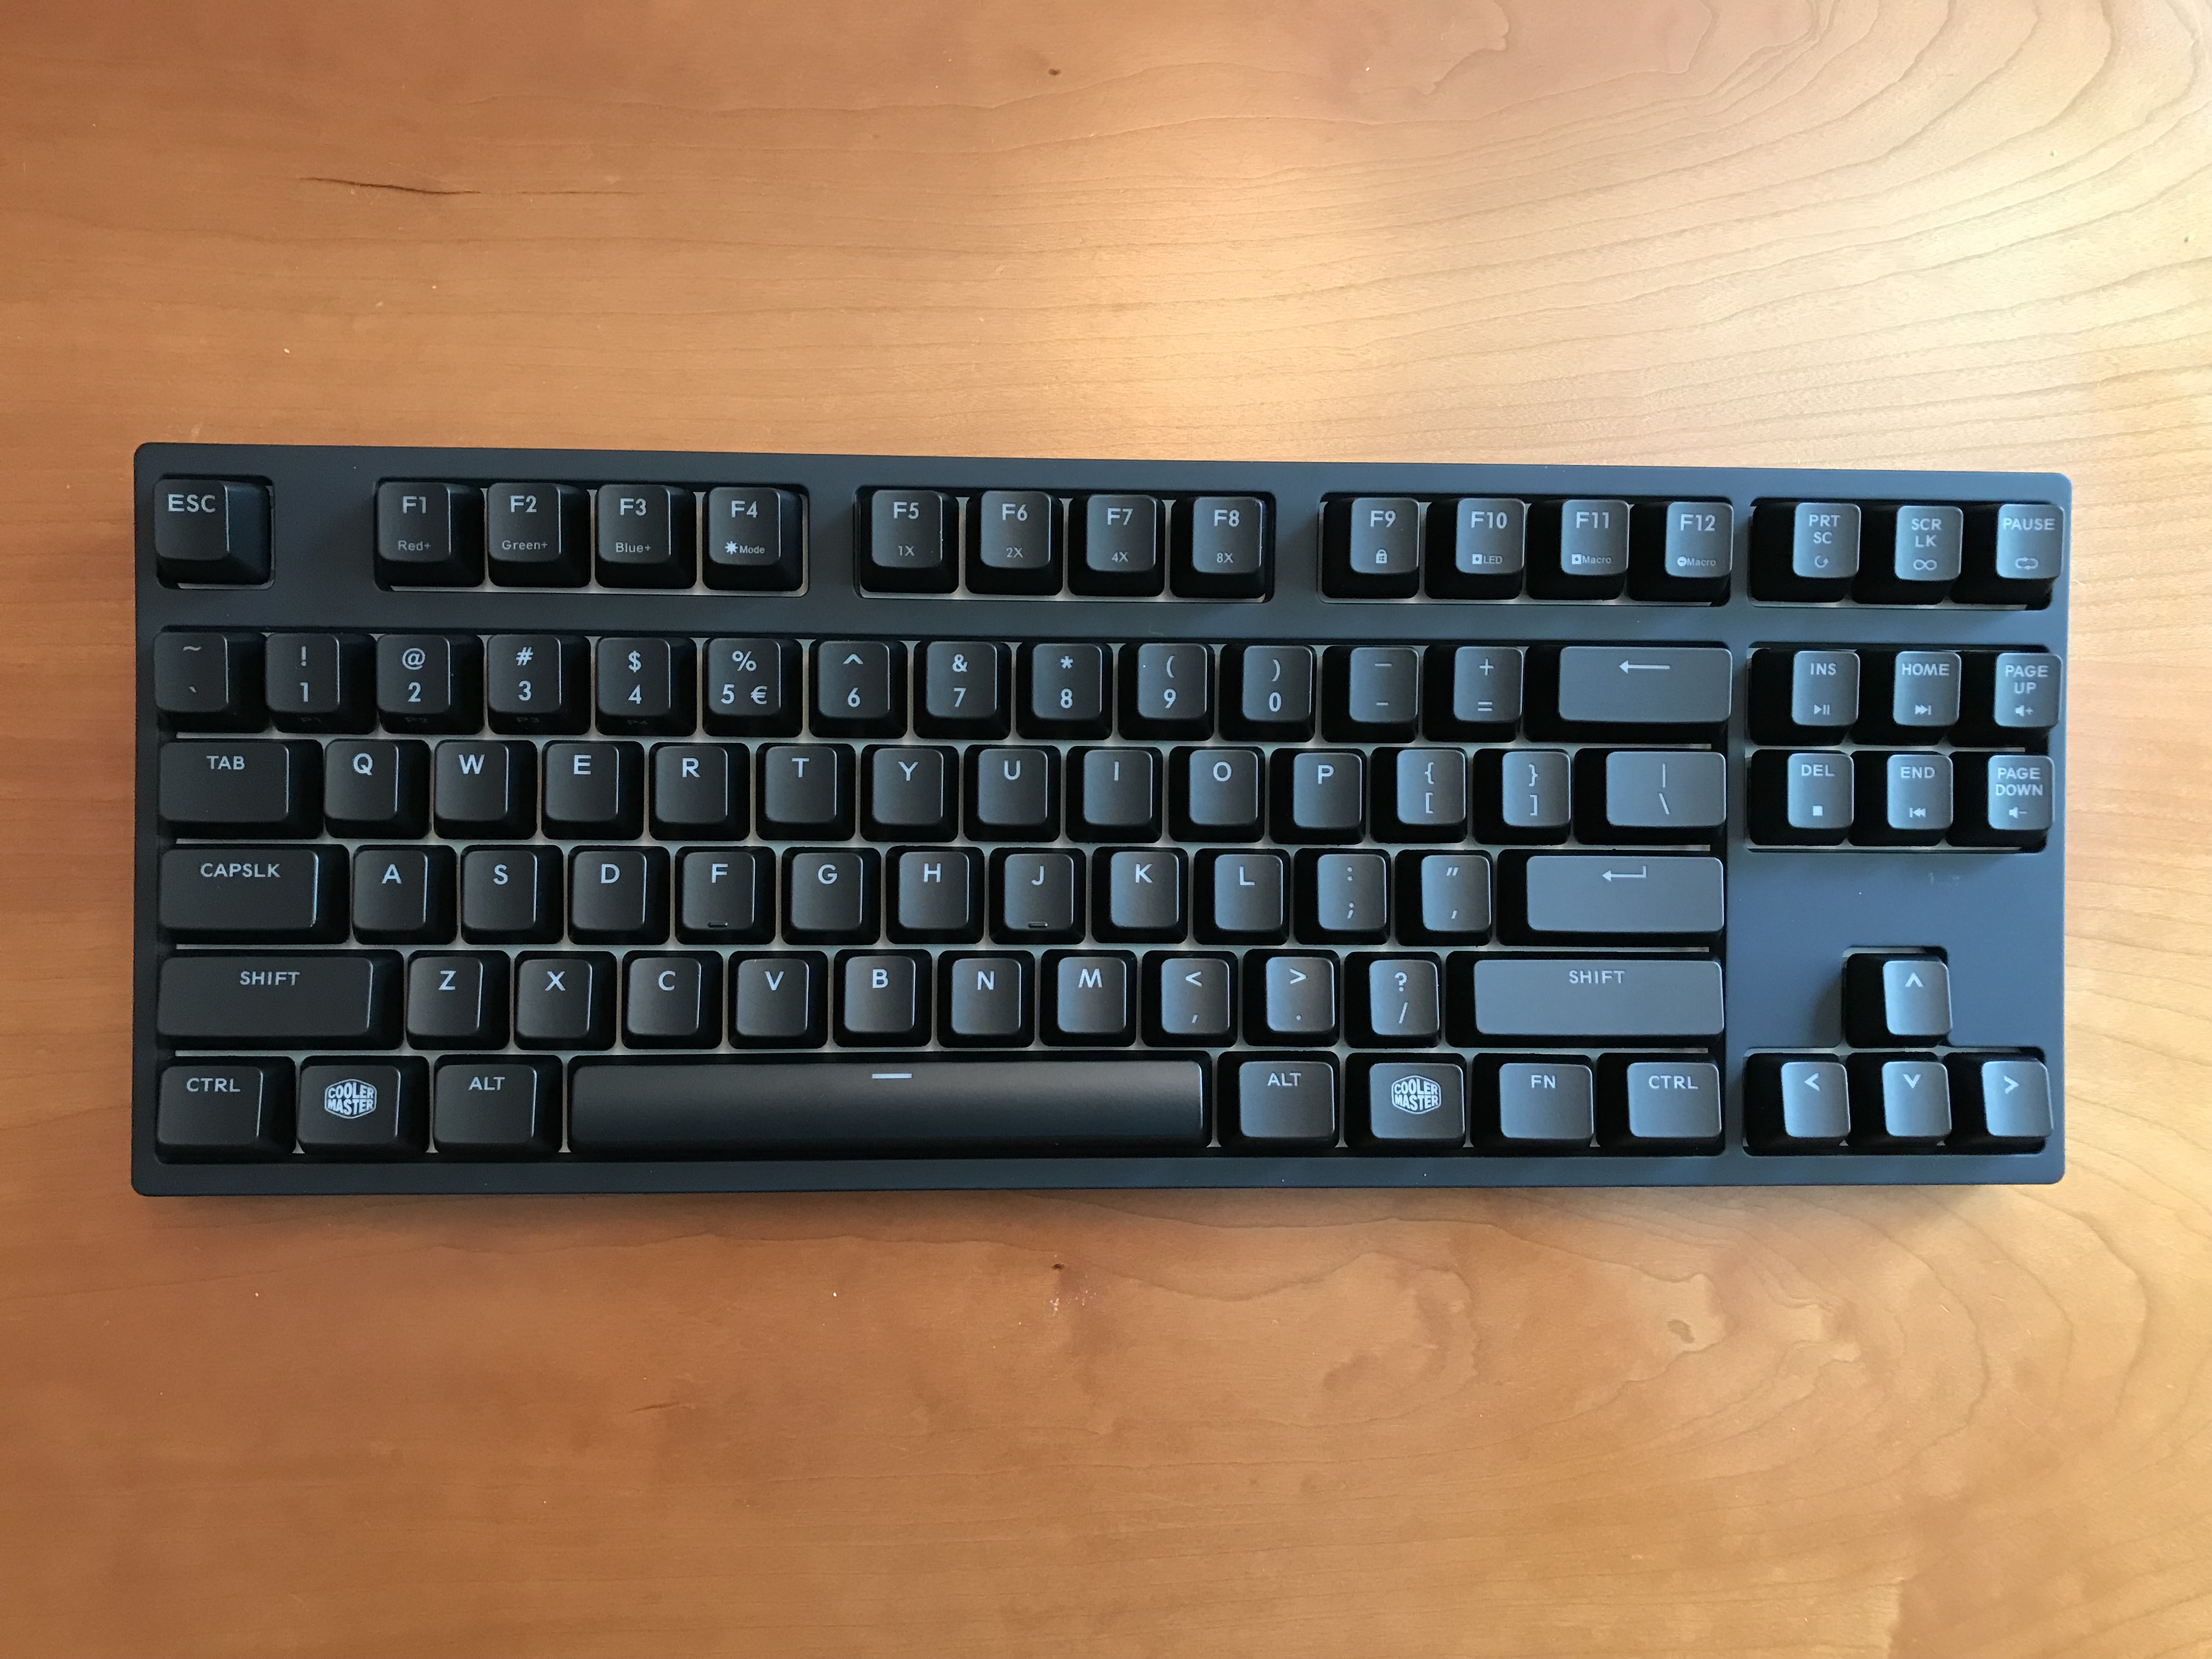
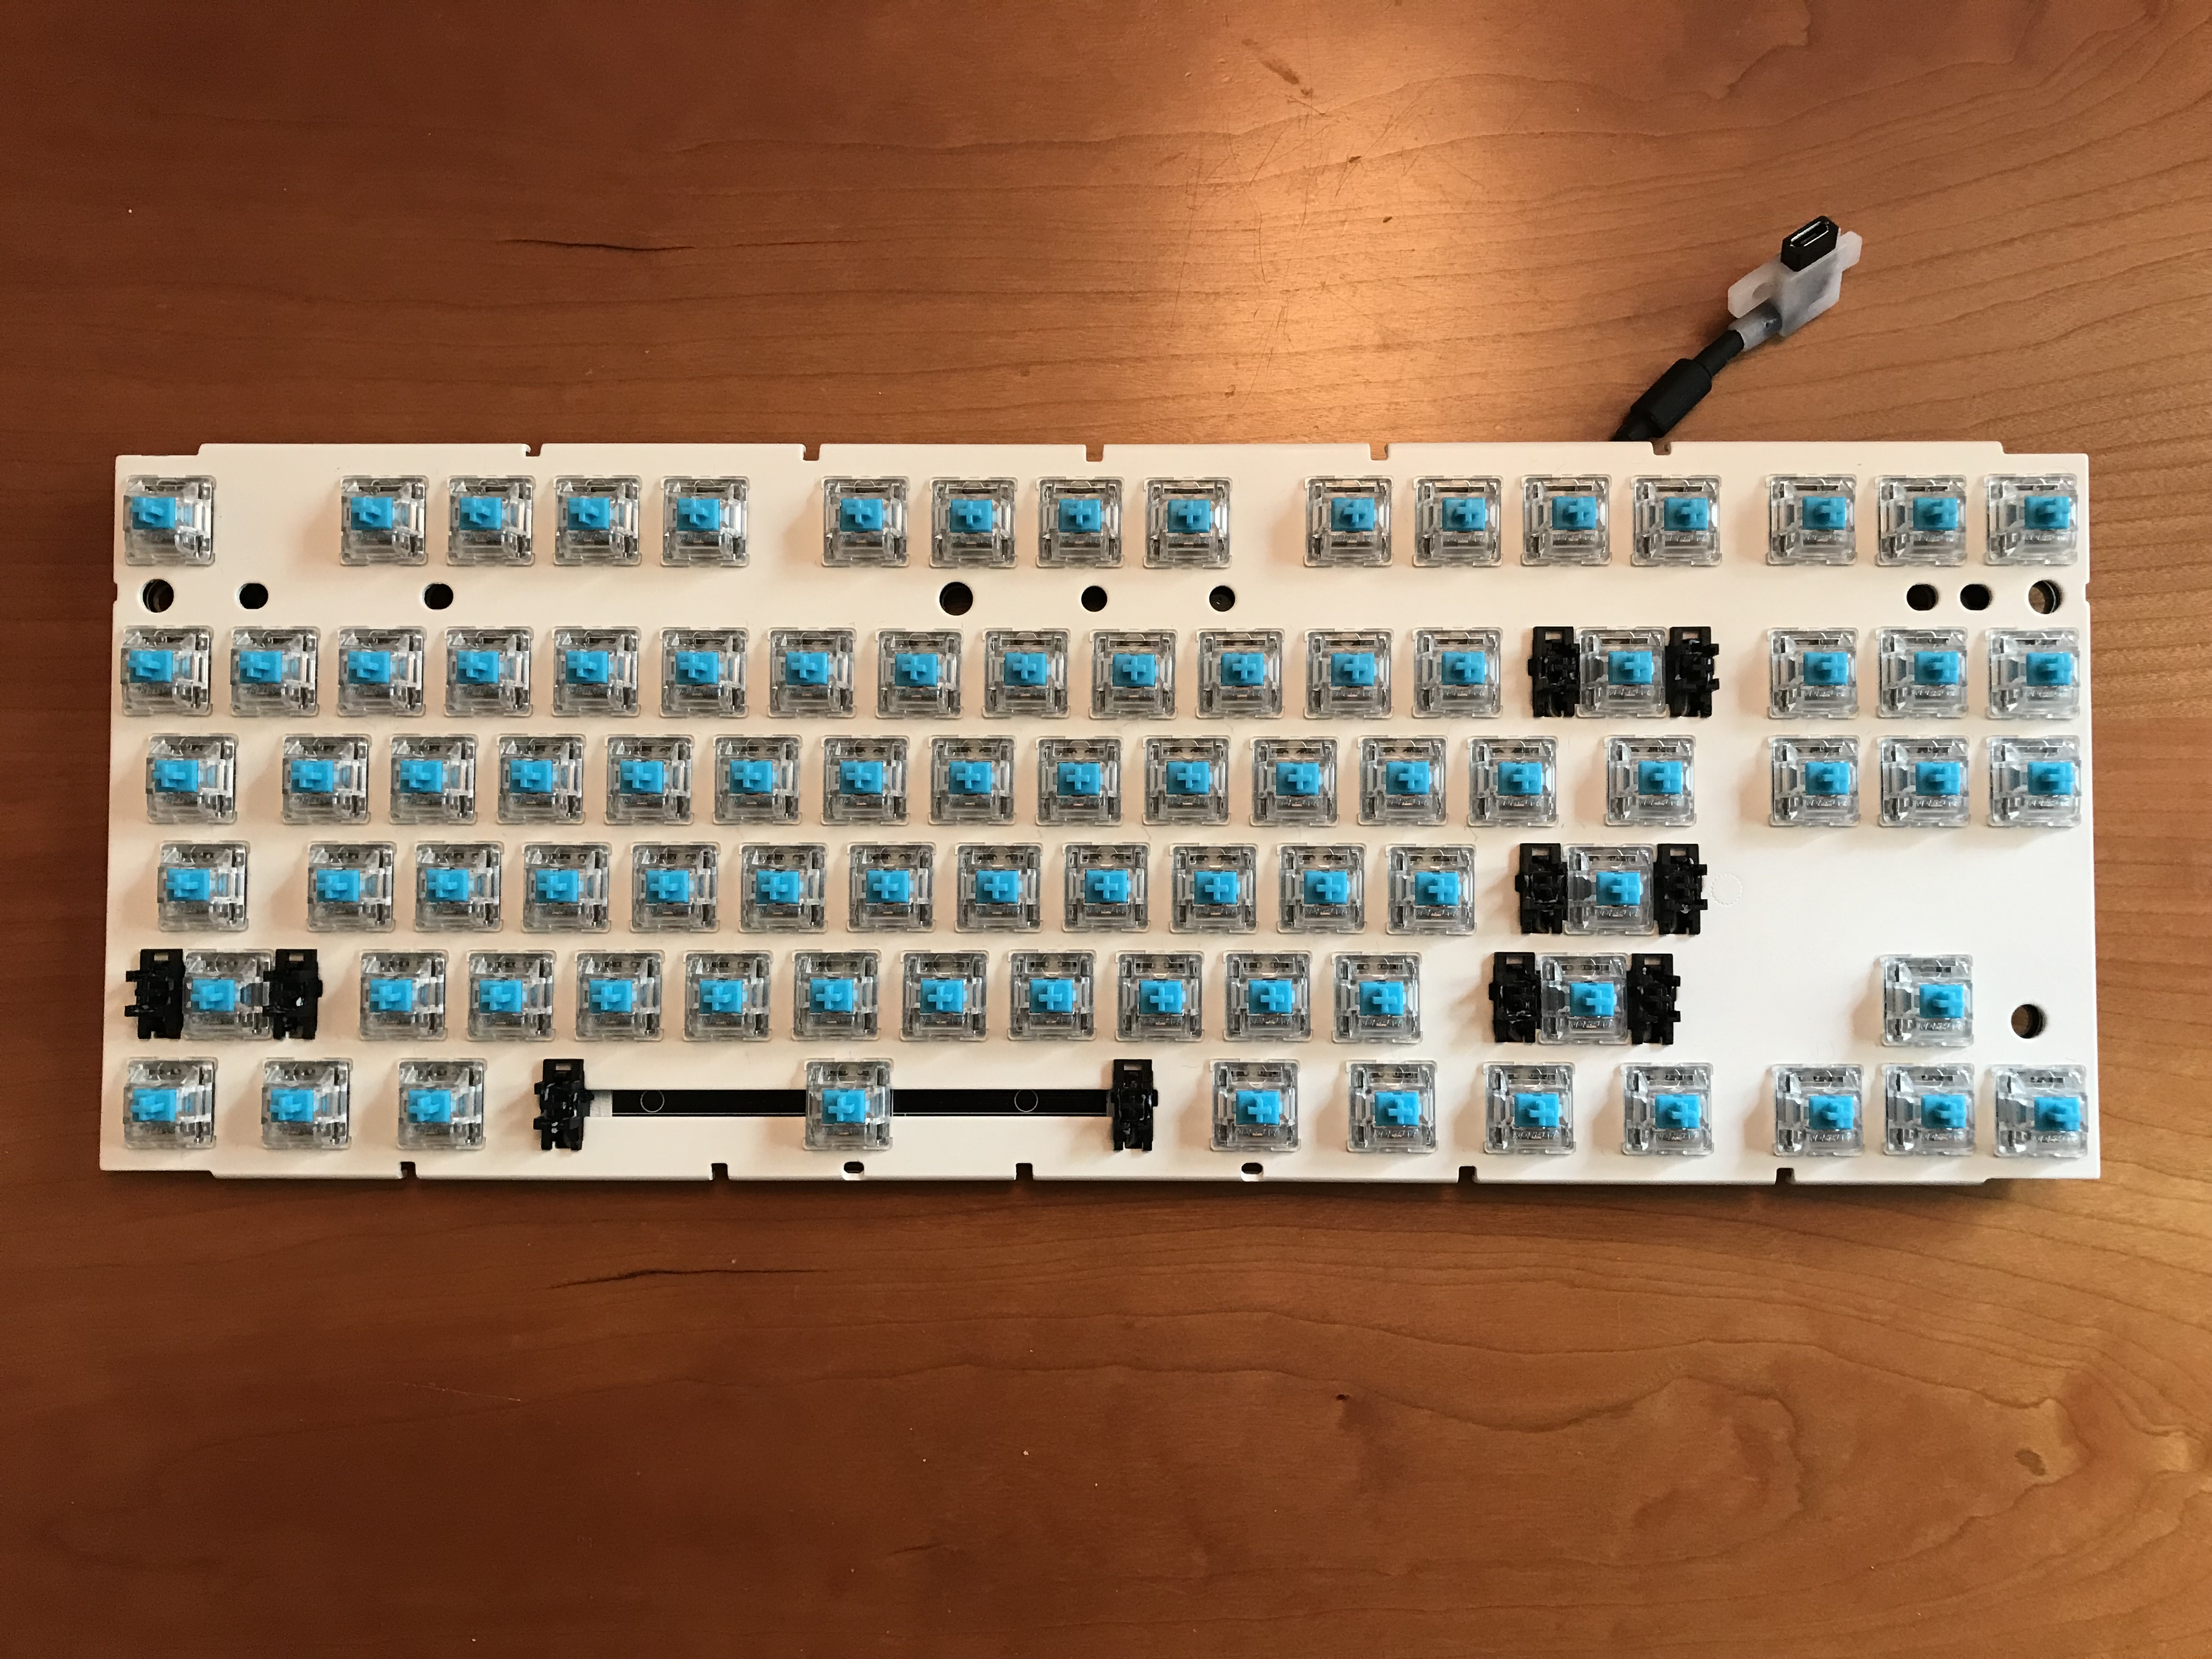
Let’s start by introducing the raw materials for this build as they arrive in pre-op - a CoolerMaster MasterKeys Pro S keyboard, which will be donating its PCB and plate for transplant into a Norbatouch Pi, fresh from group buy.

The Norbatouch housing can accept three discontinued CoolerMaster TKL models: the Novatouch, the Rapid-i, and the MasterKeys Pro S. Of these, the Novatouch has been the most popular choice to receive the Norbatouch treatment, as it offers Topre switches with MX-compatible sliders. Because of that combination of features, however, and the ability to harvest the board’s infamous purple sliders for other Topre builds to enable MX keycap compatibility, its price on the secondary market is skyrocketing. The MasterKeys Pro S is the easiest to find and cheapest to purchase, so if we’re willing to do the necessary surgery on the MasterKeys, it can serve as a good base for the build.

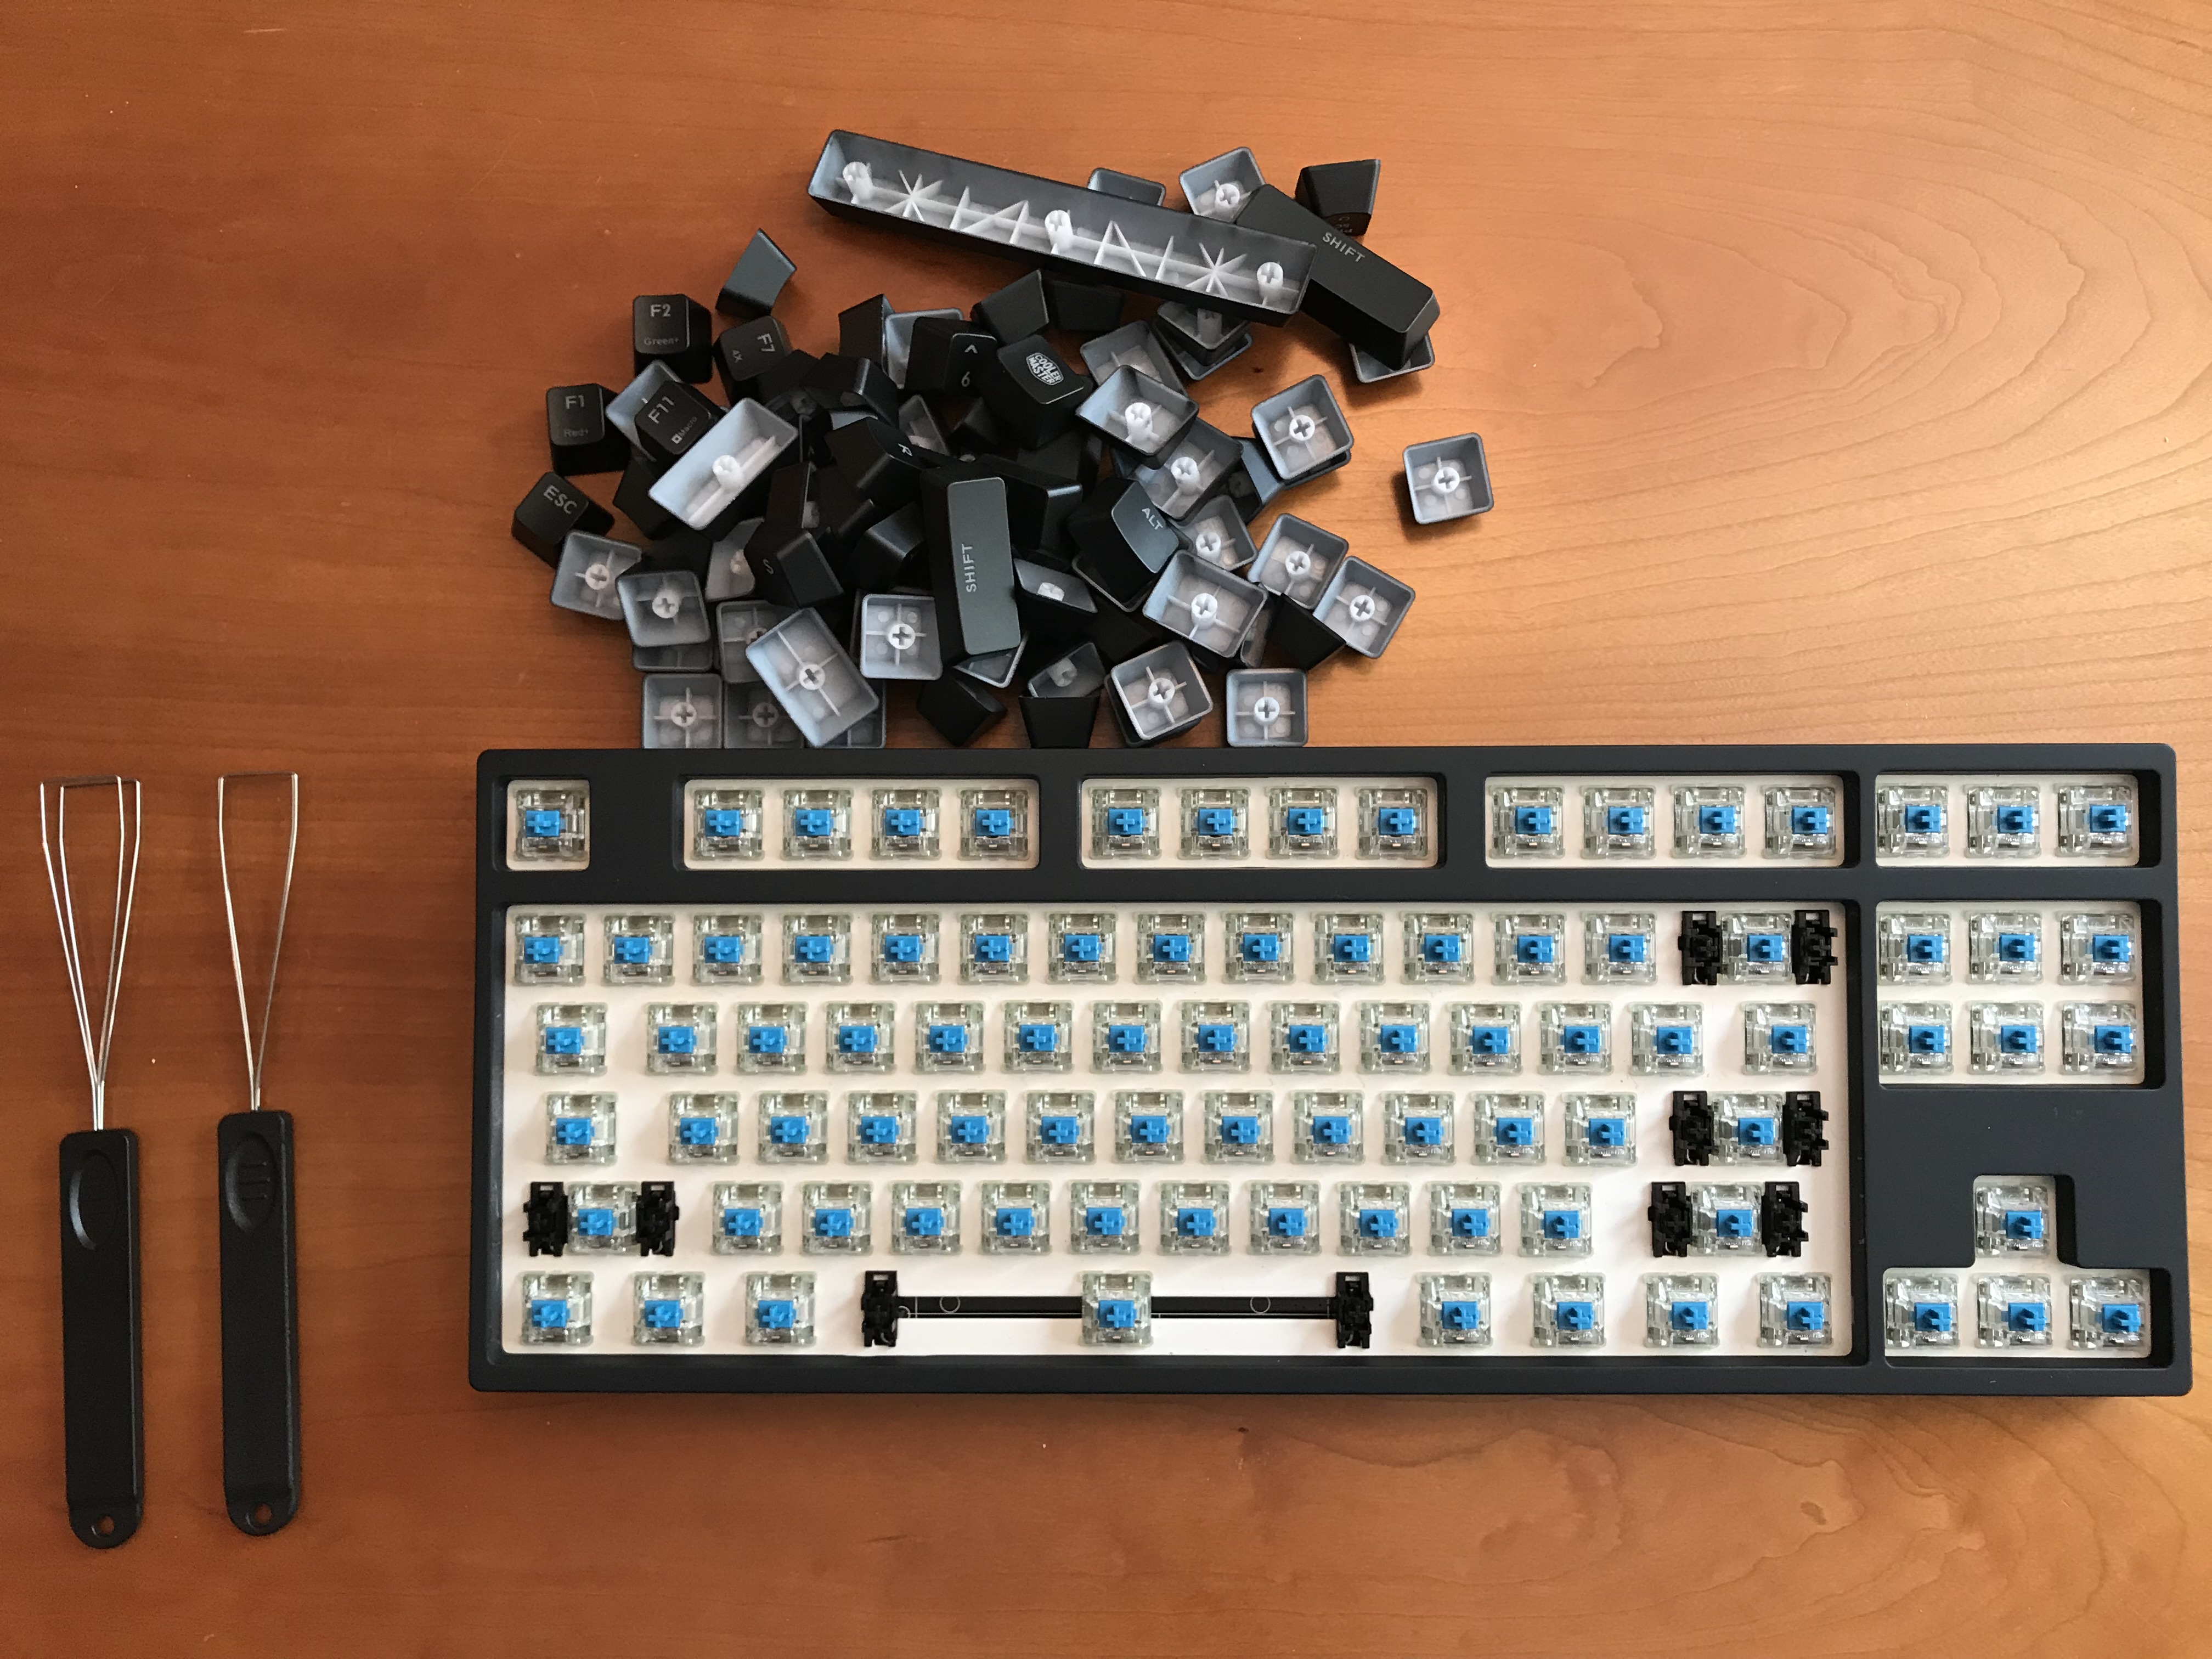
And surgery will be necessary. As is typical of OEM boards, the stabilizers are loud and rattle with every keypress, so we’ll need to mod and/or replace the stabilizers. The MasterKeys Pro S line uses Cherry switches, and this particular donor board has Cherry Blues, so we’re going to have to desolder the board to put new switches in. Finally, to even accomplish either of these improvements, we’ll first need to disassemble the MasterKeys Pro S.

Disassembling a MasterKeys Pro S

The patient is ready.

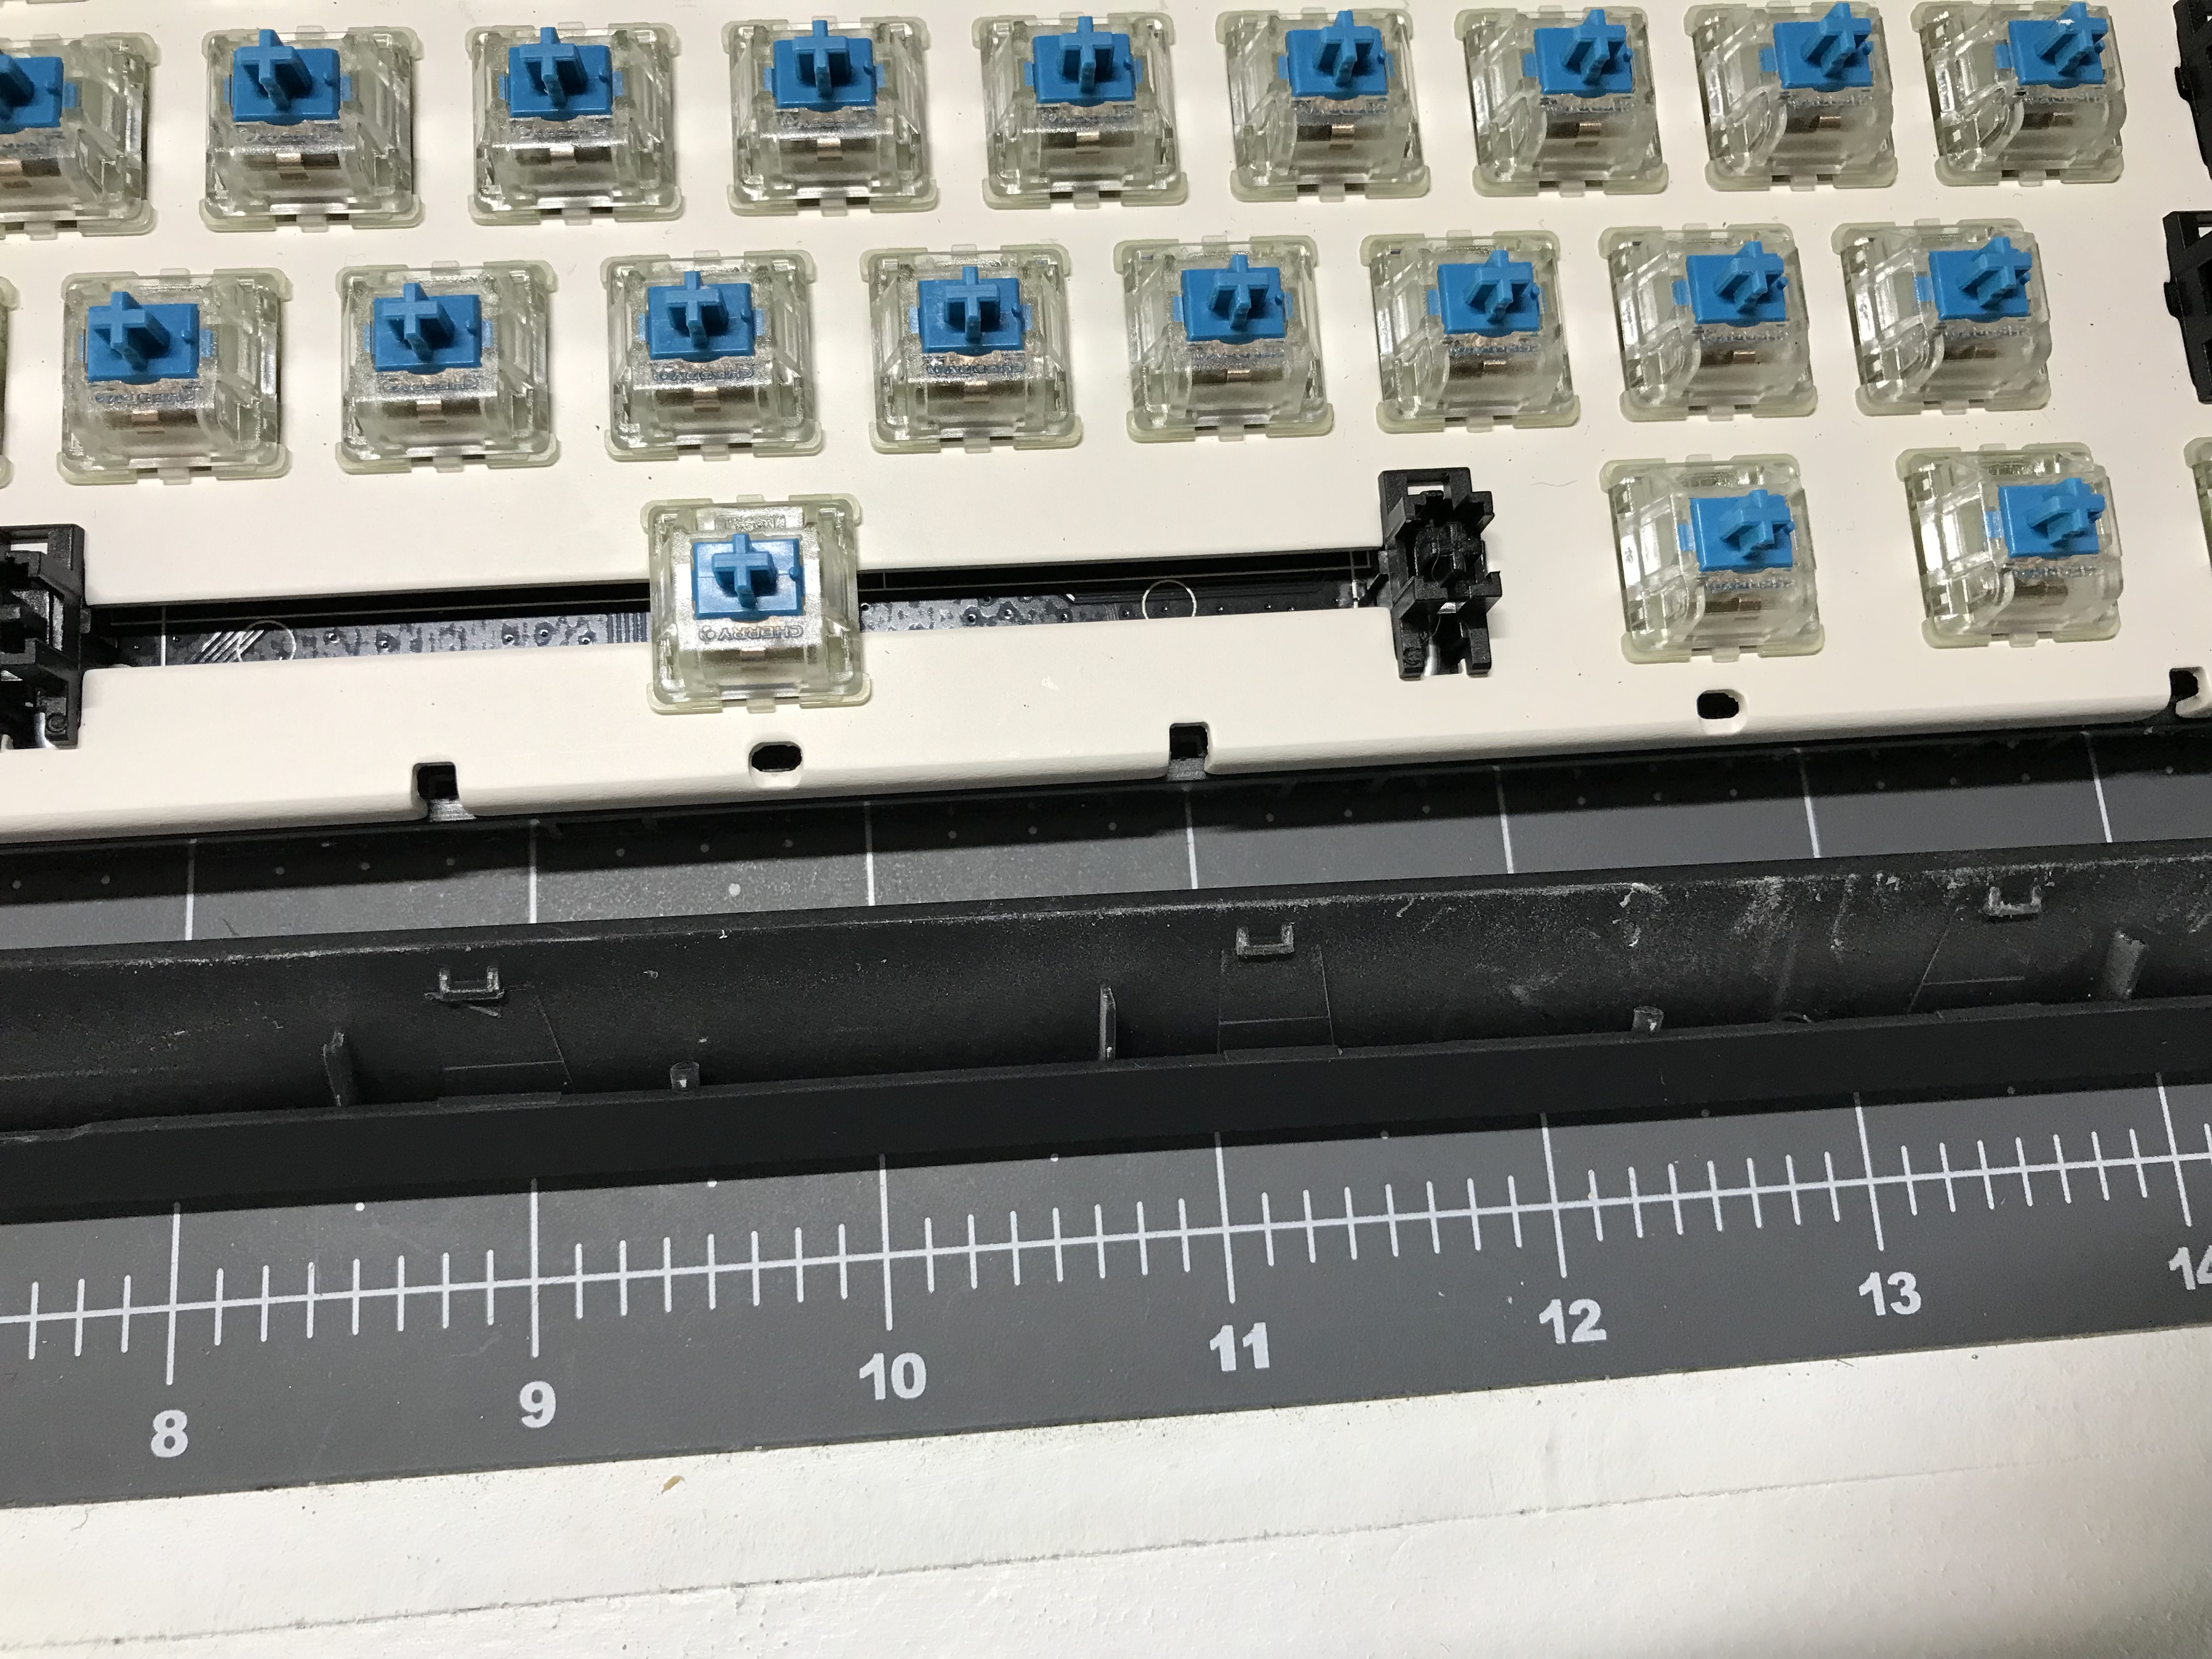
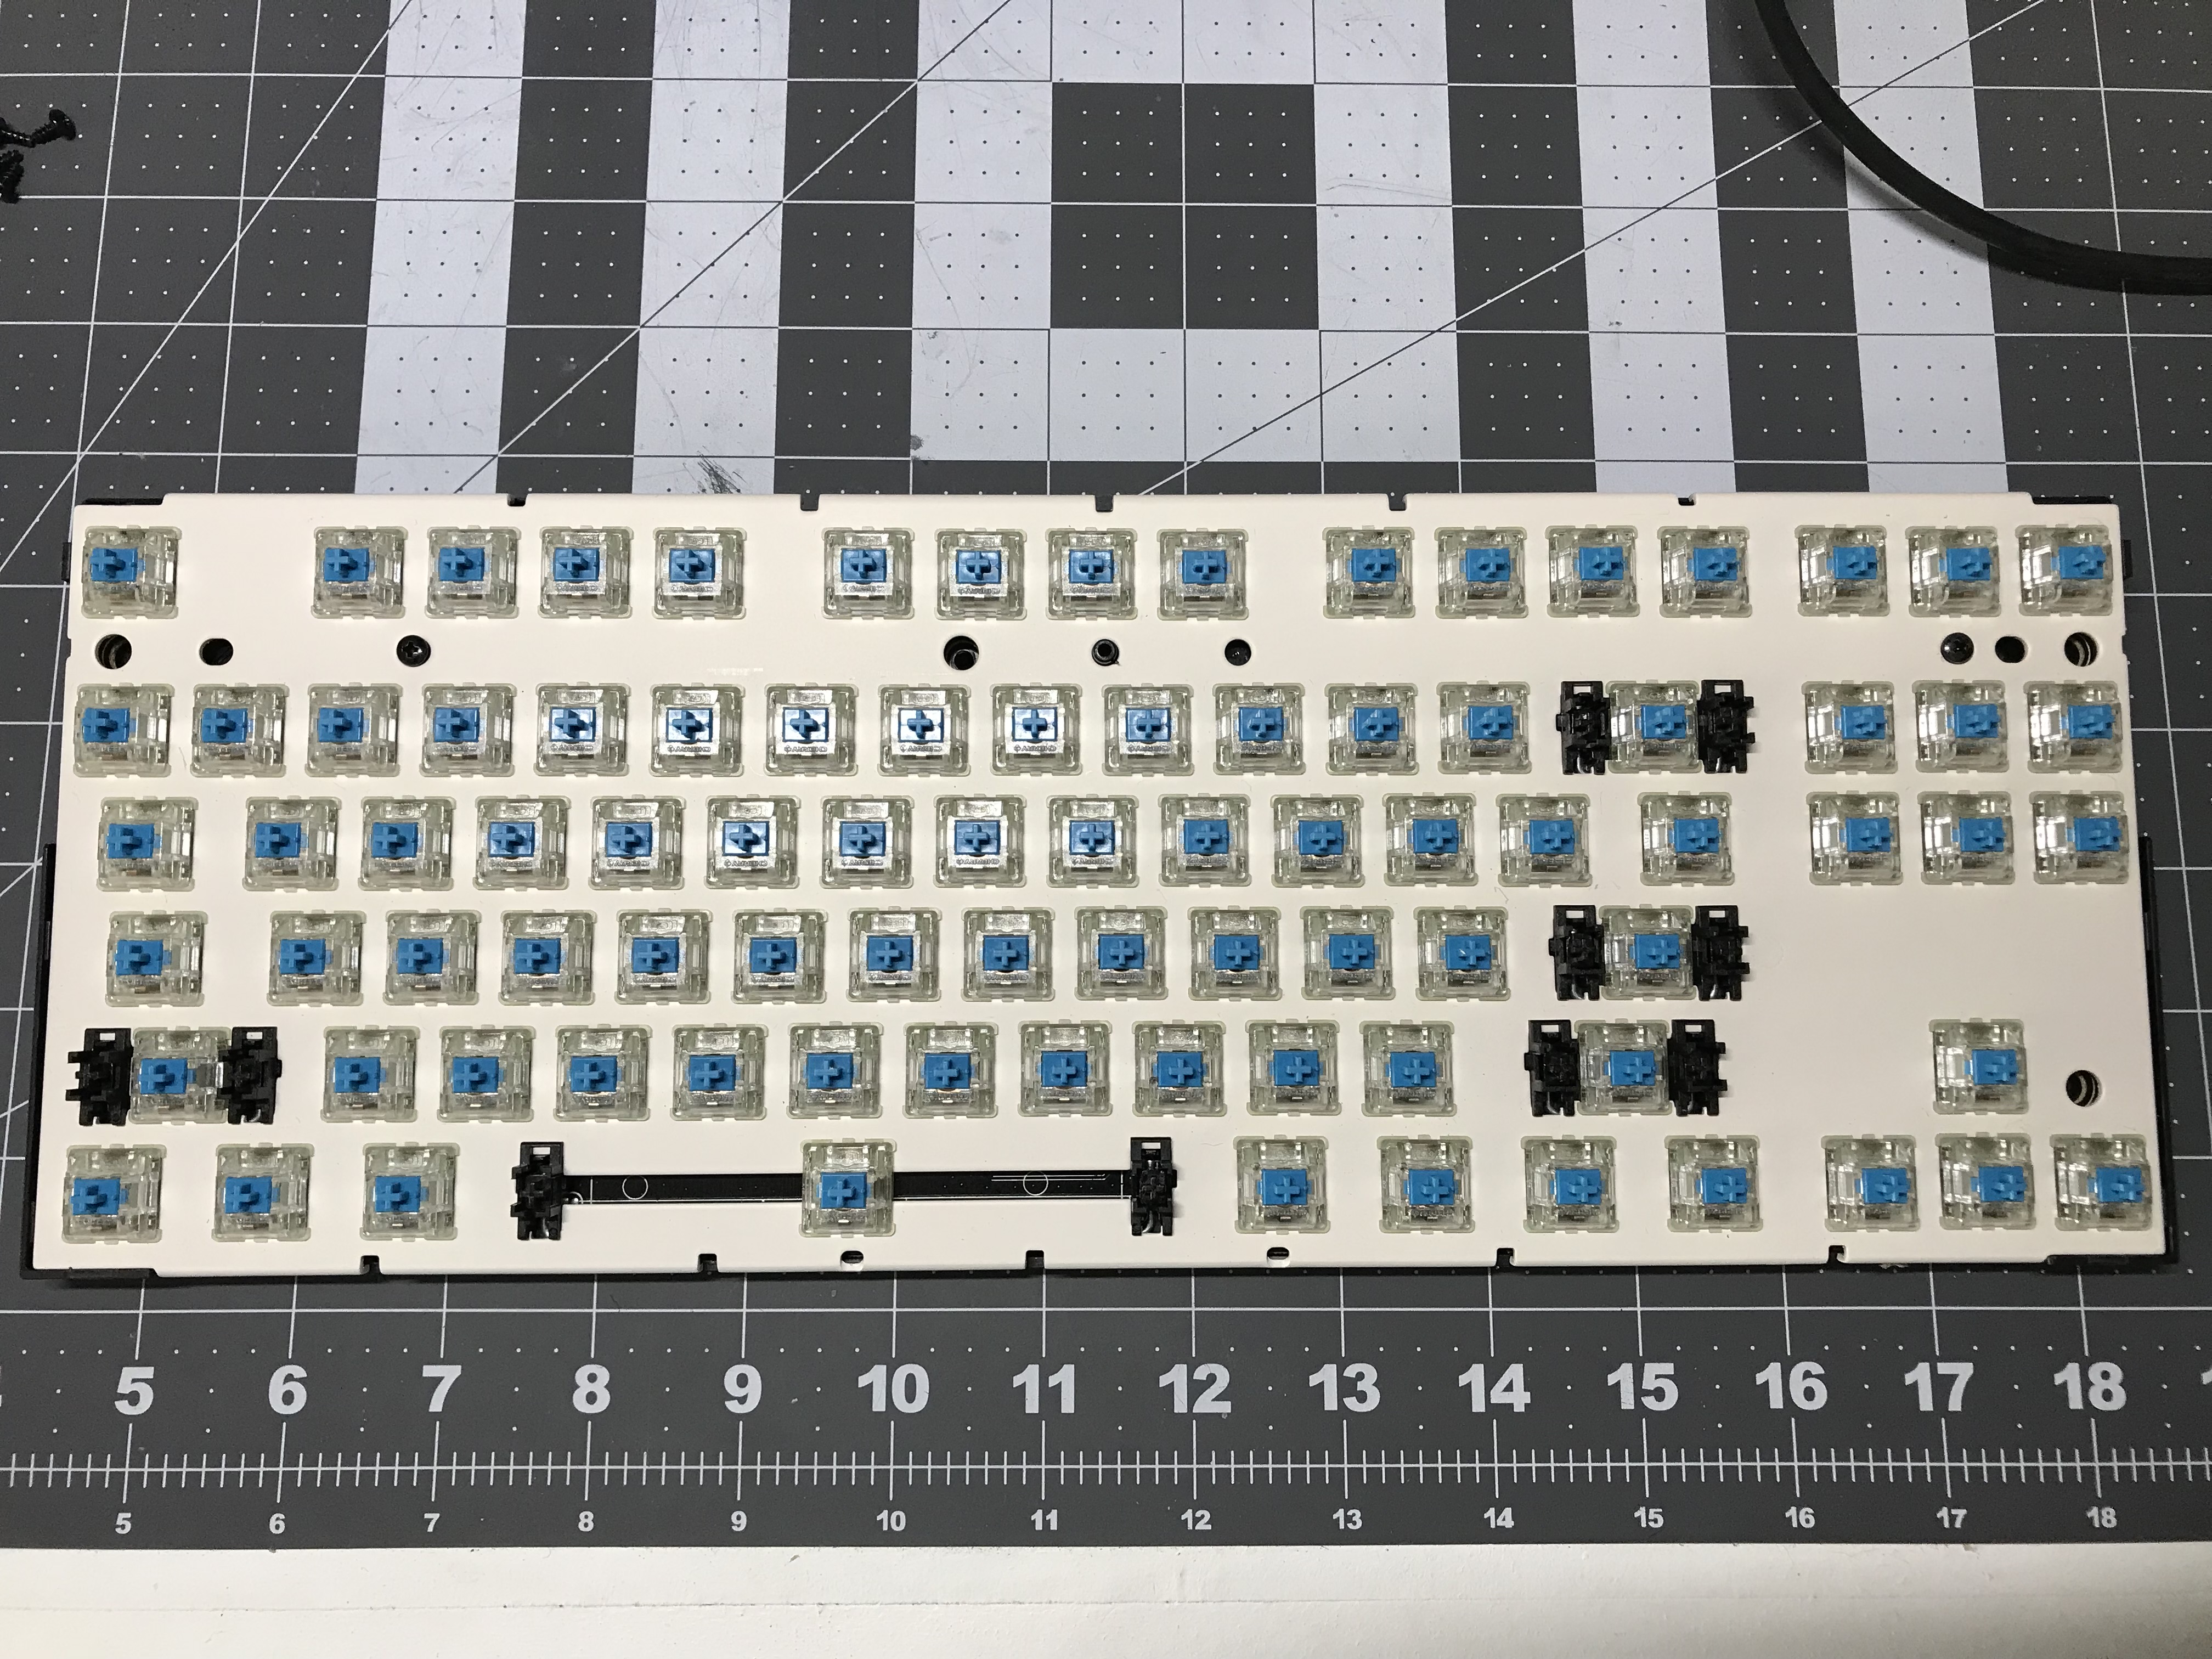
After removing the keycaps, we get our first look at the plate for the board. It’s an aluminum plate, with
plate-mount stabilizers.

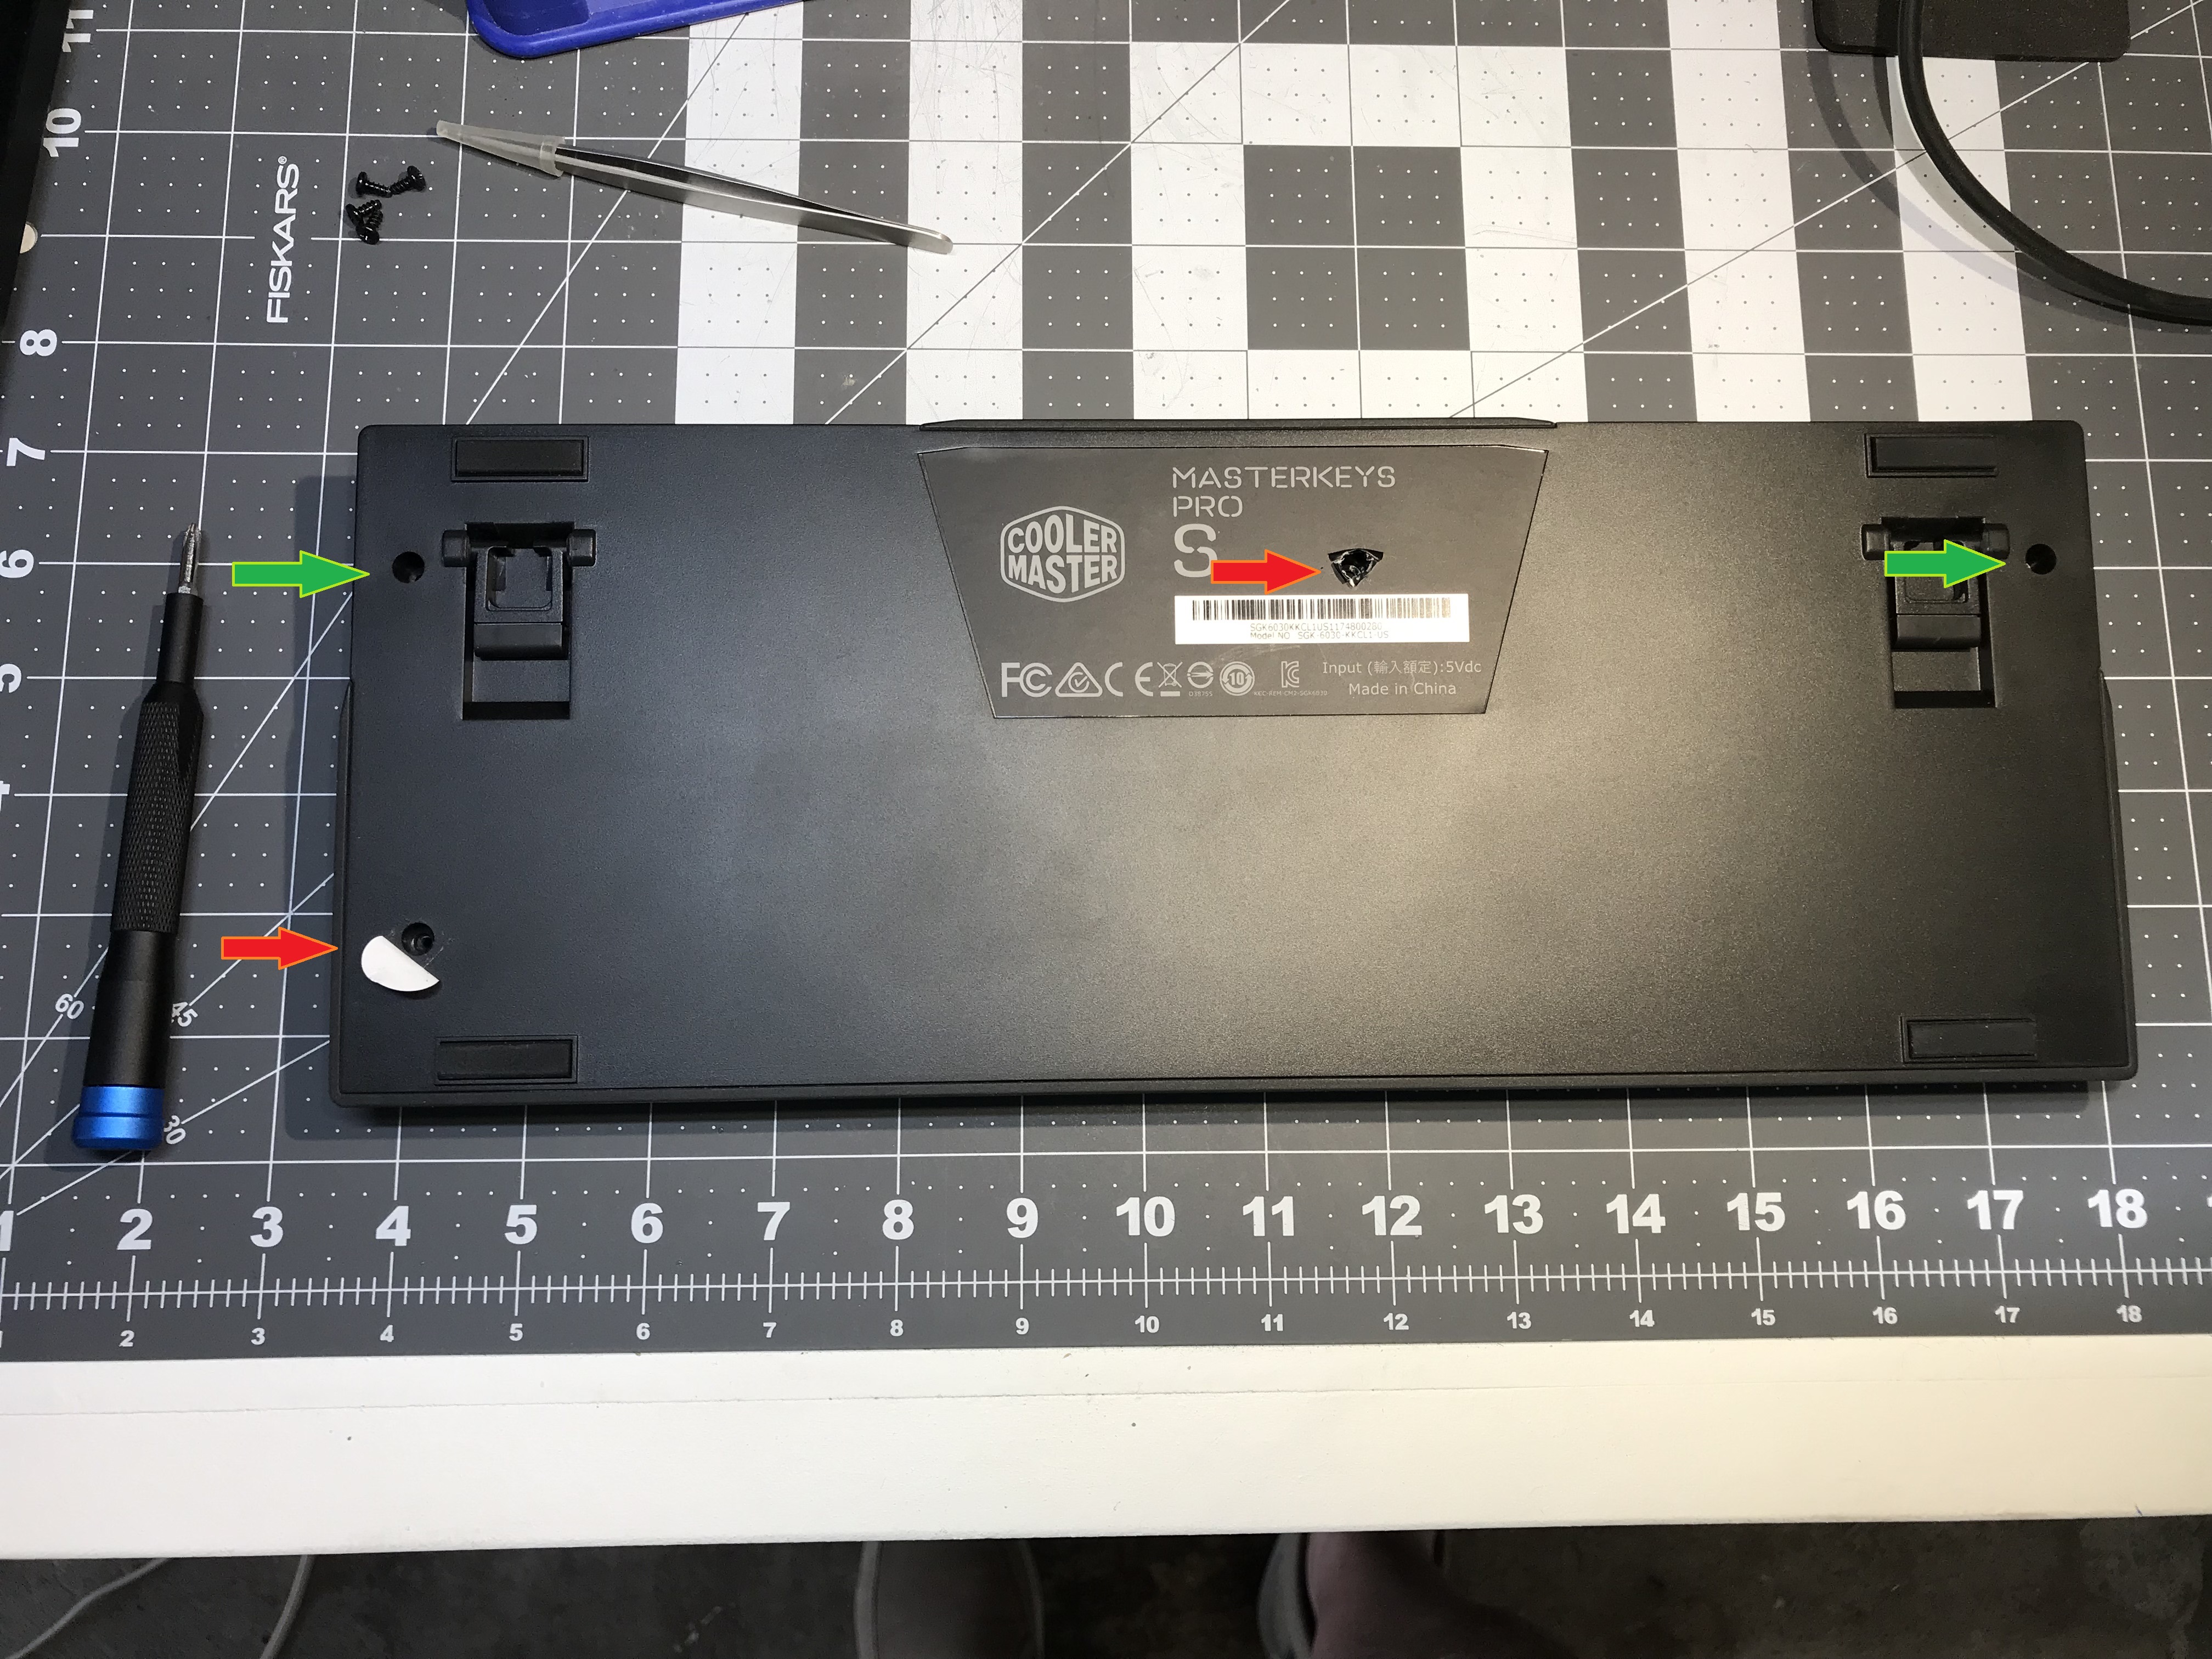
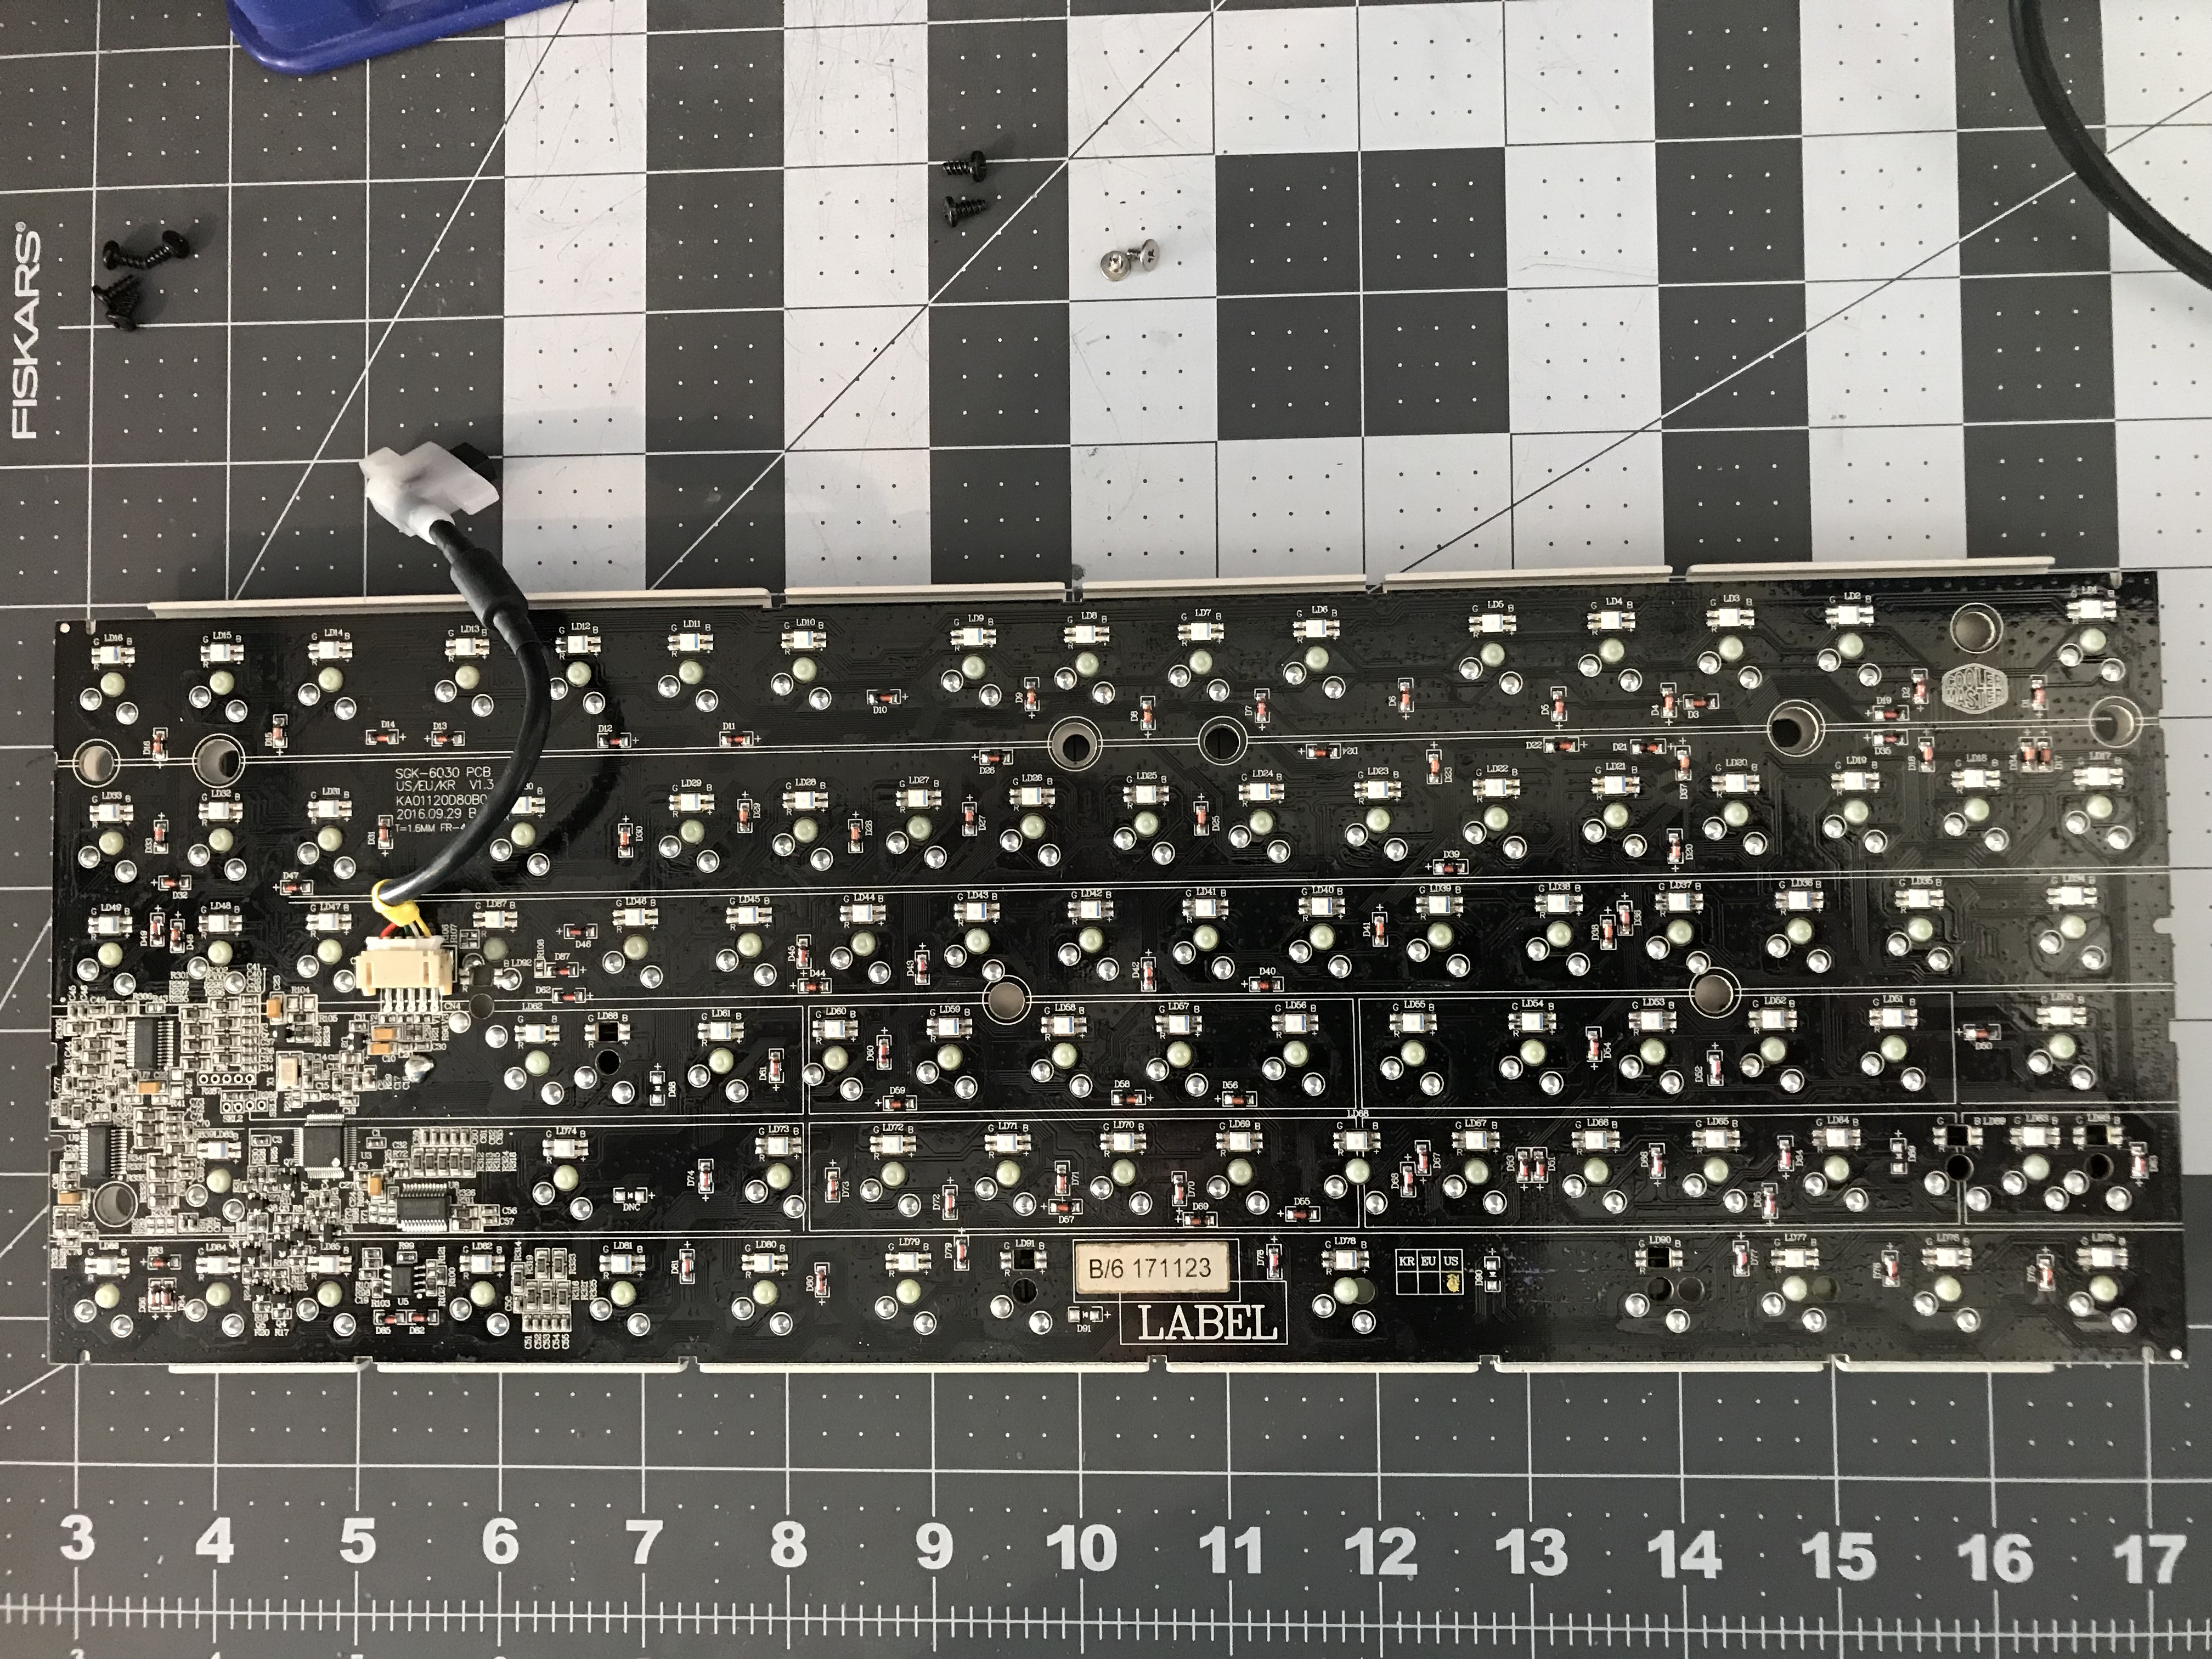
Flipping the board over, we can begin disassembly. There are four screws to remove, two of which are visible (green arrows), and two of which are hidden under stickers (red arrows).

Next, we have to separate the top and bottom halves of the case. The two halves of the plastic case are held together by little tabs along the inside of the seam between the halves. To separate the halves, I used an old credit card wedged into the seam along the back of the case, and worked the card along the seam to pop the tabs out of their holes.

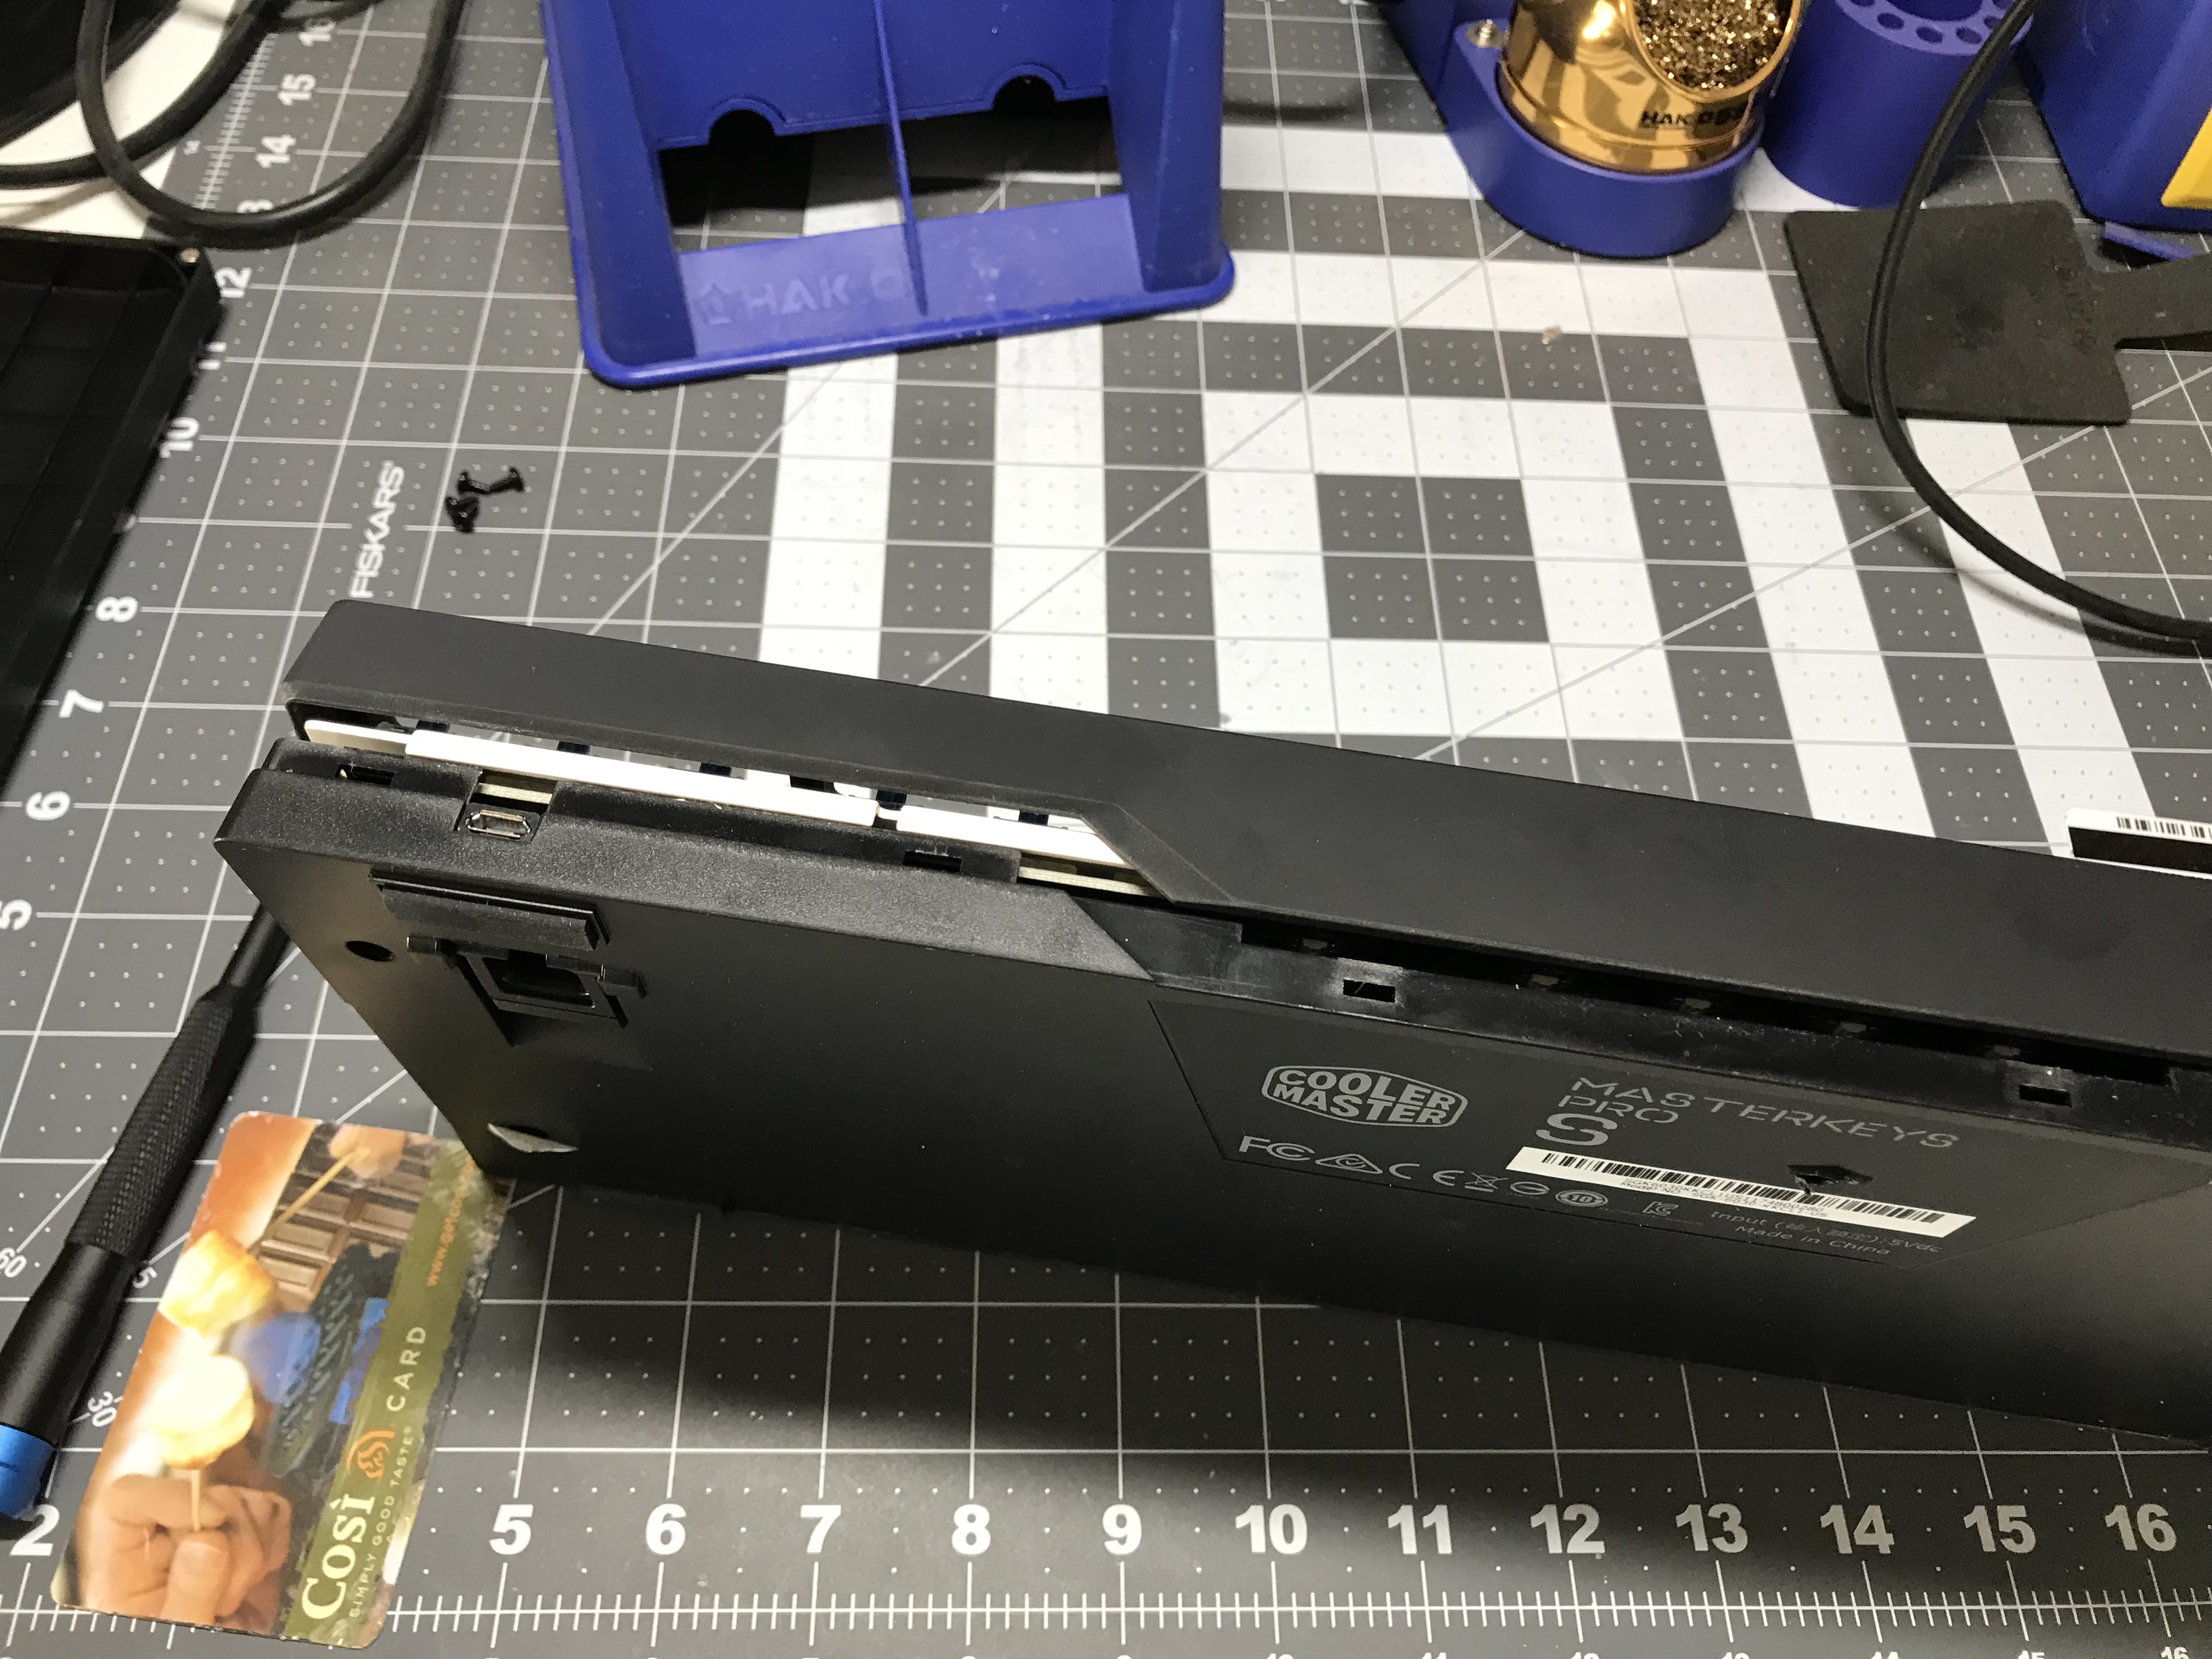
Eventually, once you’ve separated the two case halves along the back, you can gently apply force (and more prying with a credit card) to separate the halves along the other three case sides. To give you some idea of what you’re prying apart, here’s a look at the tabs on the inside edge of the top half of the case.

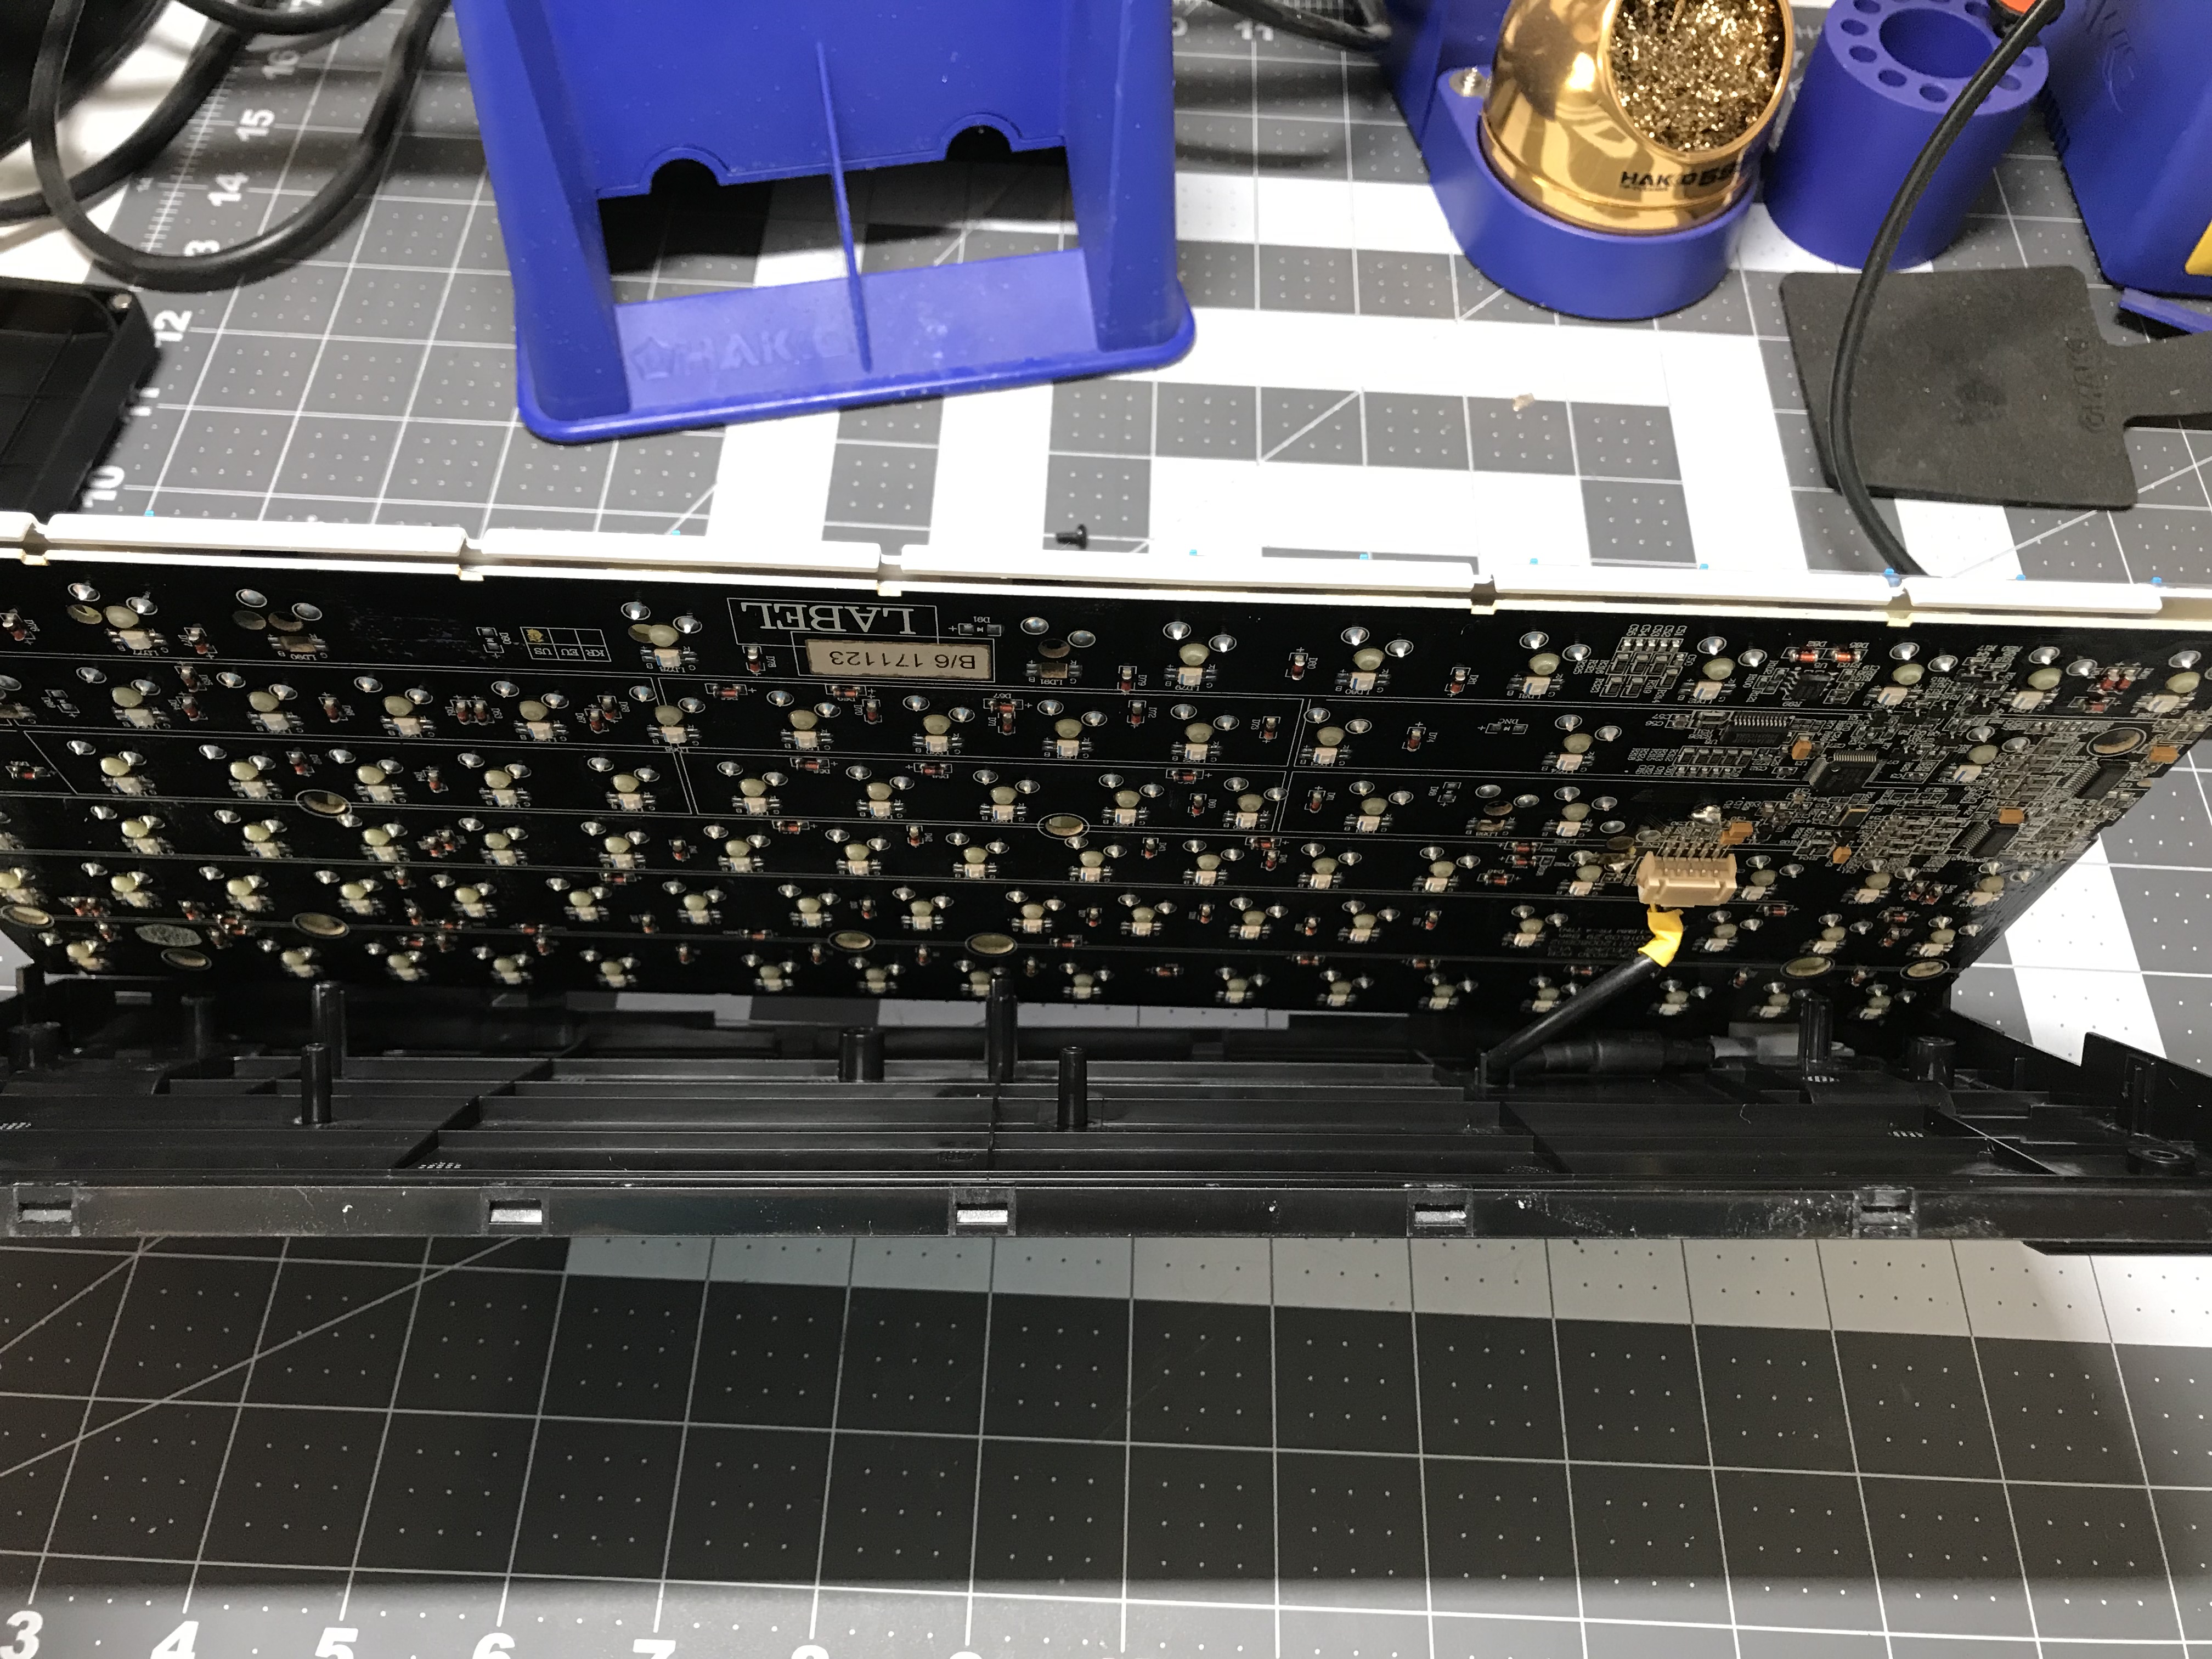
Next, there are two screws attaching the PCB/plate assembly to the bottom half of the case.

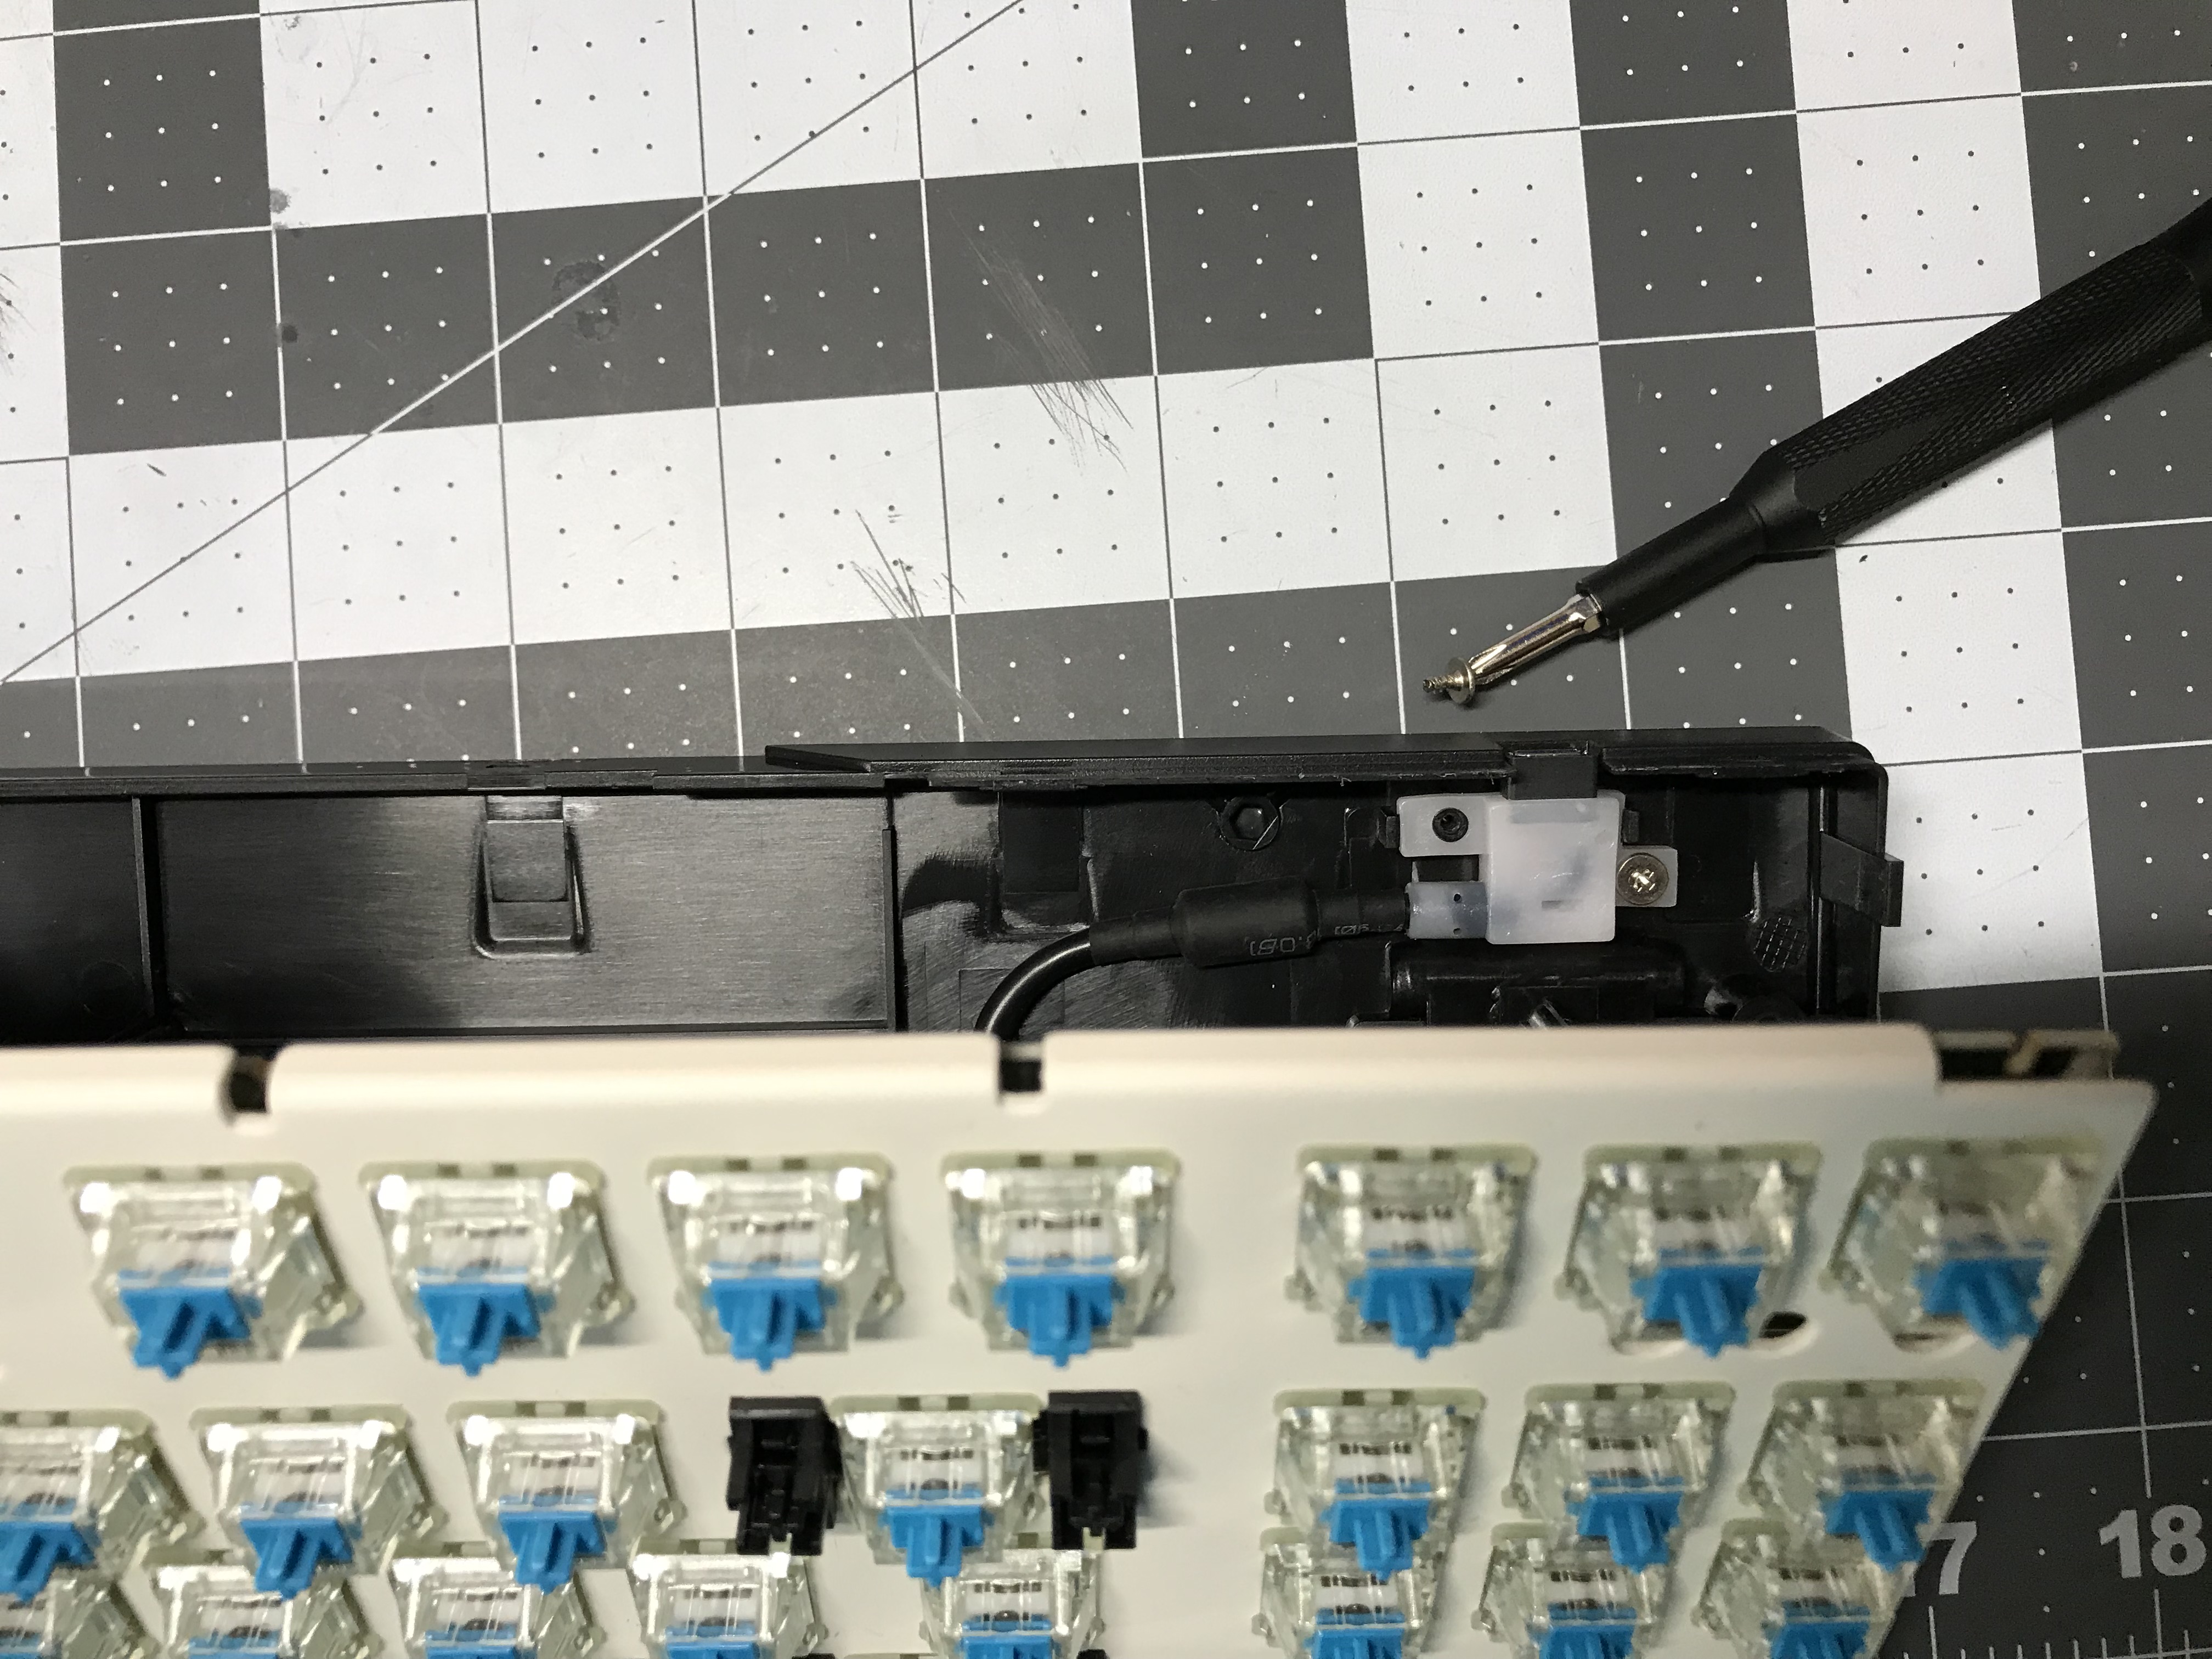
Once those two screws are removed, you can now separate the PCB/plate assembly from the bottom half of the case, but be careful - the USB cable port is still attached to the bottom half of the case by two more screws, which you will also have to remove.


At this point, we’re left with just the PCB/plate assembly, and there are no more screws to remove…

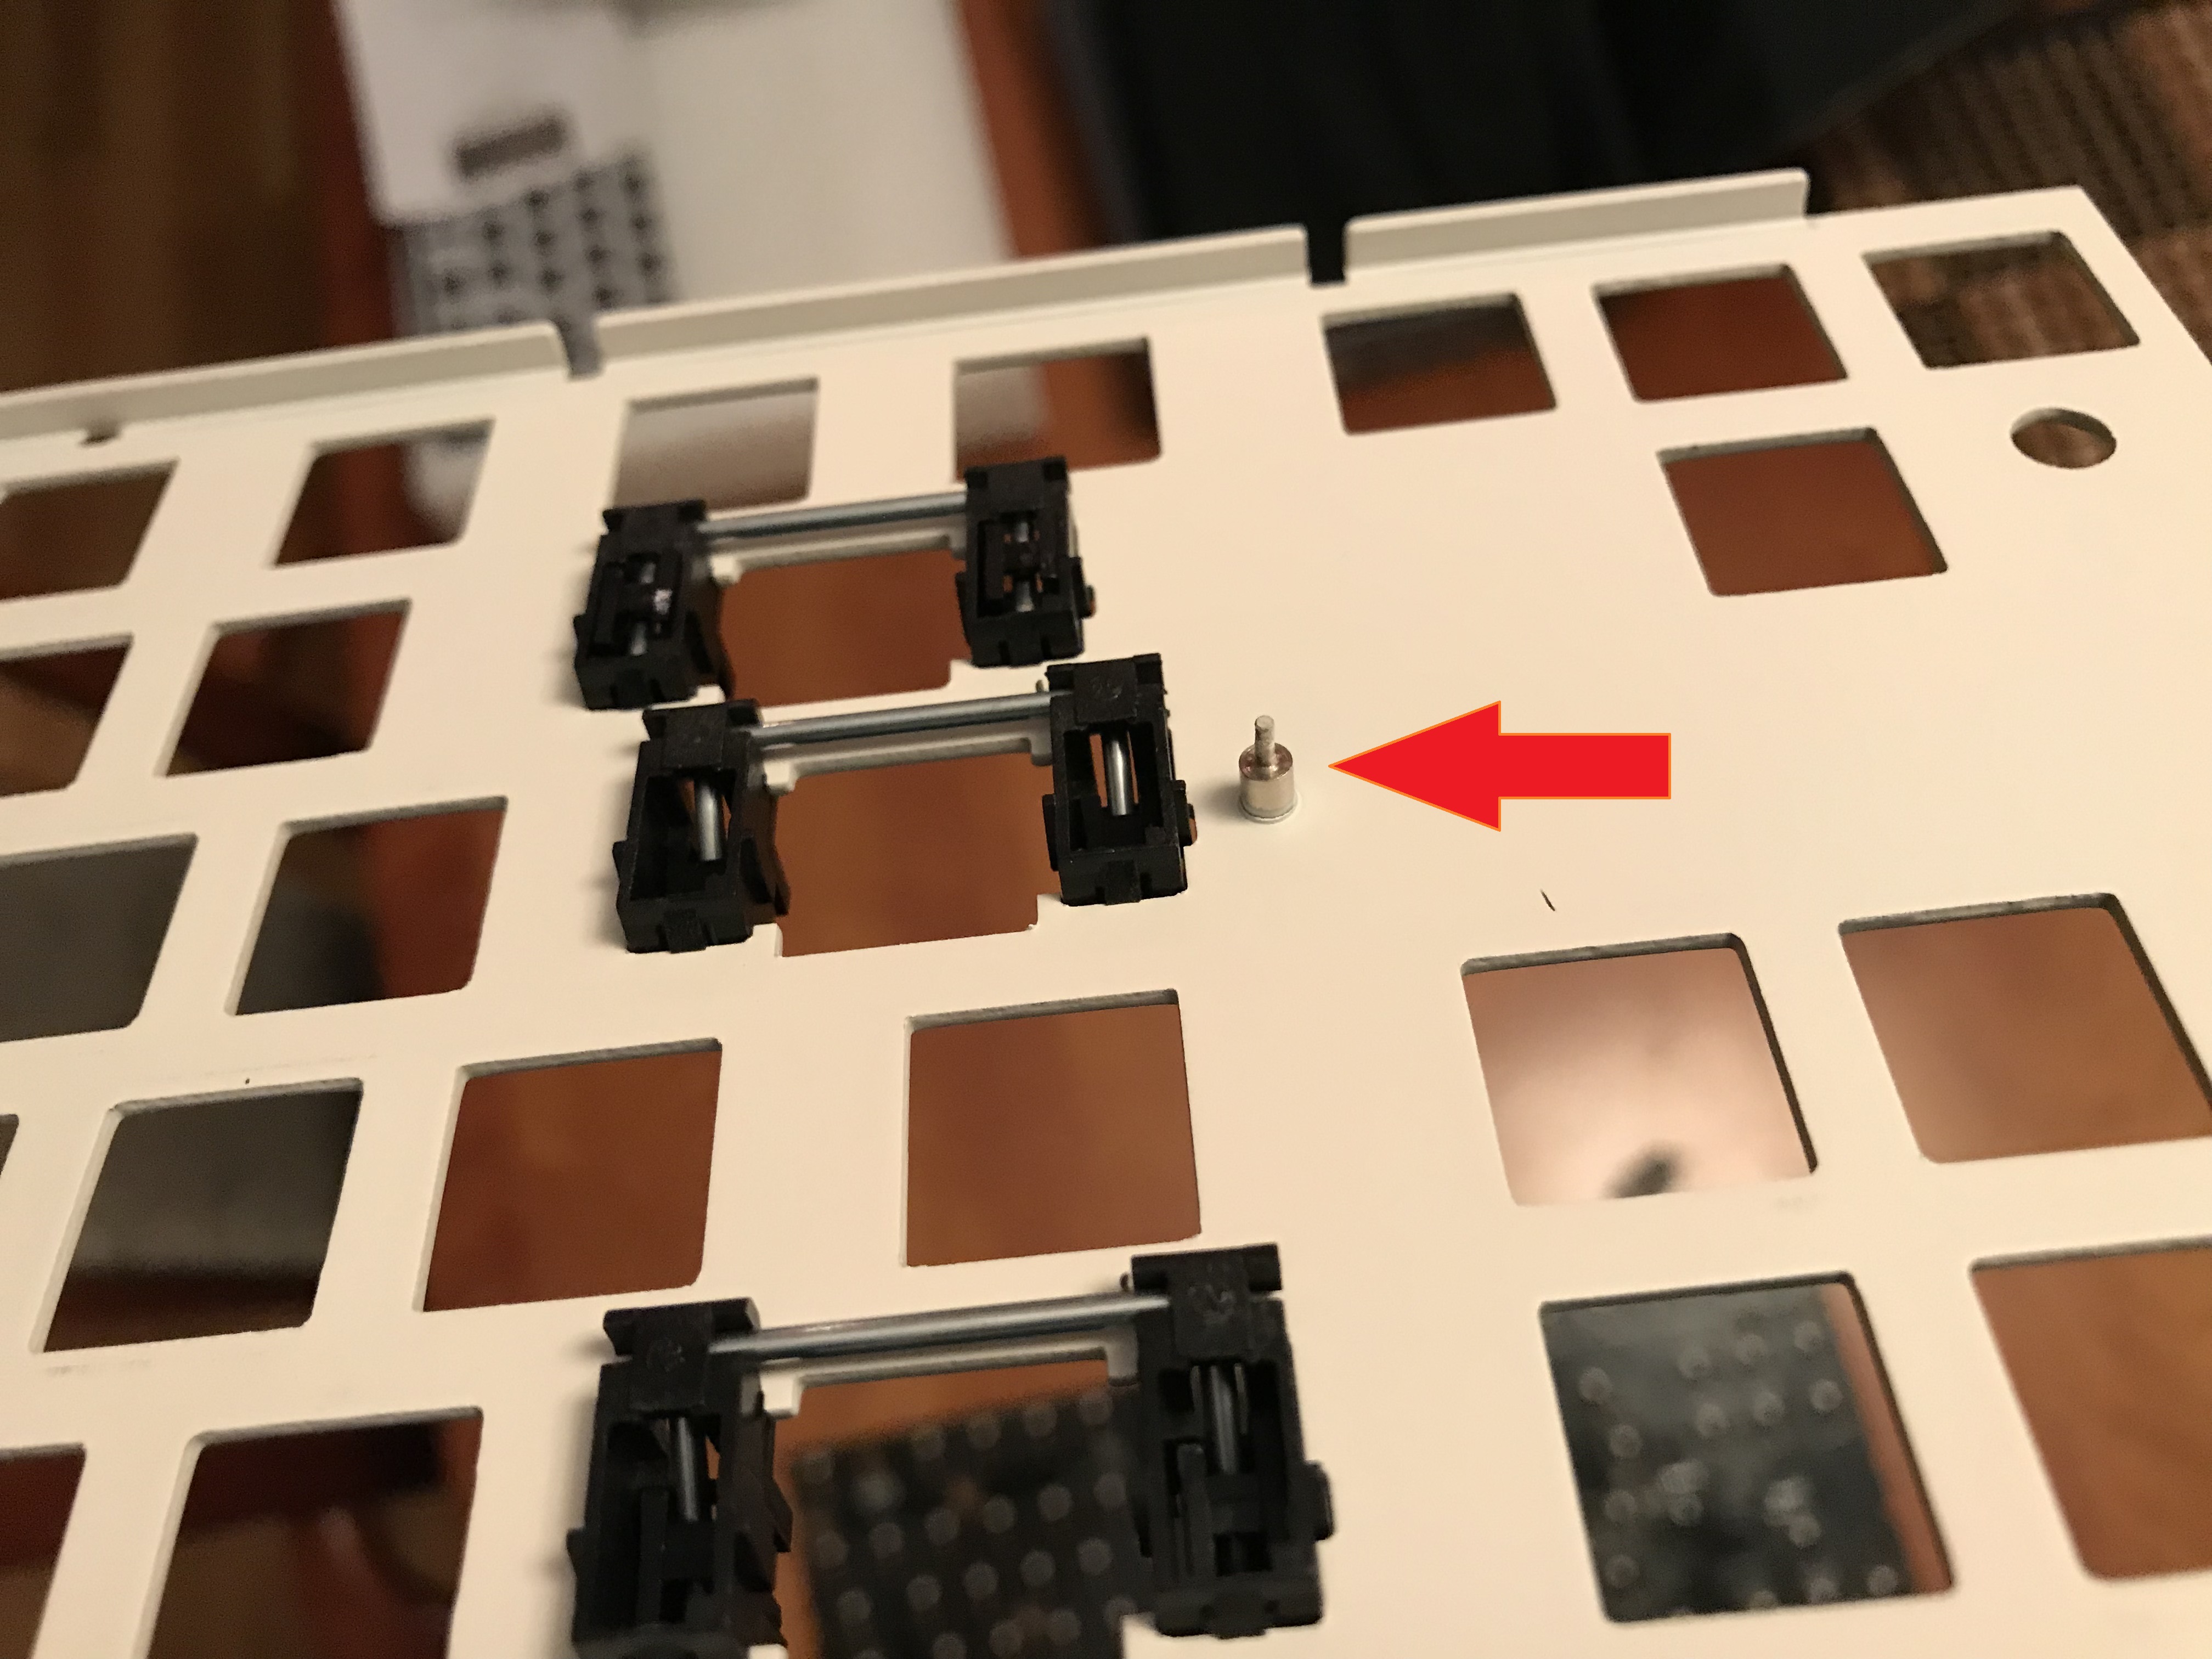
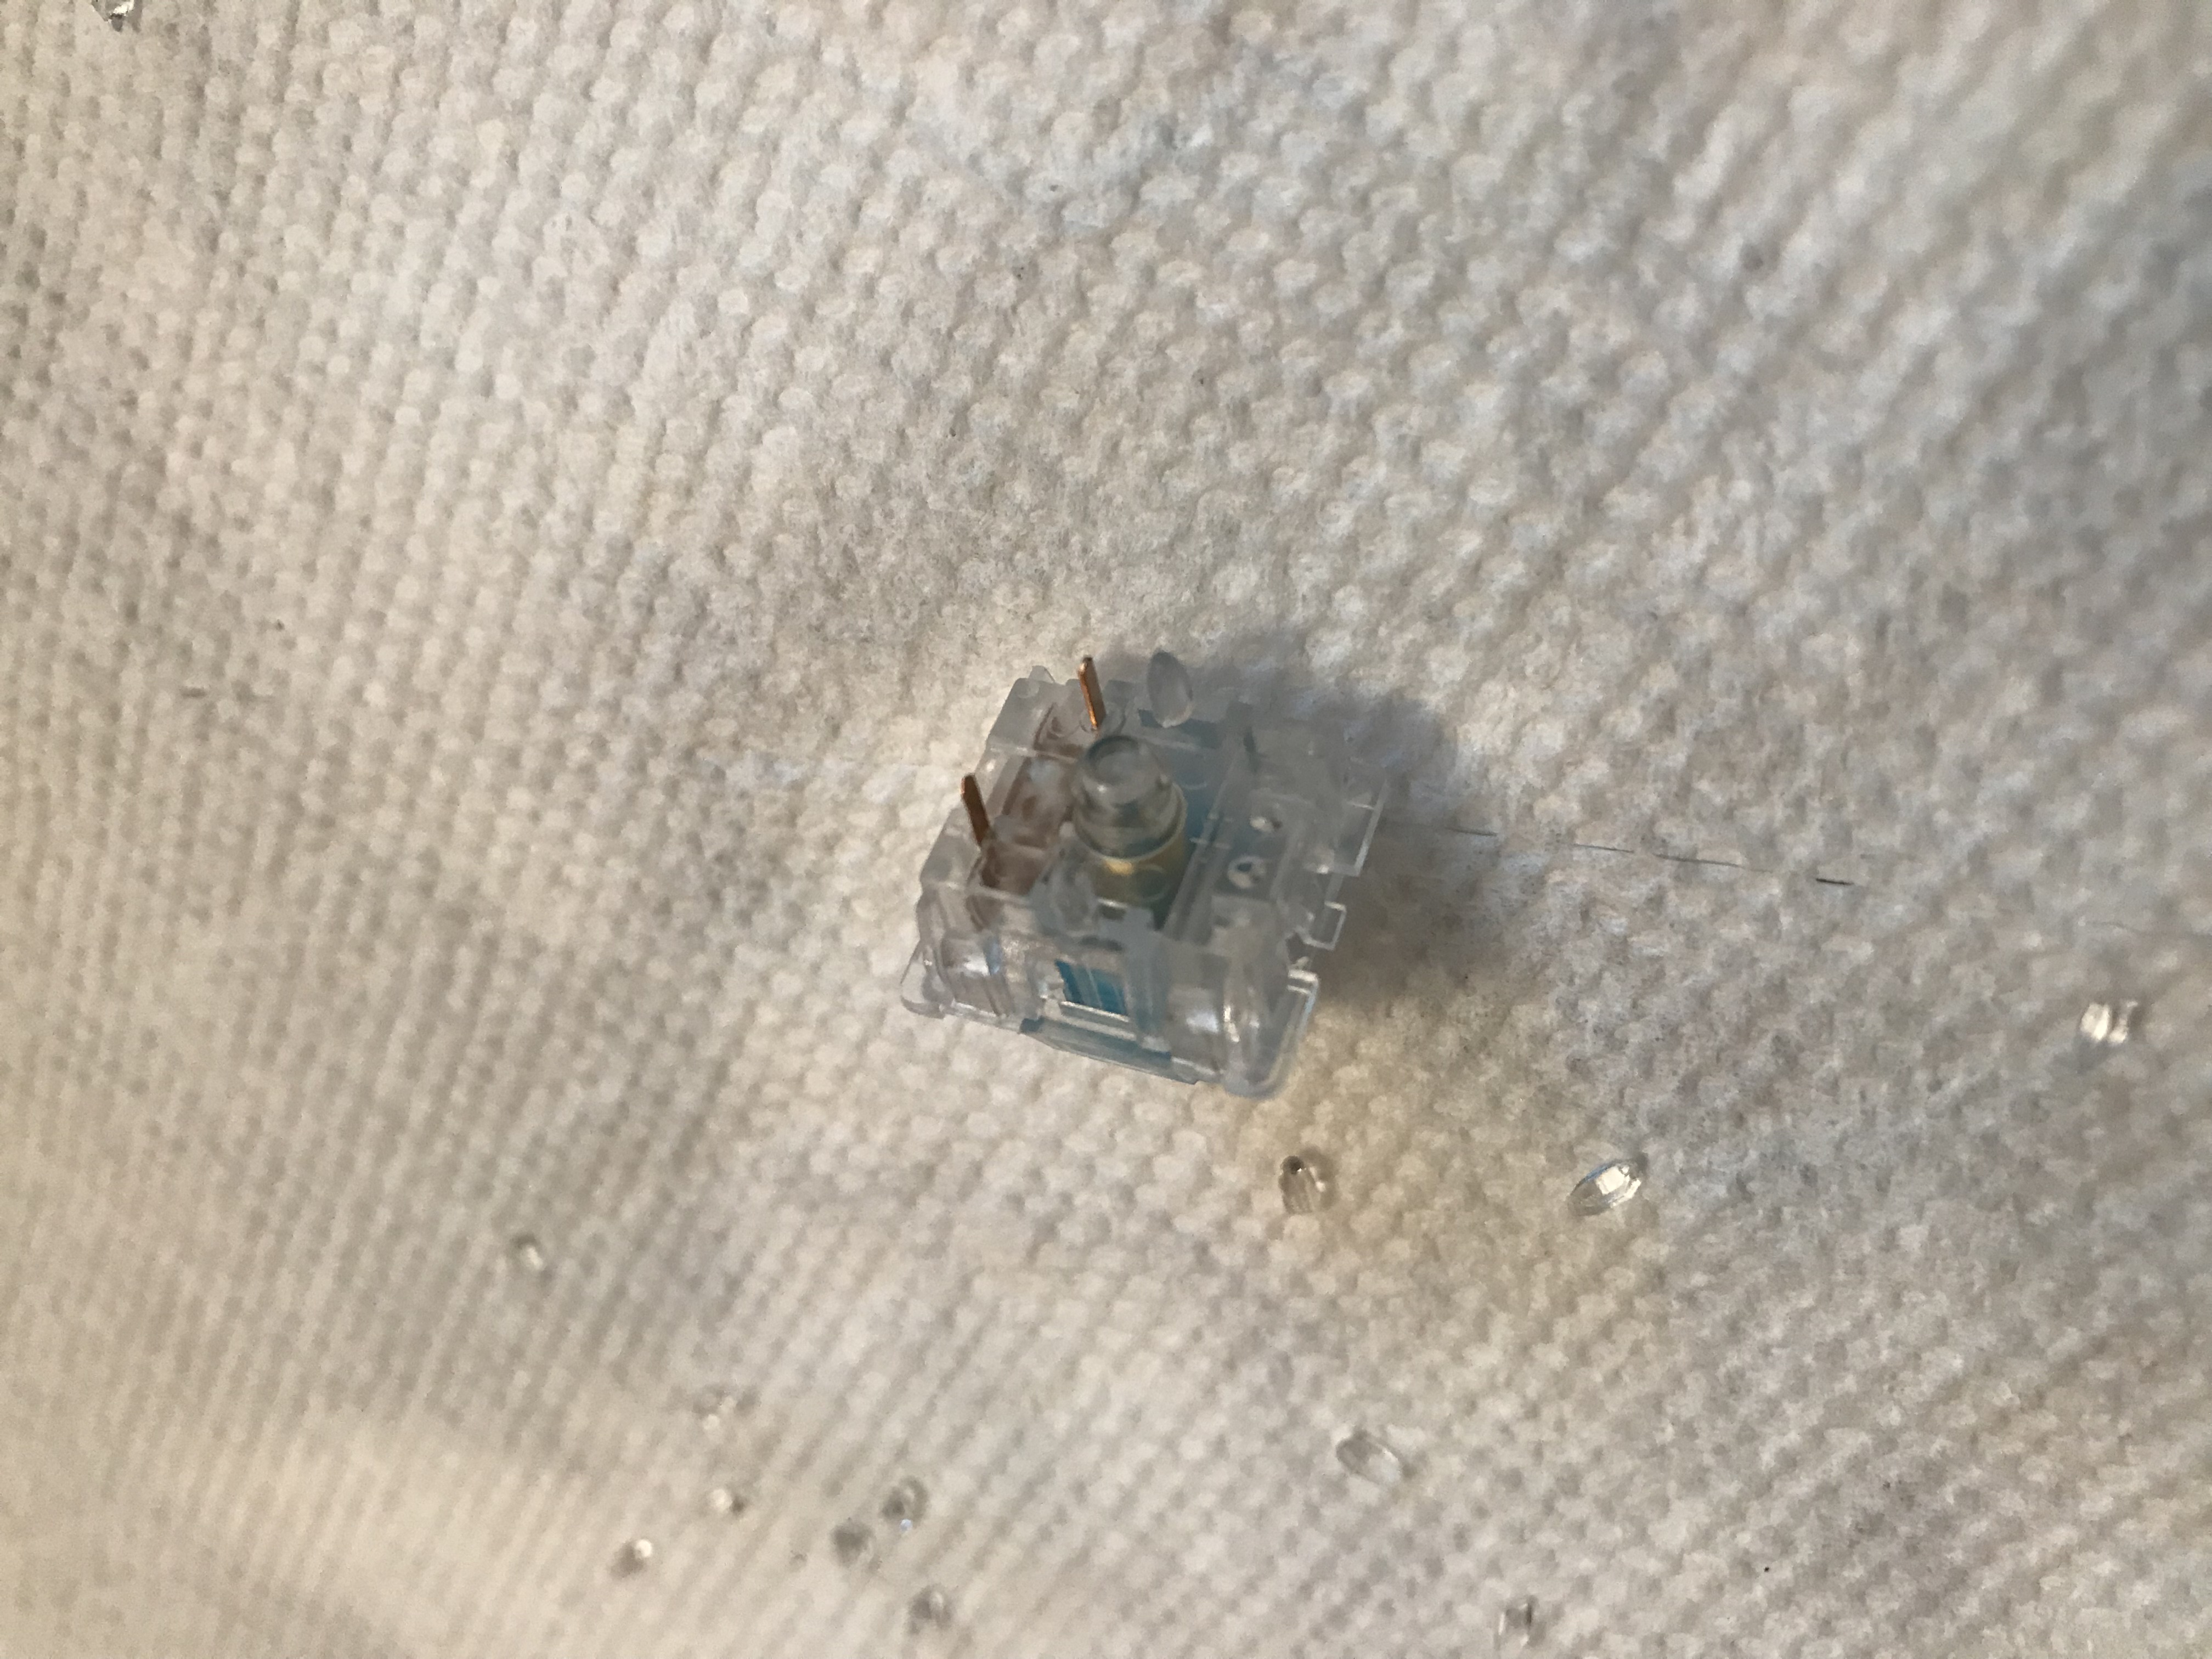
…but there is one last gotcha (after desoldering switches, which we’ll talk about in a moment). On the underside of the plate, there is a metal alignment pin, right next
to the Enter key cutout, that slides into a hole on the PCB. To separate the plate from the PCB, I found I had to rotate the PCB slightly, gently bending it just a little bit so that it would clear the flanged edges of the plate. Here’s what that alignment pin looks like, once you get the plate removed:

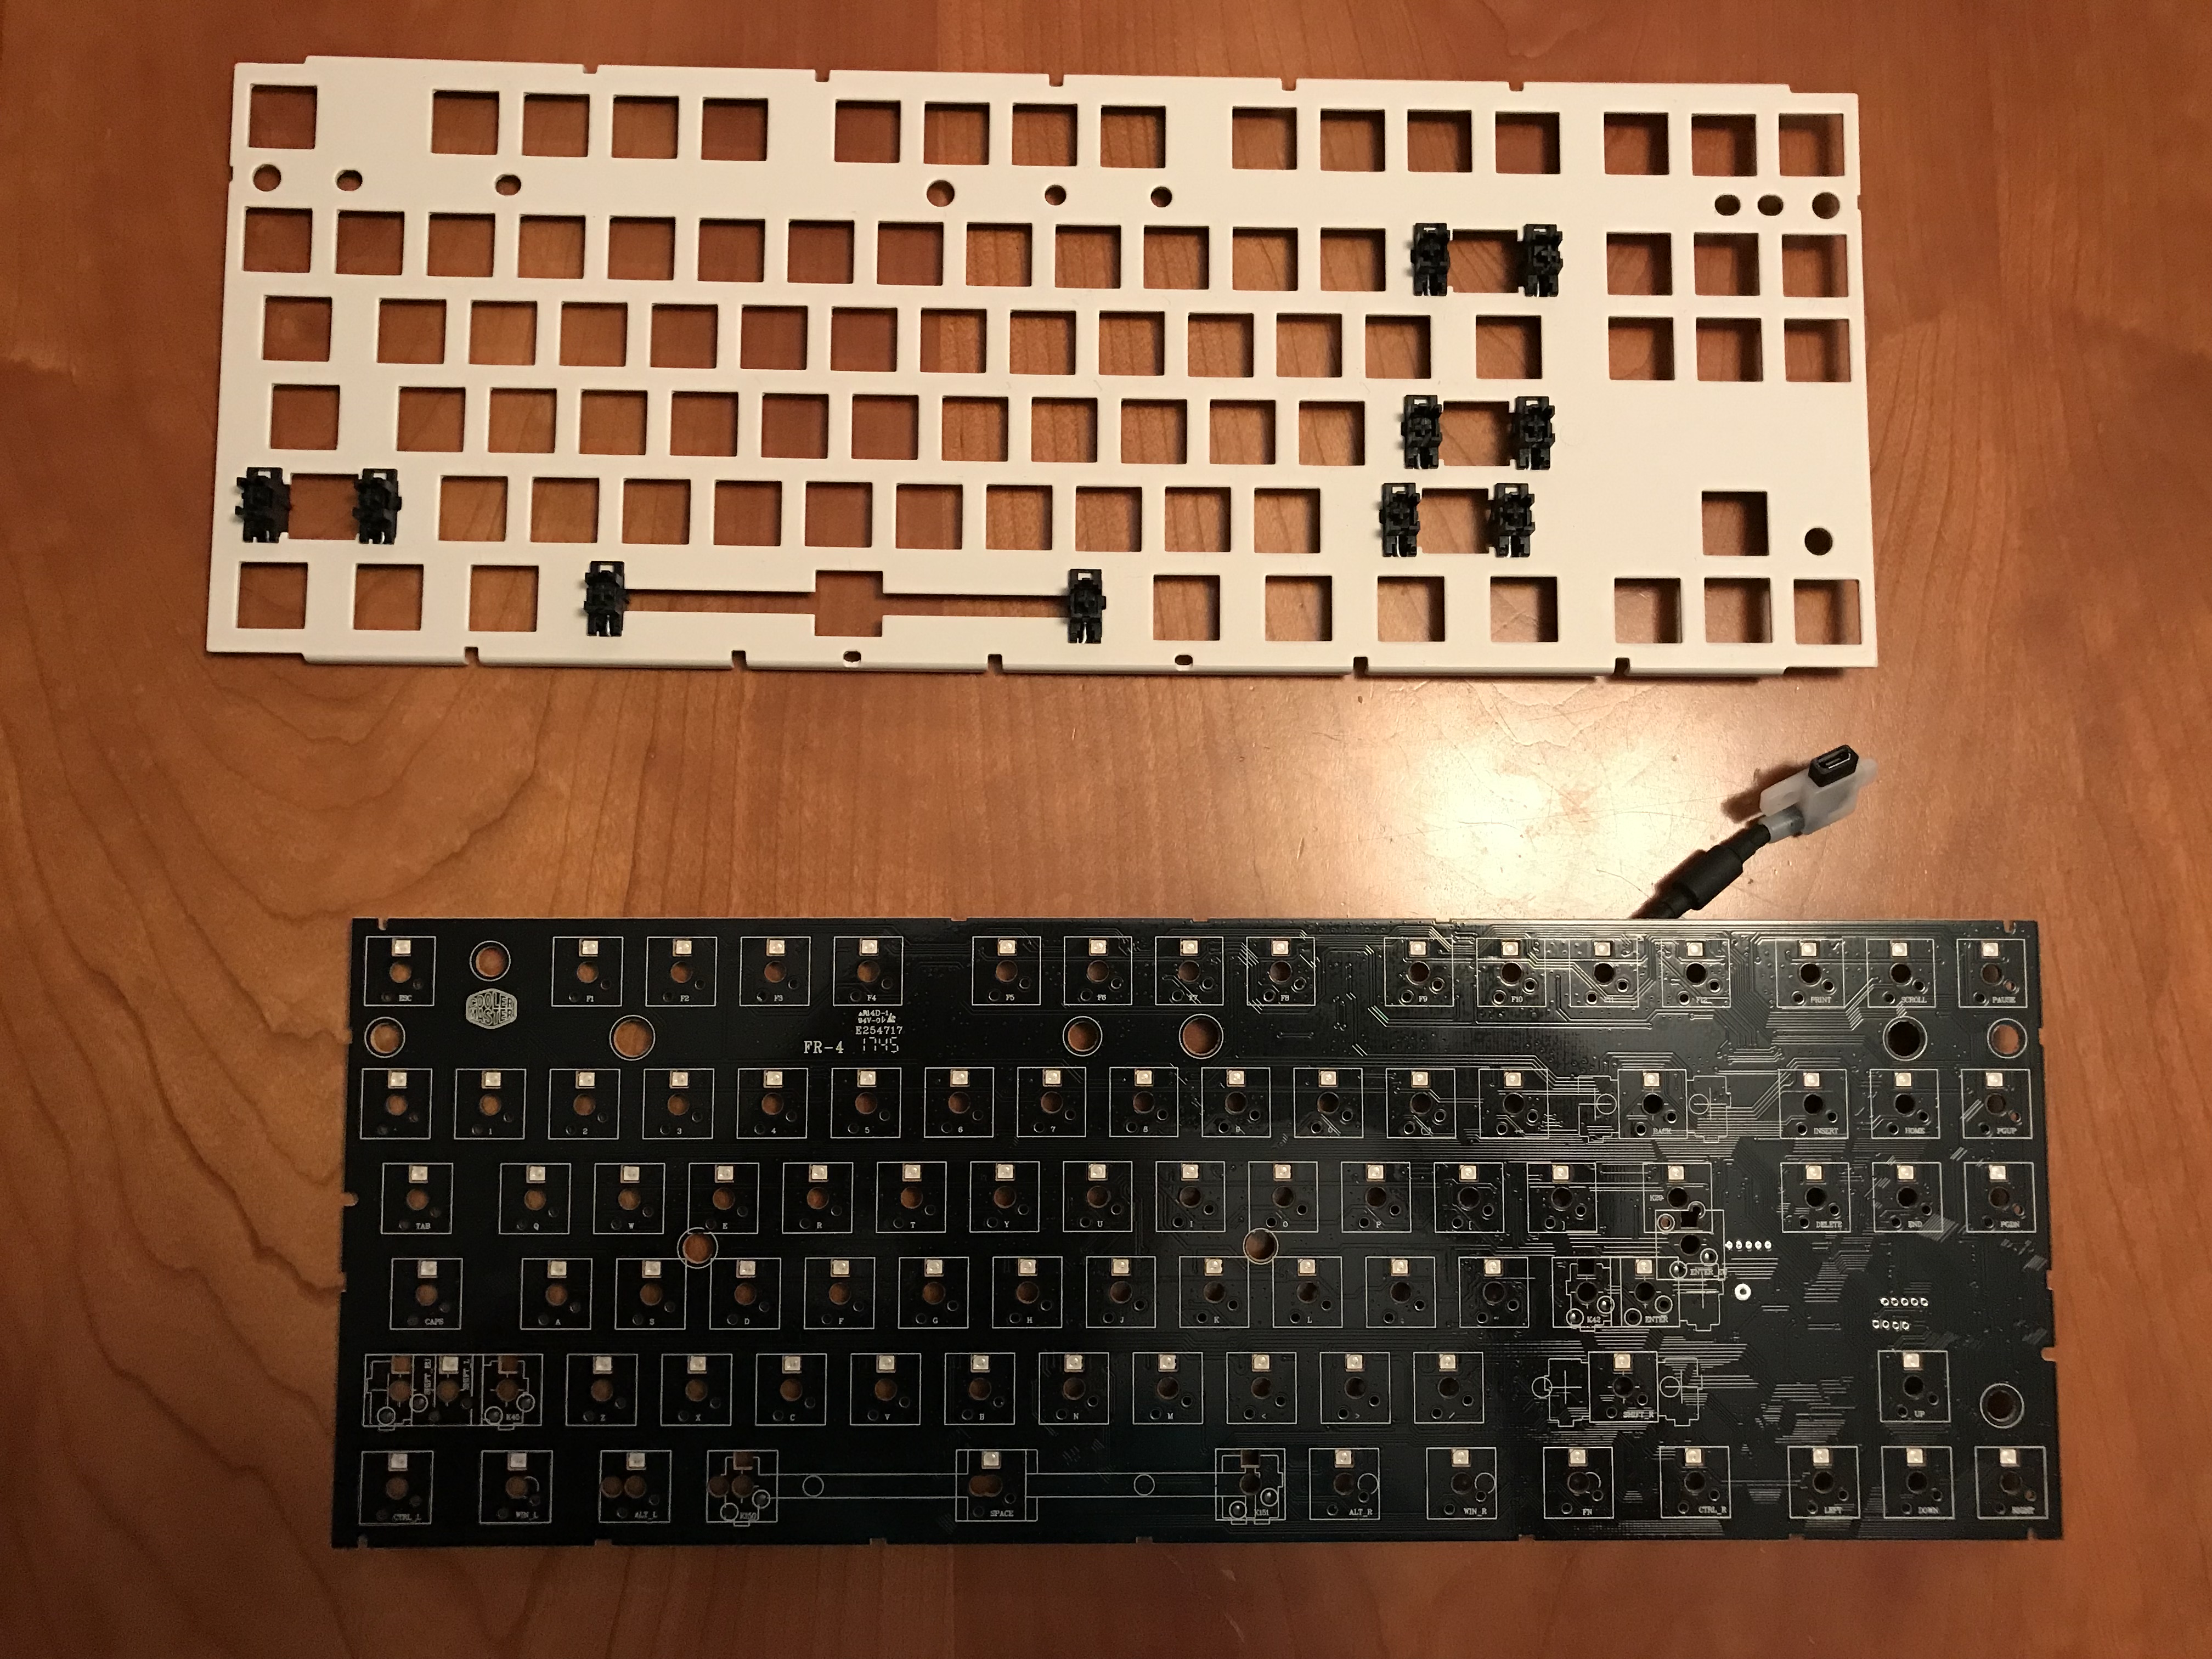
Finally, we’ve got the plate and PCB apart!

Desoldering

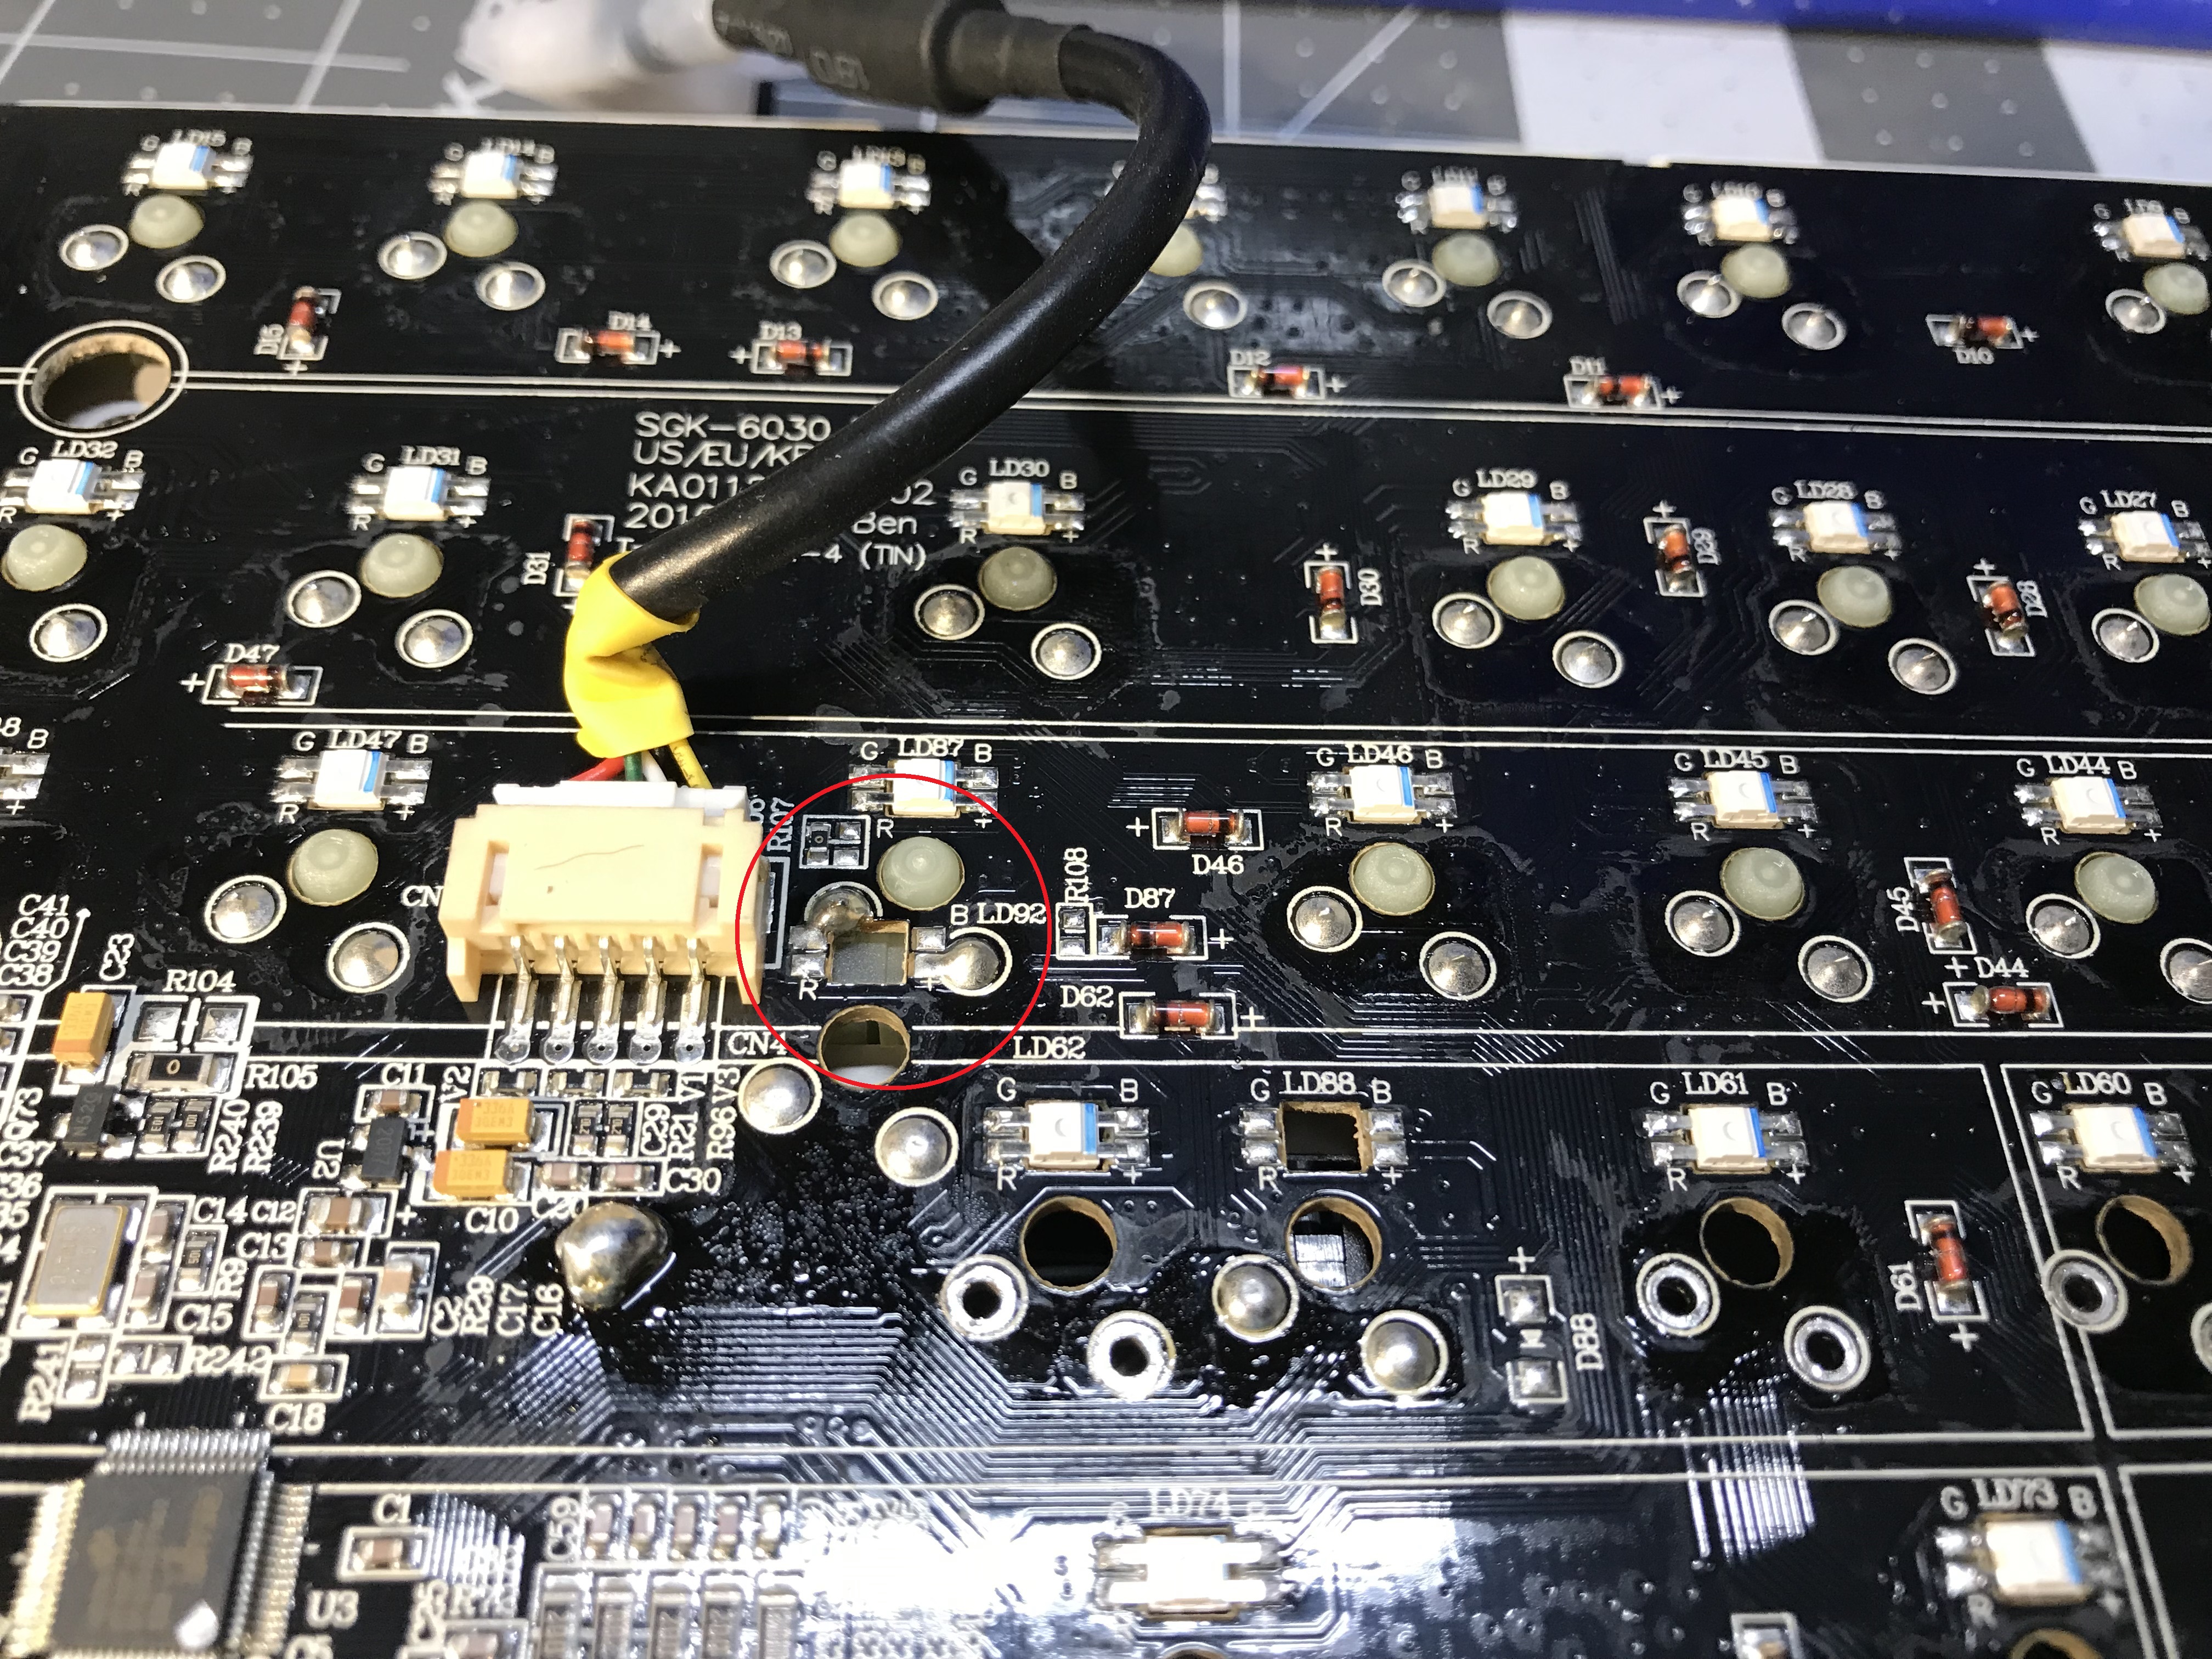
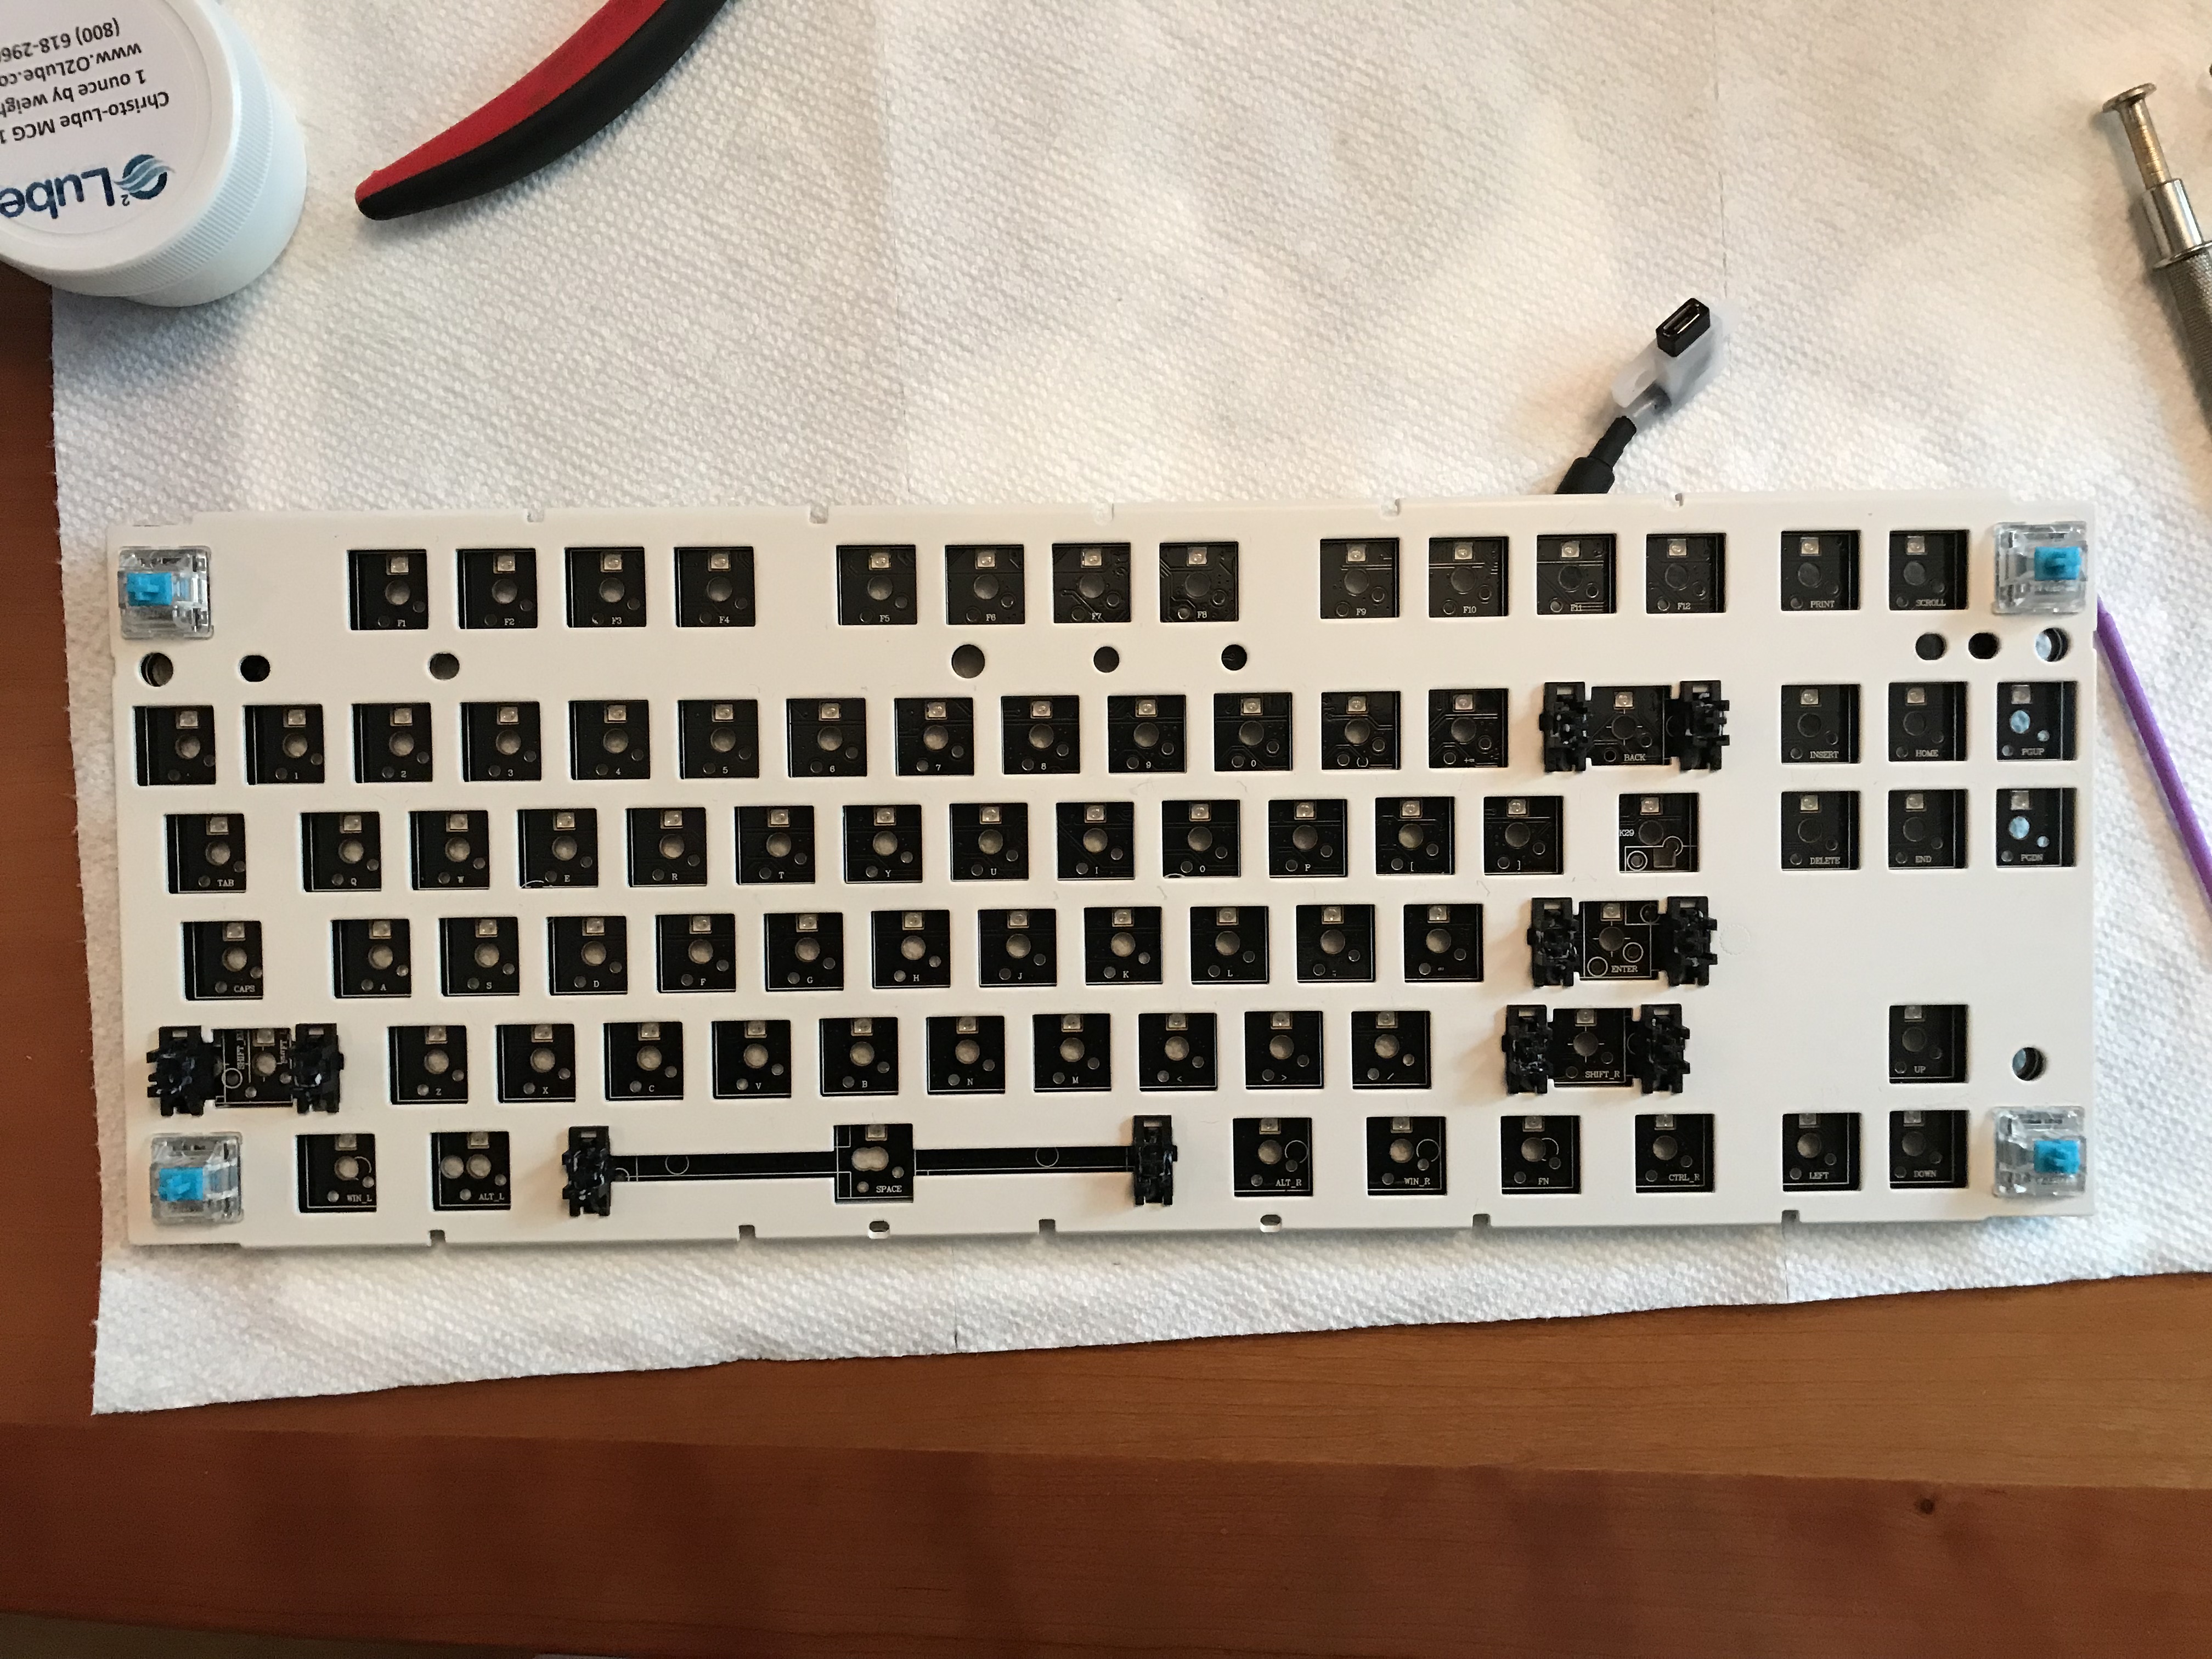
Before we begin desoldering switches, it’s worth taking a look around the PCB, to identify any potential trouble spots where we might need to exercise extra caution. There was one area that concerned me, right next to the connector for the USB cable (highlighted below with the red circle). The solder joints for this switch sit right next to two solder pads that aren’t connected. We’ll want to be sure that when we solder a new switch into this location, we don’t bridge those pads to the new solder joints.

While we’re inspecting the PCB, there is one more issue I want to highlight. Although it’s not a desoldering issue, and it’s not an issue we need to worry about for this build, it is an issue worth considering for anyone attempting to renovate a MasterKeys board. The MasterKeys PCB has north-facing switch LEDs:

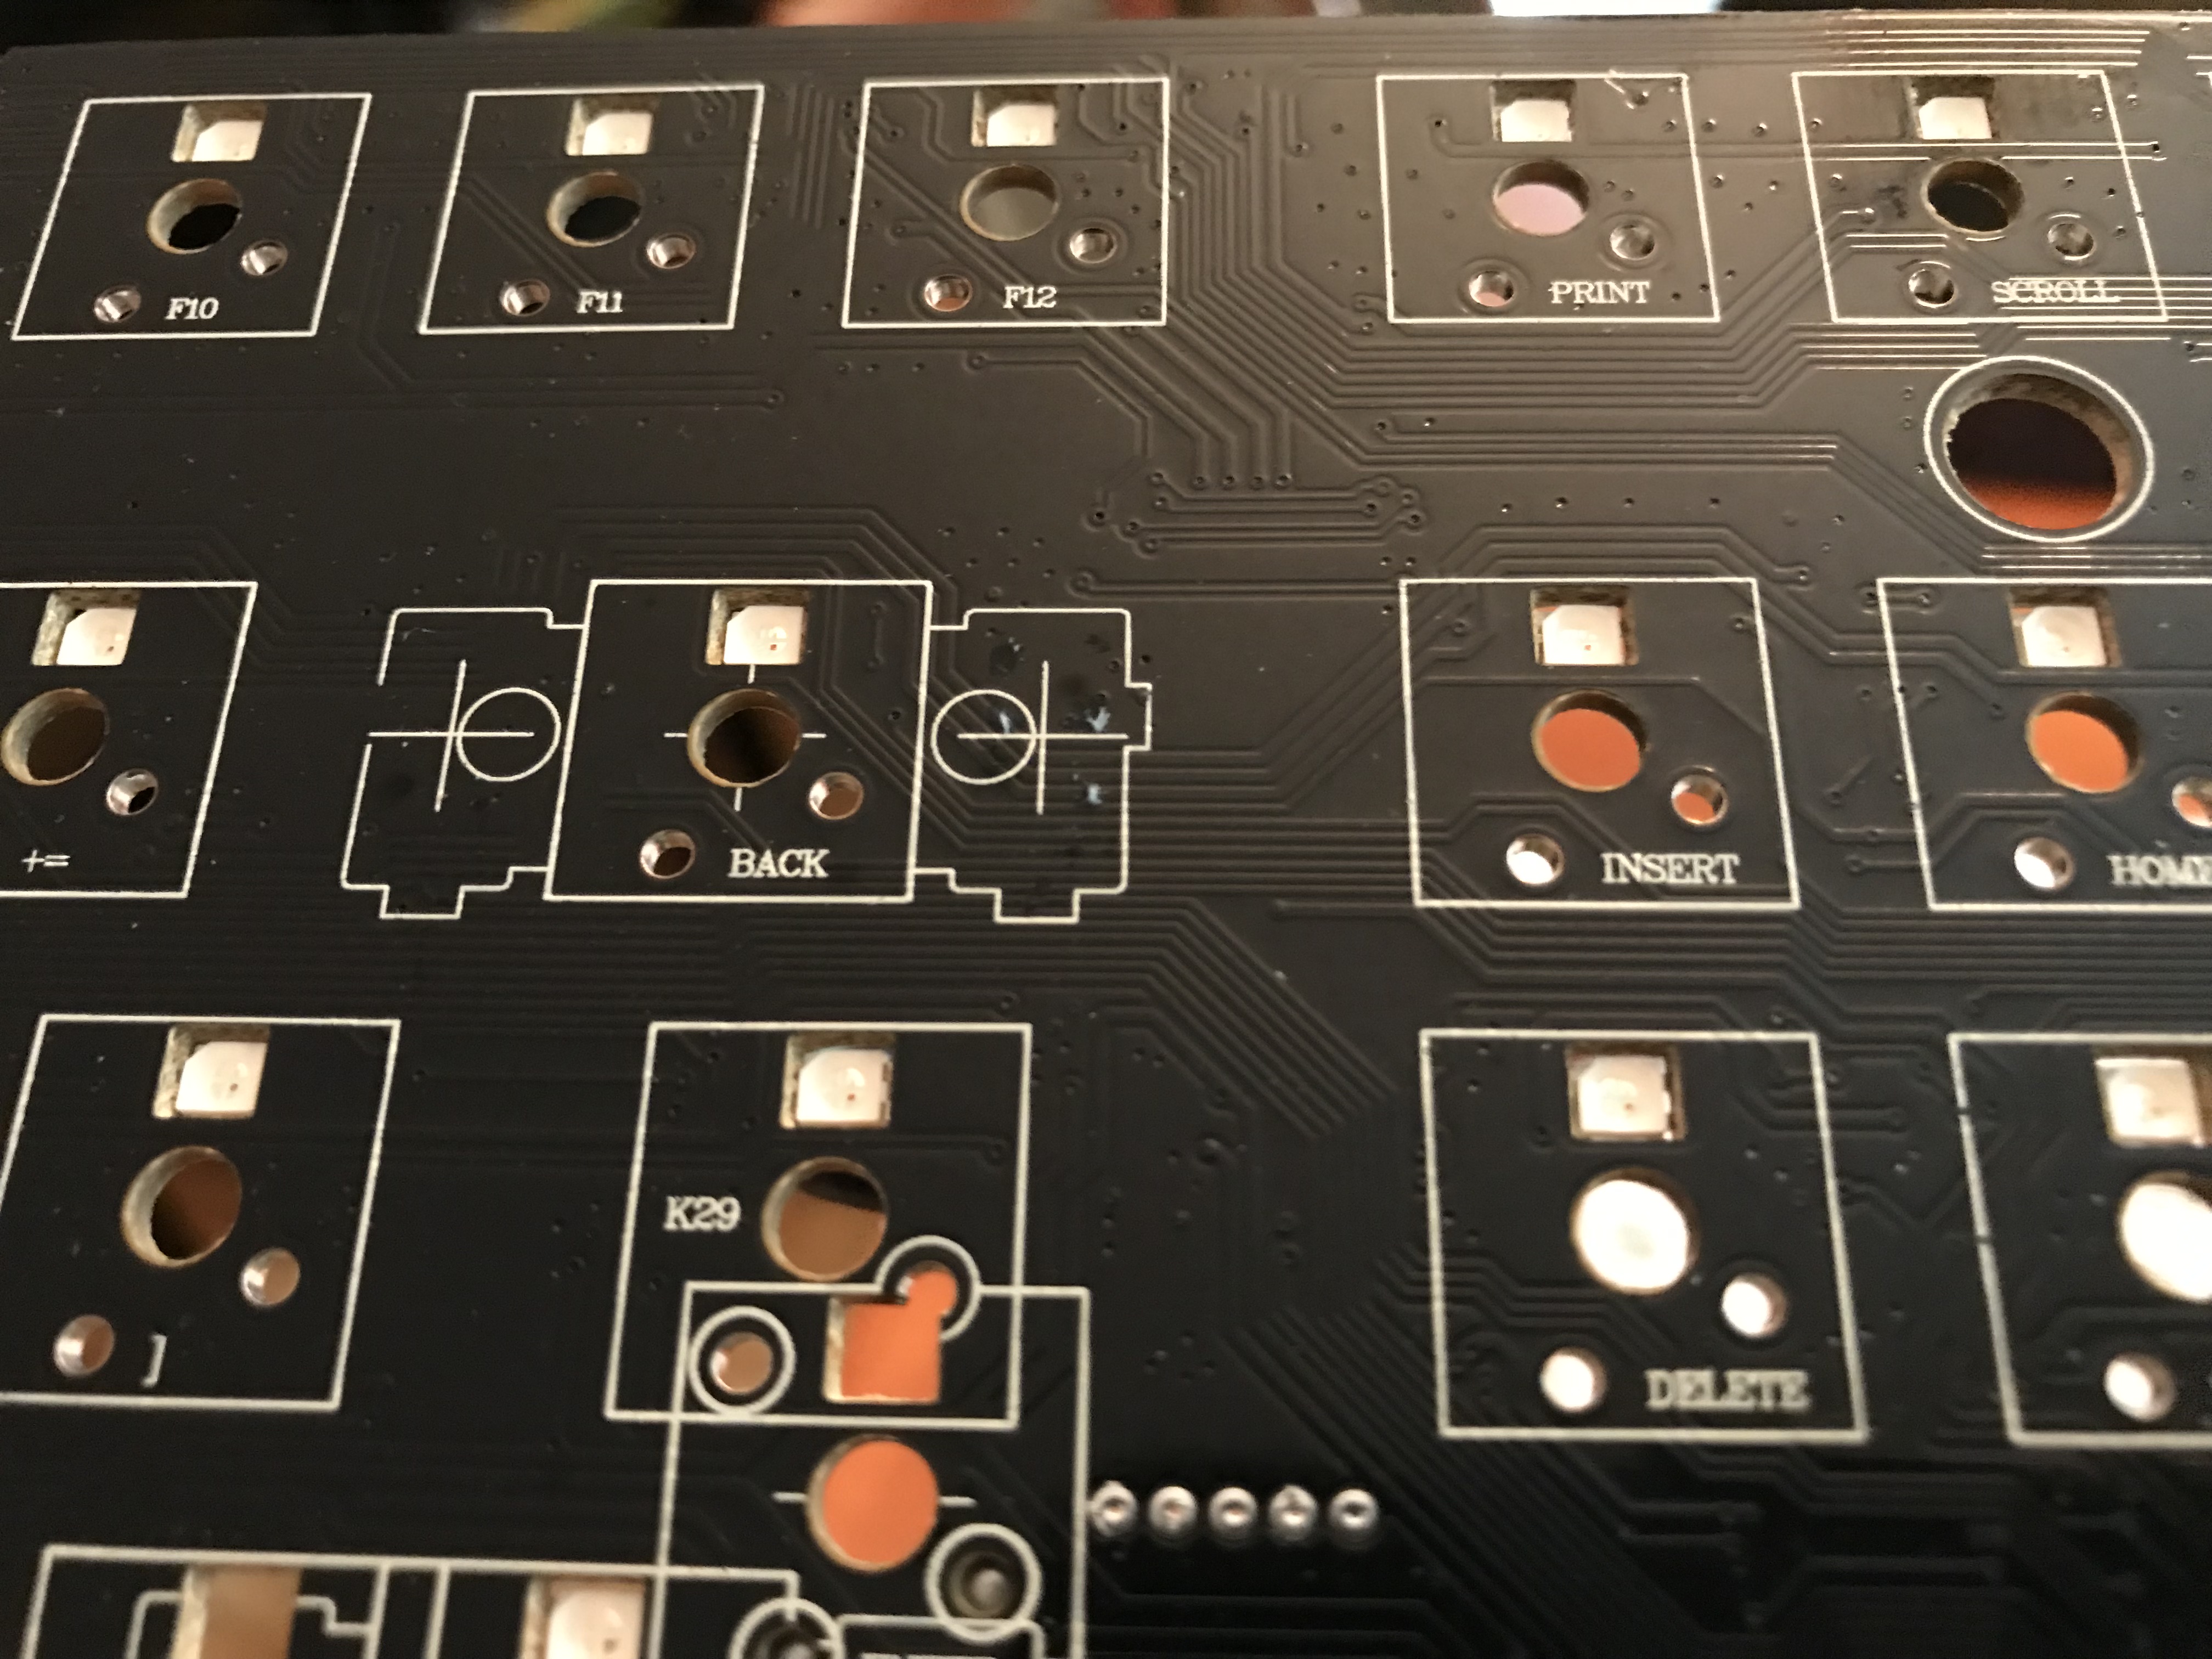
This means that the switches will be oriented “upside-down” relative to their usual orientation.
GMK keycaps will impact north-facing housings on key presses, interfering with both feel and sound.
In the event you want to use GMK keycaps with north-facing switches, the current best solution
is to place washers on the stems of the switches, elevating the keycaps just enough to avoid
impacting the switch housing.

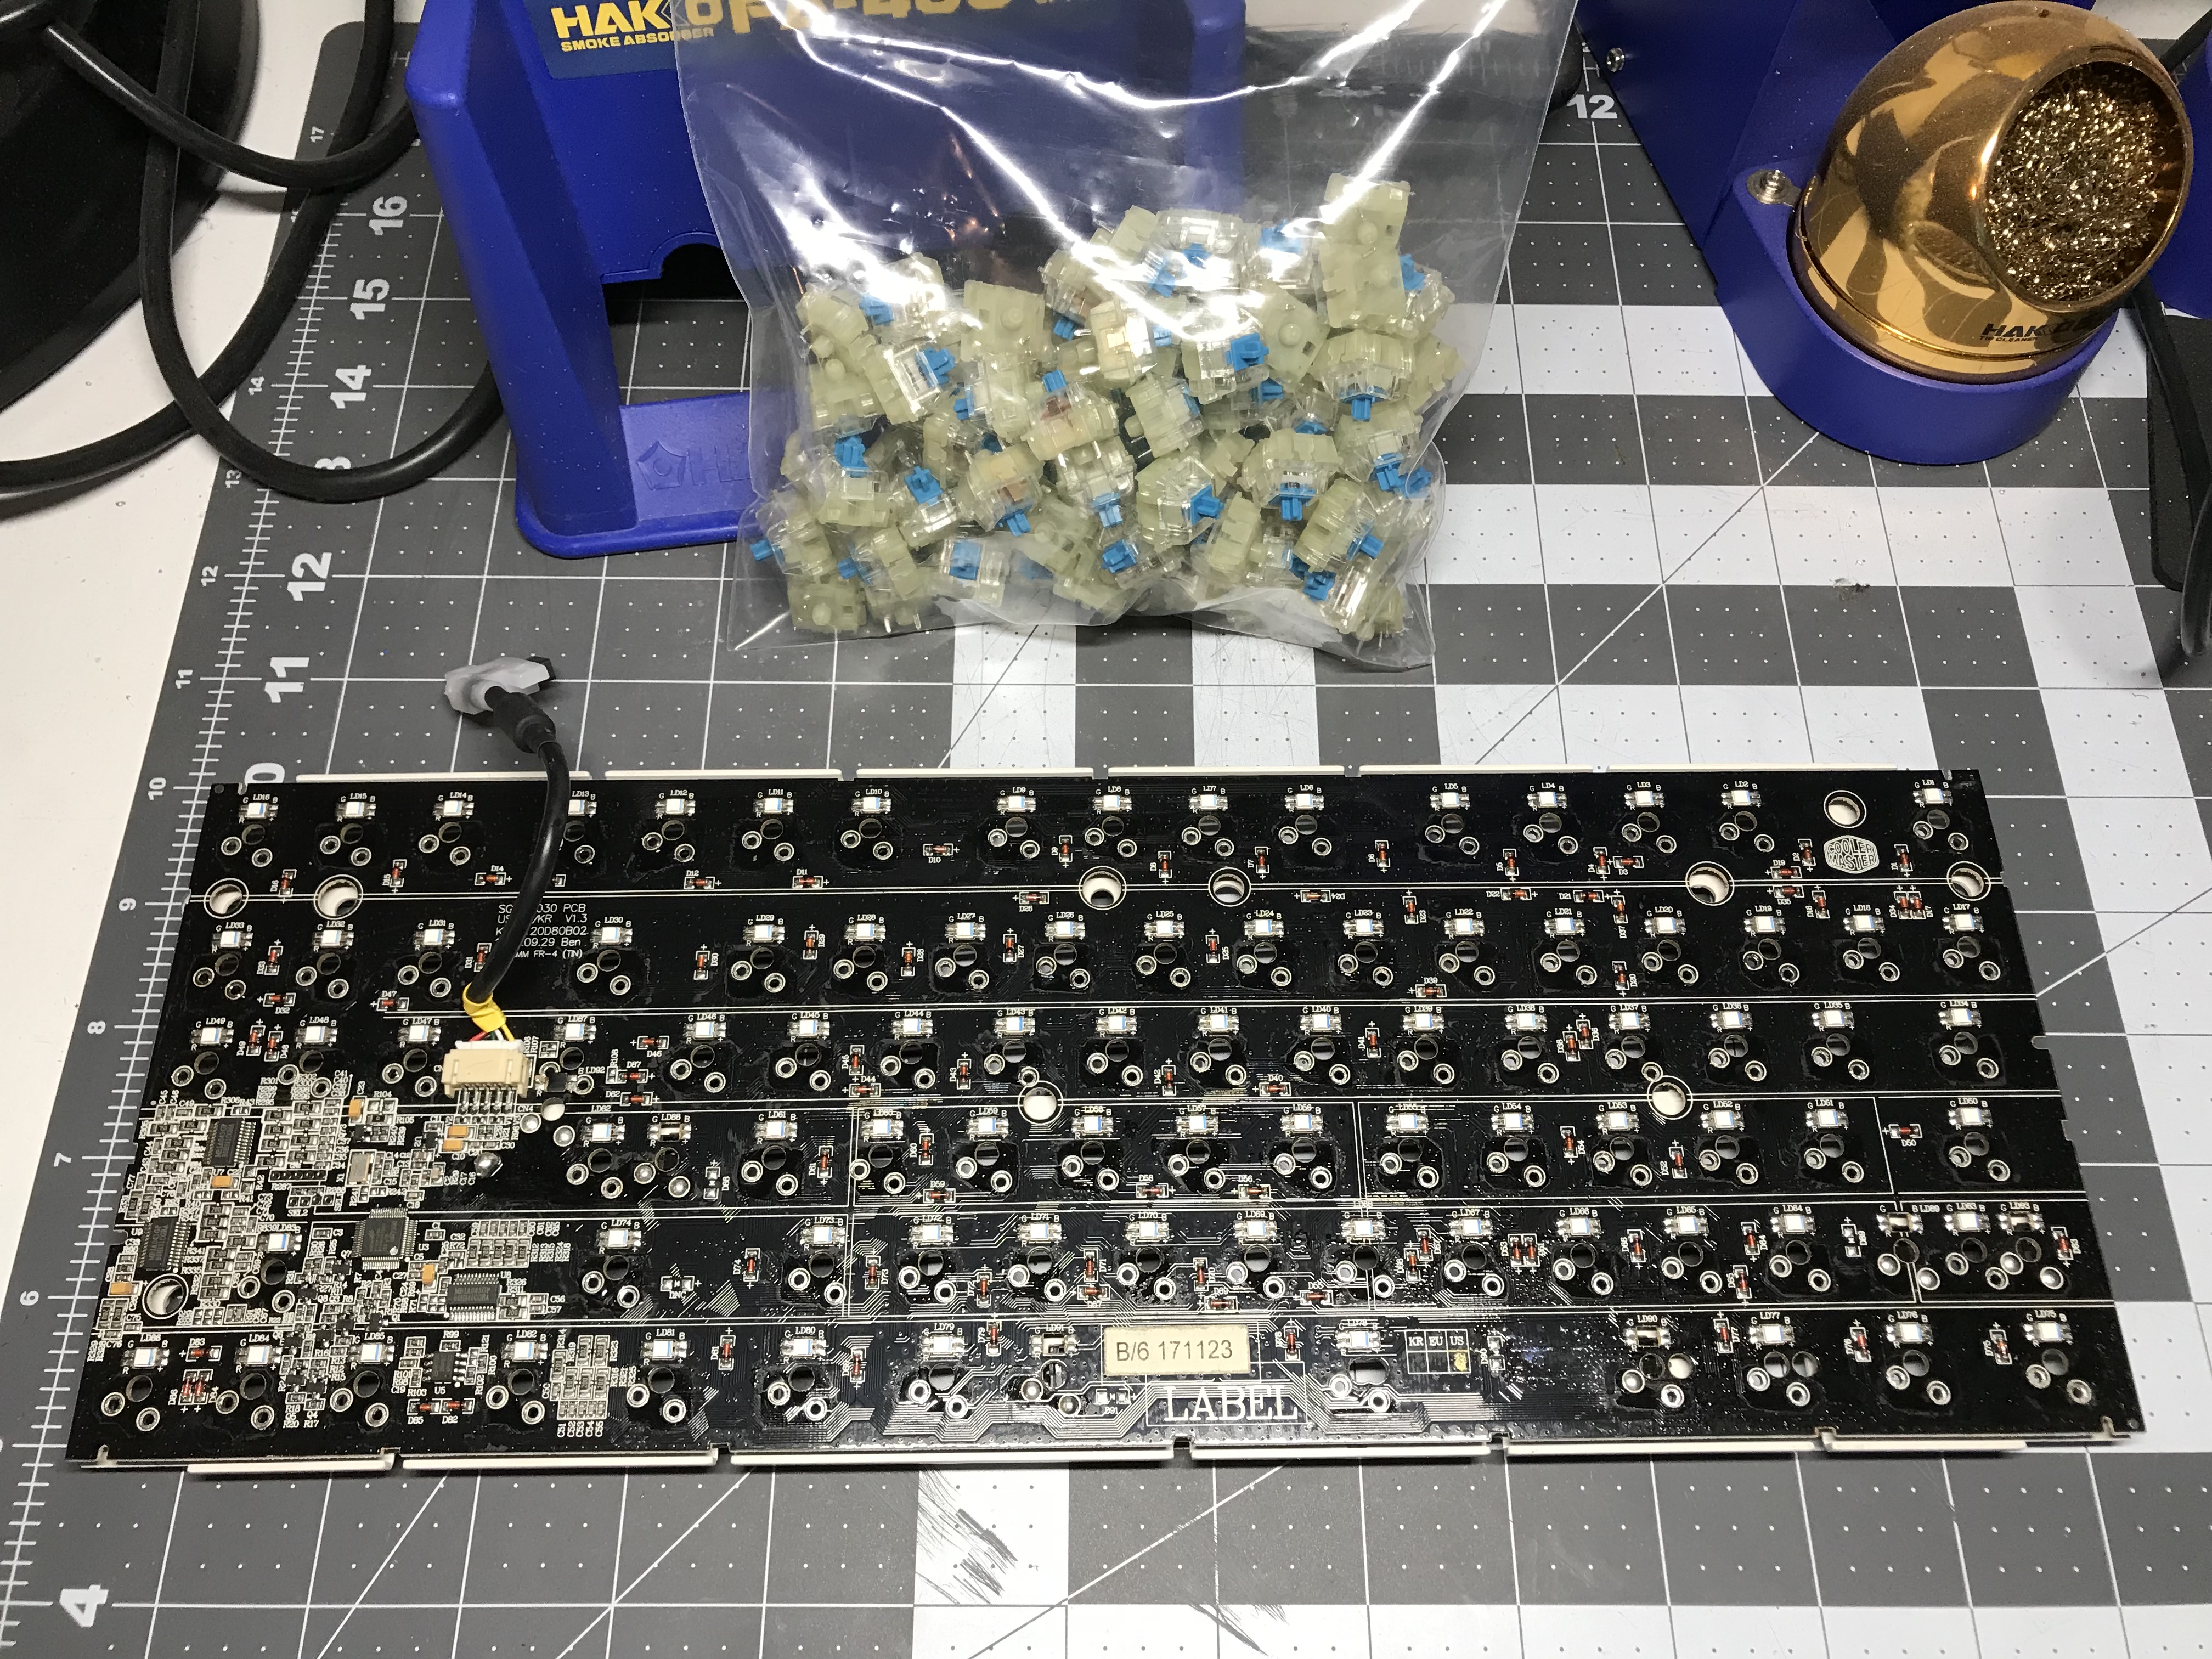
Back to our regularly scheduled program. It’s time to desolder a bunch of Cherry Blues, and for that job, I use a Hakko FR-301 desoldering gun. Expensive, yes, but it makes very short work of a job like this. If you think you might be desoldering more than a small handful of times, I’d strongly recommend it.

If you invest in this tool, here’s a quick primer on the technique I use. I don’t claim this is the best or only way to use this soldering gun, just that it works for me.

  • Set the temperature to 700F, and let the gun come fully up to temperature before using it. You want to work quickly at this temperature to avoid damage to the PCB, but this temperature also allows you to remove solder quickly.
  • I place the tip of the gun on the switch pin and bring it down over the pin to make contact with the solder. As soon I see the solder “give way”, usually a fraction of a second after contact, I immediately trigger the vacuum, working the tip on the gun gently in a circular motion to “mop up” solder, and then pull the gun away. The entire process from first contact to removal of the gun, at this temperature, is no more than three seconds.
  • Clean the tip of the gun periodically, just as you would clean the tip of your soldering iron.
  • If you find that the suction is not working well, there are three likely causes.
    • The suction chamber has filled up with solder. You’ll need to remove the chamber once the solder has cooled down, and pry the solder chunks out of the chamber. I find that it’s best to clean out the chamber every time I get ready to use the gun, before I have turned it on. Ever used a vacuum to clean your rug? Same maintenance idea - you’ll get better suction if the chamber is empty.
    • The chamber is not seated properly in the top of the gun. Both ends need to be properly seated for good suction to be produced.
    • The little white pad at the butt end of the chamber is completely covered with solder dust and grime, and needs to be replaced.
  • Sometimes, even after desoldering, a switch doesn’t want to come out easily. In this case, don’t apply force - you can easily damage the PCB. The likely cause is that a bit of solder is still attaching the switch to the PCB. In this case, the solution is counterintuitive, but it really works - add new solder and redo the solder joint, and then apply the desoldering gun again on the new joint.
  • Use the included wire to clean out the desoldering gun nozzle before it cools down and you store it, and do this every time you’ve finished a session with the gun. This helps to prevent any buildup of solder residue inside the nozzle.
  • Be aware that all solder is not created equal. In this particular case, the difference in cleanliness and flow between the OEM solder and the new Kester 63/37 solder I used was significant - the latter flowed much more cleanly, and desoldered much more easily.

Goodbye, Cherry Blues.

Switches and mods

To replace the clickies, I opted for silent tactile switches, the V2 Zilents. It’s worth noting at this stage that the Zilents have clear housings, which is relevant if you care about the built-in per-key RGB supported by the MasterKeys RGB PCB (I’ll also note in passing that the MasterKeys Pro S comes in two models, one with per-key RGB, and one with per-key white LEDs). Here are the switches after disassembly, in preparation for lubing.

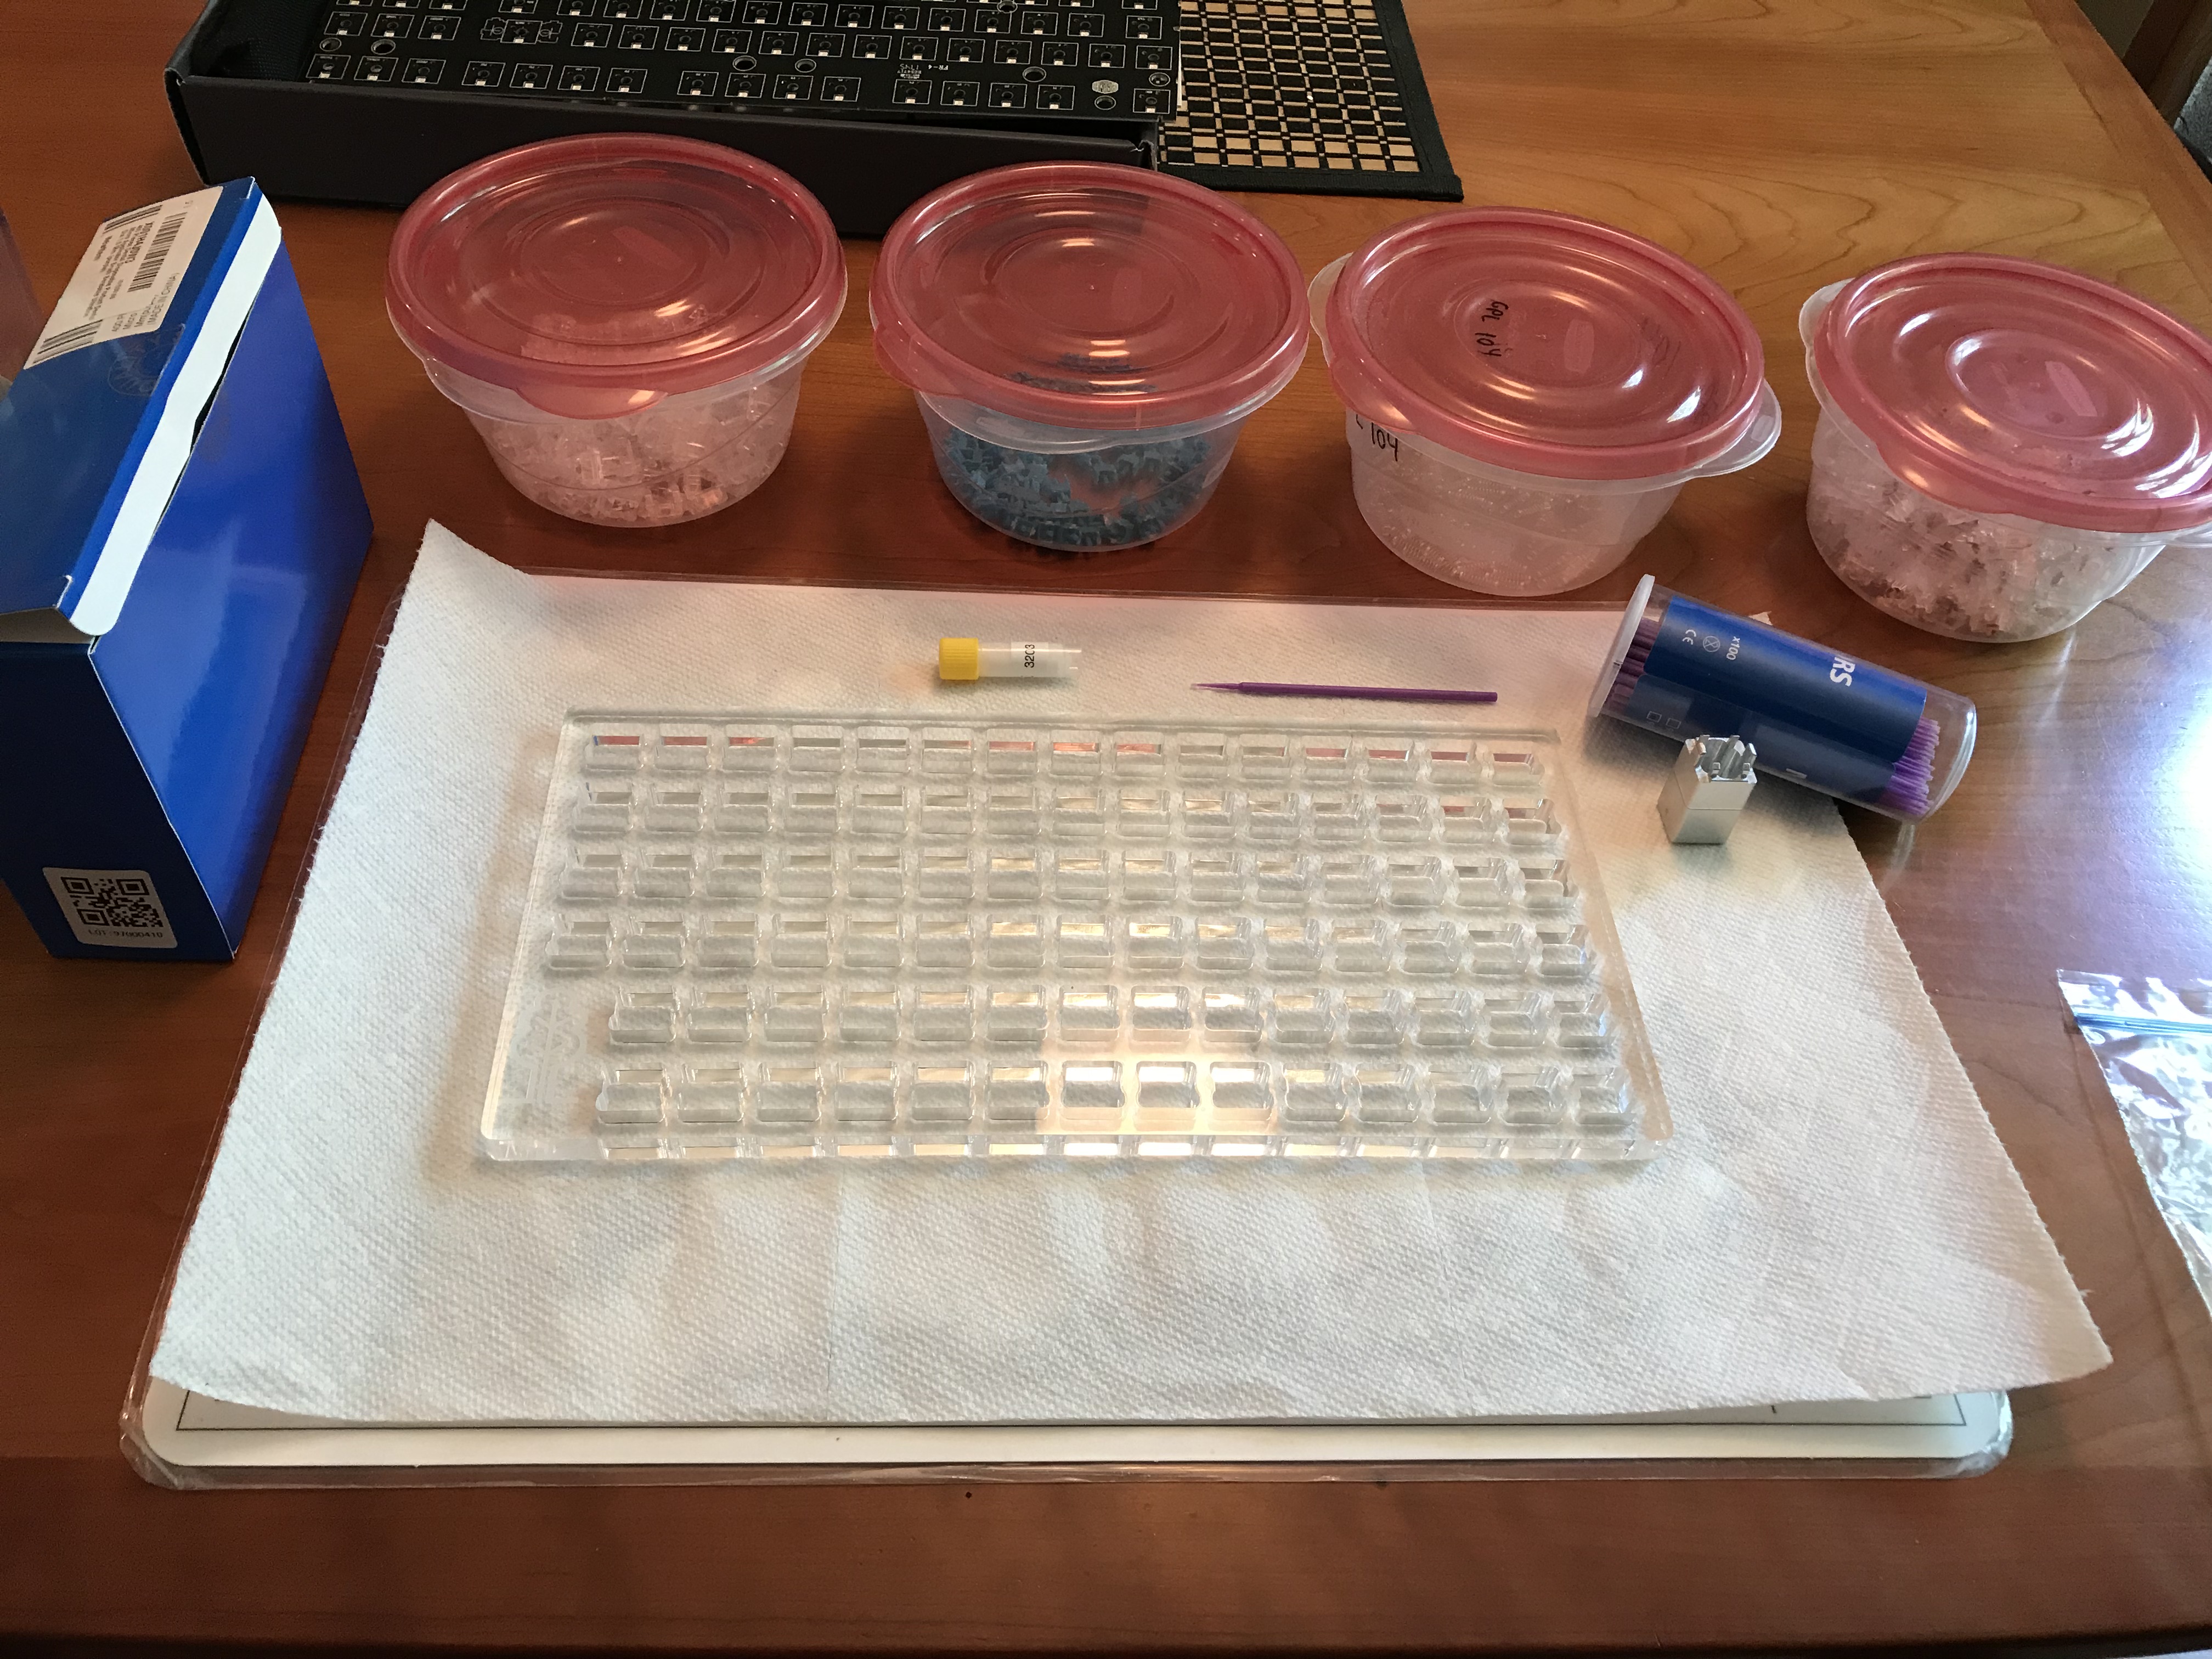
Using a dental applicator, I applied Tribosys 3204 to the housing rails and the stems. I don’t apply any
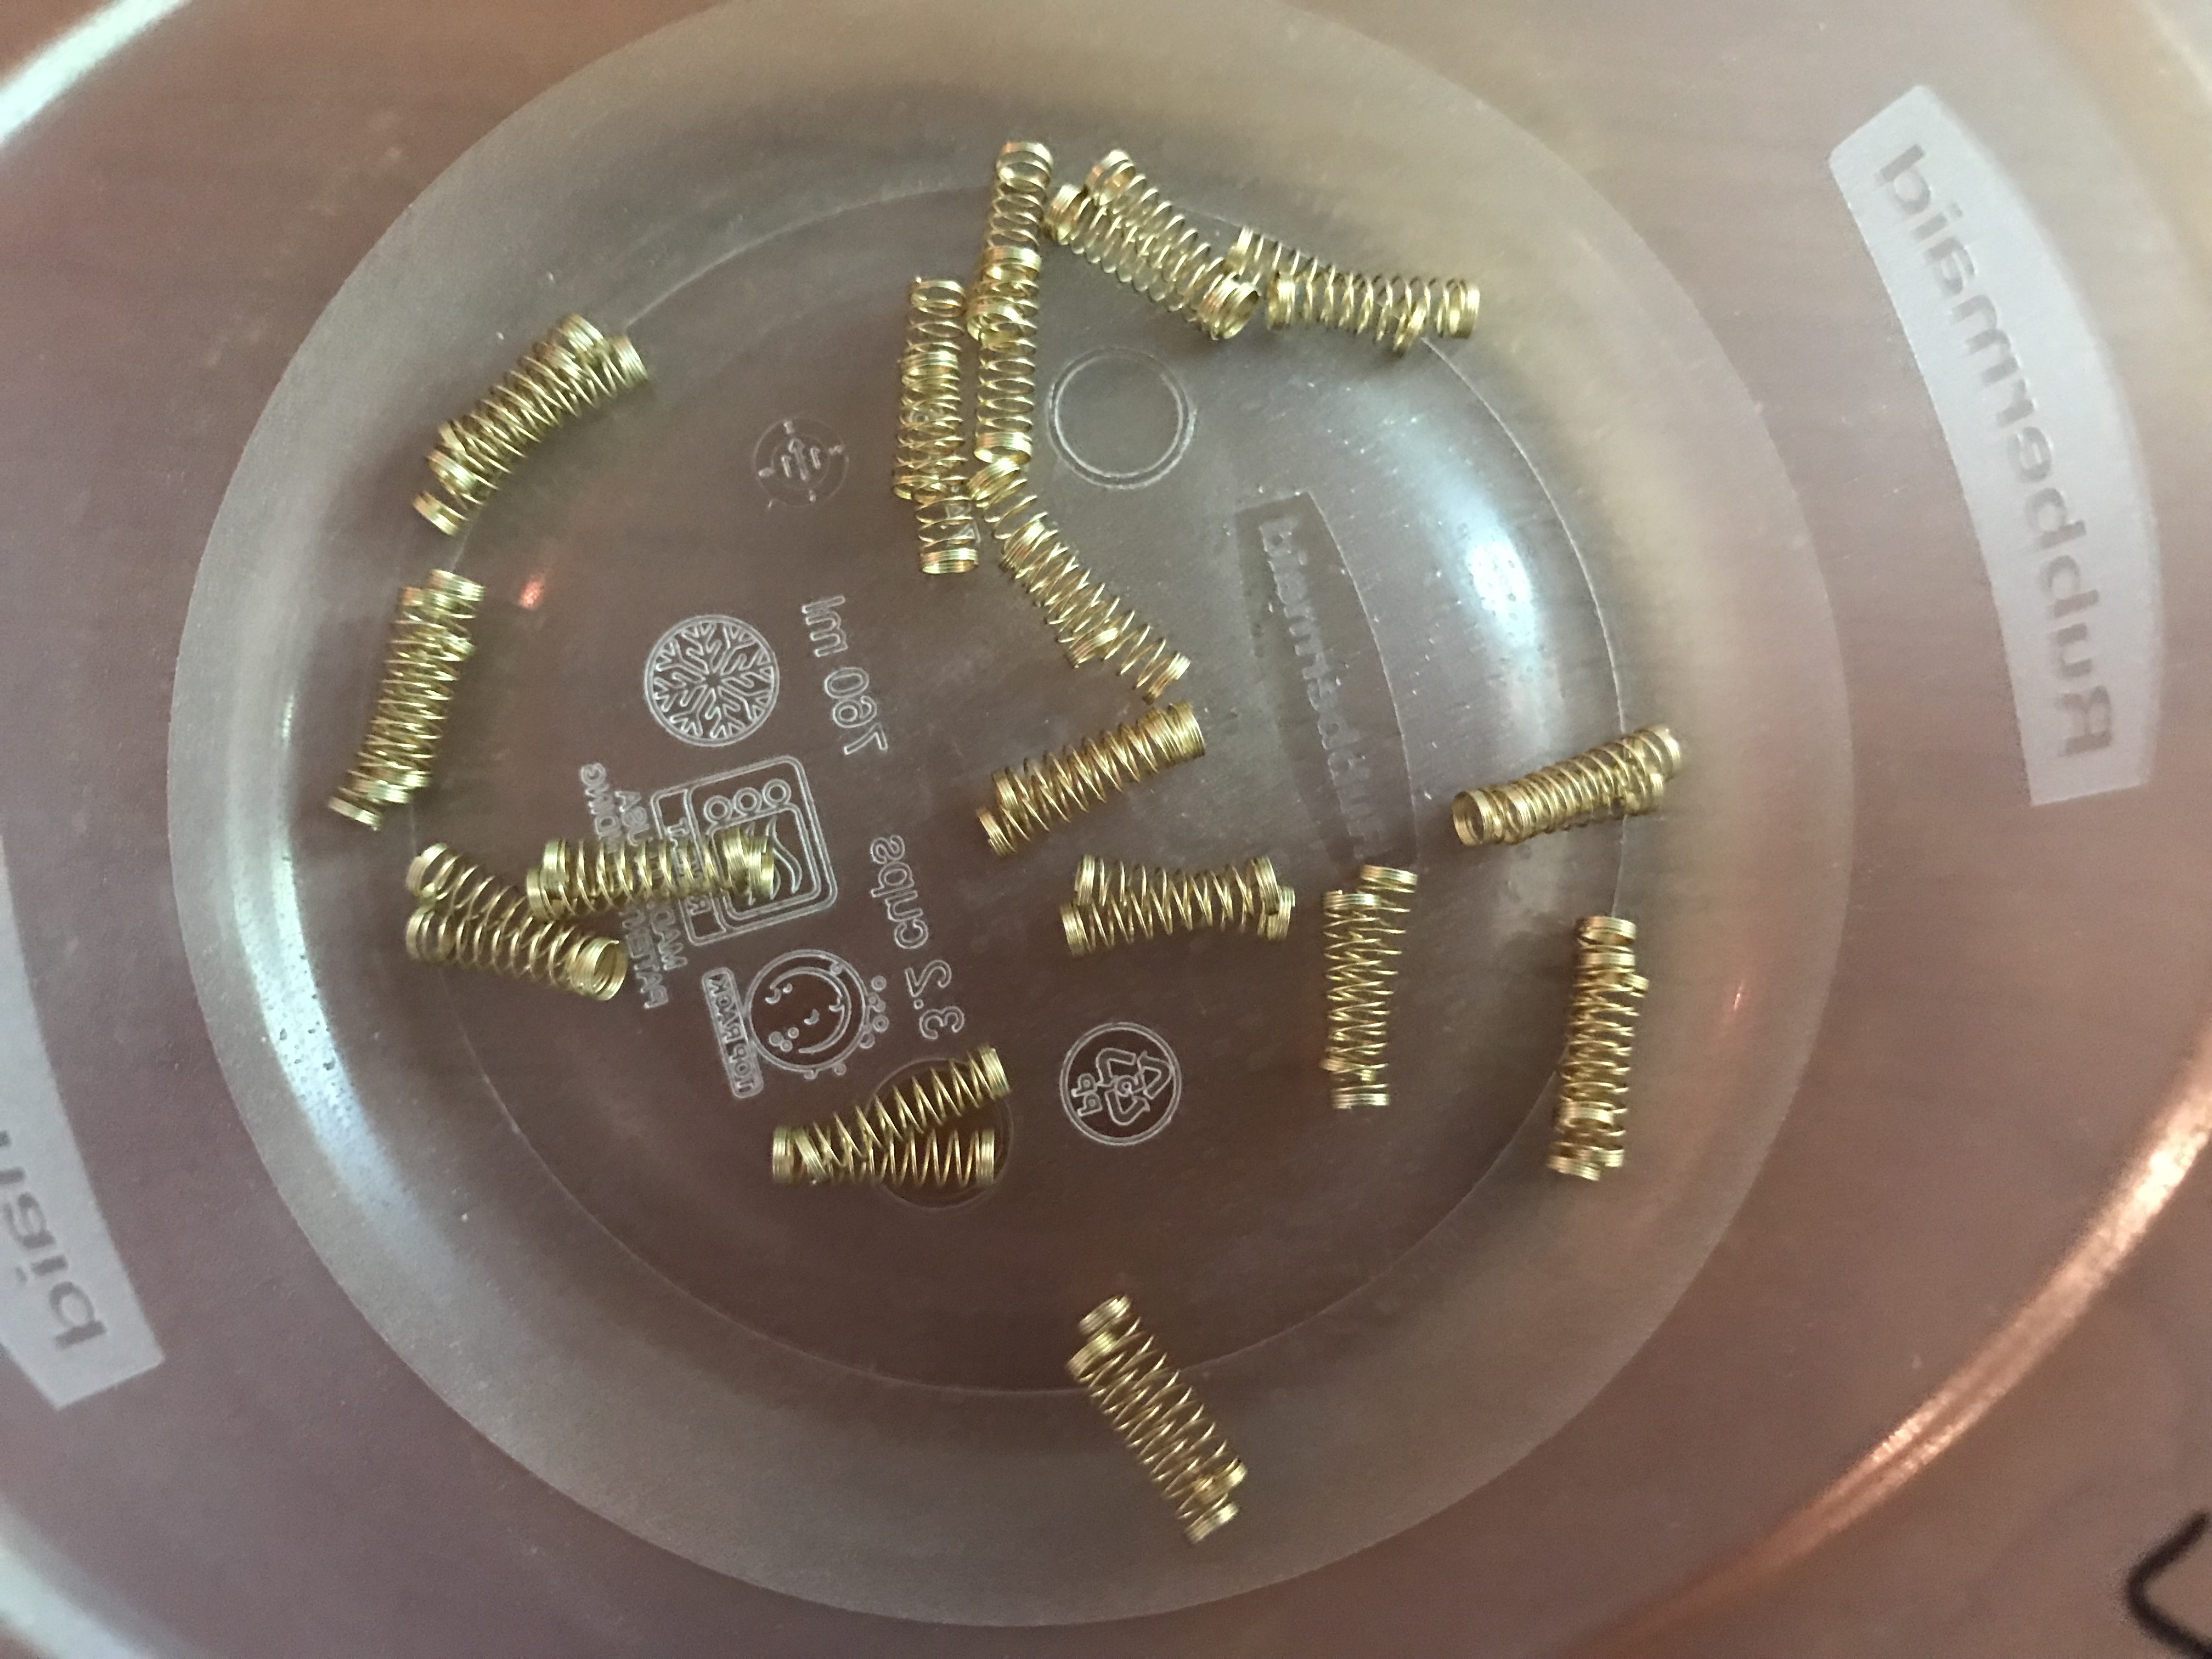
lube to the stem legs with the bump, to avoid losing any of the tactility. For the springs, I tub lube with Krytox GPL 104, about 1 drop per 6 springs, and give it a good 2-3 minute shake, using tweezers to remove the springs when I’m done. If you tub lube, note that as you remove springs from the tub, you’ll eventually reach a point where your tub contains only intertwined springs. Be gentle when you separate the springs, and remember that tweezers are your friends.

After reassembling the switches, there’s one last task we have to do to ready them for installation and soldering. The MasterKeys PCB does not have mounting holes for the plastic switch pins, so in order to use Zilents, which do have these pins, we’ll have to clip the pins off, flush to the switch housing to ensure that the switches will sit properly on the PCB. Flush cutters are essential for this task. Here’s a before-and-after shot of one Zilent switch - the pins sit on either side of the central mounting post in the first picture, and have been removed with flush cutters in the second picture.


Stabilizers and mods

The OEM plate-mount stabilizers that came with the CoolerMaster were rattly, and lubing wasn’t going to be sufficient; part of the rattle was due to a loose fit on the plate. To resolve that, I switched to GMK plate-mount stabilizers, which had a tighter fit on the plate.

For plate-mount stabs, I used the same methods I employed with the Phantom build - I clipped all four legs of each stab stems, lubed the stab stems, housings, and wires, and performed the @walkerstop O-ring mod. I find that with plate-mount stabs, the O-ring mod is essential to address upstroke noise, and as with the Phantom build, it made a huge difference here. The reason I know it made a huge difference is that I first tried both the OEM and the GMK stabs without that mod, and the upstroke noise was quite harsh, particularly for the spacebar. With the O-ring mod in place, there is no upstroke noise. It’s magical. I really wish GMK screw-in stabs had the same internal geometry as the plate-mount stabs, because I would love to apply this mod on those stabs as well.

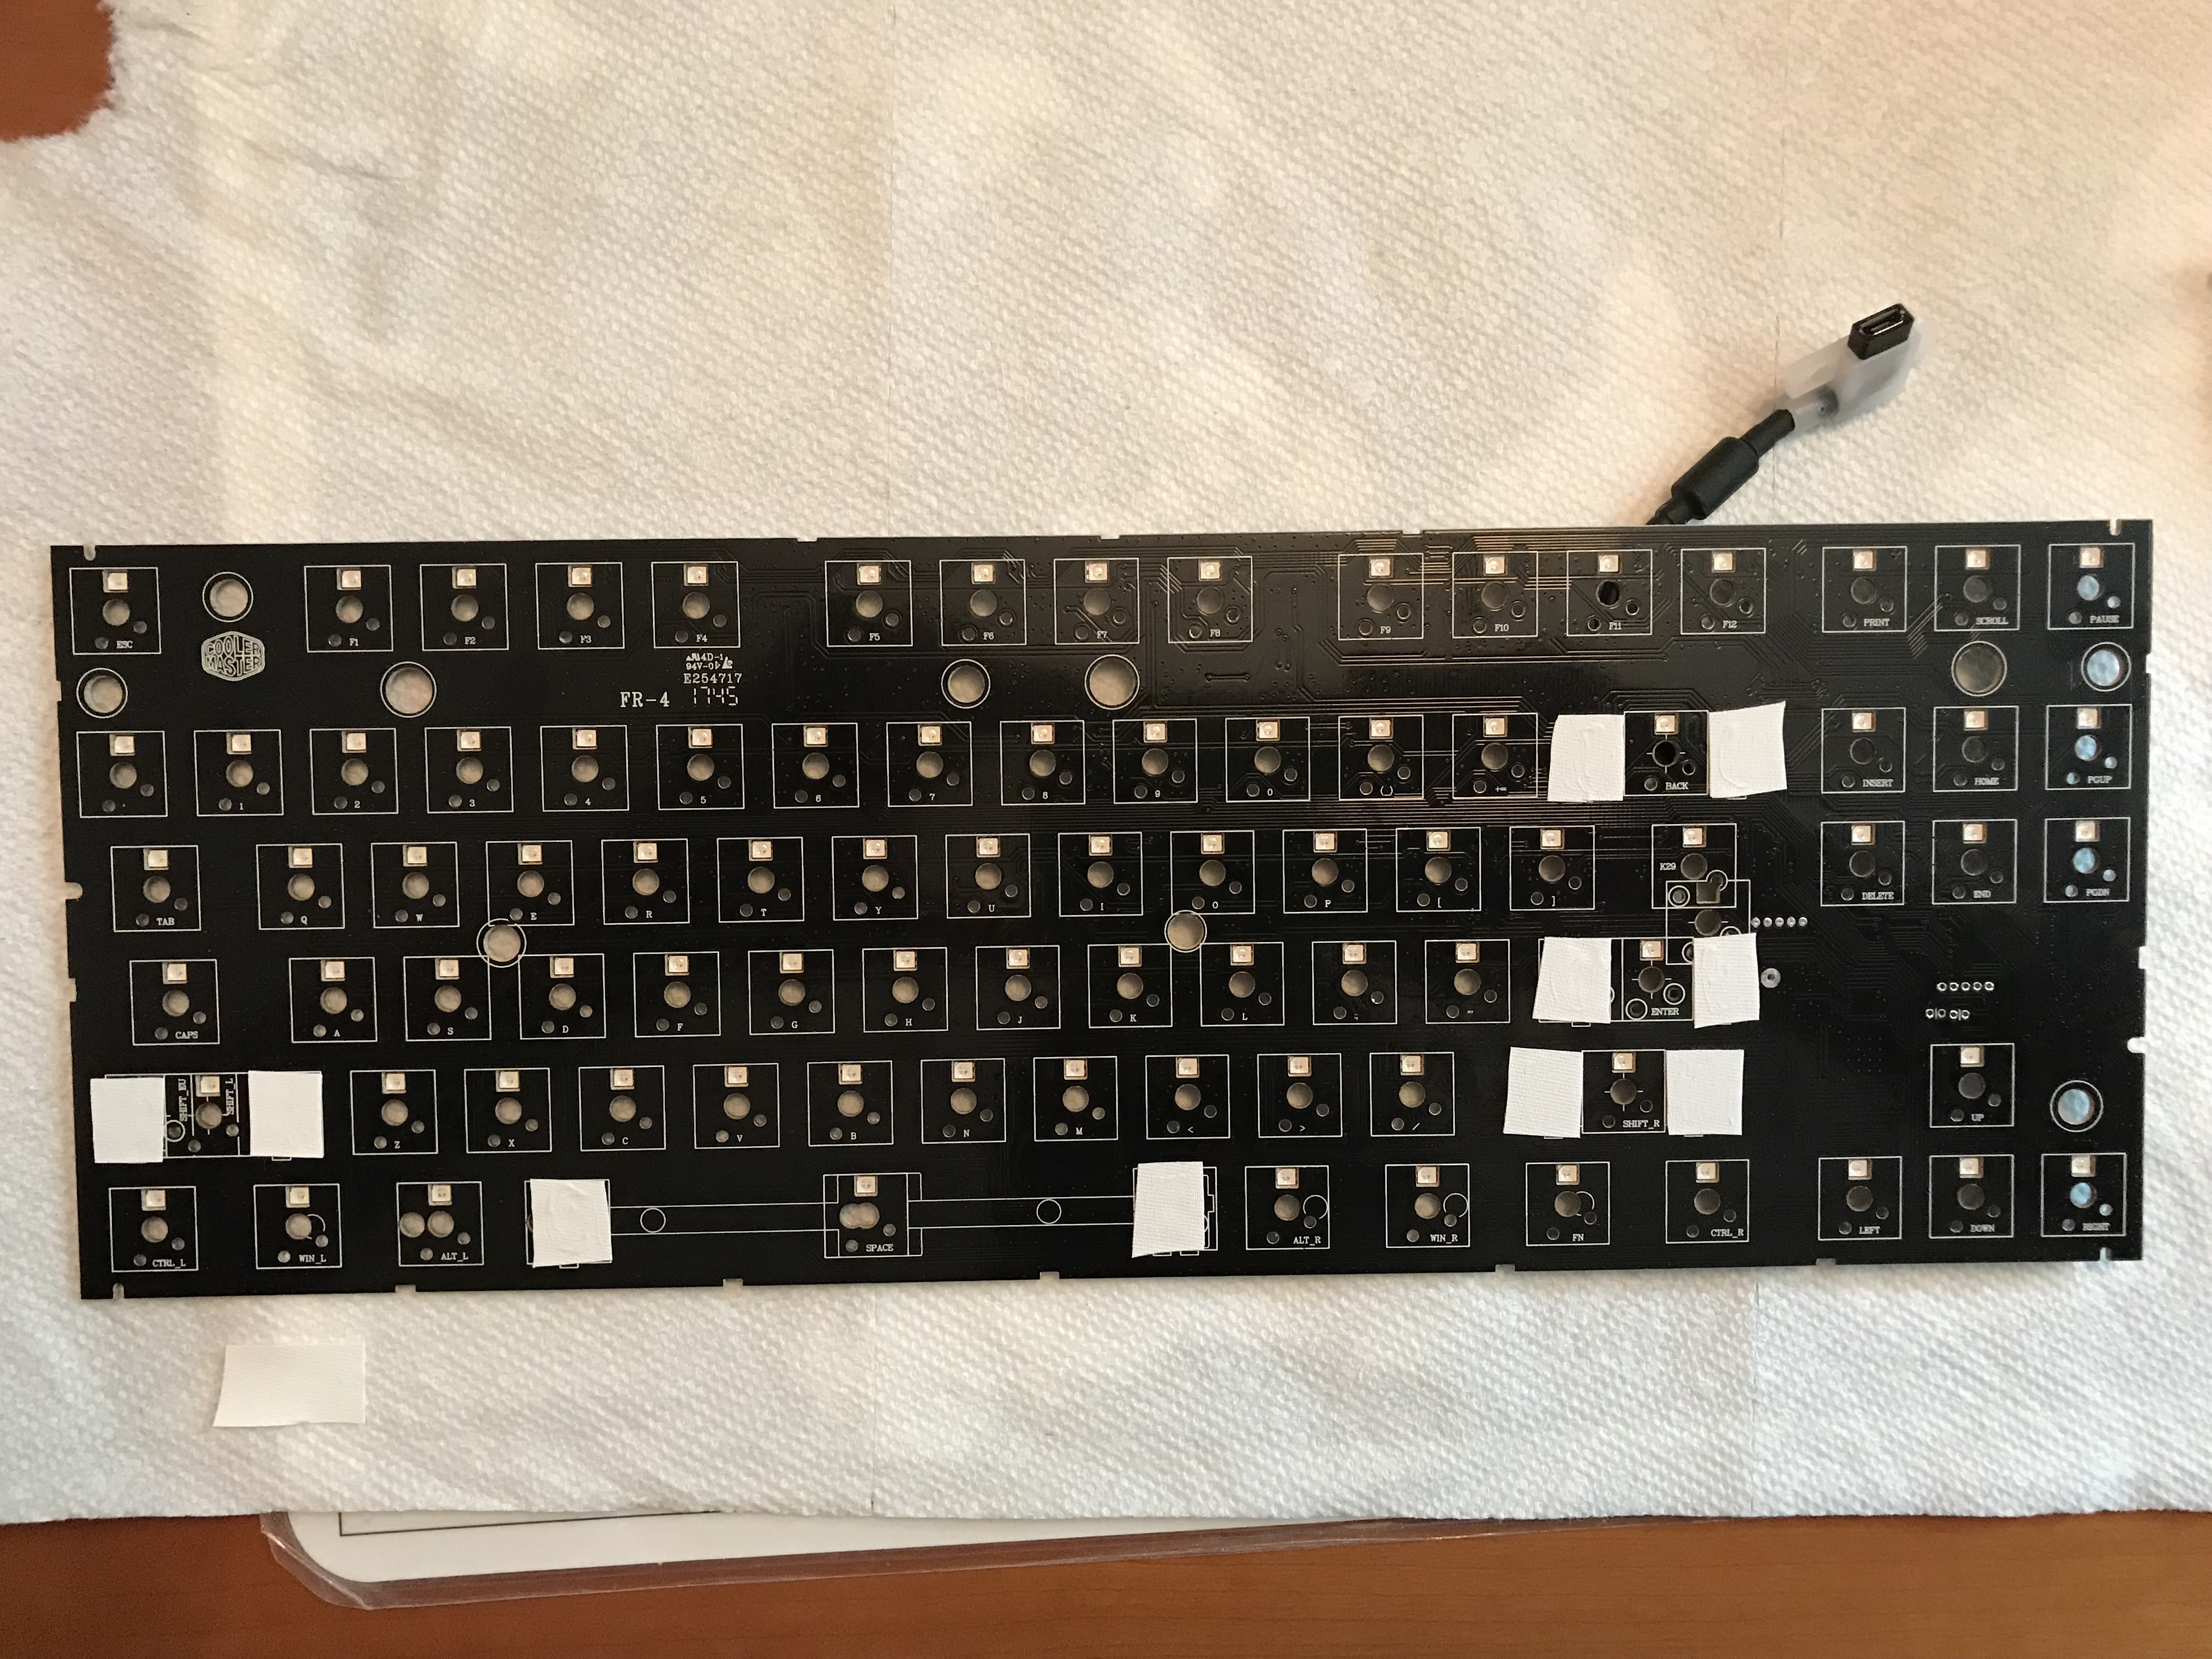
It’s not clear to me that there is any stab impact on the PCB when plate-mount stabs are used, but out of an abundance of caution, I used gaffer tape for a bandaid mod. I will say that if you’re doing the bandaid mod, it’s quite convenient when the PCB has graphics showing exactly where the switches and stabilizers sit.

PCB/plate dampening

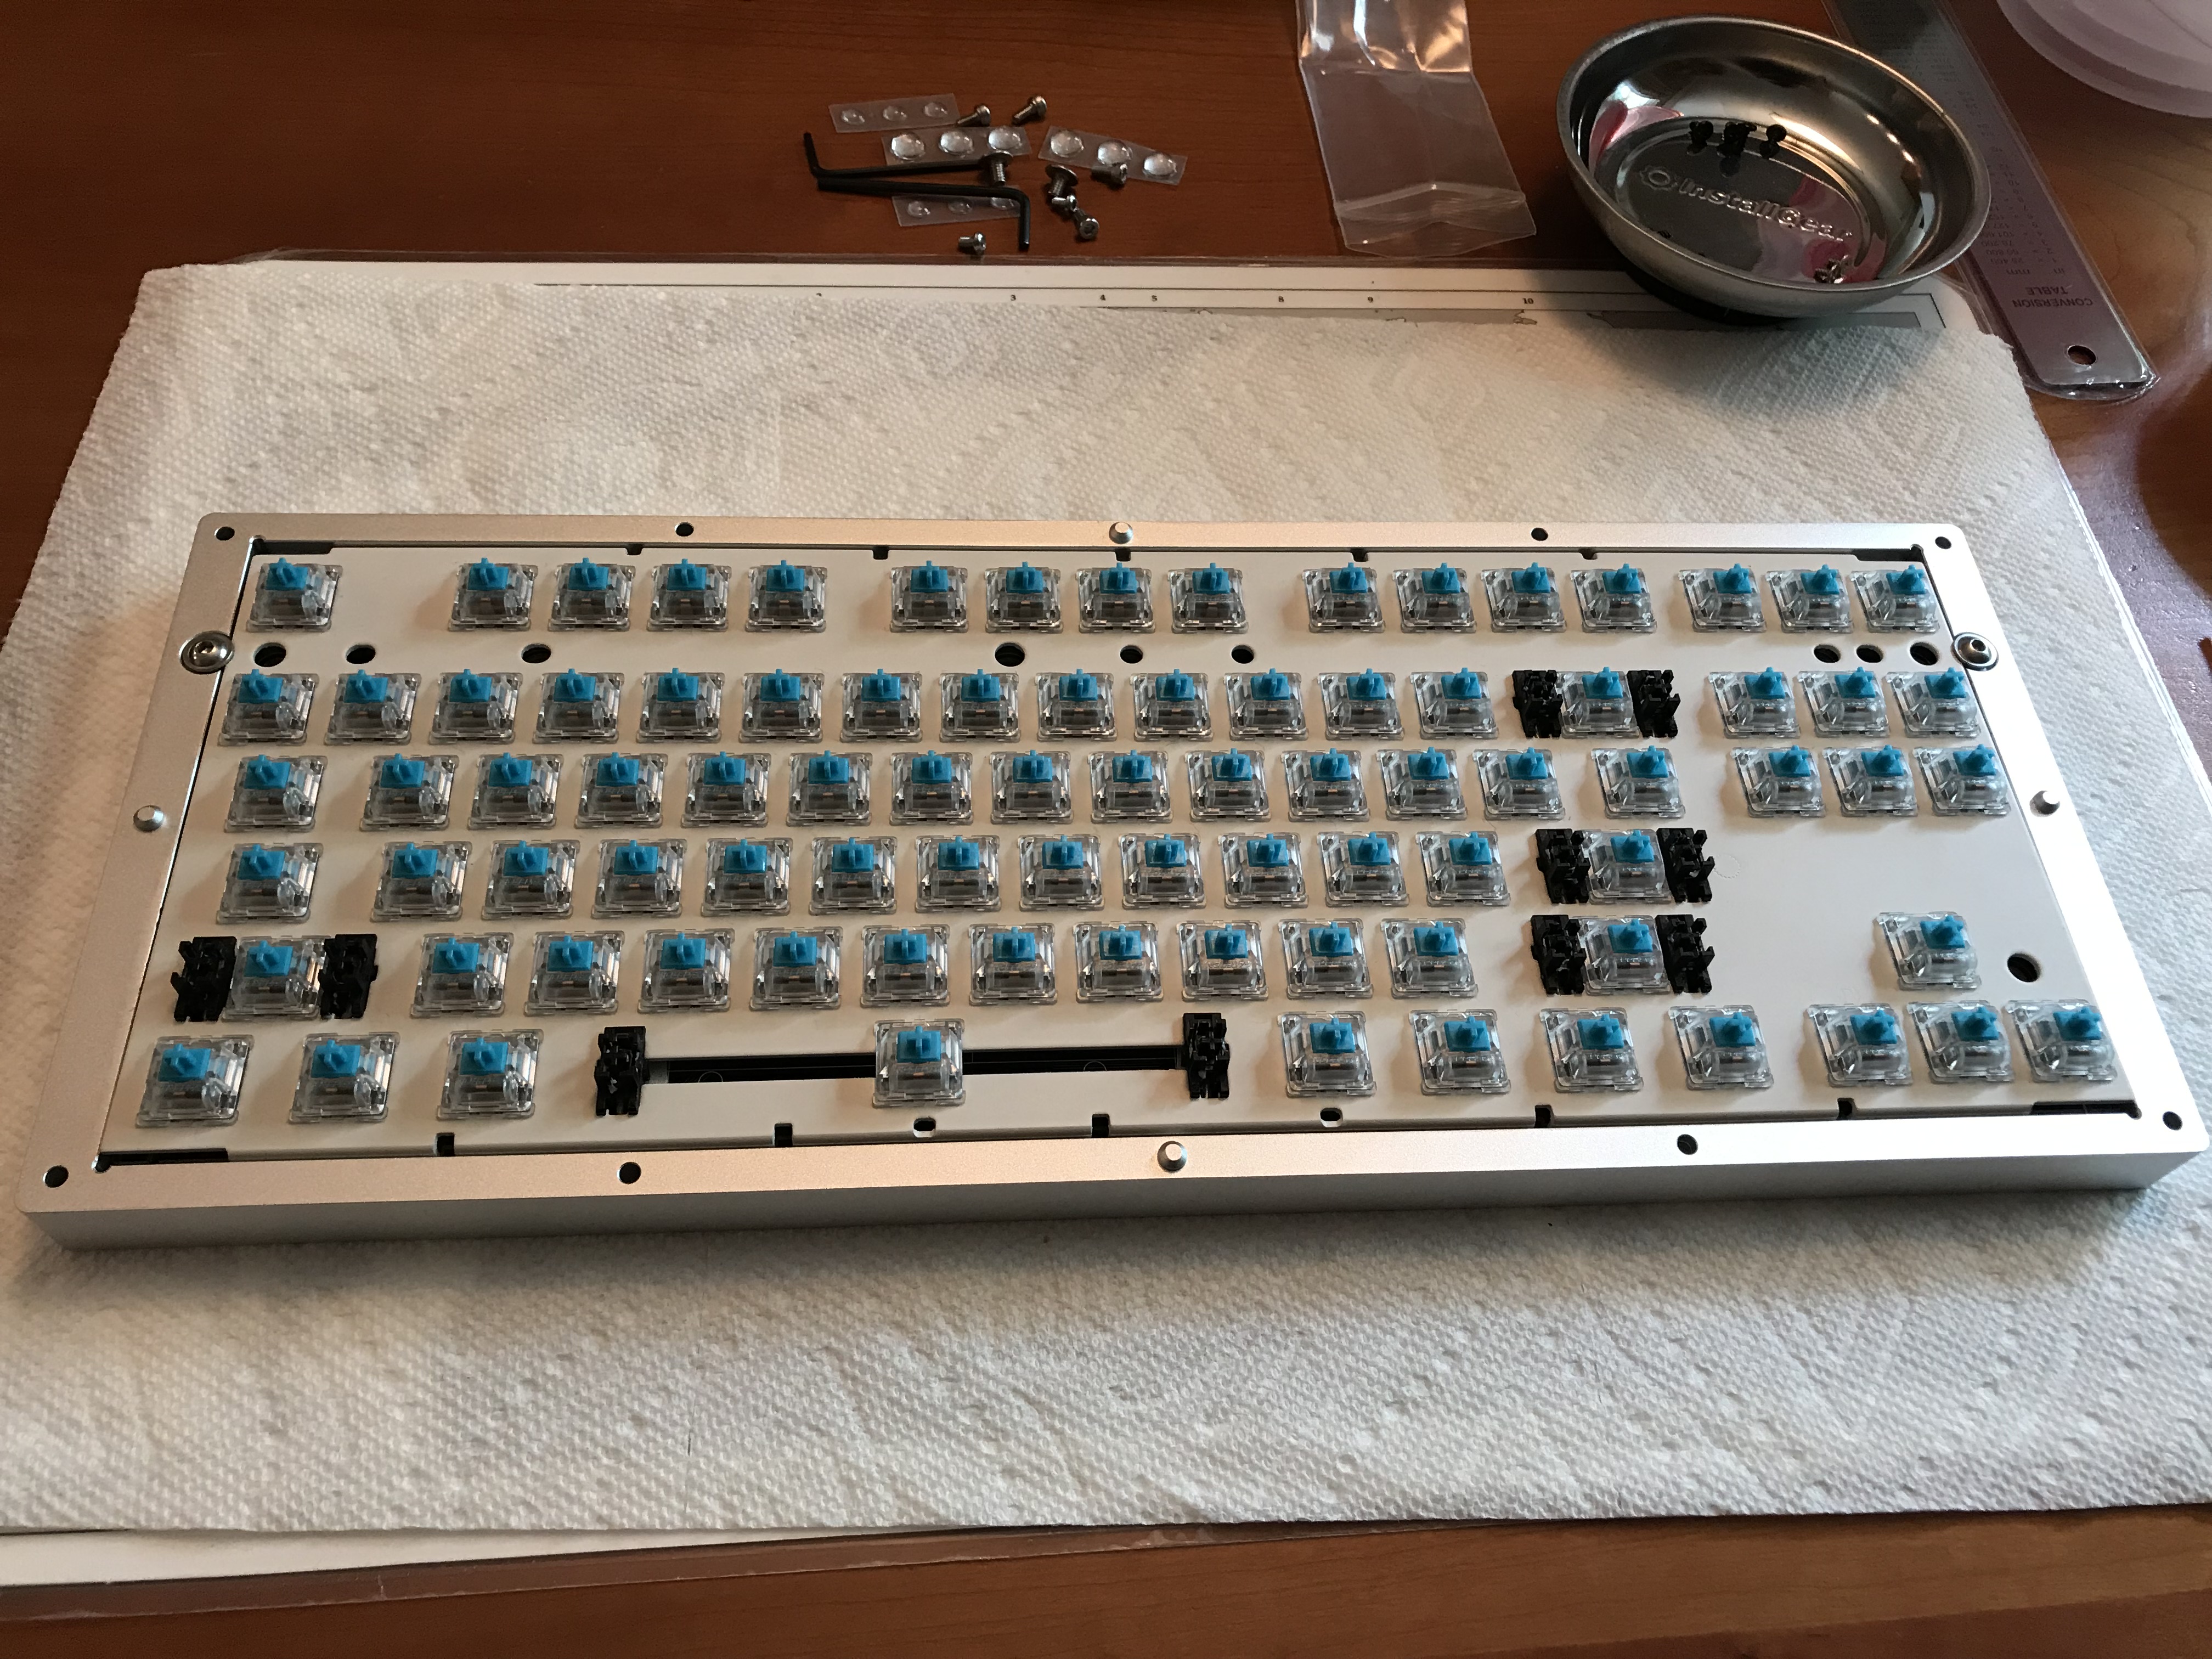
After placing a few switches at the corners of the plate and at a few locations in the interior of the board, and double-checking to make sure everything was seated and aligned properly, I soldered them in place. This is a good time to address sound dampening for the plate, while we still have access to the gap between the plate and PCB.

In the past, I’ve used thin strips of Sorbothane, placed between the plate and PCB along the gaps between switches, to dampen plate ping. This has worked, but in the past I’ve done this before any soldering takes place. Sorbothane works best under a bit of compressive load, but that’s problematic, since the same load makes it difficult to get switches properly seated on the PCB for soldering when the Sorbo is “pushing back” as you try to solder. I used this build as an opportunity to try @donpark’s Sorbothane strut mod, which involves pressing small pieces of Sorbothane into the gap between the PCB and plate after a few switches have been soldered in.

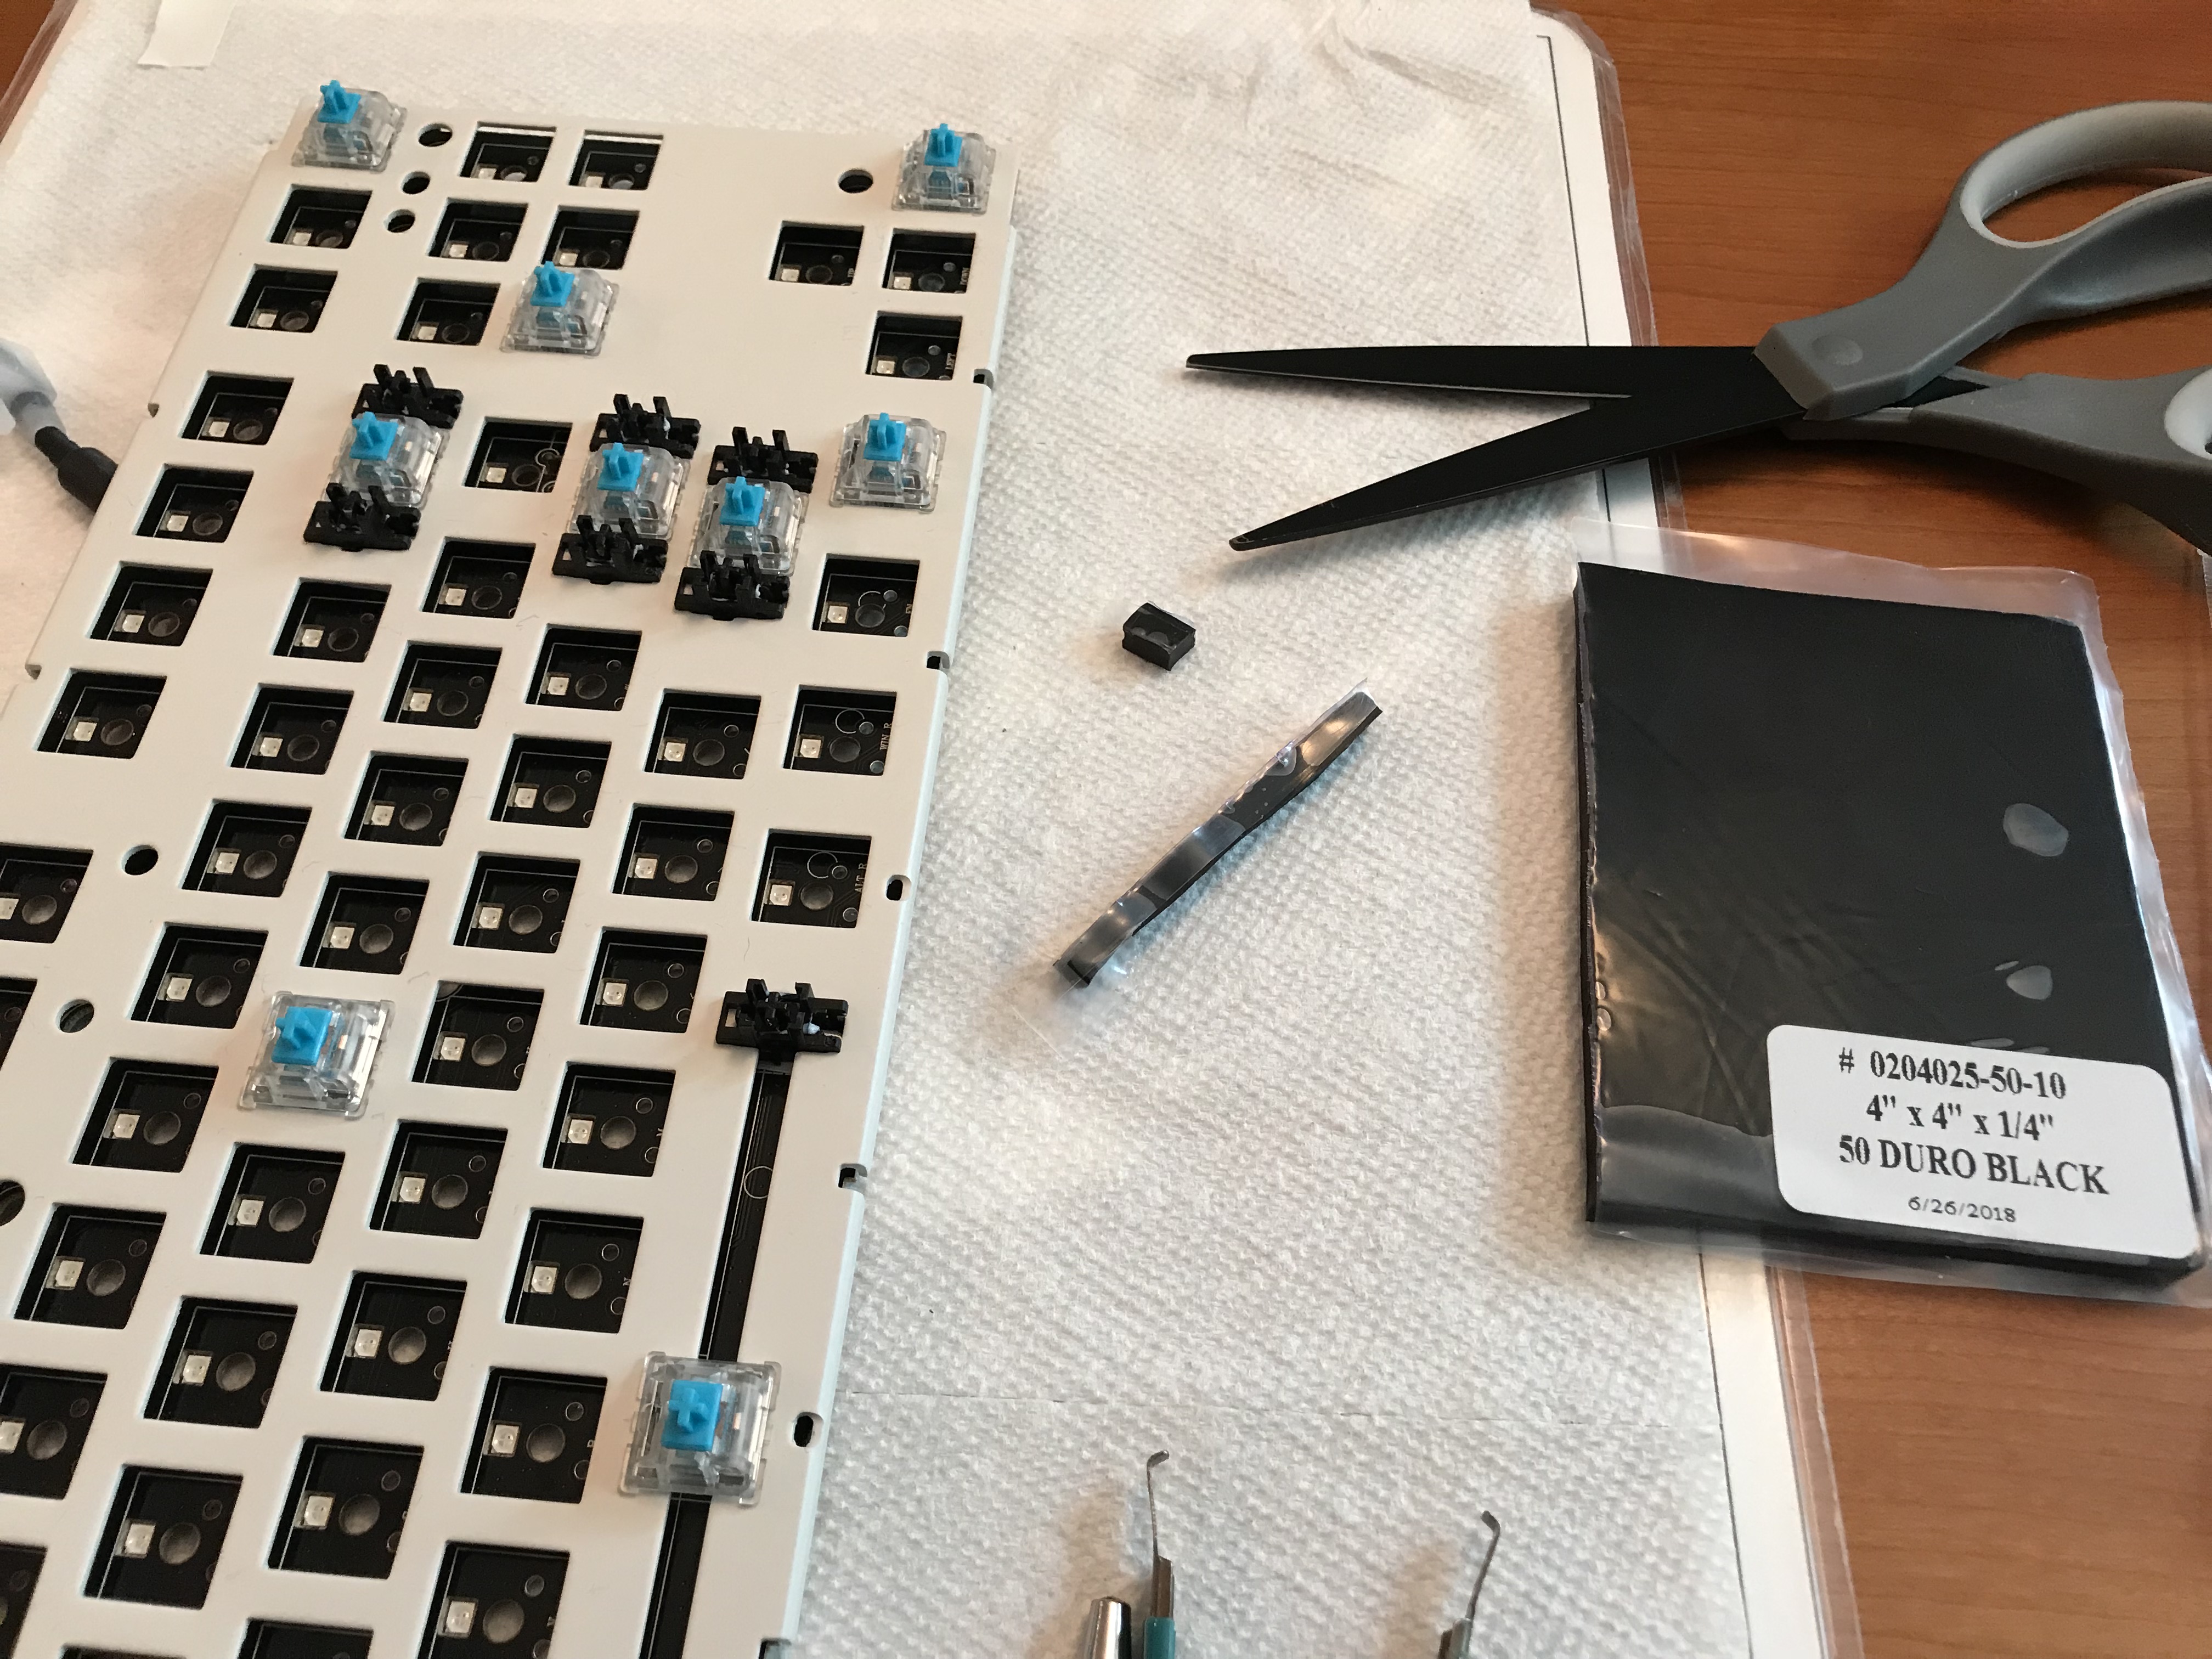
After cutting a few very small squares of Sorbothane, as in the picture above, I used tweezers to push them into place at various points between the plate and PCB, making sure that their placement would not interfere with switch installation. It’s almost impossible to see the Sorbo in pictures once it’s been installed, but trust me - it’s there, right underneath the plate. Here’s one example:

Doing the dampening in this way, it’s also easy to test the sound before and after the mod, by rapping the plate with your knuckle. In this case, putting 6-7 of these little squares in was enough to remove all of the ping and introduce a more bassy tone.

Once the Sorbothane struts are in, it remains to place and solder all of the remaining switches. With that task done, our PCB/plate assembly is now ready for the Norbatouch treatment.

Norbatouch installation

Because our hypothetical history is close to the real one, we’ll have to go with the “Aerospace Aluminum” finish. The top and bottom halves of the case are held together by eight screws. Also, gotta love the Pi.

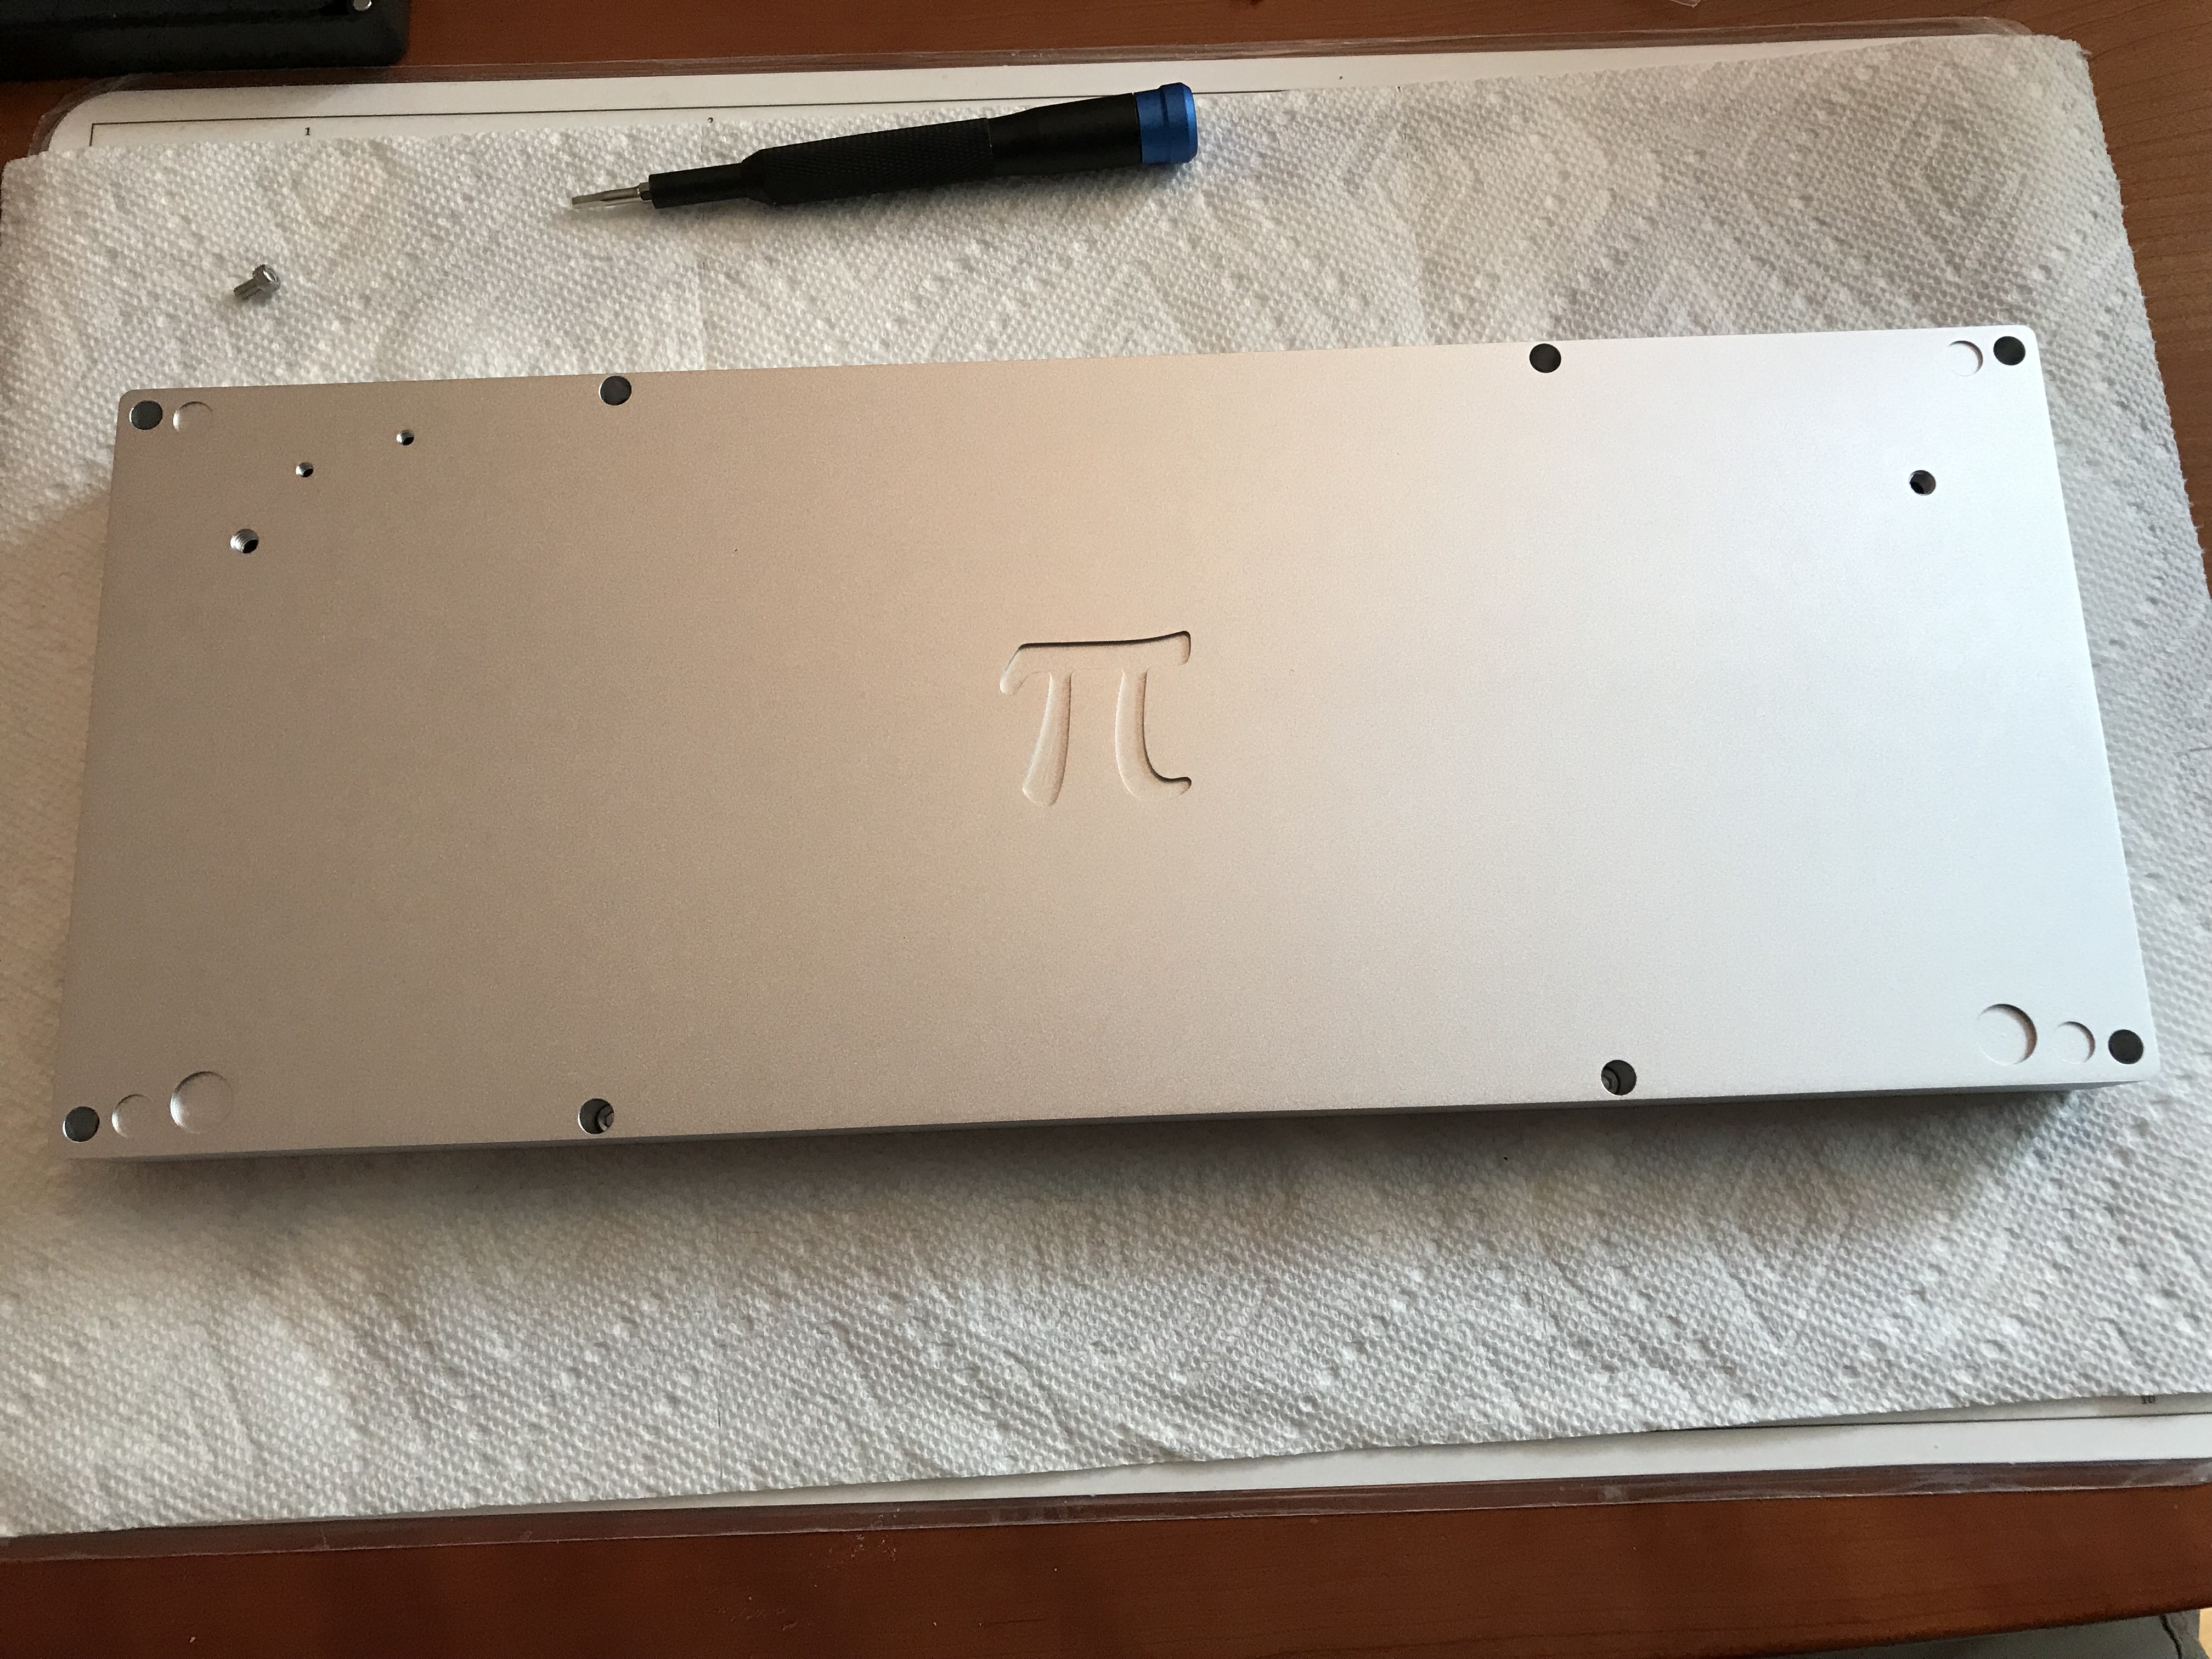
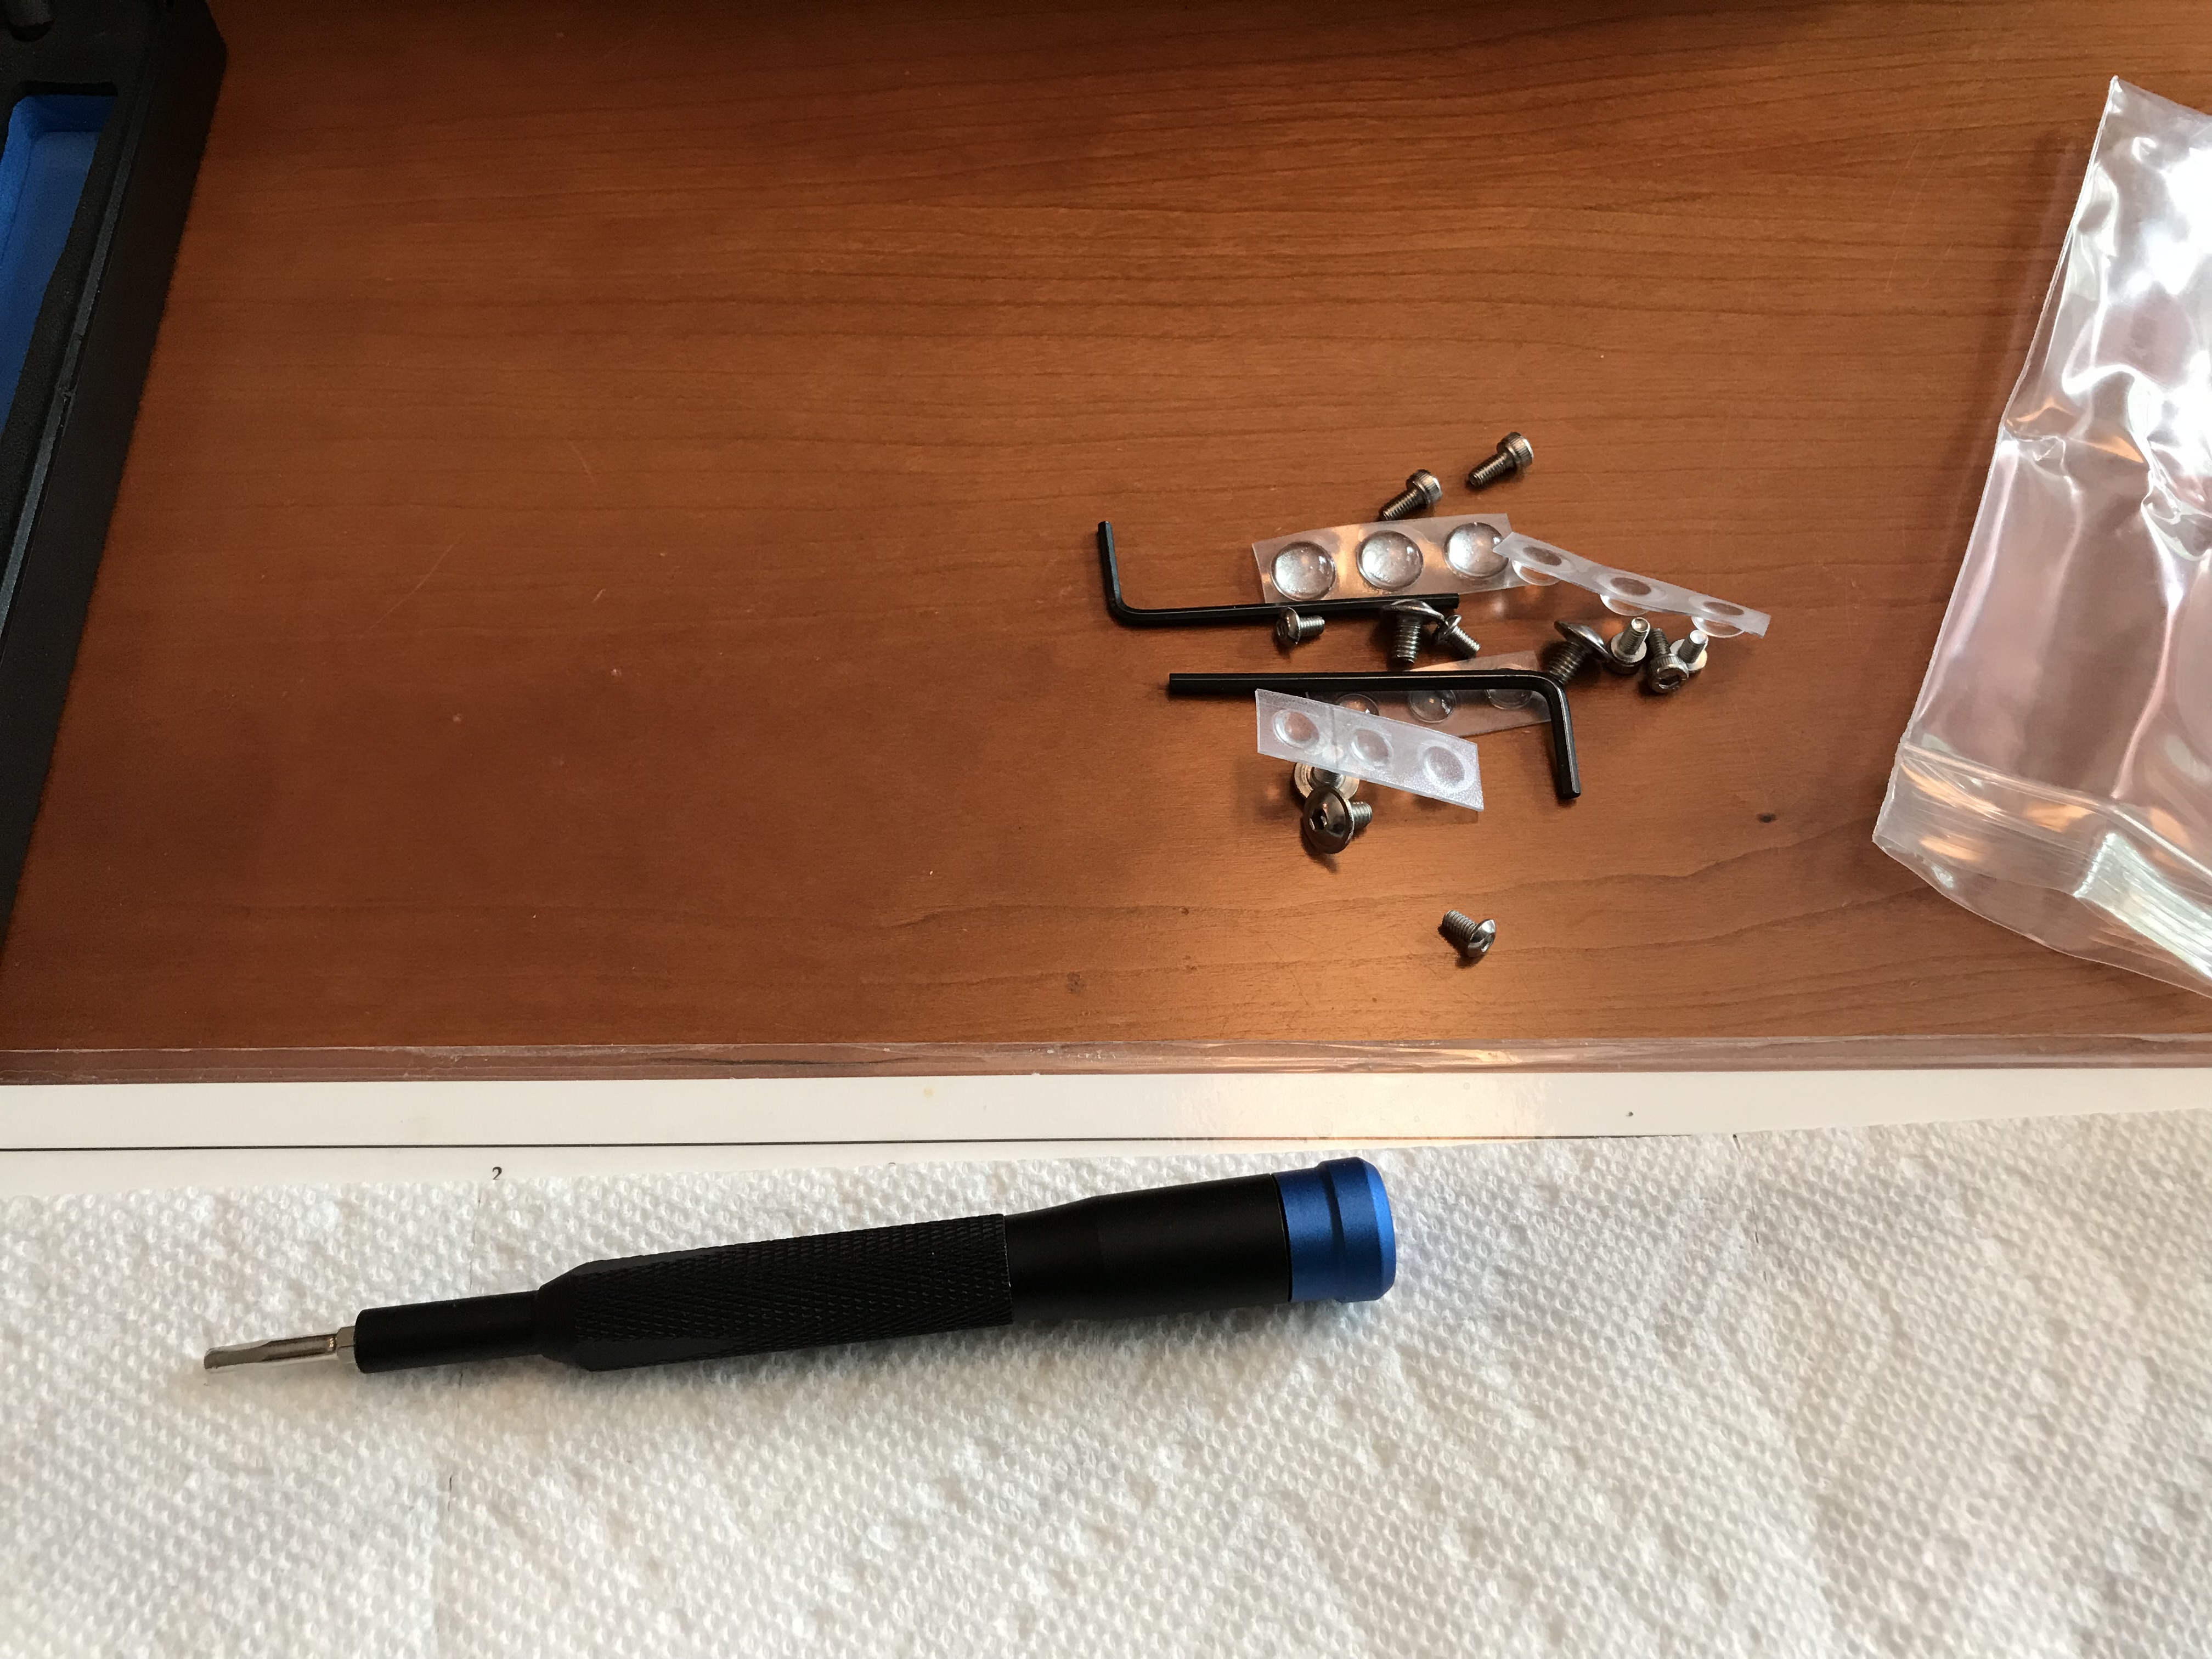
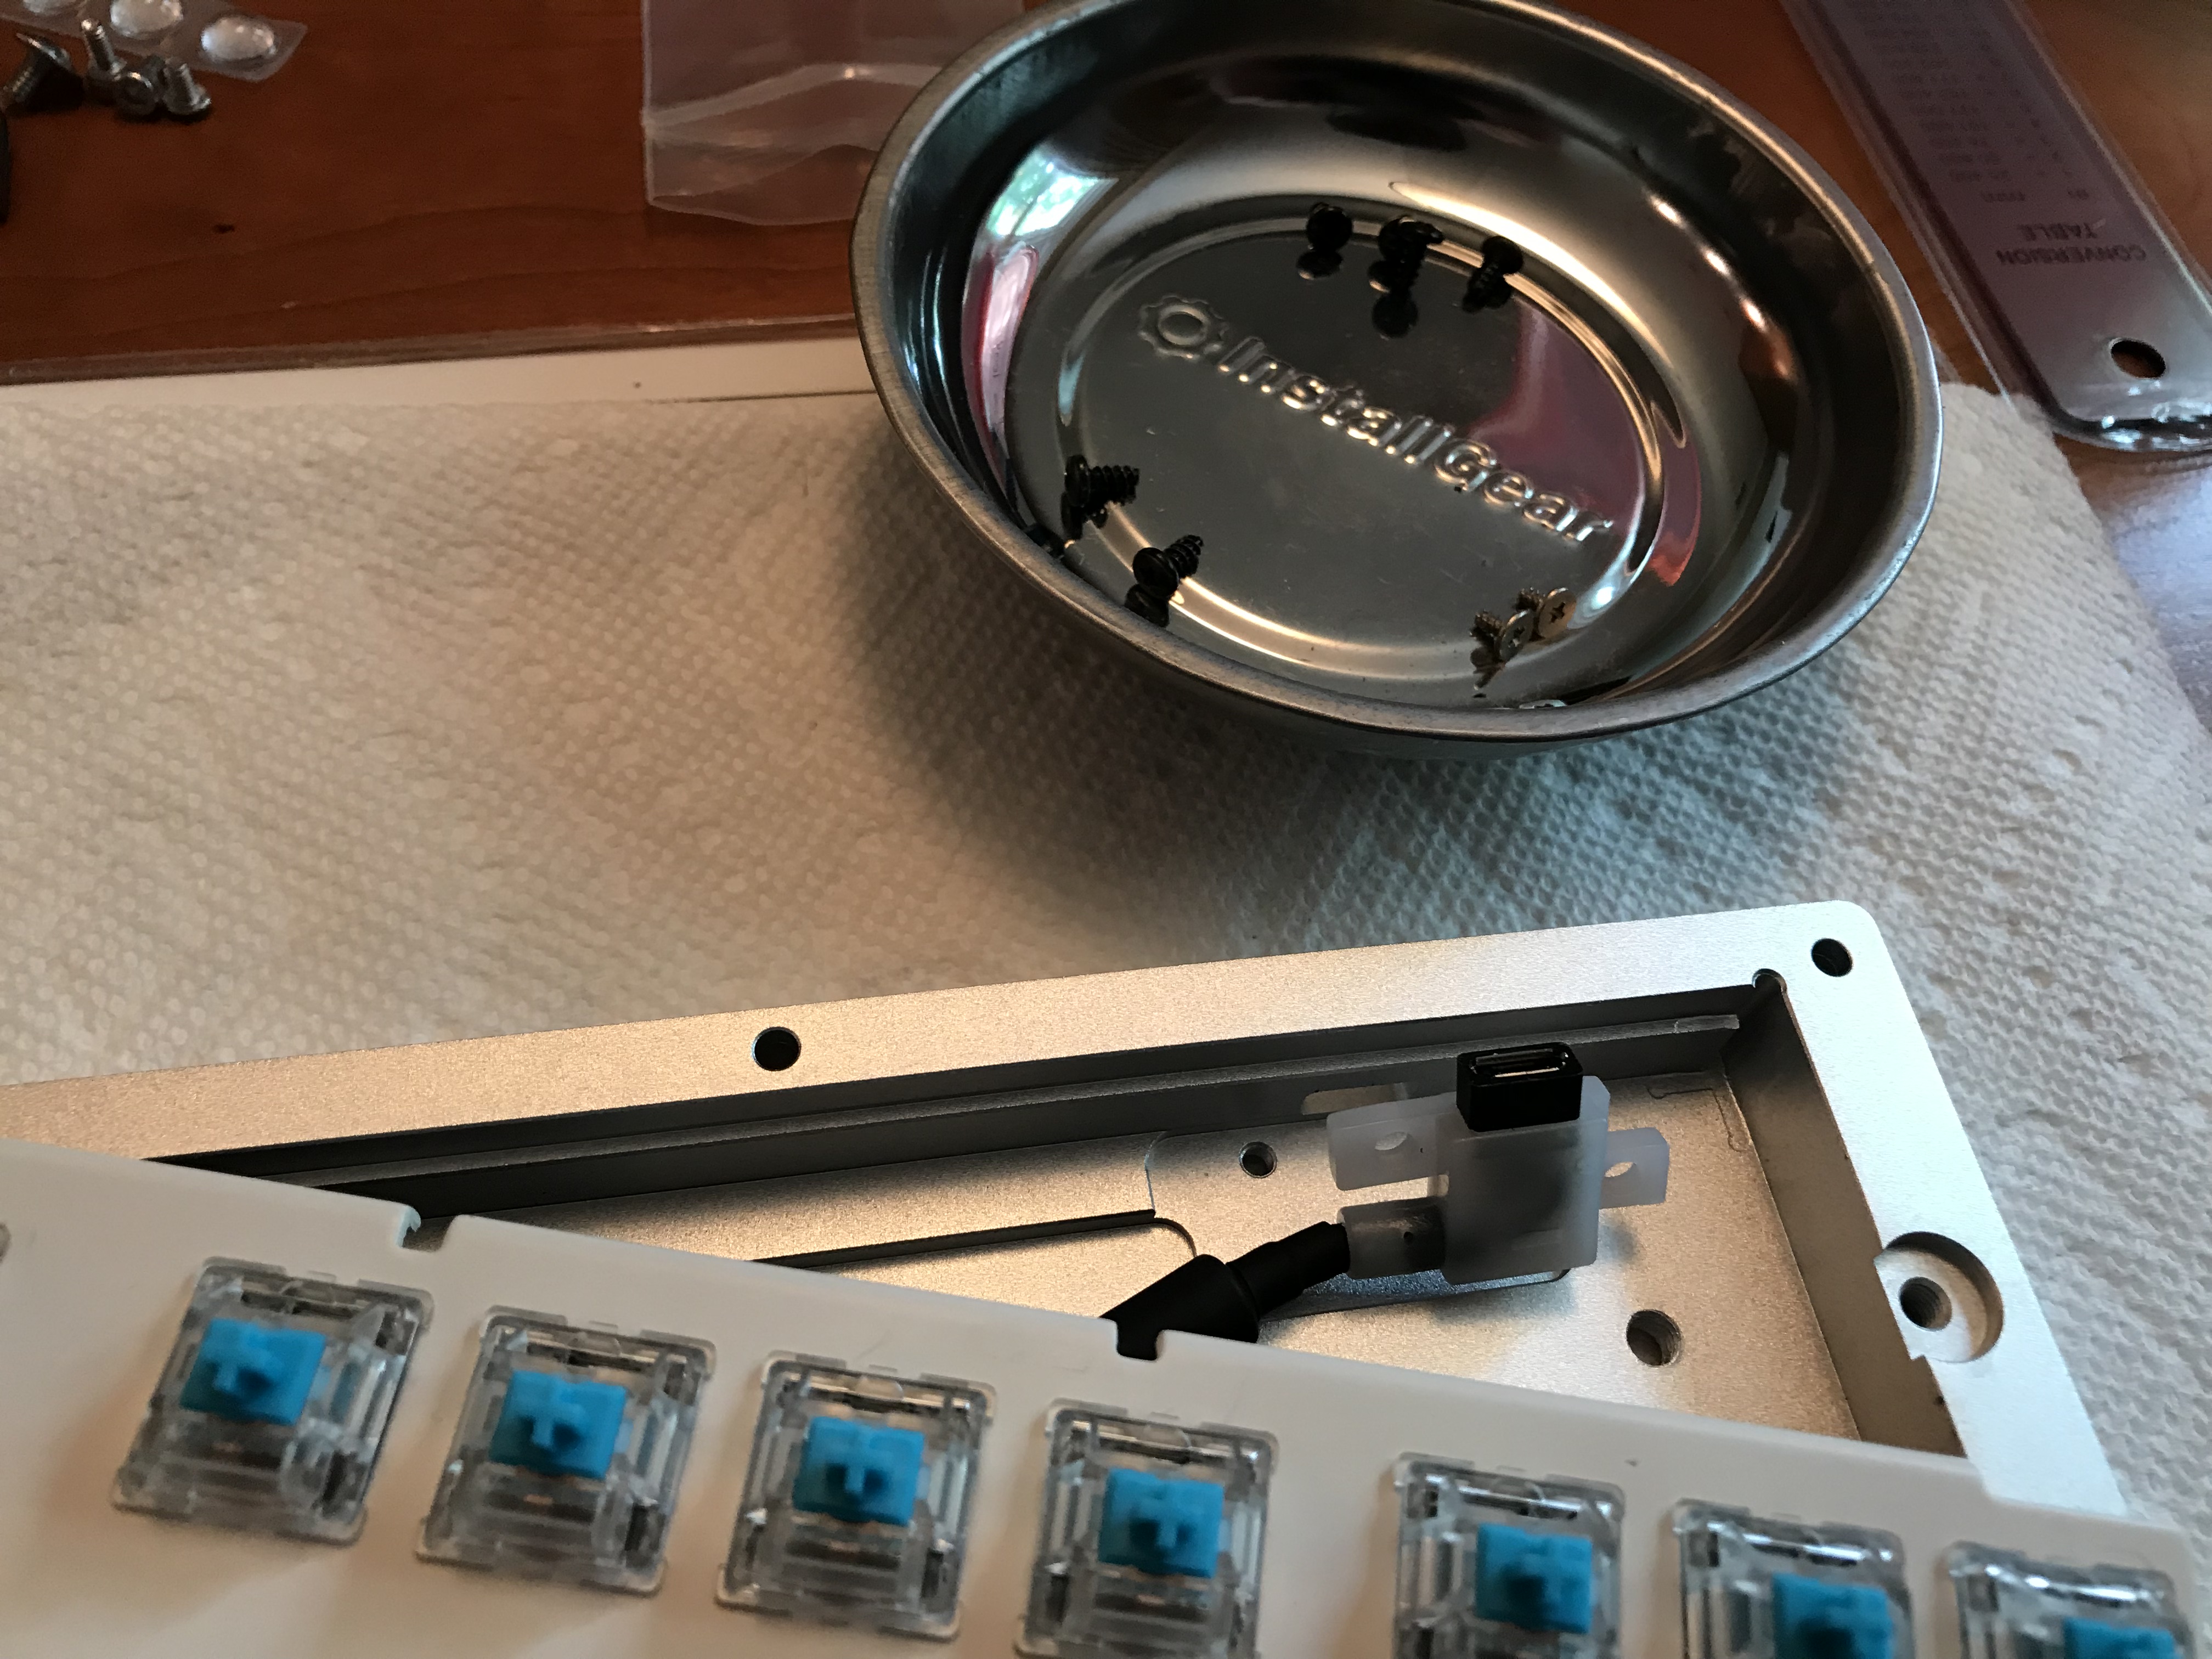
Also, gotta love the little details - @Norbauer kindly includes extra bumpers and screws for assembly,
as well as extra wrenches. By the way, if you’ve been keeping the MasterKeys screws around for reassembly, no worries; you’re not going to need them anymore.

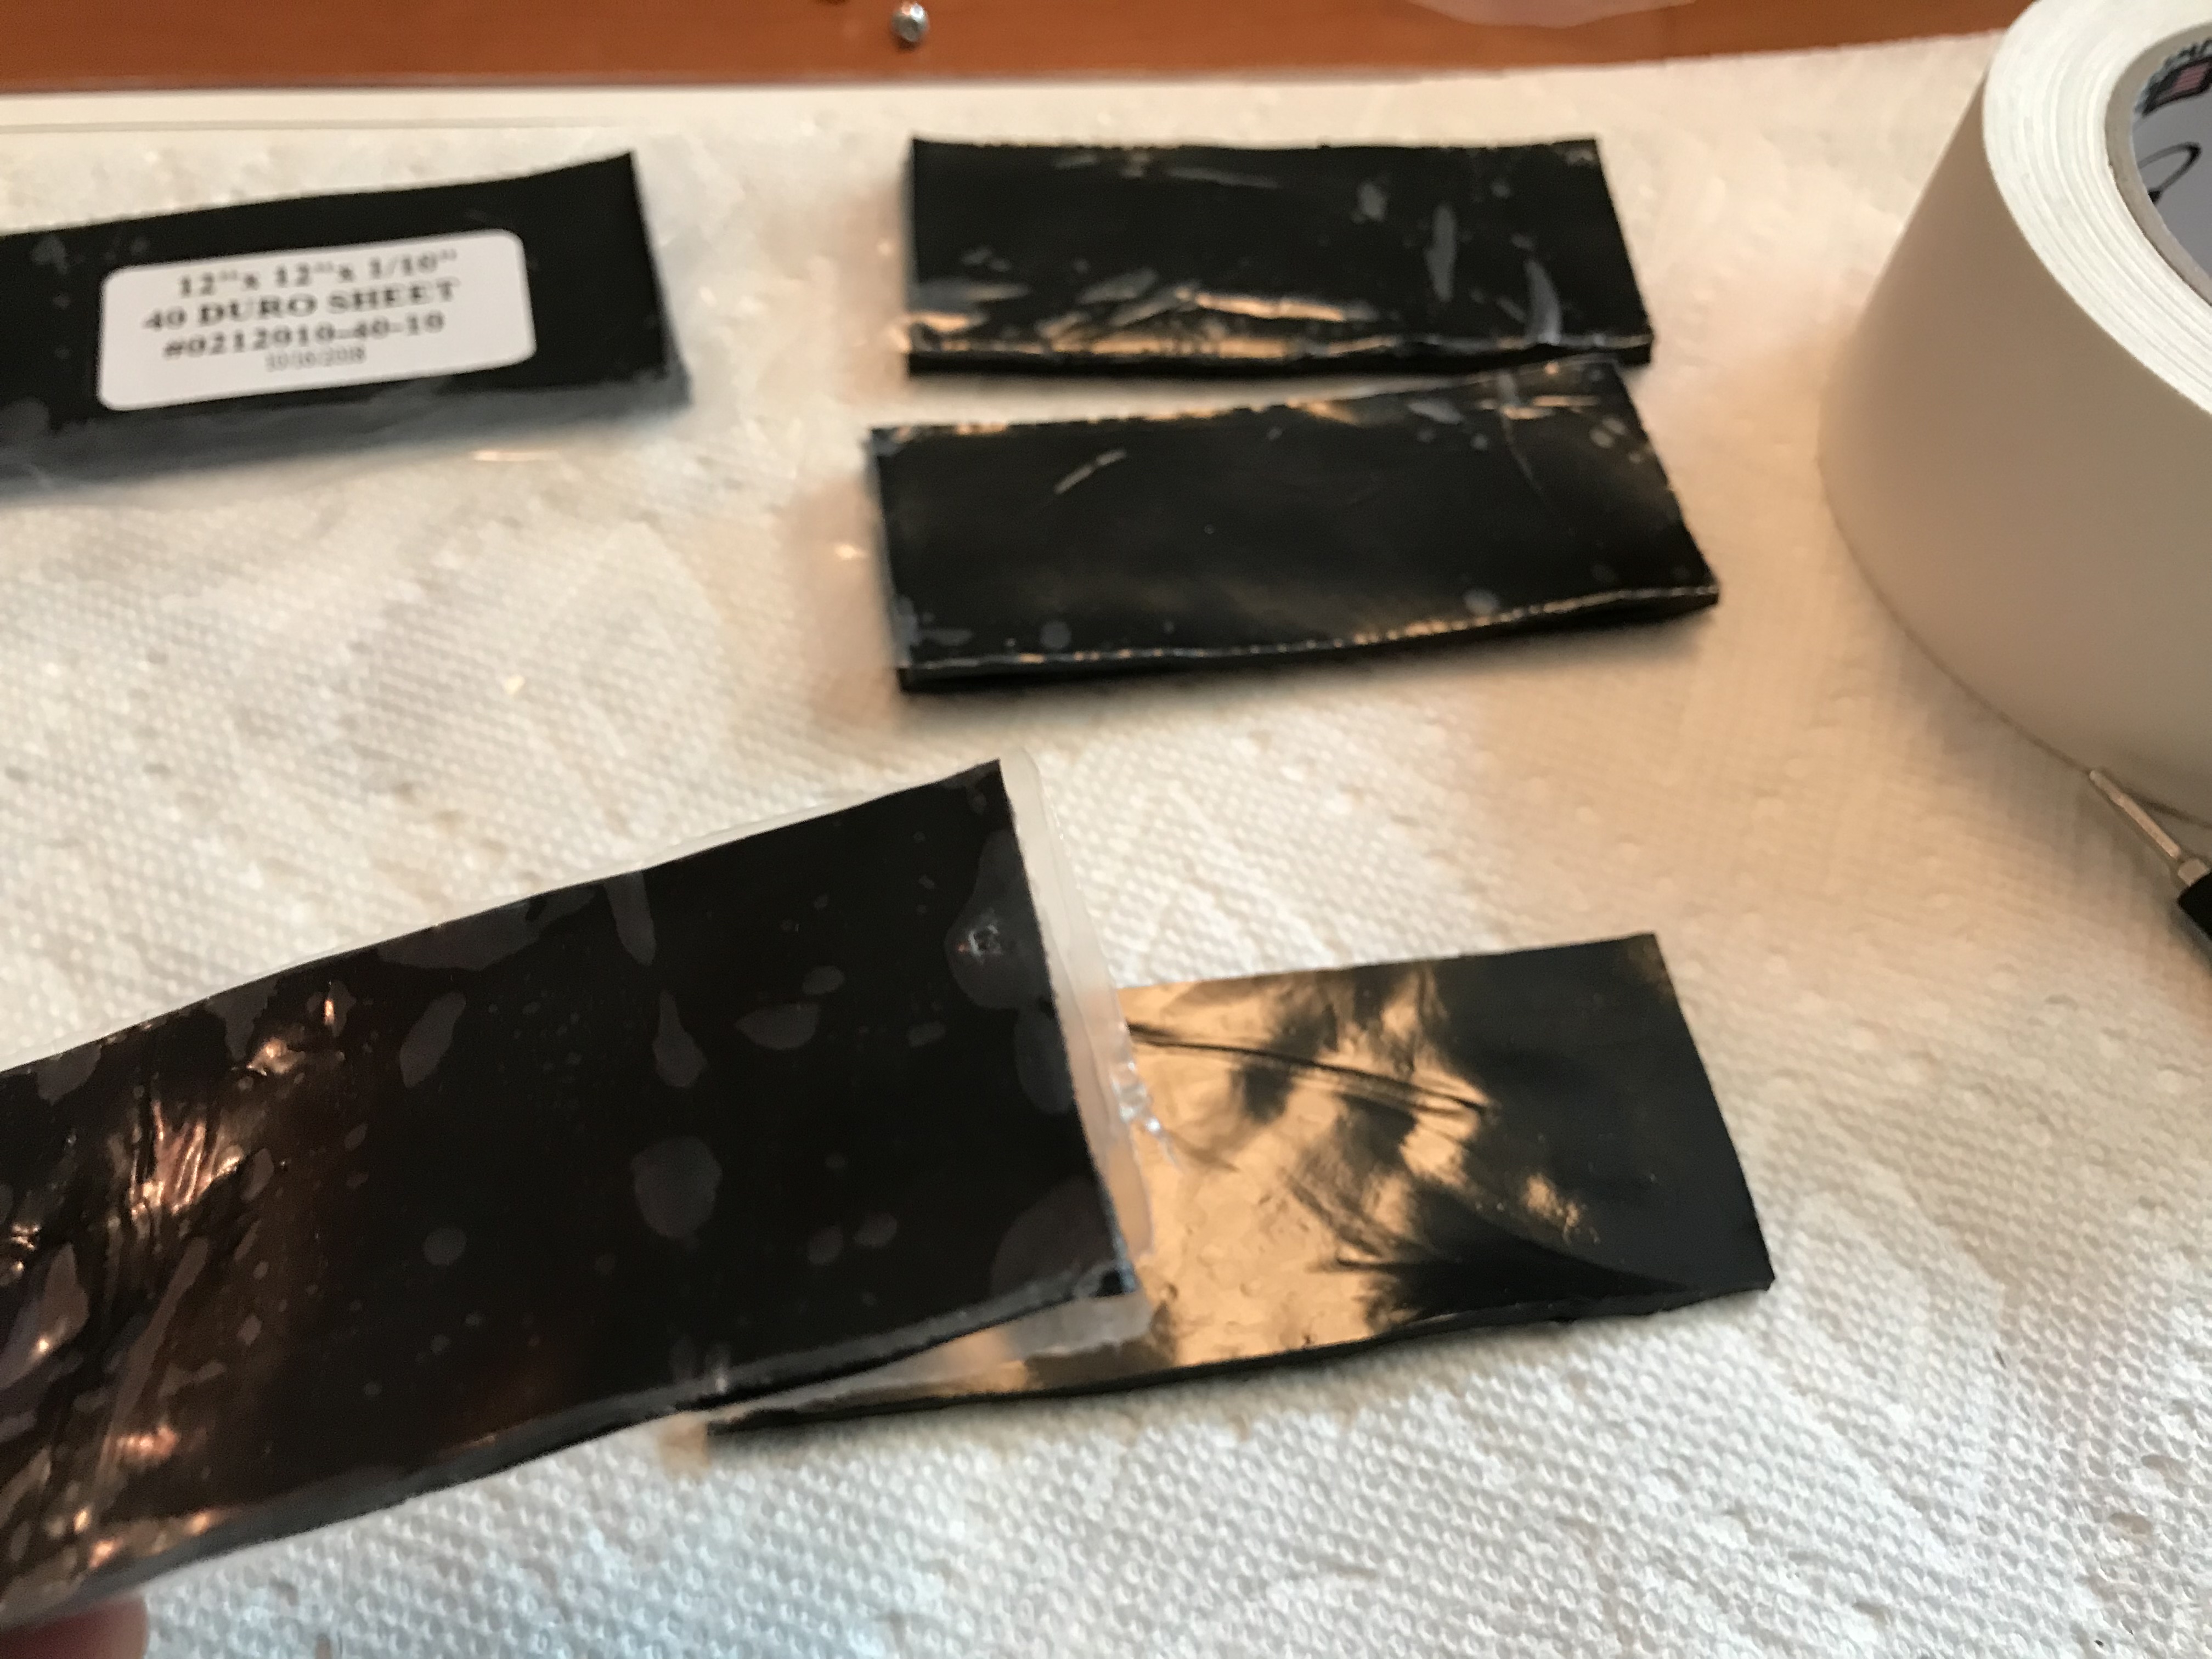
As with the Norbatouch R2.5 I covered in a previous build log, we’re going to want to apply a sound dampening treatment to the case. 0.1" Sorbothane wasn’t enough to make good contact with the underside of the PCB and the case, but stacking two layers was enough:

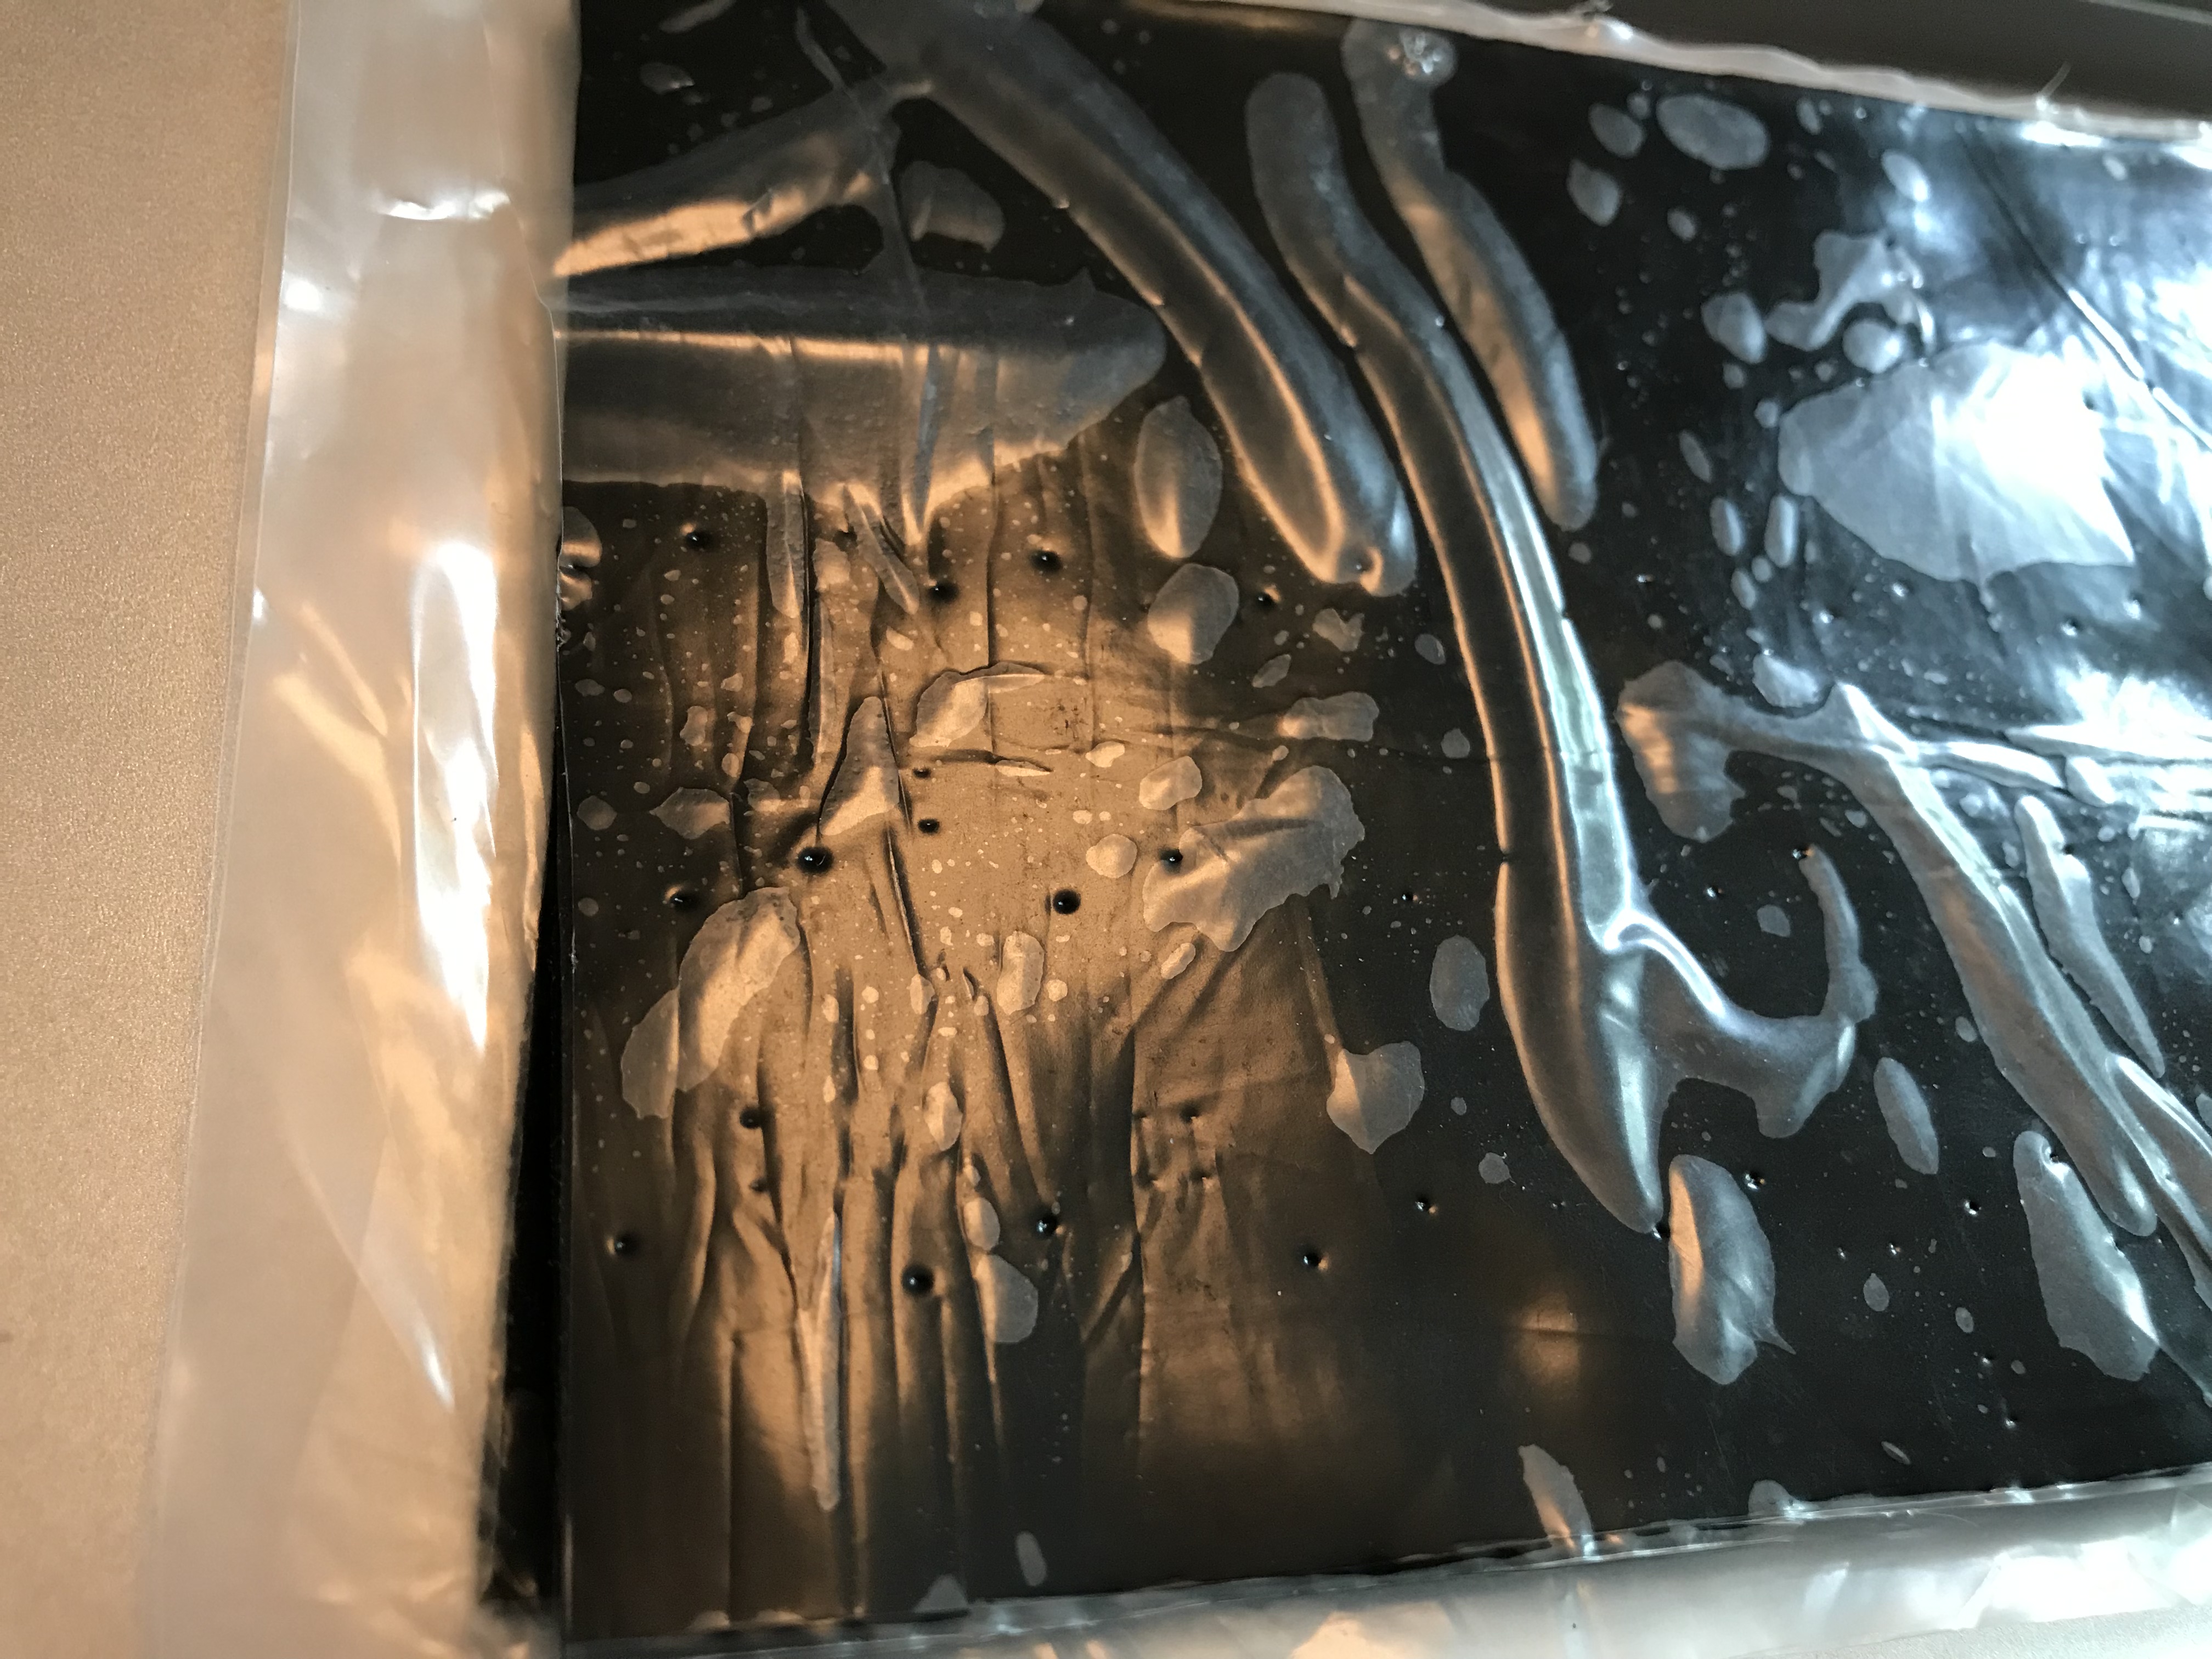
So, we need a bunch of 0.2" packets of Sorbothane. I quickly cut eight approximately-equal sized strips of 0.1" Sorbo, no need to get too fussy with measurements:

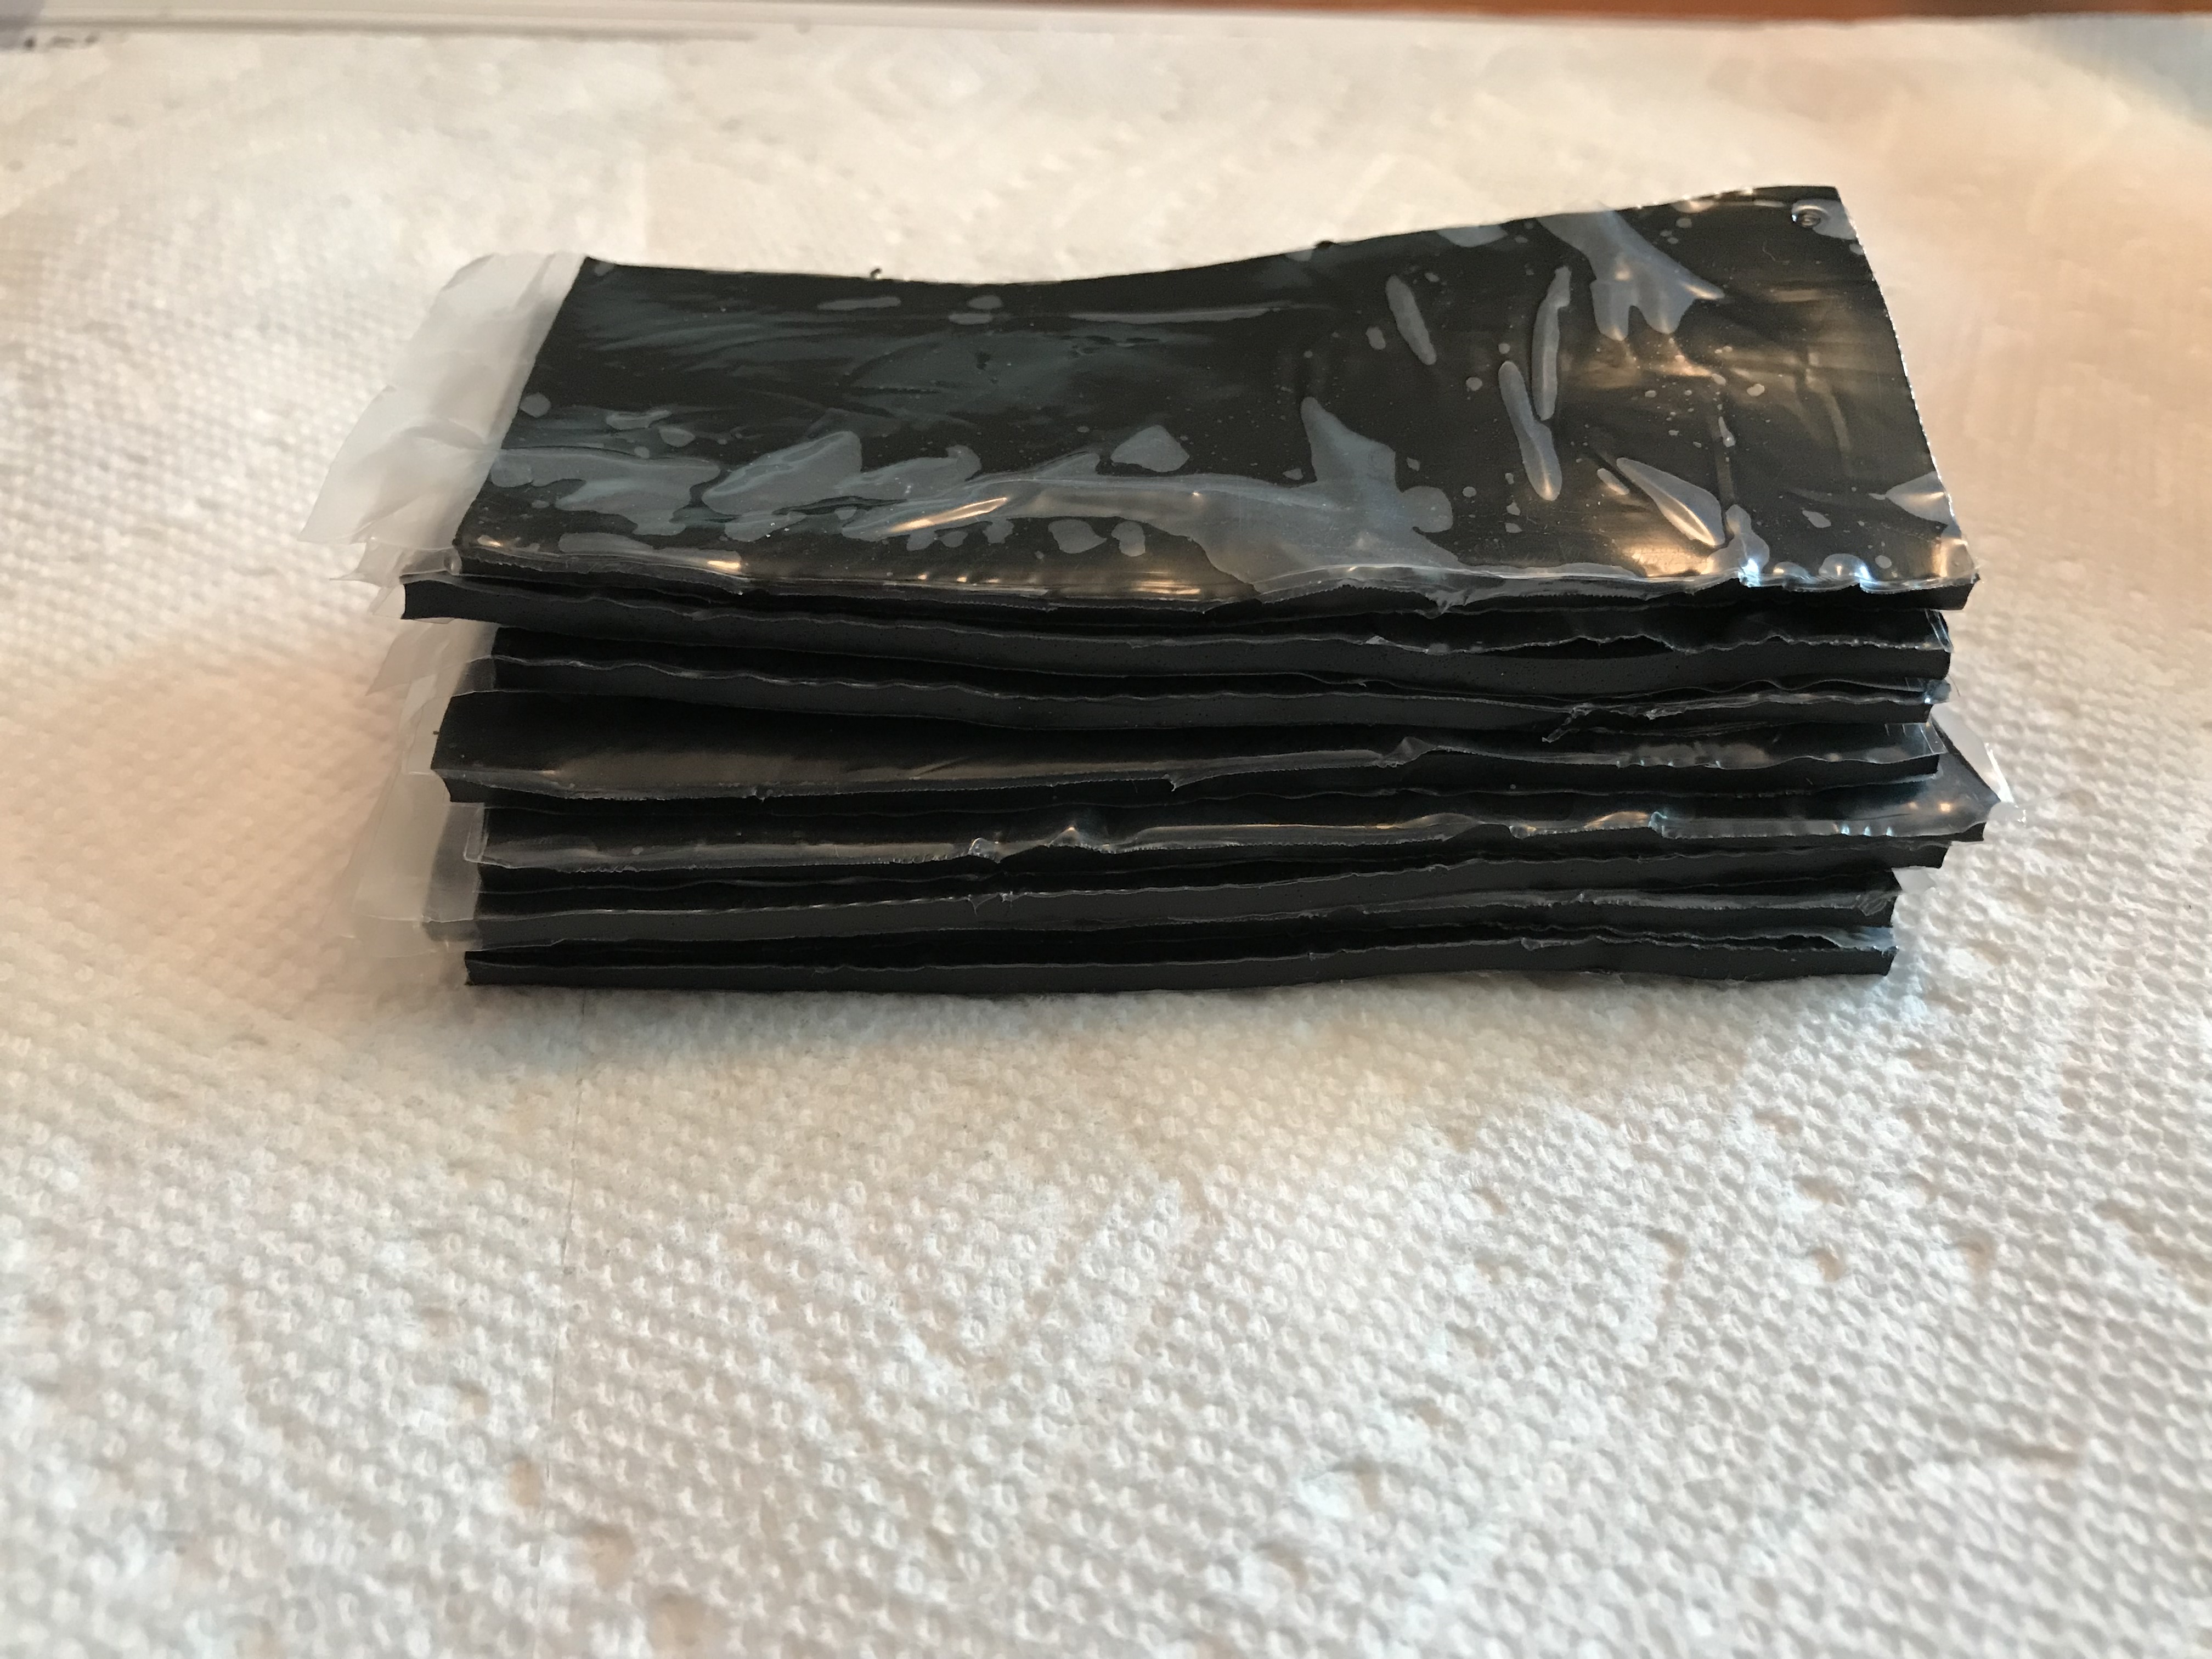
From there, I stacked the strips in pairs, removing the plastic backing from the sides that make contact with each other, while leaving the plastic backing on the other sides for the moment. This makes it easier to handle the Sorbothane while stacking.

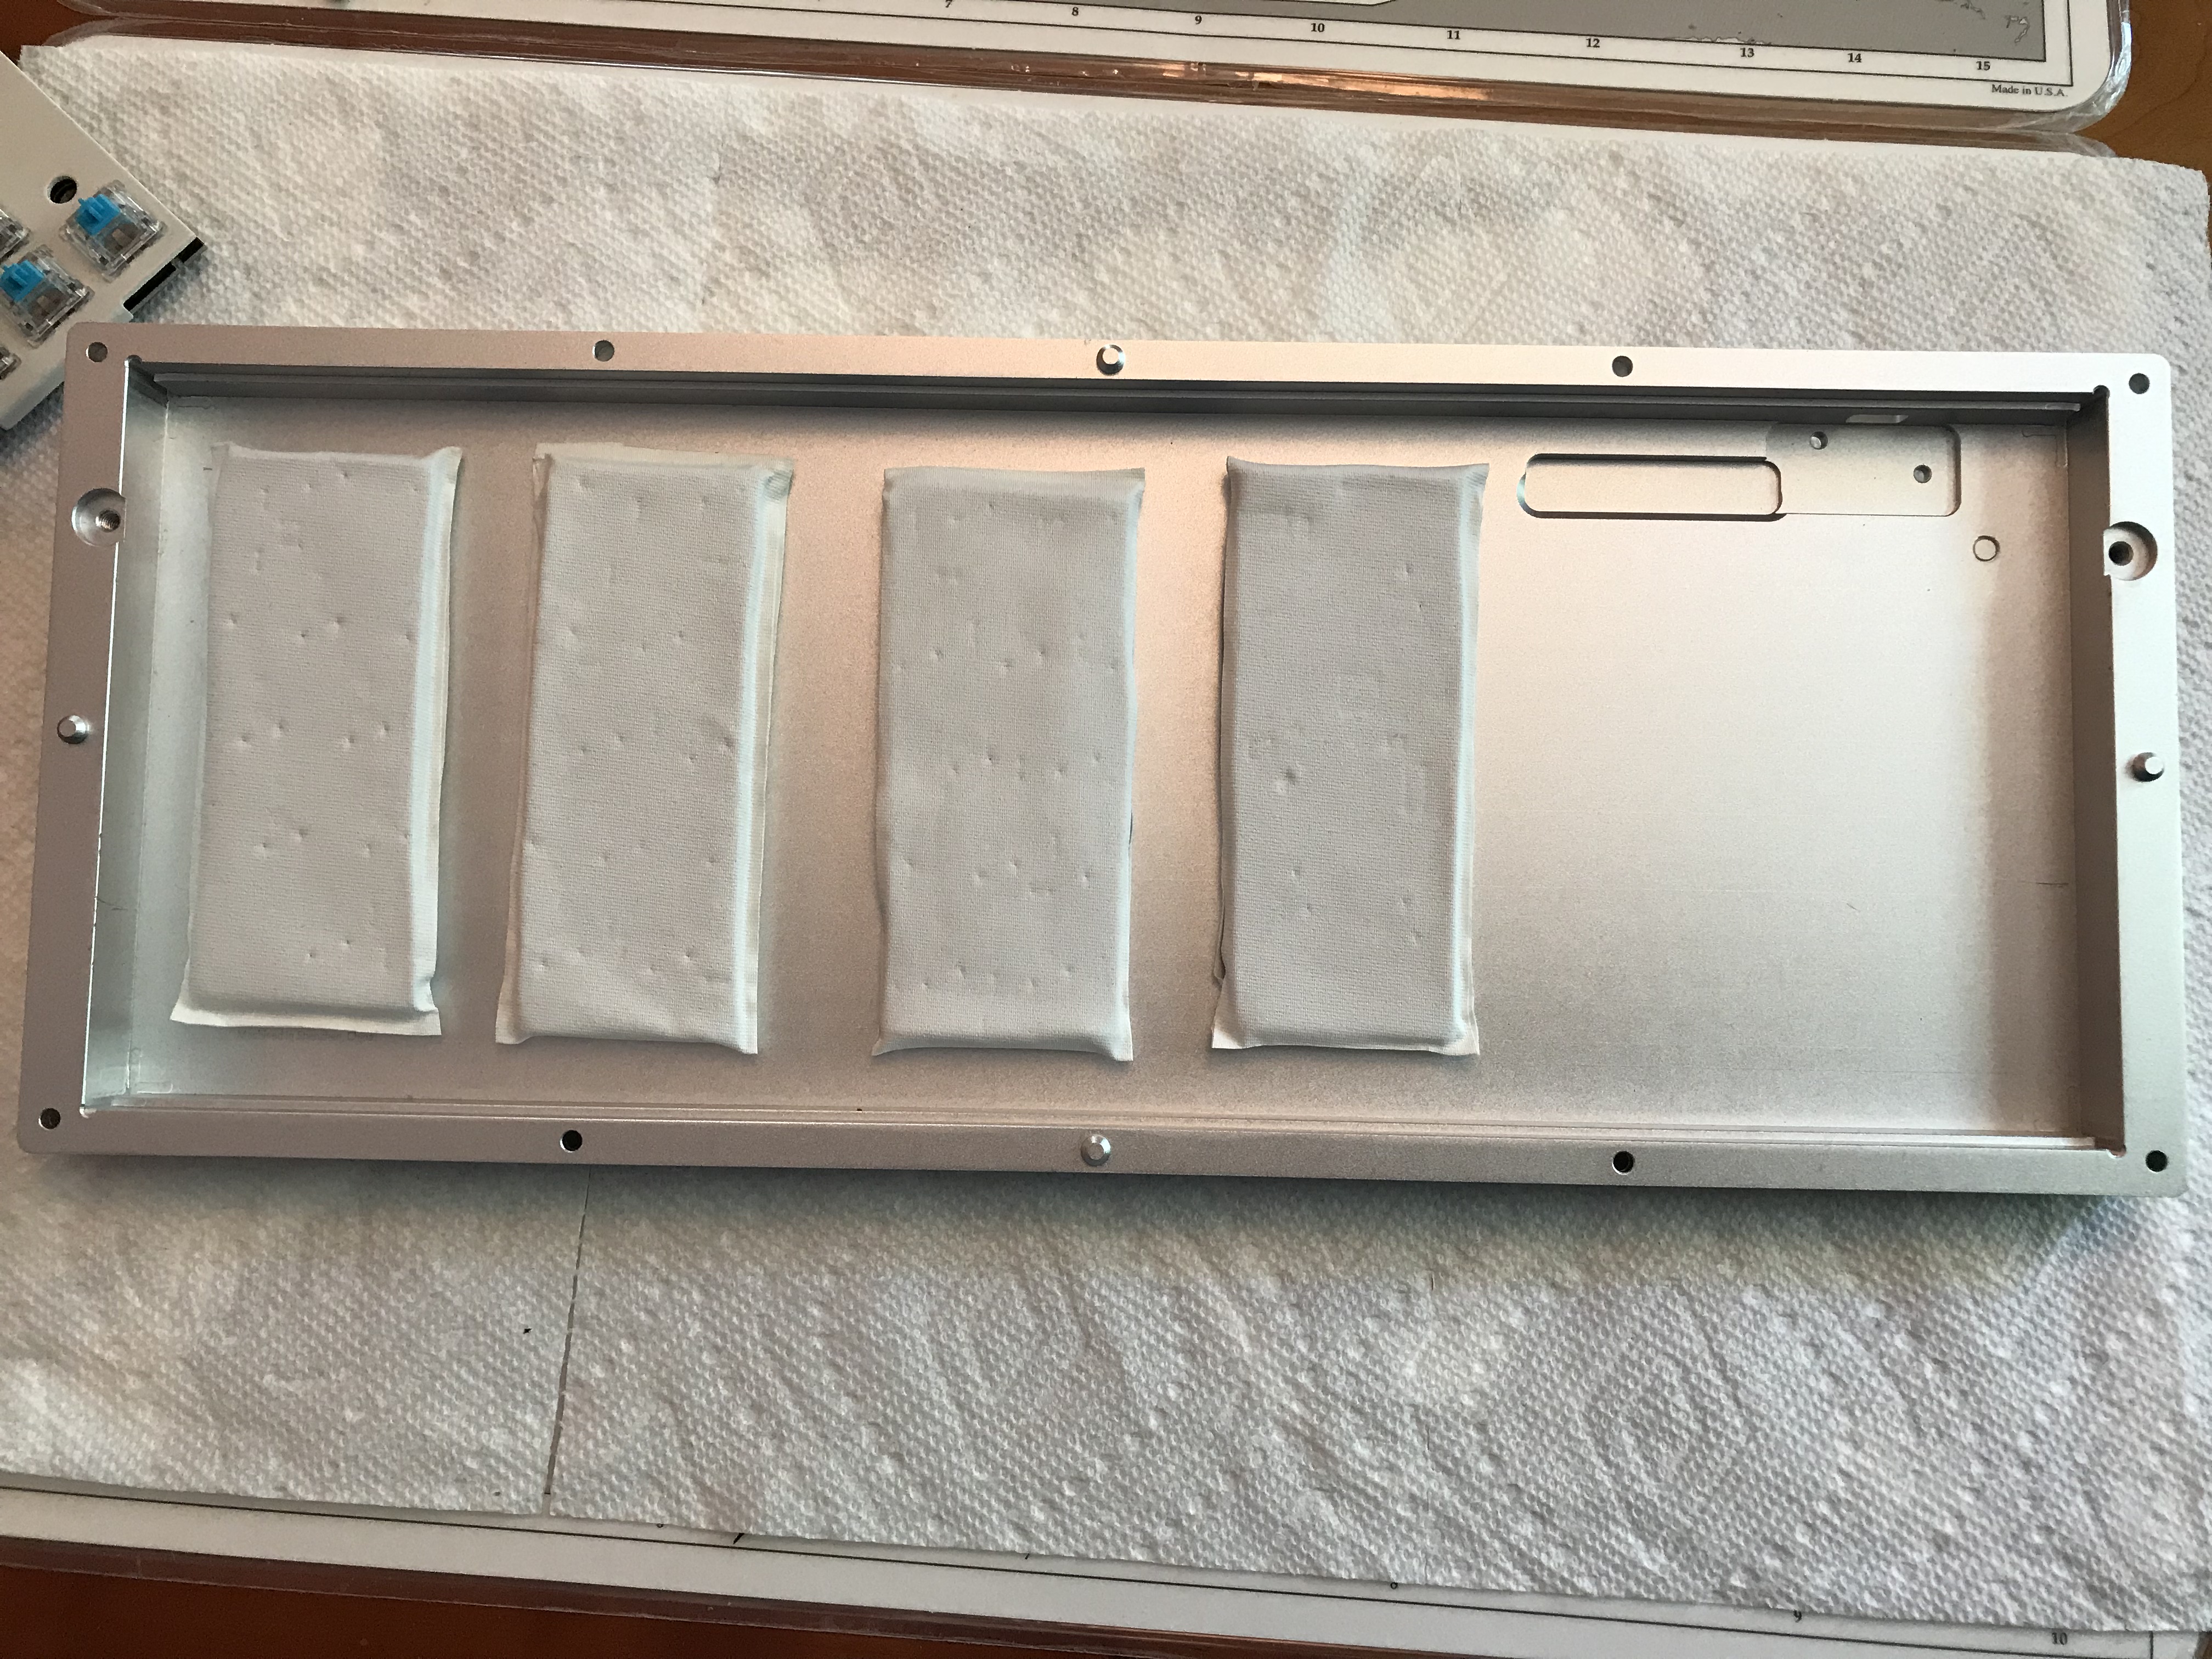
And there we are, four packets of 0.2" Sorbothane. All that’s left is to peel the remaining plastic backing and wrap the stacks in gaffer tape.

Before we place the Sorbothane packets in the bottom of the case, we’ll first need to attach the USB connector to the case with two screws.


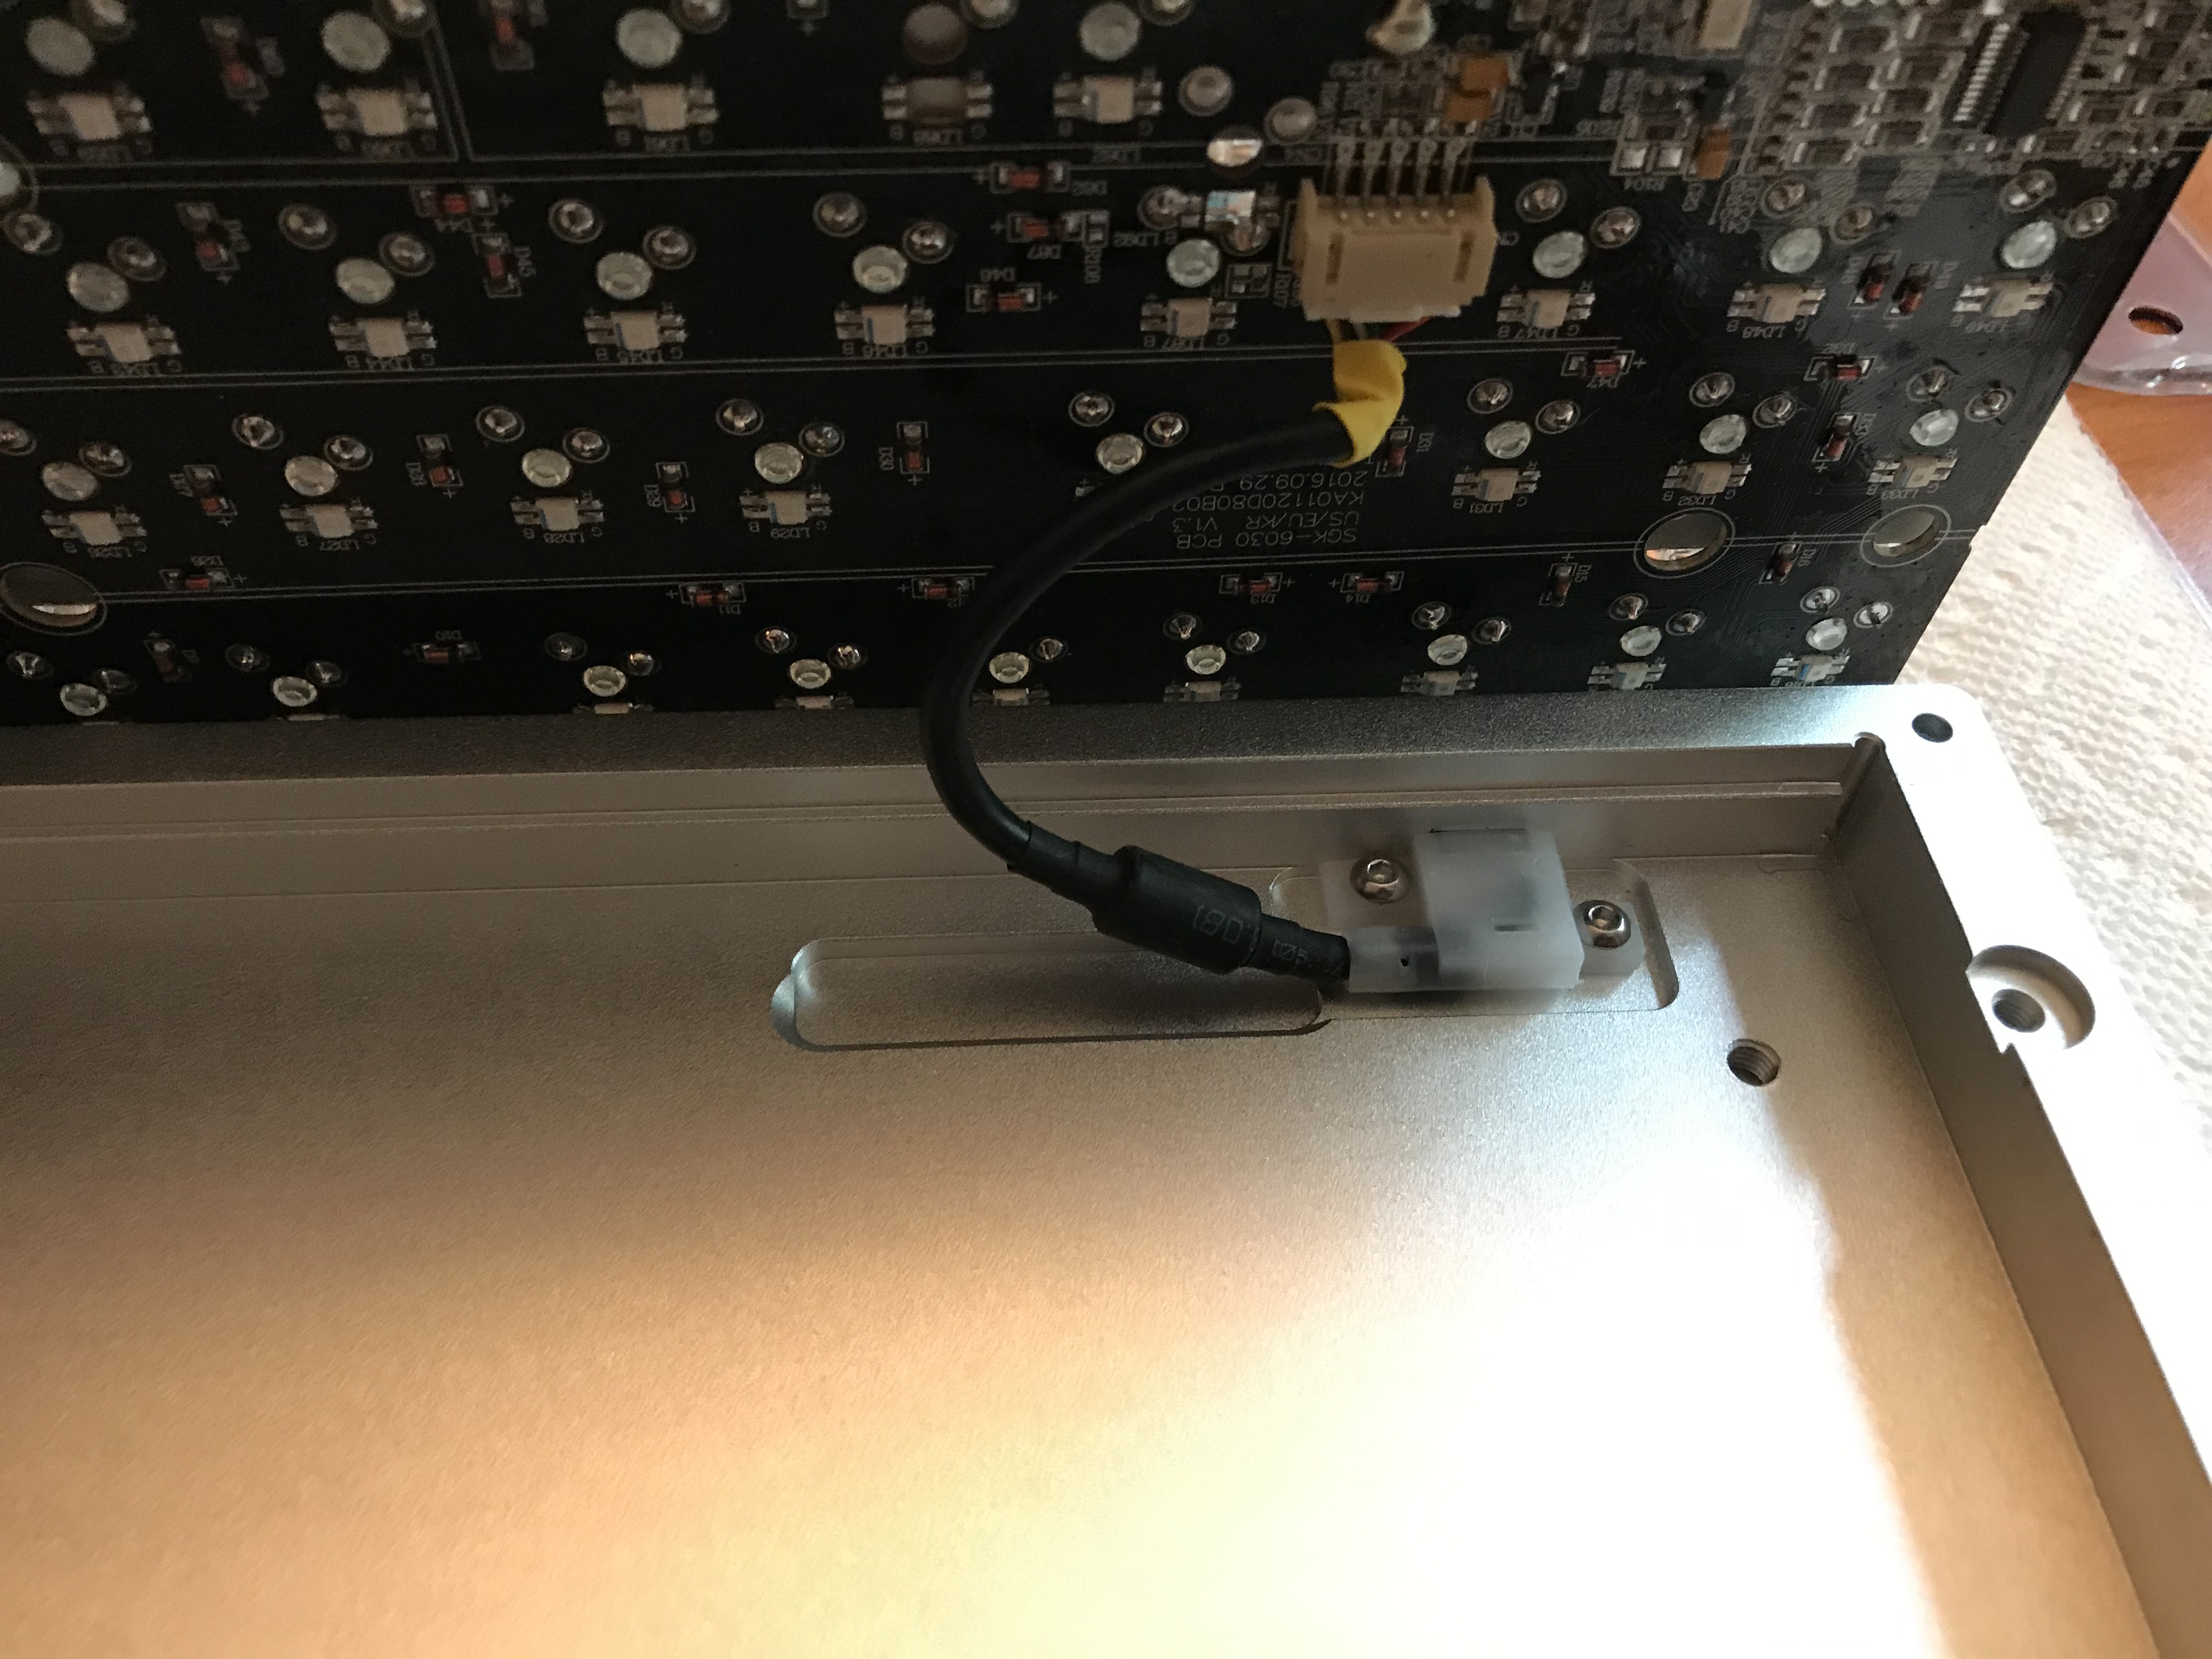
At this point, you can place the packets in the case. I’ve tried a few different arrangements, and haven’t noticed any difference in sound dampening quality. The only important thing is to be sure that you’re getting good contact with the underside of the PCB and the case. Here, I’ve opened the case back up to show the packets after they’ve spent some time under compression - you can see the switch pin indentations.

Once the packets are in place and the USB connector is screwed to the case, two more screws need to be installed to keep the plate from moving around, at least if you’re not using any case dampening material. I found that putting the screws in gave me a little better compression with 0.2" of Sorbothane, but I also found that because the screws are offset from the center of the case, screwing too tightly led to the Sorbothane pushing the lower half of the PCB/plate assembly upward to compensate for the pressure. You can see that effect in the photo below, on the right side of the case.

You can back off the screw tension up to a point to resolve that, but the recessed areas on the underside of the top of the case are only so deep, and eventually, if the screw isn’t tight enough, the top half of the case won’t seat cleanly on the bottom. If you’re using Sorbothane, or shelf liner, or some other dampening material, I’d recommend trying assembly with and without these two screws, to see which you prefer.

With the board assembled, it’s worth noting that you have one more choice to make. If you want to fully exploit the per-key RGB built into the MasterKeys PCB, you’ll have to use the CoolerMaster software to control the lighting behavior, as well as the “CoolerMaster” key commands, which are handled natively by the board’s hardware, but you’ll give up full board programmability if you choose that route. Conversely, if you want full programmability, you can use a Hasu USB-to-USB adapter to get the QMK features you know and love, except for lighting control, and except for control of the “CoolerMaster” key, for which keypresses are never passed to USB. Finally, if you’re feeling especially hardcore, it’s worth mentioning that there also exists a CoolerMaster Windows API for controlling the MasterKeys Pro S - but that software runs on the host, not on the keyboard, and requires you to write and compile code. Pick your poison.

References

It’s always nice when someone else has worked out the details for OEM disassembly. Here are the references I used for this project:

Lessons learned

  • As expected, the Sorbothane strut mod worked well. 6 small pieces inserted into strategic points between the plate and PCB deadened nearly all of the plate ping, and installing these pieces after a few switches were already soldered in was a much easier process. Sorbothane packets between the PCB and case took care of all remaining metallic ping.
  • 3203 is good lube, but I think I prefer 3204 on silent switches. 3203 seems to let more of the feel and sound of the switch come through, which isn’t necessarily what I’m after when I’m using silent switches. For pretty much the same reason, I suspect Christo 111 and 112 will probably not be ideal choices for silent switches either. As with all things feel-related, YMMV.
  • For GMK plate-mount stabs, clipping all four legs, lubing, and O-ring modding are the way to go. The default CoolerMaster stabs were rattly and loose, even after clipping and ample lubing, and the first GMK plate-mount installation with only two legs clipped and no O-ring mods suffered greatly from upstroke clack. With all four legs gone and O-rings in place, the stabilized keys sound and feel much like all the others, which is exactly where we want to be.
  • With the desoldering gun, it really wasn’t a big deal at all to rebuild the stabs a couple of times after the initial installation, to get things dialed in just right. Sure, it also helped that only the five stabilized switches needed to come off (plate-mount stabs FTW), but even so, the entire disassembly/O-ring mod/rebuild cycle took no more than an hour.
  • It’s too bad that XDA is one of my least favorite profiles for typing, because it really does look nice on this board, and the XDA Oblique legends really do create nostalgia for the keyboards from an earlier era. So it goes. On the other hand, we did say this timeline was only slightly different from the original…
  • For future Norbatouch + MasterKeys builds, it’s worth remembering that the PCB has north-facing switches, so GMK caps are going to require the washer treatment for the switch stems, at least if you want consistent feel and sound from row to row.
  • The Norbatouch Pi housing is a worthy successor to the R2.5. The anodization on this case has a lovely, very fine light-reflecting grain that plays with the light in pleasing ways. Chamfering and corners are perfect. The screw hole tightness issue from the R2.5 build has been resolved; no problem with tolerances here. Finally, the inclusion of hex wrenches, extra screws, and extra bumpons is a small but welcome detail. It only remains to convince Ryan to use magnetic screws, and our work here is done!

To think that some people believe alternate timelines are nothing more than science fiction…

Specifications

donor board: CoolerMaster MasterKeys Pro S RGB
case: Norbatouch Pi (Aerospace Aluminum finish)
case dampening: 0.1" 40 Duro Sorbothane, stacked to 0.2", wrapped with gaffer tape
PCB: donor
plate: donor
LEDs: per-key RGB, integrated in PCB
plate/PCB dampening: @donpark Sorbothane strut mod, 0.25" 50 Duro Sorbothane
stabilizers: GMK plate-mount
stabilizer mods: clipped (all four legs), lubed with SuperLube,
  O-ring modded, and bandaid-style mod with gaffer tape
switches: replaced donor Cherry Blues with 65g V2 Zilents
switch lubing:
- manually lubed housings/stems with Tribosys 3203
- tub lubed springs with Krytox GPL 104
keycaps: XDA Oblique
HxWxD (without feet or caps): 1.0"x14.63"x5.75"
HxWxD (without caps): 1.63"x14.63"x5.75"
HxWxD: 1.93"x14.63"x5.75"
assembled weight: 4.74 lb
11 Likes

Oh yes another sweet build.

I enjoy every one of them and I’m grabbing popcorn/beer and enjoy each one that comes out !

1 Like

Thank you very much for this great build log!
Very nice to read and instructive as always :wink:

Didn’t know that Norbatouch case could accept Cherry MX base PCBs!
I really love @norbauer case designs, your last keyboard is simply gorgeous!

2 Likes

Yes! Keep the builds coming. Another great build man, really like this one although I would have enjoyed to see it be a Topre build lol

1 Like

Good things come to those who wait…

4 Likes

Build #20: KBD67 Jamón

Some good friends of ours make artisanal salumi for a living, which means that every so often, out of the goodness of their hearts, the contents of our fridge look like this. What can I say? It’s truly a glorious thing.

Suppose these were your friends, and, upon discovering your second life as a keyboard builder, these friends requested a build from you. What theme should this build have? What current keyset seems as apropos as any keyset could possibly be? What set might @Zambumon ask us to please consider?

Let’s get to the build. To stay true to the color scheme, I selected a kbd67 kit in burgundy, with a brass plate. The kbd67 came with PCB snap-in stabs, and as these didn’t seem appreciably different from GMK PCB snap-in stabs, I used them. The standard layout for the kbd67 uses 3x2u and 1x6.25u stabilizers, which have been disassembled here.

The stab stems, after clipping.

Recently, I’ve been getting good results with Christo-Lube 111 for stabilizers, and I used that lubricant here. 111 is very forgiving on stabs, and can really be slathered on. Here are a couple of looks at a stabilizer stem with 111 applied; this is substantially more lube than I would use if I was using SuperLube or some other dielectric grease.


You can also see that a significant amount of 111 is being used in the stab housings as well. Granted, 111 is white, and is more visible than SuperLube would be in a similar photo, but take my word for it; liberal application of 111 on stabs is just fine.

Let’s have our first look at the brass plate. While the finish on this is noticeably rougher than you might expect from a plate billed as “PVD brass”, it’s not bad. The kbd67 supports split spacebar and ISO layouts, so the plate does have some swiss cheese action, particularly on the bottom row.

Because of that bottom row, and because it’s a wise thing to do in any case, we double check to make sure we’ll be installing stabilizers in the proper locations before clipping them into place.


Before starting the build, I asked our friends a few questions to try to dial in their preferences, since this was going to be their first custom keyboard experience. One of those questions involved sound - on a scale of 1-10, where 1, 5, and 10 were these sound tests of Healios, Creams, and Holy Pandas, respectively, what seemed acceptable and/or desirable?

The answer: 7-10! I decided to split the difference, and take advantage the opportunity to build with a switch I hadn’t tried yet: 67g V2 Zealios. Tactile and clacky, to be sure, but to my ears and fingers, just a half-step dialed back from Holy Pandas.

These days, I tend to set up four Tupperware bins for switch disassembly. One of the bins is reserved for tub-lubing springs, and I mark it so I know which of the bins is “wet”.

I prefer to lube switches in batches of 15-20, so that I can take breaks as needed to stretch my legs, make dinner, whatever. Here, I’ve just finished applying 3204 to the bottom housing and tub-lubing the springs with 104, and I’ve used tweezers to put the first spring back in place.

I’ve already showed you how much 111 I use on stabs; here’s how much 3204 I use on switch stems. You can also see that I try to avoid applying any lube to the legs - I want to keep as much of the tactility as I possibly can, even though this requires an extra level of diligence during lubing. Again, it’s good to have opportunities to take breaks and do other things in the middle of a switch lube job…

I was hoping the thumb-bruising experience I had with the tx108se was a one-off, but no. Several of the switches required significant force to be properly seated. But not all of them - the tolerances on this plate’s switch holes were all over the place. Possibly the least consistent plate from hole to hole that I’ve worked with. Here, the stabs and a handful of switches are placed, for a quick bit of initial soldering to establish good fit between the plate and PCB.

Where the magic happens.

We can now resume seating switches, but now is also a good time to address PCB/plate sound dampening.

I’ve pretty much switched over to the @donpark Sorbothane strut mod approach, cutting a few very small squares of Sorbothane, and wedging them into spaces between the plate and PCB. Here’s one of those squares, tucked into the space below the backspace key:

From here, it’s just seating all of those switches in that stubborn plate, more soldering work, and a quick round with a keytester to make sure everything is functioning as expected. The complete PCB/plate assembly:

If the keyboard thing doesn’t work out, maybe there’s a second career as a hibachi.

Let’s get it out there right now - if you’ve never built a kbd67 before, you are going to need sound dampening. Without any treatment, the sound of the board (especially with a brass plate) is harsh, pingy, and hollow. Normally, I use Sorbothane for all sound dampening applications in my builds, but I do like to try new things, and this seemed like a good build to try out craft foam.

Here, after making the cutout for USB jack clearance, I’ve marked the locations of the underglow RGBs on the PCB, in preparation for making more cutouts to allow the LEDs clearance.

Also can’t hurt to avoid undue pressure on the controller or the reset button.

The final foam layout (two sheets, black and white) is held in place by pressure from the PCB. Here, you can see the indentations produced by the switch pins when the plate and PCB are mounted in place:

The kbd67 case separates into two pieces. The plate is attached to the bottom of the case by six screws; the top has cutouts to make room for the screw heads. You then put the top and bottom of the case together, flip it upside down, and use six long screws to attach the case halves.

Before you screw everything together on a kbd67, note that the reset button on the PCB is not accessible once the case is put together, so now is the time to flash new firmware to the PCB if you’re going that route. I’ve learned that lesson the hard way, so in addition to flashing before final assembly, I also make sure the flashed firmware provides the RESET keycode on another layer, so that we don’t have to open it up again to flash it if we don’t want to.

In addition, our friends are Mac users, so I had to spend a bit of time setting up a new keymap with Mac-centric keycodes, something I hadn’t done before, but that wasn’t a big deal. One minor gotcha - the Mission Control and Dashboard function keys aren’t available as QMK keycodes, so strictly speaking, they can’t be built into the firmware in the same way that media control keys can be (this is a simplification of the underlying technical issue, which is described in much more detail on GitHub). However, on a Mac you can use the Keyboard preferences to set up macros to do the same thing, so I just had those function keys send the default macros that the Mac uses. Not perfect, but I suspect most users would never notice.

To complete this entire package of fun, I threw in a Jamon-themed deskpad, and sleeved and soldered a couple of color-appropriate USB cables. Before we partake of a slice or two of fine ham, let’s review.

Lessons learned

  • Thin layers of craft foam, with sufficient pressure between the case and PCB, can do 80-90% of the sound job that Sorbothane does, and for this build, it worked well. With that said, if no metallic ping of any kind is tolerable, then Sorbothane is still the best option.
  • 67g V2 Zealios are definitely heavier-feeling than their V1 counterparts. Neither here nor there, just an observation. The sound is not quite as focused as a Holy Panda, but that’s also just an observation. I find the sound from both switches to be quite pleasing.
  • I glossed over the cable builds, but that was the first time I’ve done that project. If you’re sleeving the cable with paracord, it’s really important to have the ends of the cut cable be flush; otherwise, the wires inside the cable will eventually snag on the paracord as you’re threading it, and at that point, not only is it impossible to proceed further with the sleeving, but any snag will likely crimp the paracord in such a way that no further sleeving attempt will make it past that crimp, either. I found it best to stretch the wire sheath outward to effectively recess the internal wires an 1/8th of an inch or so, to completely avoid the issue.

With that, it’s time to return the favor of meat.

Specifications

case: kbd67 (burgundy, PVD brass weight)
case dampening: two layers of thin craft foam
PCB: kbd67 rev1 non-hotswap USB-C
plate: brass
plate/PCB dampening: 0.25" 50-Duro Sorbothane "struts"
stabilizers: PCB snap-in
stabilizer mods: clipped and lubed with Christo-Lube MCG 111
switches: 67g V2 Zealios
switch mods:
- springs tub-lubed with Krytox GPL 104
- housings and stems hand-lubed with Tribosys 3204
keycaps: GMK Jamón
- base, Jamonelties
HxWxD (without feet or caps): 1.19"x12.19"x4.19"
HxWxD (without caps): 1.25"x12.19"x4.19"
HxWxD: 1.50"x12.19"x4.19"
assembled weight: 3.14 lb
13 Likes

Well done! I hope that cured your friend of the custom keyboard itch.

1 Like

that was a good read

1 Like

Awesome. Can’t wait to read more. You have really put your time into these guides!

1 Like

As always great build log.
Thank you so much !

1 Like

In situ!

6 Likes

Build #21: Klippe+ Black/Red (Laser Trio 1/3)

Good news, bad news. Good news first? Since I started doing these logs nearly a year ago (!), I’m getting much faster at doing builds, and generally feel comfortable that I can get a good result with every build, even if I do occasionally have to open a build up for some fine tuning. The bad news is that I’m not much faster at writing them up - so we have a backlog of less recent builds. As a consequence, we’ll be looking at a couple of builds that were done earlier this year, when I was trying new parts, materials, and mods, with hit-or-miss results, as well as one more recent build, which we’re collectively going to call the Laser Trio.

The Klippe+ case, run as a group buy by Mekanisk in October 2018, and fulfilled at the very end of 2018, was an update to the original Klippe tray-mount case, introducing the option of a branded base weight with a different anodization color than the rest of the case. I loved the look of this update, and wanted to try matching these color options with GMK Laser to achieve a stark, modern, and aggressive vibe with the builds. First up for the Laser Trio: a black Klippe with a red base, and the Laser gaijin and mitowaves sets for a particularly loud look.

We’ve got to get some switches ready first. Here, I’m working through a batch of 62g V2 Zealios. I think this was one of the first few builds where I began tub lubing springs with Krytox GPL 104 to save time, while still manually applying 3204 to the stems and housings. More often than not, these days I’m still using the same approach, as I get consistently good results with it.

I wanted to try out a new stab mod for this build - the Rama heat-shrink mod, which involves cutting a piece of heat-shrink tubing to a 6mm length, and applying the 6mm tubing to the stabilizer arms right at the bends. The theory here is that the heatshrink tubing eliminates the hard metal-on-plastic impact sound when the stabilizers pop back up on an upstroke. Prior to experimenting with this mod, my feeling was that most of the irritating stab noise was coming from upstroke and rattle, which the Rama mod and lube should address, so I didn’t feel a need to do the bandaid mod.

I did find it helpful to use some extra mechanical hands to hold the stab in place while I used a heat gun to apply the heat shrink.

For this build, I wanted to use Zeal stabs with a standard ANSI layout, so I needed to do the mod to 4x2u and 1x6.25 stabs.

Here we see the stabs after lubing and reassembly. Being able to see the stab mods through the transparent Zeal housings will prove useful in a later build log…


Let’s Zeal it up, babe. It’s worth mentioning that the Zeal60 PCB requires soldering a few pairs of pads together to function properly; the board supports a few different layouts, and your choice of layout will require a specific set of pads to be jumpered. Because all of the pad pairs in question are adjacent, no jumper wire is needed - it’s enough to apply drops of solder to each pad, and then place the tip of the soldering iron so that it joins the two drops.

For color matching purposes, I went with an aluminum plate with red anodization, but this particular plate was not cut consistently or accurately for the stabs, so I had to do some filing. Here you can see the silvery raw aluminum after I filed away some excess material to get better fit and clearance for the stab housings.

I note in passing that the plate was also slightly warped when it arrived (sigh), so I ended up using some small C-clamps during soldering to get a good fit.

Recall that this was an older build, so I hadn’t yet tried the Sorbothane strut mod, which is my current approach for handling PCB/plate sound dampening. For this build, I did PCB/plate dampening in the way I had usually been doing it up to this point - place small squares of Sorbothane strategically to make good contact between the PCB and the plate.

We have clearance.

It’s not a great photo, but hopefully this gives you some idea of the Sorbothane contact and compression between the PCB and the plate.

More potato pics! A pair of looks at the plate/PCB assembly and the Klippe+ case…


I did a quick hack job on a sheet of Sorbothane to fit it between the PCB and the case, leaving its protective plastic sheet on, and making room for screw standoffs and the ledges around the case perimeter. I also like to cutaway areas where the controller, USB jack, and reset button are placed. You can see the indentations left by some switch pins - this is about the level of compression I like to see for best sound dampening results.

Going for that gaudy overdone RGB look.

Playing around with Mitowaves icons.

So that was all good and well. How did the board feel and sound? The good news was that all of the non-stabilized keys felt and sounded great - the 62g V2 Zealios have a lot of tactility and pop, but the lighter spring weight compensated for that to an extent. Quite nice. Unfortunately, it became clear very quickly that the stabs were sluggish and sticky.

Fast forward three months, to March 2019, and I came back to this build to diagnose and correct the stabs. I did manage to figure out what was going on, but in the interests of suspense (and consistency of photos with respect to the story), you’ll have to wait for the next build log in this Laser Trio series for the full stab story. As always, stay tuned…

What I will say for the purposes of this build log: once those issues were resolved, the result is probably my favorite 60% tray-mount build to date, specifically for sound and feel. Sometimes people treat additional weight as little more than a meme, but I disagree; up to a point, a heavier case yields a deeper sound, and I find it’s easier to tune away residual ping with Sorbothane or foam with a heavier case than it is with lighter counterparts.

Lessons learned

  • The Rama heat-shrink mod and Zeal stabs are not a good combination. Details to come in the
    next build log.
  • With tray mount cases, it’s easy to measure the gap between the PCB and case by measuring the height of a screw post, which helps to determine the necessary Sorbothane thickness (a good rule of thumb is to multiply the measured gap by 1.1-1.2 to obtain the desired Sorbothane thickness).
  • The Klippe is sometimes maligned for its expense relative to the Tofu, its relatively recent competition in the 60% tray mount category, but you are getting something for that extra expense - it’s substantially heavier, and that weight contributes appreciably and positively to feel and sound. (It’s also worth noting that more recent Klippe releases are closing that price gap, making the Klippe even more attractive.)

Specifications

case: Klippe+ (black case, red weight)
case dampening: 0.1" 40 Duro Sorbothane sheet with cutouts
PCB: Zeal60 R4
plate: red anodized aluminum
plate/PCB dampening: 0.25" 50 Duro Sorbothane, small squares
stabilizers: Zeal R2 transparent (1x6.25u, 4x2u)
stabilizer mods: lubed with SuperLube
switches: 62g V2 Zealios
switch mods:
- springs tub-lubed with Krytox GPL 104
- housings and stems hand-lubed with Tribosys 3204
keycaps: GMK Laser
- Gaijin, Blocknet, Mitowaves
HxWxD (without caps): 1.38" x 11.18" x 4.25"
HxWxD: 1.75" x 11.18" x 4.25"
assembled weight: 3.12 lb
6 Likes

Build #22: Klippe+ Black/Blue (Laser Trio 2/3)

In the previous build log, we introduced the first member of the Laser Trio, a black Klippe+ with a red weight, red plate, and splashes of red from GMK Laser kits. With this build, I wanted to try out a slightly more visually subdued version of the same build, using a blue weight, blue plate, and the GMK Laser Kobe kit, and in keeping with that more subdued theme, I opted for 62g V2 Zilents. As with the previous build, the first task is switch lubing, and what can I say at this point that I haven’t already said? It’s switch lubing.

Waiting for the resolution to the Rama heatshrink mod cliffhanger? Let’s jump right in. In order to diagnose the problem, I repeated the heatshrink mod on this build, installed the stabs, soldered in switches, installed the PCB/plate sandwich into the case, and tested.

Sure enough, the same sluggish, sticky behavior. Why? And why did I build the entire board to test this problem, when I could have just installed the stabs on an empty PCB and tested right then? Sometimes a time machine would be handy.

I have no answer to the latter question, but at least I have one for the former. Zeal stab wires are gold plated, and aside from the bling factor, another attribute of that plating is that it is smooth, noticeably more so than GMK stab wires. While you can apply heatshrink to these gold plated stab wires, eventually the heatshrink tube will loosen, and begin to move back and forth along the end of those smooth stab wires (the green arrows below illustrate the direction of movement). At some point, when the tube slides to the end of the wire, the tolerances inside the housing are tight enough that the tubing catches on the housing when the stabilizer stem moves, creating the sticky behavior.

I can imagine several potential solutions to this problem (use different wires or stabilizers, try tighter heatshrink, use epoxy to bond the tubing into place), but given that Zeal stabs are generally high quality stabs, I felt the best approach was a retreat from the Rama mod: desolder the board, unscrew and remove the stabs, remove the heatshrink from the stabs, relube, and try again. This did the trick. Thank goodness for desoldering guns.

With that solution in place, the build went quickly from there, perhaps my fastest build up to that point (ignoring, of course, the entire desoldering that just took place, for this build AND for the previous build, to fix the stab problem. Sigh). Here, I’ve installed a few switches to get the plate and PCB lined up.

This was also one of my earliest attempts using the @donpark Sorbothane strut mod, in which small Sorbothane pieces are inserted into the gaps between switches through plate cutouts, before all of the switches have been installed. Here’s a side view of one such Sorbothane piece.

YMMV, but I think the blue plate and light blue Zilent stems work well here. As with the previous build, to facilitate direct comparison of sound and feel, I used a Sorbothane sheet between the PCB and case.

So, what do I think of this second member of the Laser Trio? It’s a fun board. In terms of sound, the Zilents have a bit of a “scratchy” sound that may not be to everyone’s taste, but there’s no question this board’s acoustics would be acceptable in a shared office environment. As far as switch feel goes, the 62g Zilents are a bit on the light side for me, but much more workable than the V1 Zilents with the same weight, where at times I felt that breathing on the keys was going to result in actuation. Exaggeration, of course, but yeah. Subjectively, the 62g V2 feels like something between a 65g and 67g V1.

Full disclosure: out of curiosity, I tried this build with and without the Sorbothane layer between the case and PCB, with and without a deskmat. While the best sound came from the combination of the Sorbothane case treatment and the use of a deskmat, the deskmat alone got 90% of the way there, eliminating the bulk of the metallic ping that resulted from using the untreated board on a hard wooden desk without the deskpad.

Lessons learned

  • The Rama shrink-wrap mod doesn’t mix well with Zeal stabs - the tolerances are too tight and the wires are too smooth to prevent the shrink wrap from sliding and catching on the housing.
  • Don’t try a new mod on two boards at the same time - if the mod proves unsuccessful, you’ll be undoing it twice.
  • Don’t forget that the surface underneath the keyboard is part of the sonic equation - the presence or absence of a deskmat contributes significantly to the sound of a board.
  • This was the first build in which I tried @donpark’s Sorbothane strut approach, and I’ve been using it since; it’s easier to get good plate/switch/PCB fit first, before installing Sorbothane.
  • Take your time seating the PCB/plate sandwich in the Klippe+; it may initially look like you have it seated properly, but you’ll be able to tell otherwise since the screw holes won’t line up well with the PCB.

Specifications

case: Klippe+ (black case, blue weight)
case dampening: 0.1" 40 Duro Sorbothane sheet with cutouts
PCB: Zeal60 R4
plate: blue anodized aluminum
plate/PCB dampening: 0.25" 50 Duro Sorbothane, small squares
stabilizers: Zeal R2 transparent (1x6.25u, 4x2u)
stabilizer mods: lubed with SuperLube
switches: 62g V2 Zilents
switch mods:
- springs tub-lubed with Krytox GPL 104
- housings and stems hand-lubed with Tribosys 3204
keycaps: GMK Laser
- Kobe, Blocknet
HxWxD (without caps): 1.38" x 11.18" x 4.25"
HxWxD: 1.75" x 11.18" x 4.25"
assembled weight: 3.17 lb
5 Likes

FYI, I’m now using plate paddings from https://mkultra.click/ on all of my boards. While the Sorbothane ‘strut’ hack only improved the feel, plate paddings improved the sound as well. I think it’ll eventually become a ‘must’, like plates. Highly recommended.

3 Likes

Oooh, interesting. This might be a personal preference thing - both when I was installing the Sorbothane between the PCB and plate the “hard way”, and when I install it with your approach, I definitely hear a sound improvement. Specifically, the high frequency “ping” from plate impact is largely to completely attenuated with Sorbo, and that yields a deeper bassy sound which I prefer.

With that said, I’ve got a couple mkultra plate pads waiting on builds. Maybe I should think about doing an A/B comparison with a focus on sound…

1 Like