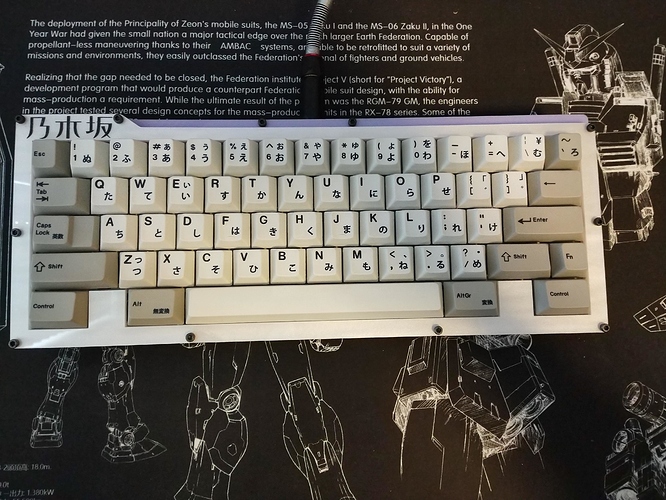
Thanks Evan! I’m always up for crazy keyboard ideas.
I’m probably just blind but I don’t see anything about the thickness of the materials used. Is there a thickness you would suggest for each part?
Ahh! My mistake! I used 3mm thick layers as its a normal thickness of acrylic.
If you are willing to order different sizes of acrylic you can get by with 4 layers:
Top - 6mm
Plate - 3mm (or 1.5mm standard thickness if you can find anthing that thin)
Mid - 9mm with a 3mm plate or 12mm with a 1.5mm plate
Bot - As thin as you want.
Alright thanks!
Note, I think @thebeephaha’s laser will have issues with this thickness. I don’t remember where he said it maxed out but I think it was somewhere around 6mm for a clean cut.
This is absolutely beautiful! Thank you for sharing.
This is not only an awesome idea, but an awesome thing to share. Thanks!
Would a Sentraq 65% PCB fit in the case? I mean, that one supports split backspace.
I don’t think the S65-X PCB supports that bottom row though (unless you don’t cut the blocker) …
Edit
Noxary 268 PCB should work but I don’t know if @xondat is selling the PCBs separately or only as part of the 268.2 group buy?
Whitefox PCB should also work …
I don’t think the S65-X supports that bottom row though
I think @cerement is right, doesn’t seem to have the bottom row compatibility. If someone has the exact width and height of the S65 PCB I could see if it fits in the existing case.
If your top layer doesn’t have the bottom row blocker, then it should be able to use a couple different 65% PCBs …
WITH blocker: Noxary 268, Whitefox
WITHOUT blocker: Tada68, S65-X, YD68, M65-A, 22mini-B
.2 is USB C FWIW
I emailed Sentraq and this is what they told me
It is 96x305mm and 1.6mm thick
I just asked for length, width, and height… I dunno why I asked for all three, but yeah. Hope it helps.
Super cool! We need to get @jolimon on here so he can cut some cases for us too.
WITH blocker: Noxary 268, Whitefox
WITHOUT blocker: Tada68, S65-X, YD68, M65-A, 22mini-B
Don’t forget LFKeyboards for an alps build: https://www.lfkeyboards.com/smk65/ (think you can use the blocker on that one)
Also, for people who want hotswap MX: https://www.lfkeyboards.com/lfk65-hs/ (tada68 layout, no blocker)
As someone with access to a laser cutter and who owns a large format printer… this is very interesting/compelling… especially seeing as I have spare sheets of cedar ply in the garage…
i wonder how this would be with water jet or laser cut sheet metal?
Hey, I’m really liking this case, it looks great and well designed.
However, I’m curious about a few things.
The donation only includes files usable for laser cutting, not anything that works with 3d modelling software, right?
Because as much as I like it, I would like to make a few modifications.
Namely, I’d like to use the normal Tada68 ISO layout, and if possible remove the plate and just use the one from the Tada68 (so switching cases becomes possible, and I don’t have to desolder my board). Furthermore, I would like to add a few more holes for underglow and the switch (reset button on the Tada68) on the bottom as well as space for the battery, as I’d actually like to use it with the YD68. Oh, and maybe shrink the top bezel to half its size.
I don’t mind doing this myself, but I also understand that you probably don’t want to share the cad files (and maybe aren’t too keen on me butchering your design for my own purposes, either?). Sadly, I have exactly zero 3d modelling experience, and while I can probably manage to hack out the parts I don’t want from your design, I could never make such a nice board myself, and it looks like the only possibility for a “proper” YD68 case so far.
As far as I can tell, you don’t need to 3d model for any of the modifications you mentioned.
To use a regular layout I think you would just need to remove the blocker on the top layer.
To make it tray mount you would need to have holes at the right spots added to the bottom layer for standoffs. Do check that the plate fits inside though.
Again holes can be added on the bottom piece for underglow and reset button.
In order to fit a battery you might need to add another layer of acrylic since it might not fit. You probably want this layer to have a cutout for the battery and the other holes you would have for the bottom piece or you could just cut another one of the mid pieces and stick the battery on the bottom piece with double sided tape or something.
You could probably just scale down the outside bit of all the layers to shrink the bezel.
I just used LibreCAD to mod the design. GL if you decide to mod it. Here’s what I ended up doing.
Hey there, you are correct in some assumptions. Available are a .svg file or a .dxf file. You can use the .dxf files to get the line work into 3d CAD software and go from there. Or open it up in AutoCAD and make the adjustments you’d like. The v3 available has a smaller top bezel like you mentioned. I had considered making a tray mount version as well specifically for those who would want to drop in their TADA pcb and plate like you mention. I’m happy to help you out with this when I get less busy at work.
The YD68 PCB doesnt support the .5u blocker on the bottom which this has as an inspiration from the Canoe. Though the YD68 does have the 3x 1u keys like the traditional TADA does.
