Hah! That looks rad dude. Love the Japanese flair you incorporated. 
This project caught my attentiion, thanks Koduh for releasing the files!
Sadly the YD68 PCB does not work with .5u blocker. Learnt this the hard way 
Still looking for a compatible PCB with underglow that isn’t too expensive. Right now it seems like the 22mini-B PCB is my best bet!
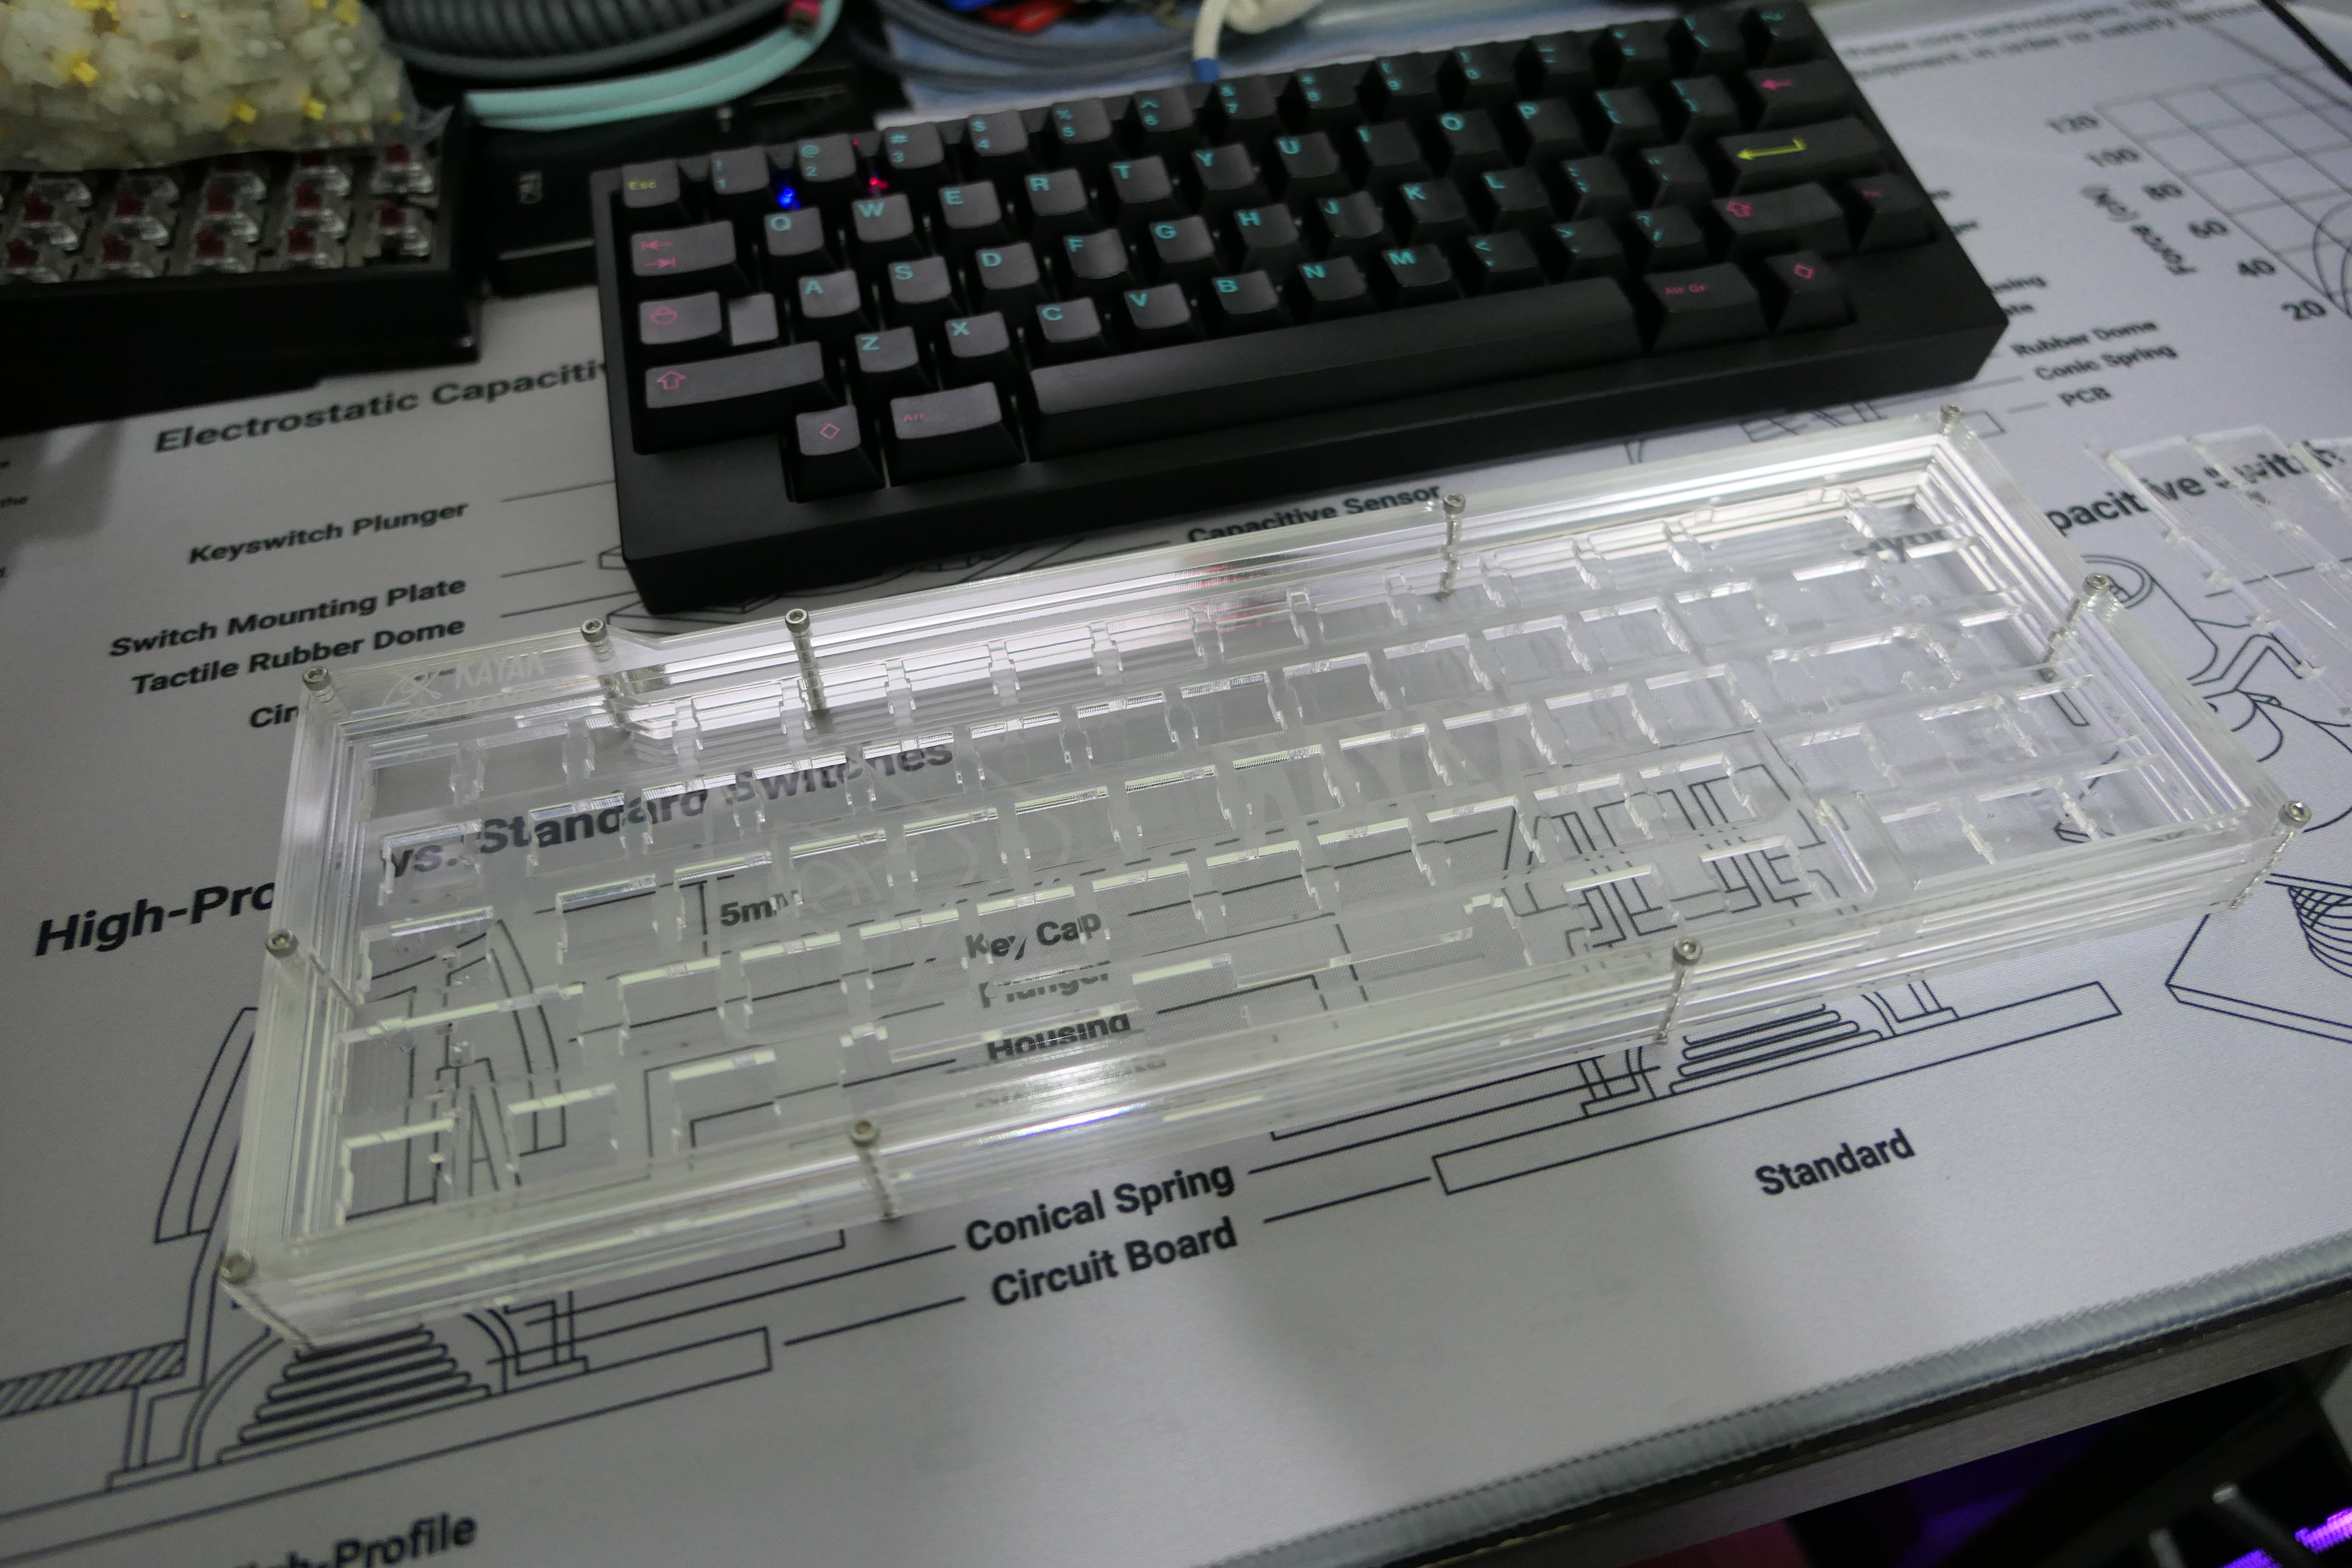
Here’s mine (v3) in acrylic…
1 Like
Thanks very much for the insight!
Yes, I’d like to get rid of the blockers.
I see that the case is flat without the “feet”. Maybe it’s possible to insert another piece between the feet , basically like this:
http s://i.imgur. com/qp2SrQ0.jpg
and have a cutout on the piece that’s covered.
By the way, I quite like the rubber feet on the board, could someone point me to where I could get them?
I’m super super stoked to get back to school so I can use our makerspace to build this! Does anyone have a build log or parts list/pricing estimate?
I love how accessible and inexpensive this is, especially given that there are a growing number of websites offering laser cutting/engraving services these days. I’m seriously considering this design as a first build project!
I haven’t seen any mention here regarding stabilizers, though. What stabilizers would one use here? Is it dependent upon the PCB that you install?
Essentially yes. In the photo of the TADA68 PCB you see above I used PCB mounted stabilizers and the files provide cutouts for PCB mount as well. Although with some minor alterations to the files you can swap to plate mount if you desire.
Thanks for clarifying. I’m probably content to use PCB-mount stabilizers and not customize too much for a first build, but I’m not really that familiar with how stabilizers differ. I assume they all have slightly different feel and sound as well as mounting differently, but I think for now I’m content to work from the design and only make cosmetic changes at most.
I’ve downloaded the drawing files from your website and I’m in the process of preparing them for Ponoko (my cutting/engraving service), but I’ve noticed that the SVG drawing I’m working from isn’t to scale. I’ll need to know the dimensions to scale the plates to, so that I can set the drawing up for my cutting/engraving pass.
Would you be able to post those or just PM me with them so I can make those adjustments? Even just the outside width of the plates would be enough.
If you don’t mind my making a couple of suggestions… I’m sure others would appreciate if the drawings were already to scale when downloading from your website. Another minor gripe is that the files aren’t named usefully as downloaded, so you have to just open them and figure out whether they’re v2 or v3 files and rename them accordingly. Making these 2 changes would make the process of getting started with the files a little easier.
@digitalmachinist - I appreciate the feedback! This is my first time doing something like this so I know I have much to learn. I will take your suggestions and hopefully find sometime to apply them here soon.
I spent some time earlier today cleaning up the v3 file and made a v3.1 I plan on releasing as a replacement as soon as I have it cut and can confirm it fixes the issues I saw previously.
If you’d like the most recent changes I am happy to PM them to you, and will happily send you the .dxf or the .svg files directly if you wish.
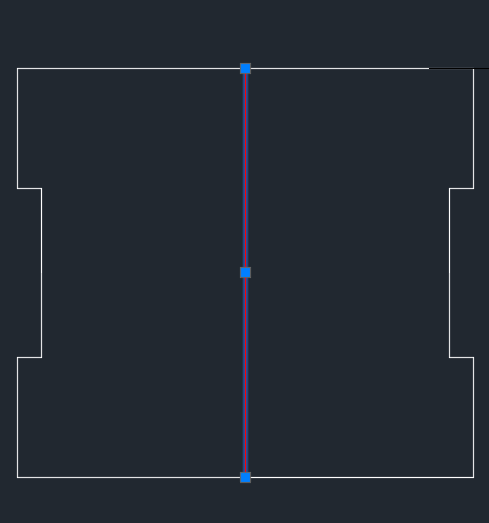
As far as scaling goes, the files were drawn in AutoCad with mm for units which I believe gets lost when converting to .svg. I do not know how to preserve the scaling in .svg, though if someone were to help me, I’m happy to oblige.
To help you scale the file: the switch holes are exactly 14mm tall. In the screenshot below the red line is 14mm long. If you can scale those to size everything else should follow suit.
Dang, I really like this case, would you be interested in creating a similar one for an ortho-board?
Preonic or maybe the XD75?
I really wanna see some T H I C C O R T H O boiz
2 Likes
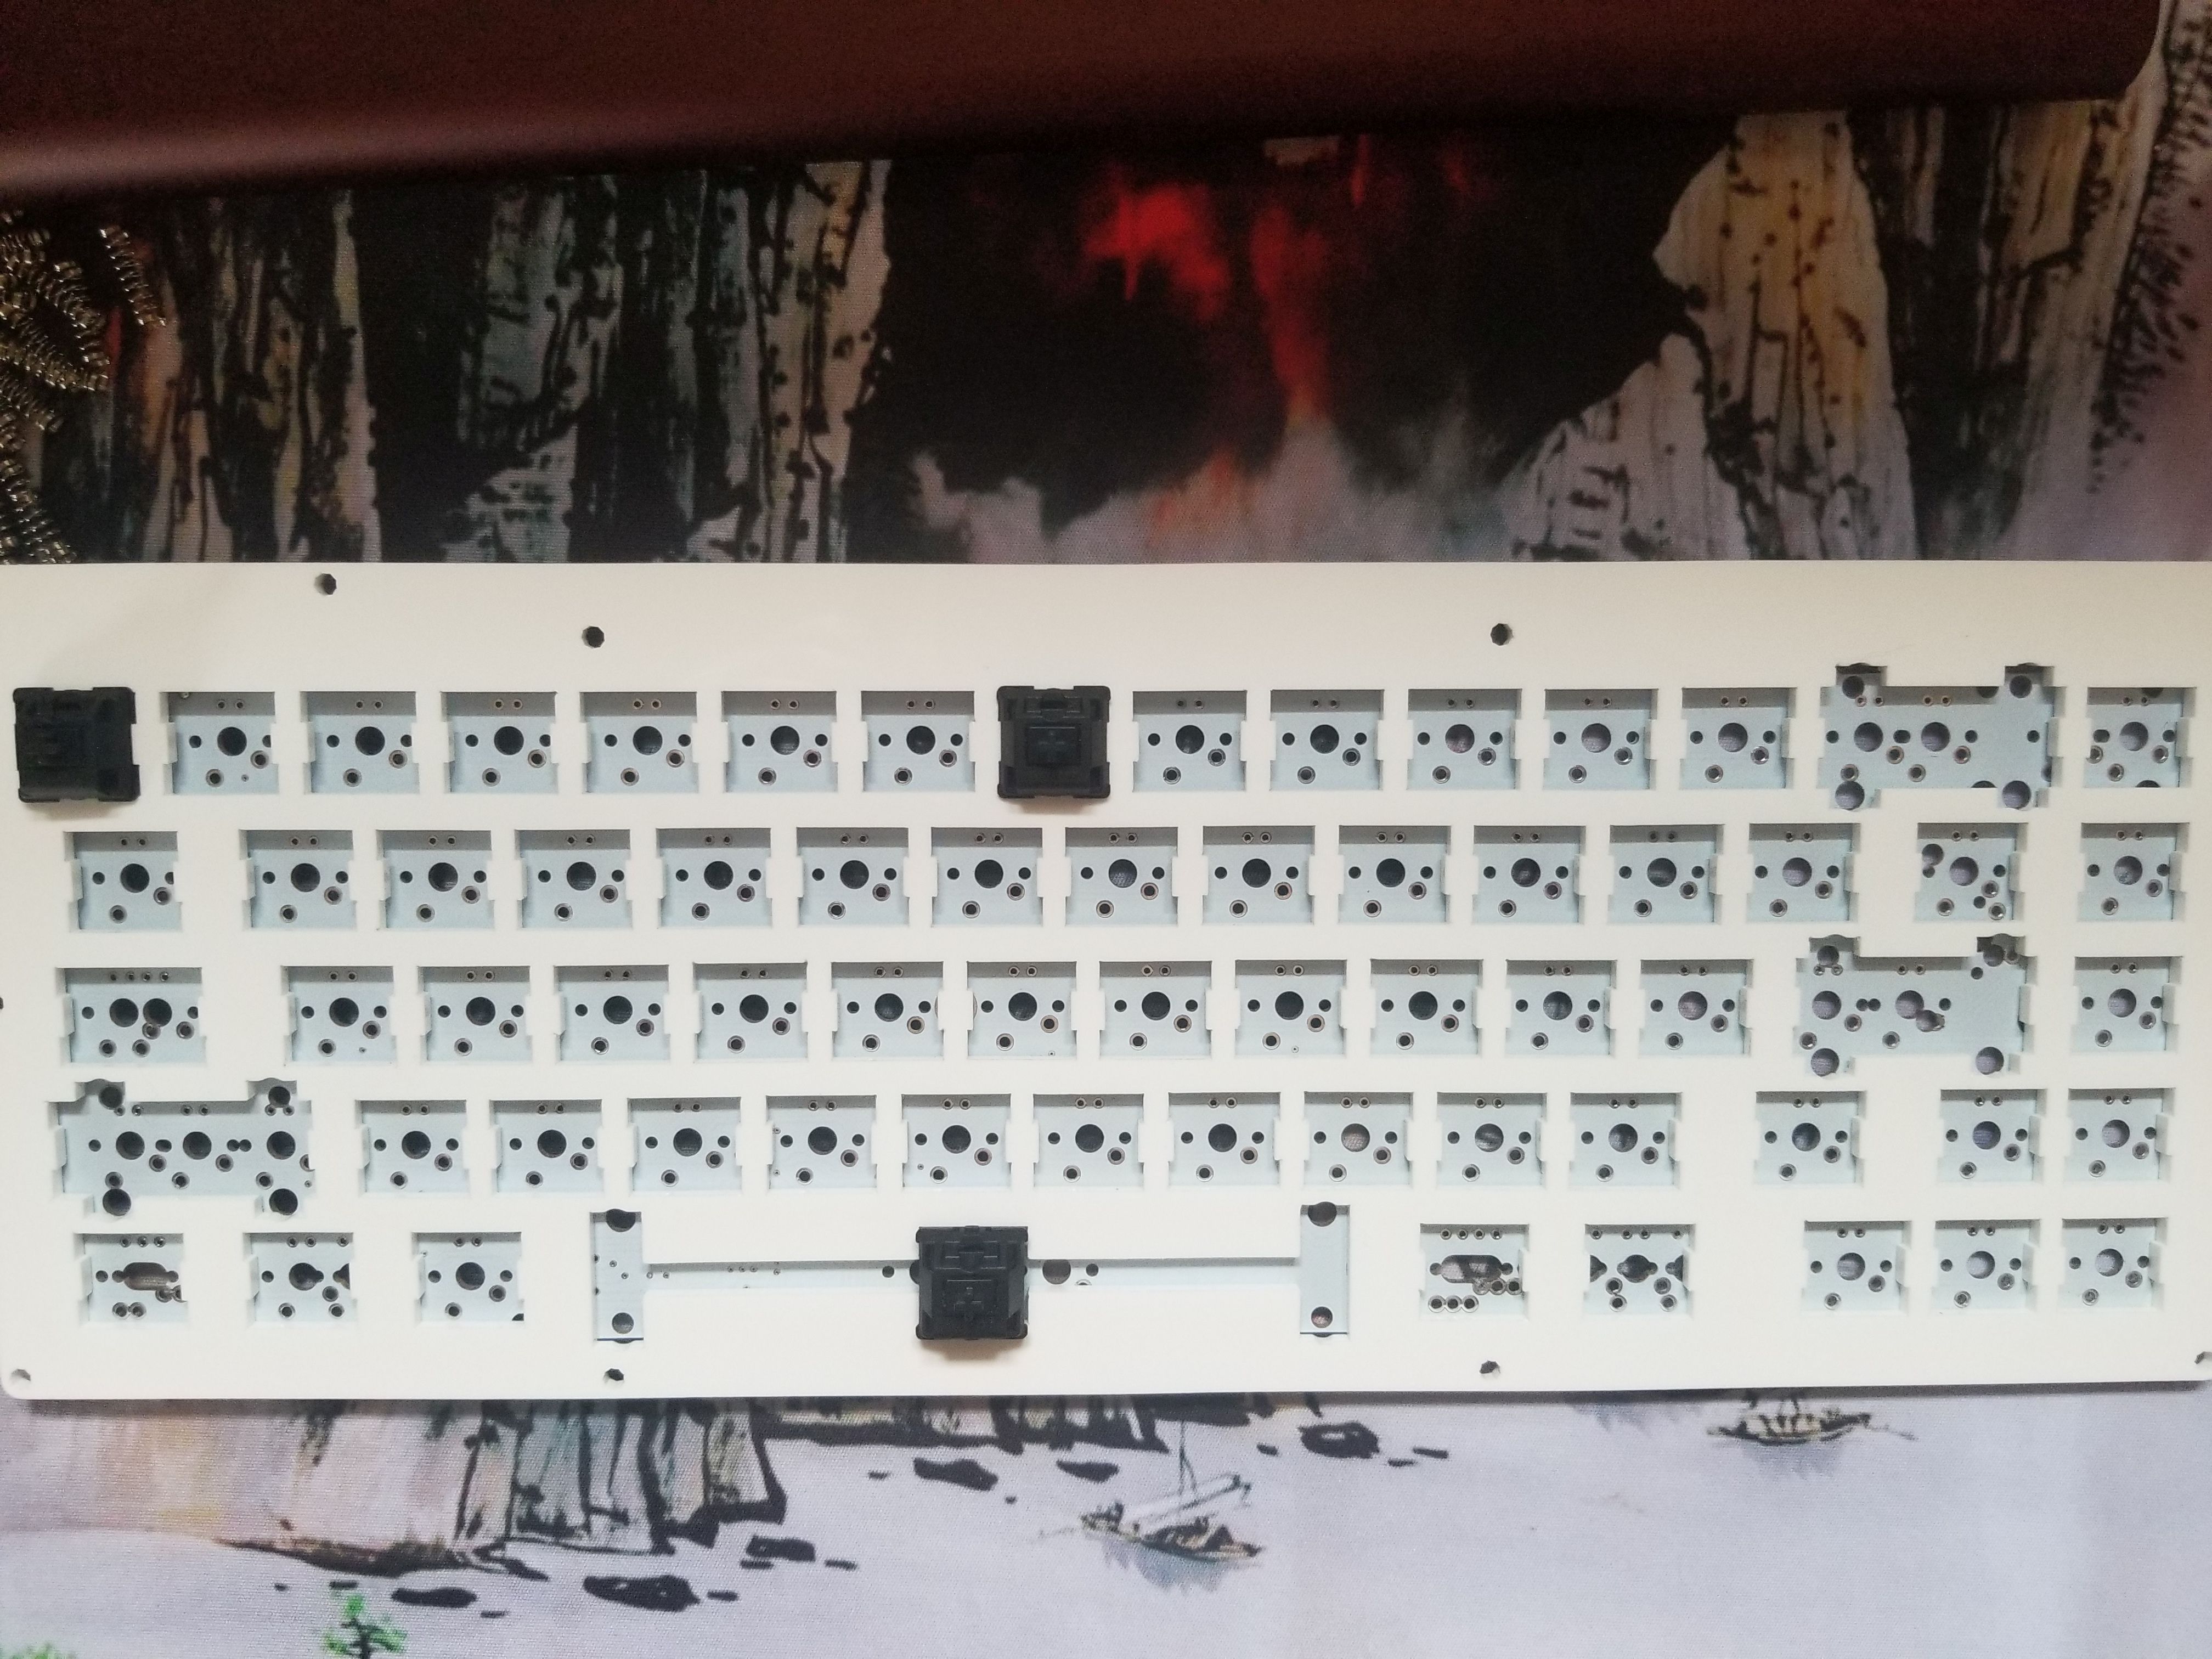
I had the newest version cut by thebeephaha, but it did not fit the linked Tada68 PCB. The spacing ended up being off like an acculumated error across the plate if each switch spacing was just slightly too small . I’ve emailed him about it, so I’m not sure if this was an issue with his cutter or the design yet.
Oh no! So the switch holes are too small for switches to fit into? Or are the holes not lining up somewhere? Can you send a photo of what you are seeing? @beep and I are working together on getting a few more cut so we can make sure to get you a new plate that will work.
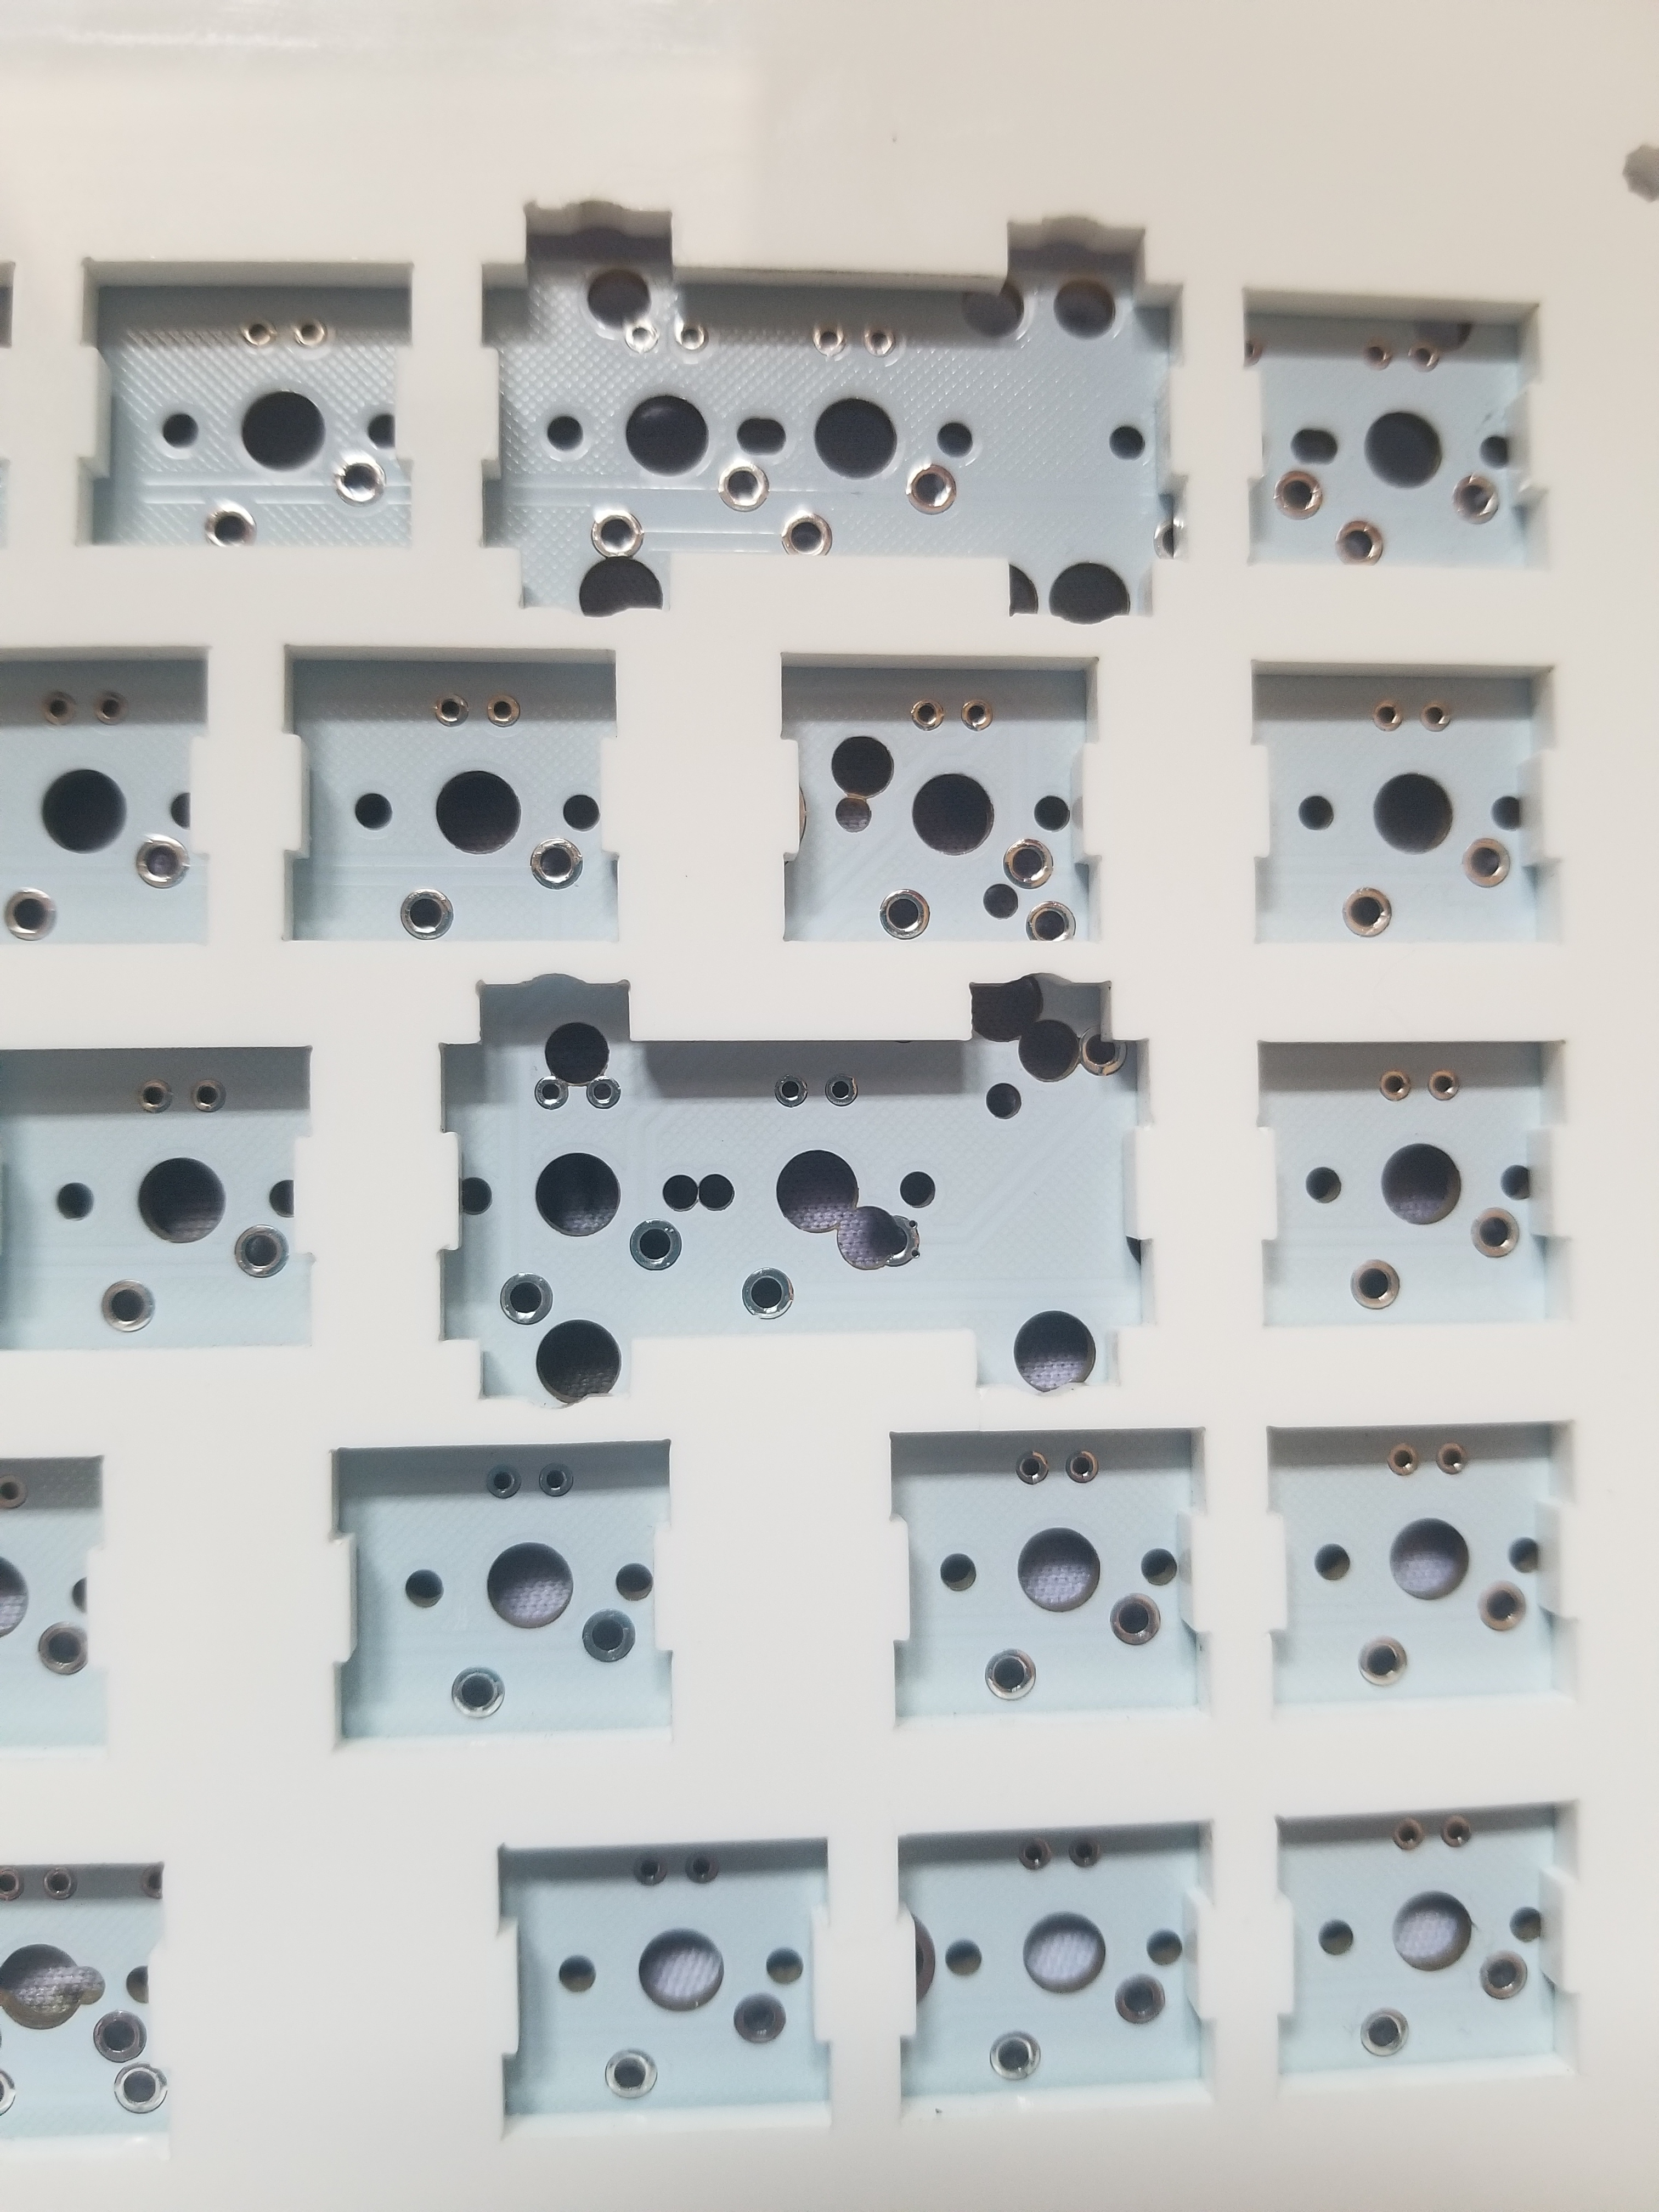
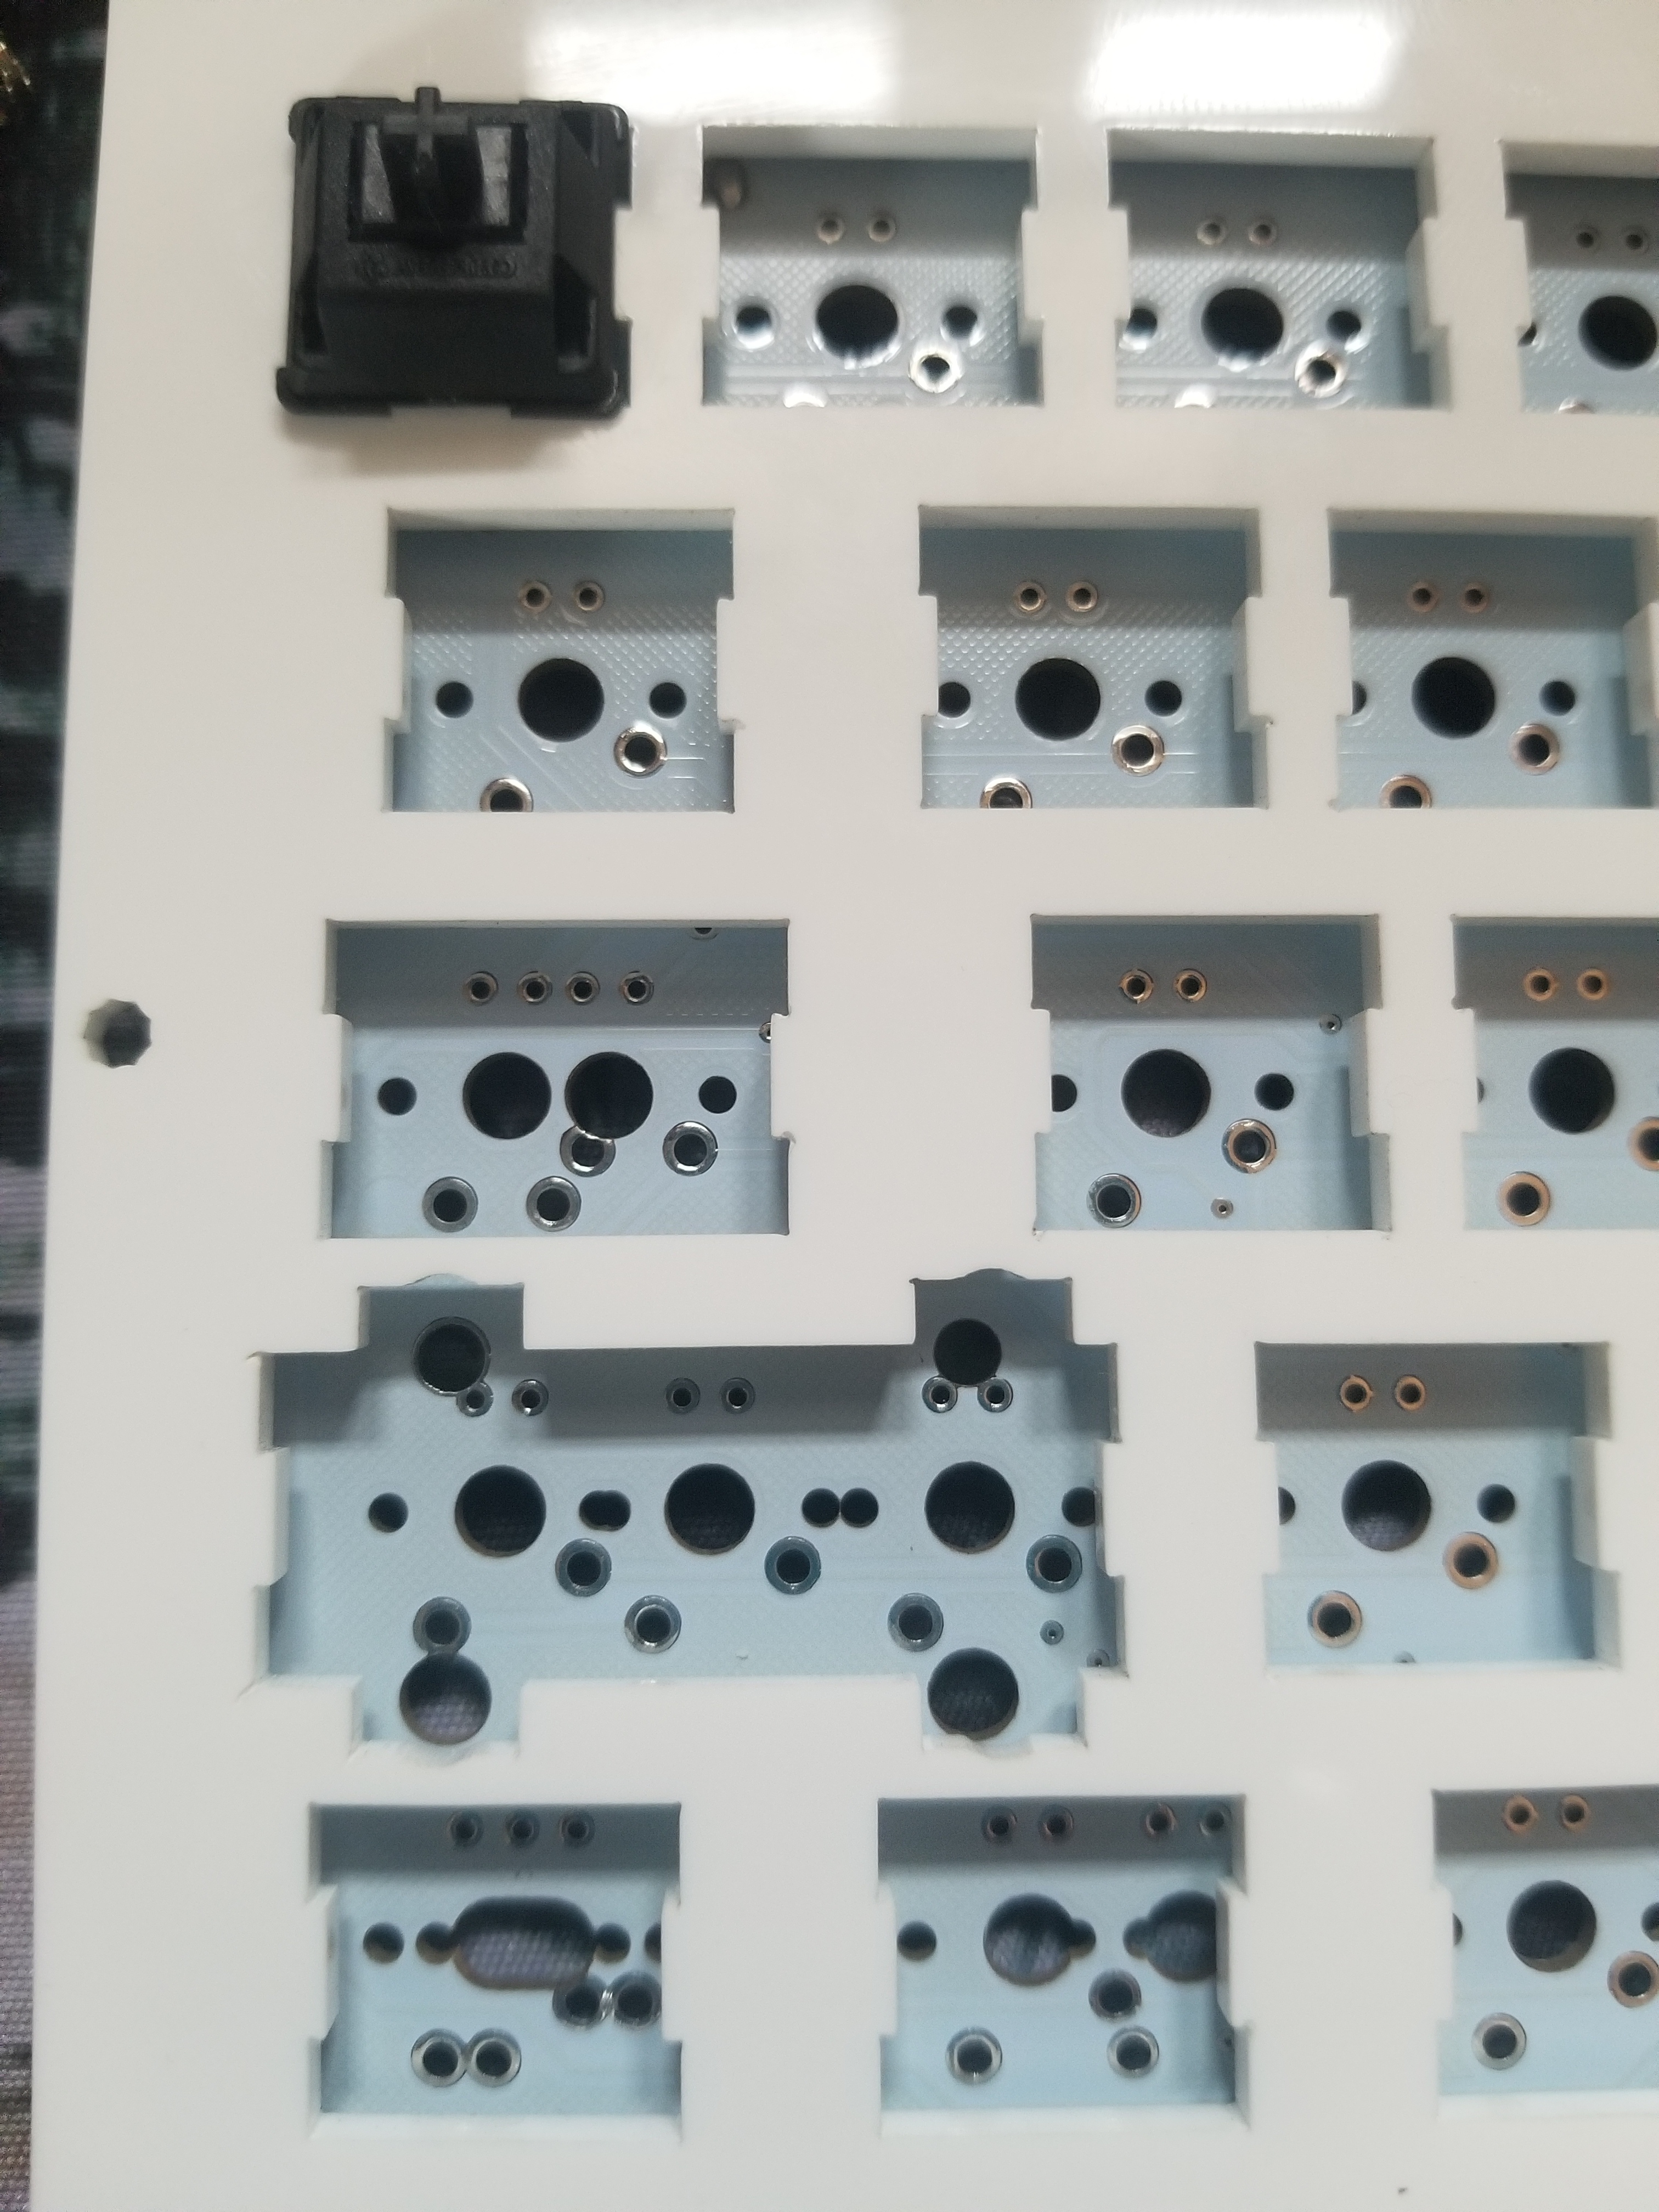
Not the switch holes, but the size between them is my guess. I haven’t had trouble inserting any switches into the plate. You can see the right most column has the plate cutout nearly protrude over the PCB mount switch pin hole. This makes it impossible to insert a switch into the PCB through the plate. The top switch is actually at the furthest right I could get it before it had alignment issues. The angle makes it hard to see, but every stabilizer position besides spacebar is messed up. The left stabilizer cutouts aren’t far enough left with the right cutouts not far enough right.
edit:
Here are the stabs. The bottom left on l-shift is slightly more misaligned than the photo lets on.
2 Likes
@DasGnome thanks so much for the photos. @beep and I have traded so many plate files recently something obviously got a little screwy. We are going to correct the issue with the plates and will send you a replacement. Sorry it puts off your build though! 
Once corrected I will send updated files to everyone who has downloaded them.  Sorry about this.
Hey @UltimaQ! The design can certainly be altered to do so! @beep is the man with the laser cutter and would be happy to give you a quote on getting one made. ![]()
2 Likes
@DasGnome I’ve identified the issue, it appears the switch spacing on this newest design is a bit off as you’ve obviously found. I’ve overlaid the original Kayak plate that I cut for @koduh on top of the newest plate and will realign everything and re-cut your plate and also the plate I just cut for @PMSingChicken.
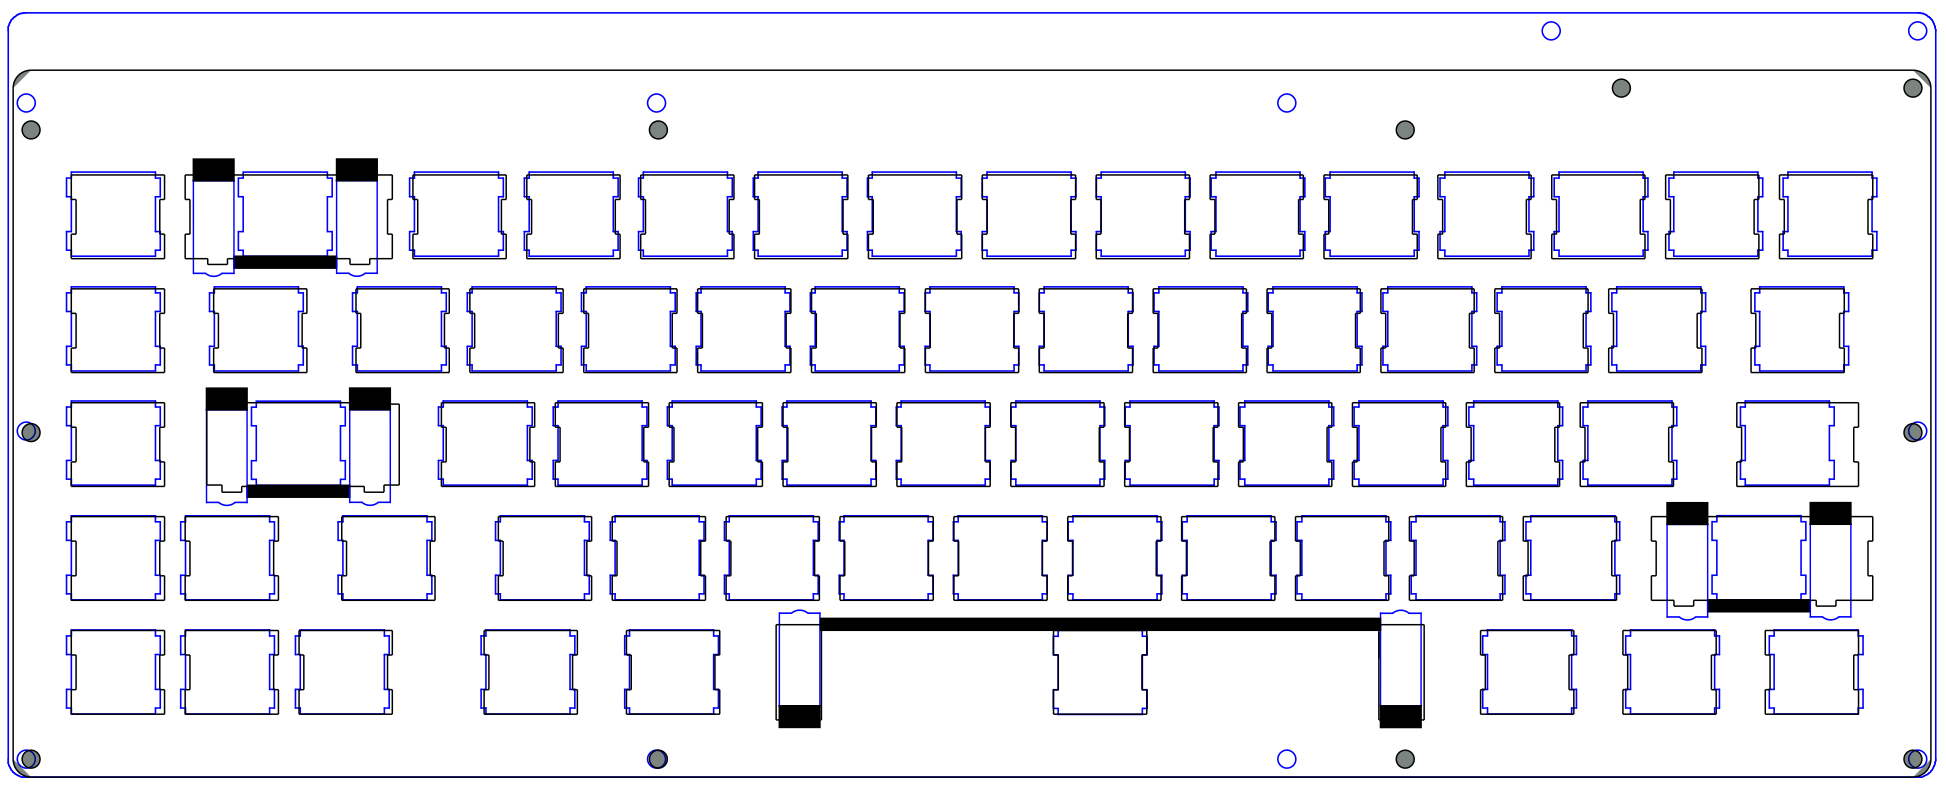
(the file is backwards due to how I have to cut it)
I will need to run to the acrylics shop on Monday to grab more material for both. The good news is that just re-cutting the plate is a real quick job and they should go out hopefully same-day.
3 Likes
I see, I thought I was just dumb and not doing it right. Thanks @beep
Just got myself access to some laser cutters so I can make use of theses files. Is v3.1 tested/released to your website as of now? More than happy to “donate” ![]()
What material did you use for the plate? Looks like some kinda foamcore…
Its laser cut acrylic.
1 Like