What's on your workbench today?

Get yourself a high speed steel drill bit for making holes in metal plates. They are made specifically for drilling into metal, also they cut it much cleaner & faster than regular carbide bits. I also recommend using a center punch to get a good starting point & to keep the drill bit from “walking” away from where you want the hole centered. Drilling metal is much, much easier with those bits & punch mark to start IME.

Edit: Oh yeah almost forgot, since you already have holes drilled in that plate but they are too small you’ll want to use a high speed steel stepped drill bit to enlarge them. That’ll make widening them much easier than trying to use just a bigger straight shank drill bit. Even if it’s a high speed steel one.

5 Likes

Never heard of these before. I’ll definitely be investing in one of these for future projects. Thanks!

2 Likes

Was working on fixing up a Realforce that came in yesterday with some help from Lady Gaga… there was one key that had a weird resistance to it, and very pronounced spring crunch. Strange.

Imagine my surprise when this was the problem…

The key had two springs underneath it, combined into a strange frankenspring (pictured, the freed spring)!!! This is straight from Topre since the warranty sticker was still intact when I received the keyboard… What a bizarre conclusion to my Sunday sleuthing!

Or am I just being daft and forgetting some keys really do have two capacitive springs underneath?!

5 Likes

A Lily58Pro in progress having to re-solder the pins on the Elite-C’s since I can never get the orientation on these correct. Going to add some excessive RGB under-lighting too, because why not?

Also printed a new clear hood for the soldering fan (adding some “lightness”).

3 Likes

i am fulfilling my good auntie duties tonight

Nibbling put it together but it didn’t work as intended so here I am trying my luck

6 Likes

Following up on my shame post from the other day, I took the dremel to my tofu case and cut out space for a USB-C daughterboard…

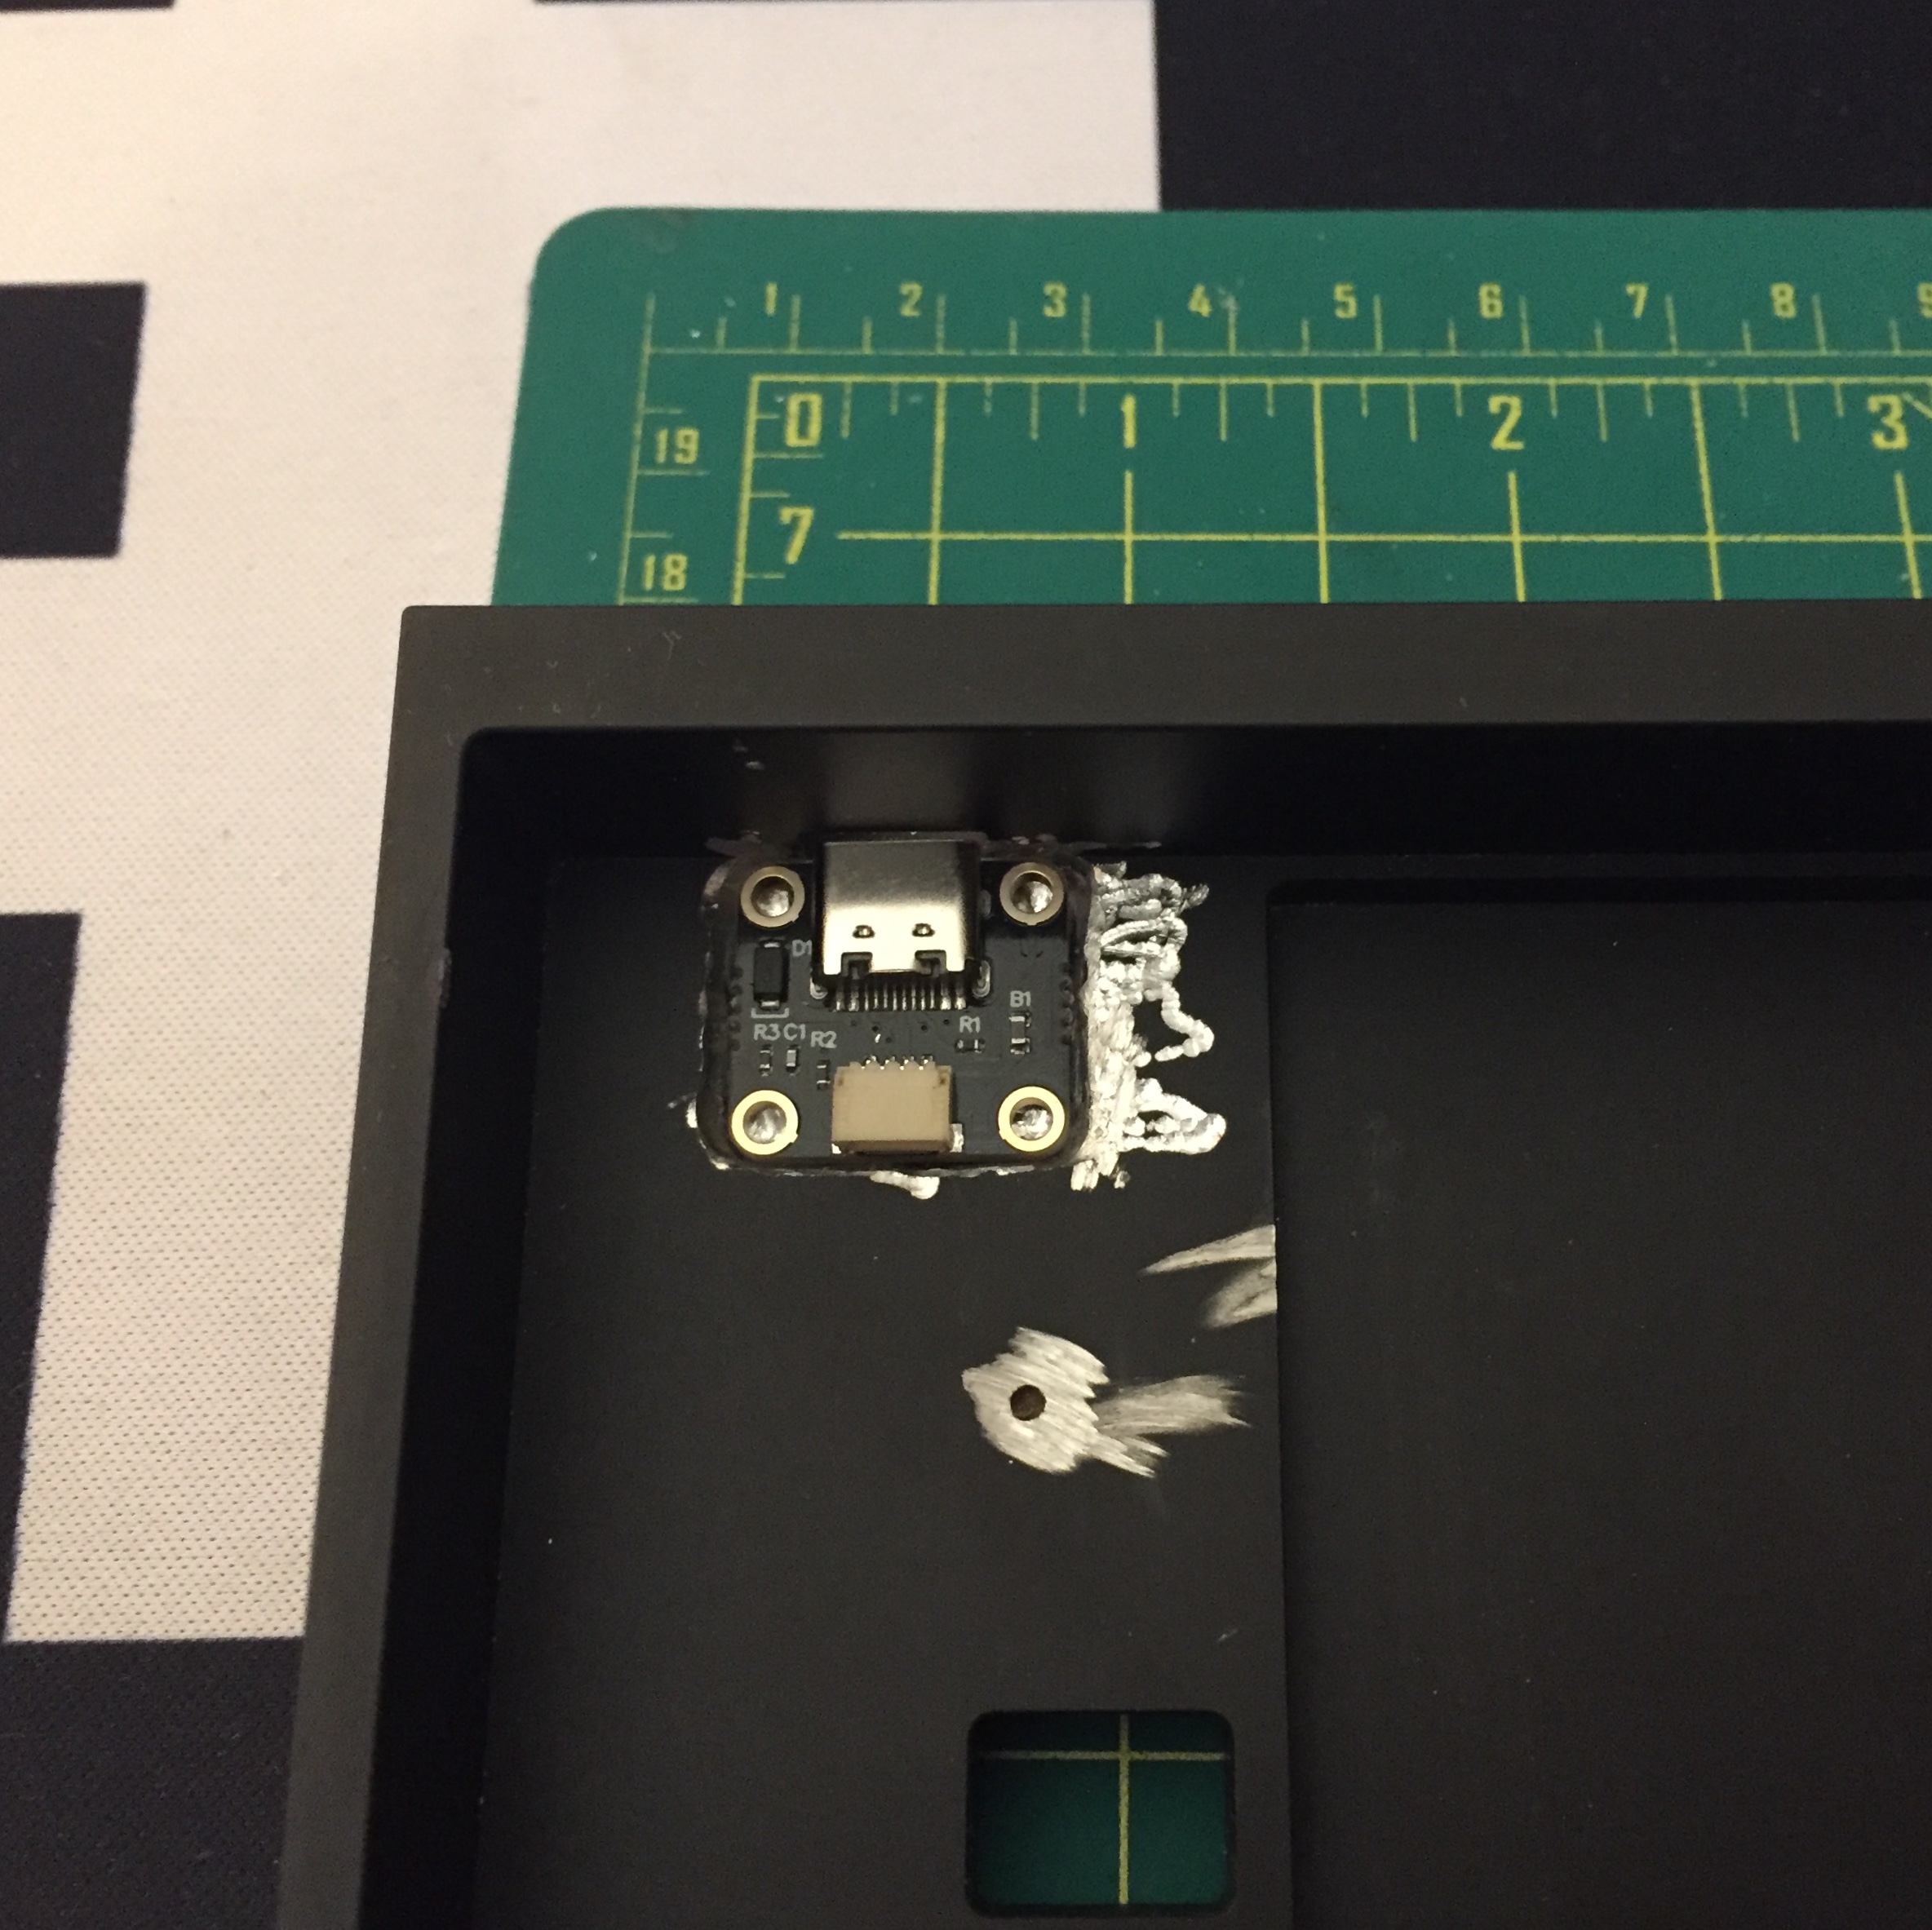
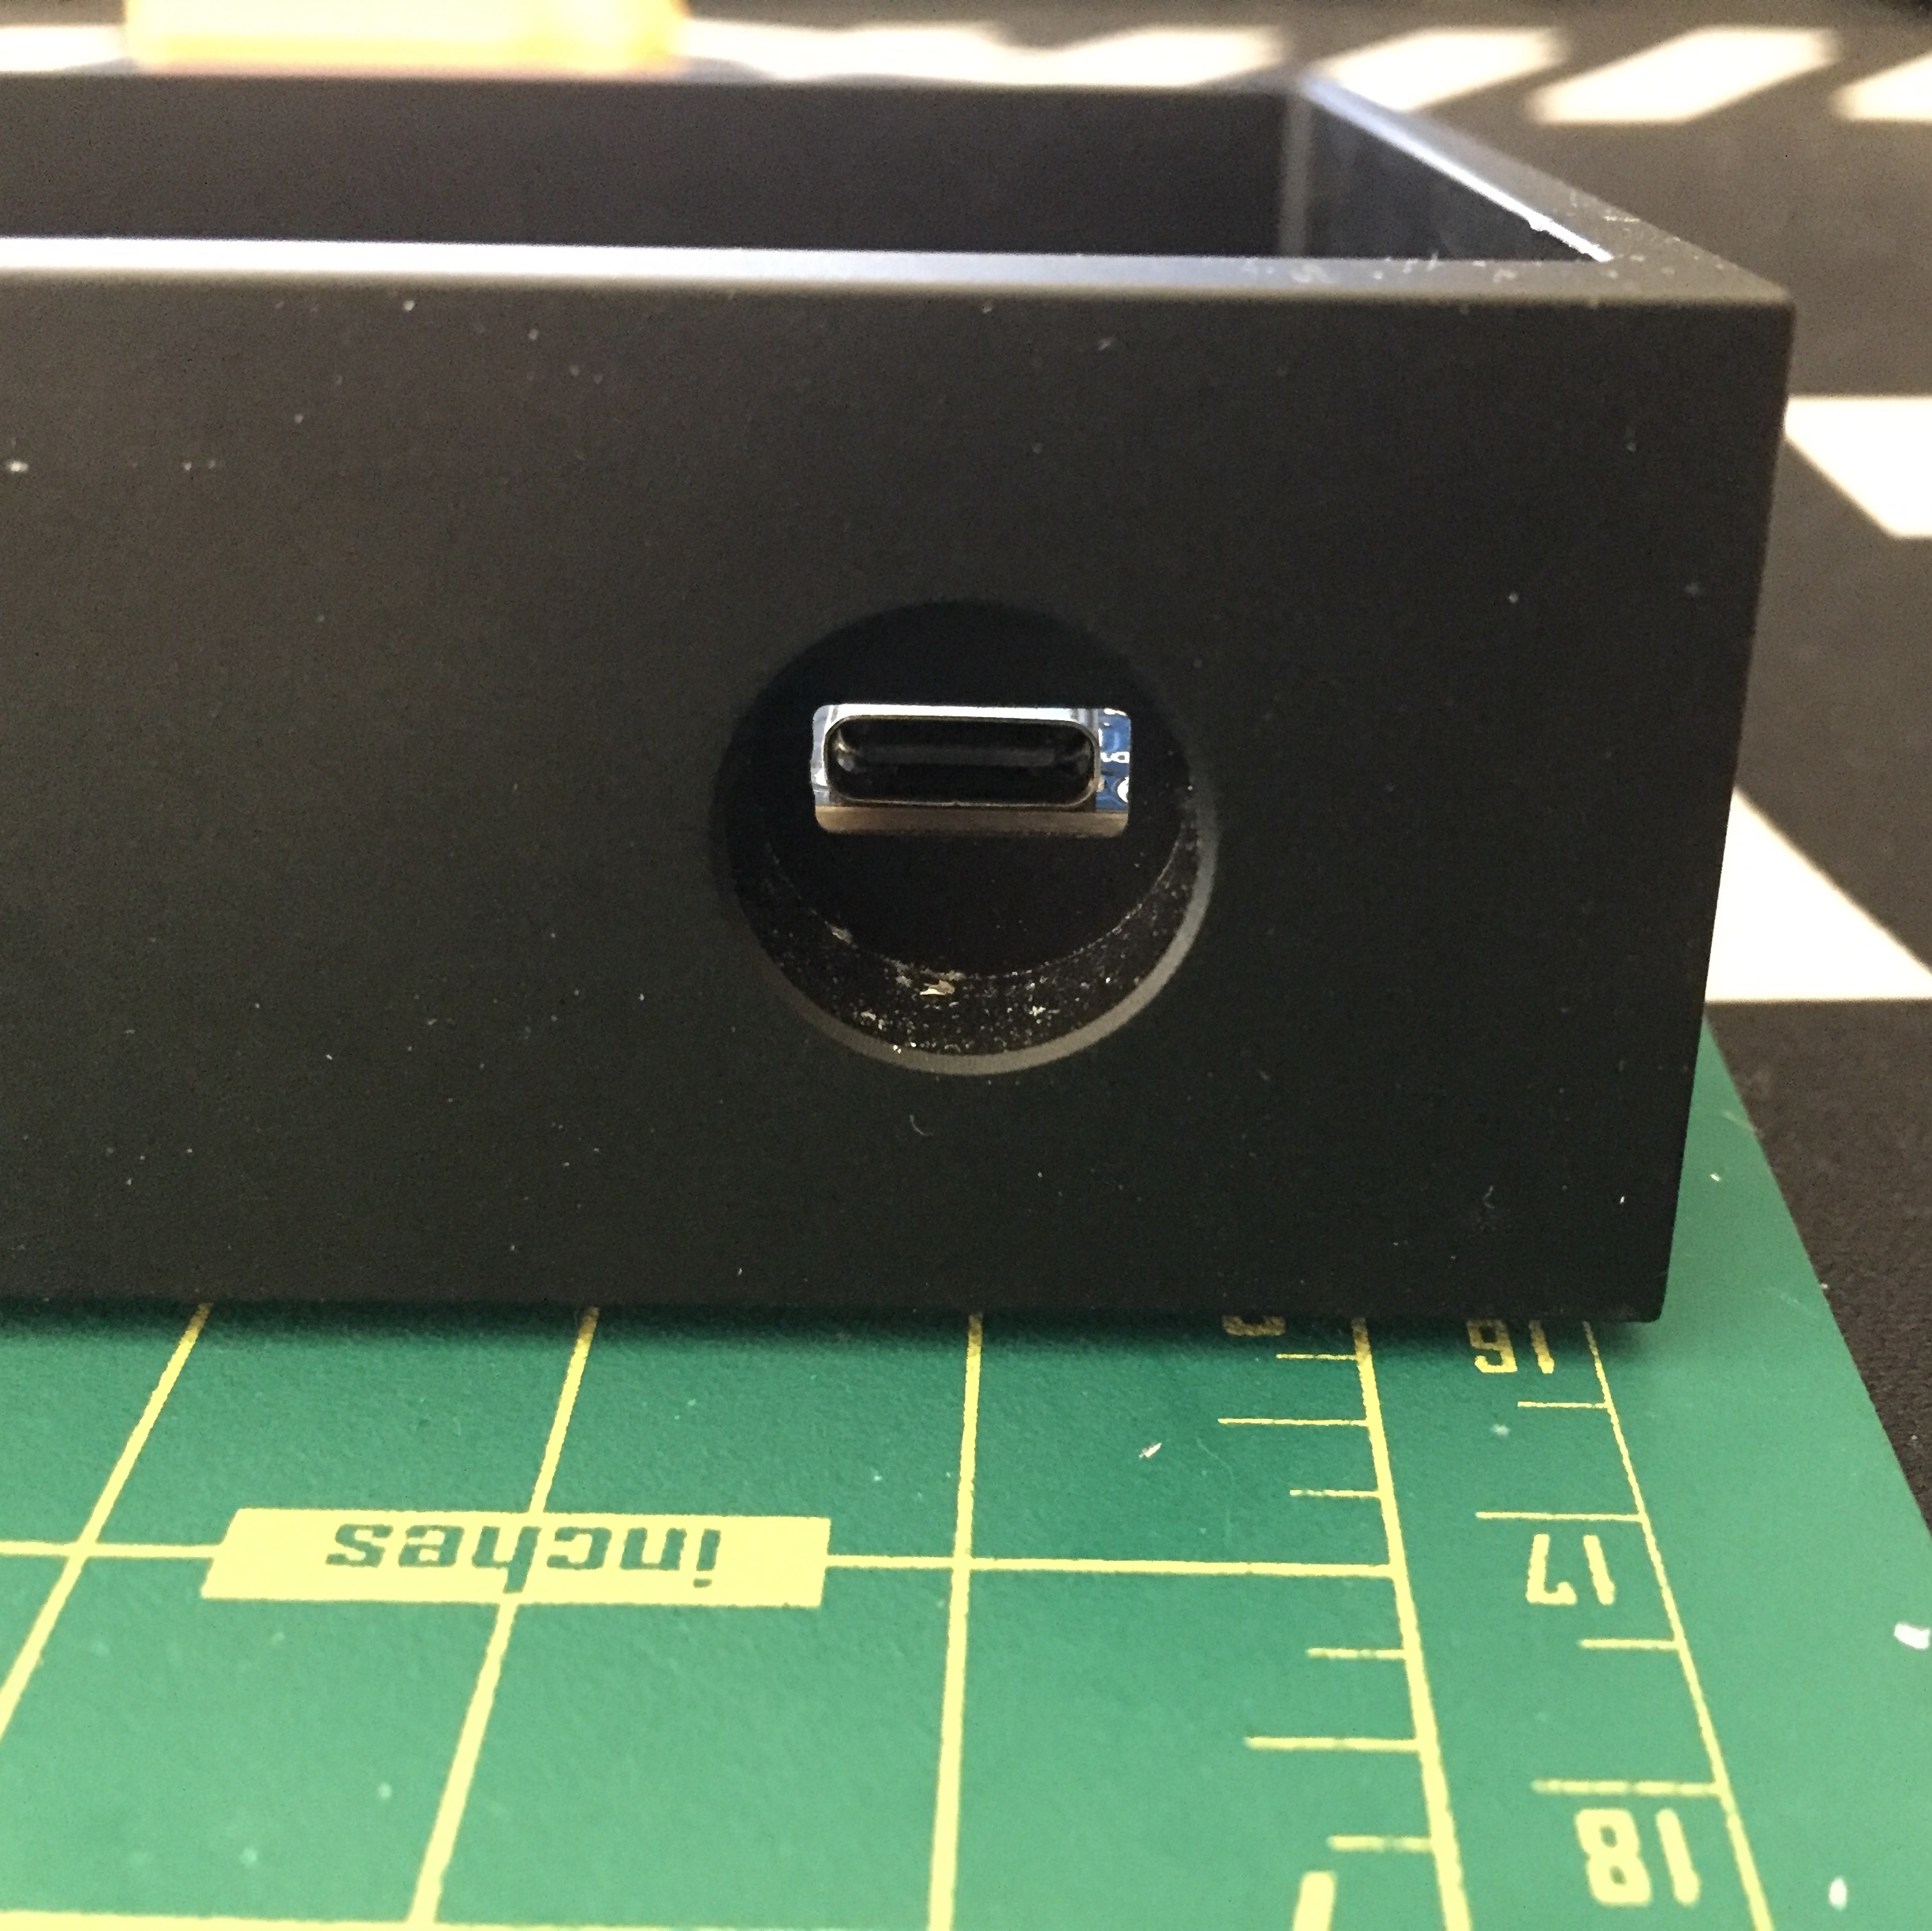
obviously not very pretty when the board is opened up but I managed not to scratch anything that’s visible when assembled and most importantly it works!

One of the selling points of the plexus PCB I’m using is that it has flex and the newly installed daughterboard does interfere with the flex slightly, though not enough for me to really notice while typing. Eventually I will go back in to make a bit more space so that the port sits bit lower and stops interfering with the flex, but for now I’m happy to have my favorite board back in working order!

8 Likes

On my workbench today is the Heavy-9. I 3d printed some adapters to mount the plate and PCB. The was needed because using an acrylic plate that is too flexible to mount with the traditional methods. There is a small scrap from the backing of a mouse pad between the 3d printed part to give a nice bouncy feel. Also had to stack up a few 15mm x 30mm under the spacebar to prevent too much flex under the spacebar.

I still need to cut 2 of the screws down a mm or so to dial in the feel.

Edit: All done! Its nice keys feel like I wanted them to.

594rn9

USB-C cable fits through the opening without molding the housing (I am using a zap cable, regular off the shelf cables didn’t fit.

I ran out of screws that were the right size to secure the USB breakout board to the standoff. I had to result to hot glue which I know is lame. But it works and is surprisingly strong. I will swap that out with screws next time I am in there along with a universal usb-c daughterboard

11 Likes

Update: Finished the actual build of the break in machine with an m4 standoff completing the build. It can be taken apart quickly and is balanced so it can be hands free. This guy is my desk buddy while I am doing actual work and not in meetings.

Edit: Controlling speed with dimmer switch because the trigger is super sensitive and I didn’t want to mess up any switches. If after all this hassle the switches are still scratchy I am so going to run this full power hammer drill mode. I will video the destruction but lets hope it doesn’t come to that… :japanese_ogre:

Trying to gauge how quickly to run it. I have run it at about 300~400 actuations a minute for 150 min. The switches are smoother but still have some scratch. While it is fun to run it faster (this drill could do a couple of thousand RPMs) I feel like going too fast may not break in the scratch parts in addition to probably eventually breaking the switches. Going to run it for 4 hours total rotating the switches 90 degrees every 60~90 minutes and see how they turn out.

@DonPark there is 1 rack of diamond paste and 1 of toothpaste in there just for you :slight_smile:

12 Likes

lol. :crossed_fingers:

1 Like

I’d check condition of switches with diamond paste frequently to prevent wearing out the stems.

1 Like

HOT AIR GUN FAIL :cry: :cry: :cry:

I was removing residue from double sided tape with my fancy, new heat gun and was so focused and excited that it was working that I didn’t notice that the hot air was destroying another portion of the plastic.

Argh#@!

8 Likes

oh man. Yeah, that’s the drawback. They work… really well.

Oh no, that poor Commodore 64. :cry:

1 Like

oh no! goo gone is the key my friend

4 Likes

Paw Macropad. Routed the reset button through a switch. Was tired of disassembling the polycarb case every time I wanted to flash it.

Slightly hacky but there was no other way to get to the button unless I wanted to put a hole in the case.

Wiring closeup

4 Likes

Put this together last night while patiently waiting for my Kyria kit to arrive. White on navy looks so clean.

8 Likes

Dis-assembled Ink V2’s, and Kailh Black stems - ready for sonic cleaning.

After that, I’ll be lubing the springs with 106 and the rest with 205g0, and then re-assembling for some very smooth and clacky long-pole linears.


Side note; I’m curious, wondering why the POM stems from Creams smell so much worse in a closed container than other POM stems… I took out my “Creamy Inks” to compare them to a test one of these, and whoof - they stanky. Definitely adding a bit of dryer sheet to the lid of that jar…

7 Likes

And here I thought “creams smell like fish” was just a meme

2 Likes

Swapped the Lavender Linears out of my MAJA. Swapped in some T1s. Tried out linears for as long as I could, but I really have learned that my preference is tactile.

10 Likes

Good on you for trying. Honestly, eliminating a category of switch options will save you from a lot of regrettable purchases as you try things out. Now you can focus on finding your perfect tactile (or enjoying the differences between them).

I enjoy using both linears and tactiles. Tactiles typically are for having some fun while working, but linears are for getting down to business (tactiles can break my concentration sometimes).