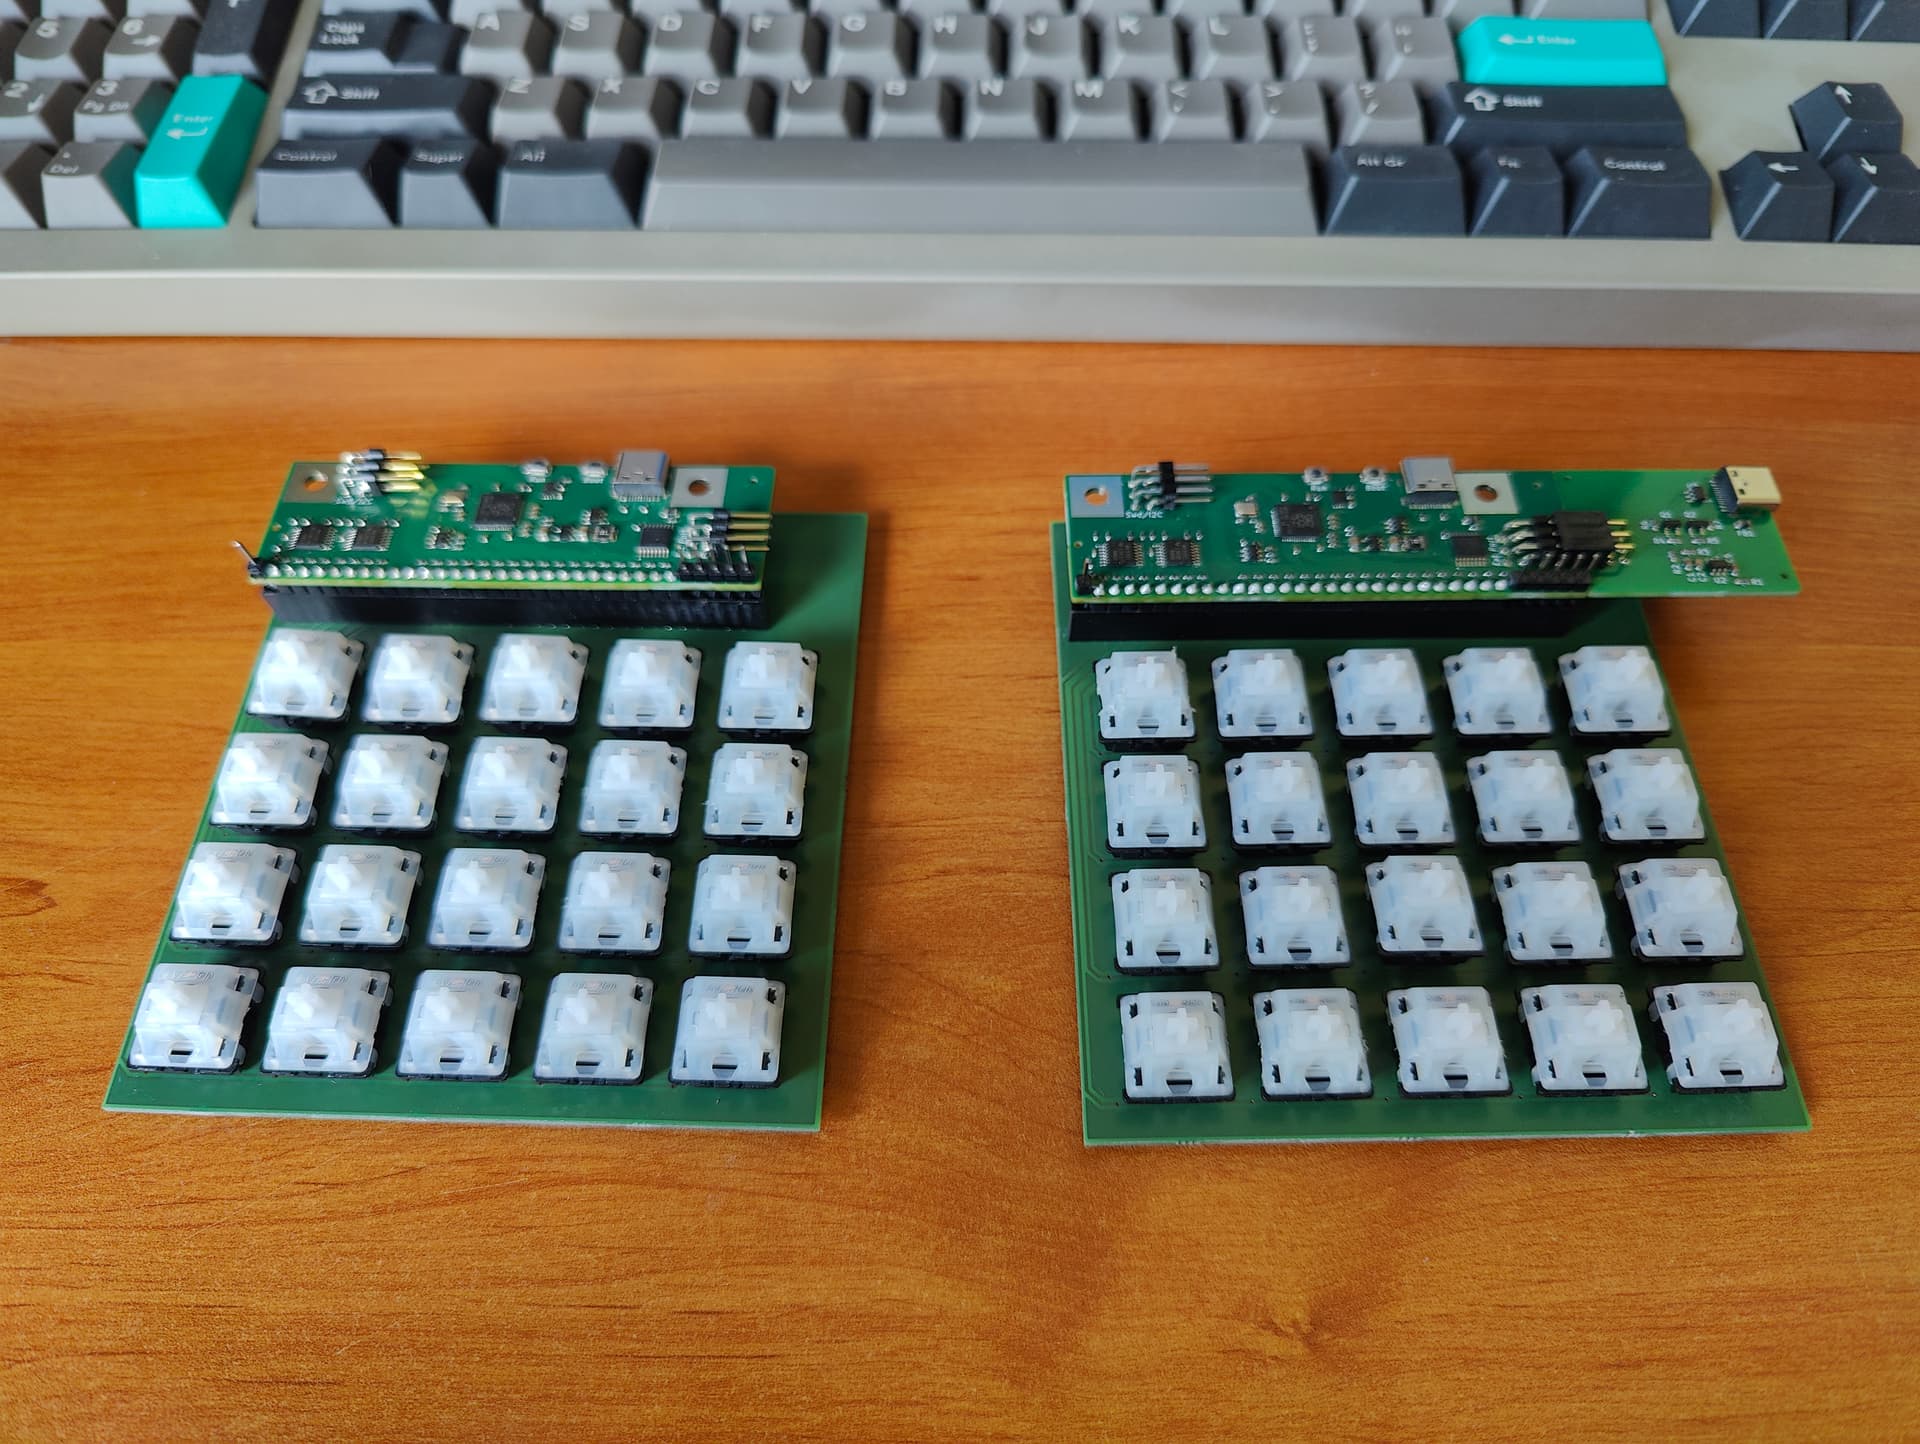
Soldered these two boards today.
Those are test PCBs for the Leyden Jar, this will allow me to investigate various future features like split keyboards and PS2 output.
4 Likes
24 Likes
I Can’t Believe It’s Not Topre! [1]
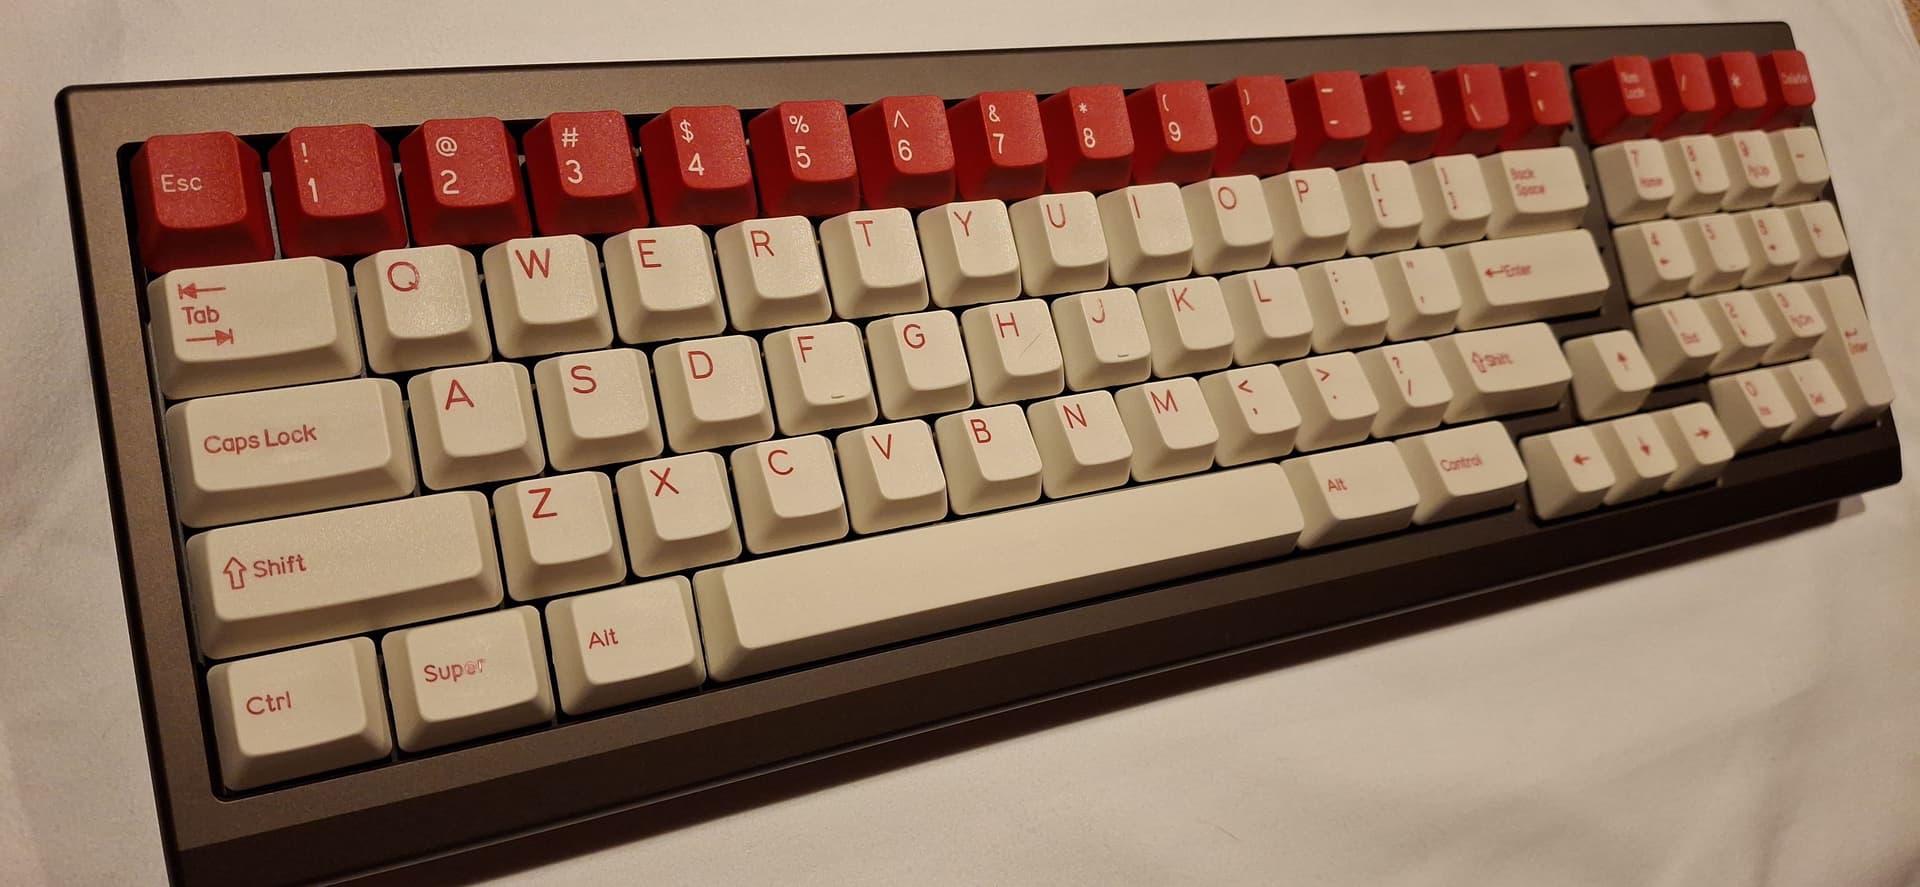
Finally got the Venom TKL builds done, one in F12 layout and one in F13 layout.
These worked a LOT better than the Venom 60 build I complained about earlier. Not sure if it’s due to better tolerances, the larger size, or what, but these pop out much less than with the 60% build.
I did go with lowish profile caps on both, though, which minimizes the pop-out problem by leaving very little leverage. Top F13 is DSA Hana, while the bottom F12 is PBS MV Classic. Cases are KBDFans “OG” Tiger Lite (F13) and KBDFans Tiger Lite Gaming (F12).
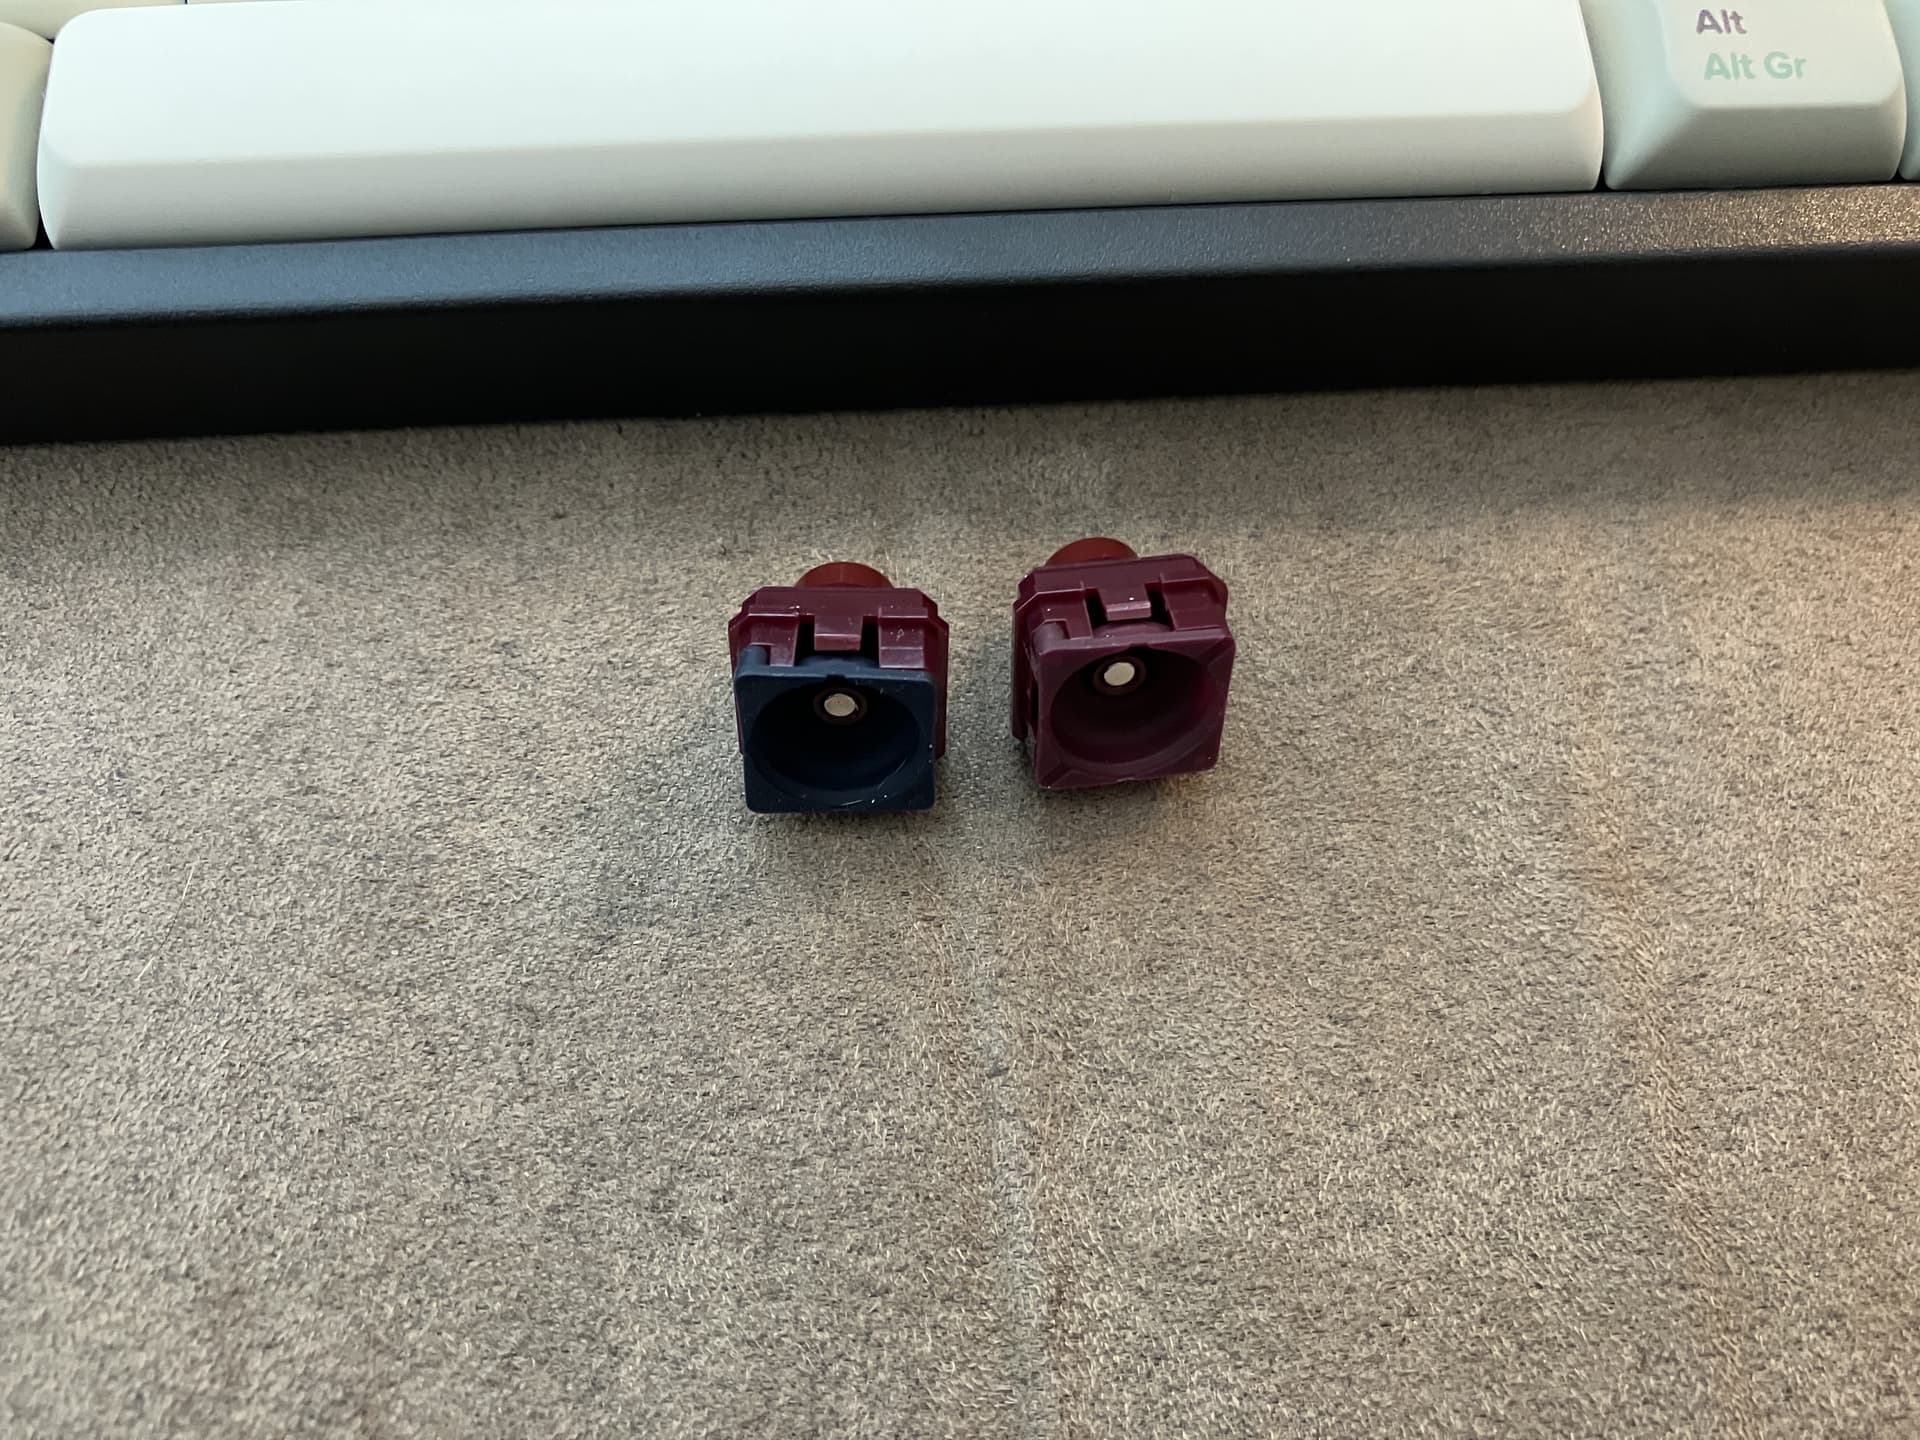
One other modification I did to the F13 board was to swap out the Raed’s domes for the blue domes from the Naevies. This was a giant pain and I don’t recommend it – you’re essentially destroying the EC switches for their domes, since getting the plastic cap on is a pain and you can sometimes bend the springs. (I am not a Topre person, so I don’t know how much abuse they can take before they get unreliable.) But, it does result in higher tactility that I enjoy.
I assume joke this dates me somewhere between the Triassic and Jurassic periods
 ↩︎
↩︎
7 Likes
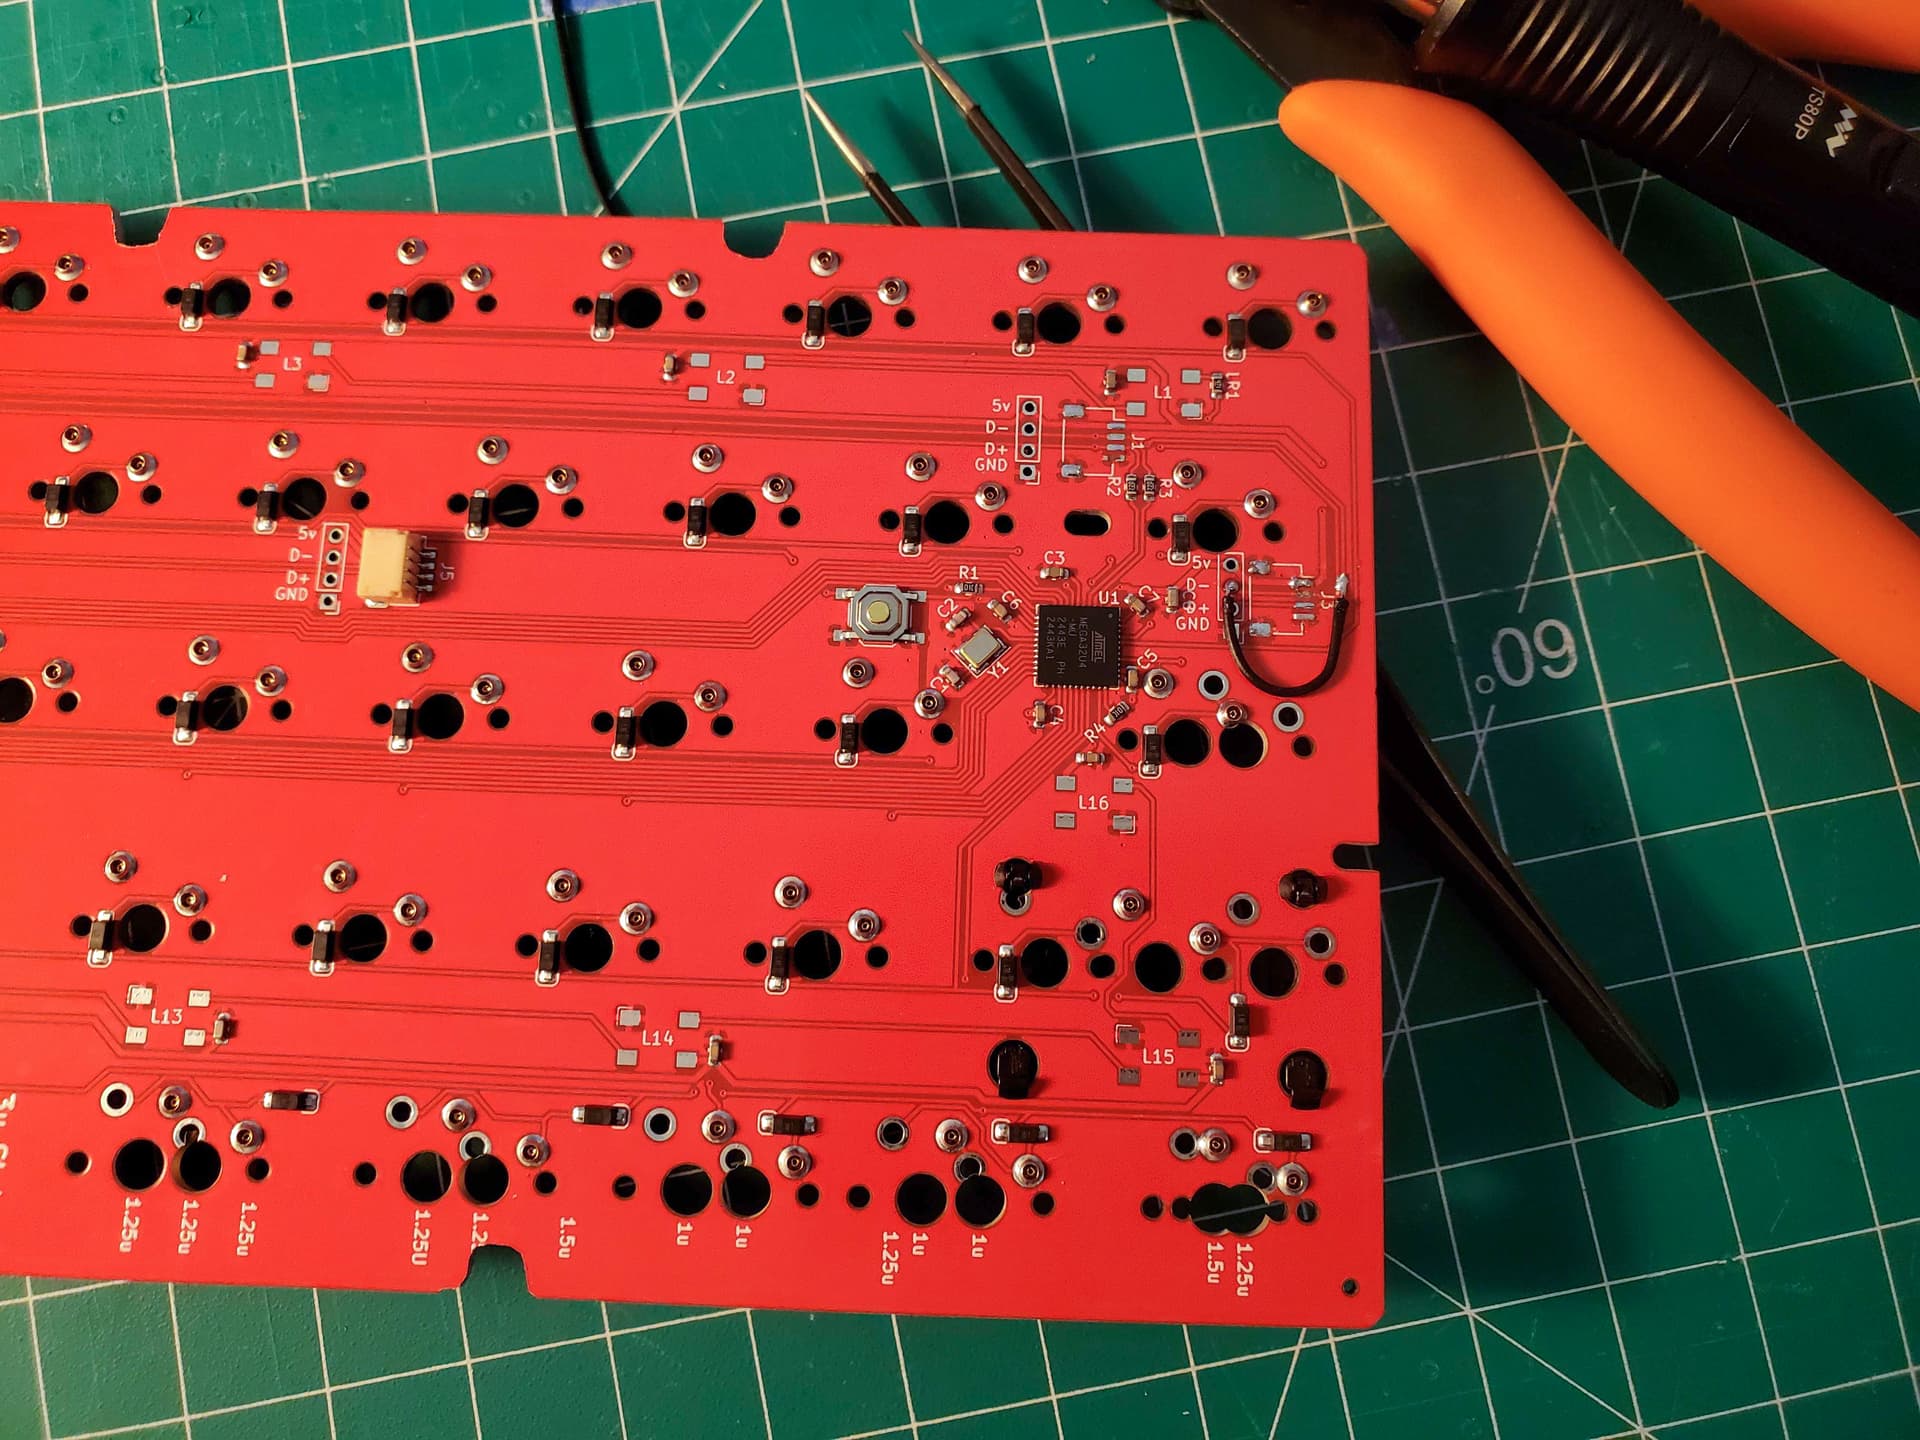
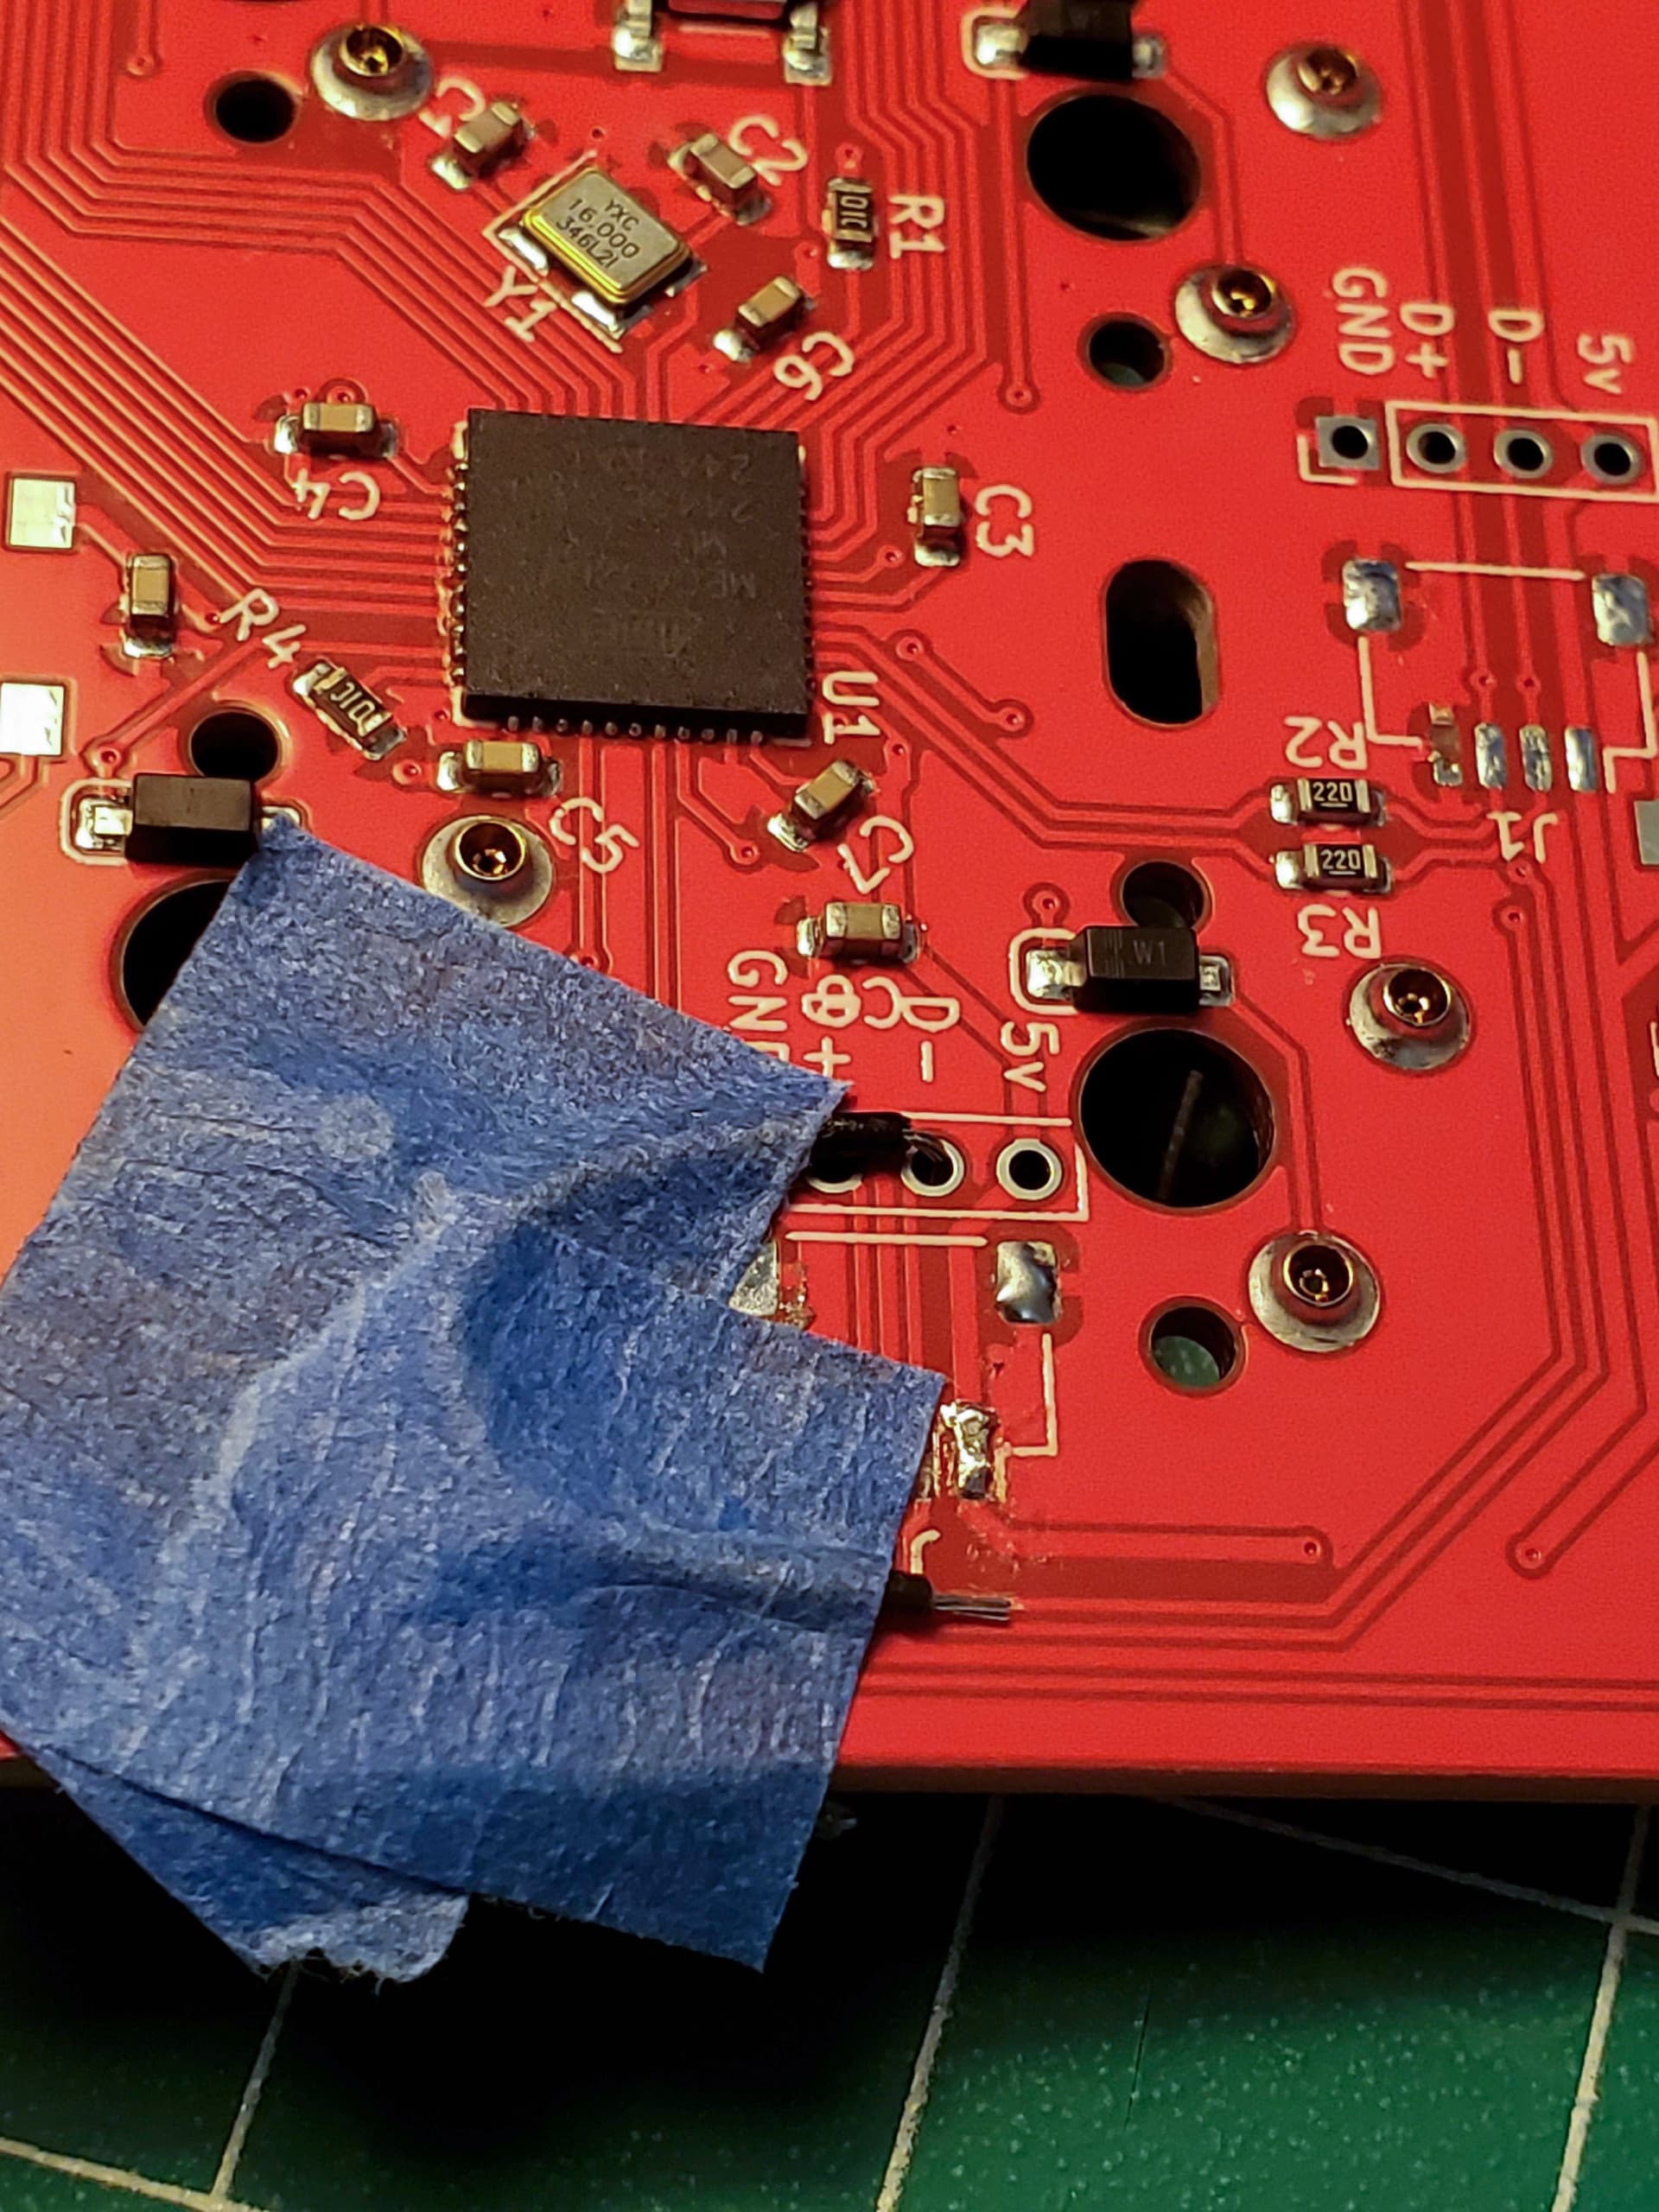
In less great news, I got my Cycle8 the other day. The physical build was super easy and felt pretty good…and then I tried to flash a new build of QMK to it (with my custom keymap and OS switching code).
The board’s not exactly bricked – it is picked up by USB. But, it doesn’t function as a keyboard at all and the reset button doesn’t trigger the bootloader (just resets the device). And since the keys don’t work, there’s no way to trigger the bootloader that way.
I even backed up the old firmware, so if I could just reactivate the damn bootloader, I could at least restore it until I figure out what went wrong.
So off to read STM data sheets to try to figure out what pin(s) I need to ground or pull high to get this thing back in bootloader mode. Worst case scenario, I think the SWD port is there, so I should be able to rescue things that way.
5 Likes
Thanks for the very interesting report.
I like tactility, but I like light-weights. Wasn’t a huge fan of Niz 45 G tactility, seems I’d probably enjoy 35 G Naevies more. [Or 35 G Raeds if that was the only option.]
Good to know that the Tiger Lite board is a viable basis for these builds, it would have been my first choice.
You also demonstrated once again the case for tactile domes in the Raed switches.
2 Likes
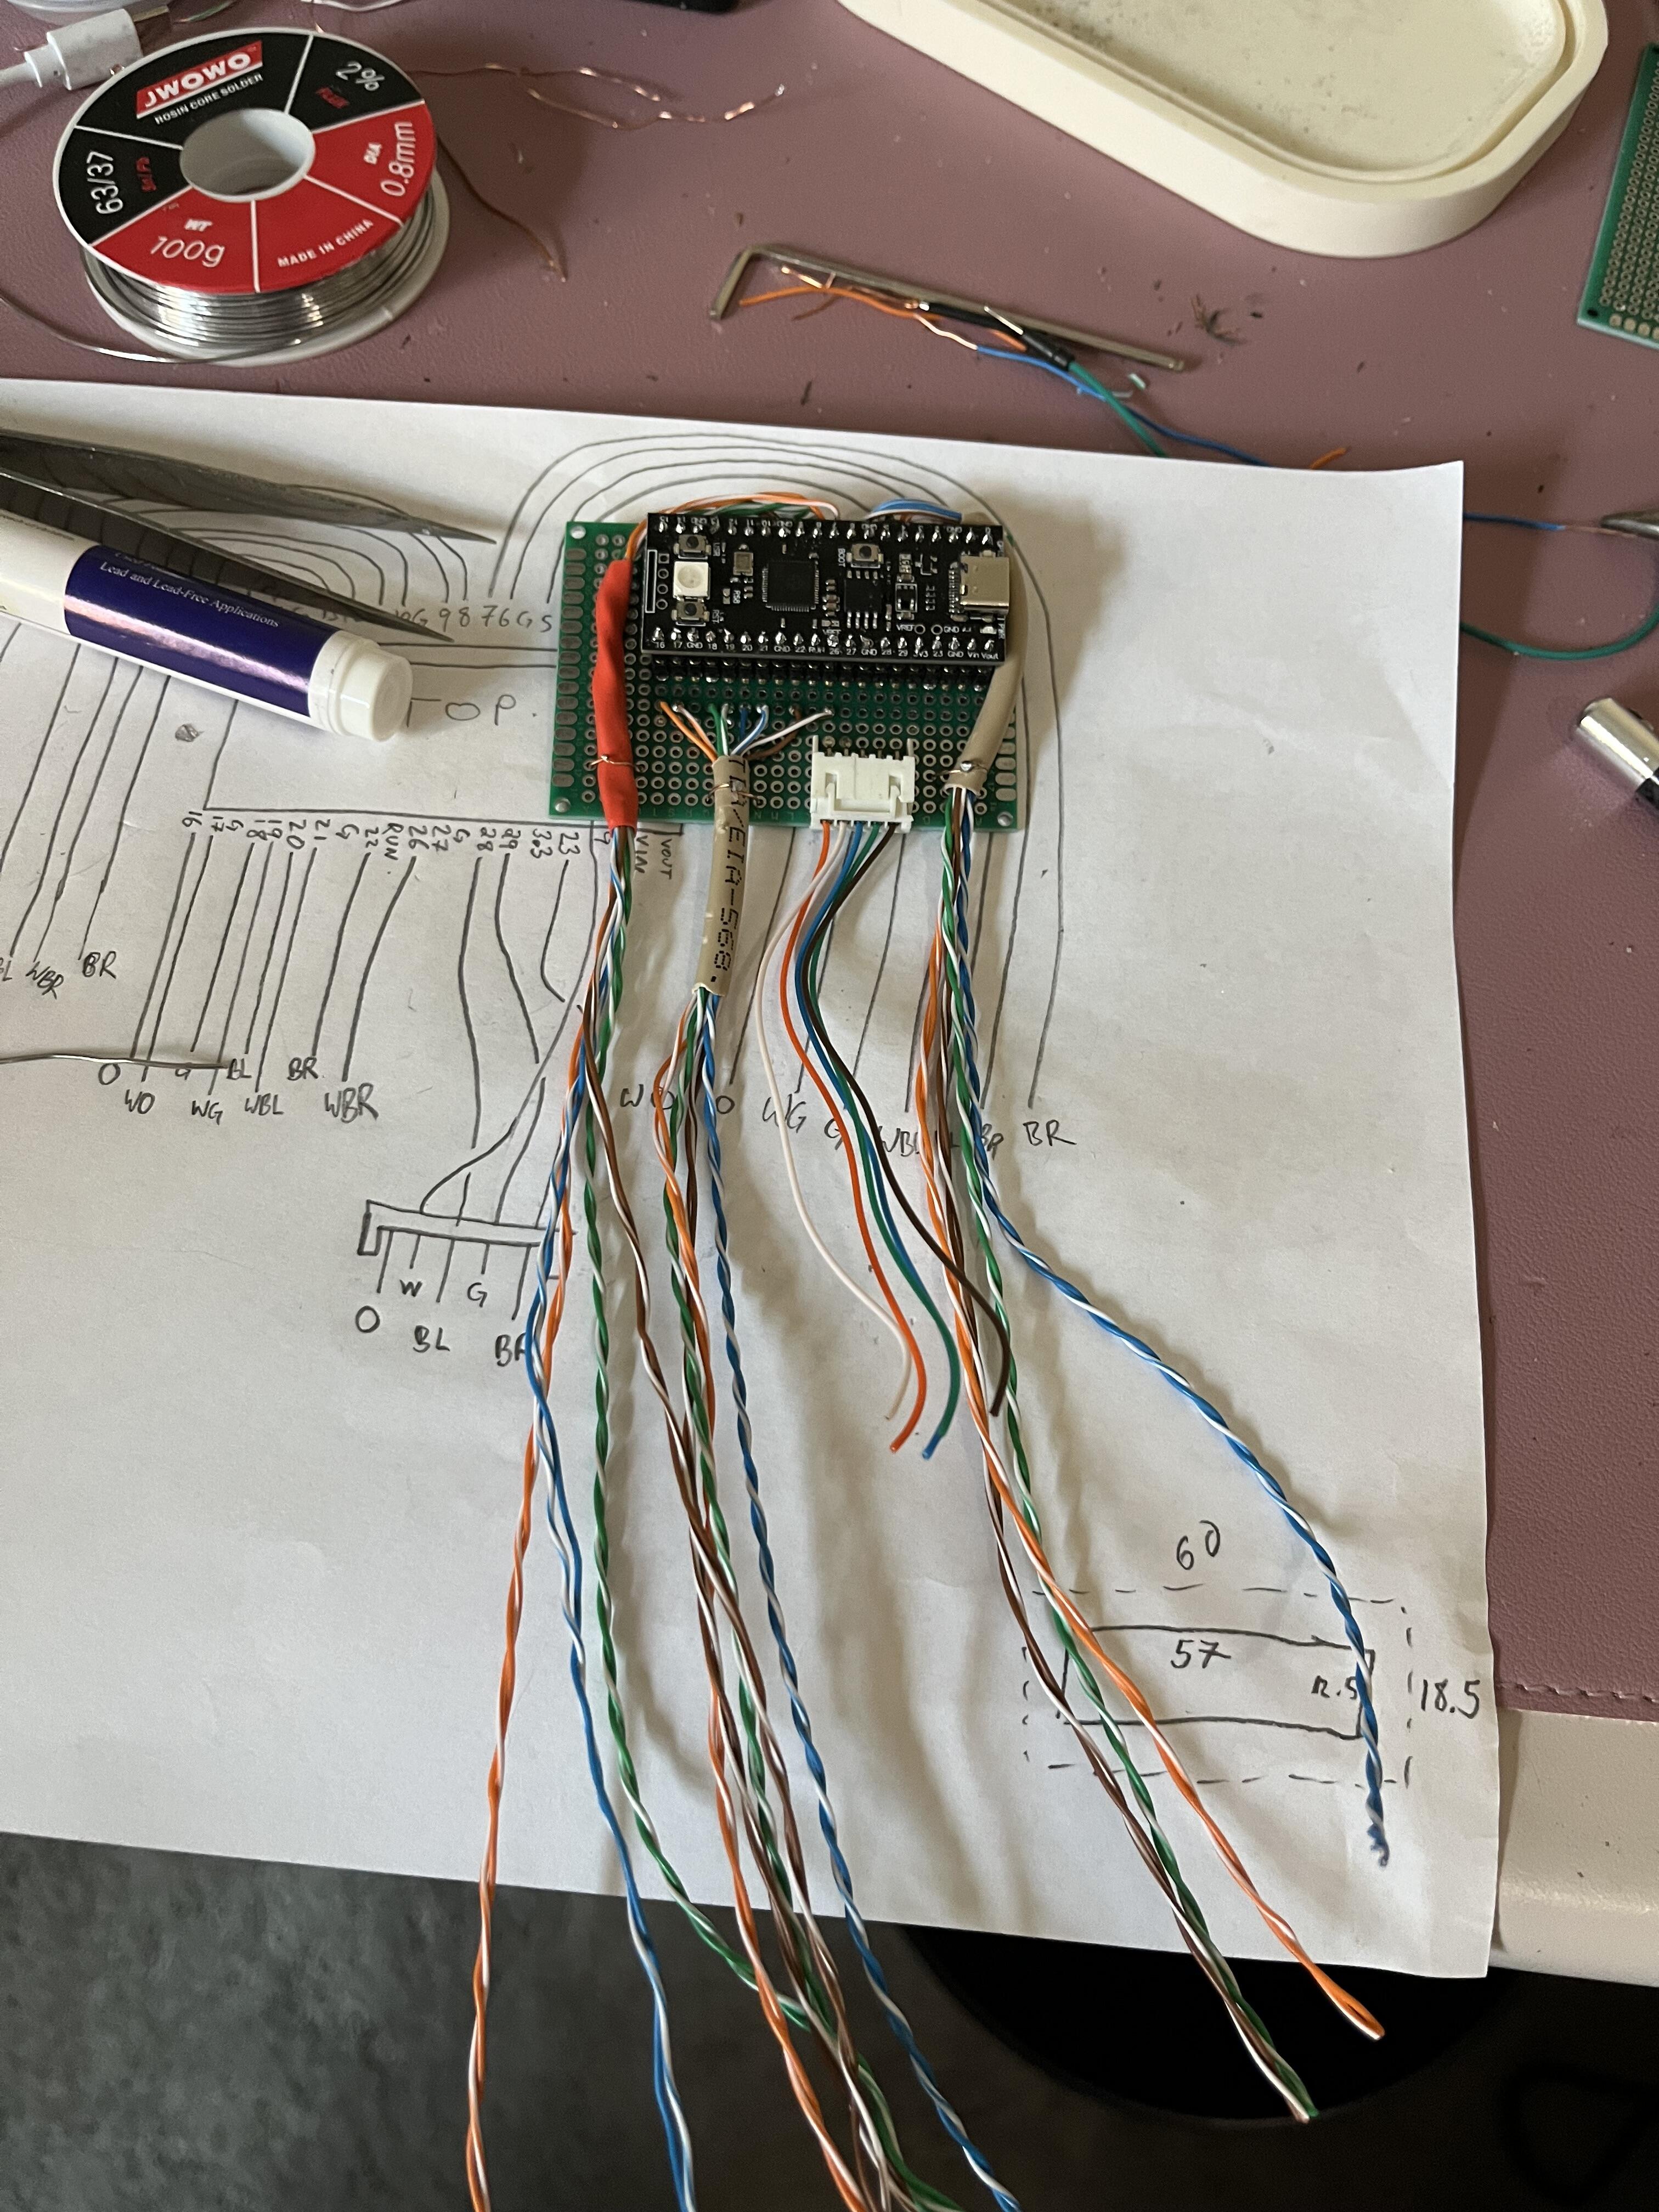
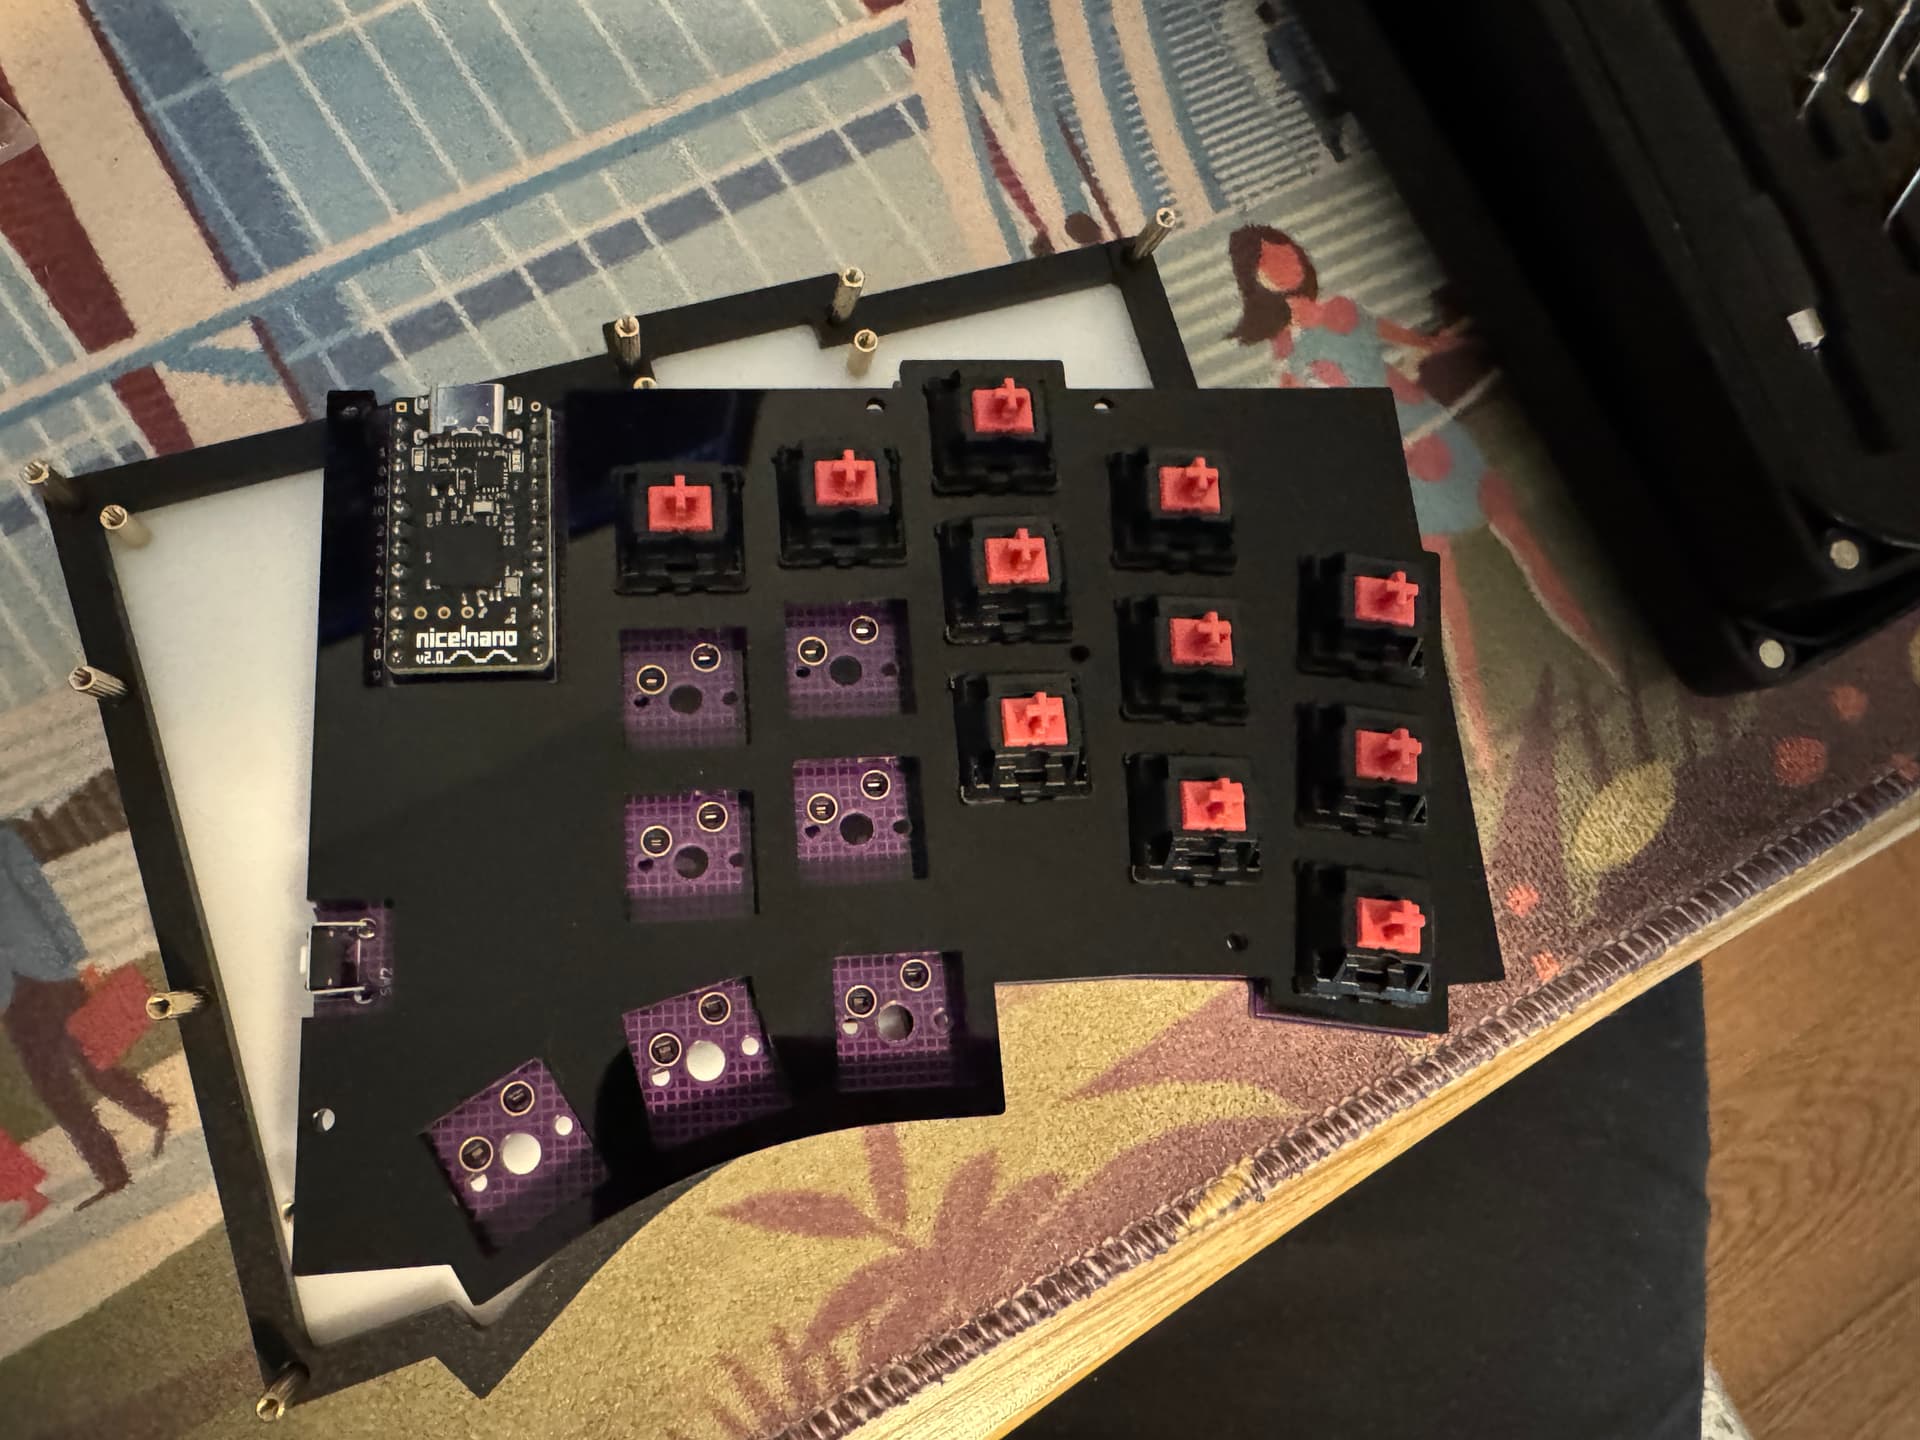
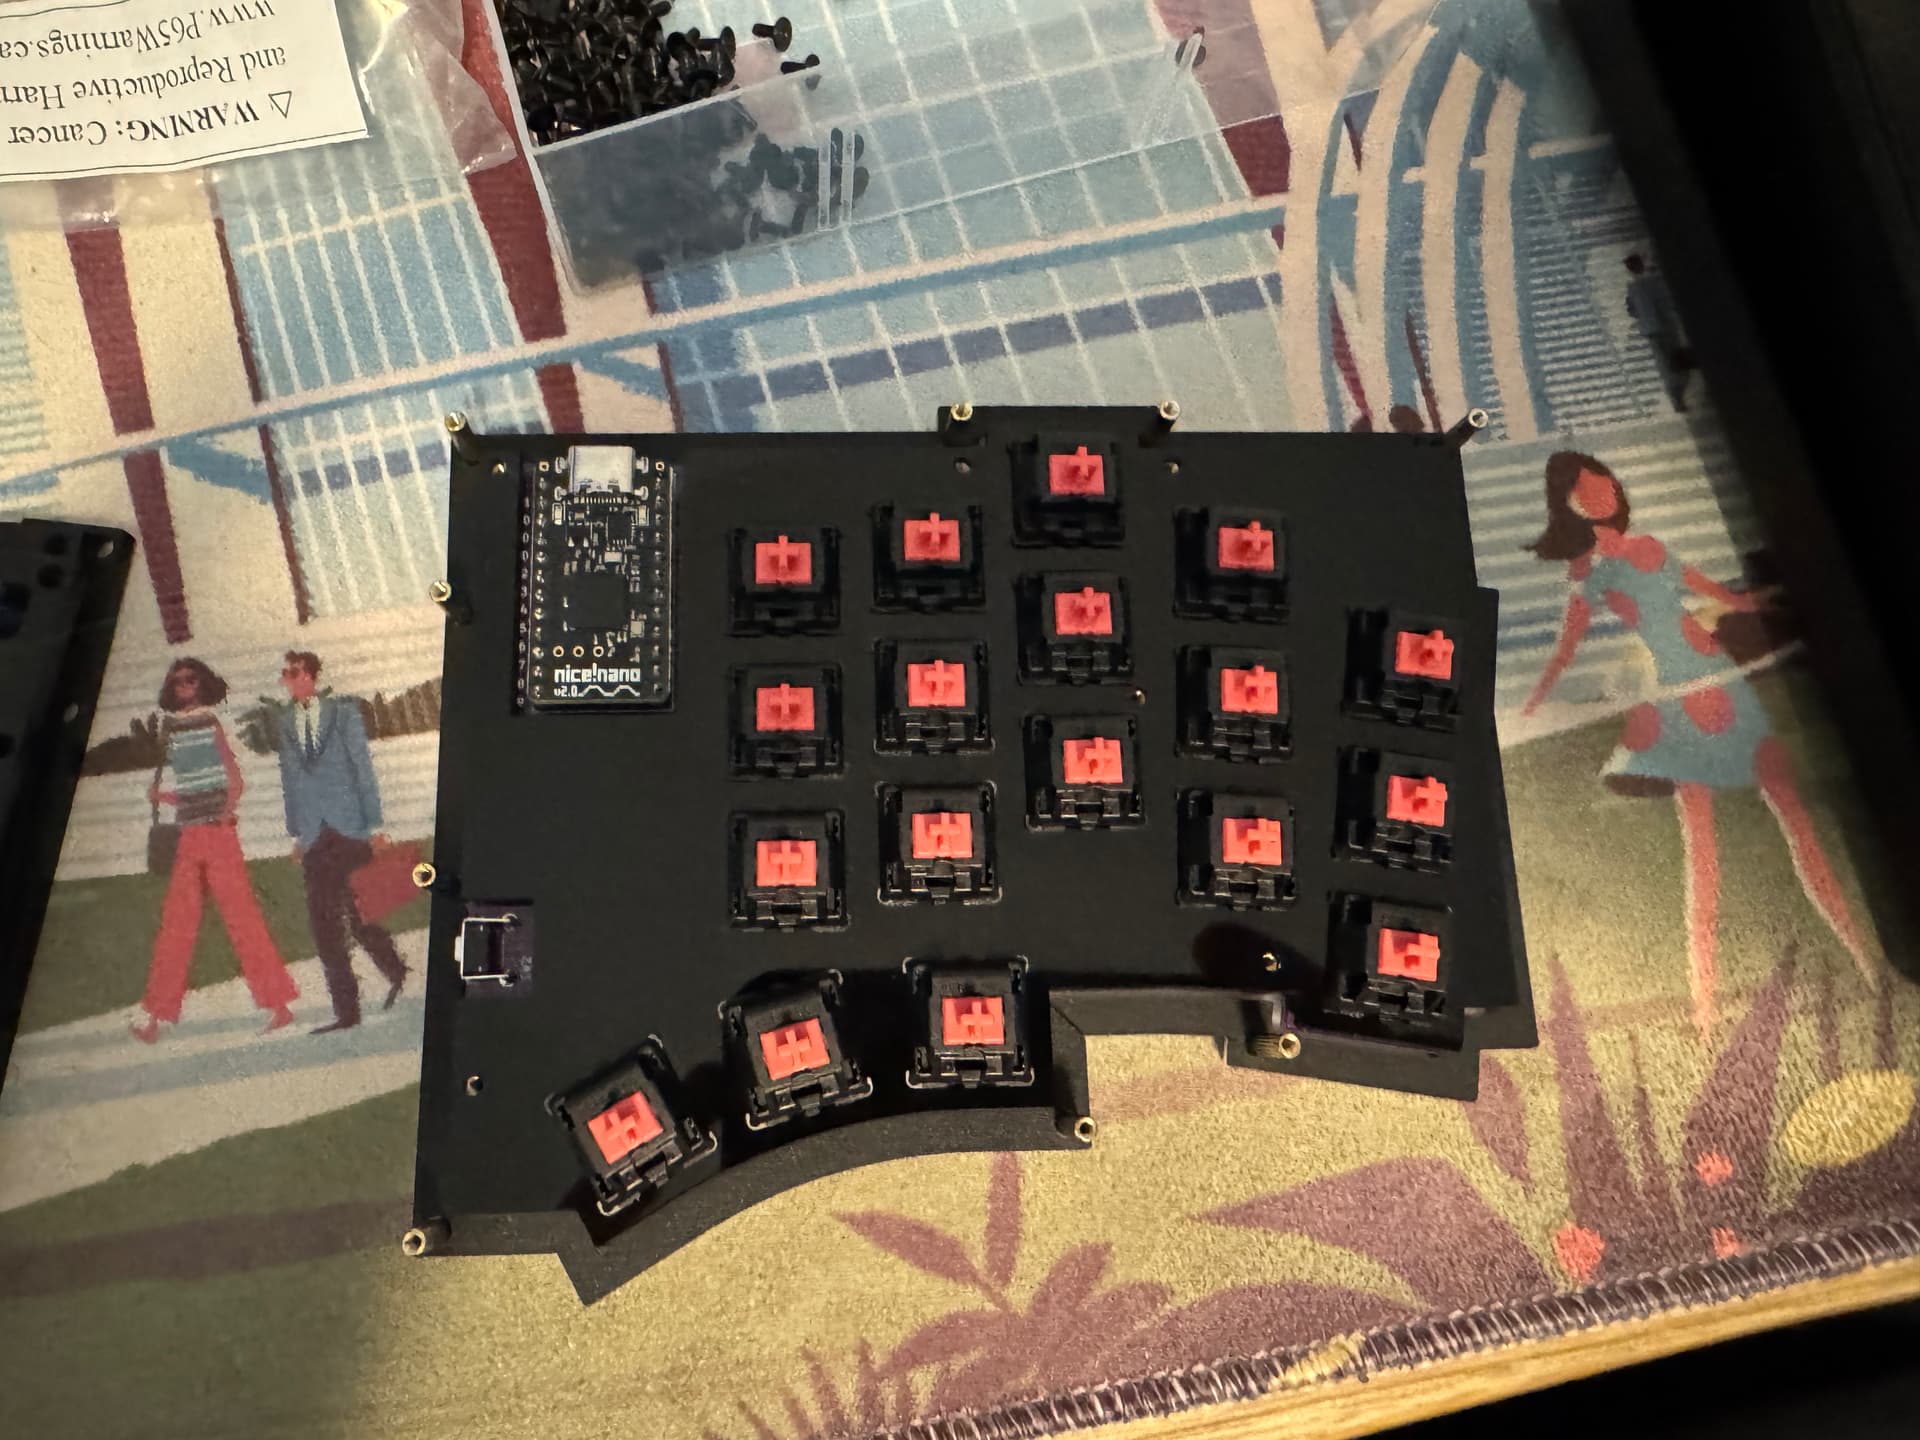
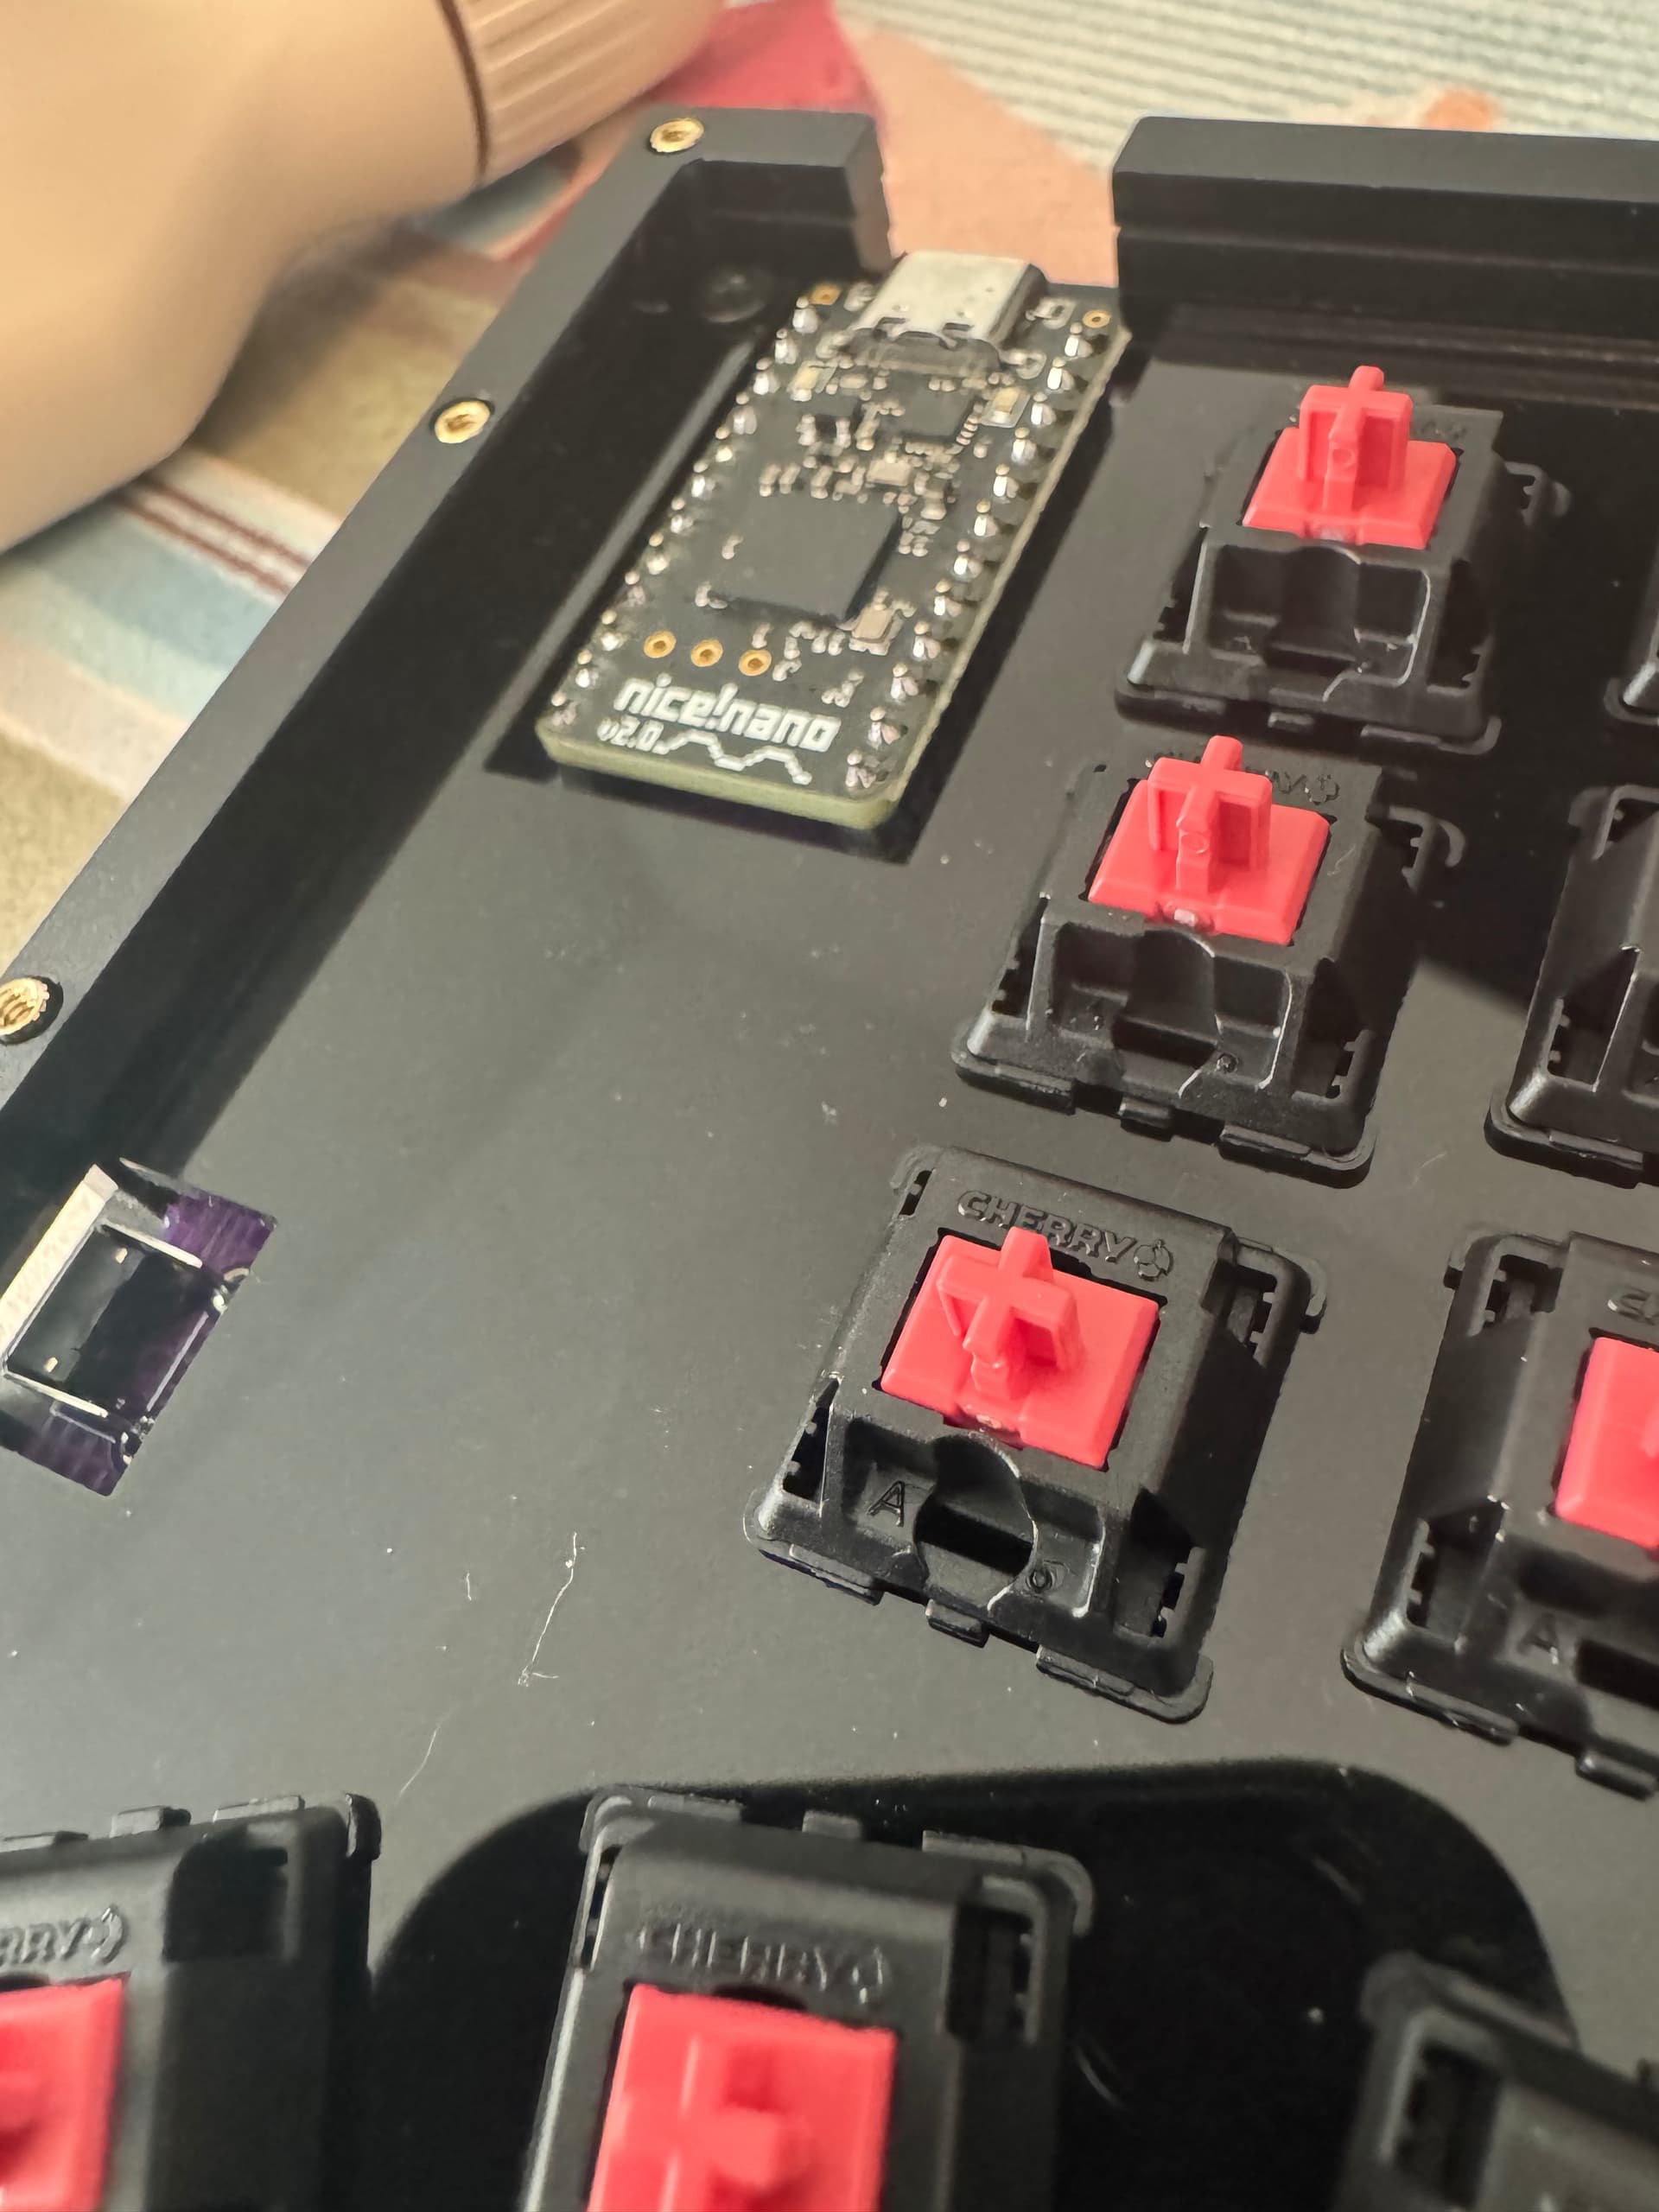
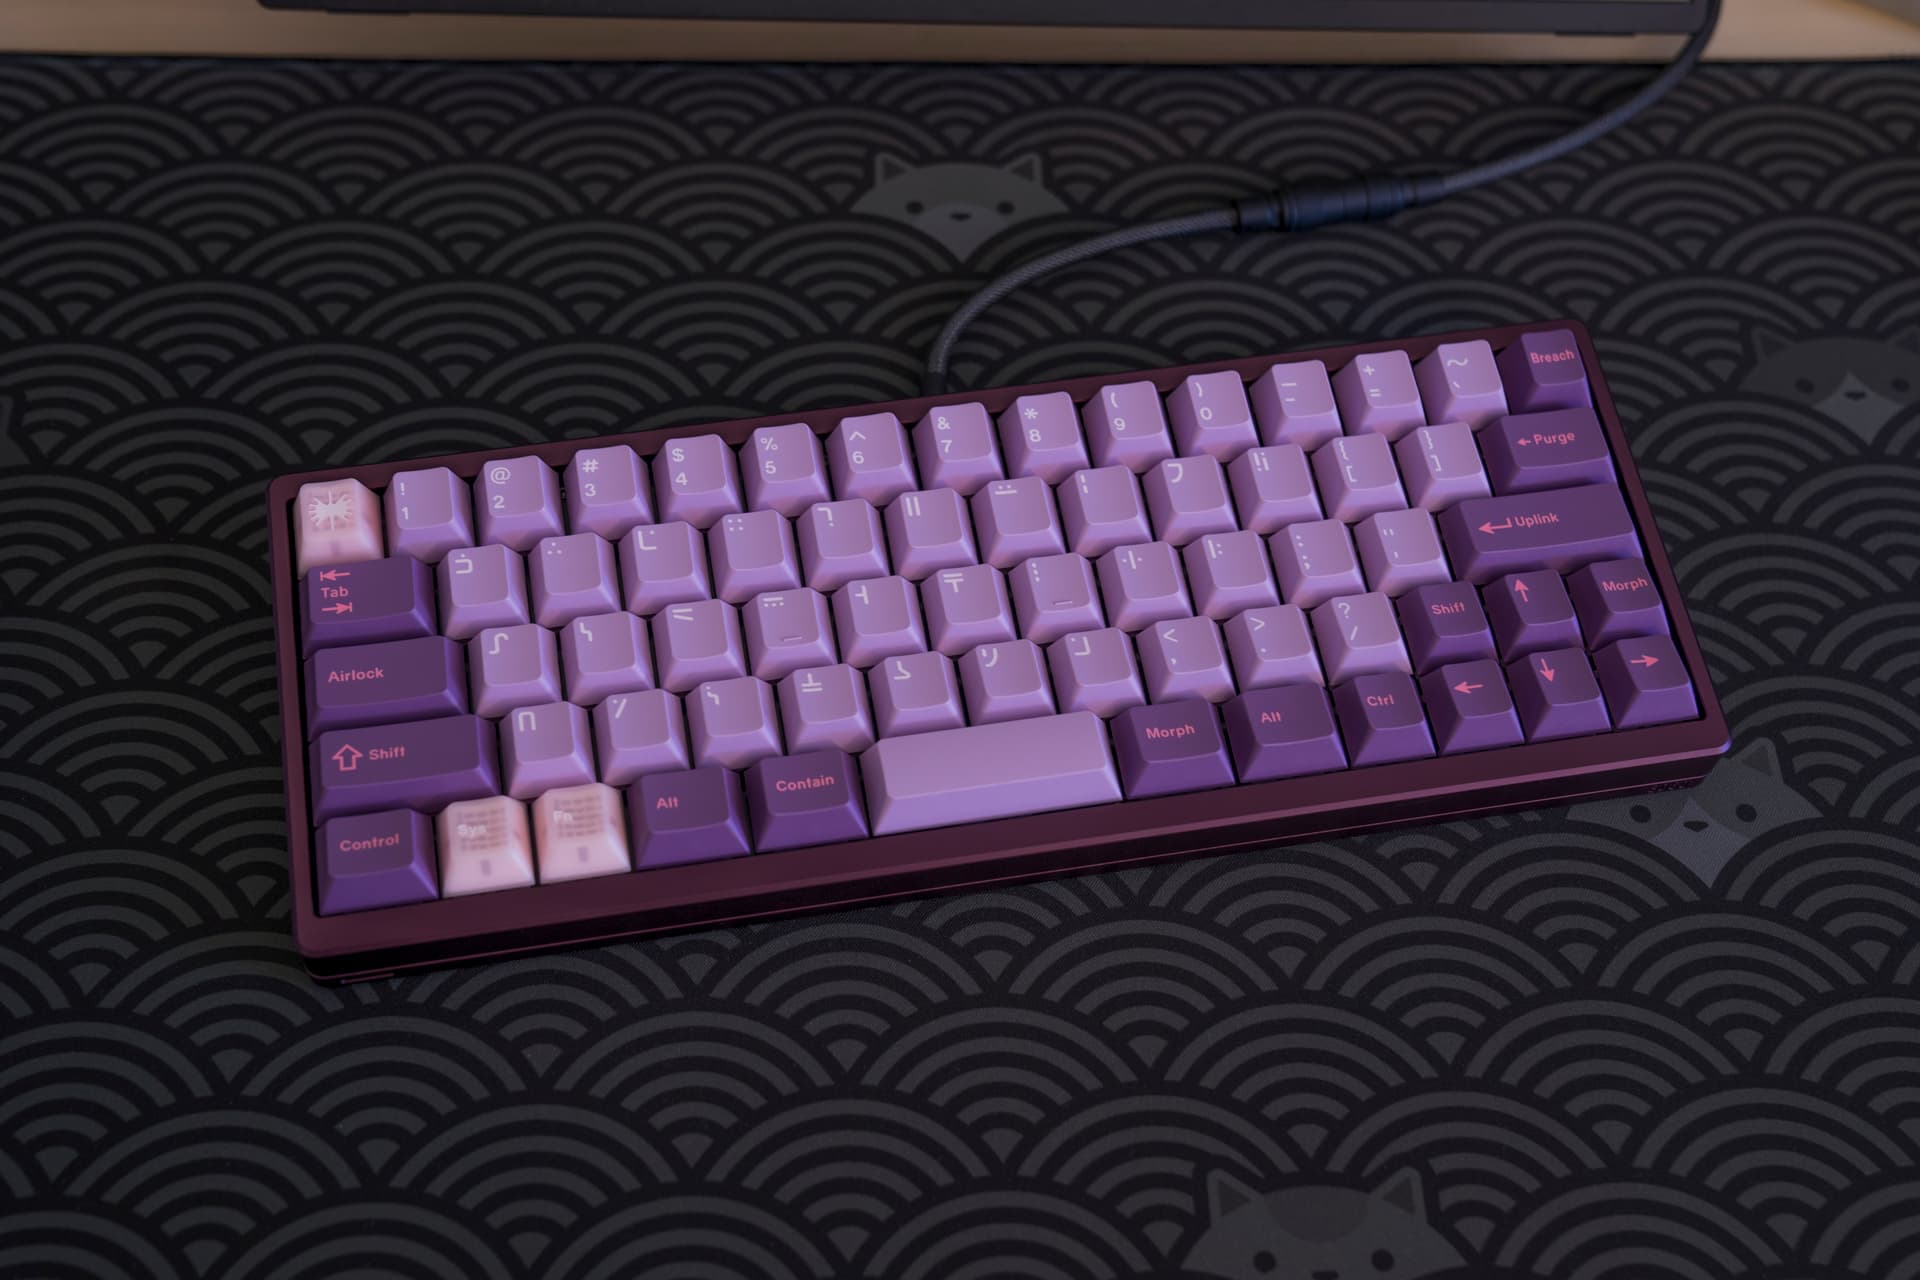
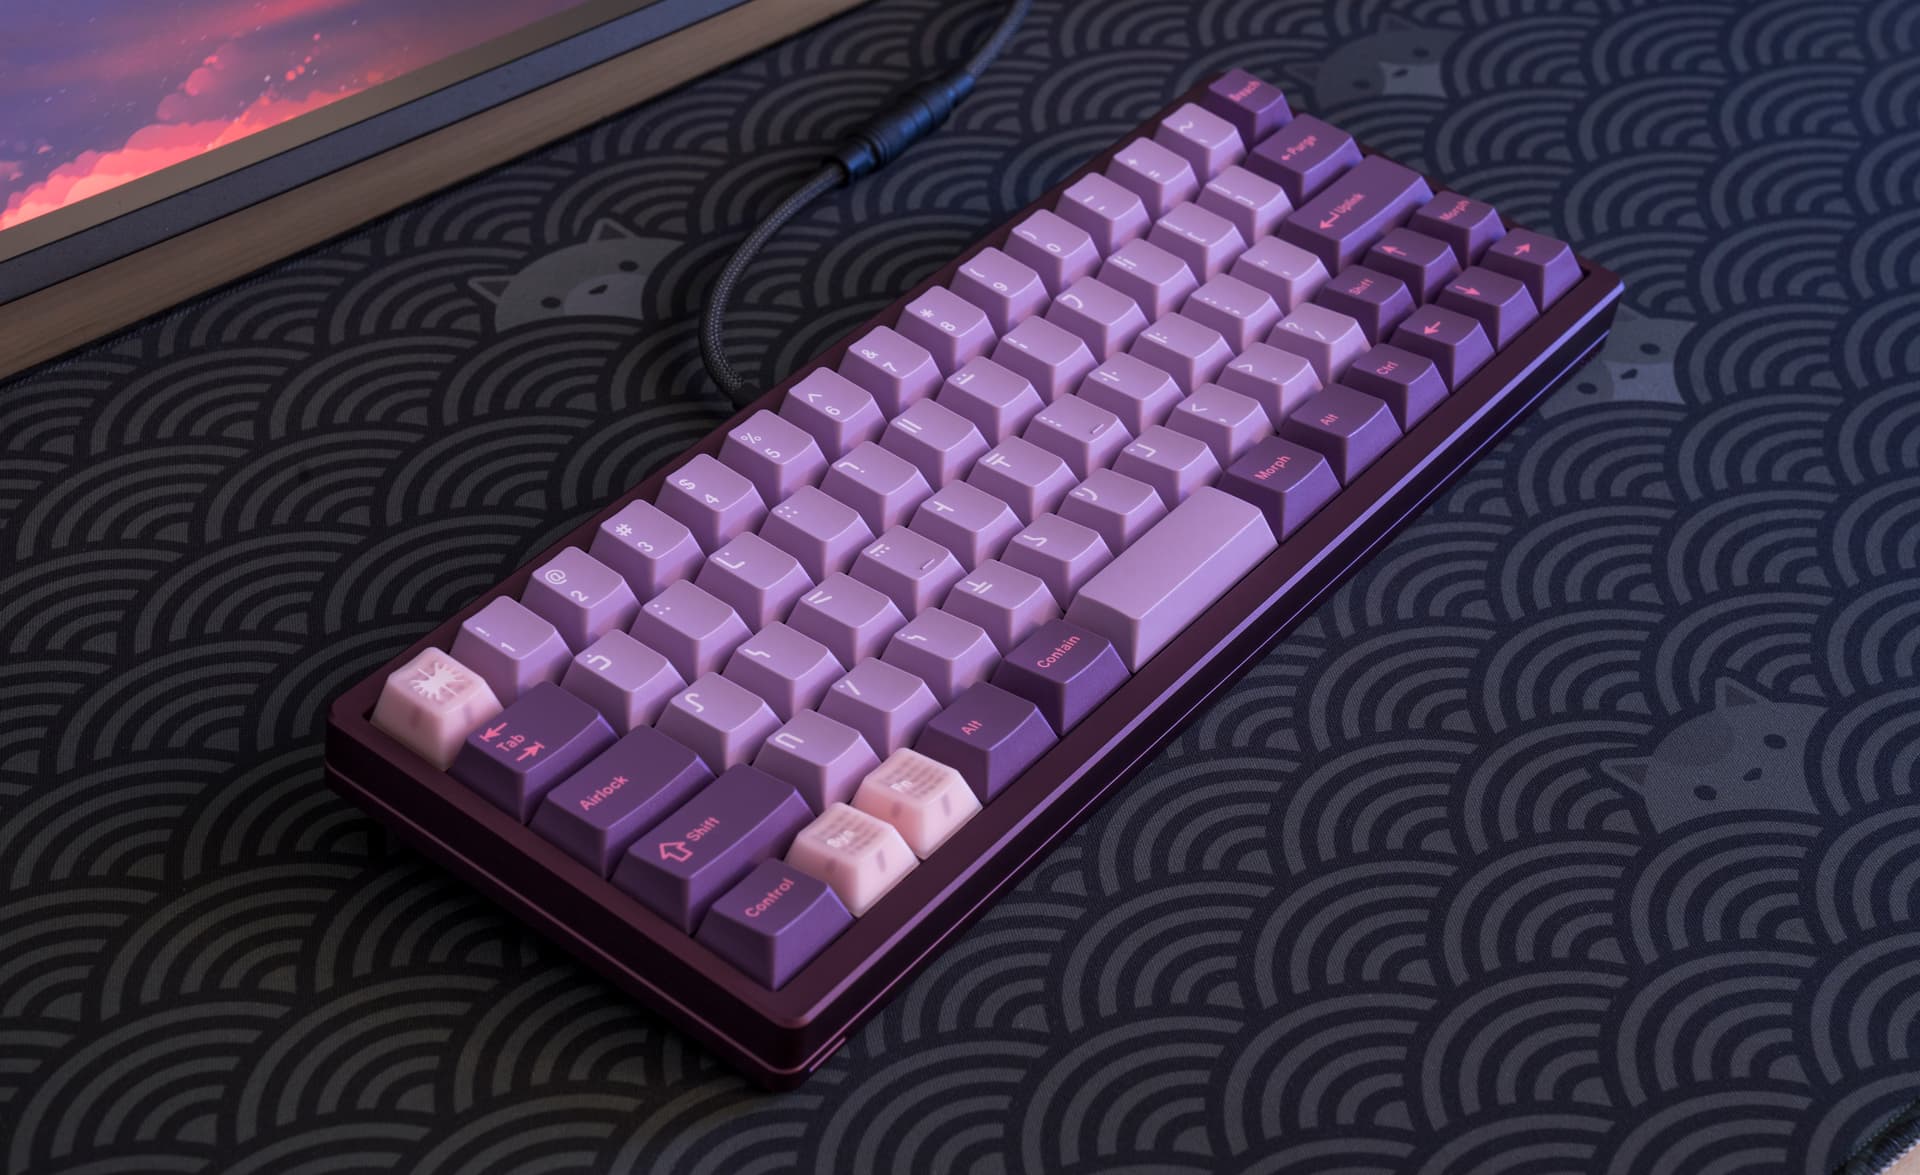
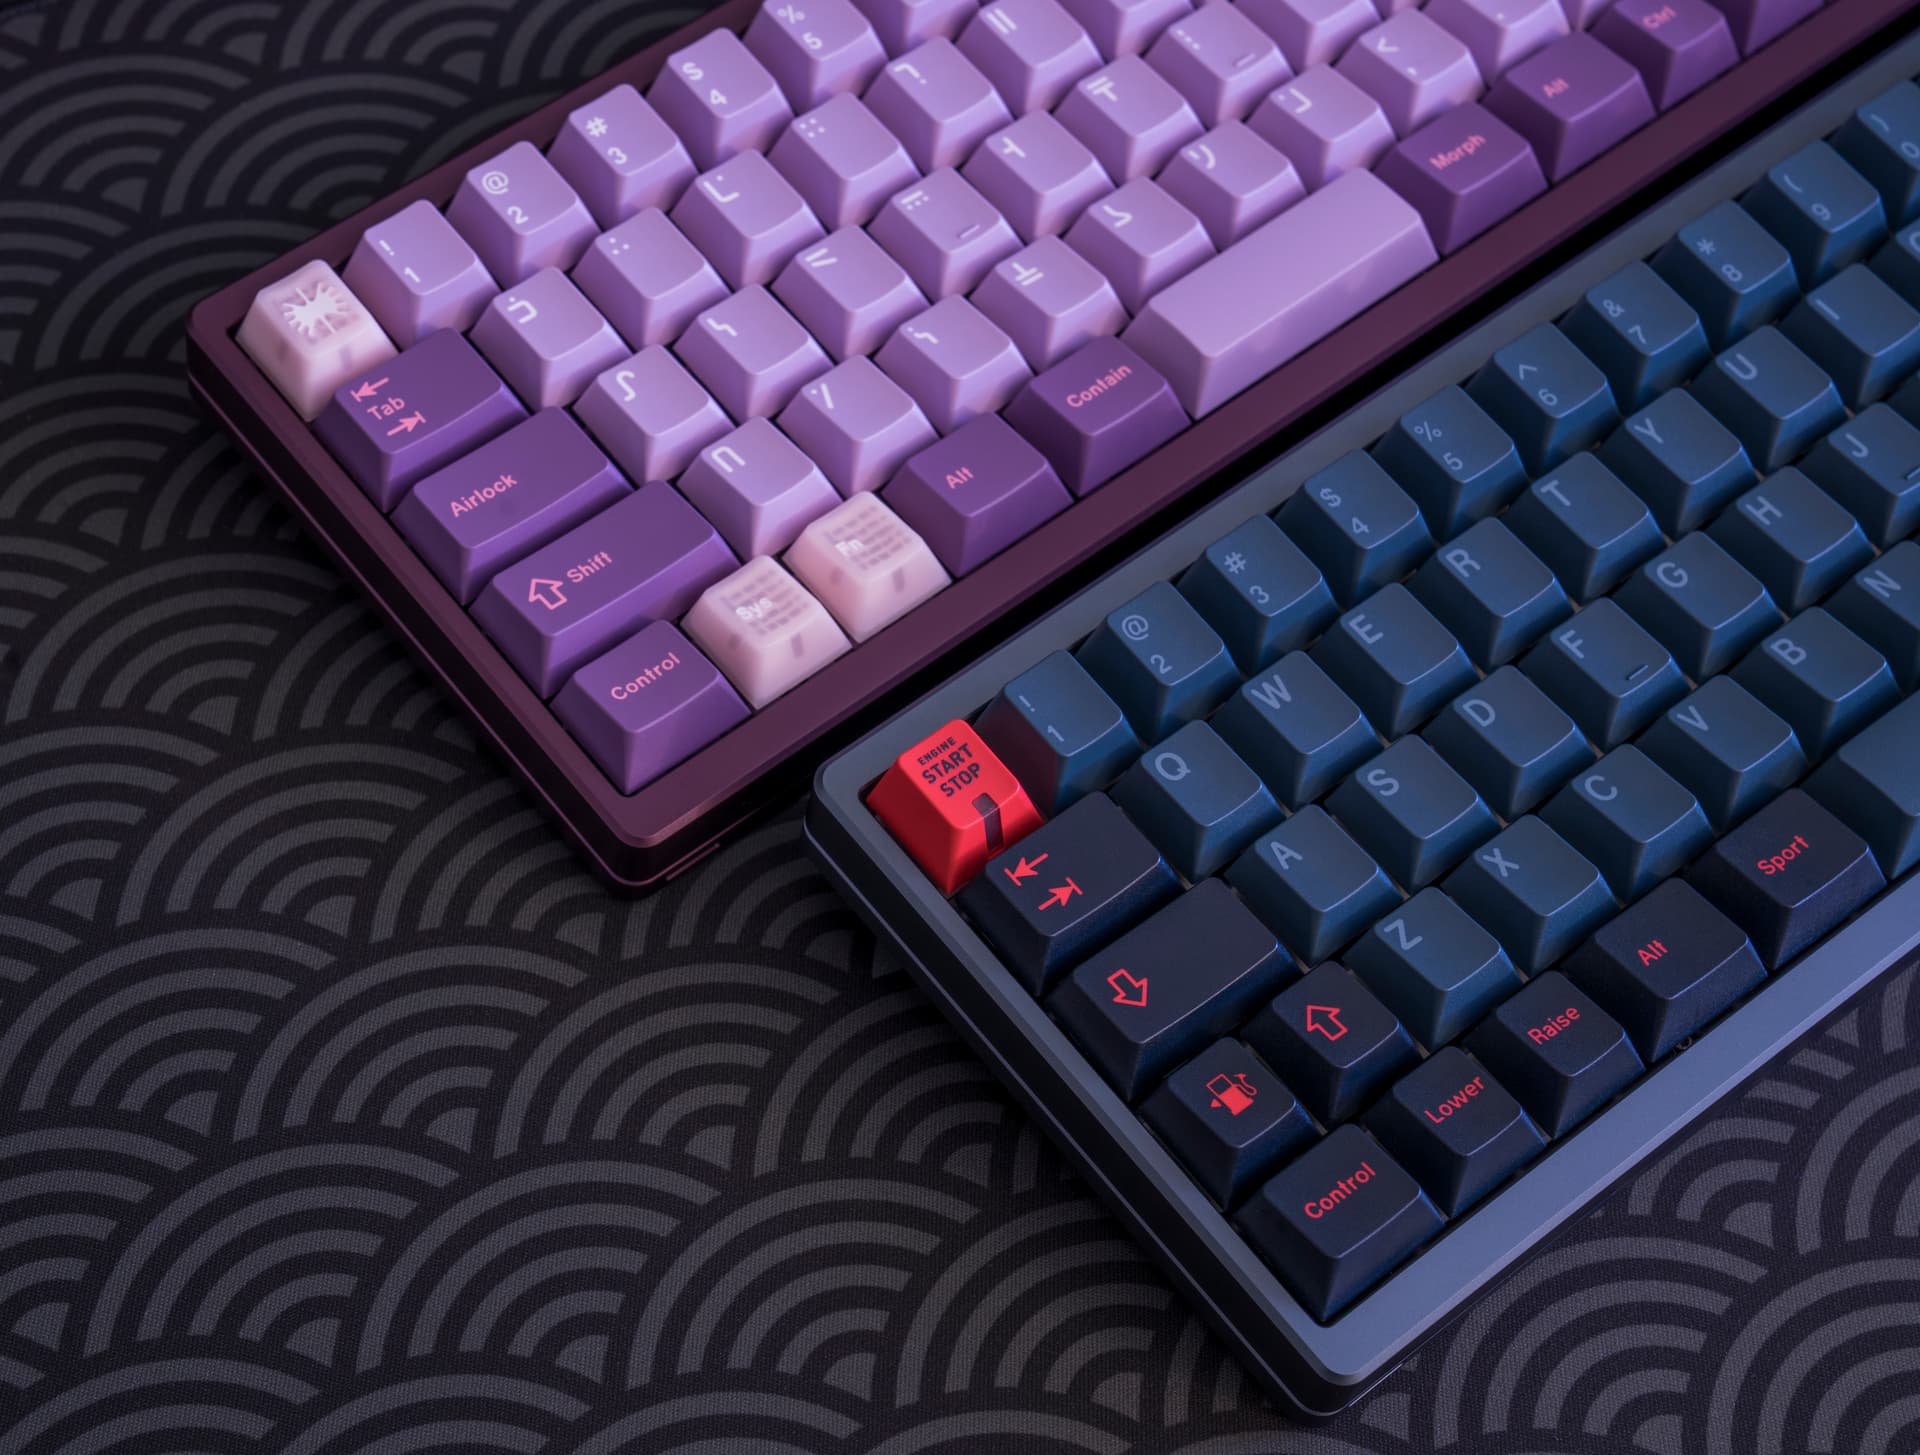
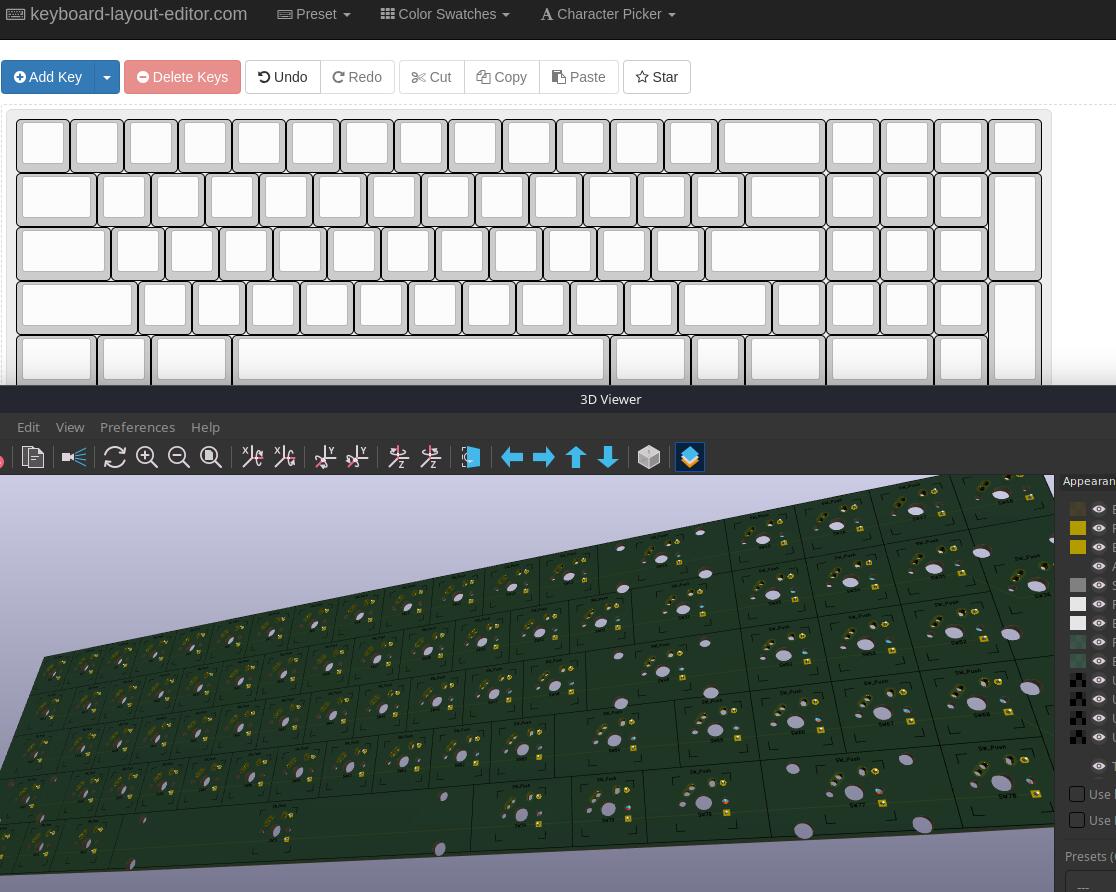
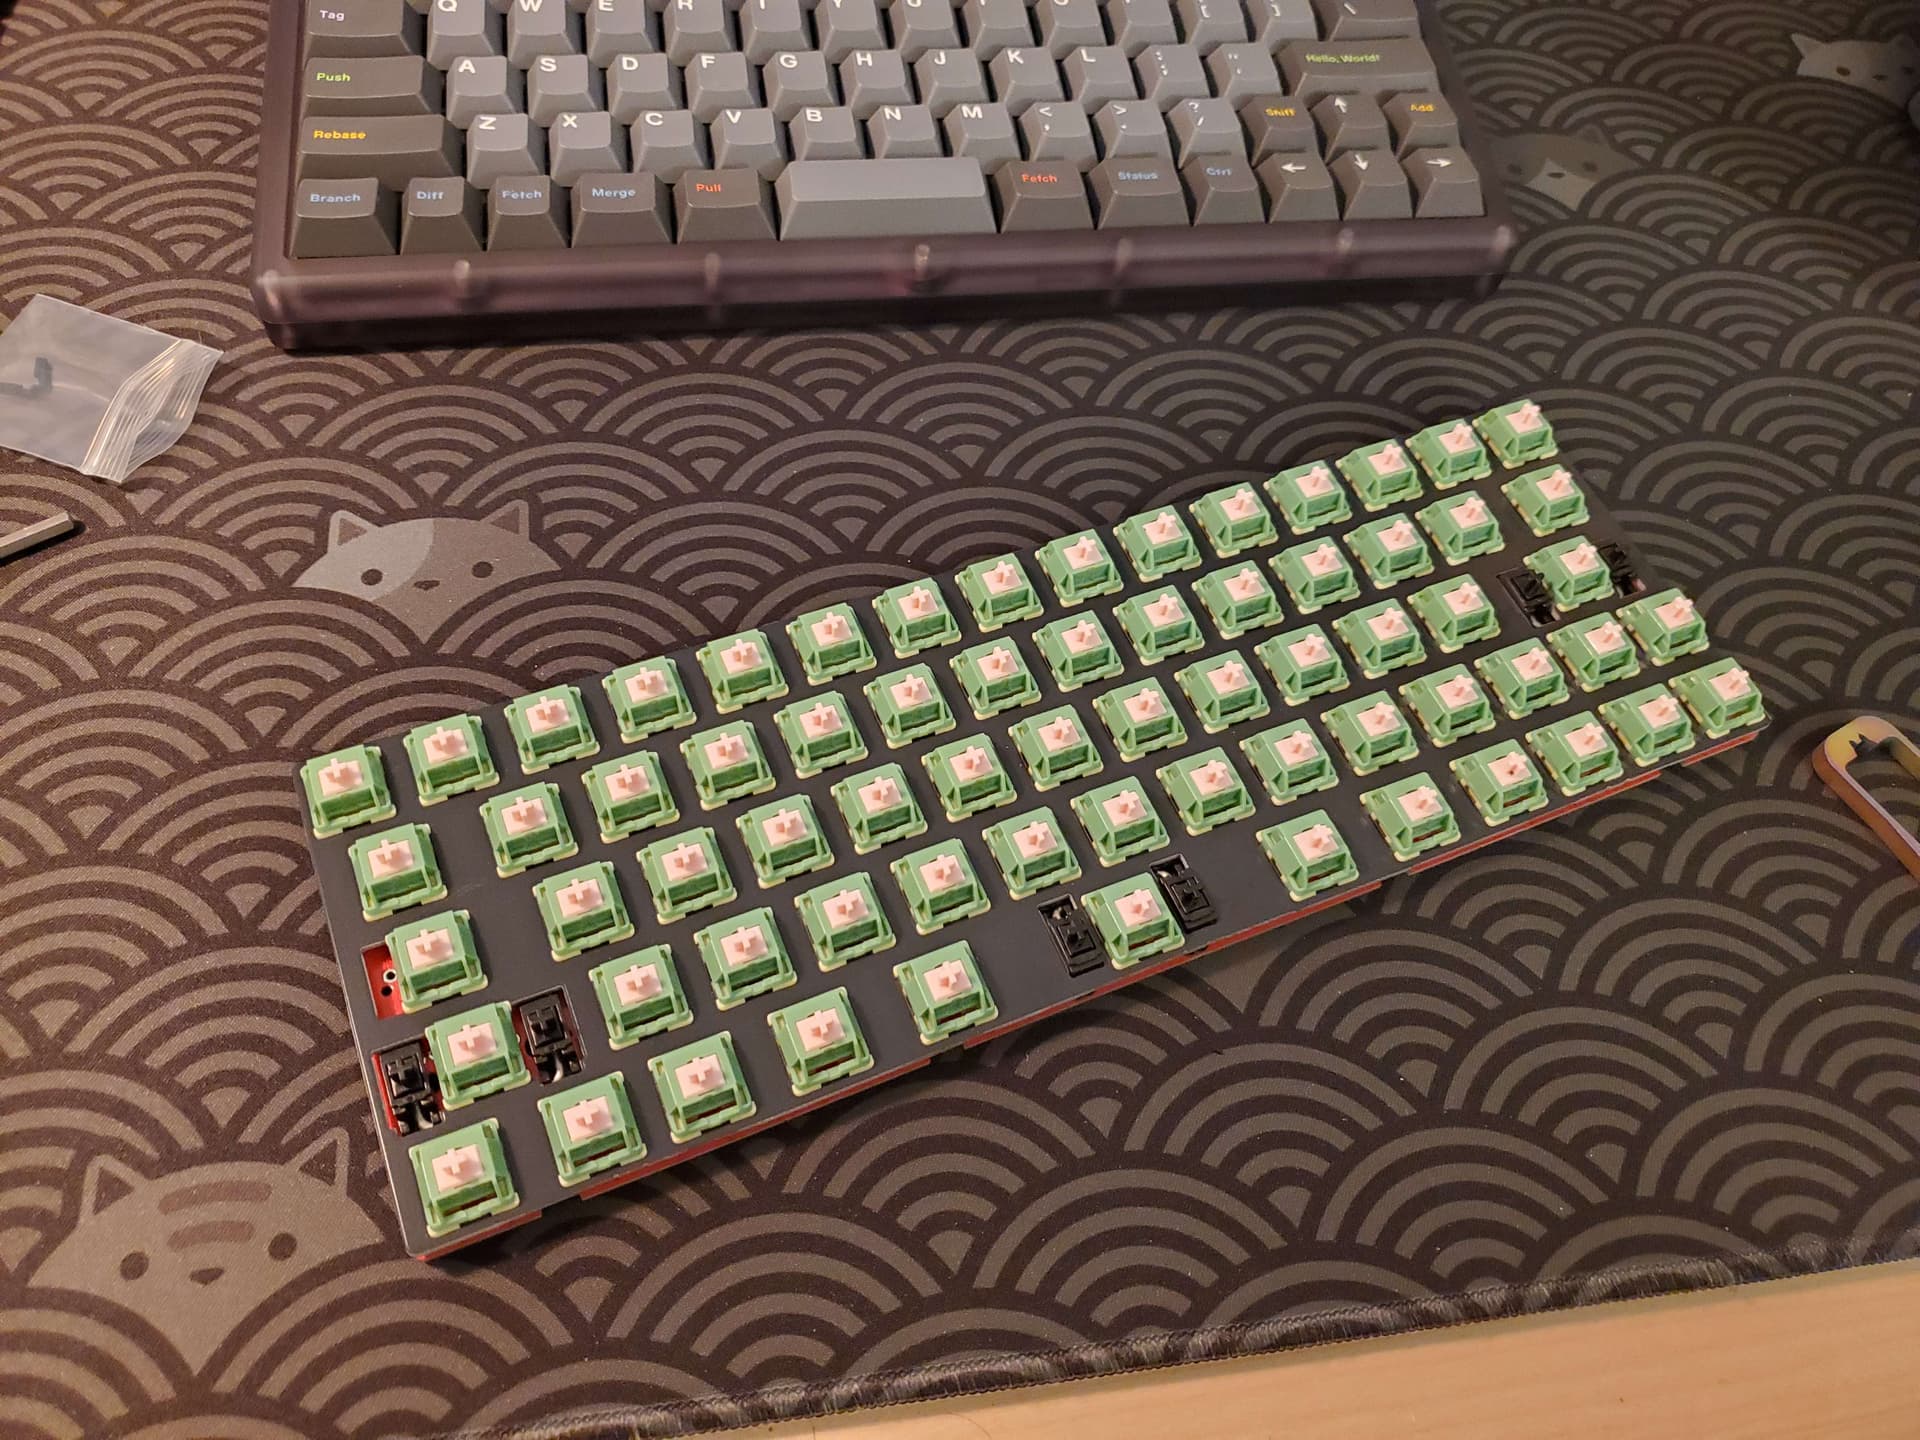
I just finished up writing the ZMK config and soldering up my custom diodeless PCB in Klor form factor that I got in the mail today.
Flashed the firmware and everything seems to be working great. Will complete final assembly and post pictures when I receive the parts of the sandwich case.
4 Likes
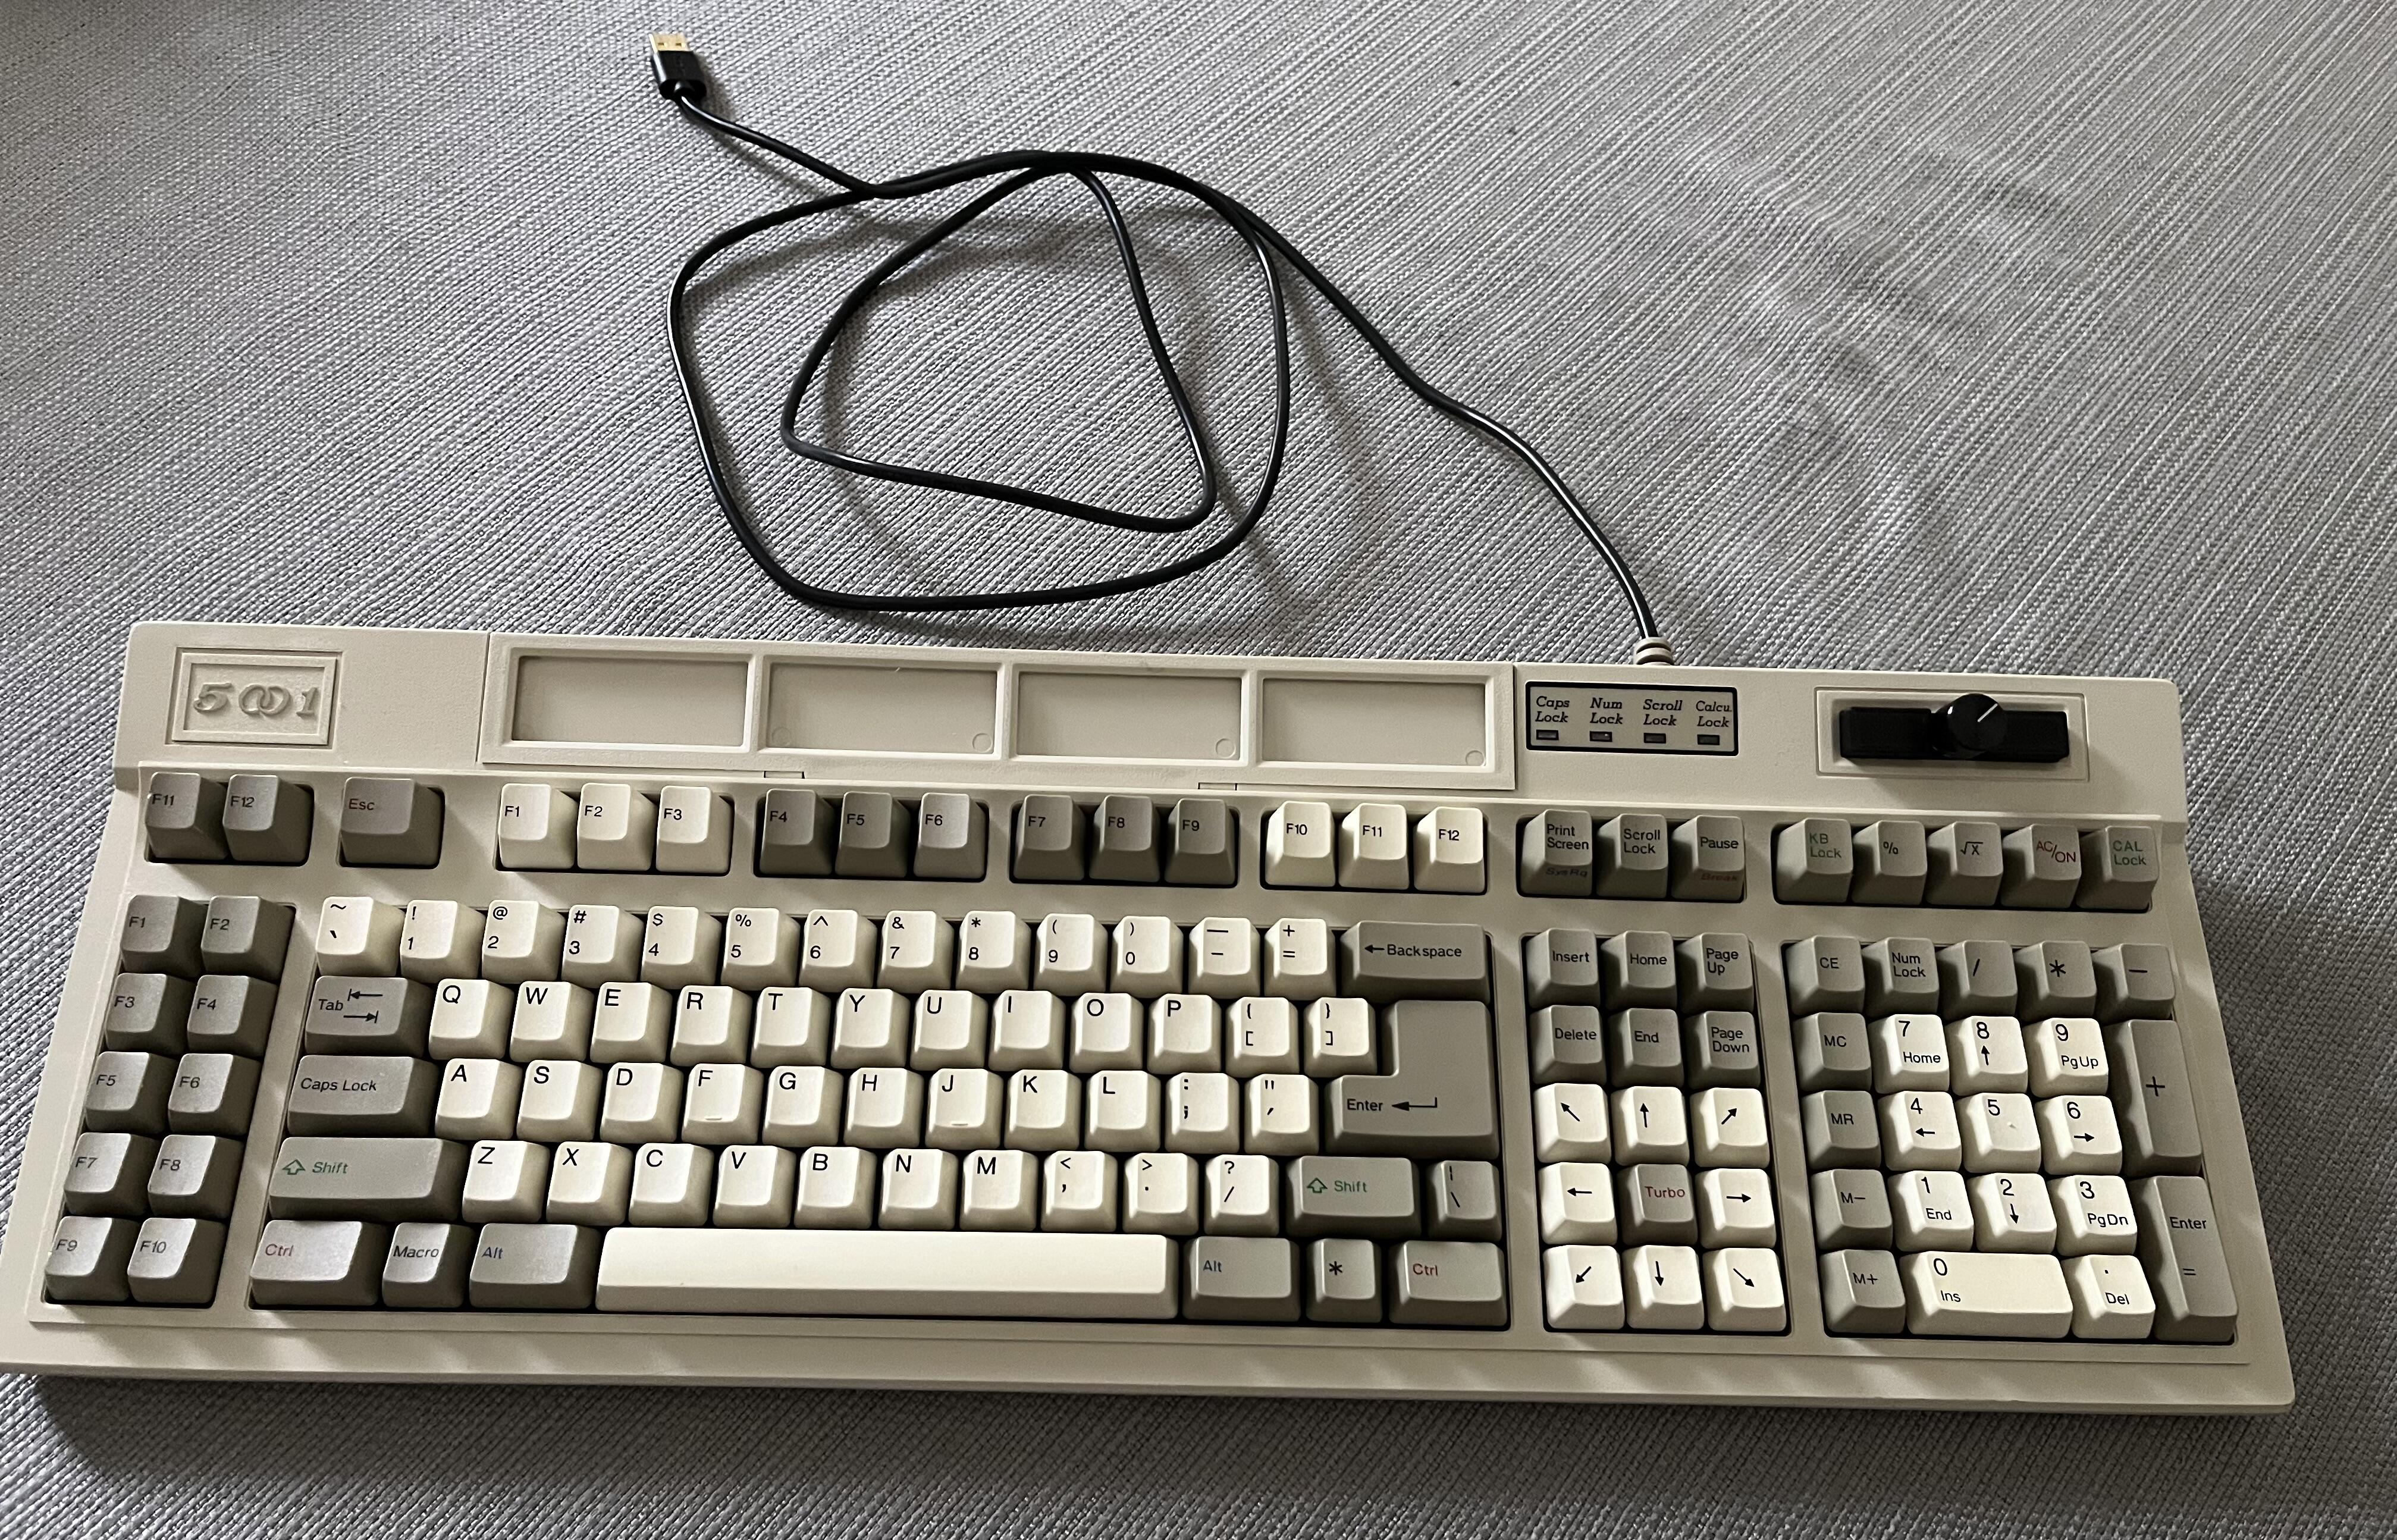
Worked on the FK-5001 “Deadbug edition”. Got a quick-n-dirty plug printed for the calculator screen’s opening with a mounting point for an encoder (calculator and main PCBs safely set aside; the main one needs a bit of cleanup and replacement insulating tape on its jumper-side, as it’s a one-sided PCB and jumpers bumping into each other is probably what set all this in motion to begin with).
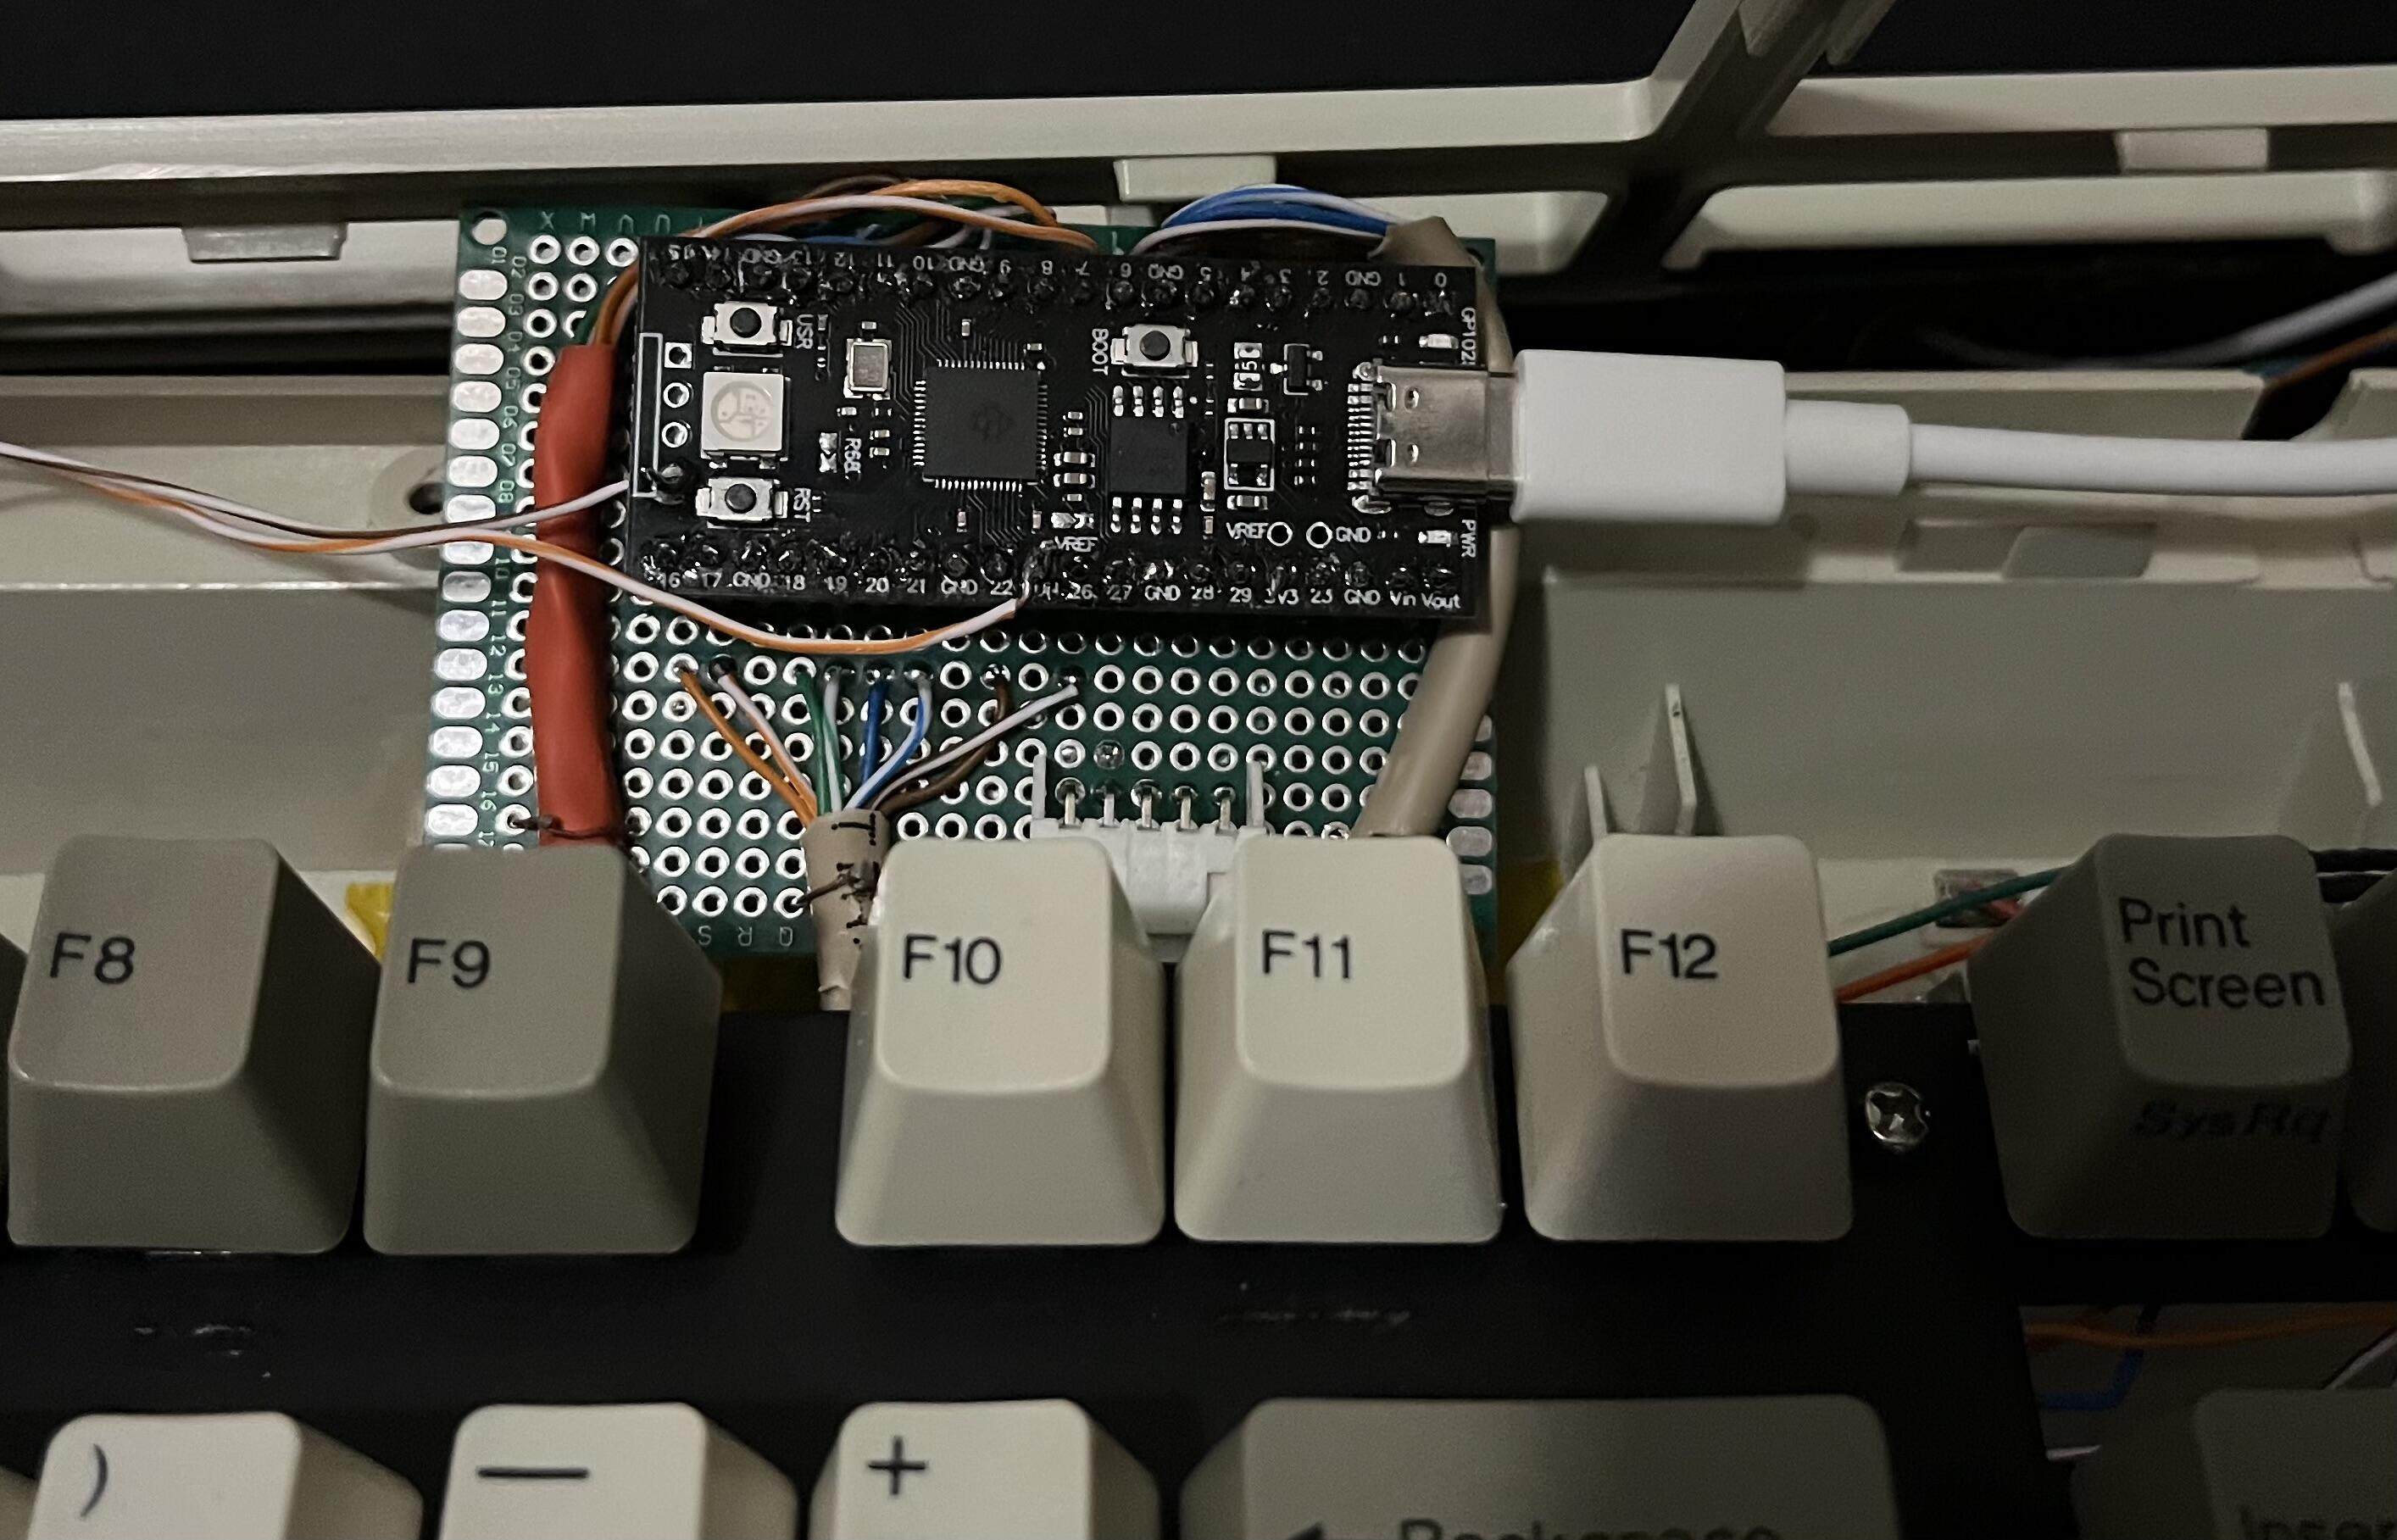
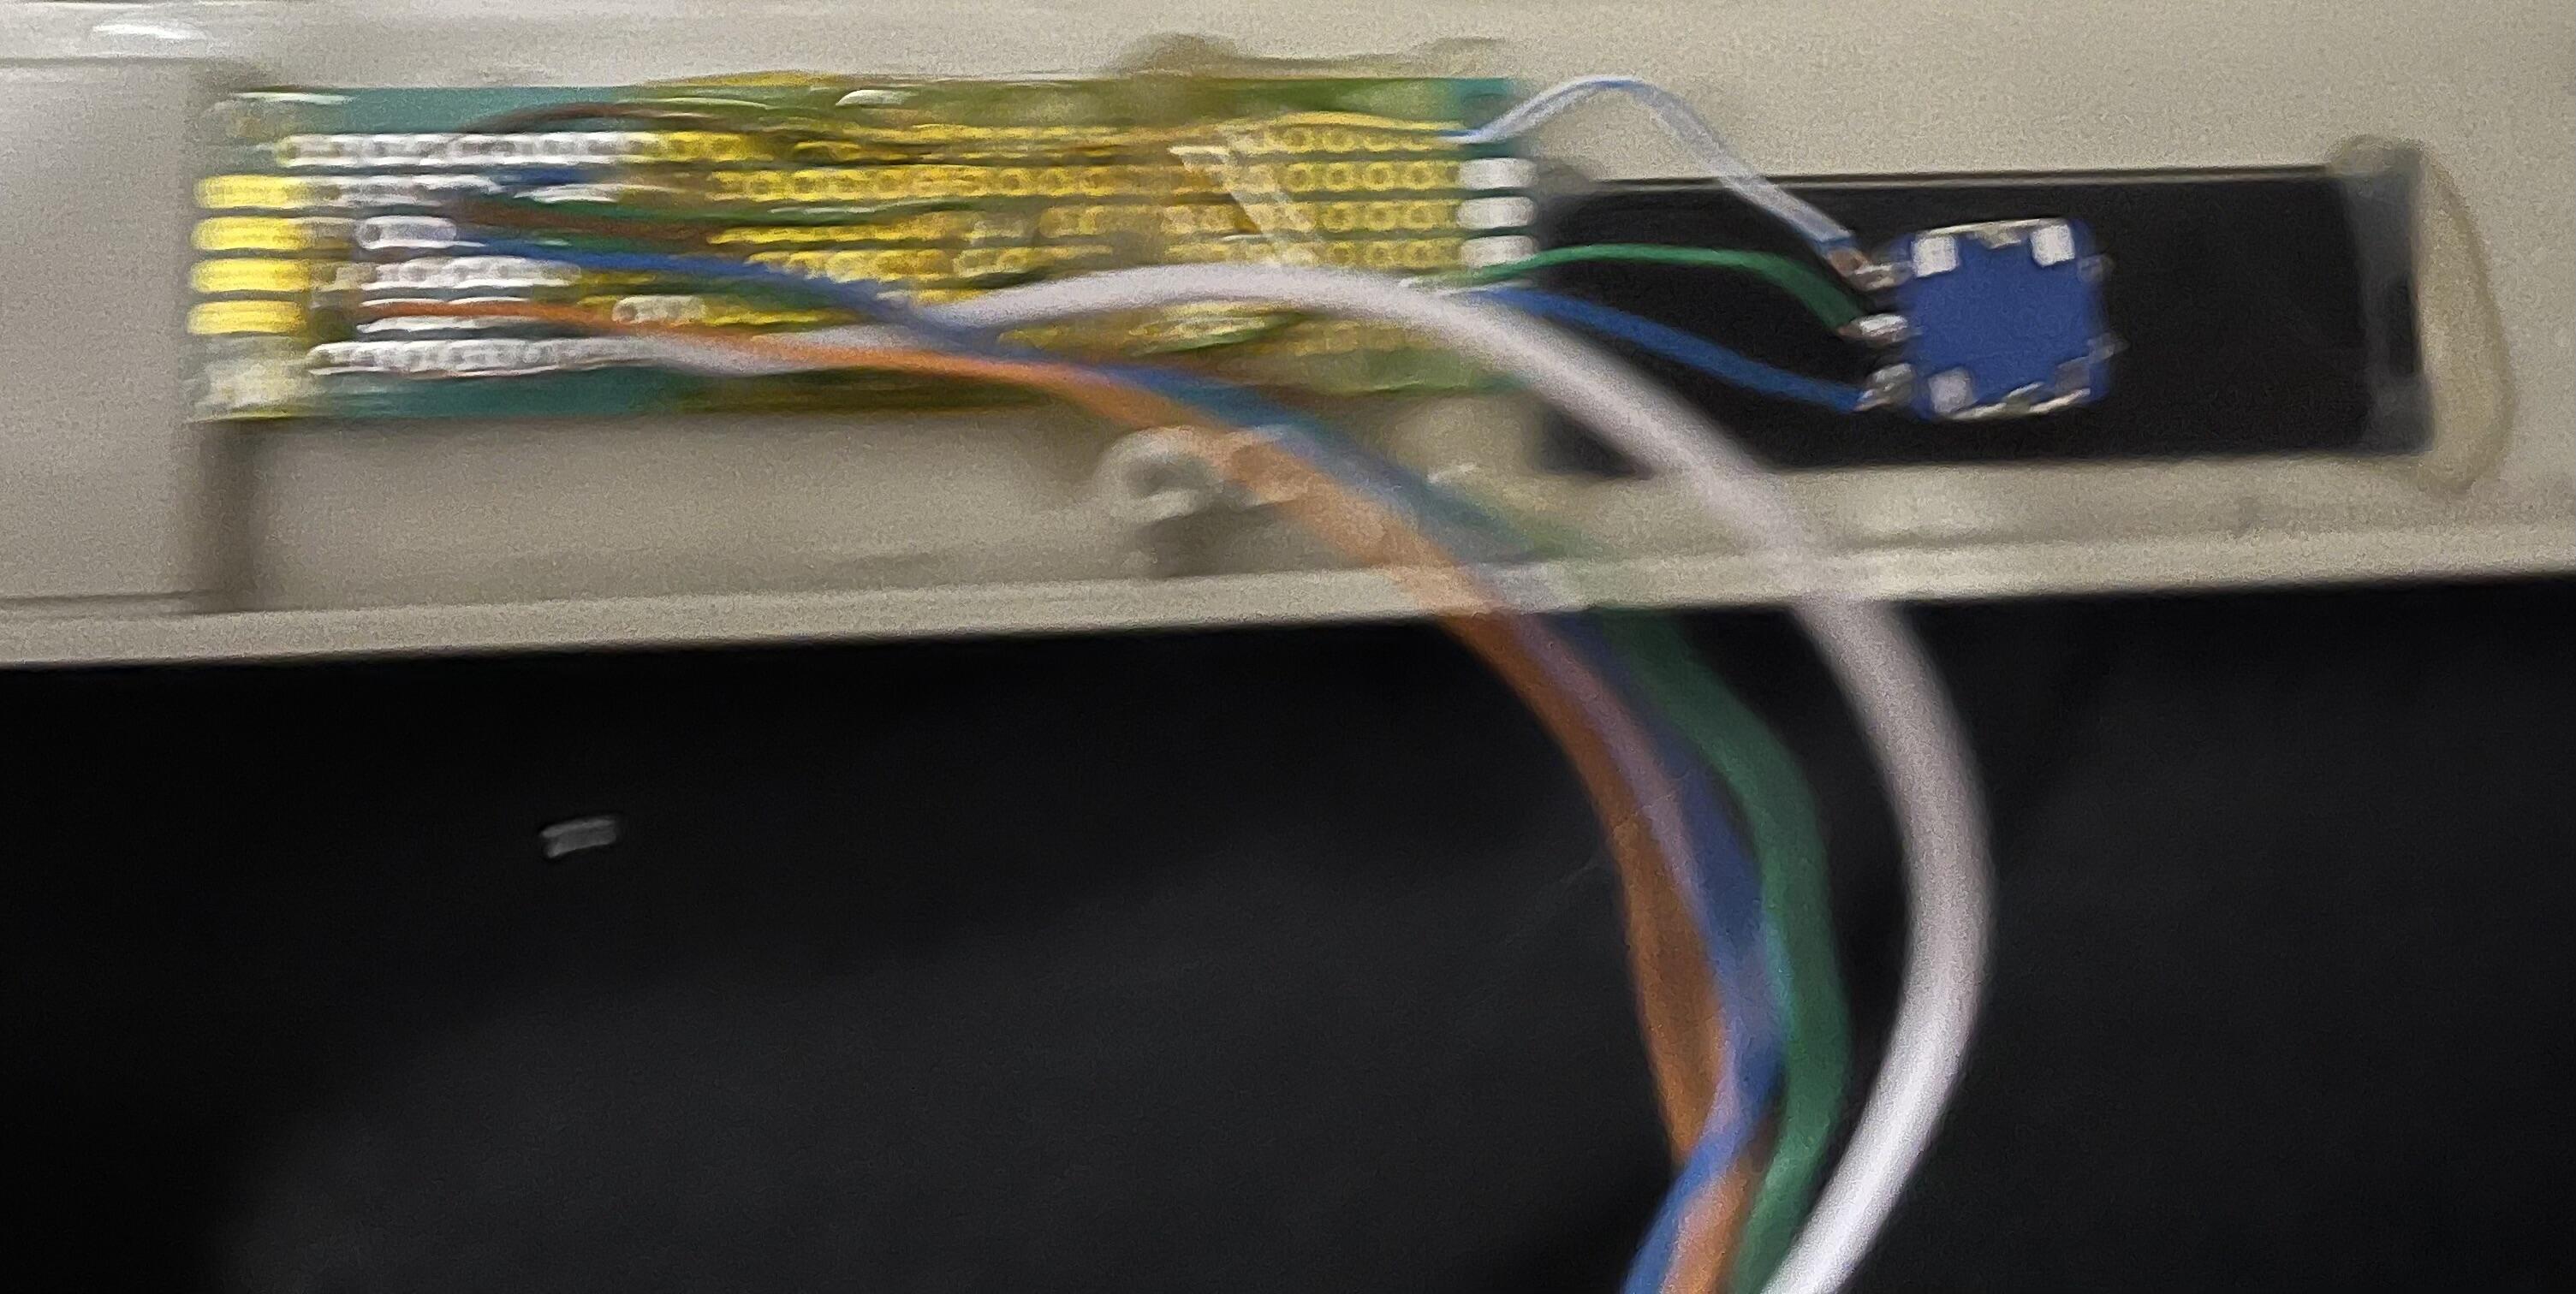
Finished the soldering for the LEDs, Encoder, and the MCU, and began coding the KMK. The POG utility was being difficult for me, so I just edited the keymap by hand. Officially, the matrix is 12x12, and it uses some “Western Duplex” wiring to make it fit. Upon testing, it seems I have one column definitely not connected right, one column that’s a little sketchy, and three individual keys misbehaving in a way that could be my wiring or could be the switches (Alps White, and they’ve now been through a lot).
Once I have the hardware straightened out, I’ll pull in the code for the lock indicators and encoder. Currently the pushbutton on the encoder isn’t wired to anything, and I’ve been reluctant to tie it into the matrix since the case design means I need it to be easy to disconnect. I may make it the reset button just so I have one outside the case, but they’re less critical on RP2040 boards. I’ll take some more pics once I open the case back up.
After this one, I think I’m going to take a break and move on to some organization and woodworking projects for a bit, maybe keeb-related, maybe not.
Edit to add: seems like, hardware-wise, we’re done. One bad switch, one bit of melted insulation, and a few cold joints, all fixed now. I didn’t end up wiring the encoder’s button to anything. I mean, there are 130 already, plus the knob itself. I did wire a little momentary switch that lives in the DIP switch window under the badge as a reset button. I also retained two fo the four(!) lock indicator LEDs, though I replaced the green with red. Only thing left now is to fine-tune the keymap. I’m debating whether to keep any remnant of the 8-key arrow cluster, or just devote the usual four physical keys to arrows and do something with the others; seems like a good spot for media keys.
Edit 2: Today’s electrical engineering lesson for the English major: Electromagnetic interference and induced current! Specifically, EMI on a rather long run of lightly insulated wire connected to my new reset button. I was driving myself nuts wondering why the RP2040 was resetting itself, with the most reliable way to make it happen being when I (and the multi-spectrum transmitter in my pocket) got up from my desk and walked away. I mean, I’m a charming guy and all, but the keyboard was beginning to feel pretty clingy ![]() . I suppose I need some more time to be sure, but so far desoldering those leads seems to have done the trick.
. I suppose I need some more time to be sure, but so far desoldering those leads seems to have done the trick.
5 Likes
Unsure if this fits here buuuut…
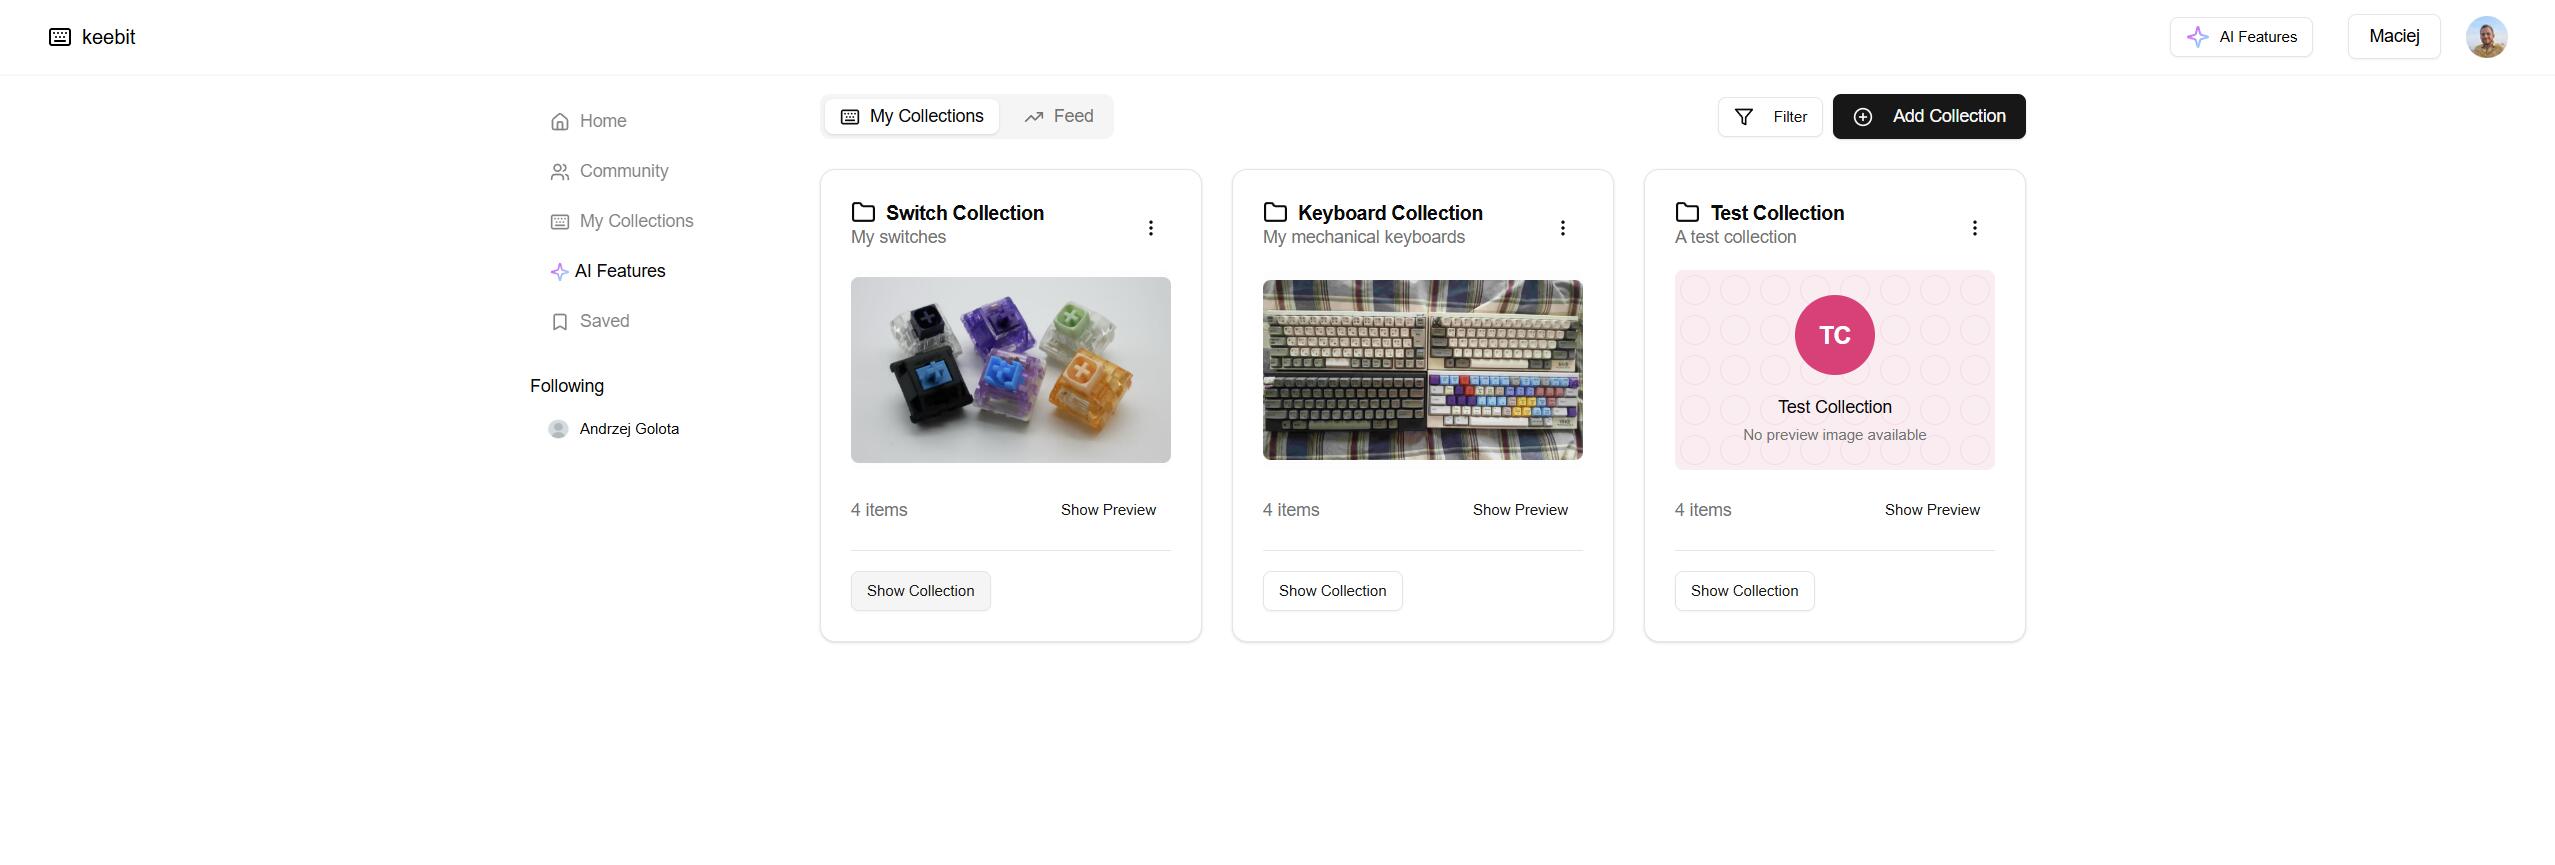
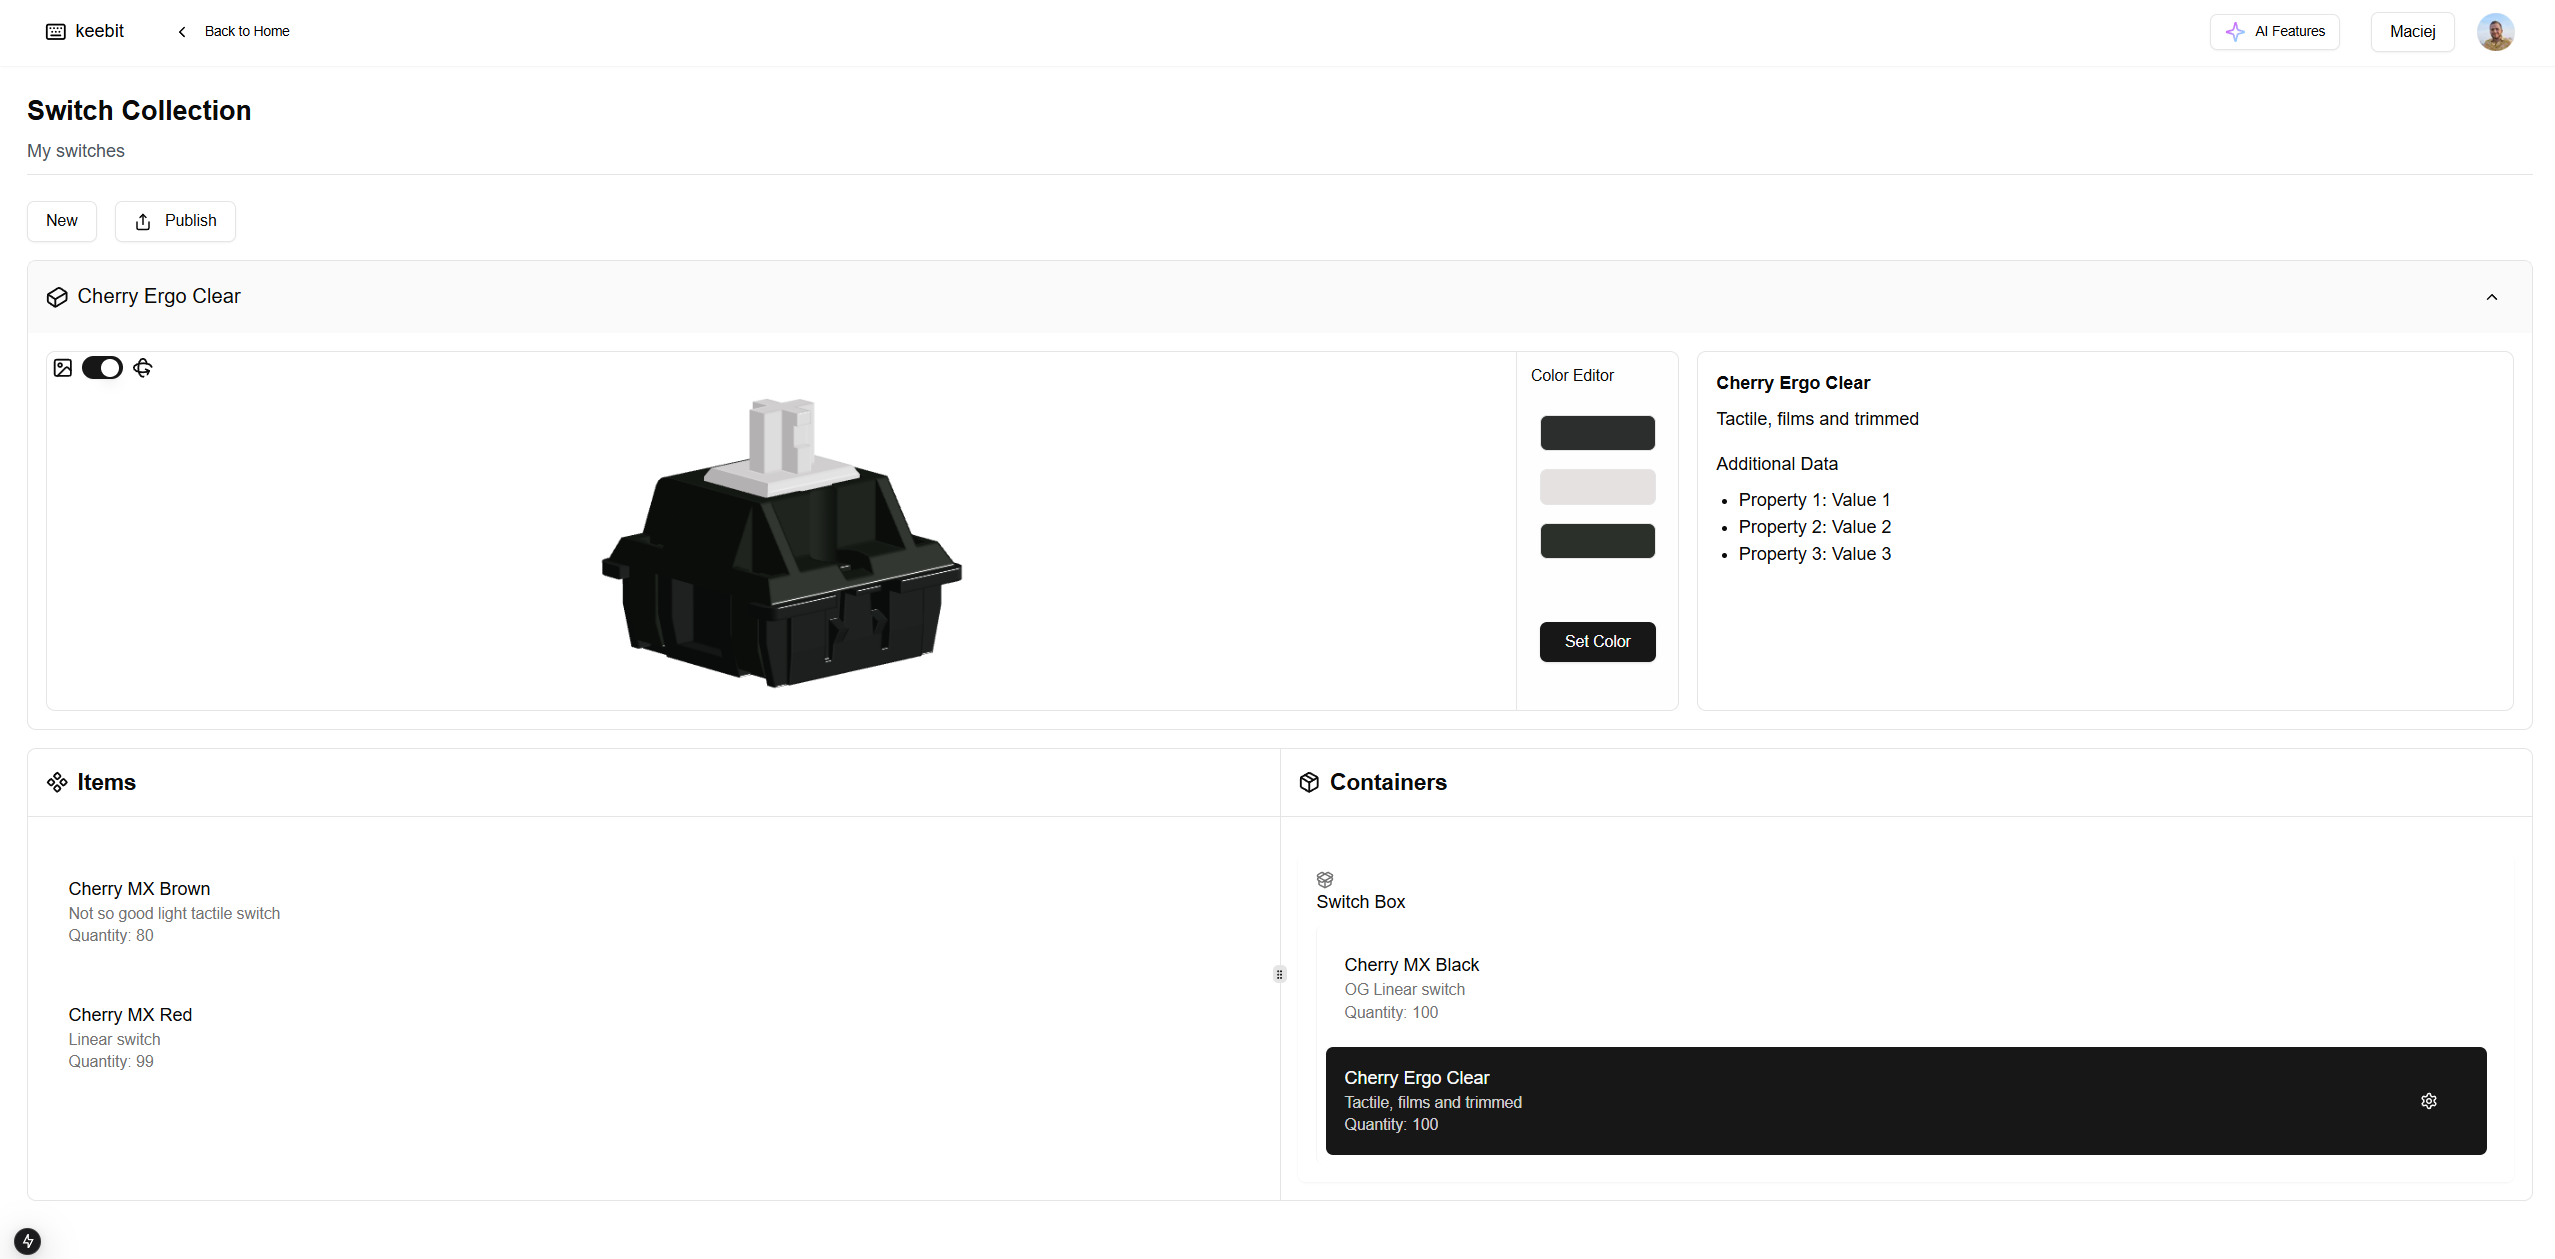
Currently working on my Master’s Thesis for which I have decided to make an inventorying app tailored for mechanical keyboards enthusiasts.
I feel like there is a void on the market for such an app and personally I know I would use such a solution. Yes, you could use a spreadsheet of some sort but I believe that a tailored soulution would be really nice.
The scope of the project is really creeping up and for now I am focusing on implementing the base of the app which is:
- creating collections
- creating items inside a collection
- creating containers for items inside a collection
- 3D model viewer with optional color customizability
- creating custom item types
- a feed for sharing collections/items/builds (?)
- some AI toolbox (?)
As I have said I am mainly creating this as a practical part of my Master’s and a personal tool but if there’s positive feedback I may share it with You guys!
If I was to publish the app I would really like to reach the point where a user can use it in two modes: online and offline. Online mode would be hosted somewhere on the server and a user would be required to log in to the app via credentials or some provider like google/github wheras the offline mode would be a clone on your system or a downloadable client that runs locally on a local database with no need for a user to log into it. An option to export/import data as a JSON so that you can keep your data as you wish would also be a cool feature. I am kind of drawing inspiration from Obsidian app here.
App would be 100% free - a Thank You from me to all the amazing users of this community.
Any feedback would be nice so that I can use It in my thesis and/or during the multiple presentations. The feedback doesn’t have to do with my application but It can be whether You’d be interested in such an app or if You use any other solutions for keeping track of Your collection.
9 Likes
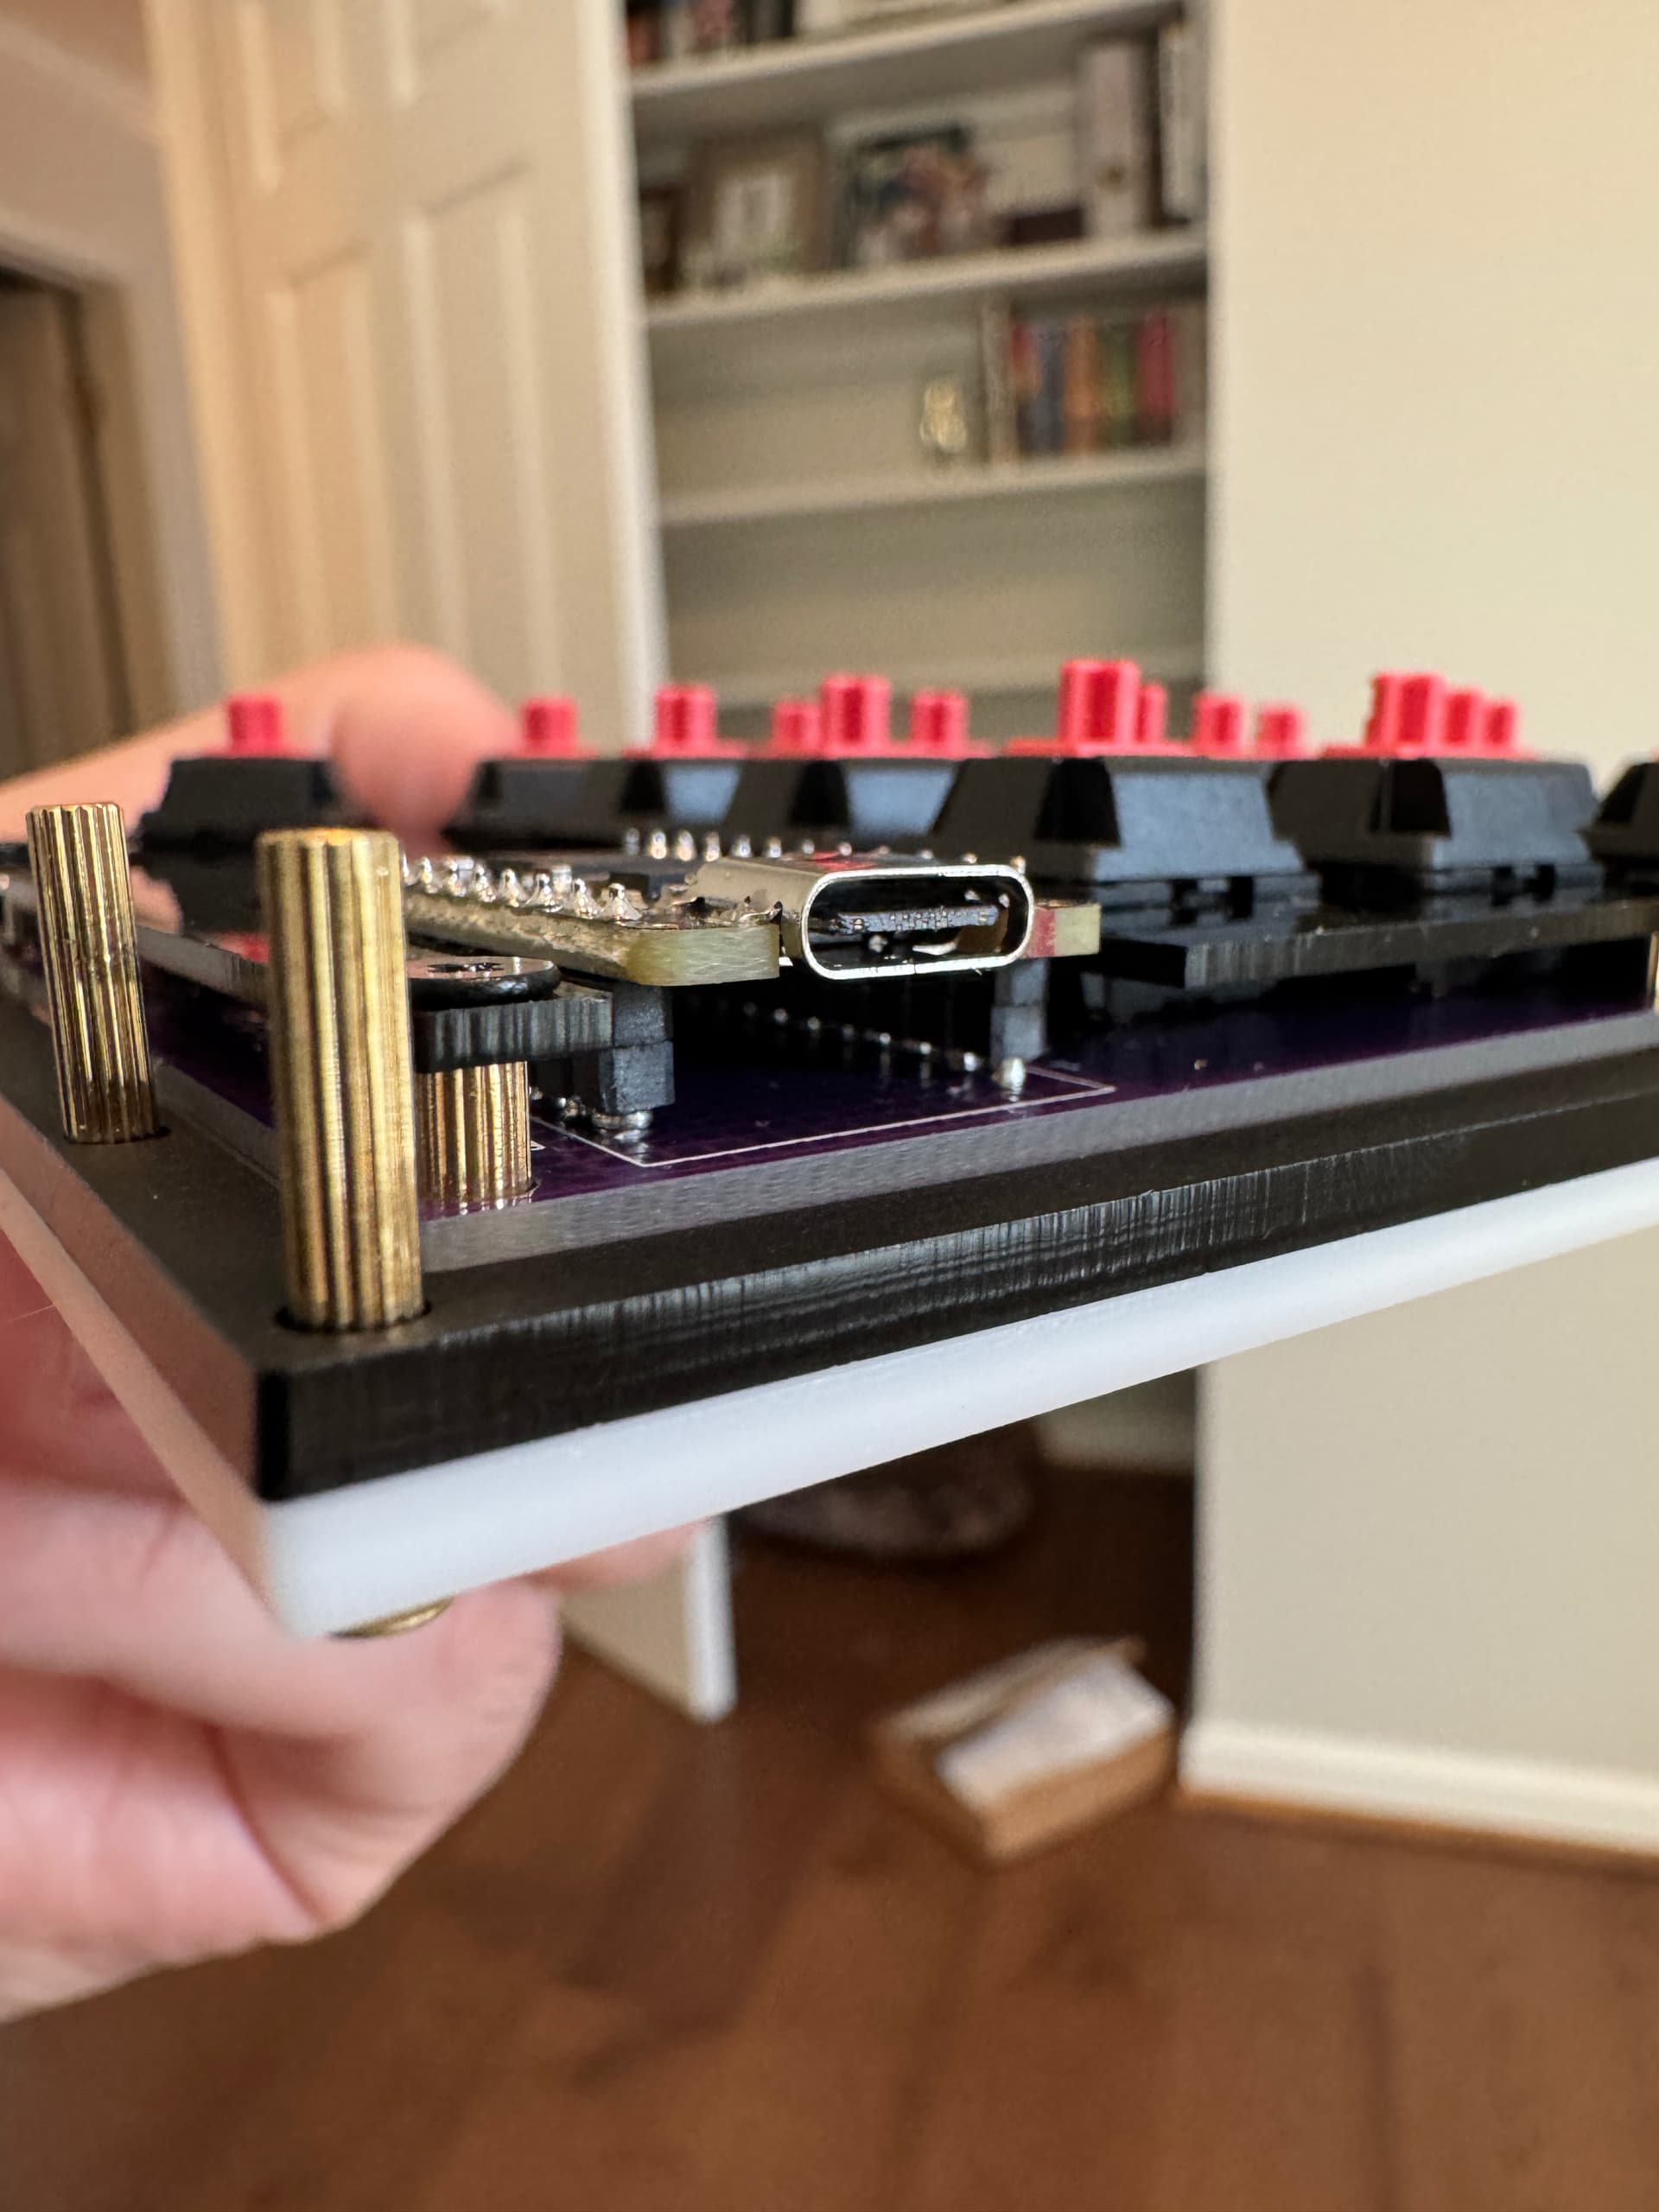
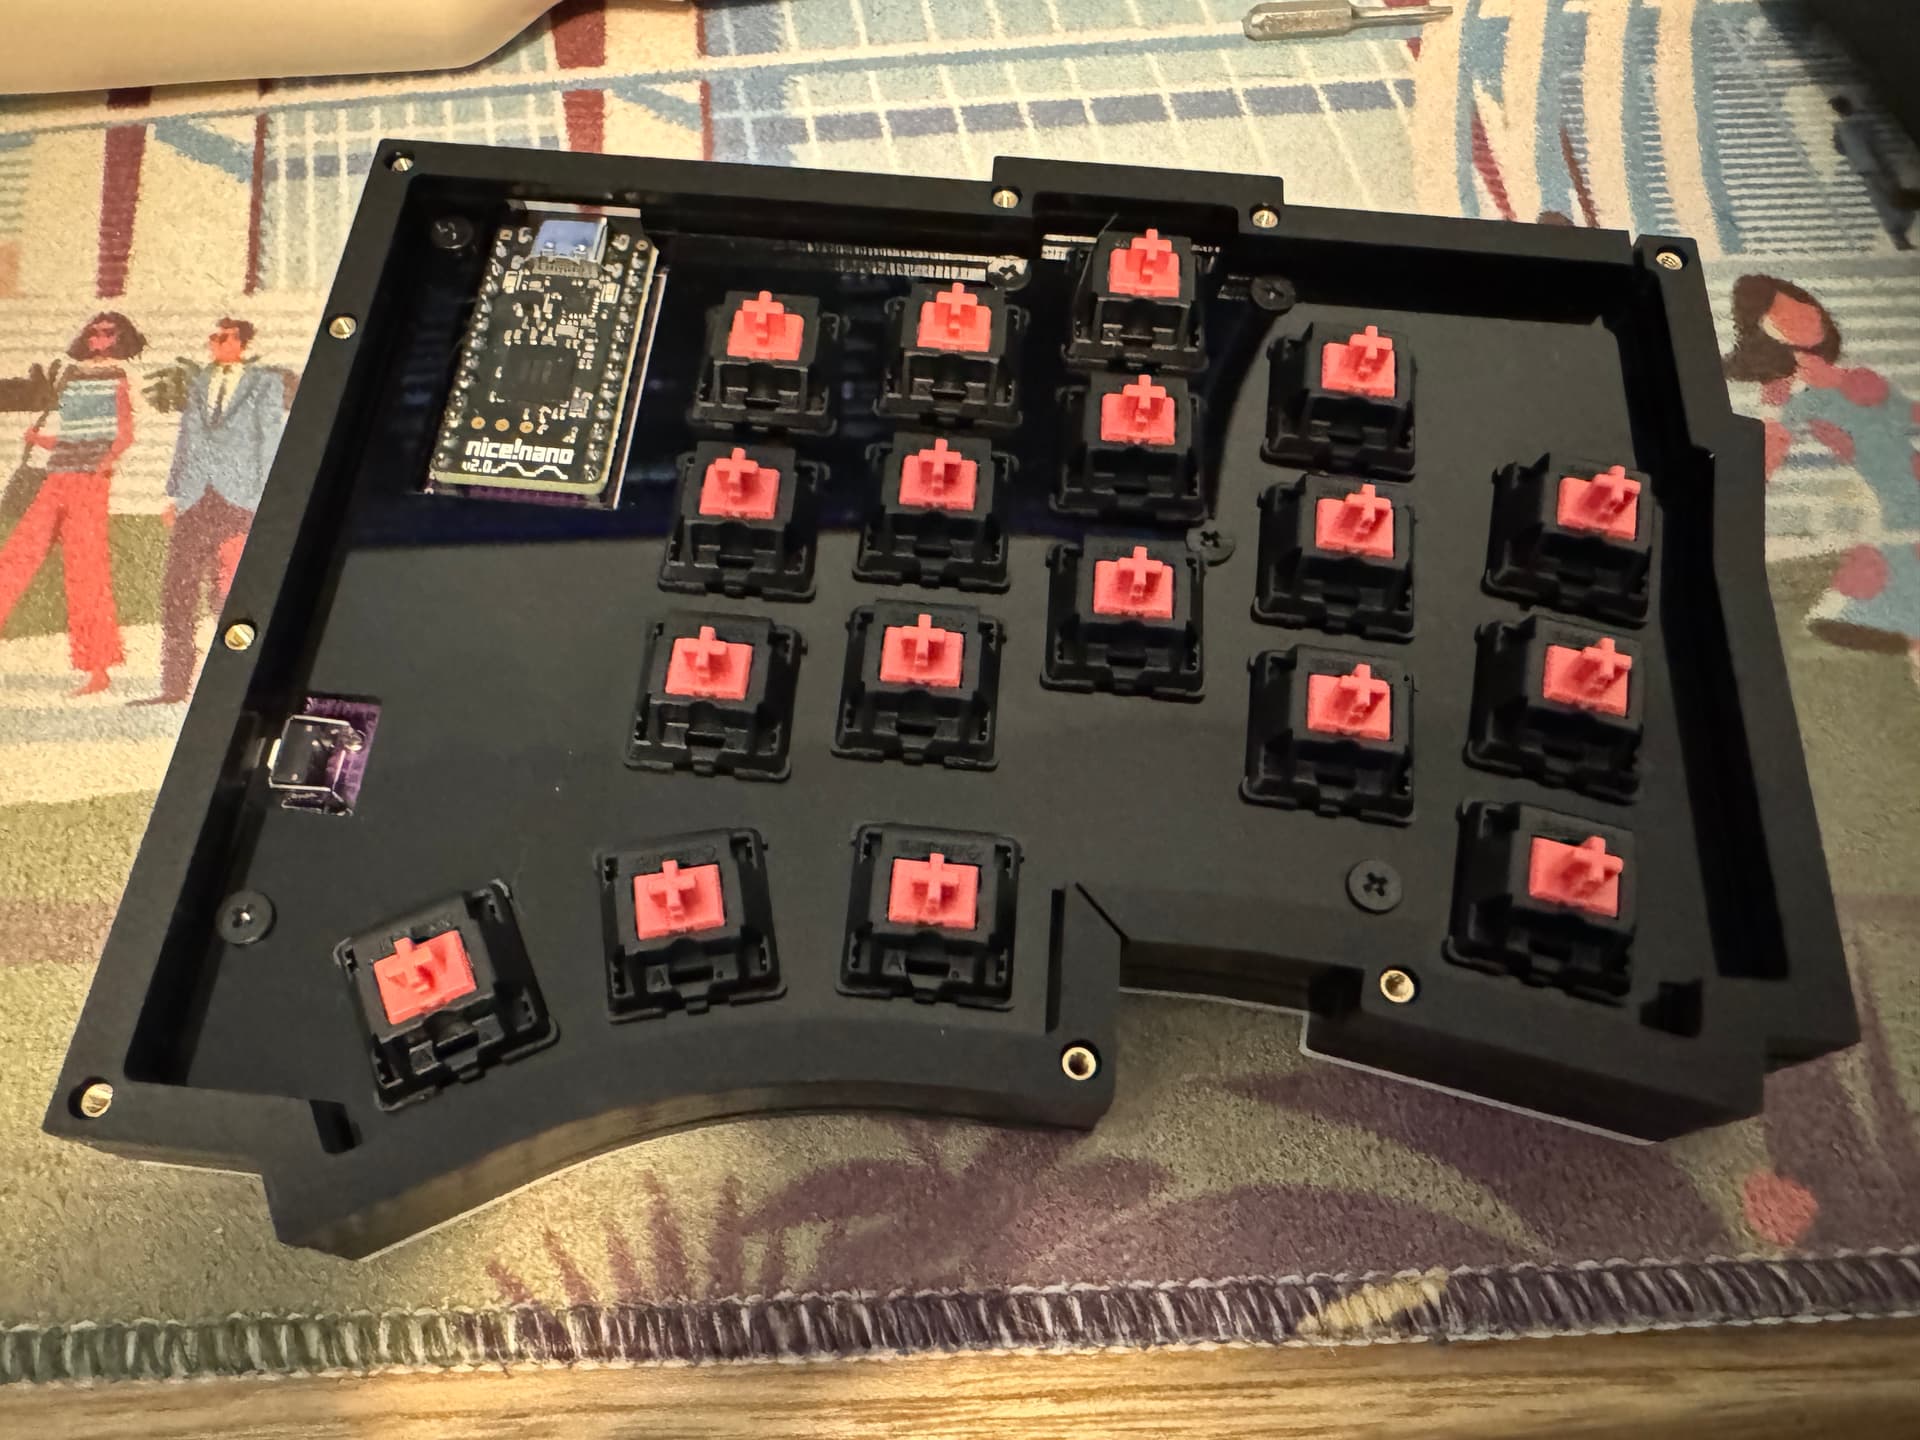
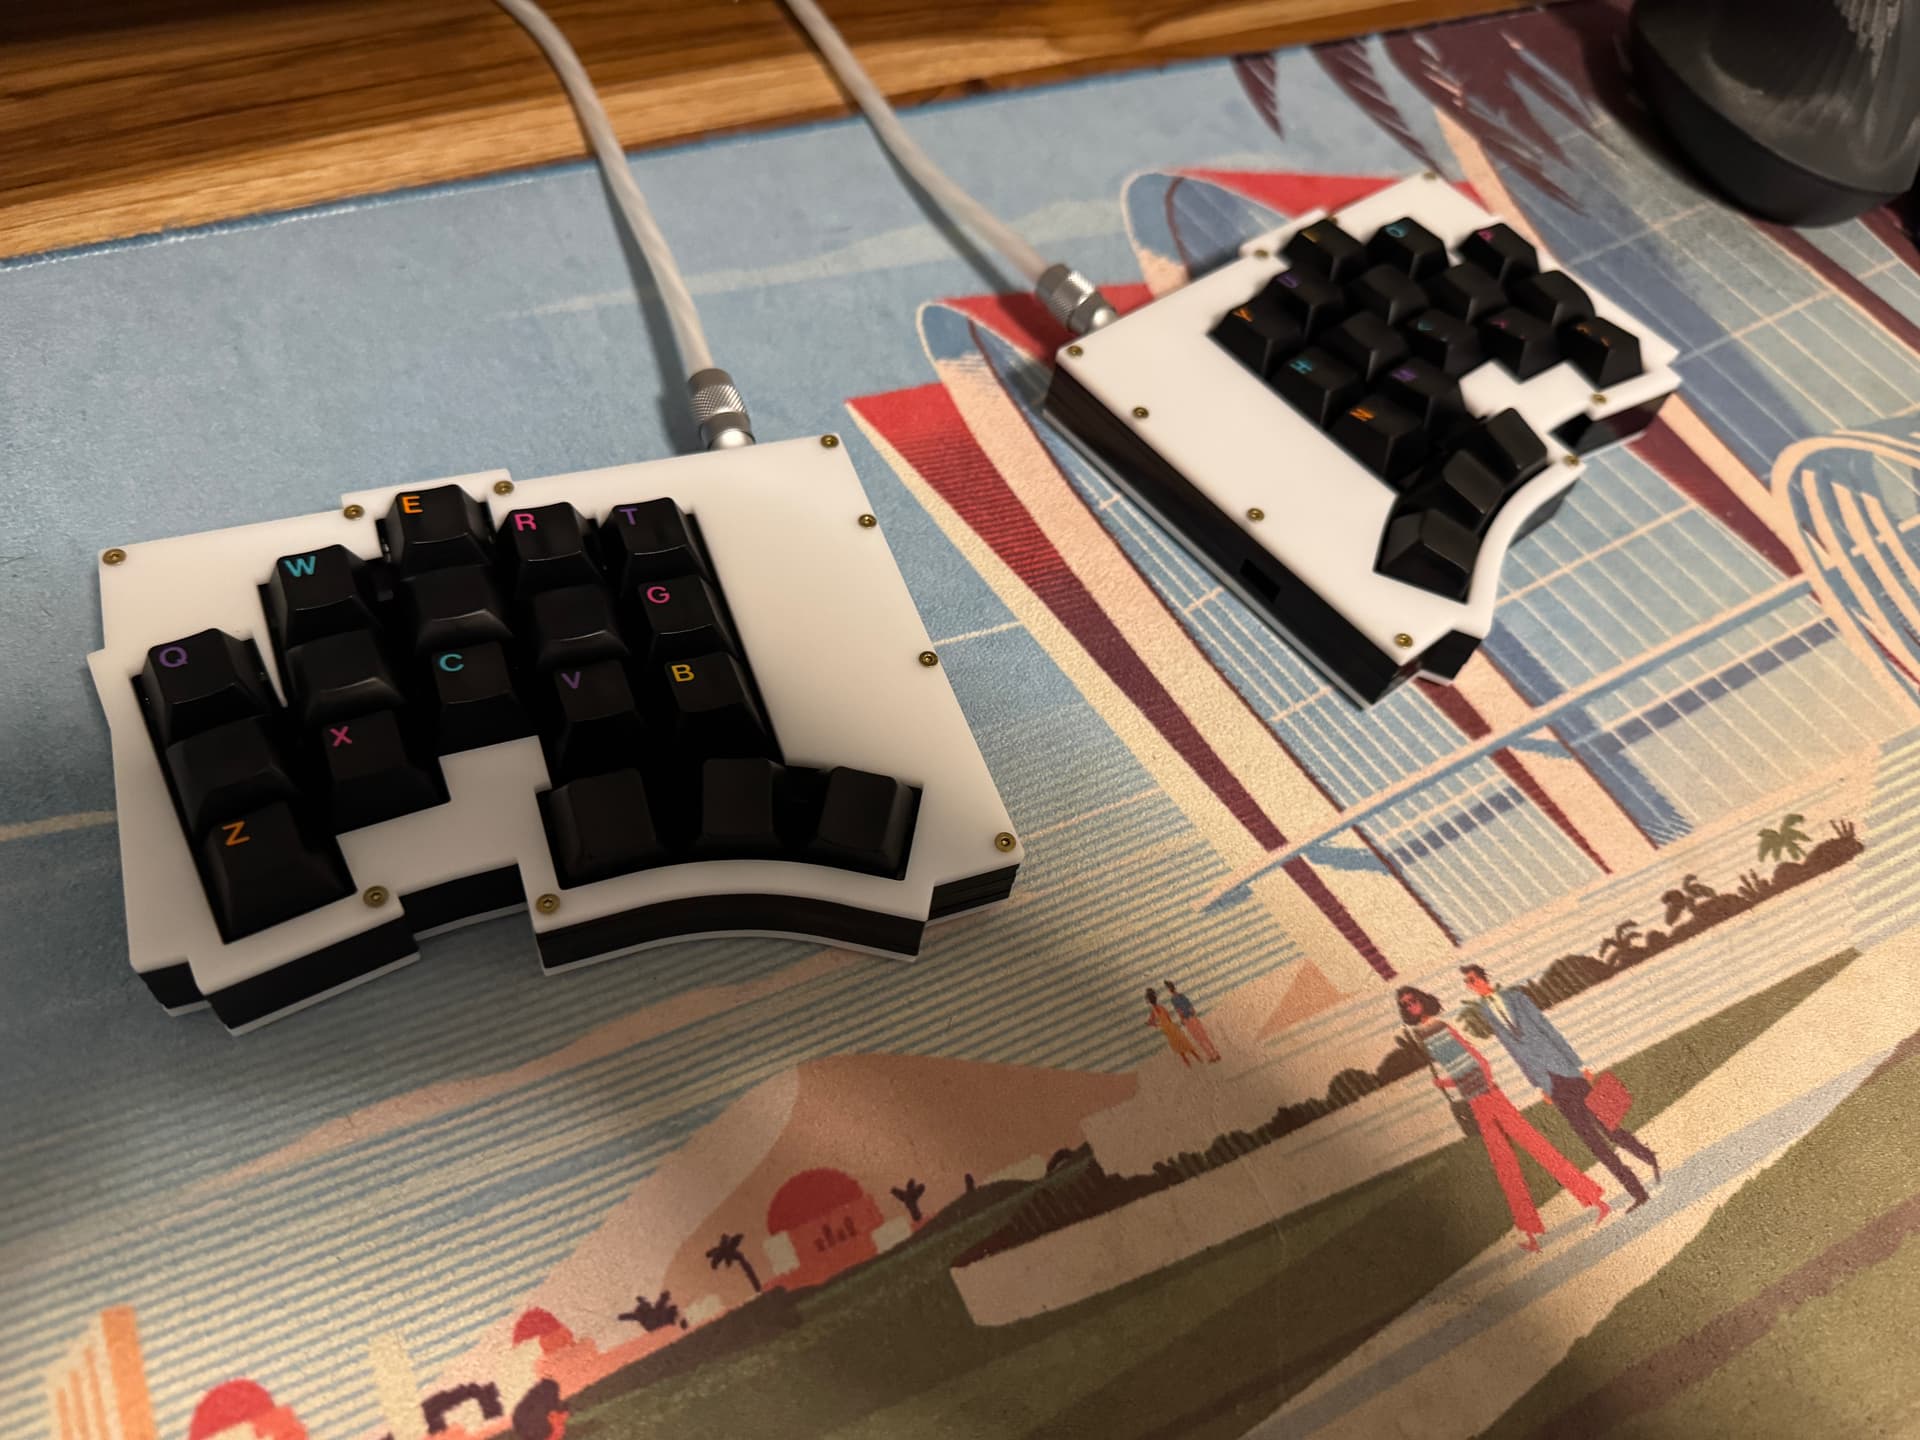
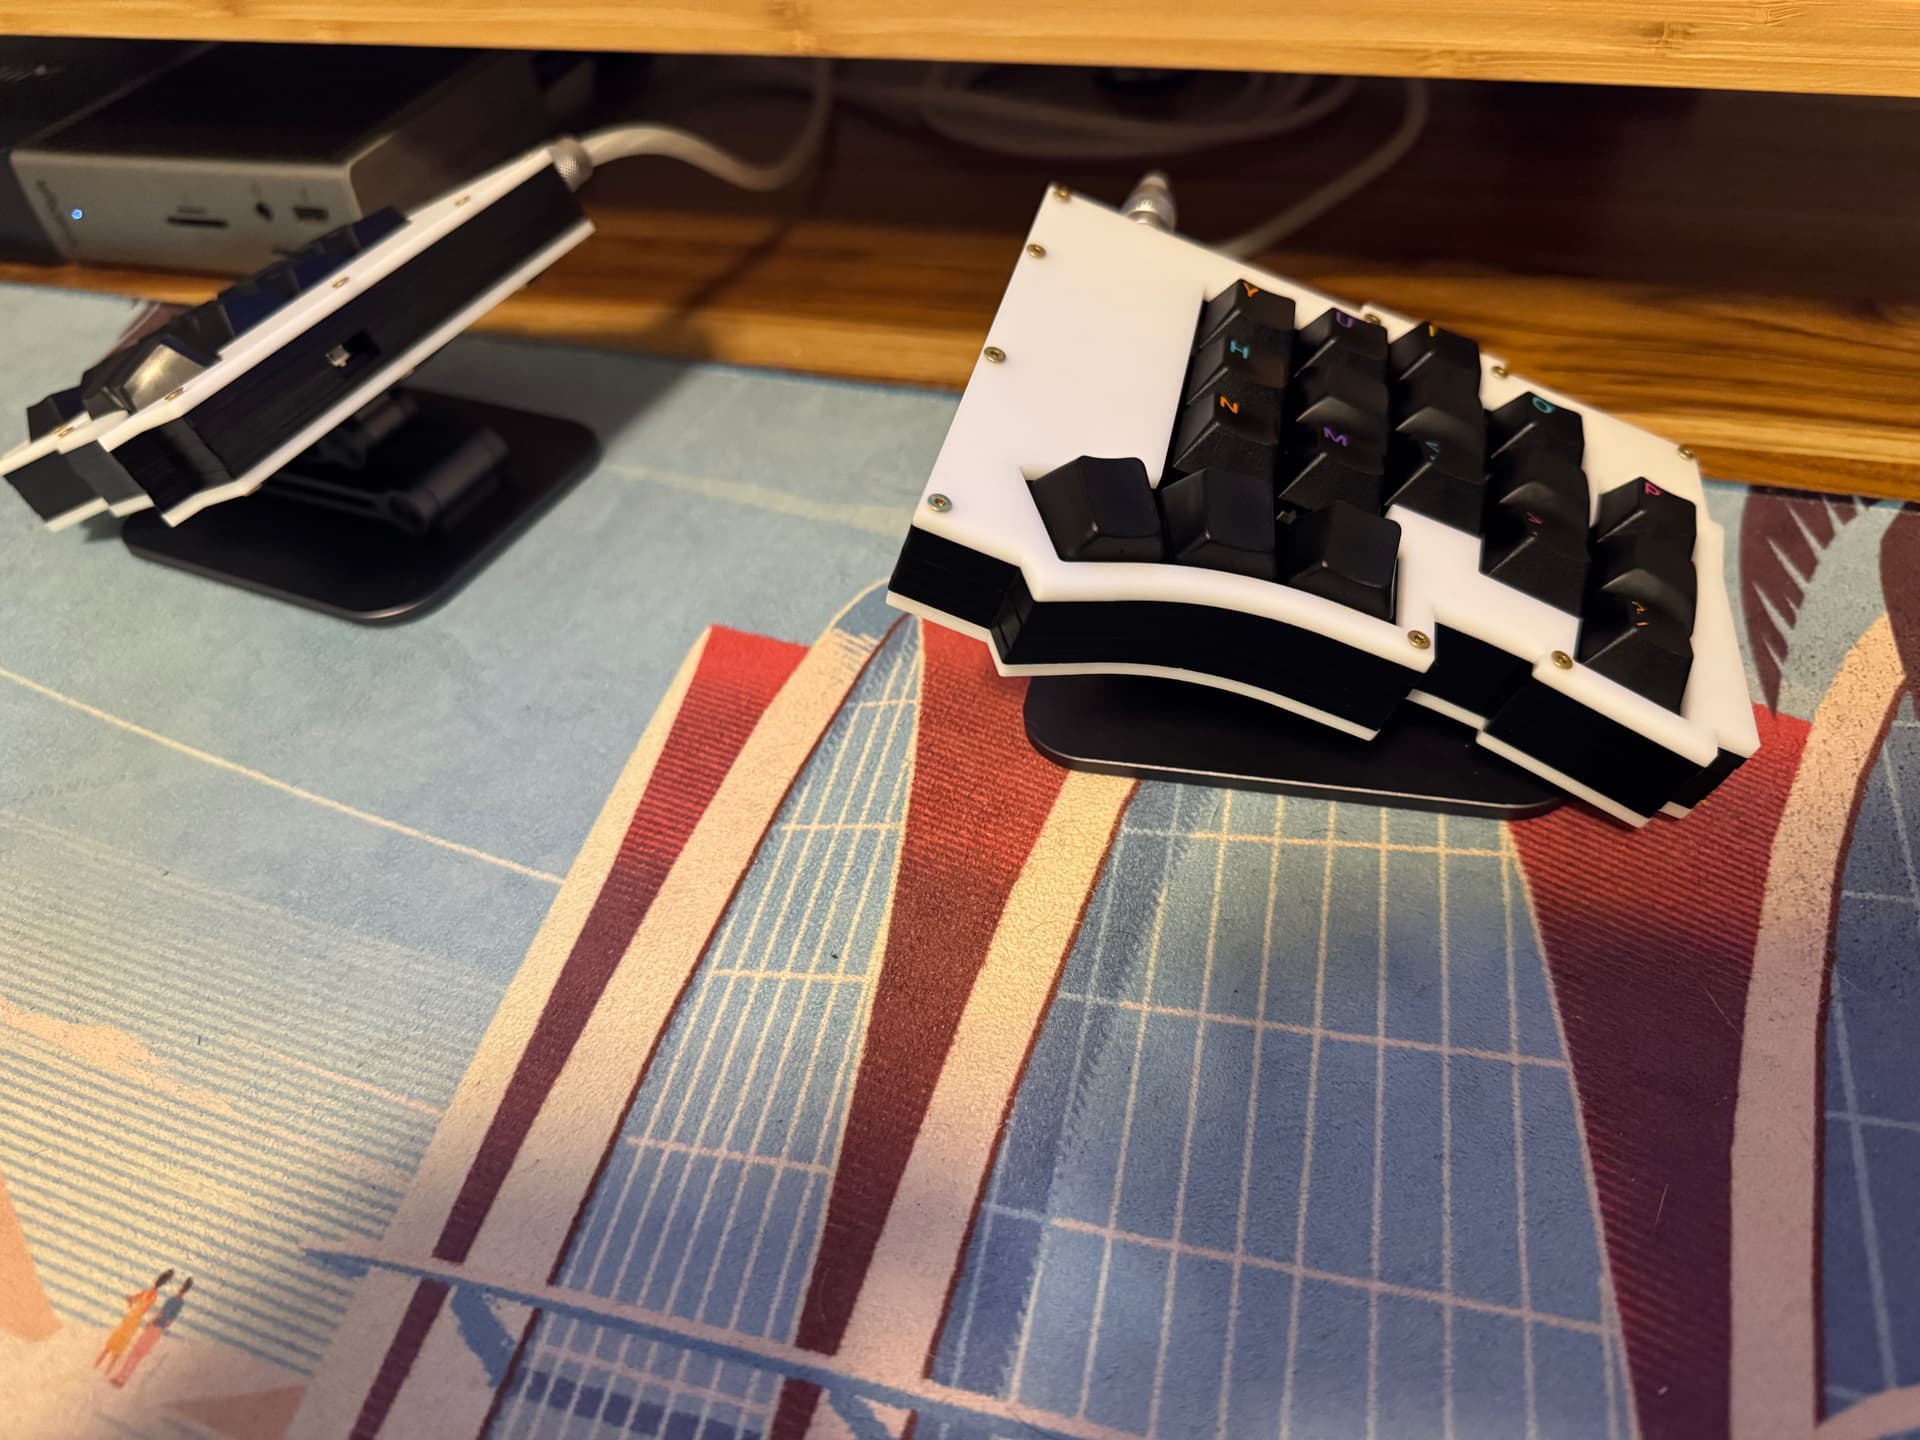
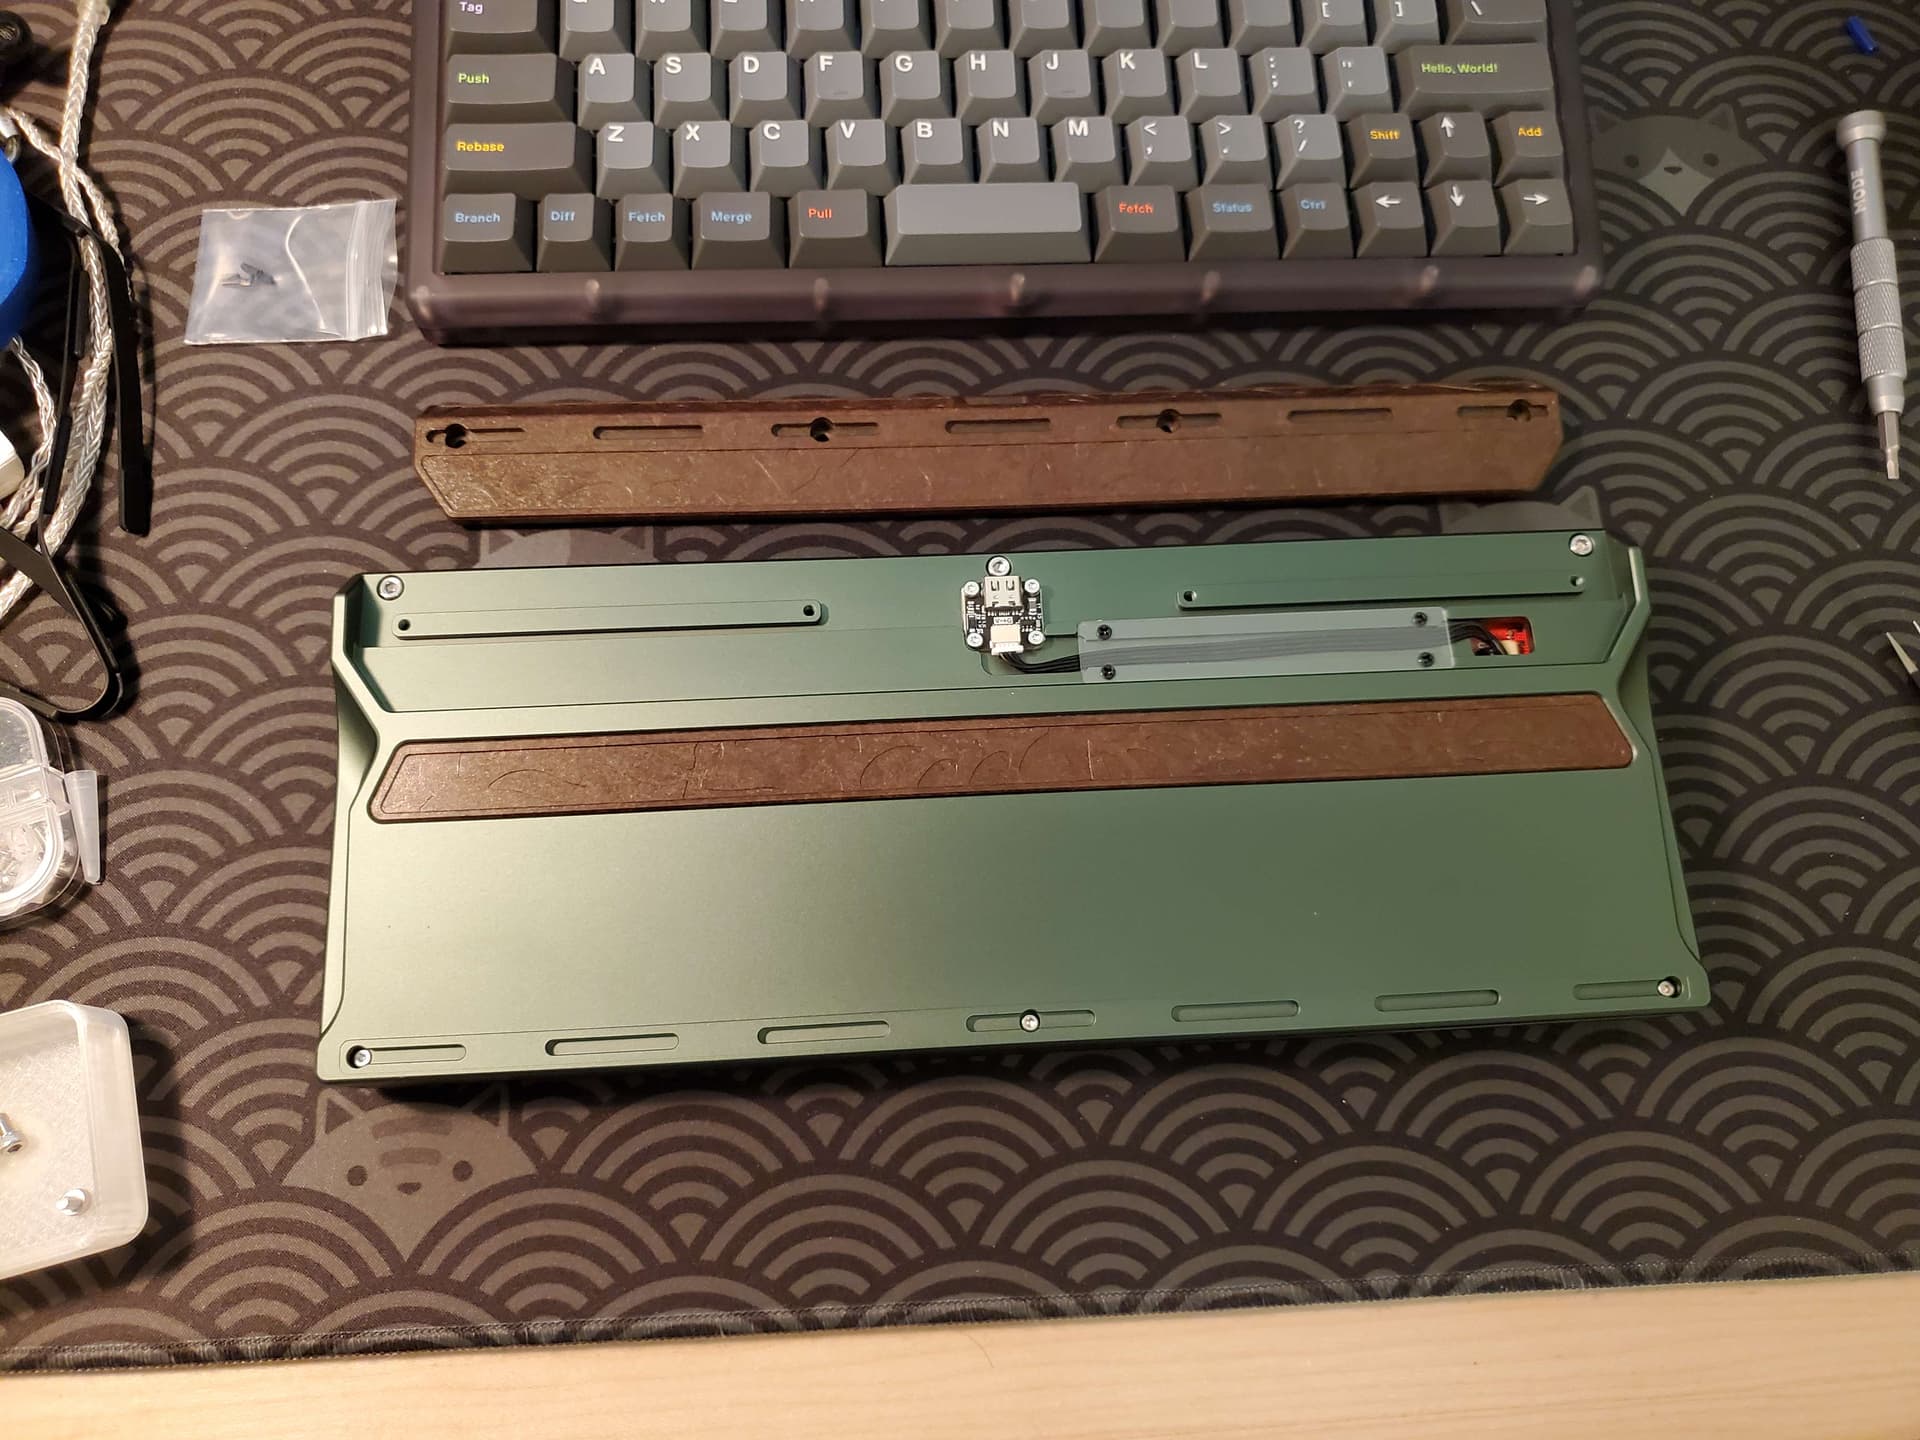
I finally got all of the acrylic parts in for the sandwich case for my custom PCB in modified Klor form factor, which meant customized acrylic pieces as well. The main adaptations were changing some of the cutouts for the reset switch and MCU and changing the plate to accommodate a taller reset switch and socketed Nice!Nano.
I’m really quite happy with how this turned out, so here are some pictures complete with my customary dog hair here and there.
10 Likes
Mill maxed another custom PCB and thought I’d share what I do to clean my boards after mill maxing.
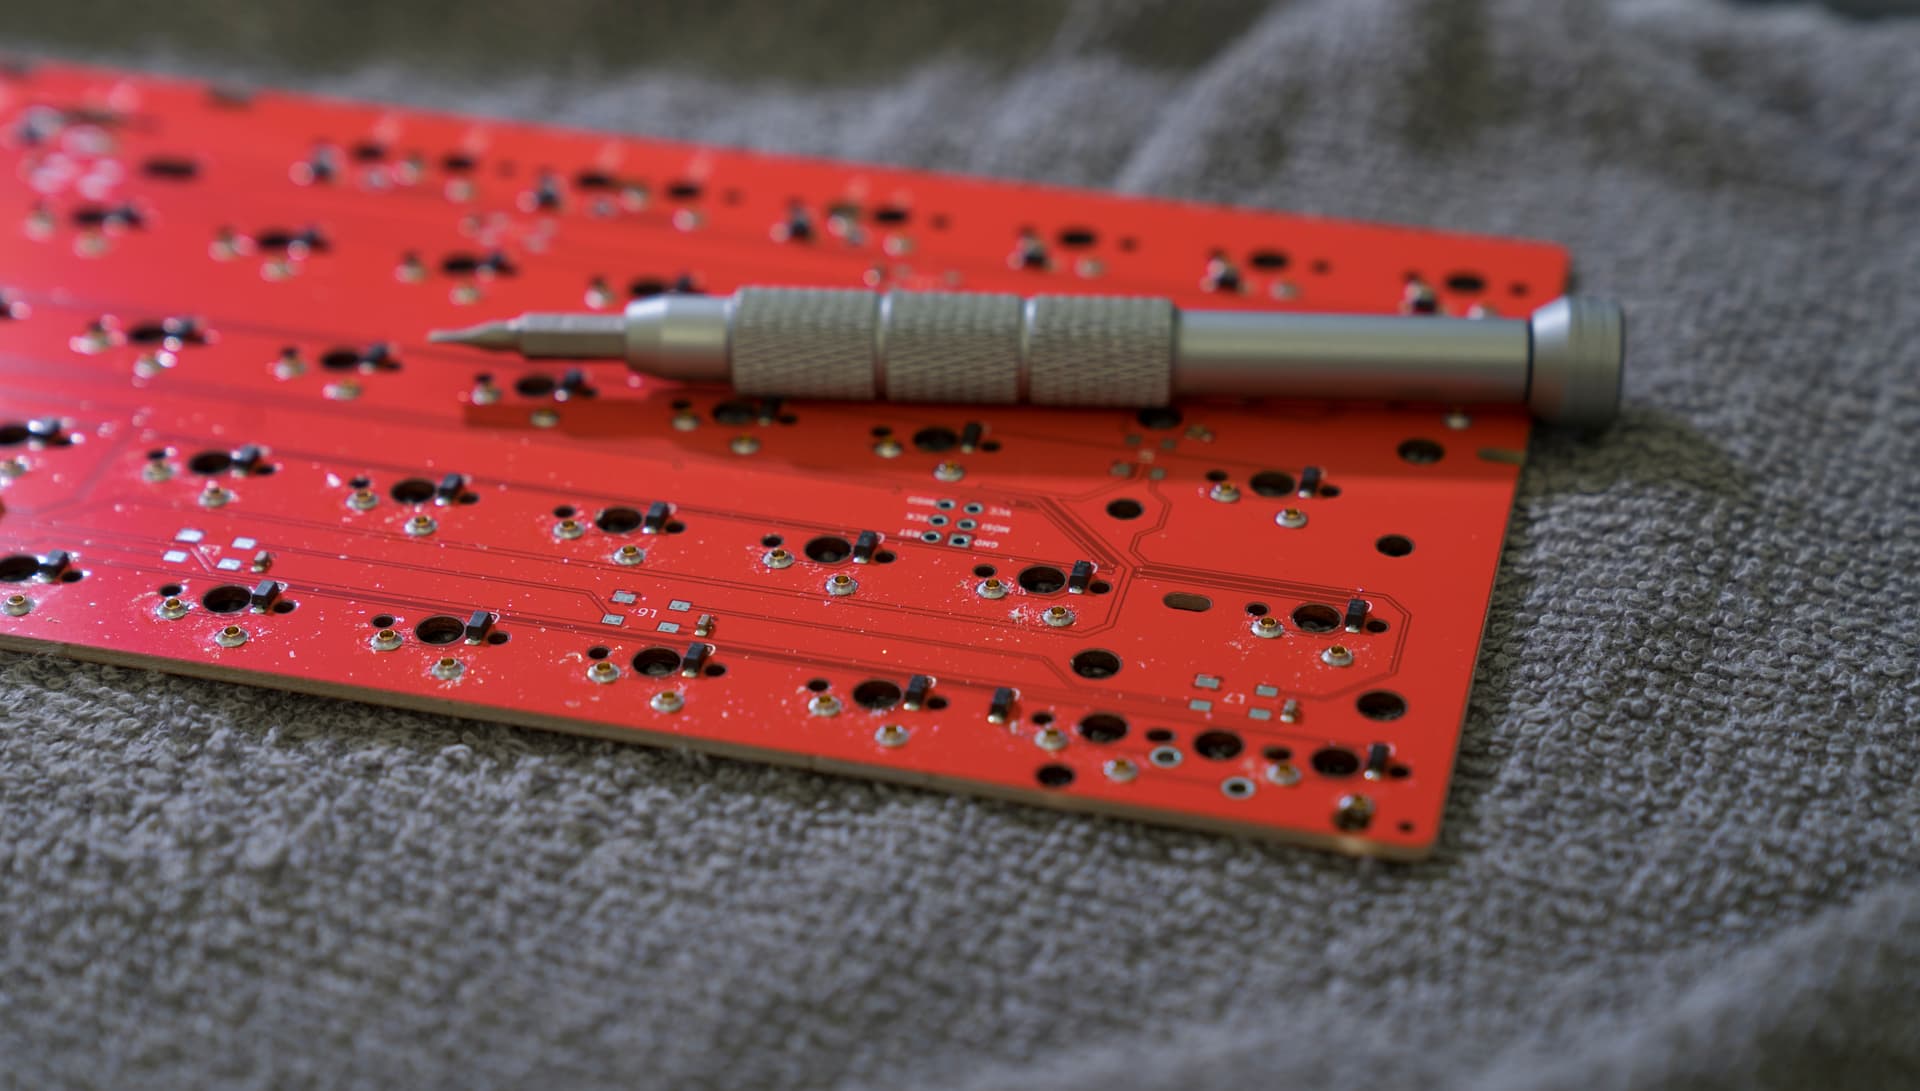
I use 63-37 tin lead rosin core solder at 340-350deg. It leaves small puddles of rosin that I chip away gently with a flat head. Light fingers, quick work.
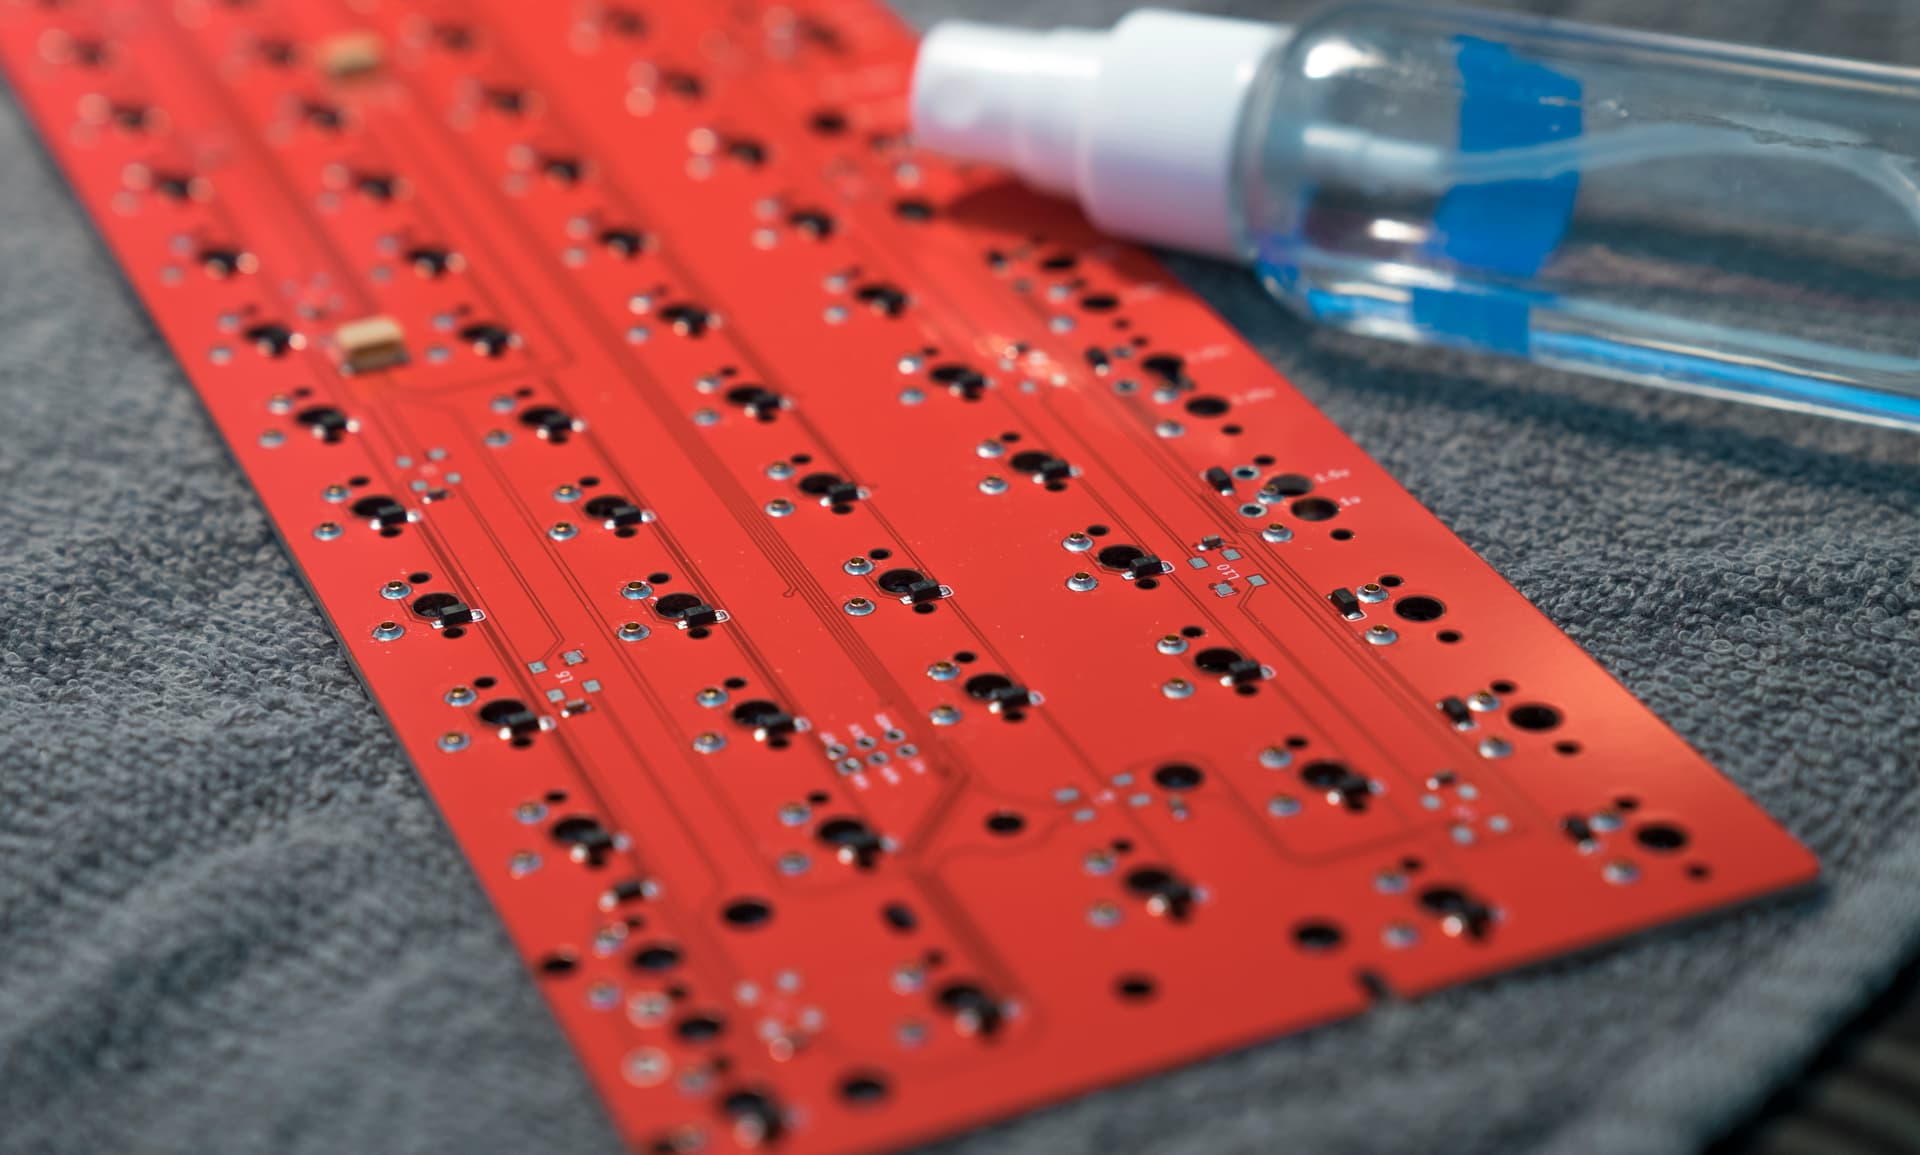
Then I blow off the dust and flakes with a duster and use a hand towel (the one under the PCB) with some 91% IPA and gently rub off the remaining rosin. I spray a liberal amount of IPA so it pools and soaks for a couple seconds before rubbing with the towel. One finger behind the towel in small circular motions.
Then I go back and spray everything down once more and ball up the towel and gently rub the in tiny circles across the board to get rid of streaks.
This works with 70% IPA too, though it takes a few more passes and you have to let it soak a little longer–91% IPA is also cheap and accessible. You really don’t need the expensive 99% IPA unless you’re trying to wash away the rosin or are doing a bath.
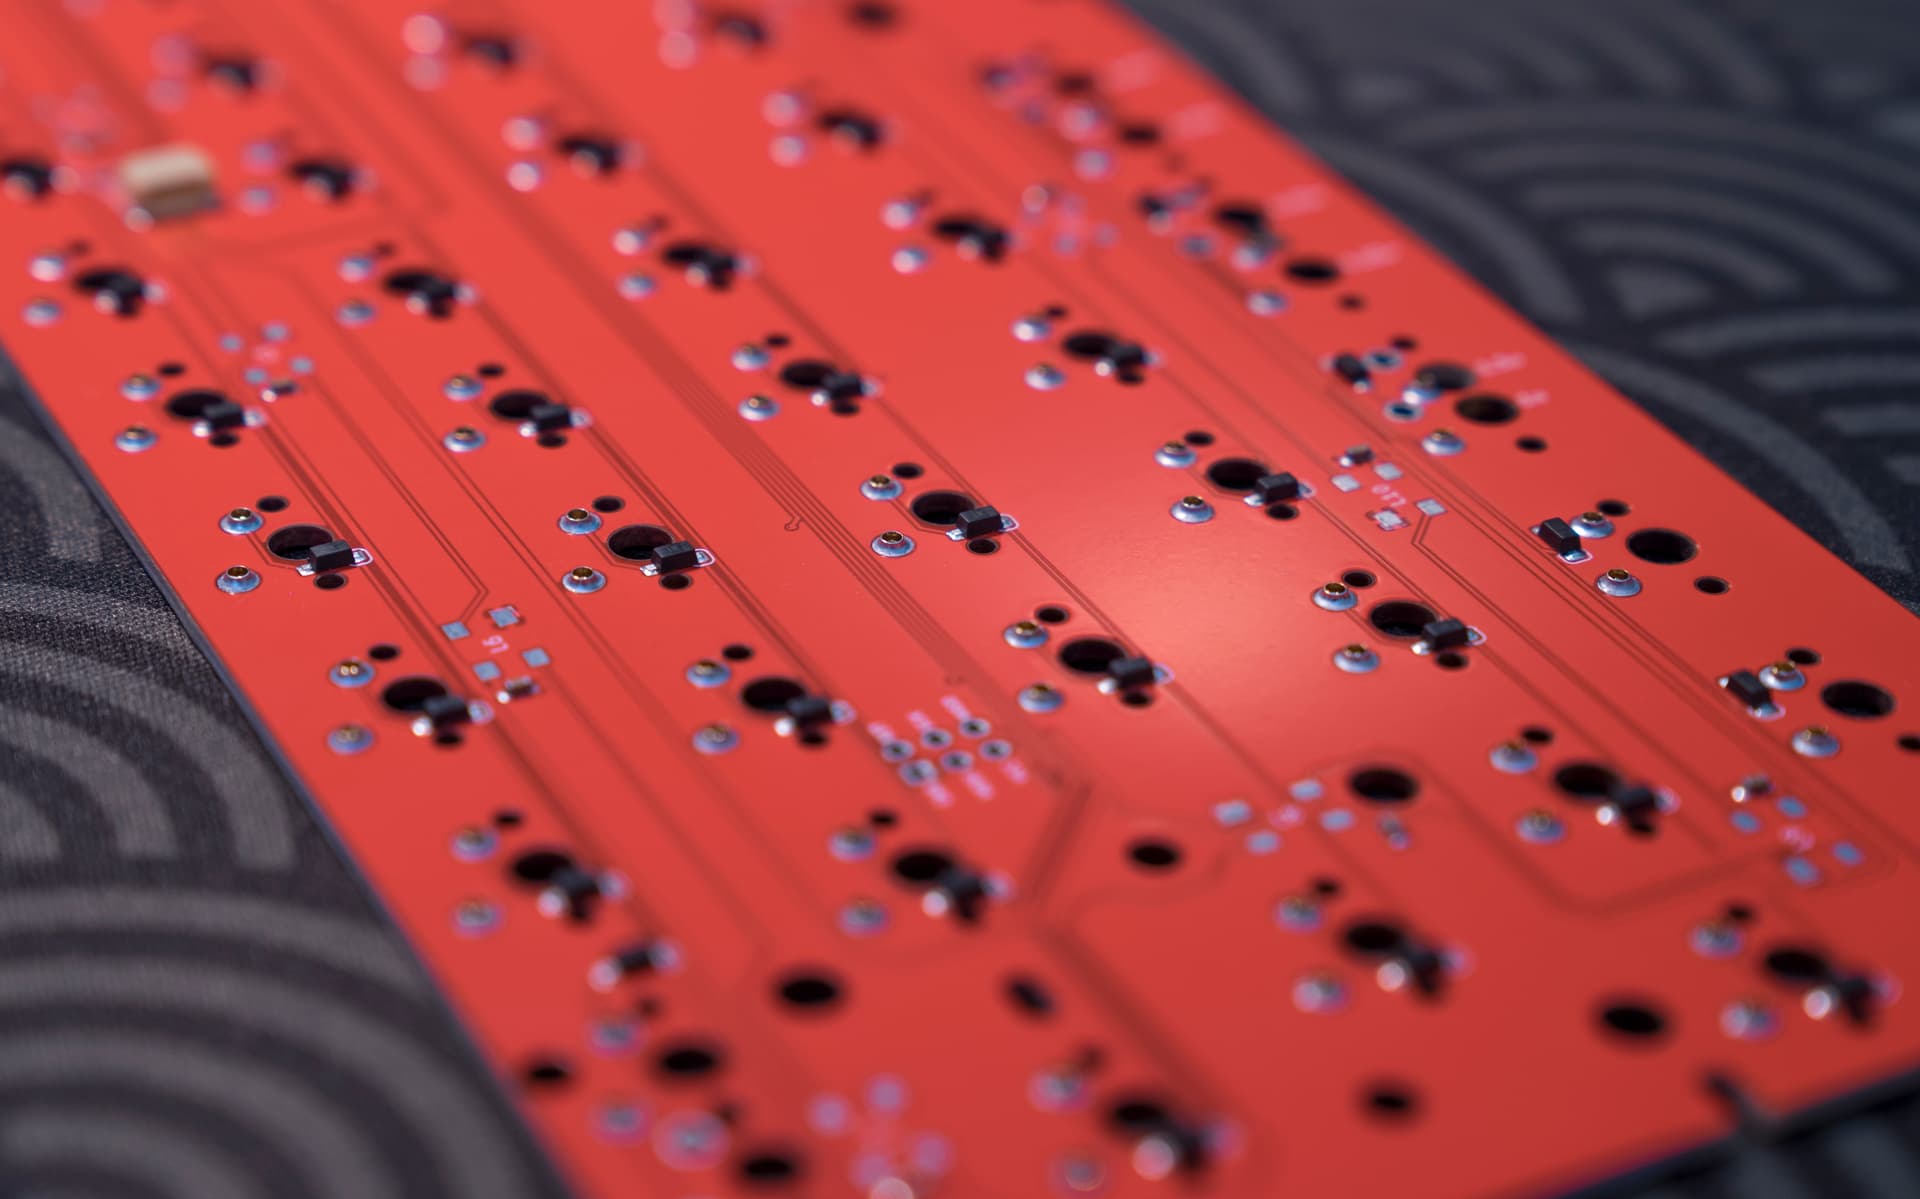
But anyways, I moved some mill max sockets around on my HMKB60. With the cost of the sockets, I’ll always put in the extra effort to reuse every one.
It was a 2u space config that I’m not really feeling much anymore.
The before:

The after:


The HMX EVA switches are so damn nice; built on an alu serpentine plate.
11 Likes
I finally got around to building the B-stock BD60 I bought a few weeks ago. The finish is immaculate and you really can’t tell it’s B-stock so I’m very happy.
I accidentally pulled off a pad when trying to remove the extra JST connectors on my PCB and had to expose and solder to a trace. My eyes are definitely not what they used to be… I wonder if it’s early onset of presbyopia or something… ![]()

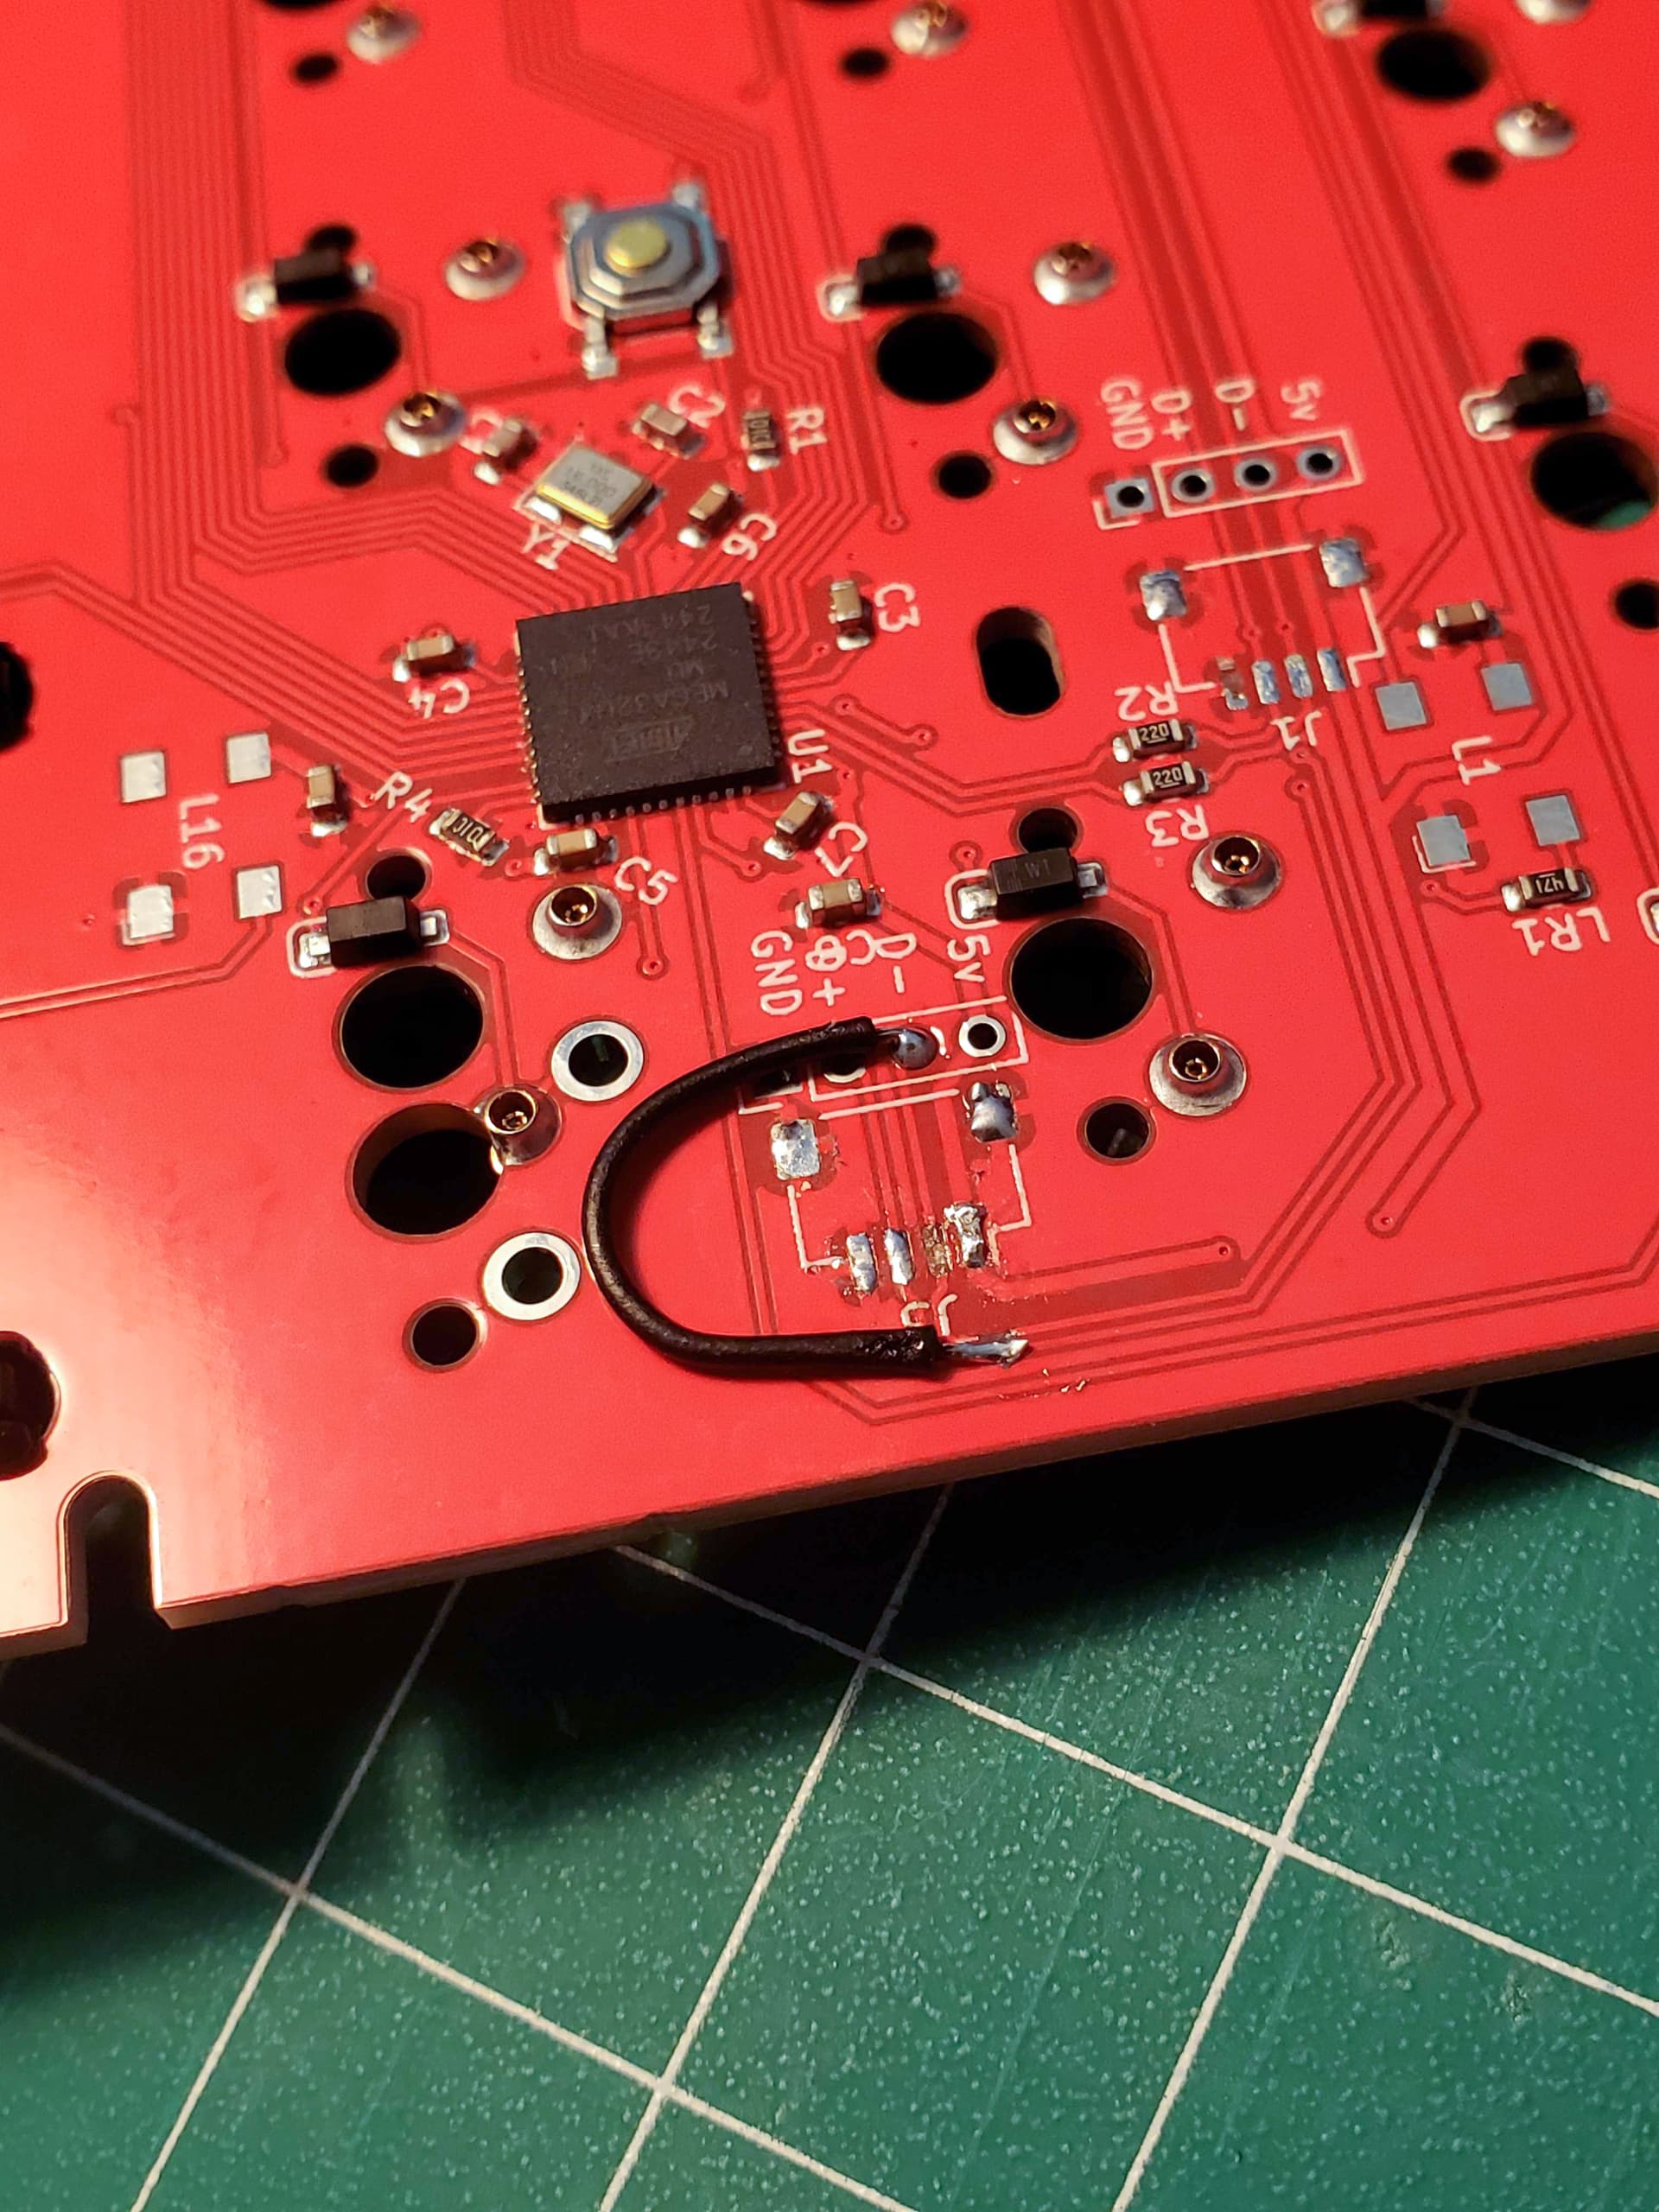
My biggest gripe with the case is the ping and resonance that is just practically impossible to entirely get rid of. Force break does not work on this case for some reason. Neither does stuffing it with polyfill, which I ended up taking out.

I think I’ve gotten most of the ping away by backing out every screw 1/3-1/2 turns. If you squeeze and push the case halves, there’s a tiiiiiiiiny amount of movement but it’s nothing crazy. Same on both BD60s I have. There’s the tiniest amount of reverb on certain keys sometimes, but for as much as I hate ping and reverb I’m surprised most of it’s gone now.
Used spring swapped Boba LT’s, L+F’d, and they sound great IMO.
10 Likes
Petrichor builds! (Sorry the lighting is bad and yellow - I’ll take better pics later…)
My fools gold with DCS Lam Alert, alu plate, no foam, Knight stabs, Hojicha Reserve tactiles (thanks pixelpusher!):
My partner’s green with XMI Vintage Support II, alu plate, plate foam, Knight stabs, Outemu Silent Lemon v3 tactile:
8 Likes
Annnd, we’ve kicked off the next project, if only digitally for now. On the possibly dubious assumption that I’ll be able to source halfway economical fabrication, I’ve started the PCB for my second of two Alps projects. I found an auction on eBay that had the FK-5001 that I rewired, but it also included a Tai-Hao TH-5539-3 (sold), a very weird F&F terminal board (documented on Deskthority but too far gone for me), and a Focus FK-7000P trackball board that might have been saved, but needed a lot more work than the 5001 (including obvious re-capping) and all for a questionable end result.
So, that one got harvested. Genuine Alps clickies, and the usual double-shot ABS keycaps with BAE, split Rshift, and Tsangan bottom row. All the missing keys were isolated to the F-Row, so that goes away, leaving me with a 60%+Numpad layout. I’ve been wanting to put my money where my mouth is and build a wooden case, and to keep that simple, I’ve compacted the layout. It ends up looking like an M0118 and an XT had a baby. I love inverted-T arrows, so my initial plan is is to map RShift (which I rarely use) and the right-side mods to be the arrows.
It’s early yet, but I like to take baby steps forward with each build (at this rate I should have something marketable in a decade or so!), so the plan for this one, in addition to the case, is to keep the PCB simple and through-hole, but to properly route the traces to a Pi Pico that I mount to the board like a normal keyboard-building weirdo, and to make the mechanical part of the pcb a touch more sophisticated than my previous one, which doesn’t even have screw-holes.
Knowing I may never make another Alps board, I’m using Ai03’s combined switch footprint library and leaving room for a normal 1.5u backslash if I use spare boards for Cherry MX builds. Alps have to use plate-mount stabs anyway. Adam Wysocki’s kbplacer kicad plugin also already saved me a bunch of time. Still lots to do though, including nudging the diodes away from the switches so I can solder them onto the upper side of the PCB.
I honestly don’t expect this one to go very quickly, but it always feels better to have something on deck.
11 Likes
Ouuu a Wooden ALPS build sounds awesome (and not something I would borrow indefinitely if I happened to visit your house).
3 Likes
This will be the craziest ALPS custom we’ll ever see !
2 Likes
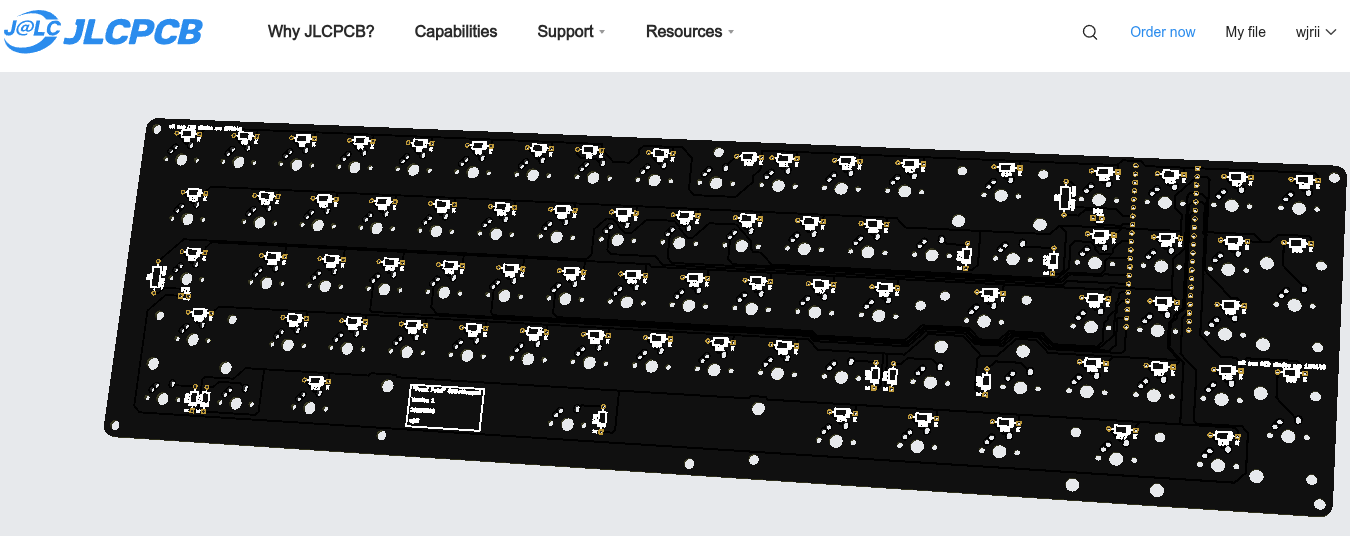
Ugh. The PCB fab business is such a weird little outlier. I guess at 80-something bucks for 5 boards, the price from JLC still isn’t bad, and definitely beats anyone else, but it’s 2-3 times higher than it was, makes extras feel like an albatross instead of a bonus, and you just cross your fingers and trust that JLC and UPS will do the DDP paperwork properly for you to get a little back. Price-wise, Lion Circuits out of India is close, depending on what tariffs are imposed, but even they can’t quite get there, and there’s a reasonable chance that the situation changes again or that the project, being obviously and solely a keyboard PCB, would be subject to the lower tariff, for as long as that lasts.
Note that this price is still for a primitive, no-components THT design, so I still have to source diodes, a couple of resistors, and a Pi Pico (all of which for now, I already have), then actually, y’know, solder the thing. Anybody trying to do anything actually sophisticated must be truly hating life.
What a stupid state of affairs. Utter uncertainty and letting big companies know you can beg or bribe your way out of some tariffs is not even a good way to use them to rebuild manufacturing, which is already highly debatable as an idea anyway (to put it mildly).
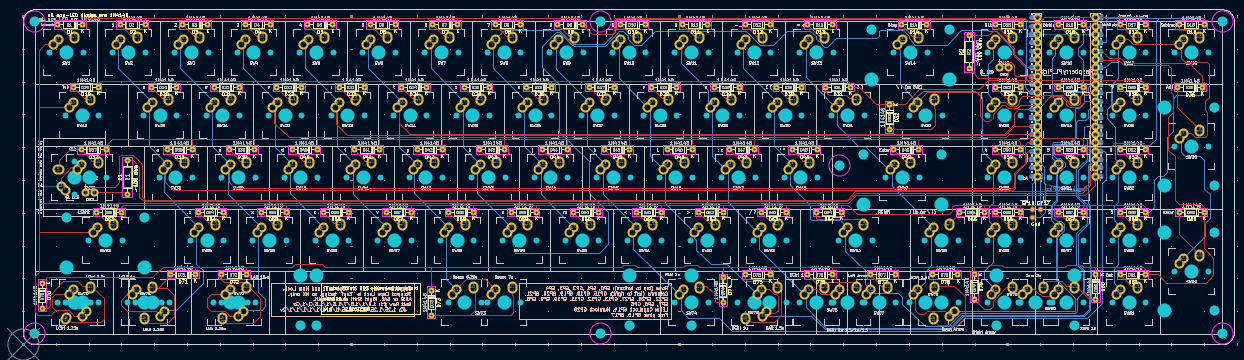
On the plus side, KiCad indicates that the matrix is sound, and I was able to squeeze in on-switch indicator LEDs for the two remaining lock keys. Some perusing of 40s forums helped me be confident that I could get the Pico mounted somewhere less disruptive than under the spacebar (front height was going to be pretty bad).
Gonna let it percolate for a bit and see if I can figure out a way to reduce the costs, if anything else occurs to me on how to improve the design within the scope of my ambitions, or if the world situation changes, but I’ll probably order the PCBs in the next week or two.
7 Likes
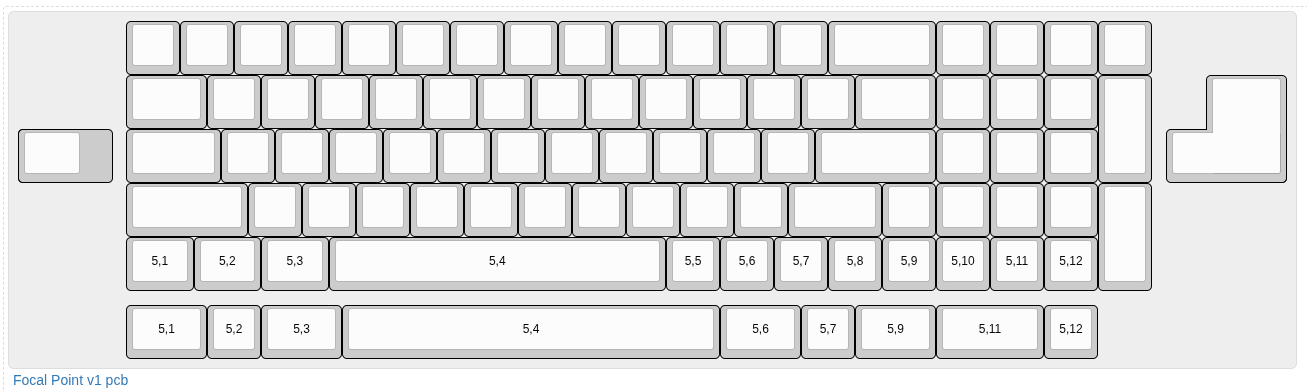
I completely re-did the matrix wiring (it’s still my own particular brand of crude, but it’s better), tidied up the silkscreen information, added support for stepped Caps (mostly… it has to be east facing to make the swiss cheese work with these footprints and therefore is MX only), and included both Tsangan 60+20 and a single compressed FRL 1800 layout that’s similar to several of my other builds but has a 6.25u spacebar and most of the usual stabilized keys. You could obviously do WKL as well, or use the full size numpad zero if you can deal with a different arrow layout.
There’s more that could go wrong now, but if they come out okay, they’ll be more versatile. Now that I think about it, it won’t be that hard to support 2.75u RShift, so I guess I’ll do that too.
5 Likes
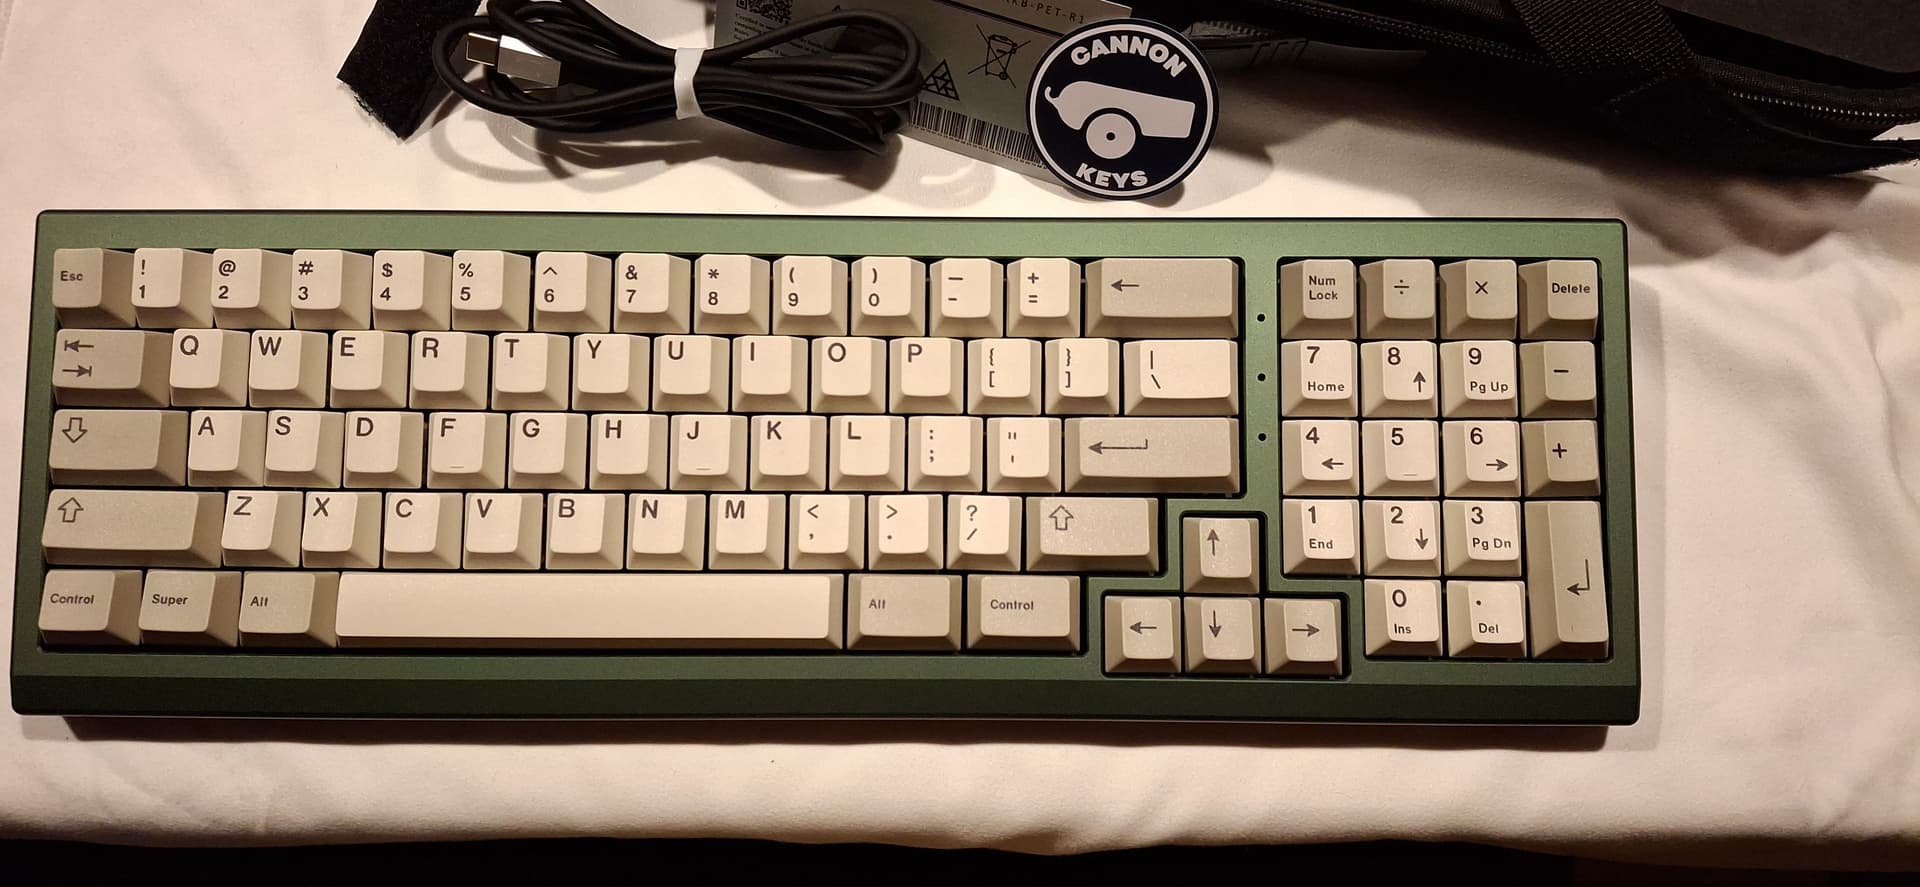
I recently got the Eden60. But R2 didn’t have the O-ring mount anymore and was purely PCB mount. So I 3d printed my own standoffs for O-ring mount and glued them in.
Blue tape for force break because I was somehow getting ping in the periphery keys–force break took care of it.
Built with HMX Lotus and TX AP stabs. Sounds and feels pretty good with a 70A o-ring. I mill max everything so I can’t o-ring mount normally–I cut the o-ring in half and have a strip on the top and one on the bottom so it isn’t pulling the plate and PCB apart. Works well for me.

It’s such a beautiful board and gorgeous green. These cell phone pictures are horrible; I’ll have to take some proper photos another day.
9 Likes
Took some better pics!


11 Likes
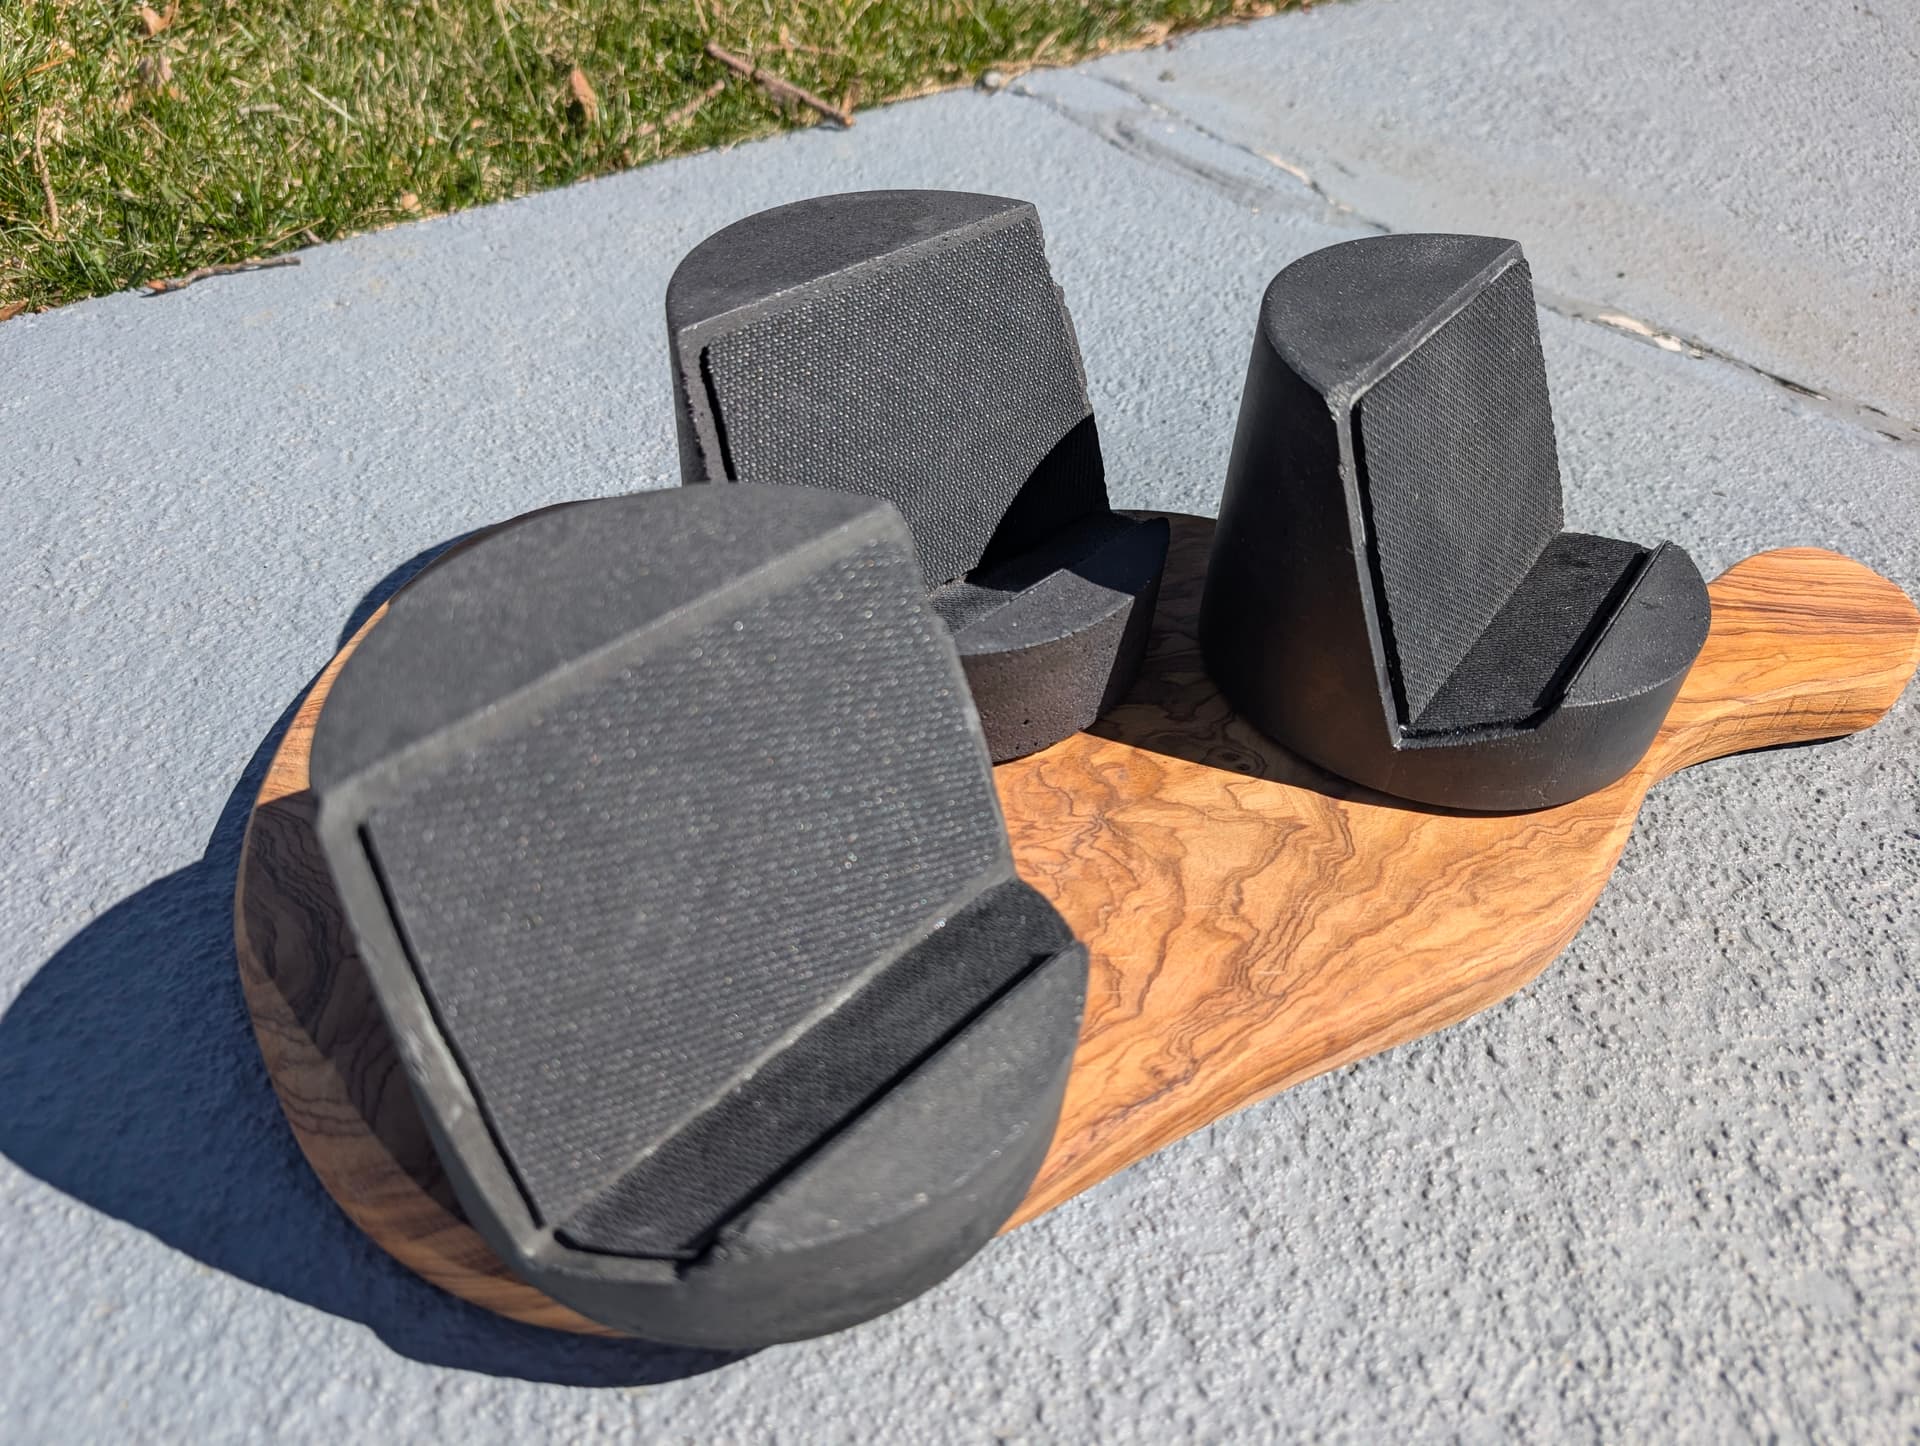
I feel like I can get a cool similar but different texture if I use grout instead of cement ![]()
1 Like