How could I forget Kiwis! I’d say nearly the same about them as I did with the Ambers; a few might benefit from filming but don’t need any help with smoothness. I do think the lubing method is probably different between the Ambers and Kiwis, but they’re otherwise both extra-nice T1 variants.
With the U4s it seems like it might depend where you get them, and if you get them as parts or complete switches. It’s also possible that there have been iterative updates along the way that have changed those factors - I believe the stems have had a few slight revisions since the translucent prototype versions were up on Daily Clack.
A newer batch of U4s I got felt a bit different to me, so I compared them - vs my previous ones, the new ones felt more tactile but less clean - that could come down to all kinds of things but might just be a difference in factory lube (or lack thereof). I know at least some of the Boba tactiles I’ve gotten have light factory lube on the legs, just to keep the aggressive bump from being too crunchy. I’m wondering how much inconsistency in the application of that lube may or may not play into the difference in sound and feeling.
man, @Deadeye it sounds like we have very similar tastes in switches.
If you would have asked me to list what switches I would consider using unlubed, unfilmed i would have said:
T1 Amber
Momoka Frog
Boba U4T
Aquaking (but as you mentioned, the inconsistency kinda sucks. And they’re really a tad too heavy for my liking)
Moderate consideration for low fussy switches that are close but with issues:
TTC wild are good and smooth but sound so clacky and high pitched.
KTT Strawberry are close, but I’m not convinced I like the sound profile
Gateron Pros sound good but still feel and sound better with lube
Durock Cobalt are nice sounding but the short travel and wobble are an issue for me
I could live with stock pewters, but the leaf ping is so annoying.
Still have really high hopes for the TTC Matrix-01s.
I have some Ice Candy switches with the Nylon stems coming next week. I like the regular ones, but the stick slip on them is pretty strong on slow or off-center presses. Hopefuly the nylon stem will help.
Definitely sounds like I need to try the ACE switches.
Ha, yes! I’d put the Cobalts in the same “almost” category - I really like the them for the feel and plastic sound, but they’ve definitely got some noise going on - I’m thinking it’s spring chatter, like the coils just brushing stuff inside as they wiggle, or maybe just transferring energy into the stems without enough lube on the ends.
I haven’t tried the Wilds but I’d say the same about the Gold Pinks. “Clink-y” is the onomatopoeia that comes to mind. Definitely curious about the Matrix-01s, as well as the ones they’ve done with Akko lately.
I’ve also been curious about those Ice Candy switches - the ones I was looking at had the Nylon stem, what came in yours at first?
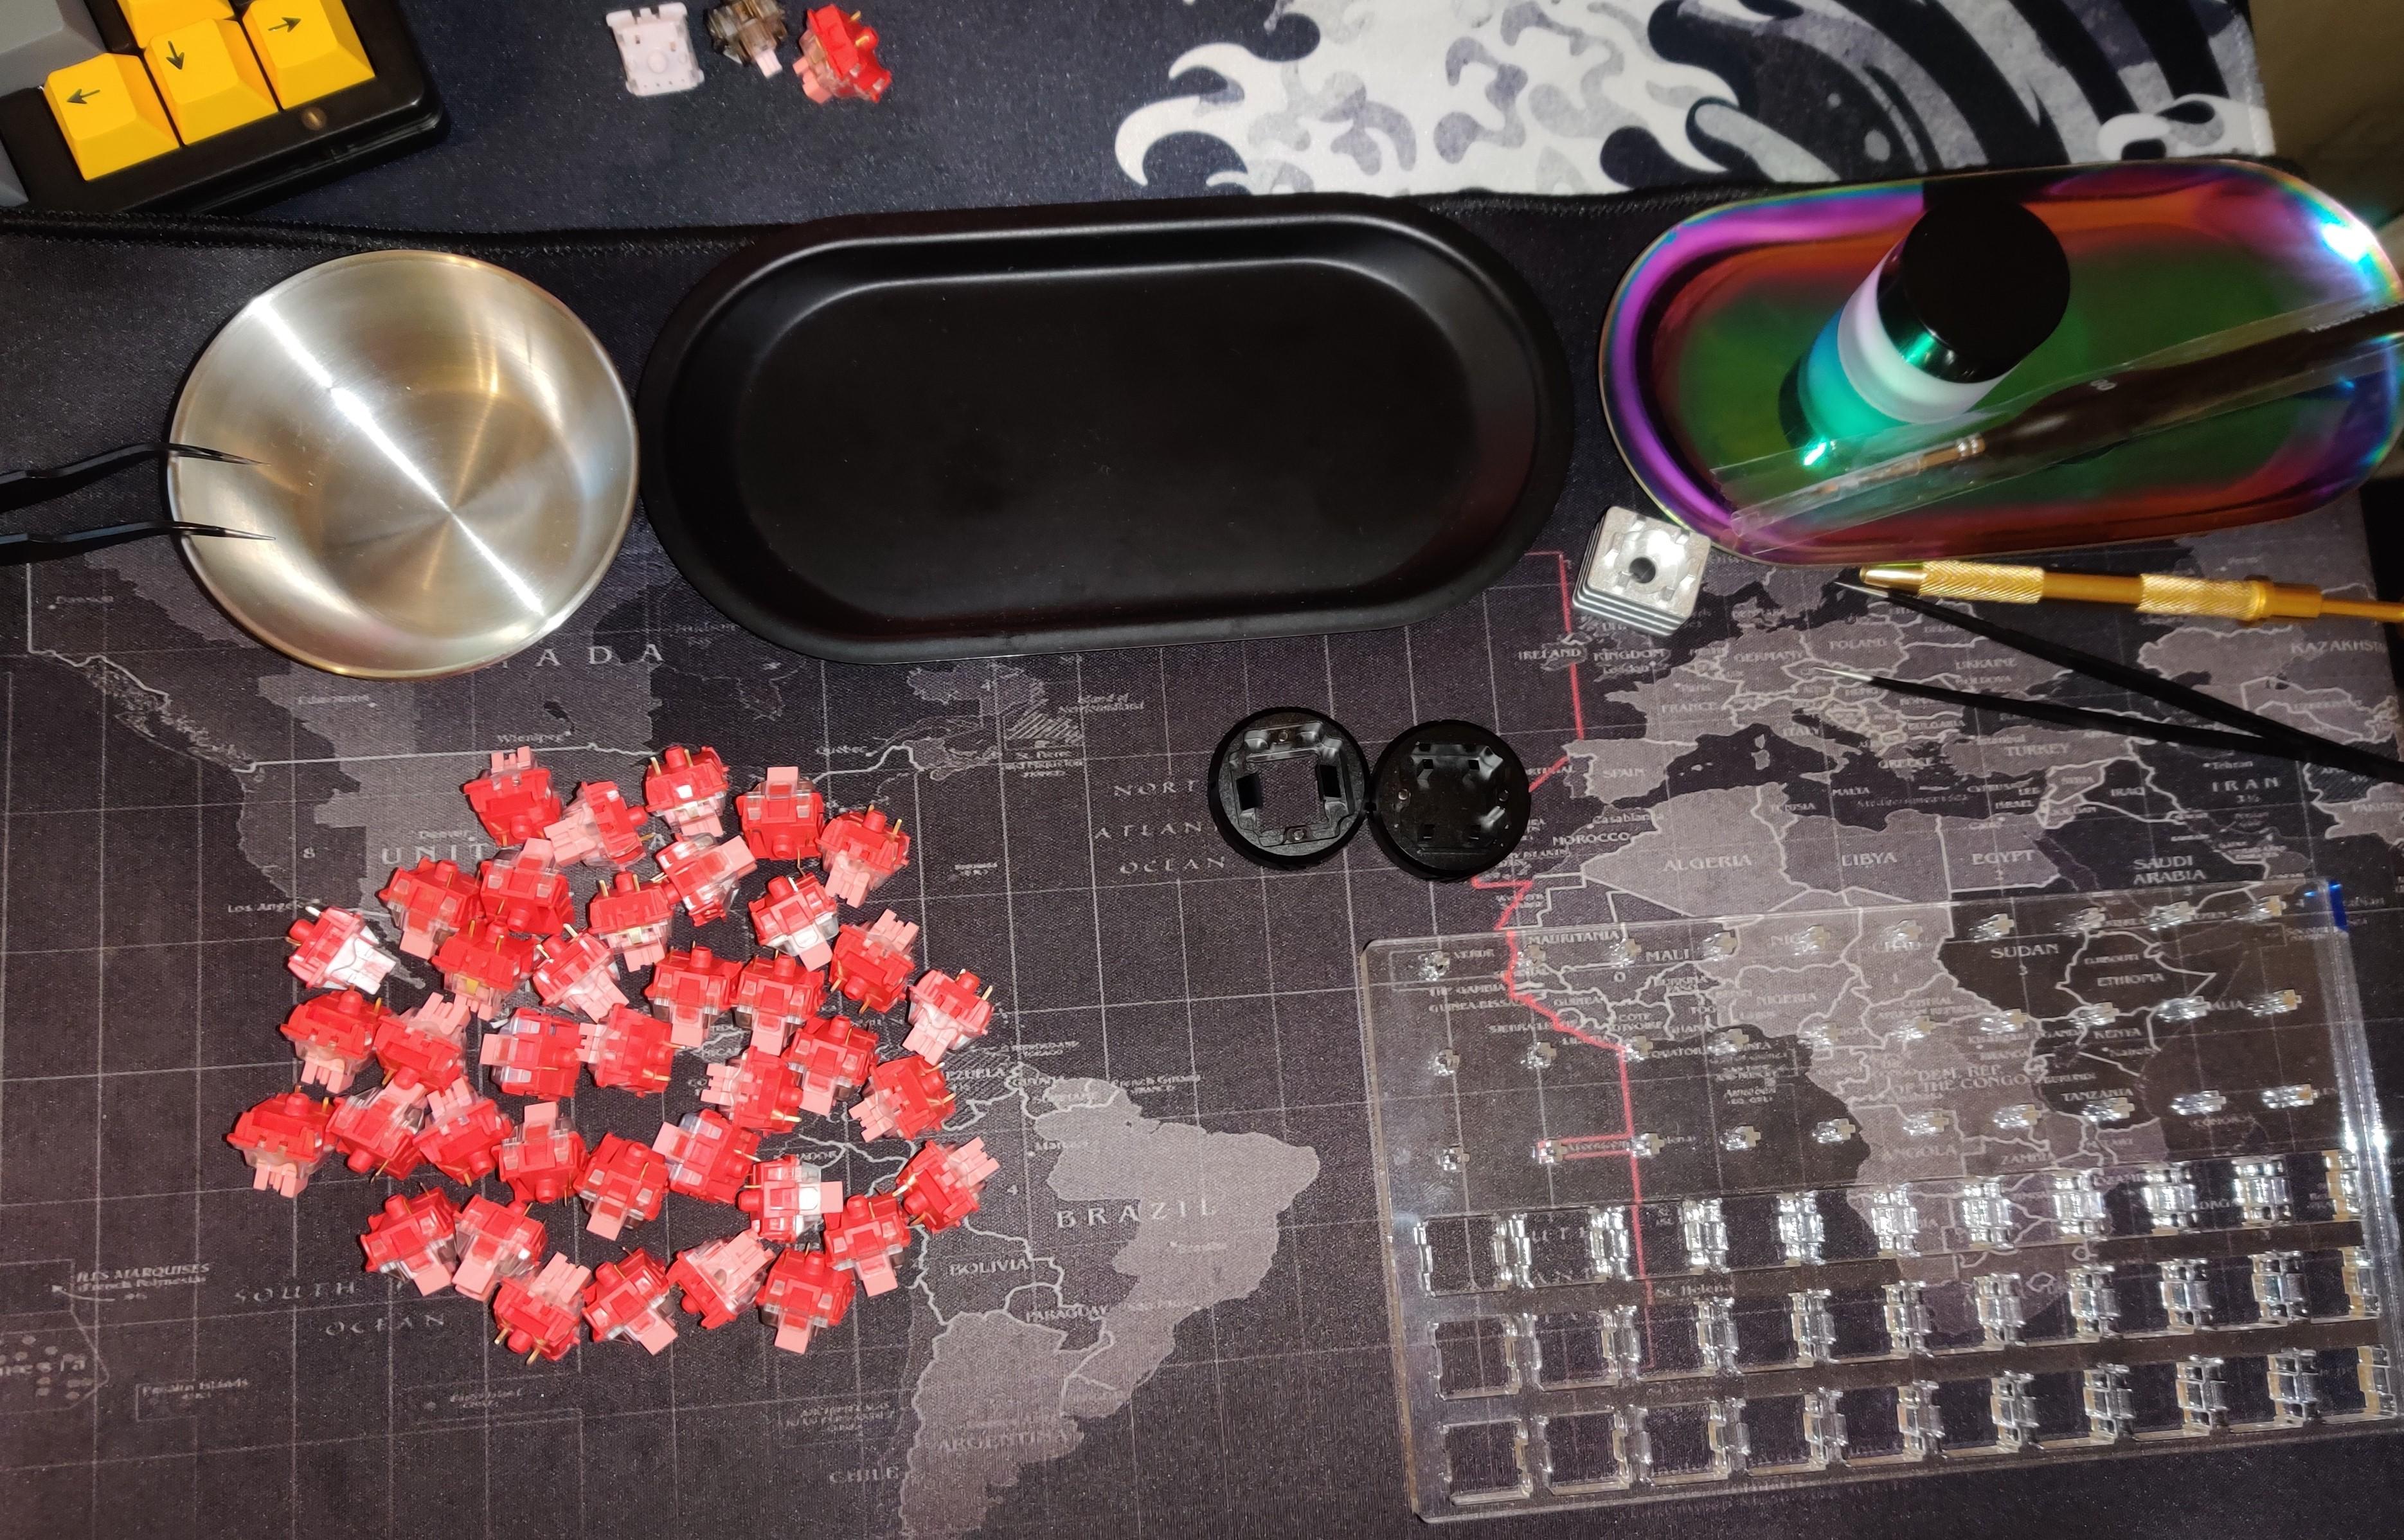
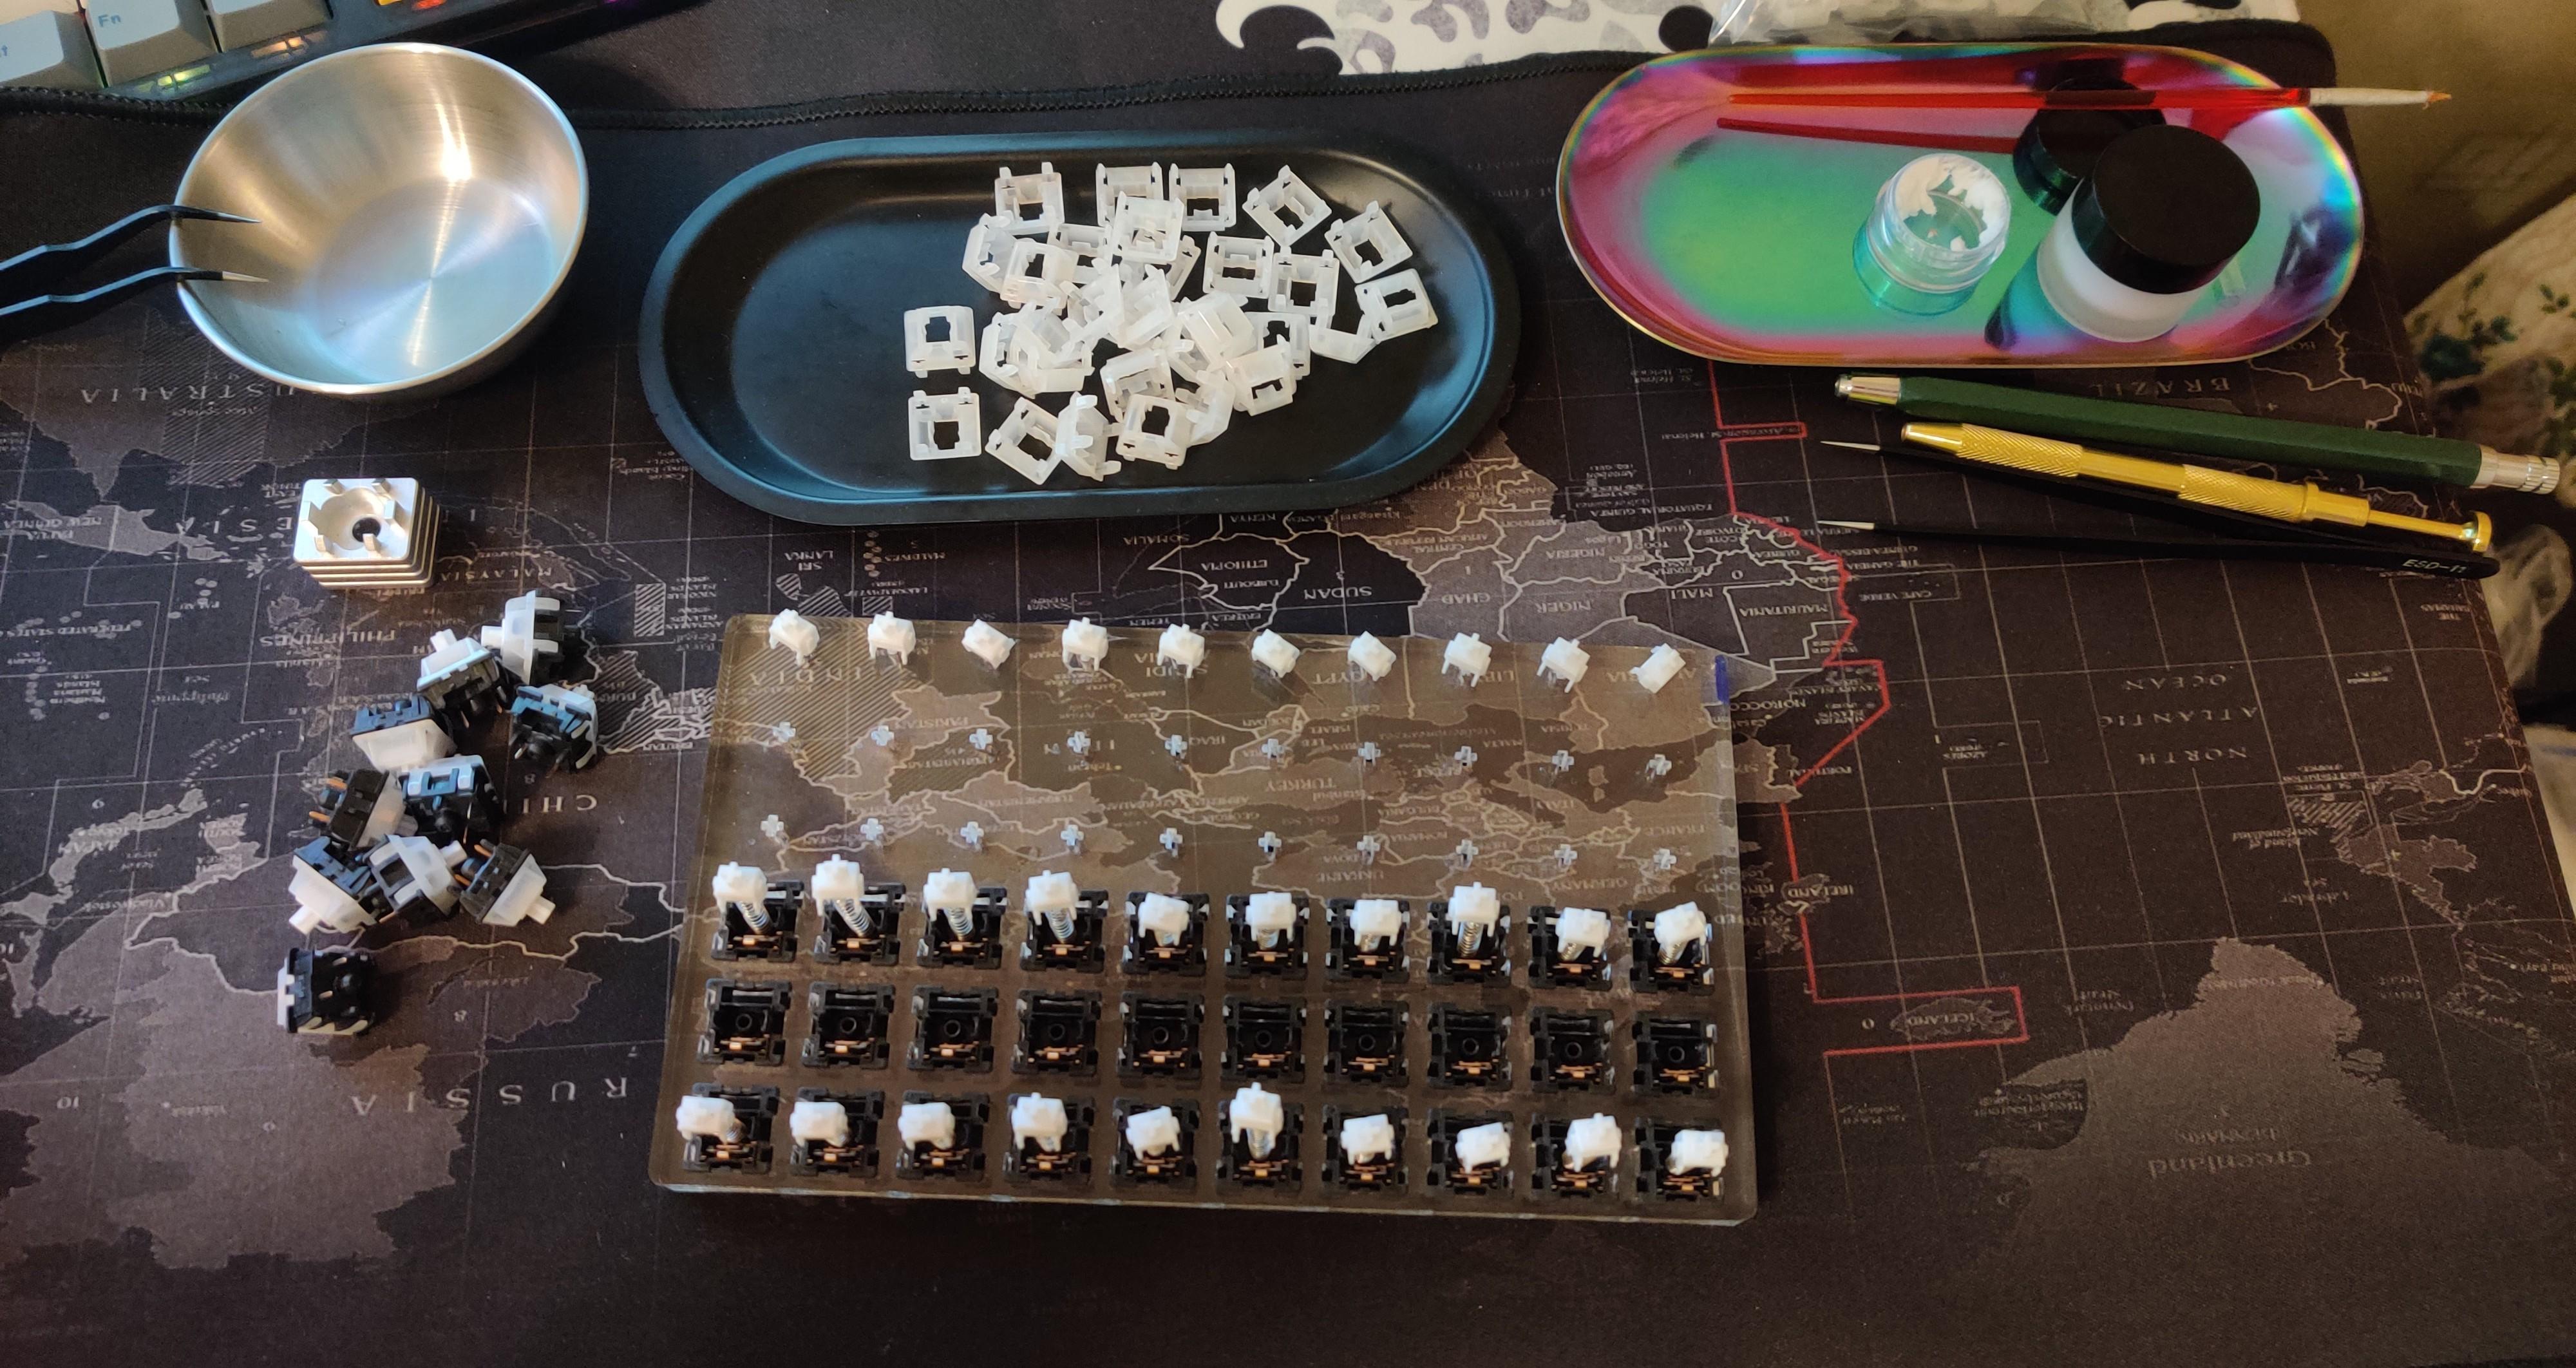
Piggybacking on the effort:results discussion, I finished lubing and filming these TTC Wilds yesterday, and…the combination of double-staged springs and box stems made this way more time-consuming than usual, which seems especially vexing because the smoothness differential before-and-after is super negligible.
However, as @pixelpusher mentioned, TTC Wilds are clack monsters, and lubing and filming elevated (i.e., deepened and dampened) the sound profile of these switches, so in the end it was worth it for this particular switch.
Generally, I don’t bother lubing switches (right away) for hot-swap boards but I always lube and film for solder boards. There’s something about the semi-permanence of soldering that makes the tediousness of lubing worthwhile.
After 400 pieces of switches (grease), it goes on easily. The main thing is that I realized that here, as in any work, it is important that there is a convenient good tool. Good brushes, tweezers, grease jars or boxes, grease station, Switch Opener.
I include streams such as Taehi. There is no time to simply watch 2-3 hours separately. And the lubrication is just 2 hours, two things at once.
I think I mentioned last time, the blue light through the orange switches looks neat.
This thing sounded rough before modding. I don’t have a recording of the complete board, but this is what the stock TTC Gold Brown V3s sounded like up-close:
Imagine that on every key, plus massive stab rattle and you’ll get the picture.
I lubed the switches with some 106, and I think they’re actually quite nice now. I lubed the stab housings with a 105/205 mix, with a pretty generous coat of XHT-BDZ one the wire-ends. The case got some PE foam and a couple lead weights nicked from a GMMK fullsize, the PCB got a wide piece of masking tape, and the lock-keys got some special 80g clickies to simulate old lock switches.
It’s no Epoch - but it’s come a long way. Here’s a poorly-recorded typing test:
This board is a gift for my dad, who currently uses Velocifire’s first TKL model, equipped with Outemu browns. It’s probably the worst-feeling mechanical keyboard I have ever used, barring a few bottom-of-the-bin finds from the outdoor recycling center. I got it for him as a gift years ago when I first got into keebs, after over-hearing him mention he wished he had something with back-lit keys. I don’t think I’d even modified a keeb yet when I got him that one, but I could tell it was pretty meh even compared to my Amazon GamerSlab87.
He loved it anyway and still uses it for its back-lighting, but I figured it was about time that pops properly benefited from his son being a keeb nerd.
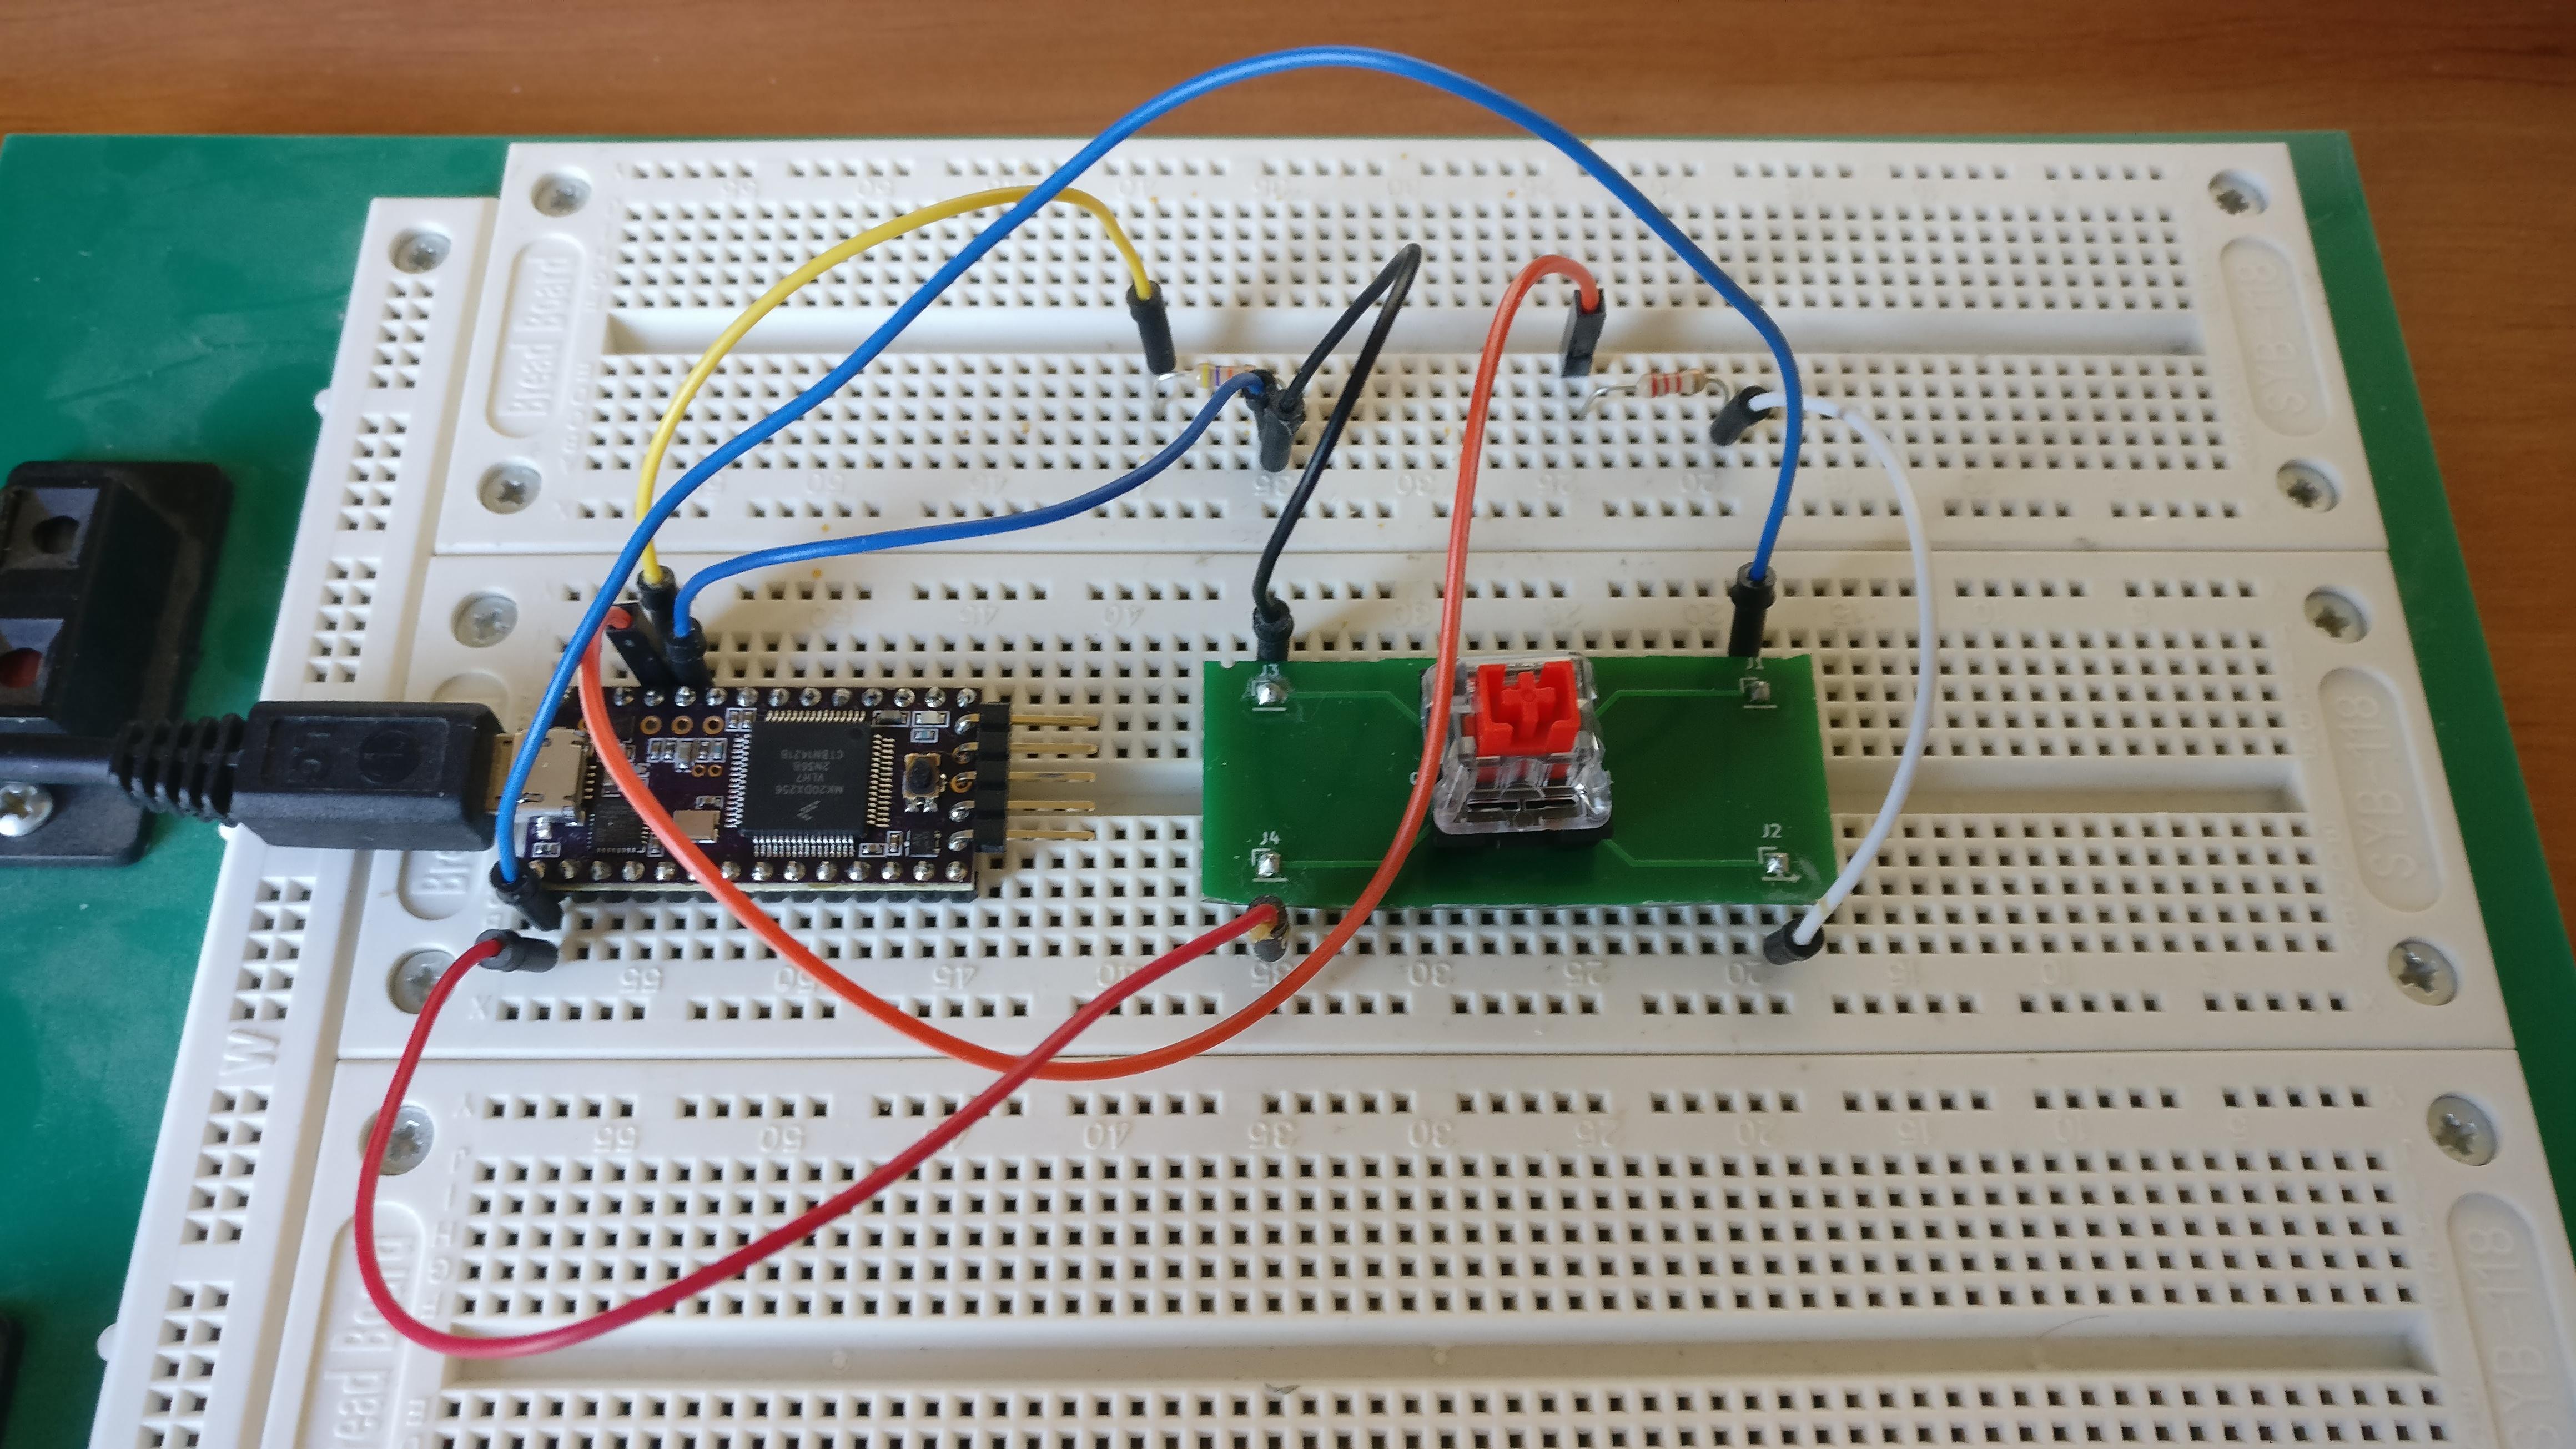
My “stab” at stabilizer station in FR-4 and aluminum. Aluminum ones were very difficult to solder due to the heat dissipation. Was able to solder the hotswap sockets on by turning my iron up all the way and using flux. Overall I like the aluminum ones but I think most people will prefer the FR-4 for ease of assembly and to closer represent the actual keyboard.
(For all the time I spent on making the files for this I did miss rounding one side of the silkscreen for the spacebar it, always room for improvement)
First tried the old fashioned way of using a fine iron tip and plenty of flux. Had some success, although one of the diodes got stuck to my iron tip and melted. The pins on the USB connector are so fine I really struggled.
So next I experimented with using a hot plate. I happen to have a hot plate for grilling meat and veggies at the dinner table and although I thought it might not get hot enough, I only needed to go to half power to get my solder paste to melt.
I used an metal bracket to sit he PCB on so I could easily remove it with a pair of tweezers, but actually I could just have turned the hot plate off and let it cool down slowly.
The final product had a couple of solder bridges on the USB pads that I had to carefully fix with my iron. My had really isn’t steady enough for this super fine work, but with flux, a magnifier, and a bit of patience I could just about manage.
 elevated (i.e., deepened and dampened) the sound profile of these switches, so in the end it was worth it for this particular switch.
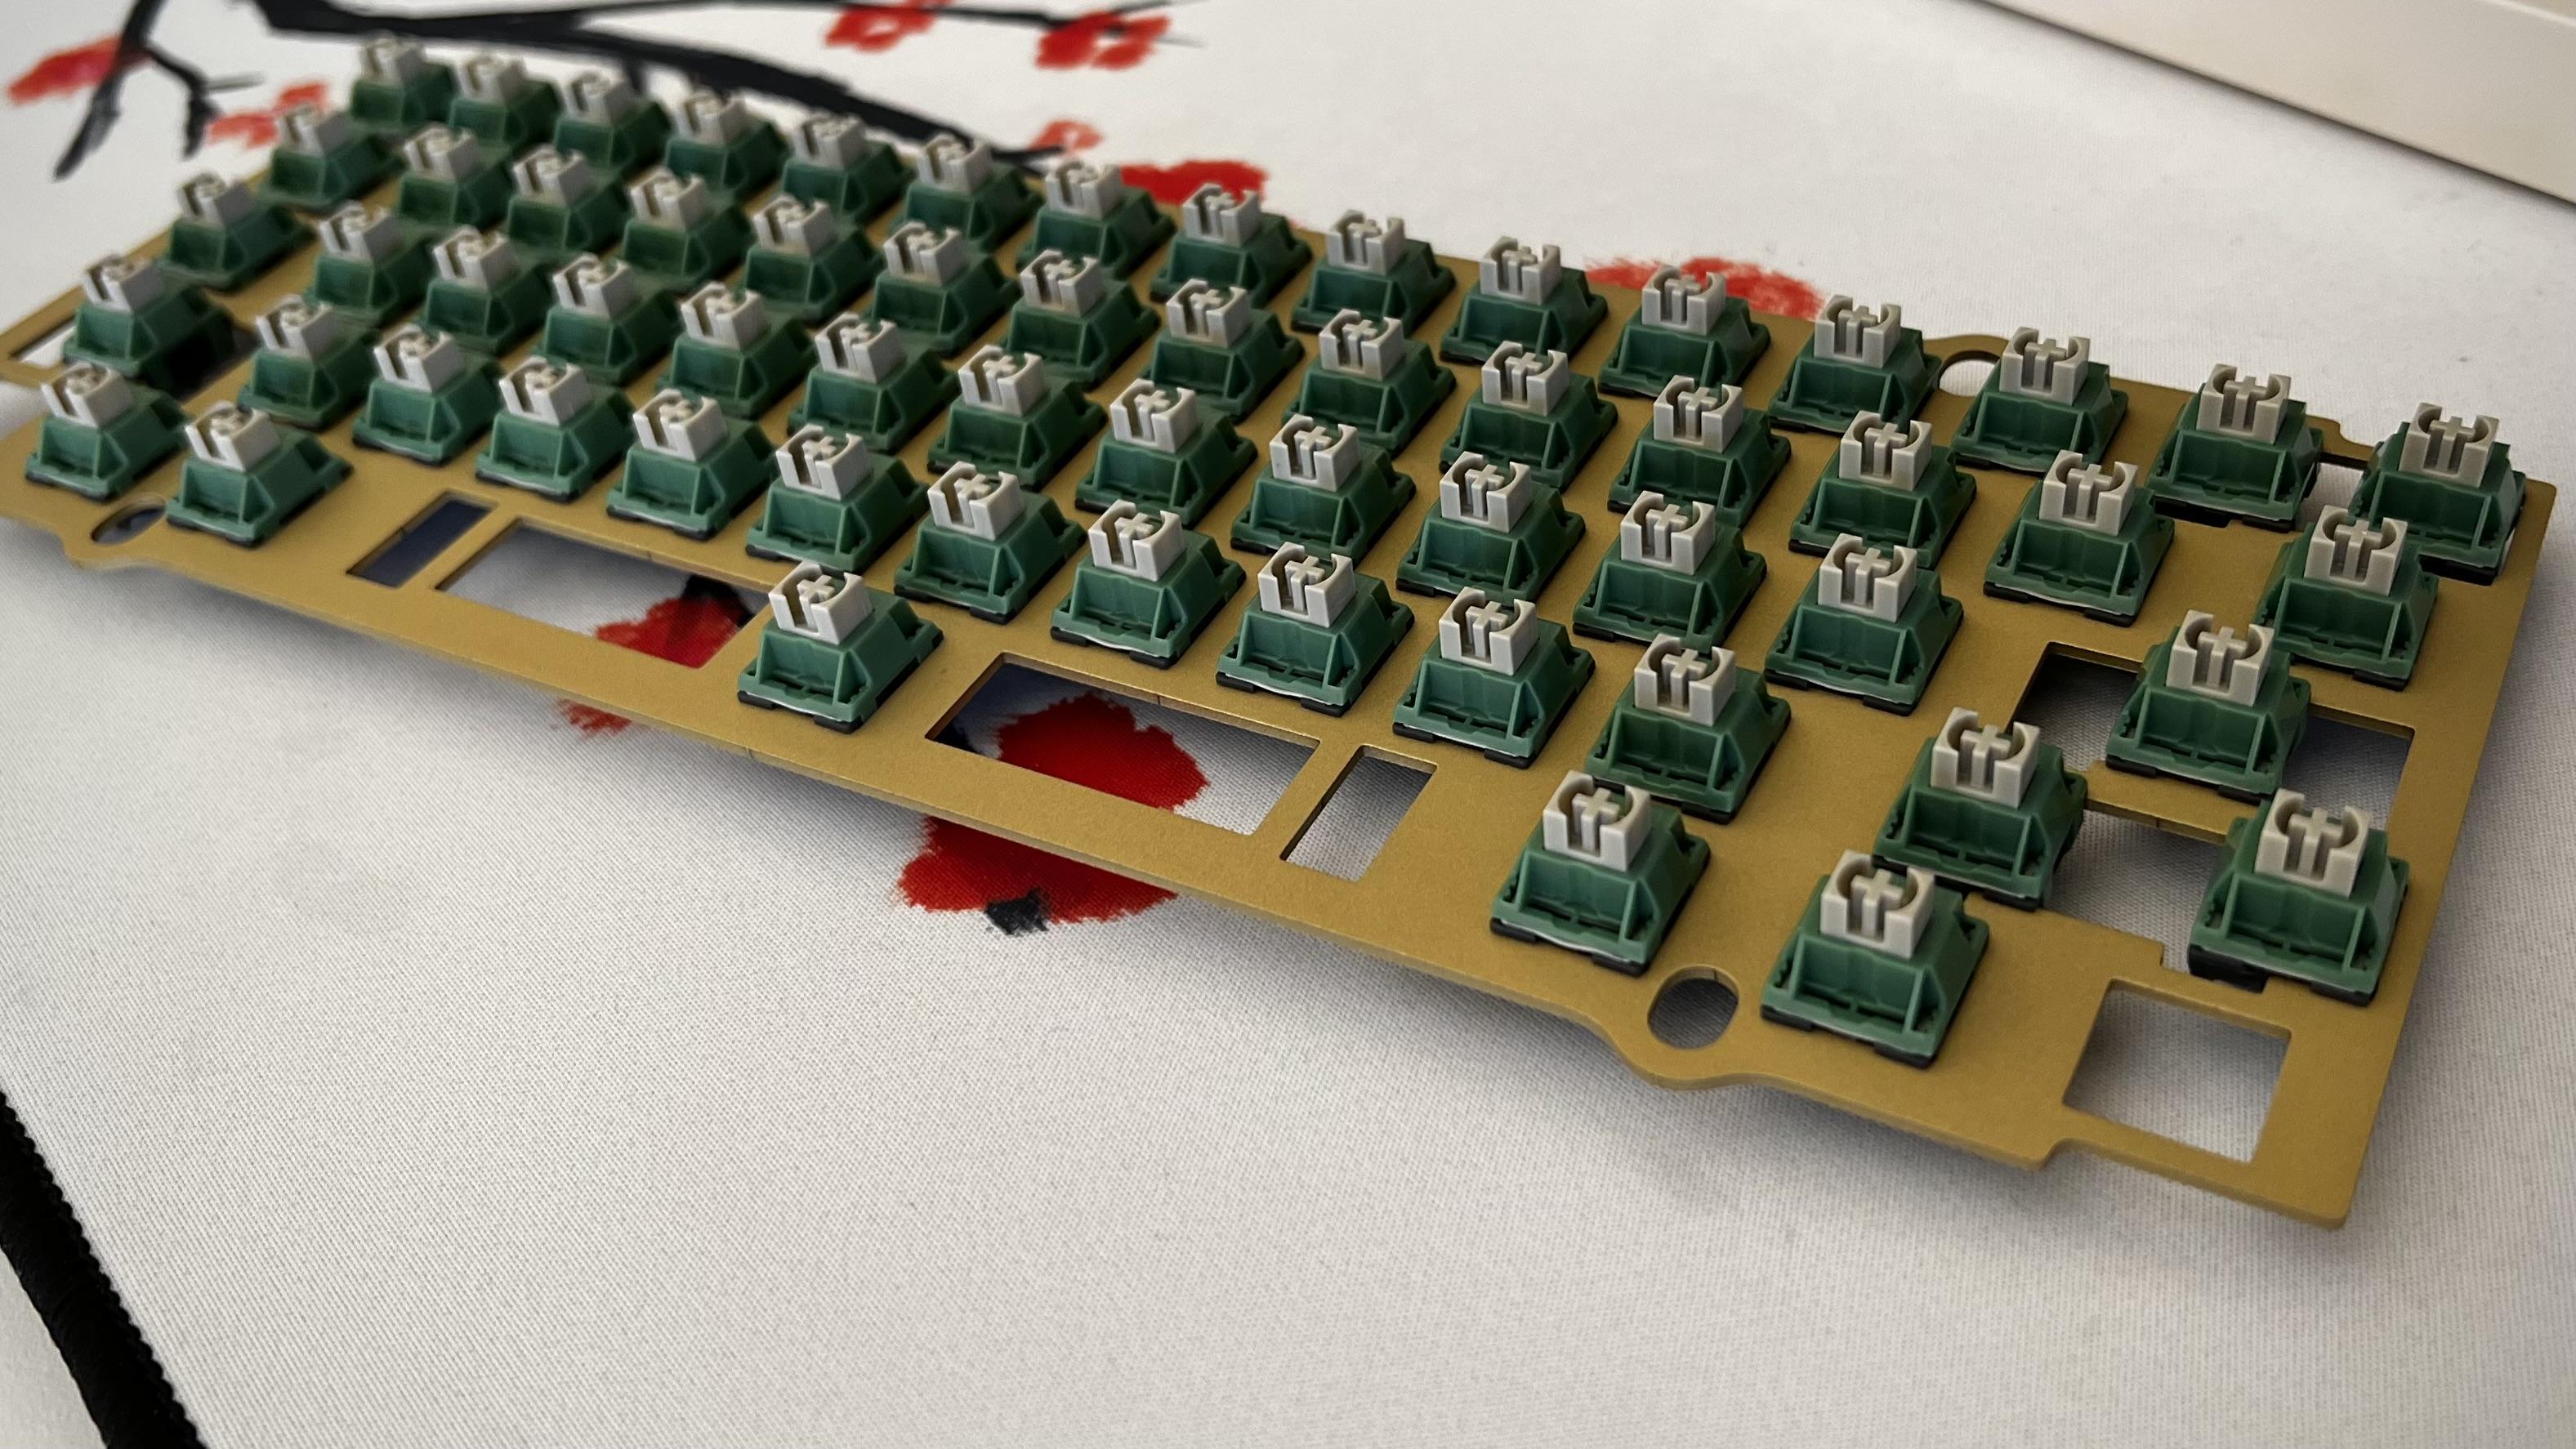

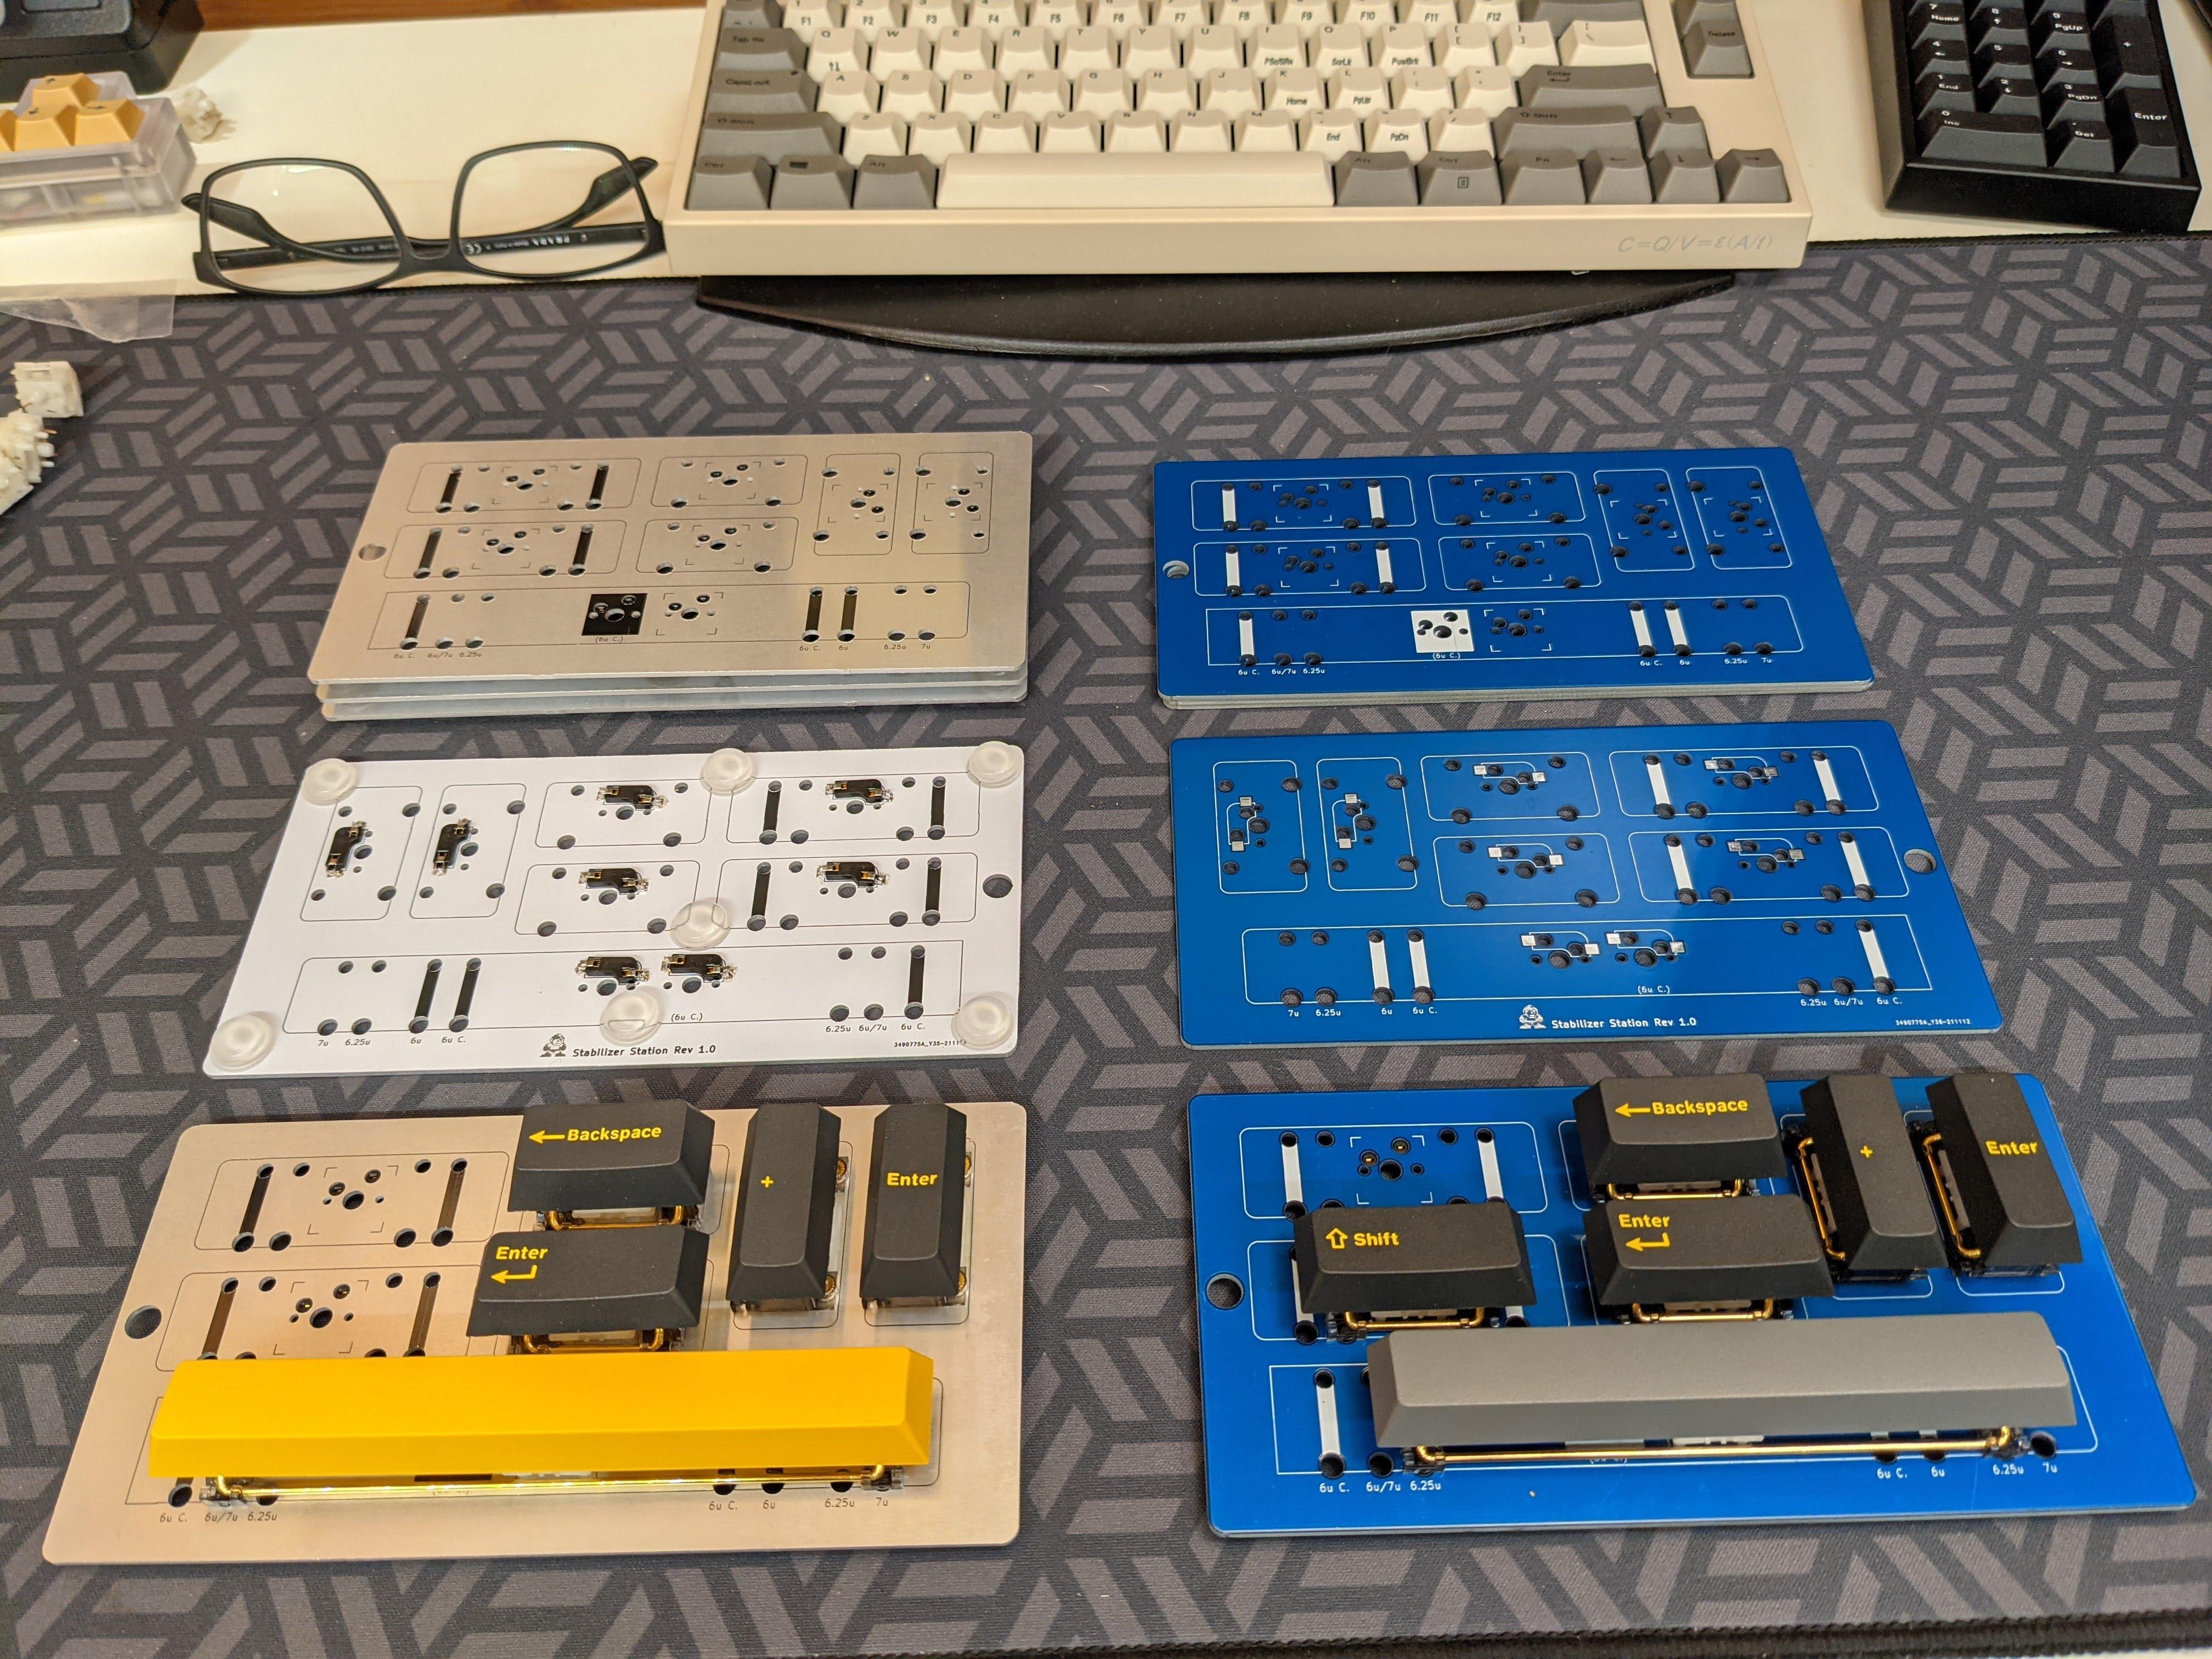
 always room for improvement)