Oh yeah, very nice work there! The cut outs & fitments for the stab holders looks great & should work perfectly on a full plate. I’m gonna need to get those measurements off you for the stab cut outs so I can use them in future custom ALPS plates! Not knowing the proper stab placement other than in relation to old stock plates has always held me back from a few really cool ALPS projects I wanted to try. Anyways just glad to see you having fun with ALPS boards man! Love to see it!
Still working on improving Welles- doing renders, etc.
Also working on a new set, wonder what everyone thinks of it…

5 Likes
Love the inclusion of 1u BS and 2u shift ![]()
1 Like
And is that a 1.75u Enter and a 1.25u R2 key of any kind whatsover? Thank the maker!
Lovely colorway as well.
1 Like
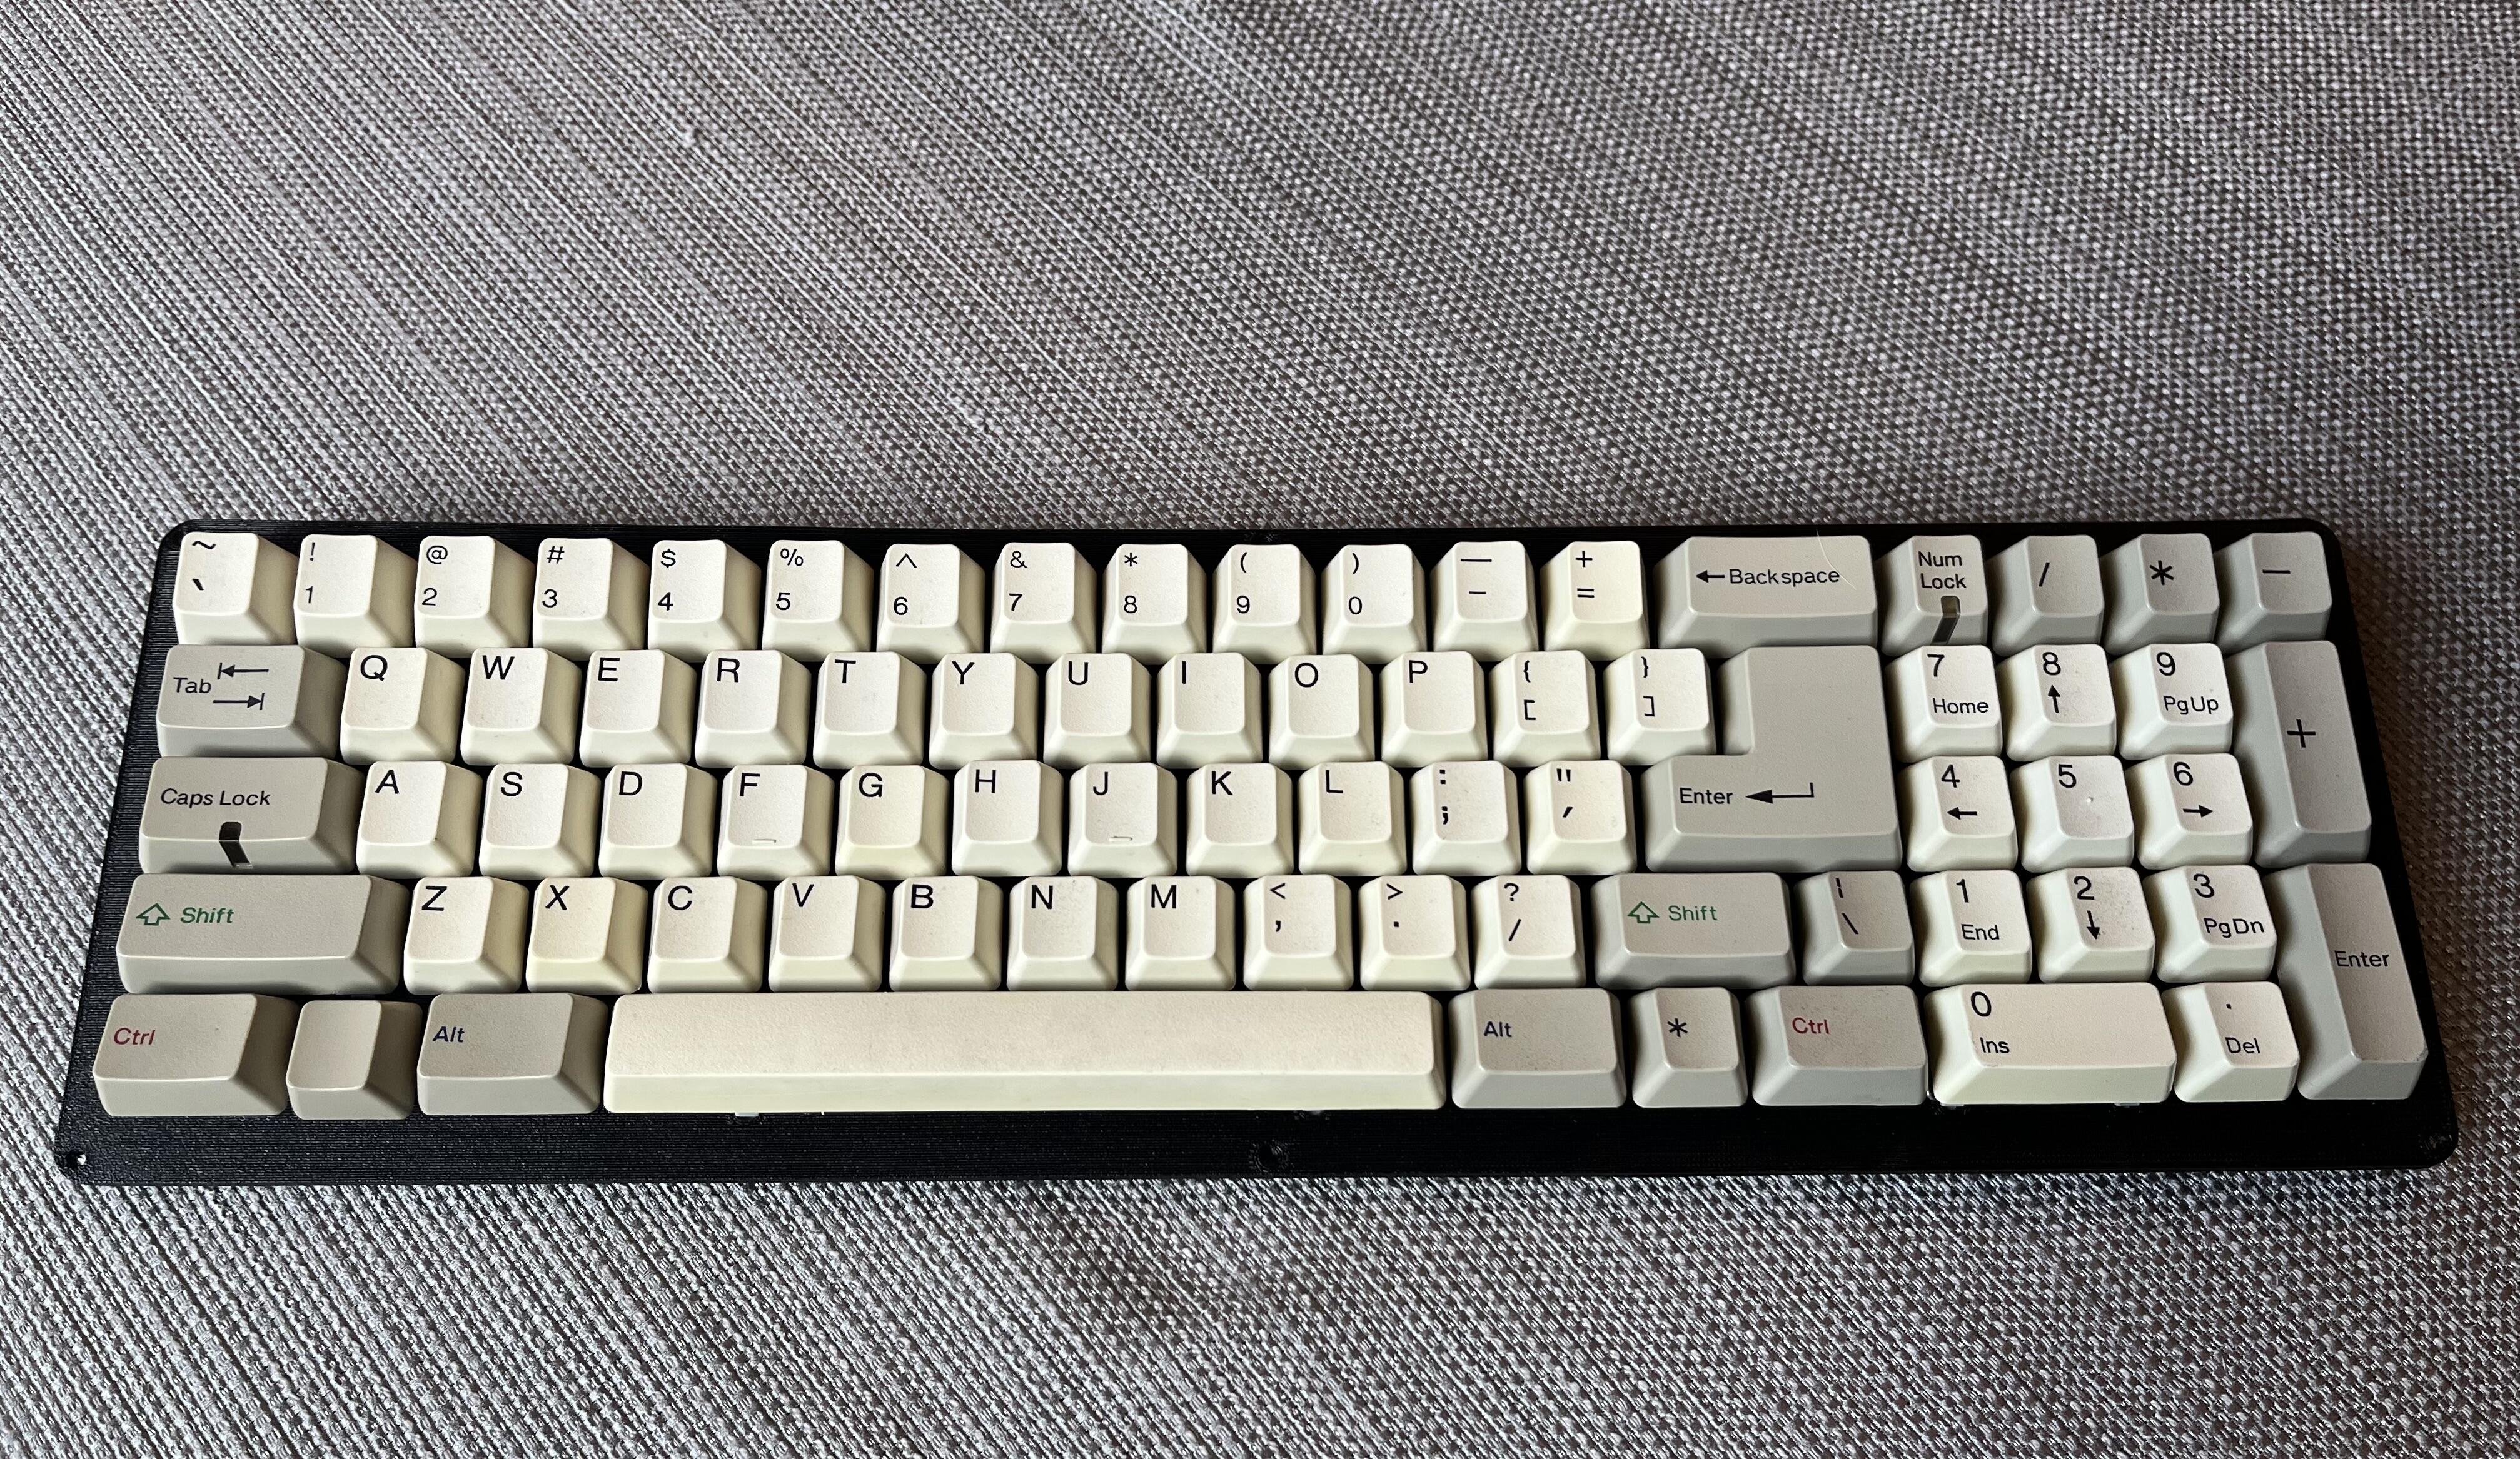
REcently got my new 3D printer set up, and boy oh boy, is a big bed and auto-leveling nice. I was just able to take my plate design, intended for the laser, and extrude it as a 2.8mm plate with numerous 1.4mm relief cutouts to allow stabs and switches to fit a little better. I still used hot glue on the stab inserts, especially on the two where I didn’t confirm the plate generator put them on the same side that the original plate did. The new drilled and filed holes are… interesting.
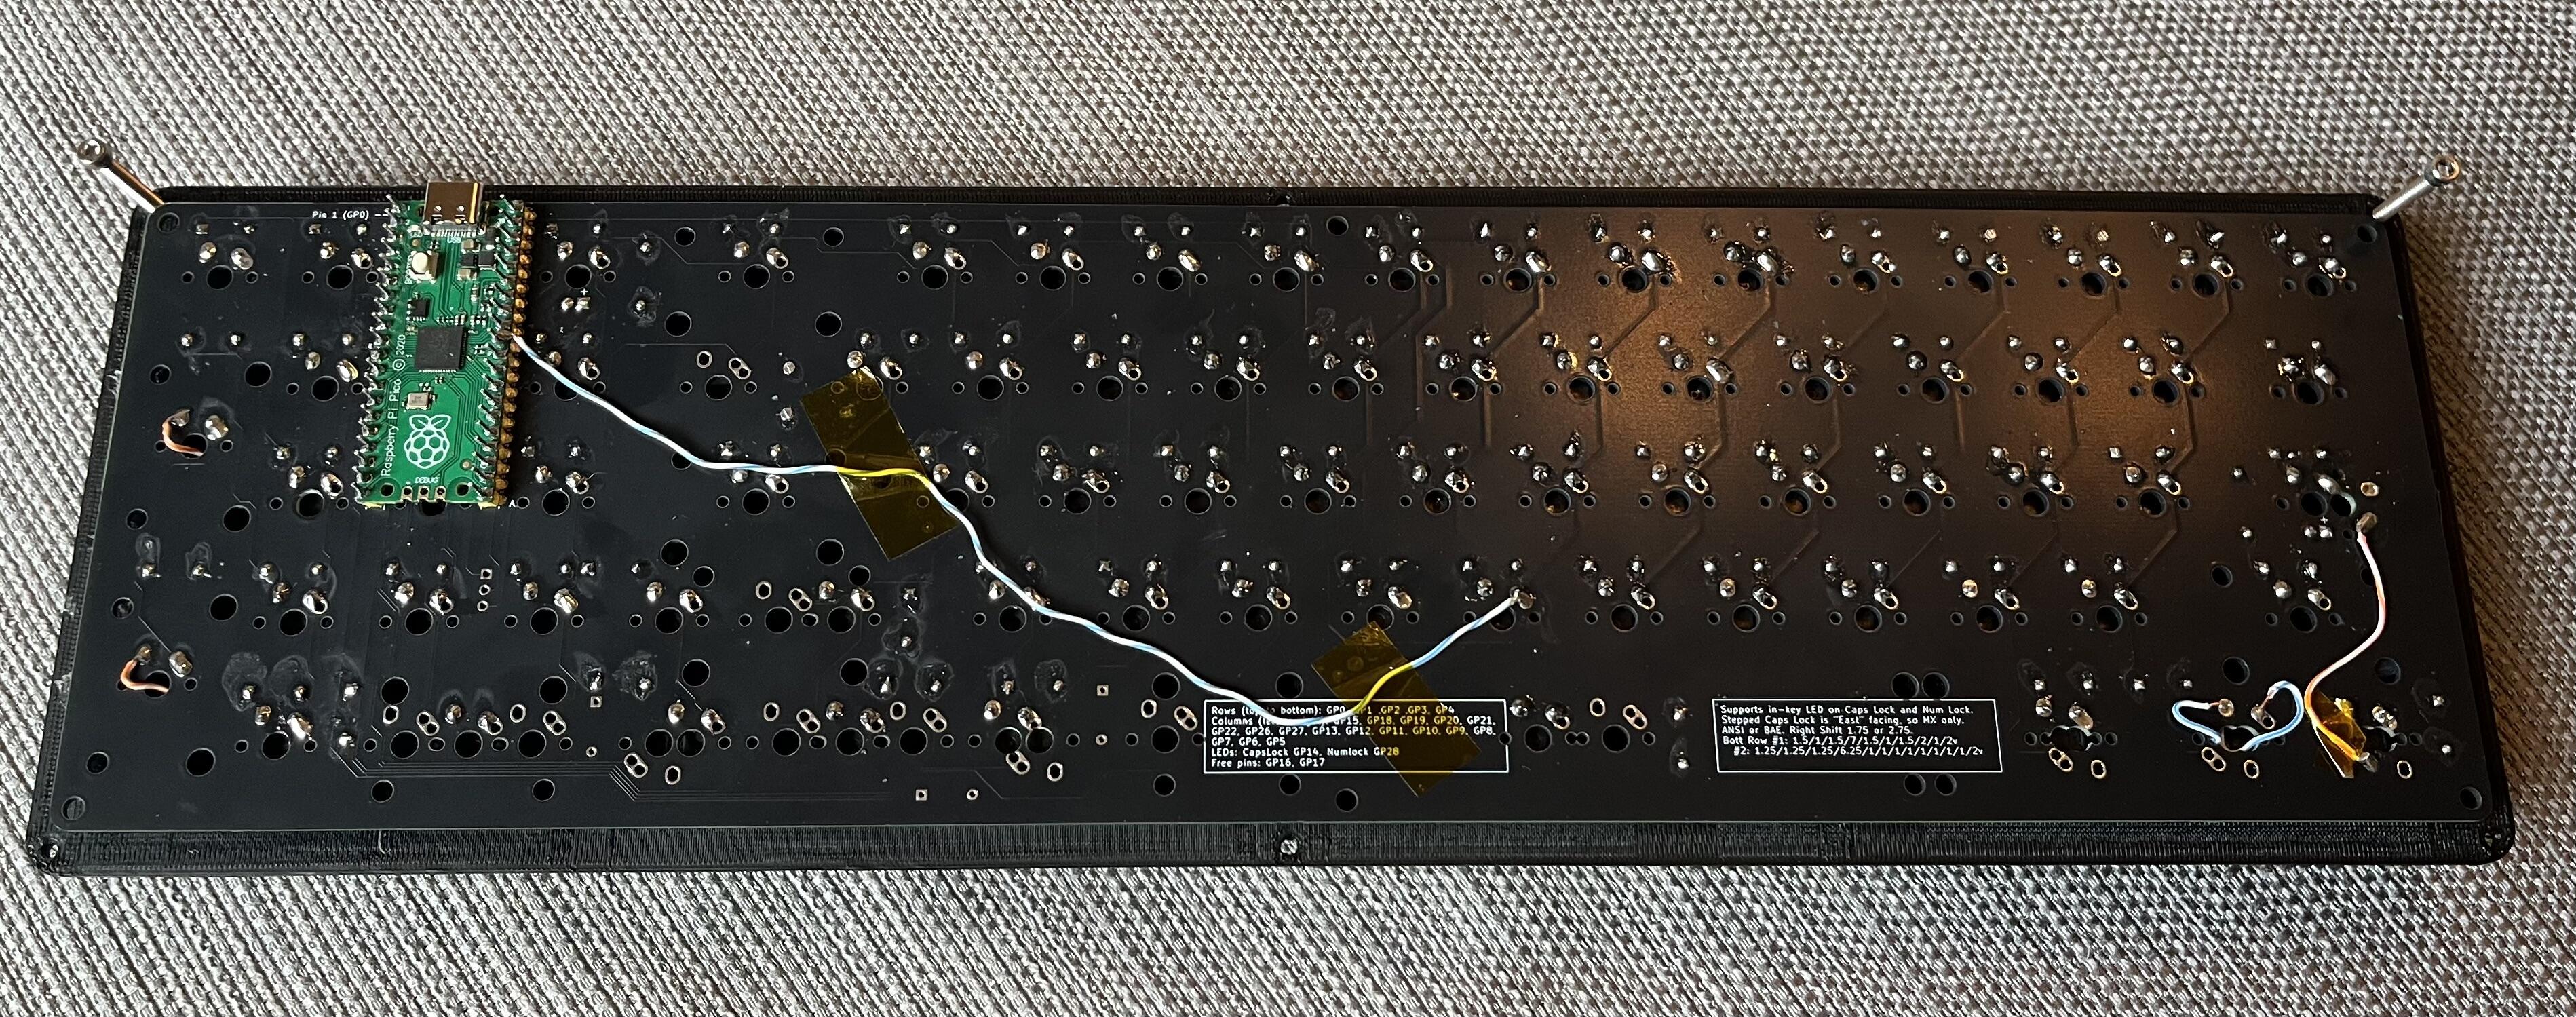
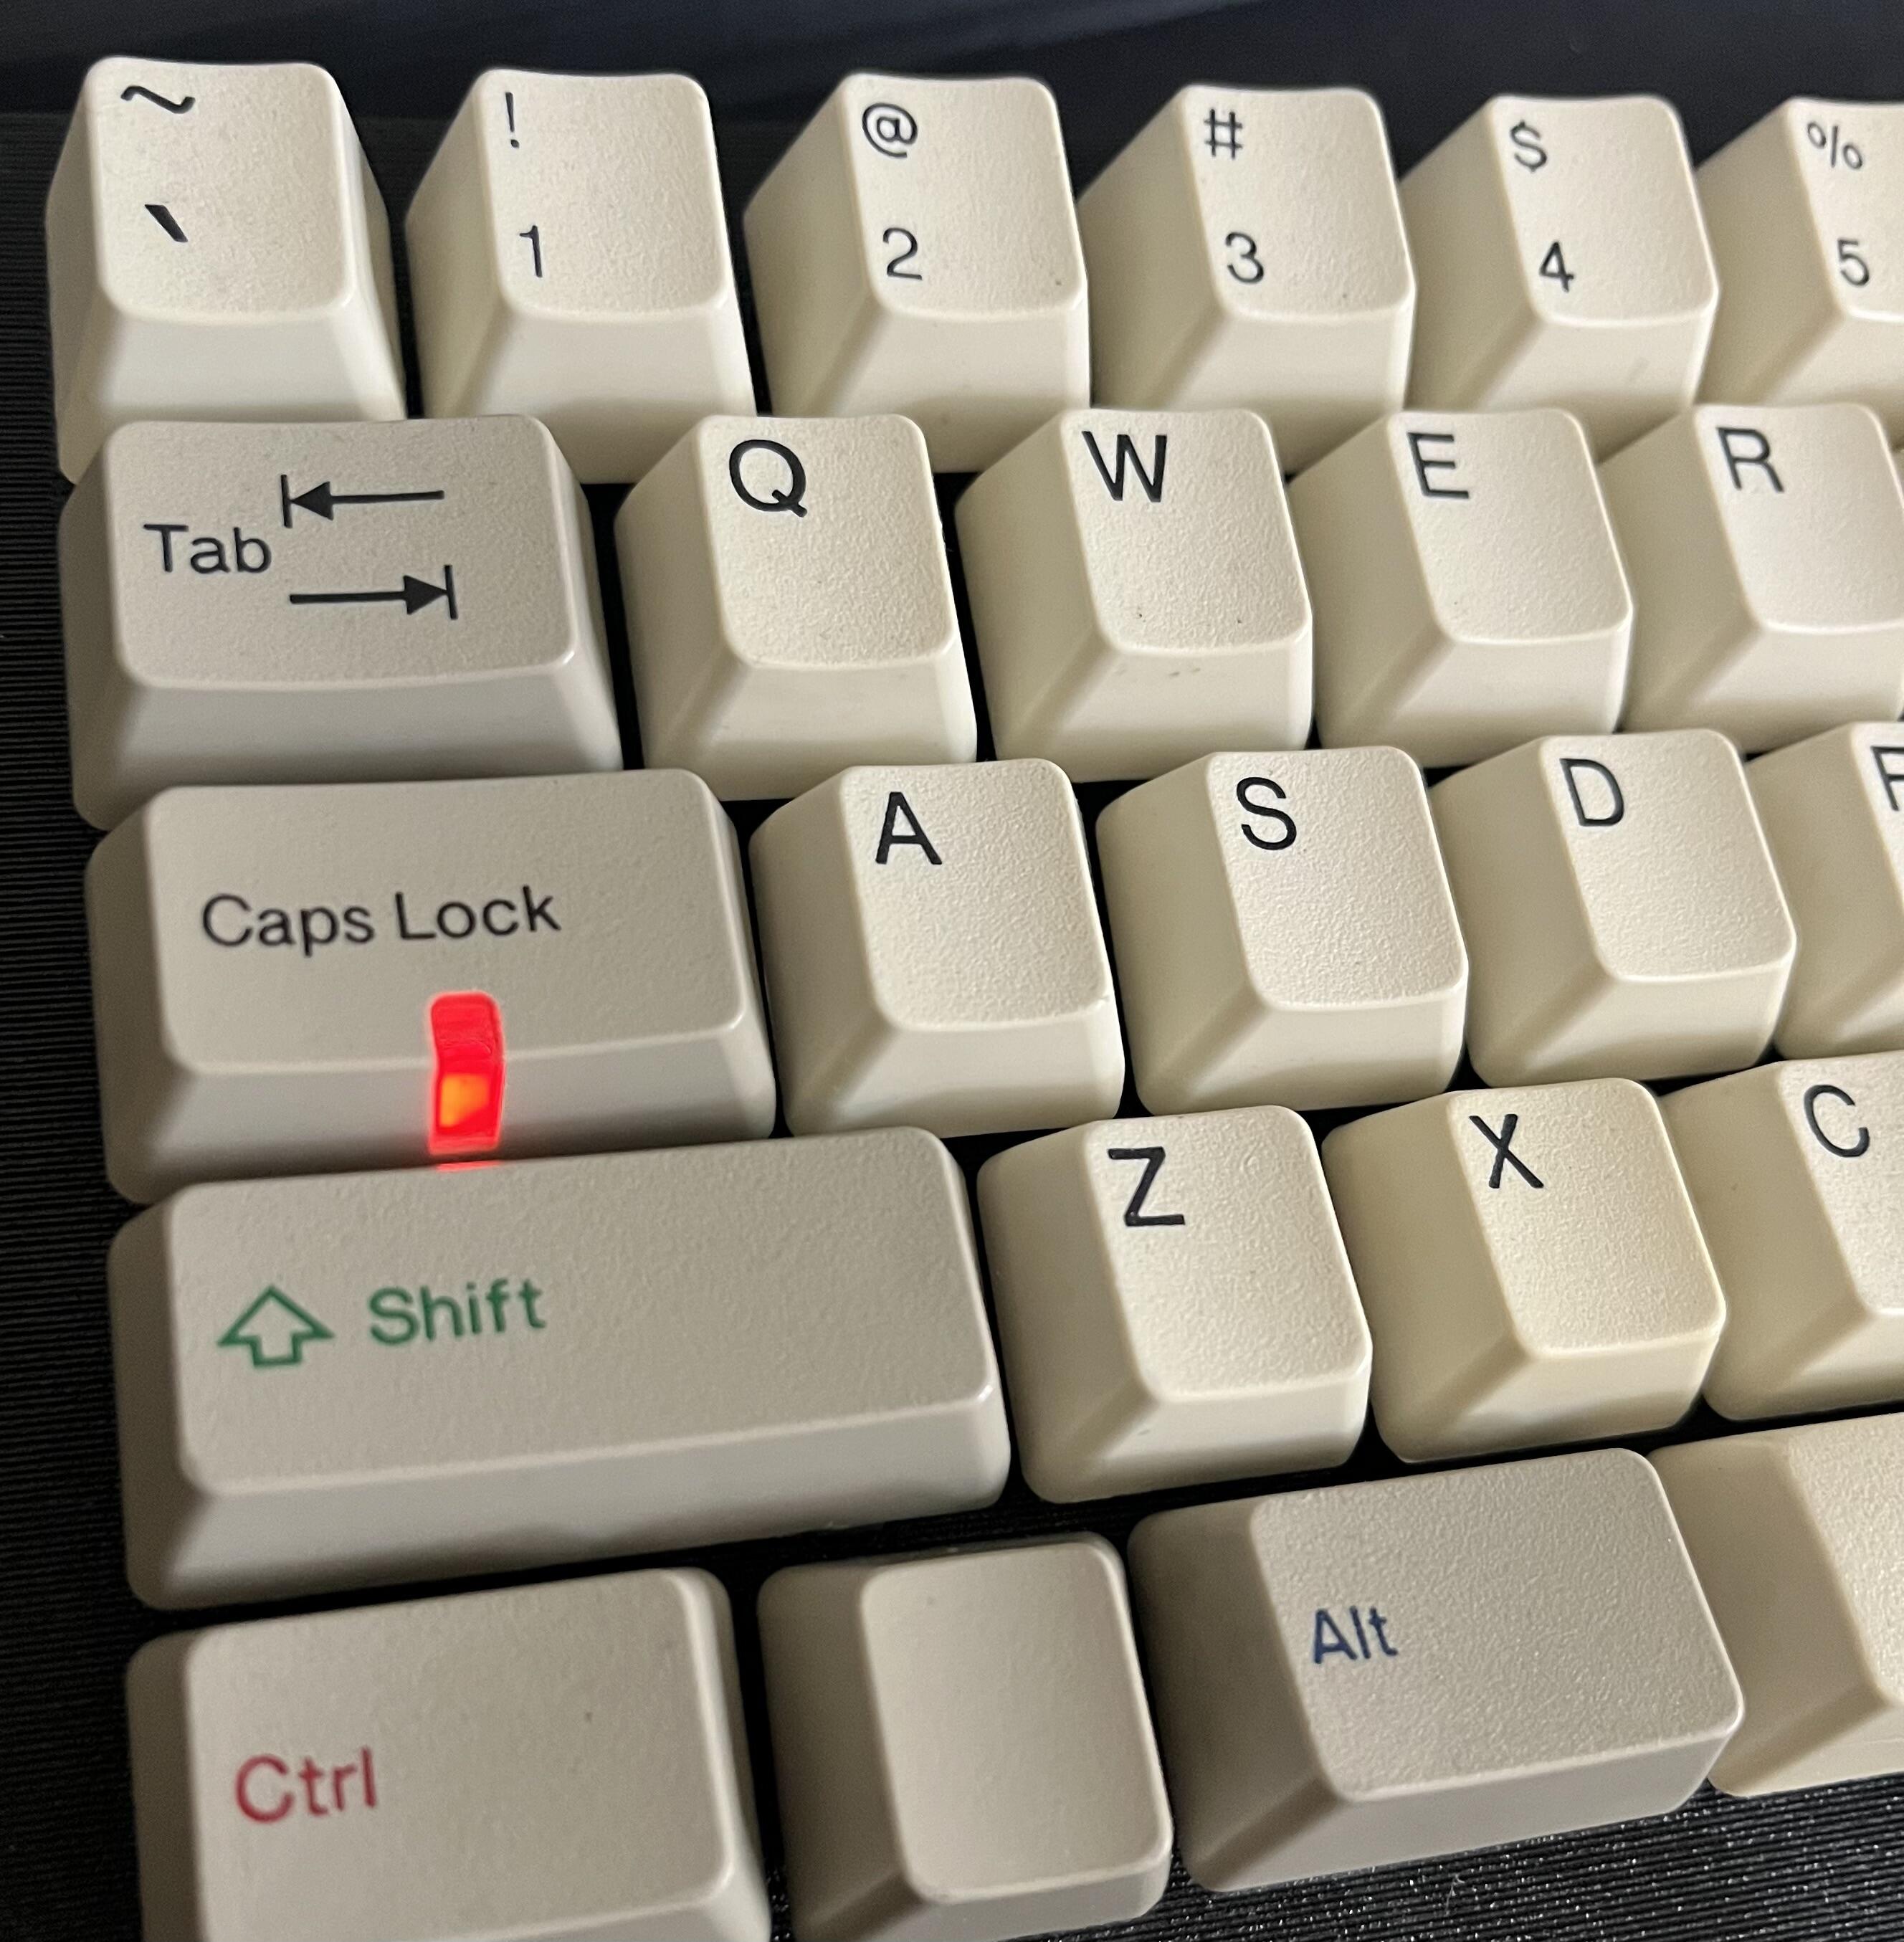
Speaking of interesting, don’t let English majors design your PCBs, folks. In addition to the other oopsies I’ve documented, even though Alps with Focus keycaps have been the target, I actually designed the board in KiCAD based on an MX layout that uses basic 1800/96% caps, because it had the most switch footprints on the bottom row. I then manually placed the Tsangan footprints and connected them. I mostly did this okay, but I did the 1u mod on the left side based on the 1.25u LCtrl, not the 1.5u. So that key is officially hand-wired with the jumper wires threaded through the central post cutout for an MX switch, and I need to see if I can tweak it a bit to clear up the tiny amount of north-south offset that resulted (under 1mm, but I see it and it annoys me, which is saying something for this build). I also completely forgot that I mapped Capslock to be my Fn key, and as it is one of the bodged keys, I did a lot of desoldering and resoldering of that key before I decided to check the firmware. ![]() On the plus side, got the LEDs right on the first try!
On the plus side, got the LEDs right on the first try!
I also noticed one of the stab inserts was broken, but a little super glue and a sliver of plastic snipped off a grocery store loyalty card 99% fixed that up (sensitive fingers can juuust sense the slightly reduced travel when numpad-plus is pressed from the upper half). So, as has been mentioned in the past, literal garbage. ![]() The spacebar is just a touch heavy, but perfectly usable. I suspect the tube insert part of the stabilizing system is a hair off, but I am not even sure I’ll mess with it. Some of these parts are 35 years old, and all of them were assembled by an idiot. Sometimes you just chalk things up to “character.”
The spacebar is just a touch heavy, but perfectly usable. I suspect the tube insert part of the stabilizing system is a hair off, but I am not even sure I’ll mess with it. Some of these parts are 35 years old, and all of them were assembled by an idiot. Sometimes you just chalk things up to “character.”
Software wise, mostly all good. Sometimes the PC recognizes the Pi Pico as a storage drive, but if I plug it back in that seems to fix itself. Might investigate further. Last big step will be the case. I think I have enough walnut to make something decent.
4 Likes
Debating doing some switch swap just to mix things up - just have to find the motivation to do so.
Right now I’m back to using the Freebird with Zakus, but debating throwing something like Strawberry Shortcakes in there since I’ve had those sitting around unused for awhile.
3 Likes
Debating with myself whether or not I want to try to design replacement plates for the KA2 keywells so that I can print them.
The only reason this seems feasible in my mind is sheer ignorance. If I do attempt this, I can’t wait until I hit the point of “Huh, this is far more difficult than I anticipated. But since I’ve already sunk X time into it, I might as well finish it.”
If I do go through with this, I may just end up designing some quick single switch PCBs for the keywells too.
3 Likes
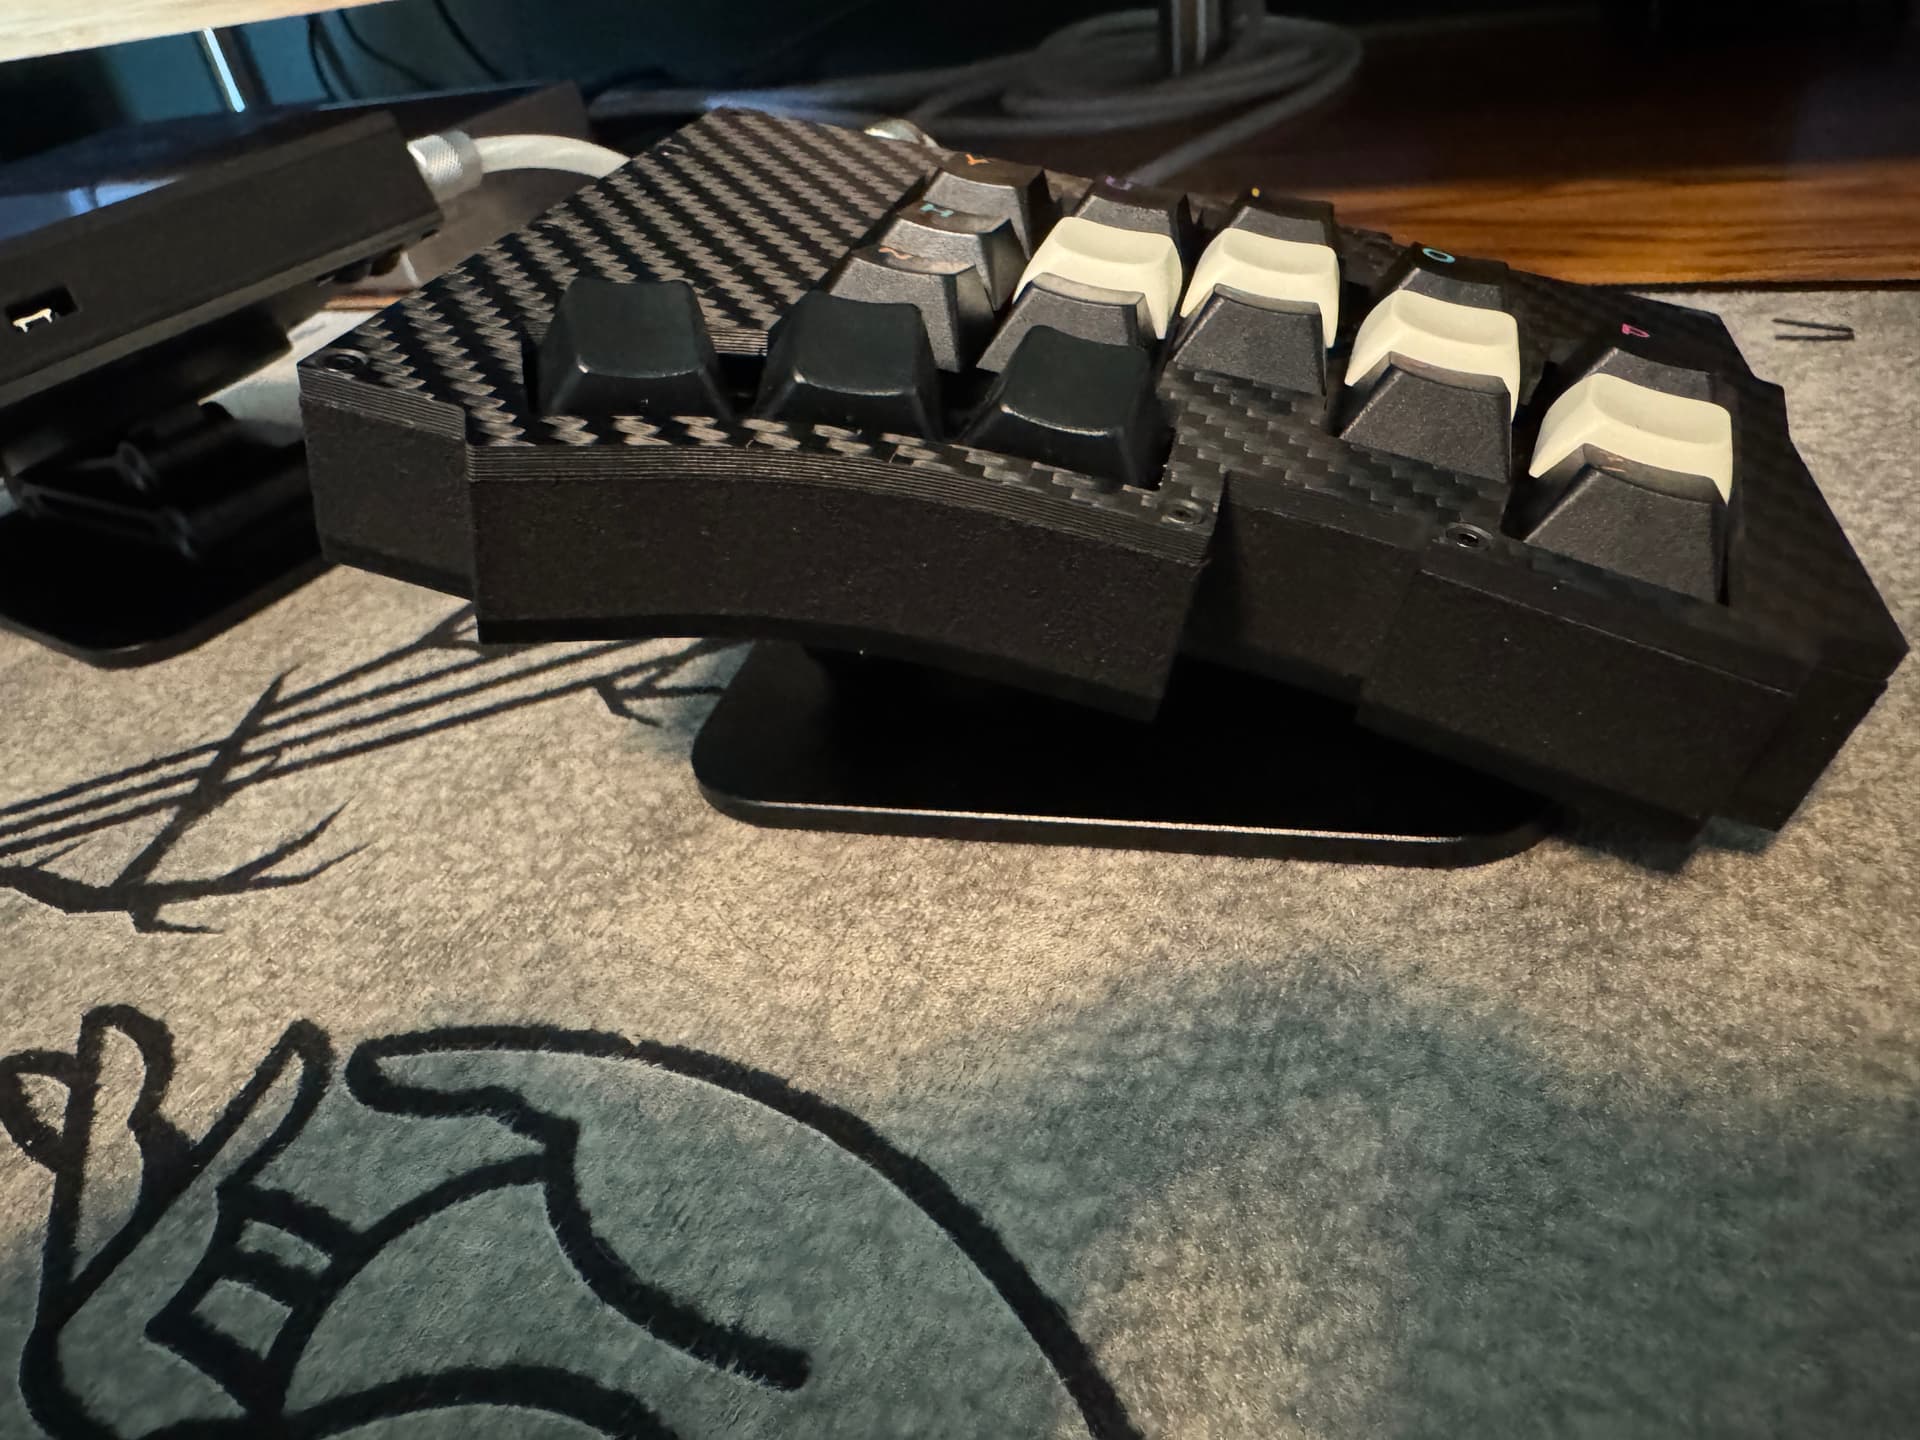
I really love these split boards I’ve been working on, but didn’t love the layered acrylic middle from an aesthetic perspective because it is near impossible to get the layers to line up perfectly smoothly. Whenever I looked and saw slightly jagged lines from the acrylic being not perfectly stacked, I could feel my sanity slip a little.
Fortunately by having uniform 3mm layers, it made it extremely easy to whip up a middle layer to 3d print because I could use the layers for measurements and guides.
Got the middle for these boards printed in PA12 by Jawstec. They came out fantastic except I wish I dropped the reset switch cutout by a mm to make the switch clear with a little more breathing room.
Made that change and placed another order for a middle section and opted to have this order vapor polished as well. Can’t wait until that gets here, but here is what I have now!
I love knowing that I have all the files I need to completely remake these boards from scratch so I never need to worry about NOT being able to procure them in the future should my entire collection get destroyed.
Plus, I’m starting to think about how customizable this setup is because I can swap that top layer to any material I want like figured wood or different metals.
2 Likes
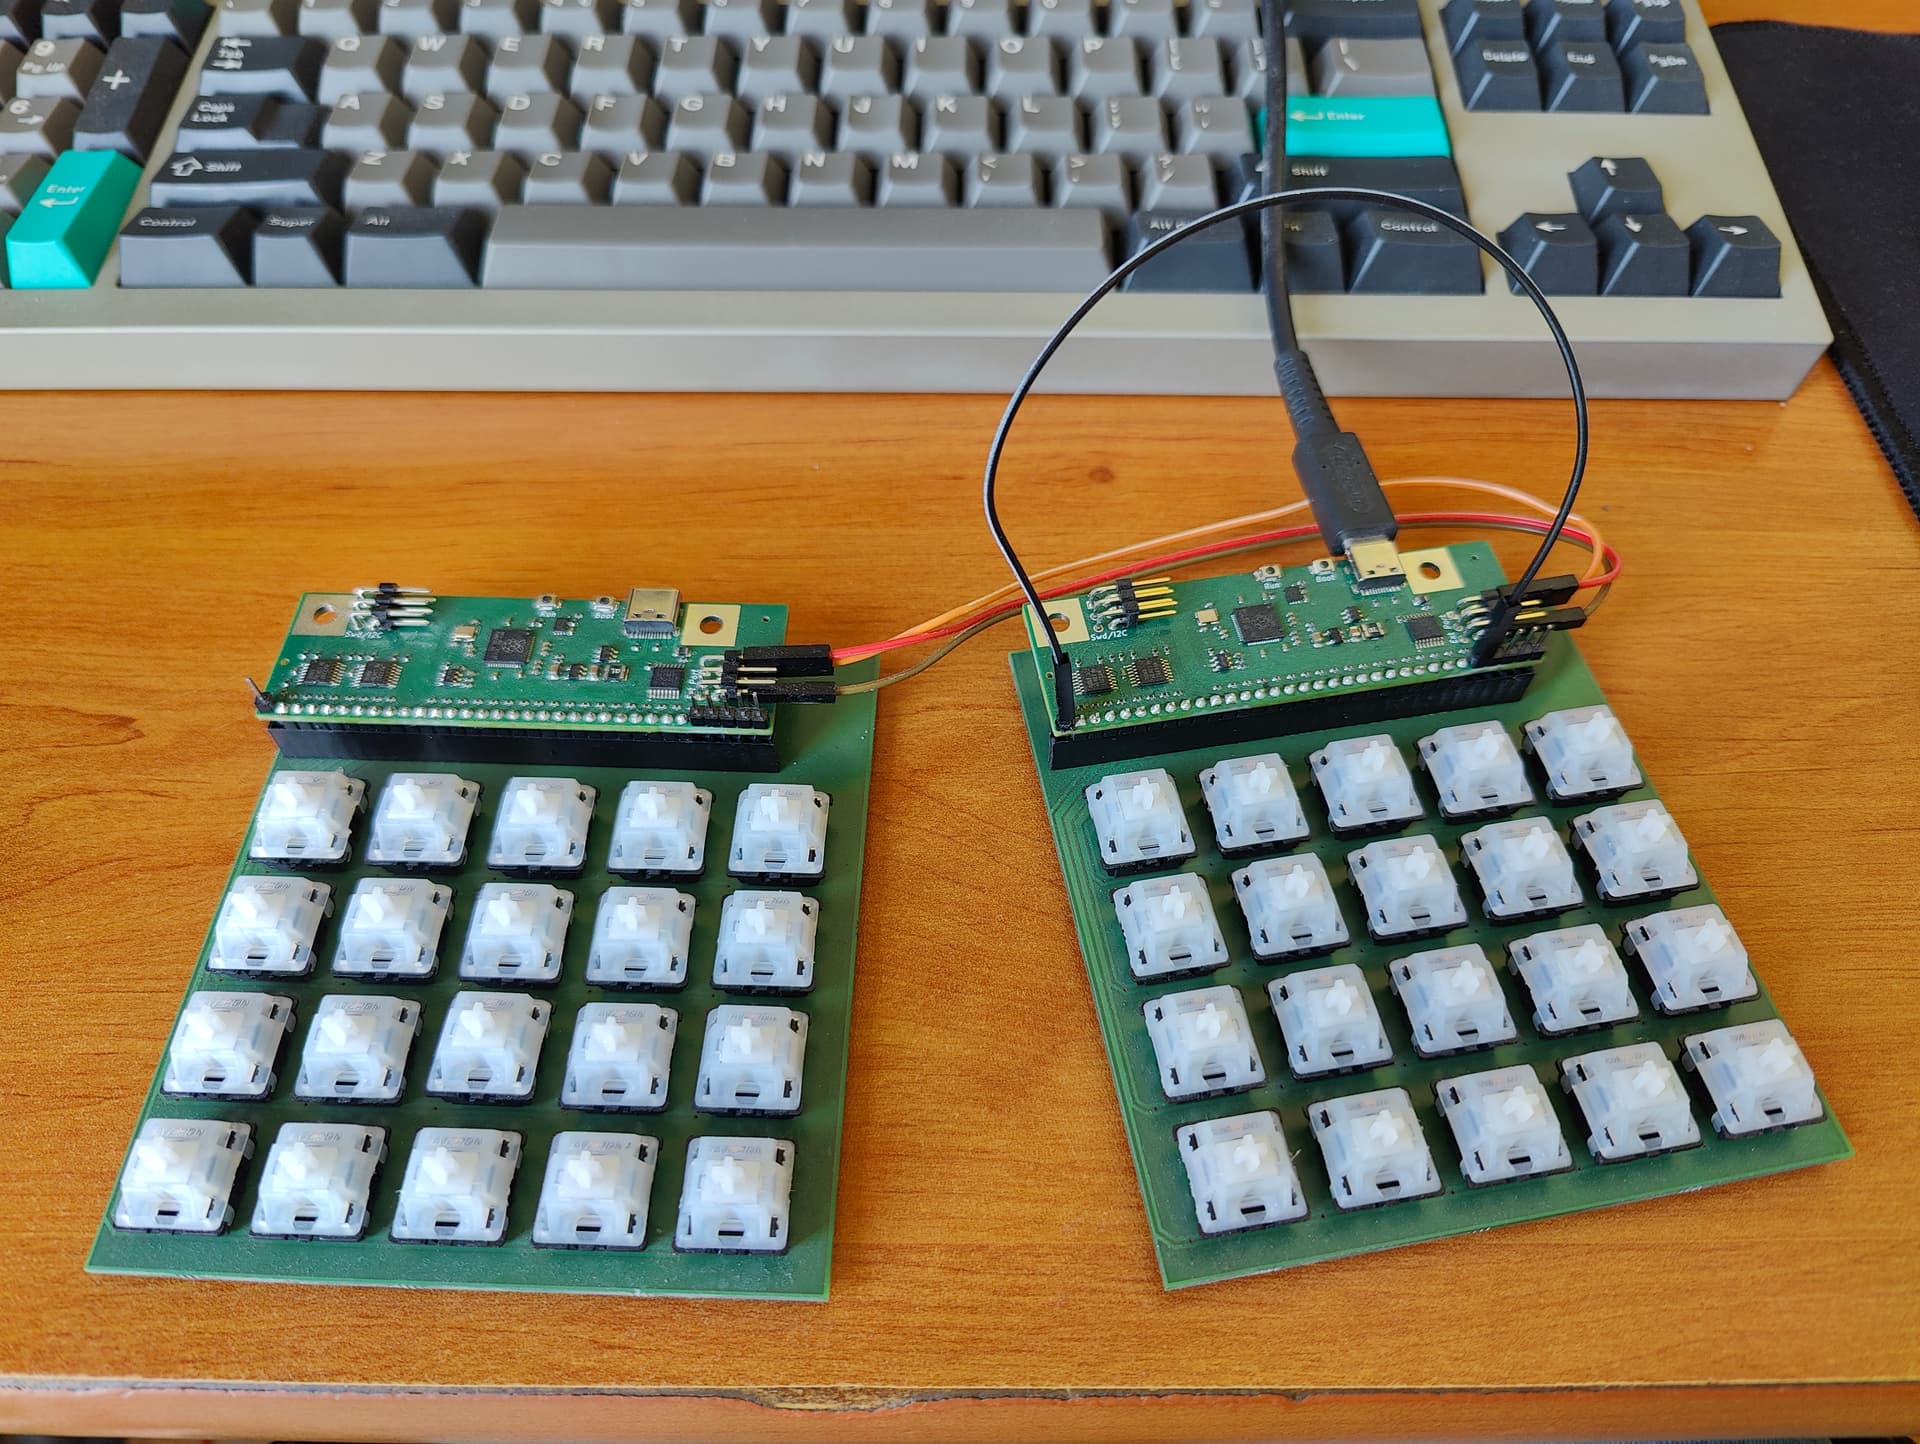
A lot of work to manage split keyboard configurations using the Leyden Jar controller.
This in order for @Ellipse and other people to easily create split capacitive model F like keyboards.
Here is a shot of the prototyping jig showing a split configuration with serial communication.
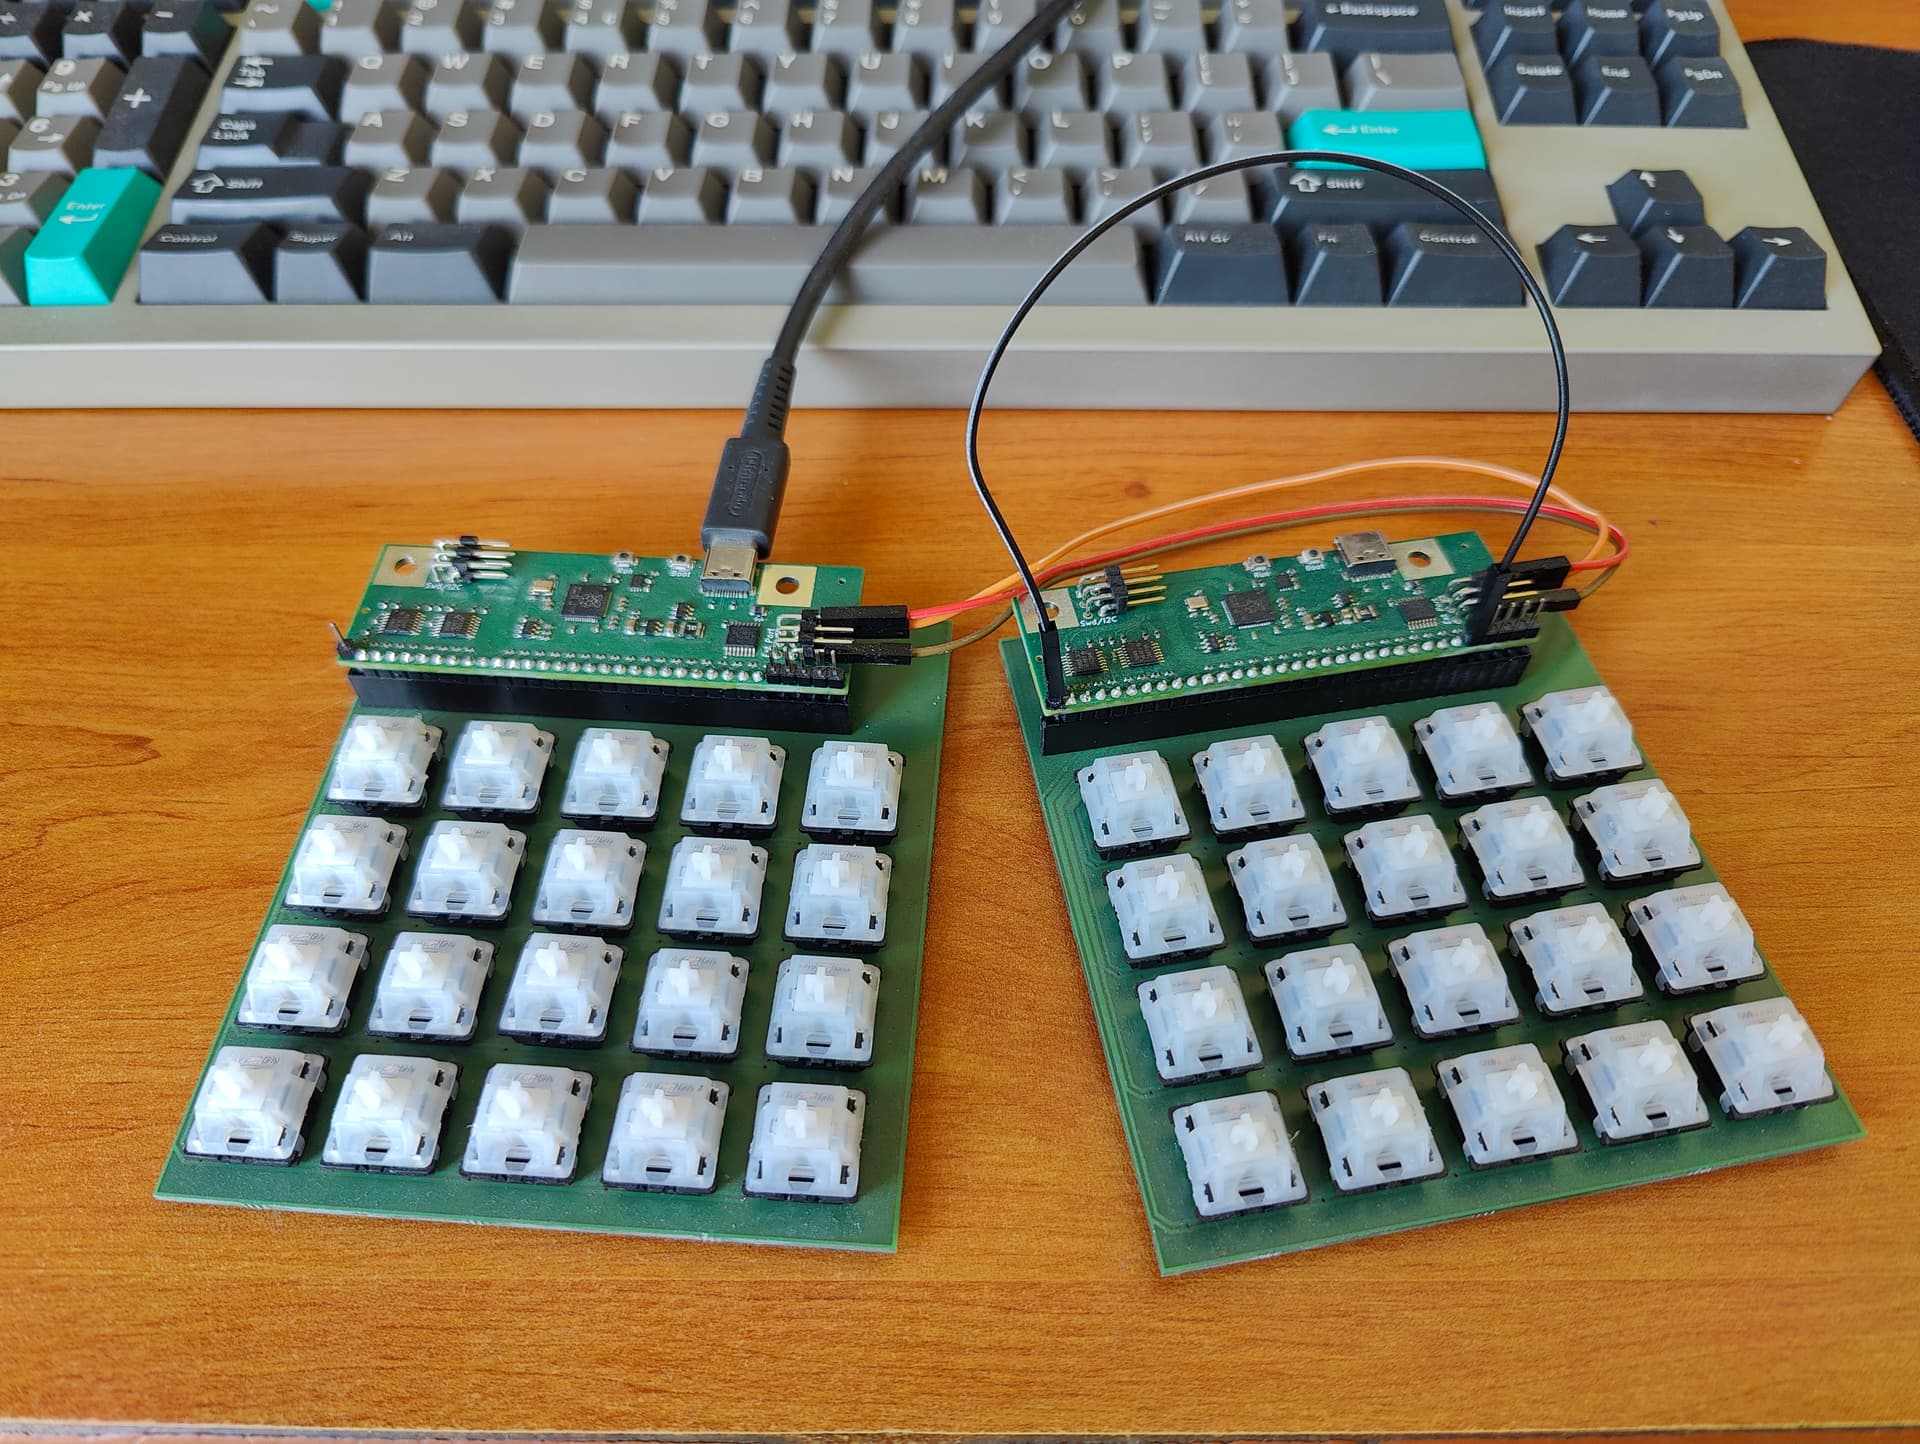
Also works when connection the right side to USB ![]()
More details on the work in the dedicated Keebtalk thread here.
6 Likes
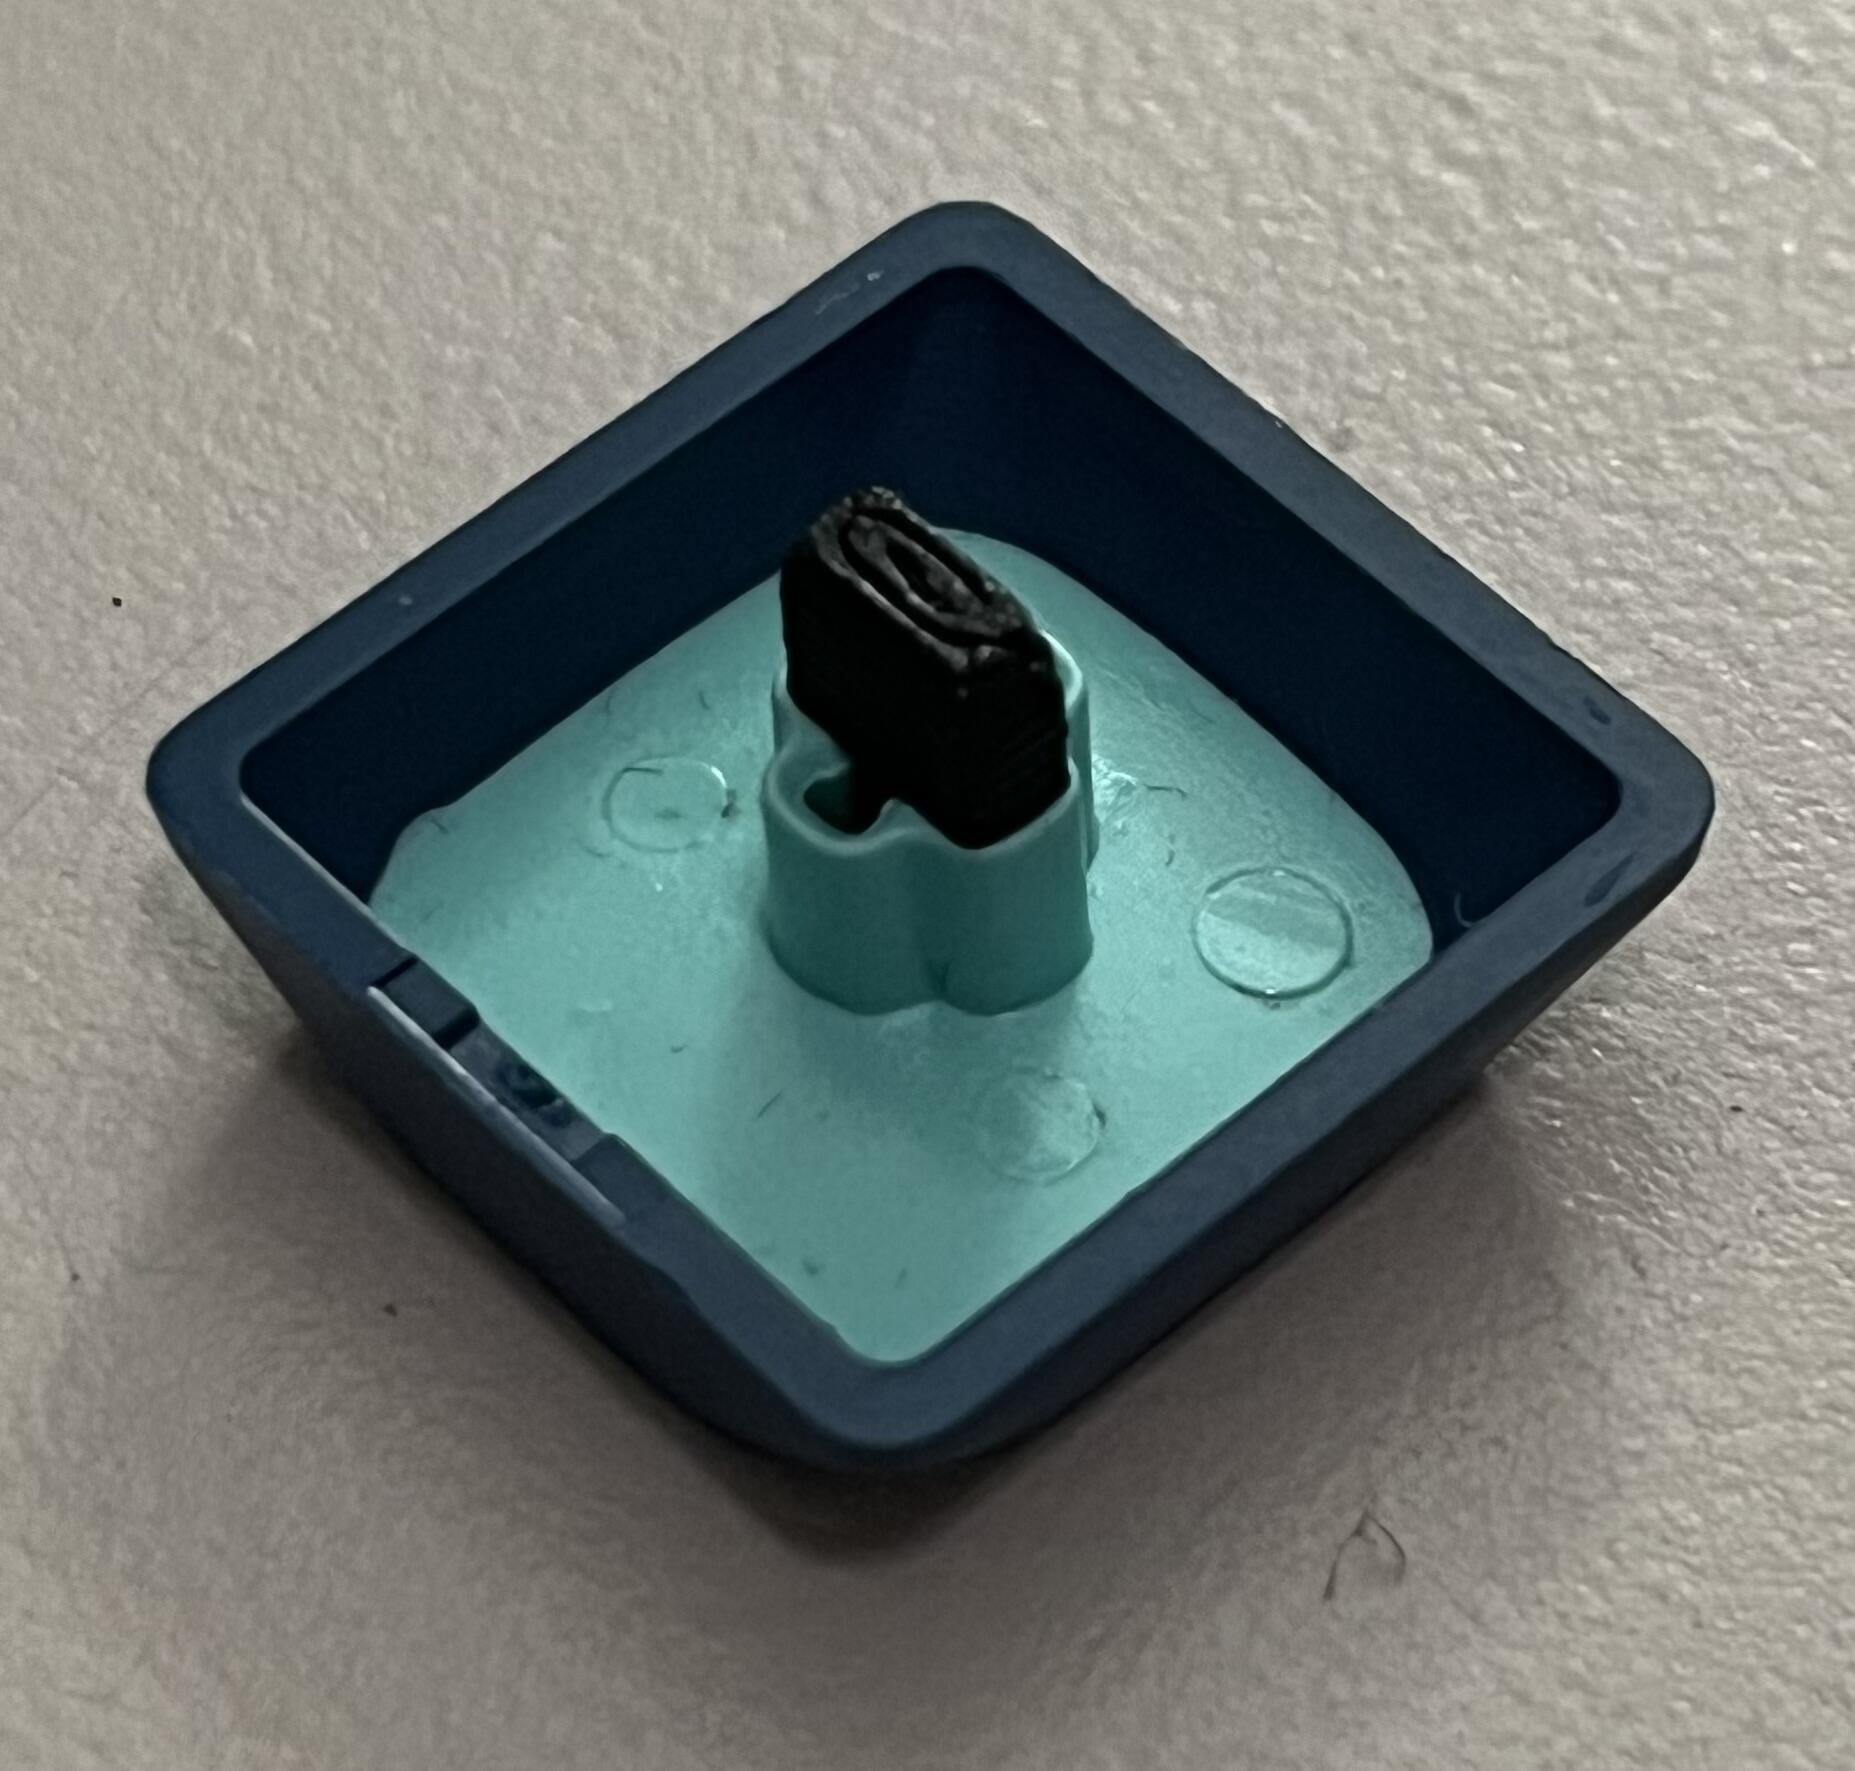
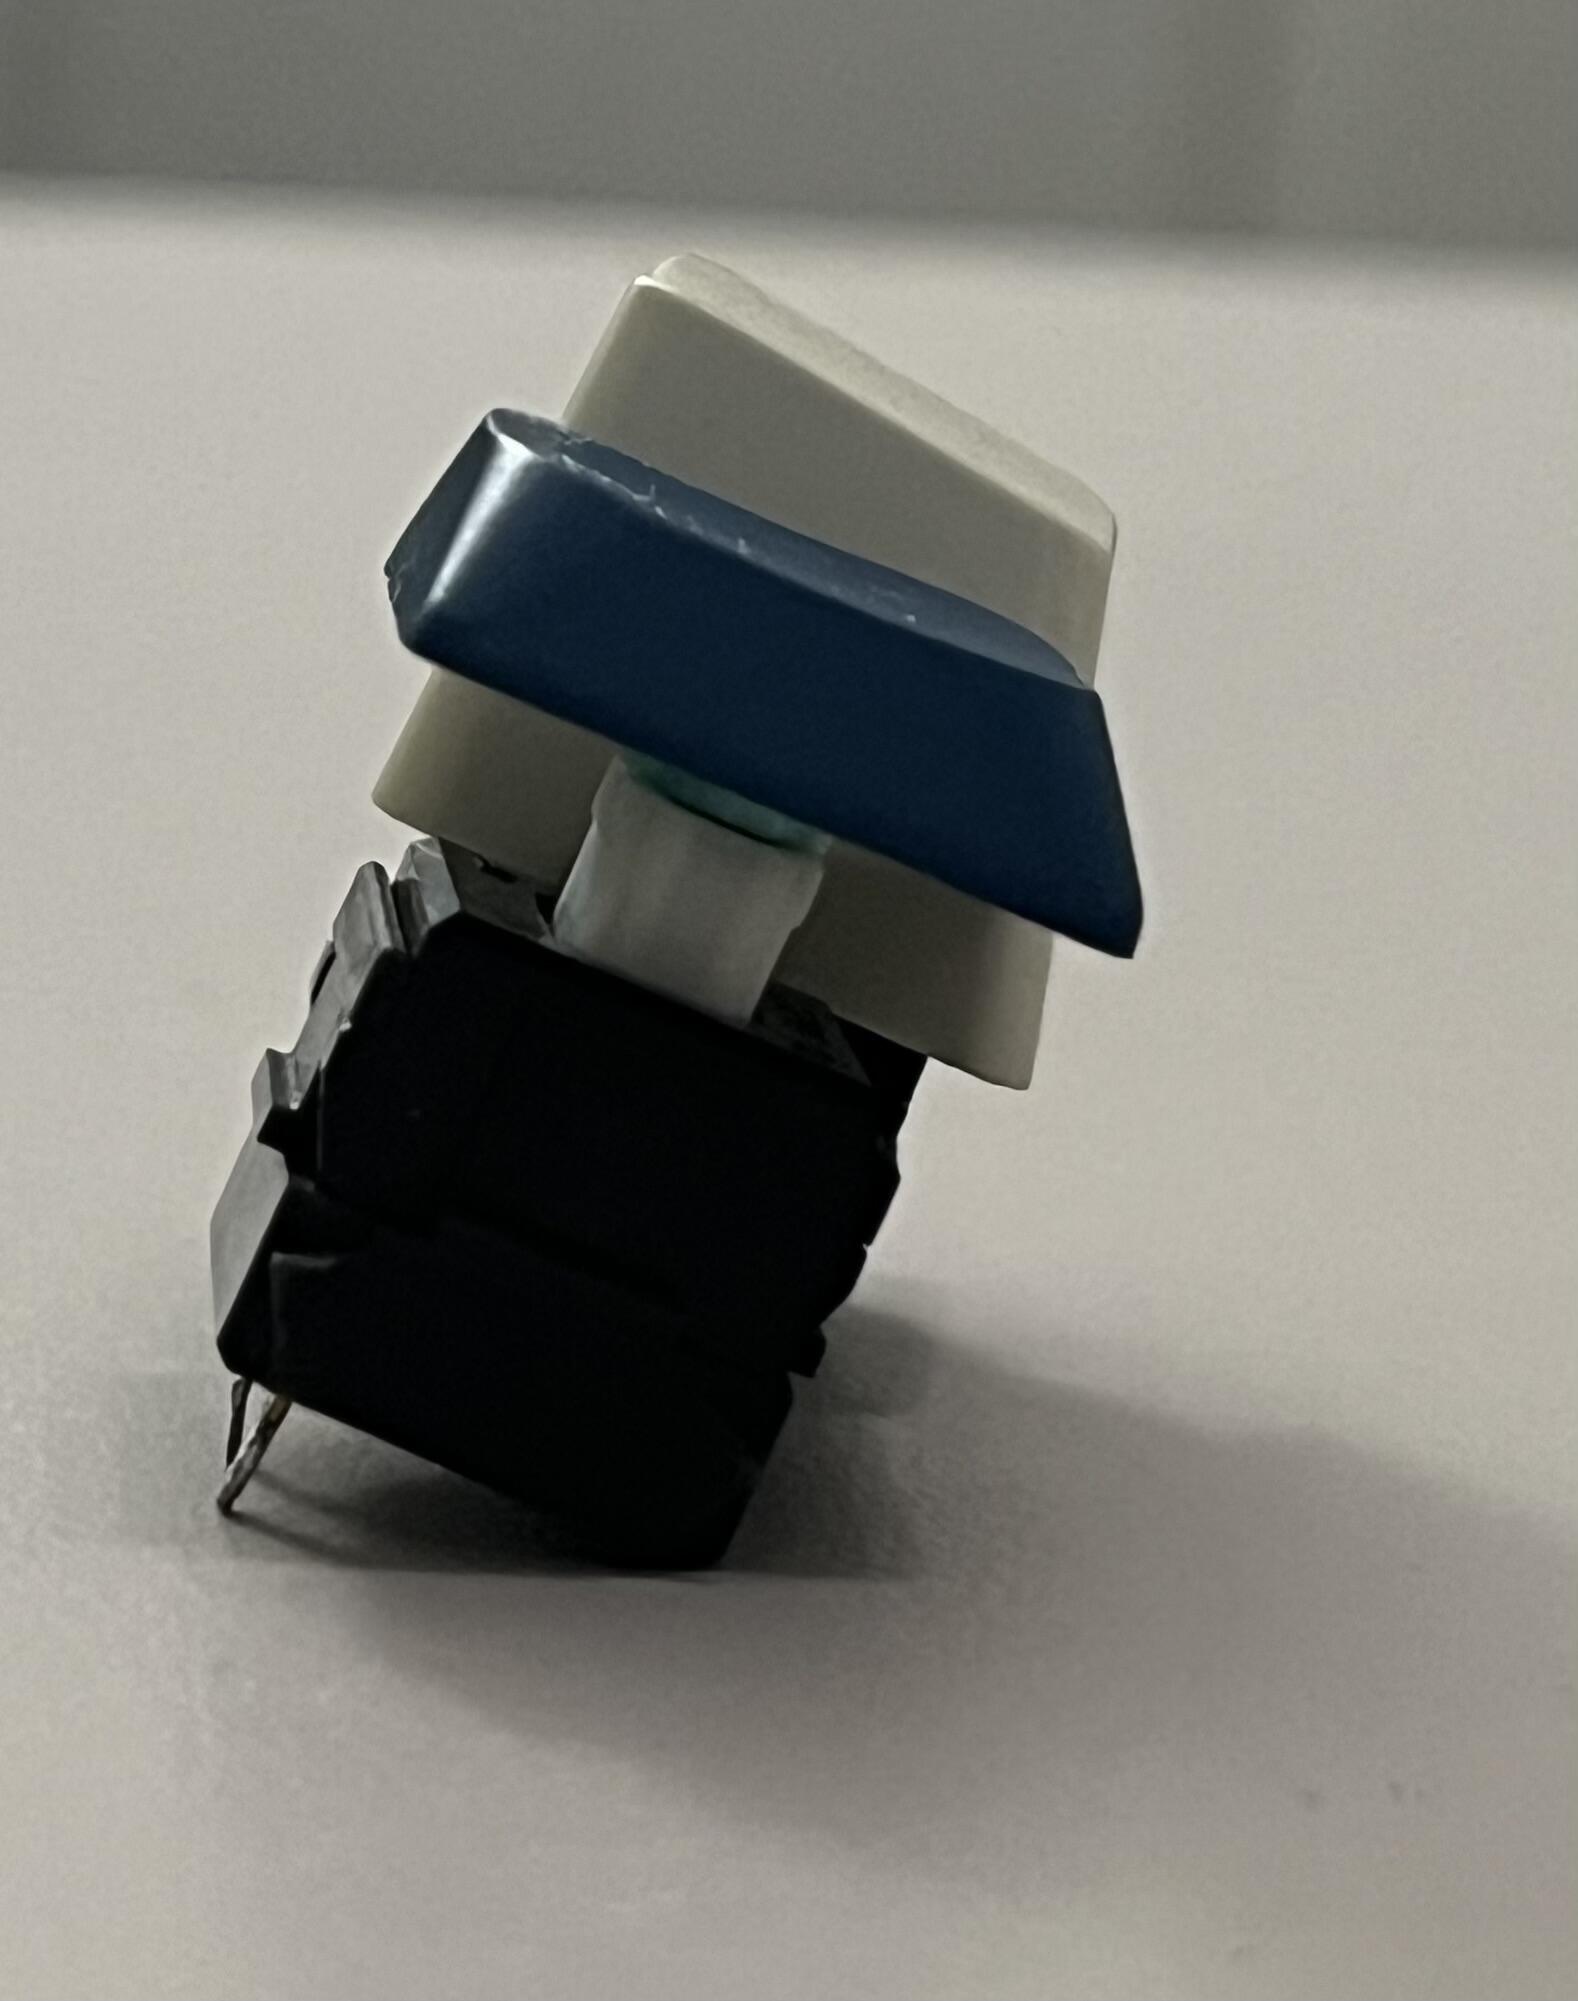
Playing with the new 3D printer. The three weaknesses of MX to Alps adapters are stability, height, and stabilization. I think the first two are tied together and can be ameliorated by using low profile caps, though admittedly losing the appeal of getting your nicest SP and GMK sets onto an Alps board. The third probably needs some creativity, but I think there are some 3D prints out there that might be adapted to do the job. The new wrinkle would be the “gamer look” of exposed switches and stems, but I think that could be worked around on most tray-mount like designs, and half of them will end up with broken clips anyway ![]() .
.
4 Likes
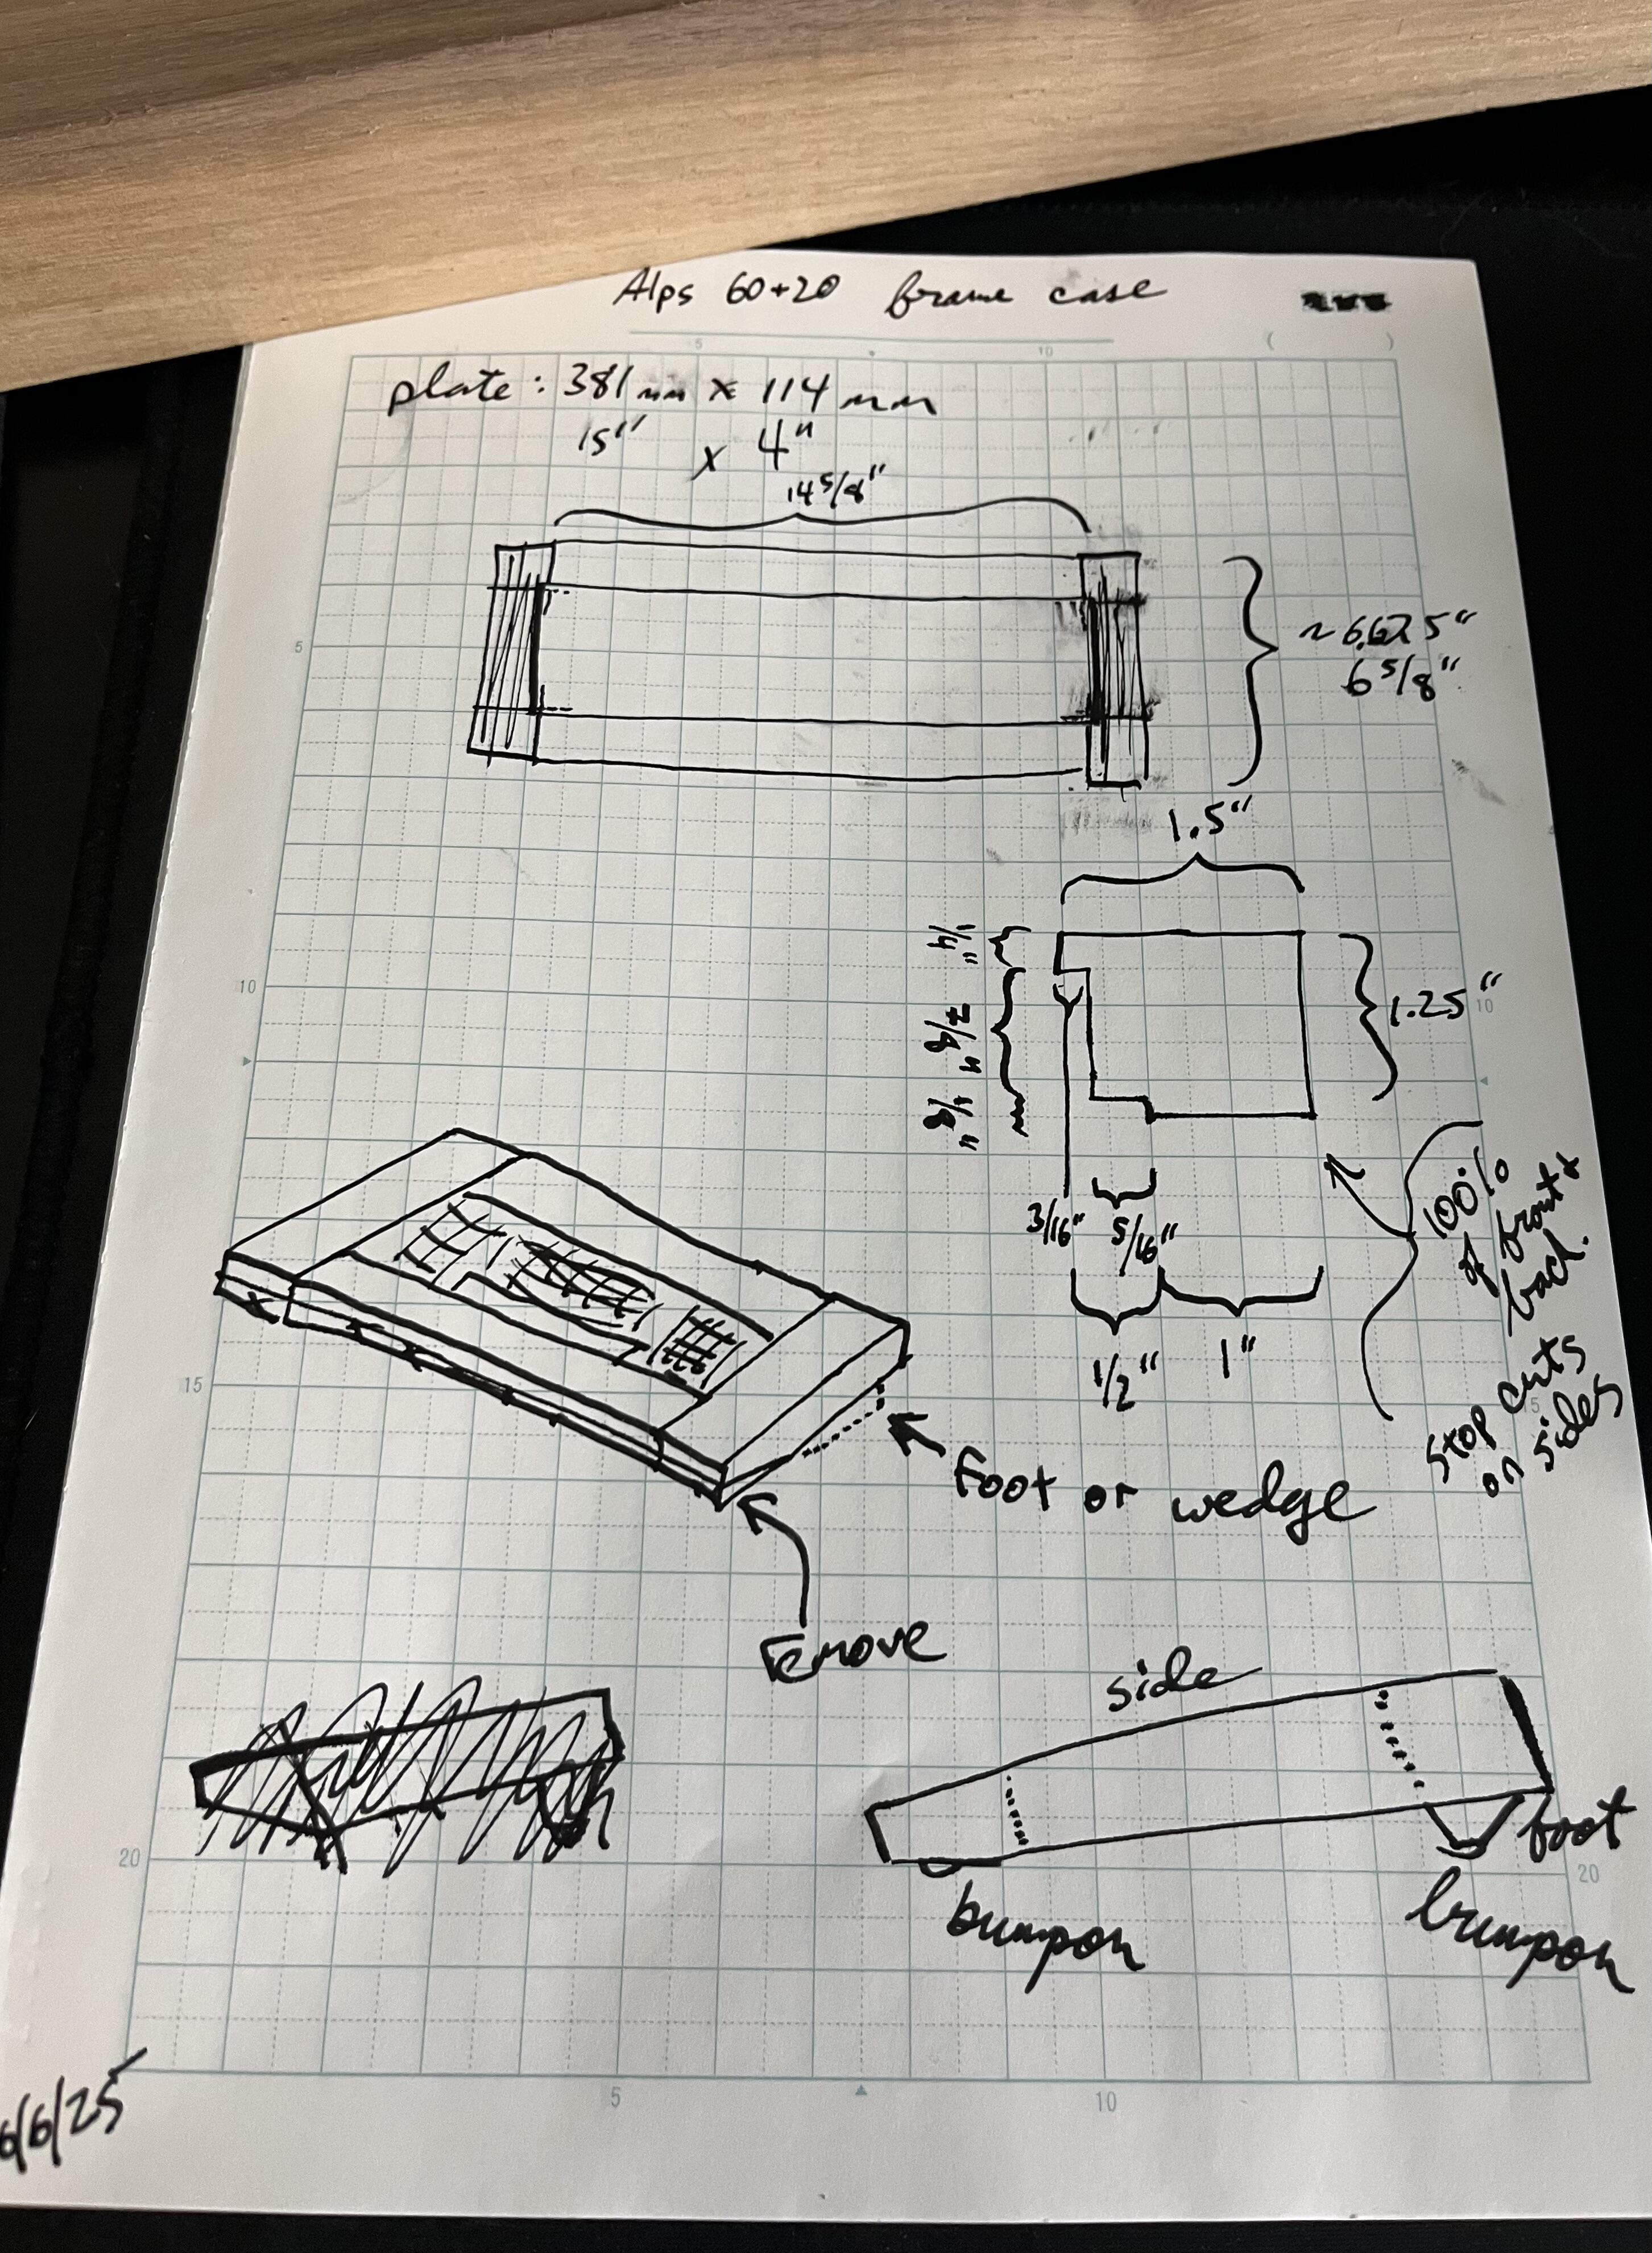
…in case you thought I only did electronics by the seat of my pants.
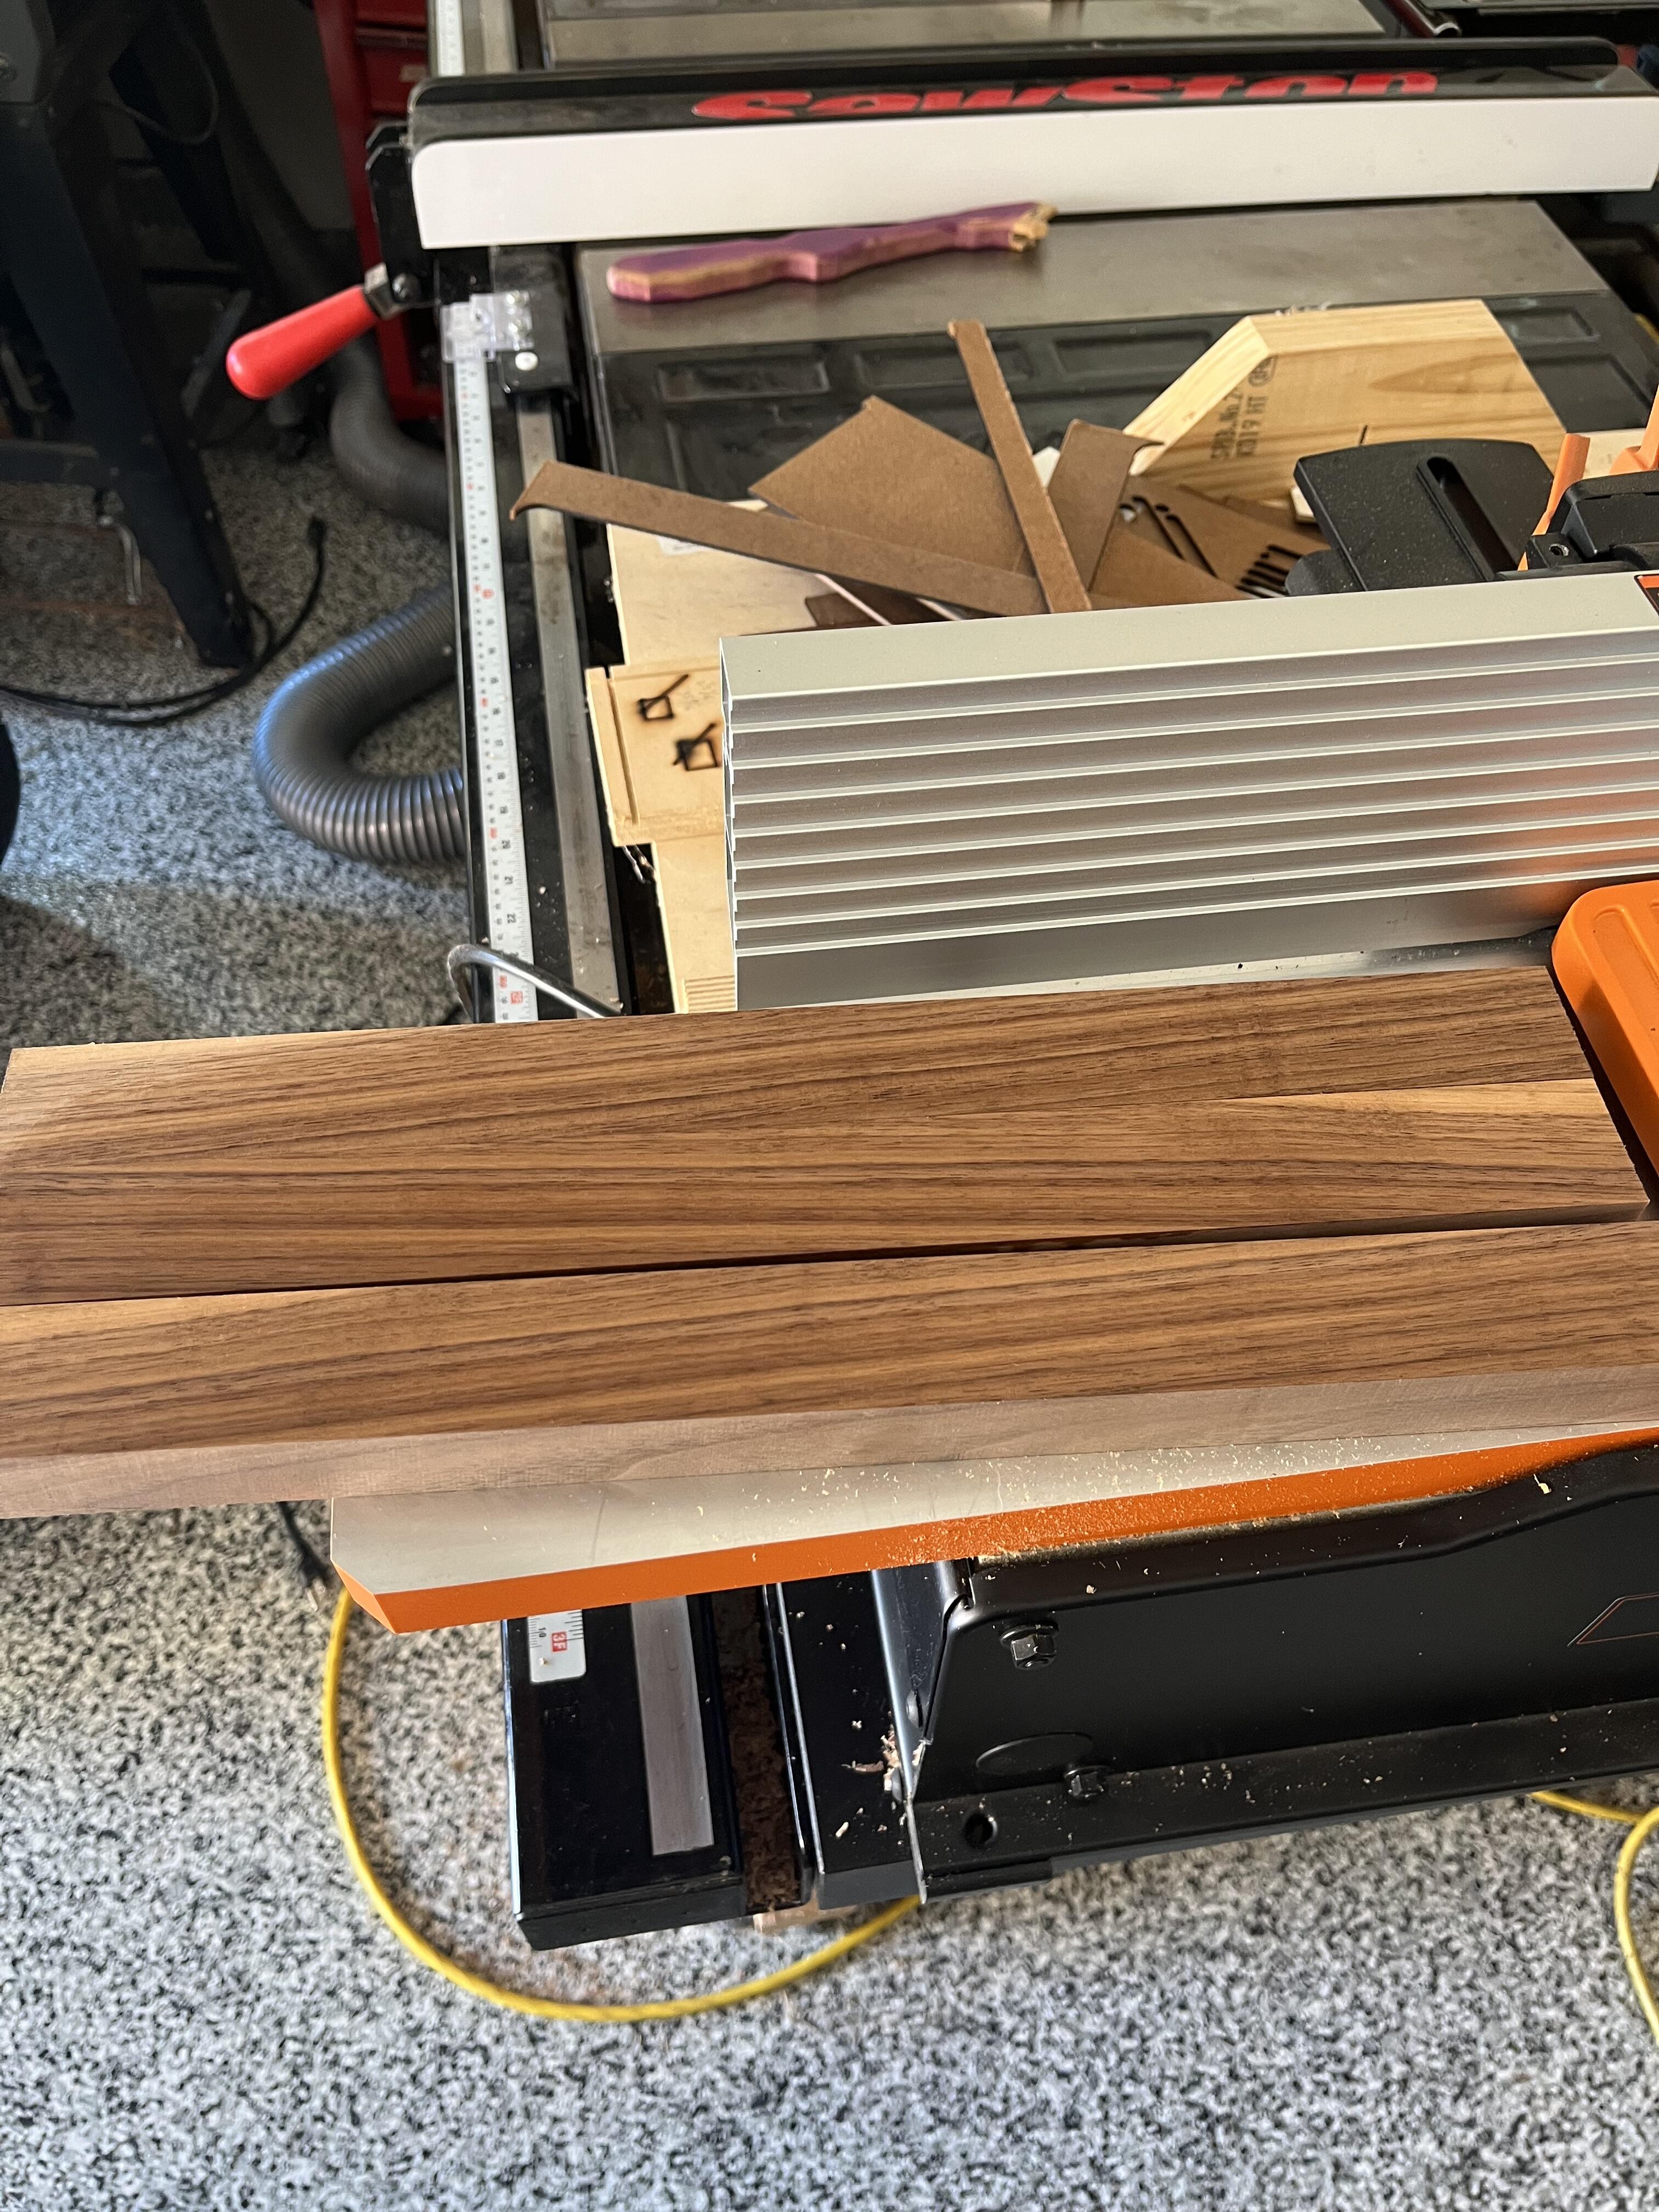
I haven’t been to a proper lumber store in years, so my only pieces of clear hardwood are these shorts around 18 inches long. They’ll work fine, especially since I’m no good at miters anyway and wasn’t going to use them, but it does mean the end grain will show on the front and back rather than the left and right.
What I am also doing is giving myself lots of bezel to play with, so there’s room to nibble away if certain things don’t go (or look) as planned. I had maple, poplar, red oak, or walnut. The current keycaps are a touch yellowed, so I think overpowering them with oiled walnut will work best.
EDIT: Already spotted a measurement error. I converted the PCB from 101 mm to inches, not the plate from 114mm. Glad I noticed that one before cutting. Speaking of cutting, some initial cuts are done, as well as some cleanup passes over the jointer. Then just a little mineral spirits to see what the grain will end up looking like.
6 Likes
Okay I’m quite interested now that there’s wood involved. Pretty cool. Look forward to seeing updates
2 Likes

3 Likes
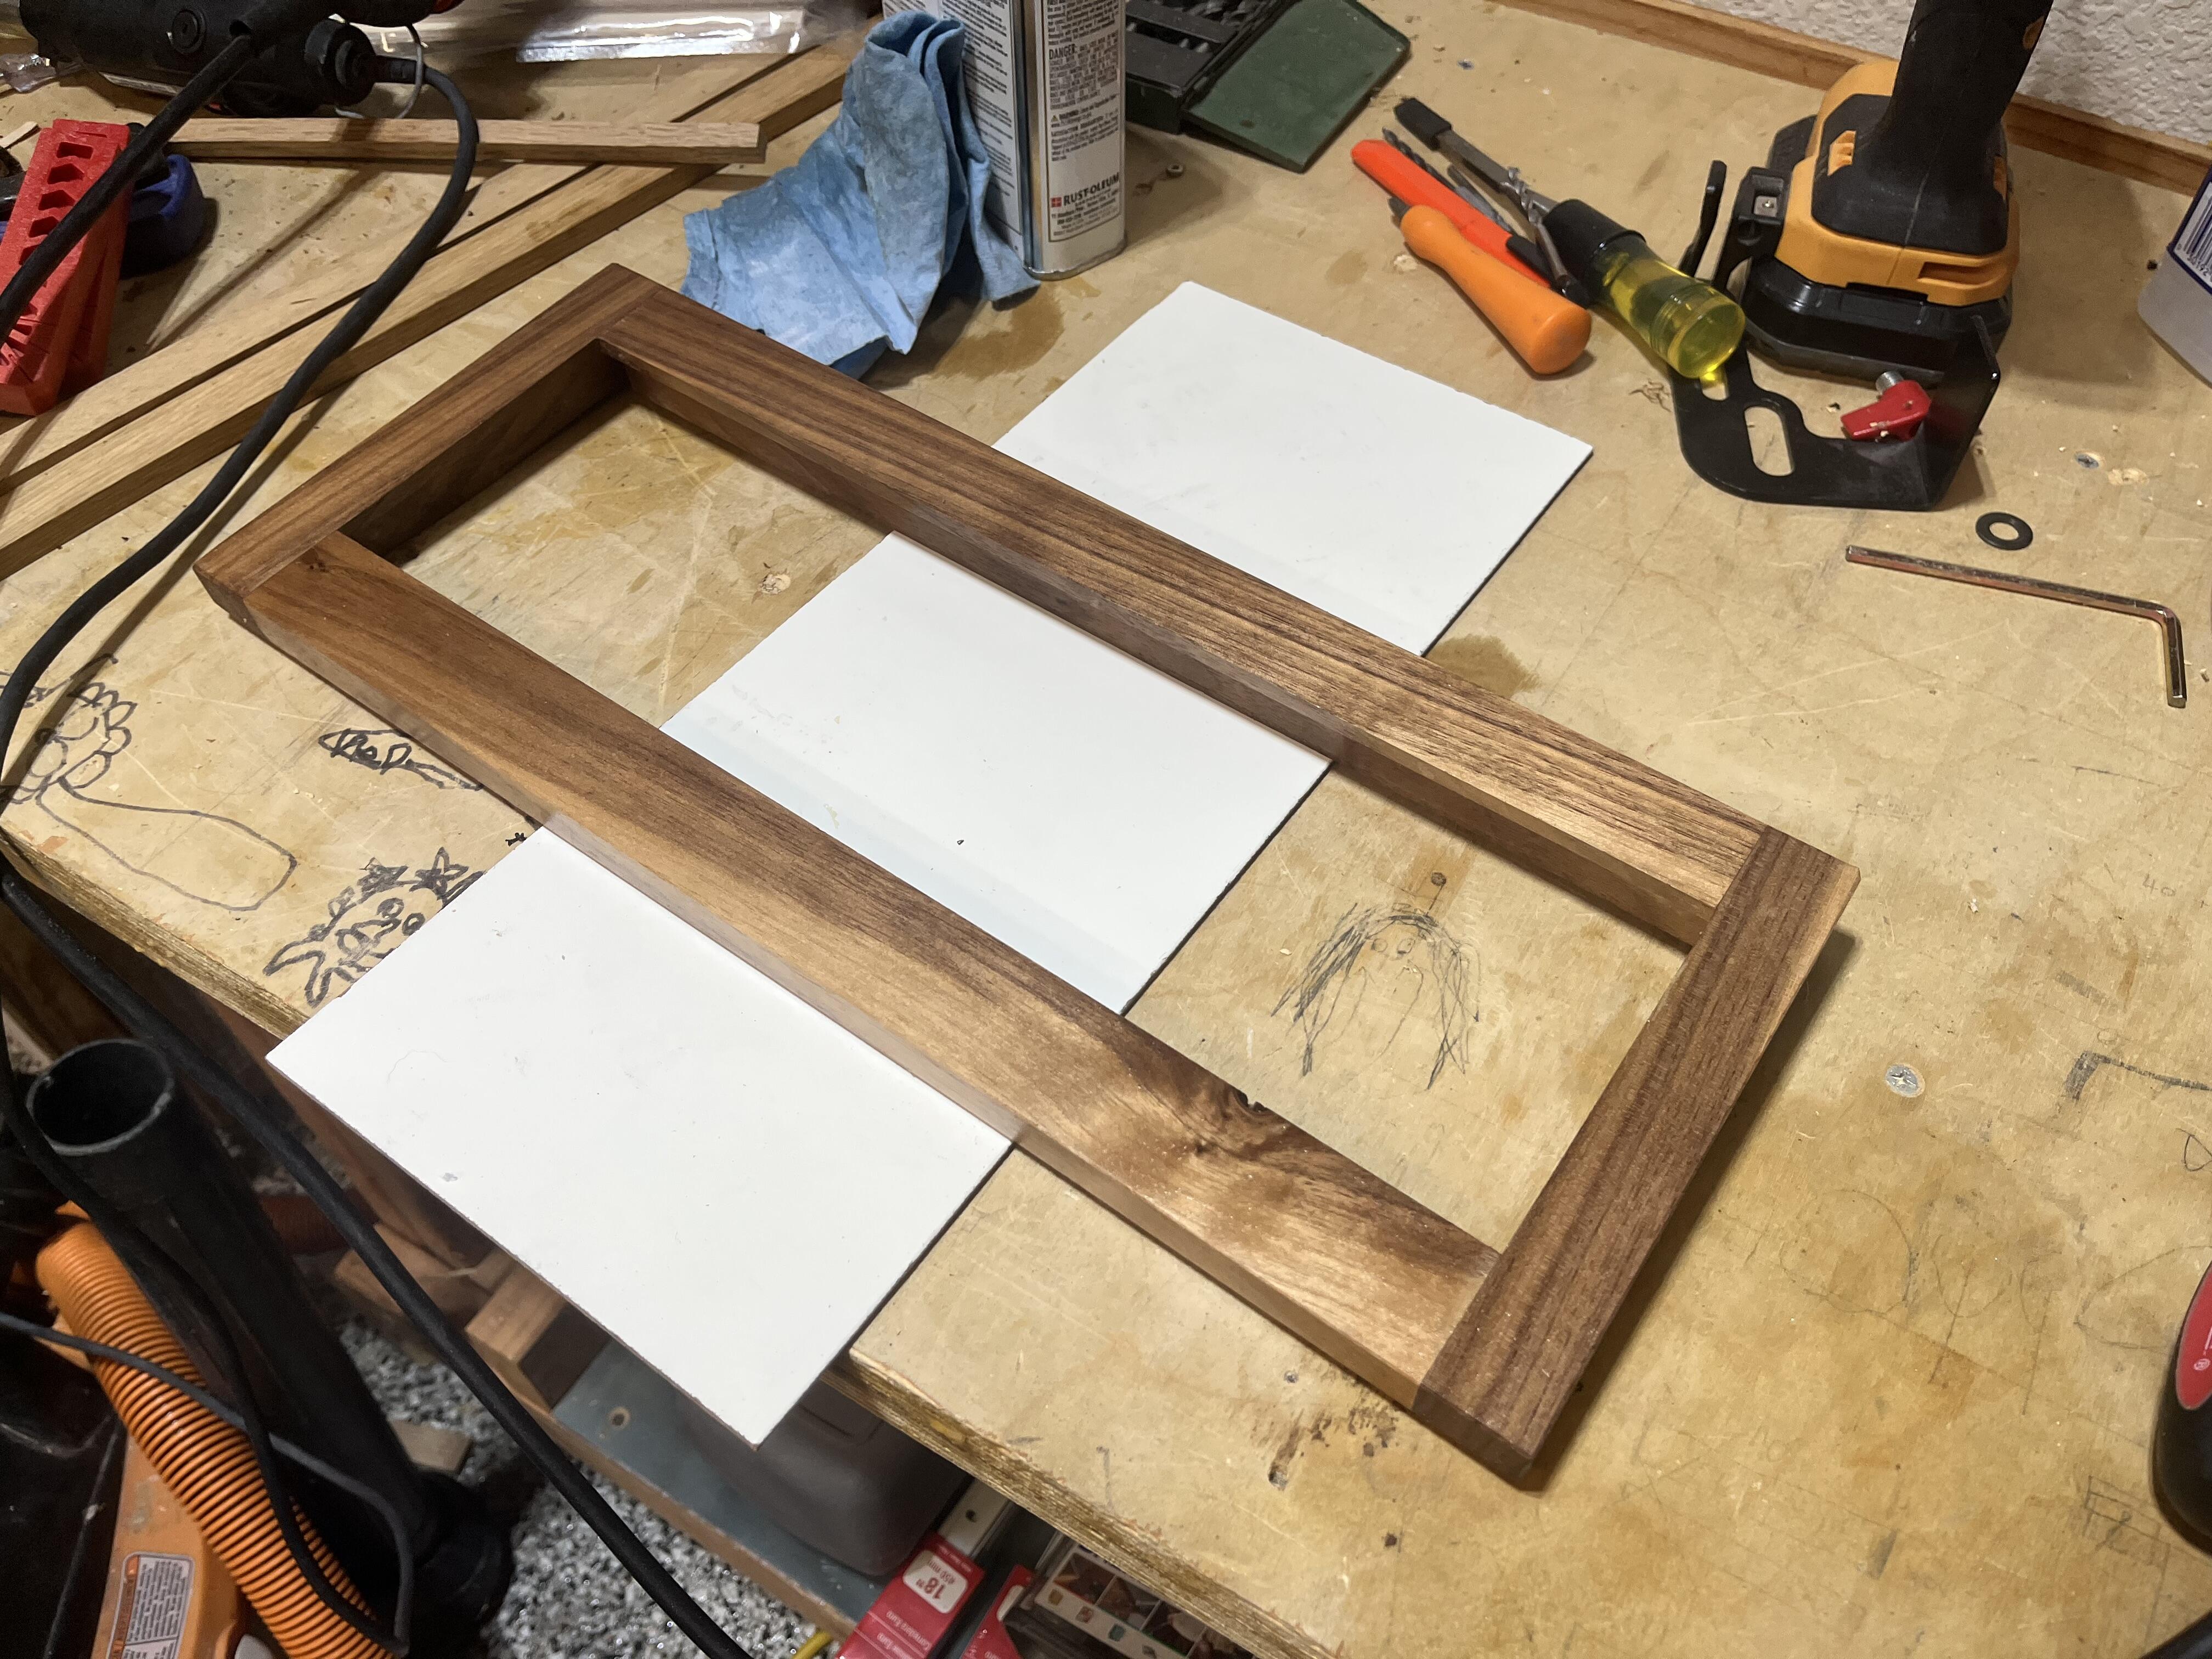
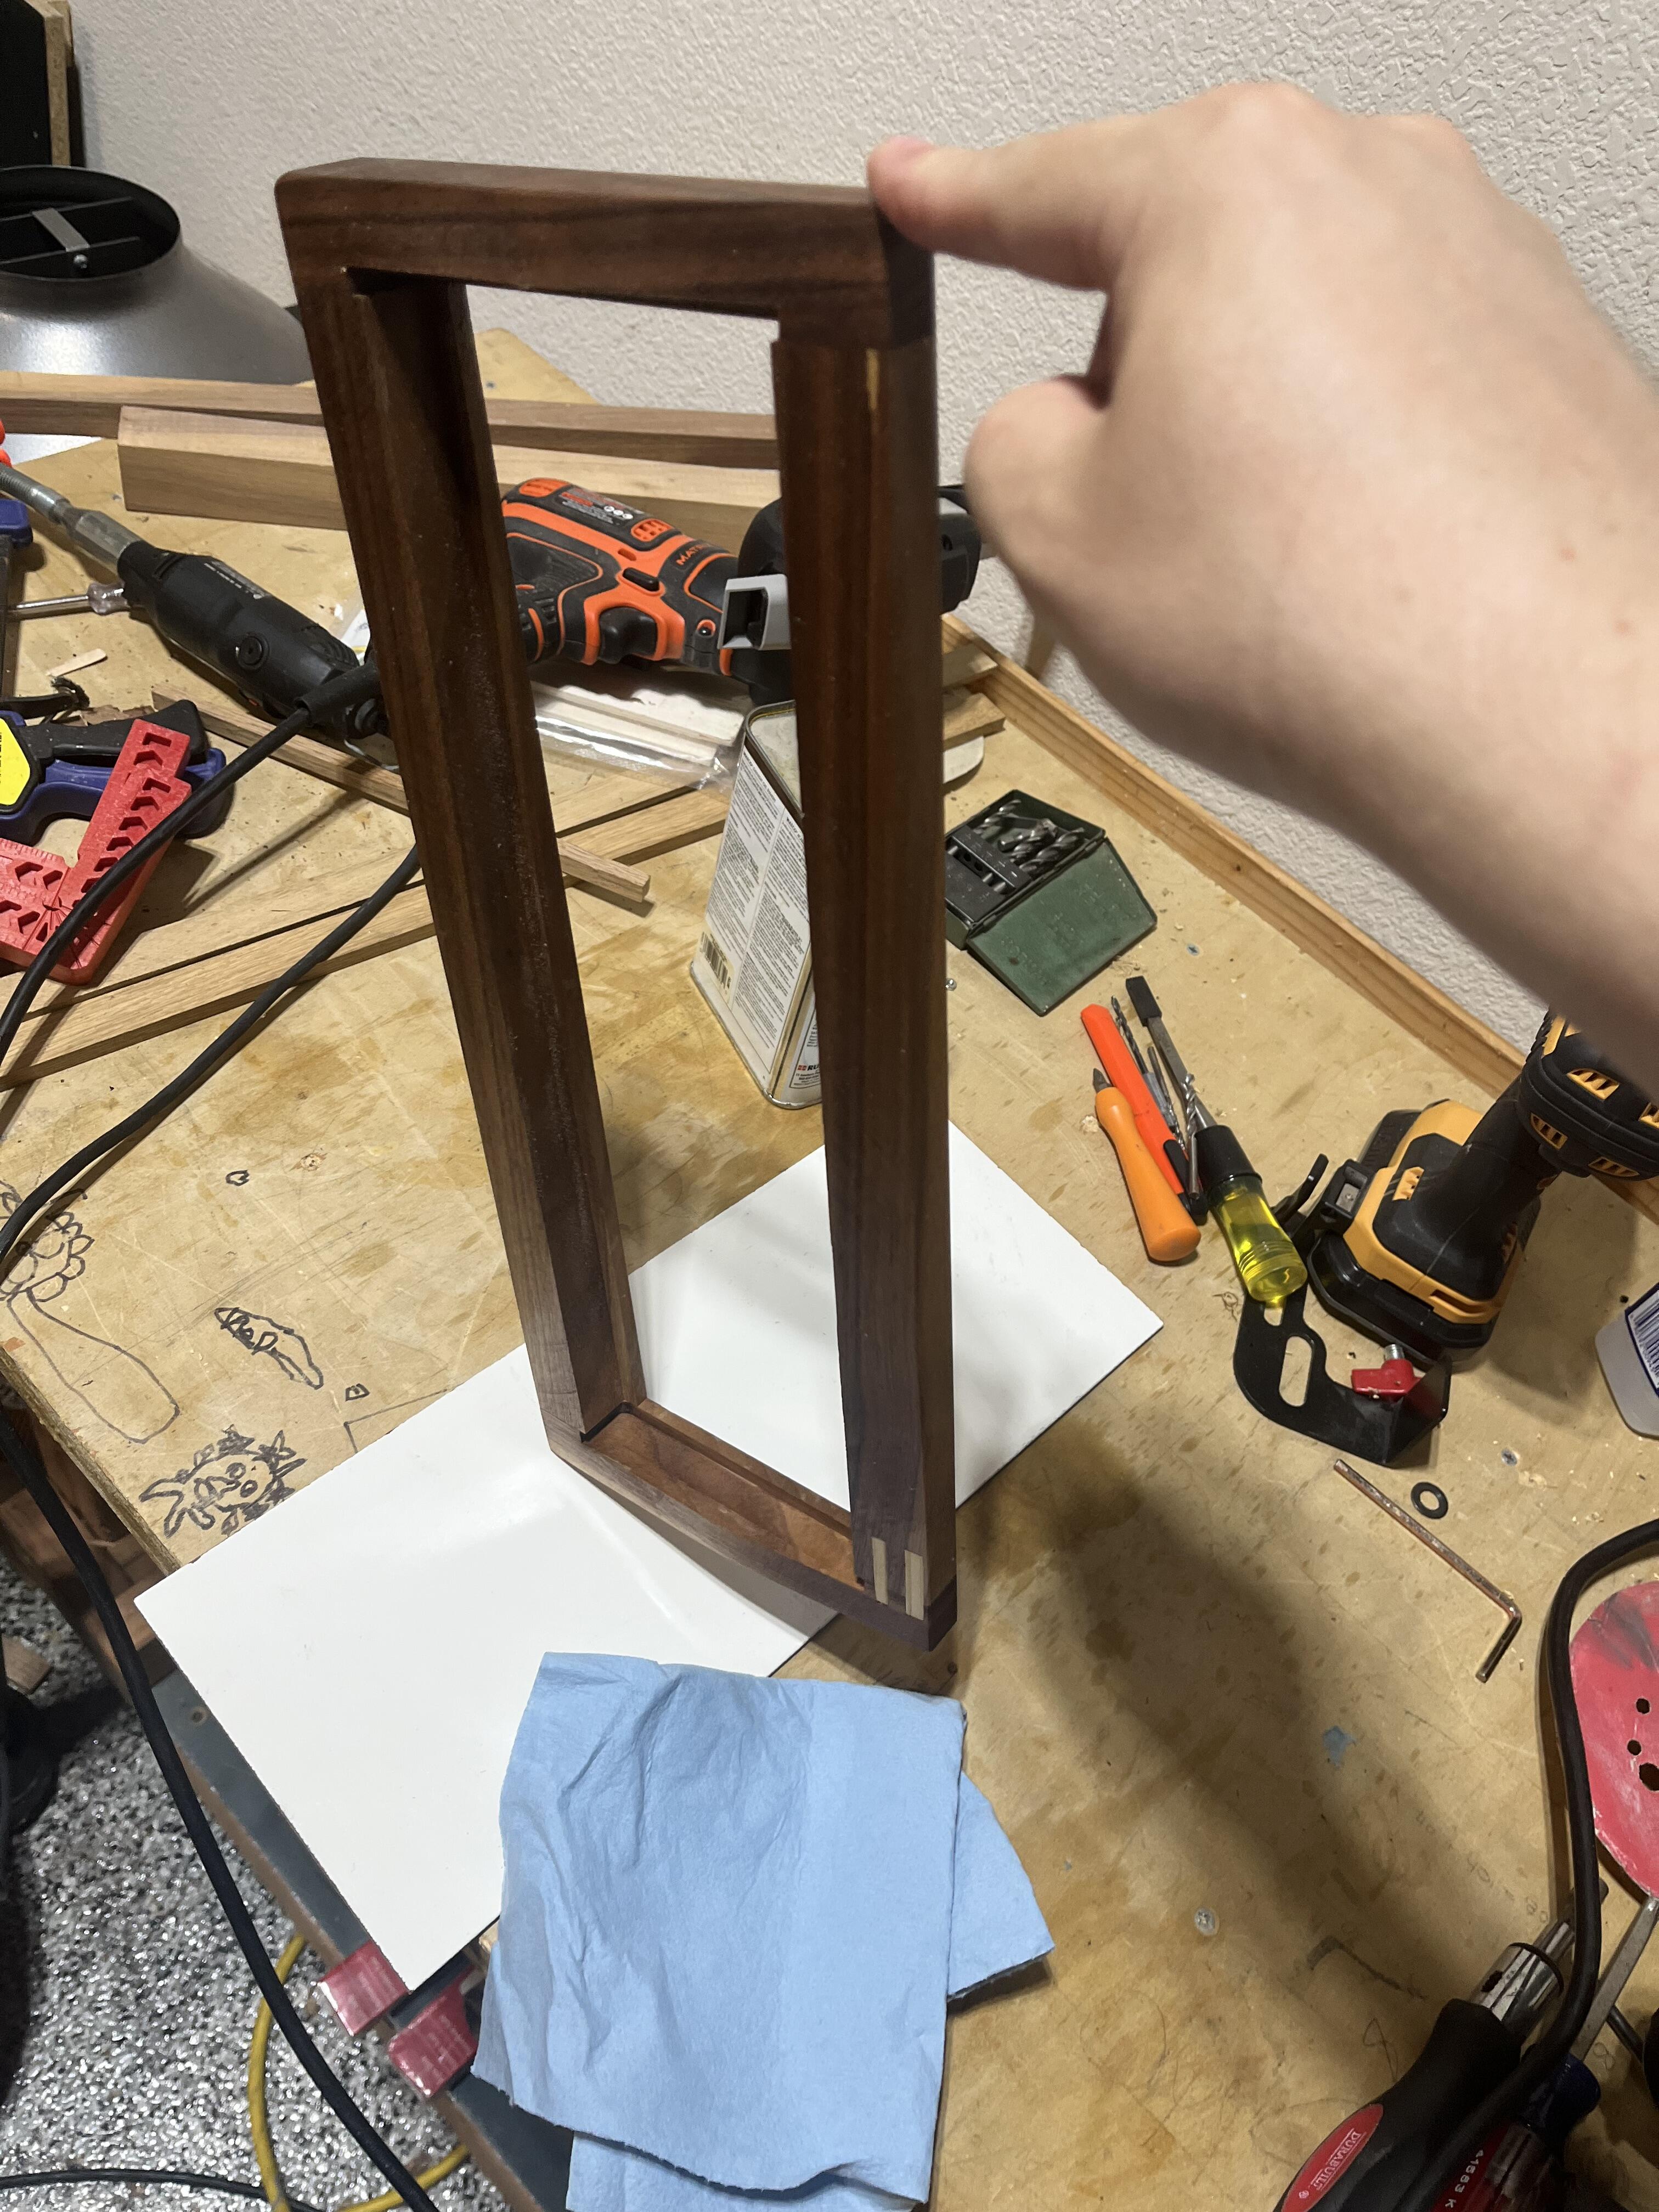
Hey it’s literally what’s on my workbench! I don’t get into the woodshop as much as I would like, meaning things get crammed in there and the tools are less accessible, continuing the vicious cycle, and in the end I never get efficient or particularly good, but I do love having it and with the right designs, wood can be a very forgiving medium. Just in the office, I made my headphone stand, fountain pen storage chest, “printer” stand (which currently holds two PCs and a Cricut with the printer on the other side of the house), and legs to mount a giant cubical desktop that serves as my electronics workbench. It’s sort of criminal that I don’t have a wooden keyboard, but that won’t be for much longer.
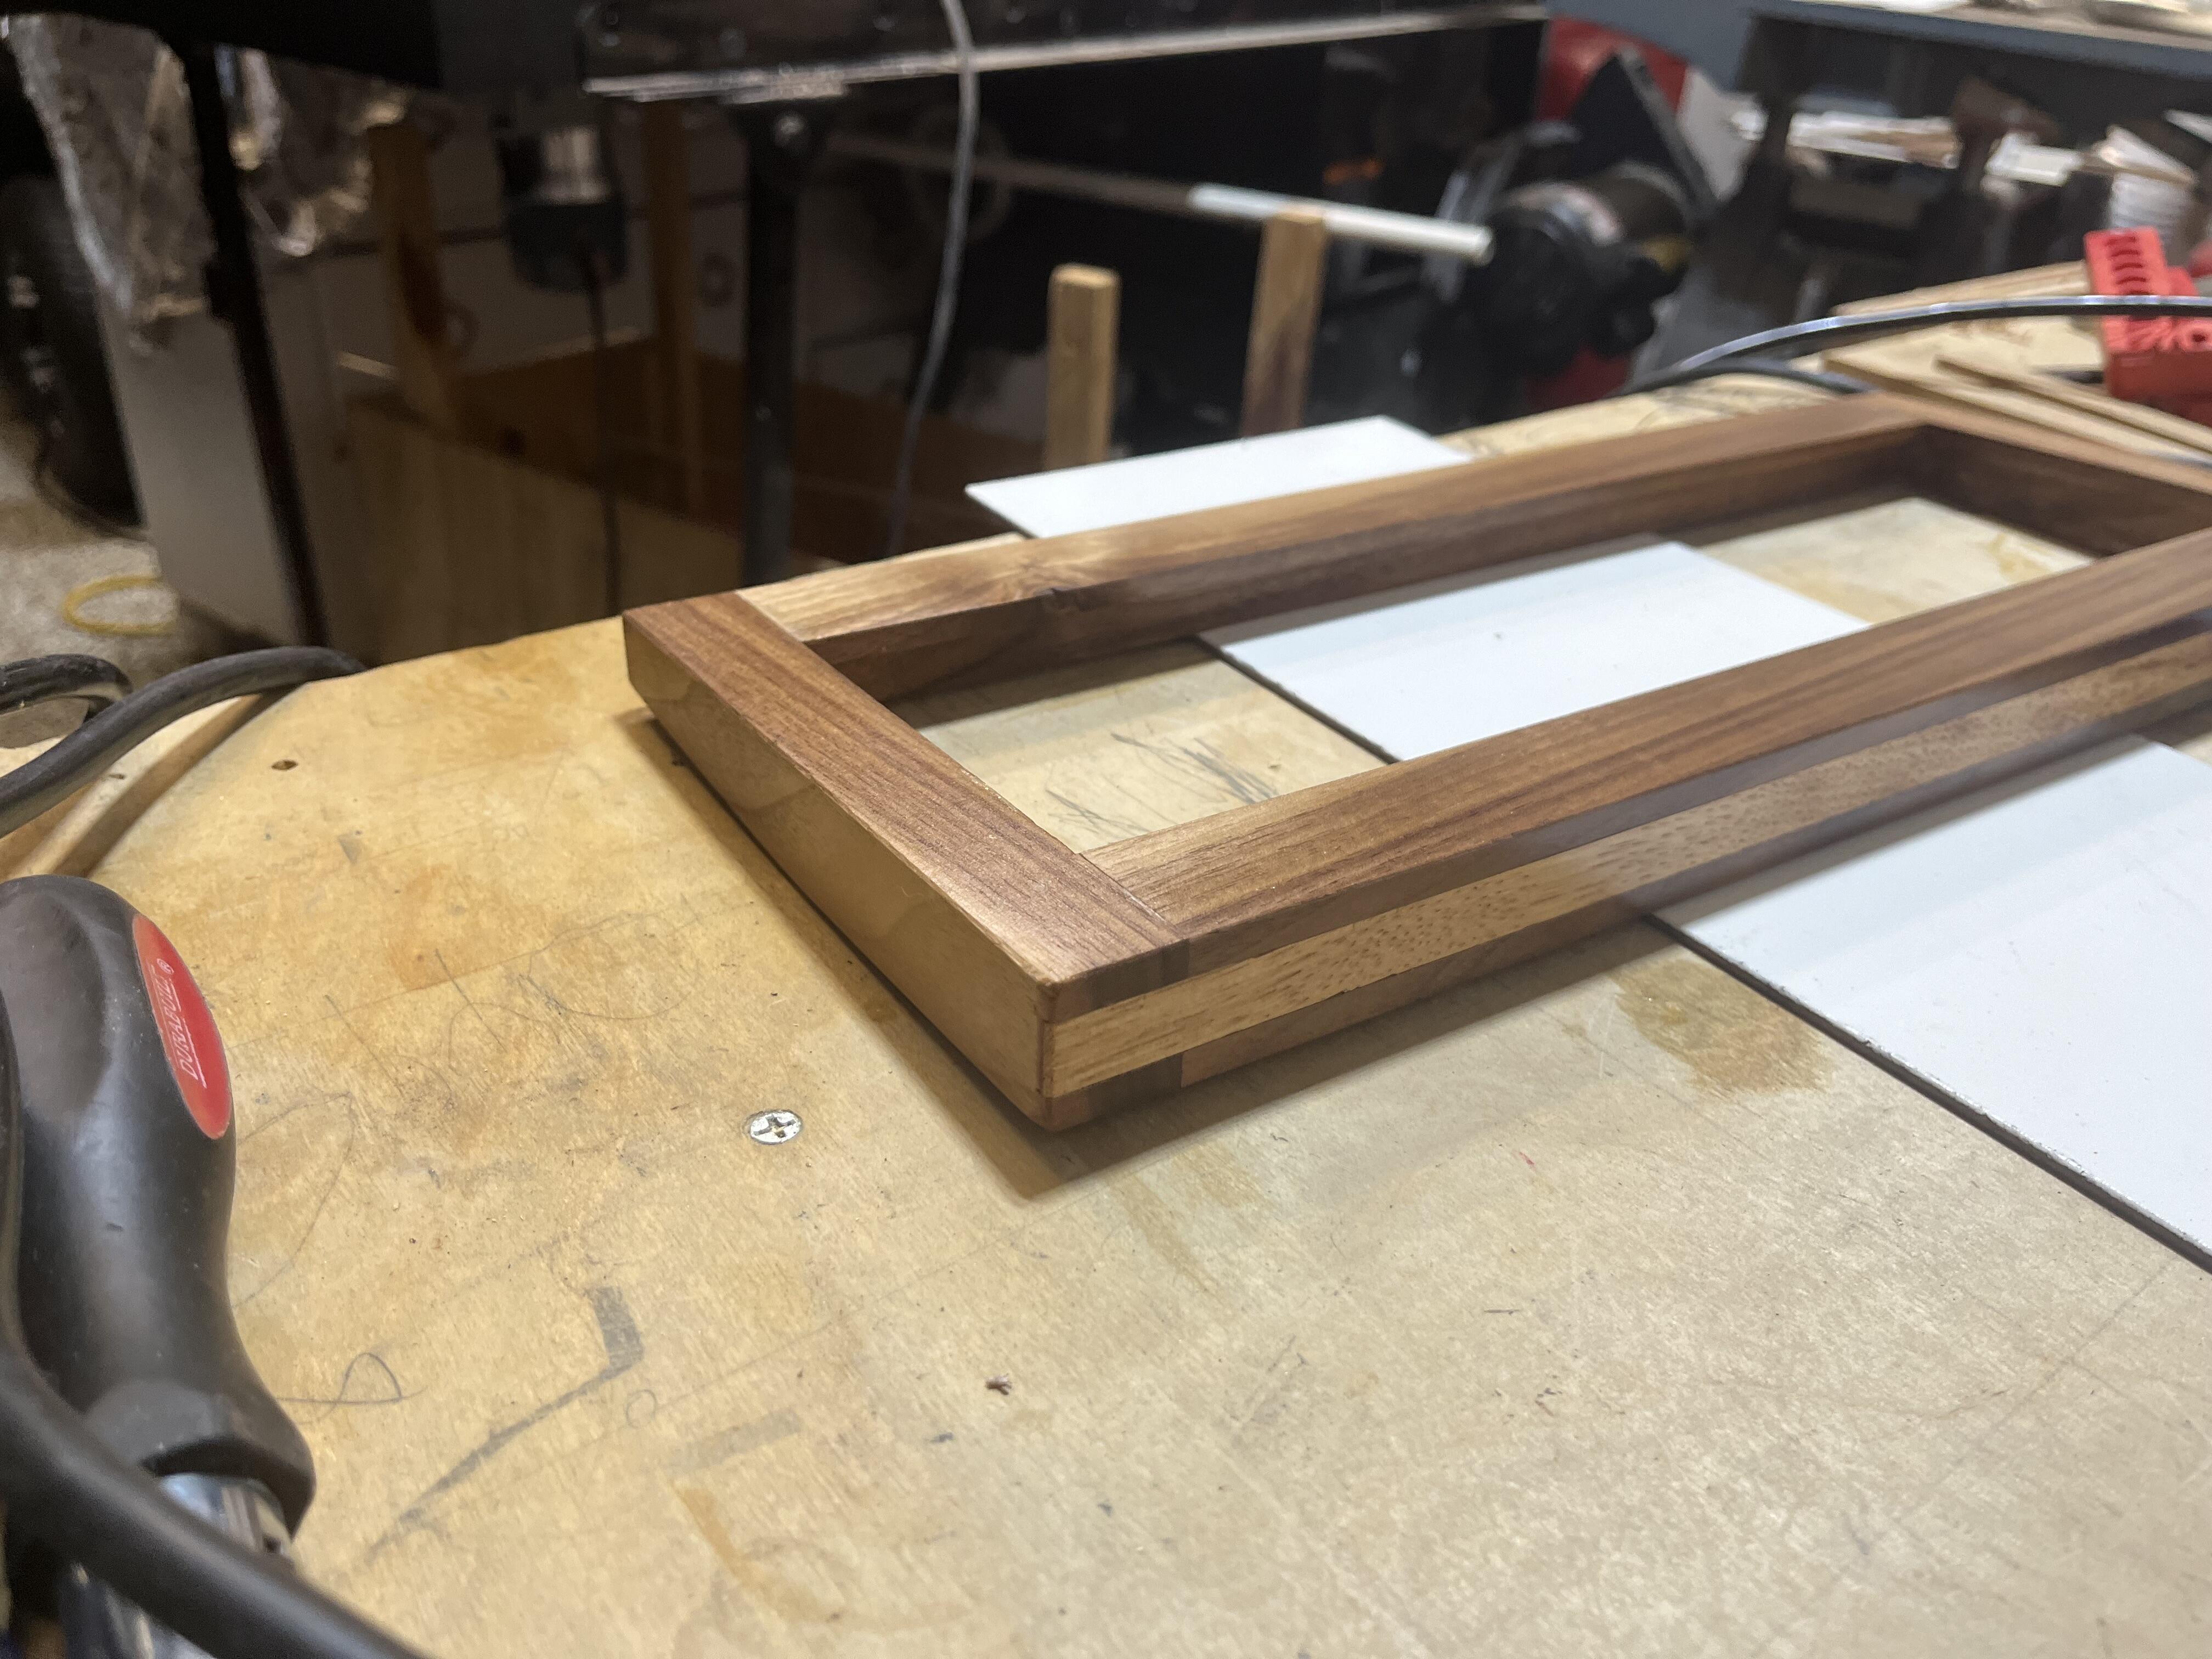
There are many more pictures of the build process, but suffice it to say that the strip of Pecan on the back of the walnut was DEFINITELY intended from the get-go and it’s certainly not hiding where I sliced right into the dowels while trimming to size. Please also ignore the visually similar artifact on the bottom where the same thing definitely didn’t happen doing a relief cut. That’s just an informational diagram about where to glue the old Focus rubber foot from the donor board. ![]()
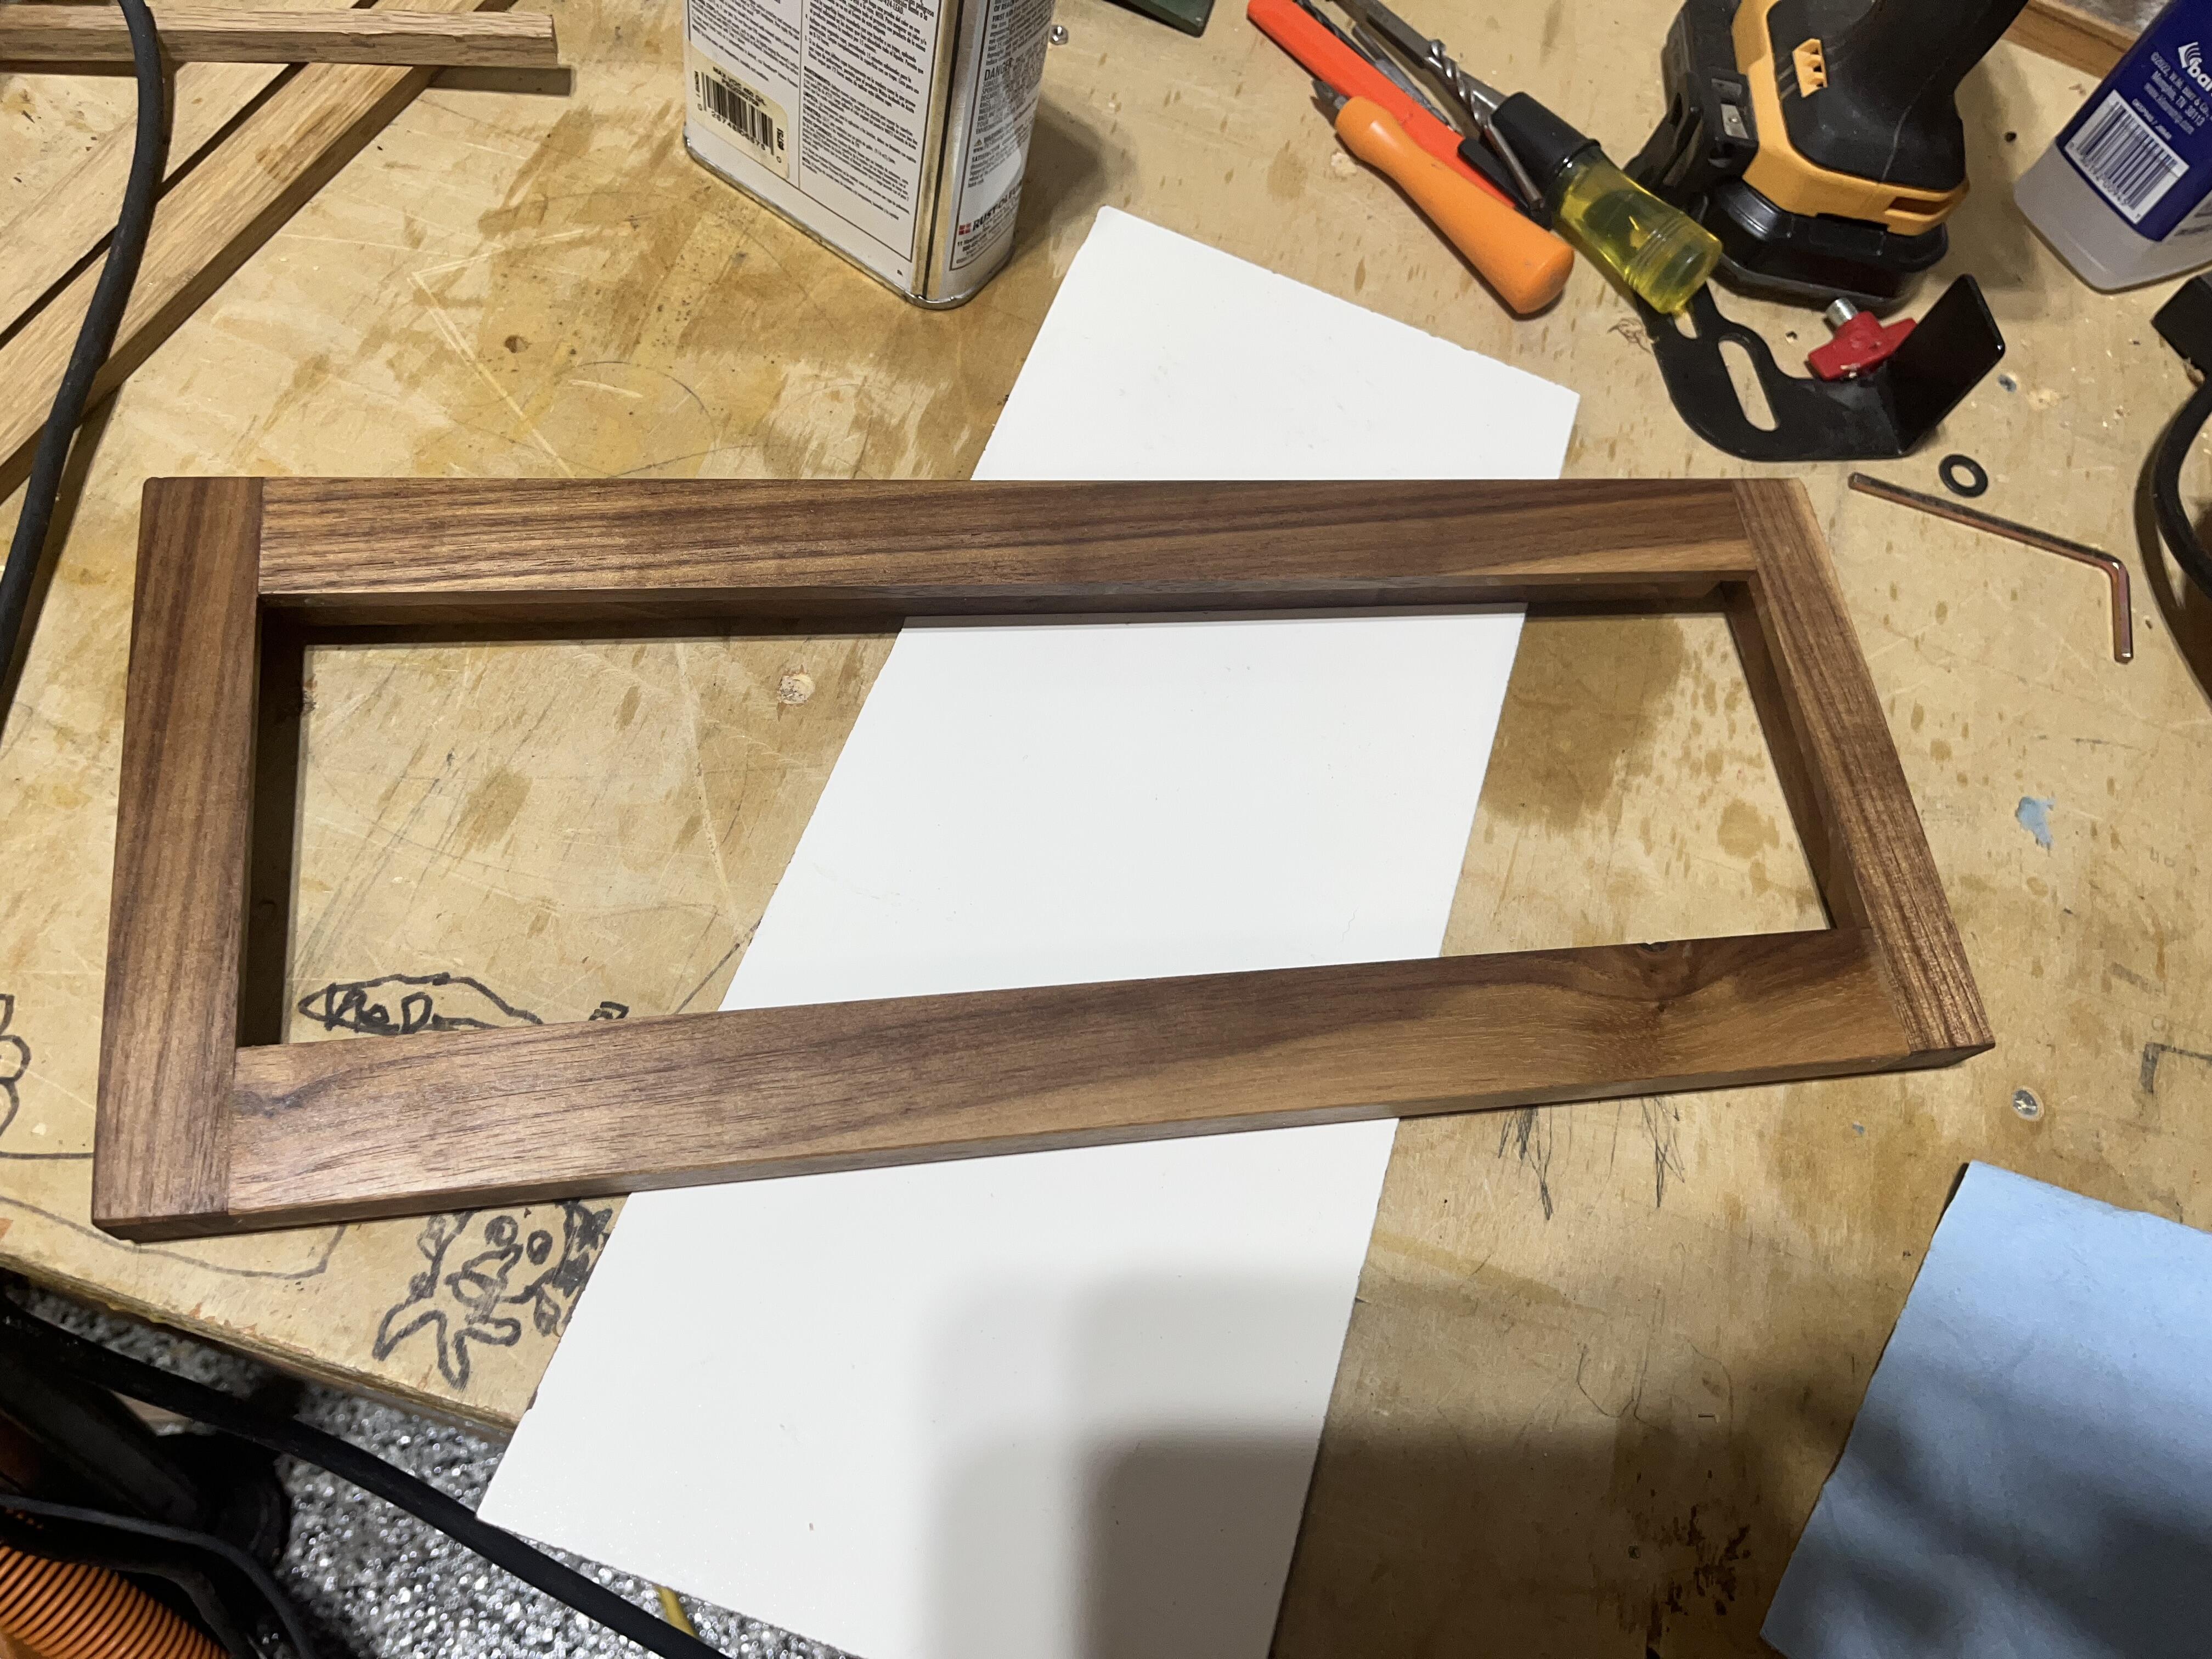
Anyway, it’s been checked for fitment, sanded to 220, and had two flood coats of Danish Oil. I’ll let it cure overnight, burnish with steel wool and then install the keyboard assembly, fine tune the vertical fit with spacers if I need to, then figure out a way to close it up. I had intended to do another rabbet on the bottom, but that won’t work easily with the new non-planar surface down there, so I’ll probably crib from furniture makers and use some scrap (or maybe cut some hardboard on the laser… feels wrong to do a keyboard without it) to make some screw-in “clips.”
Oh, and this MFer better come out nice, because I had a wicked back spasm while simply bent over trimming the pecan insert with a block plane. I’m going to be sore for a week. I’m so old.
9 Likes
YOOOOO lets goooo, Wood Board is finally happening. Do you have a name for it yet?
1 Like
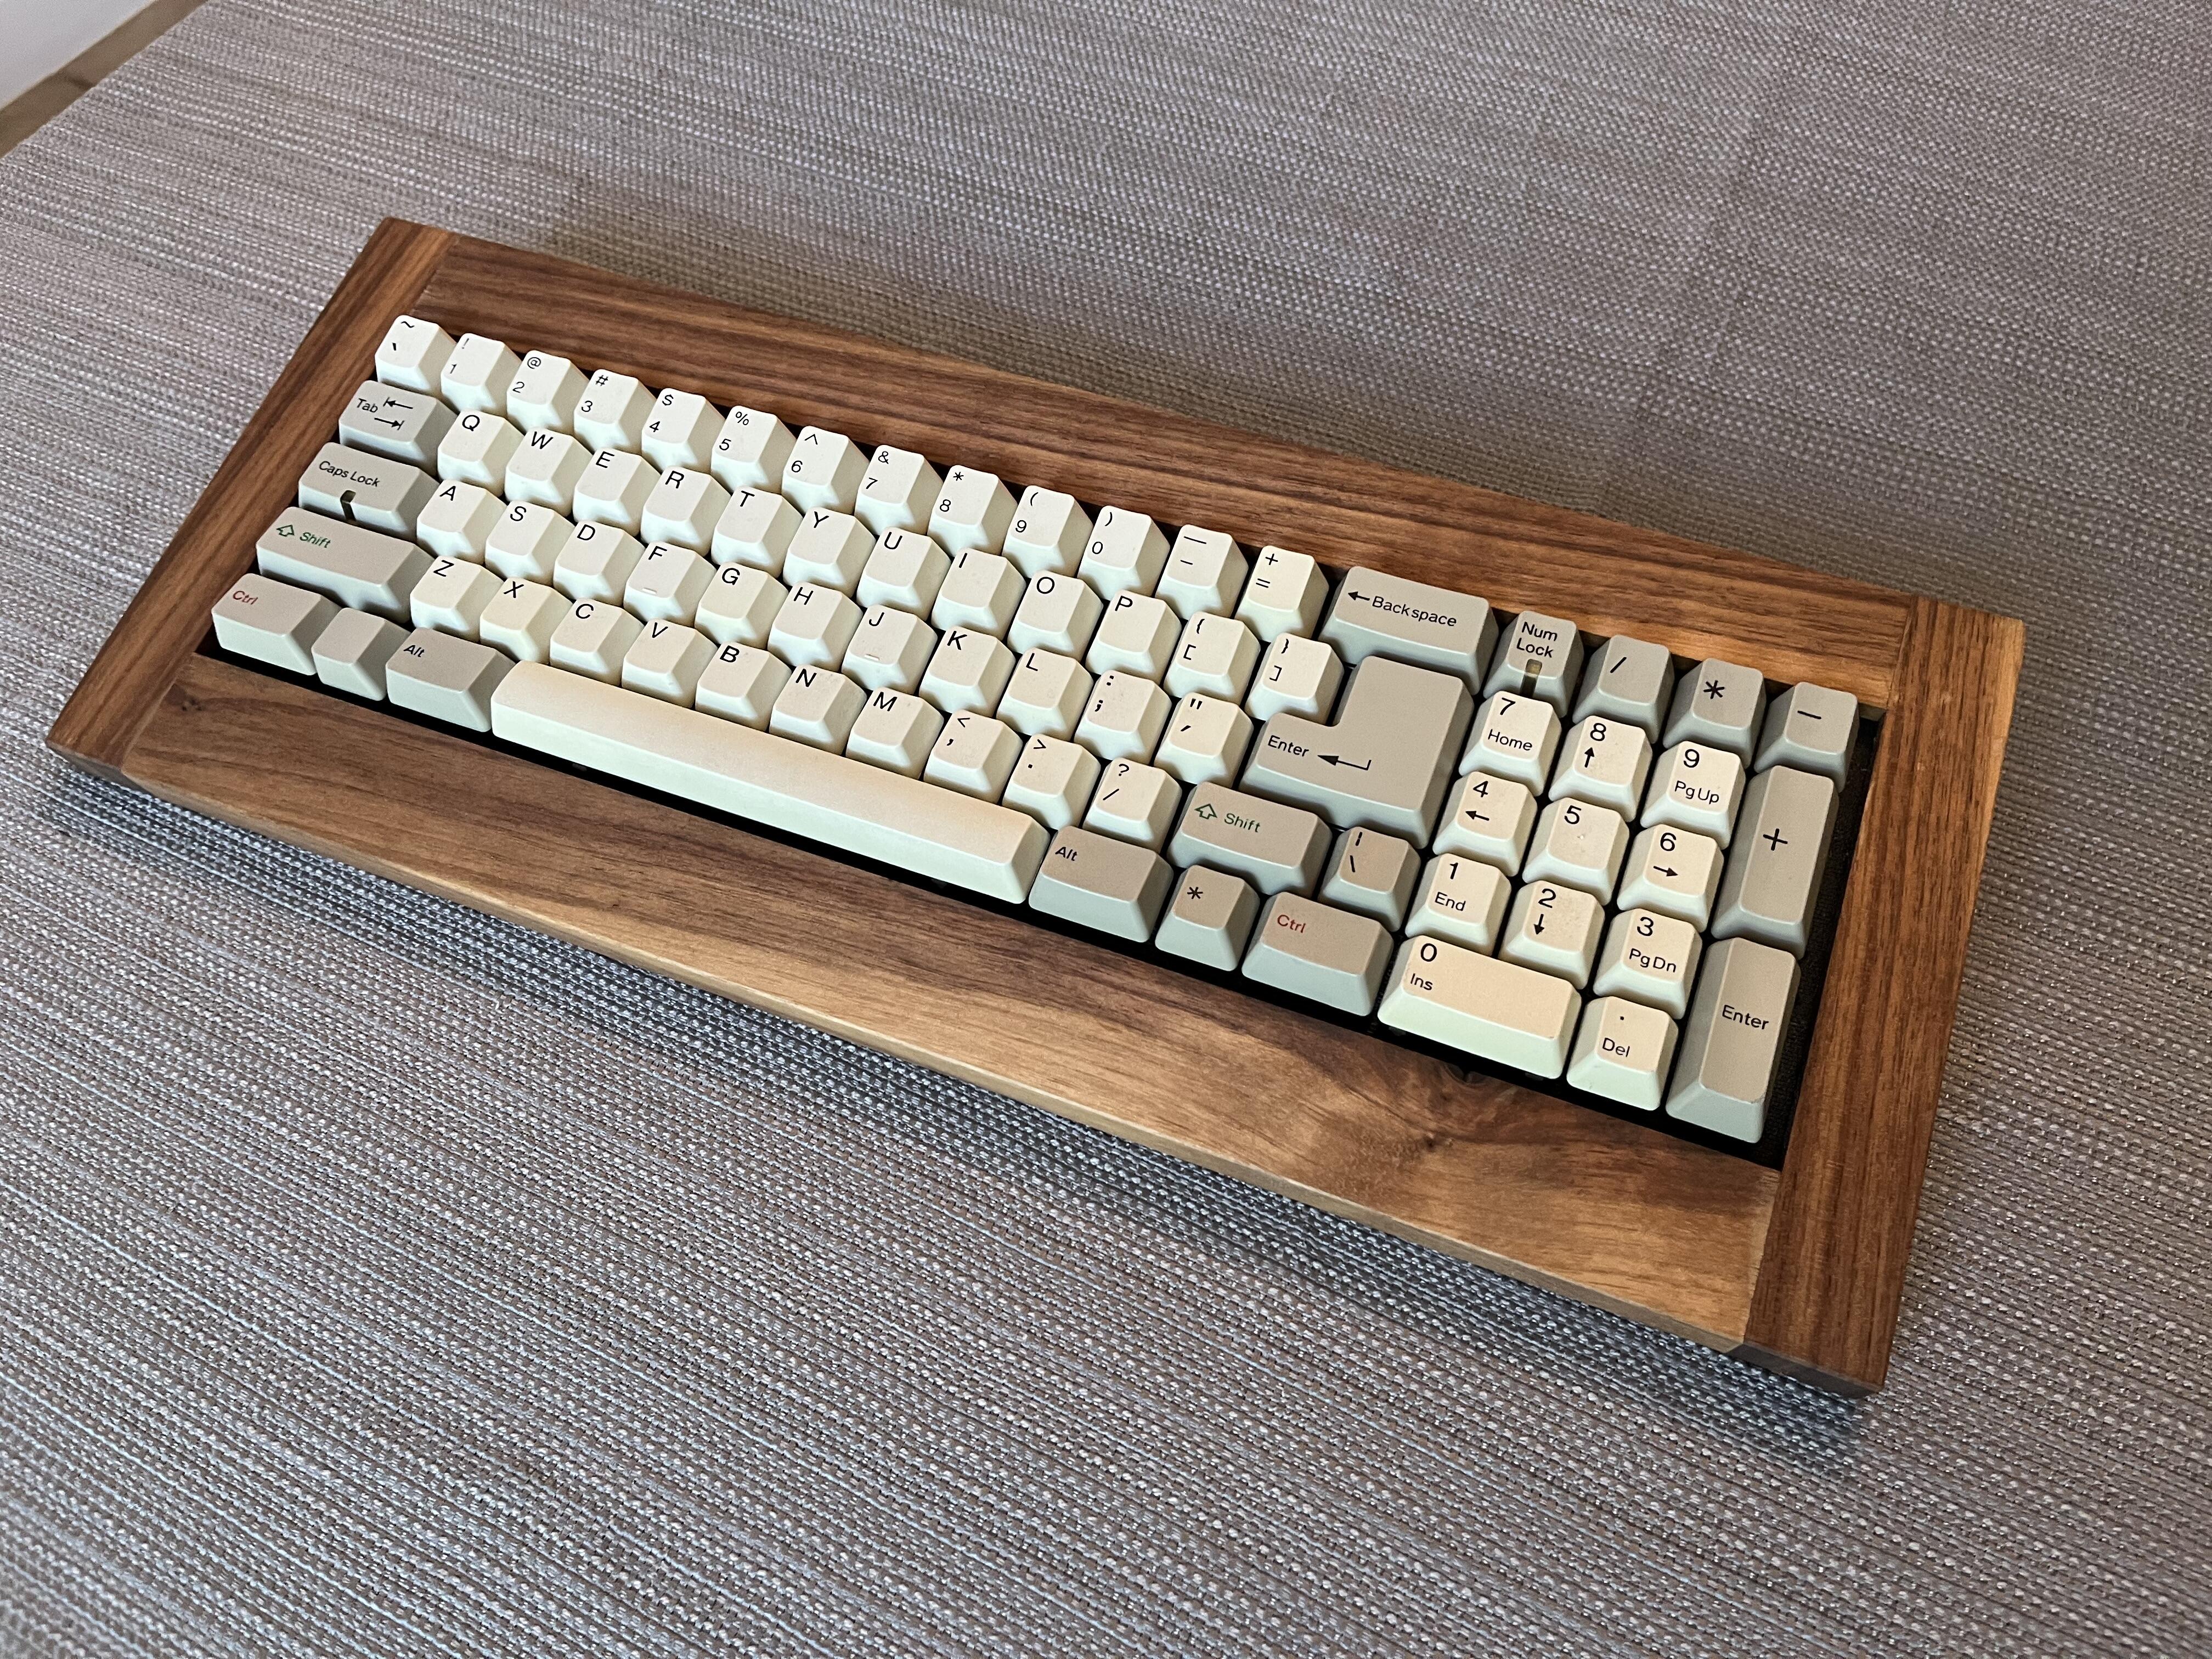
Mostly been calling it the “Alps 60+20” board, though I called it “Focal Point” in KLE because it was created from the switches and caps of Focus board. Given how the case ended up, with Walnut and Pecan, I could call it “Deeznuts.” ![]()
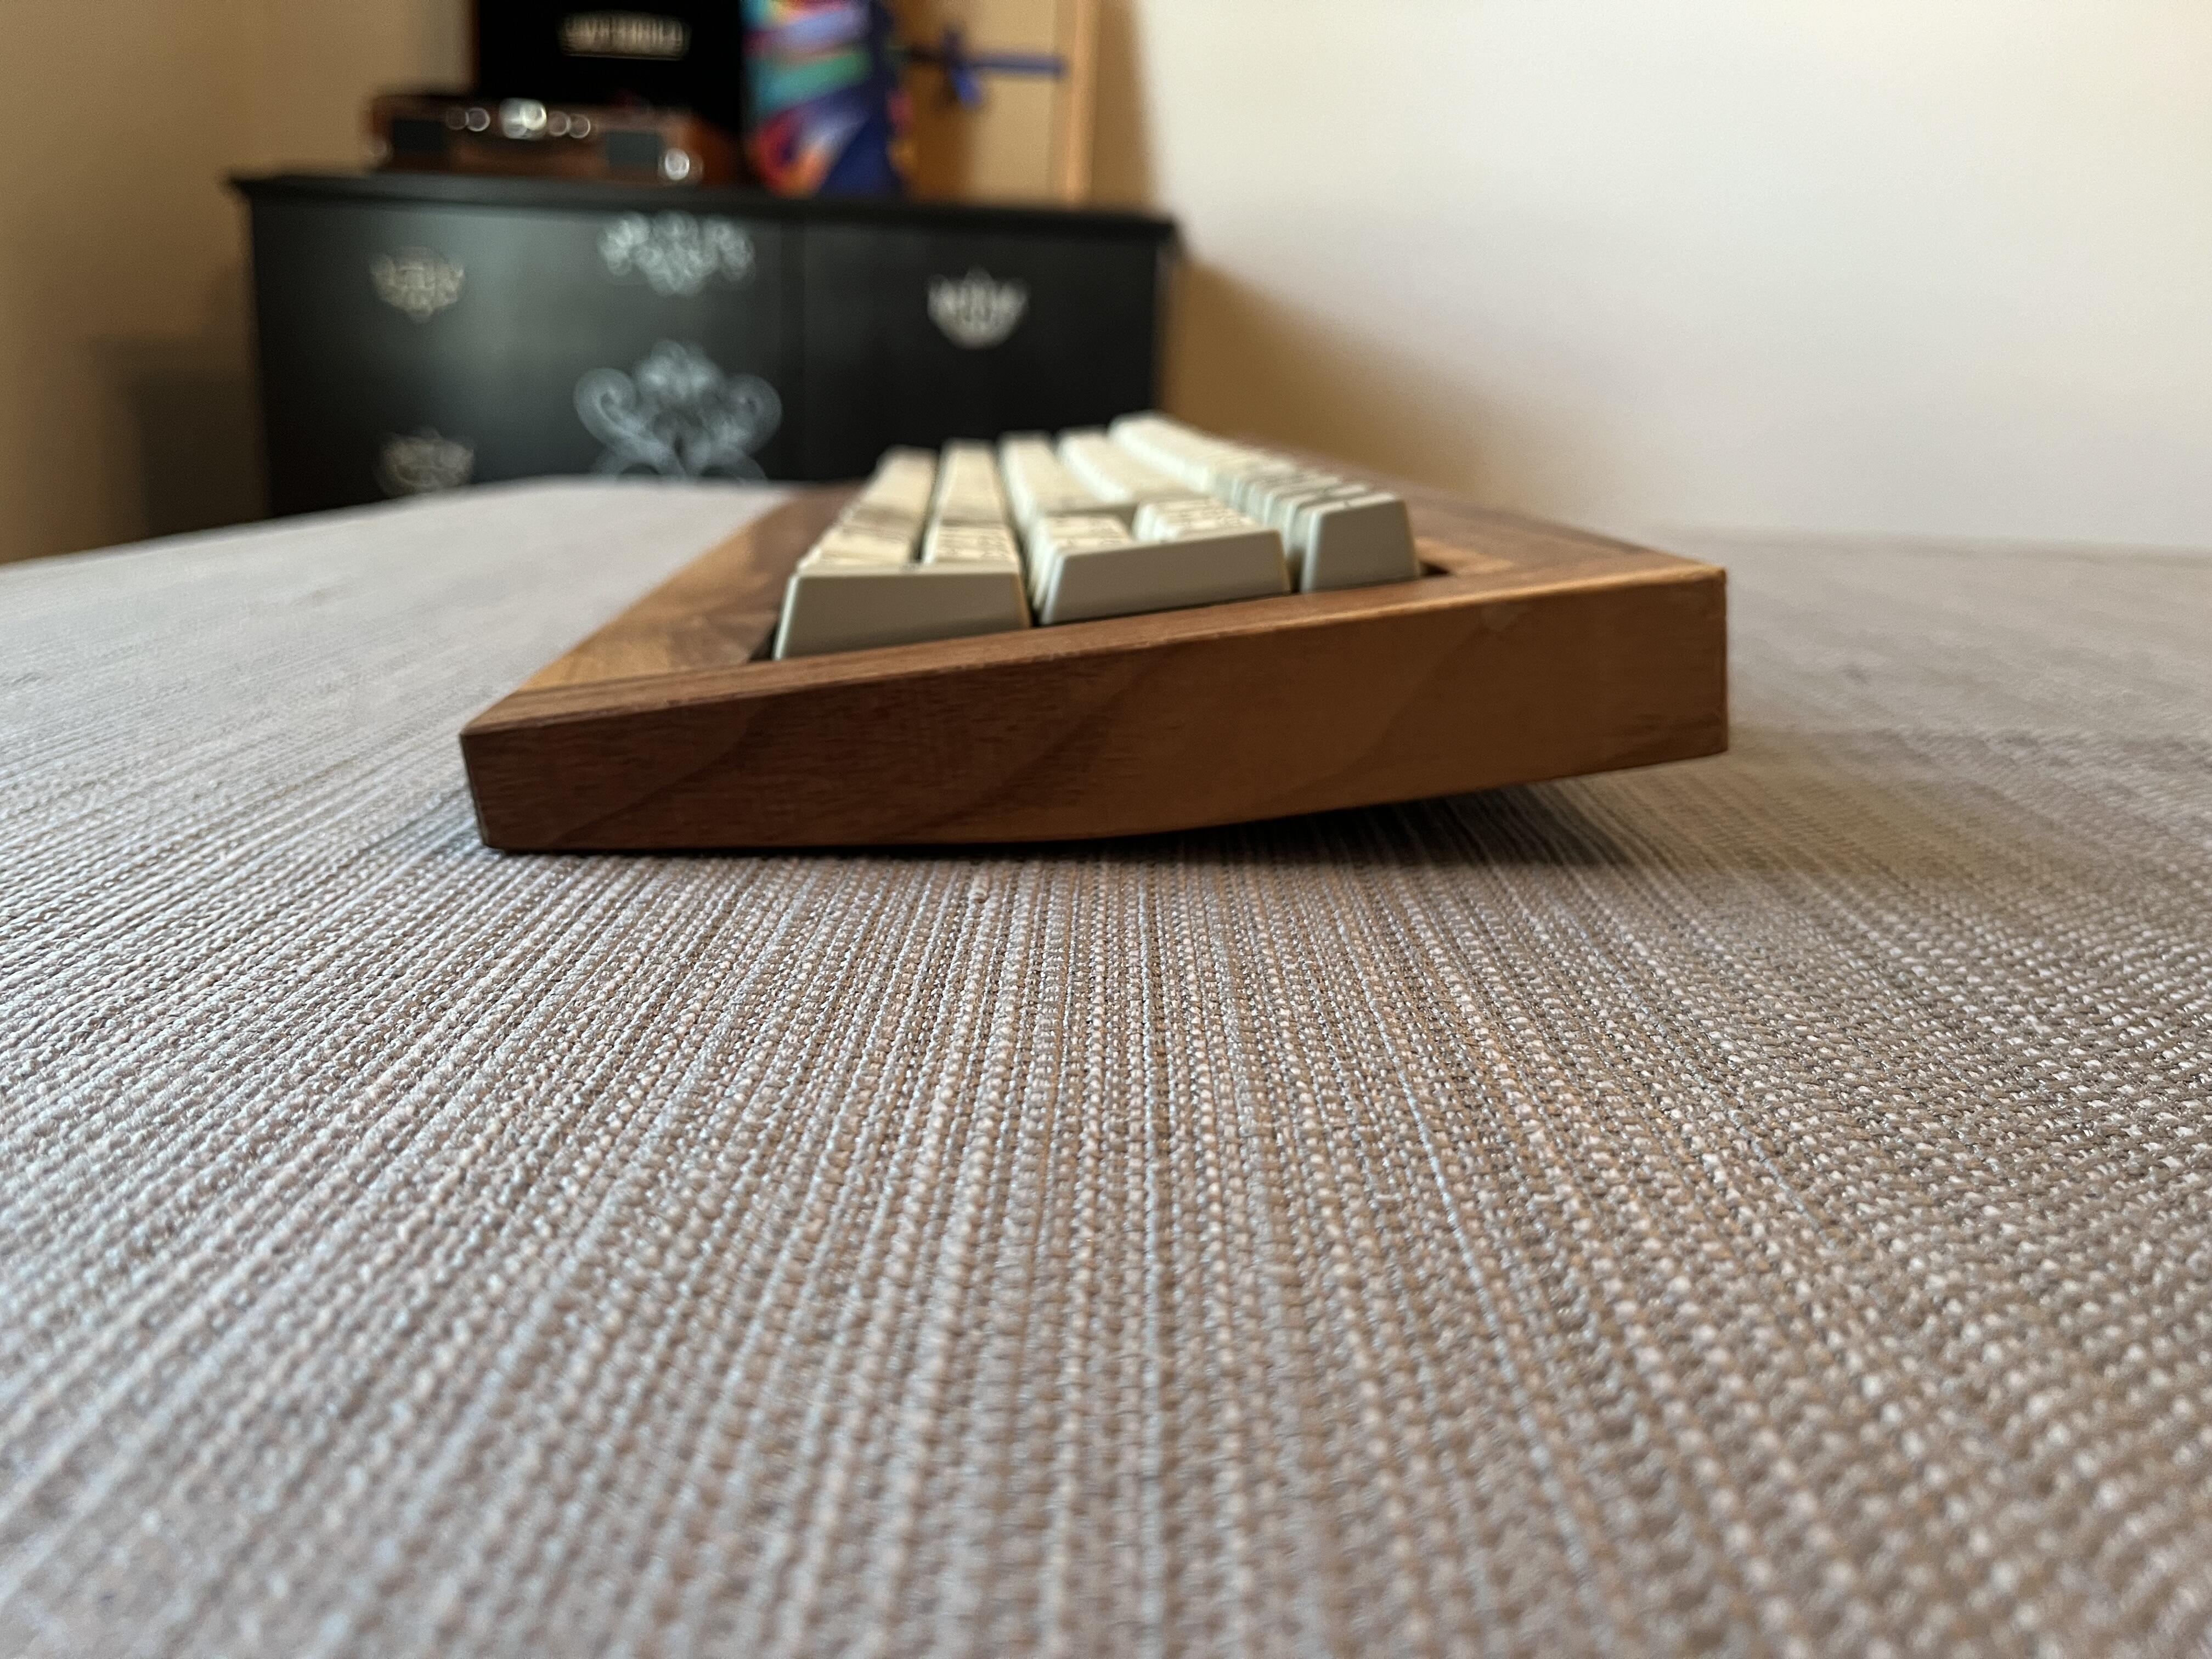
![]()
![]()
I still have to solution the mounting and drill out the hole for the cable, but this is more or less what it will look like when it’s done. I burnished with brown paper instead of steel wool, and honestly I can’t really tell the difference, but the Danish Oil over 220-sanded sort of inherently looks nice. No clearcoat, both because I like the look as-is and because while oil finishes are less durable in binary sense, it is easier to repair them if and when something happens. Danish Oil has some small and proprietary amount of varnish resin in it anyway.
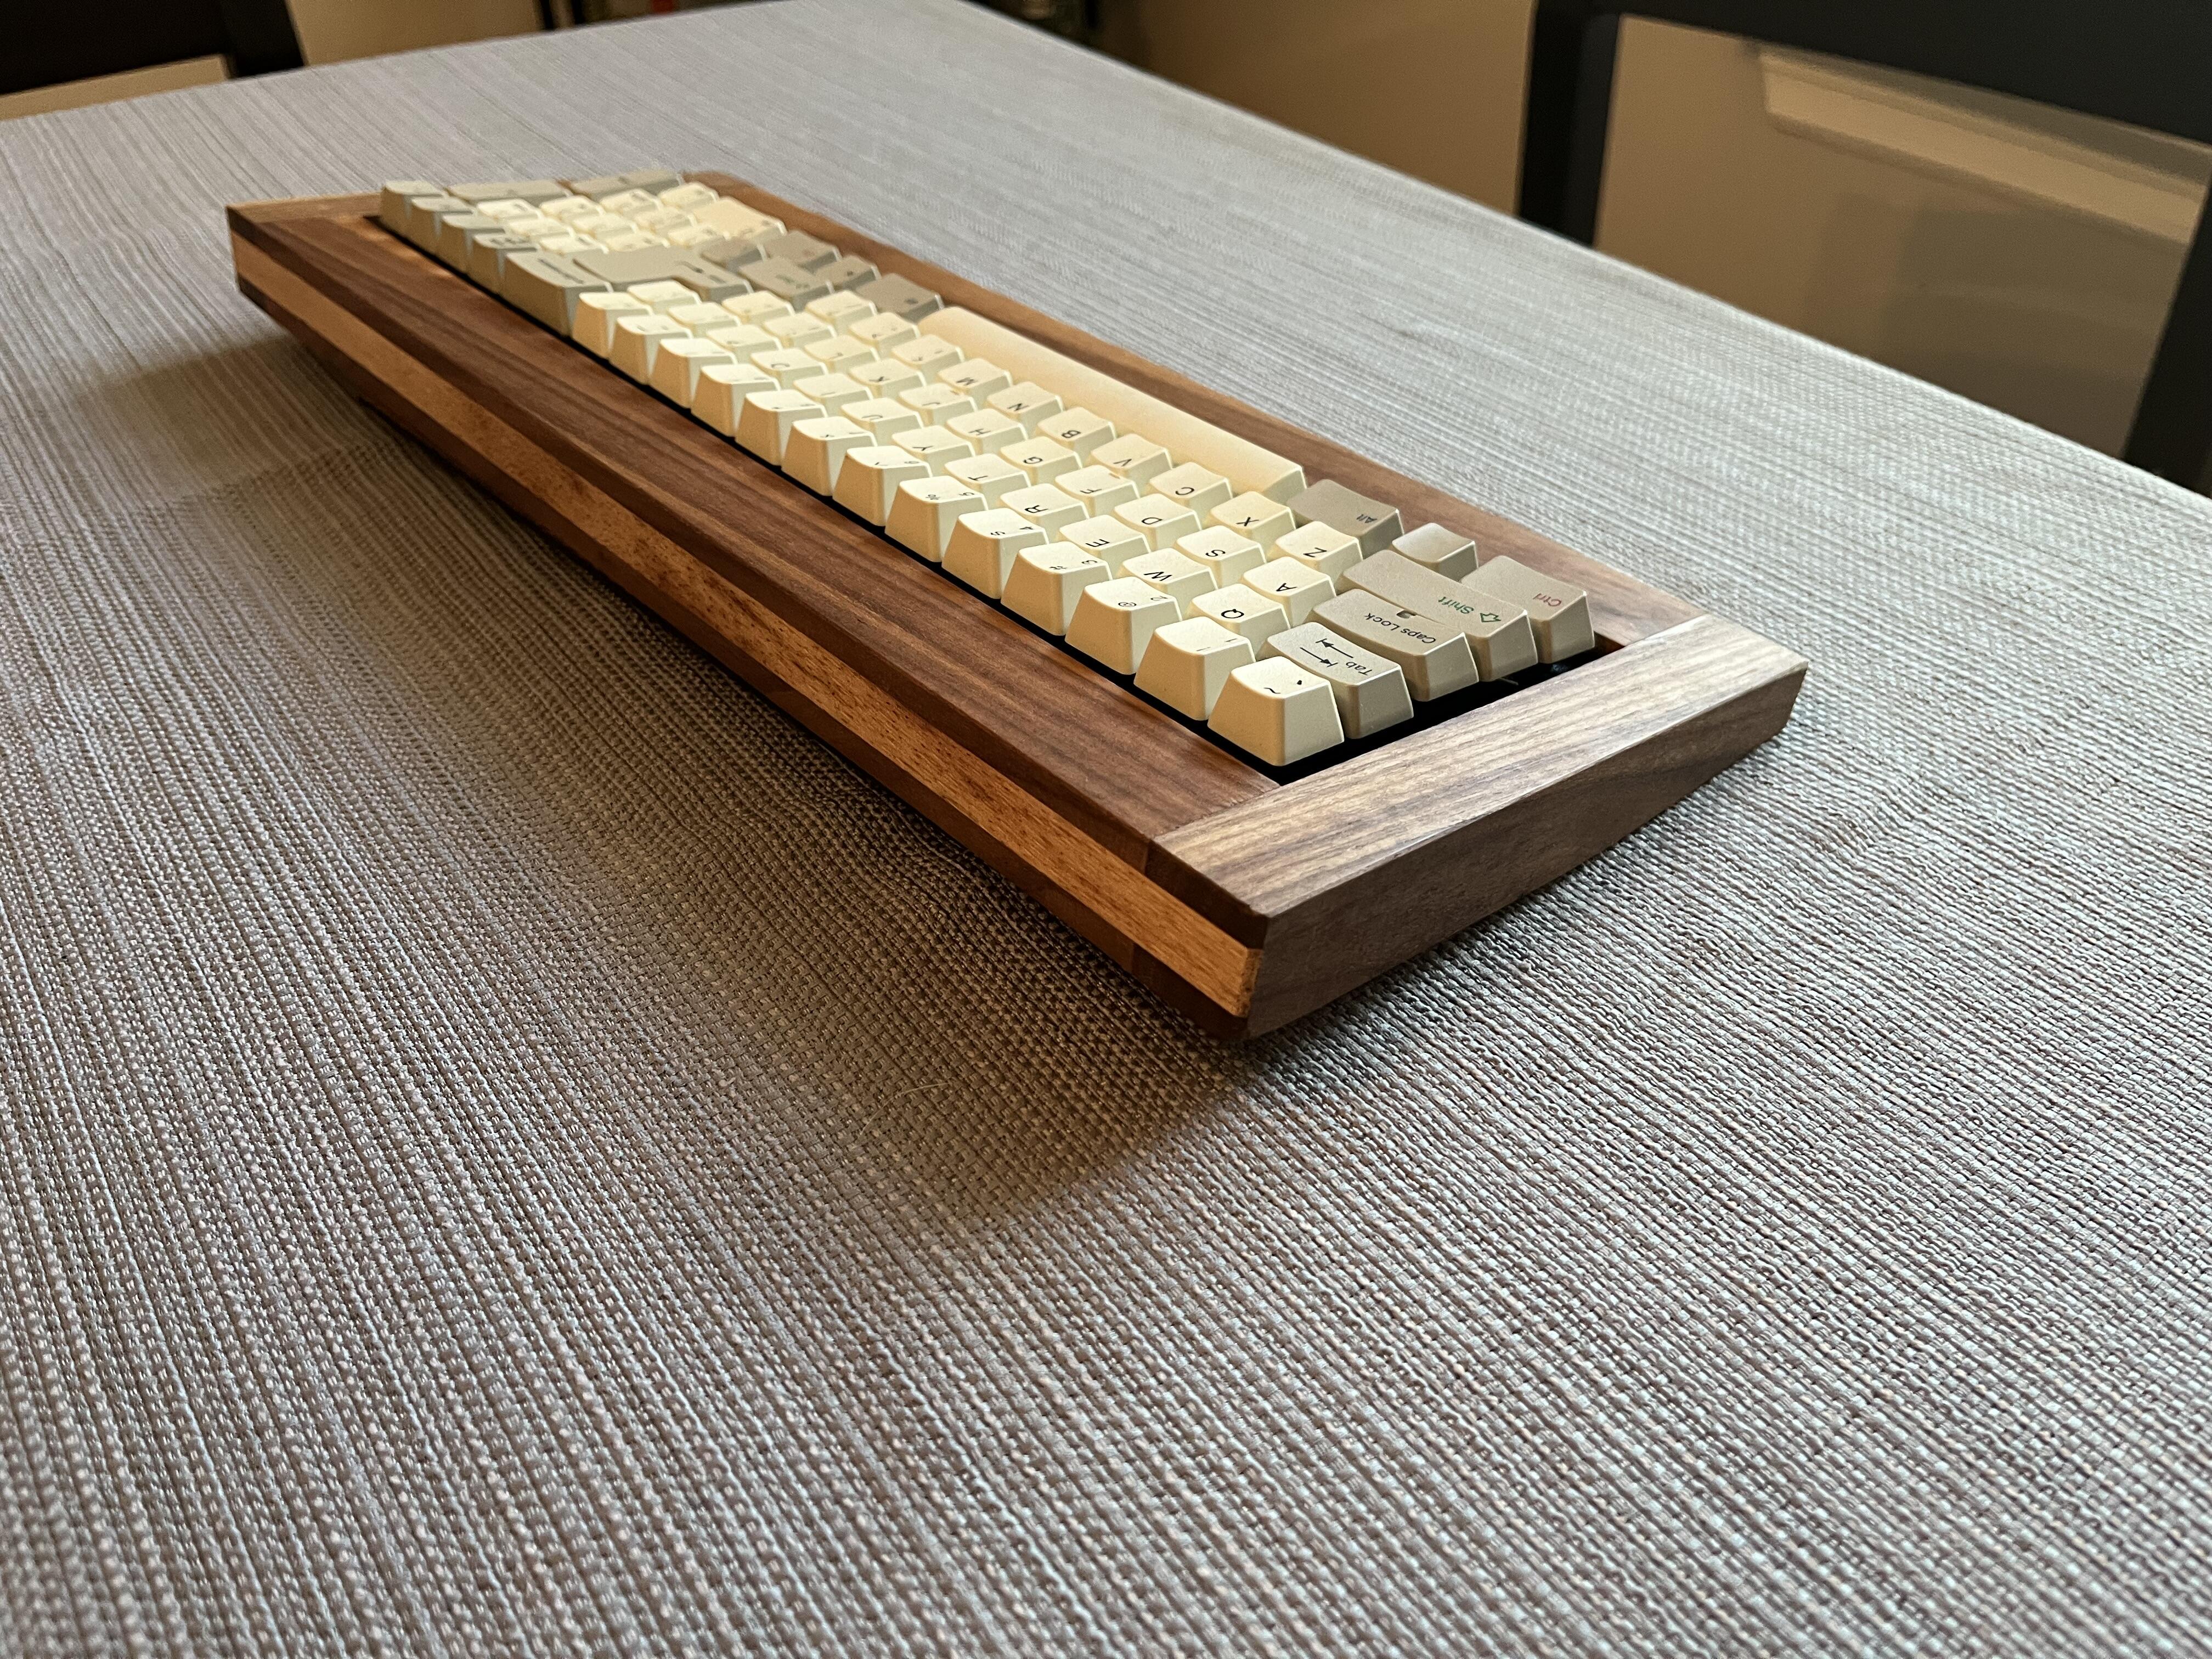
If I were to start over, apart from just being mindful of where I ran into difficulties (e.g. dowel placement) I think I’d be less of a chicken about keycap tolerances. There’s “make sure there’s no rubbing” and then there’s “this is too much,” and I think I’m closer to the latter. I’m actually fairly pleased with the overall shape and proportions, even the strip on the back, but I’ve got 3.5-ish mm of clearance between the case and keycaps, when I probably should have been shooting for 1.5. If I end up hating it, there is very reasonable 2mm brass stock out there.
12 Likes
It is very nice wood joinery that you did here!
My defunt grand father who was carpenter would have appreciated that ![]()
1 Like
Looking soooo nice when everything assembled !
Congrats on your stellar work !
1 Like
That came out super nice man, awesome work! Any reason in particular you went without the F-row?
2 Likes
Thanks! It’s flawed, in some ways deeply so, but it has some stuff going for it too.
I left off the F-Row for two reasons: First, I have found that I really don’t miss the F-Row, that I am fond of the look without it, and several of the boards that I’ve built are already basically FRL 1800s.
Second, the donor board was missing several F-row keycaps. ![]()
2 Likes