I see what you’re saying about wanting to refine the design a little more, or even moving the project over to 3D printing. When you do get it nailed down let me know please, I really like your ideal & would be willing to buy some off you if you’d be interested in making some for sale. Cool ideal though as keycap trays are so damn expensive but so useful! ![]()
1 Like
I used up some old filament to try this in 3D printing. As long as you’re not an idiot who idly presses the red stop sign on your new printer’s mobile web interface without checking what it means (“emergency stop,” btw, and not “priority notifications,” LOL), it uses about 160g of filament for a reasonably sturdy tray. I didn’t 3D print a new lid, but I may try to come up with a tweaked design for it, as the laser-cut version was an exercise in nesting parts within cutouts, and 3D printing has a different paradigm to optimize material use. The biggest negative seems to be that it doesn’t play nice with the existing stack of random boxes (flat top would help some, as would committing to this format as a “system”), but I’m pleased that I didn’t mess up the nesting. Between them, the two prototypes hold my ziplocks of SA Oblivion really well, and even provide a little bit of resistance to jostling, though I’d recommend foam and a way to secure the lid.
The Amazon tax hits pretty hard on keycap storage, and even AliExpress doesn’t seem super great. I do wonder though, if it would be cheaper and easier to source trays/boxes with 19mm or 20mm open interior and then fabricate a divider solution rather than starting from scratch.
8 Likes
Slapped some of those Keygeek Blue Cheese V2 in my F1 & man are they nice! Very similar to the Y2s sound wise, being just a tiny bit louder due to not having the micro texturing Y2s have. Definitely just as deep as the Y2s though! Not sure what voodoo Keygeek is doing to get long pole switches to sound so deep, but I’m here for it! Also the Blue Cheese have top notch factory lube & are useable right out of the box which is seeming to be the norm for Keygeek these days. Plus very nice consistent springs with no ping & no leaf tick/ping to be heard either. I’d highly recommend for anyone looking for a deeper sounding linear switch!
6 Likes
No picture (or recording) - but I rebuilt the QK100 for the office over the weekend.
- Swapped Maiz stabs for Designer Studio Adaptive
- Flipped gaskets from firm to soft
- Switched to stepped caps
These changes have made the board a fair bit more quiet, if a little less fun to use. To bring out an overused word because it fits, the build was thocky before - but now it’s properly quiet.
I thought the non-stepped caps lock looked fine, but it was a rare modern case of the North-facing interference issue actually happening - and on a silent keyboard, it was kinda obvious. Stepped caps is South-facing, so no prob there.
The Designer stabs are generally more forgiving. They make a tiny bit of quiet tacky lube noise that the Maiz / Stupid or Knight stabs don’t, but they leave less room for the wires to jangle - which I could only hear on this silent build, anyway. These aren’t perfect, either - but they’re pretty close.
5 Likes
Hey, if it’s more fun than membrane then you’re still ahead of the game, and it’s undoubtedly still real purty! Speaking of membrane, I think for a work board the baseline should be “roughly equivalent to a full-travel dome & membrane.” More than that and you’re either doing it as a challenge (awesome!) or overthinking it (don’t stress!). No one else is worrying about being fully silent, especially if they need full travel to type comfortably.
Also, and this is 100% anecdotal and not to be relied upon, but if you’re remote I think Zoom and Teams in particular are getting better about noise canceling. That said, I still don’t run the Box Navy boards for work, LOL.
4 Likes
I was using Box Jades for a bit as a non-silent protest when my office moved from fully remote to hybrid. ![]()
Plot twist: nobody cared. Haha
3 Likes

Finally put the Lanes into a board, decided to go with my Hiney TKL One since I was thinking a stiffer mount would pair well with these & I really don’t want to mess with my F1 as I am very happy with how it’s setup right now. The Lanes feel pretty damn good typing up this post, I do see why they call these semi silent clickies now though. In hand they don’t make any leaf noise at all, but once installed in a board they do have barely audible click to them. Which doesn’t bother me as it actually fits the the whole “ALPS like” narrative LOL! Gonna keep using this guy for the weekend & will report back after I have some time with them. First impressions are largely very good though!
11 Likes
Finally got around to taking the Realforce board I bought apart and lubing it all up. Other than the normal stab rattle that I’ve not found a good way to deal with (even on my HHKB), it sounds so much better now (and the spacebar is quite nice).
6 Likes
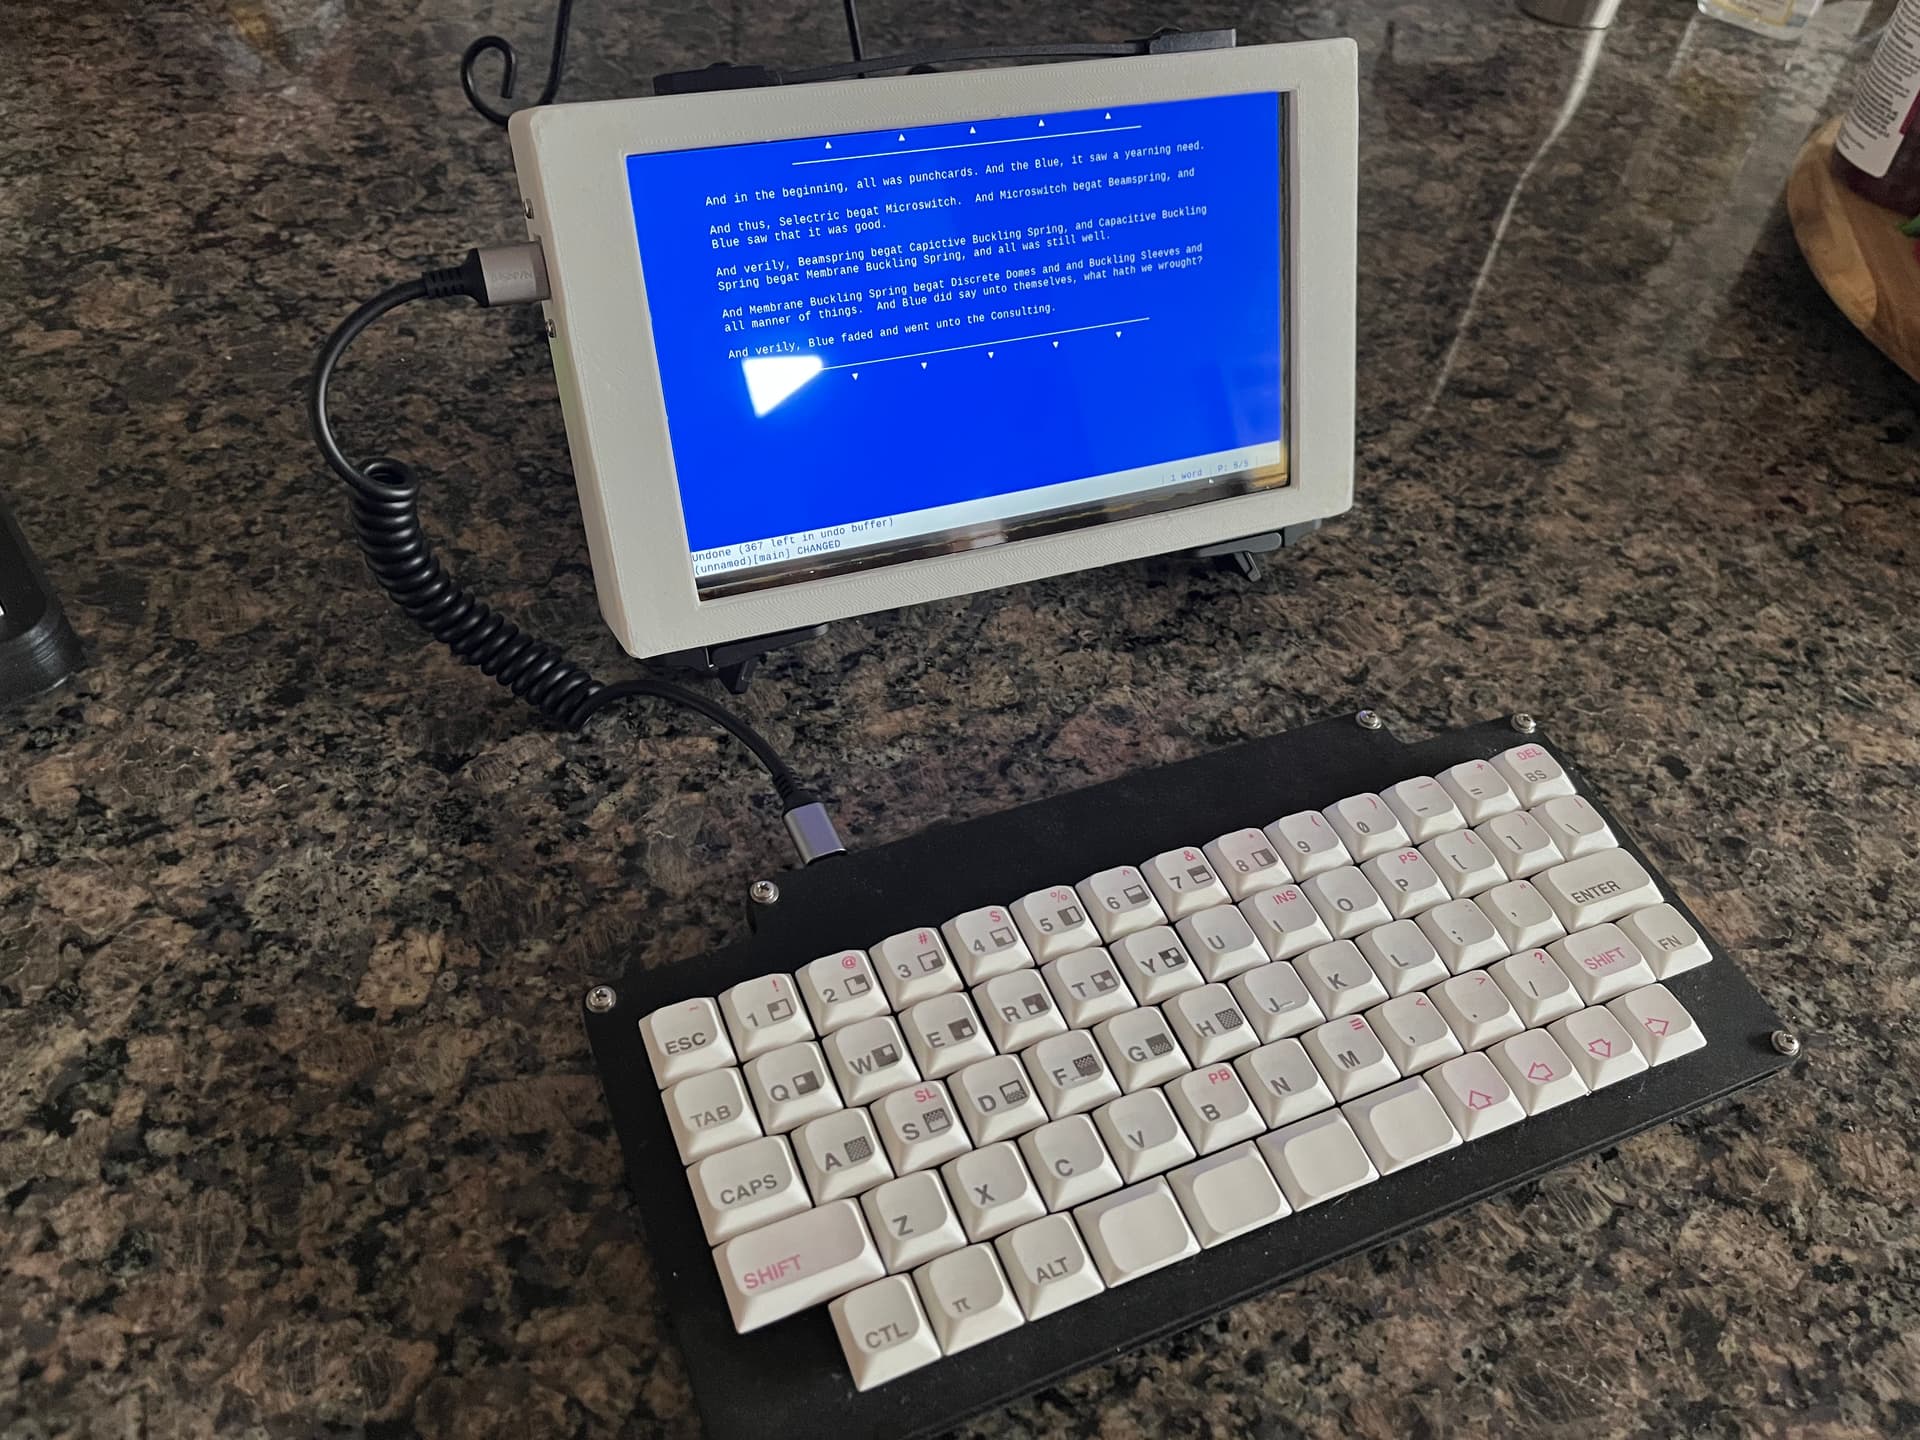
Well, here’s what was on the workbench until the cheap-ass power bank fried my Pi Zero and touchscreen, though it fried the Zero first so maybe I should have known better on the screen.
The whole assembly was coming together nicely otherwise, with a hint of a “Commodore 64 monitor” vibe. I had a couple changes I was intending to make on a second iteration that would have been painted.
That keyboard needs a cold joint touched up on the 3 key, so I might dig up its design files and print a sidewall “case” for it to replace those Masonite spacers.

11 Likes
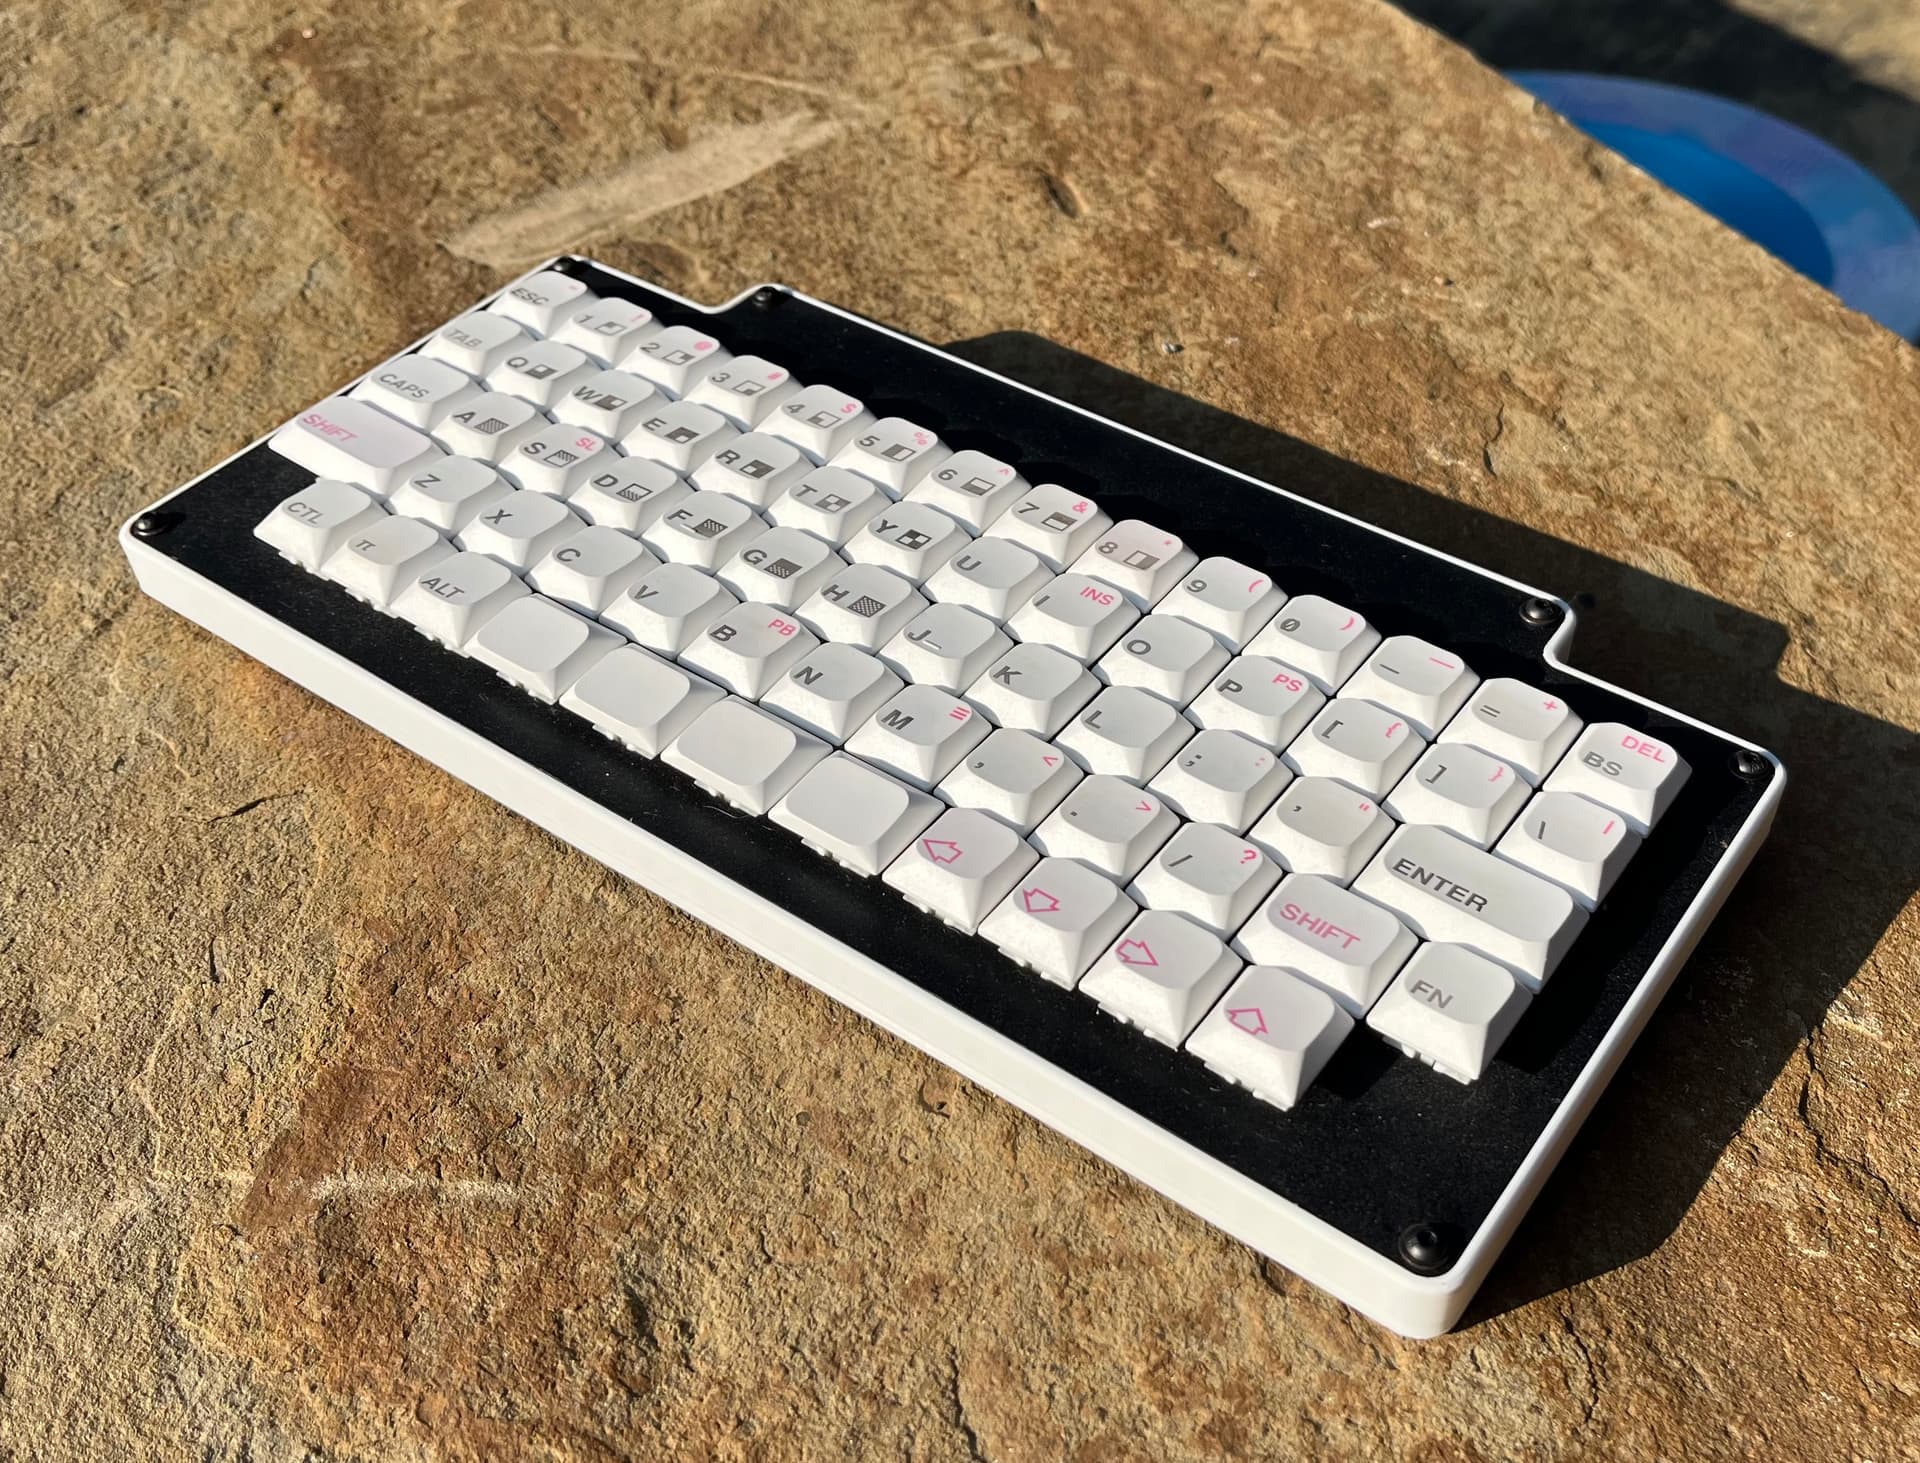
Keyboard has been updated. This one was my first PCB design (with the numpad unceremoniously snapped off), and it doesn’t even have its matrix connections keyed to an MCU dev board. A separate part of my naivete there was thinking I needed to modify KiCAD’s built in MX footprints myself to accommodate through-hole diodes, and my solution, while electrically workable, resulted in unnecessarily large pads that make soldering a little more tedious than it needs to be. Looks like the diode leg for the ‘3’ key had come loose from a very bad joint, but some reflow seems to have fixed it. As an aside, to the extent there are trends in something as niche as hand-wired keyboards, I wonder how many newbies are getting frustrated by trying to use the incredibly beefy copper-rod matrices that have become popular on Youtube and Reddit, because those things are absolutely going to be heatsinks during soldering.
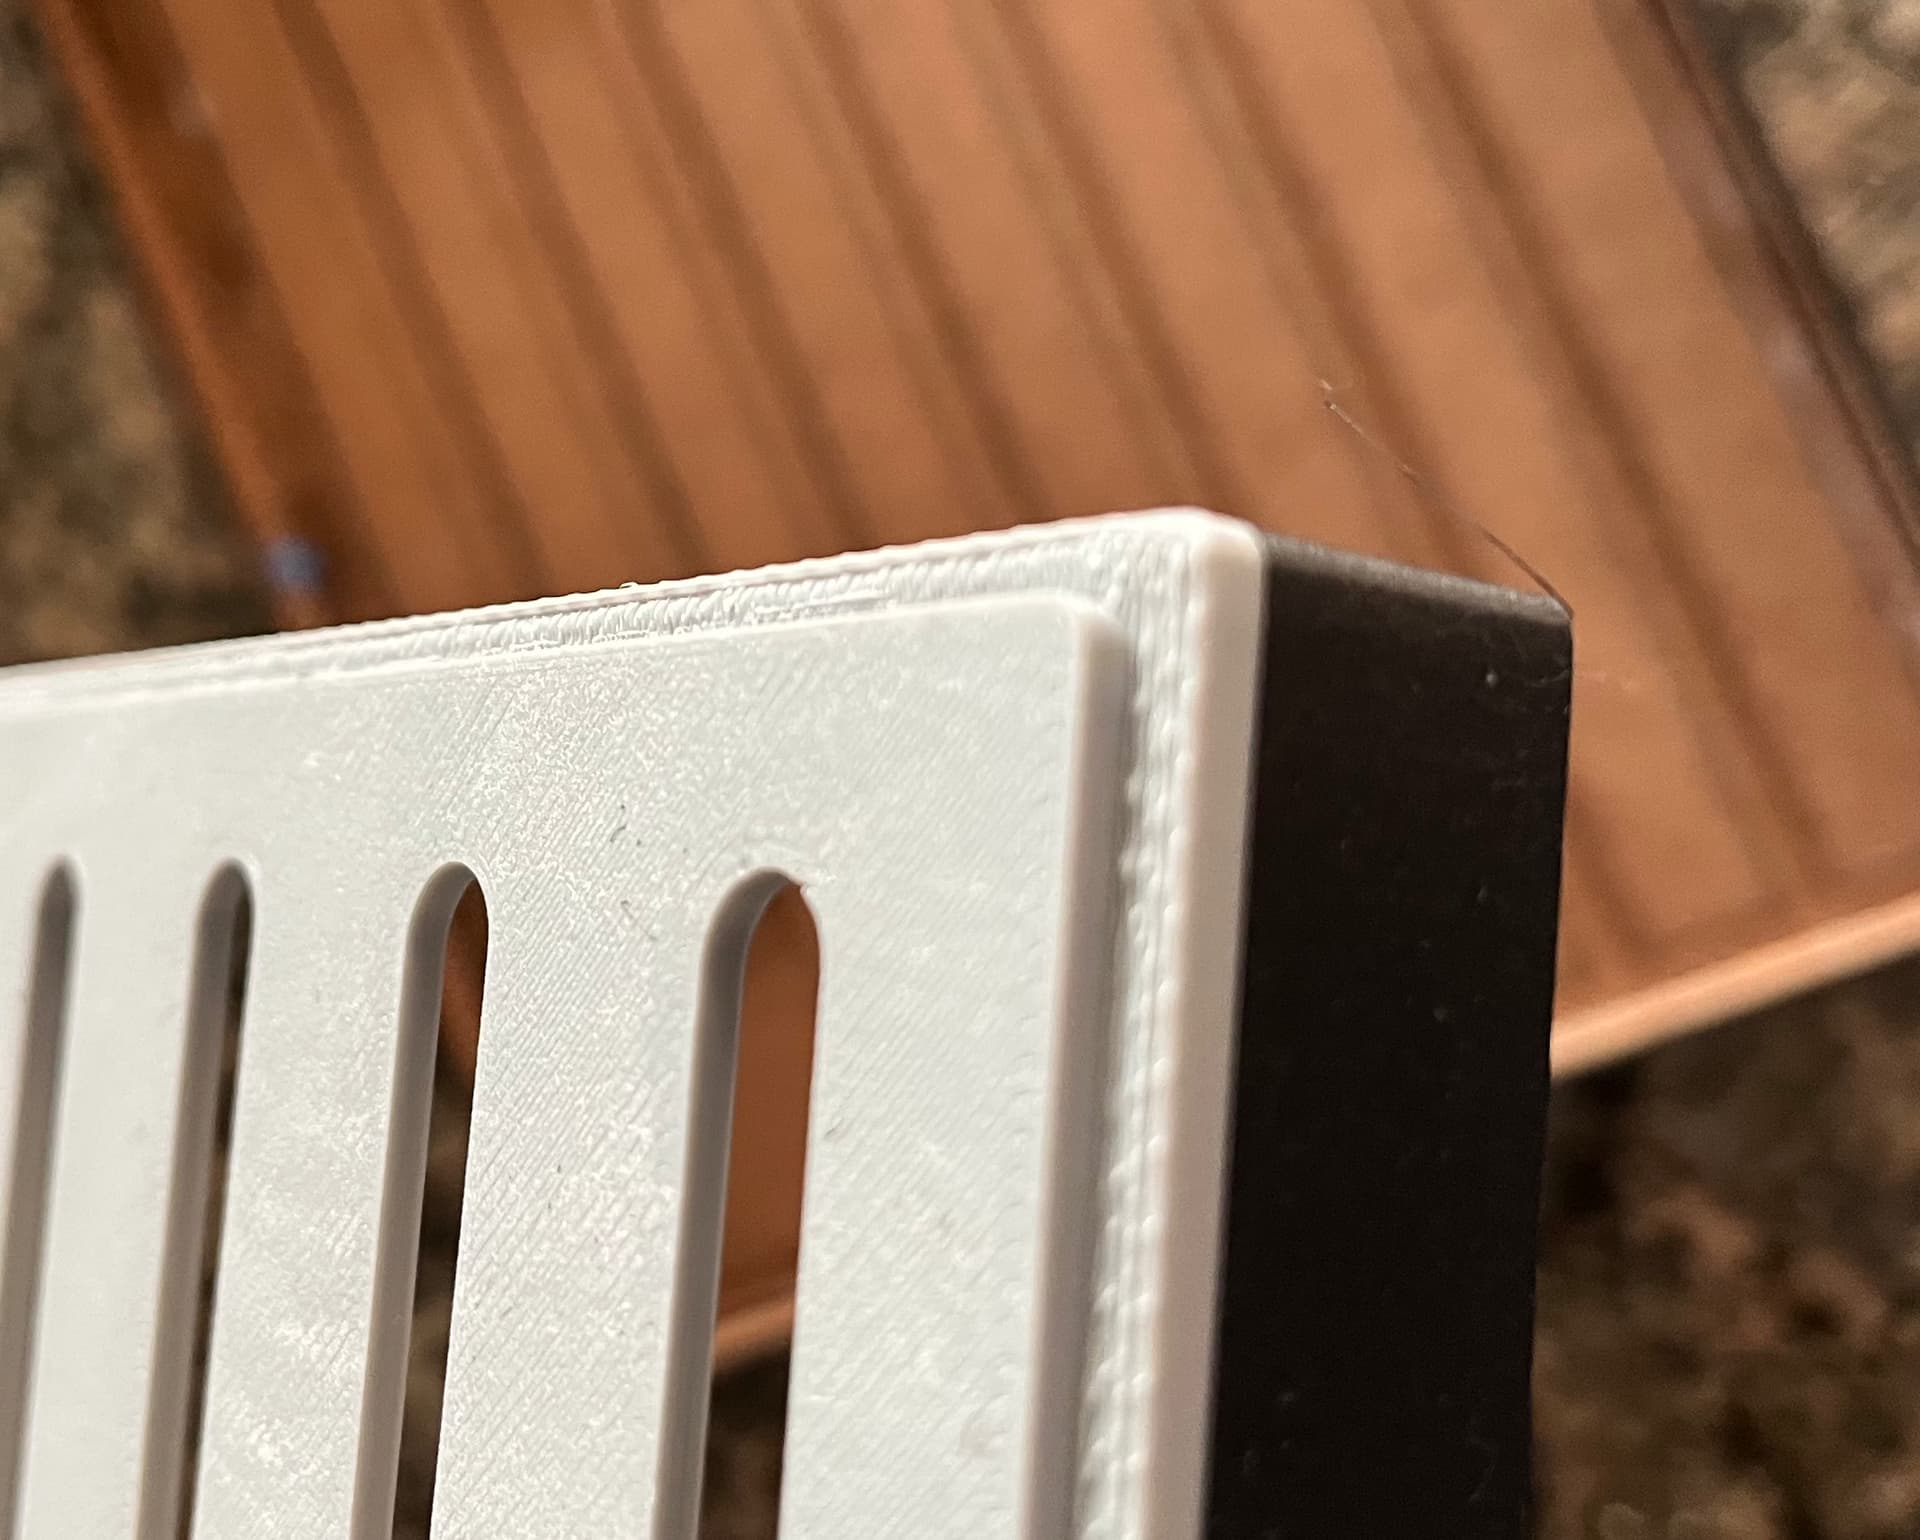
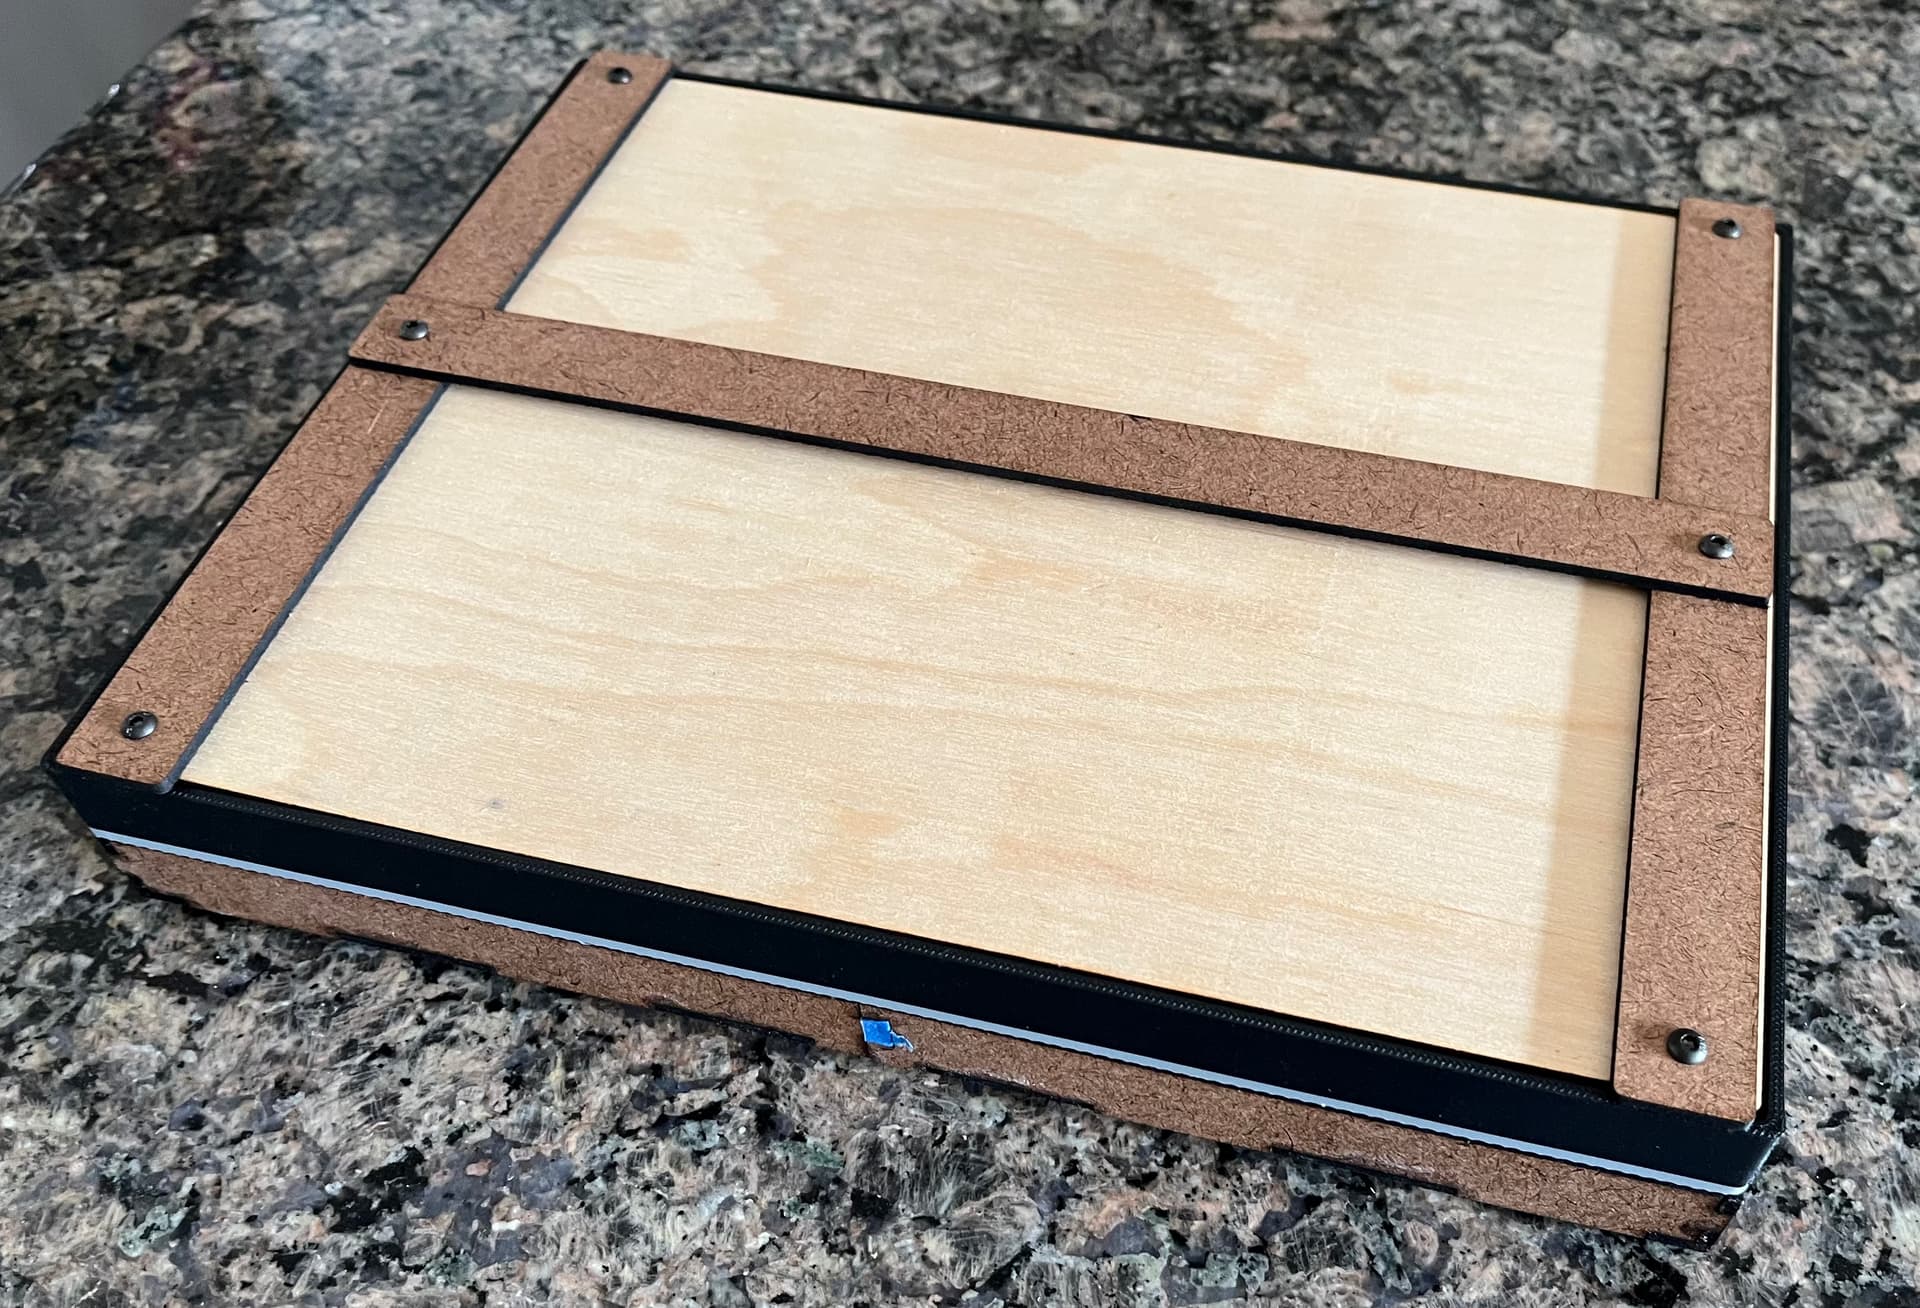
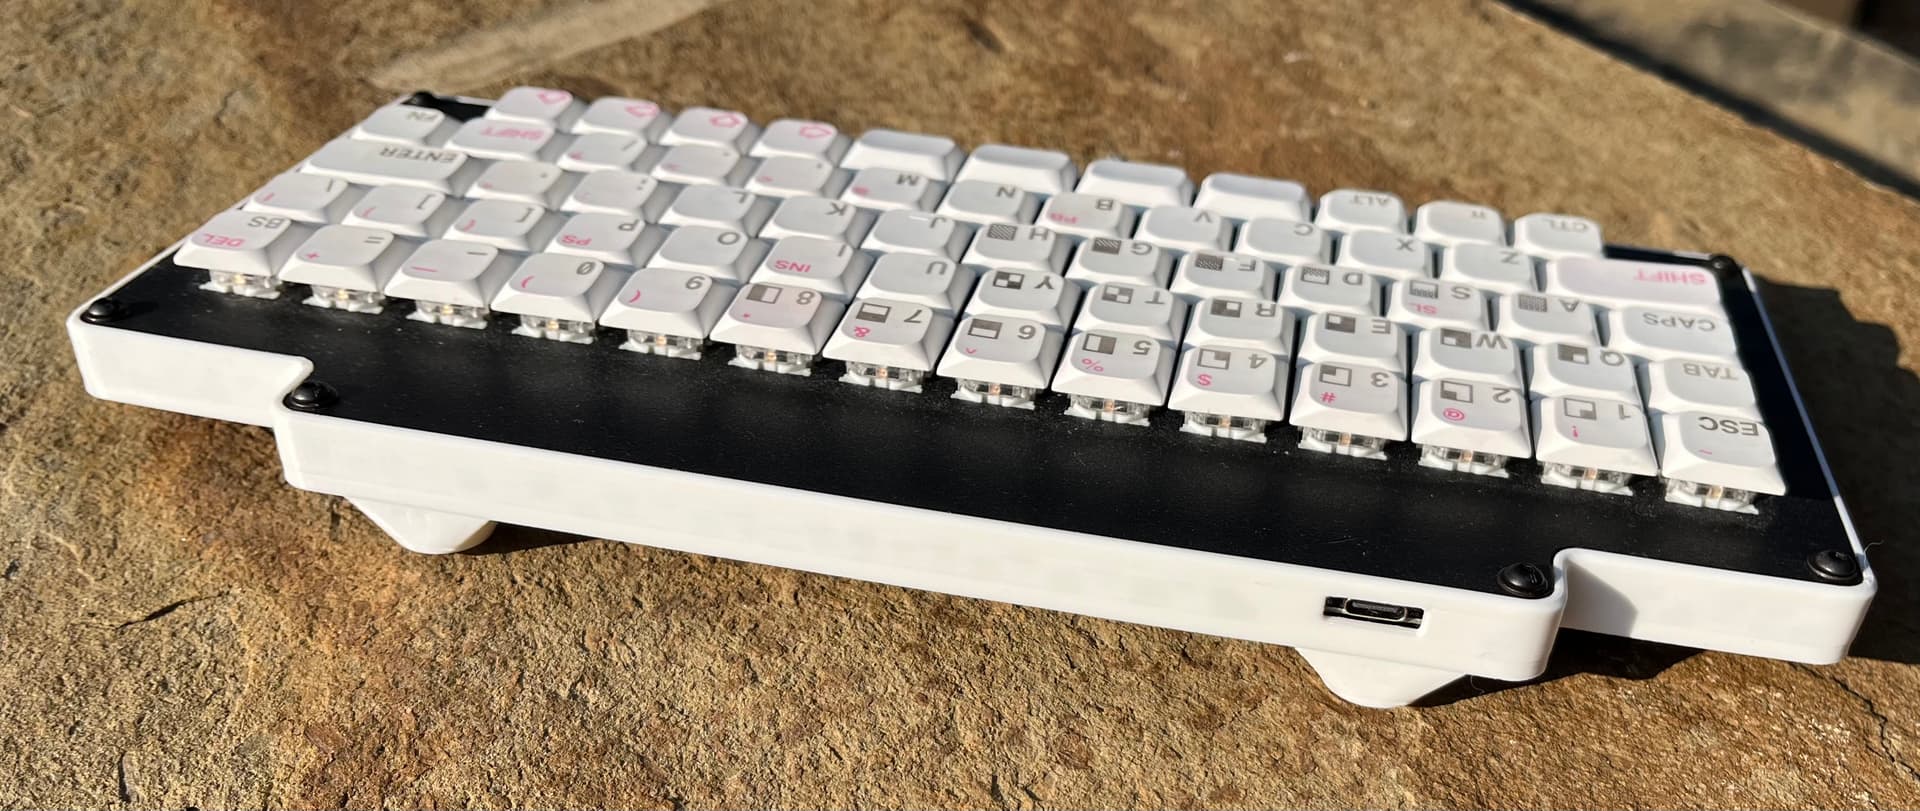
I also, as mentioned, threw together a sidewall spacer case to tidy up the sides. I wasn’t sure how it would look in white, but I think it came out nice with these keycaps, and I am loving my new 3D printer. This came together in one piece and printed in about two or three hours. The dimensions also worked out happily where I could use some black hex-head screws I had lying around, in place of the “silver” phillips-head.
I’d already added some feet on the back, as this keycap profile (“JWK” or unnamed “low profile” on AliExpress") is unsculpted BUT each cap is tilted a bit (like G20 maybe?), so unlike most unsculpted profiles these don’t feel as good for me on a zero-degree typing angle. It’s a little less robust as a “throw it in the suitcase” travel board with the feet on it, but overall it’s improved.
The writer deck project is still around, but I’m rethinking it to be based on an older ARM-based ChromeOS tablet that should still have several hours of battery life even with an aged battery.
Annnnnd as usual, nothing encourages me to dust off my keyboards like posting a well-lit picture, LOL.
8 Likes
I like this one, I kinda want one (is this a home made creation?). Also the comically large encasing and screen for the Pi Zero is funny.
2 Likes
Yeah, this is a one-off. I had a no-stabs FRL 1800 PCB made in a batch of five, and it only needed one bodge wire to work after snapping off the numpad. This one uses Outemu half-height switches and these low-pro caps, while the “complete” one uses Akko SA-L and Box Navy in a higher-profile case. I still have three of them lying around, LOL….
Also the comically large encasing and screen for the Pi Zero is funny.
It was meant to be a little silly, but also to run a larger-than-typical battery and screen, so there wasn’t actually all that much unused space by the time you factored in the USB hub and the various cables. Alas – as happens from time to time – my cheapness got the better of me. From now on, I’ll only buy power-banks from brands where people will be somewhat surprised if they malfunction and cause a fire hazard. ![]()
2 Likes
Topre time! My Kbd8x mk3 EC conversion is back on the workbench. Plans:
- Replace all housings with clear Deskeys ones
- Replace all sliders with Deskeys ones
- Lube housings and sliders with RO-59 (so I’m not constantly wiping off excess lube)
- Transfer to polycarb clear case
The Deskeys housings are supposedly designed to allow silencing rings to be used without adding gaskets, while their sliders have an indentation to allow for a silicone gasket at the dome/slider interface.
I’m /pretty/ sure the rattling stabs problems I had before were due to the housing being slightly “loose” in the plate, likely b/c it was a tight fit and I’d removed it once or twice already. I’m hoping new housings will solve that issue.
I also have decent hopes for the RO-59, as it seems like a decent use case for it.
Probably will also try other grease on the stab wires. Krytox 206g2 was alright for quieting them but going to try XHT-BDZ to see if that’s any better.
5 Likes
It is a looker !
1 Like
Welp. That was a fail.
Seems like the Deskeys housings are just slightly bigger than the KLC ones I was using before, which is causing a bunch of keys to get stuck in the fully pressed state.
They also seem /shorter/ than the previous ones, as the domes sit much higher, which is the exact opposite of what I was going for. I have the gaskets to lift the housings sightly to reduce this, but they’re a PITA to deal with b/c it’s yet another lightweight, easily moved thing you have to avoid touching once everything’s in place.
Sigh. Probably should have just bought a RF board.
3 Likes
The aftermarket EC components can be really hit or miss. The tolerance stack between a custom plate, the housings, and all the rest is a lot. The OEM stuff is a lot easier to deal with in my opinion, or at least a lot less frustrating.
Unless they’re offering a complete aftermarket keyboard, I get really lairy of the upgrade path. Outside of swapping domes of course. Personally, I tried to EC my Matrix ME, but that was a hard fail due to the PCB not working correctly and little support to get it fixed. In addition, I also experienced tolerance issues as you have.
3 Likes
Good to know it’s not just me then!
I did have some success in fixing the stuck keys – removing the landing pads seems to be enough for them to move freely. Though I just found another one after reassembling the whole thing, and I do not have the patience for taking it all apart again, at least for today lol.
One other fitment issue that I had which I hadn’t mentioned was the spacebar direction – the KBD8X Mk3 case I used only supports north-side stabilizers, but north-side orientation collides with the row 4 housings. Thankfully, the solution there is just to clip the housings, as the overlap doesn’t impact anything functional. I even saw special housings on AE that were for just this issue.
The rattle on the stabs is mostly taken care of, now, though, and I attribute that them fitting rather tightly into the plate.
3 Likes
Two things last night.
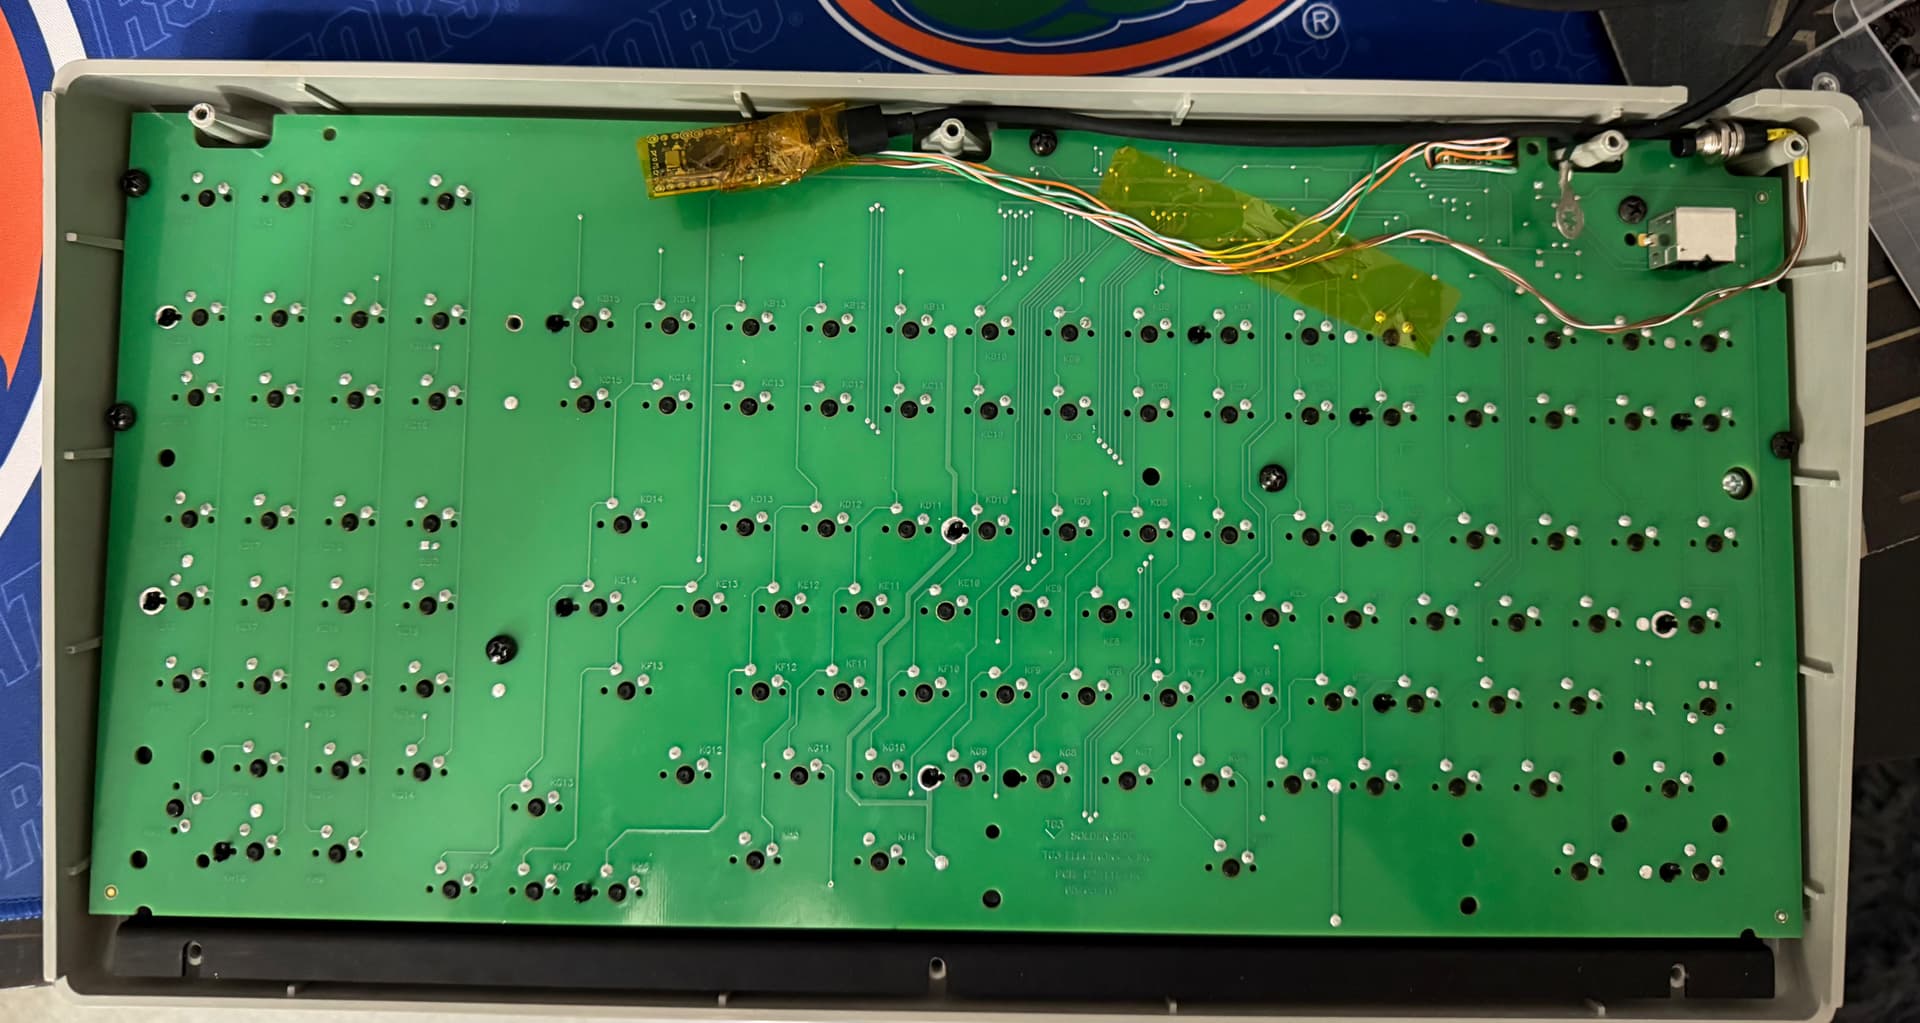
First I ran some jumpers from the PS/2 port on the Siemens/TG3 board to one of my Soarers converters, and everything worked fine, though as expected from reading old GH threads, the “Chemistry” buttons are all a little weird, sending F9 or F10, plus a letter. I’ll probably need to dig up the old Soarer mapping I saw somewhere. I have it out of the case, so the situation is not ideal, but typing feel is still pretty good, though I guess there’s no particular reason to expect that Cherry Black on an aluminum plate would be awful. I have some Pro Micros on the way, because the RP2040 is a 3.3v native chip, and while its GPIO are thought to be kind of 5v tolerant, it would be out of spec and that has discouraged most people from bothering to port the vintage converters. I’m paying the Bezos tax to avoid tariff headaches these days, so that means the difference is only $10 for three Pico clones versus $16 for three Pro Micros, so I’m not going to overthink this one… though I am going to see if that VIAL-eneabled TMK build I saw actually works…
Then, dipping my toe into switch-modding took another step. I had already spring swapped the in-house switches in my clearance-special aluminum Epomaker, but I still hated the bottom-out on the long-pole linears, so I’ve begun popping them out, using a flush cutter on the little nubbin at the end of the stem, and putting them back much closer to full travel. Sound is better and feel is better, though I admit the end result simply feels like a lightly lubed Outemu black, LOL. Still, I’ve been intrigued by the possibilities of what can be done. I’m going to try not to sink down into this particular rabbit hole, but I’m very glad I’ve added it to the toolbox.
5 Likes
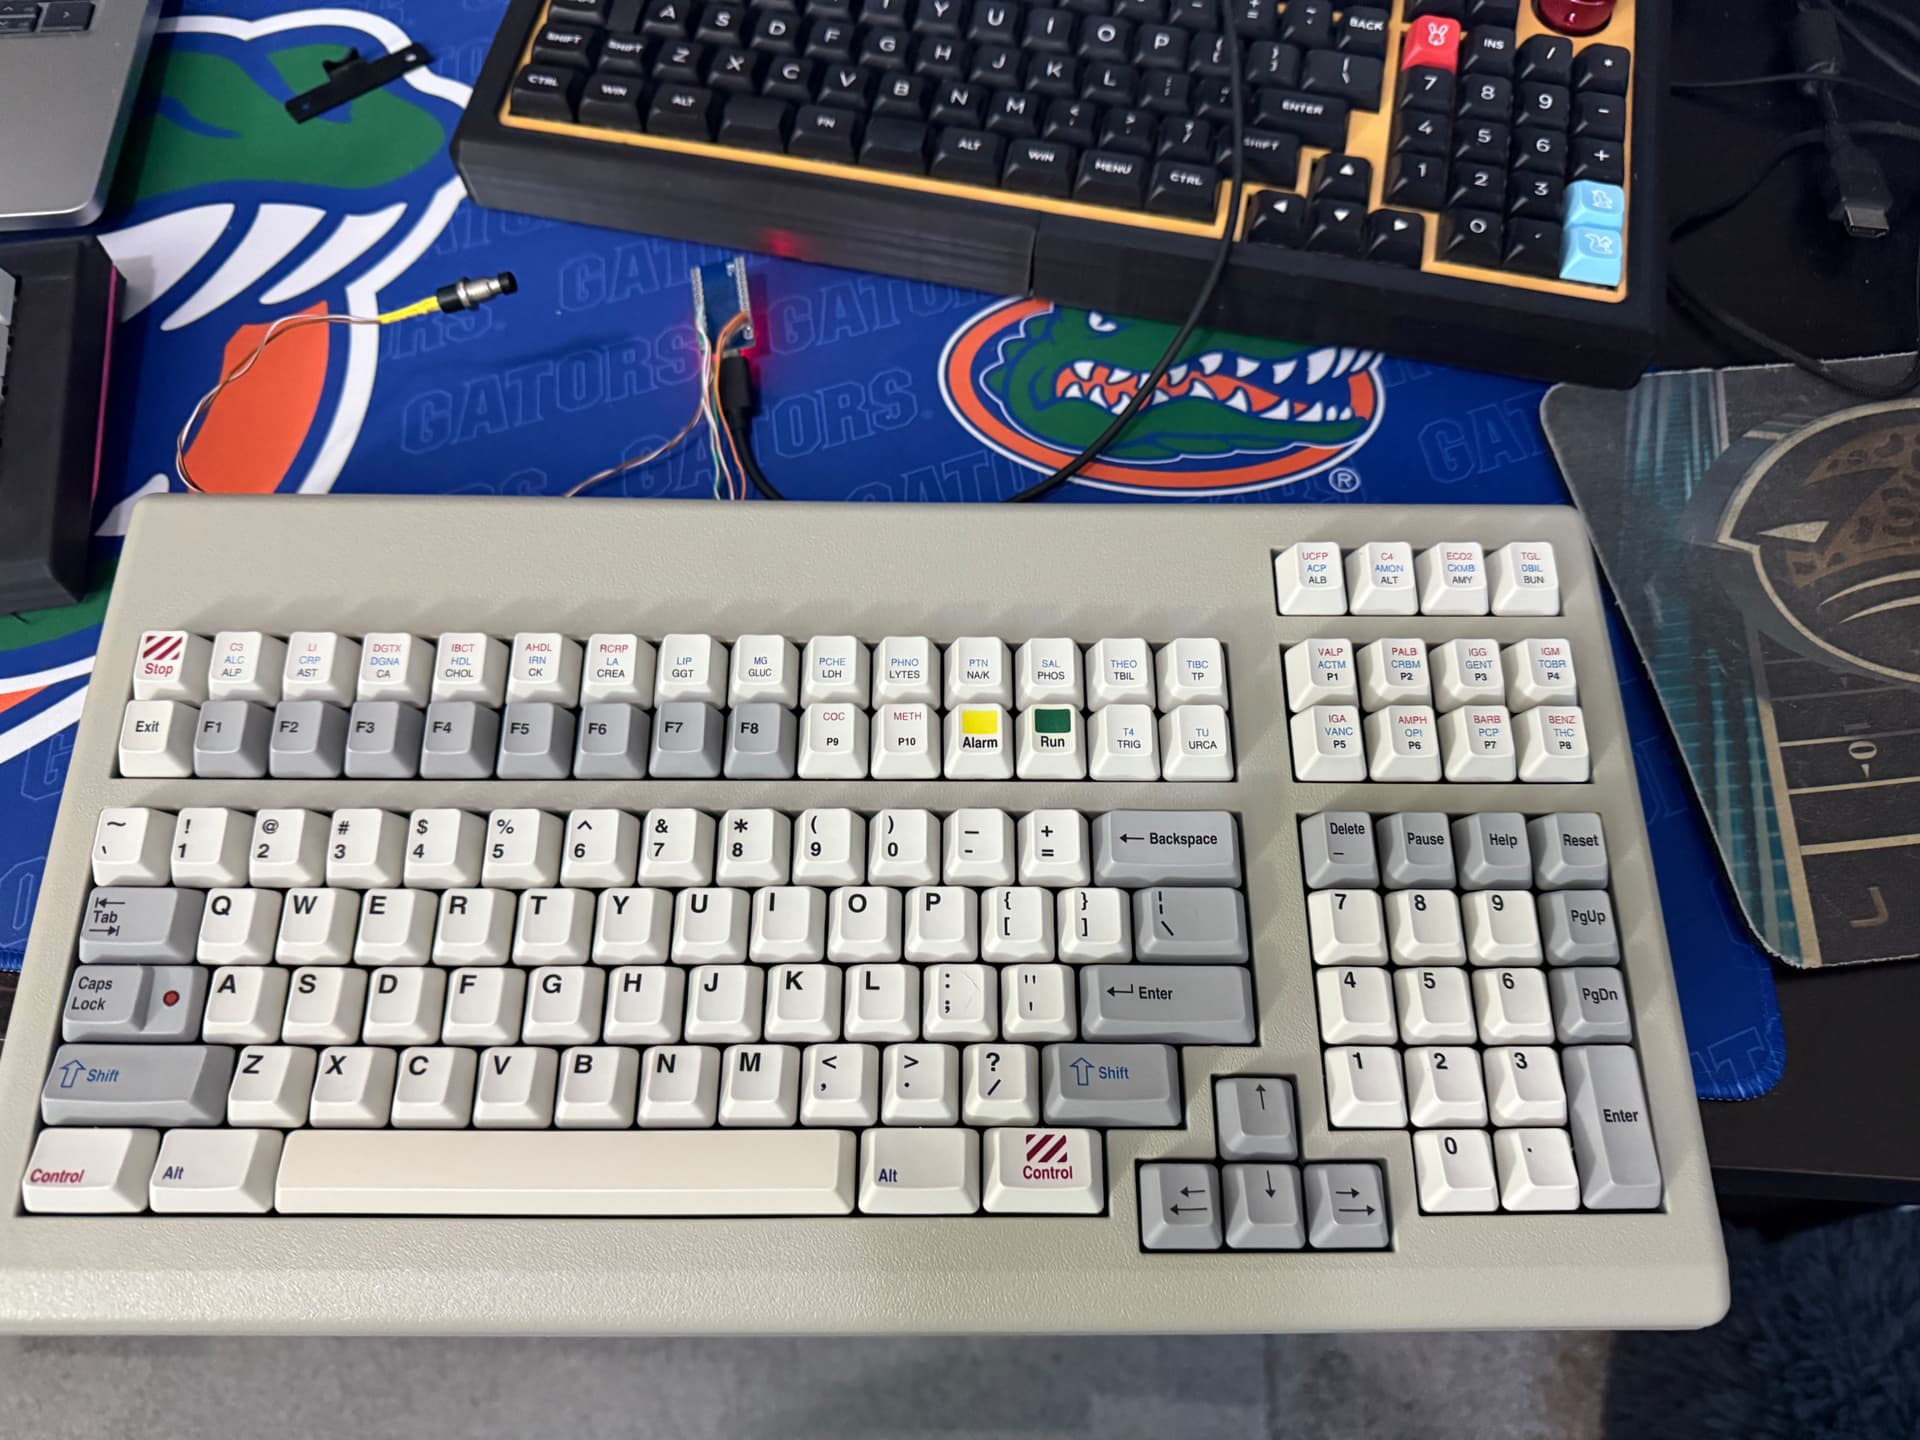
The TG3 board has been a nice and relatively easy refresh so far. I got my Pro Micros in, and while realized too late that I ordered the Micro-USB ones, I have enough old Micro-USB cables sitting around that three of these is no problem. Fortunately, this guy has a large amount of room in the case. I think it could be a pretty slick work board, though I guess the existence of G80-1800s makes that somewhat less than necessary. ![]()
- For the stabs, I just injected some faucet silicone into them as best as I could and brushed a bit onto whatever parts of the sliders would come up far enough. It helps a small but noticeable amount.
- I used a magic eraser on the case and washed keycaps in an ultrasonic jewelry cleaner. Both came out well.
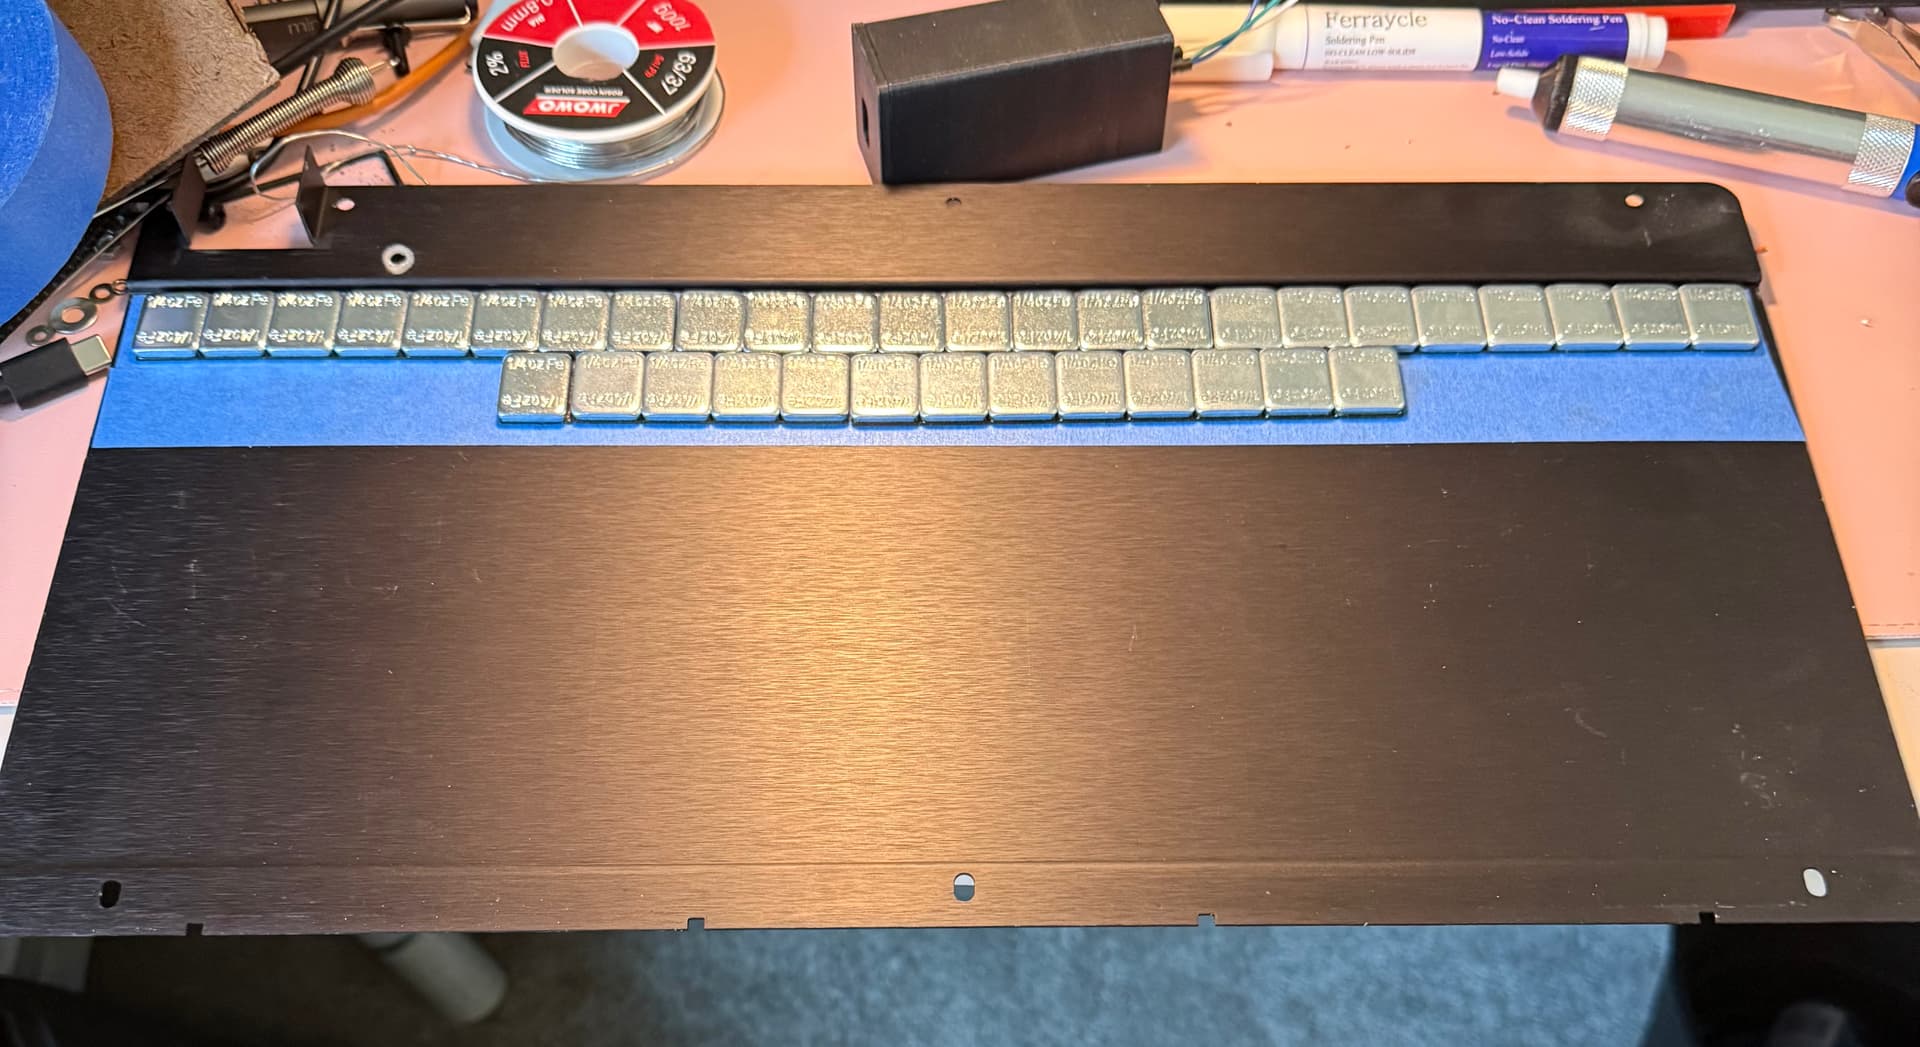
- I added 9.25 ounces of steel wheel weights to the interior side of the bottom plate. It doesn’t make it unwieldy, but rather makes it feel more like what I would expect a board that looks like this to feel like.
- I moved the keycaps around some. I may eventually completely replace them (and maybe paint the case), but for now I want to see how these DCS dye subs sound and feel. I moved some of them around to better fit the layout I’m using for this fella. I messed around with some of my other caps, but ultimately with the spacebar (which I think may have a bit more ABS in the blend as it’s just a bit more yellow than the rest of the beige caps) and with just so much real estate to cover up top, aesthetic options are a bit limited.
- The Pro Micro is running TinkerBoy’s VIAL port for the classic four-lead converters (e.g. Soarer, Hasu, etc.). I am guessing that it is right up against the memory limit, because there are only two layers and two combos available to use. This is important because…
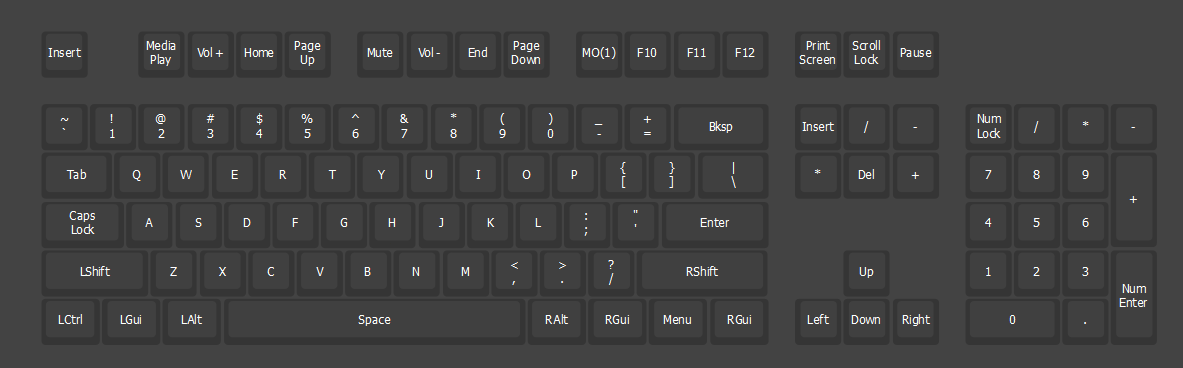
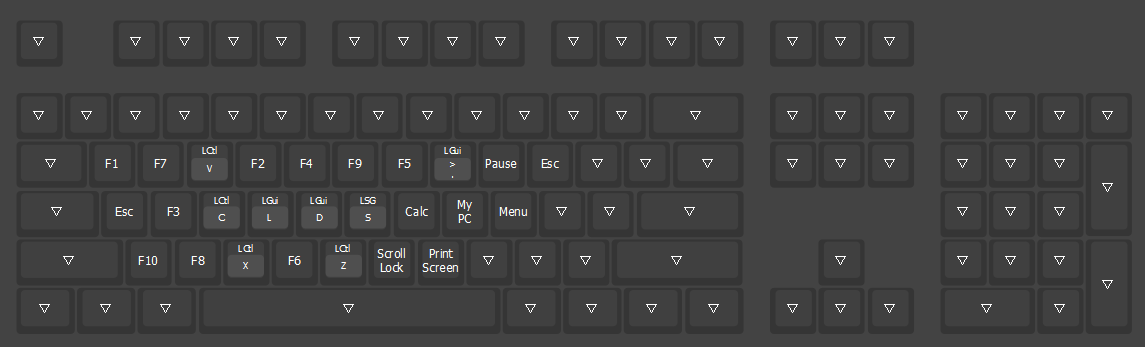
- The keymap looks a bit bonkers on the screen! The numpad has no mathematical operators, just navigation keys, Esc, and Enter. The cluster of 8 above it are normal F1-F8. The clusters of 30 and 4 all use the rather brute-force method (PCB made in the USA, btw) of sending two keycodes: F9+AtoZ, and then F10+A-H. Taking a cue from GH user “Tactile” (still around?), I figured that layers are the key, so I remapped F9 to be the MO(1) key, and that gave me access to 26 of the 34 keys, at the cost of no actual layer. I then used up the two combos in the firmware to get two more keys (F10+A and F10+B), leaving me with only 6 “dead” keys. I am going to look to see if the firmware TinkerBoy lifted allows for more layers, or maybe I’ll just flash a normal Soarer’s config, but to have this thing in VIAL, even nerfed a bit, is pretty nice.
- My final layout is actually pretty similar to other battleship types I’ve worked with before, though until and unless I do something about the keycaps I may need to gin up a cheat card. My board actually arrived from eBay with its original, but like most of the upper keys, it’s permanently marked for the board’s original purpose.
- Typing feel is fairly stiff, but really not bad at all. I assume MX Blacks (and greys) were common not so much to satisfy the hammer-typists like me, but to discourage bottom out on stiff mountings. The plate being aluminum rather than steel and the case being plastic, it’s less harsh than it could be, and by backing out the screws a hair or even doing a modest burger mount, you could probably make it touch softer than it is. I may try that later, but I don’t necessarily want to be working these screws into and out of the plastic case all that often.
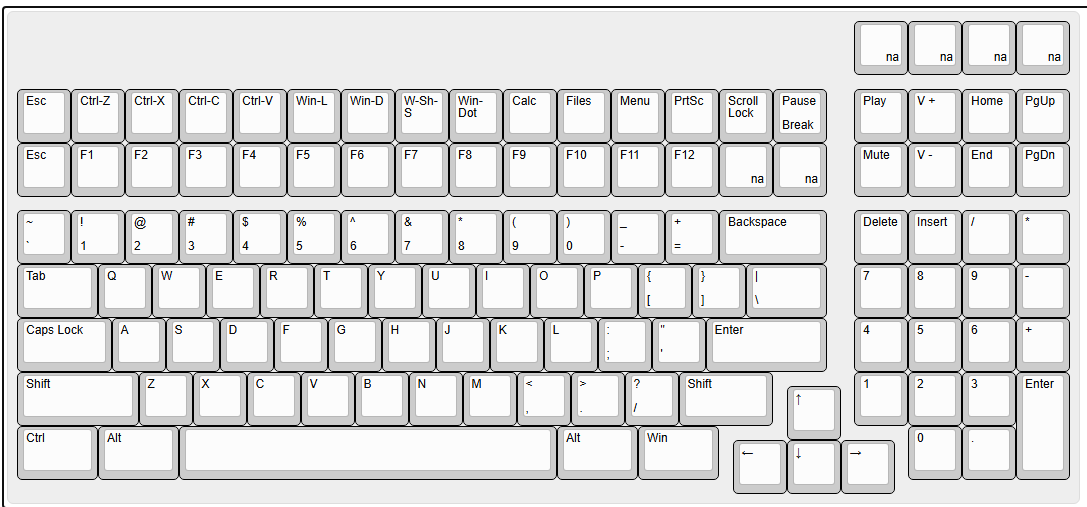
- Edited to add the KLE of my actual layout. One other quirk that reveals this board’s industrial origins: NumLock is indeed mandatory, as I’d read elsewhere. You can use another keyboard to turn it off, but as soon as the TG3 notices, generally less than a second, it turns it right back on like one of those “Useless Machines,” LOL. It’s a good thing there are enough keys not to need the nav functionality.
11 Likes
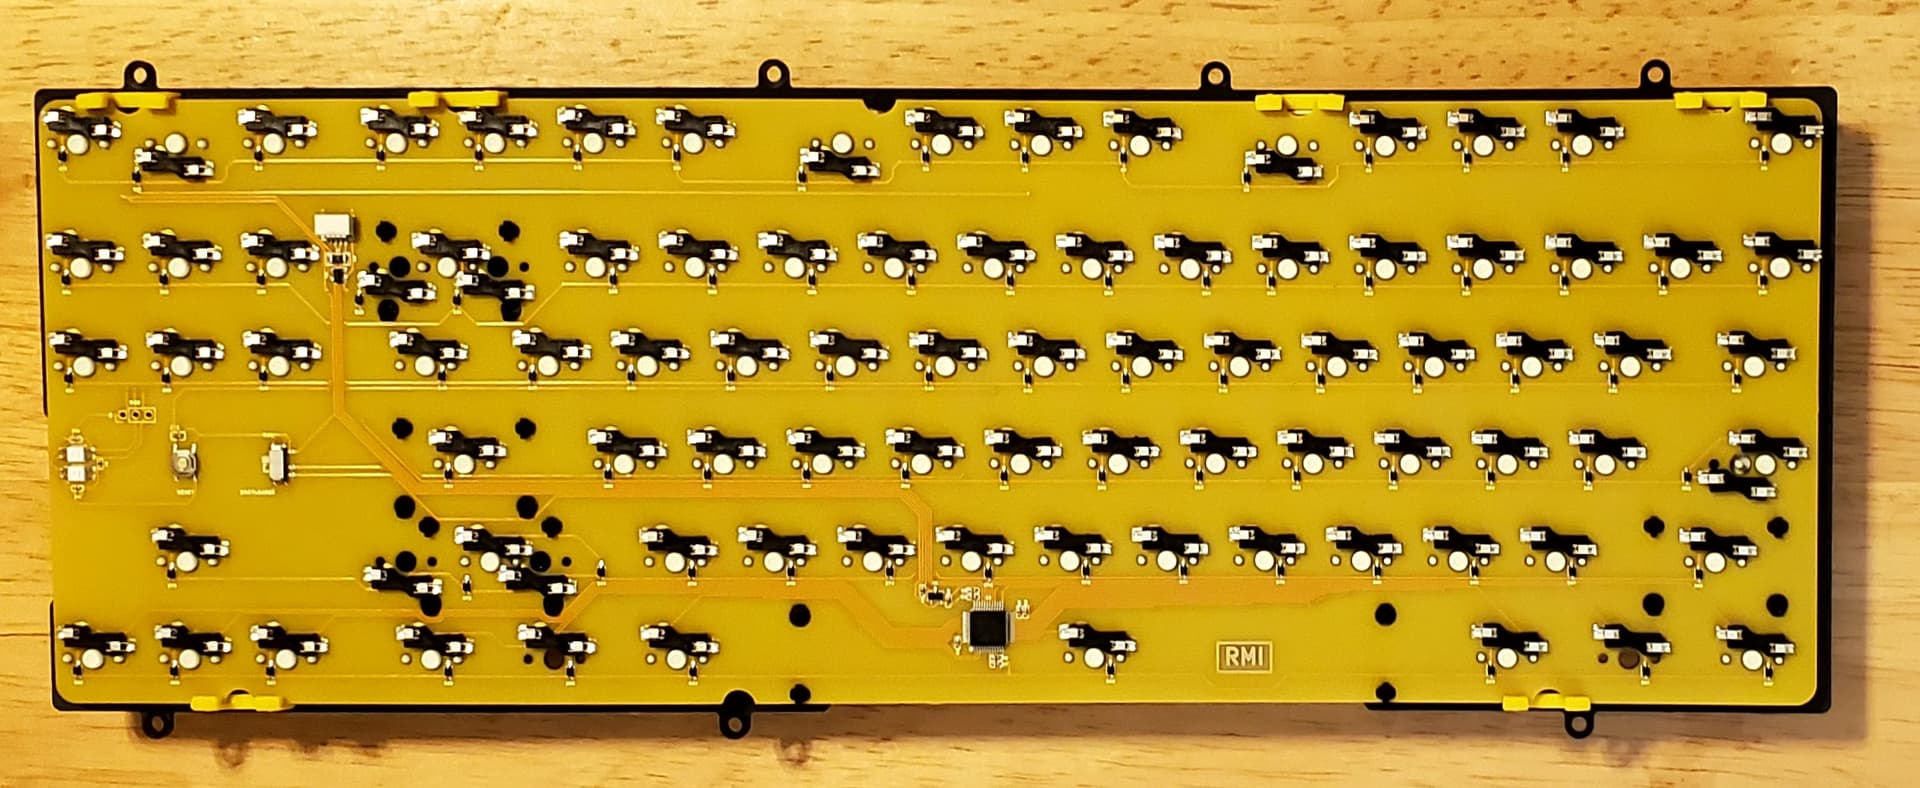
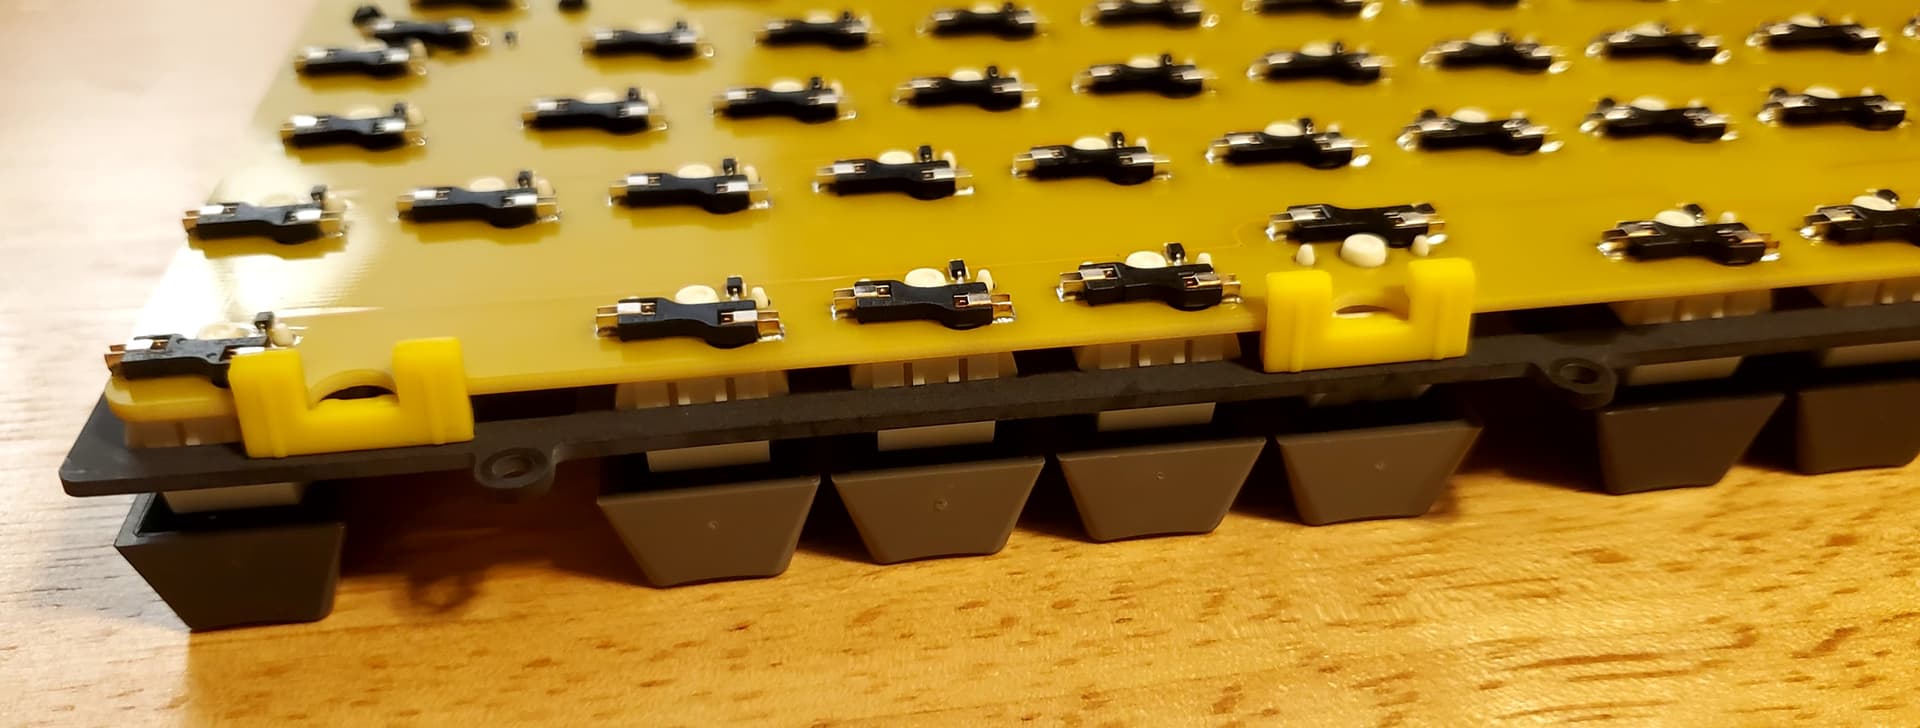
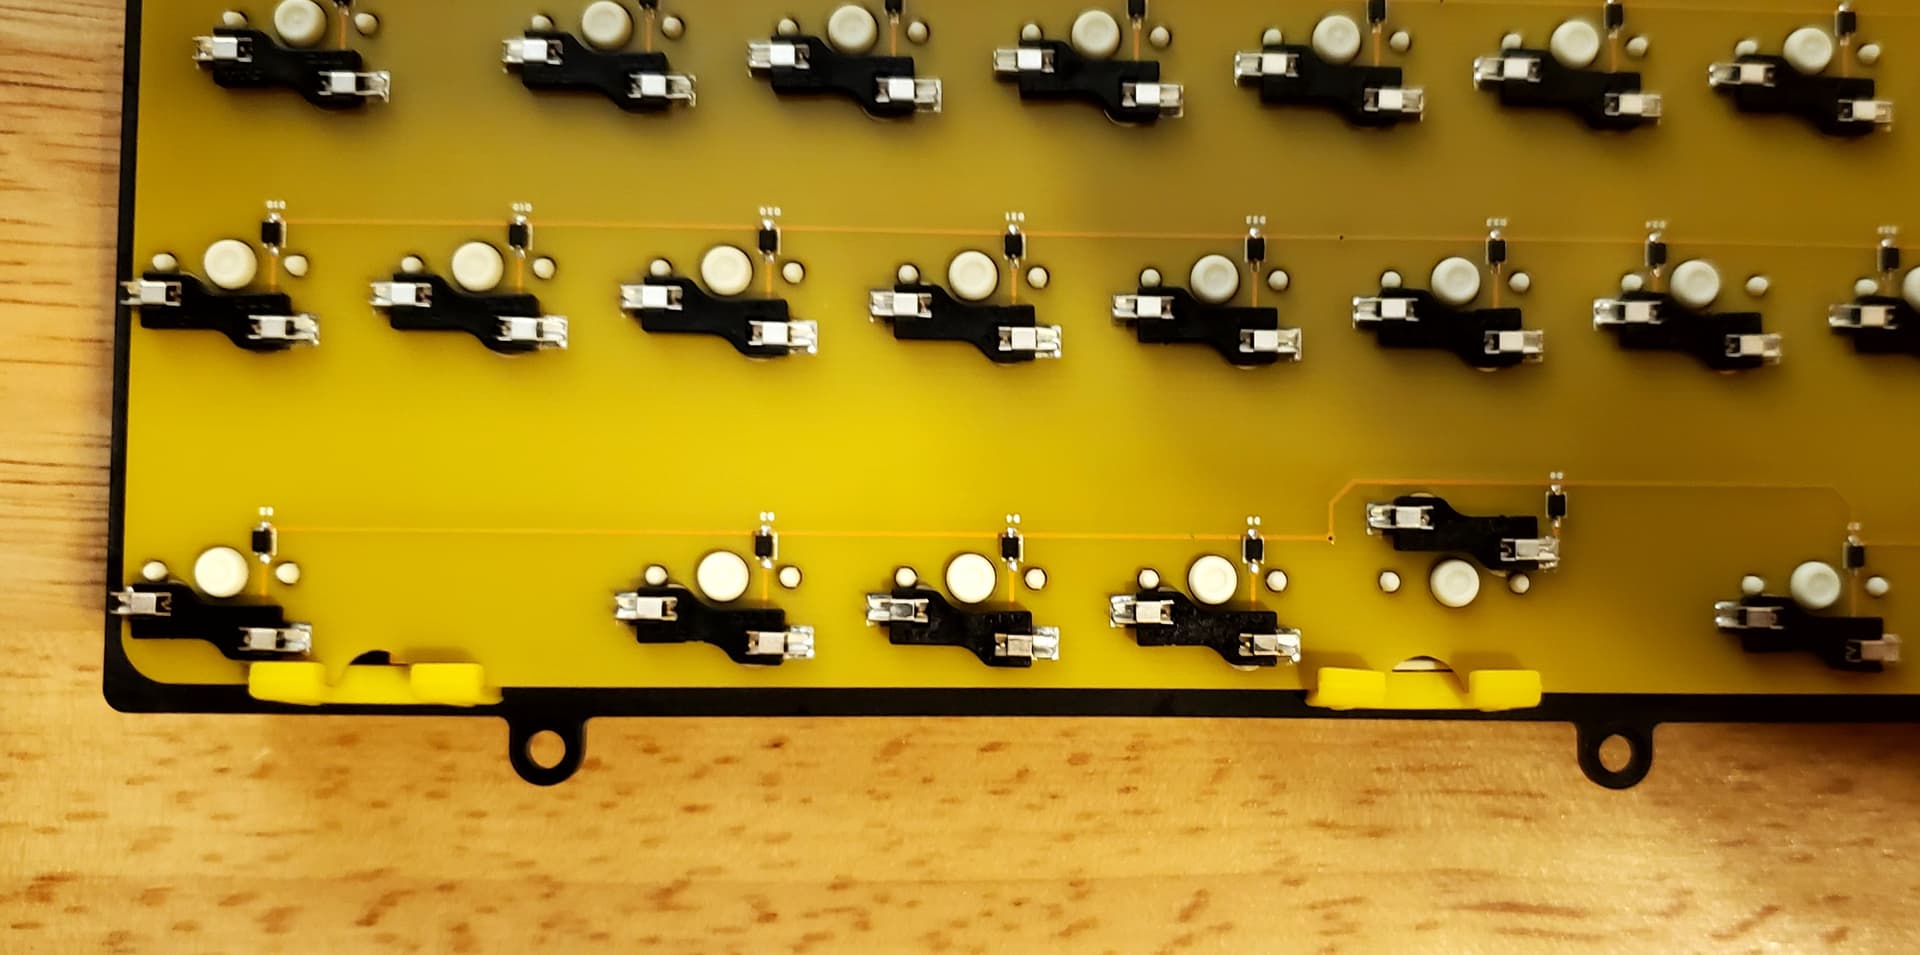
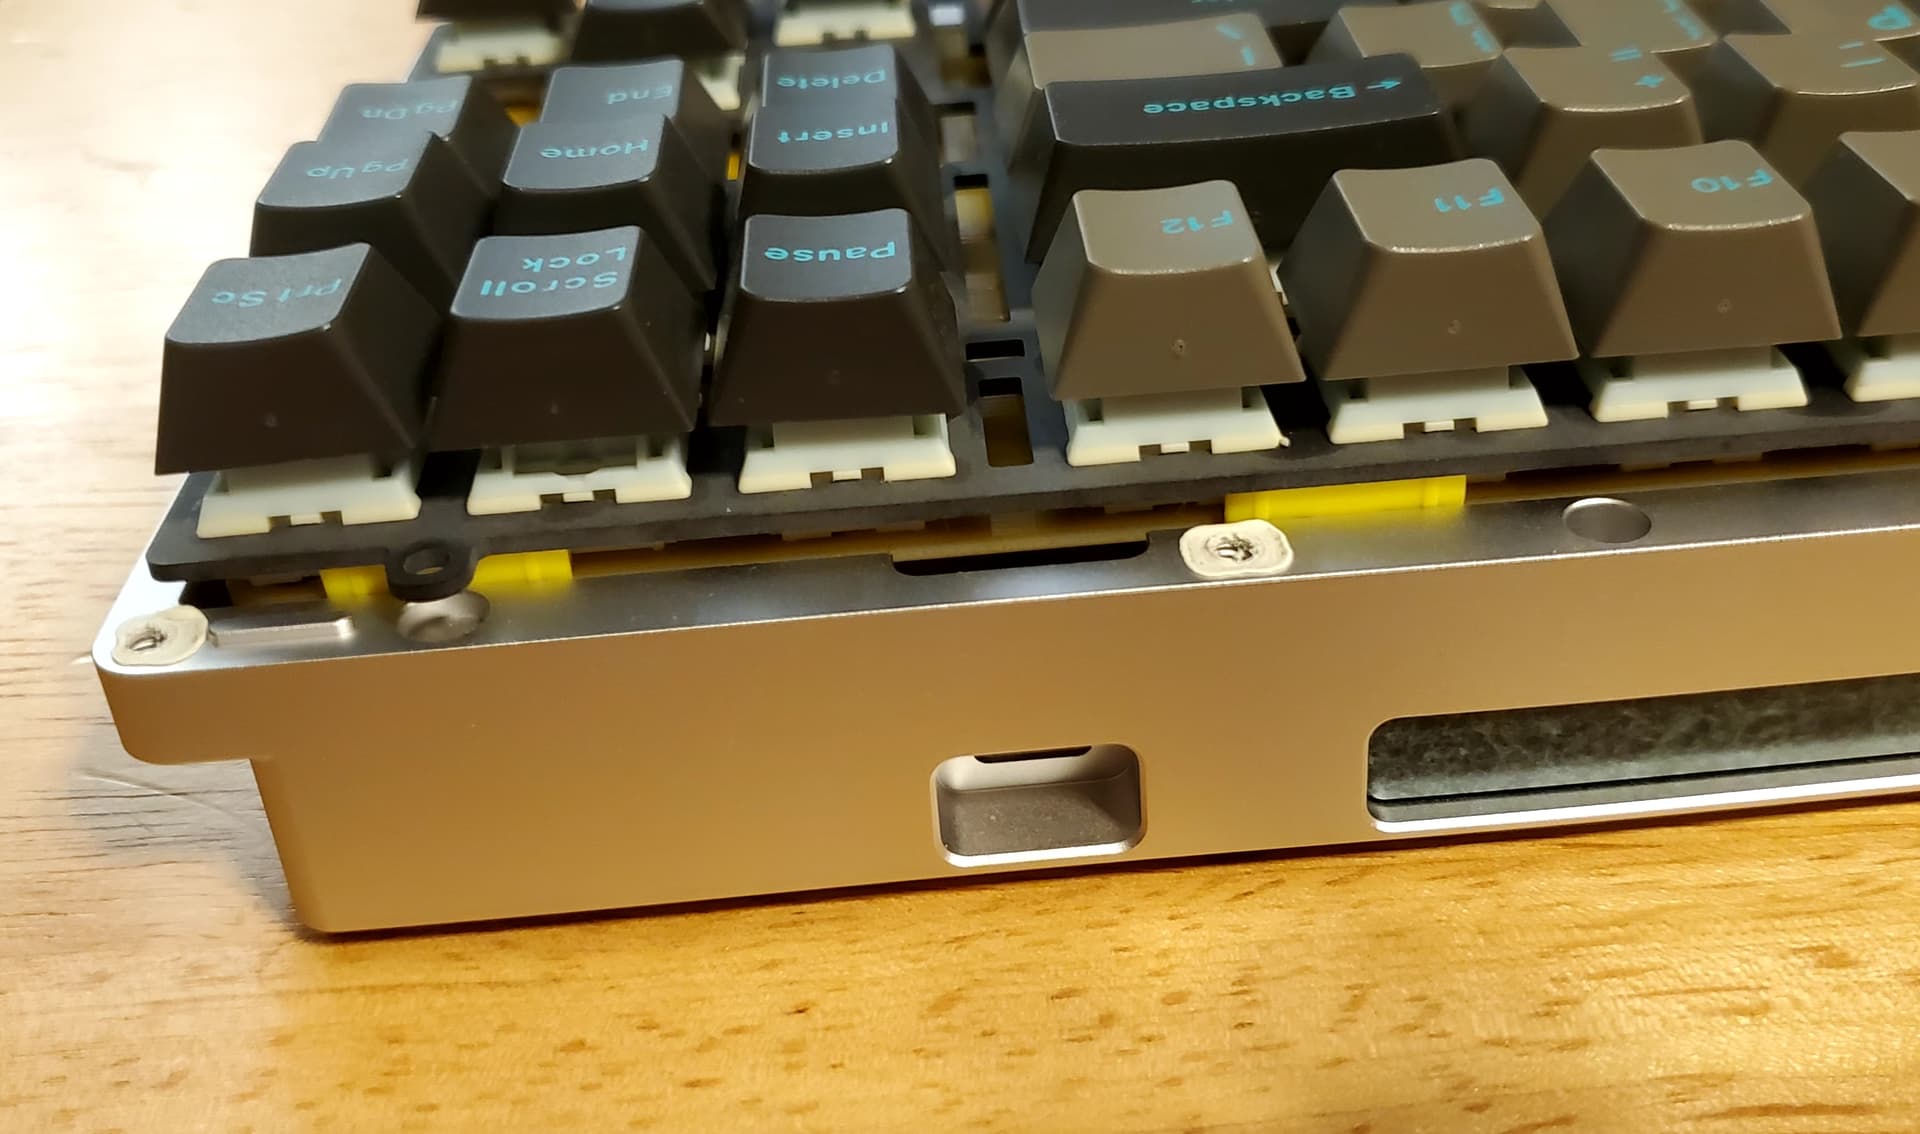
Just installed the PCBsnaps in my Spyder & these things are legit! I actually have it just mounted using them right now & it definitely has a more open sound compared to using an actual O-ring. Especially on the spacebar just like they claim! Also gives my Spyder so much more flex compared to just O-ring. Makes for a super comfy typing feel IMO. I went 4 on top & 2 on the bottom since it seemed the best setup for a TKL. Even though I just got them & only used them for a few min I’m gonna go ahead & say I think these are definitely superior to using an actual O-ring, especially in a TKL as the O-ring always sits funny on the arrow/nav cluster side. Definitely recommend these for your O-ring boards! I know I’ll be getting a bunch more!
Edit: Seems the PCBsnaps are also good for top mount boards not designed for O-ring too! Just installed the FKM PCBsnaps in my VKR-94 to soften it’s feel up a bit which worked well. It will depend on how much room the case has between the edge of the PCB & edge of the case, also components on the PCB could interfere with them as well so it’s definitely not a universal product, but I think they will work in a lot of boards. Then the KEYsnaps are a slight bit wider than the PCBsnaps too so I’d recommend picking up a pack of both if you want try them in various boards.
13 Likes