Nice! Thanks for the input. I picked some up for a few builds including my Spyder.
1 Like
These snaps are definitely interesting. Are the yellow ones on the Spyder the silicone ones? Also wanted to know what the beige putty that you have around the screw holes is.
3 Likes
Yep, they’re the silicone ones. The FKM ones are a bit harder even at the same shore it seems like. Although I got the FKM ones in my VKR-94 which is a HHKB XT layout so much less room than a TKL. I did just use 4 for that though. Then thats not a putty, those are Geon’s force break pads. Just all squished out LOL!
2 Likes
I got these as well and figured I would chime in just to give another opinion.
I am a little disappointed in these. I think they work great for some boards but not all.
I wanted to use mine in a Ori60, but I think because of the way the case was cut, they didn’t sit right. See the bottom to ridges on the case:
Also did, I mention how fiddle-y these things are! O-rings in general a pain to get positioned right, and I was really hopeful that these would be a better option, however that was not my experience. In the Ori, I was able to get them to stay on between the plate and PCB, but once in the case it was difficult to get them seated right. Again I think this is mostly due to the case. The top ones did not have as much issue, and lo and behold, there are no “dual ridge lines” in the top part of the case.
Based on @Rob27shred suggestion, I did try them in one more board, a TKL, using the same 4 on top, 2 on bottom configuration. I agree with what he stated. It lead to a more open sound and softer bottom-out cushioning, but again very fiddle-y to work with. My plate and PCB must have different spacing so when trying to put the combo in the case, the little silicon guys kept falling out of place. Overall, I think they did something. However with this board, I already have dual-mount capabilities, o-ring and top. I have never tried top in this specific board, but I kind of feel as though I could get the same sound signature just but switching to top. Clearly though you would loose the benefit of the cushion-y bottom out.
While these didn’t really work out for my projects, I think they are a good buy. They are a great little item to just throw in your cart at Divinikey when you have a larger order. However it remains to be seen if that will be realistic scenario in the future cause these sold out quickly. I really only went forward with my purchase cause I had a few Divinikey dollars that would off-set the shipping. If I had waited, I don’t think they would have been available.
4 Likes
All great points & I will admit them just working on the first two boards I tried them with definitely colored my feelings on them. Also I definitely prefer softer/flexier builds so that makes these a win for me as well, where that might not be so important to someone else. They are a bit fiddly to work with, less than actual o-ring IMO, but not by much. Shame they didn’t work in the Ori as that would be a perfect board for these if it wasn’t for that extra ledge inside. Stuff like that is what I was talking about when I said they are not universal by any means. Really I think they hit the mark with what they wanted these to do, which is to give top mount sounds with O-ring feel. They also have the bonus of allowing plateless builds in boards that normally wouldn’t support them, but that puts you firmly into a pretty soft & flexy build so personal tastes will dictate how useful they can be for each person.
2 Likes
My DSS Honeywell came in a little while ago, and I thought maybe it deserved its own board. One of my favorite ones I’ve made lifted shamelessly from the 3270 beamsprings, so I thought why not have one that lifts shamelessly from the Honeywell BO1810 terminals that inspired the keyset? This one will be a fairly run of the mill compact FRL 1800 using a spare PCB from my walnut Alps build; I was at least smart enough to make it MX compatible. I haven’t decided if I’ll get beige filament or paint, but I think this would be a good candidate for tilting up at a big angle to print using “fuzzy skin.” The angle may be necessary for it to fit on the bed in one piece anyway.
My first thought for the recess on the back bezel is to dye some UV resin, but if tests don’t go well there are other options. My PCB and firmware are set up for two indicator LEDs, so I’ll use some old-school 5mm domes, one red and one green to match the original. Case will be a simple top mount. My Masonite plates are generally soft enough that I don’t feel like I need a force break, but that would be an option. Switches will either be Box Pale Blue or, perhaps slightly closer to the original feel, some spring-swapped and lubed reds. Real stabs on this one, PCB mount even!
Still early going and all on the “digital workbench” for now, but I think once I place the threaded insert holes to mount the plate, v1 of the top-case model will be done. I’ll definitely be printing that back right corner on its own to test before running the entire print; certain “estimates” were made regarding USB placement. The bottom case will be inset a bit to provide a vague hint of that “floating bed” feeling that the original boards seemed to have, at least in pictures. I’ve never actually seen one of the things in person, LOL.

10 Likes
I’m liking this idea a lot. Looking forward to updates.
My Commodore-64-to-MX keycap adapters arrived. They work! But there are some serious caveats… just as @Piperaceae and @wjrii warned me. I just like the C64 keycaps too much not to try and include them in my daily driver.
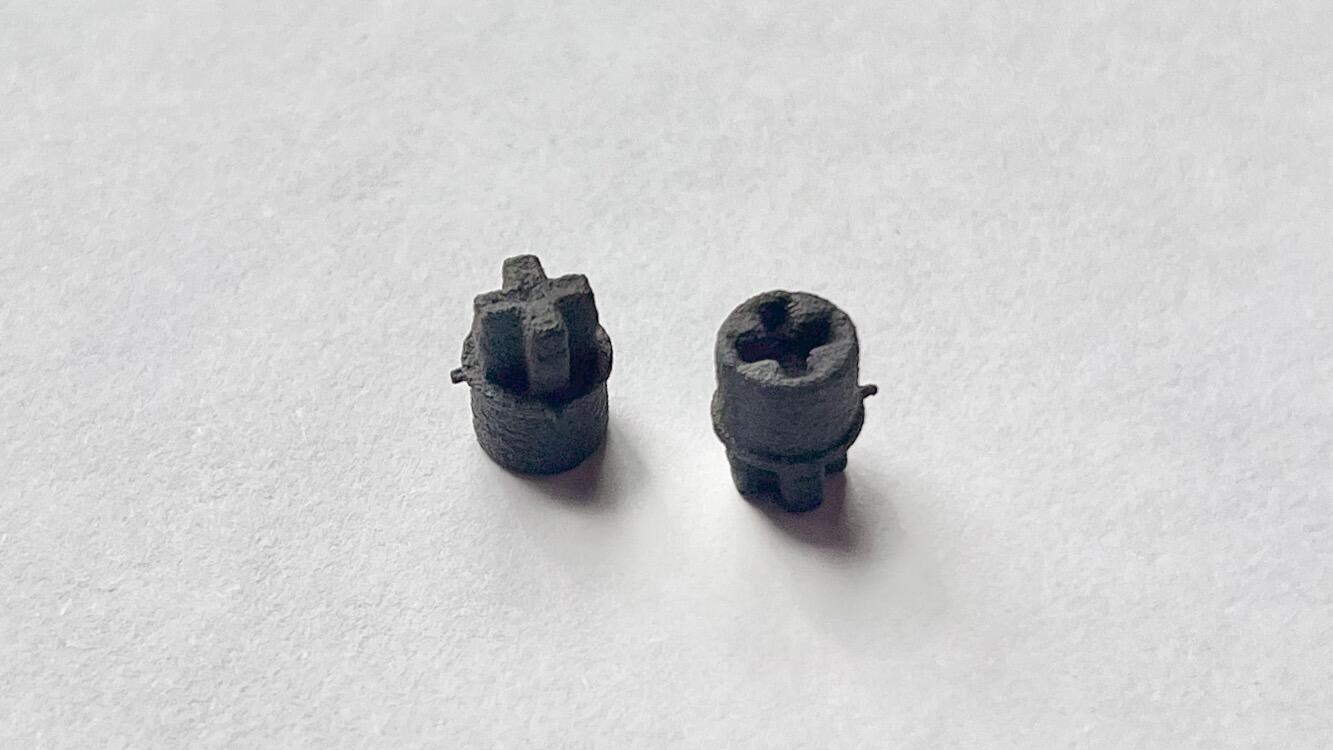
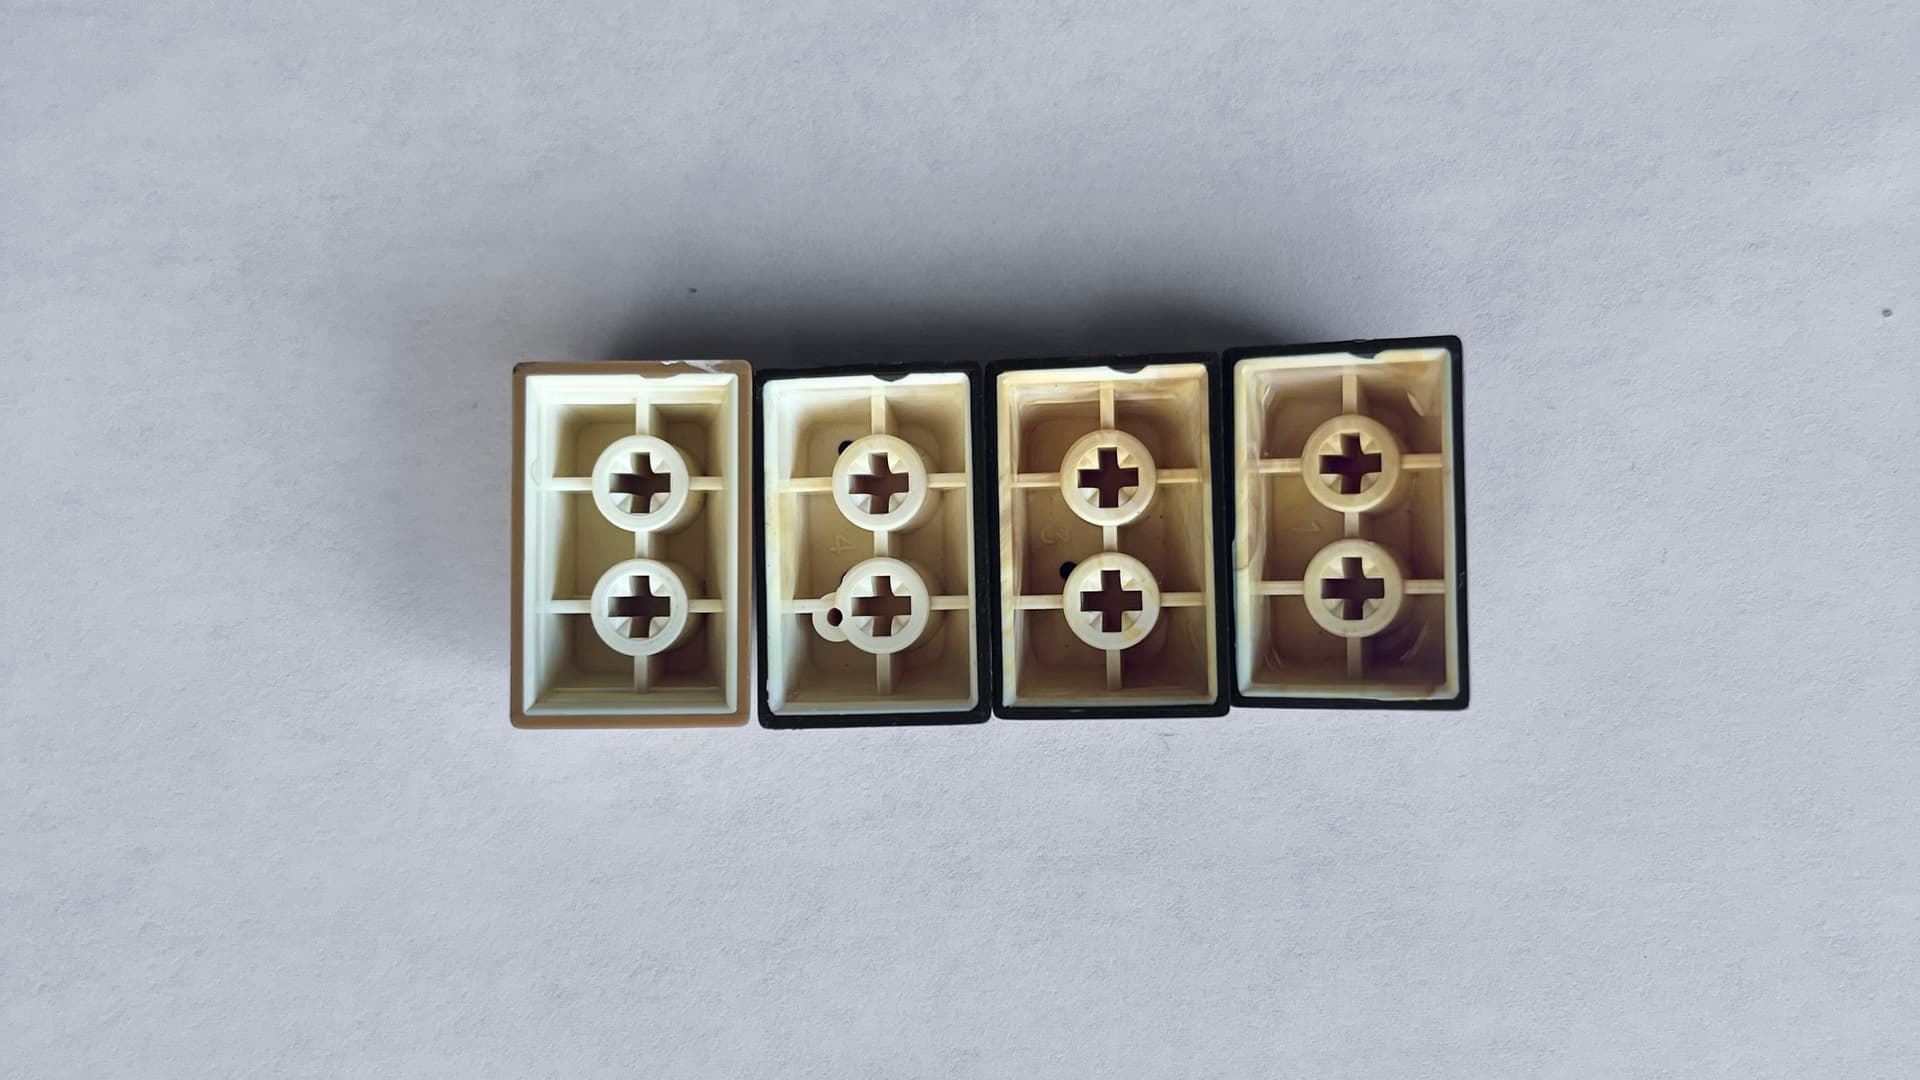
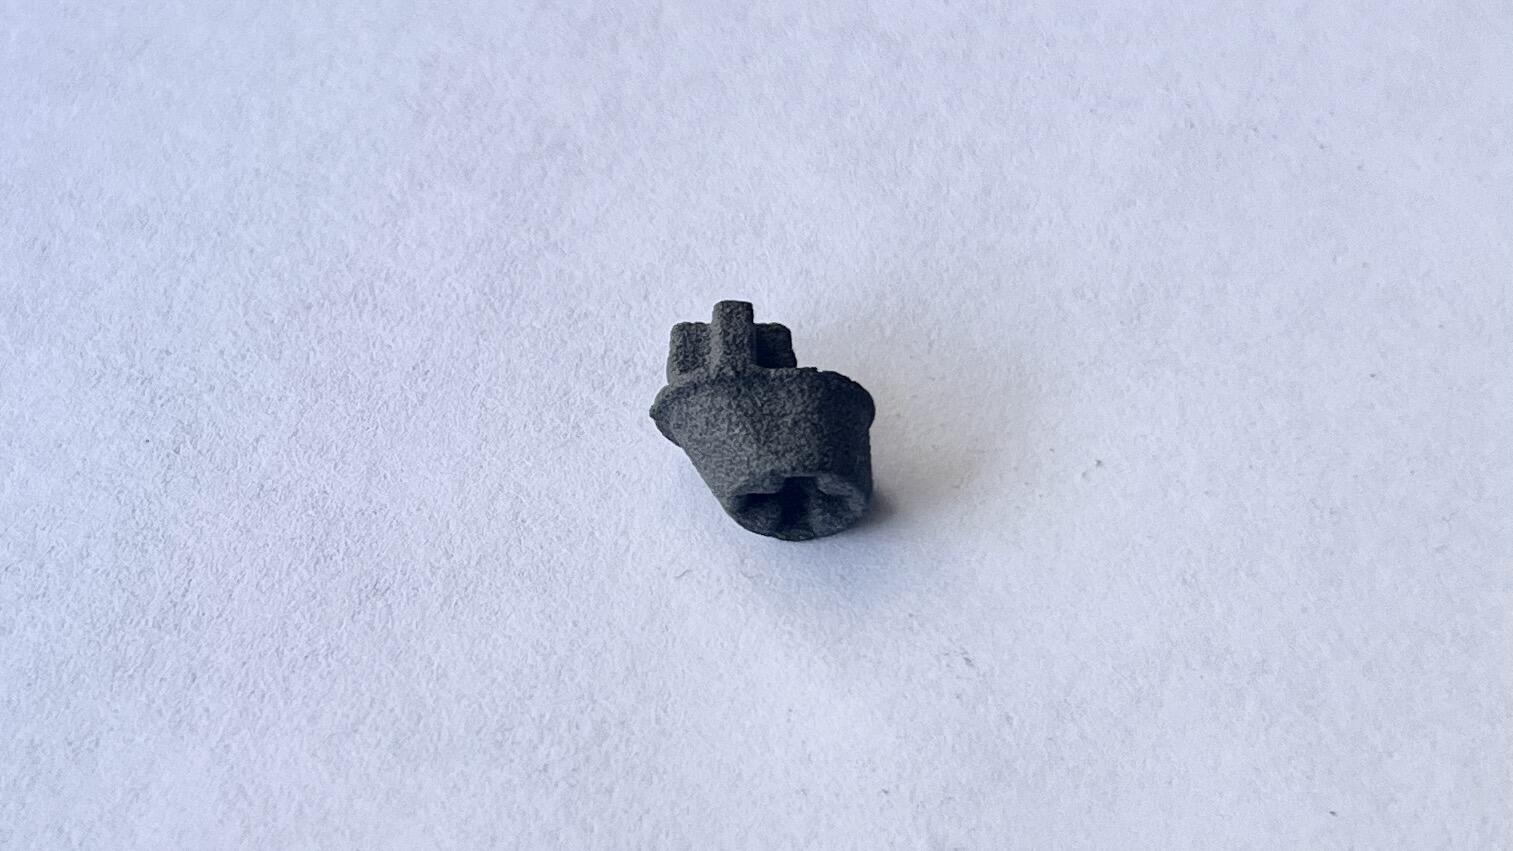
The CAD models are from this github repo. I followed the advice from this guide on breadbox64.com and had them printed in nylon using SLS. Since this process fuses powder, the adapters come clogged (left adapter below). I used a blunt syringe needle to clean out the recesses (right adapter below).

The adapters are a very tight fit, so much so that one person (can’t locate their post/comment anymore) considered that using them is non-reversible and destructive as far as the C64 keycaps are concerned. I’m not willing to try removing an adapter to test that theory! But I did notice that they cracked two of my keycaps. I’m not even sure this could be solved by tweaking the CAD models, as the problem might be inconsistency between adapters: some are tighter than others. I wonder what it would take—or what it would cost, when using online printing services—to get the tolerances down.
The adapters are not destructive to the switches: a keycap puller easily removes the adapter and the keycap together.

The adapters add about 4mm of height to keycaps. C64 keycaps are already taller even than MT3, so the combined effect is that my home row is now about 8mm taller. The increased height does cause wobbliness, but I’m not the right person to comment on this since wobble has never really been something I notice or mind. That remains the case here.
The C64 keycaps are only really usable for alphas, and, as I was warned, height differences could make it really awkward to type. I’ll have to see what this is like in the coming days.
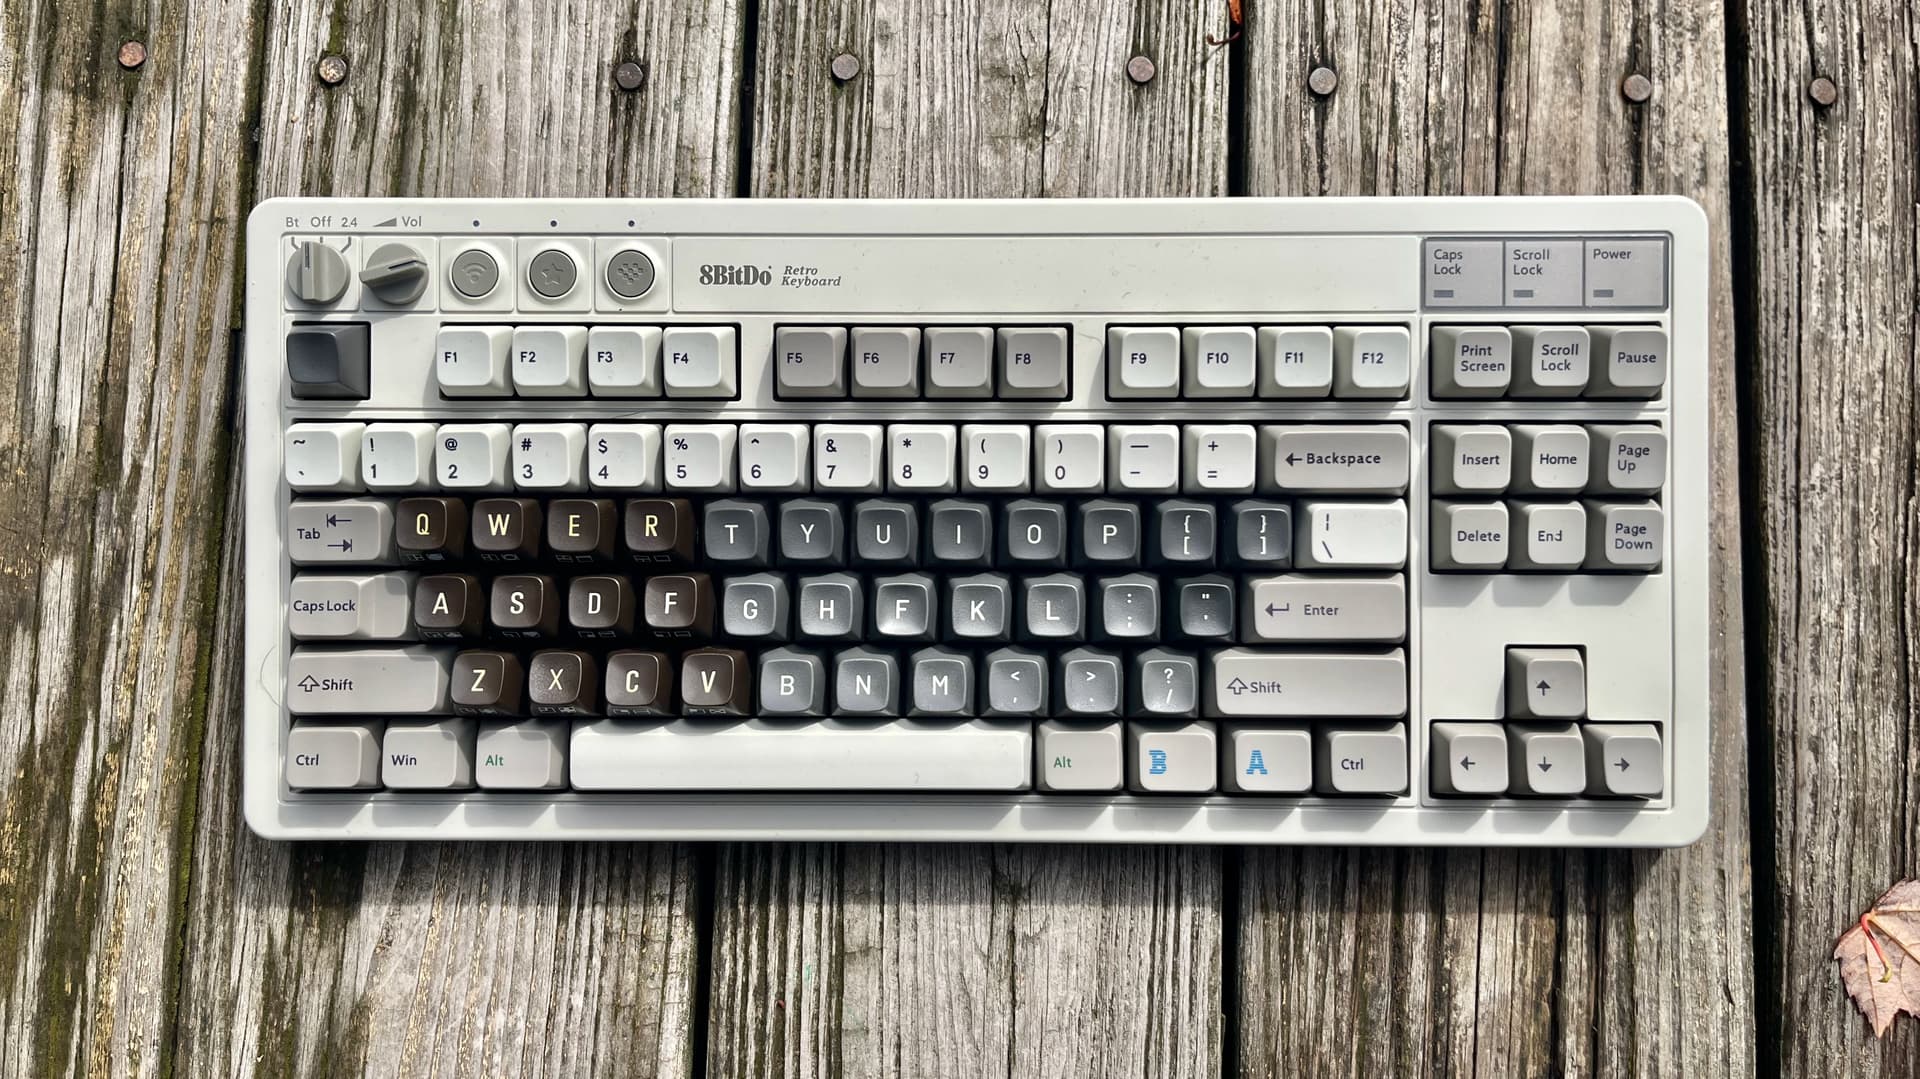
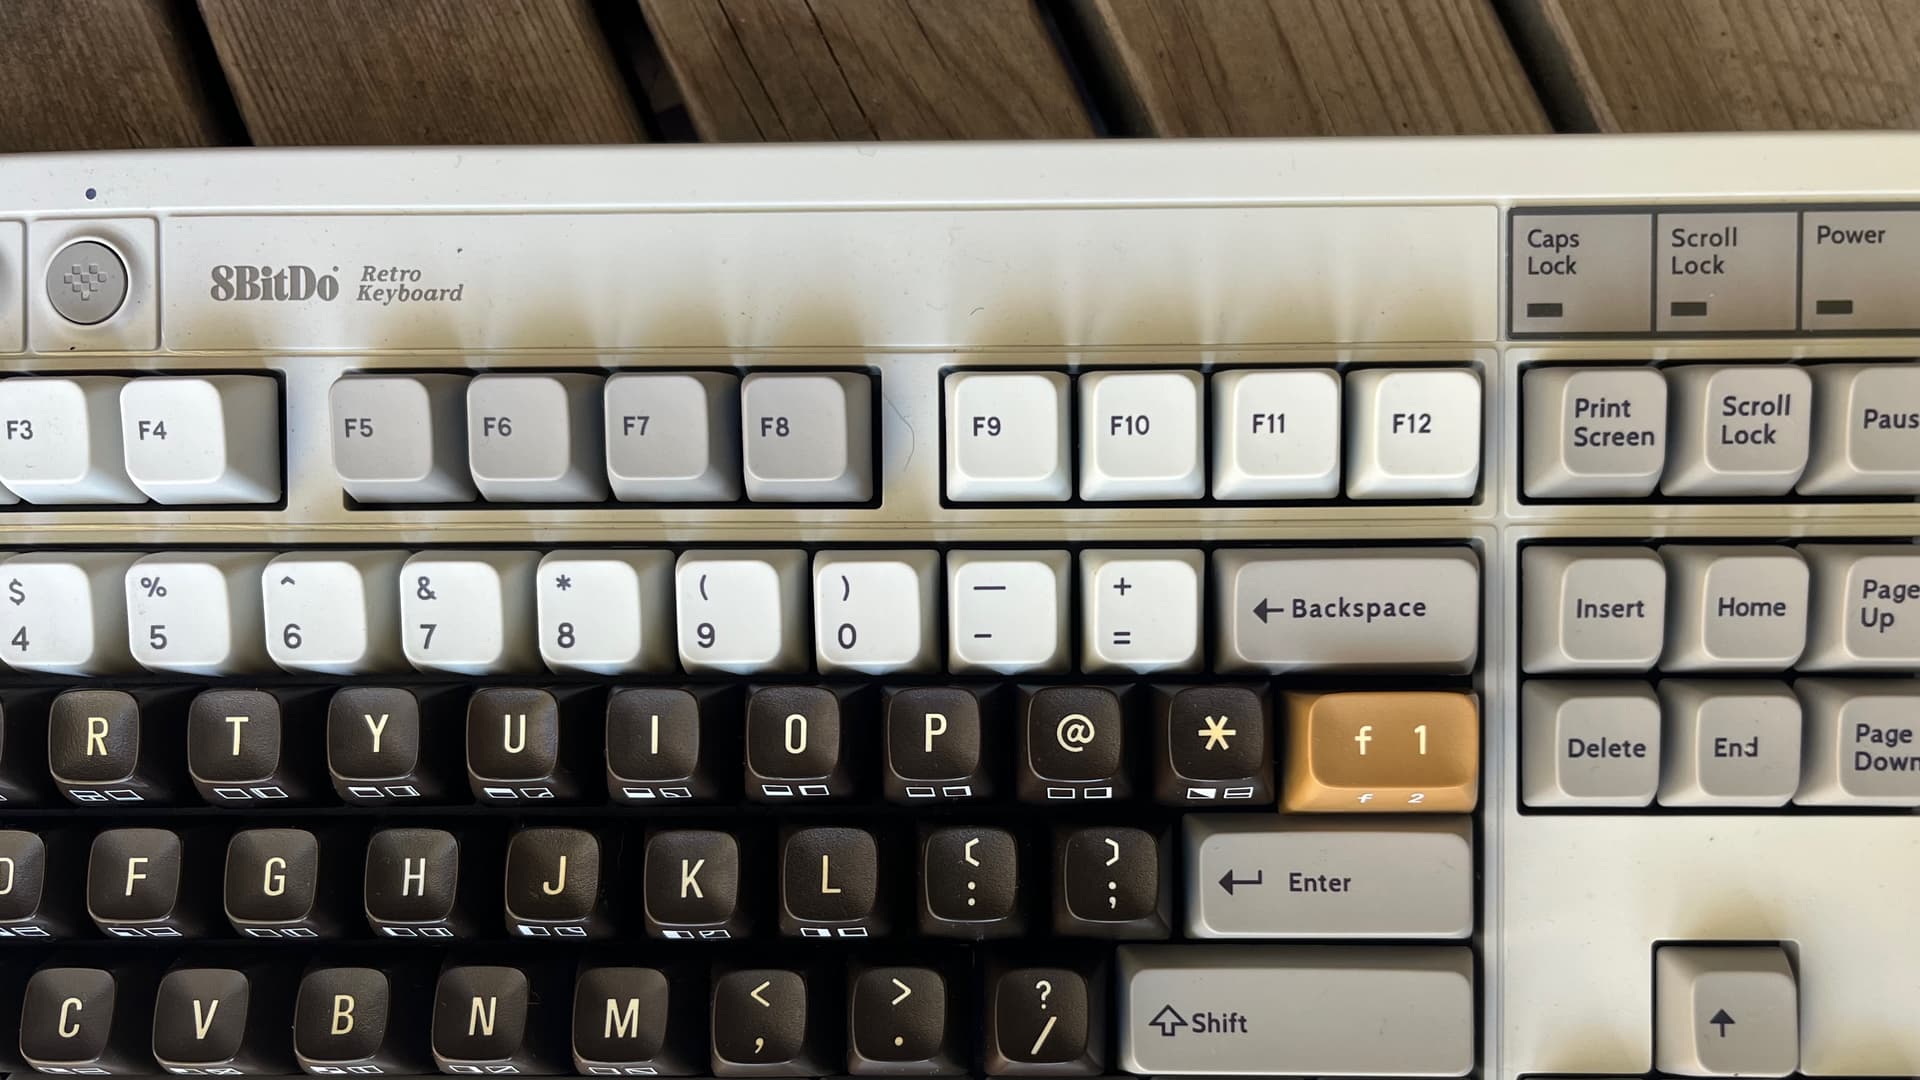
On top of the height difference, the C64 keycaps also have their own incline angle; to get the homerow to feel the same as MT3, you’d need to increase the slant of your keyboard. The C64 keycaps are also less sculpted than MT3, meaning they have more of a stepped progression along the rows that is a little more reminiscent of a typewriter. Neither of these two differences in sculpting has to do with the keycaps’ original integration with the Commodore 64, as its keyboard has the same incline as my 8 BitDo TKL.
Putting aside these three differences in height and sculpt, the C64 keycaps match MT3 quite well on a purely esthetic level. The spherical tops of the keycaps look and feel surprisingly similar in terms of dimensions, depth, and even texture. They both use similar narrow legends as well, although the Commodore legends are even narrower than MT3.
That’s it for first impressions! I hope to report back in the coming days/weeks about my typing experience.
14 Likes
Very cool to see them in place. If it’s really about 4mm and you were feeling ambitious, you might be able to design MX-to-MX adapters to match the height.
1 Like
Yeah, absolutely. My only hesitation would be that I’m actually less willing to risk cracking my MT3 caps than my C64 ones, since funnily enough MT3 are the more expensive of the two. So I’d need to be careful about that.
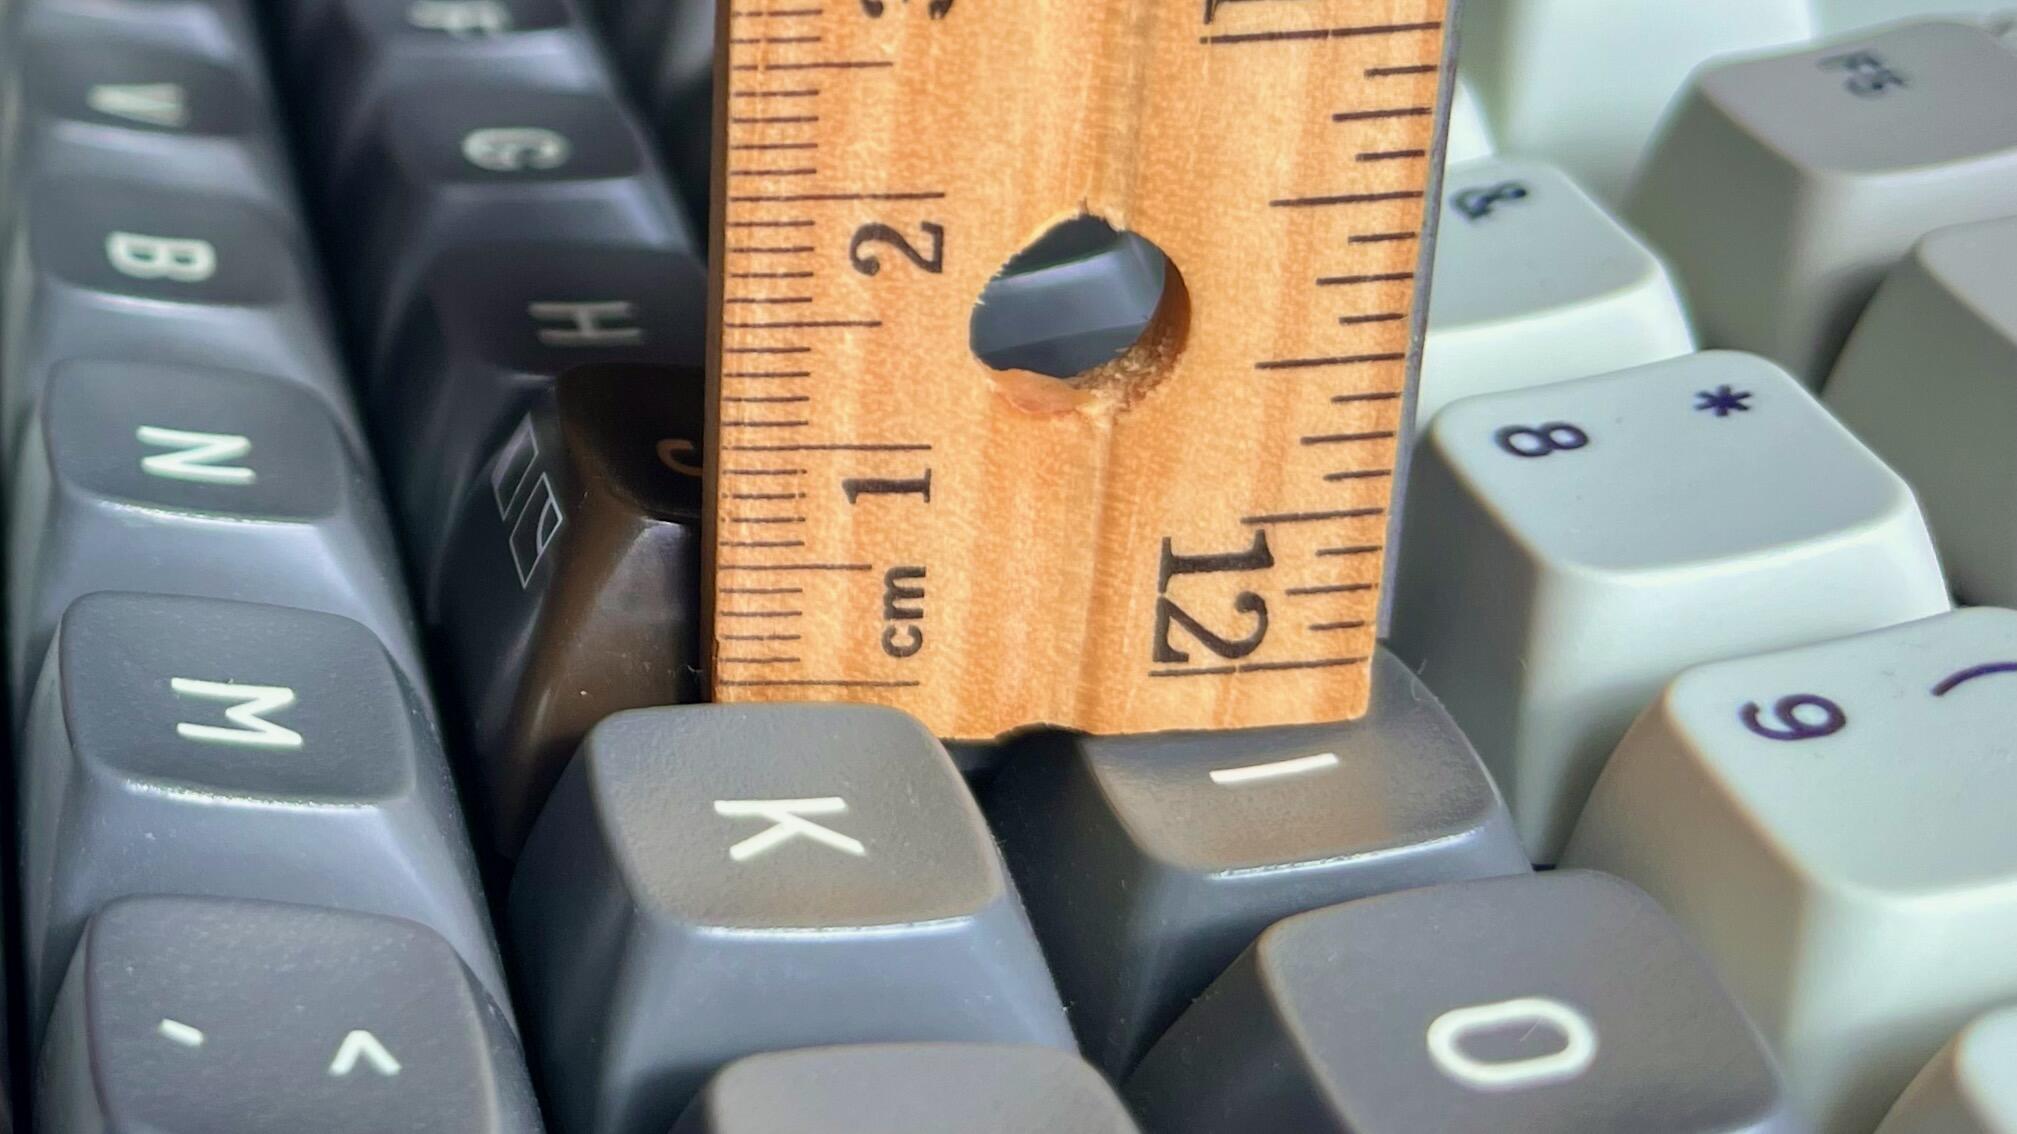
While I’m at it, I might try and see if I can make an adaptor for these 1.5u keys.
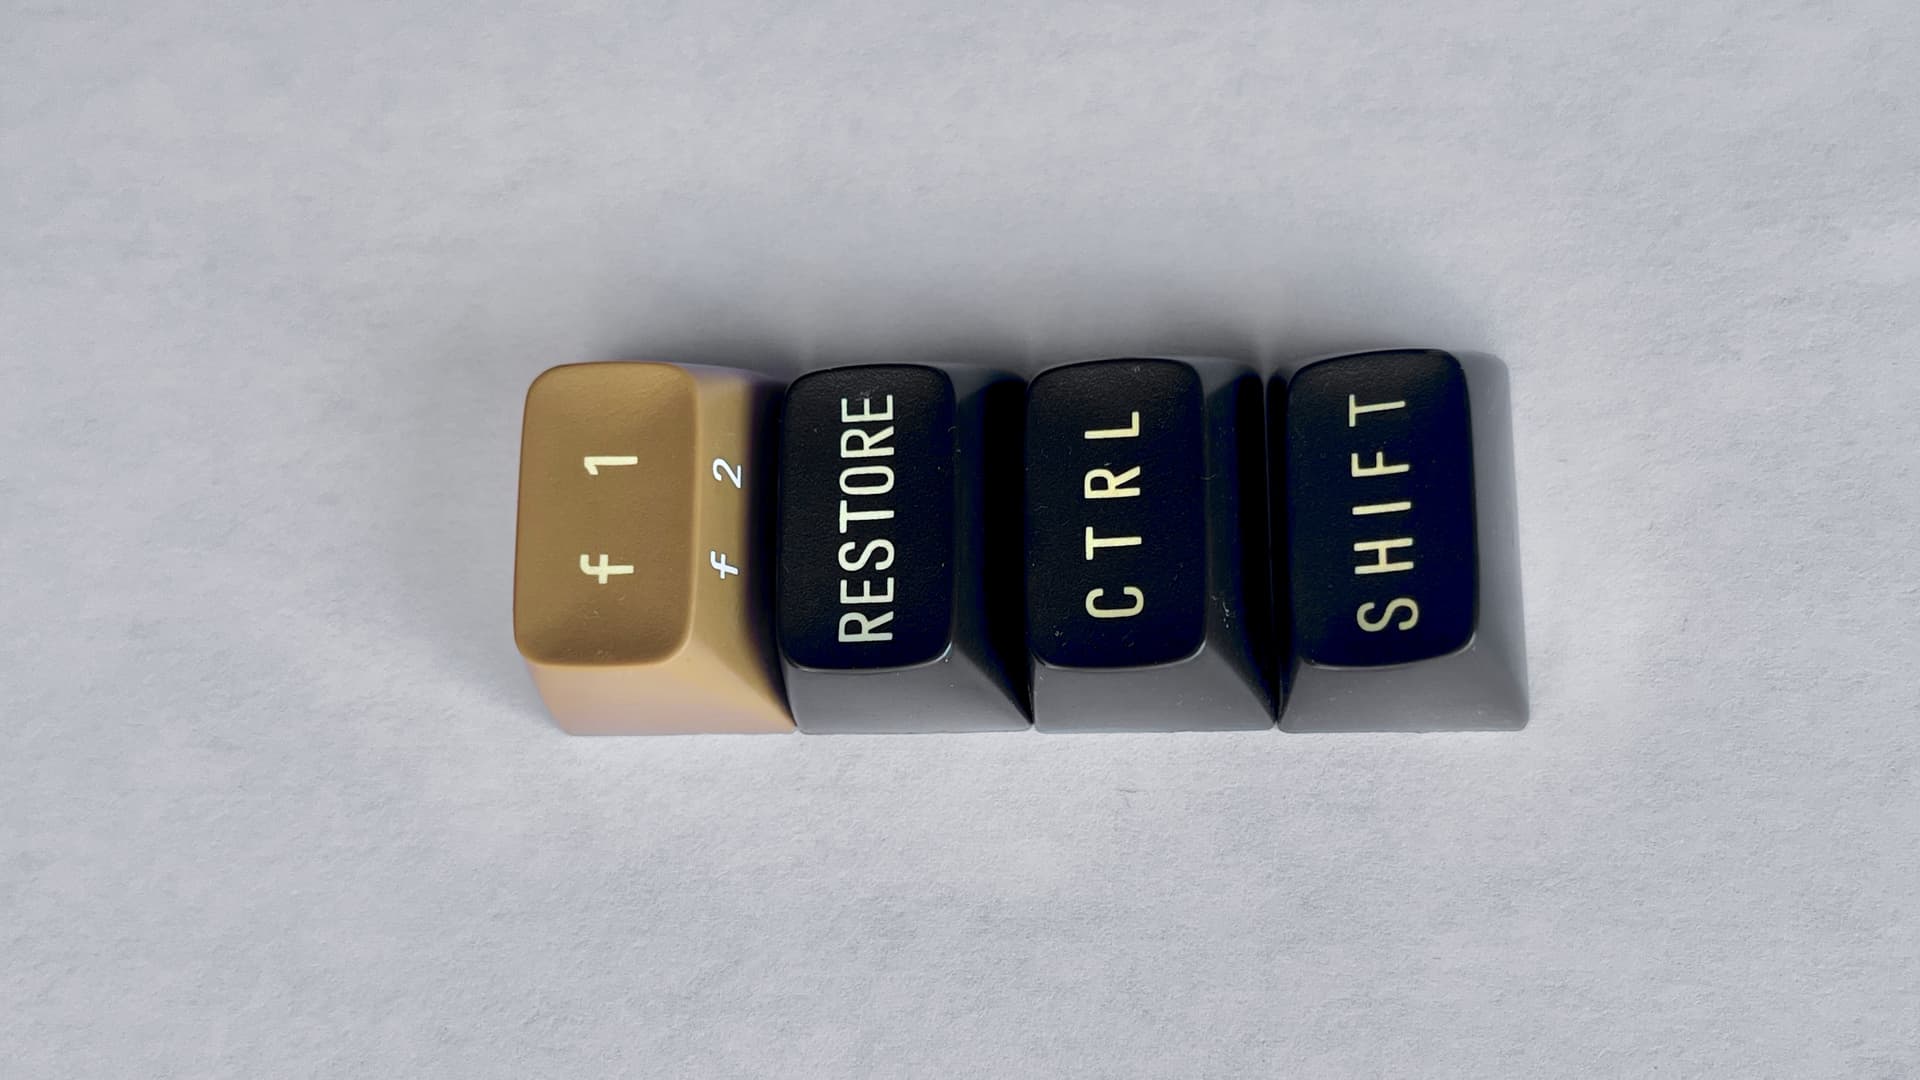
I terms of width, they and the 1u keys are the only thing that’s compatible. But the problem is that they have two mounts, instead of one centered one:
Initially I thought that the offset-adapter below was for these 1.5u keys, but it actually doesn’t work, it needs to be offset even further to accommodate a centered cherry switch.
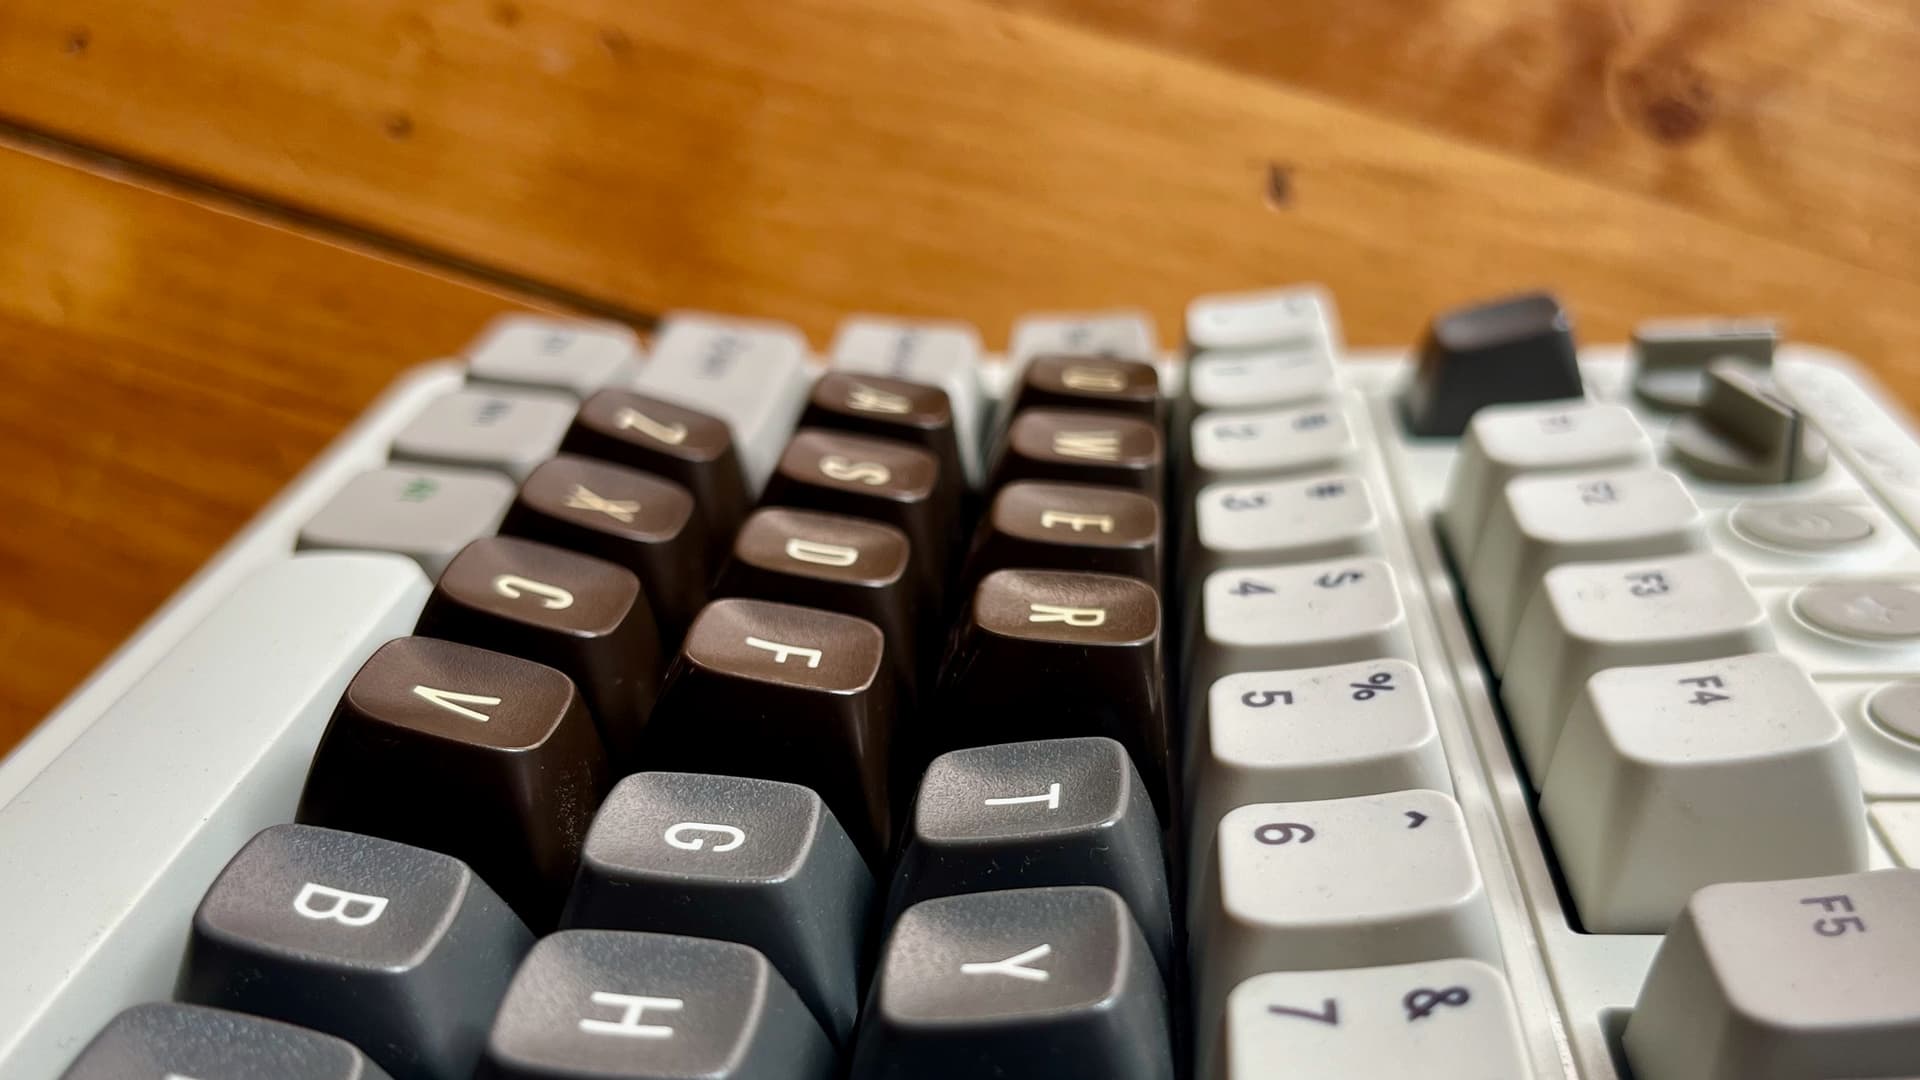
The 1.5u keys I’m most eager to be able to use are the f-keys, since they’re a lovely mocha color. Which reminds me: I’ve been calling these C64 keycaps, but they’re actually from a VIC-20, an earlier computer model. While the C64 has grey F-keys, the one on the VIC-20 are a light brown mocha color. The legends wouldn’t make any sense, of course, but I think the shade of light brown would look so good as an accent color for the dark-chocolate alphas.
6 Likes
Some C64s did have the mocha function keys, or even orange. Lots of variance among shades of grey, too. Seems like they just went with whatever resin they had on hand during production!
4 Likes
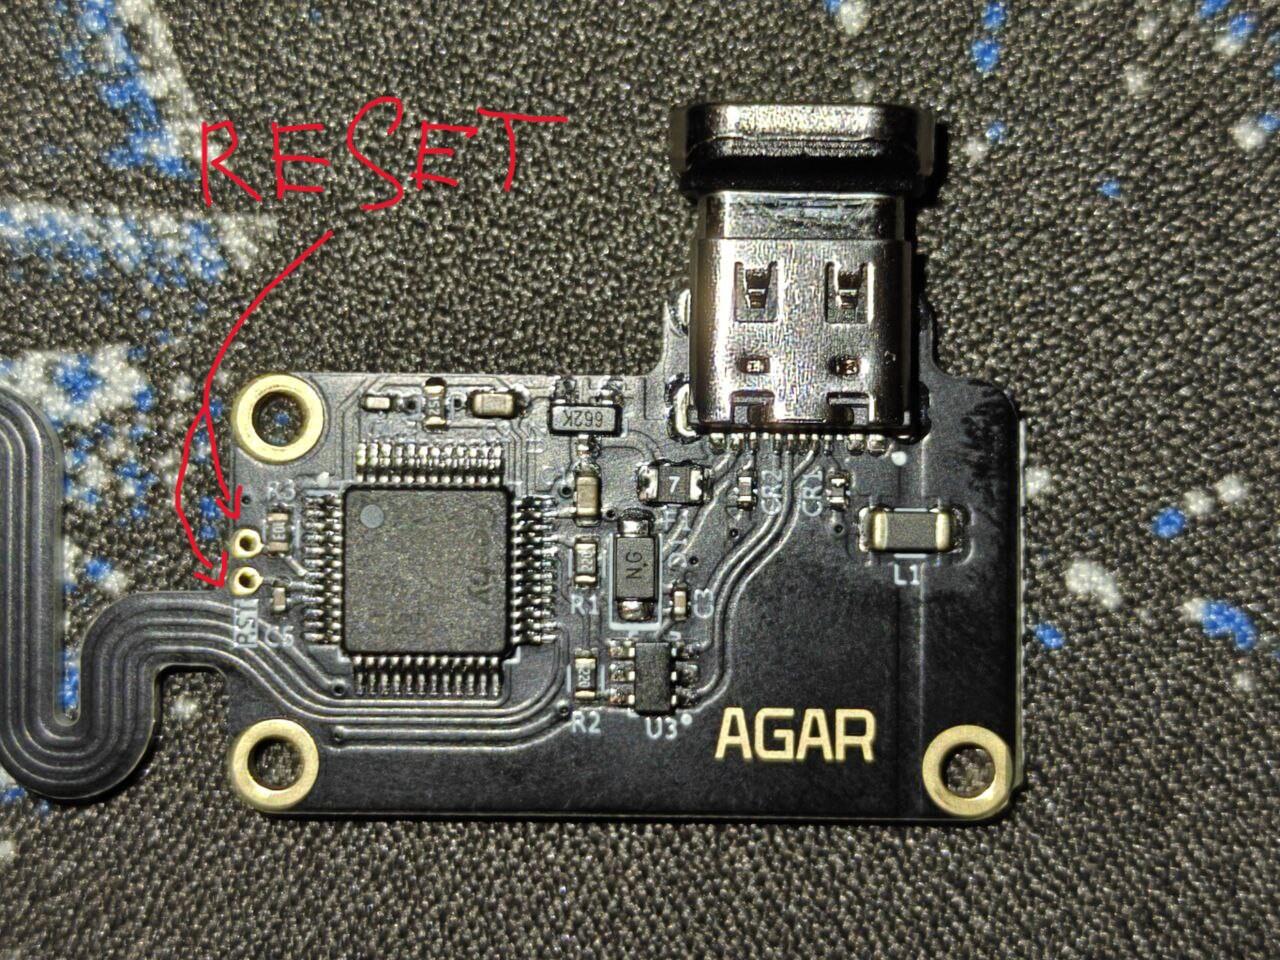
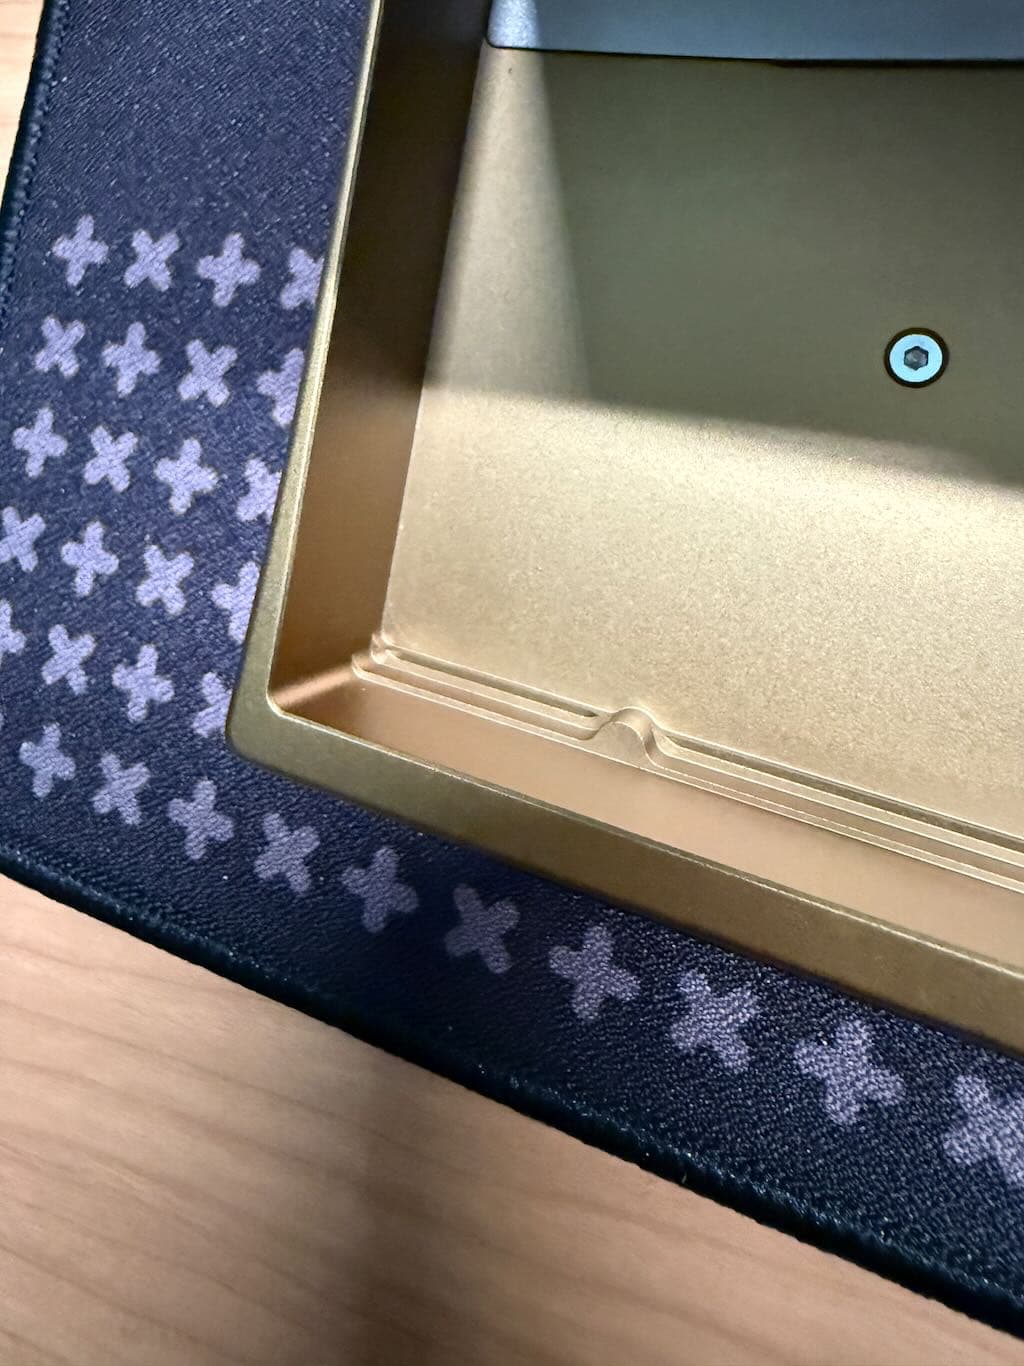
When I first received this board for the Agar MX keyboard, I didn’t check it with tweezers.
I only reassembled it now, after the keycaps and switches arrived.
And it’s dead. When plugged in, it shows all the switches are pressed simultaneously. I reflashed it and changed the USB.
As soon as you plug it in, all the switches are pressed, and in the VIA program, it shows in test mode, so you can see it. Or you’ll get a critical error in Windows and have to reboot because everything is pressed. The keys are sticking.
![]()
2 Likes
Super cool. I wonder if you’d be able to get a cleaner print with resin, and since it won’t be subjected to heat and sunlight–I’m not too familiar with the resin as a material–it could be okay? Assuming as long as it’s snug enough. Just throwing it out there, I don’t know anything about the nylon SLS or cost of it.
Waiting to see what you come up with for the 1.5u keys!
1 Like
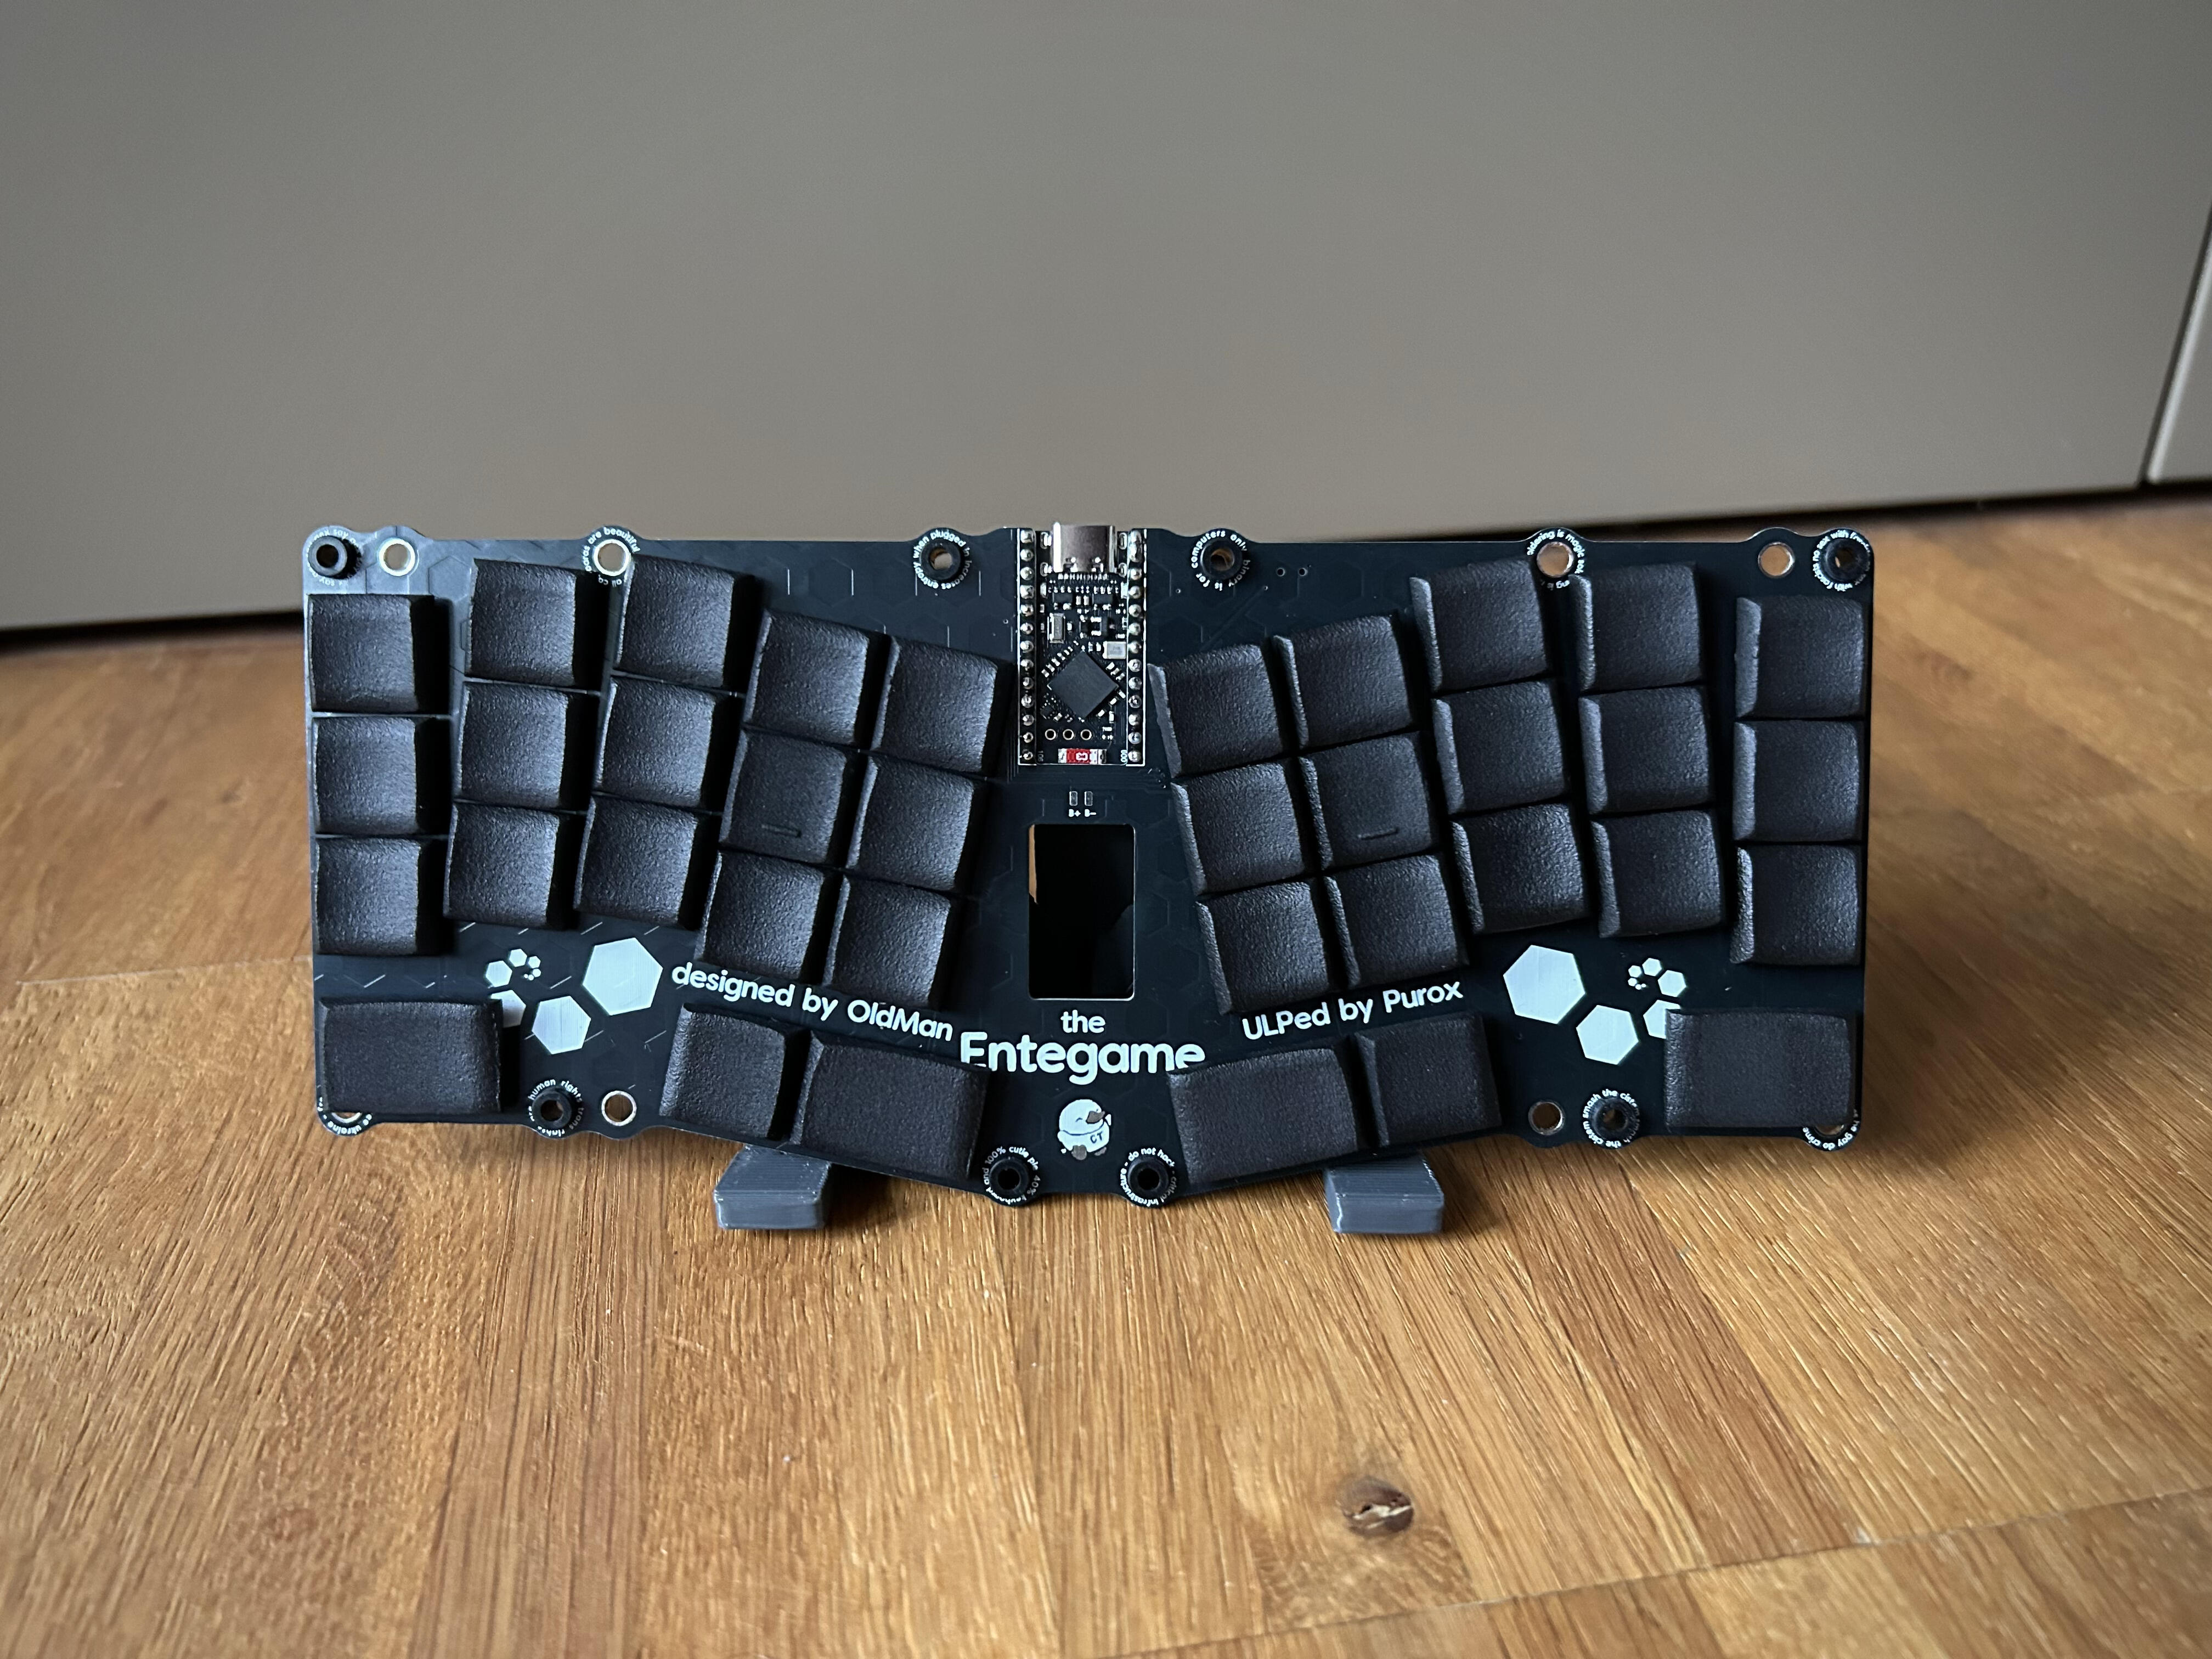
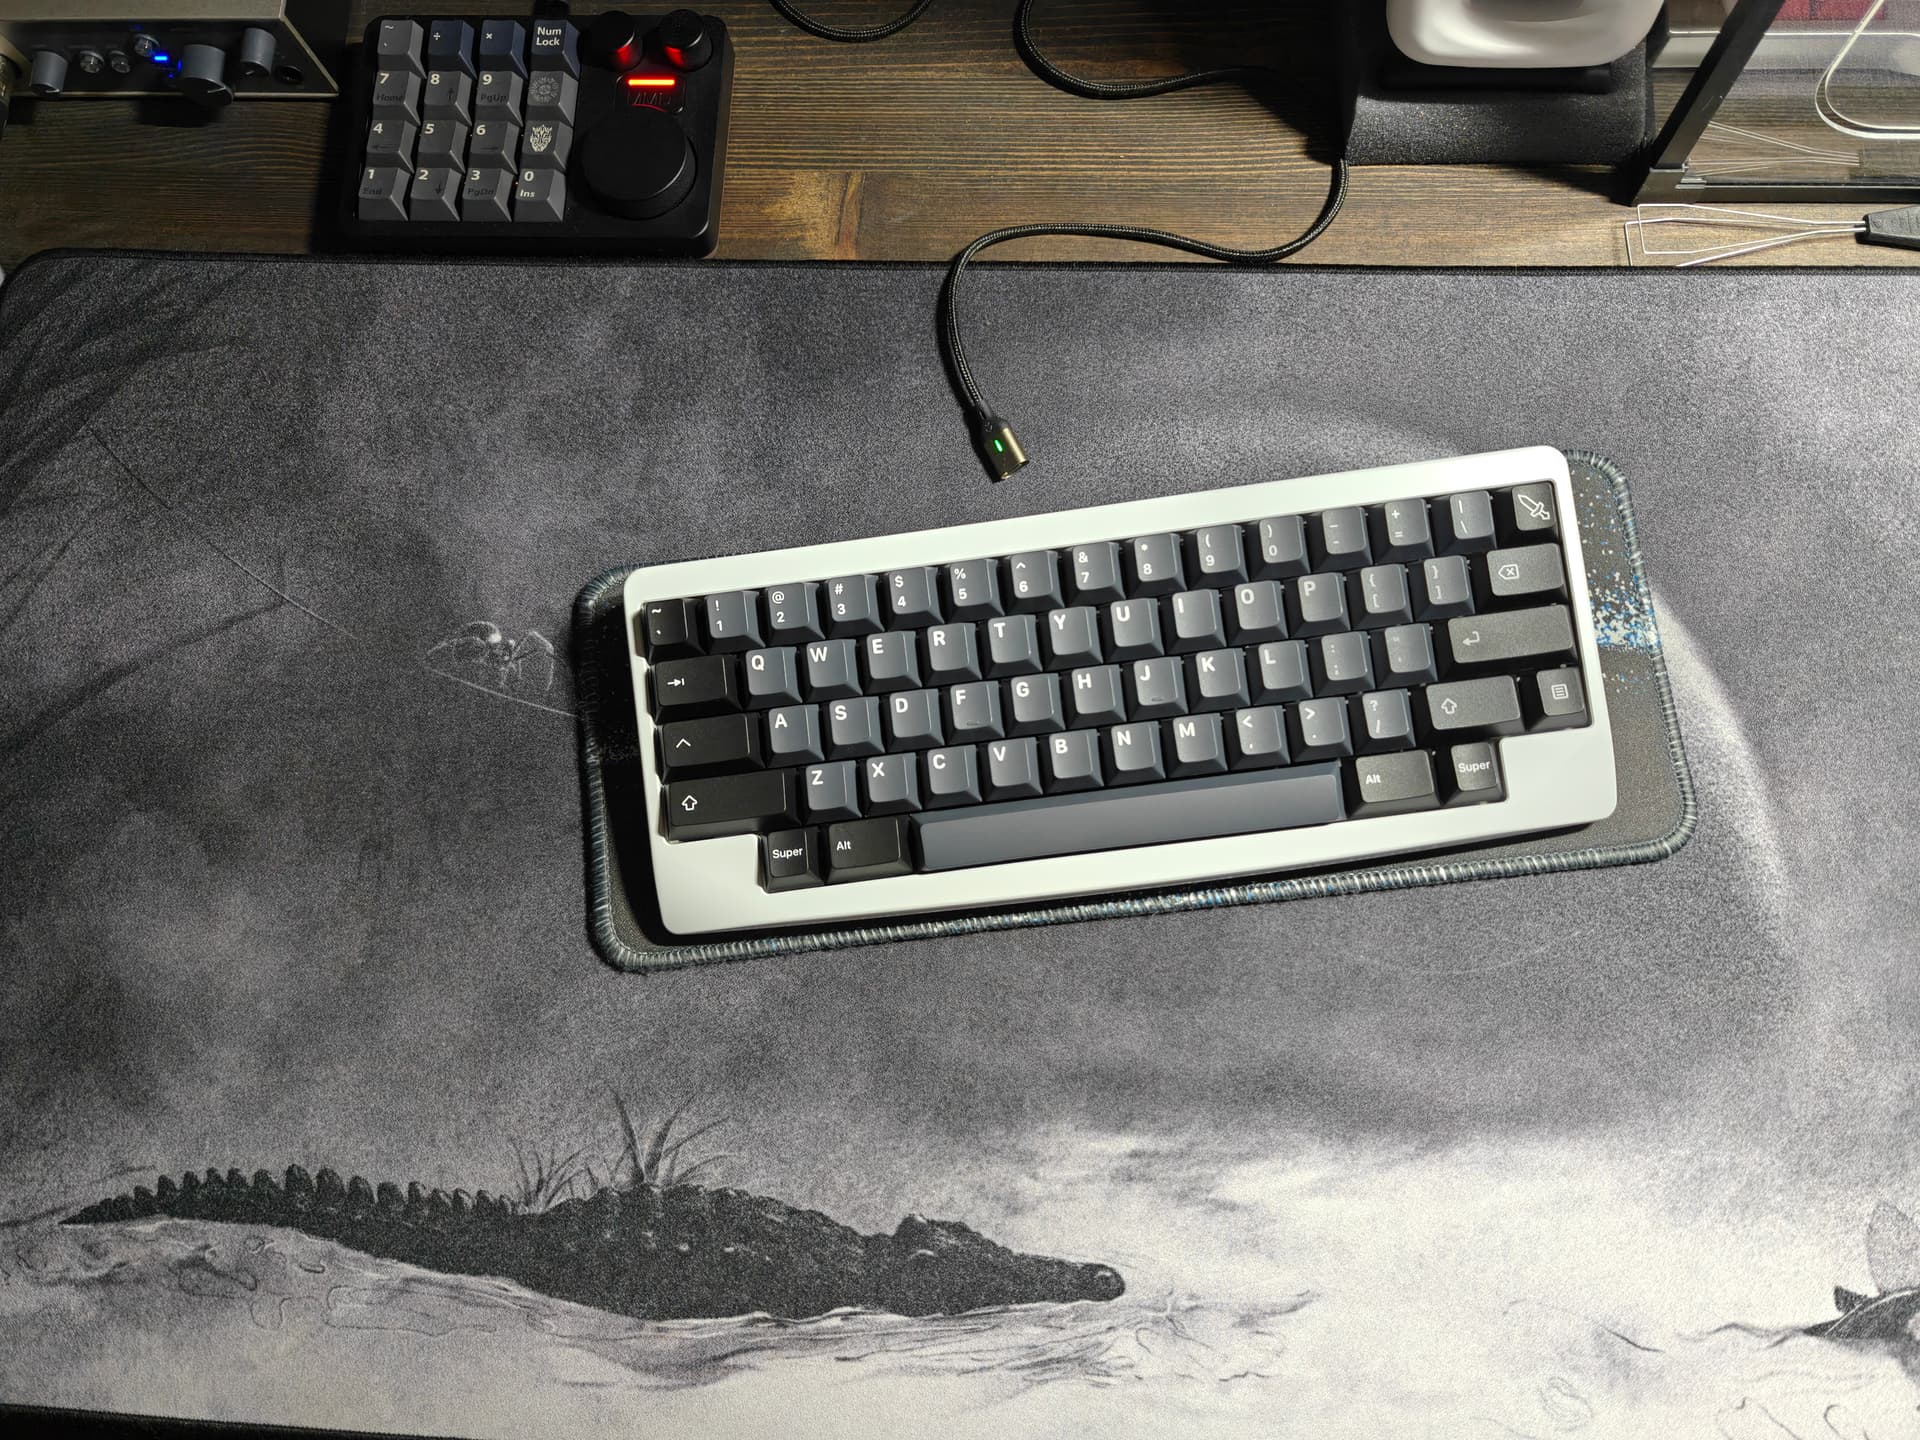
Picked up a ULP Endgame PCB and fitted CS Keycaps (JLC MJF) up from purox at Mechanicon yesterday, couldn’t wait to build it and finished soldering everything just now. Soldering the ULP switches was easier than expected, had to re-solder not a single switch, just one Diode which was not connected fully. CS matches the ULP switches extremely well, now I just need to get a battery. I would have some 400mAh left from the Klotz but such a big battery defeats the ULP approach a bit and they don’t fit the cutout.
7 Likes
I finally got bored enough to play around with the Bolsalice again and rebuild it. Decided to just build it plateless, even though it was very much not meant for that. Ended up throwing some foam into the bottom the case and found a bunch of extra gasket jackets lying around so used those around the PCB which holds it in place within the case. Used stock Strawberry Shortcakes that I bought a long time ago and never knew what to do with so that they finally got used for something.
Still getting used to the sound, but honestly, it’s not that bad.
3 Likes
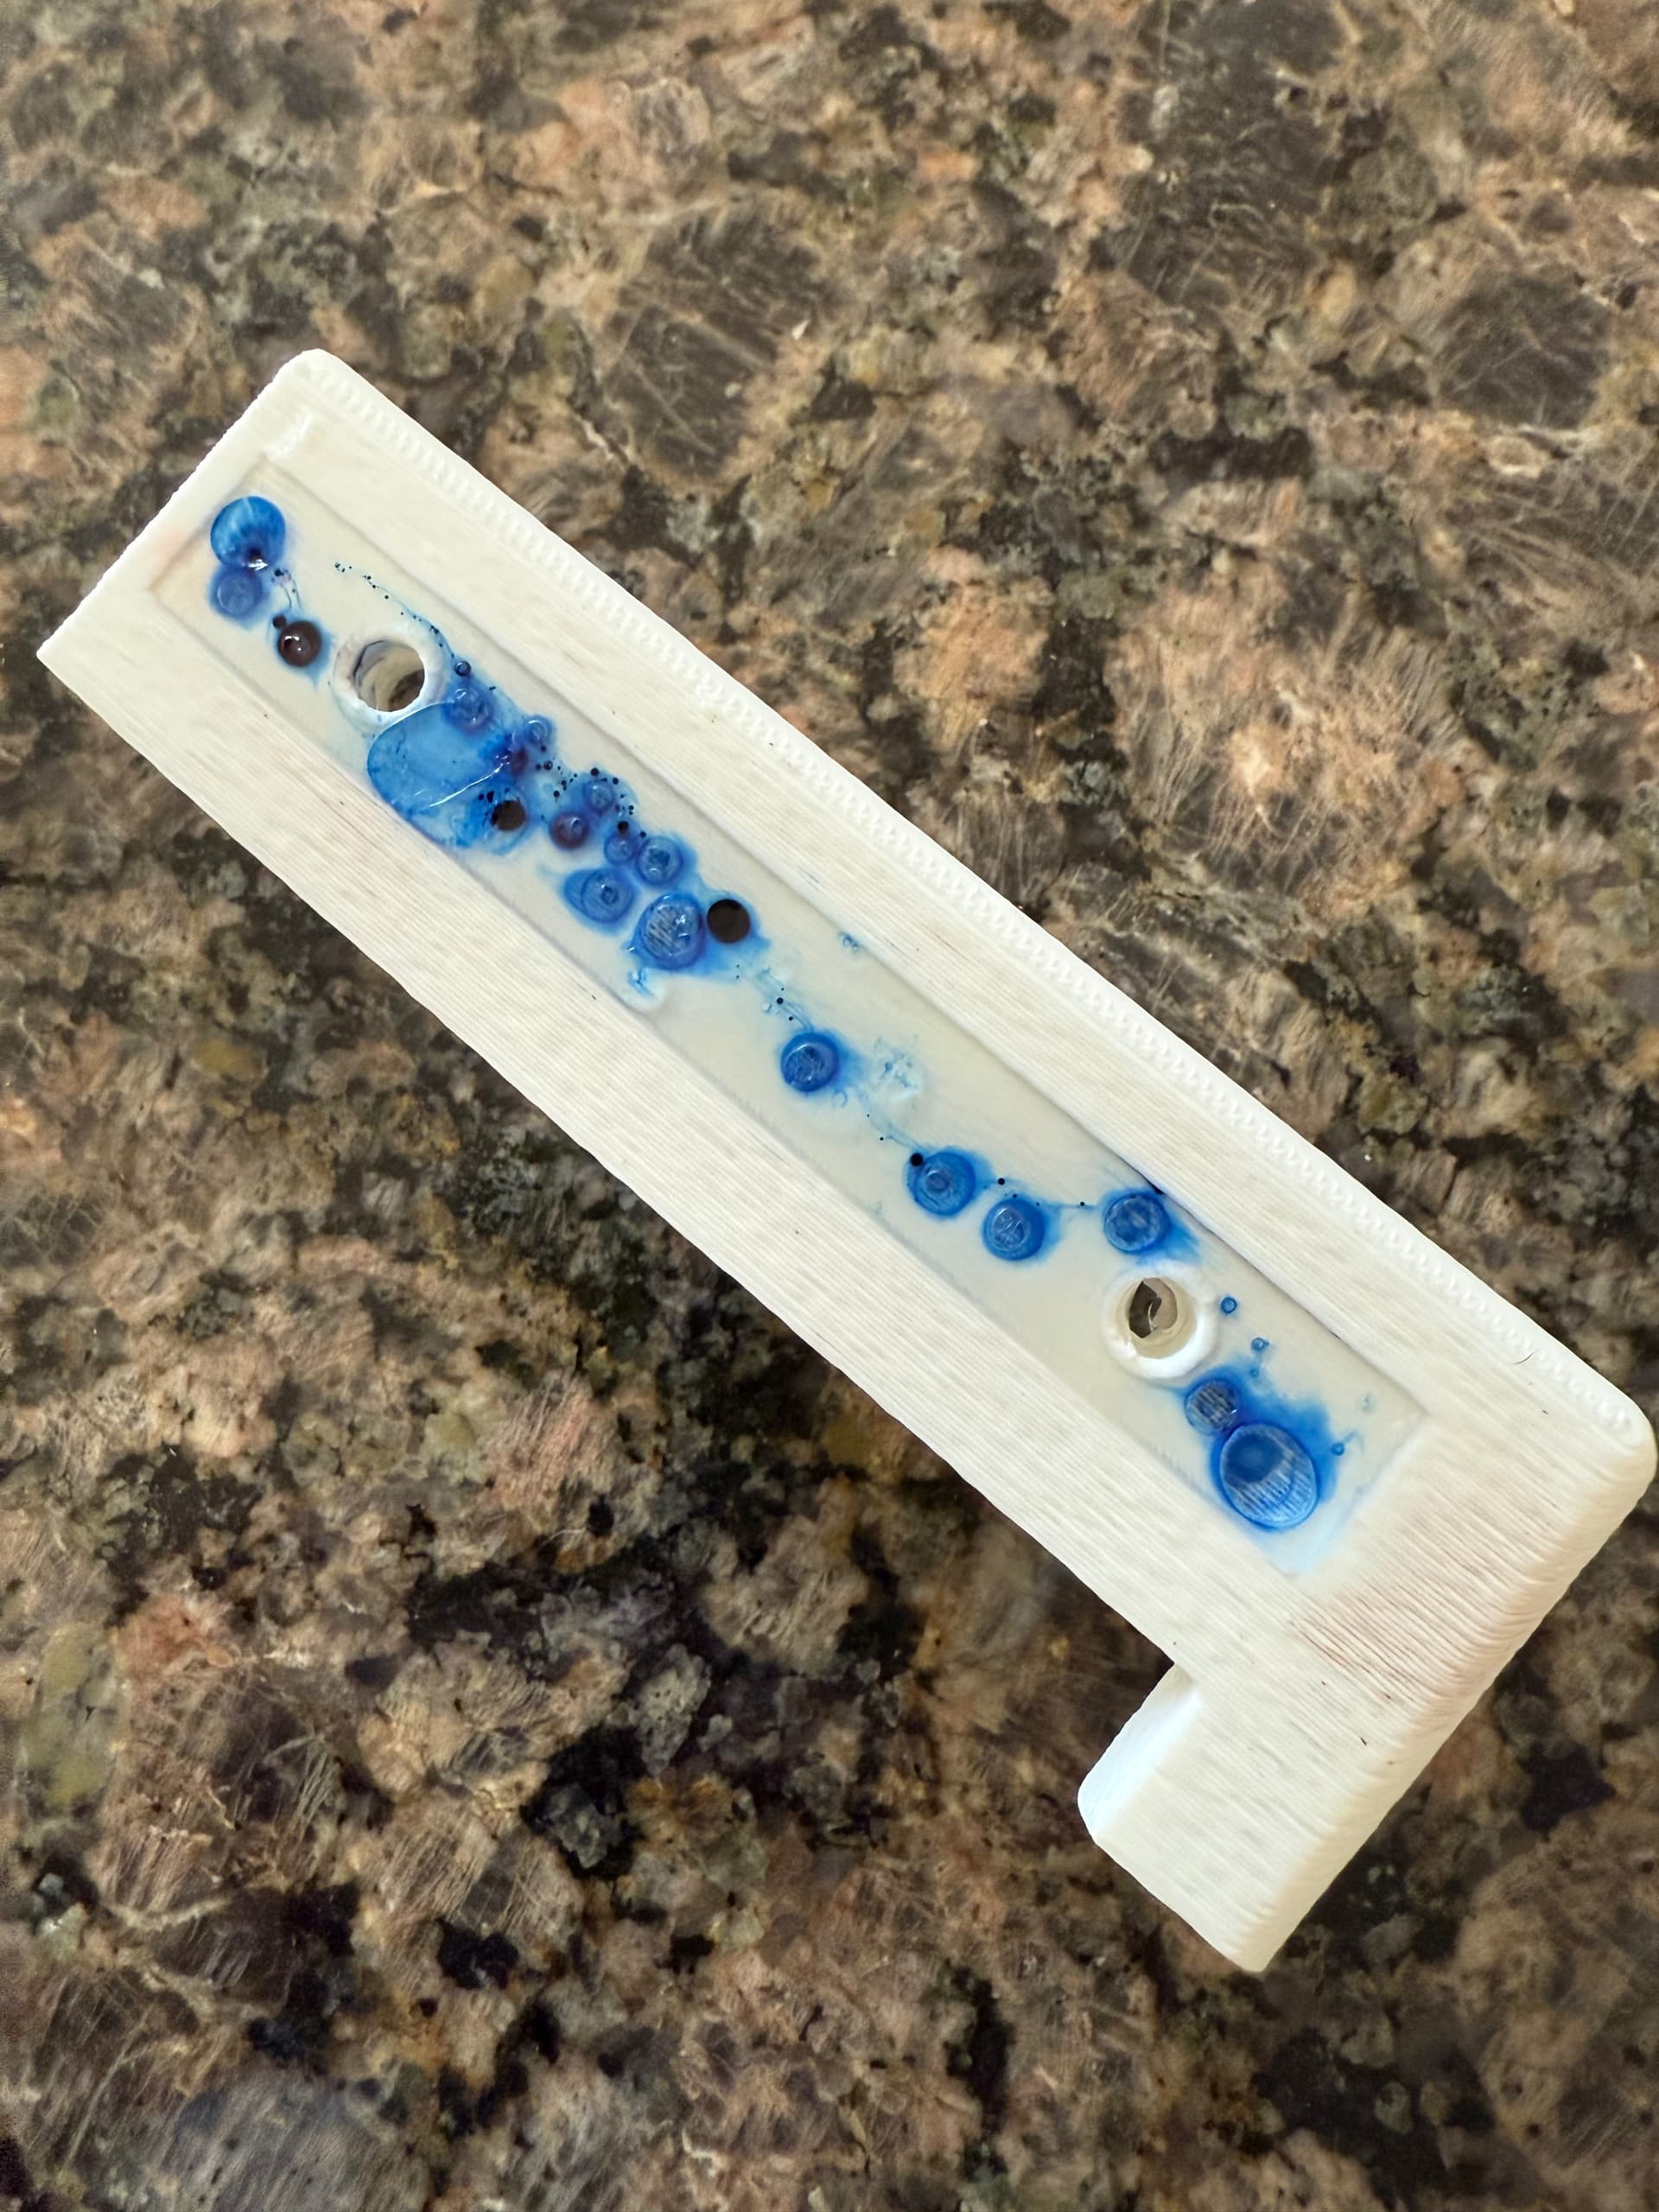
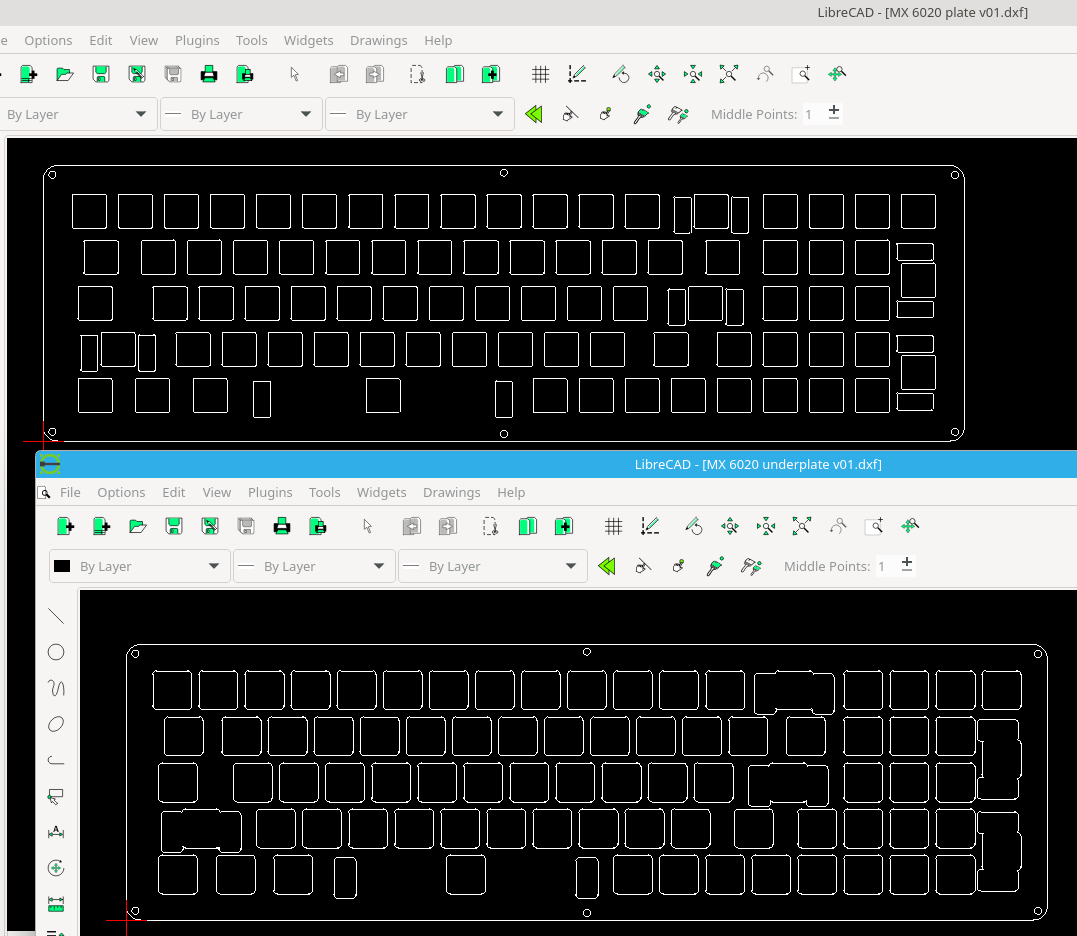
Did the first test print and finished the DXF for the plate and also the “underplate” if I decide to do laminated 1.5mm plywood. I also did a simple bottom plate that has a trapezoidal hollow to evoke the original Honeywell board and provide room for wheel weights, but no pictures of that because I don’t feel like booting back into windows right now. ![]()
I threw some UV resin into the test print’s recess and just dripped some fountain pen ink onto the top. The tint obviously cannot be done that way (and in my defense, I will insist that I was just messing around with that part), but the resin itself cured pretty nicely and very quickly out in the sun. I think pre-blending or laying down a base before the resin, and properly masking of course, is promising. One tangential note: the ink is brown, and when I touched a bubble that didn’t have enough resin to cure, it was still brown, but the interaction with the resin makes it look pretty darn blue. Physics is cool.
Next step is actually a big one. I need to fab the plate and solder the PCB so I can see if the USB cutout needs to be adjusted. I already expanded the width of the LED holes based on the fit on v1. Then I can do another test print, including playing with the fuzzy skin settings (they already look a little better IRL without my phone camera “helping”), and try the resin again. If that goes well, I can see if printing in one piece will be practical. I have some off-white-drifting-towards-beige filament arriving shortly.
7 Likes
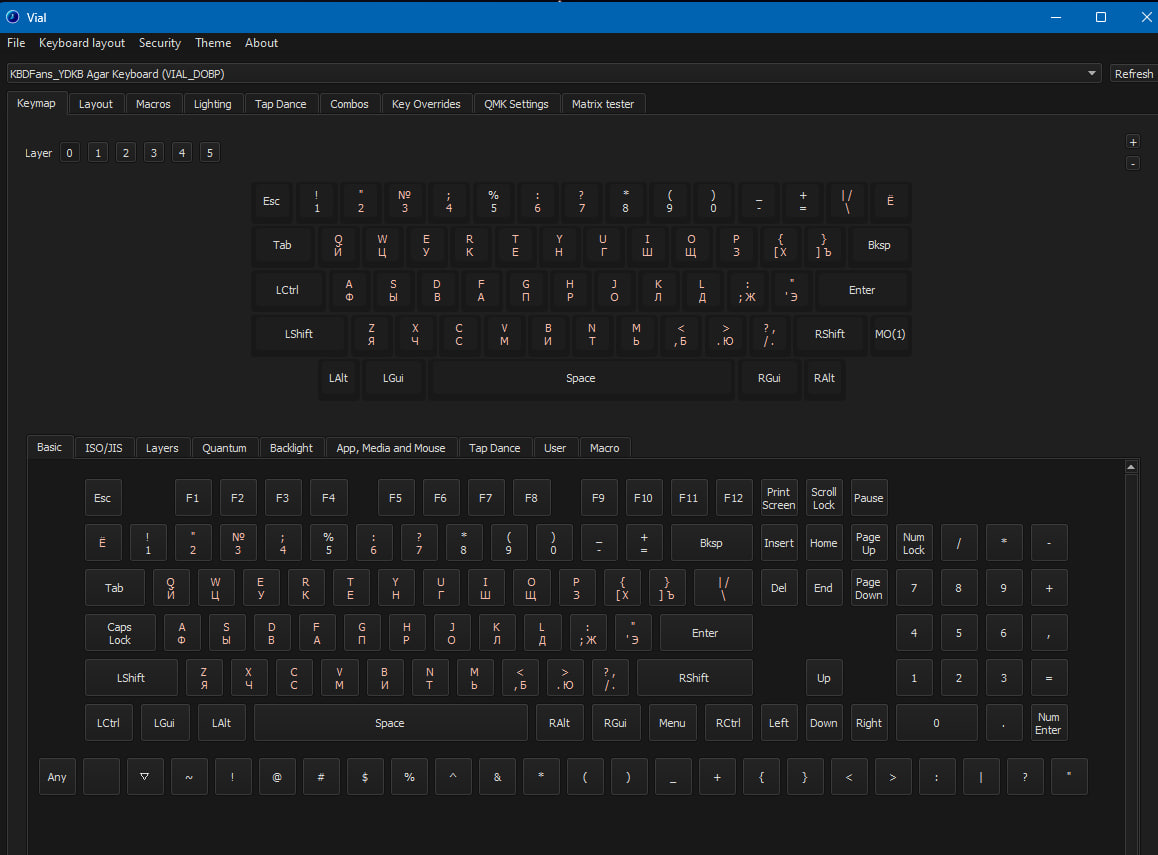
![]() [Build Log] Agar PP Plate + Dampening + B1 Bilirubin
[Build Log] Agar PP Plate + Dampening + B1 Bilirubin
TL;DR: quiet, bouncy, thocky — and the spacebar’s got an attitude.
![]() The Setup
The Setup
Finally put together a new board on an Agar PP plate, full dampening, and B1 Bilirubin switches.
Kept it simple — stock build first, no mods, just to see what the combo sounds like raw.
![]() First Impressions
First Impressions
Way quieter than expected.
The PP plate gives that soft, flexy feel with a bit of give on bottom-out. The dampening works — no hollowness, no metallic reverb.
Bilirubins sound clean, tight, and solid.
I was expecting “ear-bleed clack,” got refined thock instead.
![]() Stabilizers
Stabilizers
Running Agar stock stabs, which come pre-lubed. Didn’t even open them — just slapped them in.
And yeah, shockingly decent out of the box:
No tick ![]()
No rattle ![]()
No mush ![]()
Could use a little more lube, but the feel’s great.
The wire is a bit stiffer than TX/Durock — there’s a slight inner vibration when you bottom out hard, but it’s not annoying.
2u keys feel great.
7u spacebar, though — has a personality. If you really hammer it, the wire can “tap” against something, but only if you force it. Normal typing = totally fine.
![]() Keycaps
Keycaps
Double-shot PBT caps — a bit on the loud side, but not harsh.
The PP plate + Bilirubin combo smooths it out, leaving a crisp but controlled pop.
␣ The Spacebar Saga
Something’s off here.
The press sometimes feels… hollow? muted?
Like there’s friction somewhere or the stem doesn’t bottom out fully.
Feels like a tiny rock bouncing in a cardboard box — weirdest analogy, but accurate.
Probably a misaligned switch or stab wire sitting weird. Gonna tear it down tomorrow and test each part.
![]() Spring Ping
Spring Ping
Yep, it’s there — but only when typing fast AF (120–140 WPM).
Slow or normal typing = dead silent.
Seems like minor spring variance, not an actual design flaw.
![]() Bilirubin vs Wasabi
Bilirubin vs Wasabi
Feels super close to Wasabi — same solid bottom-out, same crisp tactility.
But Bilirubin is definitely louder, especially on the upstroke.
Wasabi felt subdued, Bilirubin’s got a fuller voice.
Not pingy, not harsh — just bold and satisfying.
![]() TL;DR / Final Thoughts
TL;DR / Final Thoughts
![]() Clean, balanced sound
Clean, balanced sound
![]() Soft yet firm typing feel
Soft yet firm typing feel
![]() Surprisingly good stock stabs
Surprisingly good stock stabs
![]() Spacebar needs attention
Spacebar needs attention
The Agar PP plate gives a nice dampened bounce, and the B1 Bilirubin switches bring that dense, snappy thock.
4 Likes
Do the stabs that come with the Agar have the same design as Maiz stabs? This description exactly mirrors my experience with Maiz stabs using the plastic wires. Because of the way the wires clip into the housing the bottom is much more open than the traditional Cherry design. Which I feel allows the wire to tap off the housing or even the PCB itself making them a real pain to tune rattle out of. Once you do get them tamed they have a similar “wire tapping something” sound when hammered. A shame cause I think the plastic wires have potential in making for a quieter, easier to tune stab. but the housings really let that down IME.
1 Like
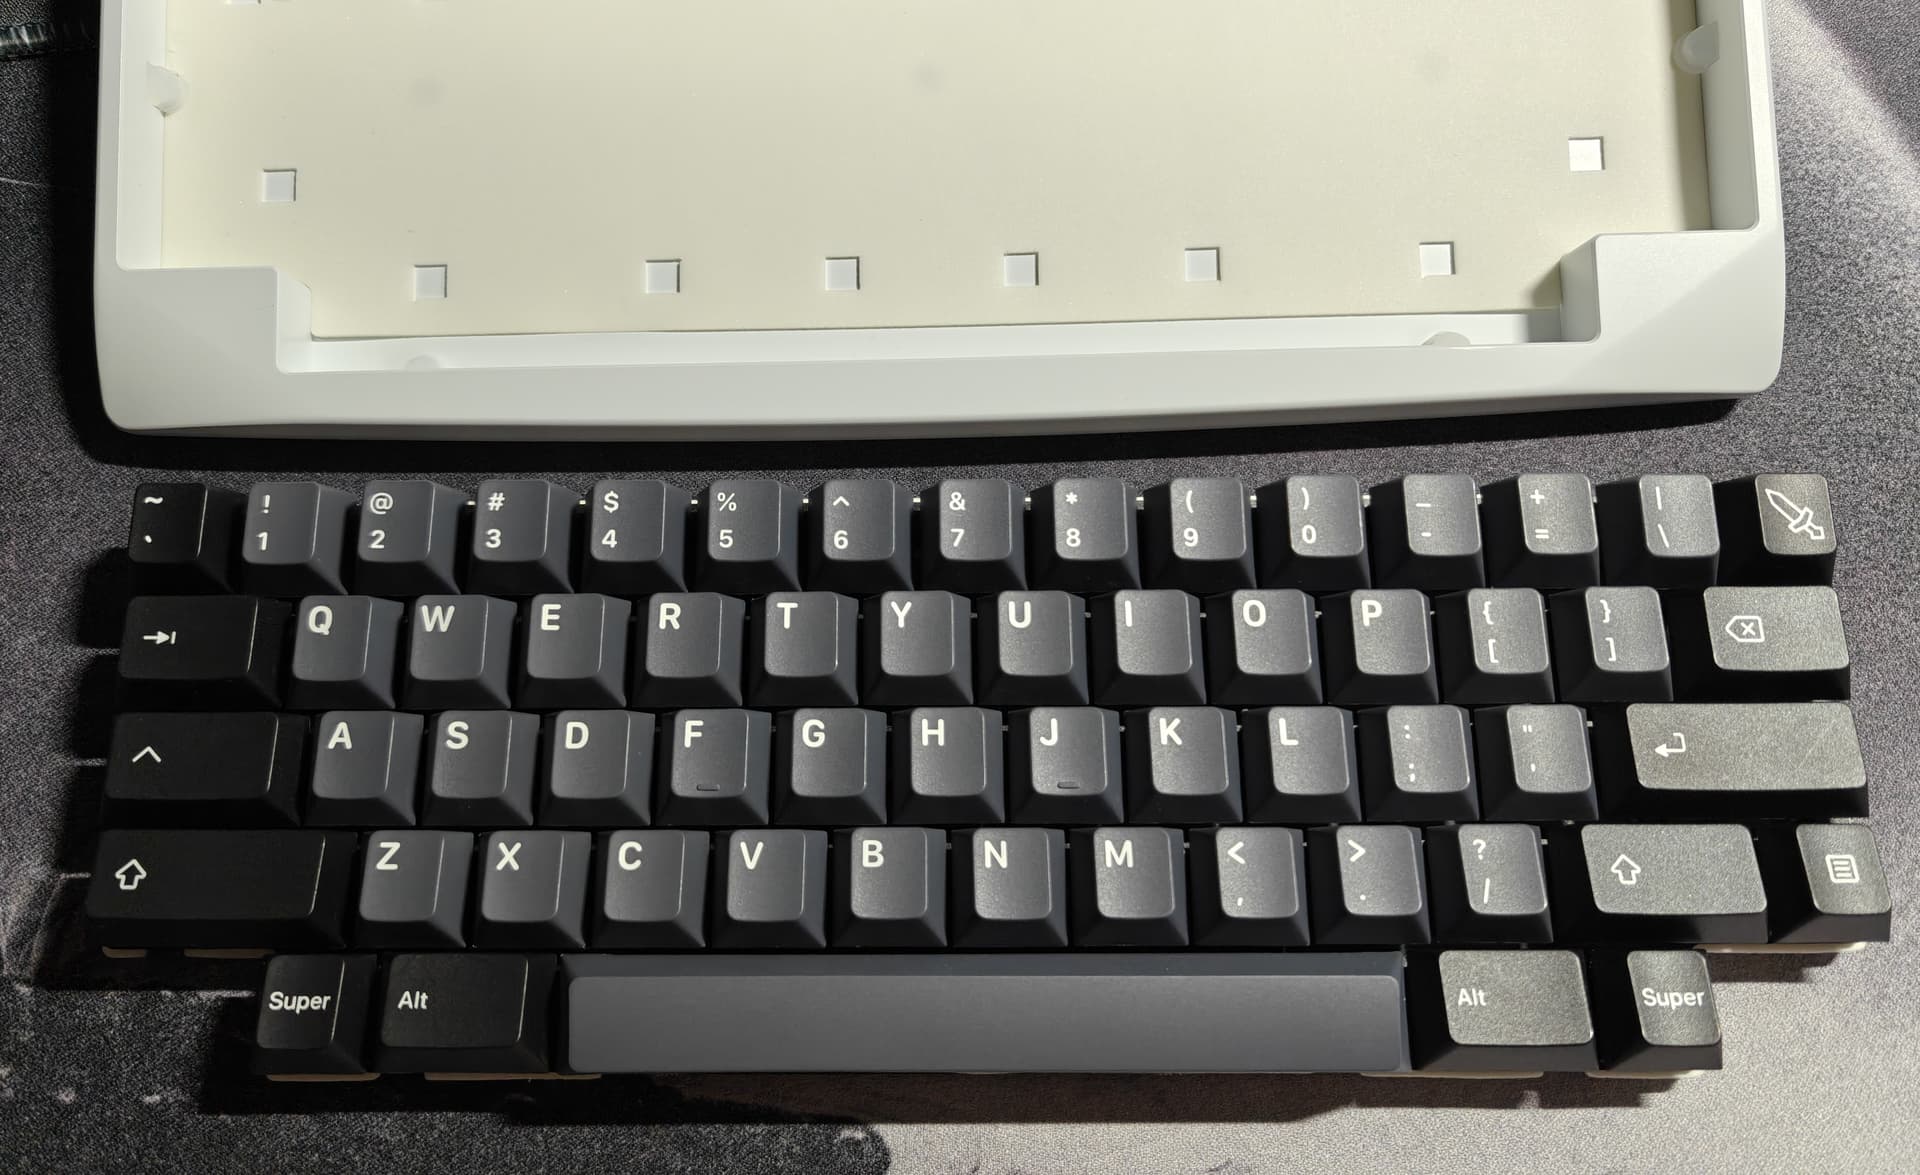
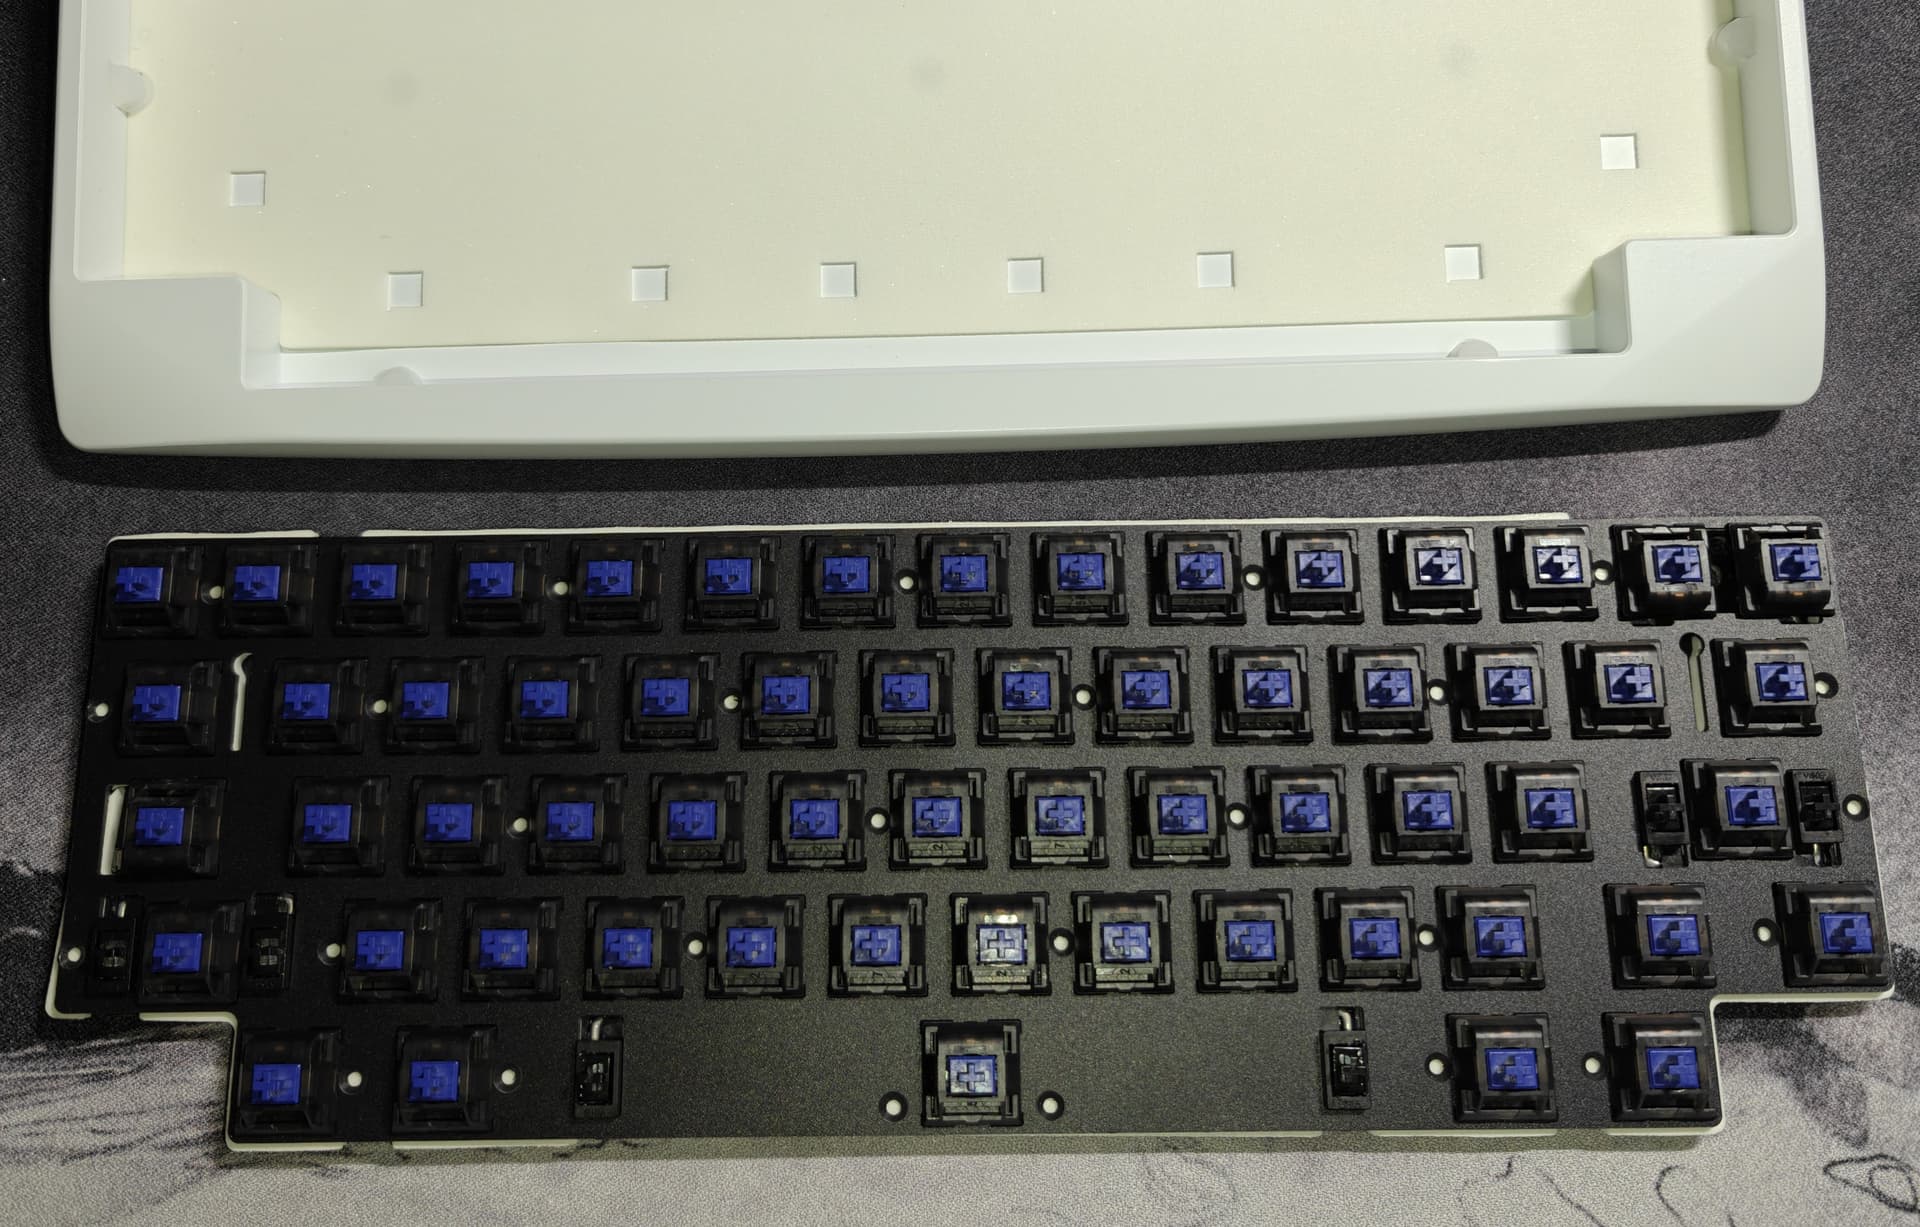
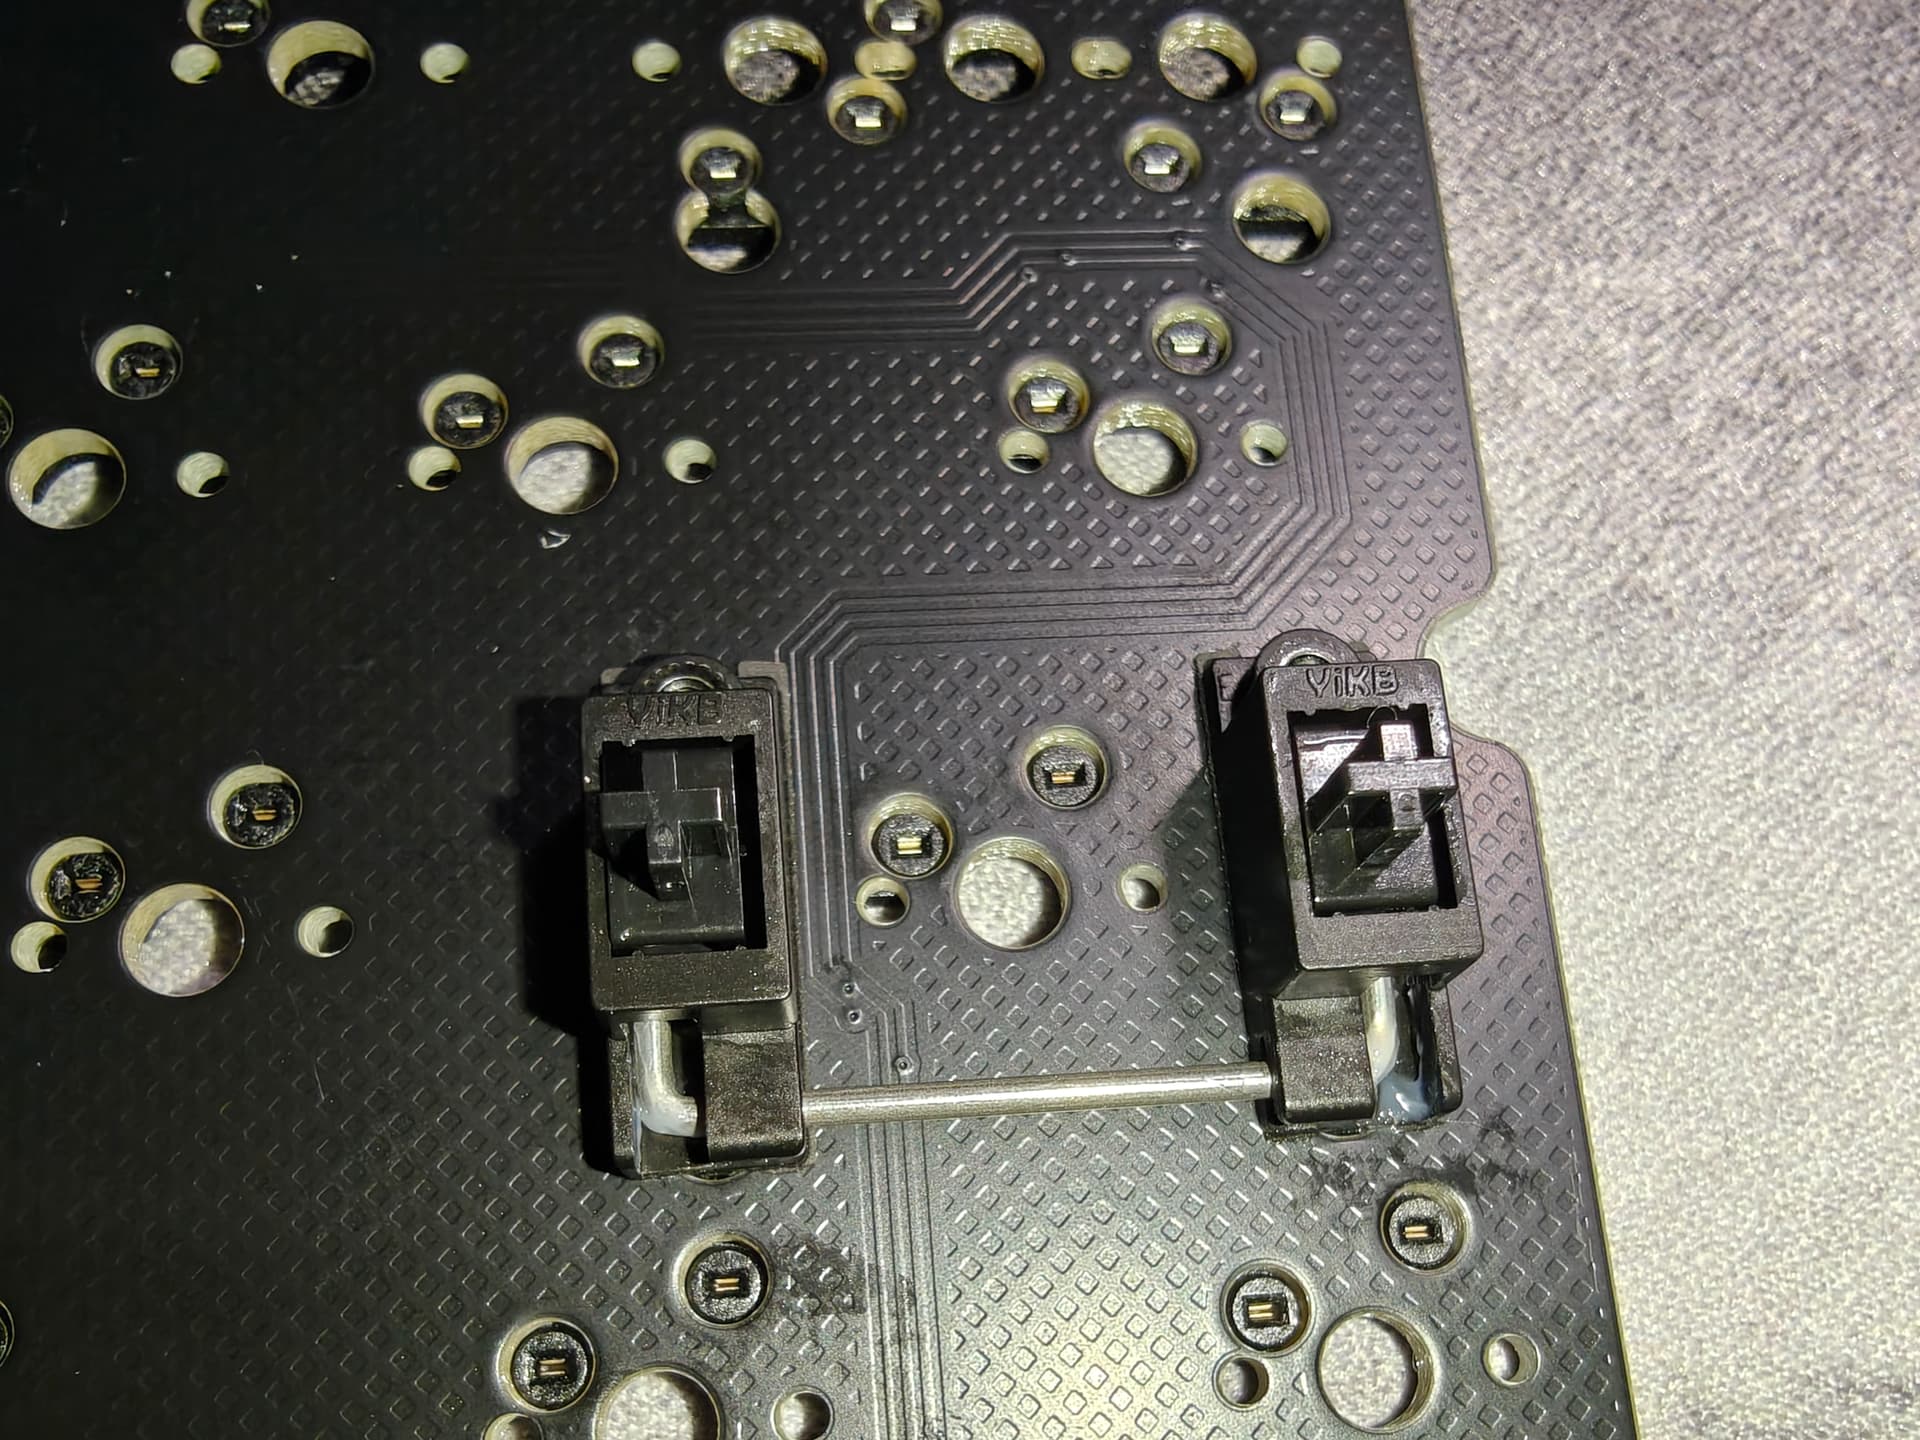
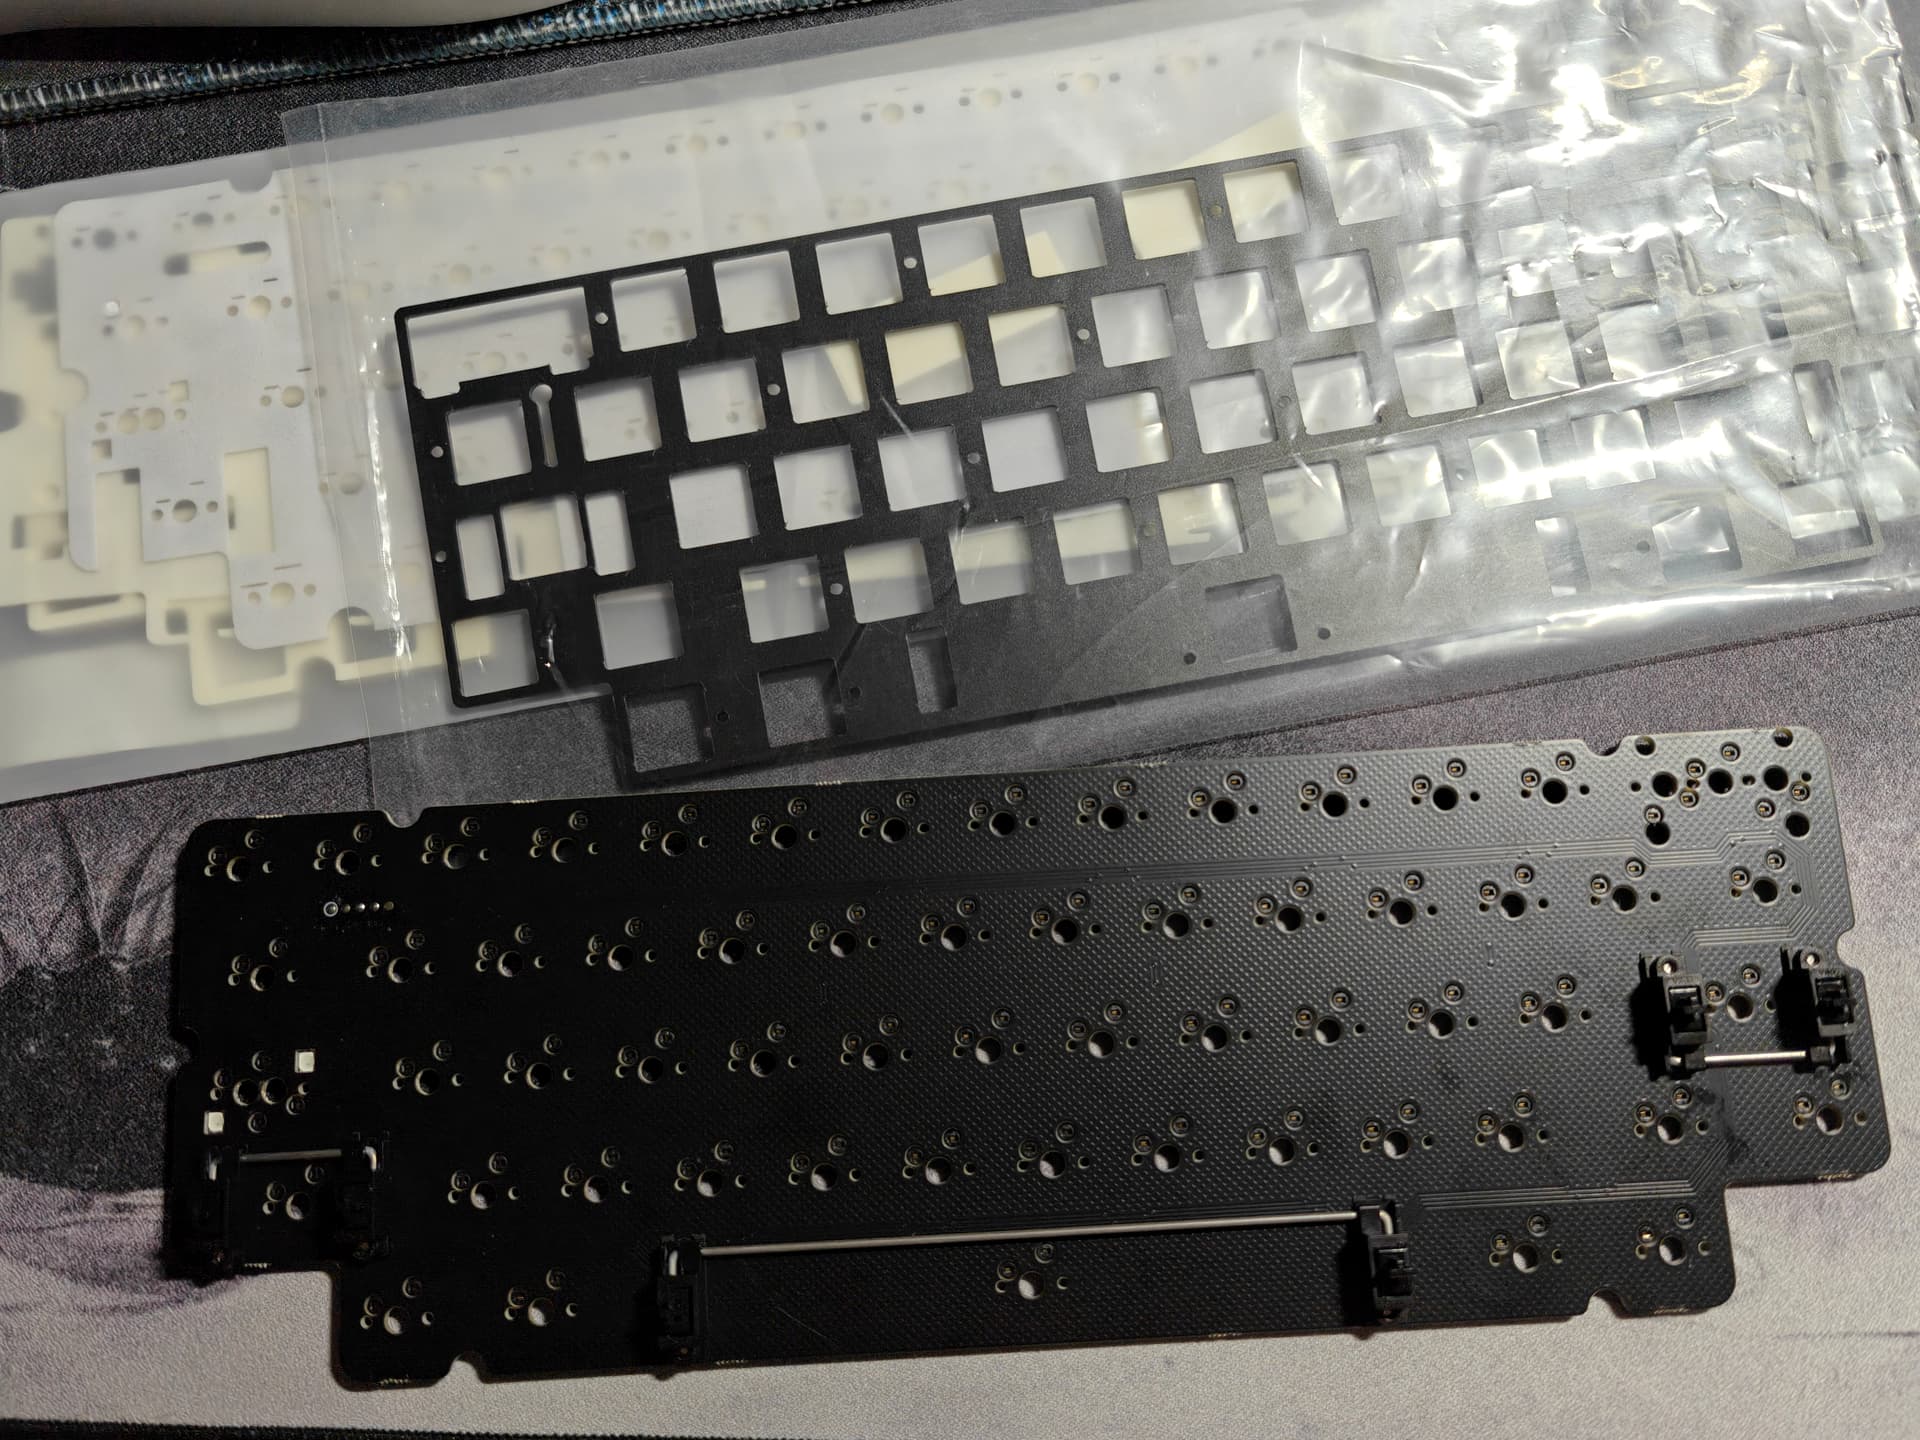
The kit comes with Typeplus x YIKB screw-in stabilizers — pre-lubed and pre-assembled, packed in a branded KBDfans bag.
I installed them stock just to see how they’d perform.
Yeah, no rattle or ticking at all.
What I meant is that they didn’t use quite enough lube — if you press really fast, there isn’t enough tackiness to keep the wire seated, so it can pop up and hit the housing. But you have to press really fast and hard for that to happen.
3 Likes
Ok I got you, I’m familiar with TypePlus stabs, actually my fav stab right now TBH. I also get what your saying about there not being enough lube. Never had it happen to me, but I’ve always got dry TP stabs & lubed them myself. I can definitely see what you’re talking about happening if they’re underlubed. A little dab of 205g0 on the wire bend/clip & a little bit packed into the back of the slider should take care of that without having to pull the stabs. I gotta say too, pretty impressive that the Agar came with TP stabs & they’re pre lubed decently enough to be useable. Haven’t been a huge fan of KBDfans as they felt a little cash graby back in the day in their first few years. Seems like they have broken out of that for the most part, although their CS is still pretty decisive from what I hear. Might have to give them another shot as there has been quite a few really nice boards ran through them recently… ![]()
2 Likes