I bought Agar for two reasons.
I like the look.
So I could have EC switches and print on them.
3 Likes
Progress on the Honeywell build.
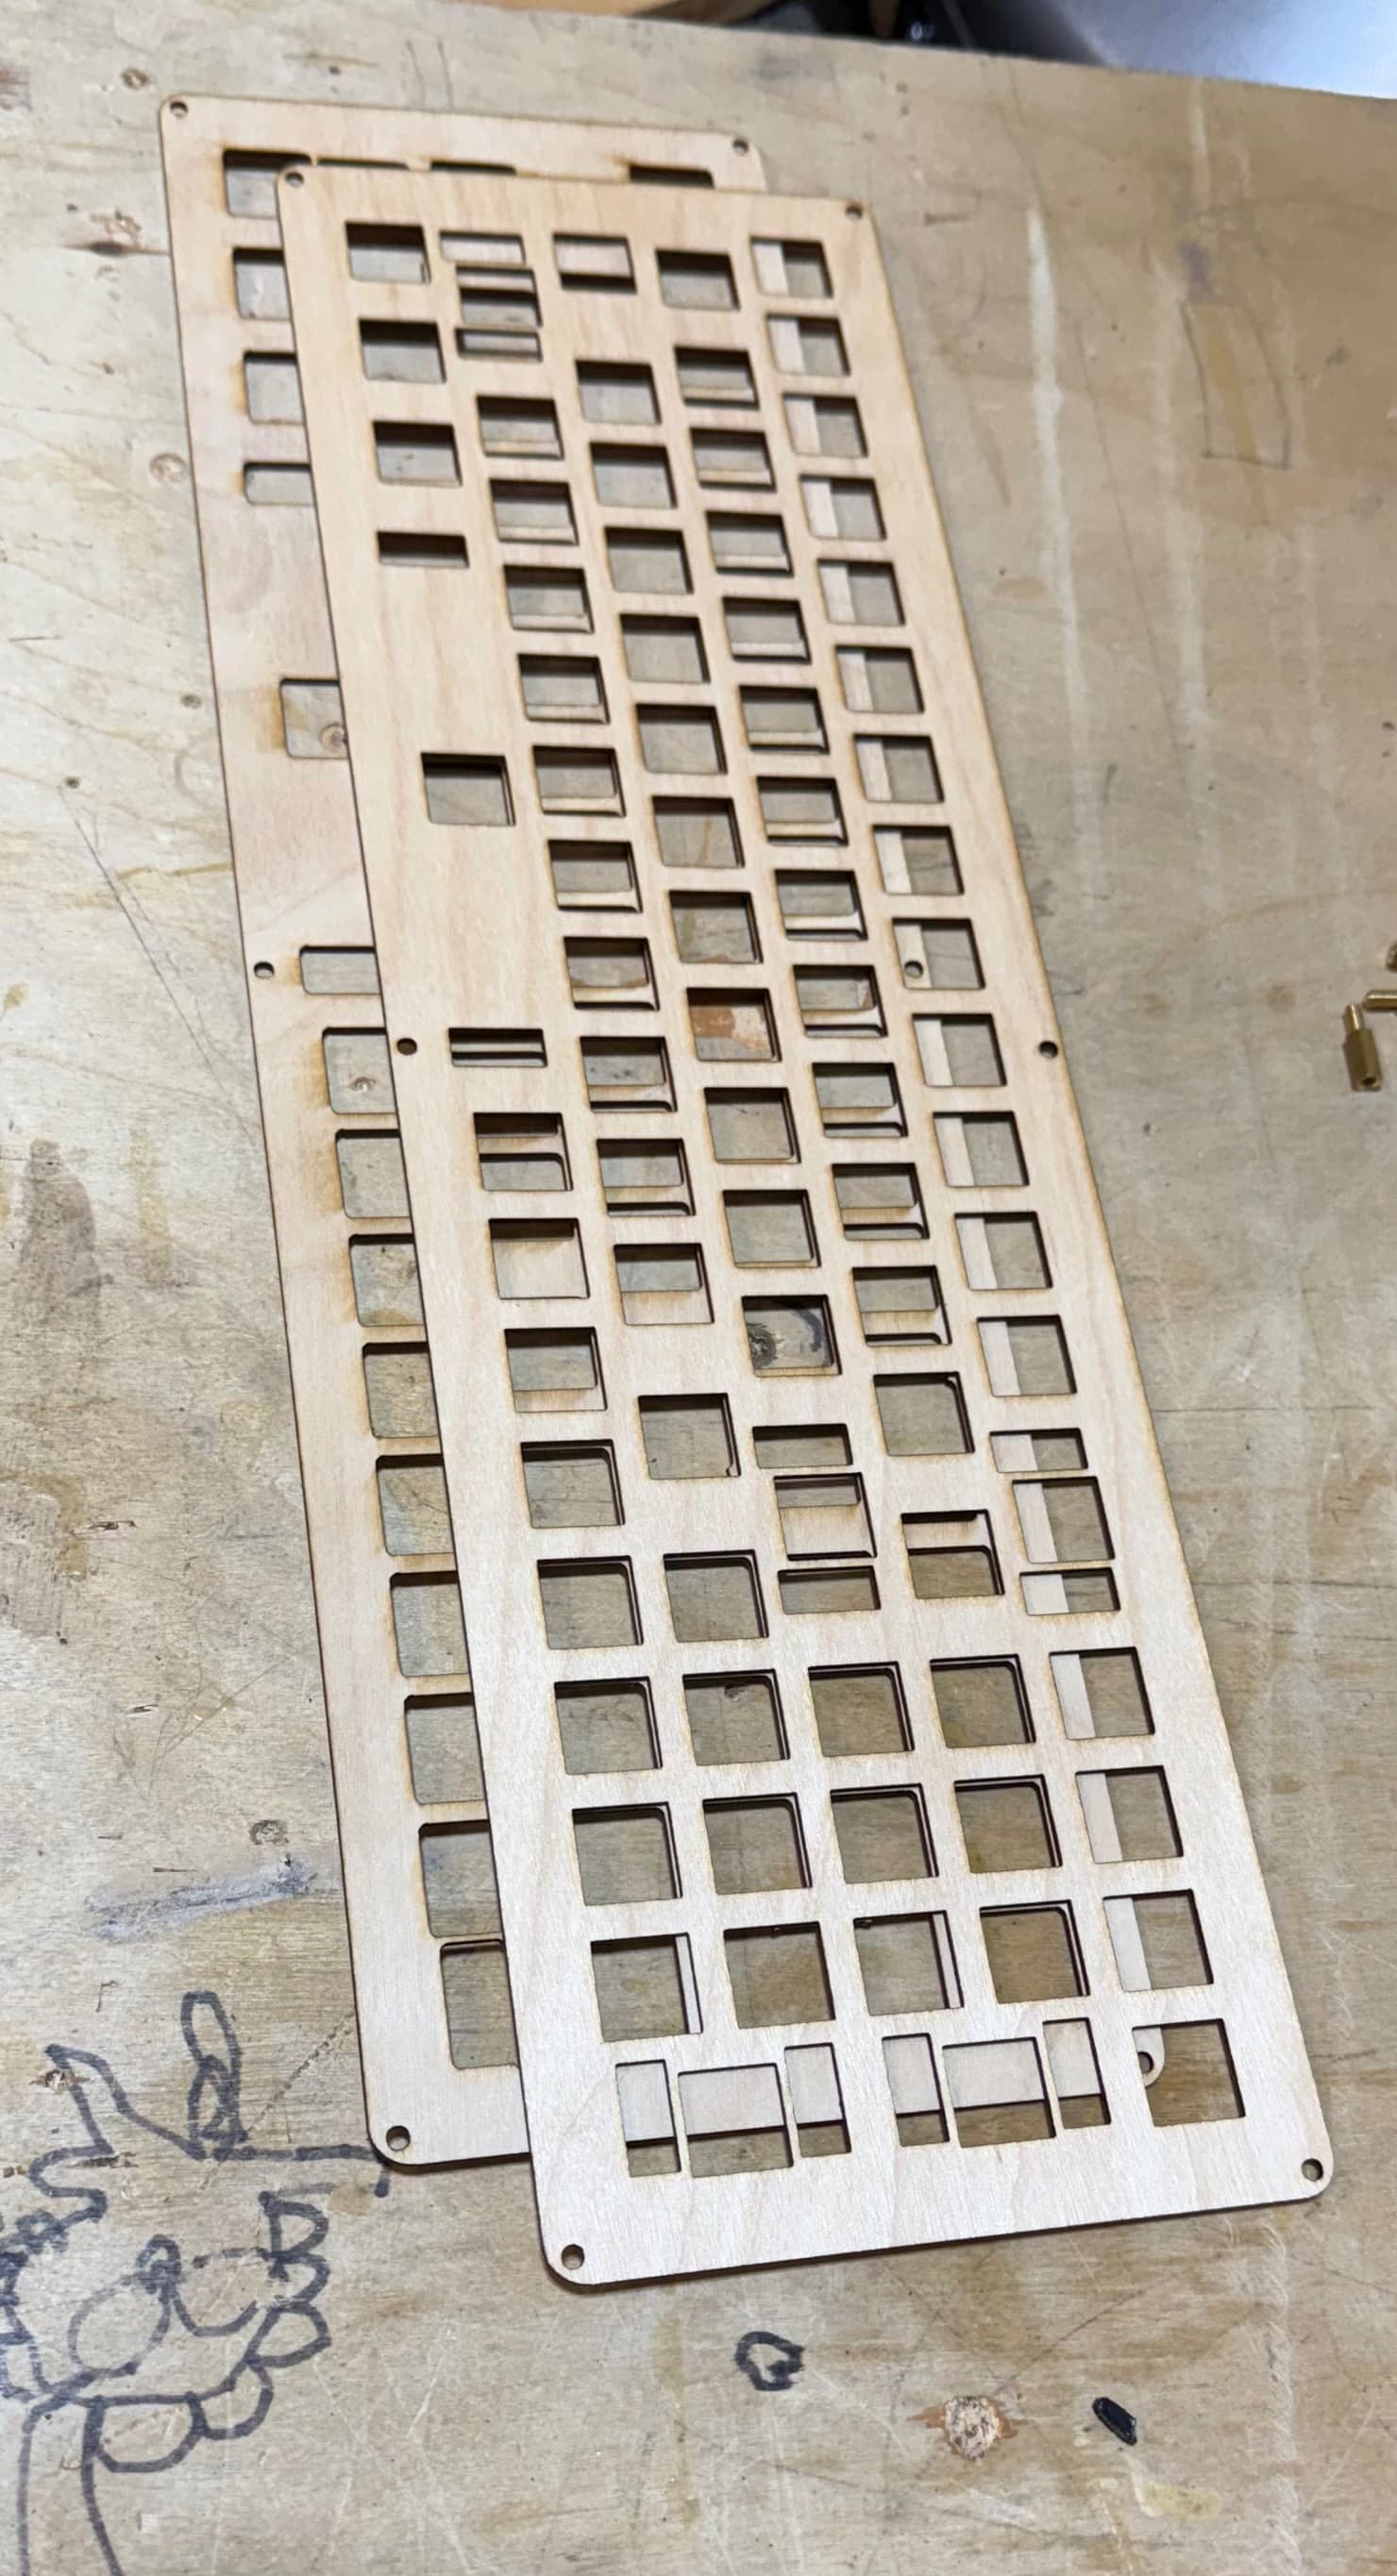
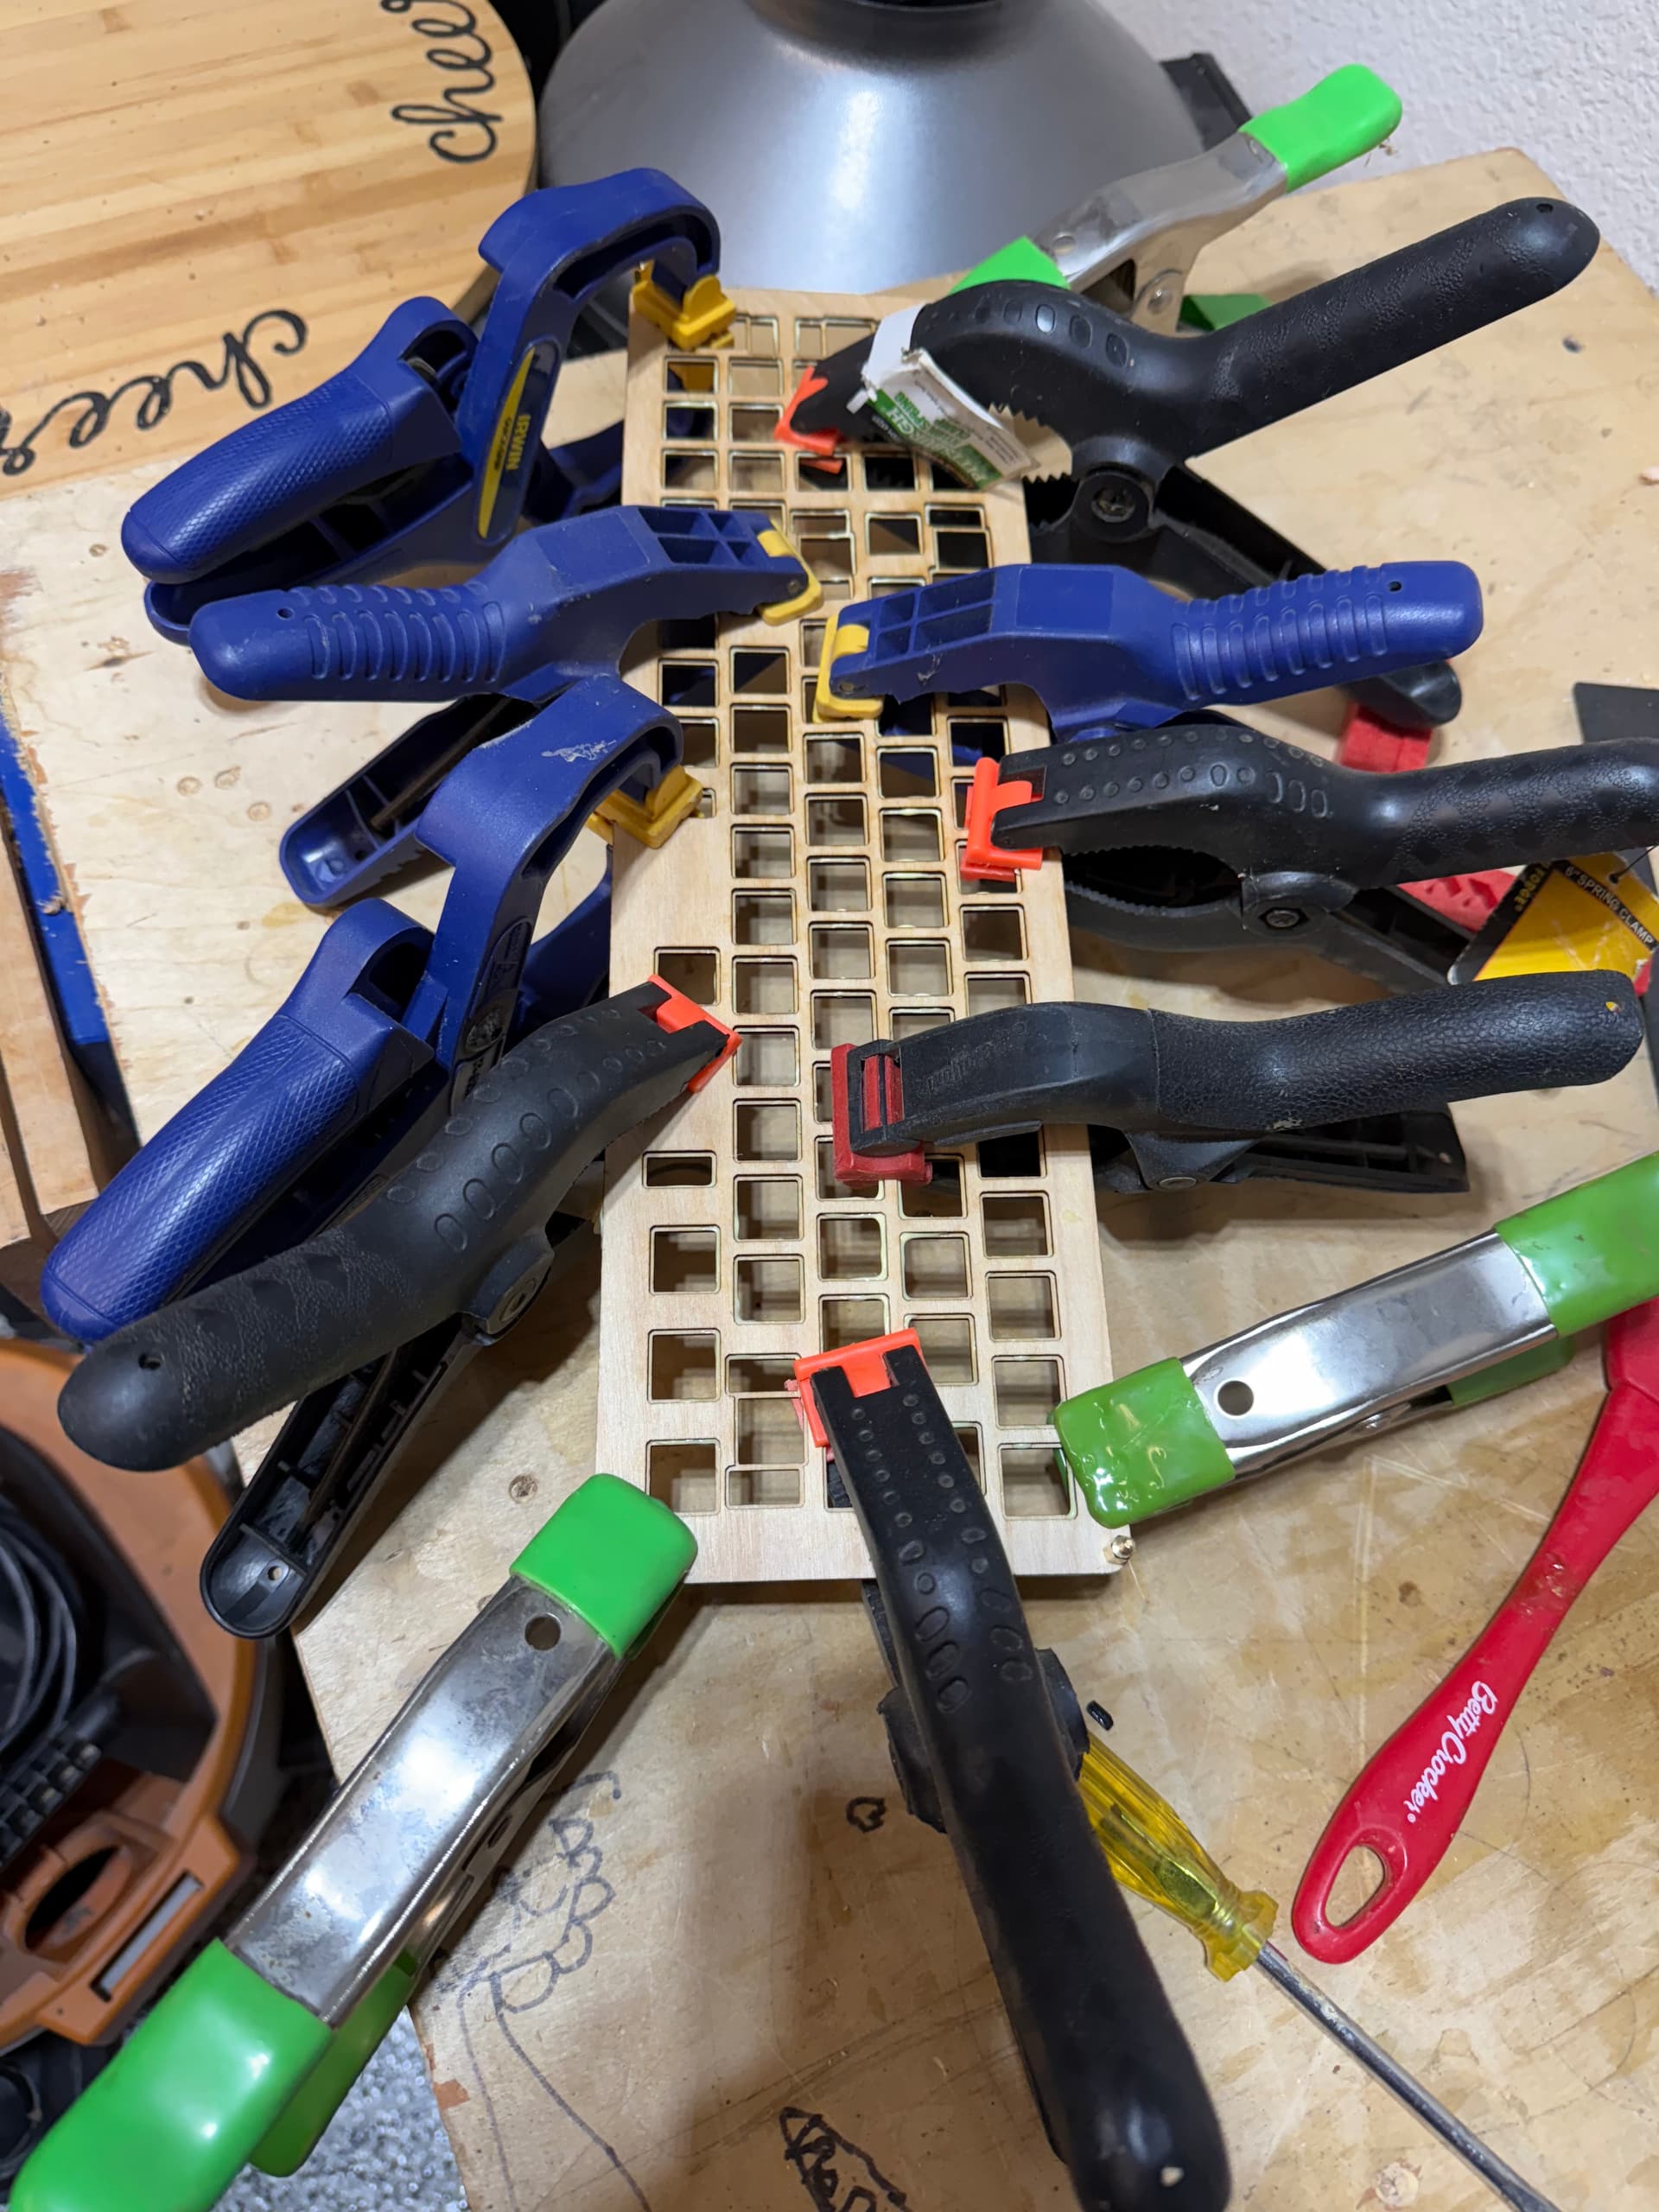
- Plate completed. I did the two-layer lamination after all. This is the ~1.4mm plywood that a few of us have used for plates before, but for this one I also did a version that extends all switch and stab cutouts by a mm in every direction, then glued it to the bottom of the “real” plate, using the M3 screw holes for alignment. Then I just spray painted the top black. I might need to trim away some glue squeeze-out of some of the switches don’t clip in quite right. The woodworking community meme of the day is: “You can never have too many clamps.”
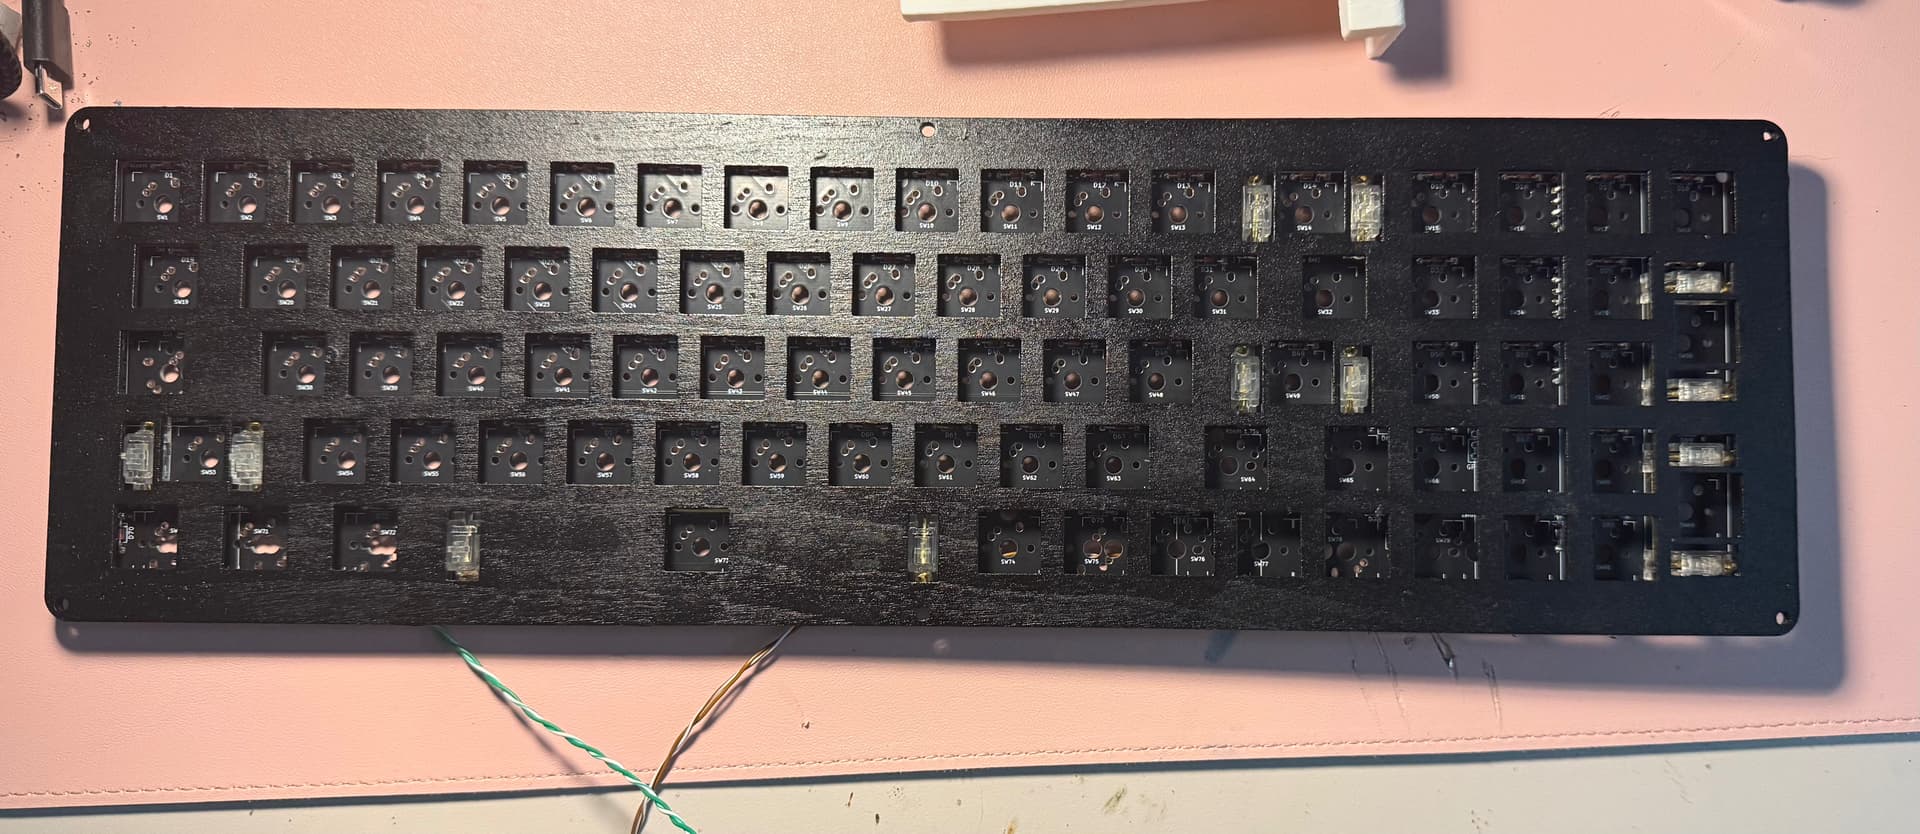
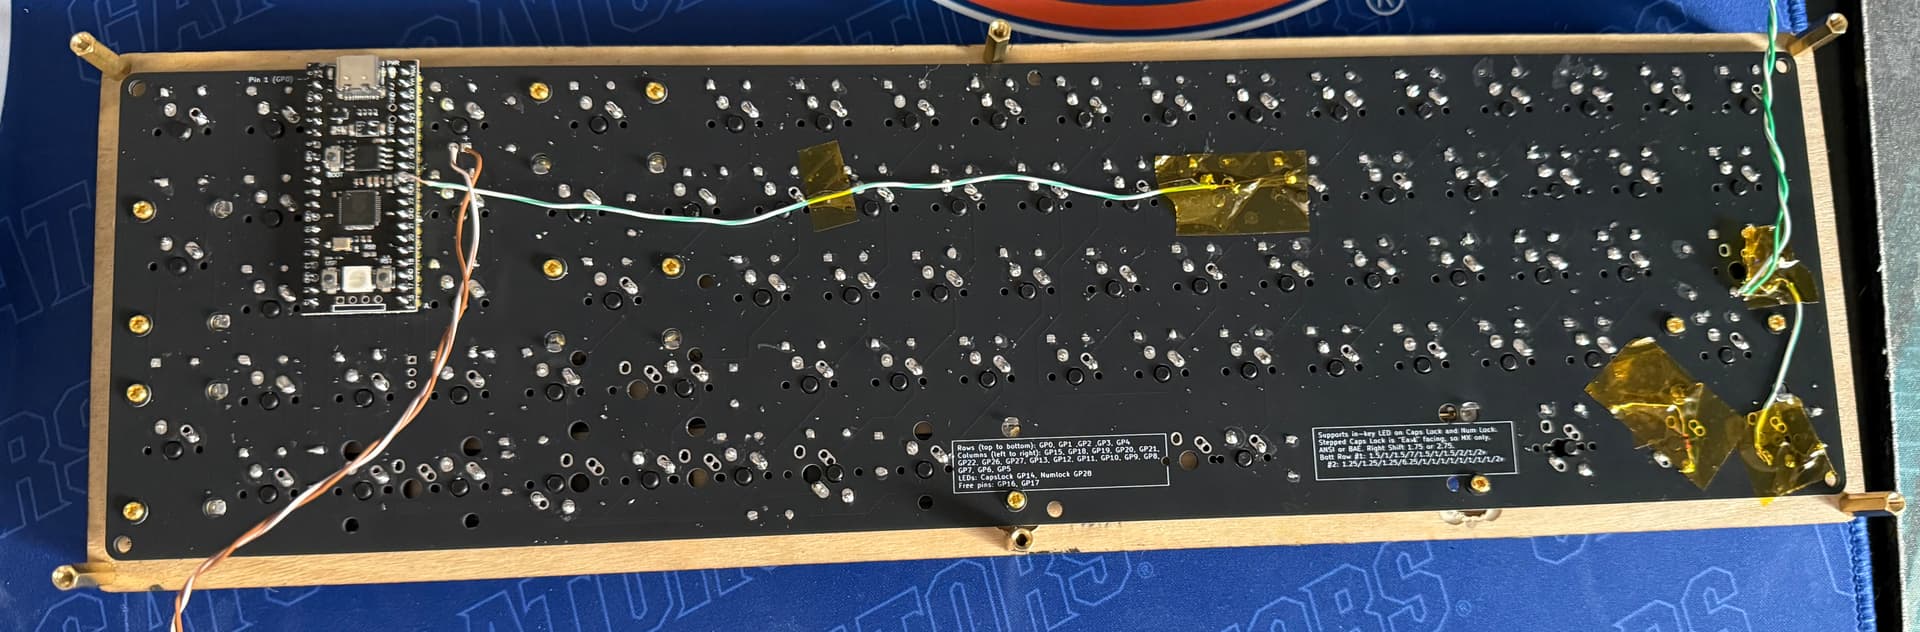
- PCB has been soldered with diodes, headers, resistors, and leads for the LEDs (since they won’t be on the keys like the PCB contemplates). Pi Pico will need to be done after the switches, and then at the end I’ll need two bodge wires to jump my oopsies when I designed this PCB a while back.
- Stabs lubed and installed. Nothing fancy here, just some Glorious screw-ins I got cheap on Amazon Resale. Good lord what tacky branding. Should be fine, though, and anyway I don’t have anything nicer than standard Durocks.
- MCU flashed with the VIAL firmware I compiled for the Alps build I did with this same PCB. Feeling pretty smudge and arrogant that I don’t have to do firmware from scratch.
I still need to to pick which switches to use. About the only thing I know is that it won’t be tactiles, mostly because I don’t have tactiles in any usable amount. If clicky, it’ll be Box Pale Blue or Navy. If linear, it’ll be Kailh black (not box), some weird Amazon mid-weight Kalih box linears, or some generic reds (Royal Kludge I think) that I would lube and spring swap to be the same weight as heavier blacks. I’m definitely stalling.
Then, once the assembly is ready, I can check fitment on my case design and make some tweaks. The new filament came in, and on the spool it seems to be about what I wanted, a very light beige that will be fine for this build (the original seems to have been quite light to begin with) but won’t scream “80s electronics” for every single thing I print with it.
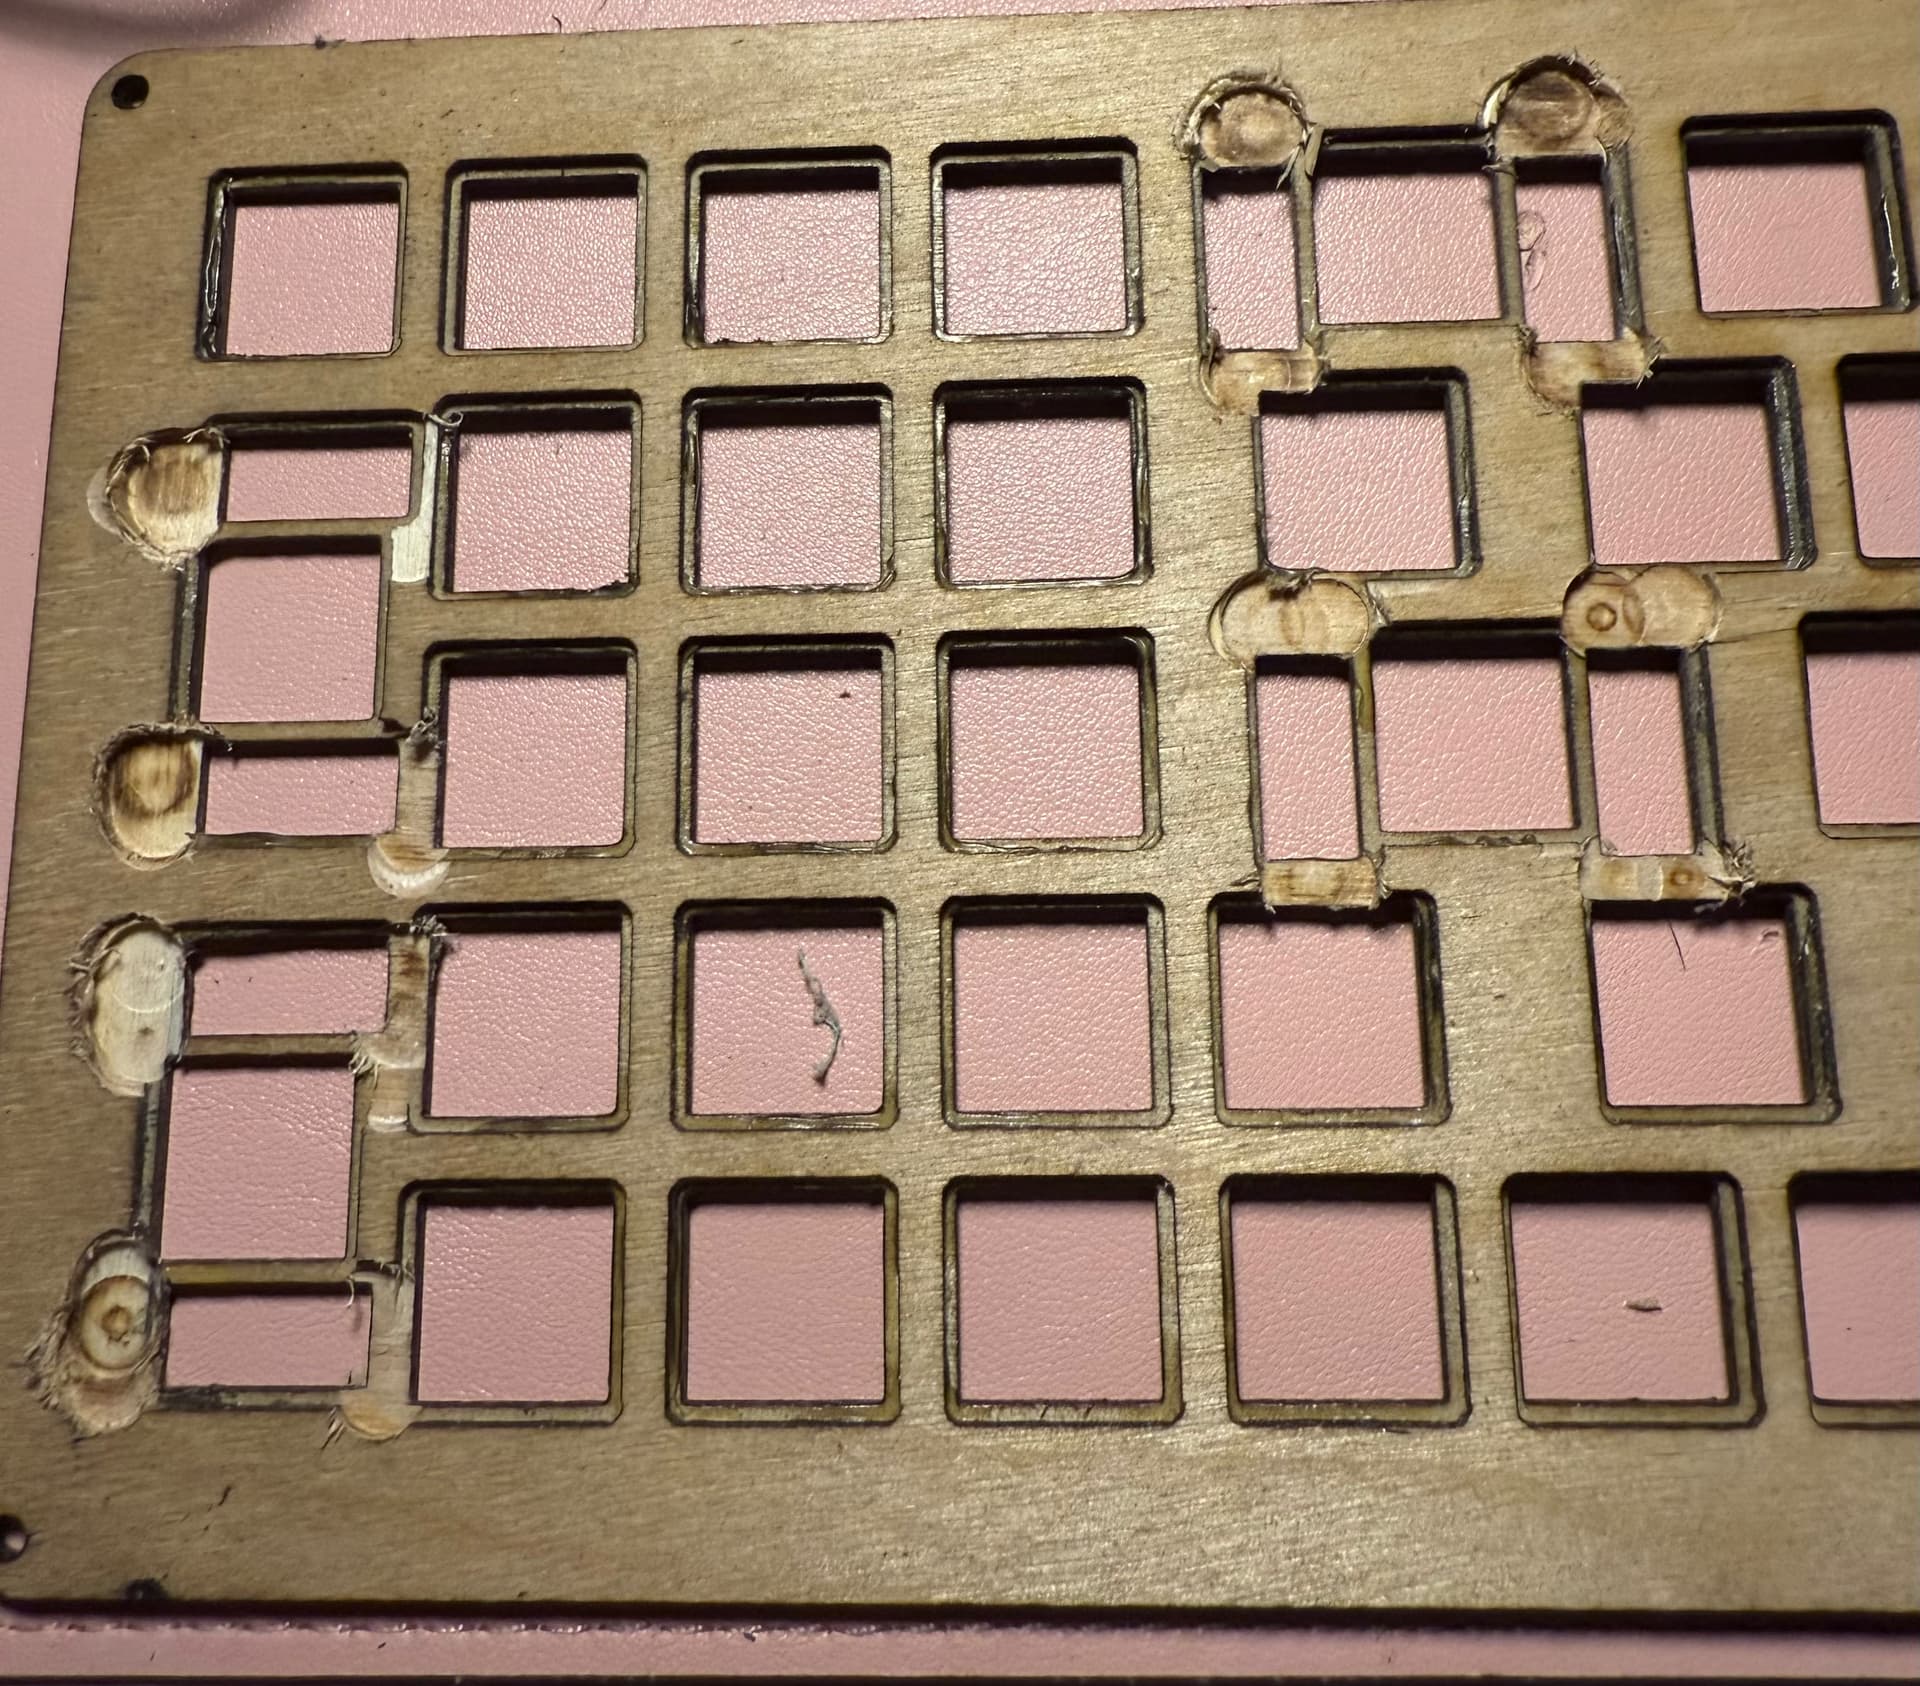
EDIT: Went with the “classic” Kailh blacks. However, I need to desolder the dozen or so that I’ve done and make a new plate. From the “asking for help is boring” department, it turns out screw-in stabs need a rather larger cutout not to interfere with a thicker plate. I tried nibbling at the underplate, but it’s still making the switches and stabs not level with each other, and with as easy as the plywood cuts on the laser, it’ll be better just to take some measurements and make a new one. I’ll take the opportunity to improve the glue-up and paint job, as well.
9 Likes
Is the wood plate just for acoustics, then?
Not really, though there’s nothing wrong with the sound profile in my experience. I suppose I could redesign the case to be plateless, but right now it’s top-mount and requires some sort of plate. I try to fabricate as much as possible at home, and my laser is rather weak, which leaves me with few realistic options: 3D printed, or 1-3mm engineered wood products (masonite hardboard, plywood, etc). 3D printed is an option and works fine, but for flat items like plates, something subtractive like laser-cutting is much faster. For all my stab-less builds, I have used 3mm masonite and friction fit the switches. For this one, I need to work around the pcb-mounted stabs, so working with 3mm stock could mean cutouts that spill over into the next switch (worth looking into, I guess). The plywood is pretty delicate, but it cuts and glues very easily, so I was trying to increase the strength while getting the benefits of a normal thickness plate, namely the ability for the switches to clip in normally. It should work fine, but as mentioned I need to redo the lower layer to give the stabs more room. I didn’t realize quite how far the shorter part of the housings protrudes above the PCB.
5 Likes
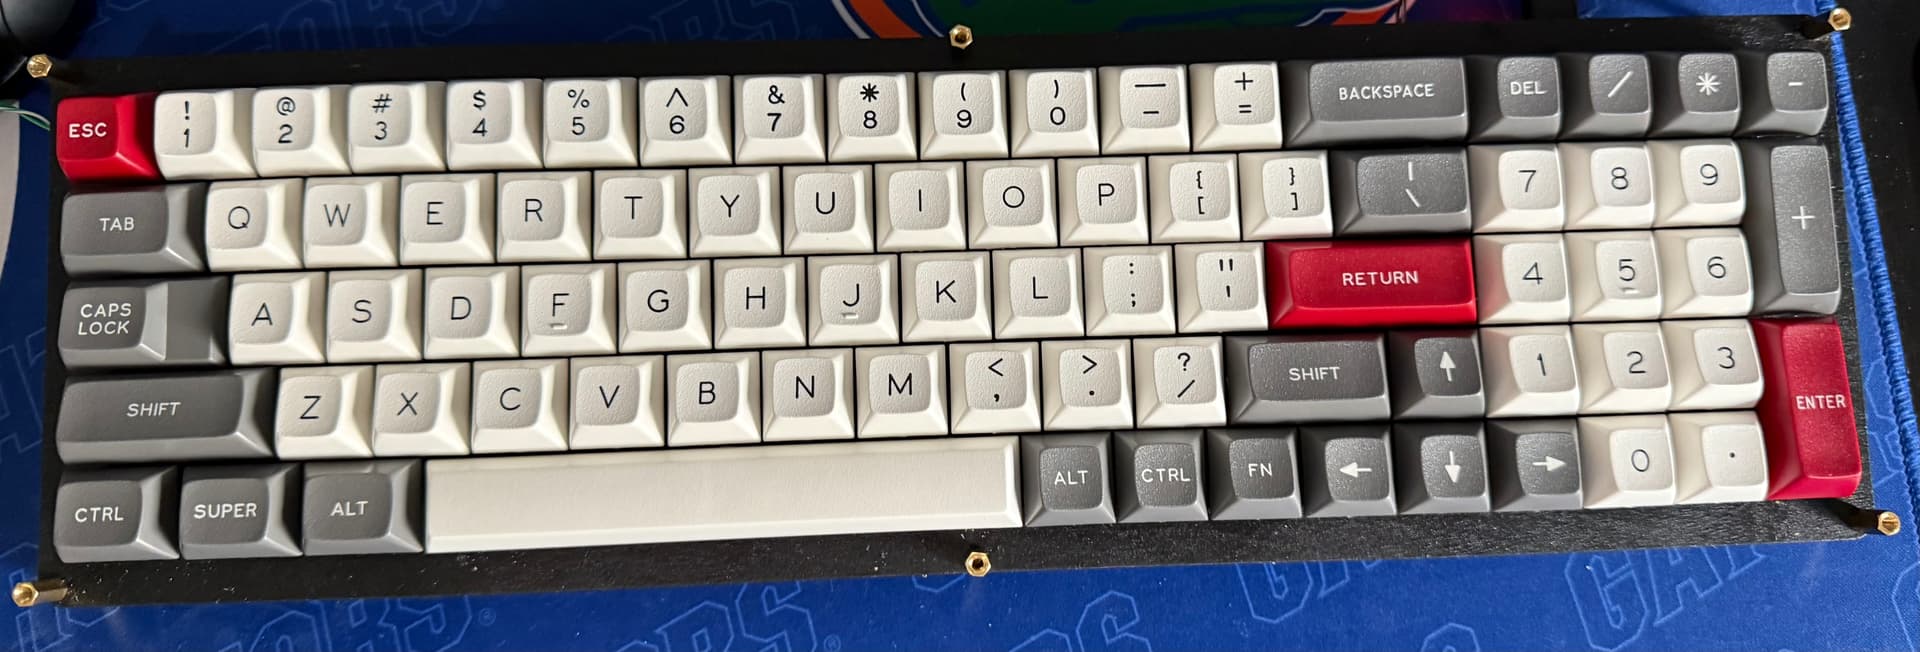
Other than the lock indicators, the electronics are done. I didn’t have to make a new plate after all. Instead, I took my woodworking plunge router and snuck up on a depth that went just a hair past halfway. The bottom side of the plate is an unholy (yet very “hole-ly”) horror now, but everything fit with a minimum of lost strength. Switches and MCU are installed, jumpers are added, and a very annoying lesson was learned about using the right soldering tip (you need a somewhat beefy chisel tip for through-hole work… little conicals just frustrate and cause cold joints). I also went ahead and installed the keycaps. Maybe even more than Cherry, the sculpt of DSS works better for me with some incline on the keyboard, but having done that (for now) with different heights of standoffs, also like them quite a bit.
8 Likes
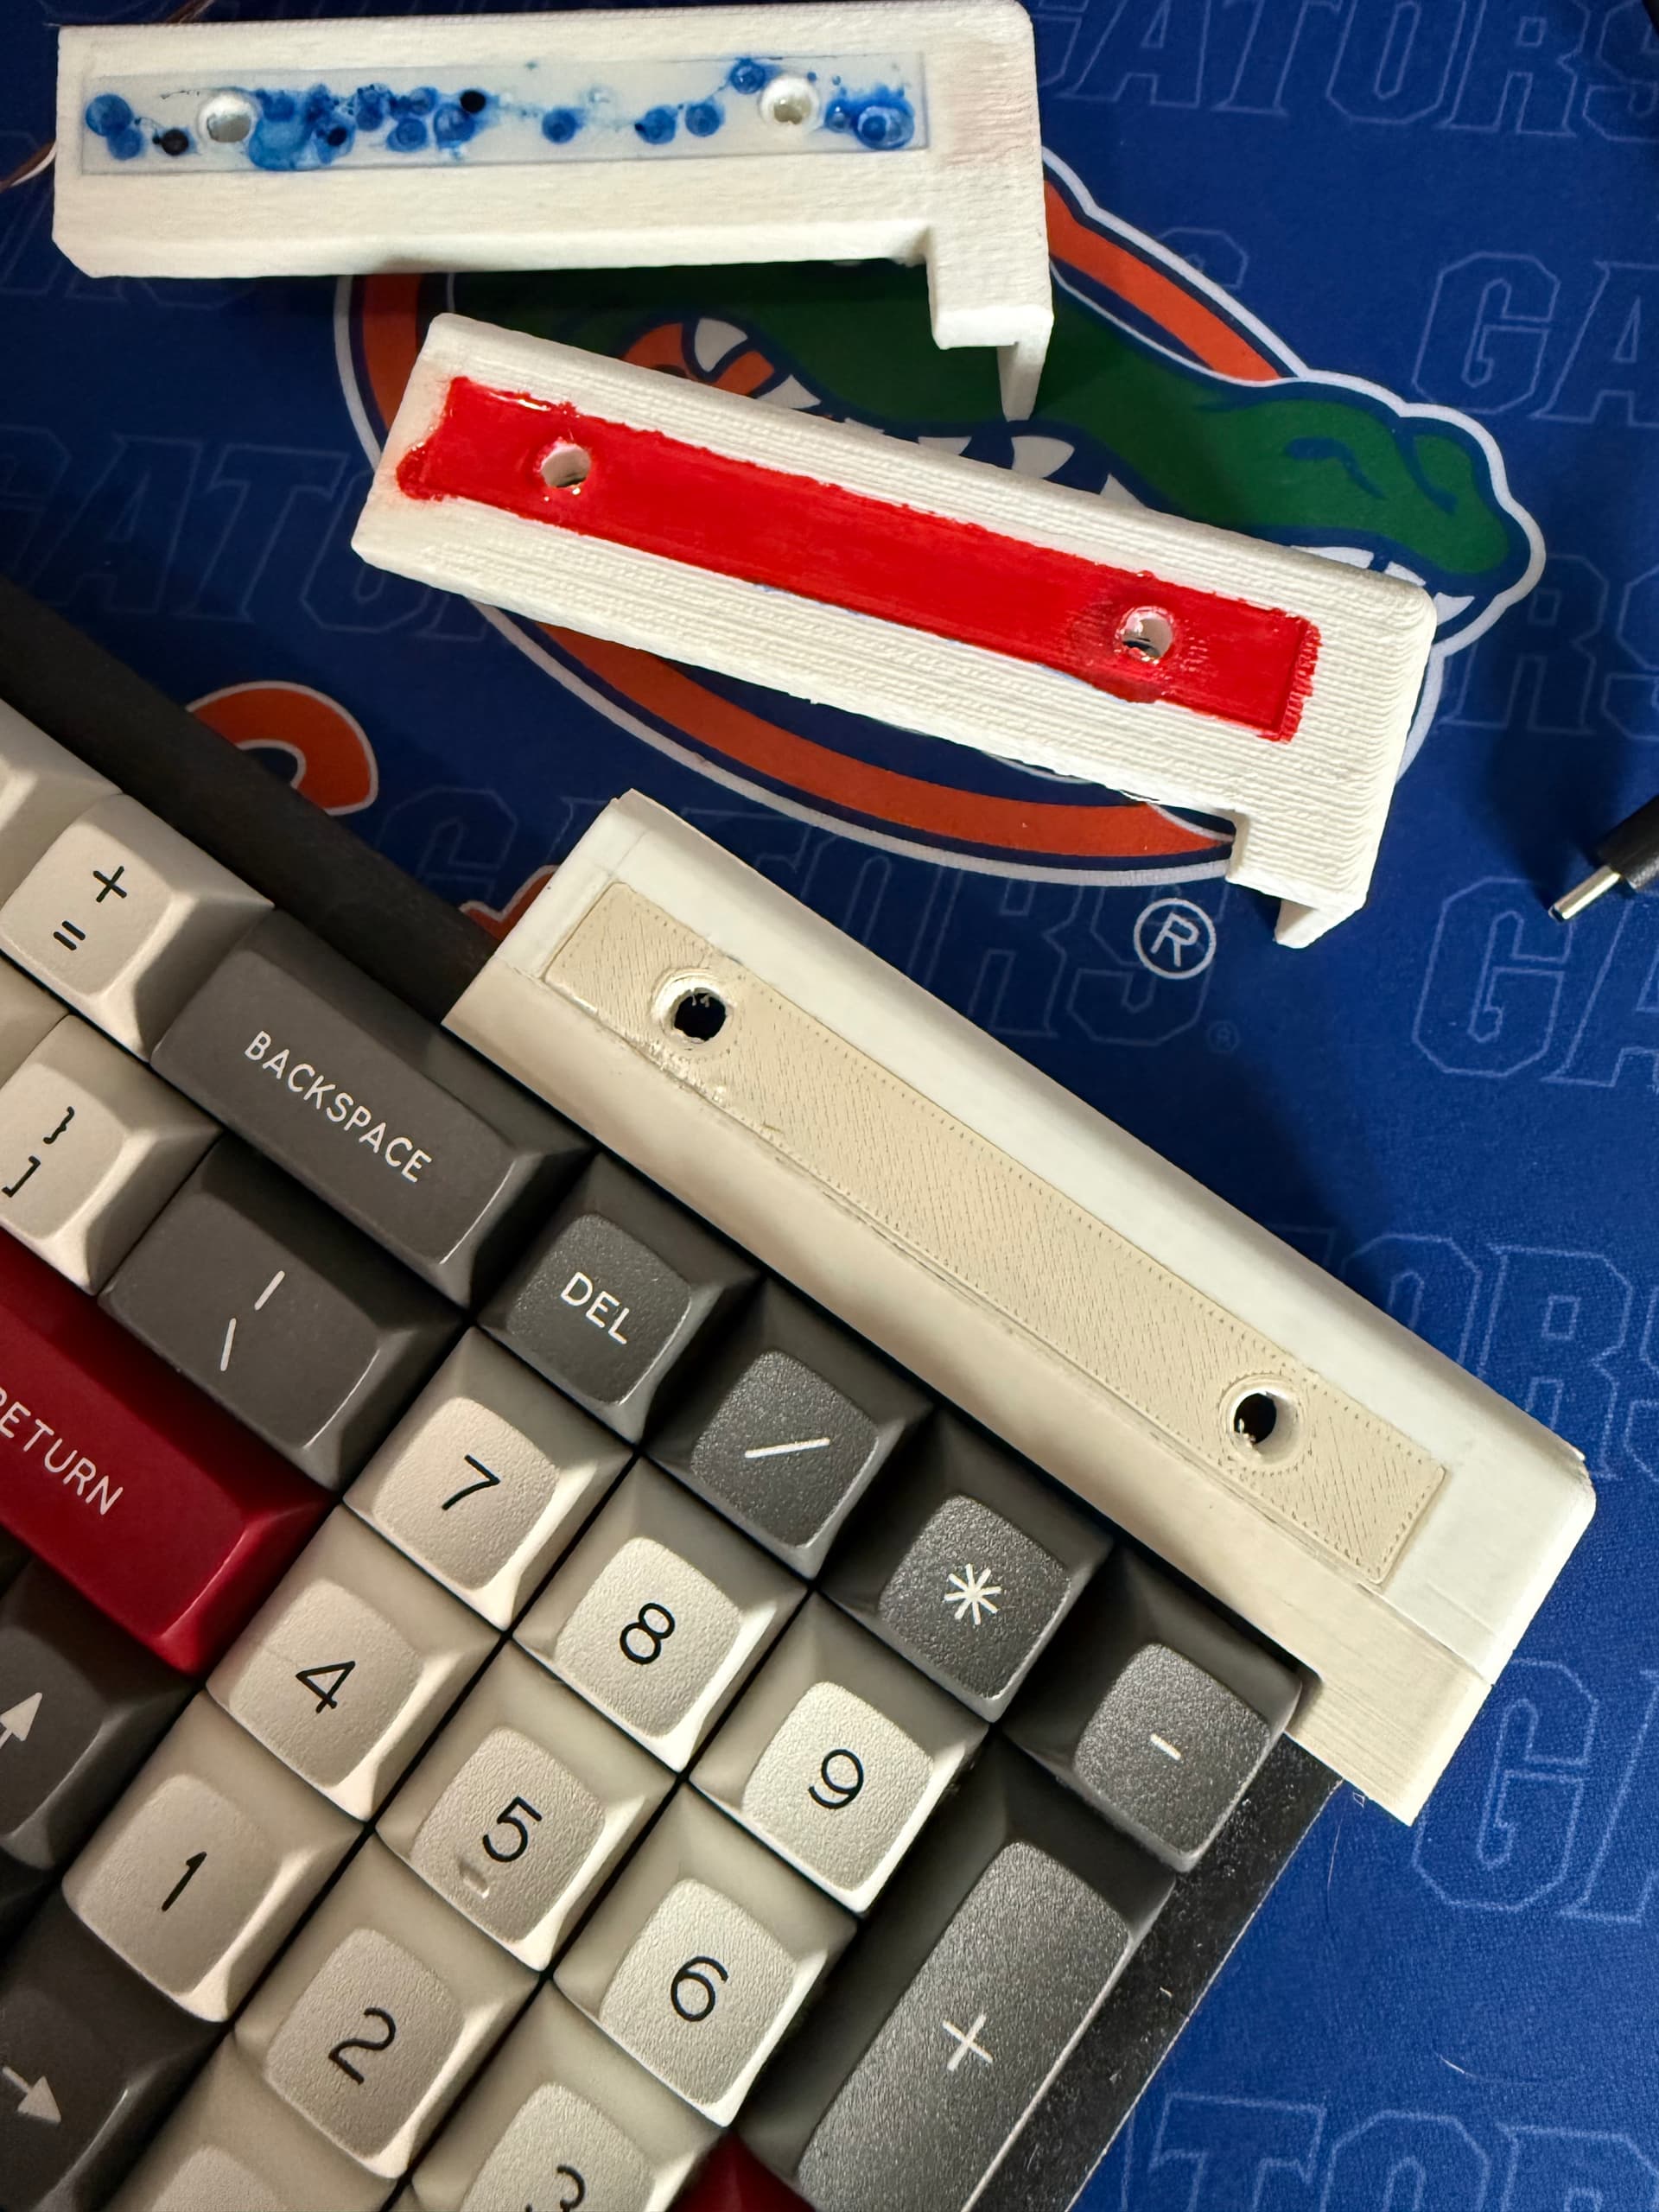
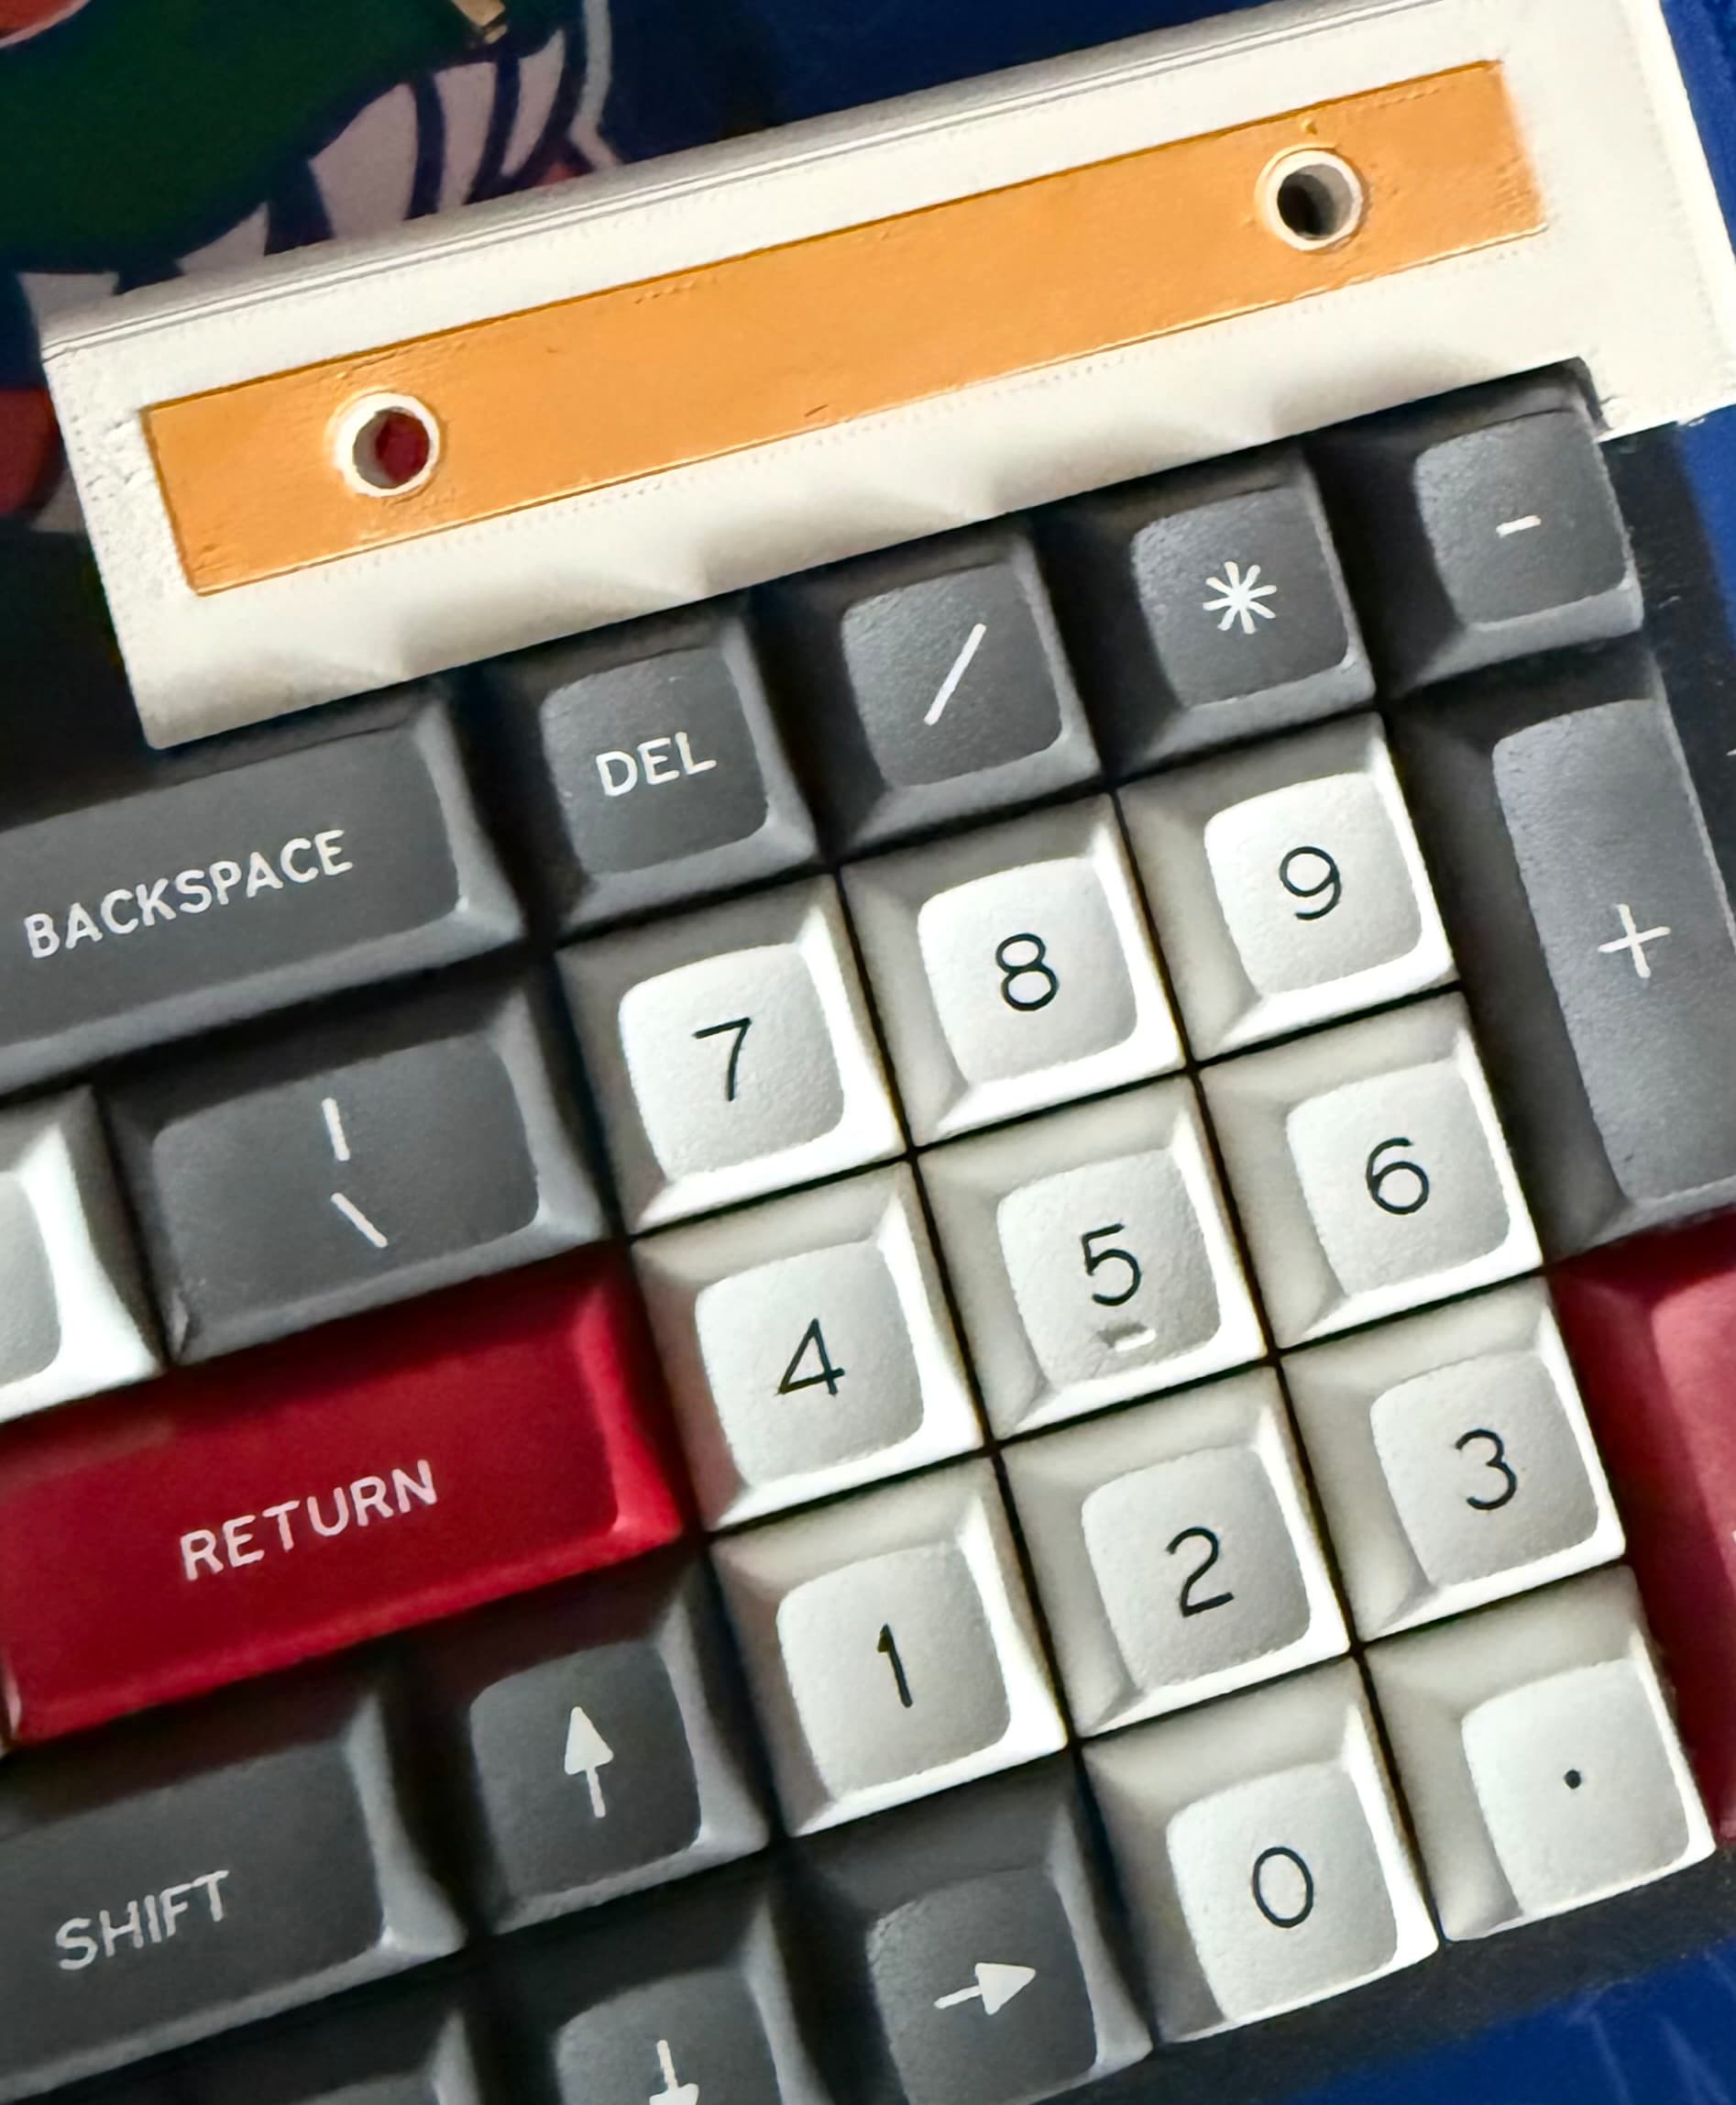
On iteration 3, I think I’ve got the port and LED dimensions where I want them. I also think this is last of my experiments with UV resin for this particular project. They’re getting better (the last uses an insert… you can just see the different shade), and I can definitely see keyboard-adjacent uses for this stuff beyond artisans, but I don’t think pour-in-place detail work is where it’s best suited or where my “skills” tend. Might be interesting to laser-cut and then stain some of the same plywood I used for the plate, or there’s always just making that bar an outset instead of inset and then masking and painting.
I also realized that my best bet to get a good SINGLE-PIECE print will be to just set the thing on its bum and go straight up. To that end, I’m skipping fuzzy skin and instead dropping my layer height to increase quality. I tried this once before and it was a disaster, but with a better-suited printer and better quality filament, I think it’ll work.
Then, finally, the new color looks just about right. Mostly white, but just beige enough to feel like it belongs. I switched the filaments halfway through this test print – definitely NOT because the white was running low and this saved me a proper filament change! – and being able to see the contrast was also helpful.
5 Likes
I was bored at work today. A sudden inspiration led me to take out the ProG switch from my drawer. After observing it, I found that its appearance was quite decent. The cover, the feel, and the typing sound were truly excellent, there was no need to say more. But the most important thing is that it goes perfectly well with my black glitter65 HE. Occasionally, decorating my keyboard at work is also quite relaxing for me. lol

2 Likes
This fits my brand of DIY vibes better. Separate 3D-printed insert, spray painted and then glued into place. The full size insert will be black rather than yellow. I think I’m ready to try the full-size one-piece case print, followed by the weight-filled bottom piece. Fingers crossed…
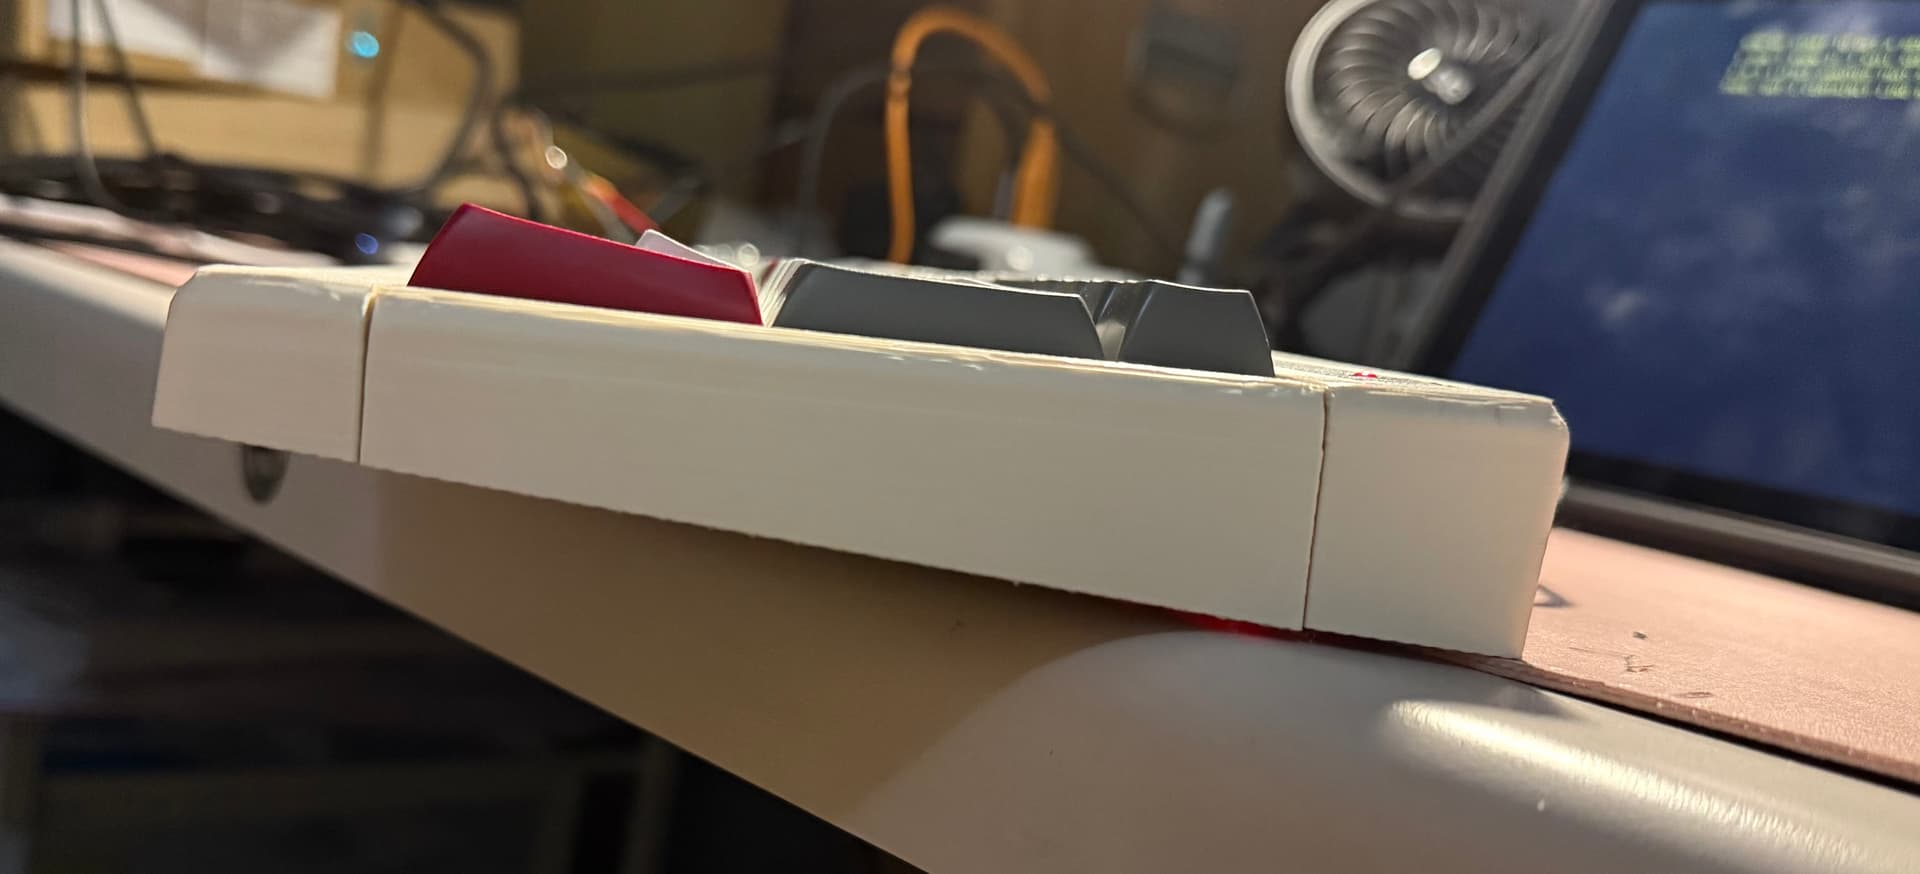
In the meantime, I’ve actually been using the assembly on 3mm standoffs and it’s been pretty nice. With no case at all, the ABS on plywood is pretty high pitched, but not unpleasant, and the switches’ spring ping has indeed been obliterated (though likely just to my ear) by everything else going on. As it turns out, DSS is yet another profile I seem to like better than Cherry.
5 Likes

Finished building my NCR-80. I poured some liquid silicone in the bottom case to make it sound a little less hollow. The switches are Keygeek Butterfly 50g linears. They have a nice deep sound and are very smooth. Here it is put together with EnjoyPBT 9009 keycaps.

13 Likes
So nice. Looks like a glossy ad spread from 1987, in the best way.
3 Likes
Purse Caps best caps!
3 Likes
Big time agree.
1 Like
Now we start to get a feel for what this board is supposed to look like. The one-piece print technically succeeded, but it had a layer shift near the top and a few lingering dimensional design issues that kept it from being usable. It was also literally more support material than actual print. I made this four-part version just to make sure we keep things moving, and it was much faster and quicker to print, especially since I did it upside down to minimize supports. I also simplified the top bezel and made it a simple embossed outline, but I may go back to a 3D printed insert, as the places where the paint got under the painters type are driving me nuts. PLA tolerates acetone, so I was able to clean it up somewhat, but it’s one of several reasons I don’t think this is the final form of this board.
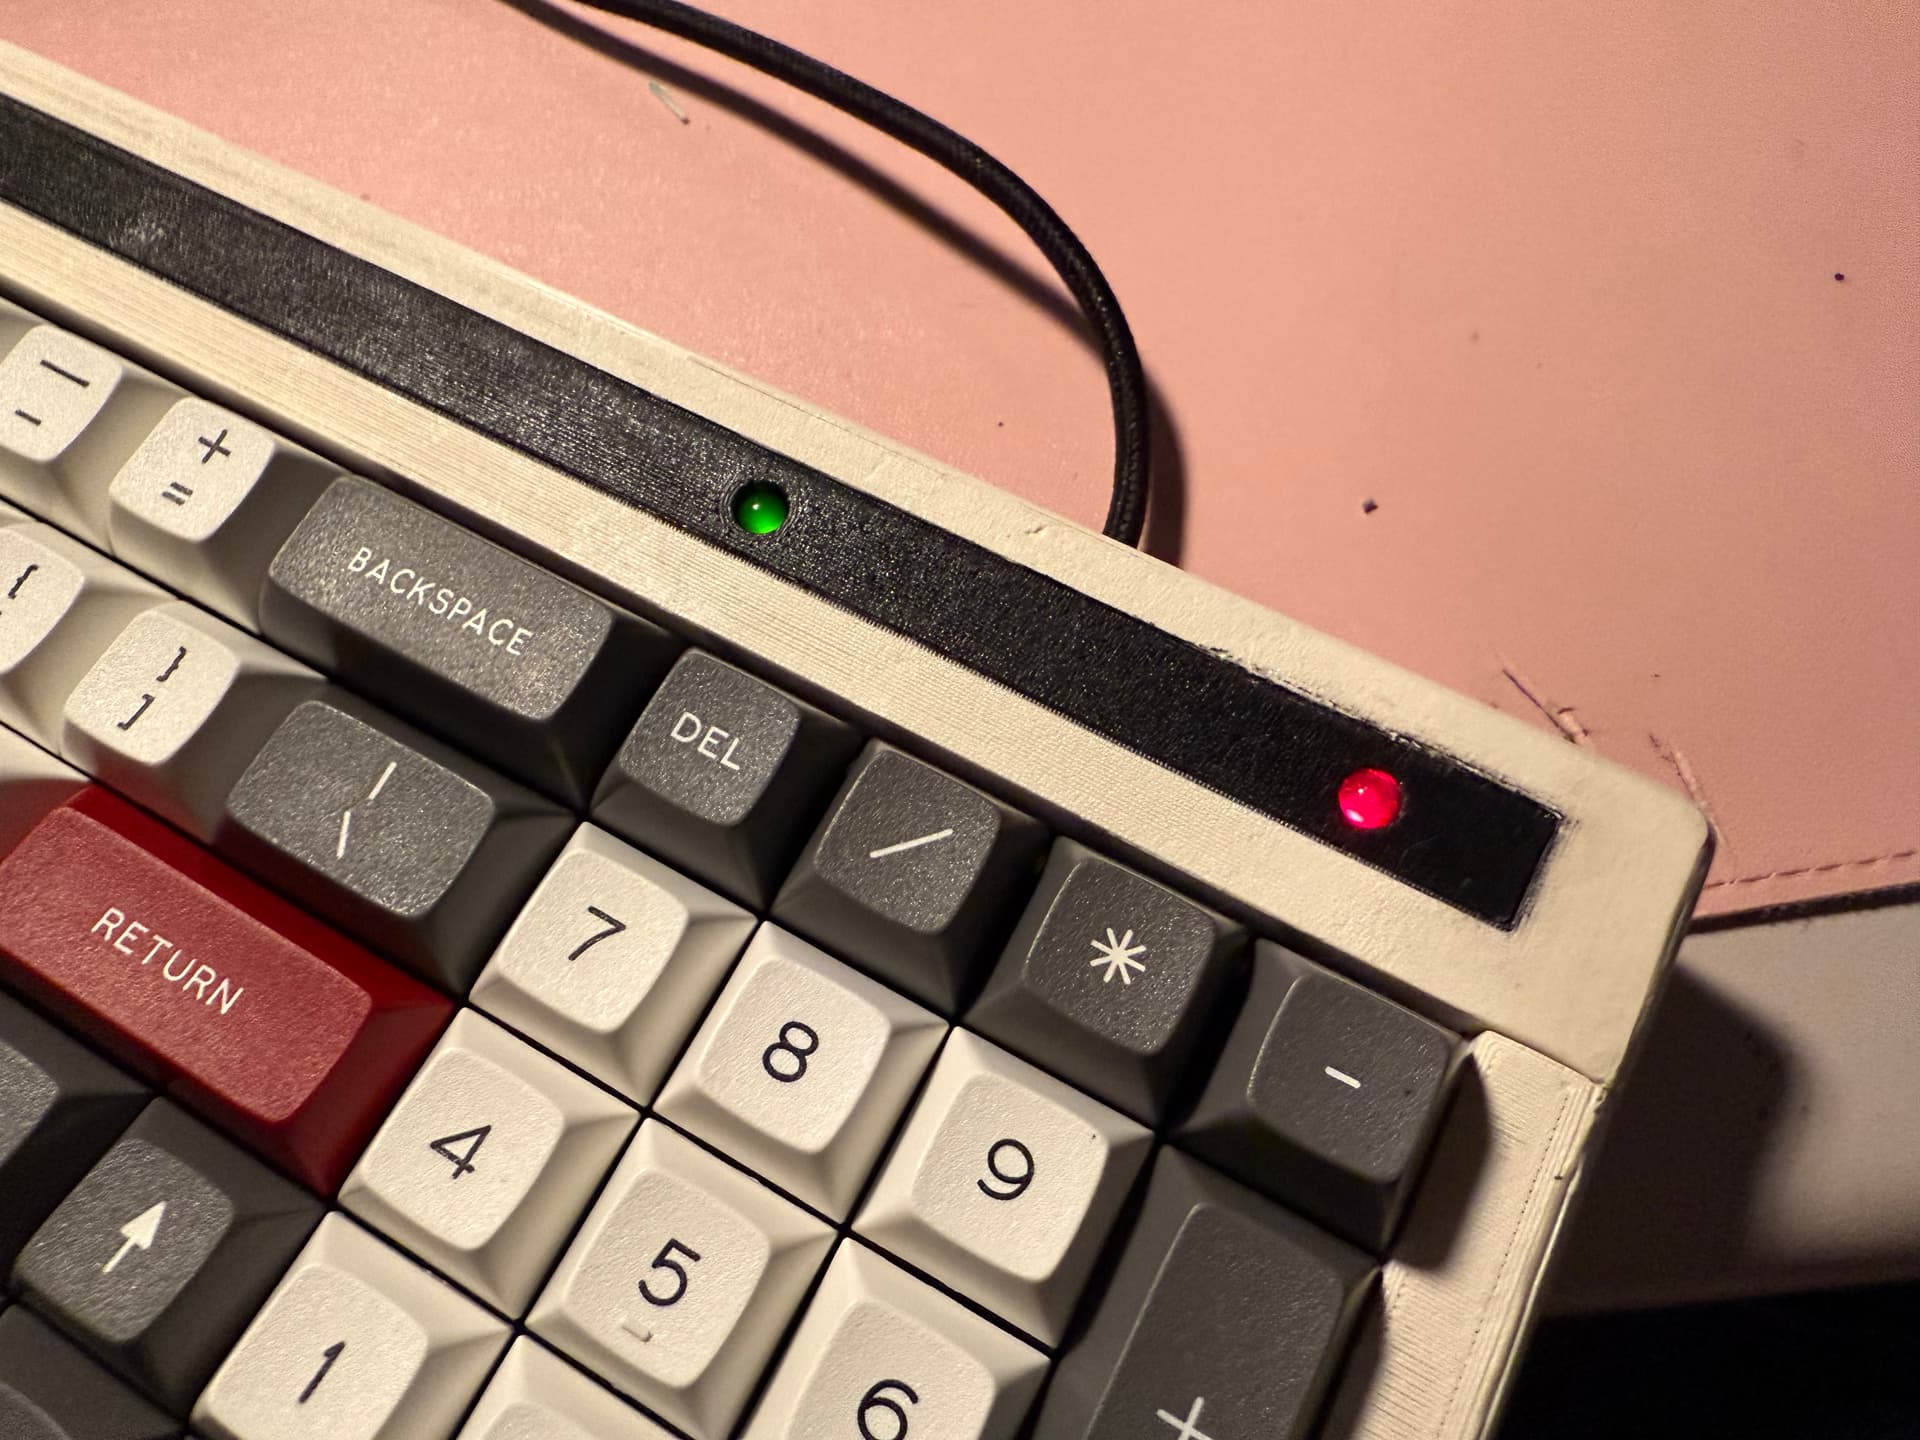
To that end, the indicator LEDs are not permanently fixed to this case, but I am pleased with how they came out. I used a fairly beefy resistor so they’re a bit dim, but I think that’s fine as they won’t be distracting, especially since the green one, being numlock, is 95% of the way to being an always-on power indicator, and indeed the left-side green LED was the power indicator on the old Honeywell terminal boards. I think one more iteration ought to do it, and unlike some of my other projects I am confident I’ll get to it, as I am not quite satisfied with the design and print issues, but I’m also in no particular rush as I’m pretty pleased with the general vibe of this board even now. I also still need to fine tune the bottom design and fabricate it.

10 Likes
This is coming together nicely - I really like the color of the beige filament you used and it goes well with the Honeywell keycaps
3 Likes
Thanks. Right now, we’re in the “good from far, but far from good” stage. ![]()
I think I will revert back to the original idea of 3D printing the colored insert, then add a couple more alignment tabs on the left and right pieces, then drill out the mounting holes on the plate to give me a bit more useful slop when assembling, and finally reprint everything right-side up but tilted 5 degrees to make the top be the flat printing surface; it’s much easier to hide questionable choices on the bottom of the build, and this color doesn’t hide my many imperfections as well as black does.
As for the color, I’m pretty happy. I attempted to color match by eyeballing the Amazon listing and an old Deskthority thread (for as long as the link lasts). If I understand my community lore, this now qualifies me to run a keyset group-buy, LOL.
1 Like
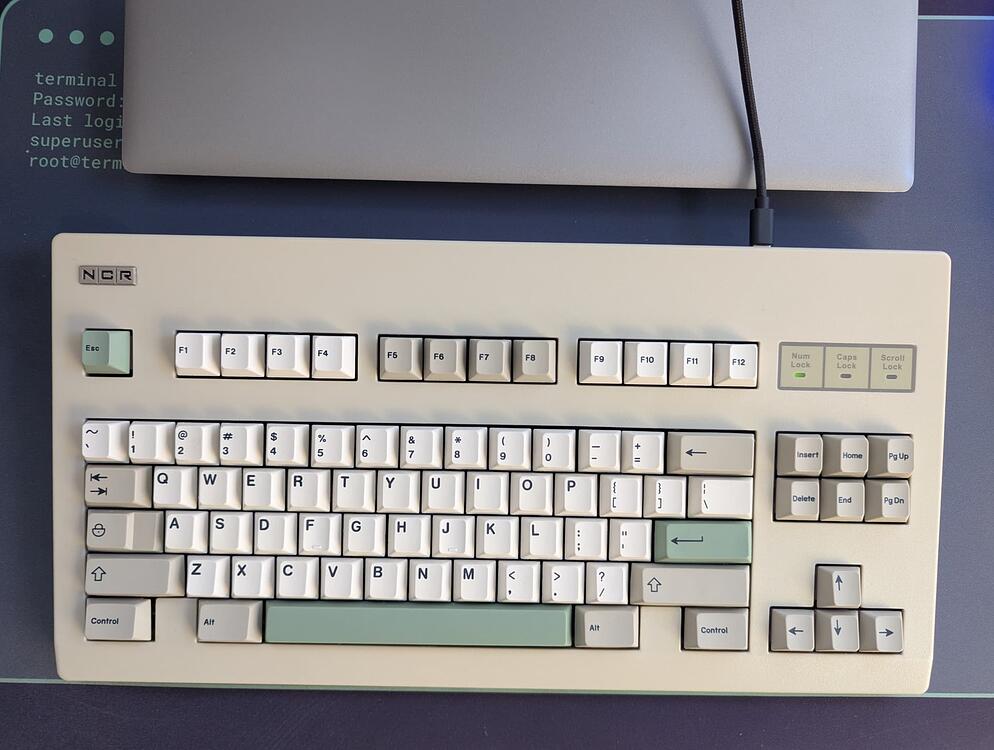
Magazine spread:
The perfect keyboard for your IBM PC XT/AT and compatibles! The NCR-80 is designed to match your PC cases and monitors all the way up to the new 386!
The tasteful beige and cream keycaps follow established standards, with added optional ‘post-it pink and green’ accents modeled after real stock-market trading computers. Dye-sublimated legends will last for generations of hard use.
Say “goodbye” to mushy rubber-domes and dirt-prone ALPS switches. Say “hello” to ultra-smooth and reliable MX-compatible switches, based on West German designs. Each switch is rated to withstand over 50 million lifetime actuations! Our specially-sourced light linears are a perfect keystroke, making typing a breeze.
Don’t wait for your aging keyboards to wear away! Our NCR-80s are standing by for your customization.
Please specify: (accents “post-it pink” / “post-it green” / mixed / none) (connector IBM PC XT/AT or PS/2)
8 Likes
Perfection. Now just typeset two columns of black text in a white block taking up the bottom quarter of the page!
1 Like
This is really nice !
And I love those DSS caps ![]()
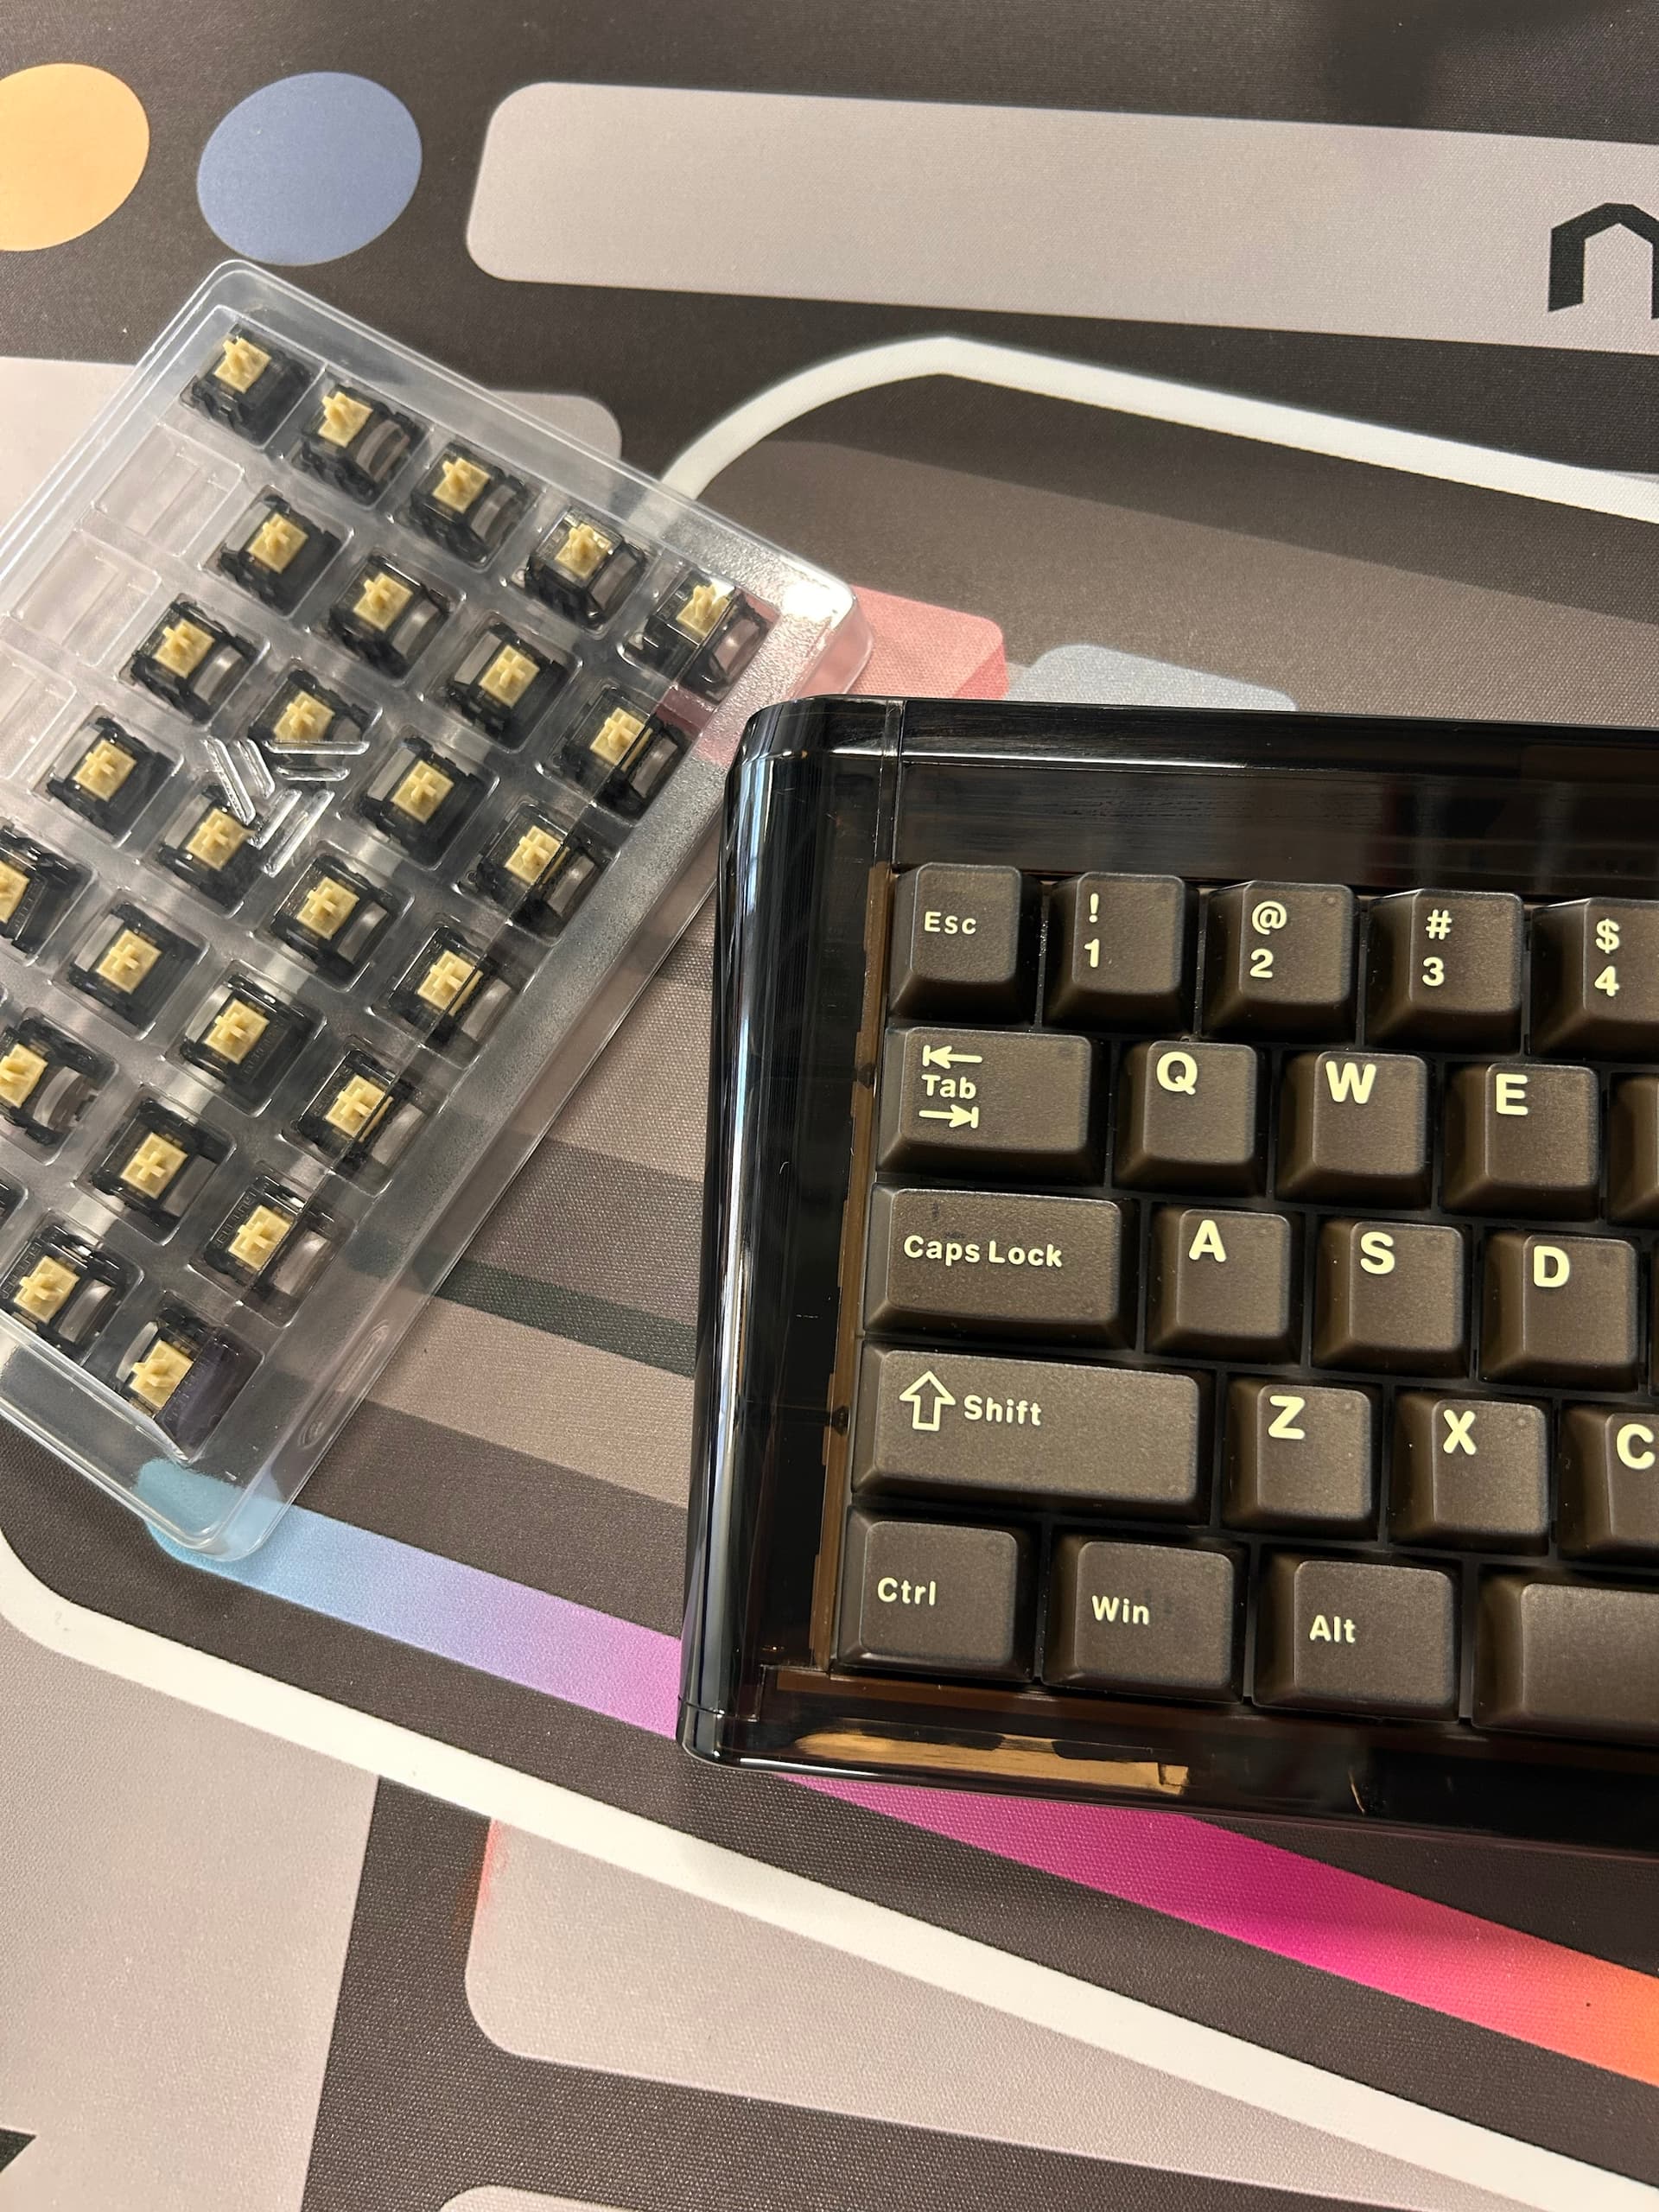
People keep asking why I travel with a box of switches…
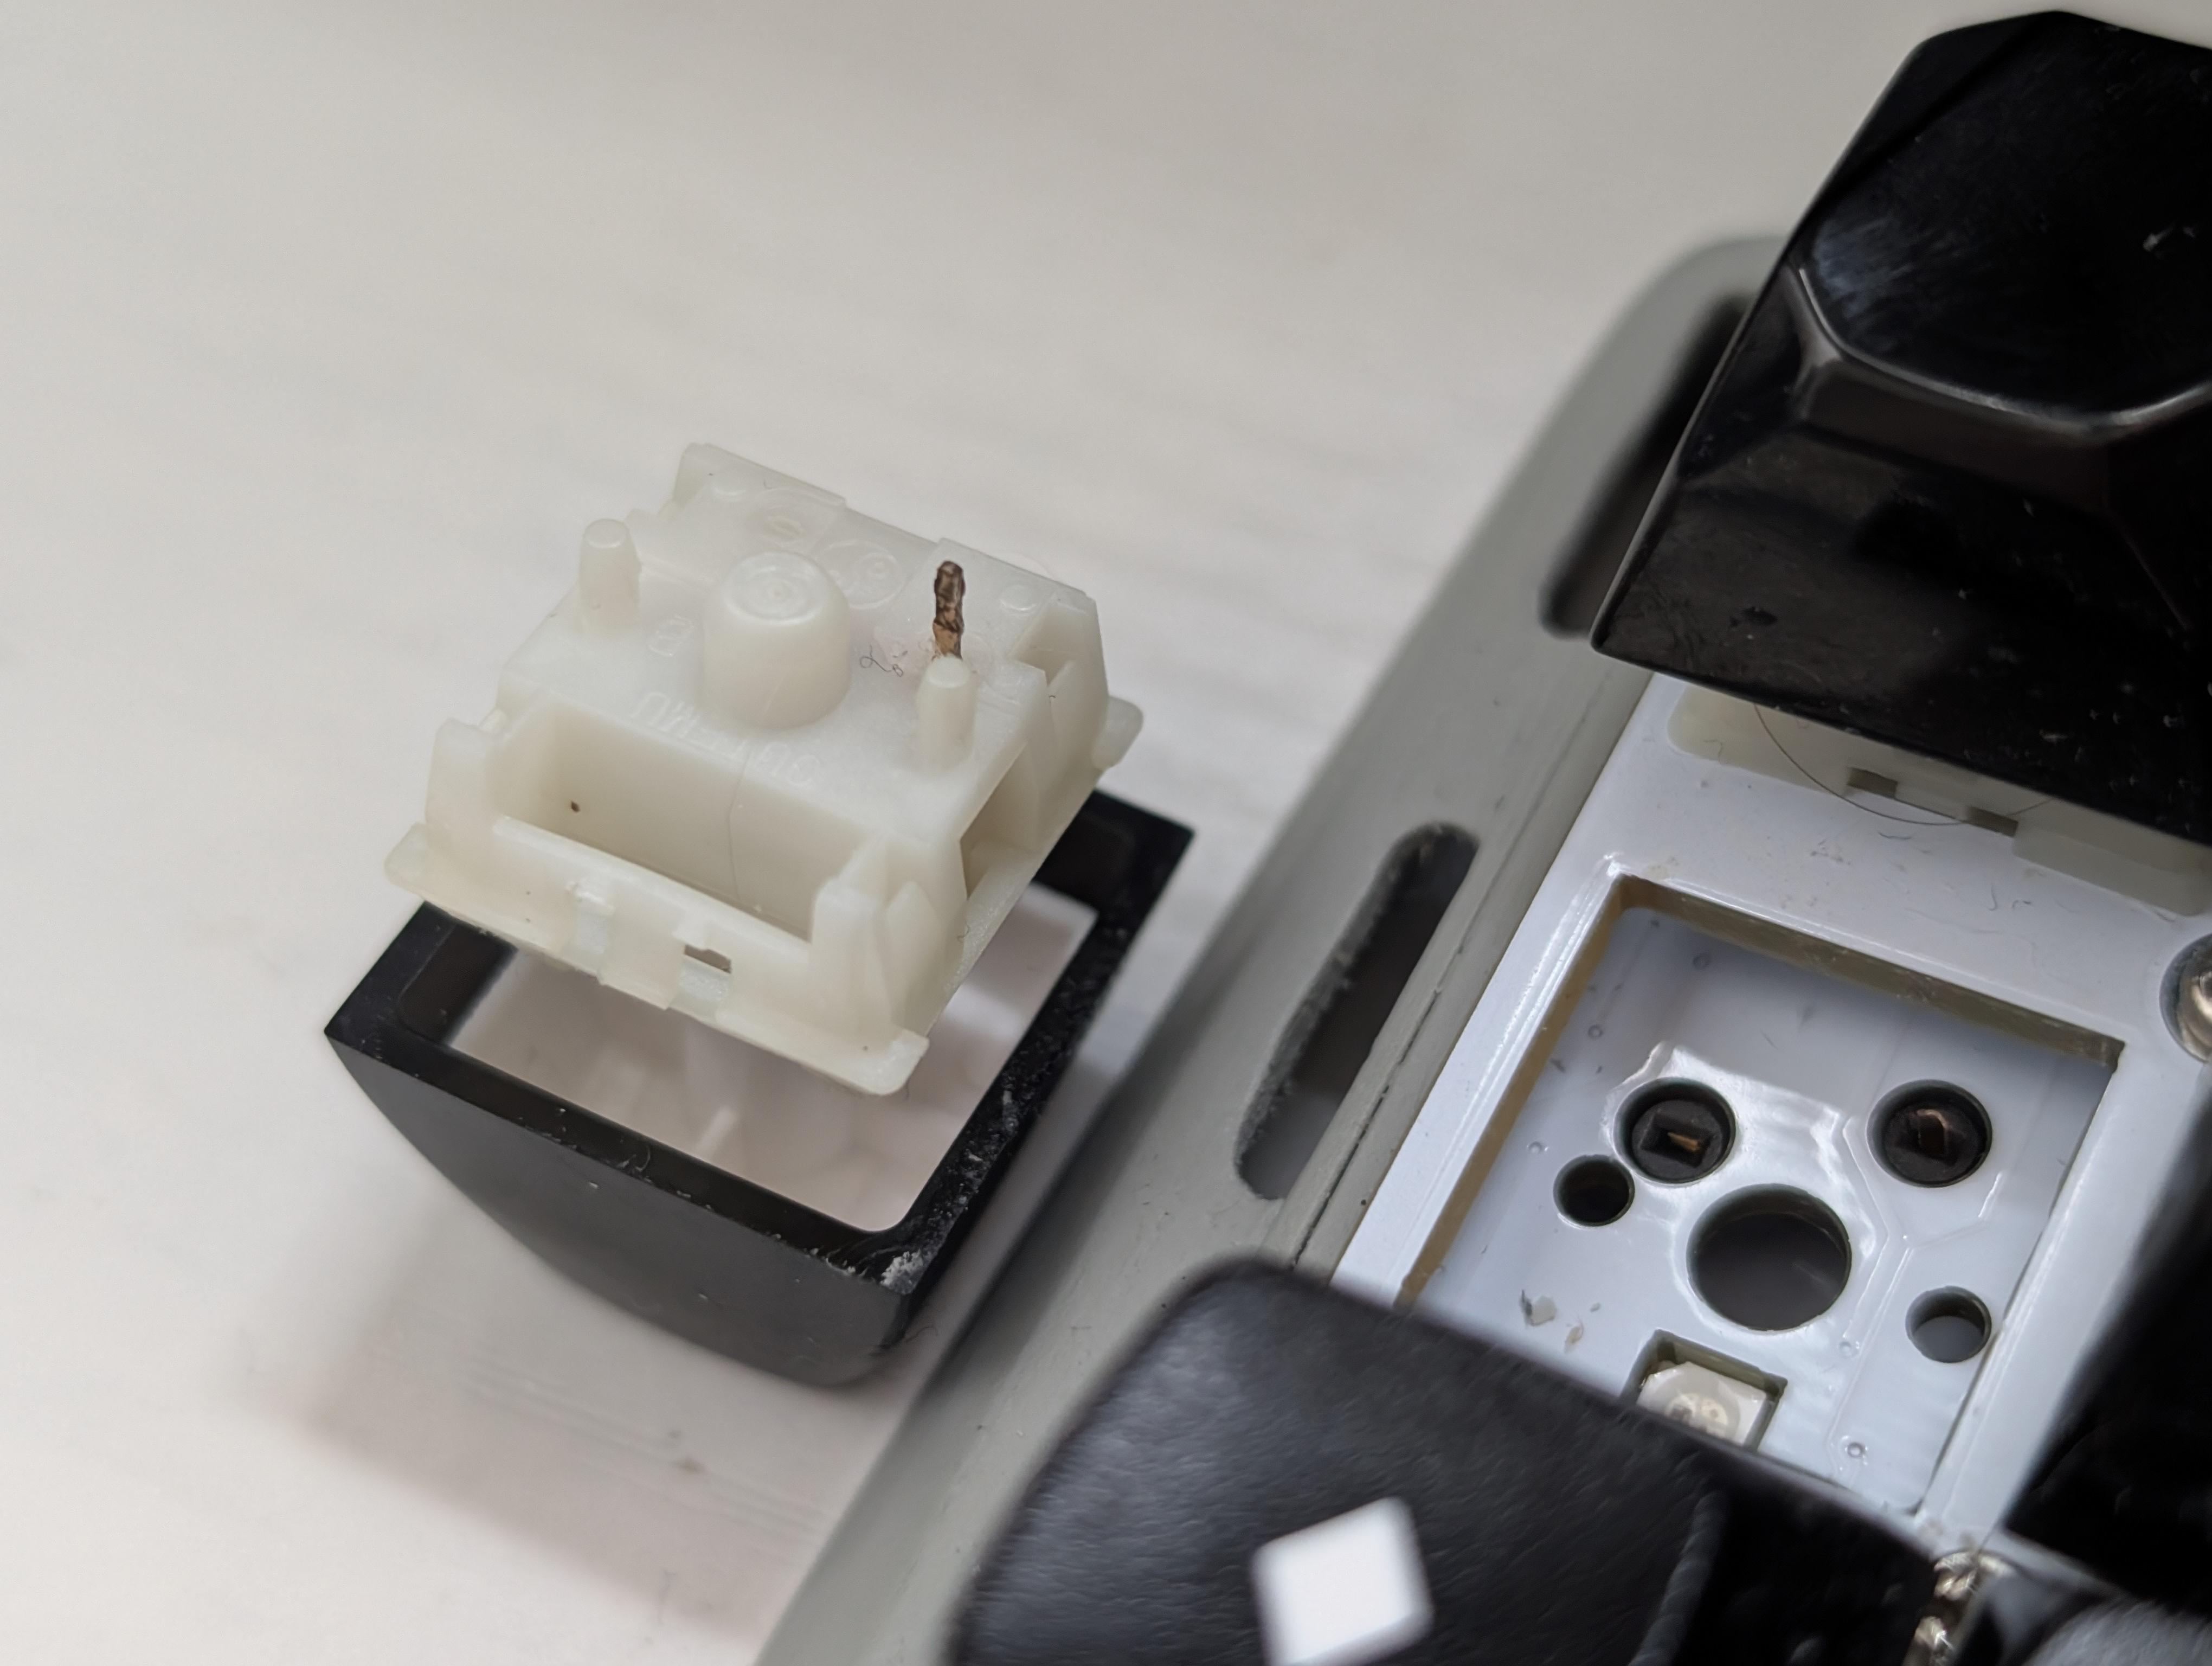
I noticed that something was off because my Ctrl key (the one with legs up) would only work every other time. Still not quite sure how this could happen. I guess I exert too much Ctrl. dum tssssss
9 Likes
Did the leg snap off in the socket?!?
1 Like