I finished the ZMK conversion for my Yushakobo Primer61 60% PCB I got in Tokyo, at least to my satisfaction. My Mac Mini actually recognized the wireless, and while I had some trouble getting a keymap with Bluetooth keys to compile (user error, I’m sure), a ZMK Studio build compiled fine so I just added the bluetooth keys manually. The Primer series are designed to use a locally designed BLE Pro Micro replacement (and their slightly noncompliant QMK build), but I didn’t buy any while there, instead grabbing the NRF52840 Nice!Nano clones I mentioned before. The PCB is meant to accommodate coin cell or AAA batteries, but with the charging circuit built into the MCU, I got a small 300mAh LiPO battery with overcharge protection, bridged the pads for the diodes that would normally prevent charging of the disposable batteries, and wired it into the On/Off switch.
With a Japanese Duplex matrix and no interrupt pins, ZMK can’t sleep like it was designed to do, so I don’t expect battery life to be great, but it works, and if battery life is truly dire it also works fine on USB-C. I am already getting towards the edge of my expertise with this stuff, so I am not inclined to go beyond the capacity limitation for battery health (~500mAh). I also soldered in the TRRS jack, but I’ve read that these N!N clones don’t play nice with TRRS split connections, so I’ll probably let sleeping dogs lie there as well, at least for now.
Now I’ve got to finish the build. I need to install stabs, design and cut a plate, solder in some switches, and then design and print a case to work with the MCU and battery off to the right of the keys.
That looks extremely promising, I absolutely need to look into that, thanks for sharing. I got around with a lot of looking at my other projects, but it was not that satisfying.
Not really much of a work project but I did swap a few things out today.
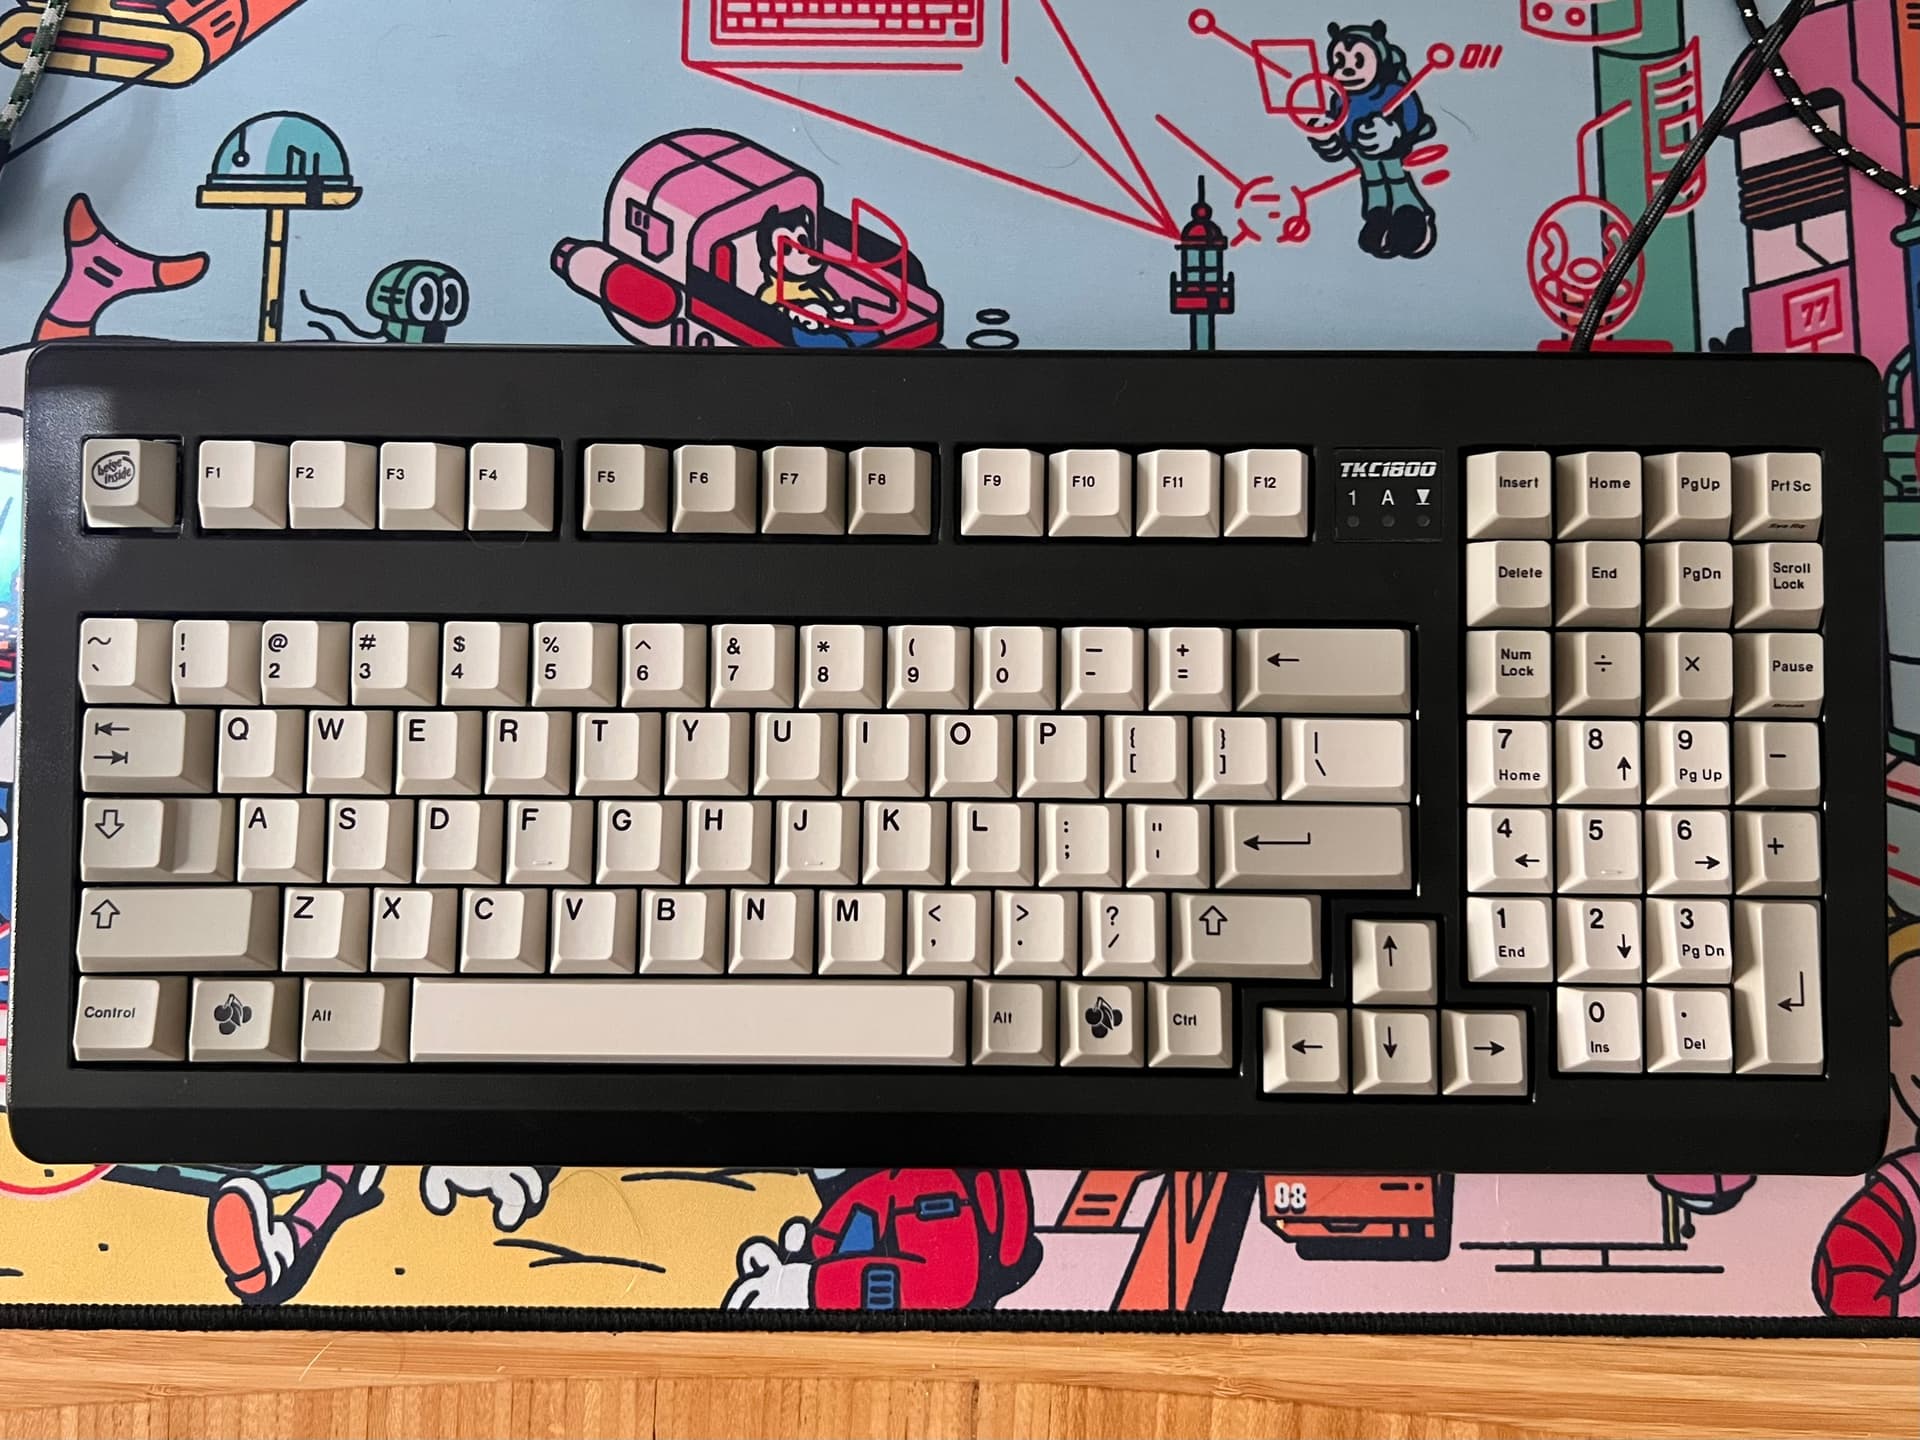
I recently decided to swap out keycaps on my TKC-1800. I tried GMK Slasher but it didn’t sit right with me. I’ve always had dark caps on it, so I went looking for something light. Ended up with XMI Vintage support caps. The thicker PBT caps work quite well with the tactile switches in this one.
Not bad. But it’s getting quite cold and dry here. About 20% humidity in the house. That means a shock every time I come back for the desk. I always discharge on a usb cable, but I figured it’s time to move back to plastic for the season
So, CSTM80 goes back to a hydrodip top. Love it. No tools involved, but this was my “work” today
Not sure these posts are really worthy of the thread, but I like to document somewhere, especially when I don’t feel up to spending a lot of time perfecting a shot for instagram
Maybe I should put these in “post your keyboard” or “what’s on your desk today” Never really sure
None of us are. Sometimes I scroll back up to the top of the threads I post in and wonder what the original OP would have thought about my contribution.
Anyway, the fact that these boards underwent some recent changes more than qualifies them for the workbench thread, IMHO. They both came out really nice, too.
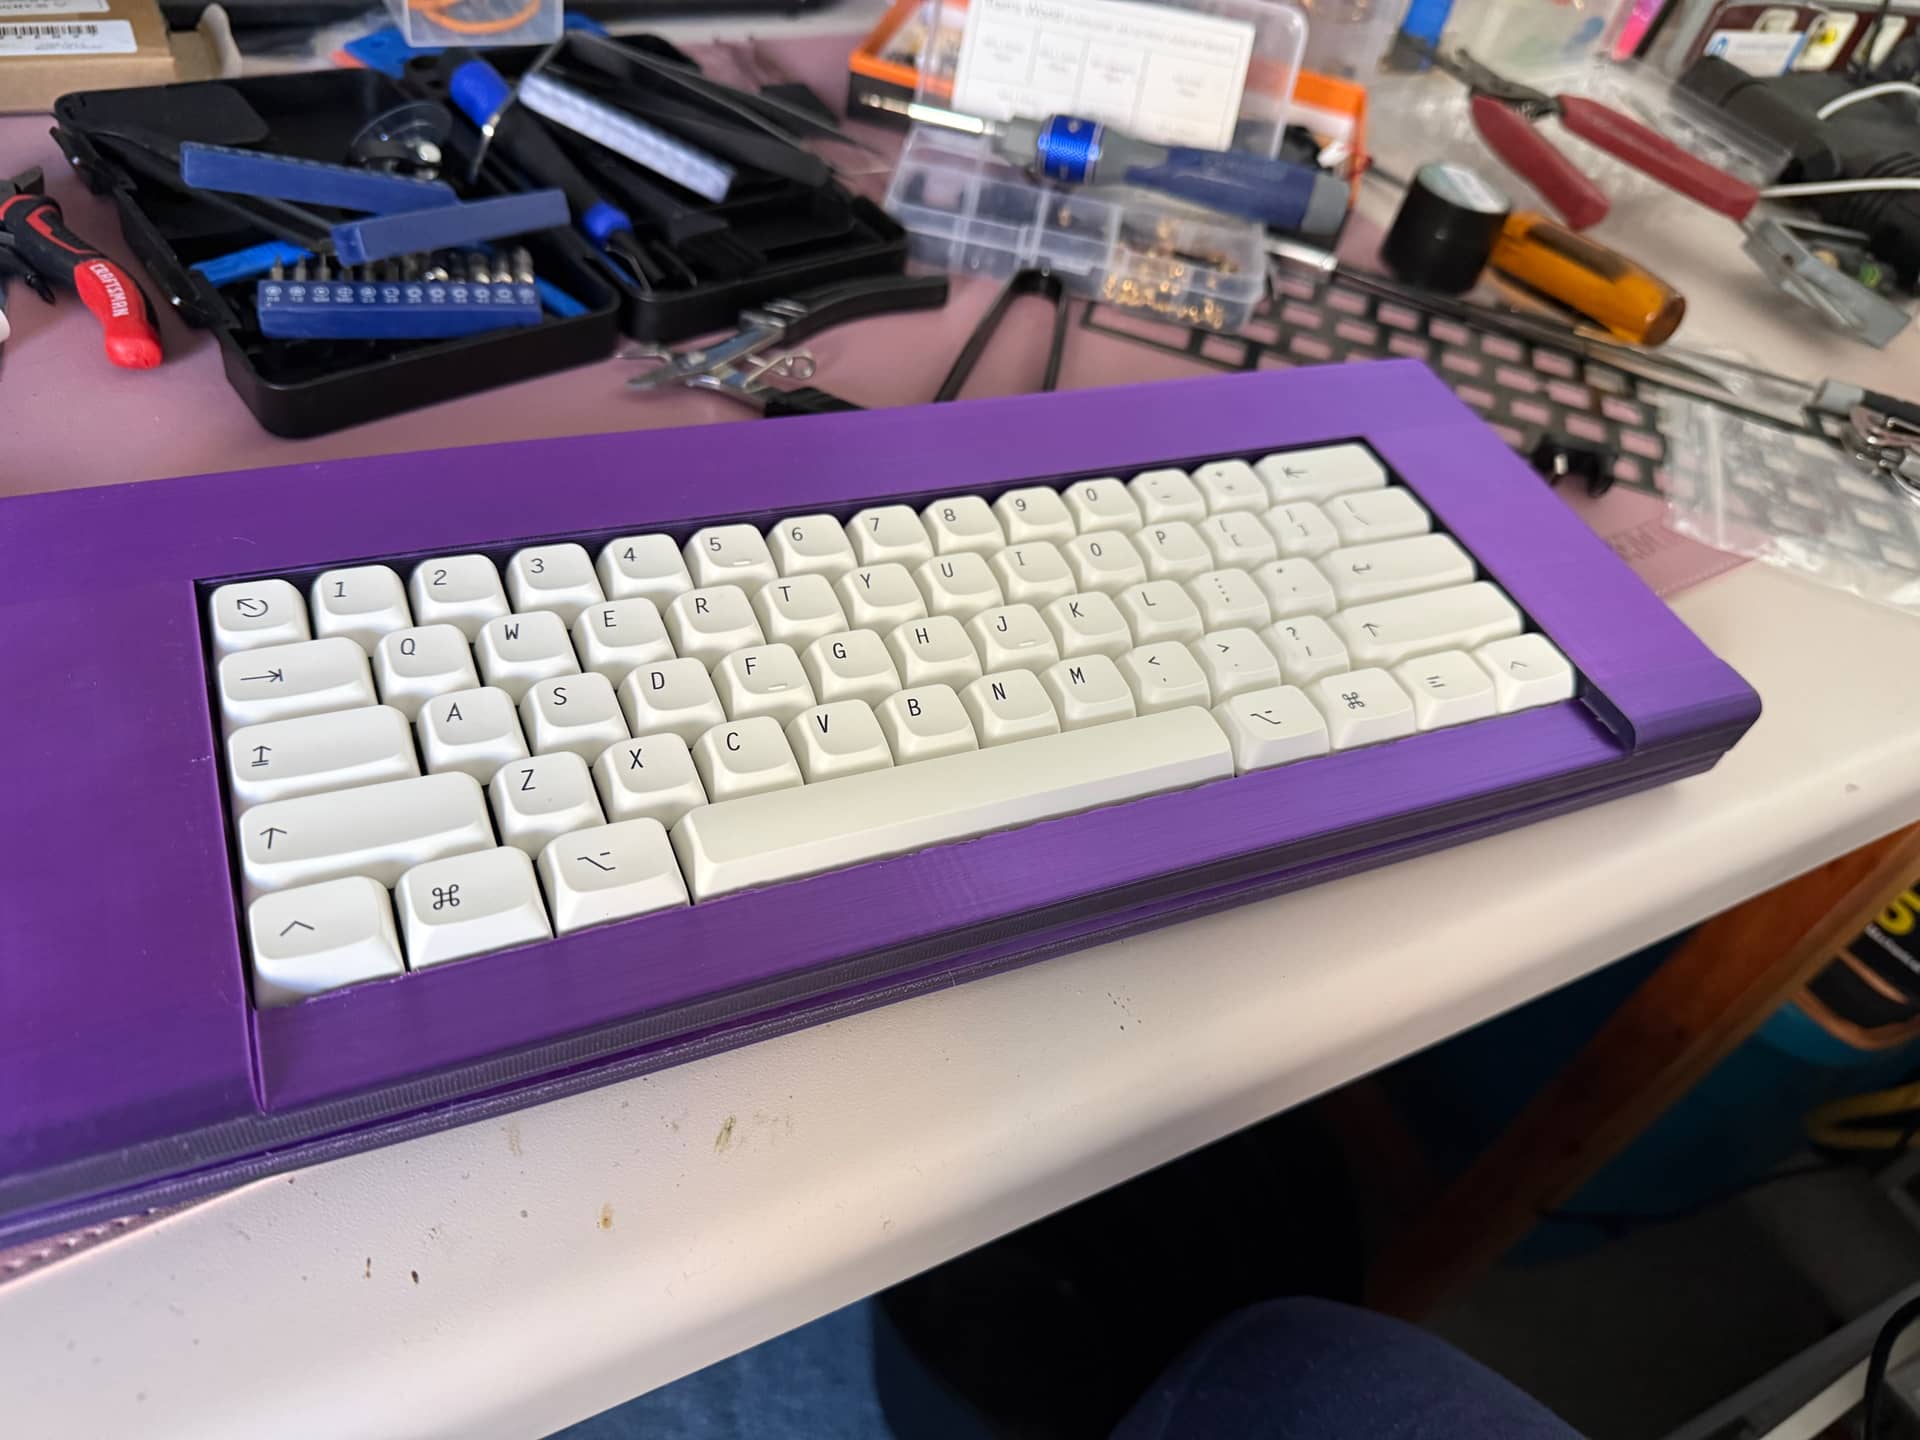
Pictures also literally taken on the workbench, BLEndgame got finally a case matching the grey LDSA. I didn’t want to reprint with the same color as the wired endgame (even if I stole its switches) and was never really pleased with what I got printed.
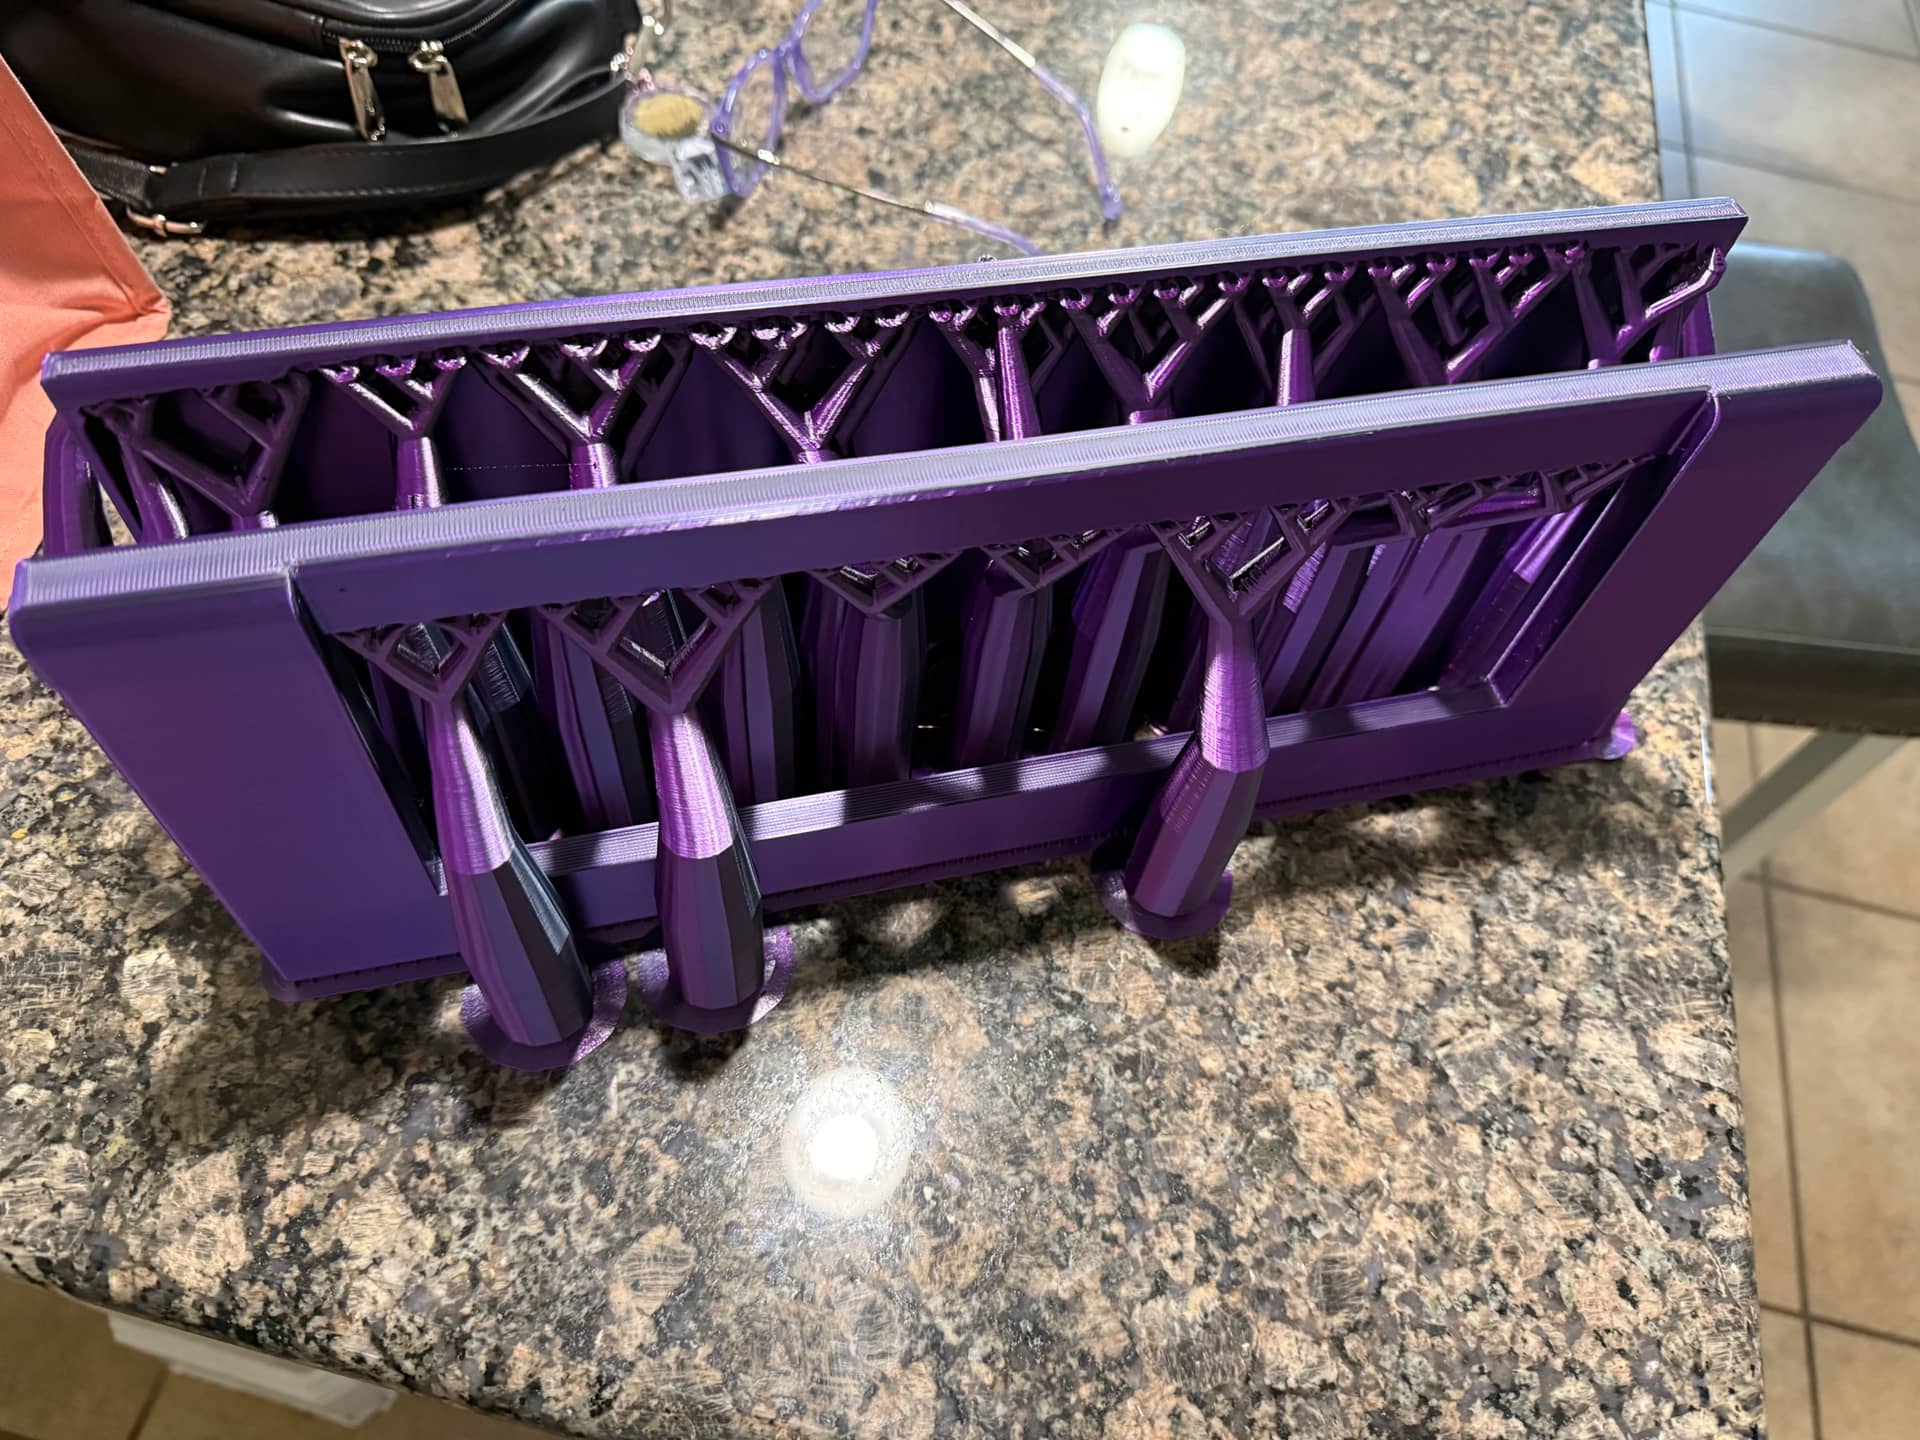
That changed today, full on clear tech enthusiasm. eSUN Clear light teal PLA, 0.8mm nozzle with 0.6mm layer height for the main case. Also all infills switched to Archimedean chords, regular crossed infill really looks bad in there.
It is similar in capability to KBD8X MKII:
-transparent polycarbonate case available
-ships without aftermarket stabilizers
-RGB underglow lighting
-RGB LED lighting
Except that the Transition Lite TKL also comes with a selection of dampening materials, maybe a positioning sheet, selection of PCB type and thickness, maybe a connecting cable, and sometimes a carrying-case.
The KBD8X MKII came with a brass case weight, and a metal plate. I had to seek alternate plates elsewhere.
So it was $89 for Transition Lite TKL, and $230 or more [maybe $300-350 or more] for the KBD8X MKII.
During November sales, some Transition Lite TKLs went down to maybe $89 CAD [shipped] when using coupons. But AliExpress sellers tried not to honour that deal, in some cases.
Granted, the KBD8X MKII shipped with a high-quality polycarbonate case, had a brass weight, and metal plate, and all that does cost more money to produce and ship. In addition, the KBD8X MKII used a top-mount, I think, instead of gasket.
So, the KBD8X MKII presented a different experience. Still, the value offered by the Transition Lite TKL is impressive.
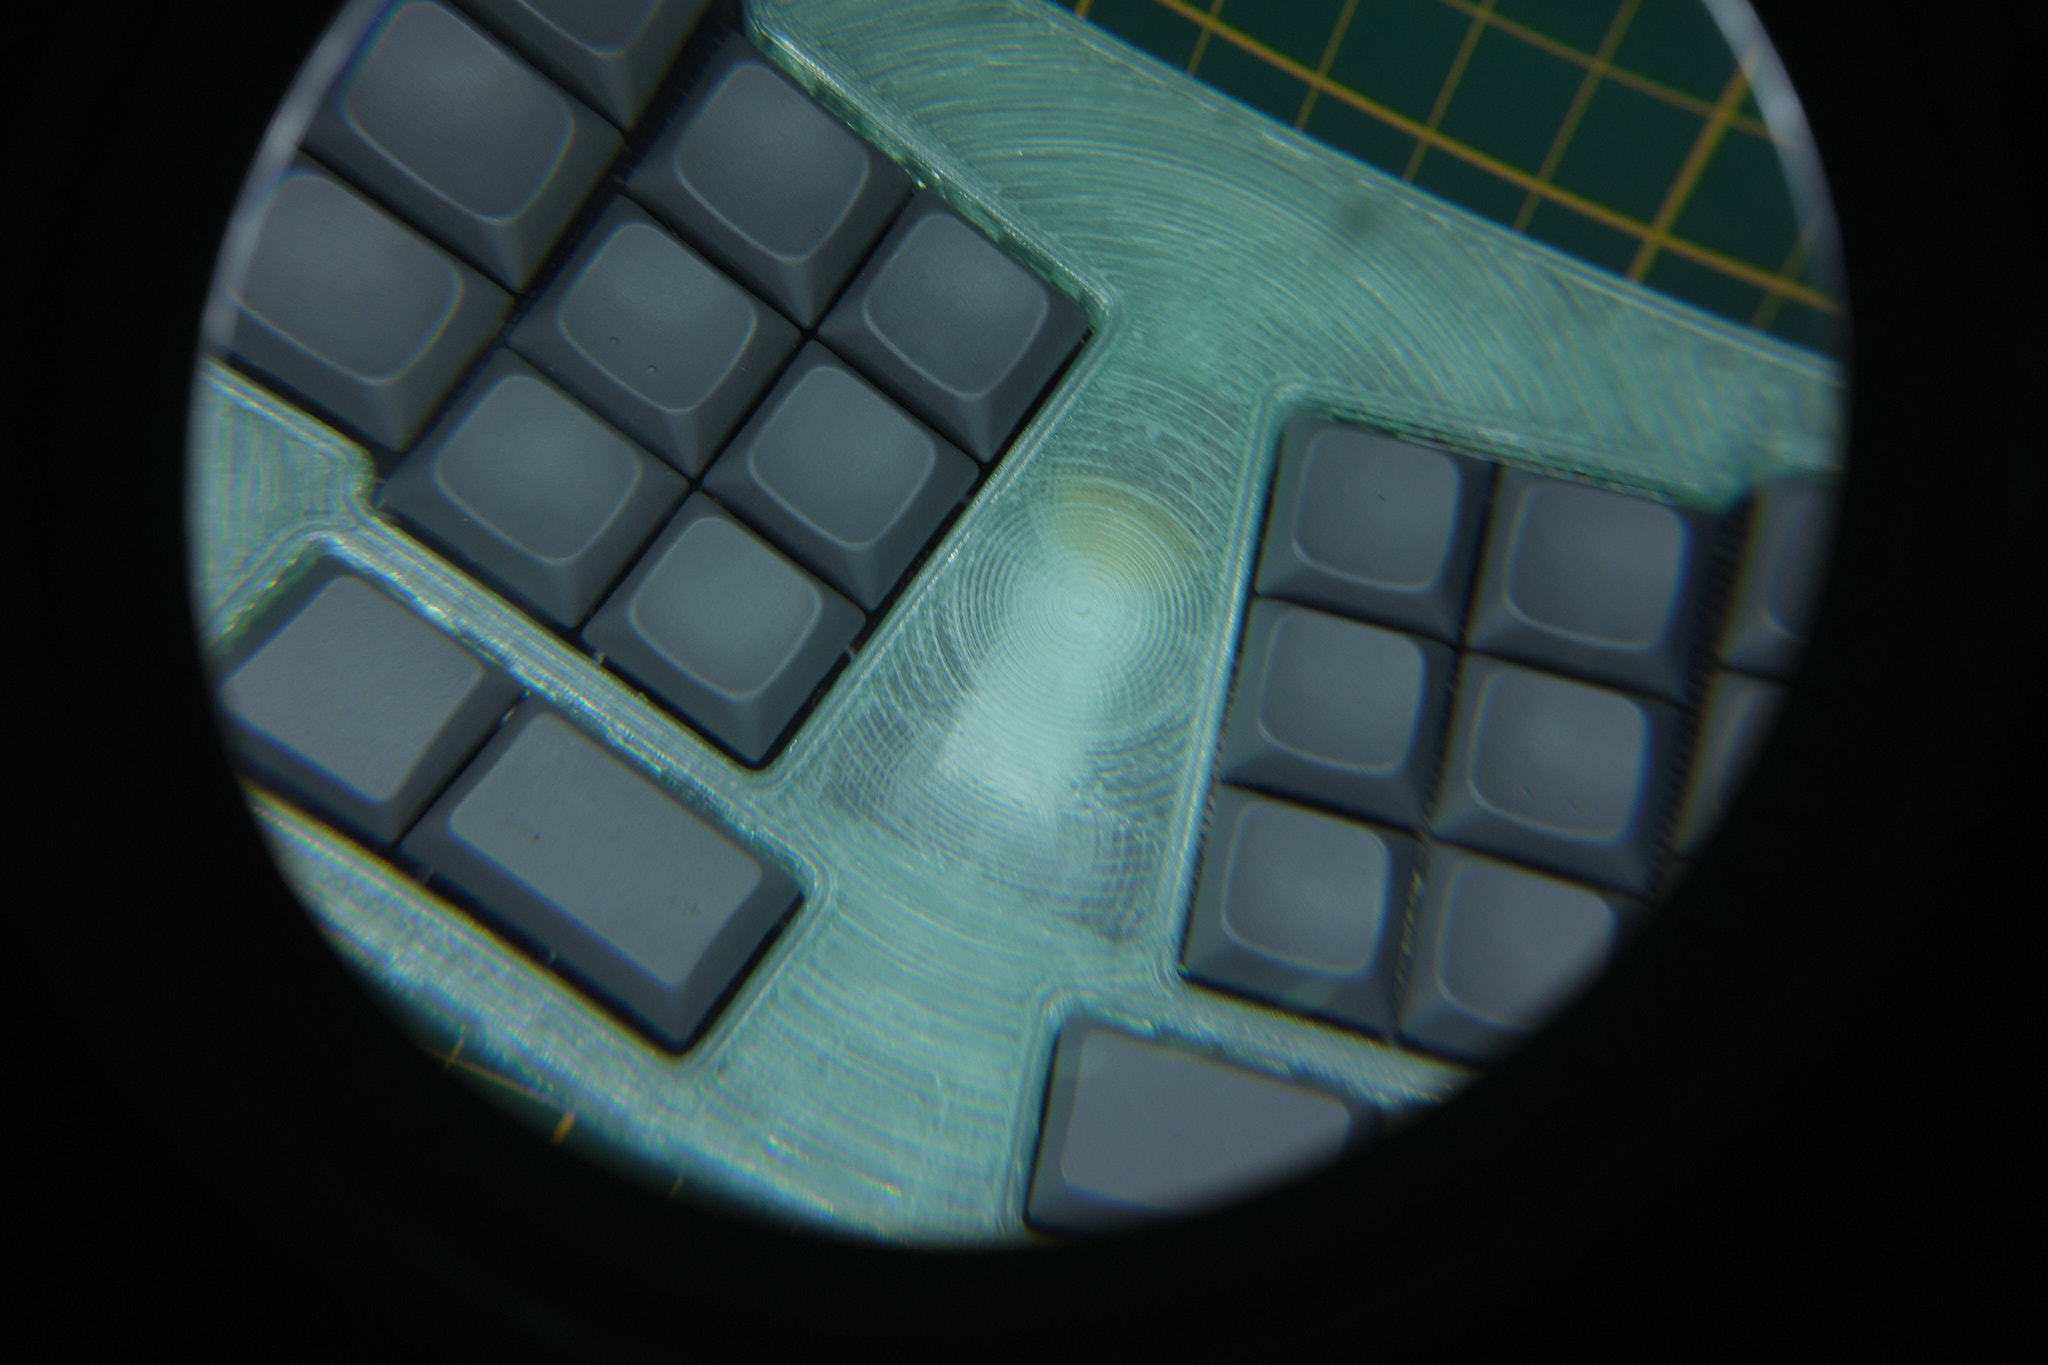
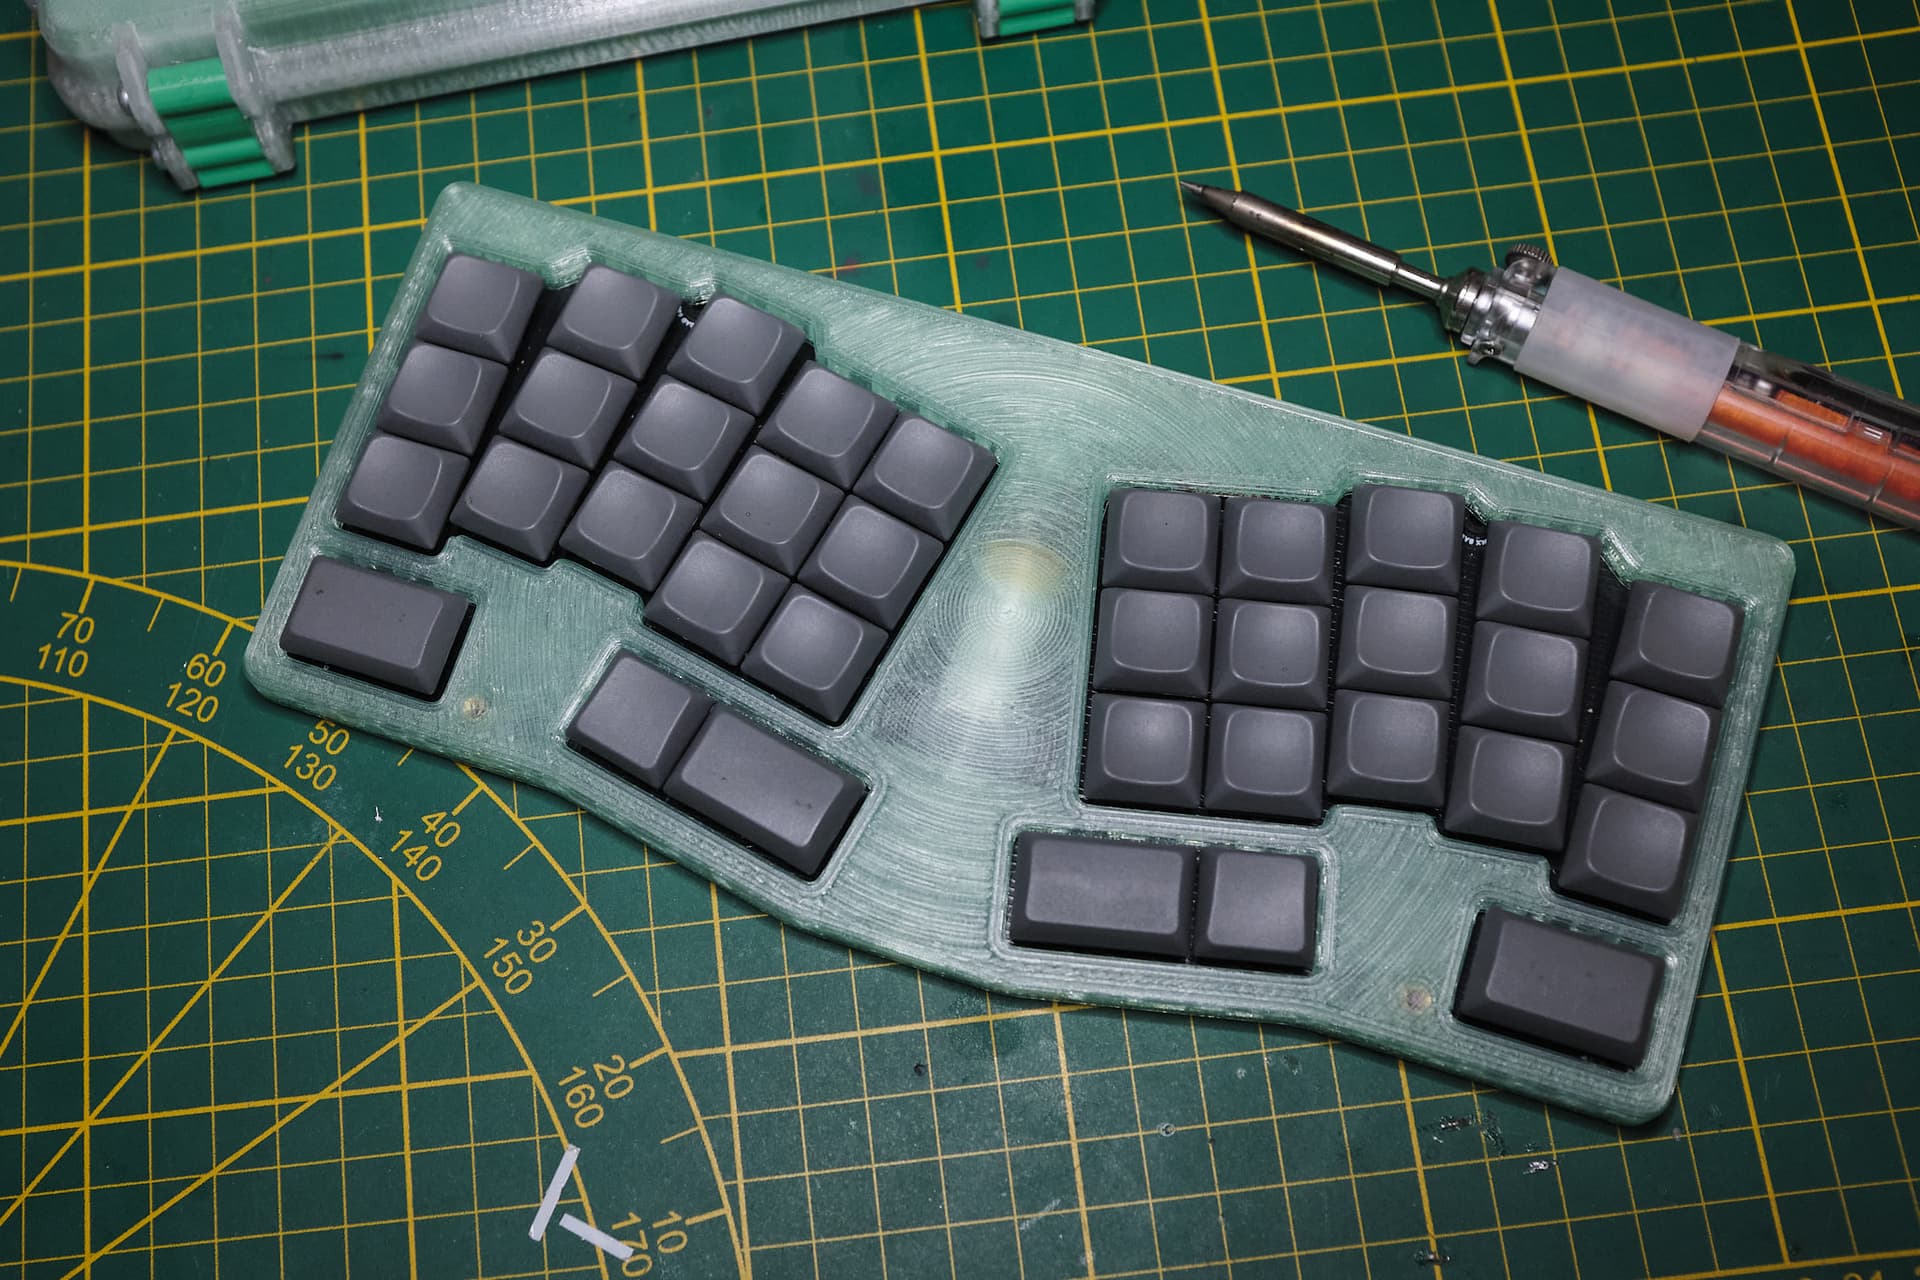
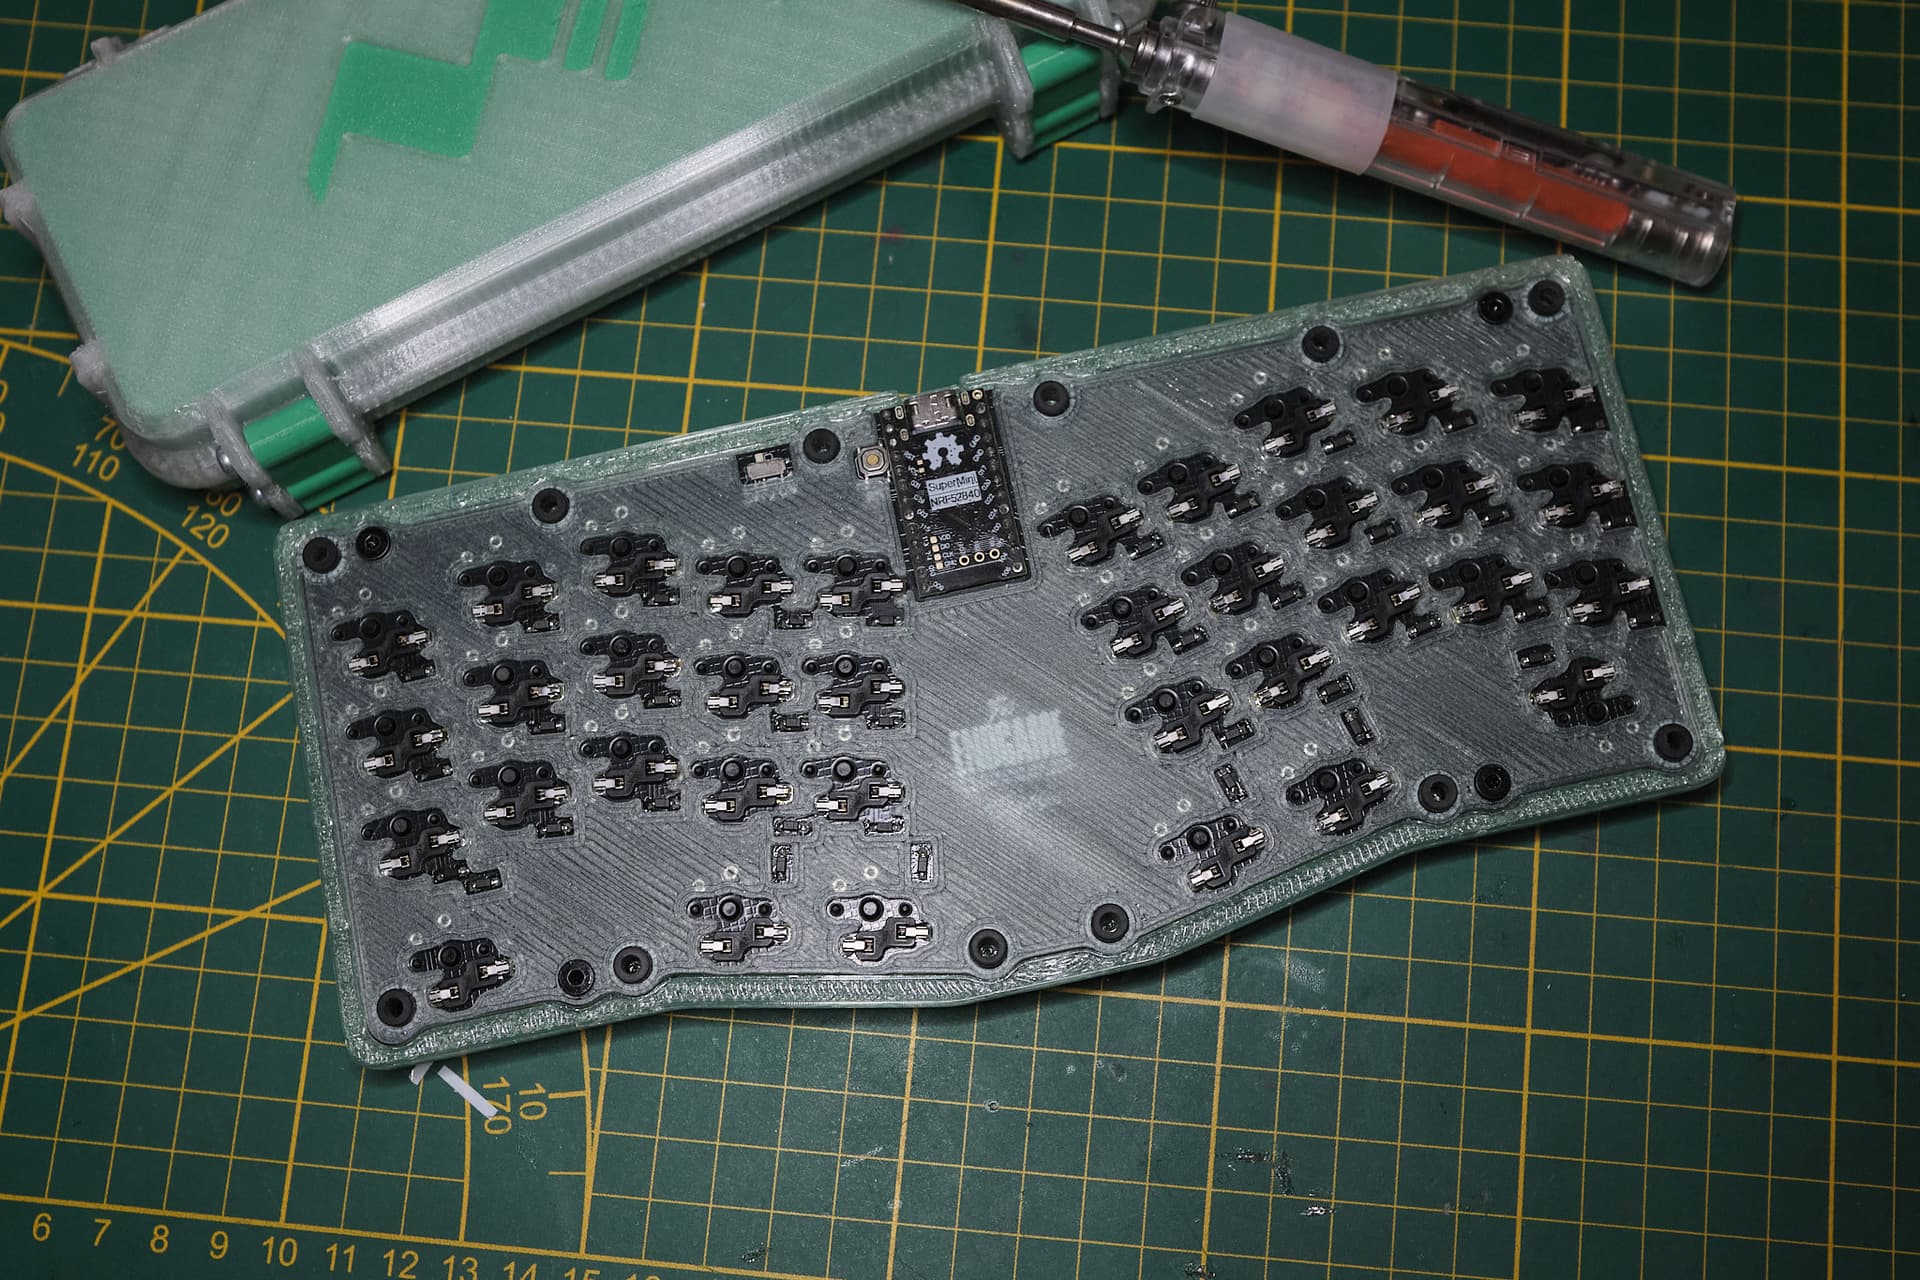
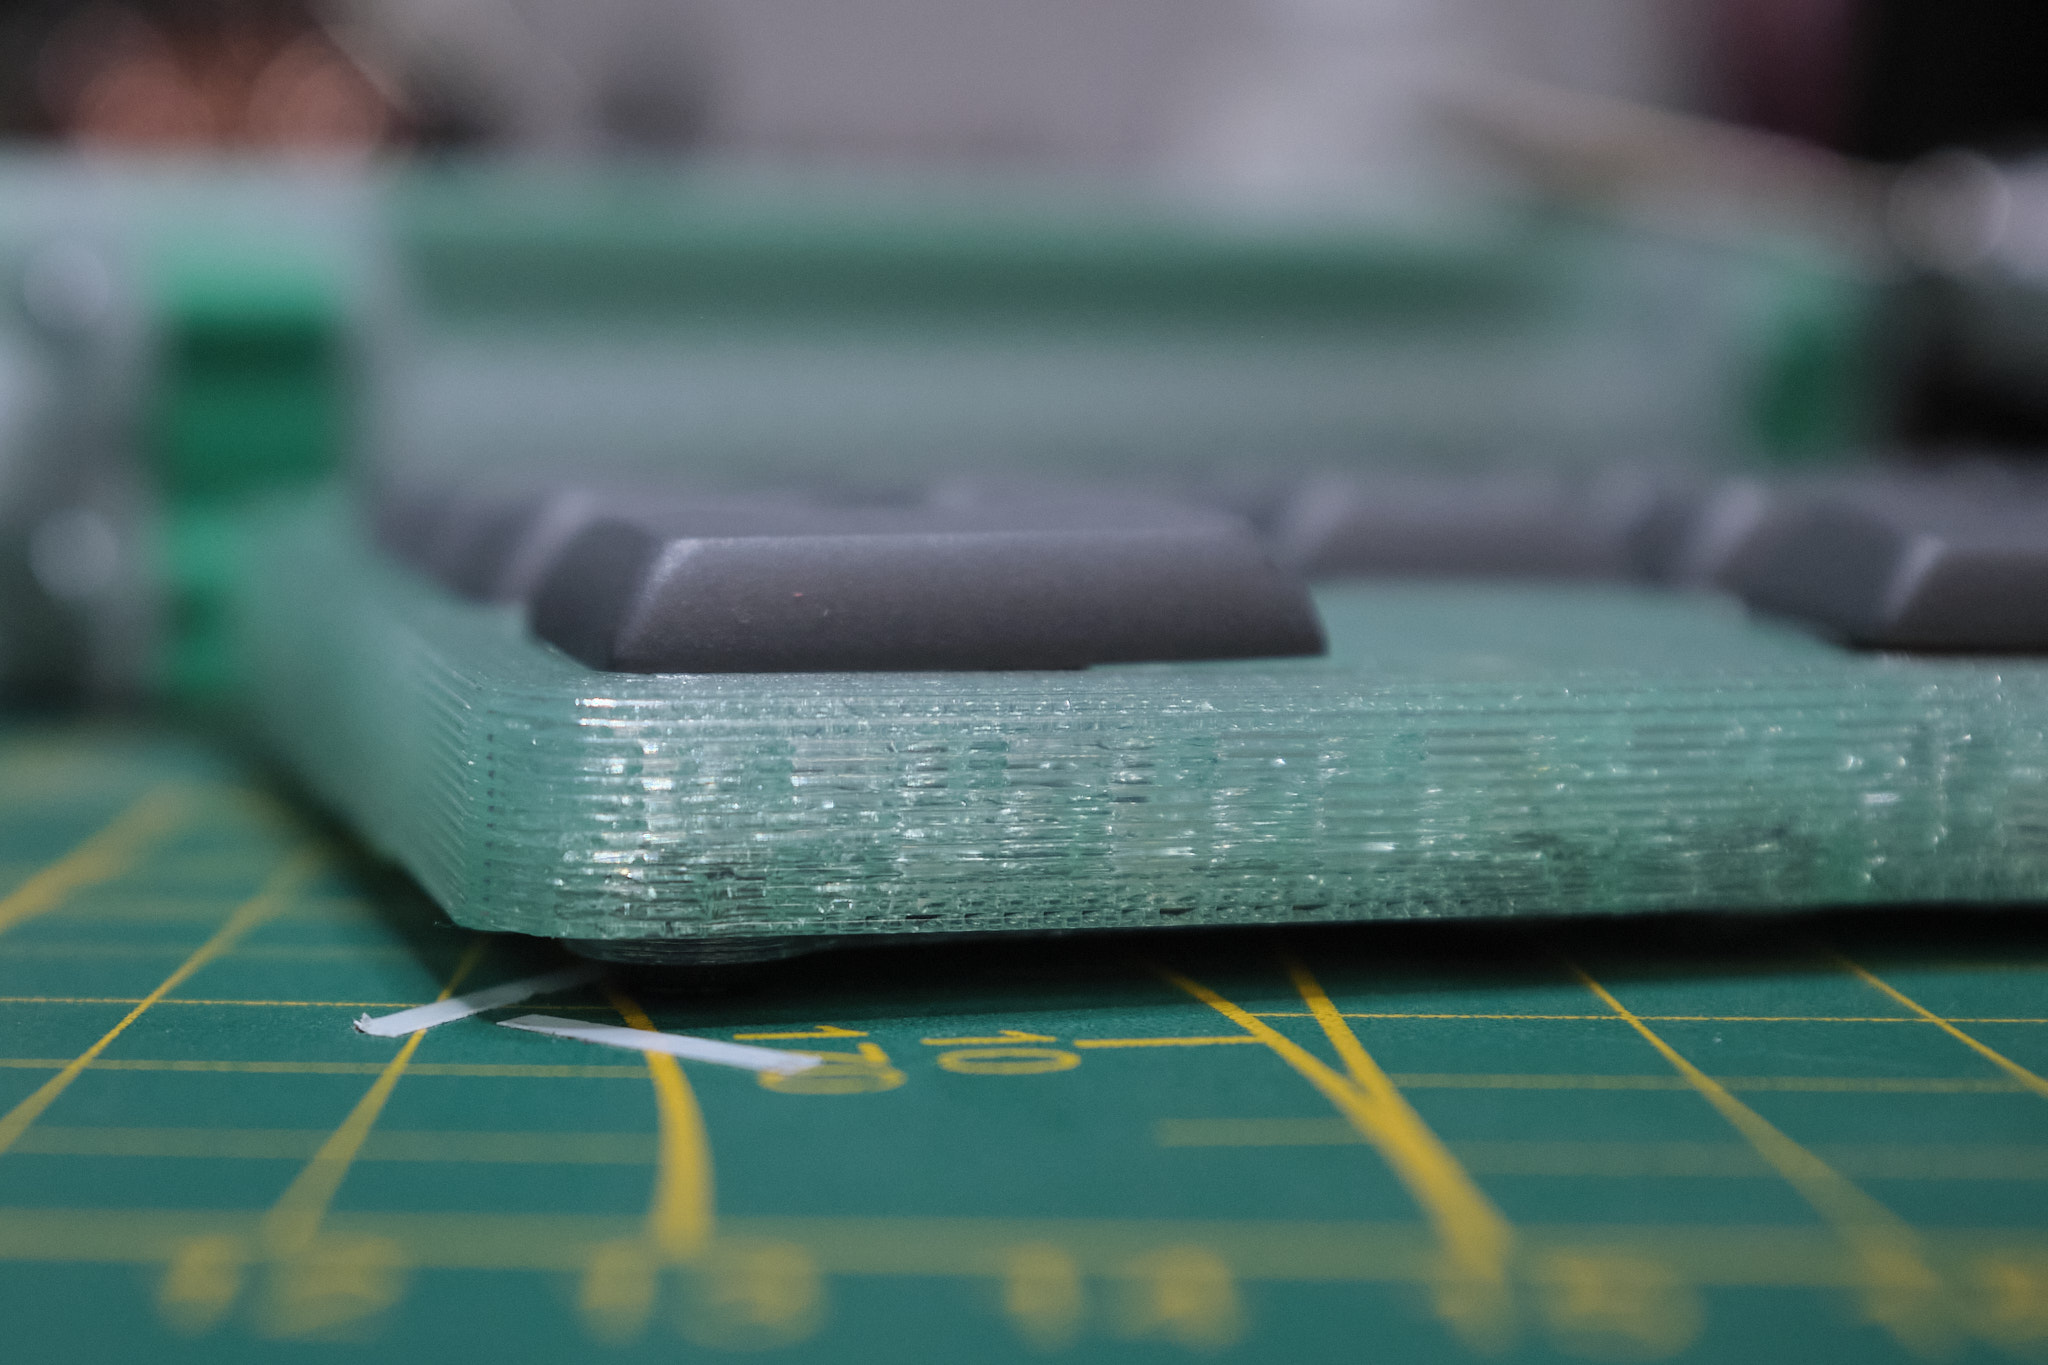
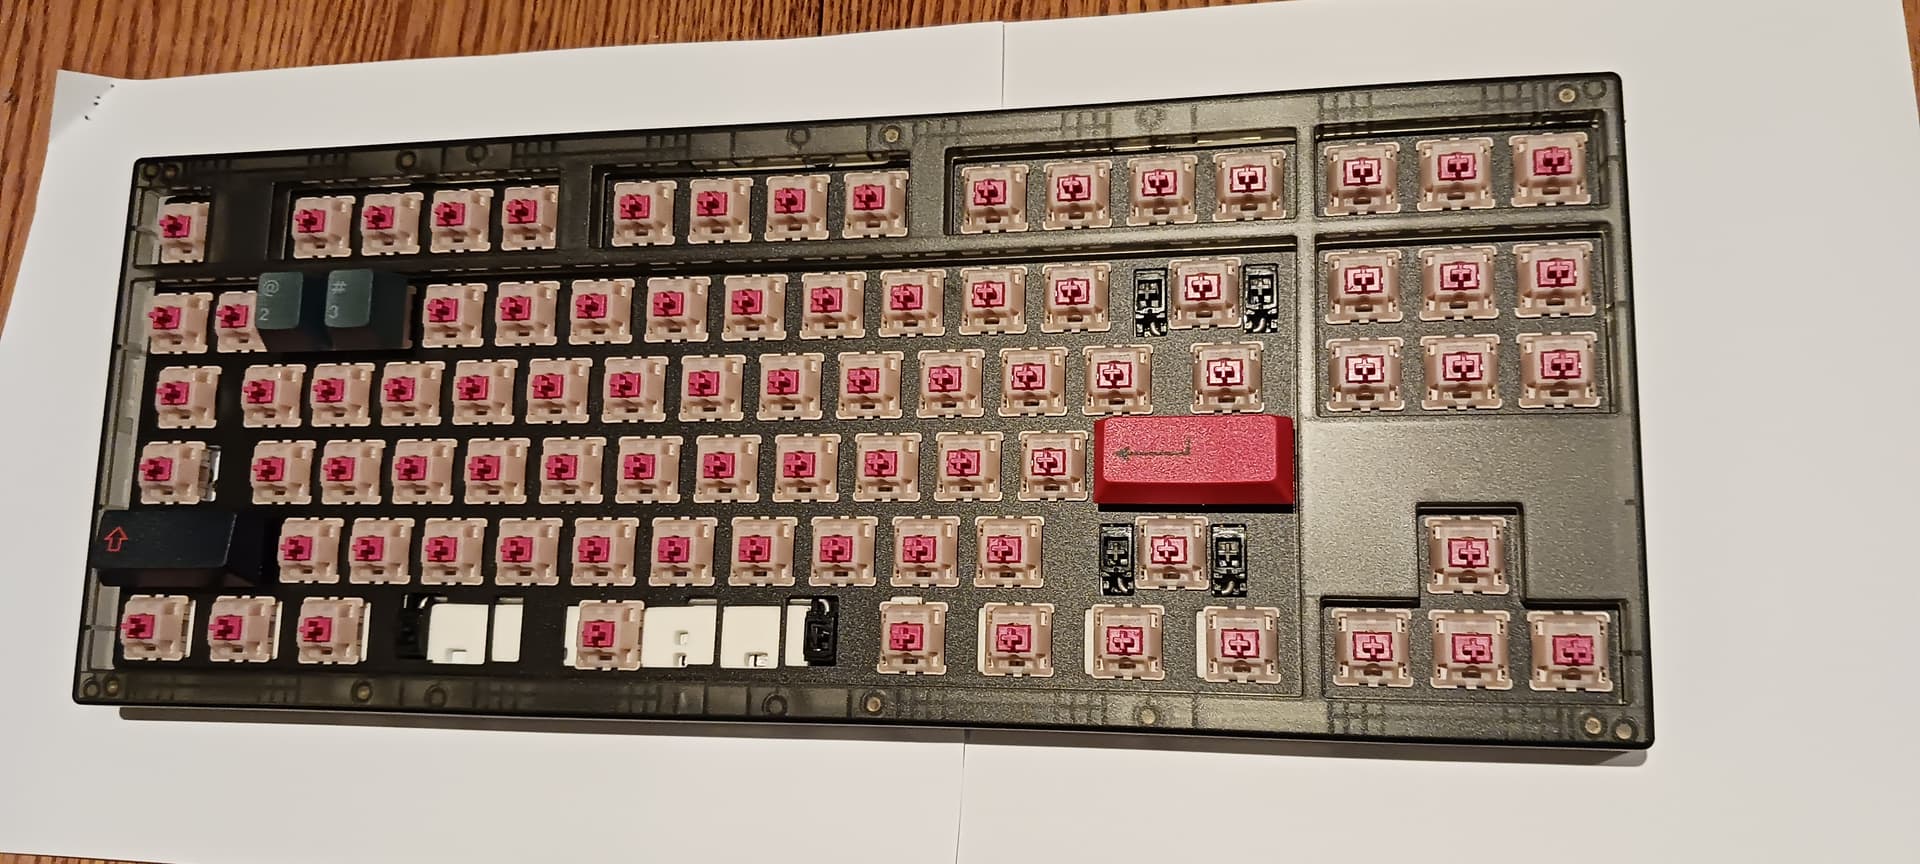
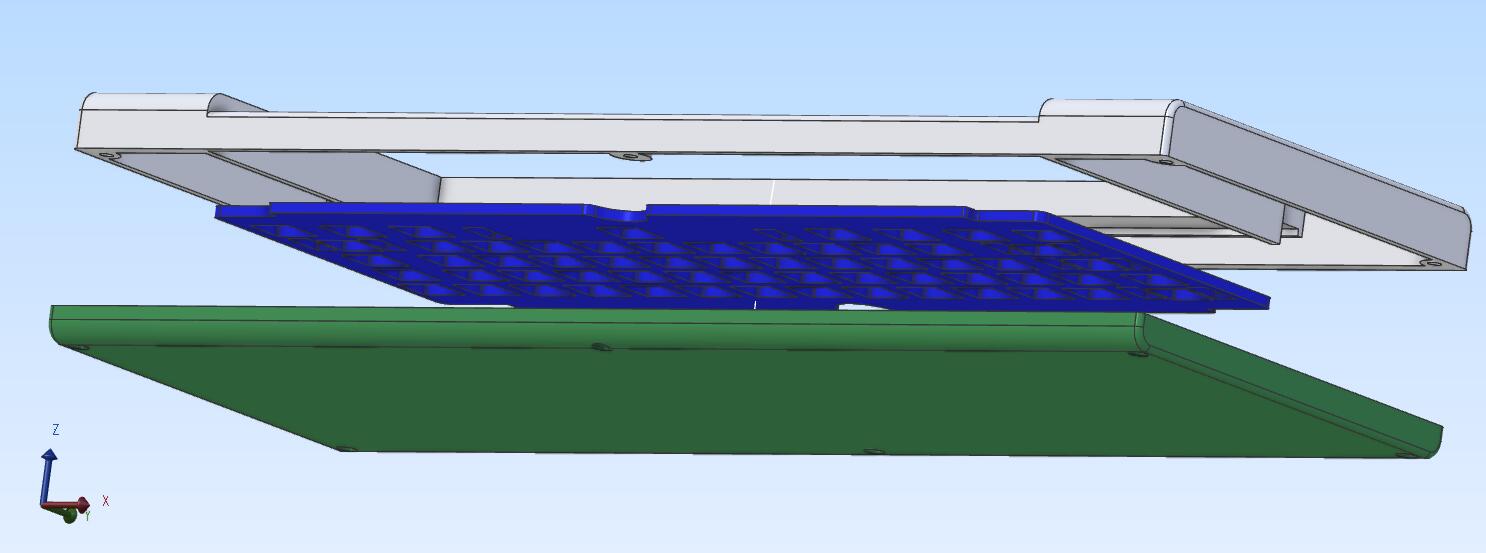
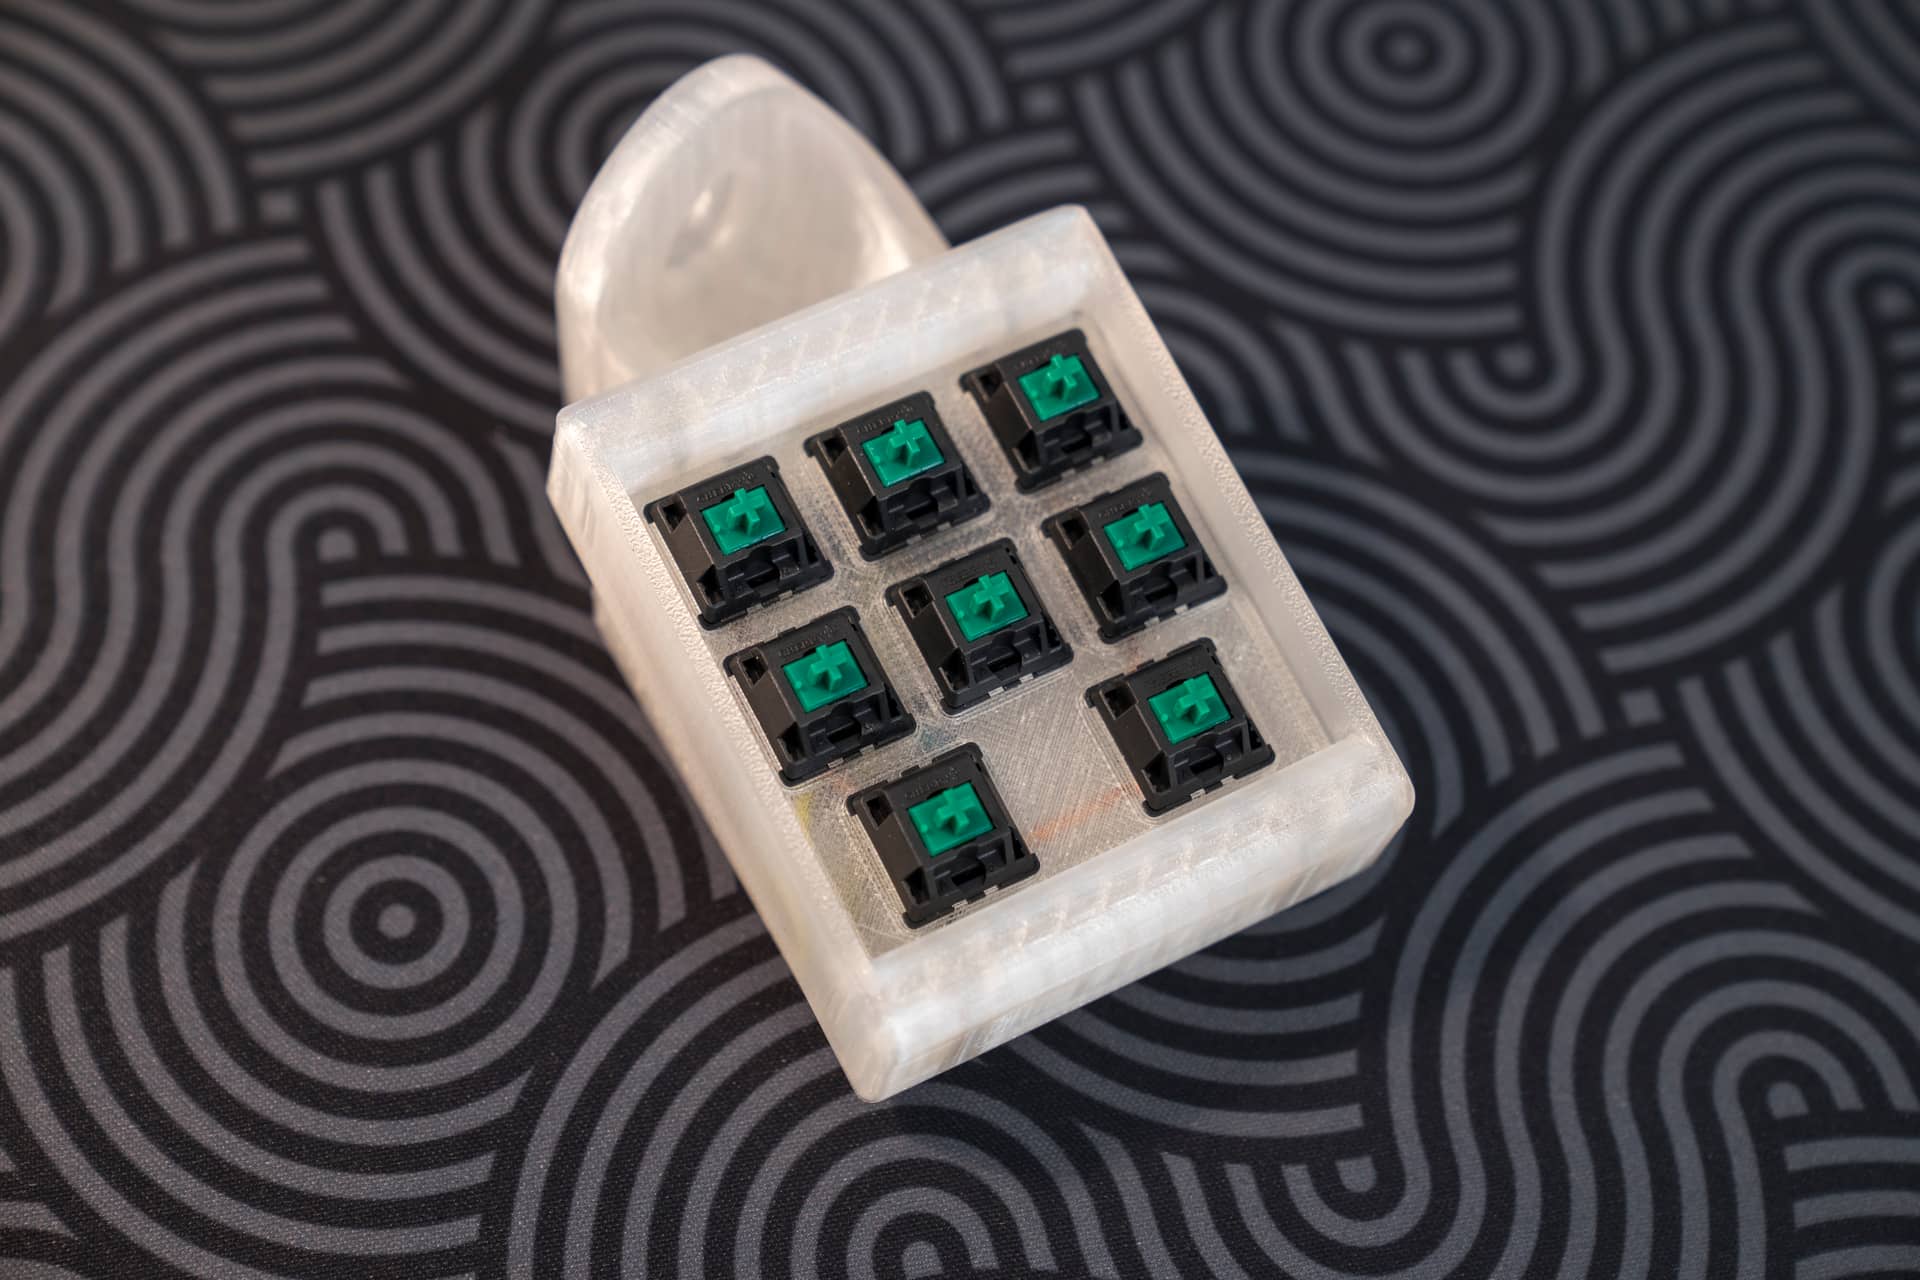
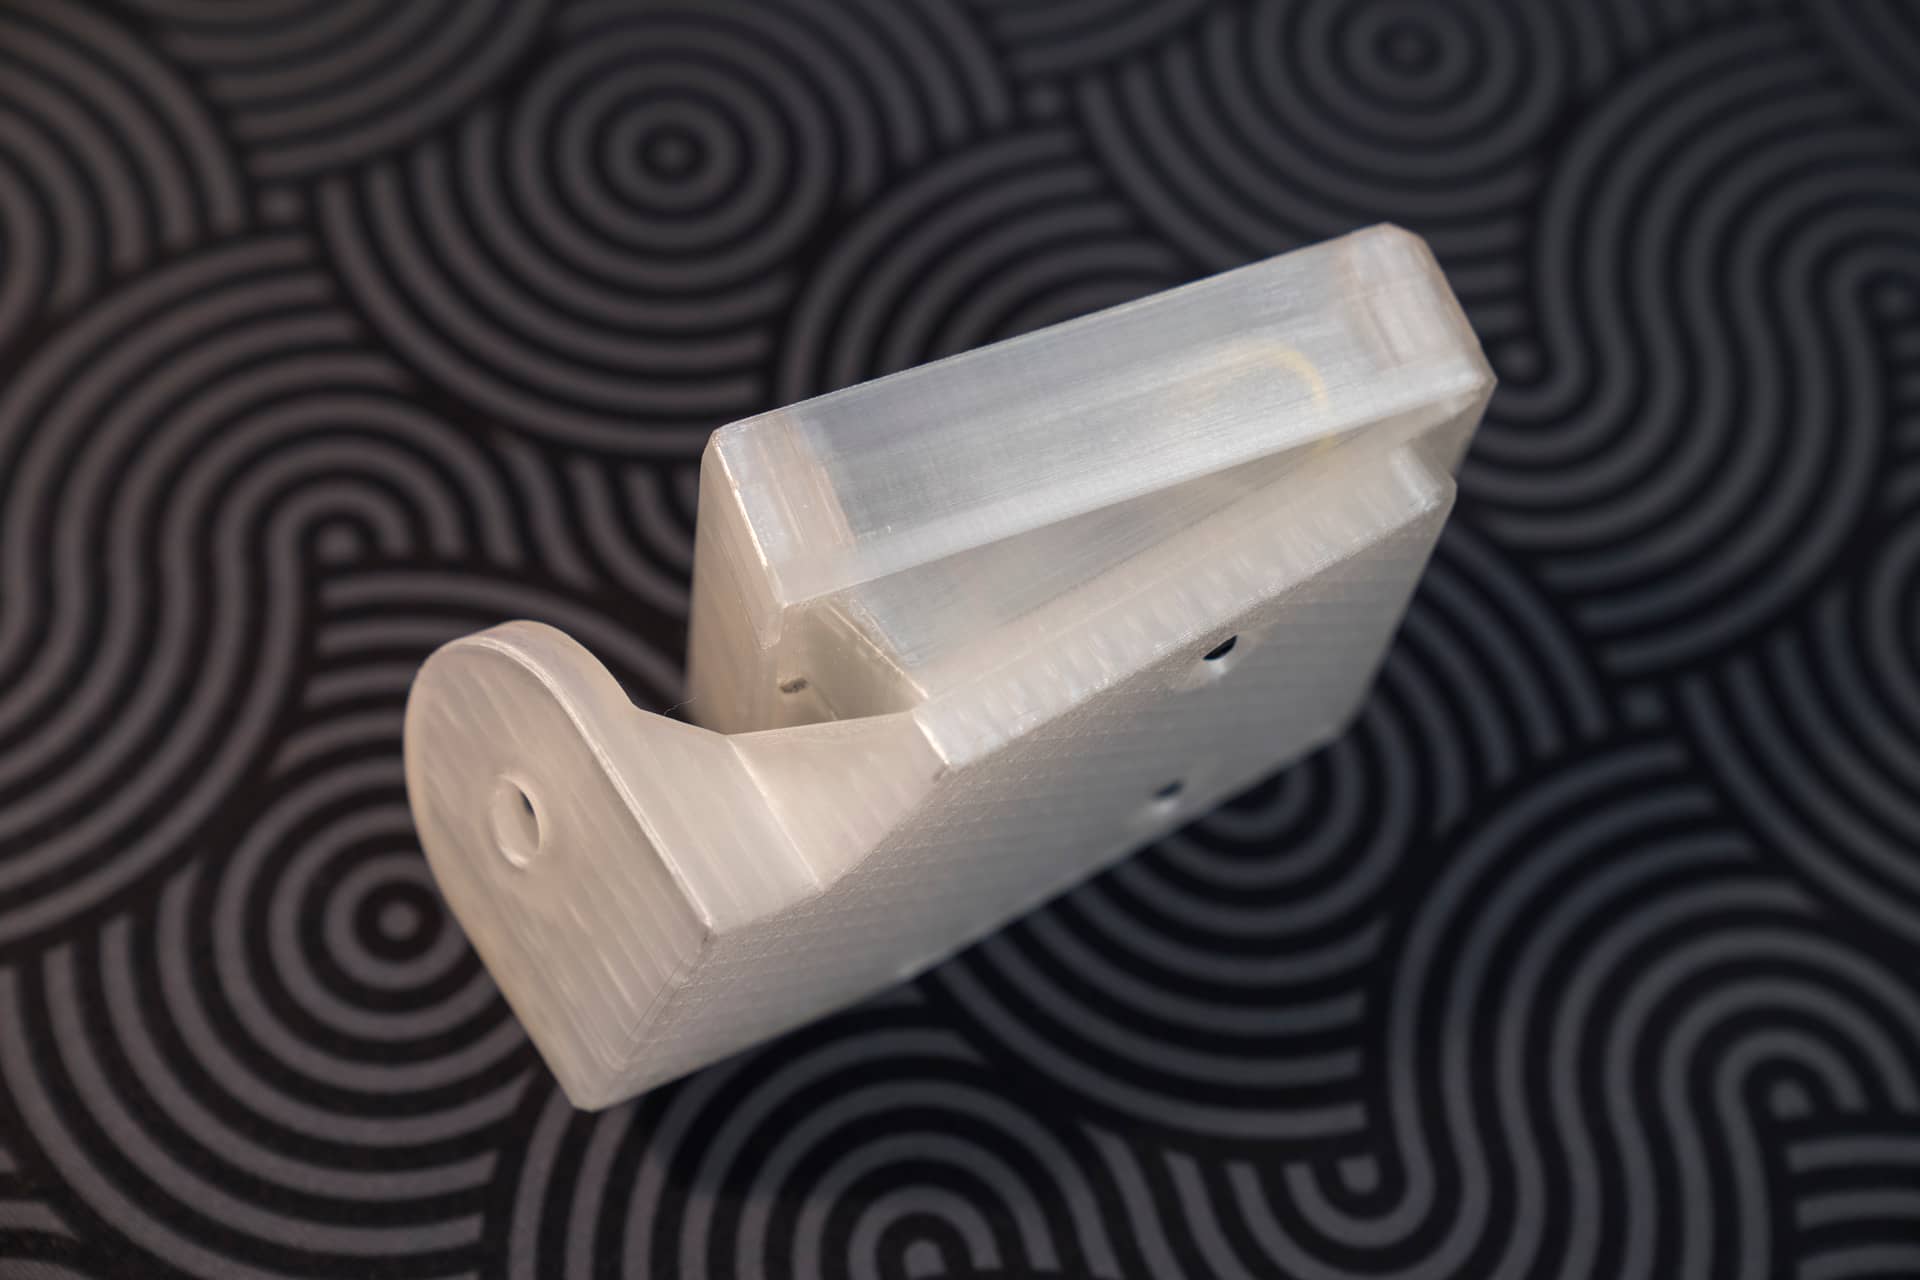
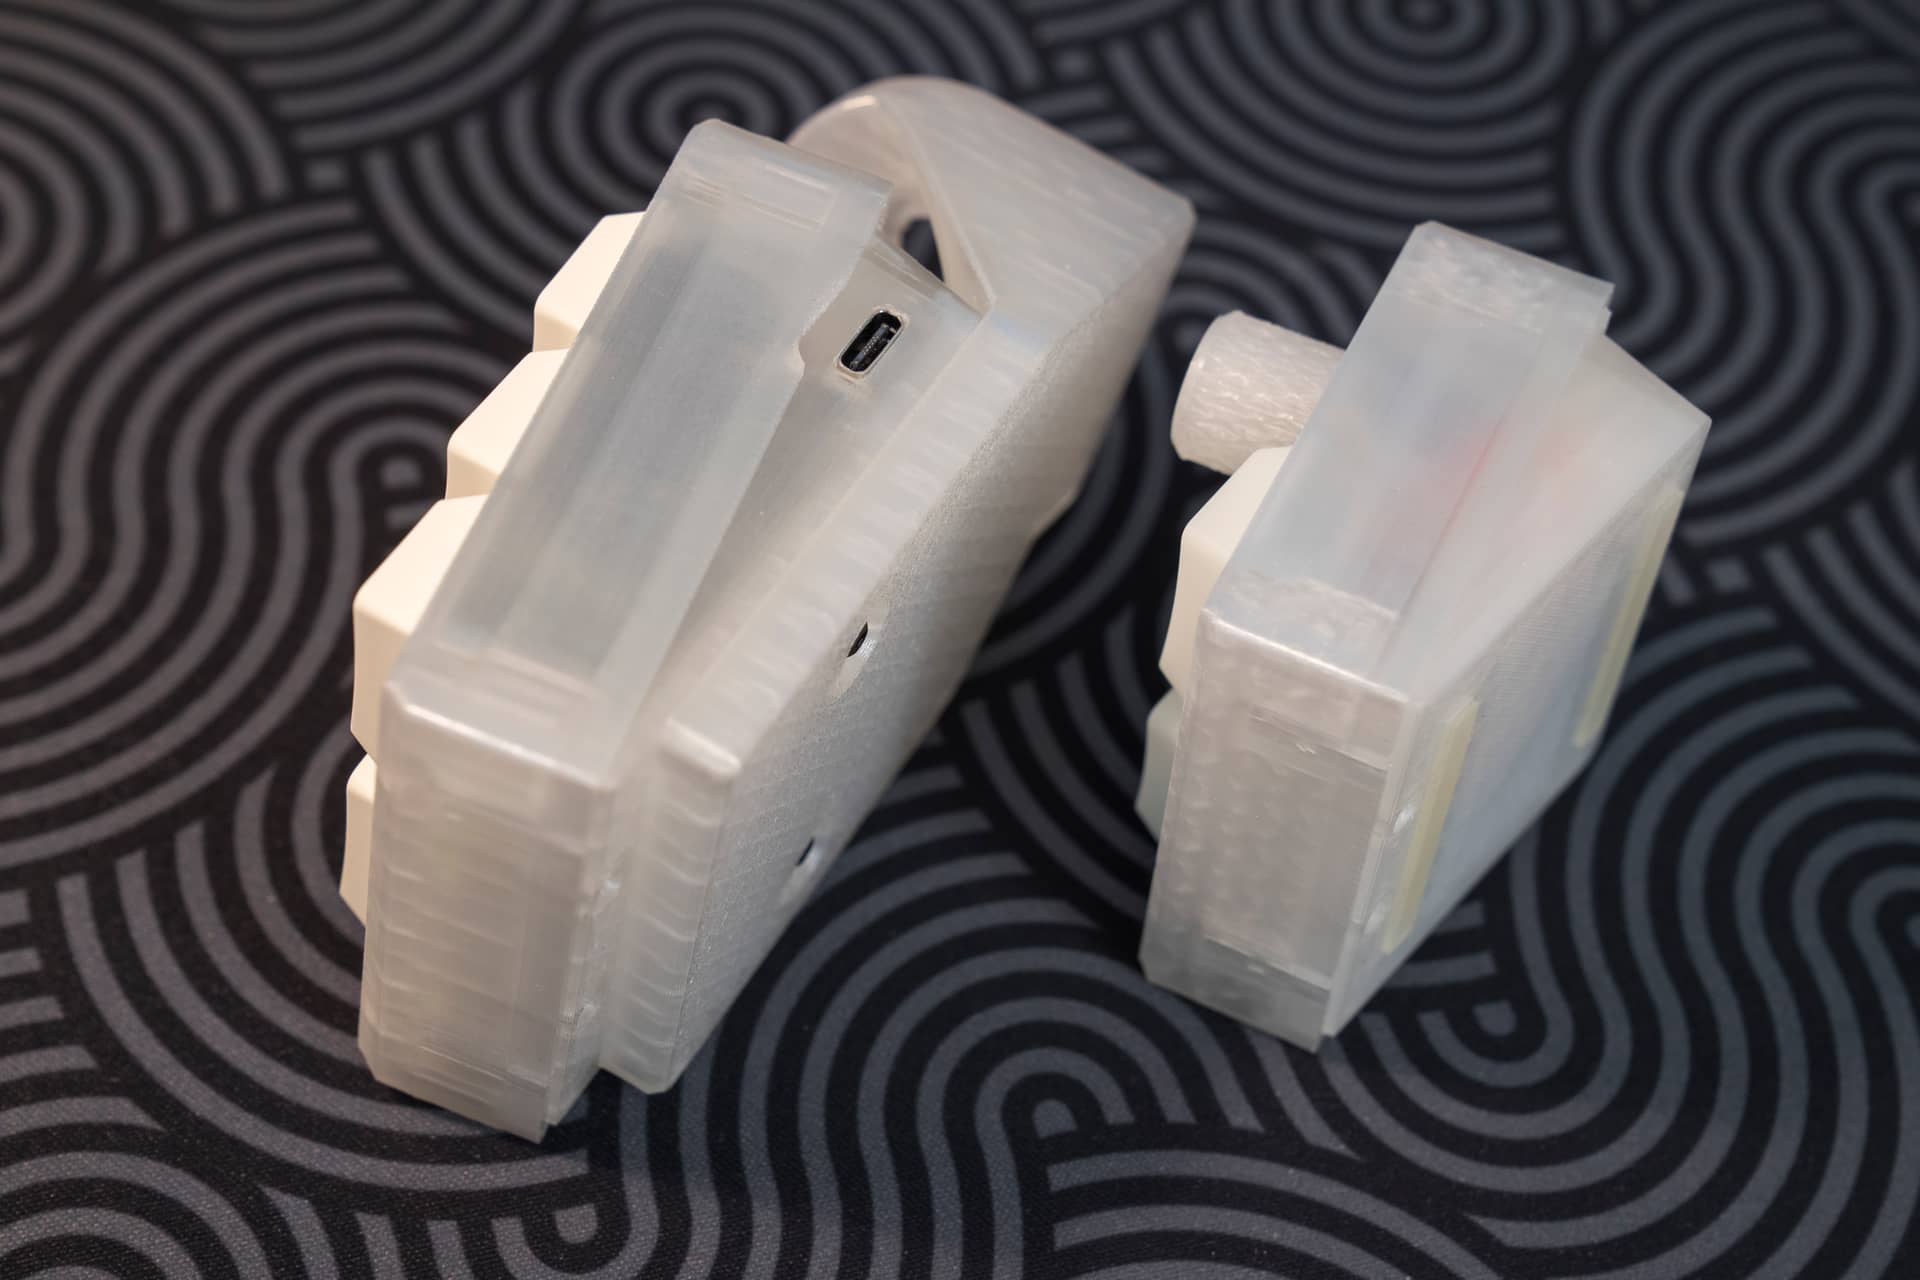
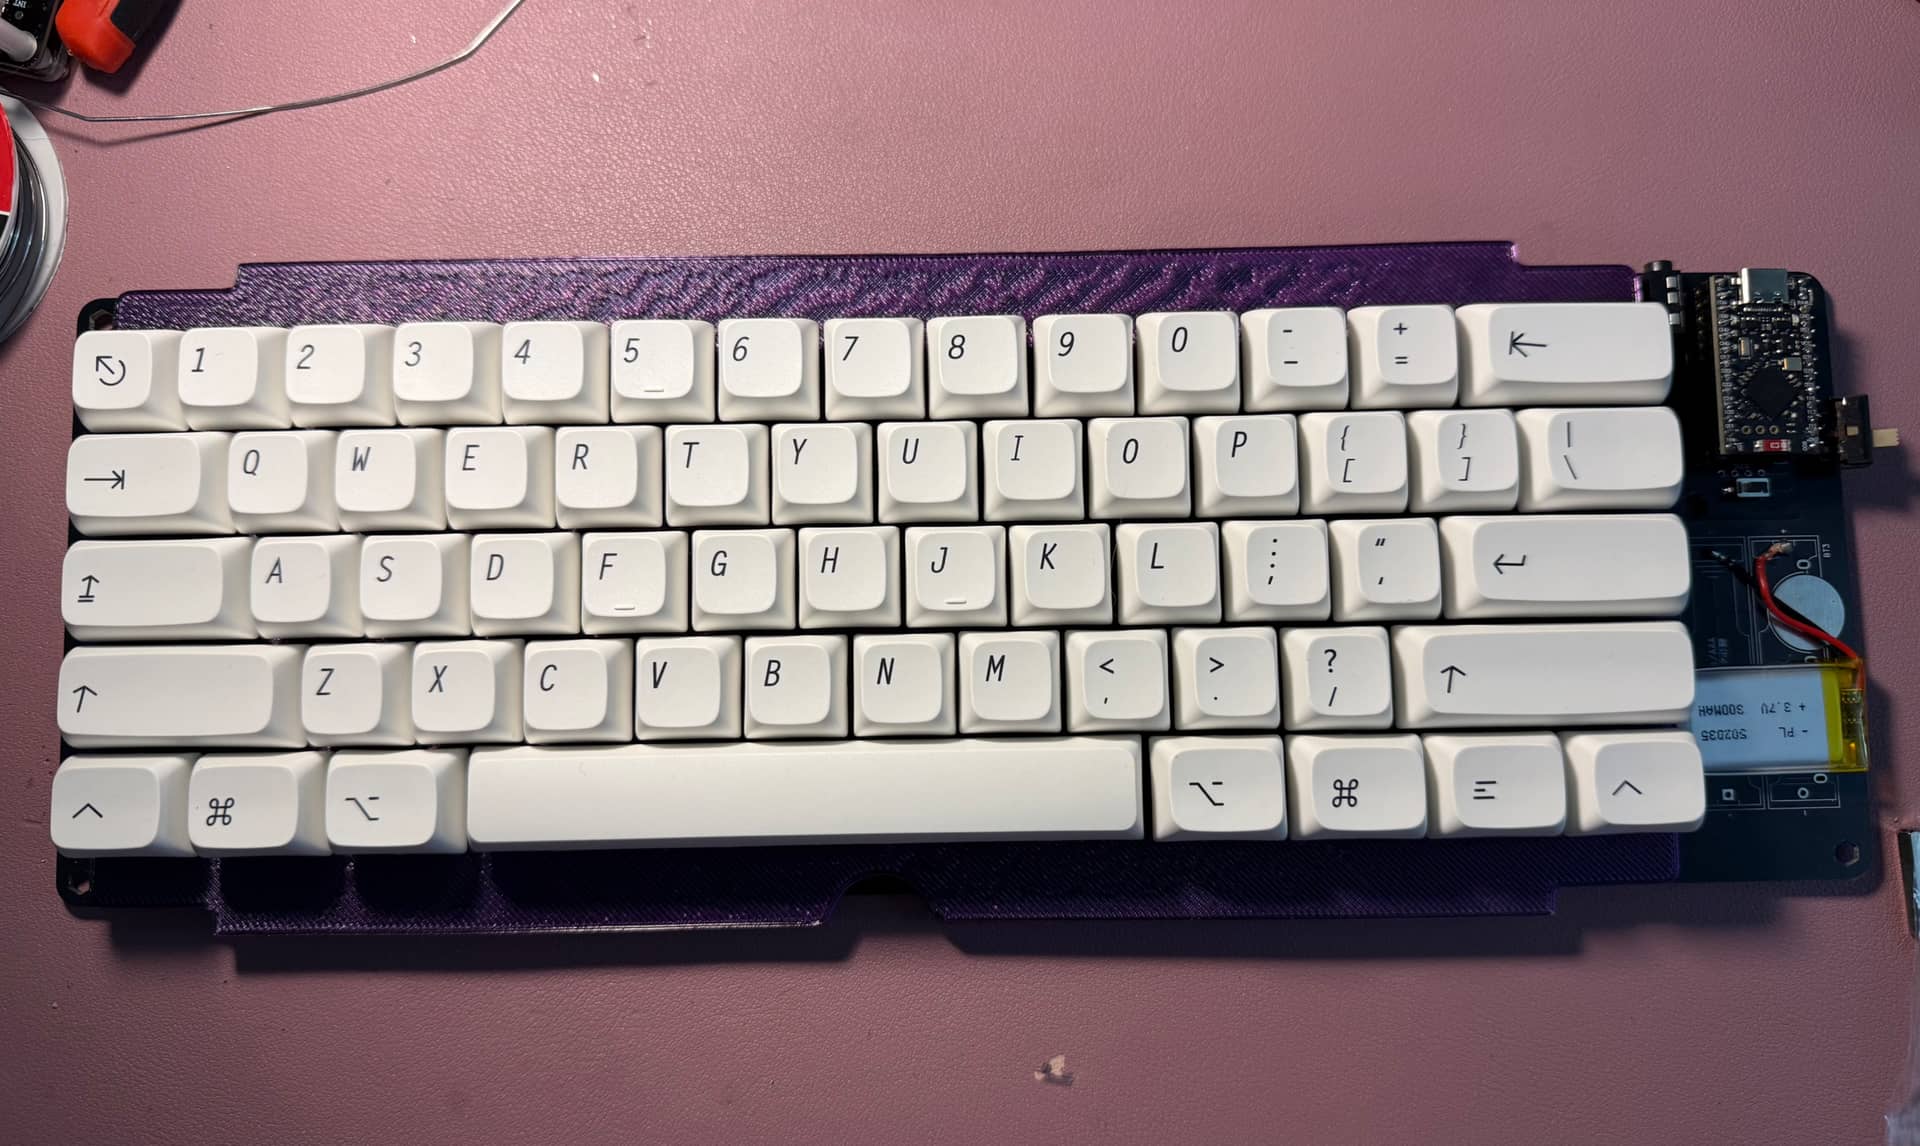
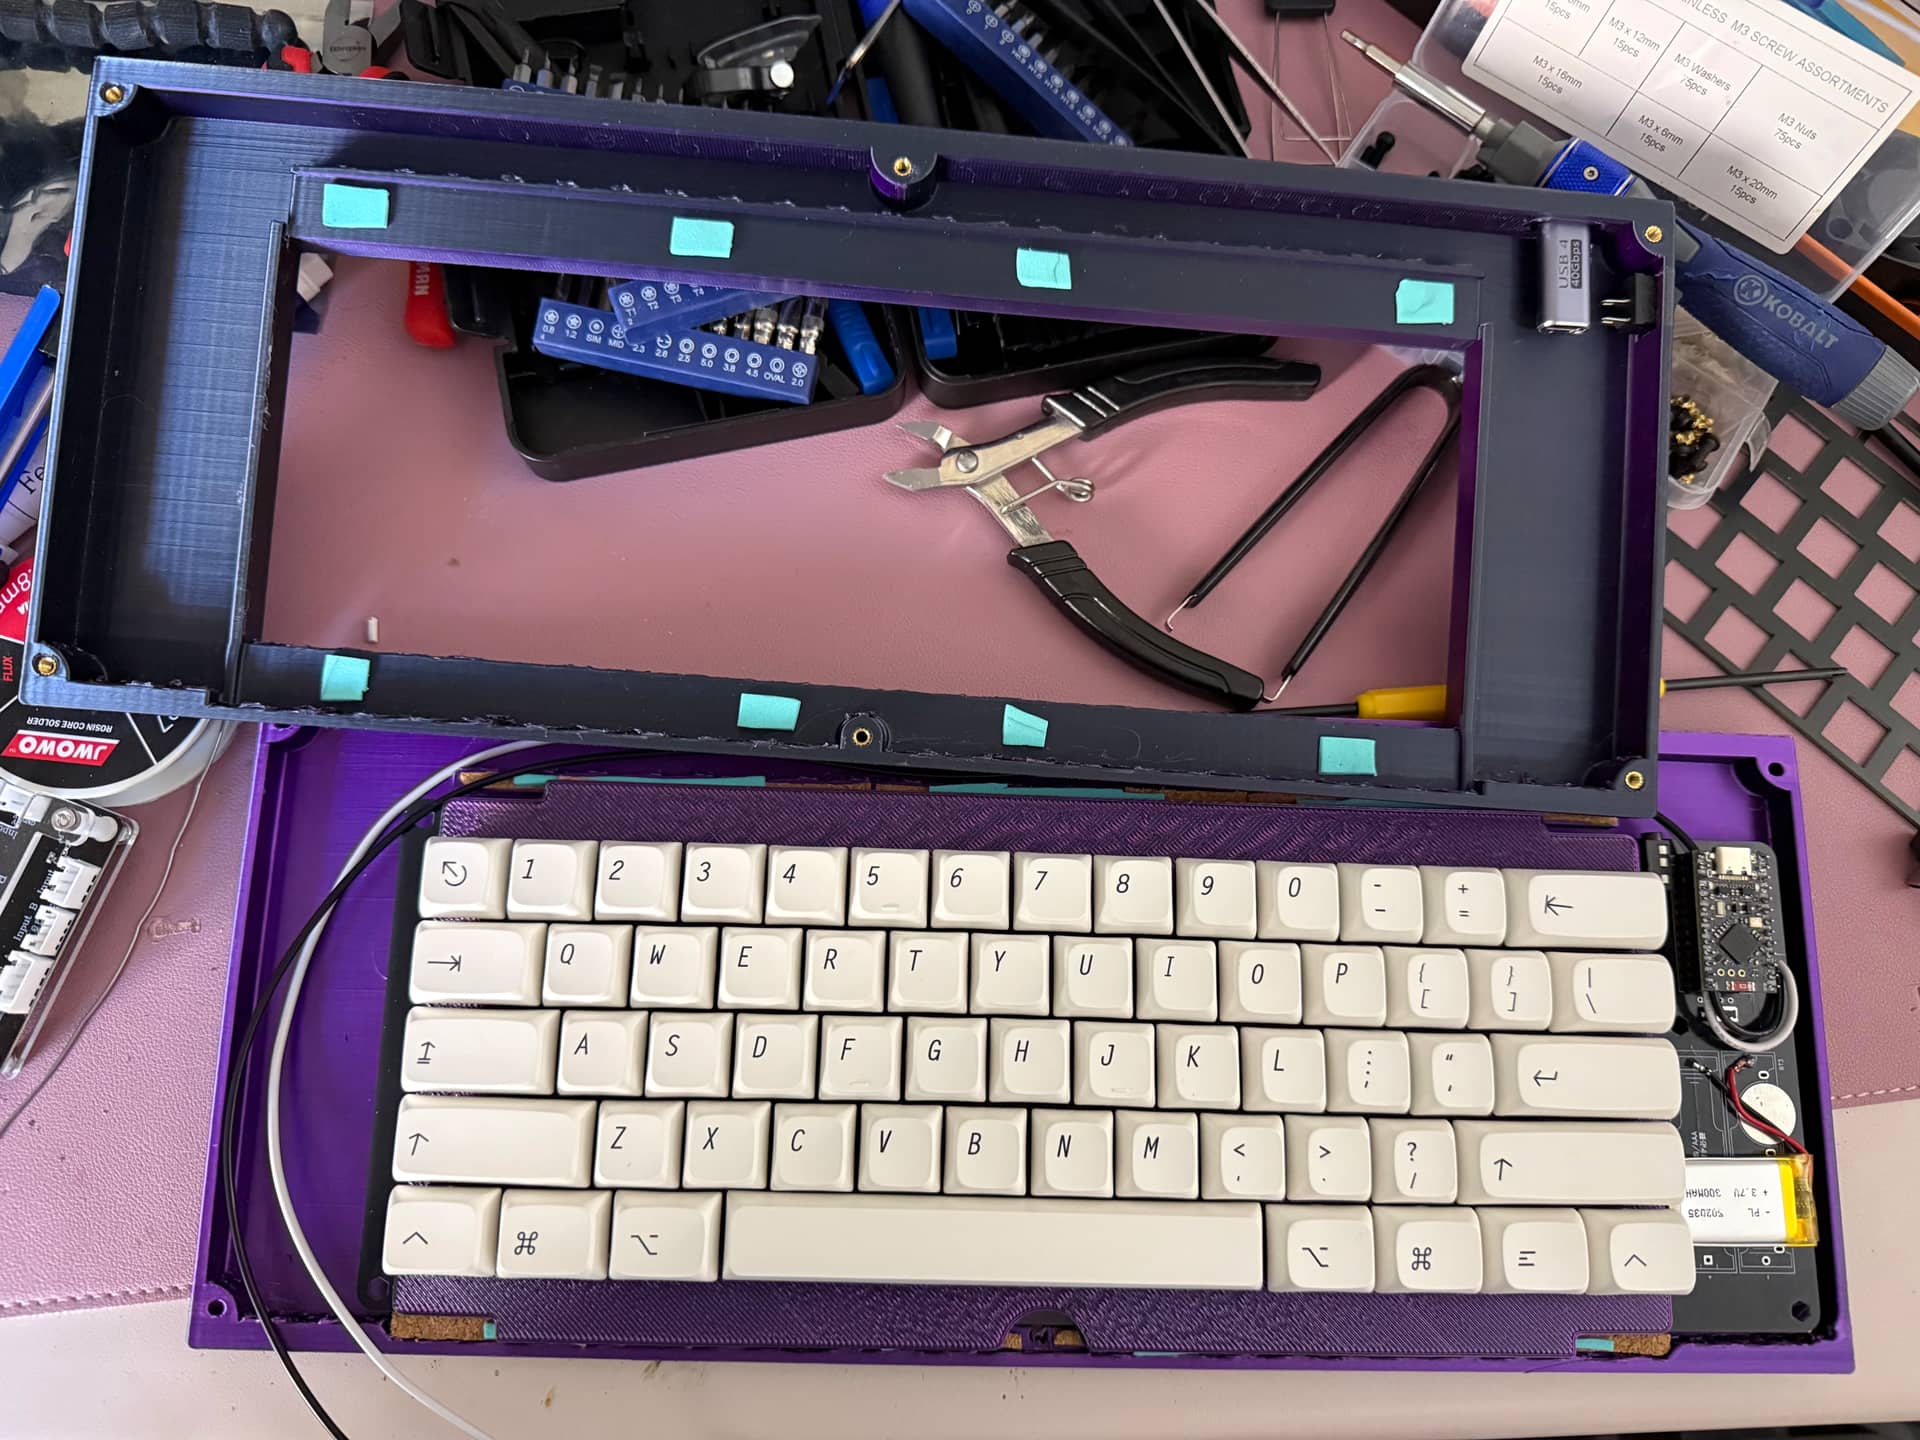
Digital workbench today. Yushakobo’s Primer61 is an odd little thing. It is meant to be an introductory project, like NK’s Skelett or CK’s Practice boards, but it also has an option for a wireless build with an alternate MCU. The MCU and battery live to the right of the main keycluster. I decided I wanted to design a case that would conceal it fully, and would also use stuff I had on-hand. I think I’m just about ready to move into fabrication of the prototypes, which usually just sort of seem to become the final iteration once they work at all.
Anyway, needing to cover up a pretty big volume of space to the right of the alphas, the obvious choice for inspiration was the Kishsaver Model F. I think I’ve got the proportions where they will look okay and fit around the electronics, including letting me route a pretty chunky cord and power switch over to the left-hand side. I’ve also elected to make a plate for this one, despite the PCB being meant to be built plateless, and I’ll fab it just like my Honeywell homage: thin plywood from the laser, laminated to an underplate for strength and then painted. I tried to build in enough room to do a sort of gasket mount, probably just with self-adhesive cork or EVA as the material, but I need to get the thing printed first to see if I overlooked something really dumb, which is always a non-zero likelihood, LOL. If it comes together, it will become my Mac keyboard, and I think I’ll slap on some XDA clones of Biip’s 2048 set; they’ve been lying around here for a good while now.
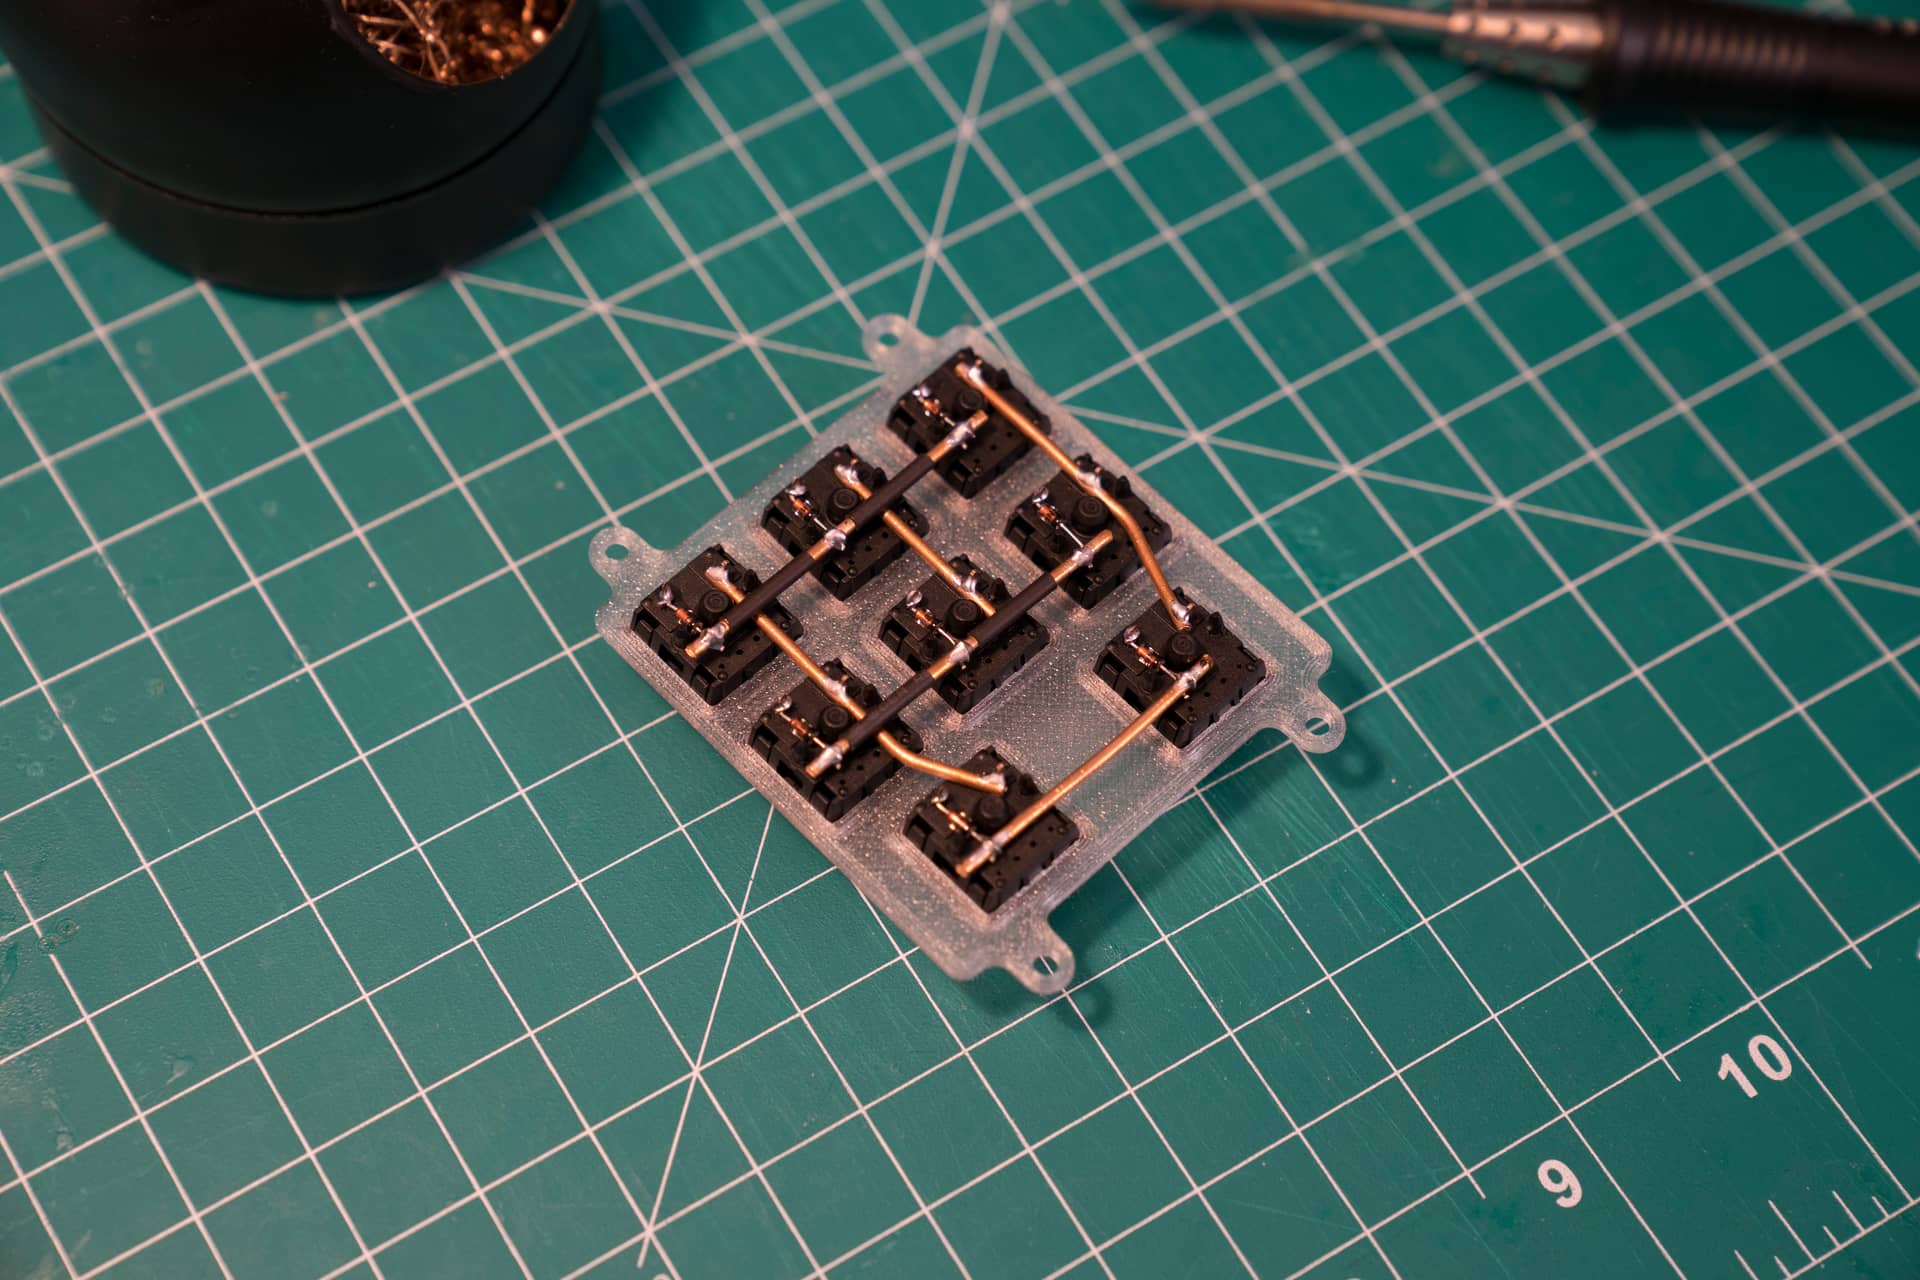
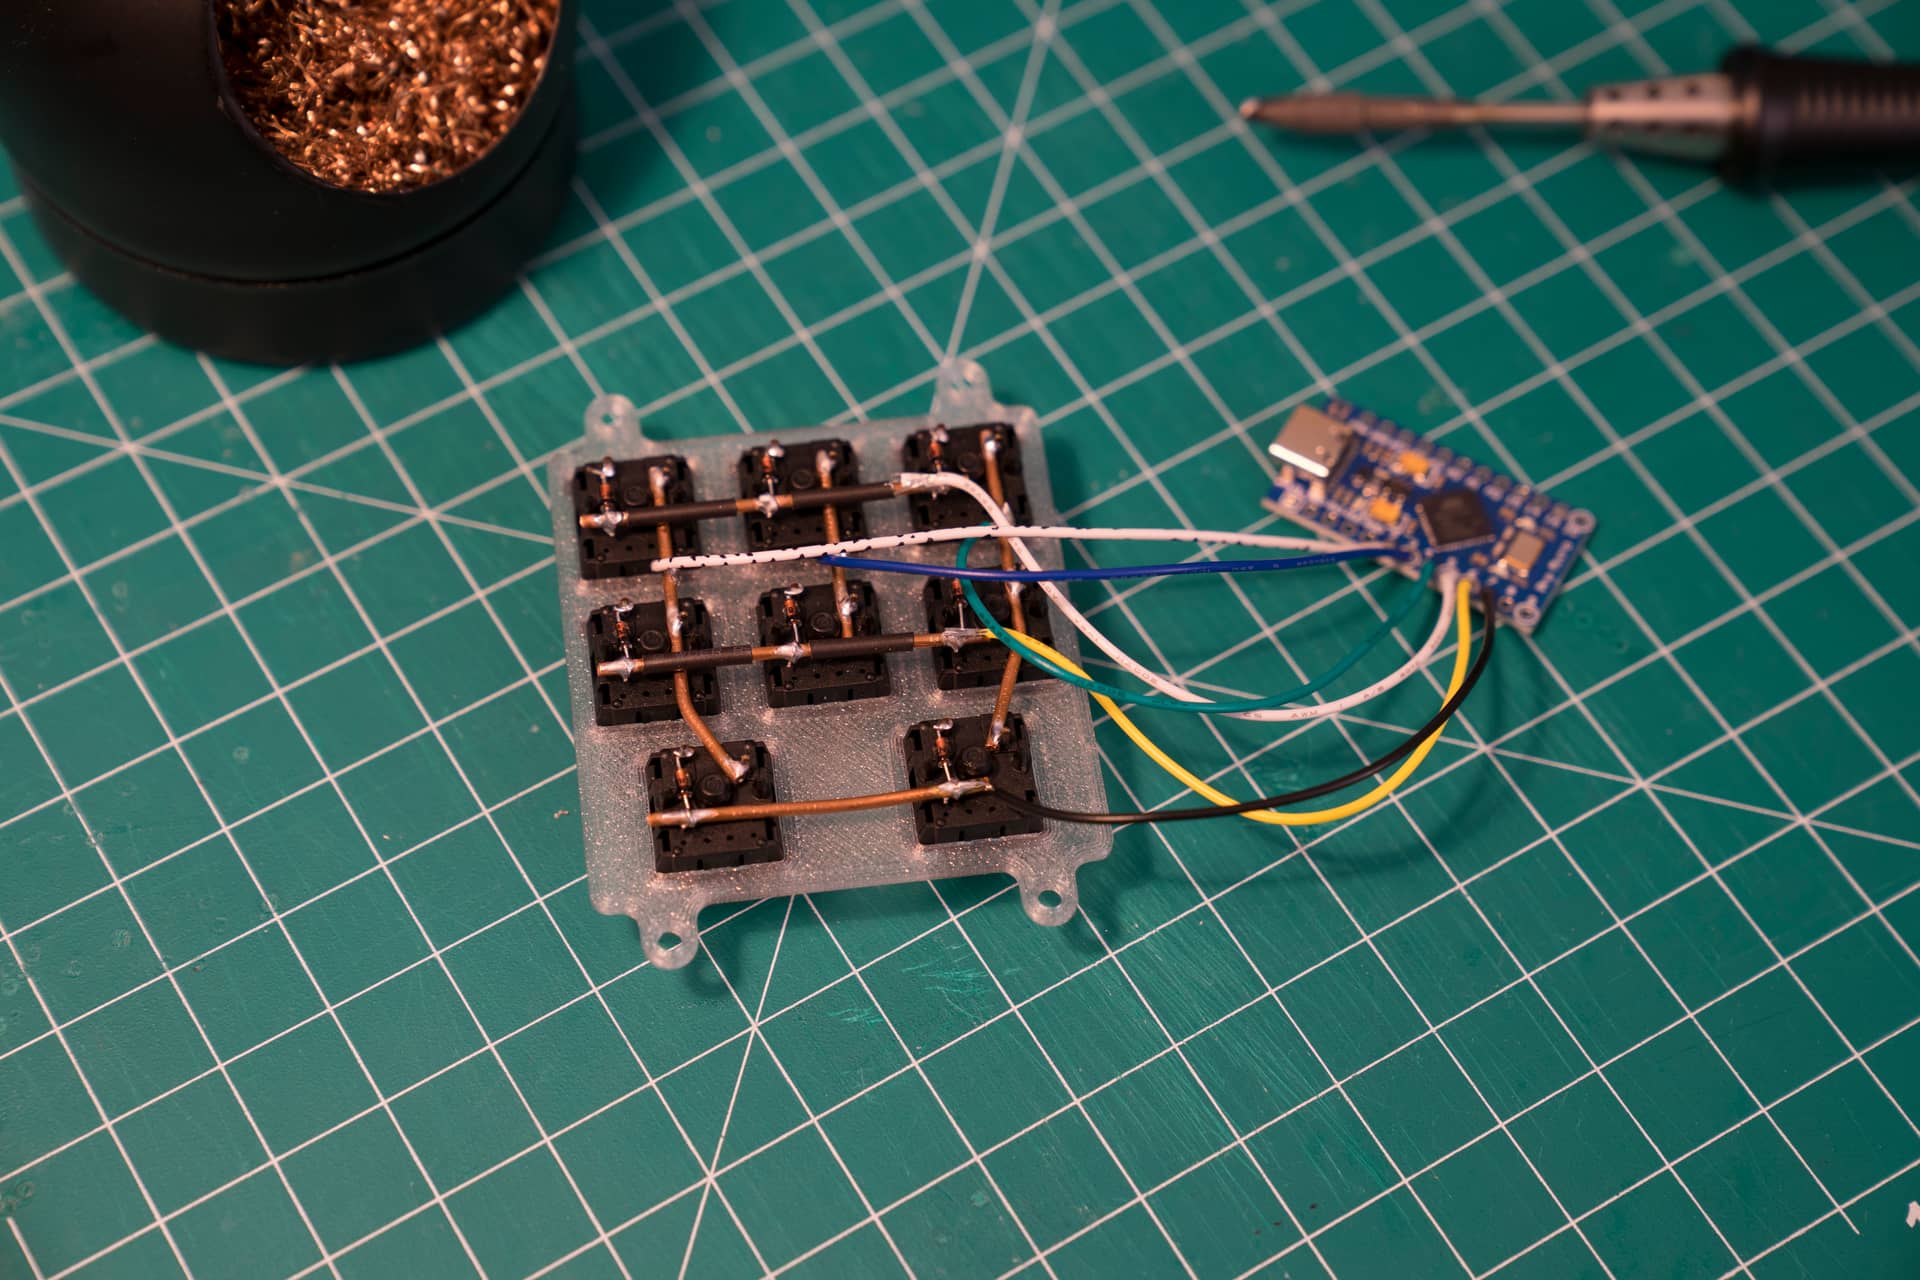
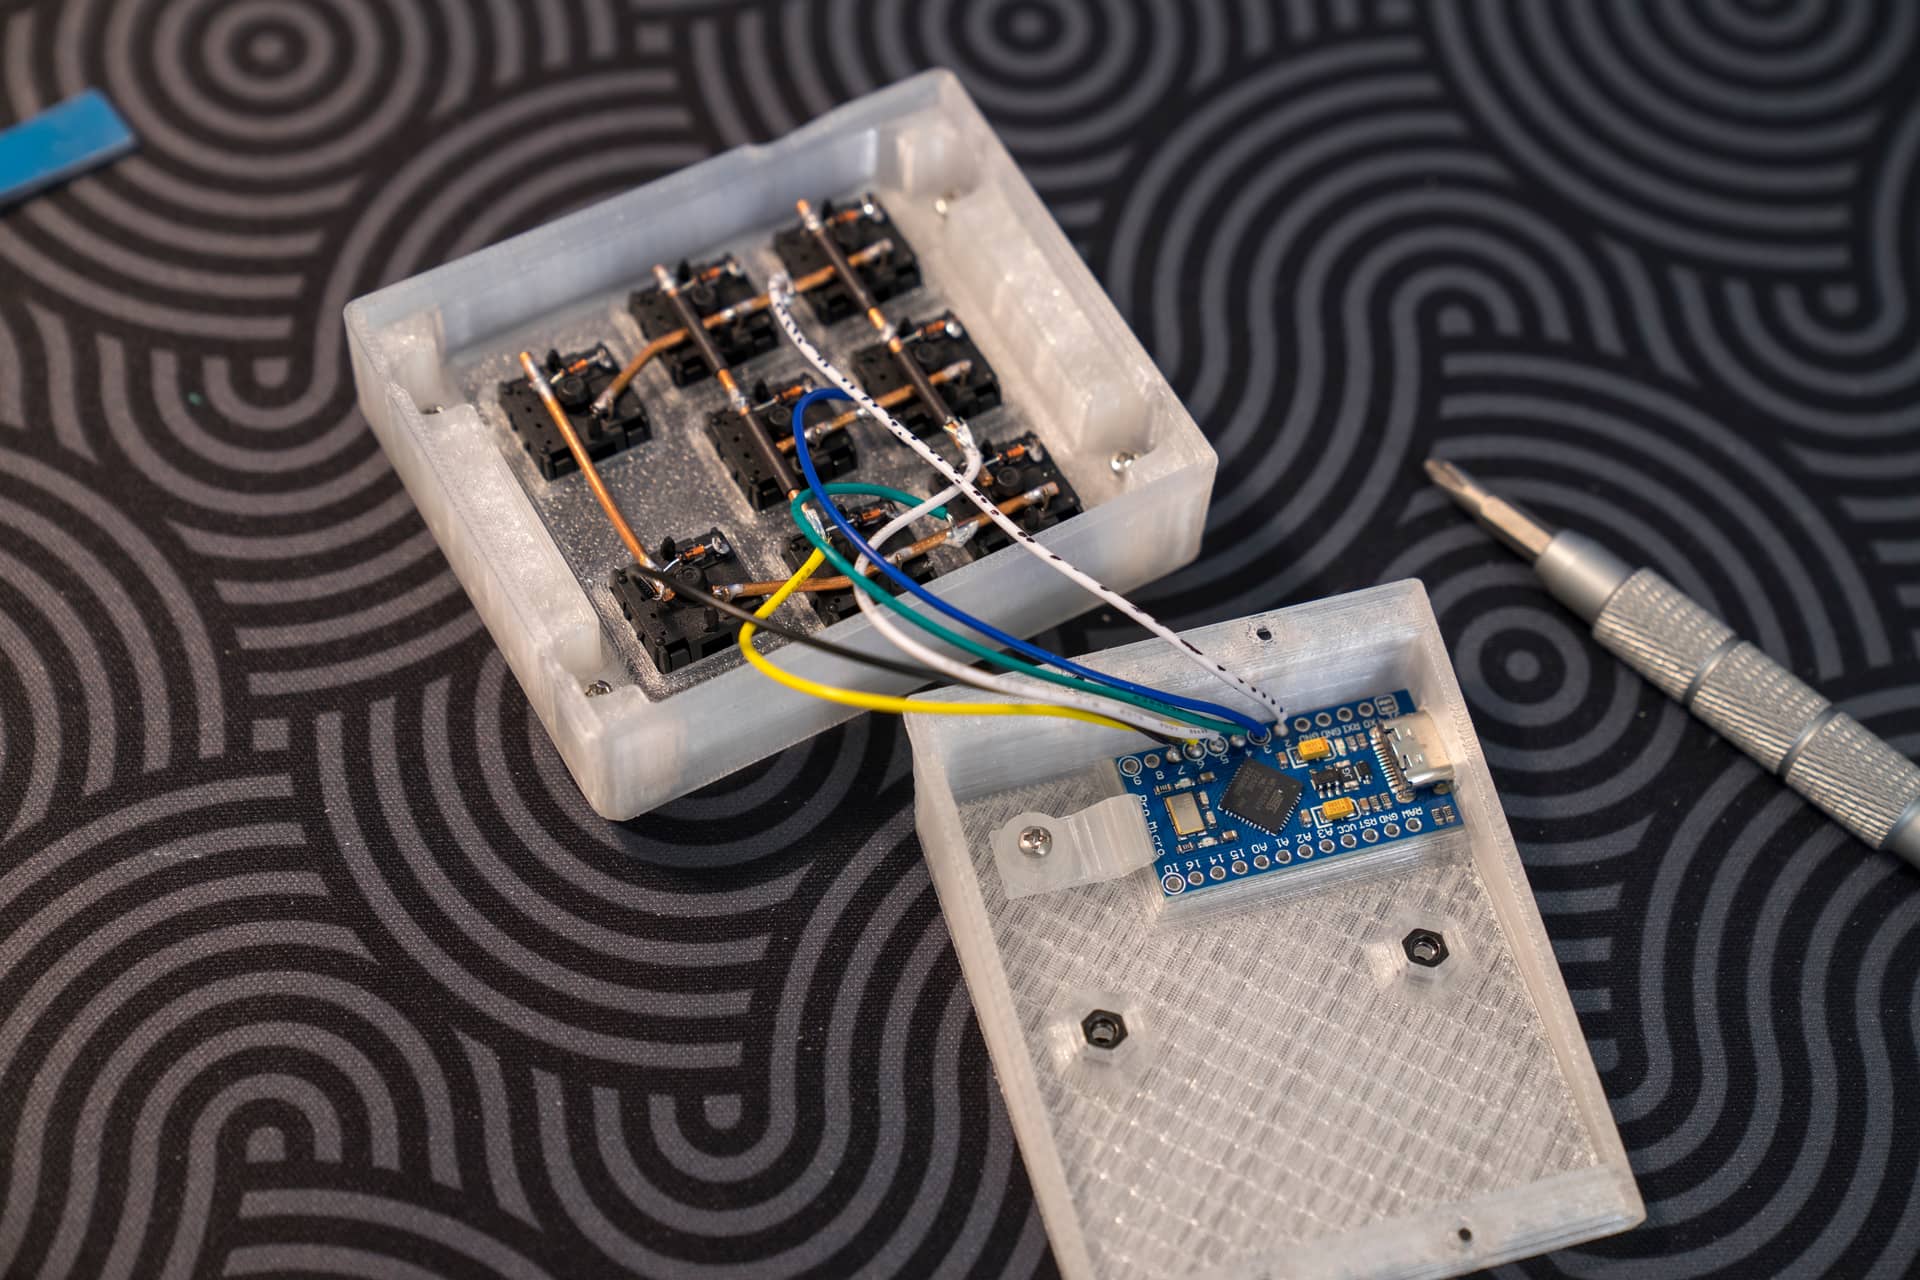
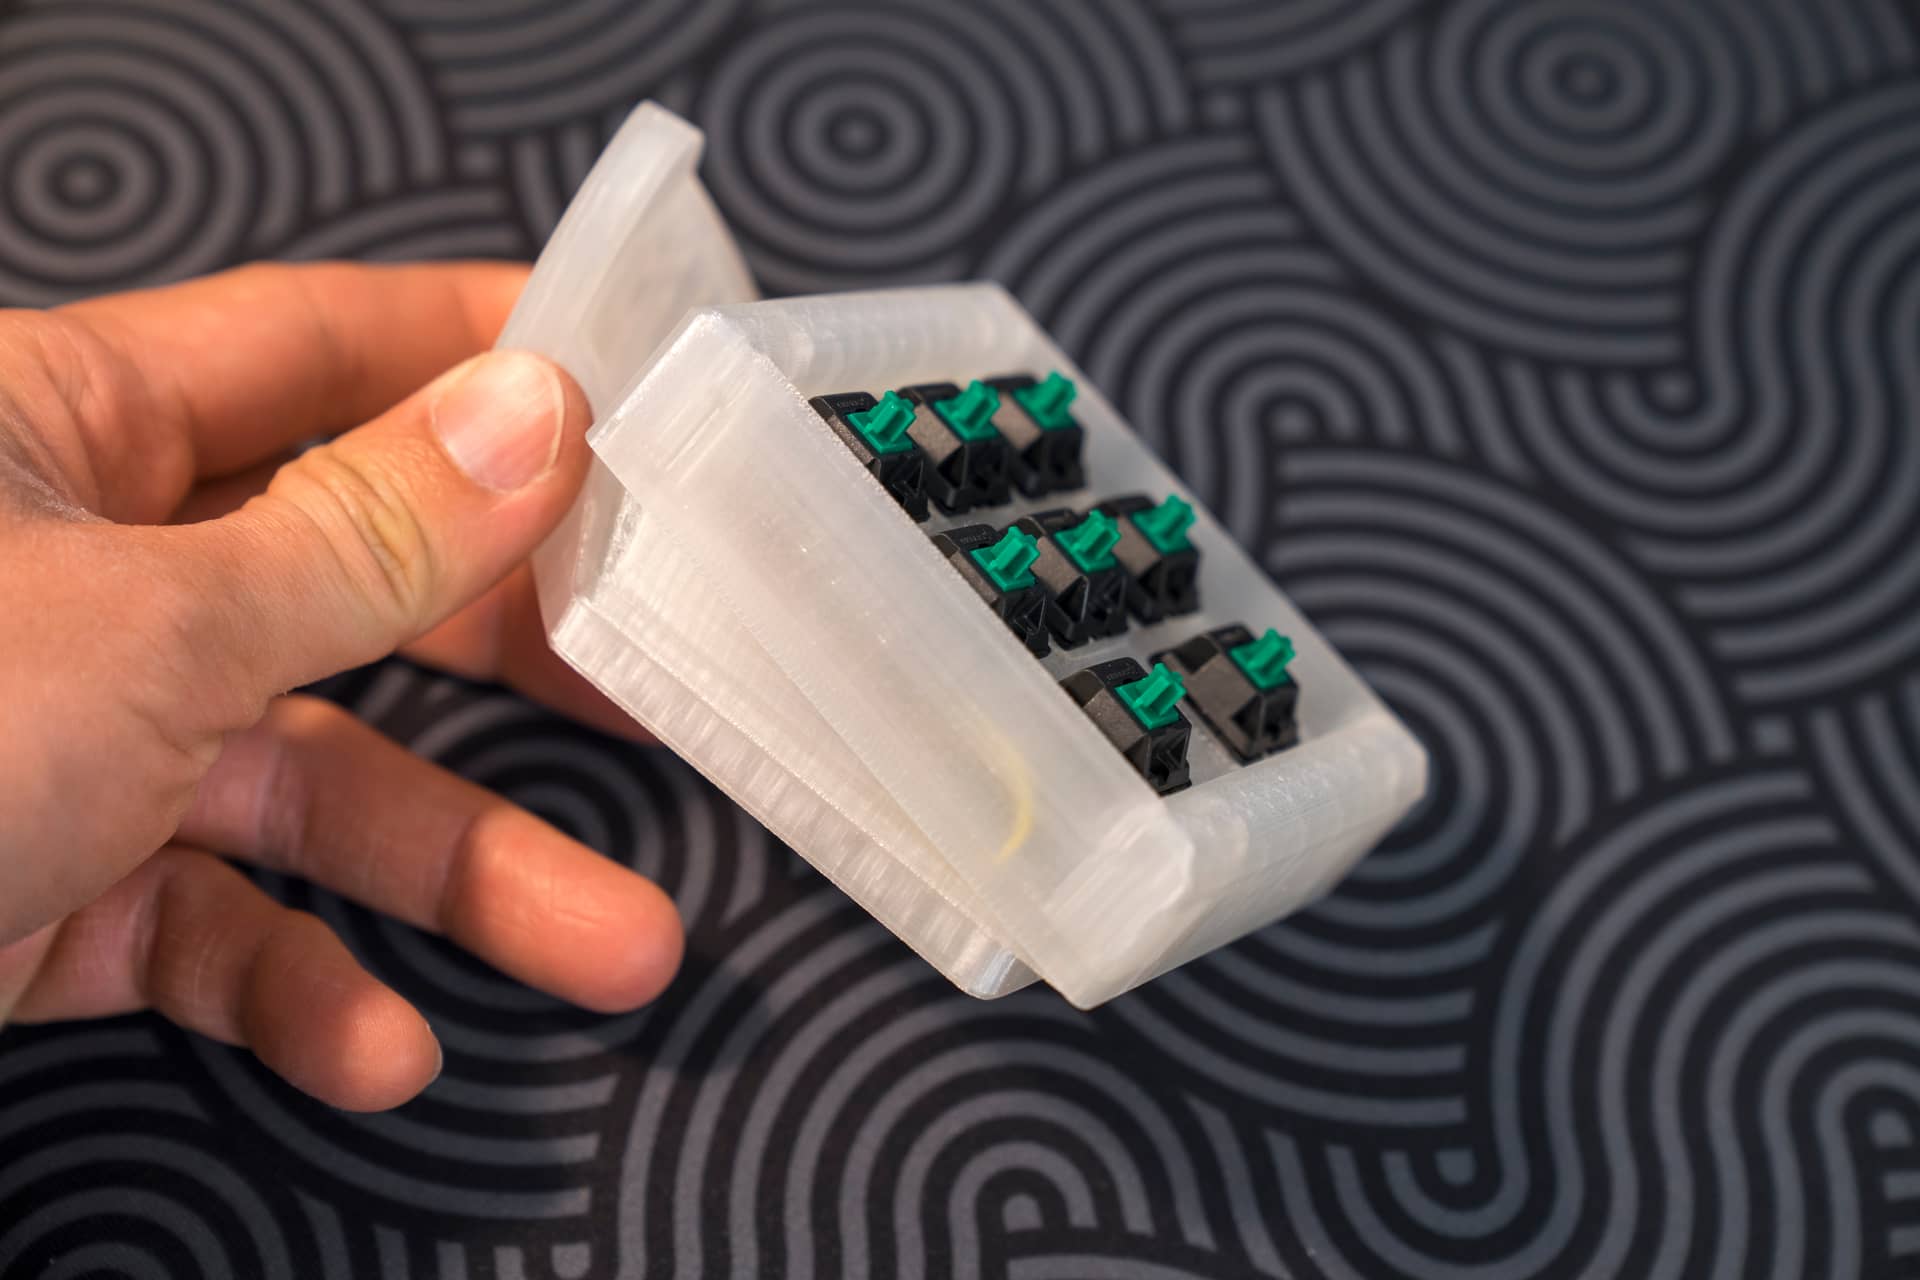
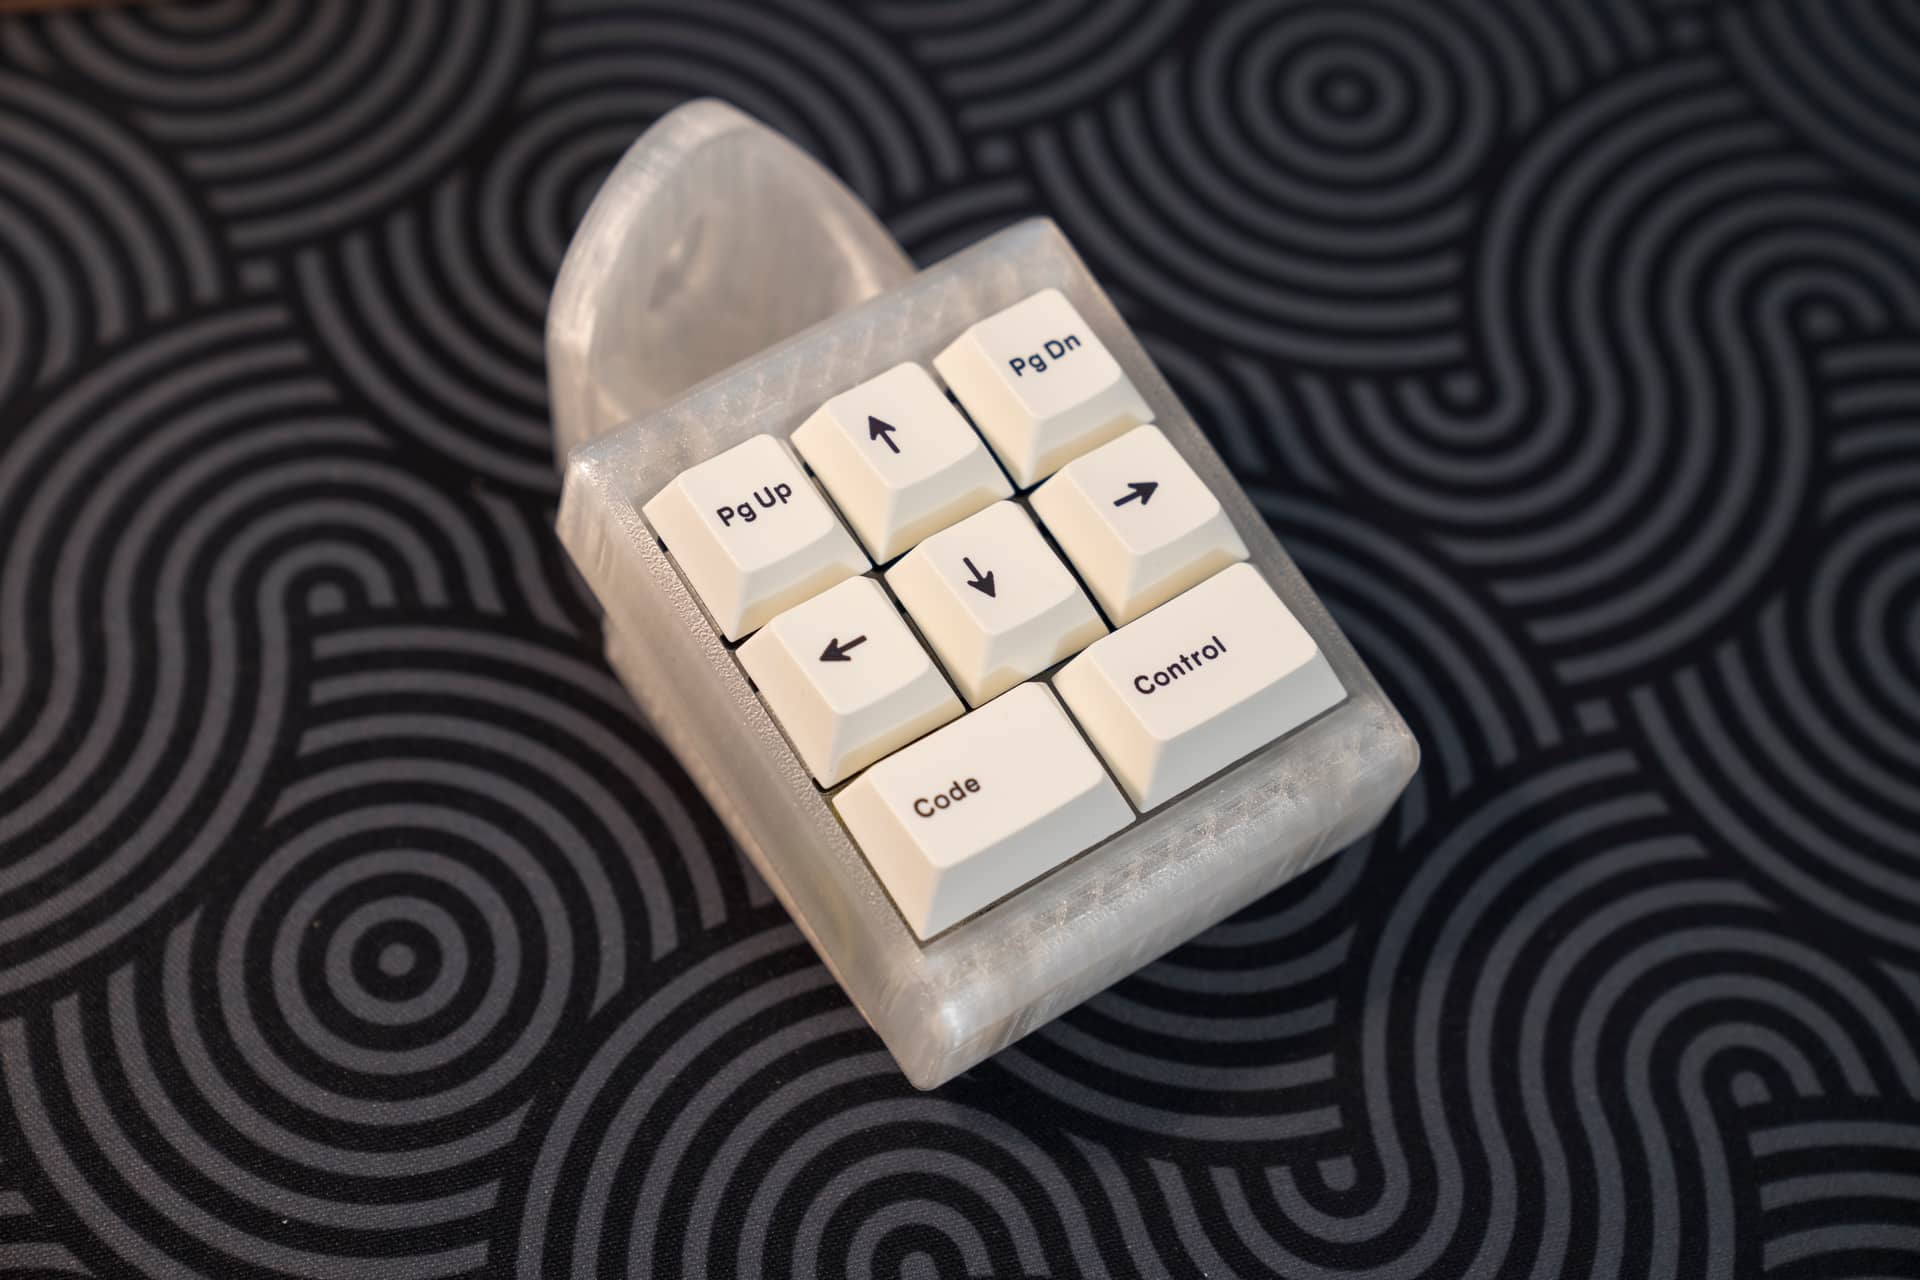
Made a macropad to mount on the side of my CNC to control movement so I don’t have to keep running back to my computer to jog the spindle around. First time using the copper wire like this–it’s actually so much neater than just wires.
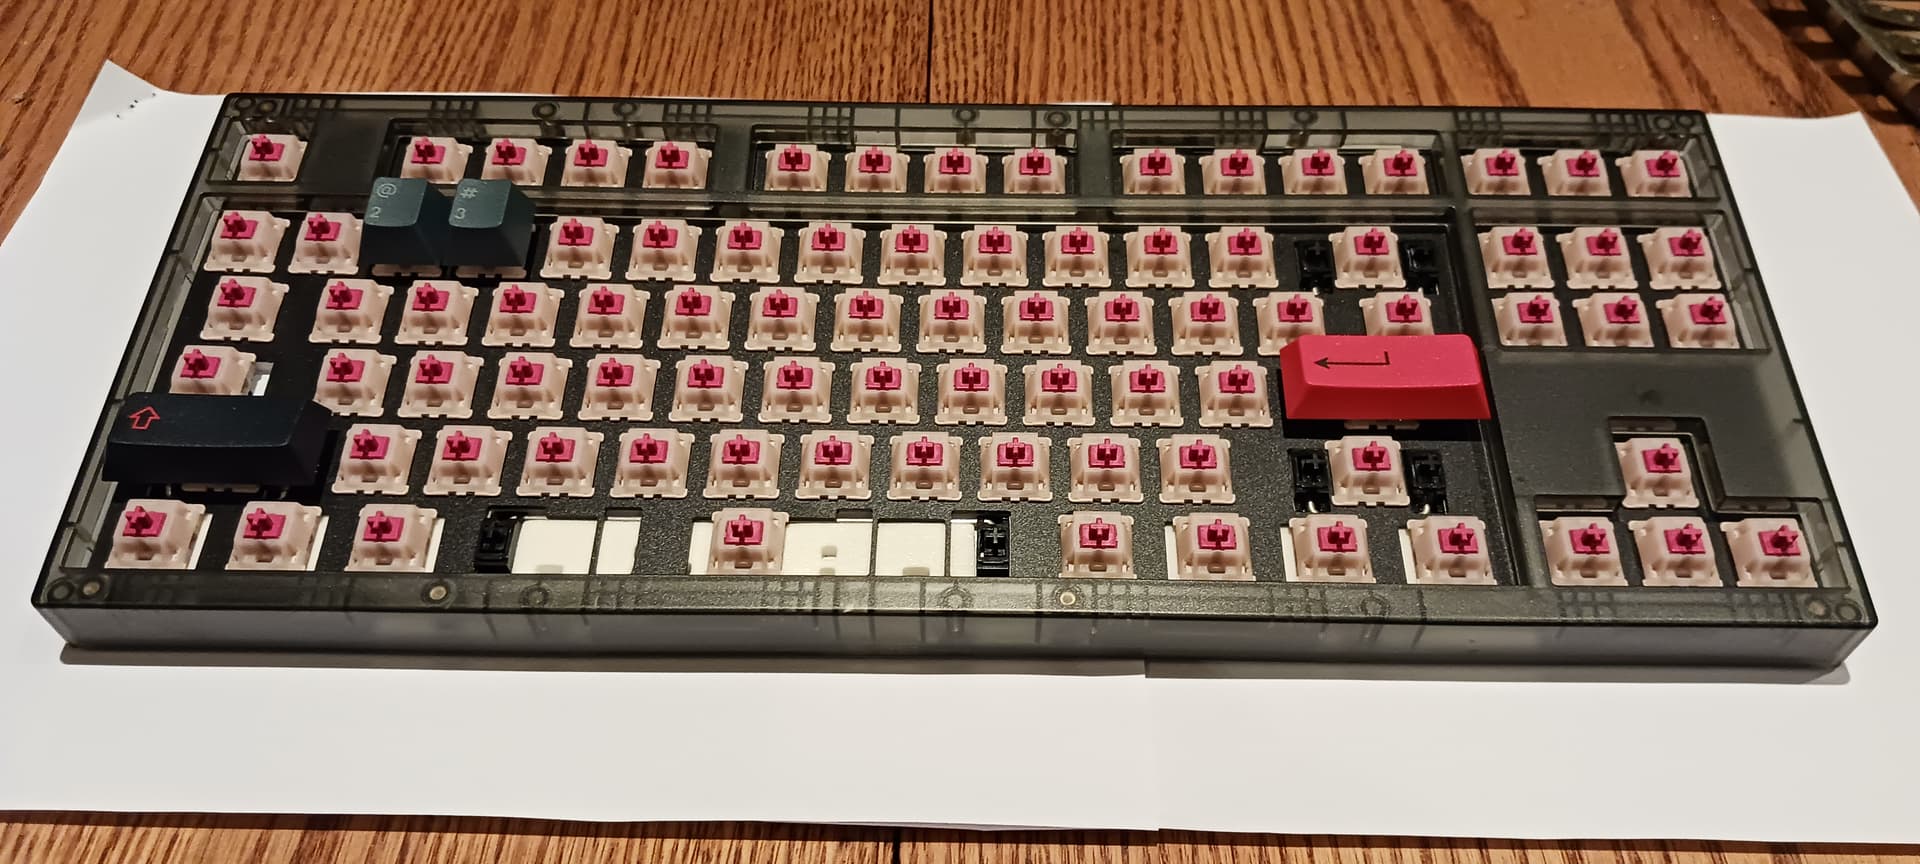
And the assembly works, ZMK wireless and everything! My laser is down for repairs (I hope) or maybe having its original 5W module put back on, so I did the plate in the same PLA that I’ll use for the case, which might actually need some screw placement tweaks now that I see the plate and PCB in proper relation to each other. Switches are Epomaker Budgerigar and the caps are XDA clones of Extended 2048. The plate doesn’t have the greatest surface texture… I think I need either a new build plate or at least to shift from glue-stick to hair spray, but structurally it was just about perfect.
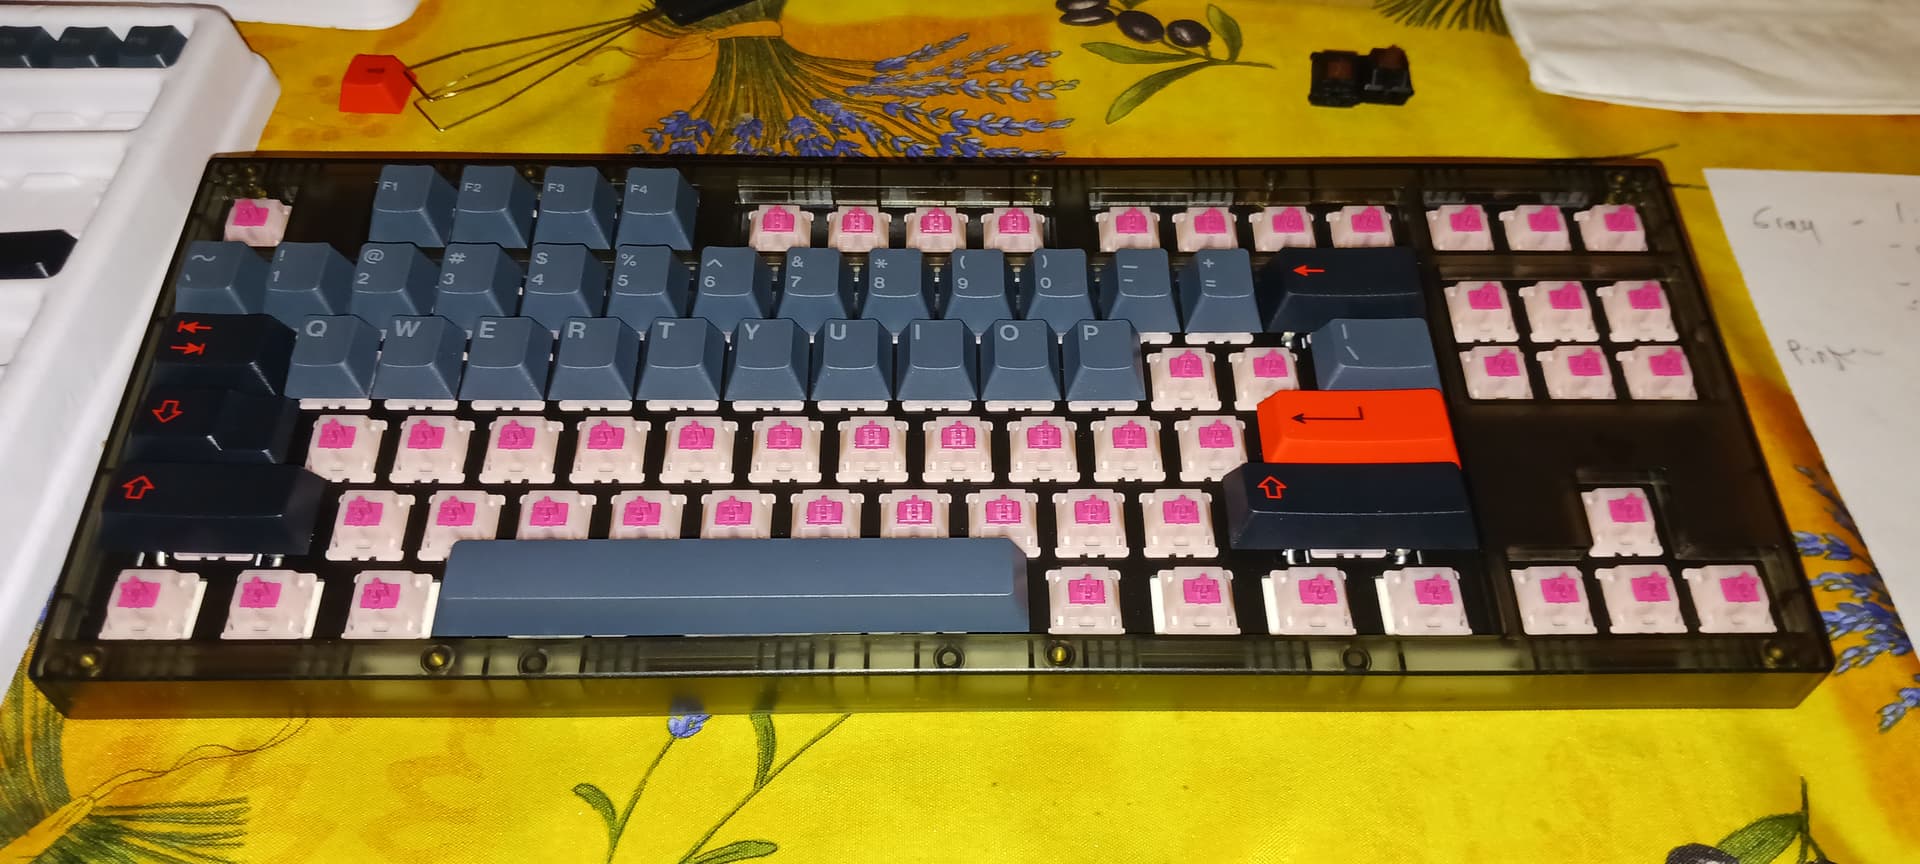
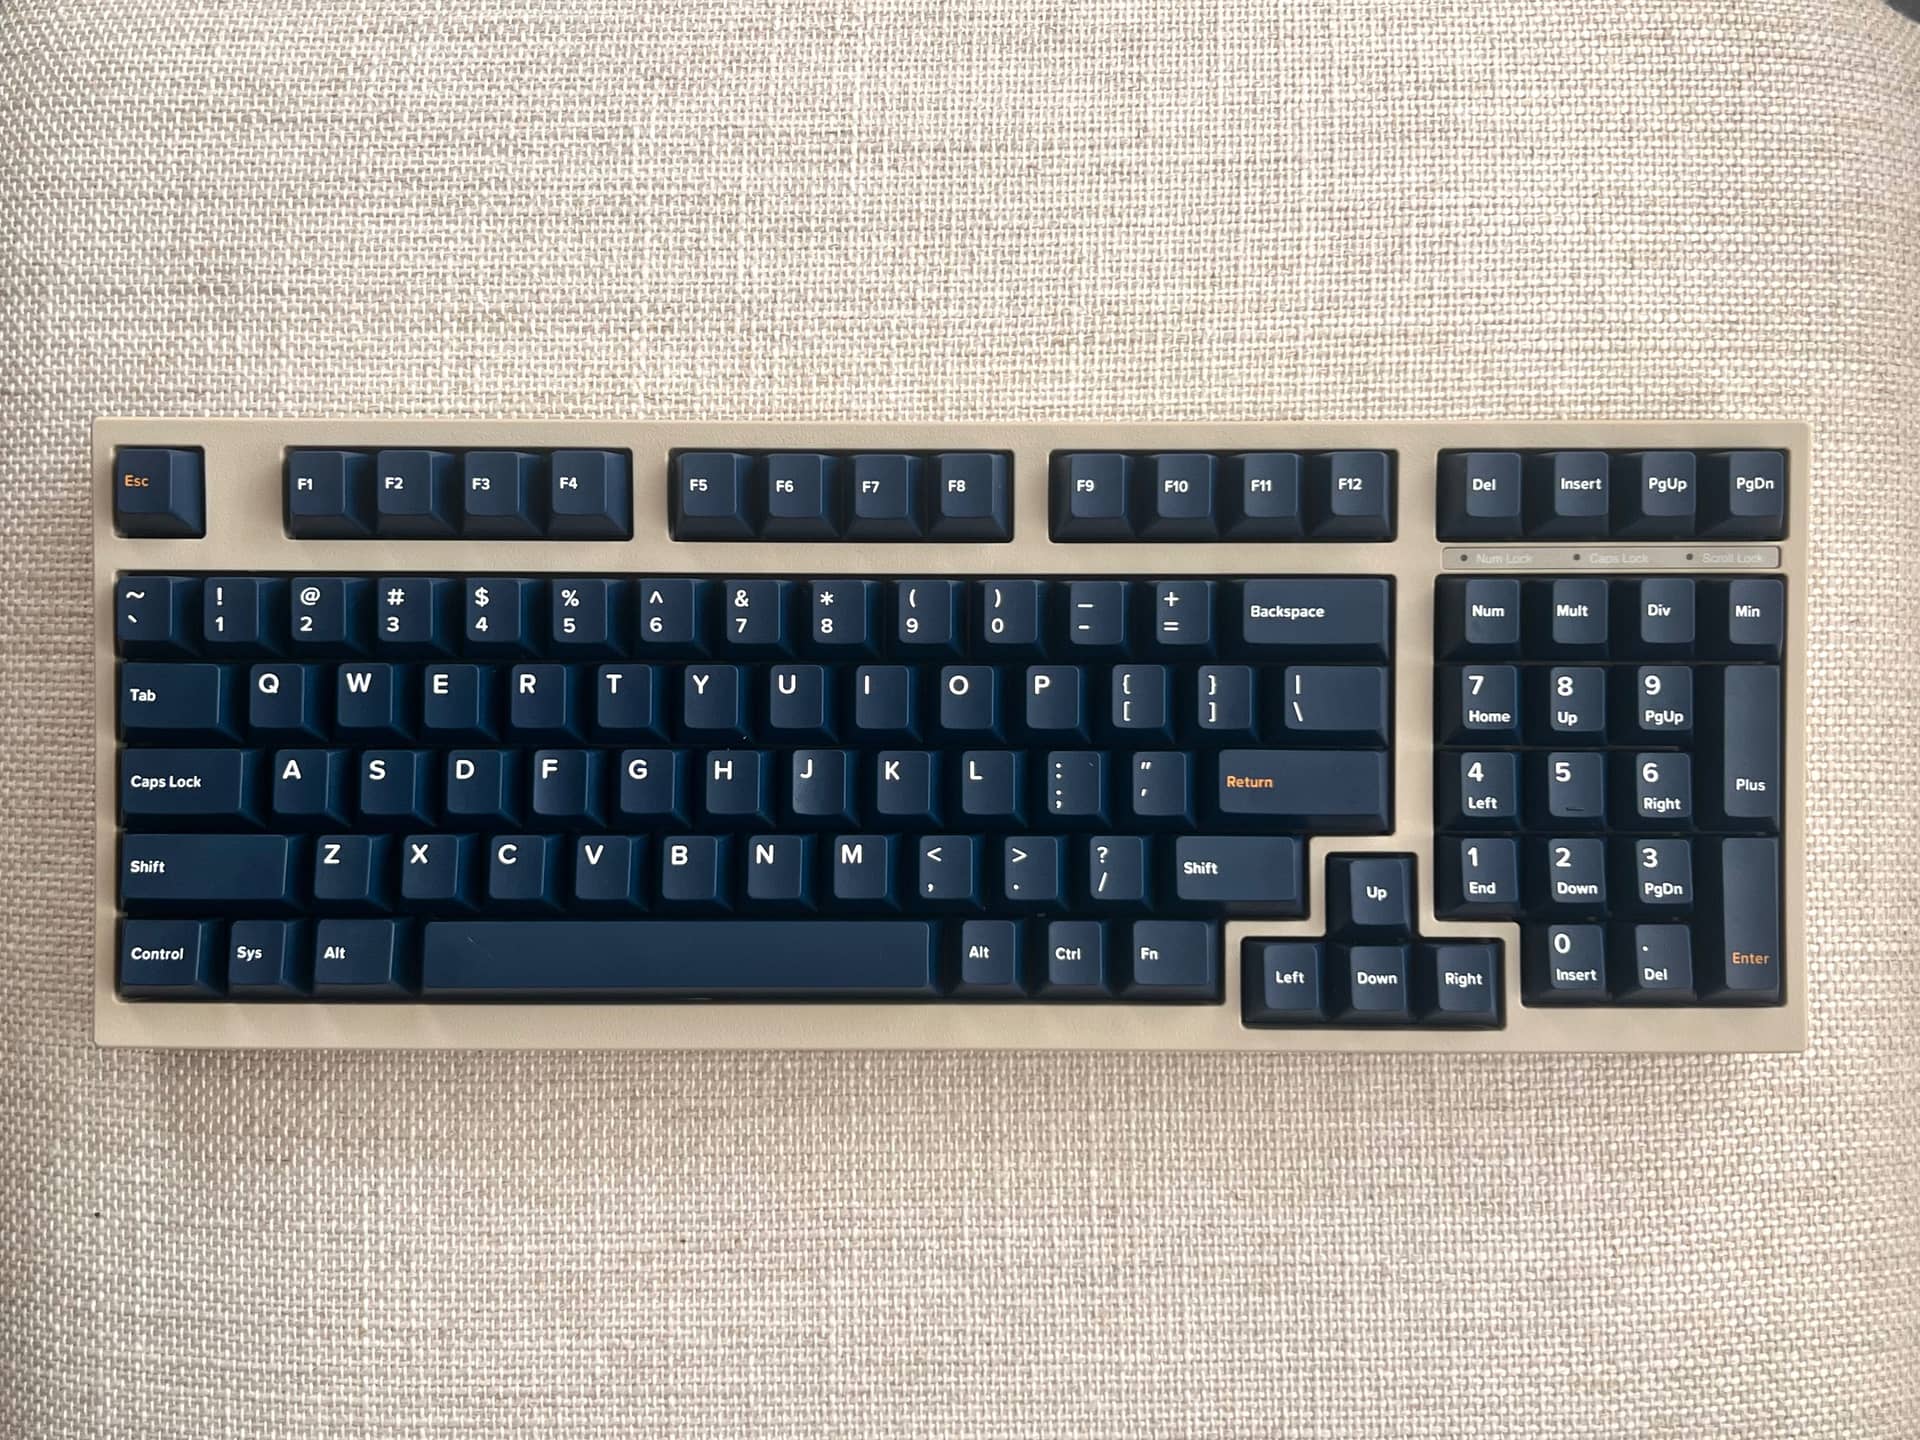
One of the reasons I never mounted this particular set on anything is that as a clone job, and one of the first I purchased after joining the hobby in earnest, its numrow is truly dire, done in some sort of courier-esque monospace typewriter font, when literally everything else is in a narrow futura or thereabouts. Well, given that state of affairs, I think repurposing the numpad is actually slightly less jarring, though the homing bar and poor alignment here don’t help, either. As a mostly-PC guy for 30 years now, Mac hardware always give me a tiny bit of the uncanny valley anyway, as nice as much of it is, and this is really meant to be a board that will mostly live on top of my PC tower sharing space with the Mac Mini it’s connected to.
Good use of Greens, if one is not going to type on them, though I maintain one generally should with heavy clickies.
How did you find working on the copper bar? Apart from simply being a cheap bastard, I’ve shied away from it due to the possibly it would be a big heat-sink and make soldering a chore.
Thanks!
2. Got these greens when I first started and quickly realized I don’t like clickies lol. I just hope fine dust doesn’t one day pose an issue with them.
3. The copper wire wasn’t too thick so it took solder easily, and it was pretty cheap in the grand scheme of things! It did make touching it unpleasant immediately after soldering though–I guess copper’s a great thermal conductor lol. I actually preferred the solid copper a lot more than just loose wires, and it appeased my OCD a little being able to shape the runs and keep it all flat against the switches.
I suppose you could always just get thicker gauge solid core wire and strip them where needed.
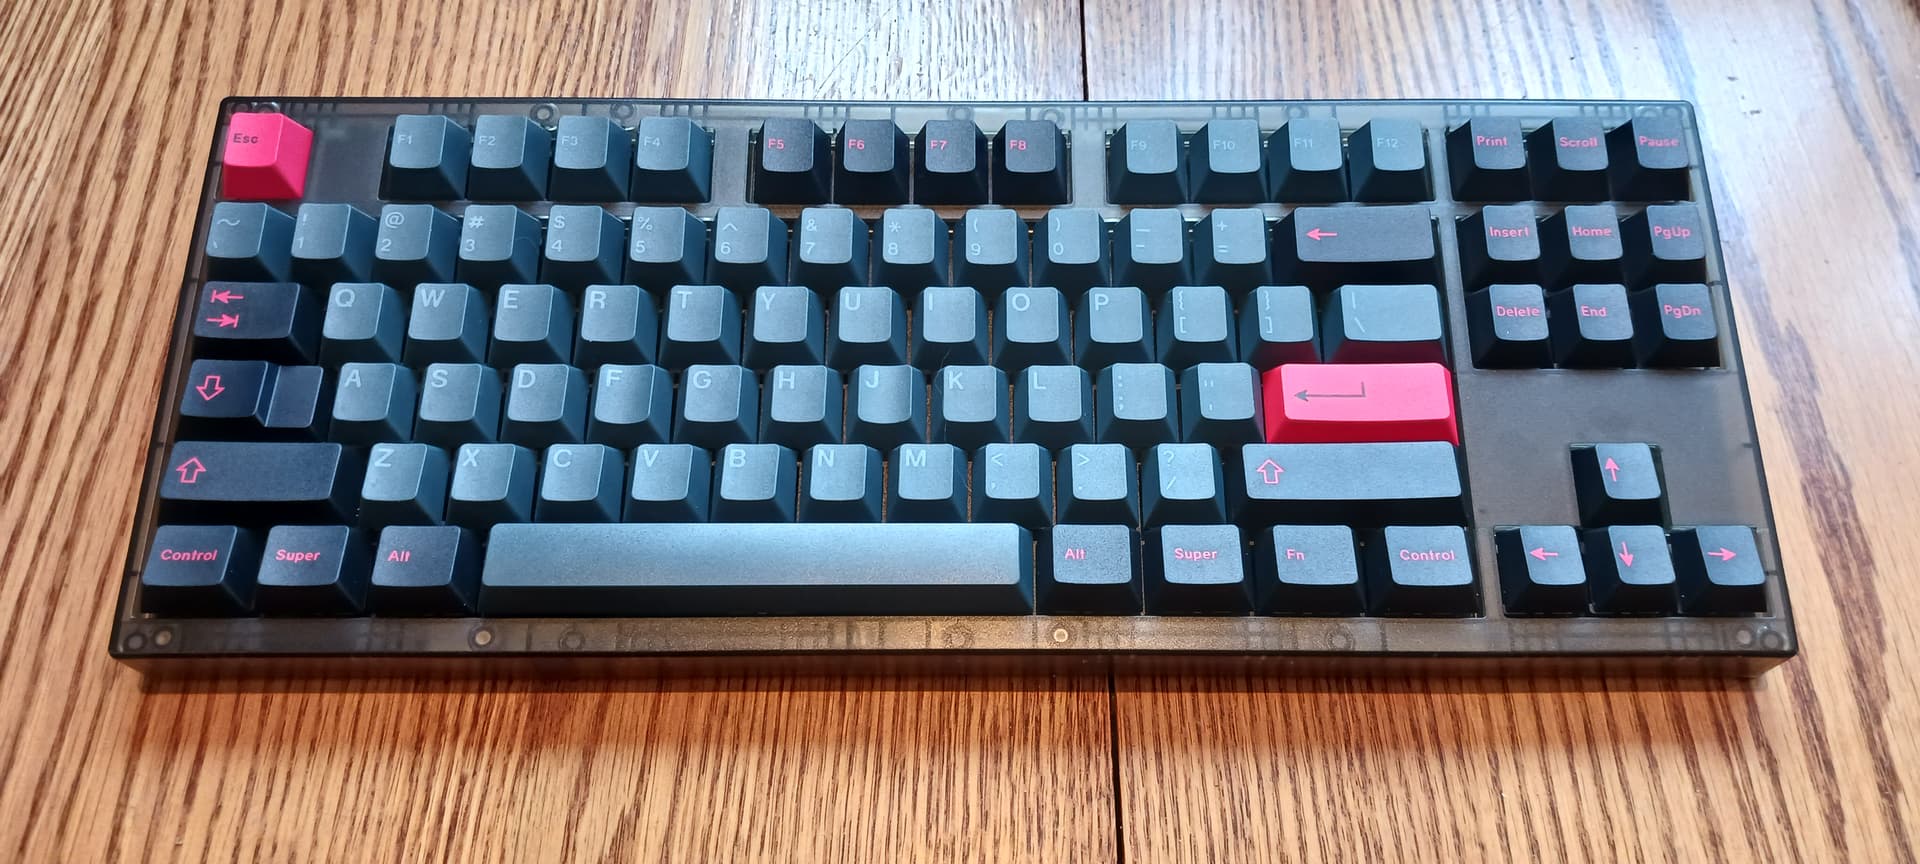
I had to slow down my “We have Voron at home” Sovol 3D printer to 50%, and I still got a bit of layer shift towards the top, but I got a usable case for the modded Primer61. In my brilliance, I forgot that while I could use the one right-angle USB-C to USB-A cord I have, or I could use the USB-C extenders I bought for another project, I can’t use both, so new cord should be here tomorrow night. I also ordered some JST pigtails so I can disconnect the case-mounted power switch without desoldering any wires. My janky stack of cork and EVA seems to be holding the assembly in place, and the Kishsaver proportions are not immediately jarring, which was the modest goal.
Hadn’t done much proper modding/building in a while, so put in some work this weekend.
Long story here if interested:
Work details
I bought a beige FC980c back in the day for my heavy 9. But that was several years ago, and I wanted the ability to put a more complementary color of keycaps on it. This was before EC was more popular and developments like Deskeys and URSA caps.
So, a few years ago I picked up an MX version 980m in black for $45 on ebay. I had the internals in my heavy 9 and it was nice, but it was acting up. Some days is would miss a keystroke here and there, andit kept getting worse. Definitely something wrong with the controller.
Back in 2022, @Dave was kind enough to send me a replacement stock PCB for it (as well as a custom MX plate and PCB). Well… here we are, 4 years down the road, and I’m finally getting around to dealing with it! This project was a stock PCB swap. I’m planning another build next week with the custom PCB/Plate.
I was going to simply replace the PCB, but things took a turn, as usual. It had cherry blue switches (which i honestly kinda like in these plastic cases with stiffer mounts). But after desoldering them from what appeard to be 15 year old lead free solder (good lord this stuff is tough to melt. I don’t like running my desoldering iron that hot, but no choice) I couldn’t bear the idea of putting the same switches right back in. What if the problem was the switches?? I mean, let’s be honest, there’s a 99% chance it’s not the switches, but you never know.
So, I go about the process of looking through the 9 storage bins of switches for something I could use. The problem is, I needed 98 of them. I don’t have 98 of very many switches. Long story short, I found a few different batches of cherry blacks that I had stored up for a decade. I also have tubs of springs that I’ve never used, so I figured I might as well spring swap to some 72s springs from Sprit. These are pretty similar to Gateron yellows.
But what about lube? Now it’s becoming a real rabbit hole. So yes, I decided to lube, but only the stems, and tub lube for quickness.
Now it’s time to try them out. Not bad. I wonder how much of a difference filming would make. Try a film… 100% better sounding. Damnit, now I have to film them. I haven’t filmed a switch in 4 years. Digging through to find what I have 98 of. Looks like I have a pack of 120 Deskeys films from NovelKeys (the blue ones). But man… the headache. These things leave the small inner rectangle when you go to peel them off. So add an extra 5-10 min of work for that.
You get the picture now? Was going to be a quick project and ended up taking about 6 hours.
But it paid off. The switches feel and sound very nice. I tuned the stabilizers while I was at it. Got it tested, all working. Put the PCB back in the case and plugged her in… no workie. Two solid indicator lights. Fuck. That looks like a short. Makes no sense, it was working outside of the case… the case is plastic.
After 30 min of scratching my head and trying different cables and solutions…I spot it. A teeny, tiny, solder ball on the main chip! I scrape it off. Surely that wasn’t the problem. Plug it in… it works!