Switch Version Differentiation

I thought it might be useful to have a thread dedicated to differentiating between switch iterations.

Sometimes the differences are obvious, most of the time they’re more subtle - but there’s usually some kind of visual cue to be found without opening the switch. Other times, you might have to crack them open to be totally sure. I’d like to make a record of these distinguishing characteristics as I find them, and certainly welcome anyone else here to do the same. Let’s get into it!
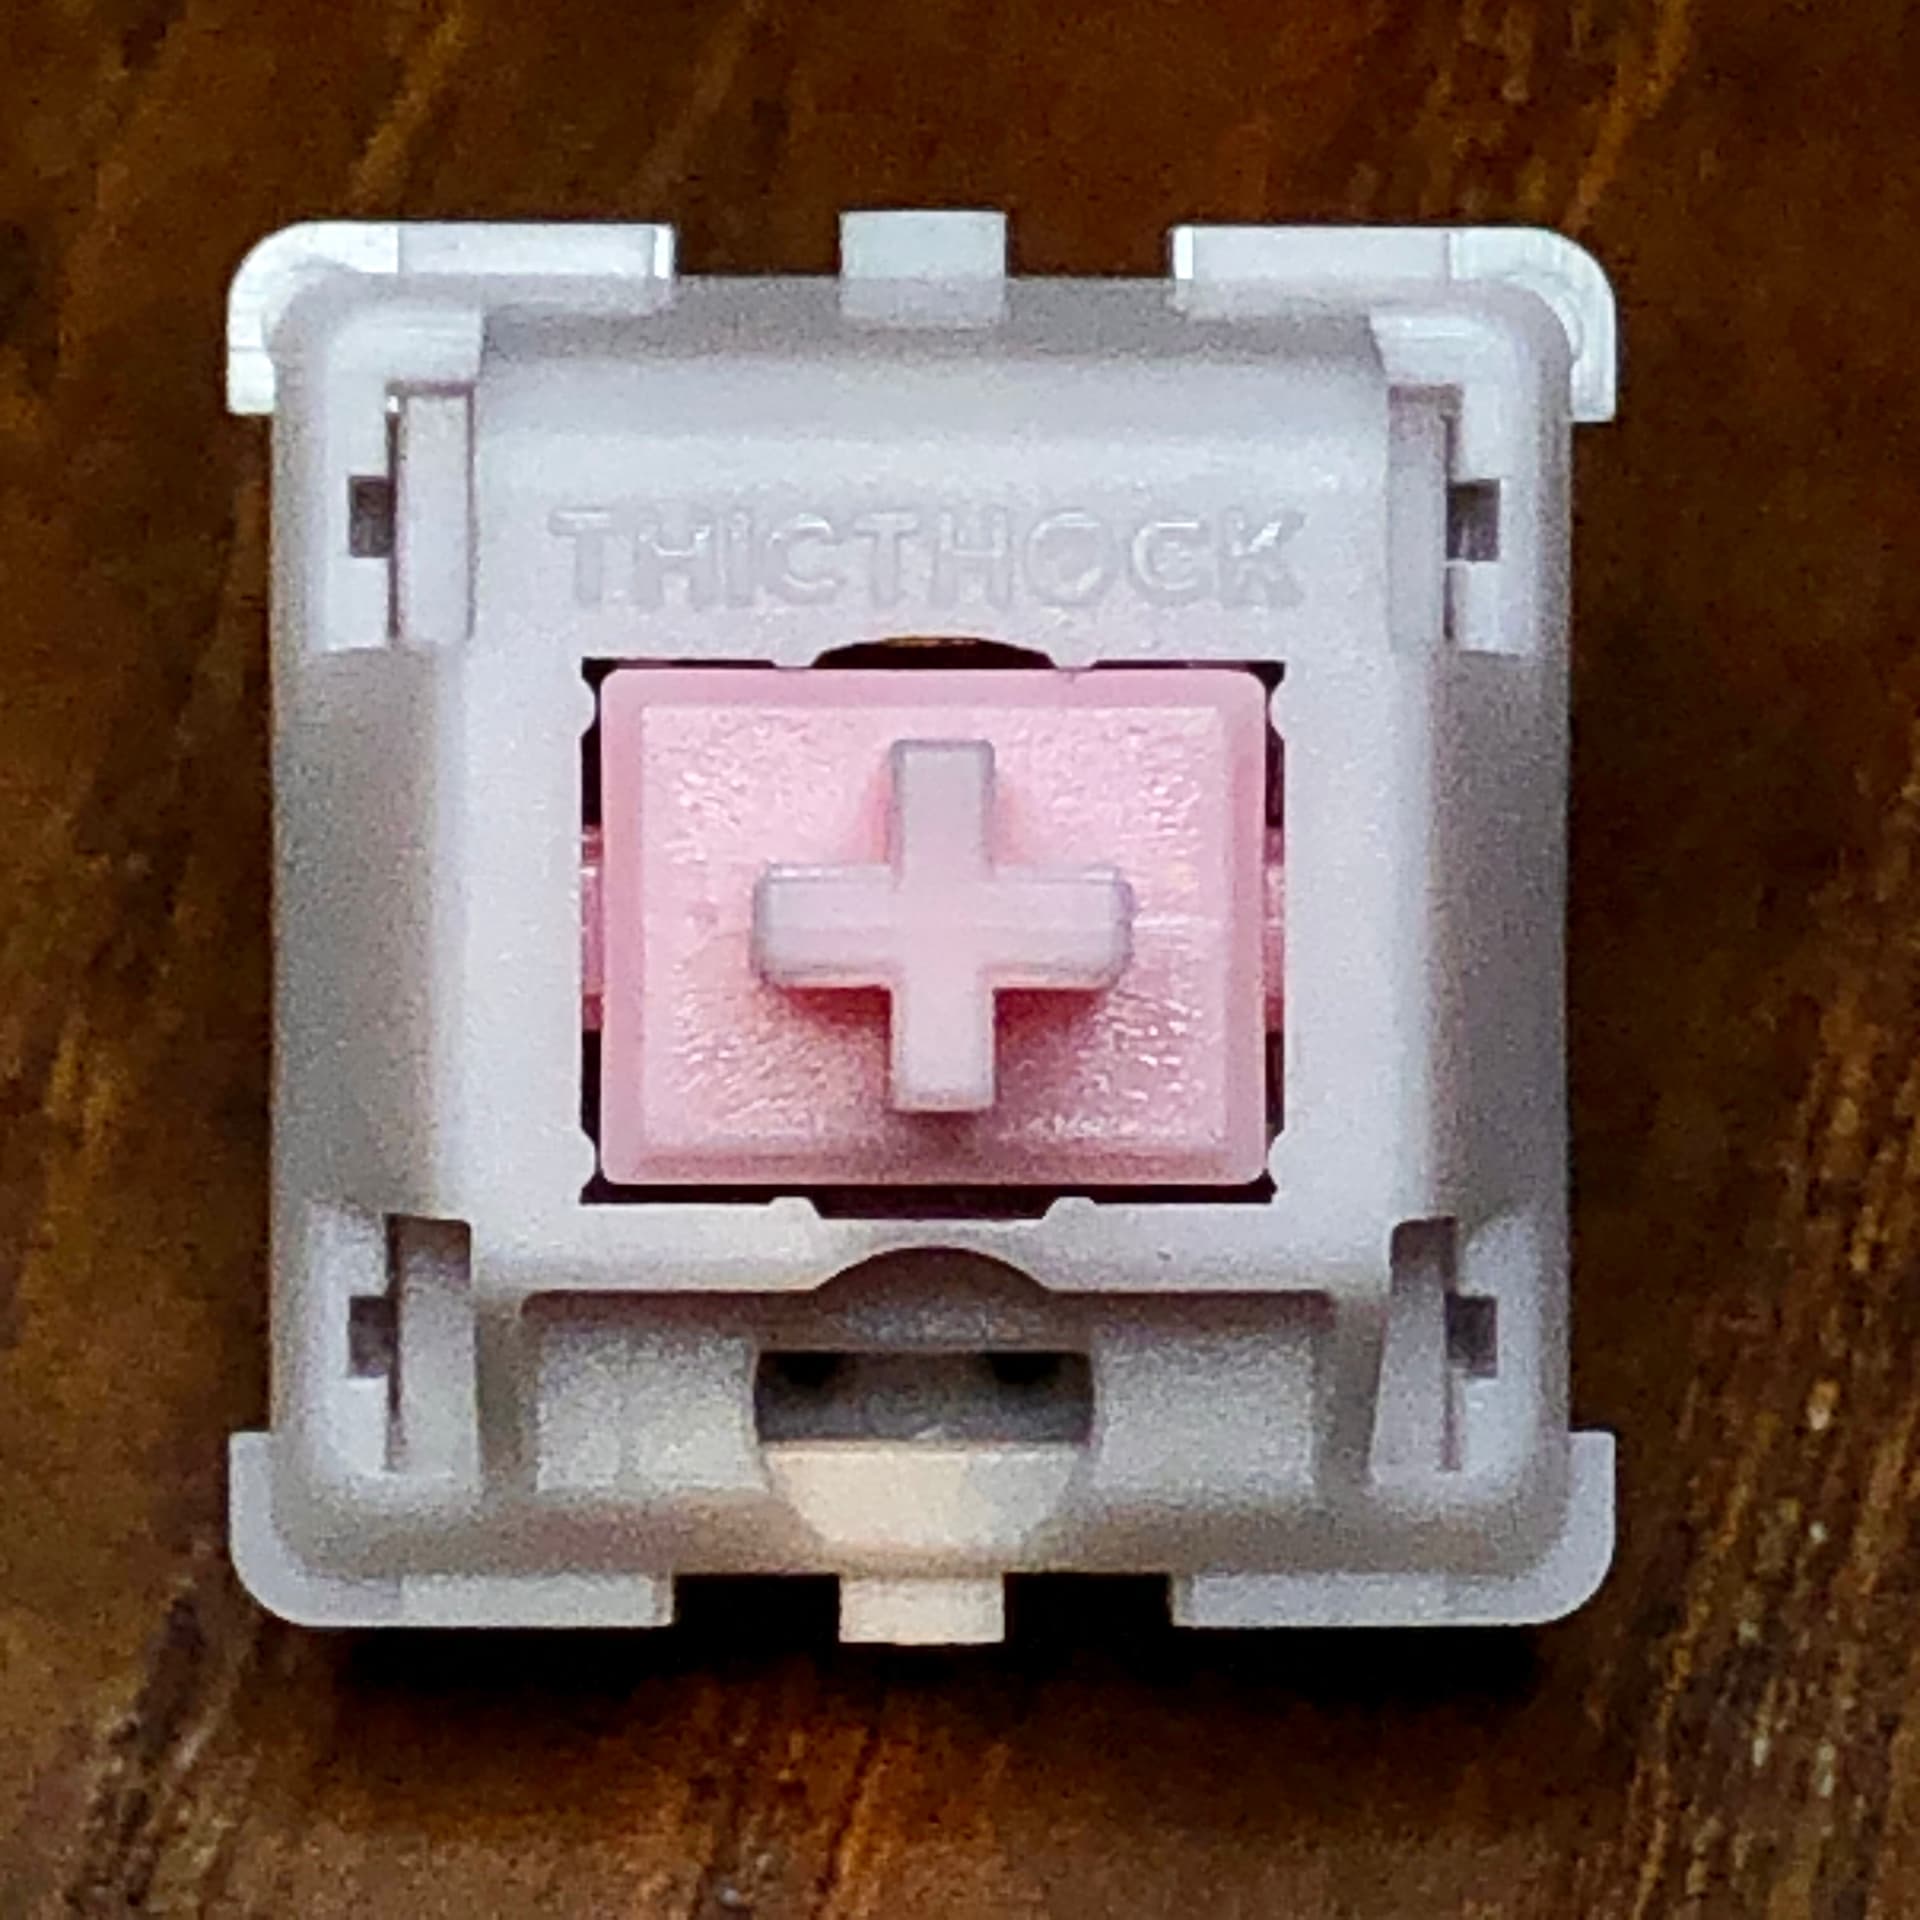
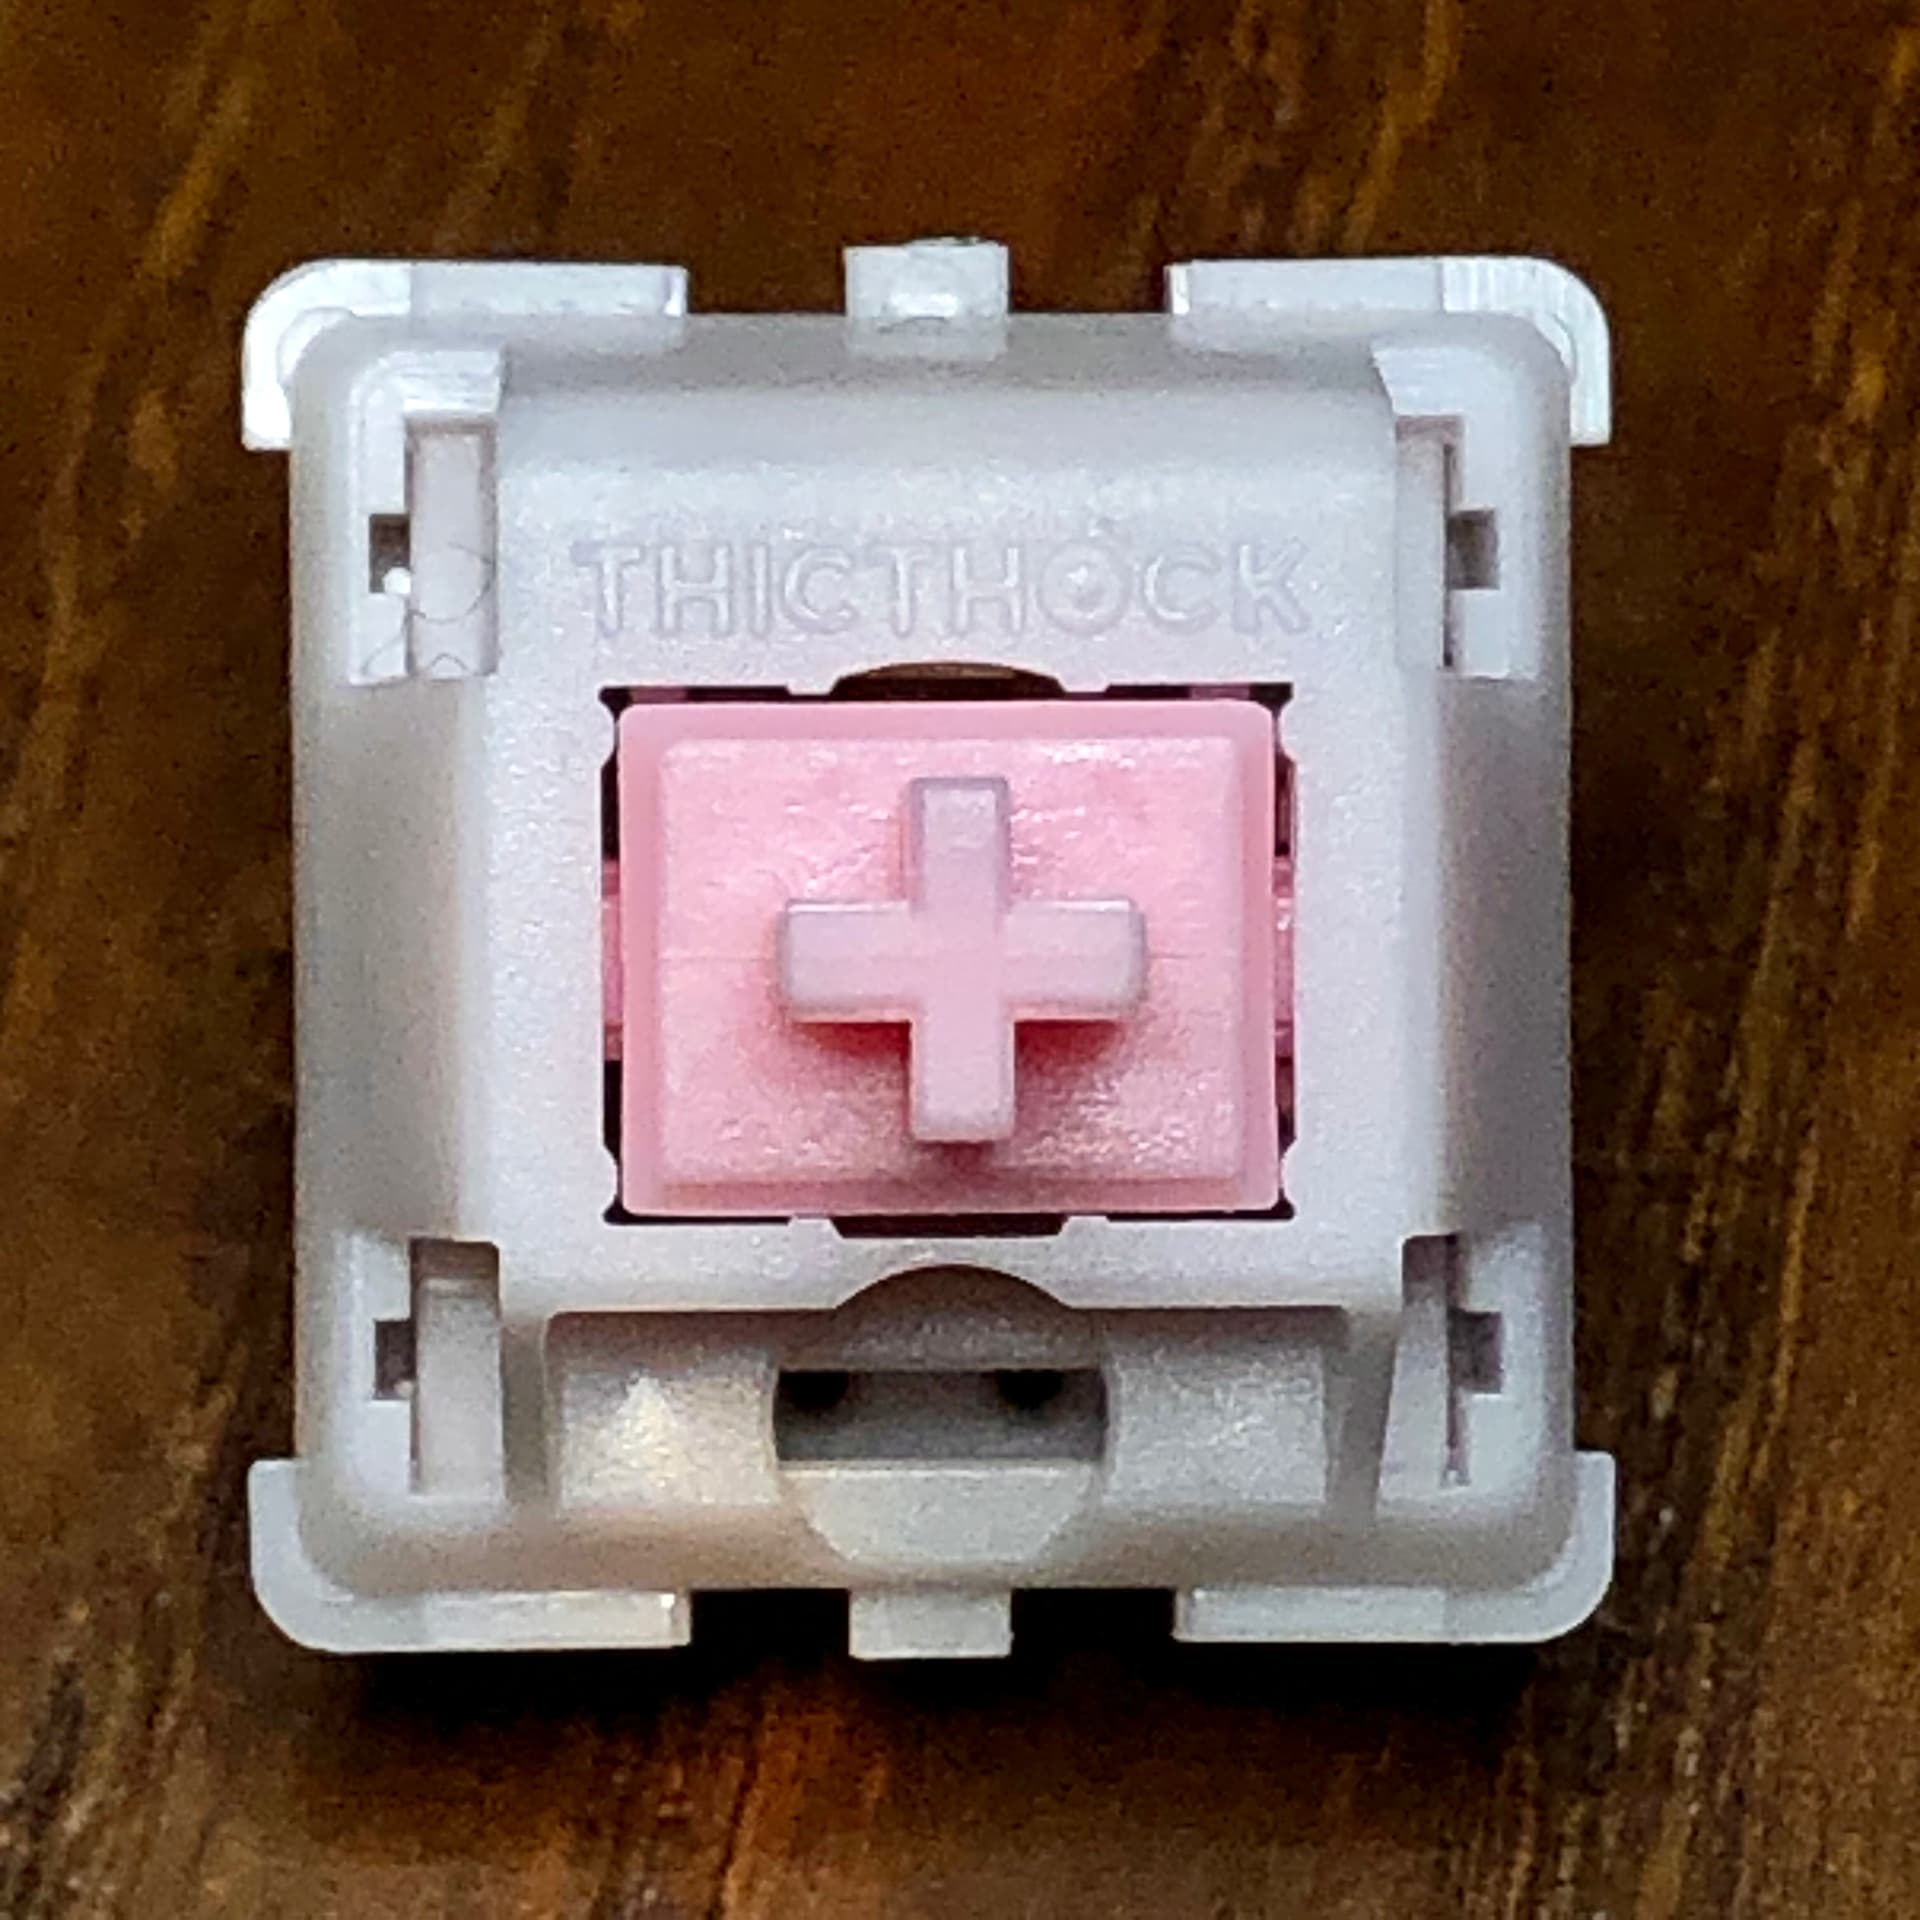
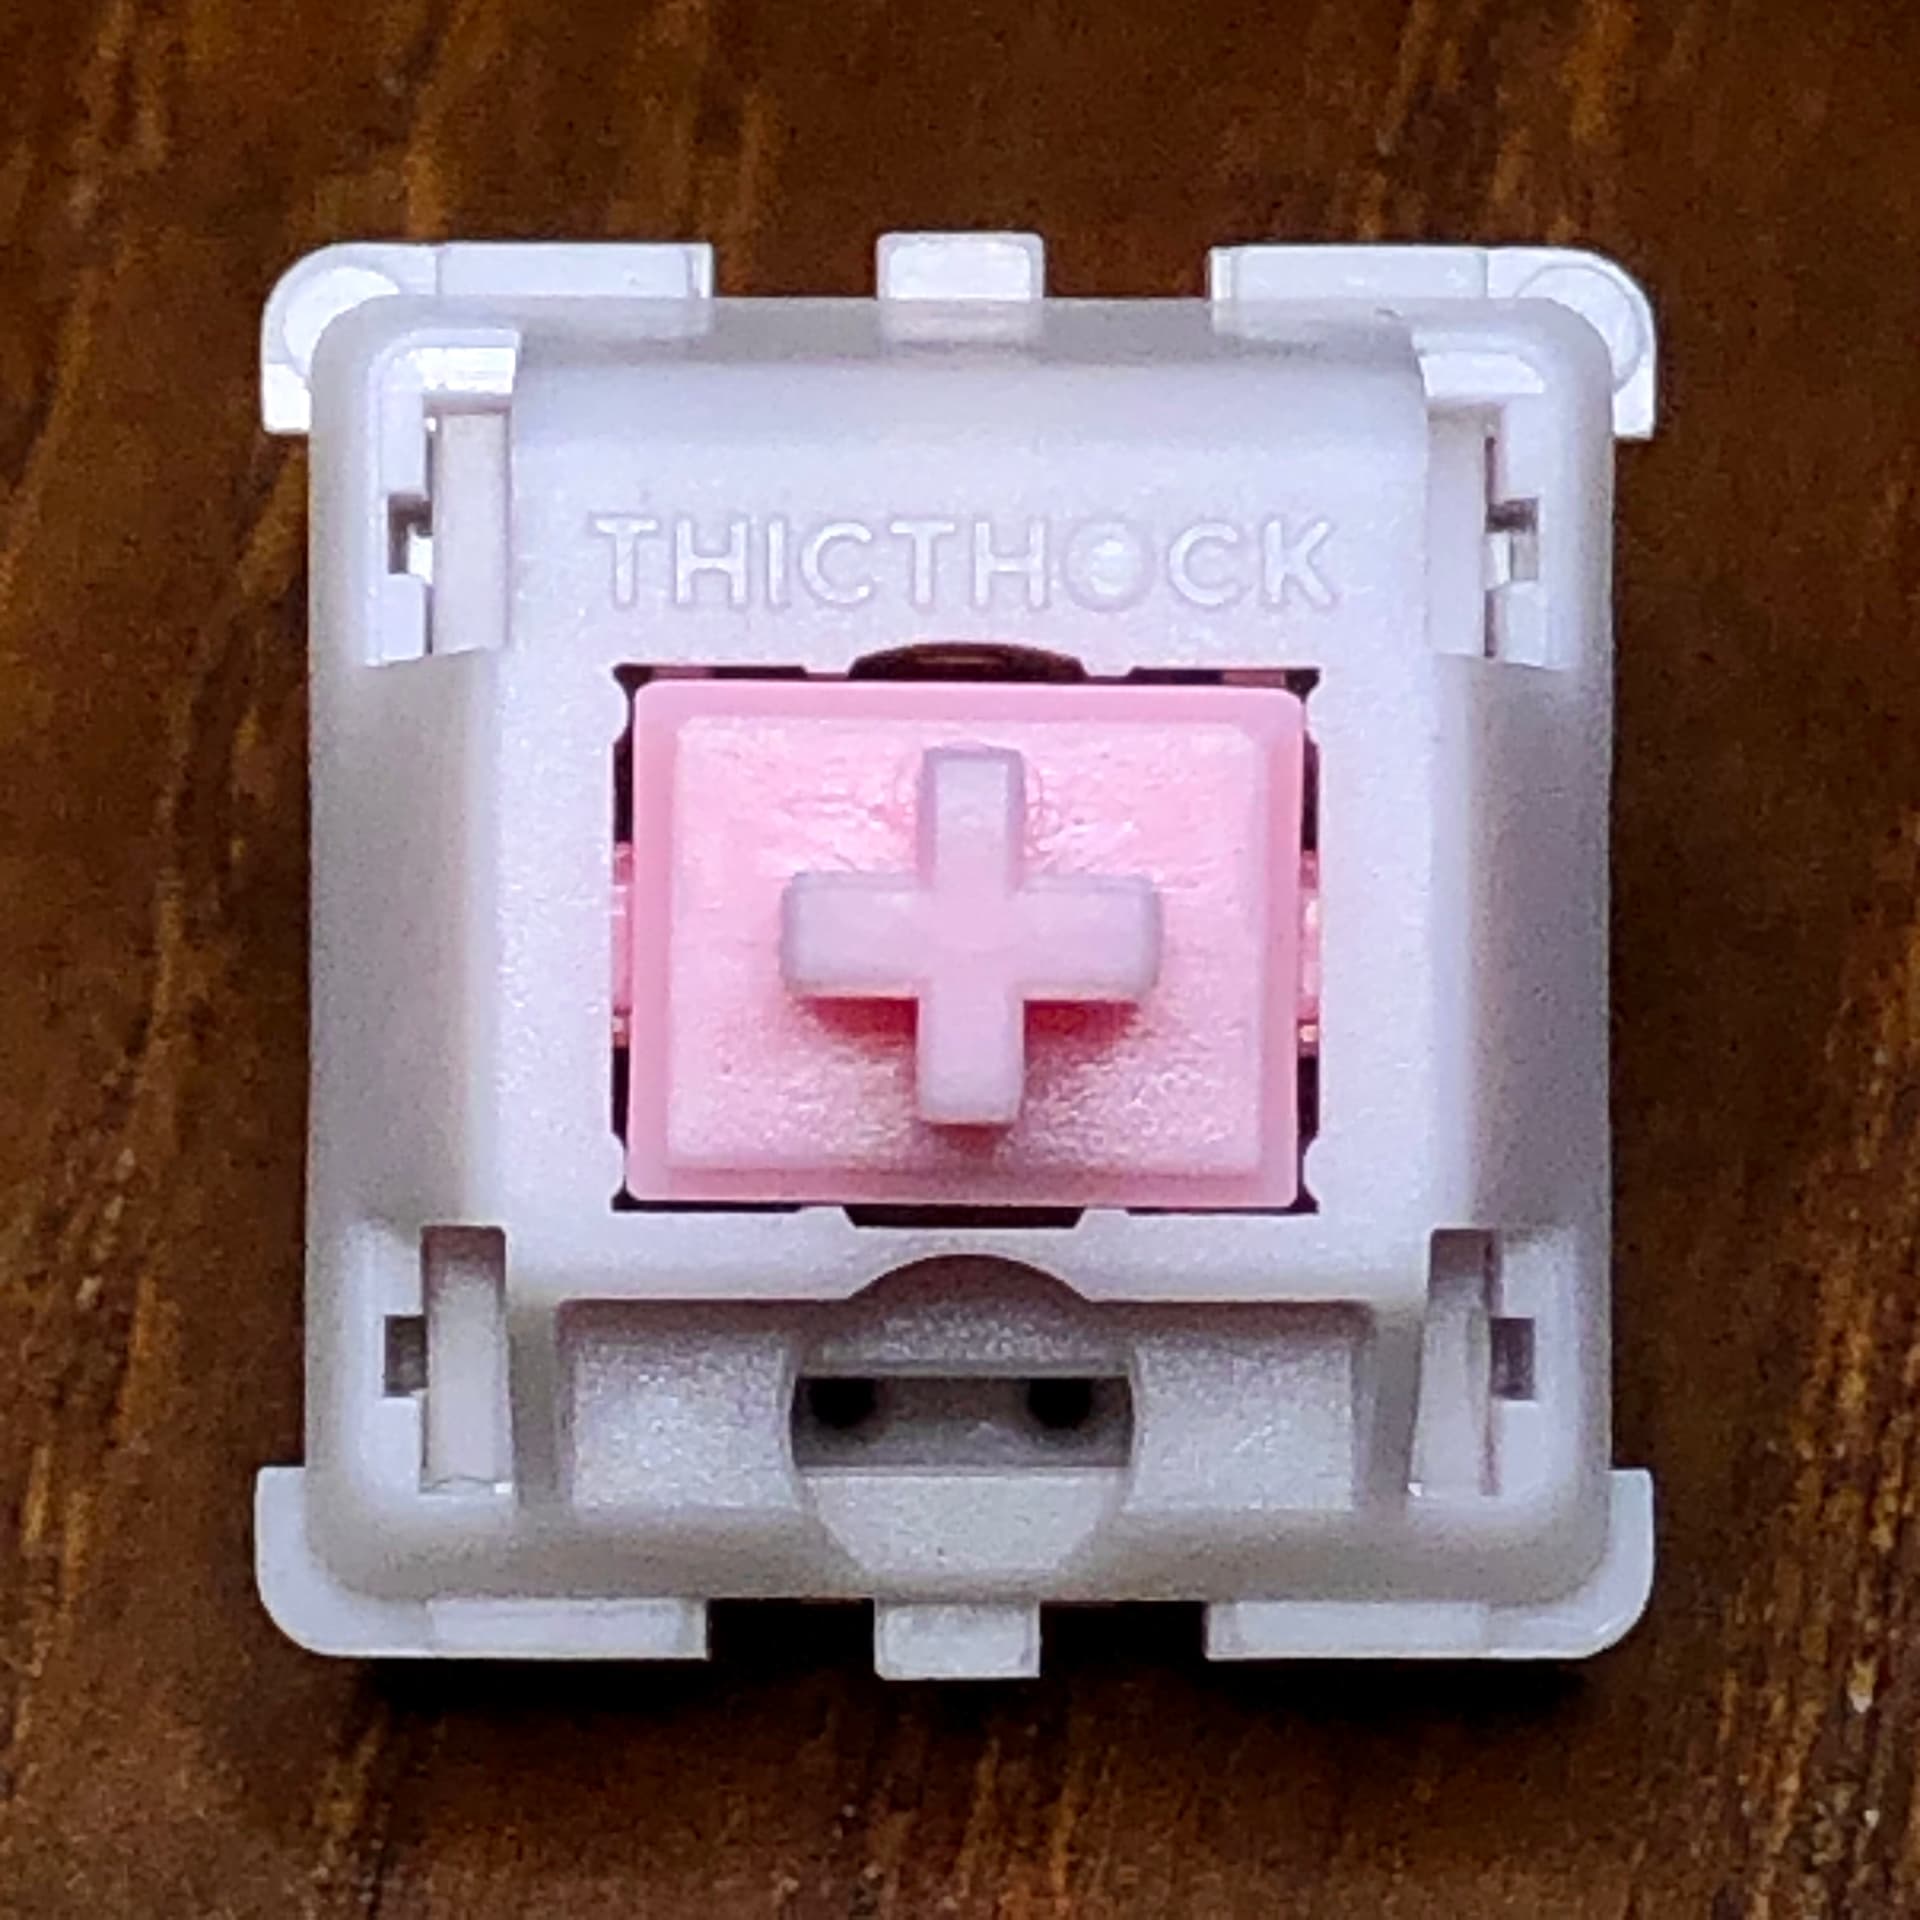

Kailh Blacks


(collapsed by default so the post intro wont be all long and stuff, click here to expand)

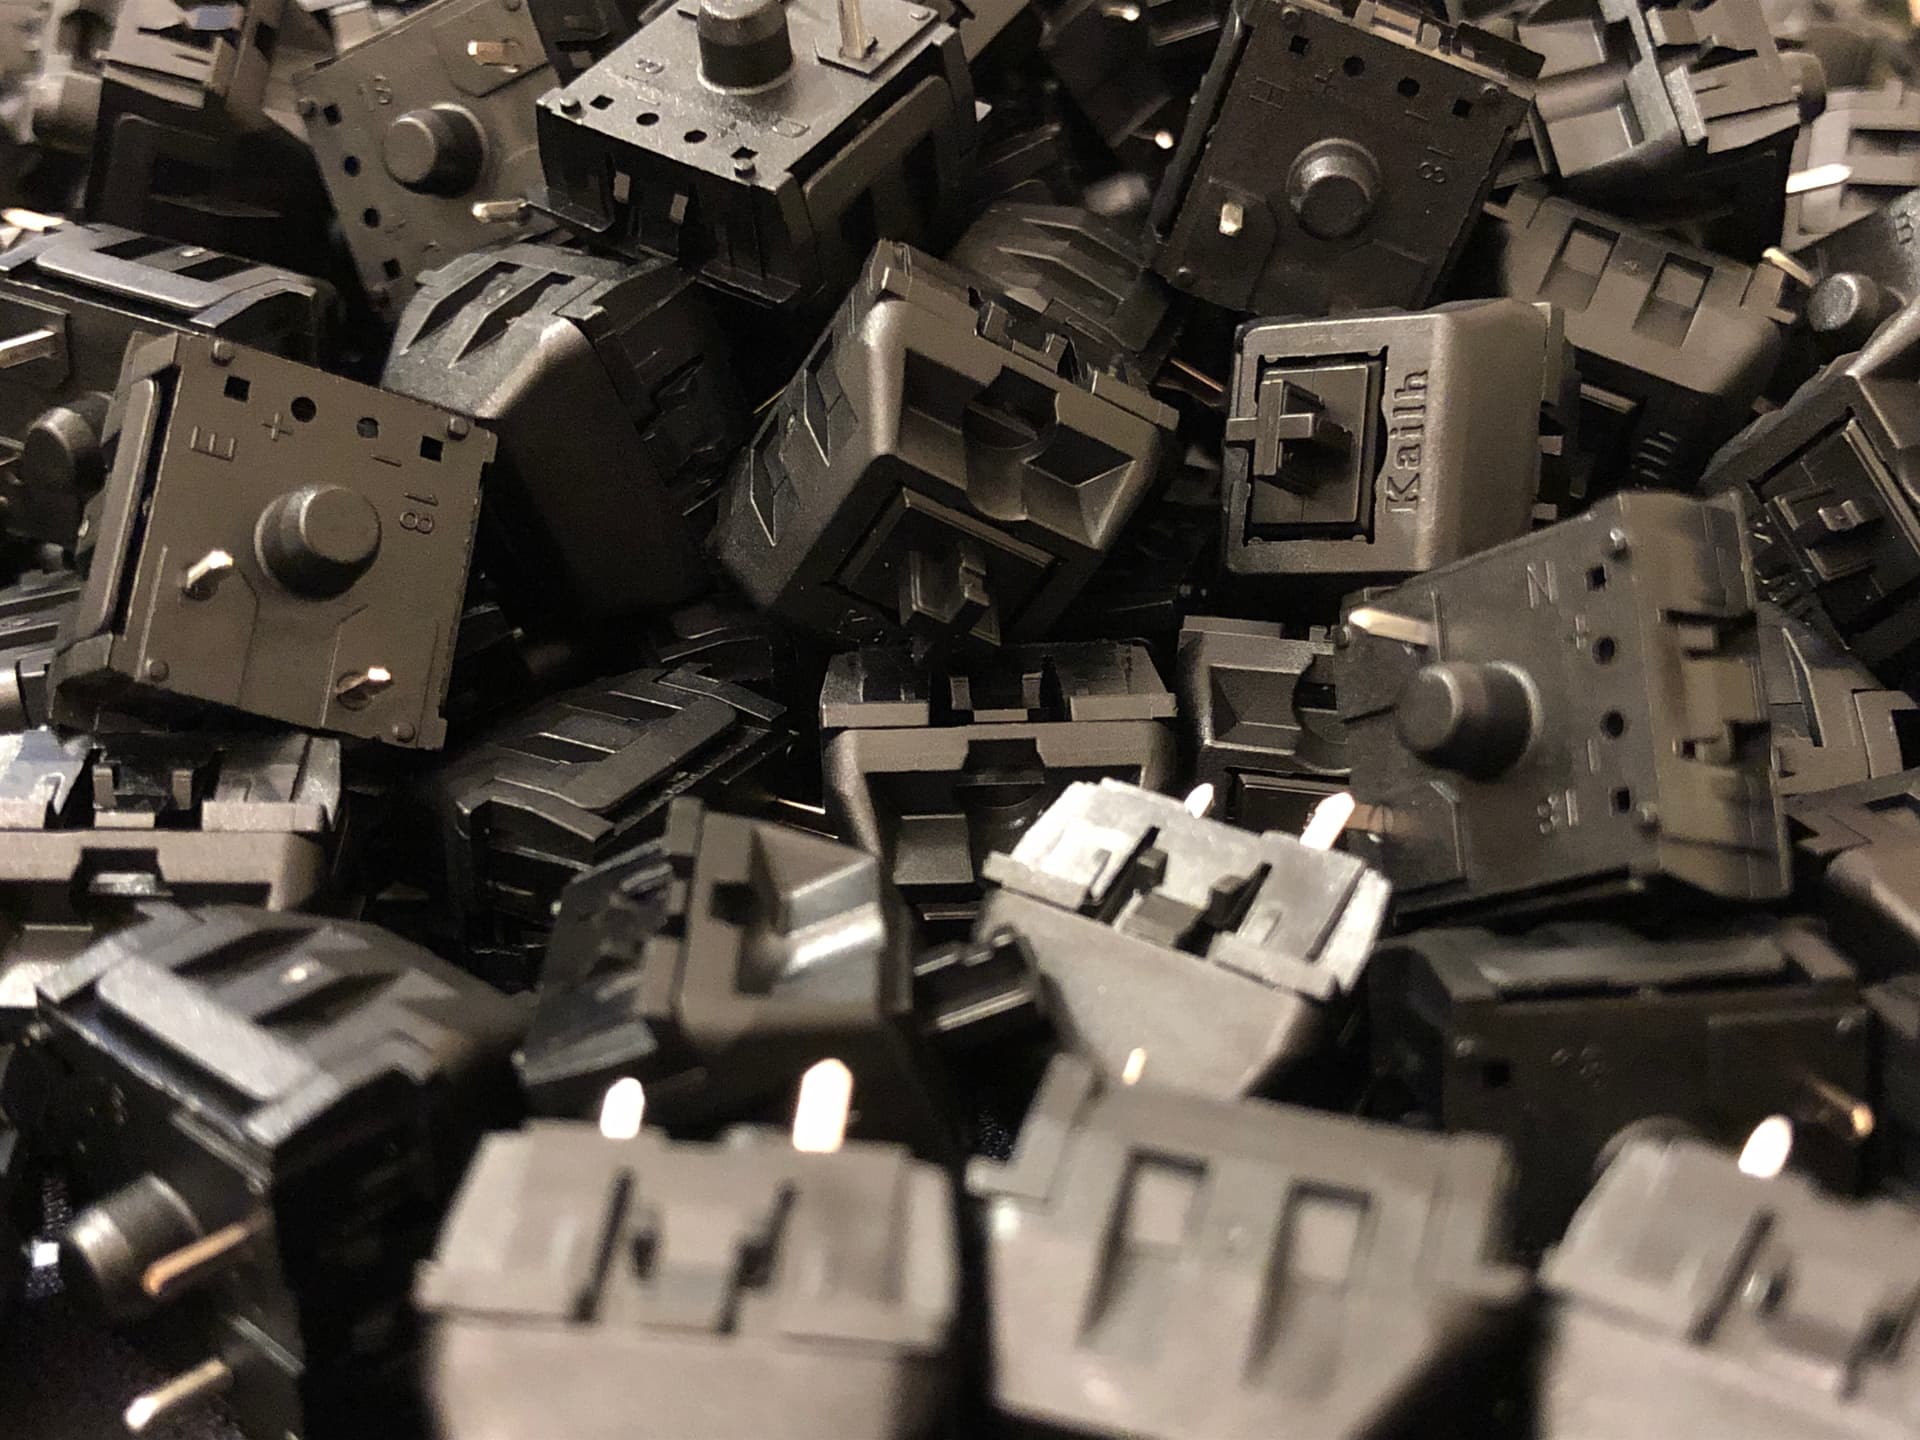
Since I just got a big ol’ bag of discount Kailh Blacks today (accidentally mixed V1 and V2 batch), I’ll get things started-off with those. High-five to Upgrade Keyboards for a.) informing the customers and b.) offering a killer discount on the batch.

Like most things, this post turned out to be more complicated than I thought it would be when I started. Unlike with Creams and their different logo size between versions, the differences with these are much less clear - at least on the outside.


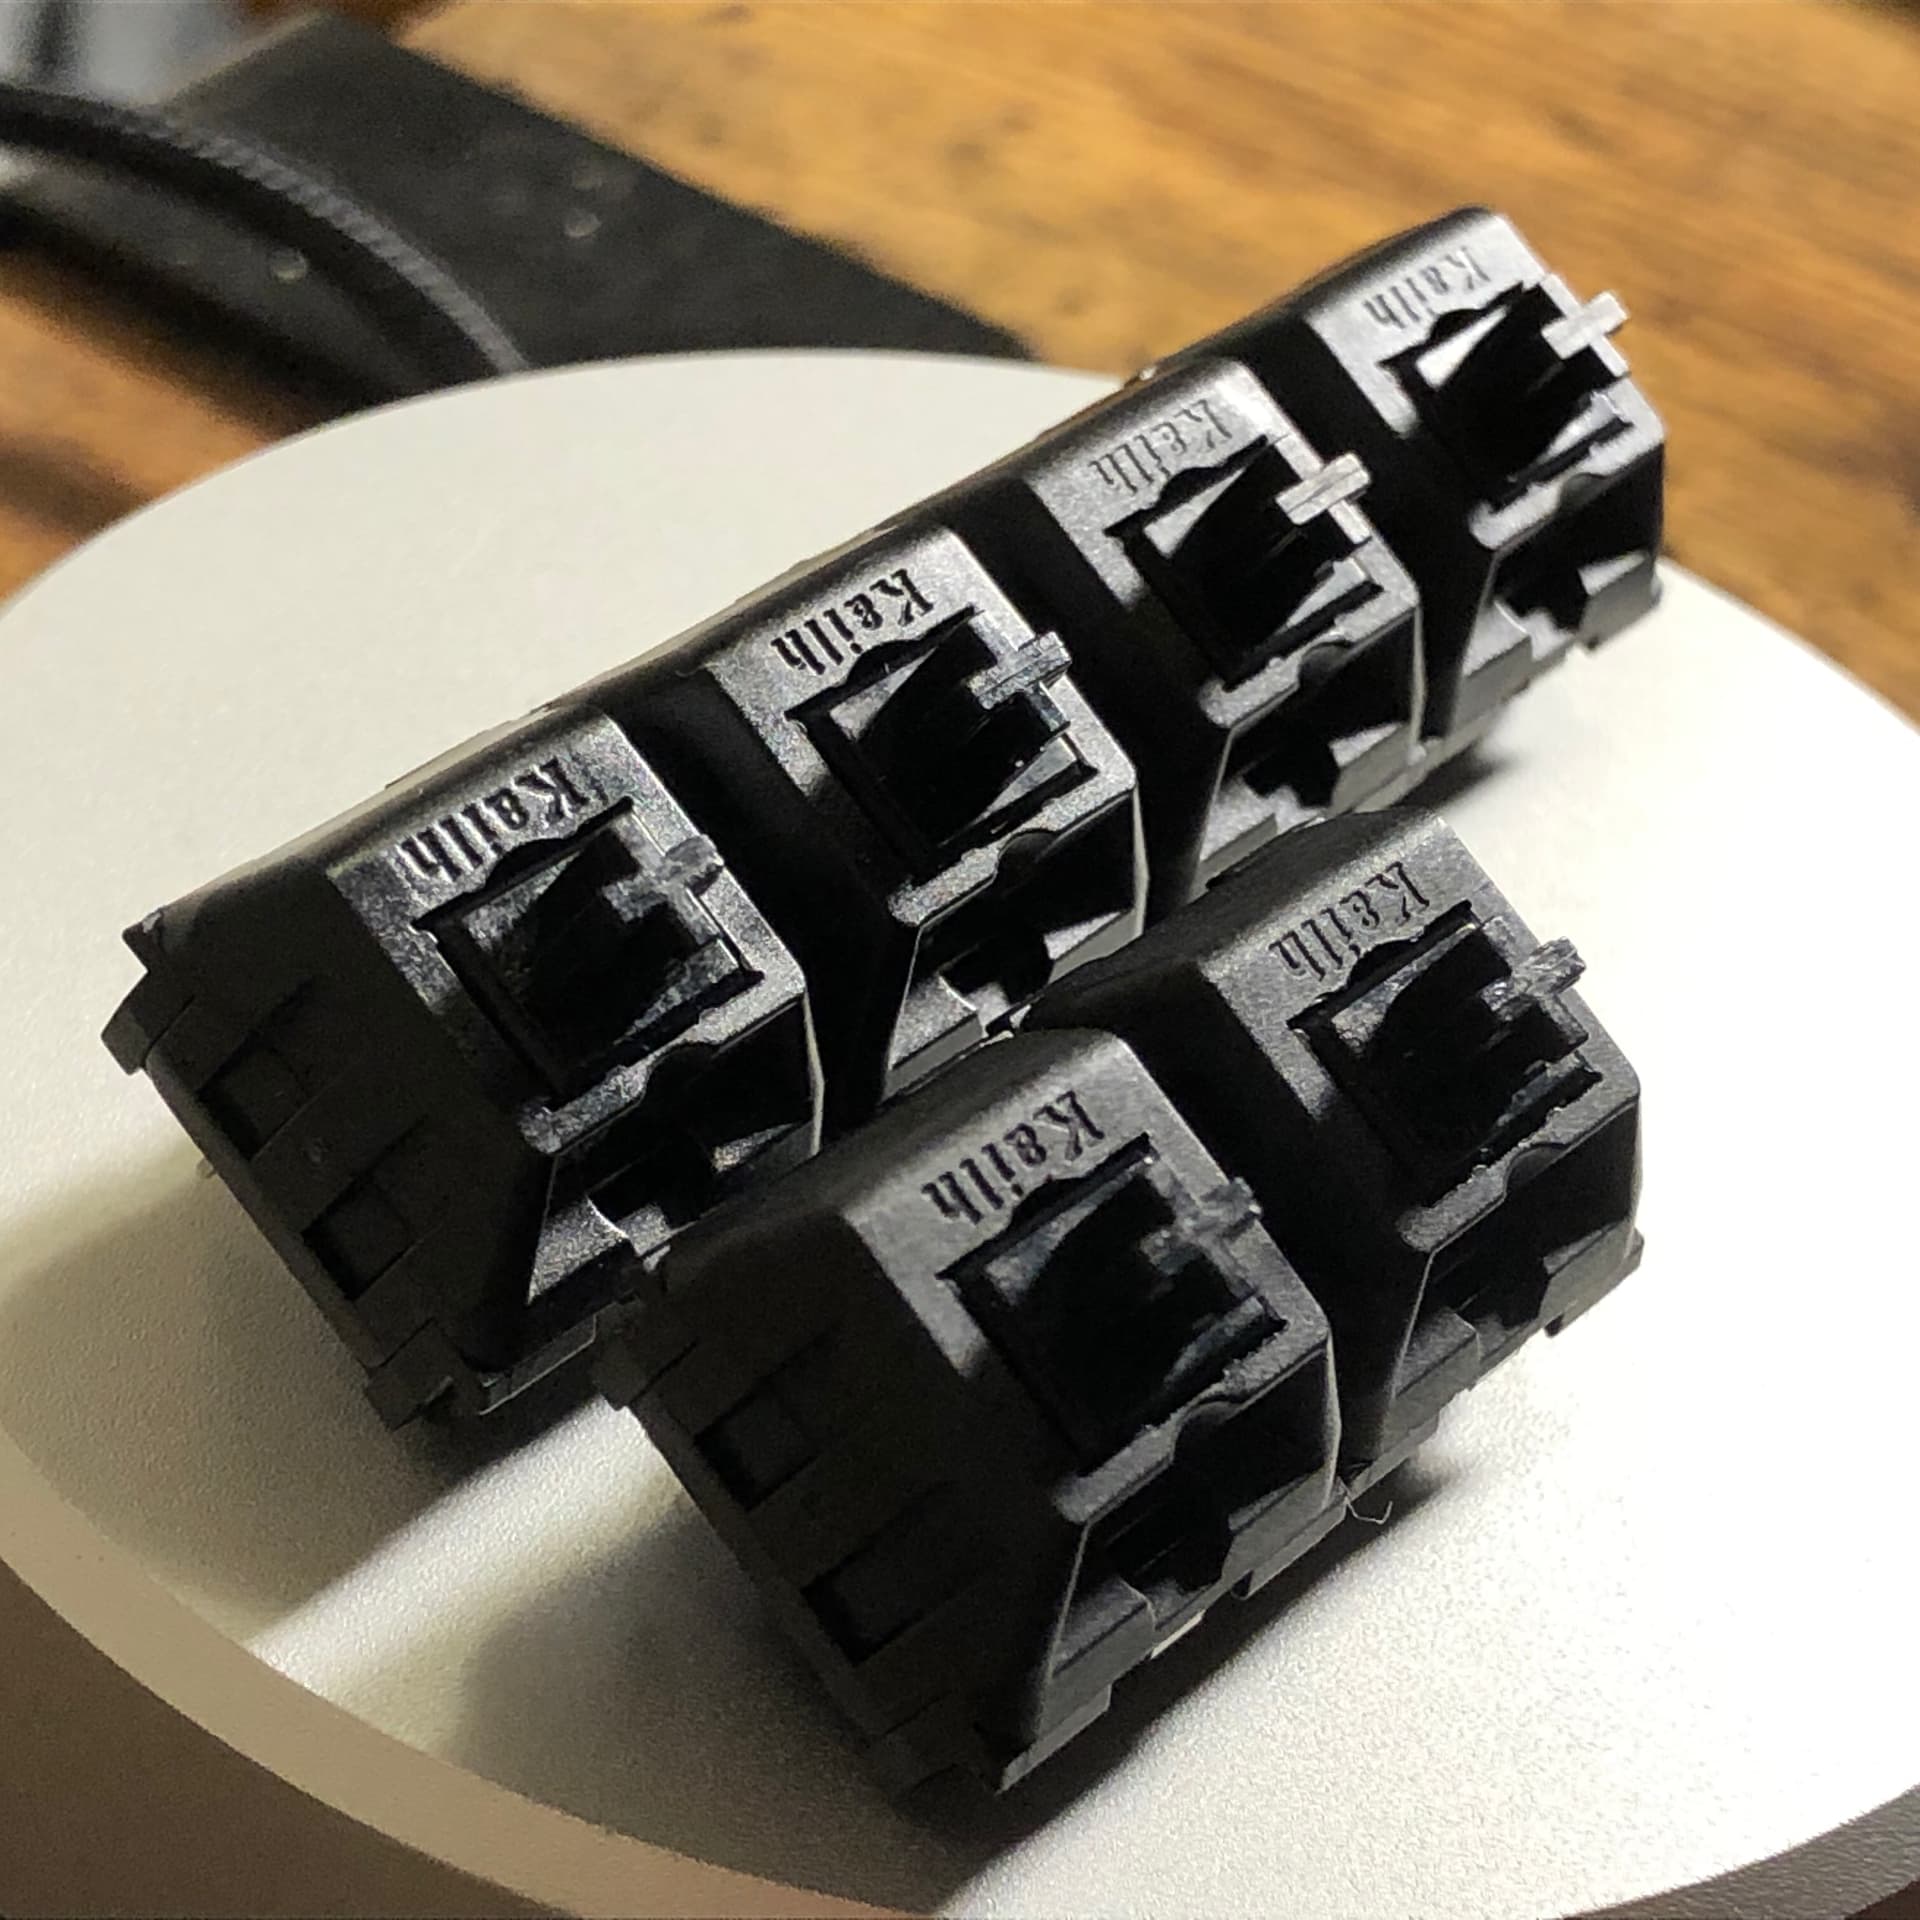
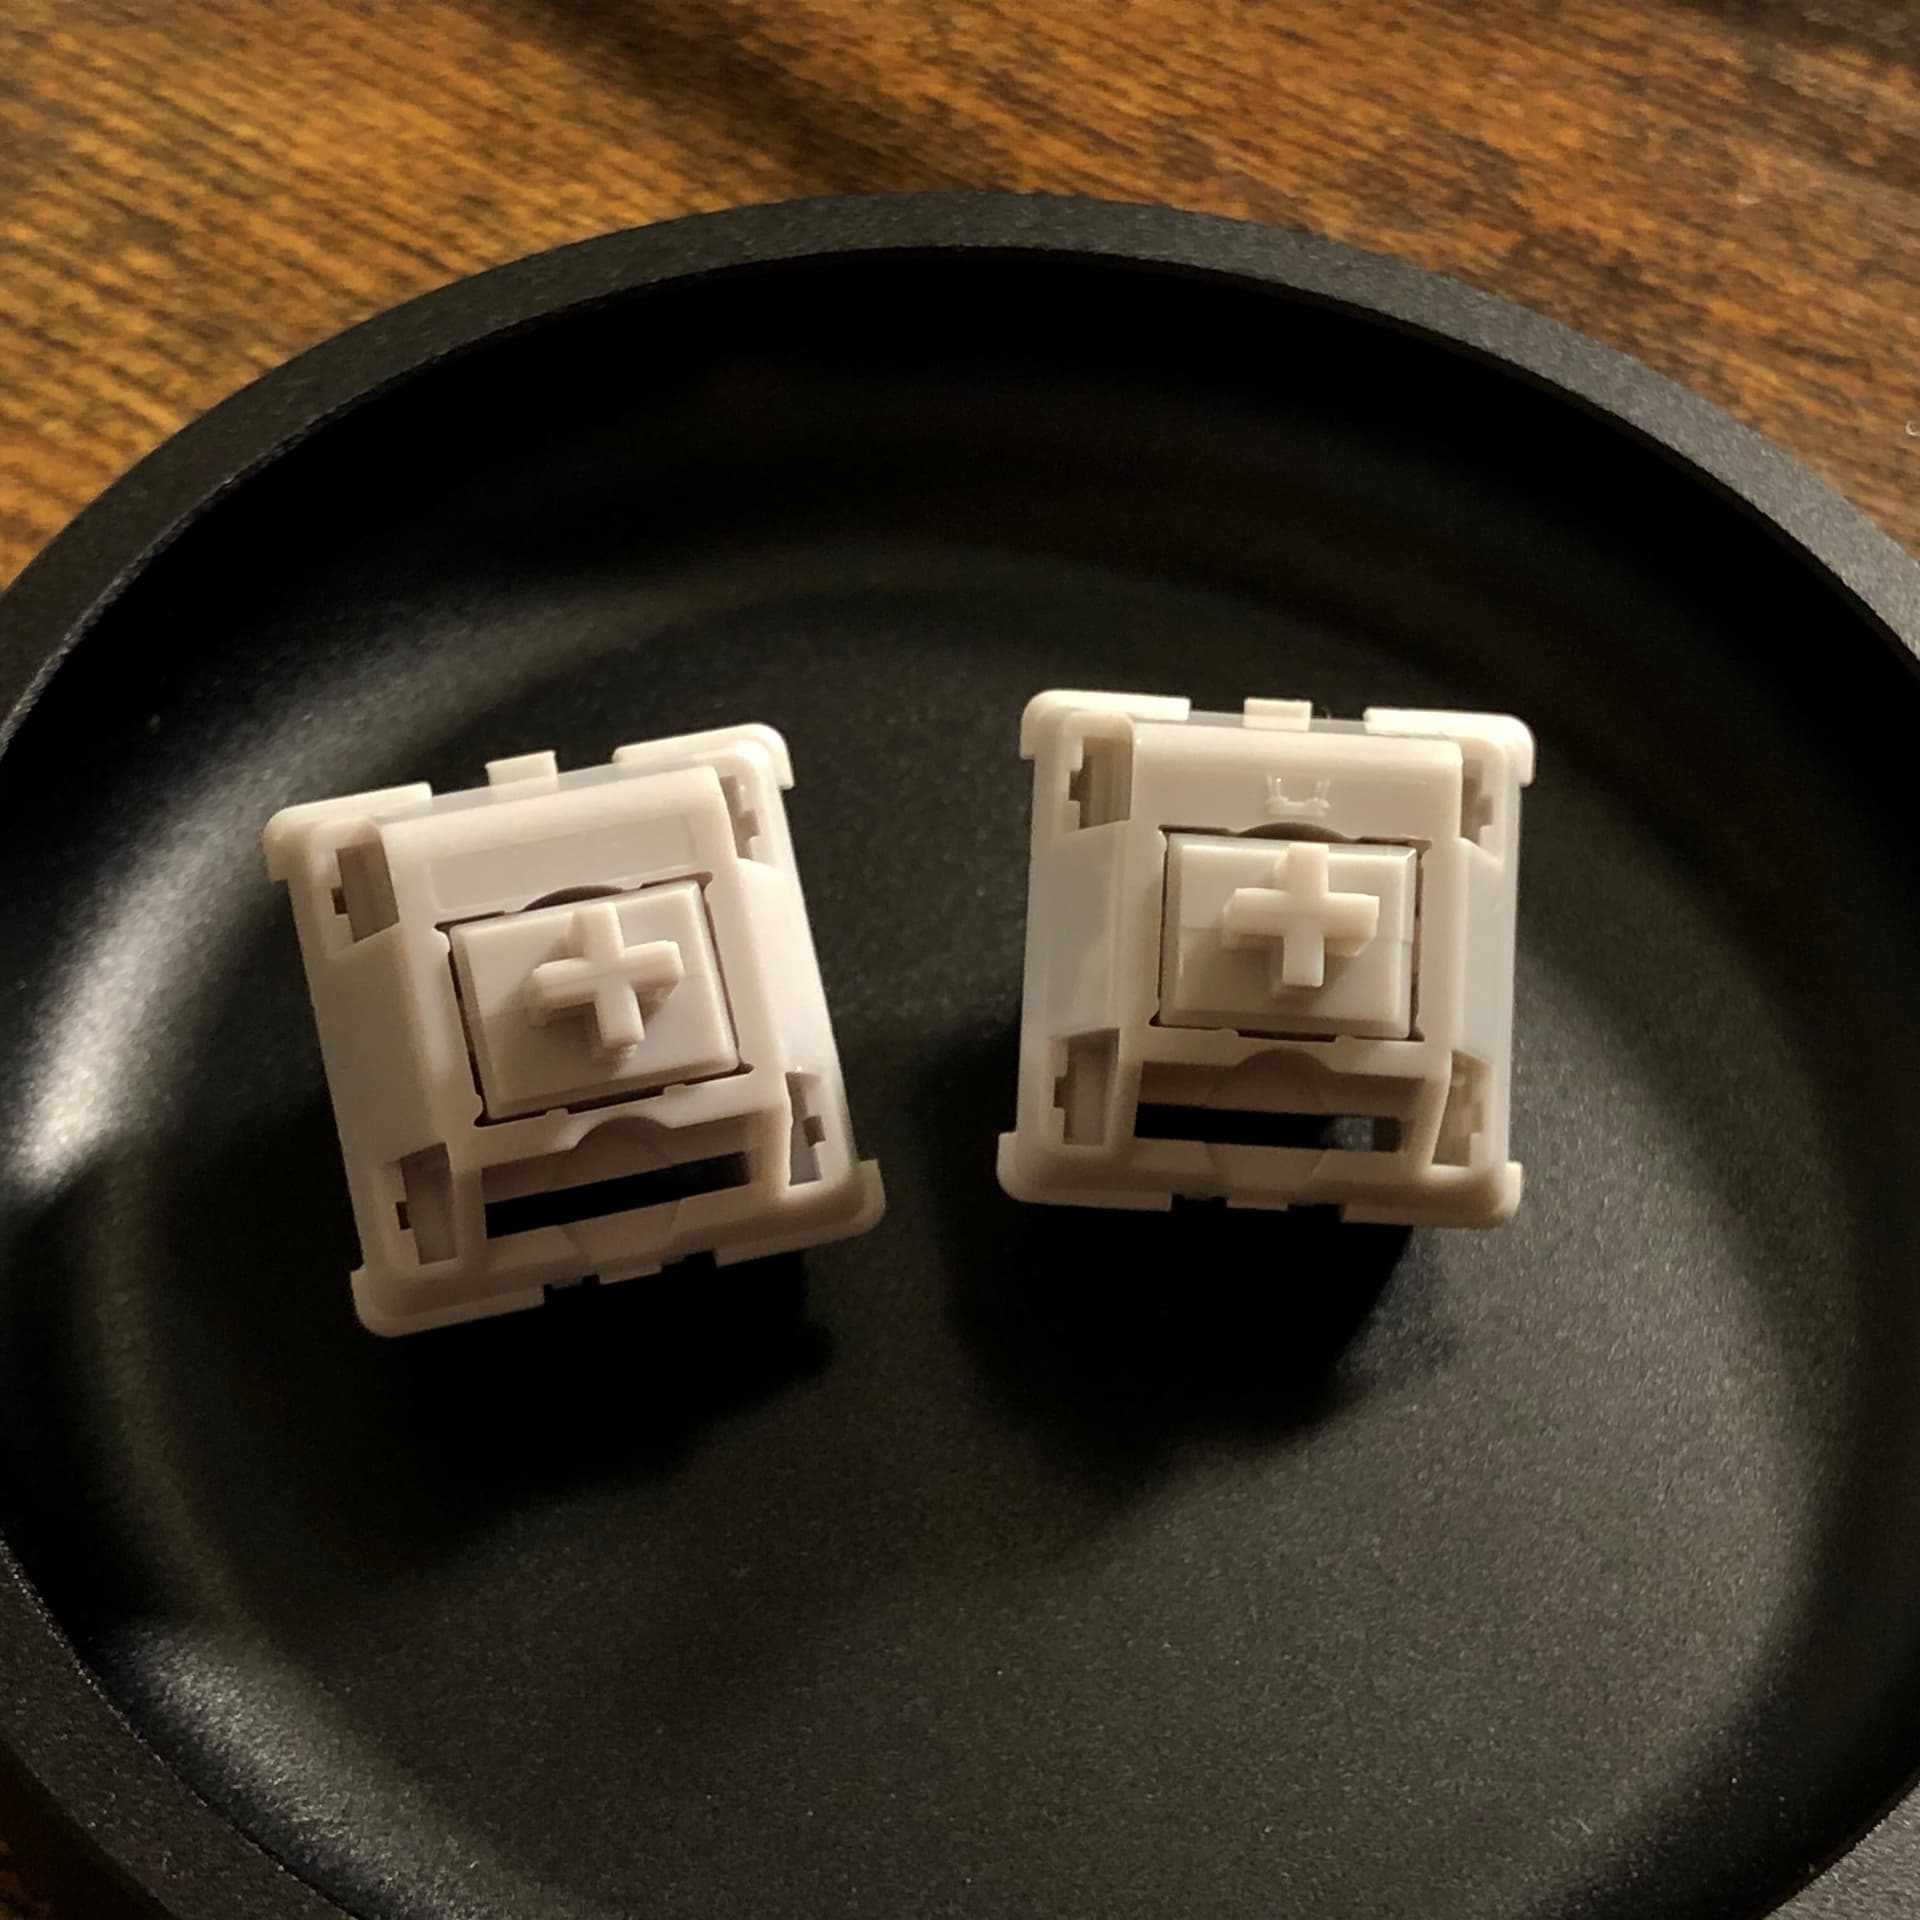
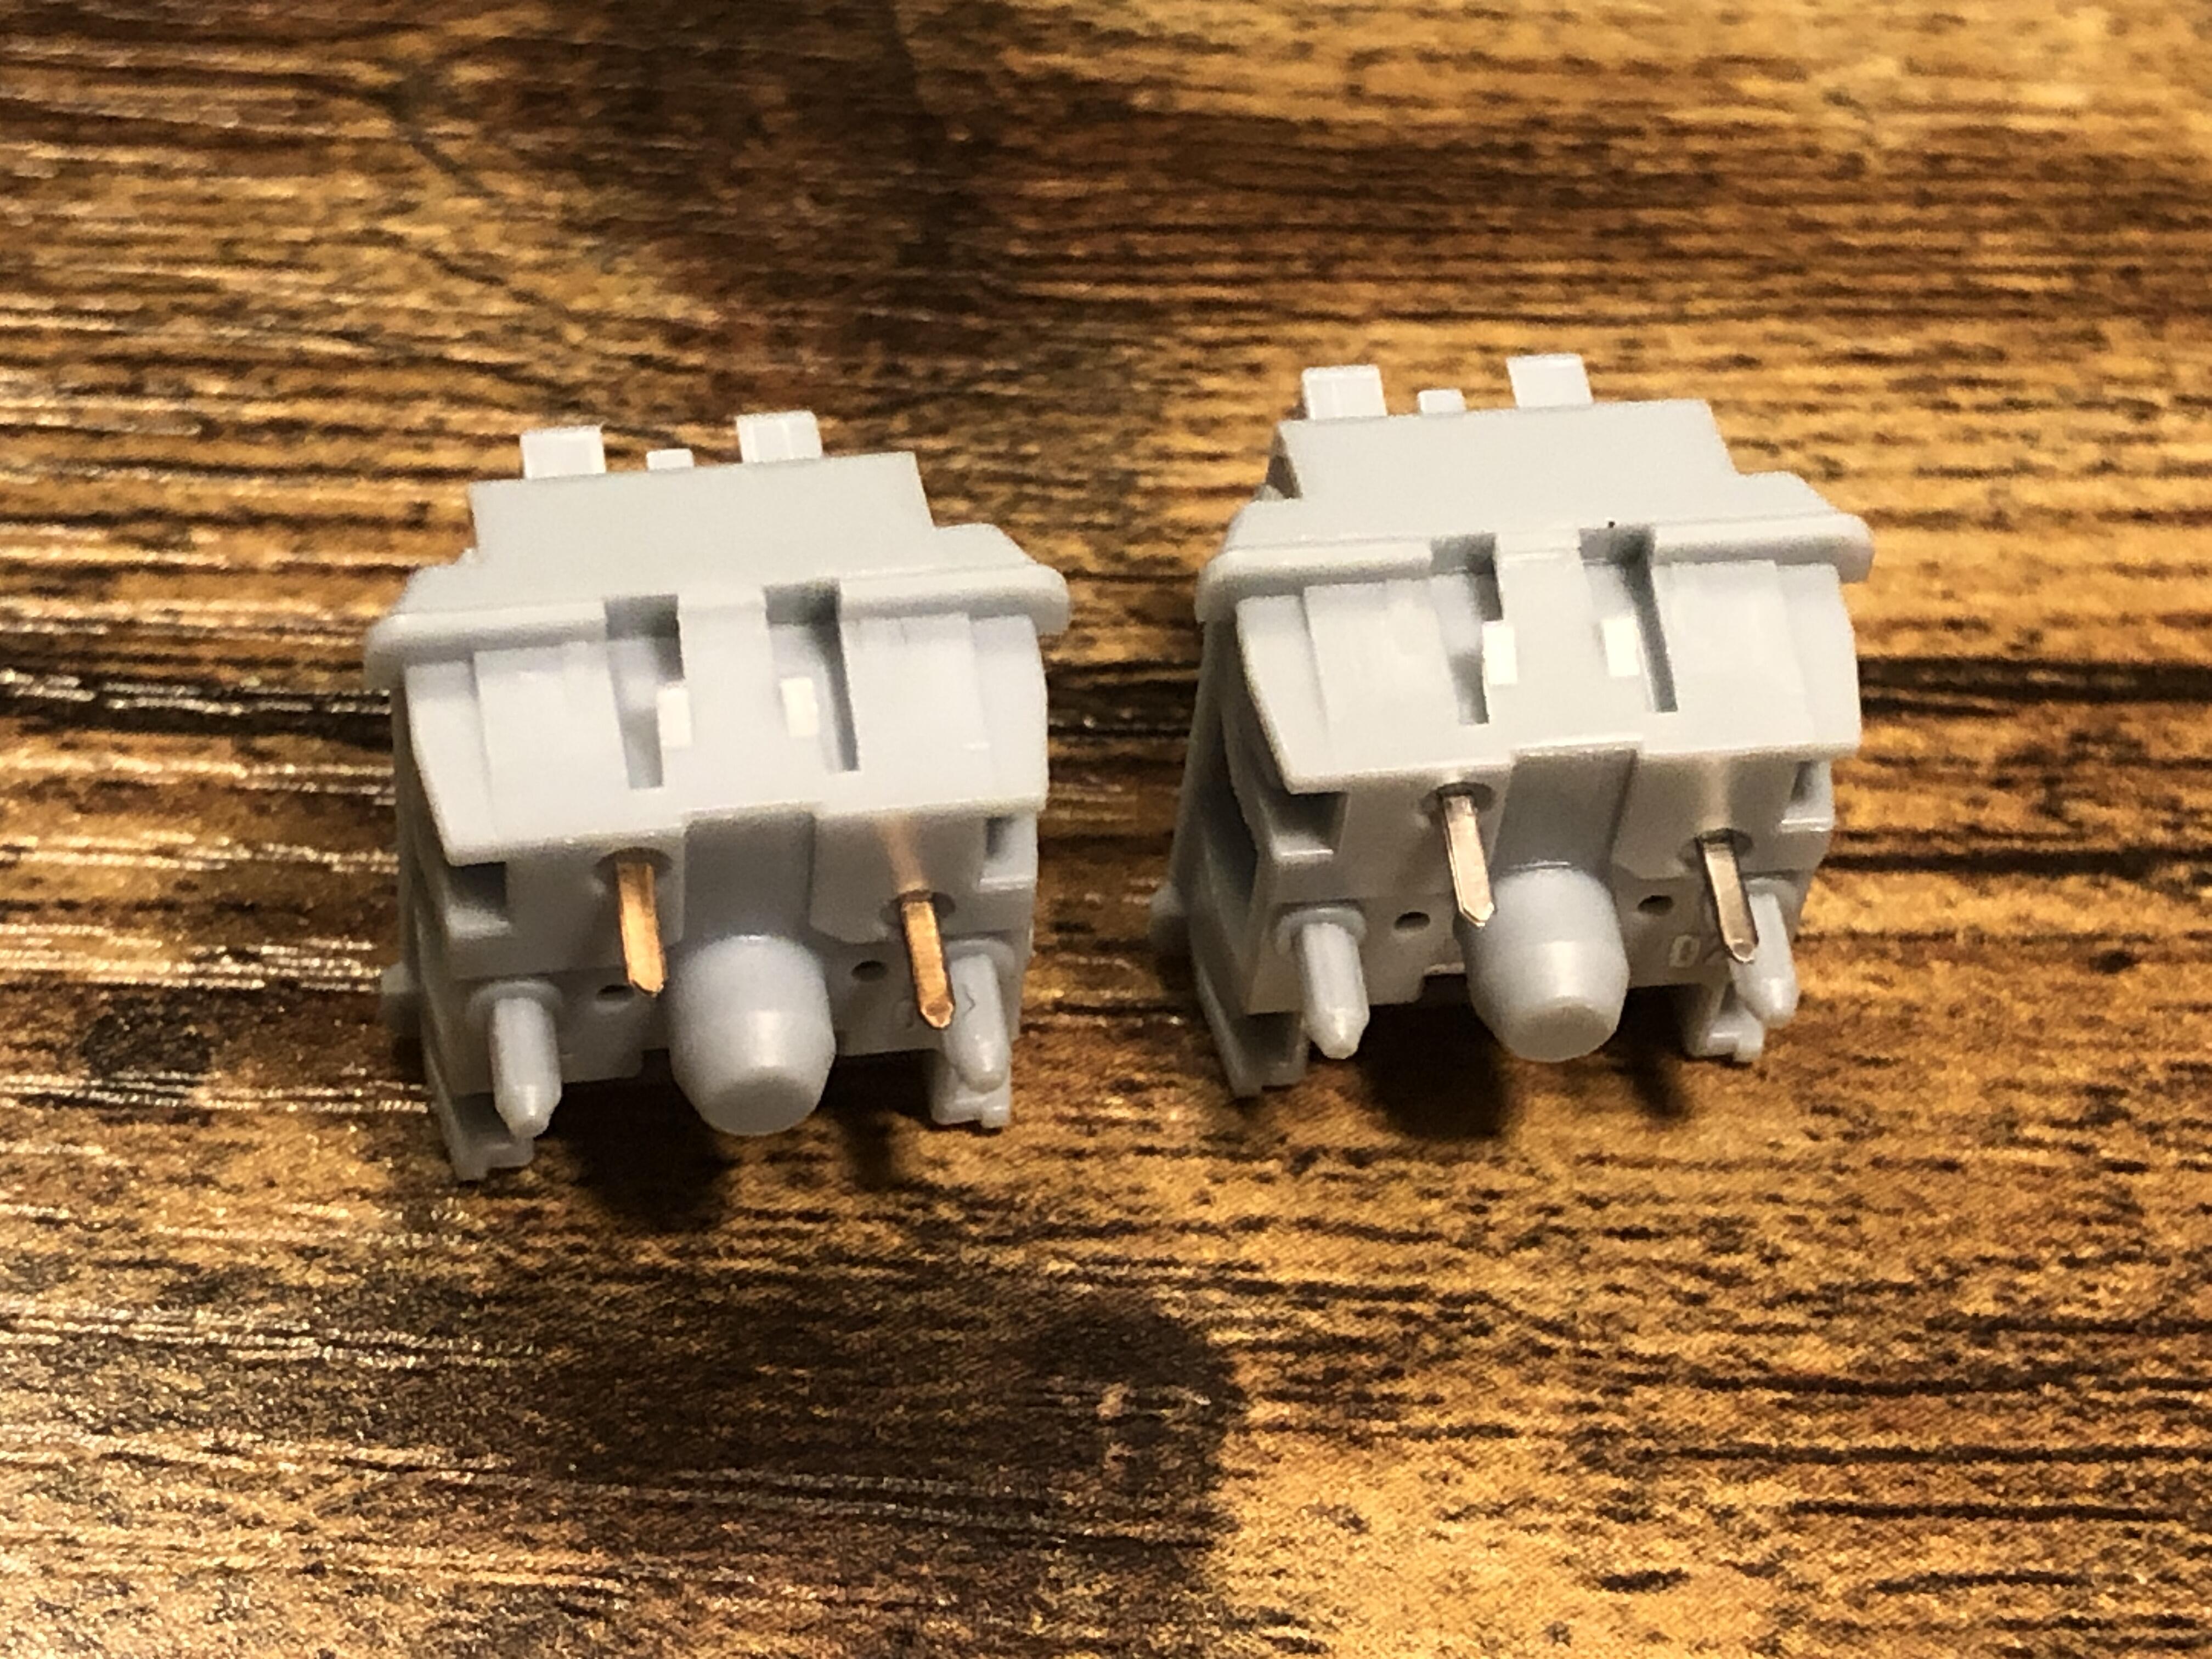
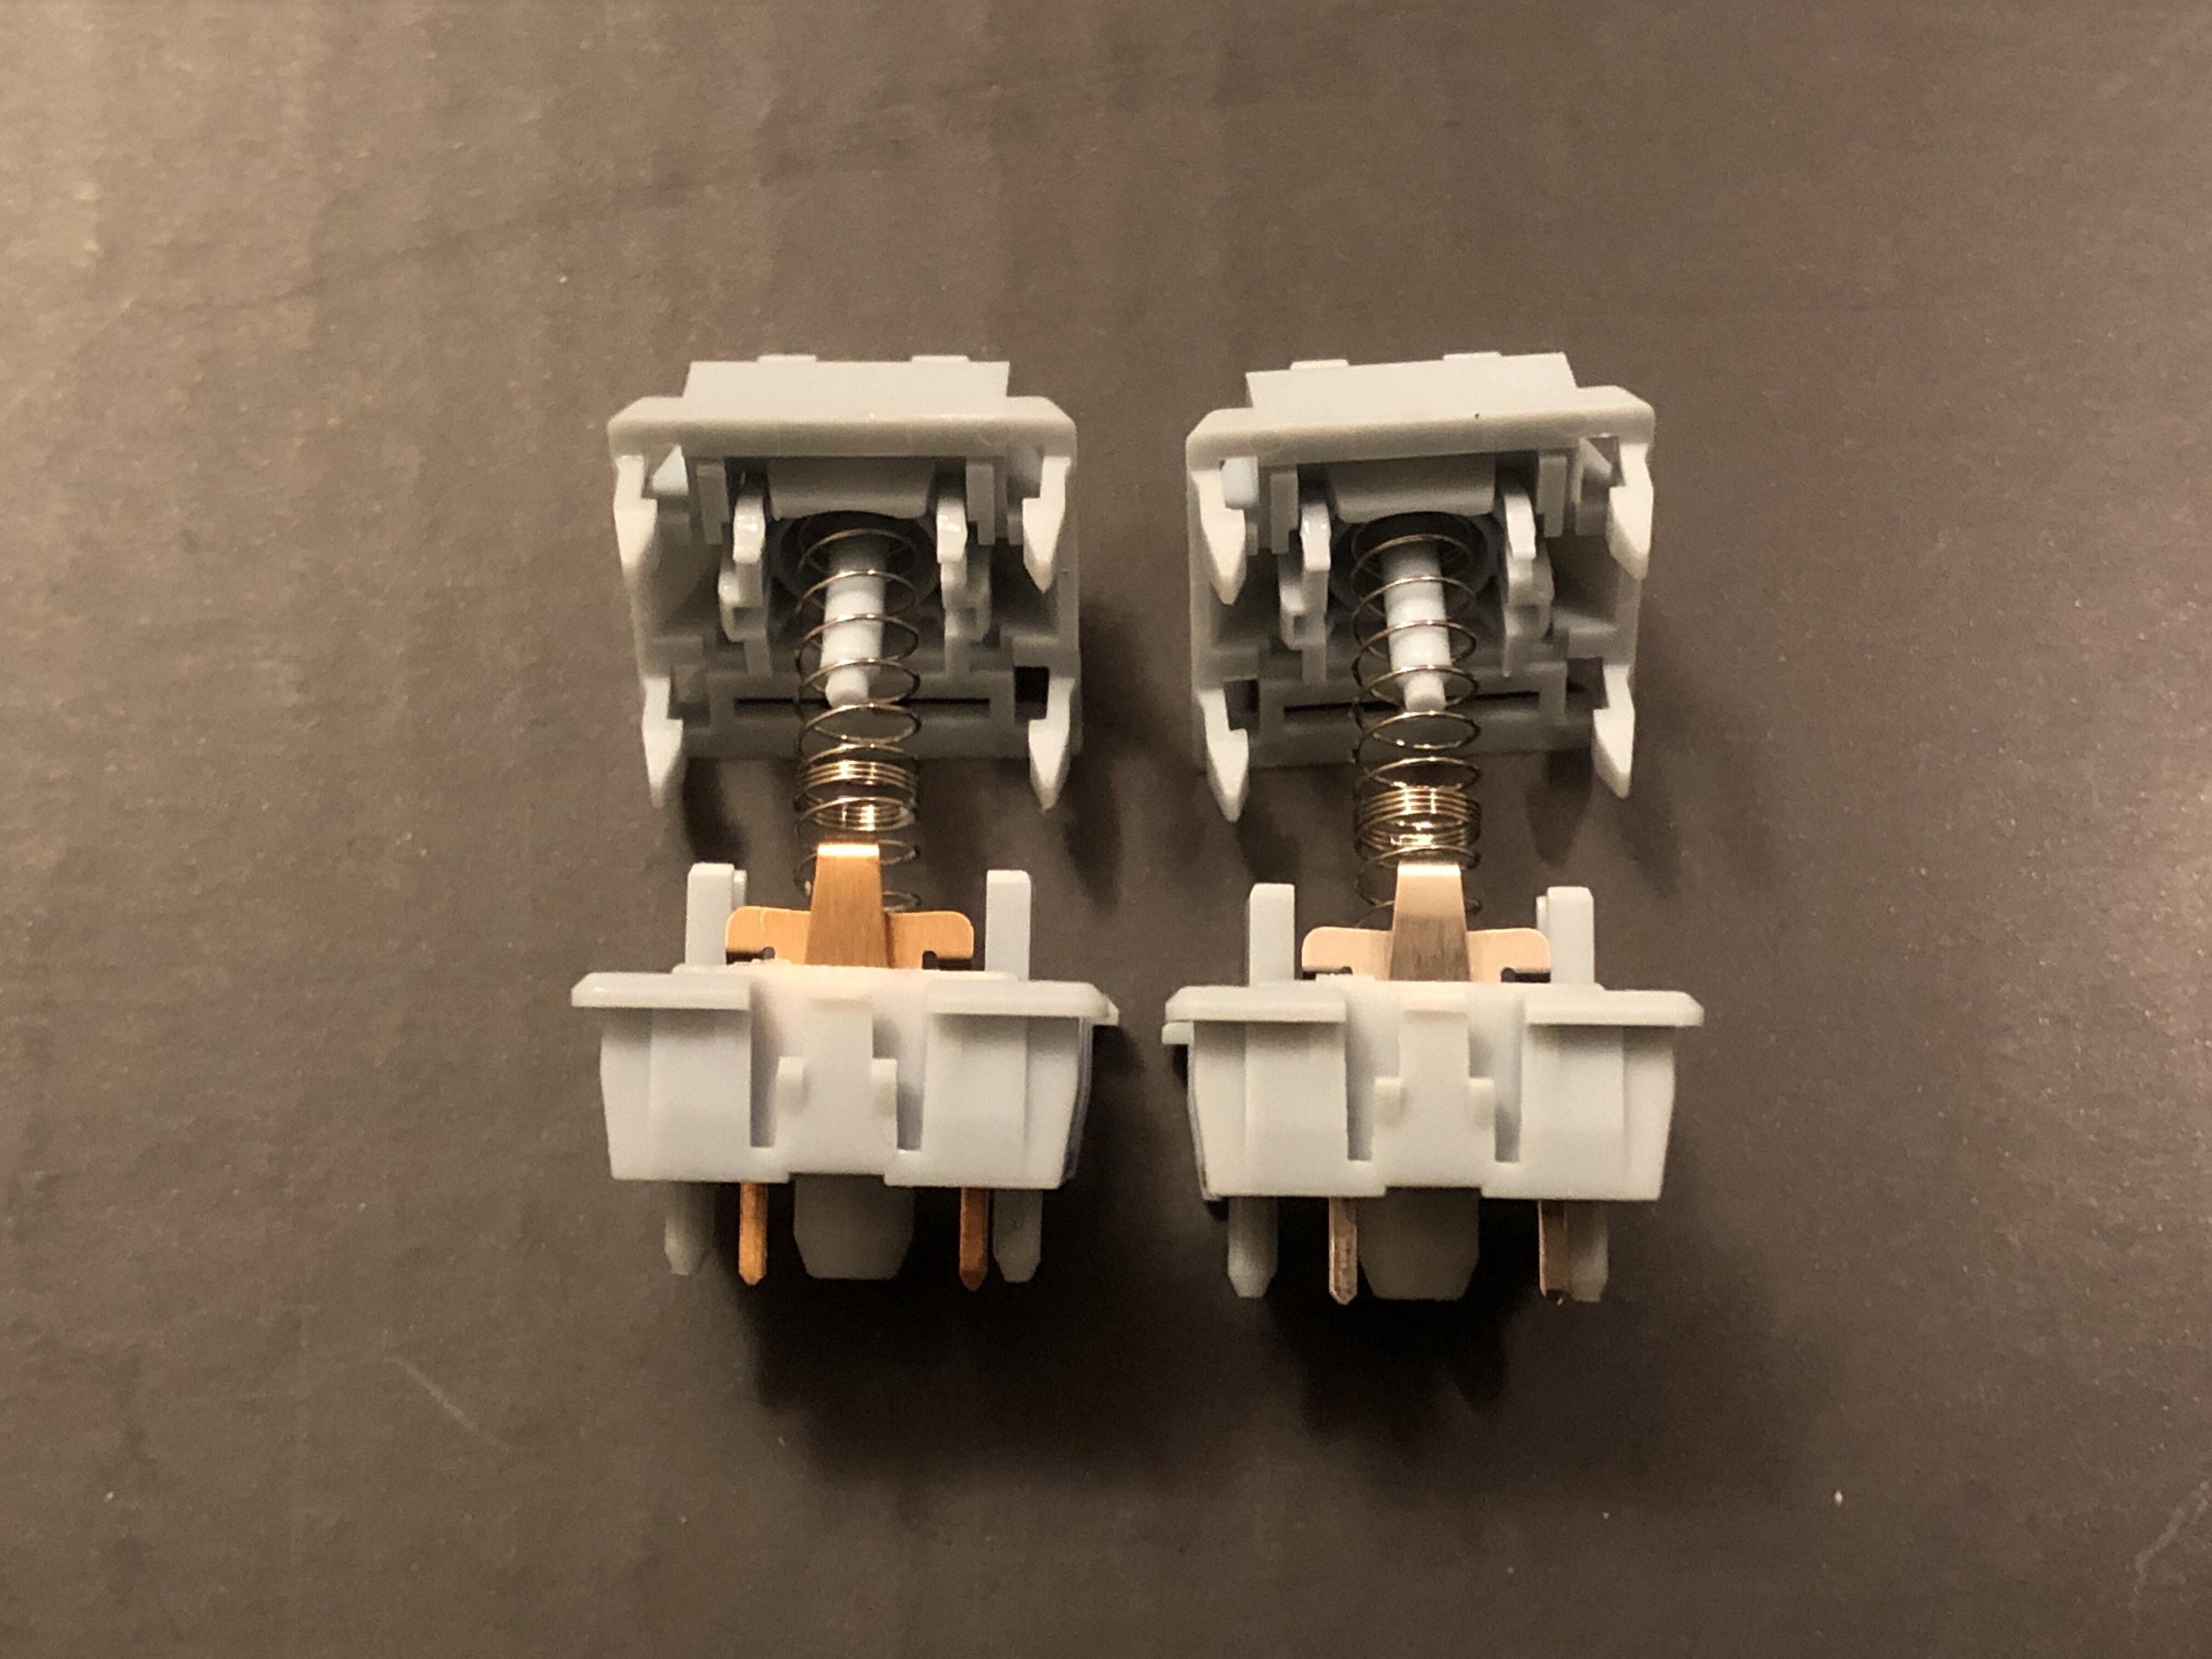
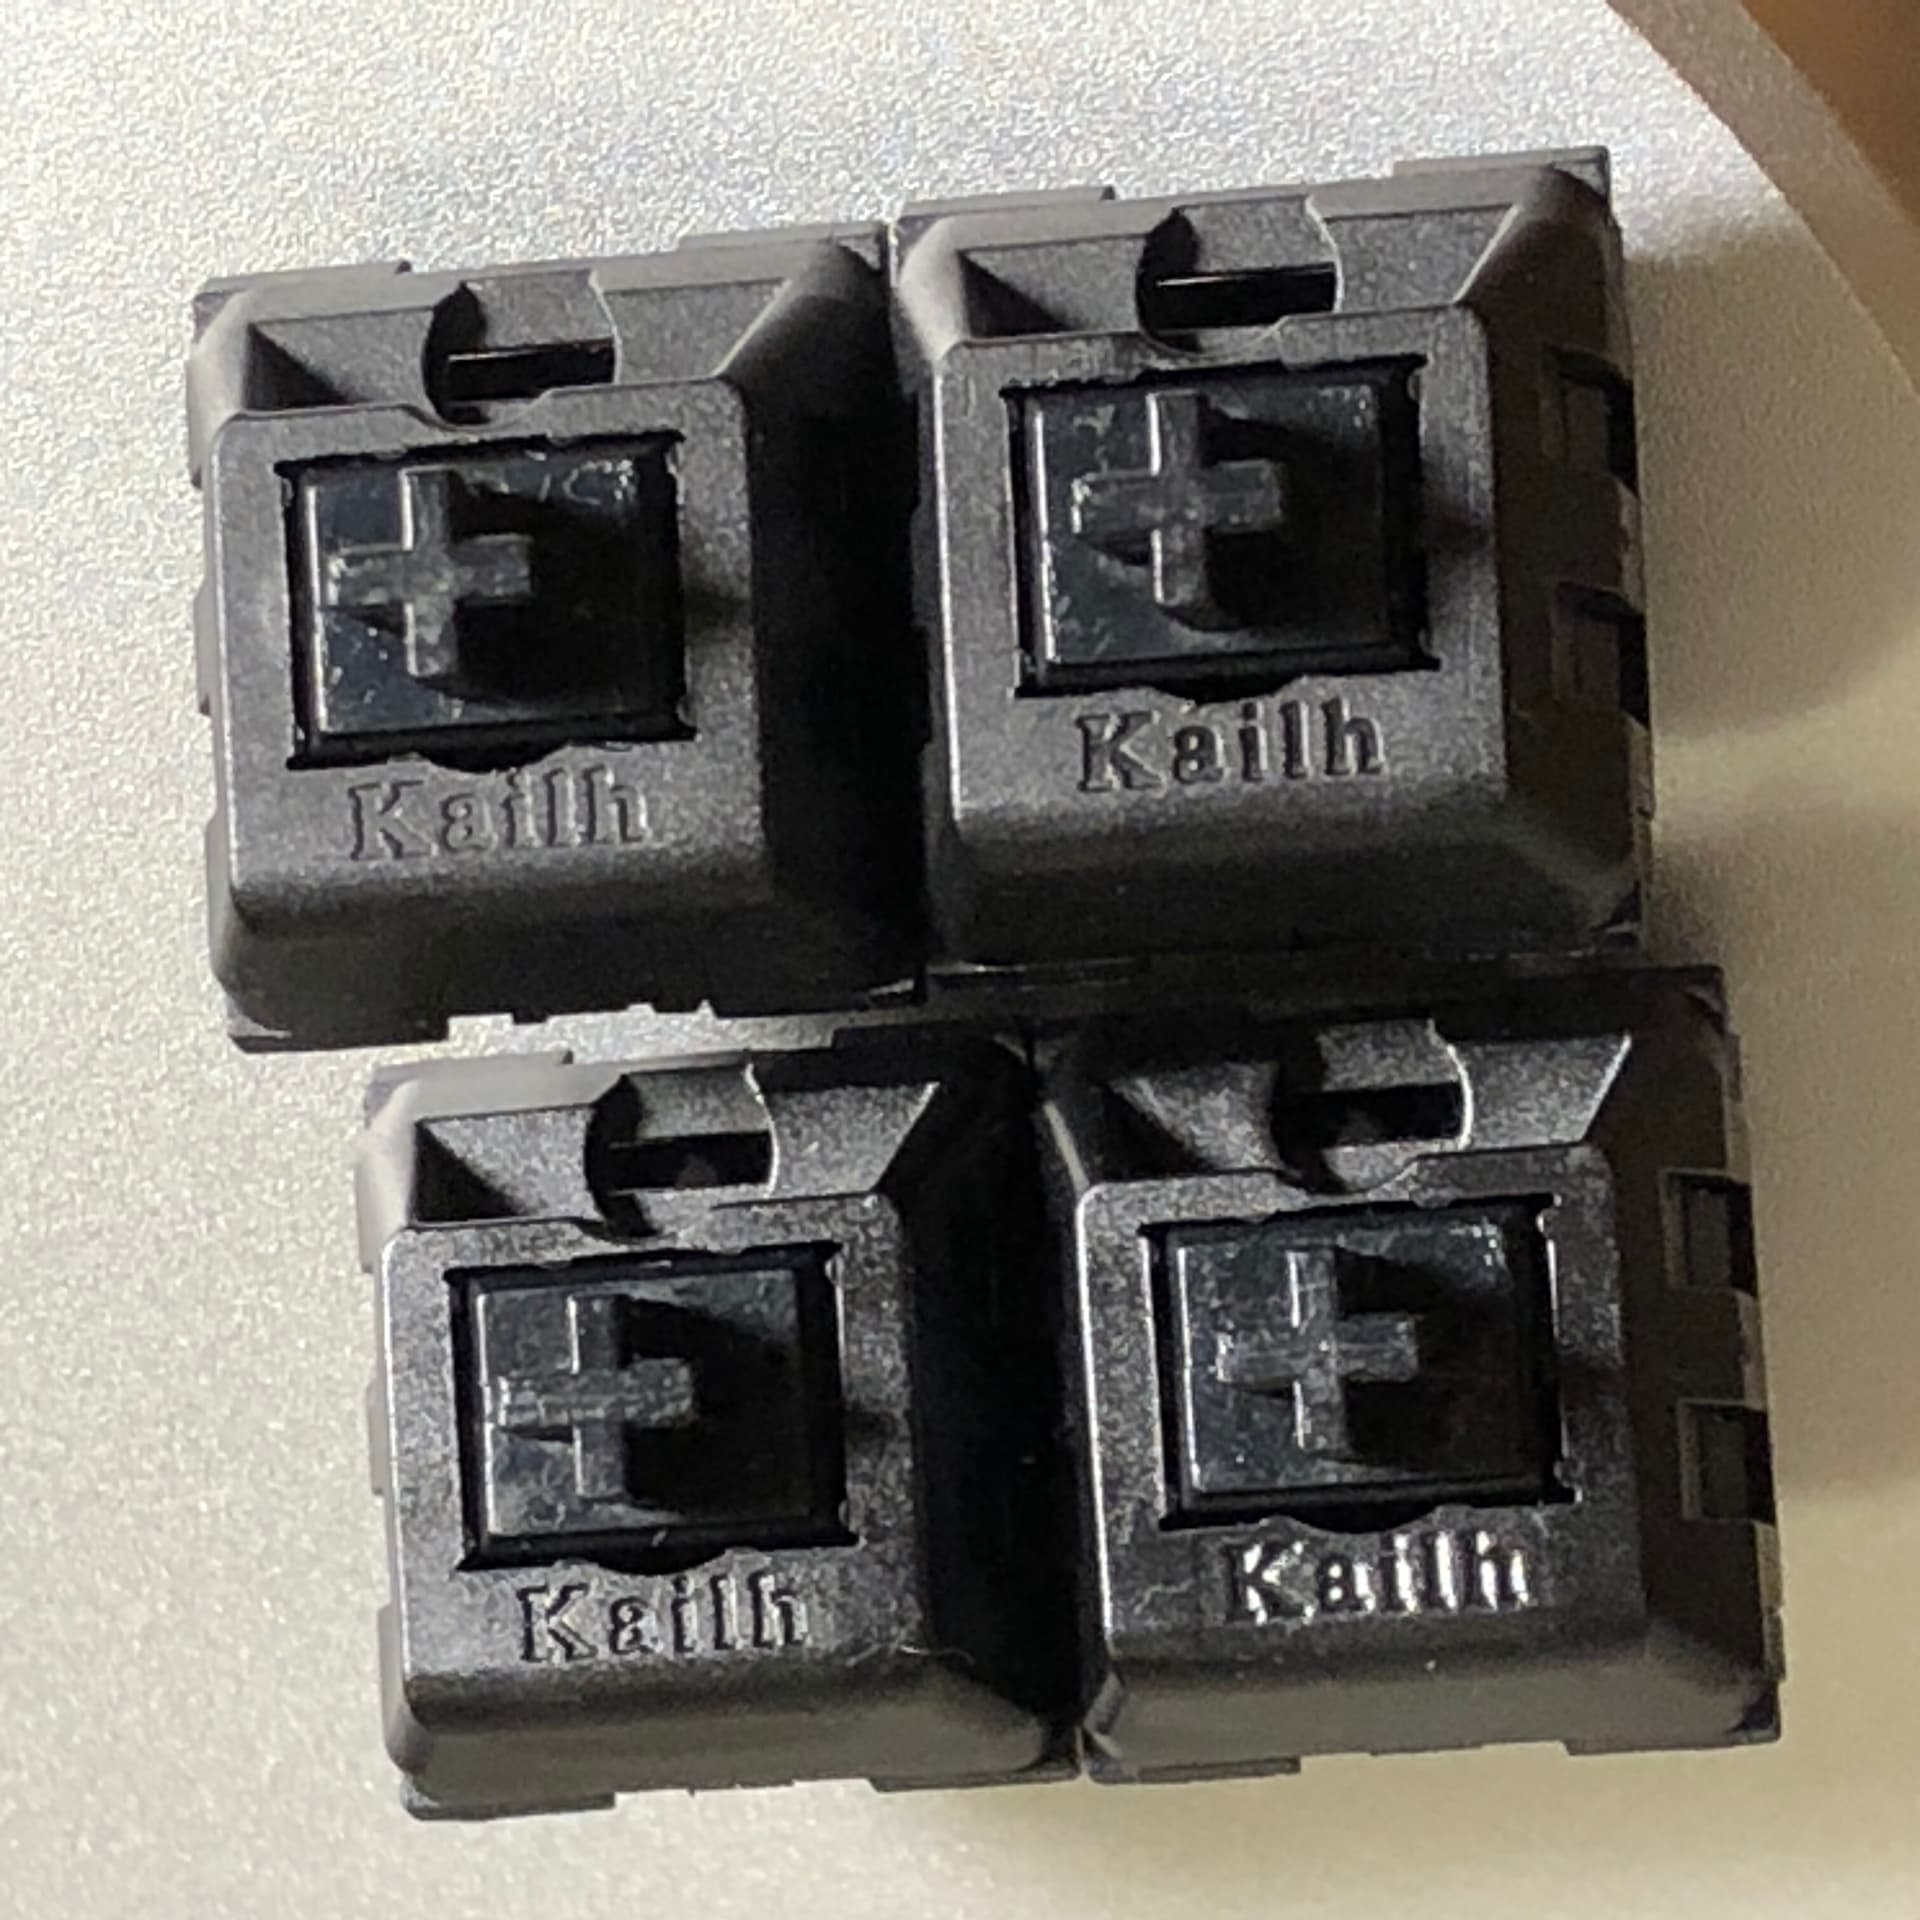
Four V1s and two V2s. Which are which? We may have to open them to find out.

I began this post thinking I’d spotted some fairly easy-to-see signs one could use to tell the difference - but it turns out none of those things held-steady when I increased the sample size. Some have shiny logos, some are matte. Some are more recessed than others. Some housings are kinda shiny, some are kinda rough.


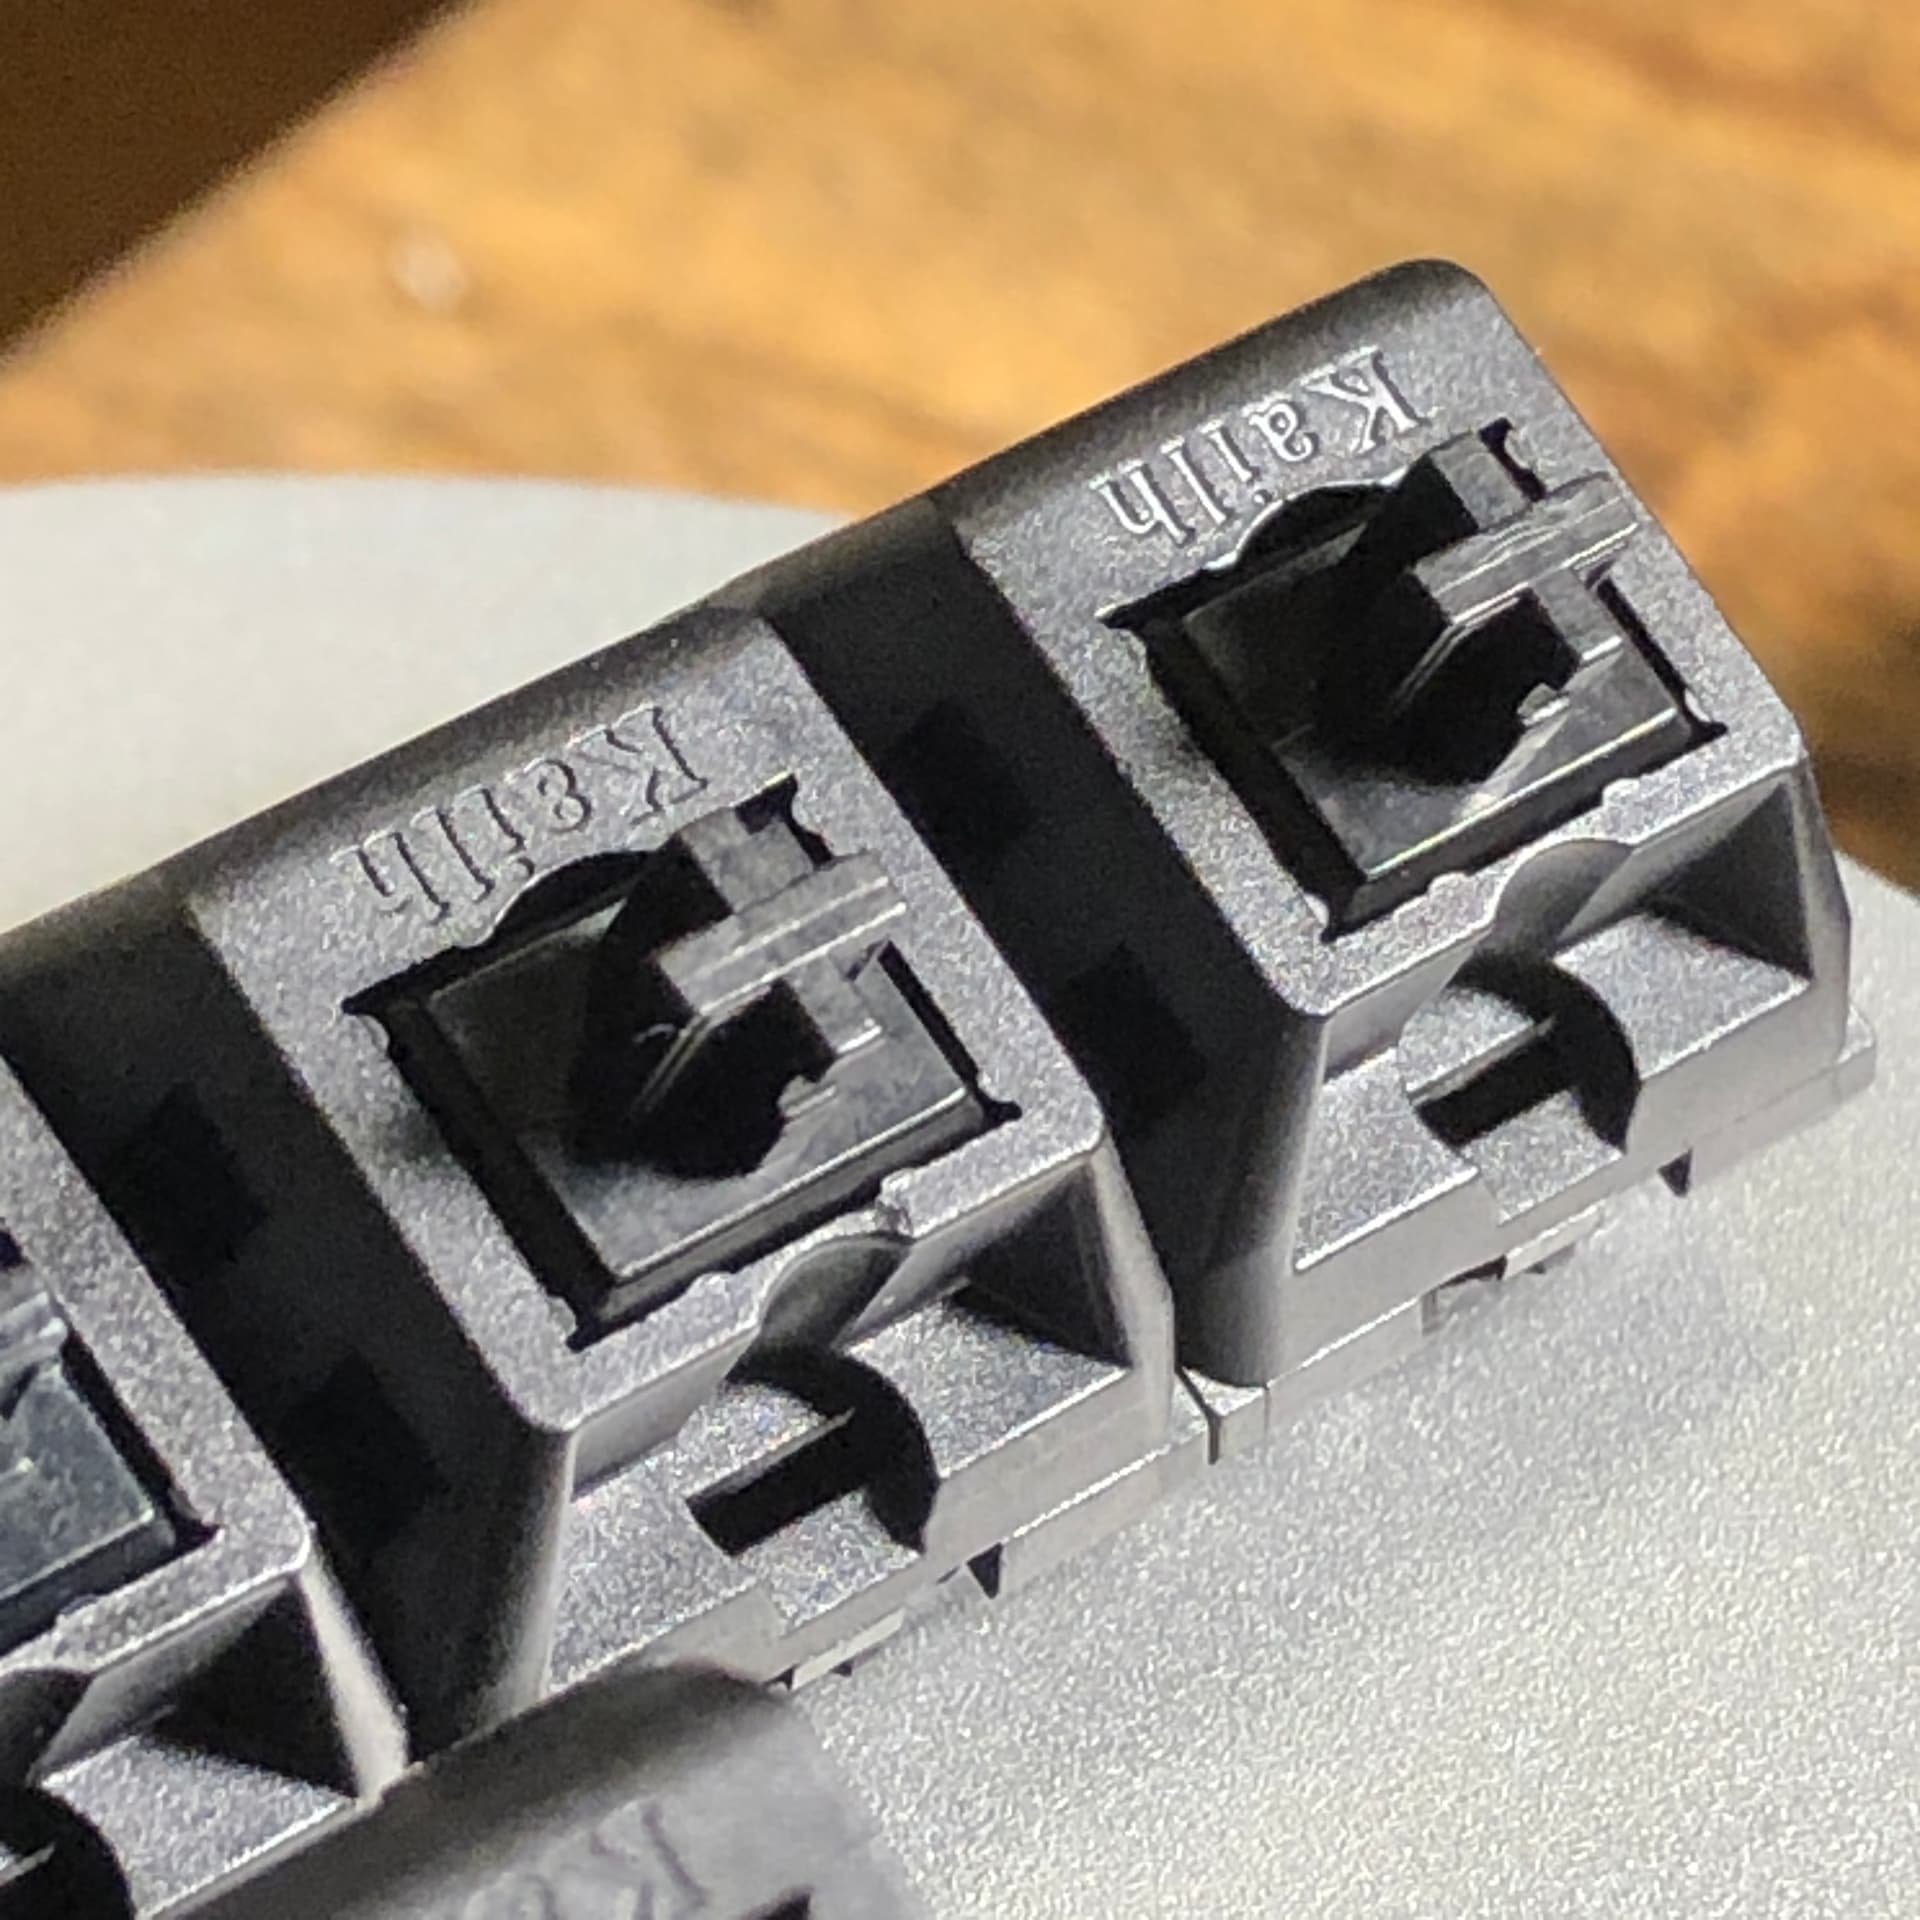
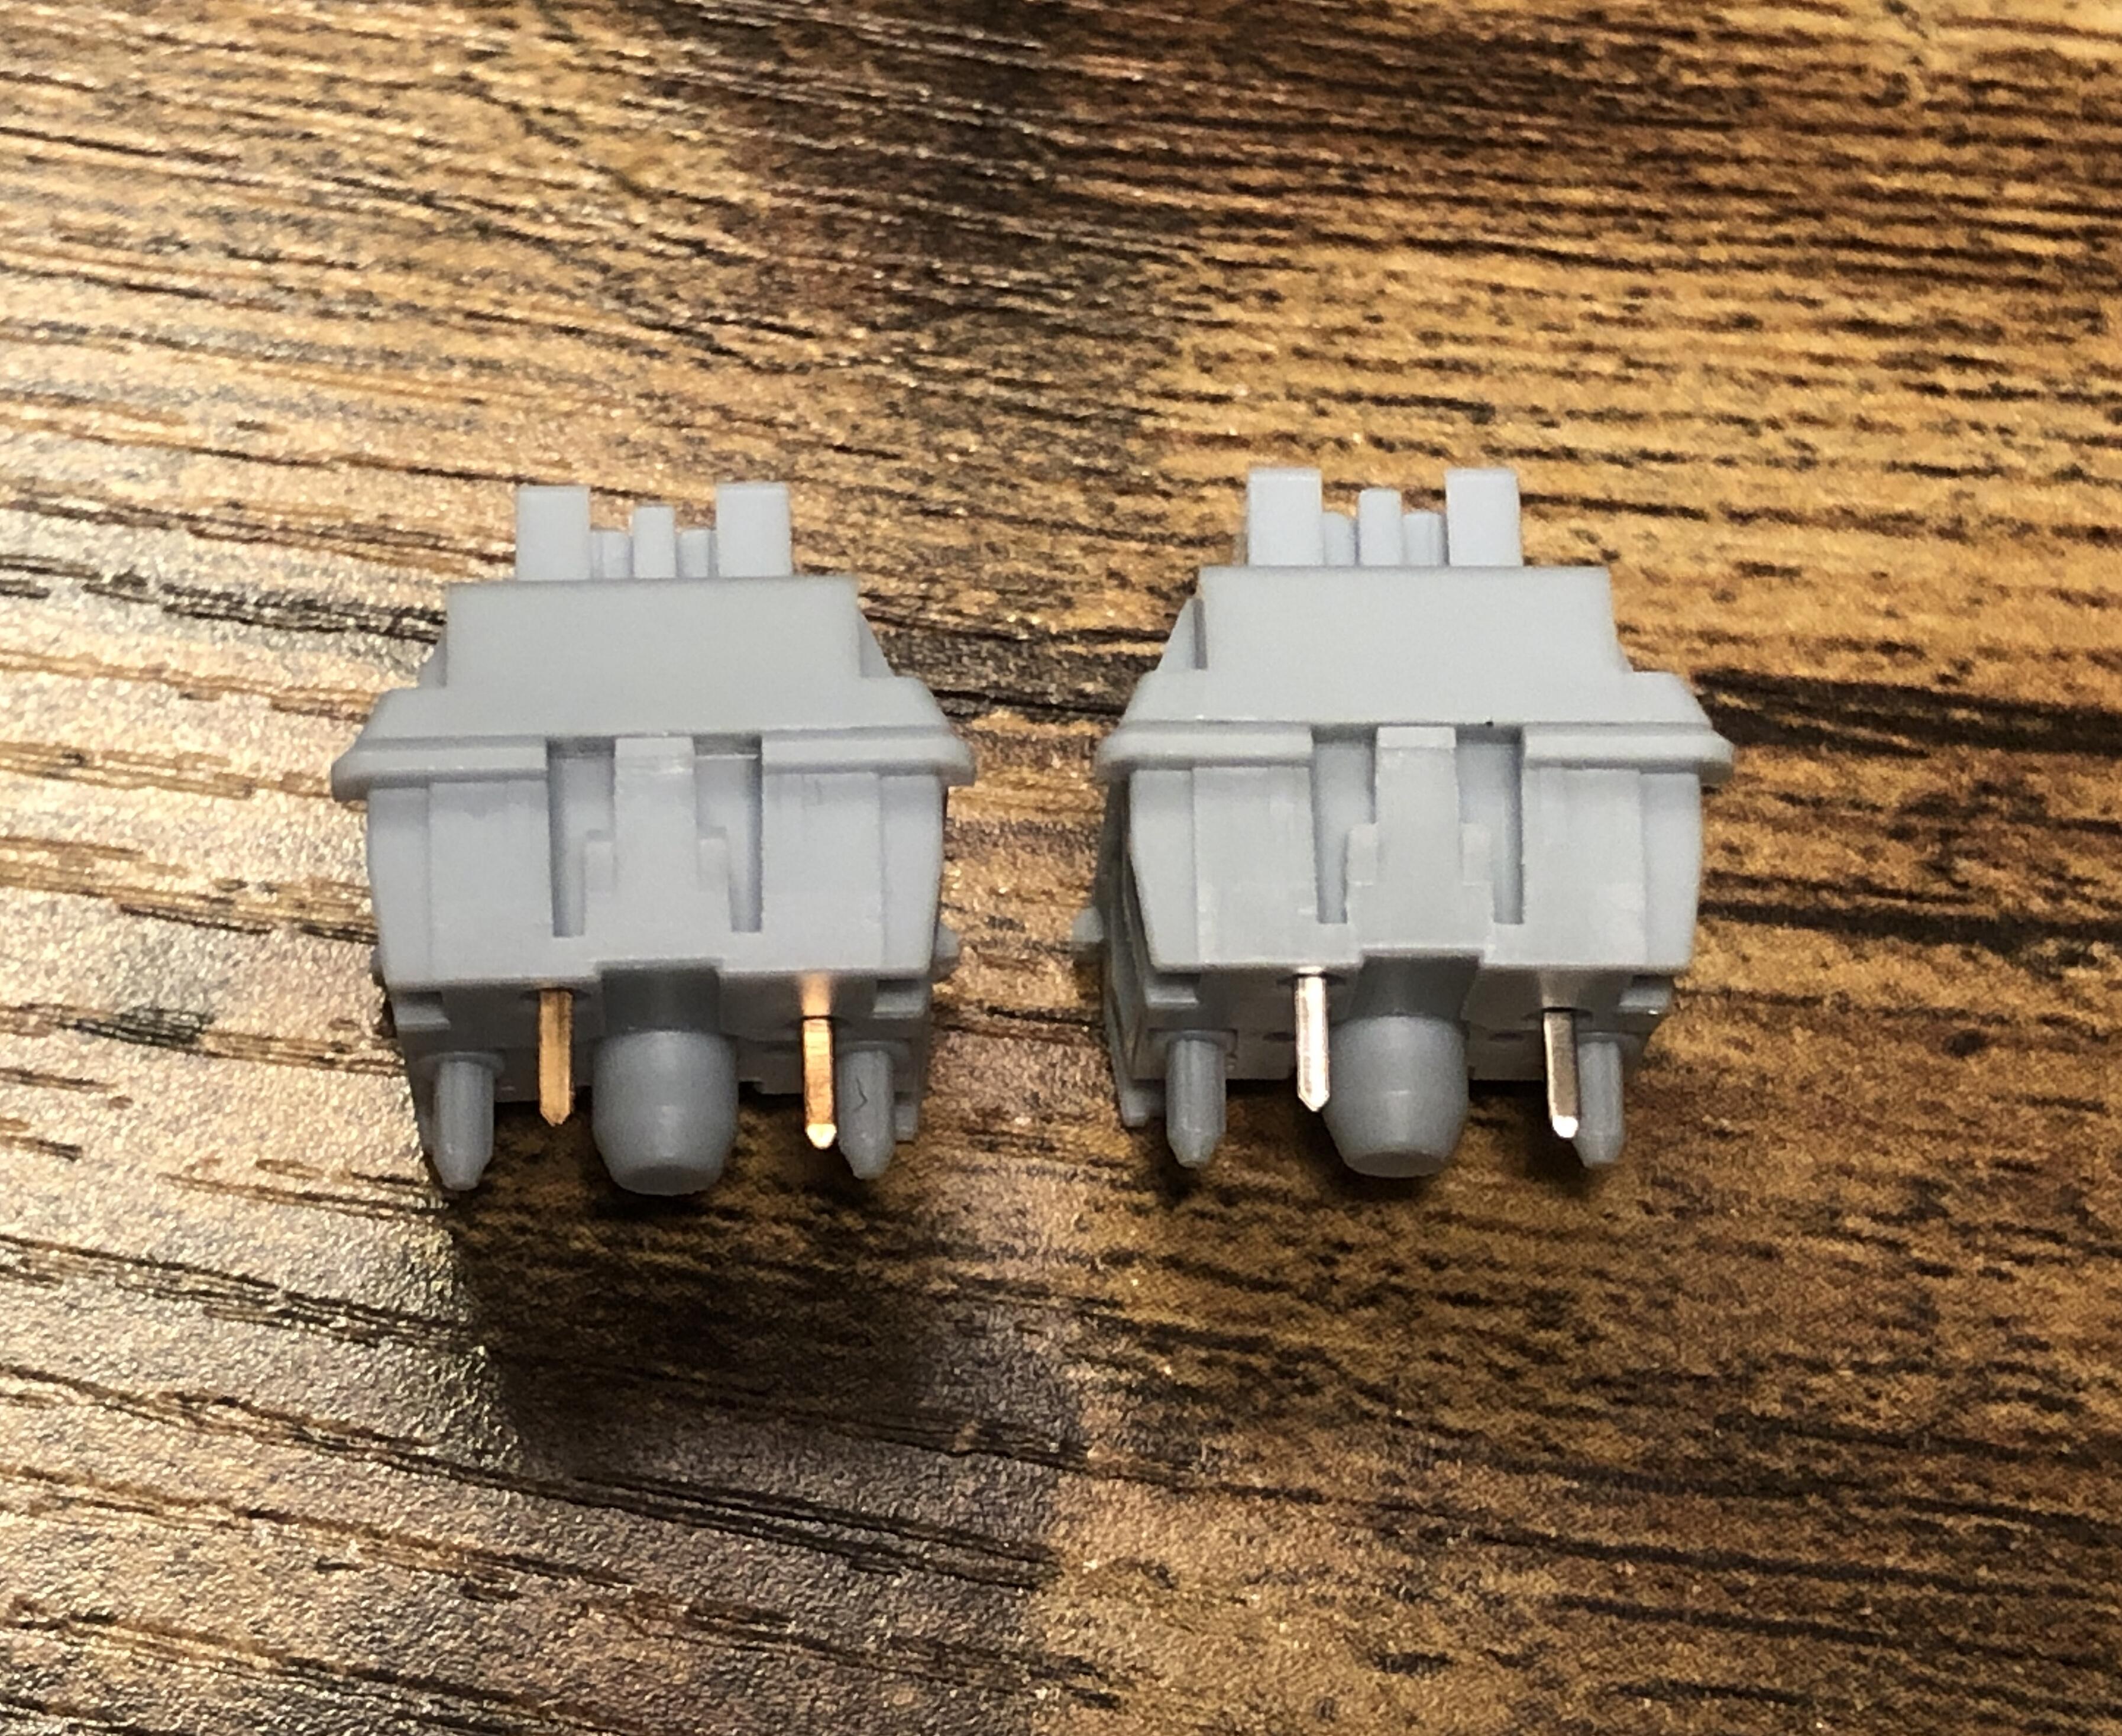
V2s, one with a shiny logo, one with a matte logo.


V1s; smooth, rough, shiny logo, matte logo - all over the place.

So far, I’ve identified at least two distinct appearances that a V2 can have… and at least four that a V1 can have… with one effectively being an overlap between both. What I’ve learned this evening about Kailh Blacks is that their outward appearance can be quite inconsistent - and that alone really isn’t going to be sufficient to tell what kind of stem you’ll have inside.


Those same V1s; different arrangement, angle, lighting

In fact, the more I look at these, the more I think that the stem itself is the only differentiating factor between V1 and V2 Kailh Blacks - at least the only visually obvious one.


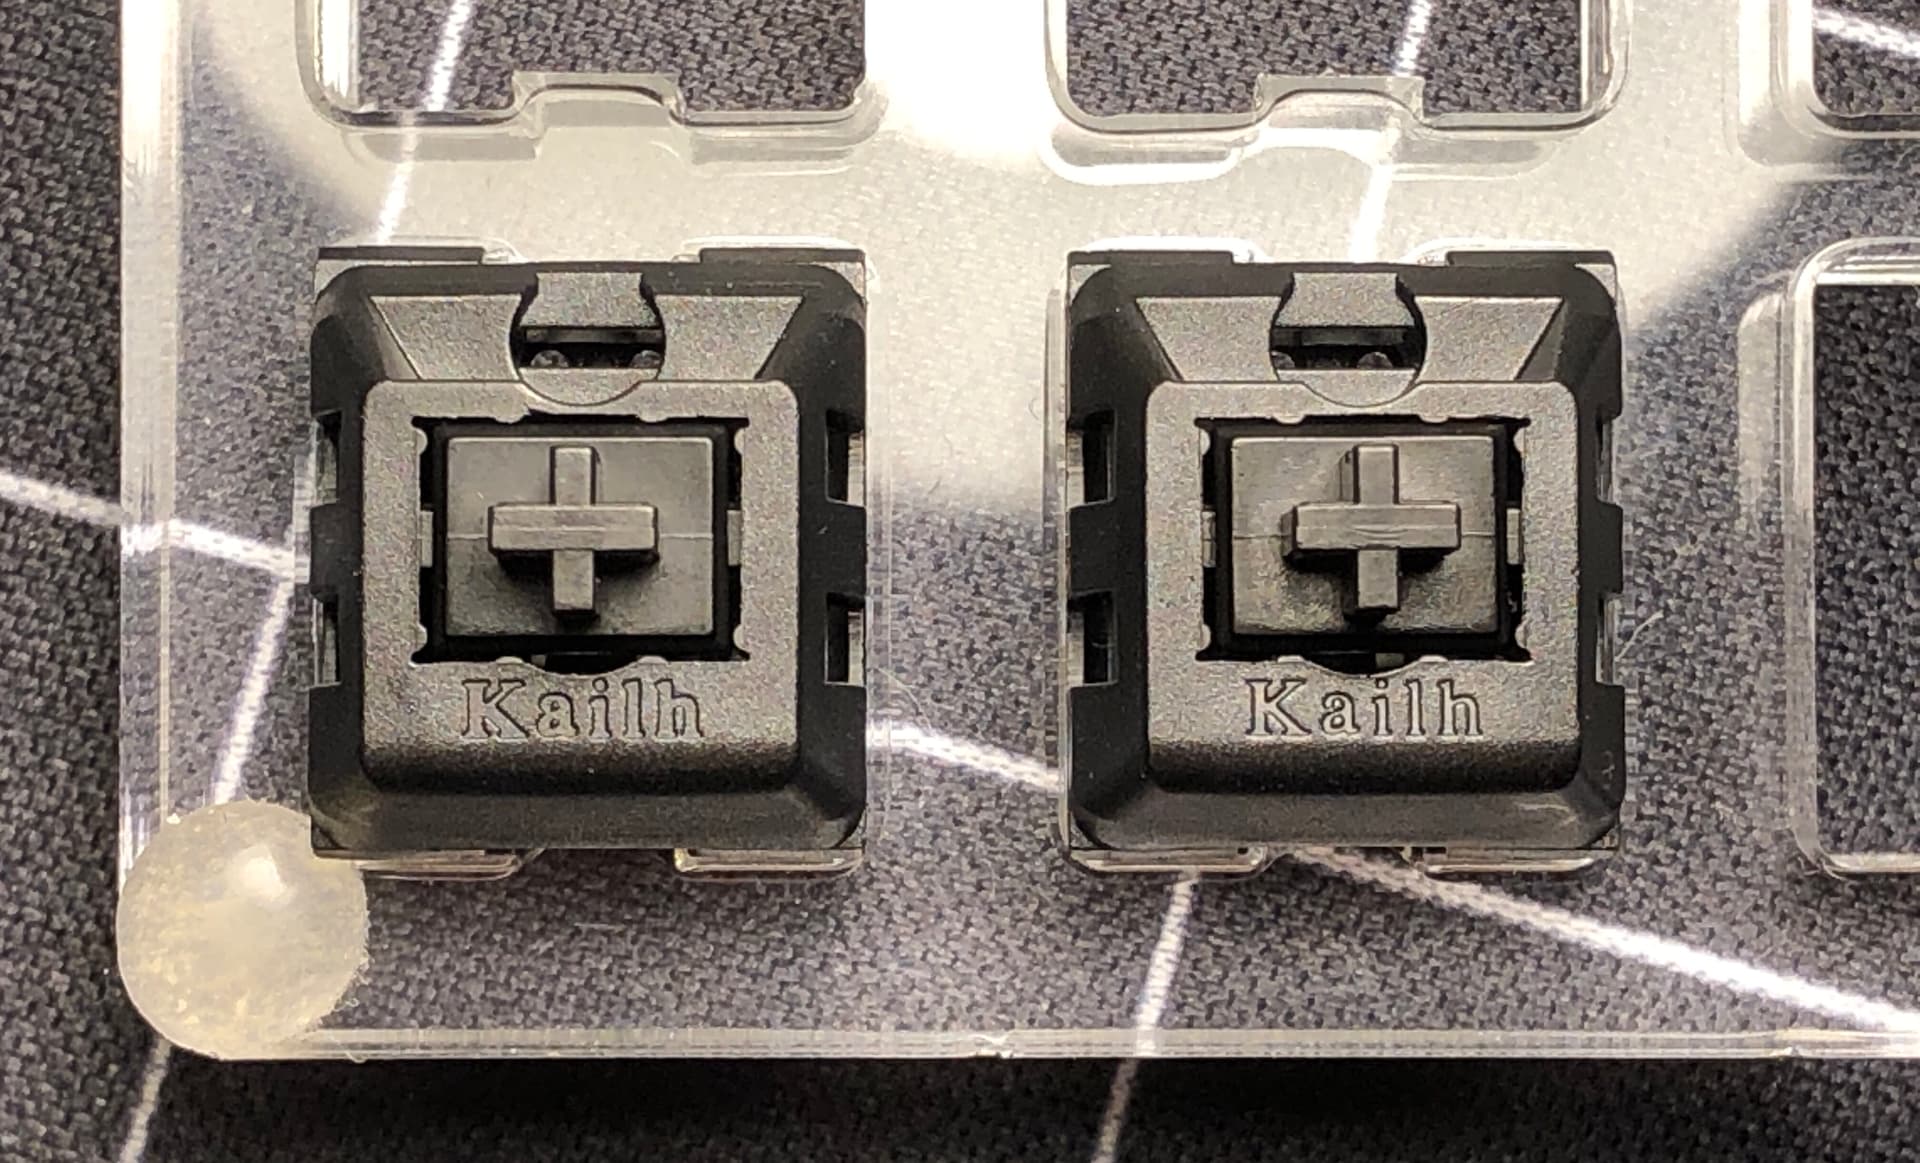
A little blob of grease on the left-most leg, there.

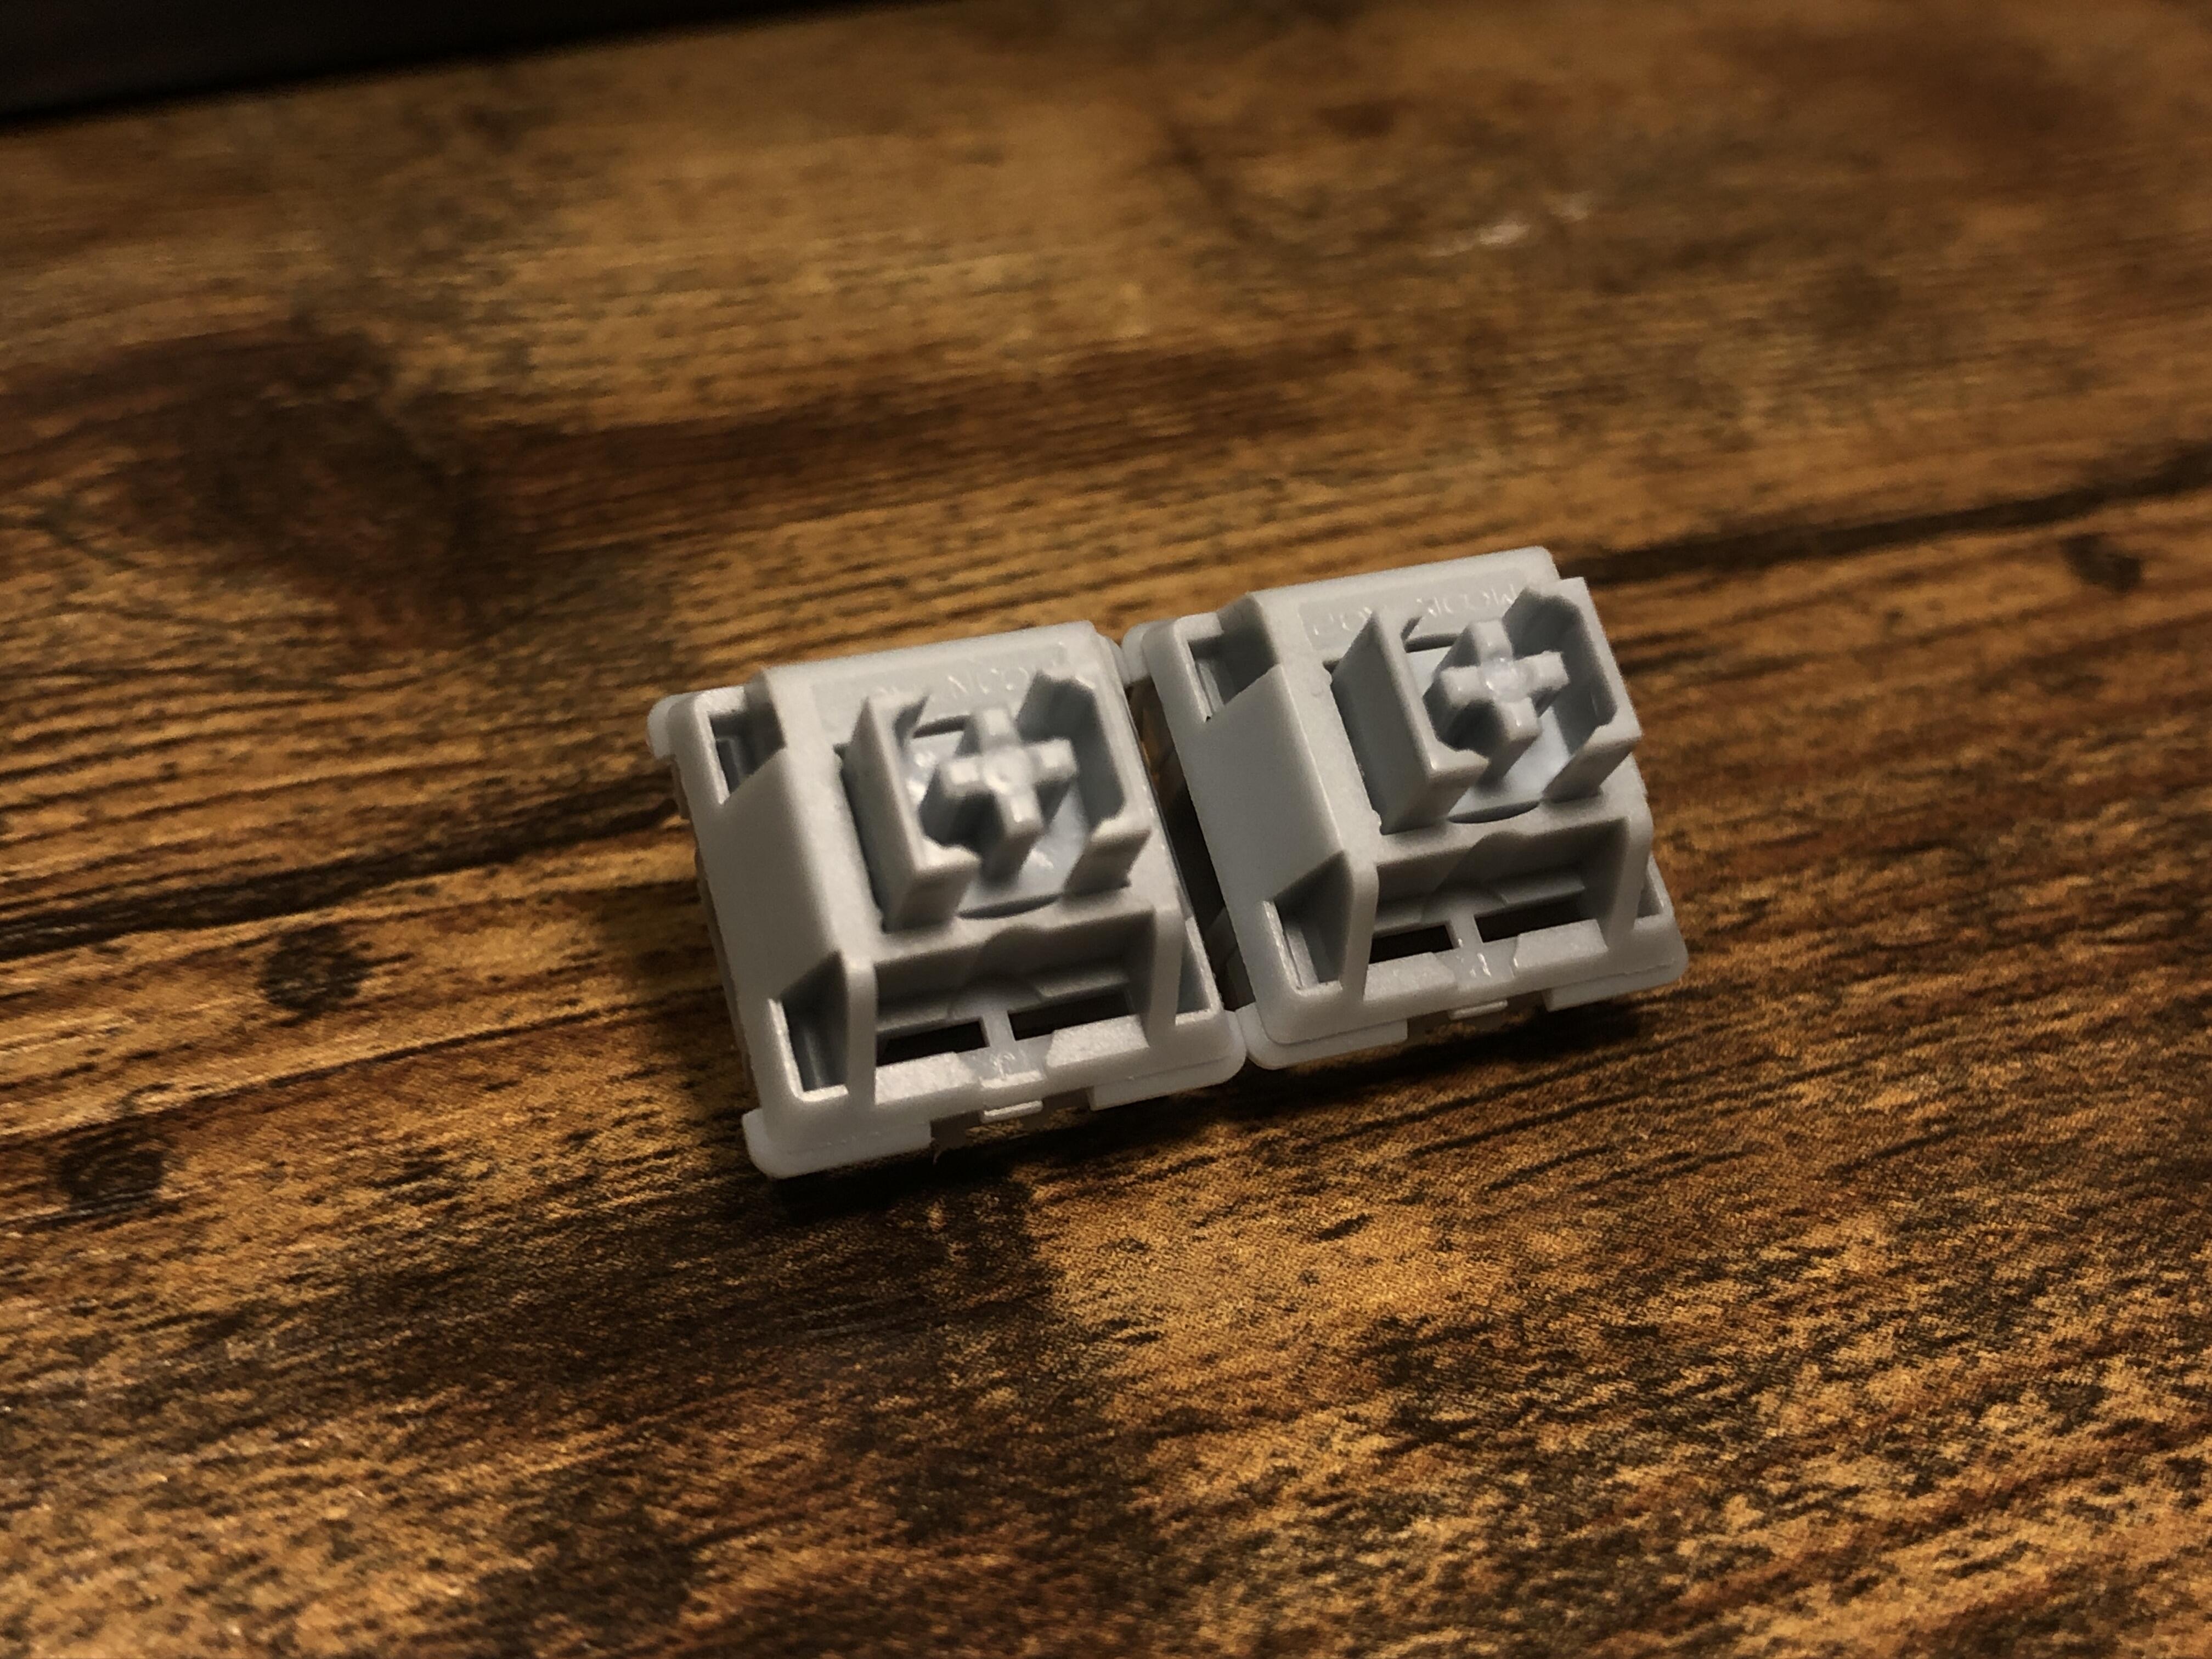
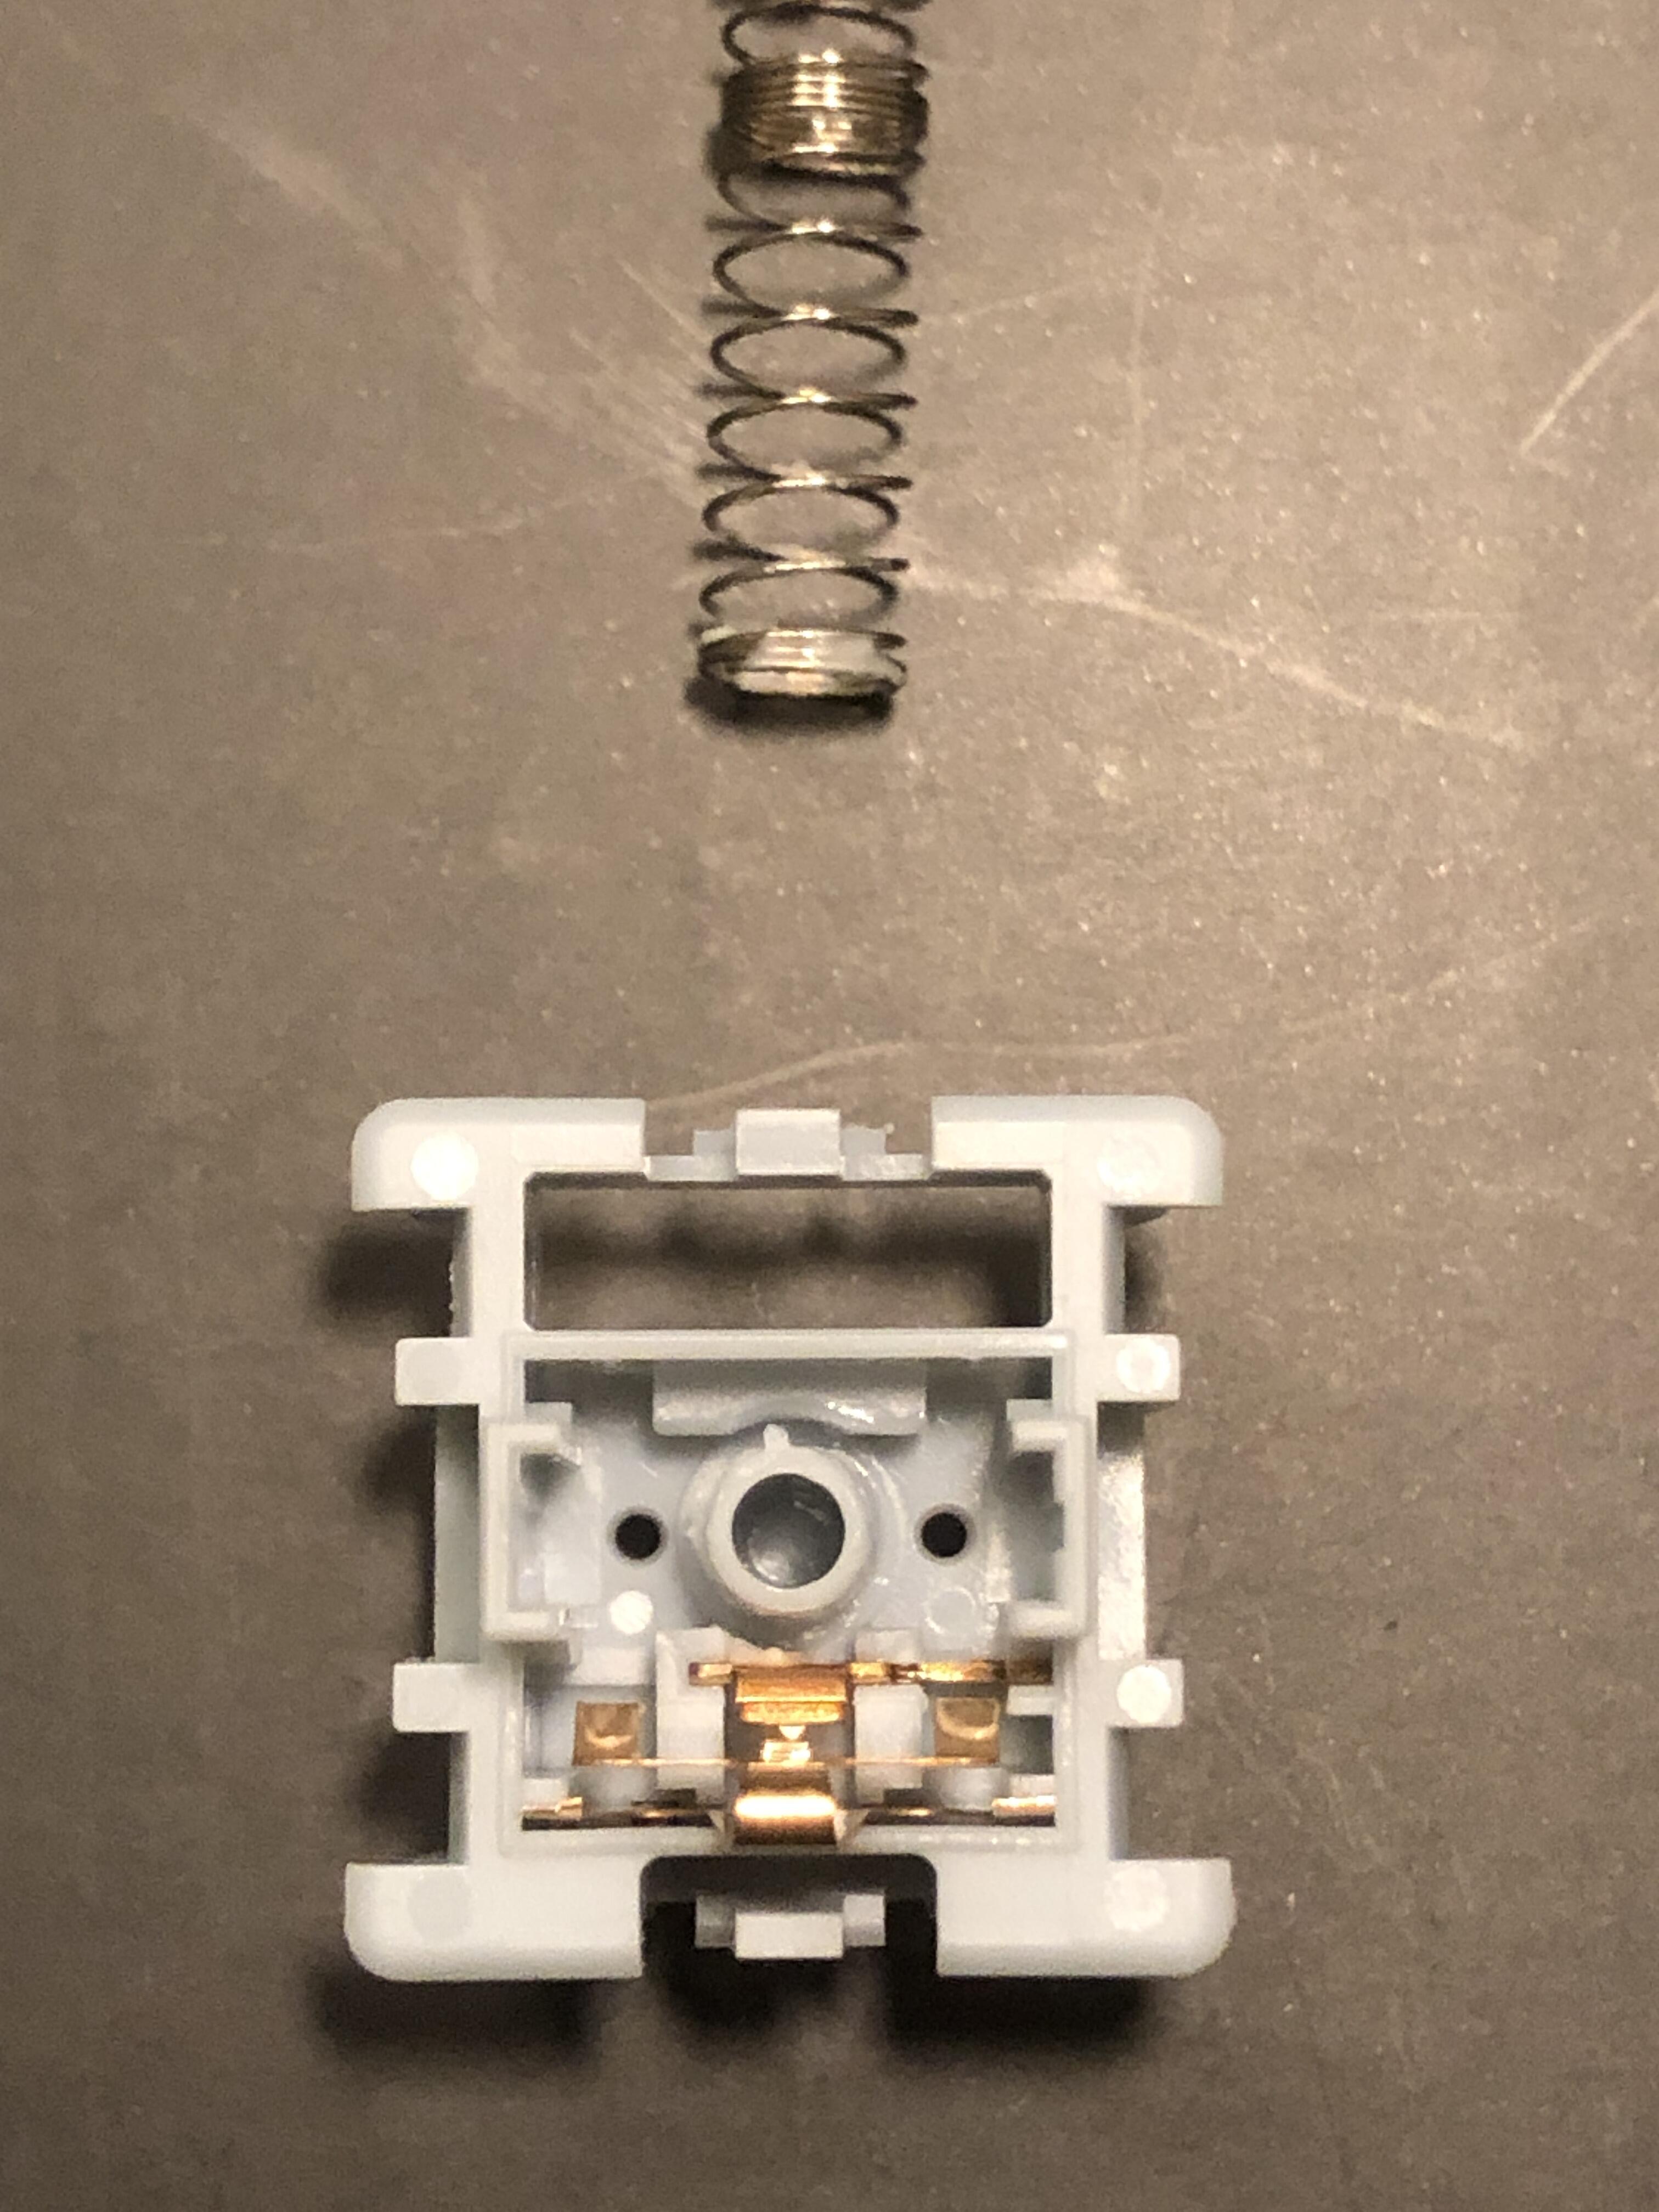
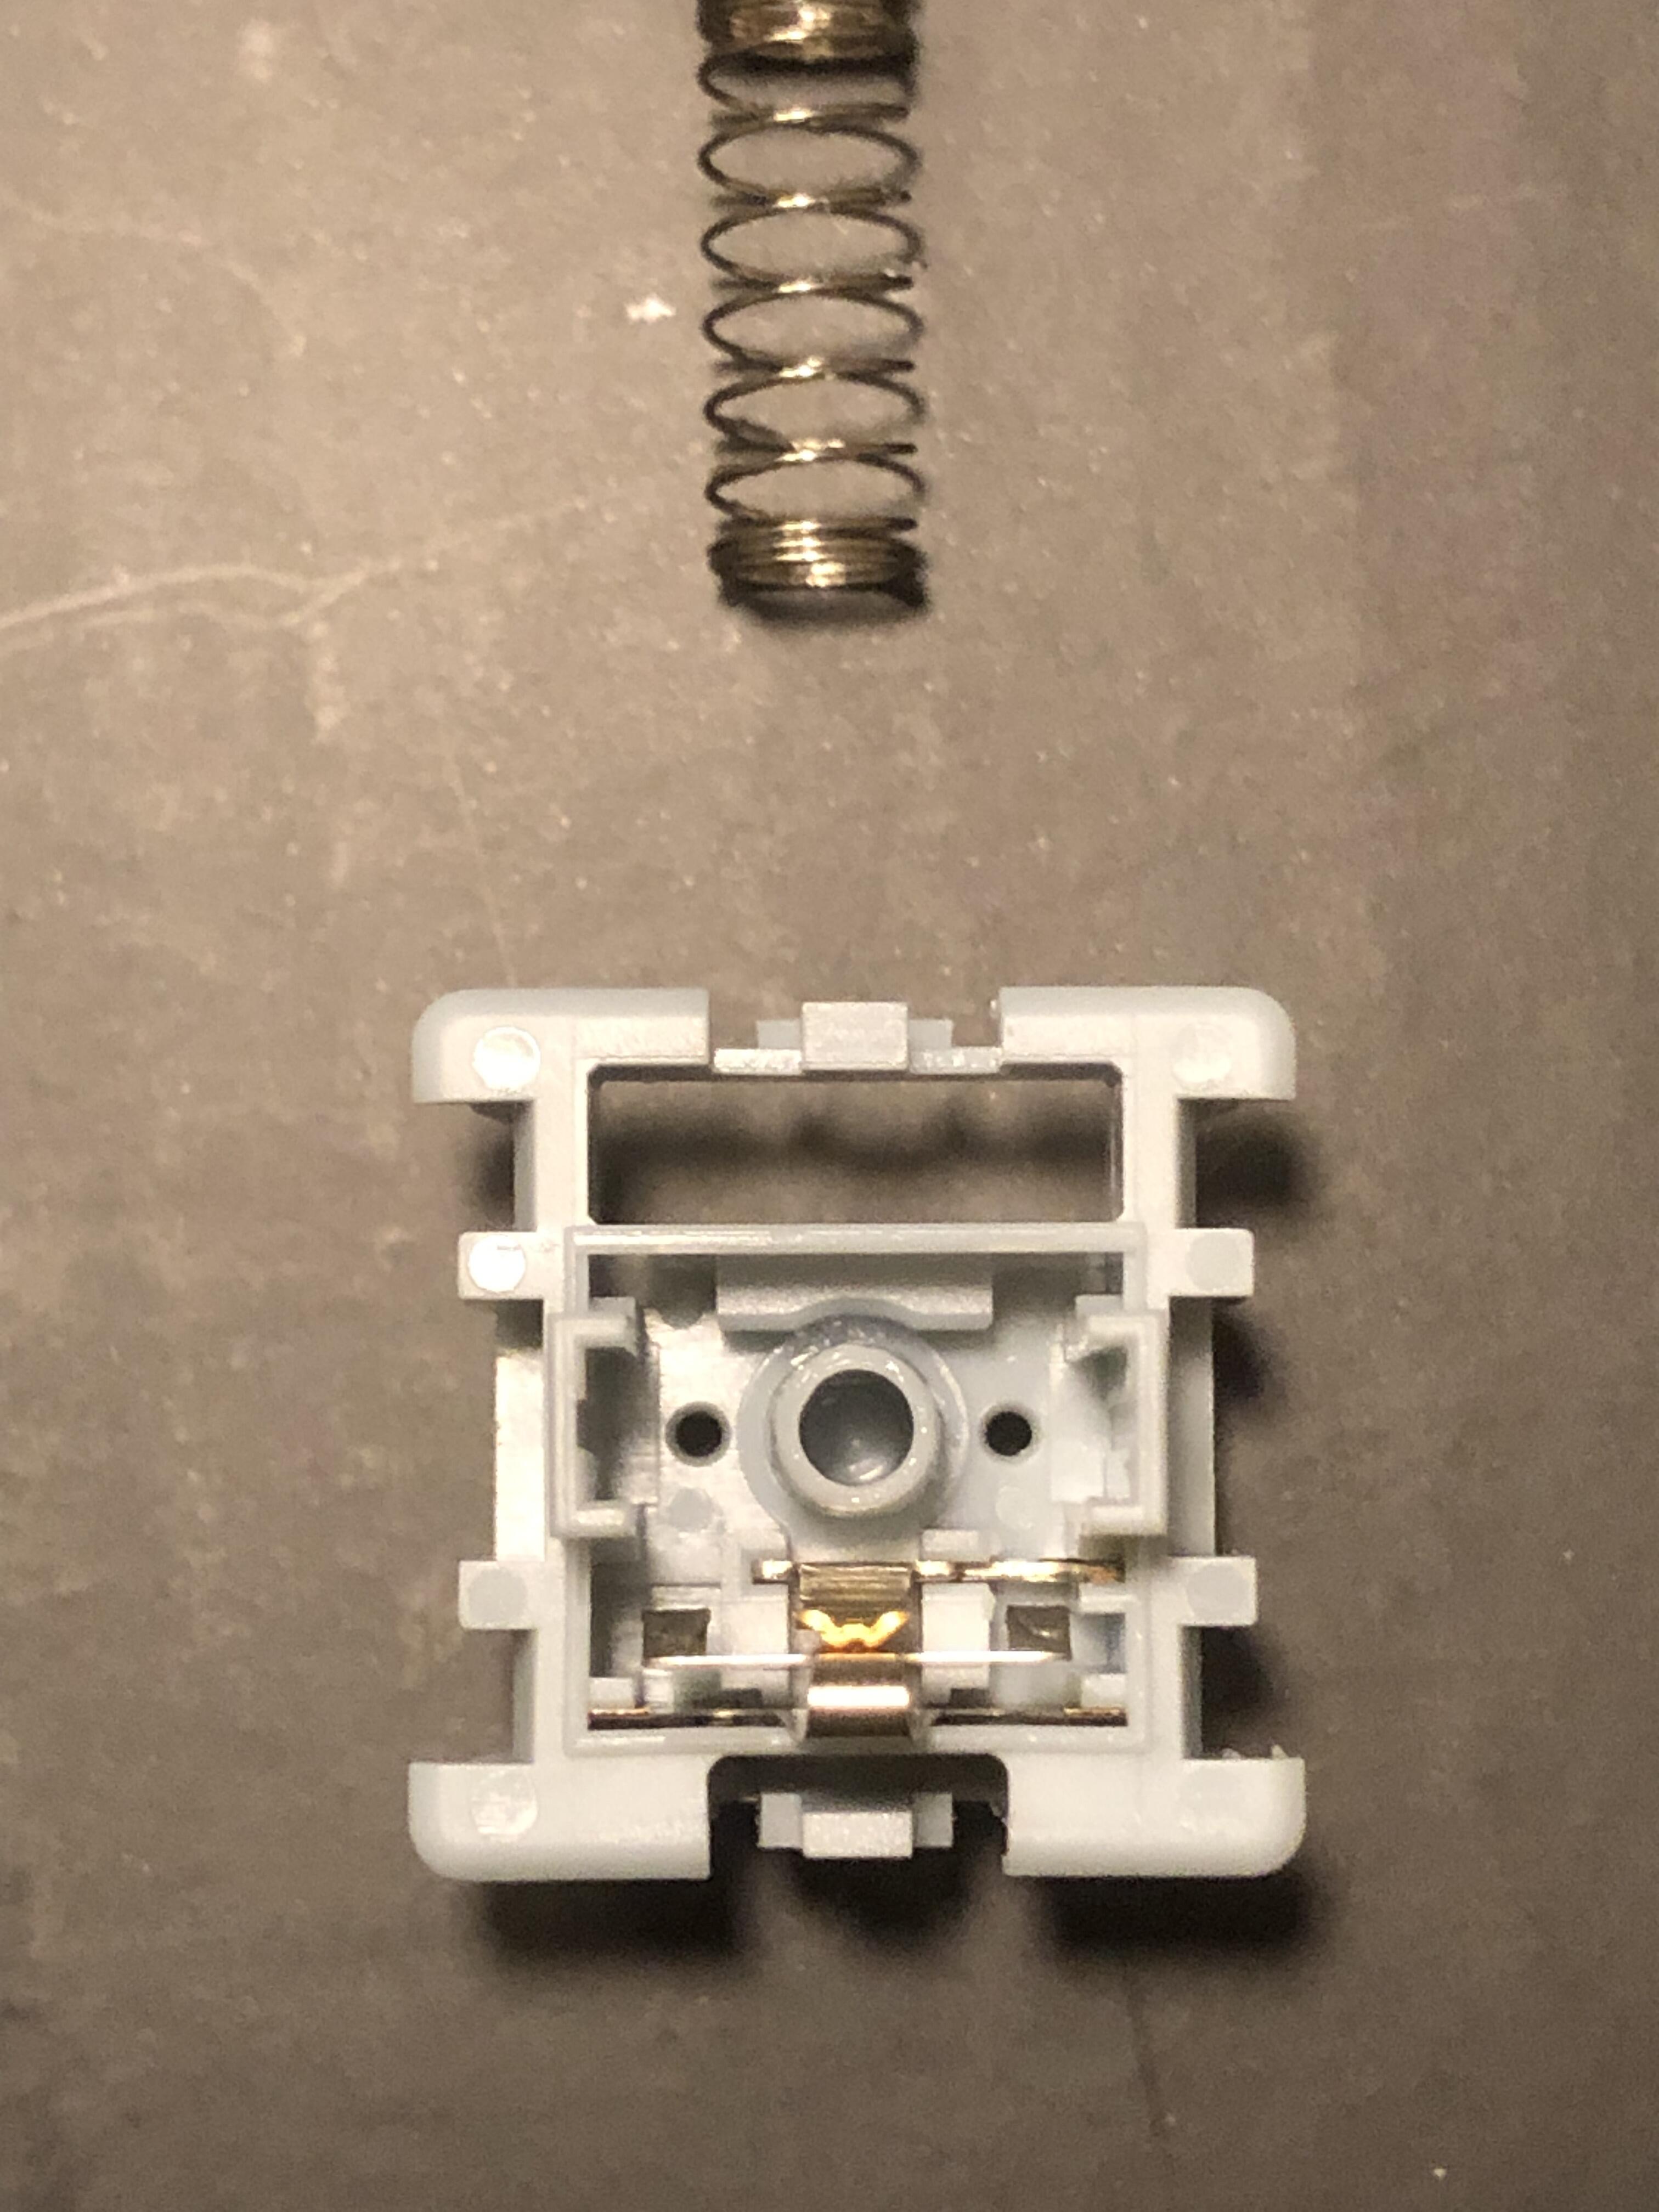
Looking inside the housings, the only difference I can spot is that the rails the stem slides against appear somewhat shiny in the V2s, while in V1s they have the same finish as the surrounding plastic.


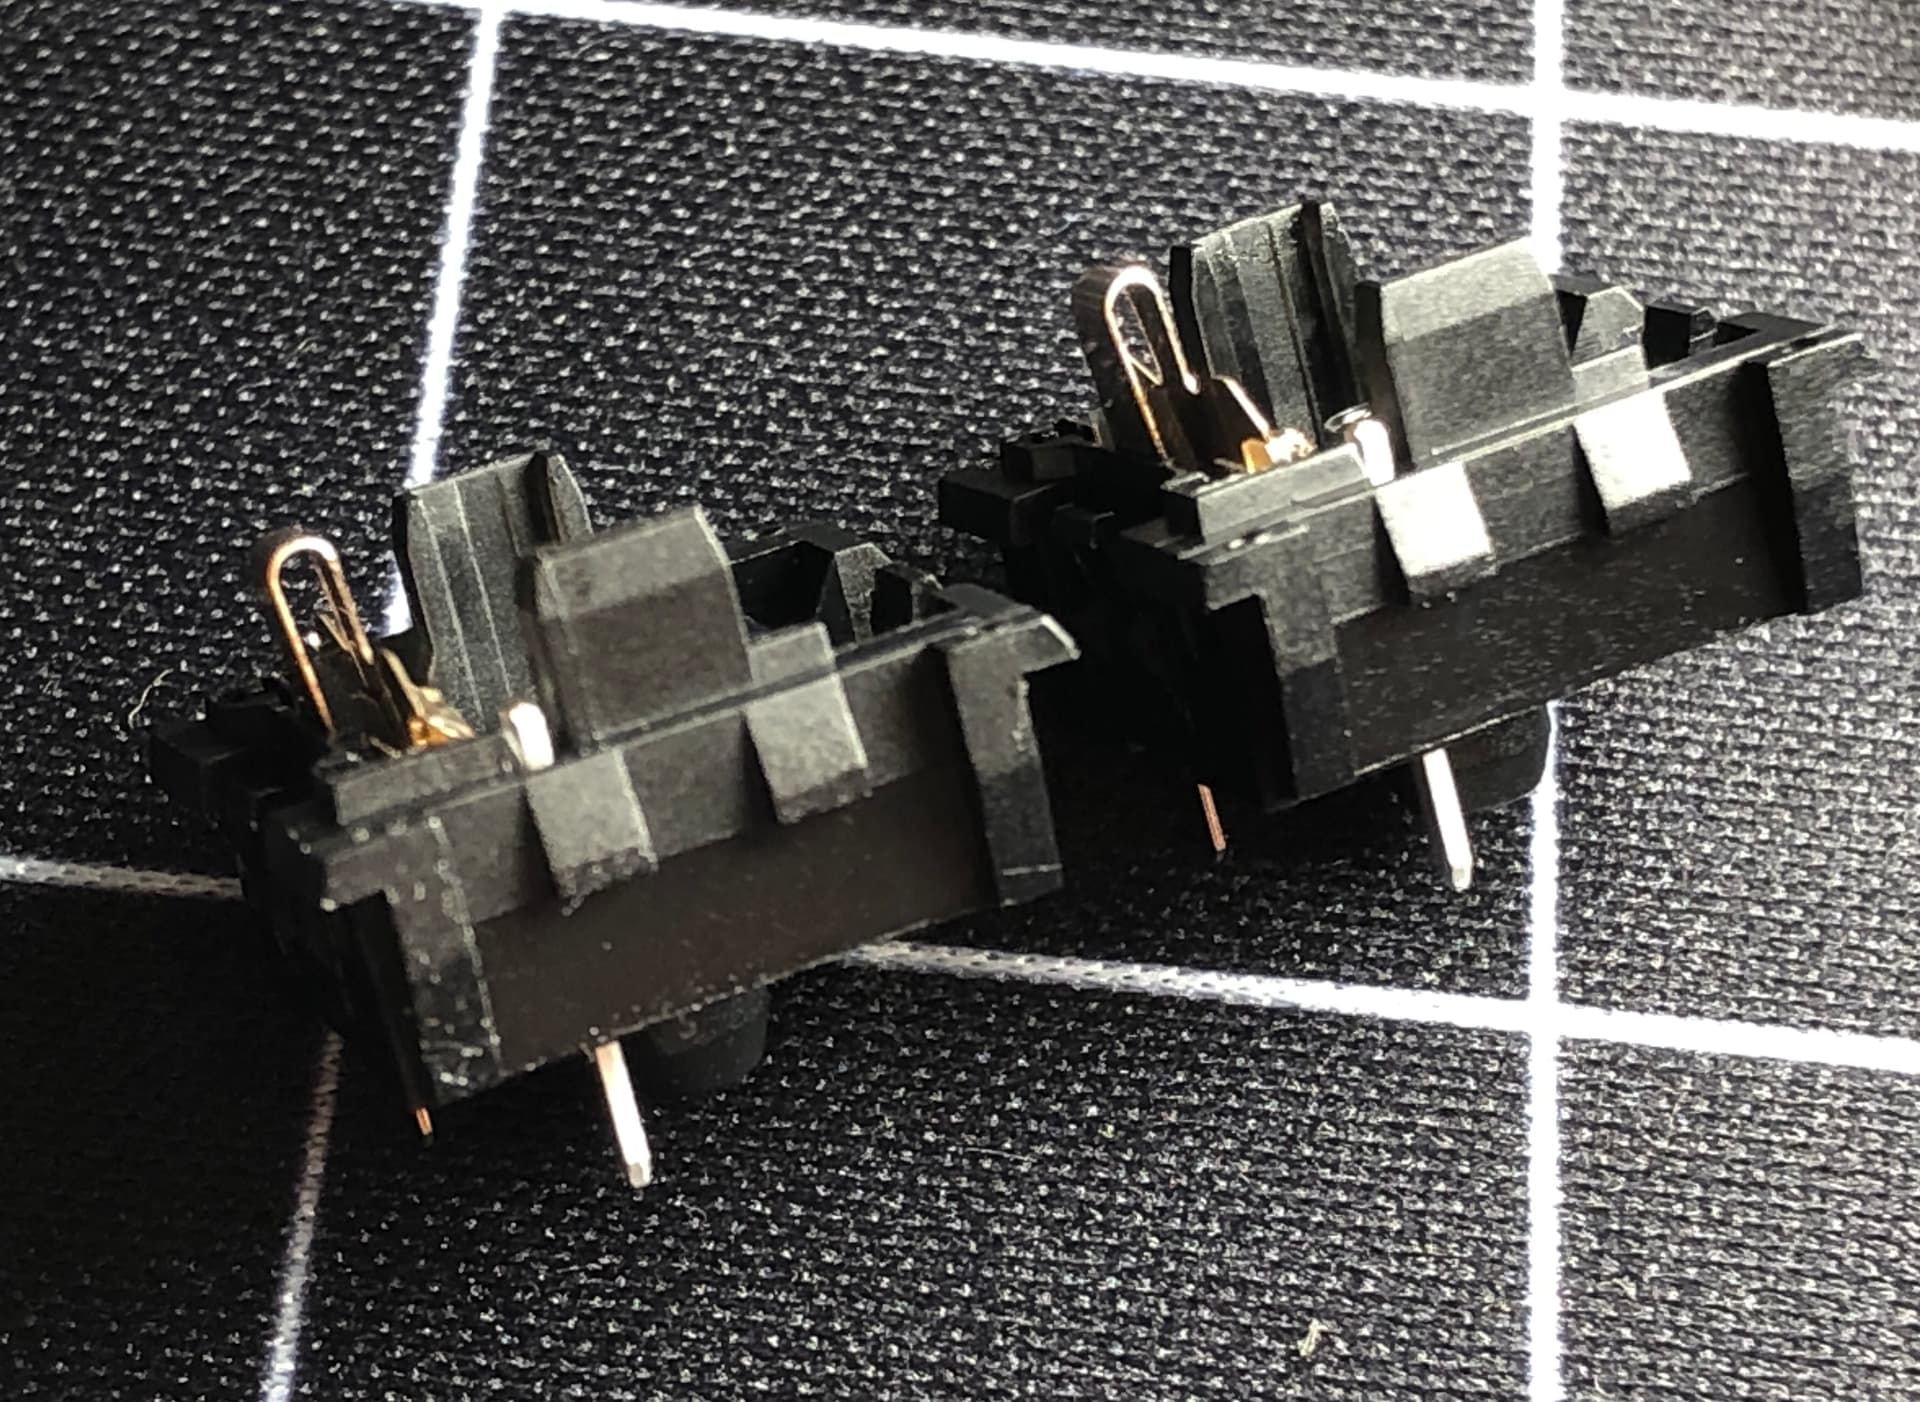
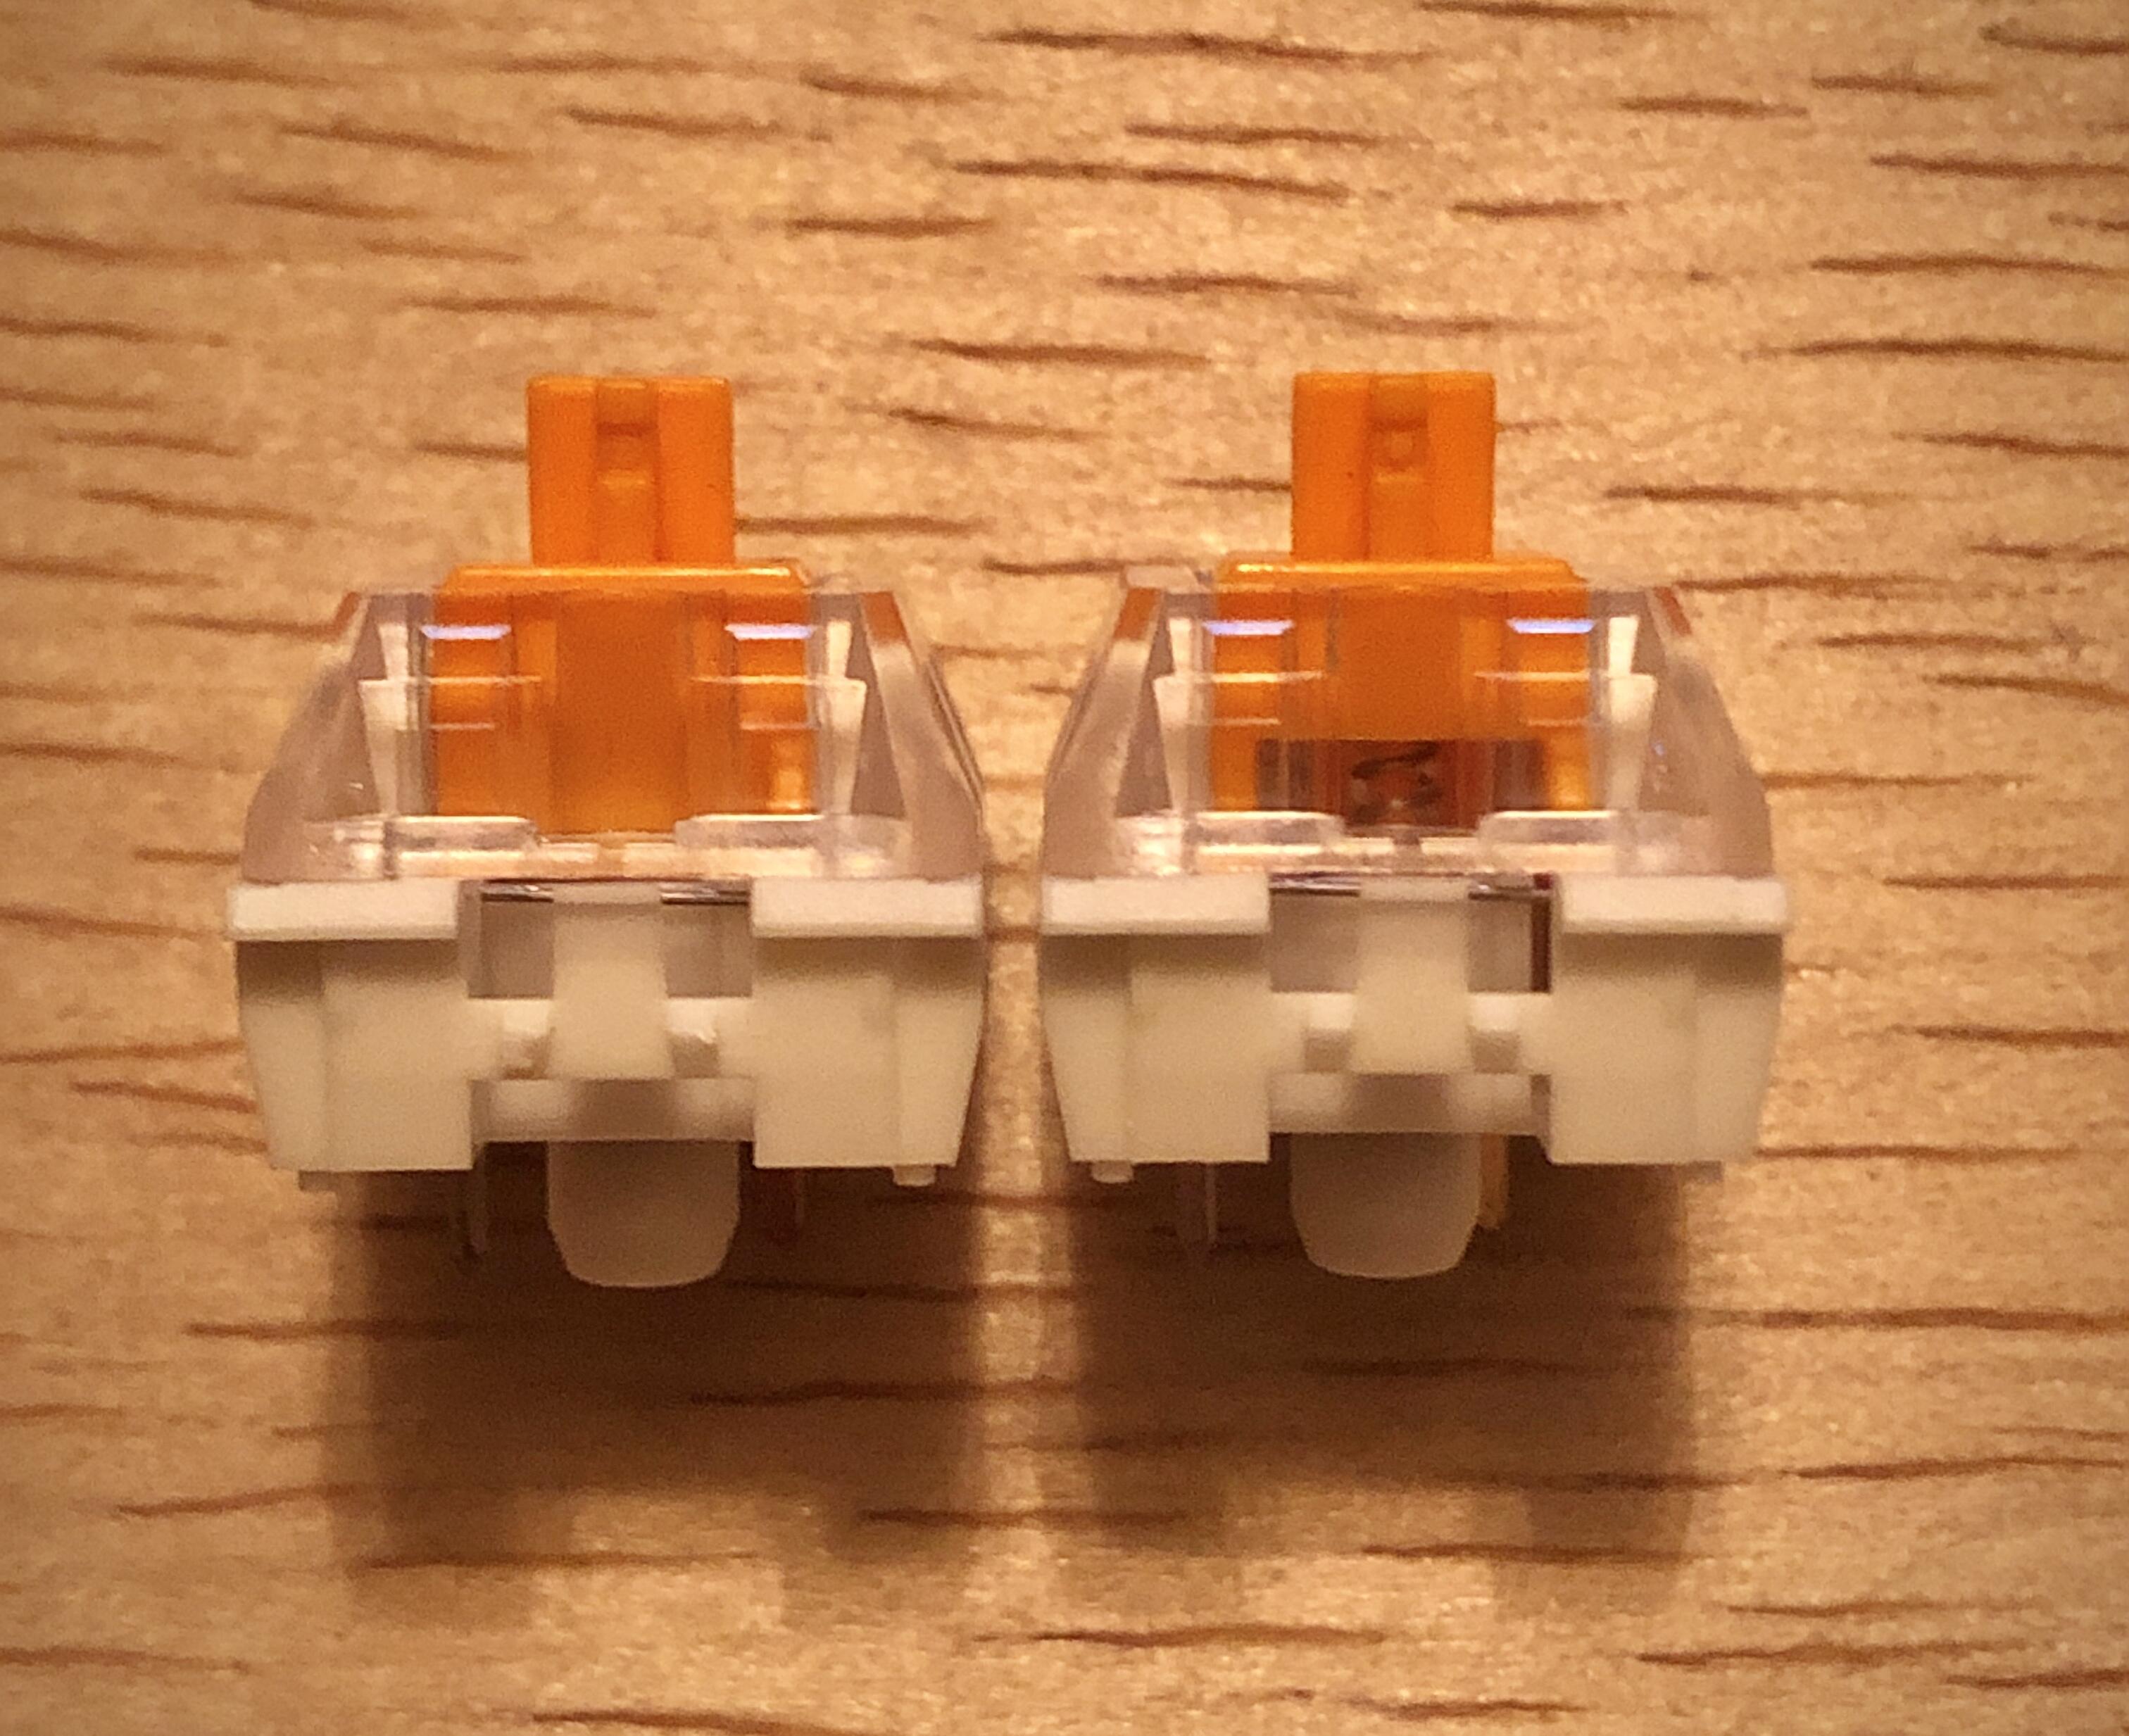
V1 on the left, V2 on the right. Note the rail sections.

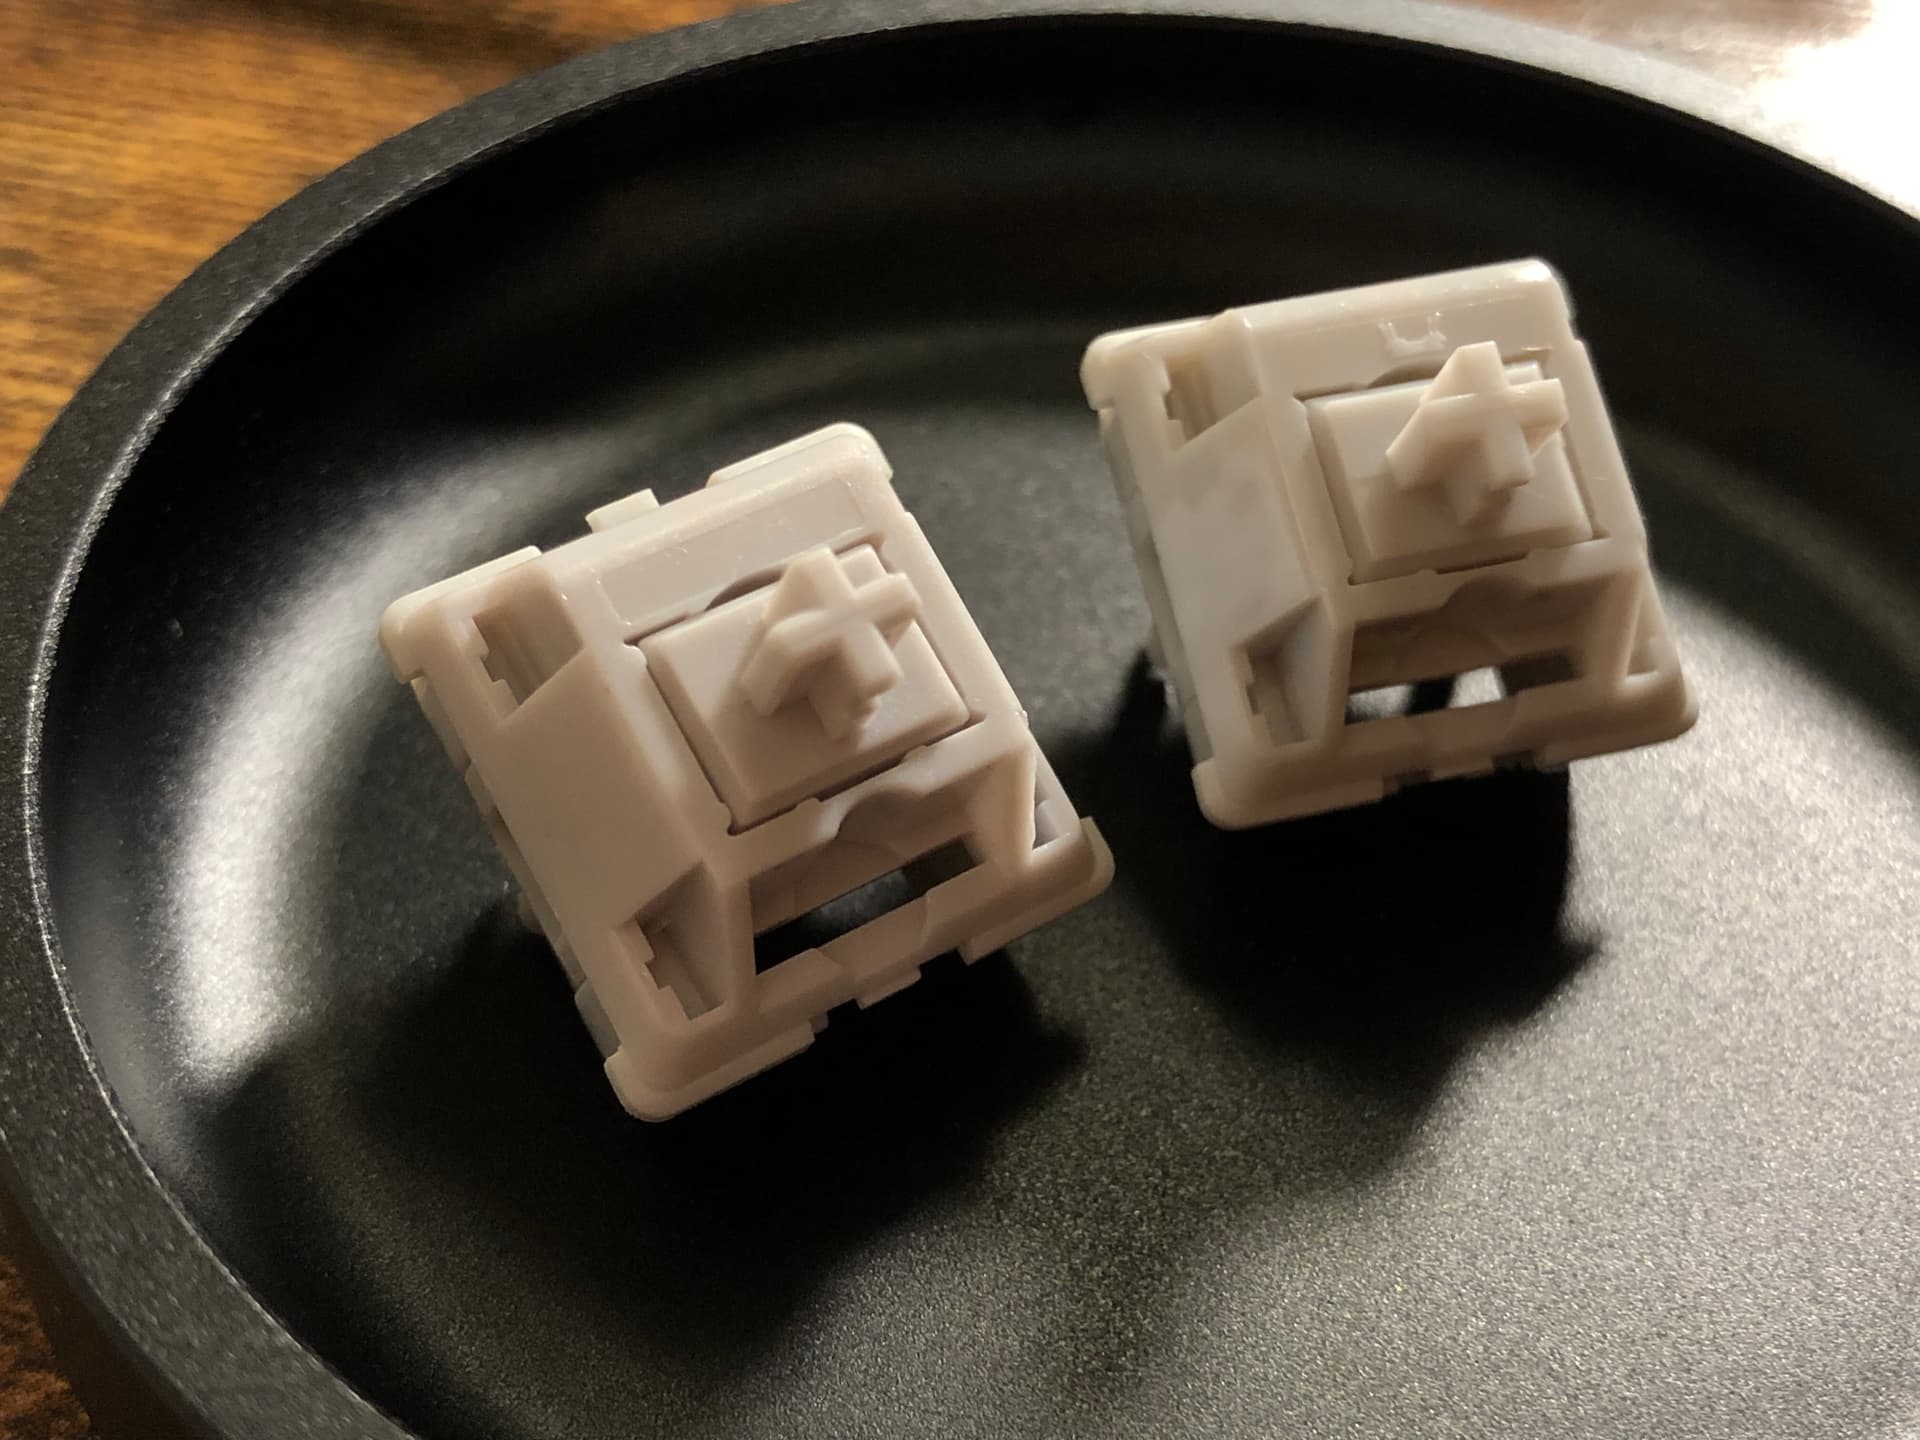
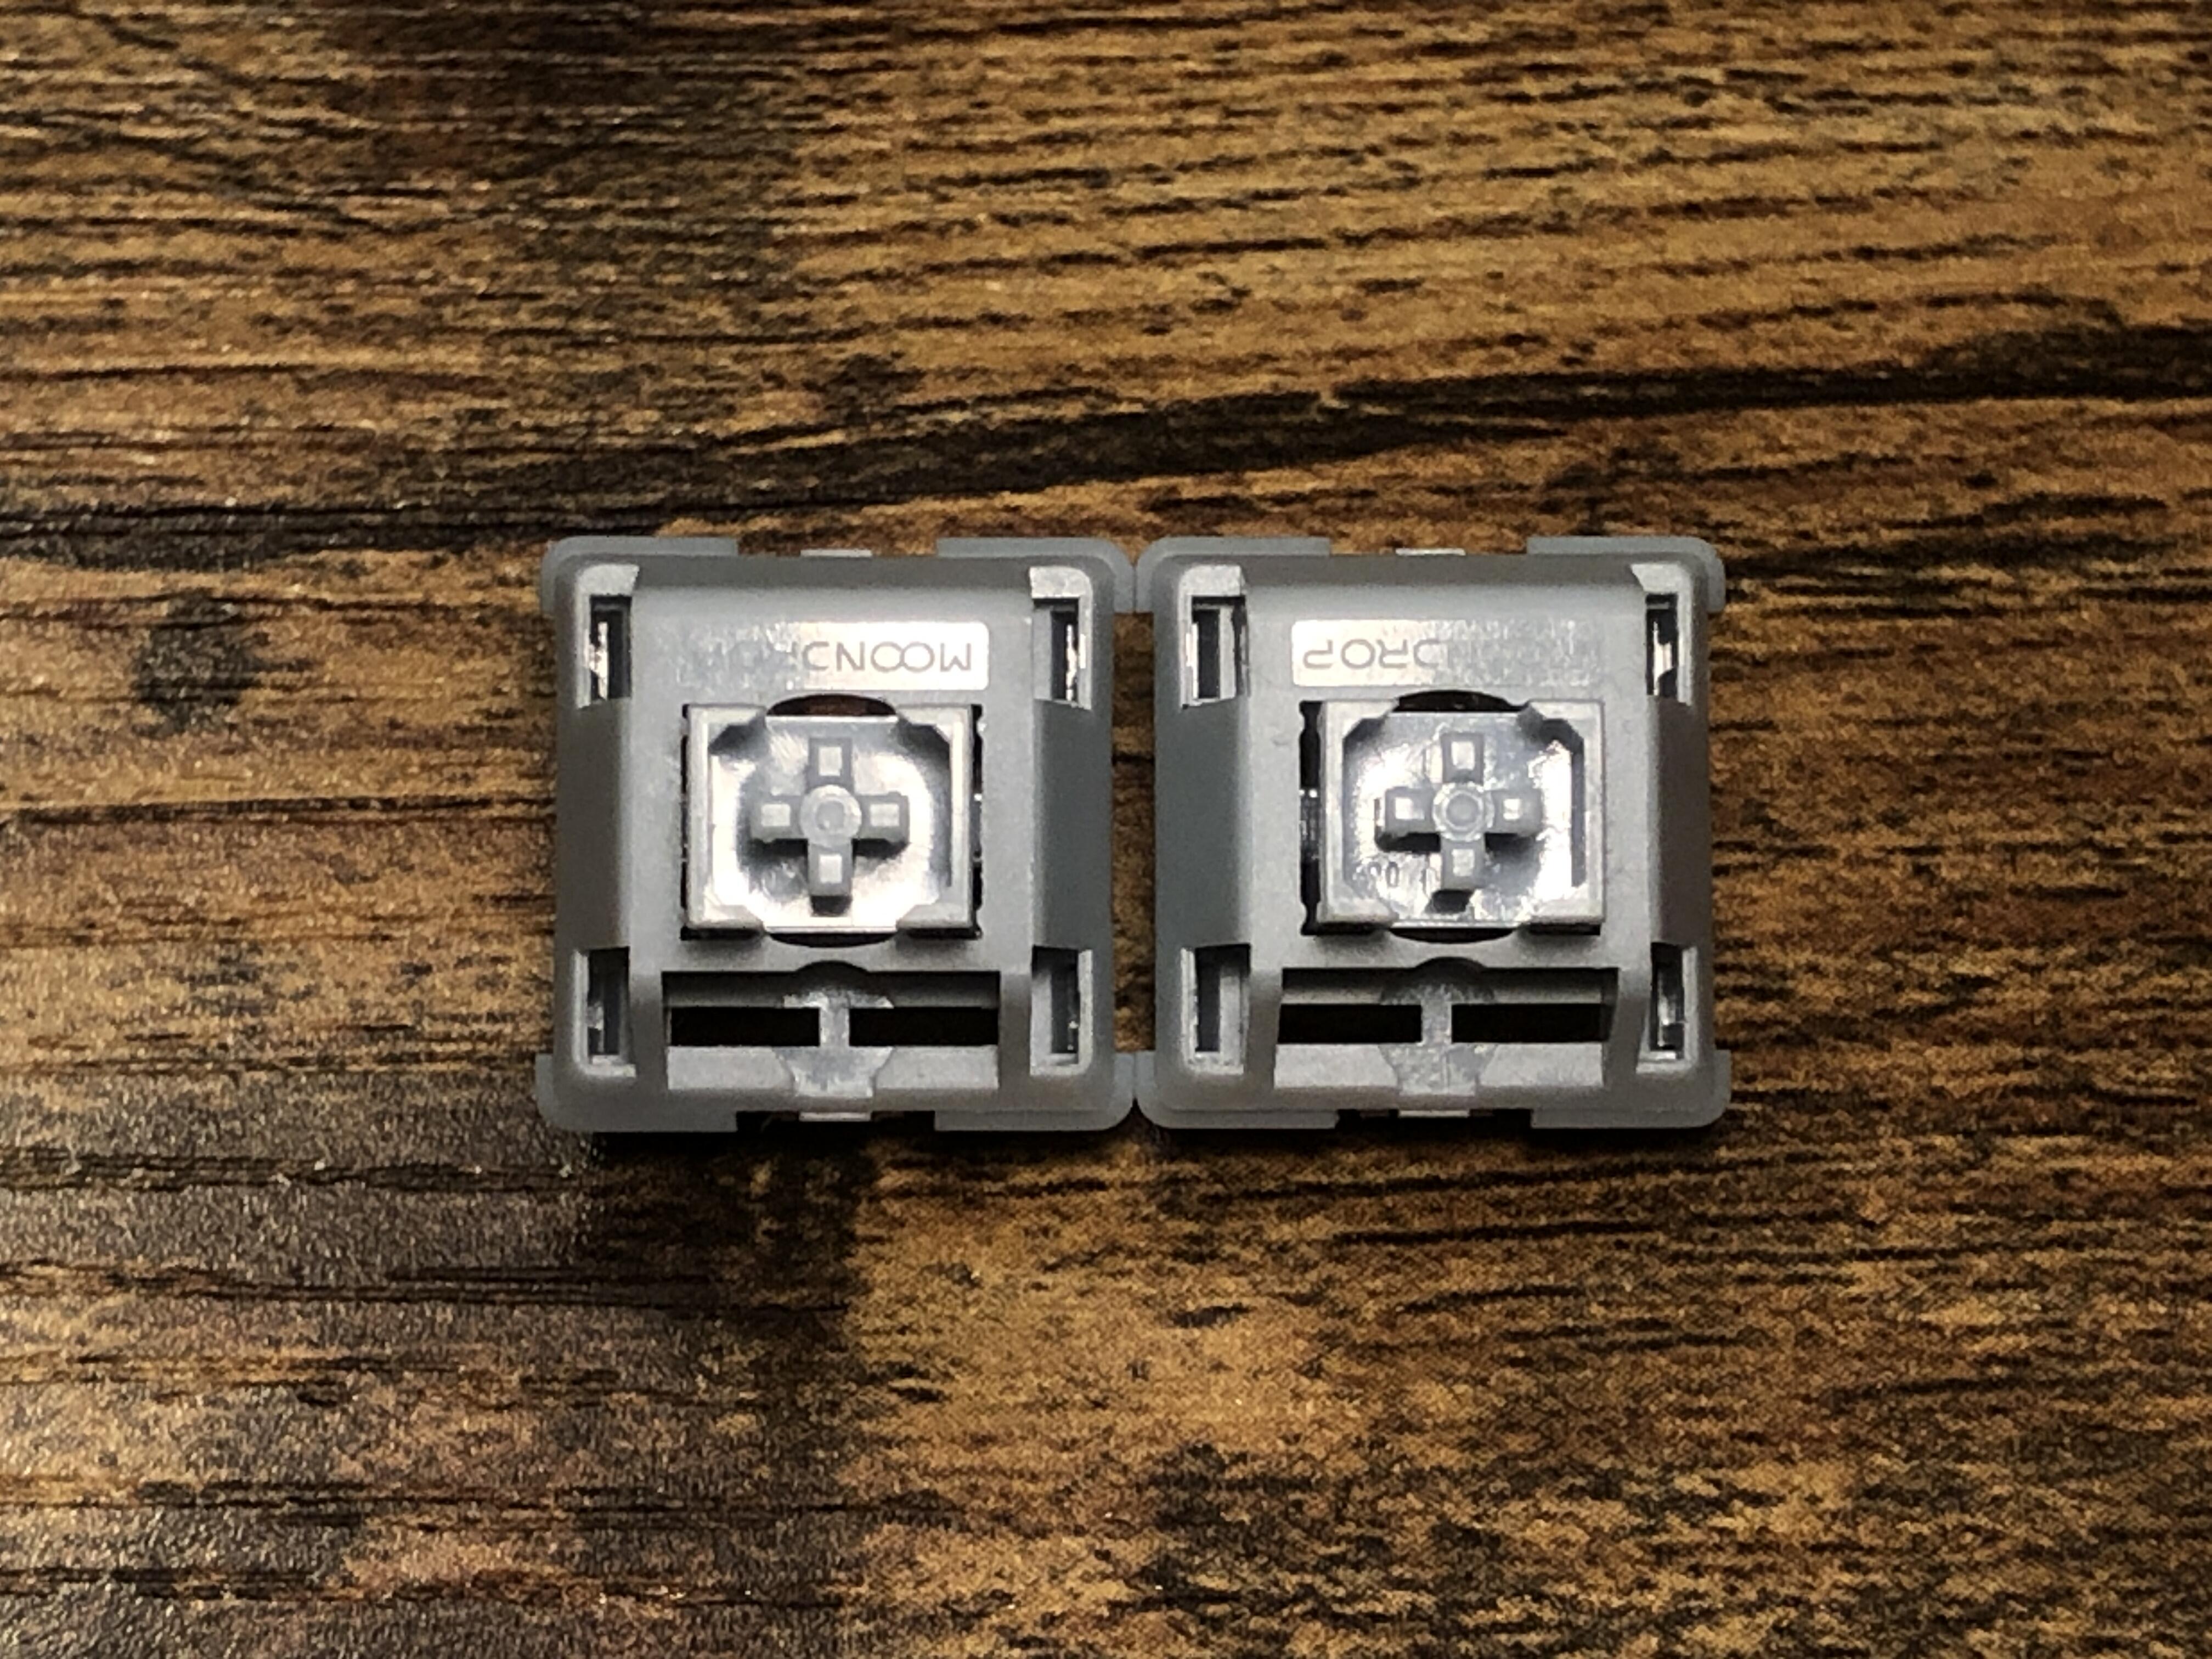
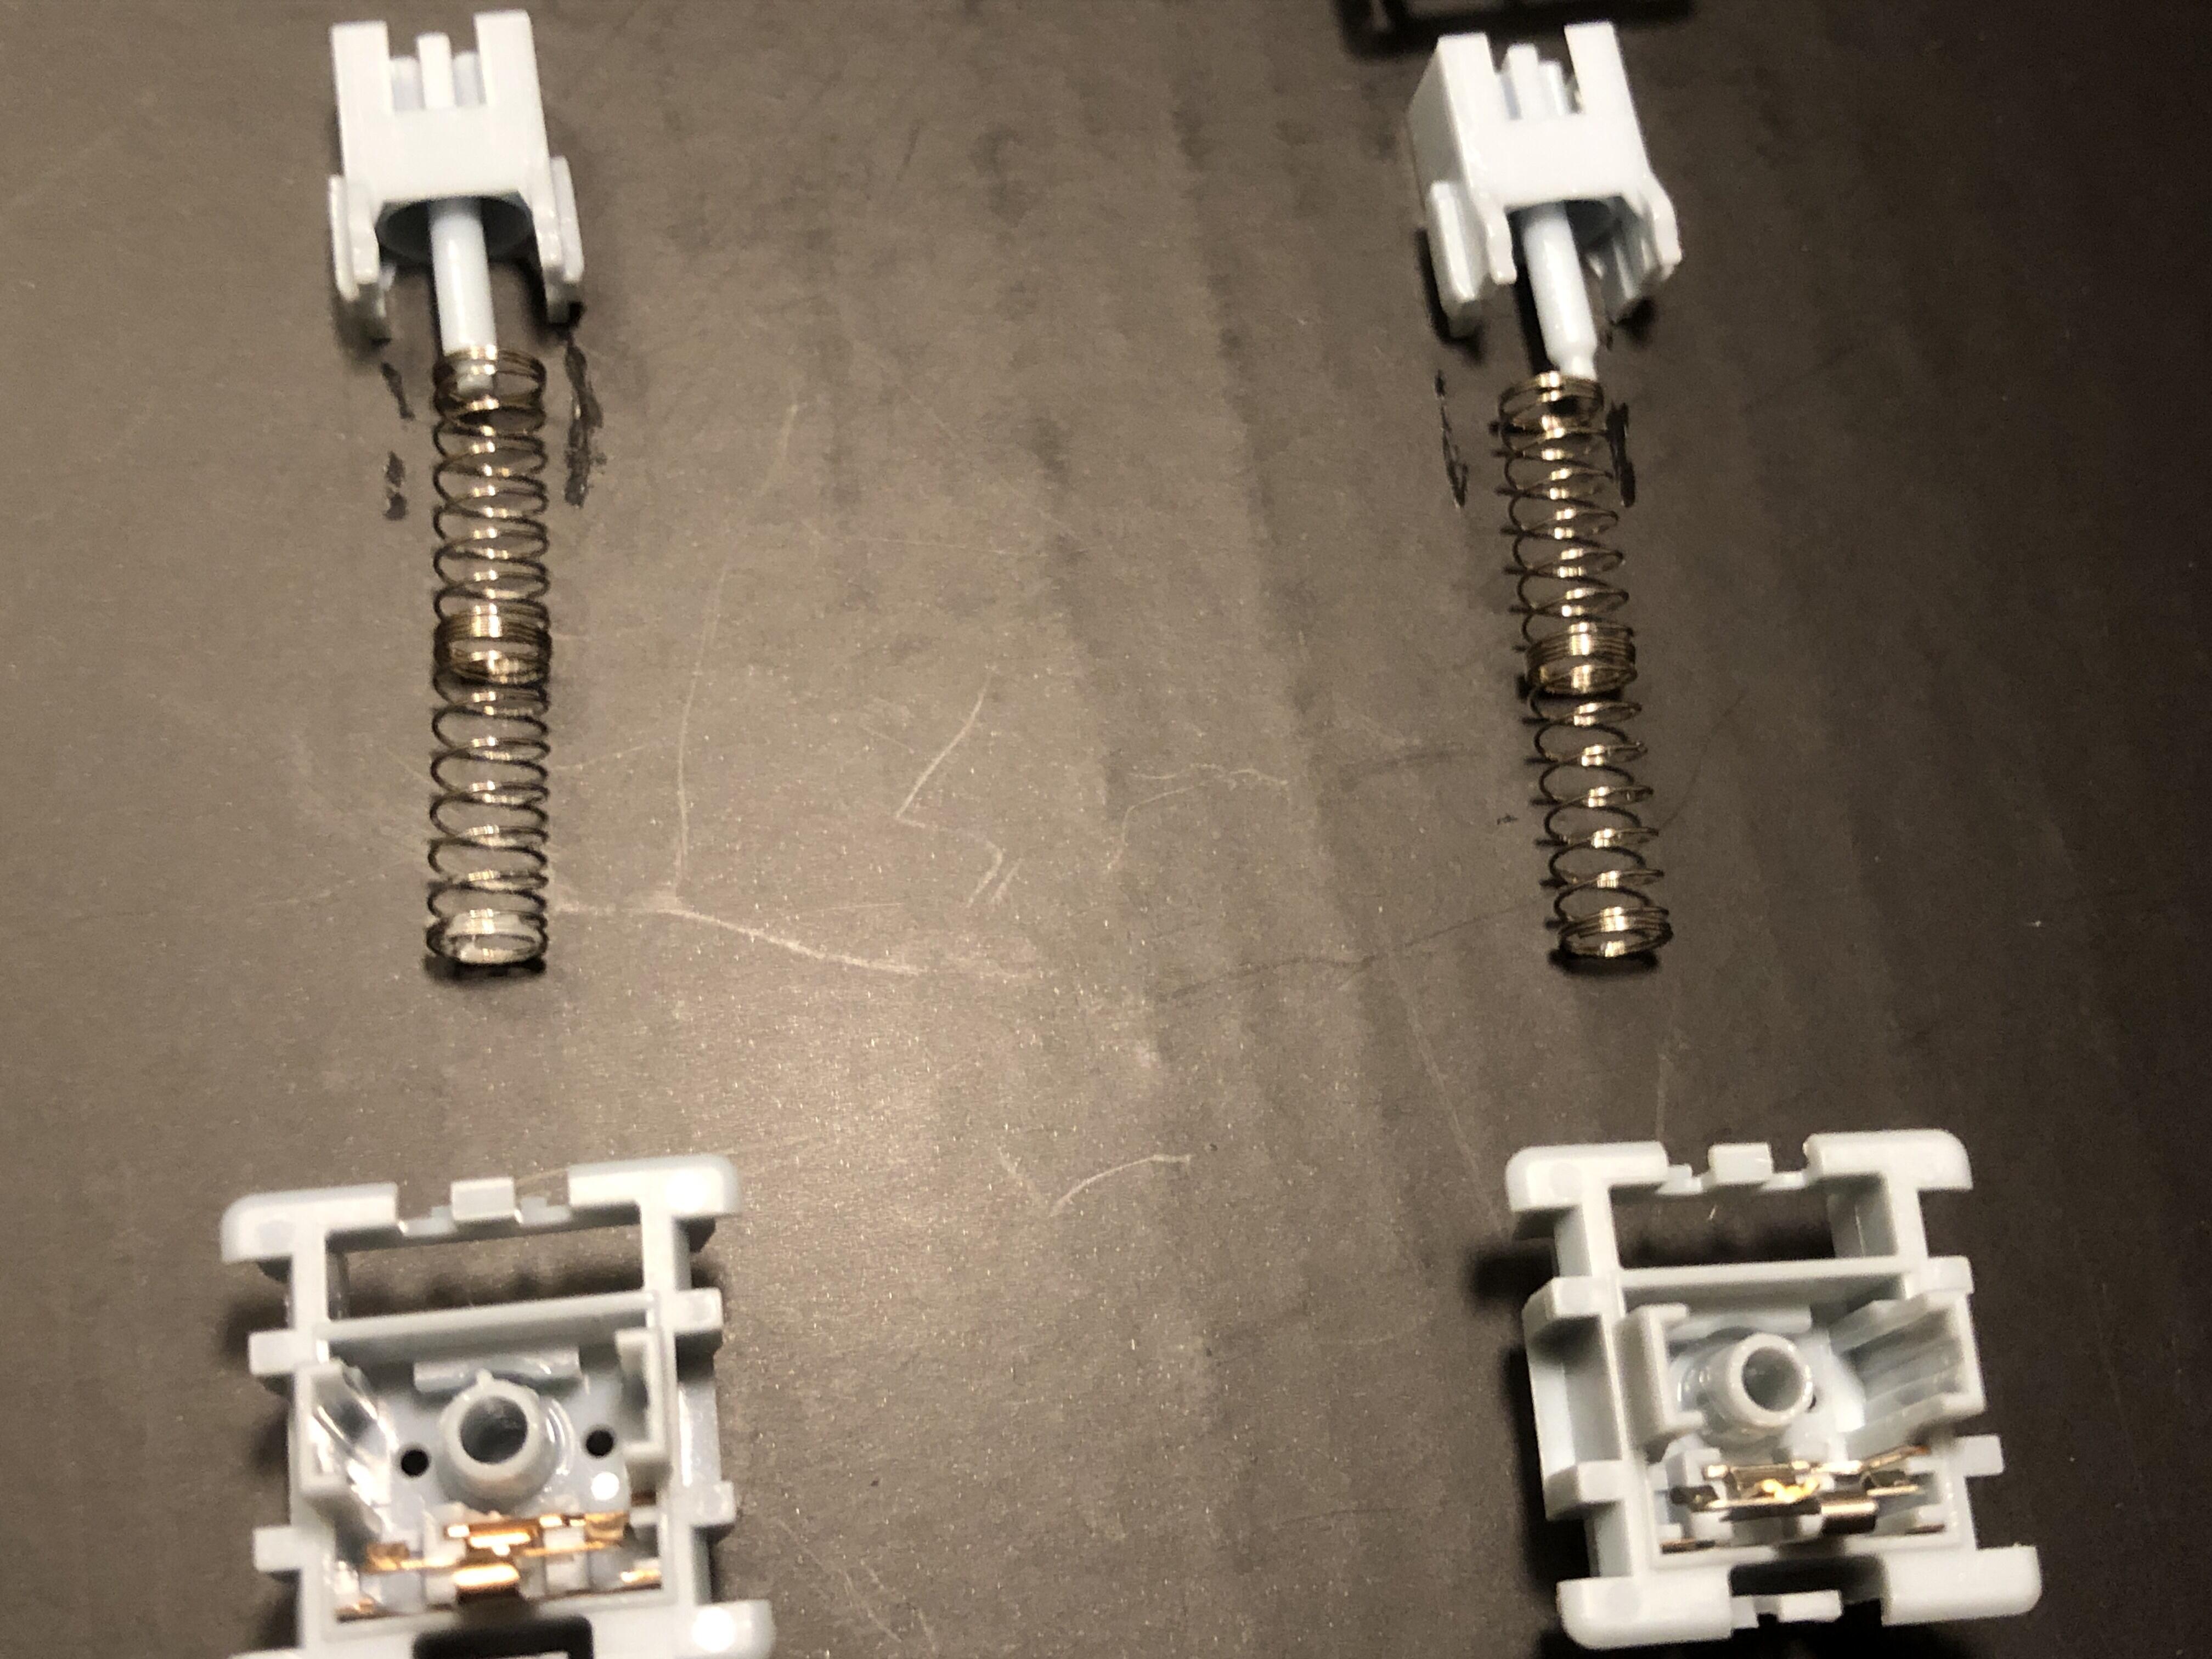
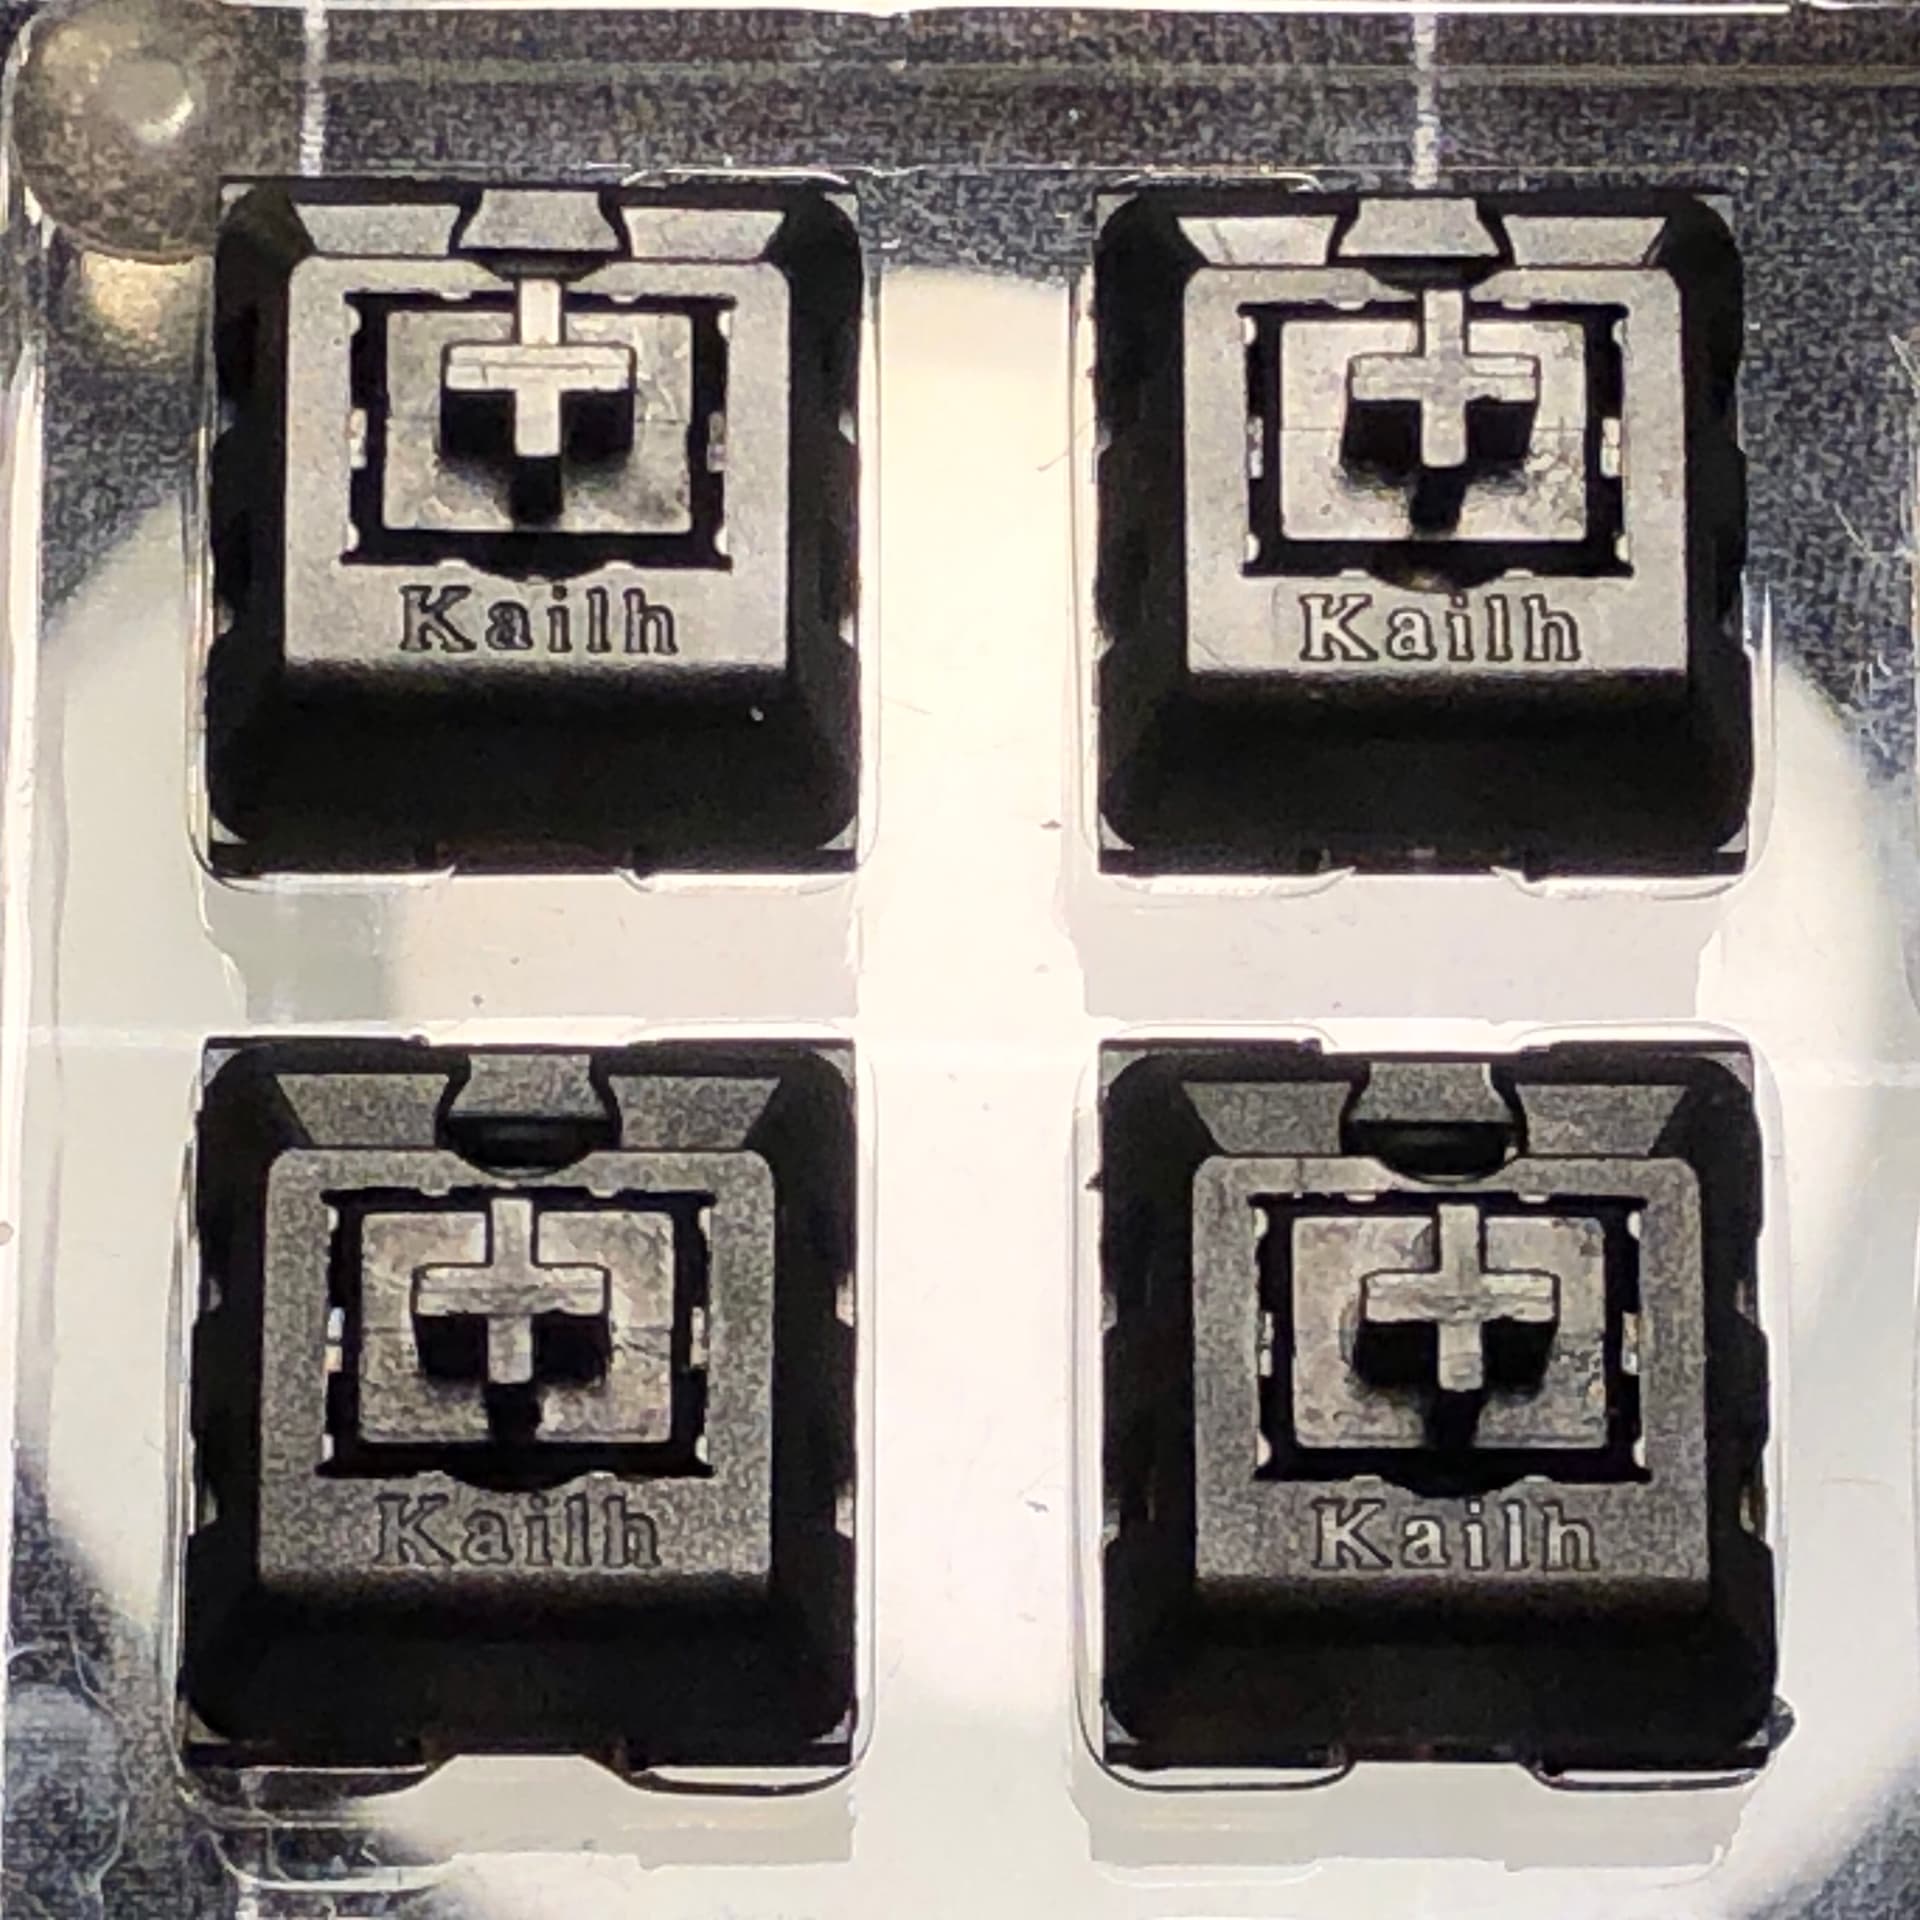
Even the stems look identical until you get to the bottom of the pole. Aside from that, all the little details are the same sizes, in the same places.


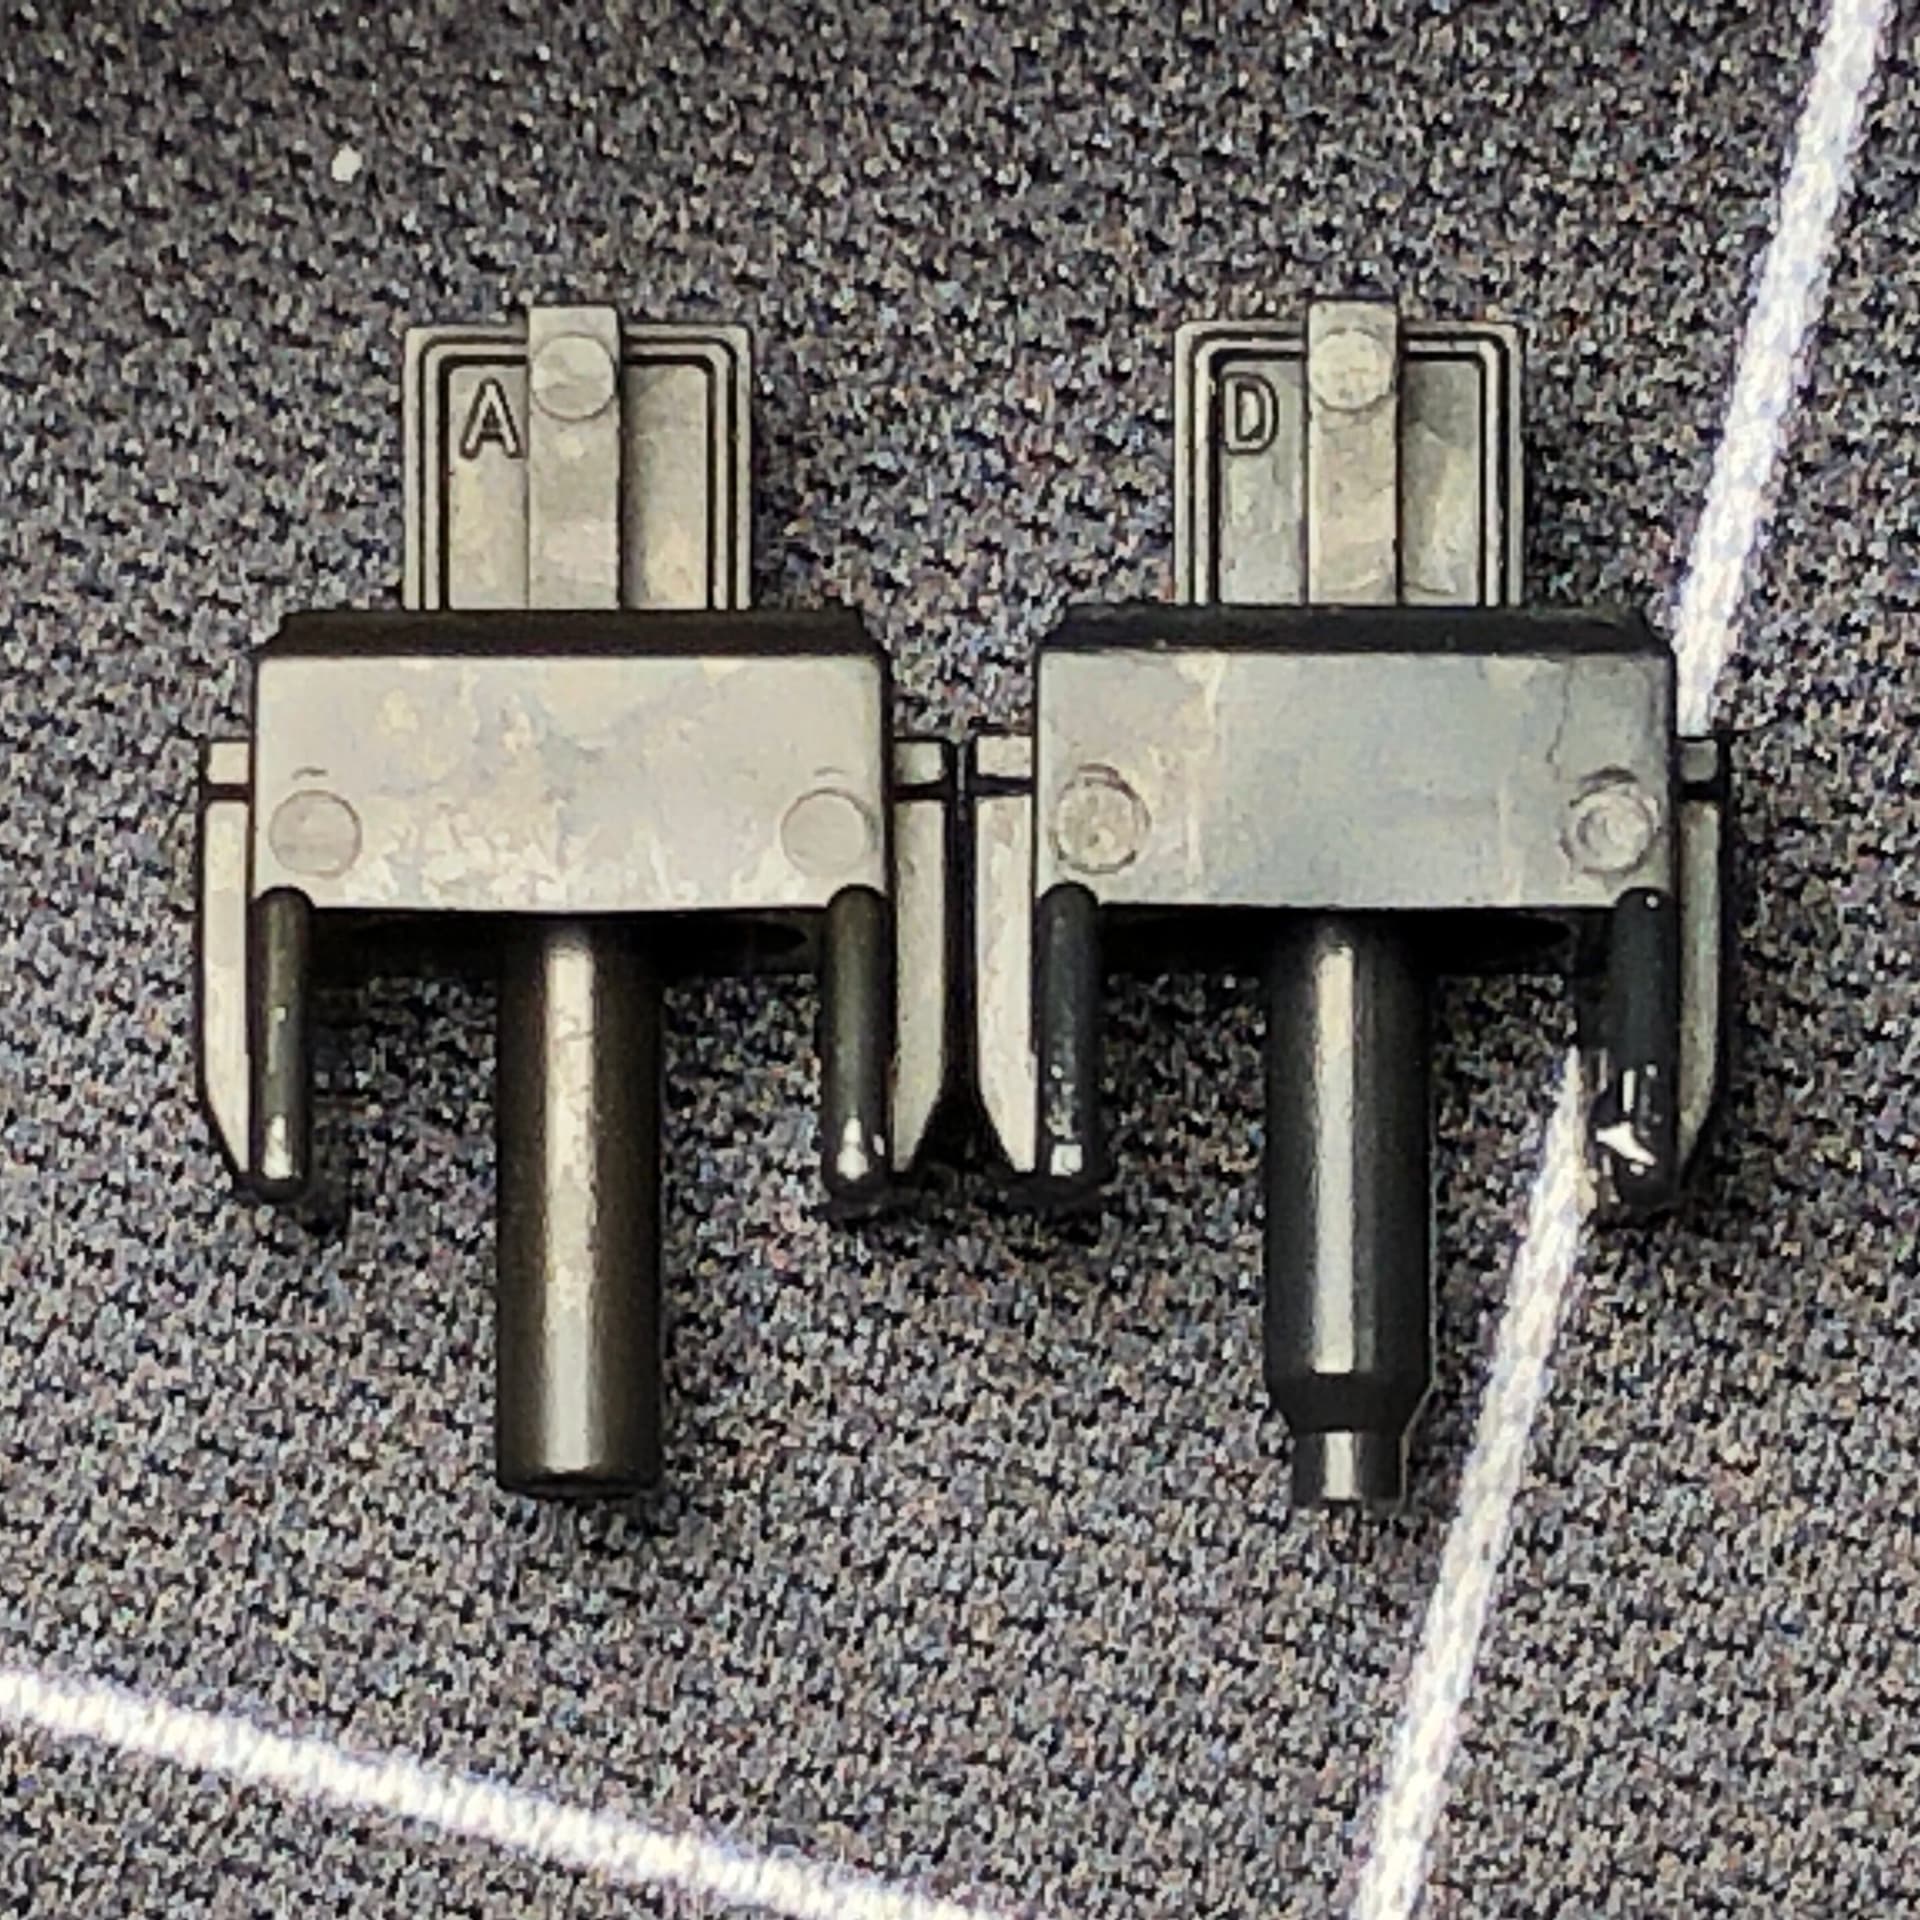
V2 on the left, V1 on the right.

So - here’s my theory with Kailh Blacks: I think V2s are made with modified V1 tooling.

Unlike some of JWK’s iterations that have ejection marks different sizes or in slightly different places and clearly come from completely different molds, all that sort of stuff lines-up between the two Kailh Black versions (and through the other inconsistencies) aside from the distinctly more shiny-looking rails inside and the flat pole-end.

Instead of making all-new tooling, I think what they did here was polish the rail sections of the existing bottom housing molds, and bored-out the pole sections of the existing stem molds.


Another angle of those same V2s; matte logo on the left, shiny on the right.


In terms of switch feel, the V1s have significantly more grainy travel texture.

In context of the rails appearing polished in the updated version, I think this makes a lot of sense. I’m not sure this would be a good way to tell them apart per-se, but on average the updated versions are better switches in their own right thanks to the subtle but significant improvements. That said, the ever-so-slightly wider stem pole is also likely the reason the new stems don’t work in many popular franken-combos that otherwise used standard Kailh linear stems.


Well. What I thought was going to be a nice, straightforward, and simple first entry… wasn’t… but hey having my expectations up-ended is half the fun of this stuff for me anyway. I was hoping to have some simple information you fine folks could use to identify these without opening them - but as far as I can tell, all of the clear visible differences are on the inside.


TL;DR: unless you have super sensitive fingers to reliably differentiate levels of scratch (with newer ones being less grainy), I think you pretty much have to open these and look at the stem to be sure which version you have: V1 stems have a taper, V2s don’t.

8 Likes

Copy-pasted from the What did you learn today? thread


Marshmallows


Today I learned there are more iterations of the tooling used for Marshmallows than I previously thought - at least three.

Thoughts on distinctions

JWK doesn’t distinguish between “V1”, “V2”, etc. as different revisions - but there are clearly different permutations, at least - so I’ll just call them A, B, and C, without any specific implication to chronology or revision from those designations.

I usually leave this type of detail to @ThereminGoat as it’s part of his standard to cover - and he has indeed covered this switch, though it is one of the older reviews that predates the photography setup upgrade, and probably at least one of these switch versions. Master Goat has probably taken a closer look at more switches than almost any person alive - if you happen to check out this post, I’d love to know if this relates to any broader pattern you’ve seen with JWK-made switches over the years.

Note these are not going to be color-exact photos and are mostly intended to show tooling mark details.

I bought some to top-off a jar, which itself was a mixture of tooling iterations (had assumed two, after counting it could have been all three) - I wanted to not have a mix in the jar if possible.

For what it’s worth I don’t think there’s much practical difference here aside from maybe how loud the springs are before tuning, just some neat trivia:


A

  • Small circles in all 4 corners
  • No marks on clip tabs
  • Badges good but not totally consistent; some "O"s don’t look filled-in from some angles due to varied surface shine, first “T” is a little flattened on the left
  • Slightly more sparkly than others
  • Lowest pitch spring ping

B

I’d at first taken these to be identical with A, but there are a few distinctions.

  • Small circles in all 4 corners
  • Small circles also on the clip tabs
  • Condition / detail of badge appears slightly better than A
  • Colors and shininess a bit different; slightly lighter, slightly less glossy badge
  • “O” in badge is most consistent of three but still doesn’t appear filled-in depending on the light
  • Somewhat higher pitched ping

C

  • Larger circles in all 4 corners
  • No circles on clip tabs, surface is more glossy except at edges - corners generally more round on these tabs than with the other two
  • Badge in good condition, good detail
  • “O” in badge does not appear filled-in from all angles, has a thin rim around outside, like A but a bit more-so
  • Bottom tooling details less shiny than other two
  • Lightest, warmest color of the three
  • Similar pitch ping as B, but noticeably louder
  • Do feel a but more smooth than the other two
  • Most visually distinct as corner circles are clearly a different size, but came from the middle order chronologically, and closer to the first; around two years ago

Thoughts on breakdown

After separating and counting all of these, which I did get from three sources, I think it breaks-down like this:

  • I had an even 30 of C with the bigger circles and shiny tabs; I believe all of these came from the preorder run by 3DKeebs, I’m thinking around two years back

  • I had a few more of A (33) with the small circles and no tab marks; I believe all of these came from the initial run, in a bag gifted to me by another KeebTalk user (thanks again if you’re still around here)

  • I had 65 of B with the small circles in the corners and on the clip tabs. My order from HeebieKeebies was for 60 and I know it’s pretty normal to find an extra or two - so it’s totally possible all of these came from that order. 5 is a generous number of extras so a few may have come from elsewhere, but in-context it still seems most likely the three iterations came from the three very spaced-out acquisitions

It looks like chronological manufacturing order may have been A, C, B even though C has the most visually-distinguishable features, as B came from an order at least a year newer than the next.

7 Likes

Bolza Zakus


Another topping-off gone sideways here - but hey, I get to share some information with you:

Original version ( A ) on the left, current version ( B ) on the right.

There’s a slight difference in color with the older version ( A ) being lighter, but the most obvious visual difference is the lack of branding on the top housing; no Bolsa logo badge on the first run.

The newer version I have here ( B ) has the Bolsa arch logo, which oddly enough is right-side-up when the switch is North-facing. This is consistent with many other Bolsa switches - as is the lack of a badge on early switches.

Why care? Well - I’m not pleased to report that the new switches ( B ) just aren’t as good. :confused:

They’re fine switches in their own right - but noticeably inferior to the originals. They feel less substantial, less smooth, less stable - and the sound has a more “thin” quality.

6 Likes

Does filming them correct any of these issues?

Even more evidence that if you want the best possible switches get them from the first batch. The longer the molds are used the worse the switch will perform (look at MX blacks & all their updates for evidence of this), then very rarely does the V2 or retooled versions of switches feel identical to the original IME. I know it sucks, but by the time a switch gets its hype train going the molds have already degraded enough to give worse performance. Gotta remember they’re pumping these switches out by the hundreds of thousands & every use of the molds degrades them a little more. Anyways great write up as always @Deadeye! I always look forward to your insights on switches!

4 Likes

NK_ Sherbets


These guys have a bad rap - and now I know why.

The old version is on the left, new on the right. Notice the solid front on the old stem.

Unlike its contemporaries the Speed Bronze and Speed Navy, that front face extends to the bottom of the block. The front lower edge of that face interferes with the housing, causing wildly inconsistent, uncomfortable crunchiness. Some are fine. Some are truly horrible.

However…

The issue is completely fixed now. Gone.

Sherbets are consistent and clean now, matching the quality of its speedy cousins. And with no fanfare!

Yeah, Sherbets are totally decent, viable switches now - and a great alternative to BOX switches if you want a click-bar.

So - just make sure you can see a gap in the front of the stem, and you’ve got the good ones.

2 Likes

So these are kinda like the speed heavy pale blue they used to sell back in the day, but actuation is lower down? I remember liking those switches but the early actuation on the speed switches never worked for me. I would often use an ability by accident when gaming. I actually think I might have some soldered into a Masterkeys Pro S somewhere in my closet :rofl:

Yep;

  • Travel Distance: 4mm bottom
  • Actuation: 2mm
  • Force:
    75g Peak
    65g Operating
    85g Bottom

ThereminGoat measured these, and it looks like it was an especially egregious example of the old ones:

I’m all but completely certain that crazy ~190g spike isn’t the clickbar, but the stem catching on the housing. That’s not even meant to be there.

That more mild ramp and fall-off towards the middle is the click-bar; the part that interacts with them has a less abrupt angle than the version in BOX switches.


Edit; I shooped the graph to simulate what the new ones should look like:

2 Likes

Moondrop Tessence


This time I decided to buy more of a switch I liked to do a couple builds with it, one for myself and one for a friend. I thought they didn't sound quite as clean out of the box as I remembered, so I looked a little more closely and saw a couple things had changed:

This is the quick and easy way to tell which is which; the first run (that sounds better to me) is on the left with the copper pins, and the updated run is on the right with the silver pins.

Here’s a phone recording, old switch first then the new one:

It’s not captured all that well, but I hear more metallic sound in the new switch - and as we’ll see below there appears to be a good reason for that.

Some more comparison photos:

The pins give it away, but as far as I can tell the plastic parts (and spring) are otherwise the same, so I don’t think it’s possible to tell just from looking at the top.

Extra easy to tell when looking at the leaves - this is actually what tipped me off to begin with, when I was opening them up:

The leaf may be the visible difference, but I don’t think it’s actually the critical one.

Let’s take a closer look - old switch first:

The old switch above has something akin to a “donut-dip” application of white grease on the base of the spring and around the tube, clearly visible.

Now let’s look at the new switch:

There’s still a sheen of lube on the tube, but I can’t see anything substantial at the base or on the spring. I’m willing to bet this is exactly where that extra metallic noise is coming from - and unfortunately, a critical distinction that takes this from an “audiophile” stock switch to just another pretty good tactile. I can’t recommend these anymore unless you don’t mind to re-tune them yourself - in which case they’ll be great - but if you’re gonna do that anyway, might as well spend less money on the switches.

The rest of the lubing seems to be the same; I’m guessing the same oil that’s on the stem is now being used on the tube / spring base instead of whatever thicker grease they had before. The actual purpose of thicker grease like that in many cases is vibration dampening, so it’s no surprise these revised versions lacking it don’t sound quite as good from the factory. The silver lining is that if you ended up with a set if these, they are totally fixable with the pretty simple process of donut-dipping.

4 Likes